Out With The Old!
Our trim shop team Kath and Brian have both been working hard on our 1972 Peugeot 504’s seats. “I started by marking out all the


Our trim shop team Kath and Brian have both been working hard on our 1972 Peugeot 504’s seats. “I started by marking out all the
One of our classic car technicians Mauro has been working on the injectors on our 1973 Triumph TR6. “I’ve refurbished the fuel injector pumps” Mauro

American owned car manufacturer Shelby SuperCars (SSC) have just set the new world record for the worlds fastest production car. Driven by our very own
This stunning V12 Jaguar E-Type is being worked on today in the Bridge Classic Cars Workshop. The old, original oil filter wasn’t quite up to
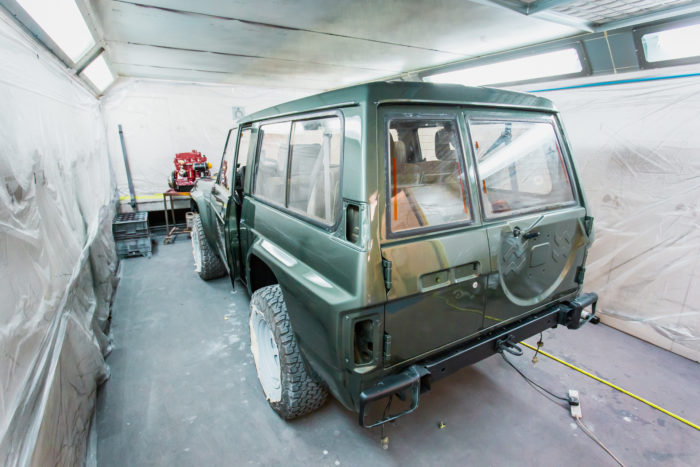
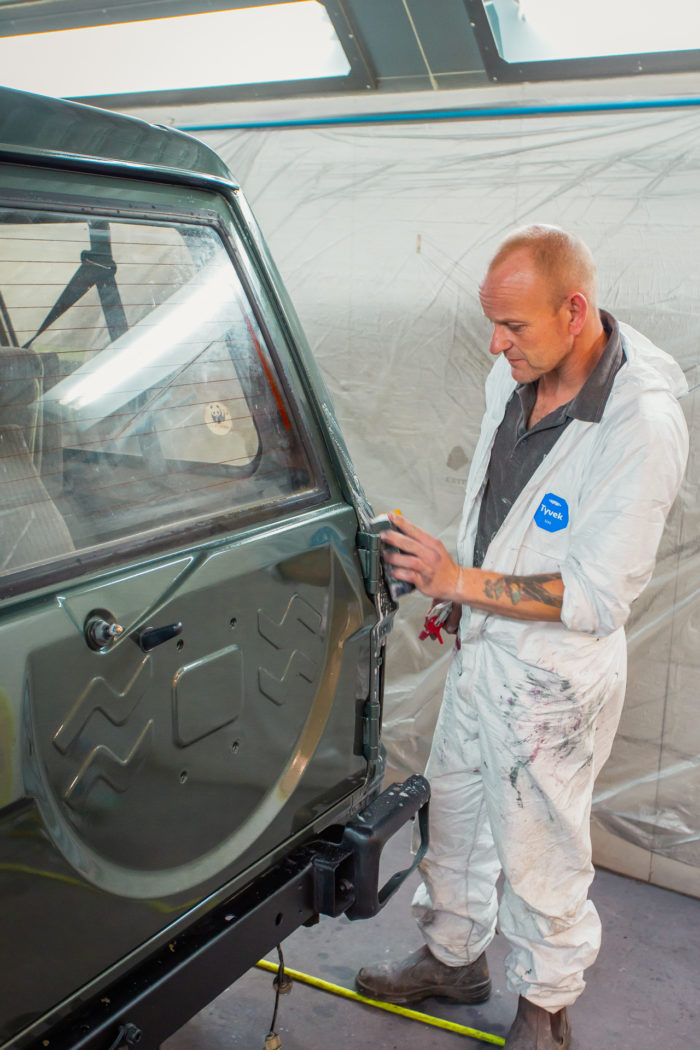
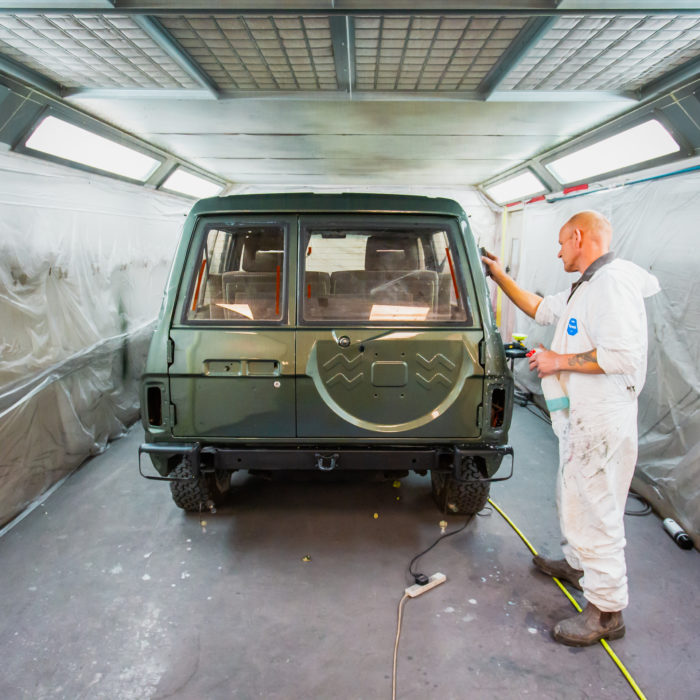
Anthony in our in-house body shop has been spending time with our 1996 Nissan Patrol this week. He’s fabricated new seal panels and lower quarter
The 1000 Miglia or ‘Mille Miglia’ as it’s also know, takes place this week in Italy. This yearly rally re-enactment is in honour of the
Our incredibly rare 1953 Taunus Ford Transit visited our in-house paint shop this week. Her owner wants to keep her patina look and our paint
Congratulations Lee Polley, winner of our 1991 Rover Mini with ticket number 410. For your chance to win your dream classic, head to bridgeclassiccars.co.uk/competitions
On a trip to Bath recently, Charlotte, our Competitions Presenter, spotted this stunning 1989 Ferrari 400GT and just had to get some snaps! Parked up
Our Director Craig has had a bespoke exhaust made for his 1984 Suzuki GSX 400T. The custom-built exhaust is the handy work of the genius
The first 1000 tickets purchased on our 1999 Mercedes 280SL competition will be entered into a separate bonus draw with a chance of doubling your
It’s our gorgeous 1961 Morris Mini Deluxe’ last day with us today. We have a load of work to do before tomorrow night, where she
Congratulations to the winner of our 1979 Ford Escort RS2000, Mike Hill We delivered the RS2000 up to Mike in Manchester today. Our covered vehicle
Scott has been fabricating and fitting new quarter lights into the Jensen. He’s had to custom fabricate some of the components to ensure the perfect
Pete has been working on our beautiful classic 1951 MG TD. Pete has just finished fitted the new steering rack into the car. ‘The steering

Our Range Rover has sold… before it even reached the showroom! One of Bridge Classic Cars’ own technicians, Pete heard we were selling our Range
Our Peugeot restoration has kicked up a gear or two in the last week. It’s being worked on both in the Paint and Trim shops.
Adam, Bridge Classic Cars’ in-house automotive electrician has installed and wired up brand new side lights, indicators and reverse lamp in our 1951 MG TD.
In with us for a full respray, this T2 has been taken back to bare metal. The Camper has been fully stripped down before the
How cool is this!? Students at the Eindhoven University of Technology in the Netherlands have designed and built a fully functioning car made almost entirely
Our stunning 1972 Jaguar E-Type Series 3 is with us again for a range of repairs, fixes and upgrades. To start with, the car’s not
Our 1960 Jensen 541R is having some finishing touches done this week, courtesy of our specialist classic car technician Scott. Scott’s drilled and fitted the
If you haven’t already, say hello to our Amphicar! Part boat, part car, this curious little vehicle can drive both on land and on water.
At the foot of the Malvern hills lies one of the worlds longest running motorcar production factories, Morgan Motor Company. A practice close to our
The exciting restoration project continues on our 1958 Jaguar XK150. This week the interior has been with our expert trim shop who have been working
This exciting 1995 BMW 840 arrived at the workshop this week, ready to start an extensive restoration. The outer body certainly needs some attention. Our
Kath and Brian in our in-house trim shop have been busy with our 1972 Peugeot 504 seats. They’re in to be fully reupholstered, so Kath
This week has seen four new arrivals into our showroom. One of which is a 90 foot boat! Unfortunately we couldn’t fit Aleda, the 1882
Our 1985 Lotus Esprit Turbo is back with us for a diagnostics and a possible full engine rebuild. Our engine expert Ady has the whole
We’ve continued interior trim work on our 1967 Jaguar E-Type race car this week. Brian and Kath, our trim shop experts, have been making parts
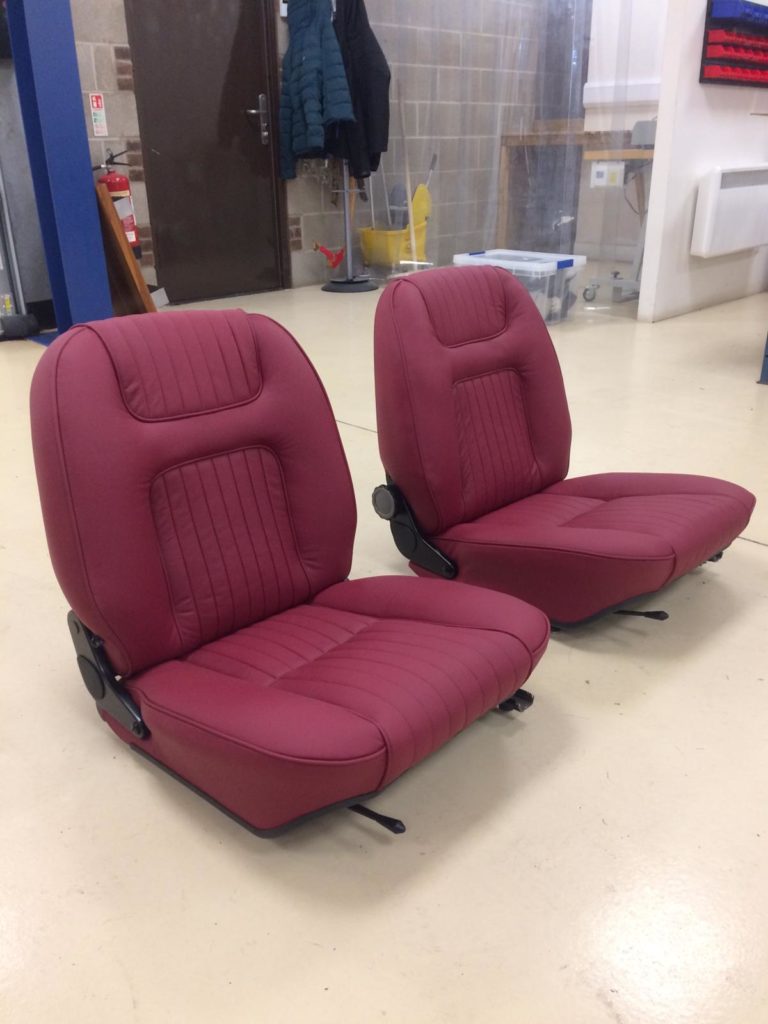
Our trim shop team Kath and Brian have both been working hard on our 1972 Peugeot 504’s seats.
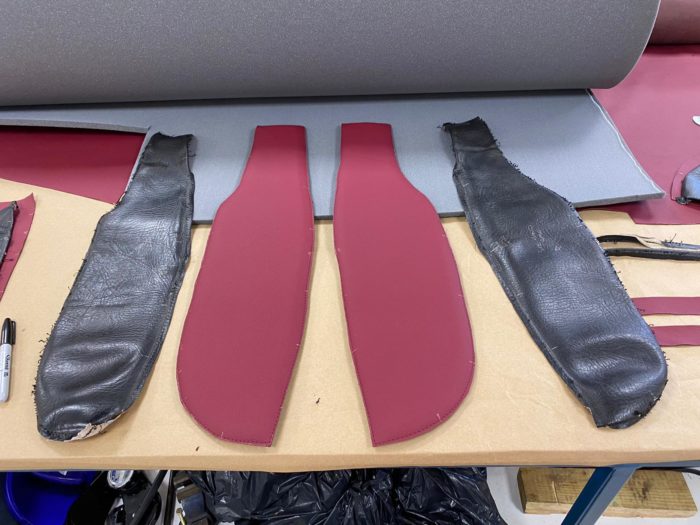
“I started by marking out all the positions of the different parts” Kath explains. “I then unpicked all the seams, removed all the hog rings and marked out the seats pattern onto the new leather.”
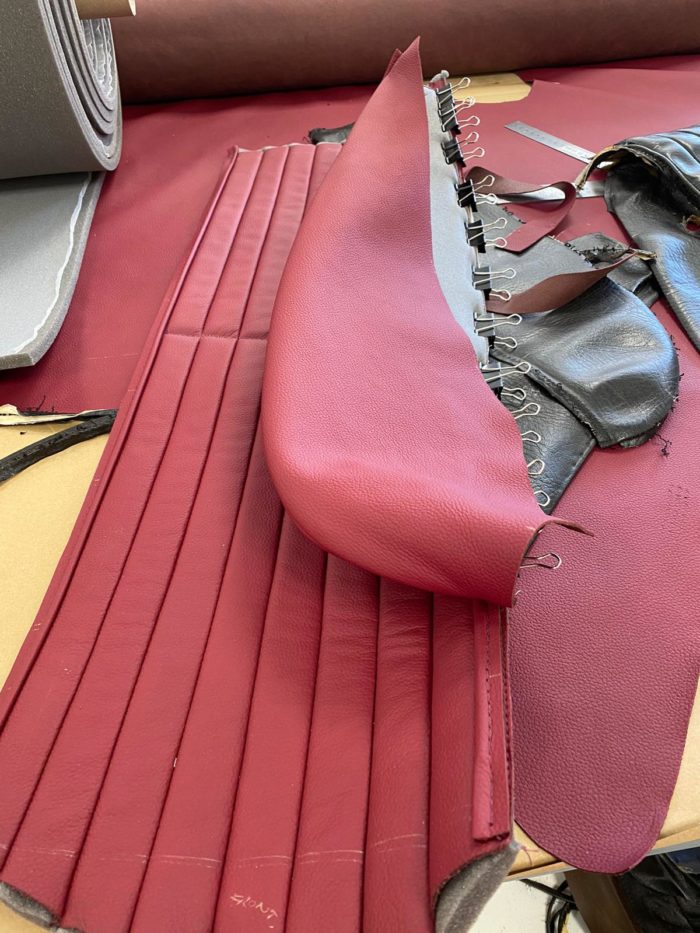
Kath then began marking out the fluted panels and sewed them. She then piped around the edges and sewed a calico loop around too with a wire insert.
“I then piped around the edges of the skirt” Kath continues, “and clipped the sides of the main face.”
“I then sewed it all together” Kath explains. “I clipped the middle fluted panel in place and sewed that together with the skirt.” After sewing those parts together, Kath then sewed a calico loop around the edge with another wire insert.
Now the covers are made, our expert trim technician Brian can begin work fitting them to the seats. He’s ready to fit both the front and rear seats of the Peugeot.
“I pulled the cover around tight, gluing and clipping it in place” Brian tells us “clipping the bottom flap to keep it in position.” Brian’s then fitted the seats back board in place, securing it with screws along the bottom. Finally, adding pvc edge trim around the back squab, fitting the seat reclining mechanisms and painting the handle he’s fitted.
New interior gives a classic car such a new lease of life! And moving from a black leather to this sumptuous red leather will compliment the Zinn Grey exterior amazingly.
Next step is to get the body out of paint and start marrying this colour combination together!
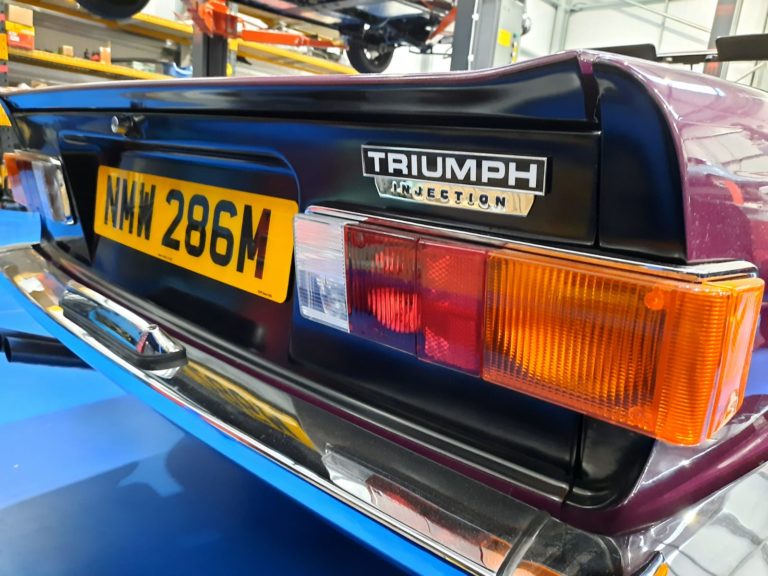
One of our classic car technicians Mauro has been working on the injectors on our 1973 Triumph TR6.
“I’ve refurbished the fuel injector pumps” Mauro explains. Which is a fairly involved process of stripping all the removable parts and giving them a thorough clean.
There are then several tests carried out to ensure all the components are working as they should. Mauro successfully got them working and reassembled the parts.
“I’ve then fitted the front and back batch of the fuel injector pumps back onto the engine.” Mauro describes. He’s also found time for less invasive work including fitting the rear view mirror and the sun visors.
The dashboard wiring has also been completed. The dashboard panel has then been fitted back onto the front with the dials and rigged up and ready to go. And what a beautiful front dash it is!
Recommissioning classic car engines is a speciality of ours here at Bridge Classic Cars. We have several highly skilled classic car technicians able to carry out this type of work, along with full engine rebuilds where required.
Get in touch with our friendly team today for more information on our classic car engine services.
American owned car manufacturer Shelby SuperCars (SSC) have just set the new world record for the worlds fastest production car.
Driven by our very own British racing driver Oliver Webb. The Tuatara reached the eye watering speeds of 331mph in two directions in Las Vegas, Nevada last week. Knocking the Bugatti Chiron’s vmax of 304.77mph off the top spot.
The 1,247kg hypercar is powered by a twin-turbocharged 5.9-litre flat-plane crank V8 producing 1,750 horsepower. But, it’s not only the powerful engine to thank for its monstrous speeds. The aero design of its carbon fibre bodywork plays a huge part in producing an unbelievable 0.279 drag coefficient.
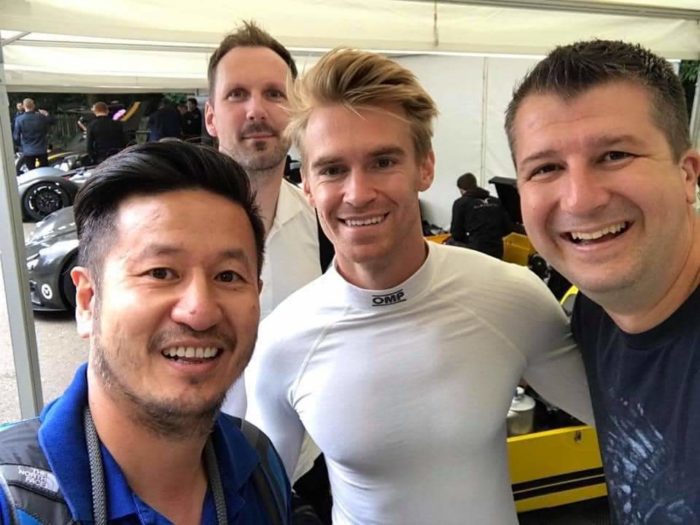
Good friend of Bridge Classic Cars, Vince Cheung, and one of our trusty tyre fitters Graeme Clarke of WeFitAnyTyresAnywhere met racing legend Oliver Webb at the Goodwood Motorsport event three years ago.
When it comes to the history of vehicle land speeds, the earlier records aren’t always that clear. However, it is on record that as early as 1926, Welsh engineer J.G. Parry-Thomas reached 169.30mph and 171.02mph in his 26.9-litre special ‘Babs’ on Pendine Sands on the south coast of Wales.
A year later, Parry-Thomas returned to Pendine Sands to regain the record he lost to his arch rival, English aristocrat, Sir Malcolm Campbell. Tragically though, Parry-Thomas was killed when he lost control of the vehicle and it flipped. It was unofficially reported that he reached a top speed of 180mph that day.
Parry-Thomas’ crew chose to bury the record-breaking car in the sand dunes at Pendine, to mark the both extortionary and tragic event. Over forty years later in 1969, permission was granted to Owen Wyn Owen to dig up ‘Babs’ who then spent the next few years restoring the one-of-a-kind car. Wyn Owens son, Geraint Wyn Owen, then inherited the car and has been maintaining her condition ever since.
Cars to some might be boxes of metal on wheels. But to others, including us here at Bridge Classic Cars, they are so much more than that. To us, they’re human triumphs, they’re our history, they’re people’s stories.
We love to share stories of classic cars. So, if you have your own to share, we’d love to hear from you!
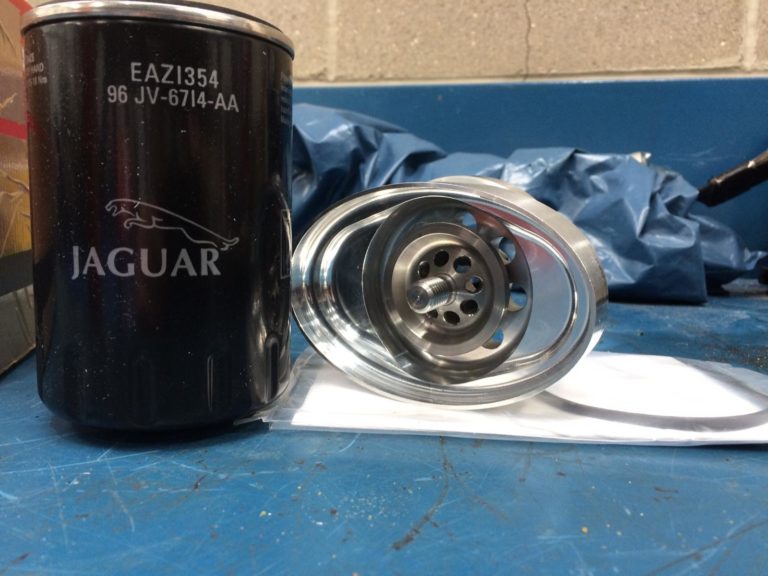
This stunning V12 Jaguar E-Type is being worked on today in the Bridge Classic Cars Workshop. The old, original oil filter wasn’t quite up to the job of keeping this beautiful V12 singing.
To fit an upgraded, modern oil filter we have had to adapt the oil filter housing to accommodate the larger cartridge-style filter.
Whilst in our workshop we have fitted a customer supplied bumper and addressed a few other running issues.
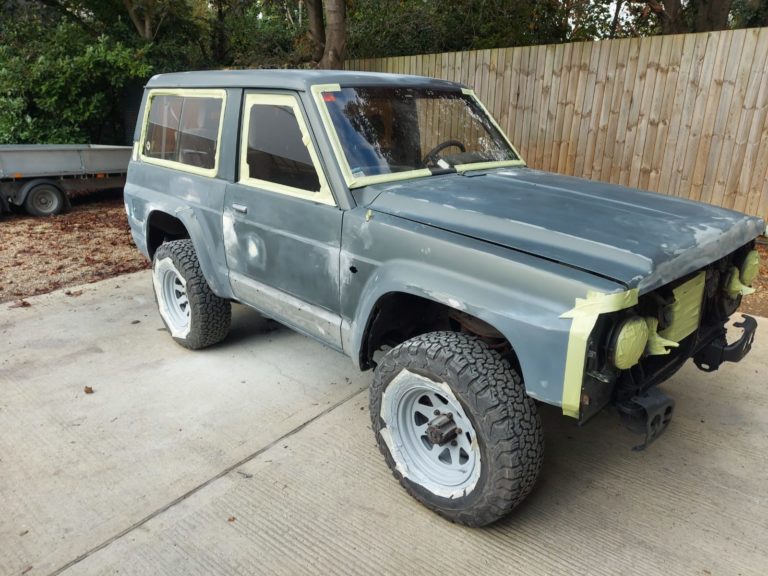
Anthony in our in-house body shop has been spending time with our 1996 Nissan Patrol this week. He’s fabricated new seal panels and lower quarter panels. “The bumper has also been repaired” he tells us “that’s now been sent away for re-chroming”. Which is done by our good friends at Douglas Metal Finishing.
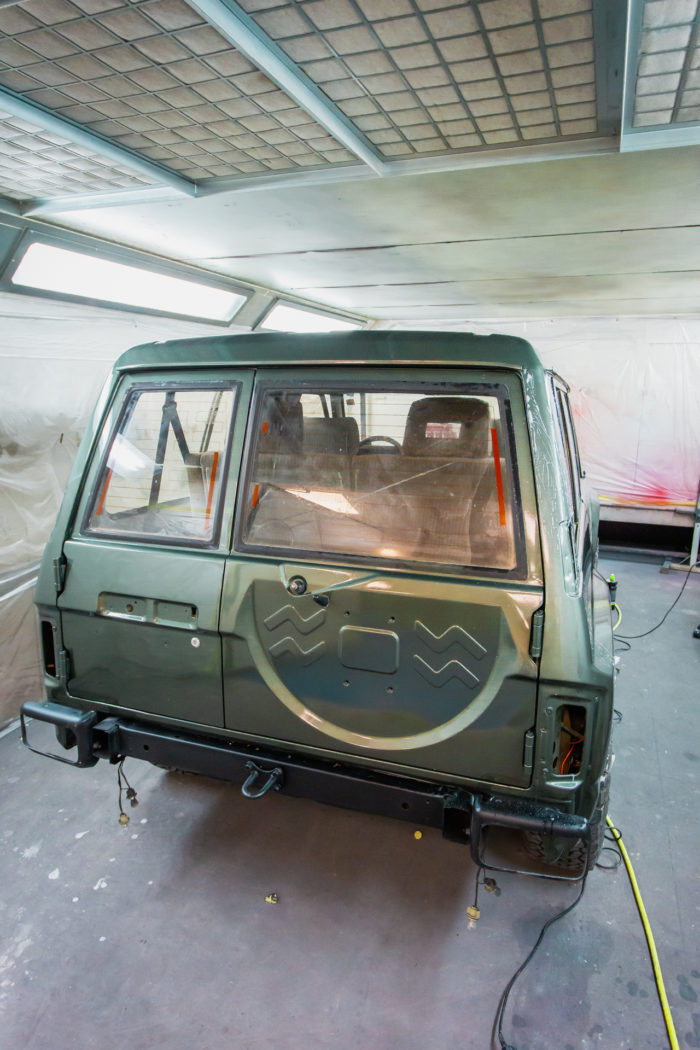
Darren in our in-house paint-shop has now started getting the car ready for paint. “The whole body’s been sanded over in prep” Darren describes. “I’ve done some minor filler correction work and put it into 2k primer.”
The Patrol’s returning to its original green. However, its wheel spats are going to be smoothed over and finished in ‘Zinn Grey’ instead of its original textured black.
Here’s Darren in the paint shop with the Patrol, its starting to return to its former glory now. Check back for more updates on this project soon!

The 1000 Miglia or ‘Mille Miglia’ as it’s also know, takes place this week in Italy. This yearly rally re-enactment is in honour of the historical race that took place between 1927-1957.
There are 400 carefully selected cars that take part each year, based on very specific criteria. The rally is due to set off from Brescia on 22nd October, heading south along Lake Garda then Milan, reaching it’s most southern point, Rome, by Saturday. The cars will then start heading back north through Siena, Parma and back to Brescia by Sunday. You can view the entire route here.
Our show-ready 1957 Triumph TR3 is one of the select few classics to be on that prestigious 1000 Miglia list. Being that it was built in the final year of the race in 1957 and meets several other of their strict criteria.
In honour of the prestigious 1000 Miglia we’re running a competition to win our 1957 Triumph TR3 for a fraction of its value. An independent valuation values our TR3 at over £60,000. Tickets to win however, are only £15!
Just imagine taking this exquisite classic to ‘The Most Beautiful Race In The World‘ and be a part of the distinguished ‘owners circle’.
For your chance to become the owner of one of the very few Millie Miglia eligible classics, head to the Bridge Classic Cars Competitions website for more information and to purchase your tickets.
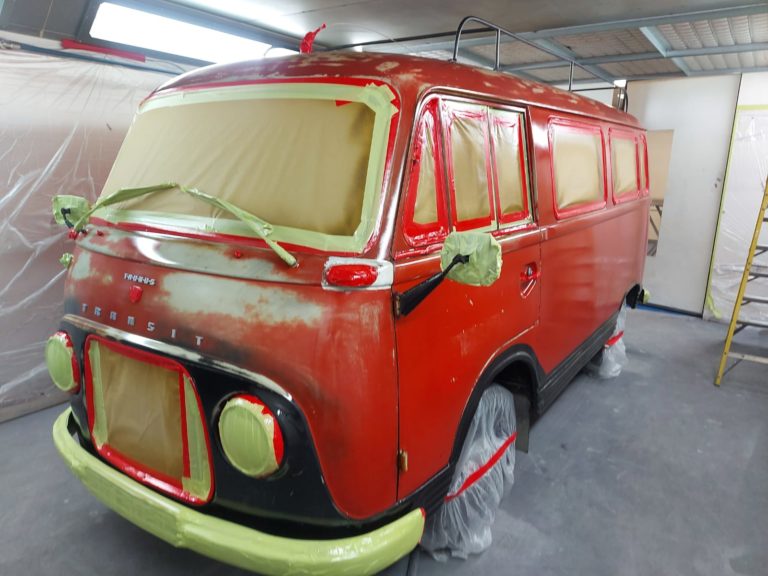
Our incredibly rare 1953 Taunus Ford Transit visited our in-house paint shop this week. Her owner wants to keep her patina look and our paint expert Darren knows just what to do.
“We’ve done a pre-clean and a gentle scotch sanding” he explains. “I’ve then used a direct-to-metal binder to act as a corrosive protector.”
This trusty Taunus might look tarnished, but it’s now ‘all elements’-proof and ready for it’s next any-weather adventure!
Congratulations Lee Polley, winner of our 1991 Rover Mini with ticket number 410.
For your chance to win your dream classic, head to bridgeclassiccars.co.uk/competitions
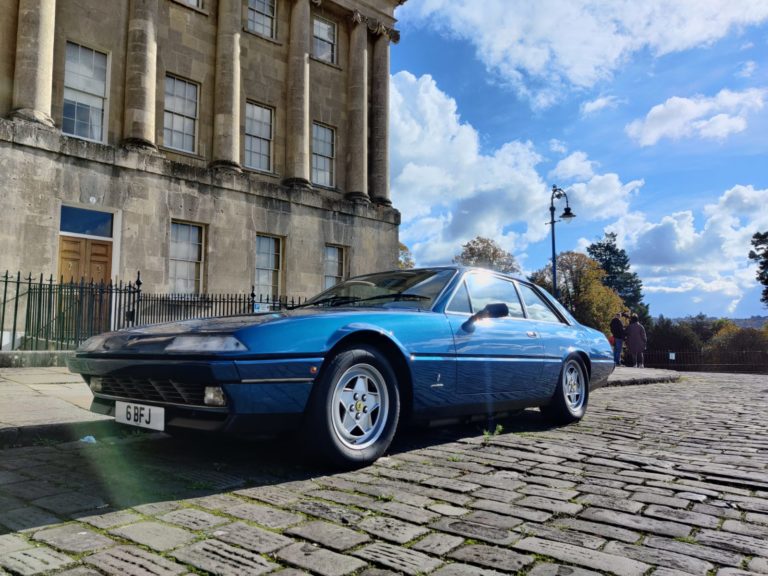
On a trip to Bath recently, Charlotte, our Competitions Presenter, spotted this stunning 1989 Ferrari 400GT and just had to get some snaps!
Parked up at ‘The Royal Crescent’ in Bath City Centre, it was as the perfect backdrop for this beautiful classic. And how awesome does the blue paint look against that sky!
We’re always on the look-out for classics while we’re out and about. If you ever spot something interesting on your travels – send some pictures our way!
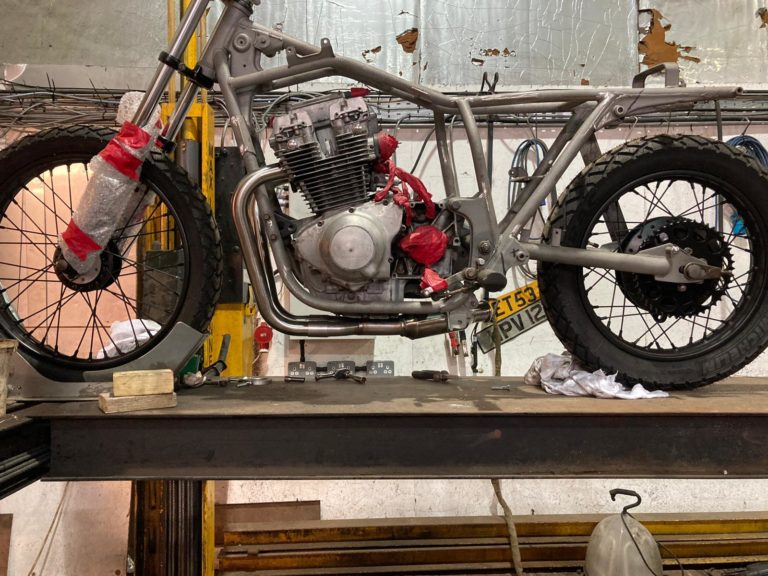
Our Director Craig has had a bespoke exhaust made for his 1984 Suzuki GSX 400T. The custom-built exhaust is the handy work of the genius Dan Dew from Demand Engineering.
“Dan’s built the whole exhaust” Craig explains “he’s even made the can shorter upon my request.”
A shorter can on the exhaust not only better suits the café racer style Craig’s aiming for, but will also make the bike louder.
If anyone can make a bespoke exhaust and can – Dan can! We’re always super impressed with the craftsmanship from Demand Engineering. This custom-made exhaust is no exception.
The only thing left for this extraordinary build is to get the engine out and blacken the whole thing. Looking forward to hearing that exhaust roar!
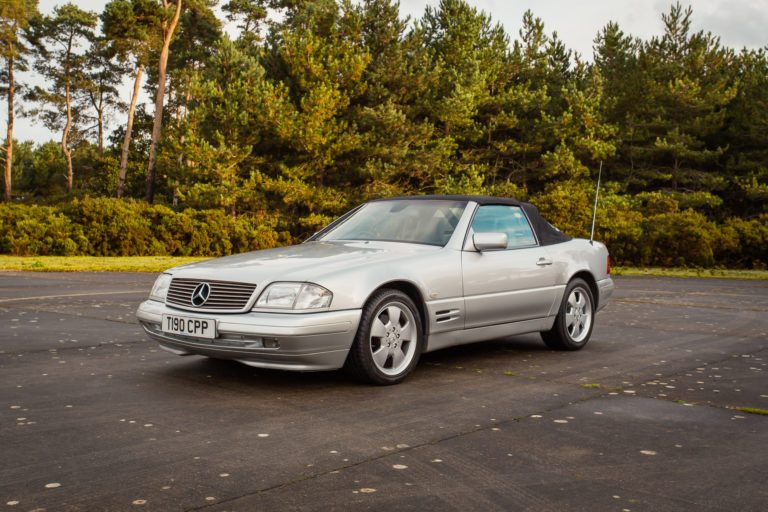
The first 1000 tickets purchased on our 1999 Mercedes 280SL competition will be entered into a separate bonus draw with a chance of doubling your odds! Using Google random number generator we will pick one lucky winner from the first 1000 tickets purchased. Whoever wins the bonus draw will have their odds doubled! This means if you’ve bought one ticket, you’ll receive one free entry. Similarly if you’ve bought ten entries you’ll receive ten free entries etc…
The more tickets you have, the greater your chances are of winning!
The bonus draw will be run as soon as we sell 1000 tickets. If the last ticket purchase takes us over the 1000 tickets threshold, all tickets within the final transaction will be entered into the draw.
For example if the final transaction takes place on ticket number 997 but the transaction was for 10 tickets this would take the overall tickets purchased to 1007. Ticket number 1001 to 1007 would also be entered into the bonus draw.
The bonus draw has no relation to the main competition. Everyone within the bonus draw will also be entered into the main draw. The winner of the bonus draw is eligible for the same amount of free entries as the number of tickets they have purchased. The bonus draw prize cannot be exchanged for anything other than tickets for our Mercedes 280SL competition.
If you have any questions regarding the bonus draw, please feel free to get in touch with us on 01473 742038 or email us on info@bridgeclassiccars.co.uk
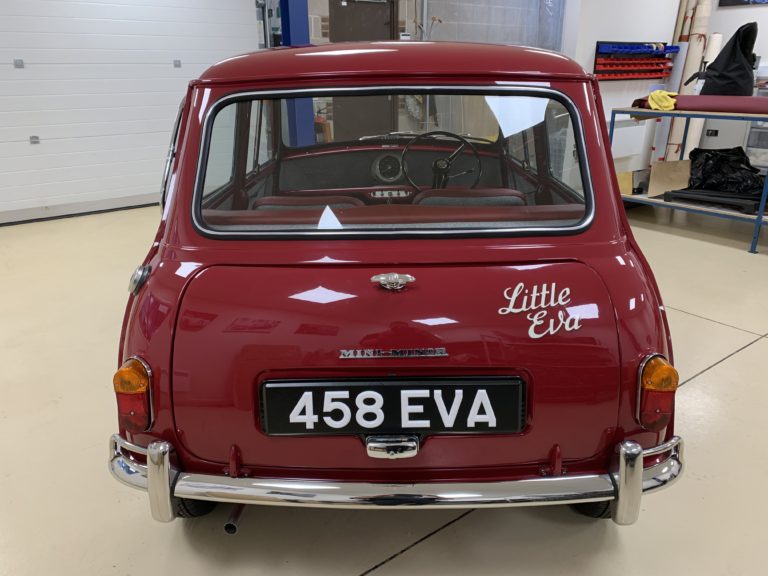
It’s our gorgeous 1961 Morris Mini Deluxe’ last day with us today. We have a load of work to do before tomorrow night, where she will be presented as a birthday gift to Eva Ranson, wife of our Director; Gordon Ranson.
The Mini arrived at our Pettistree workshop this morning looking pretty bare! Although her engine was in, she still needed all her interior fitted, including carpets, door panels and seats.
Firstly, one of our engine technicians Ted completed some final tweaks to the Mini’s 800cc engine. The engines already been totally recommissioned, as well as stripped and repainted in that lovely green you can see in the picture.
Meanwhile, Brian in the trim shop is getting the first section of the headlining in. He’s then got the front lining in and has fitted the C Posts.
The front dash was then fitted with it’s fleck material. “I trimmed around the edge” explains Kath, another of our trim-shop experts. “Then, I’ve glued it all in place.”
Kath’s then fitted the upper section of the dash, she’s then bent it round and trimmed it to fit. “I then glued the ends around the door seal” she tells us “then reattached the door seal.”
The door panels were next on the list. They were tricky! Kath had to trim the board and cut some foam out along the side to be able to slide it in. She then inserted the little door fillet panels.
The rear door panel pockets were equally difficult. “The boards didn’t fit” Kath explains “so we had to trim down to get them to fit inside nicely.”
Kath then had to trim holes for the ashtrays – a fixture you never see anymore in modern cars!
She trimmed the holes for the lights and fitted them in place. Getting the rivet bracket into position then fitting the rest of the board.
The sun visors were the next feature to be fitted. First of all the brackets were screwed into place, then the custom made visors were attached.
All the underlay and carpet was yet to be fitted when our Mini arrived back with us this morning. Underlay was trimmed up and glued into position. Matching red carpet was then fitted under where the seats will go. Taking care to trim around the seat brackets where each of the front seats will go.
The final sections of carpet were then fitted into place, trimmed up and glued to hold their position.
The seats were then fitted into the front. Looking lovely!
Brian then added sound deadening to the back seat section, before attaching his custom-made back seat. He also added the rear squab and the parcel shelf behind it.
“I’ve then fitted the rear quarter panels” Brian explains “securing them with screws at the top”. Brian’s also glued the wheel arch covers into position.
Aside from the interior, the Mini’s working components also had to be reassembled. These parts arrived back with us this morning as individual bits. The team have spent the day reassembling the subframe, ready to get the wheels back on and get her back up and running!
My goodness! What a team effort to get our gorgeous little Mini ready for her big reveal. We hope Eva loves her ‘Little Eva’ as much as we do!
Happy Birthday!
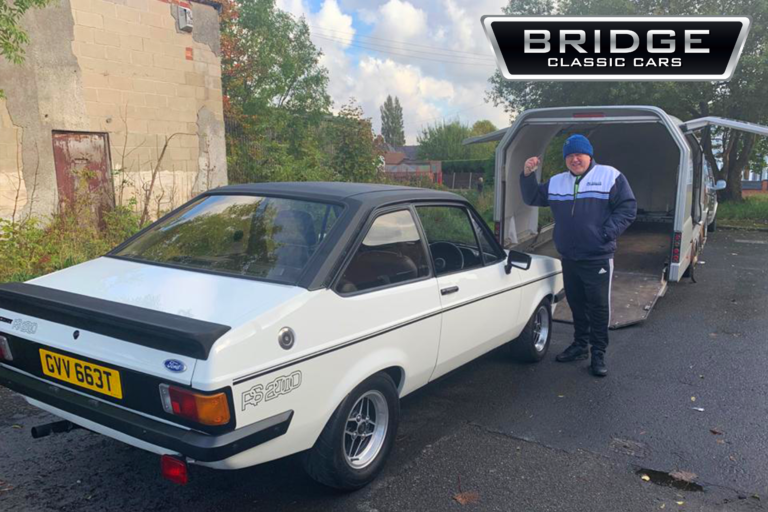
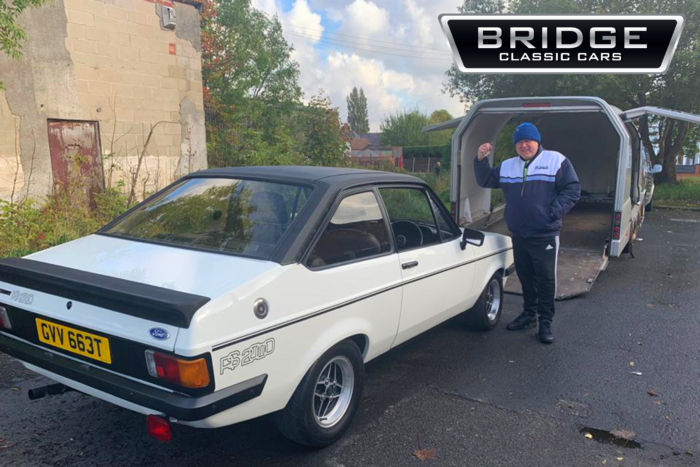
Congratulations to the winner of our 1979 Ford Escort RS2000, Mike Hill
We delivered the RS2000 up to Mike in Manchester today. Our covered vehicle transporter kept the RS nice and clean on its journey. Mike won with ticket number 1676.
We have three stunning cars live on the website, two of them will be won next week!
💚 1957 Triumph TR3 (Won in just 8 days time! 640 tickets left)
www.bridgeclassiccarscompetitions.co.uk/product/triumph-tr3
💛 1991 Rover Mini (Won in just 8 days time! 92 tickets left)
www.bridgeclassiccarscompetitions.co.uk/product/mini
❤️ 1962 Triumph TR3 (Launch Sale – tickets are just £15)
www.bridgeclassiccarscompetitions.co.uk/product/1962-tr4
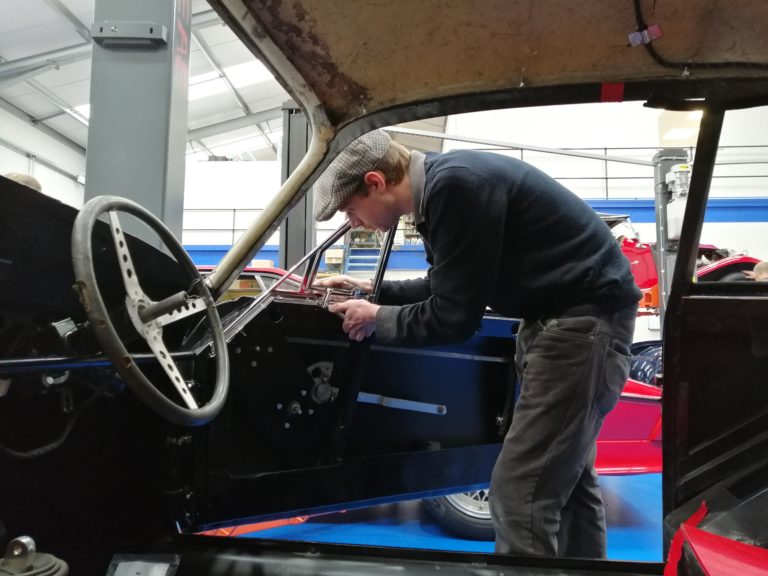
Scott has been fabricating and fitting new quarter lights into the Jensen. He’s had to custom fabricate some of the components to ensure the perfect fit. As with most handmade cars, there is very few one-size-fits-all parts on these cars. Instead, most parts will need to be modified in some form to perform perfectly. It’s well worth the effort though, Scott. These cars are looking stunning!
The Black Jensen is now heading into the Trim Shop for the next exciting phase of it’s restoration. One there, it will be treated to a full interior trim courtesy of our dream team, Kath and Brian
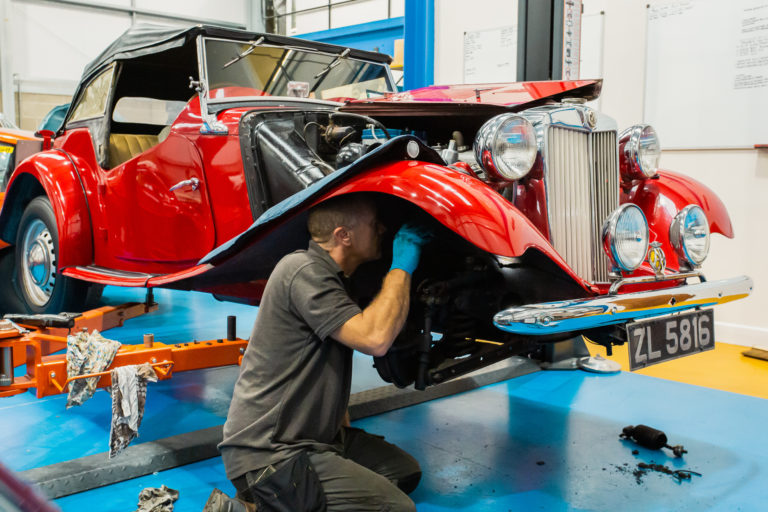
Pete has been working on our beautiful classic 1951 MG TD. Pete has just finished fitted the new steering rack into the car. ‘The steering rack presented a few challenges”, Pete explains. “Due to the length of rack, I’ve had to dismantle the rack before installation. Once it’s in position it can then be re-assembled”. Superb ingenuity Pete! Working on cars of this era presents many challenges. But no job is too daunting for our expert team!
After completing the steering rack, Pete has installed a brand new stainless steel exhaust. The new exhaust sounds lovely, we cannot wait to hear what the vehicles owner thinks!
Our Range Rover has sold… before it even reached the showroom! One of Bridge Classic Cars’ own technicians, Pete heard we were selling our Range Rover and fancied it himself! Congrats, Pete on the lovely new car!
The Range has been treated to a full alloy wheel refurb before it heads to it’s new home with Pete.
Before Pete took delivery of his new car, we refurbished the wheels. Check out the before and after galleries below.
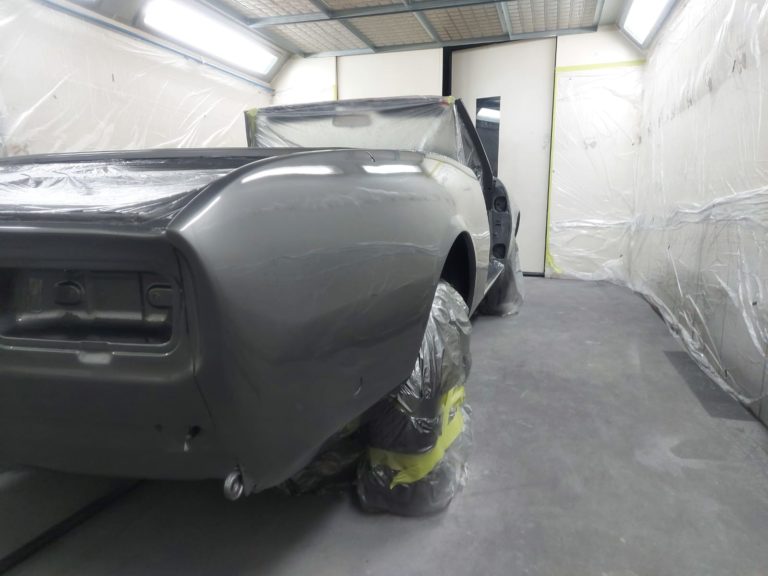
Our Peugeot restoration has kicked up a gear or two in the last week. It’s being worked on both in the Paint and Trim shops.
The colour for our Peugeot’s fresh look has been decided, it’s being painted in the striking VW Zinn Grey. Paired with a beautiful red interior, we think this specification is going to look superb. Darren our Paint Shop Manager has been applying the colour coats to our Peugeot. He firstly painted the Engine bay and boot and has now masked those areas up to paint the external elements of the bodywork.
The paintwork looks sublime under the bright lights of the spray booth. superb work, Darren
Read on to take a look at Brian’s work on the 504 in the Trim Shop
Brian has been very busy bringing the 504’s seats back to life!
He’s firstly stripped down the old seats, taking off the old fabric, ready to re-trim in the brand new, red leather.
Brian has then stripped down and covered this flat interior panel, gluing down the excess material to the back of the panel.
Finally Brian has trimmed the top and bottom panels before riveting the two together to seamlessly meet. He’s added foam to the top of the panel before pulling the leather tight into place and gluing down.
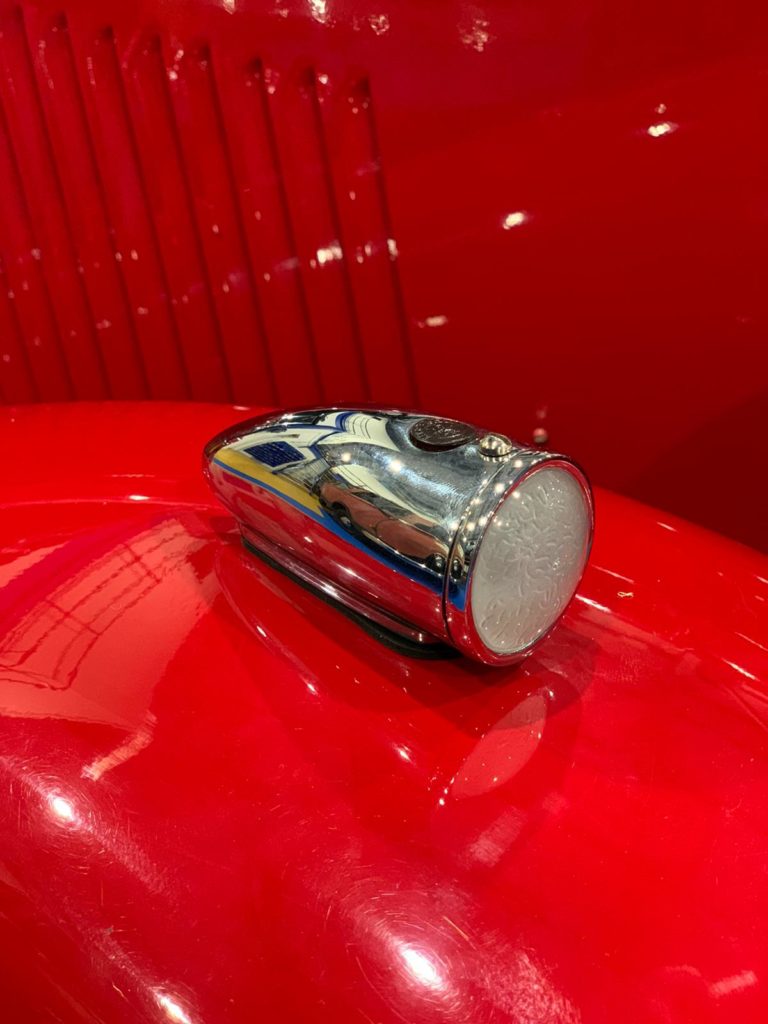
Adam, Bridge Classic Cars’ in-house automotive electrician has installed and wired up brand new side lights, indicators and reverse lamp in our 1951 MG TD.
A new member to the team, Adam brings with him a wealth of experience as an automotive electrician. There’s not job too big or too small for our team of experts!
Super work, Adam!
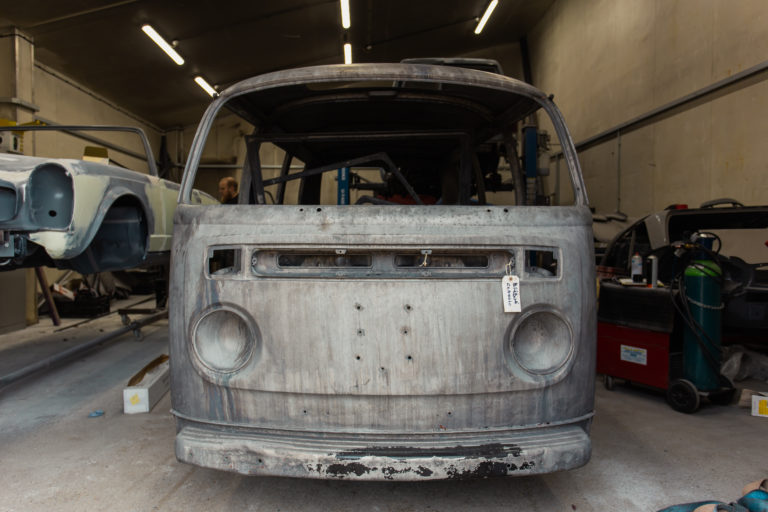
In with us for a full respray, this T2 has been taken back to bare metal. The Camper has been fully stripped down before the chassis and bodywork was submerged in its acid bath. The acid bath removes rusted metal, under-seal and paint, giving our paint shop technicians a blank canvas to work from.
Taking the car back to bare metal gives the best possible results for a full respray. It also allows for any welding work and repairs to be carried out.
As you can see from our photos, there is a substantial amount of rusted out metal that that acid bath has removed. Chris has washed the car over in grey primer to stop any rust attacking the metal while it’s in a bare state.
The next stages of work for the T2 will see Antony welding in fresh metal to the rusted out areas.
How cool is this!?
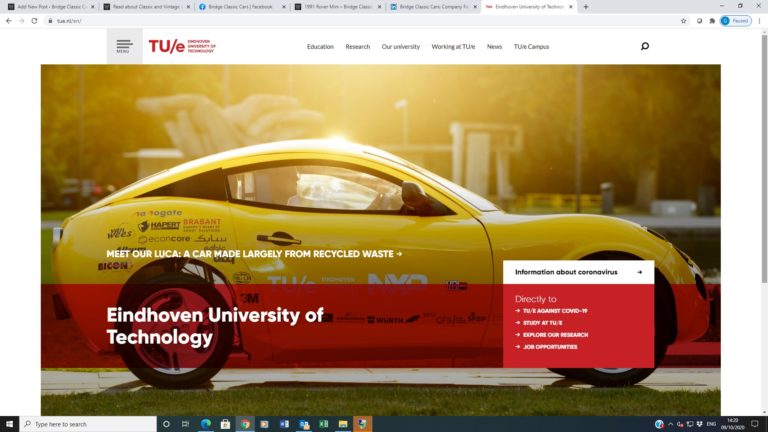
Students at the Eindhoven University of Technology in the Netherlands have designed and built a fully functioning car made almost entirely out of waste products.
Luca, as the car is known, is made out of plastic recovered from the ocean, along with horse hair, coconut fibres and flax.
The full-electric vehicle has two electric motors and a top speed of 50mph.
The car is set to be tested soon for road-worthiness. Although, the main aim of the project is to inspire car manufacturers and demonstrate that waste products can be resourceful.
What do you think? Would you drive a Luca?
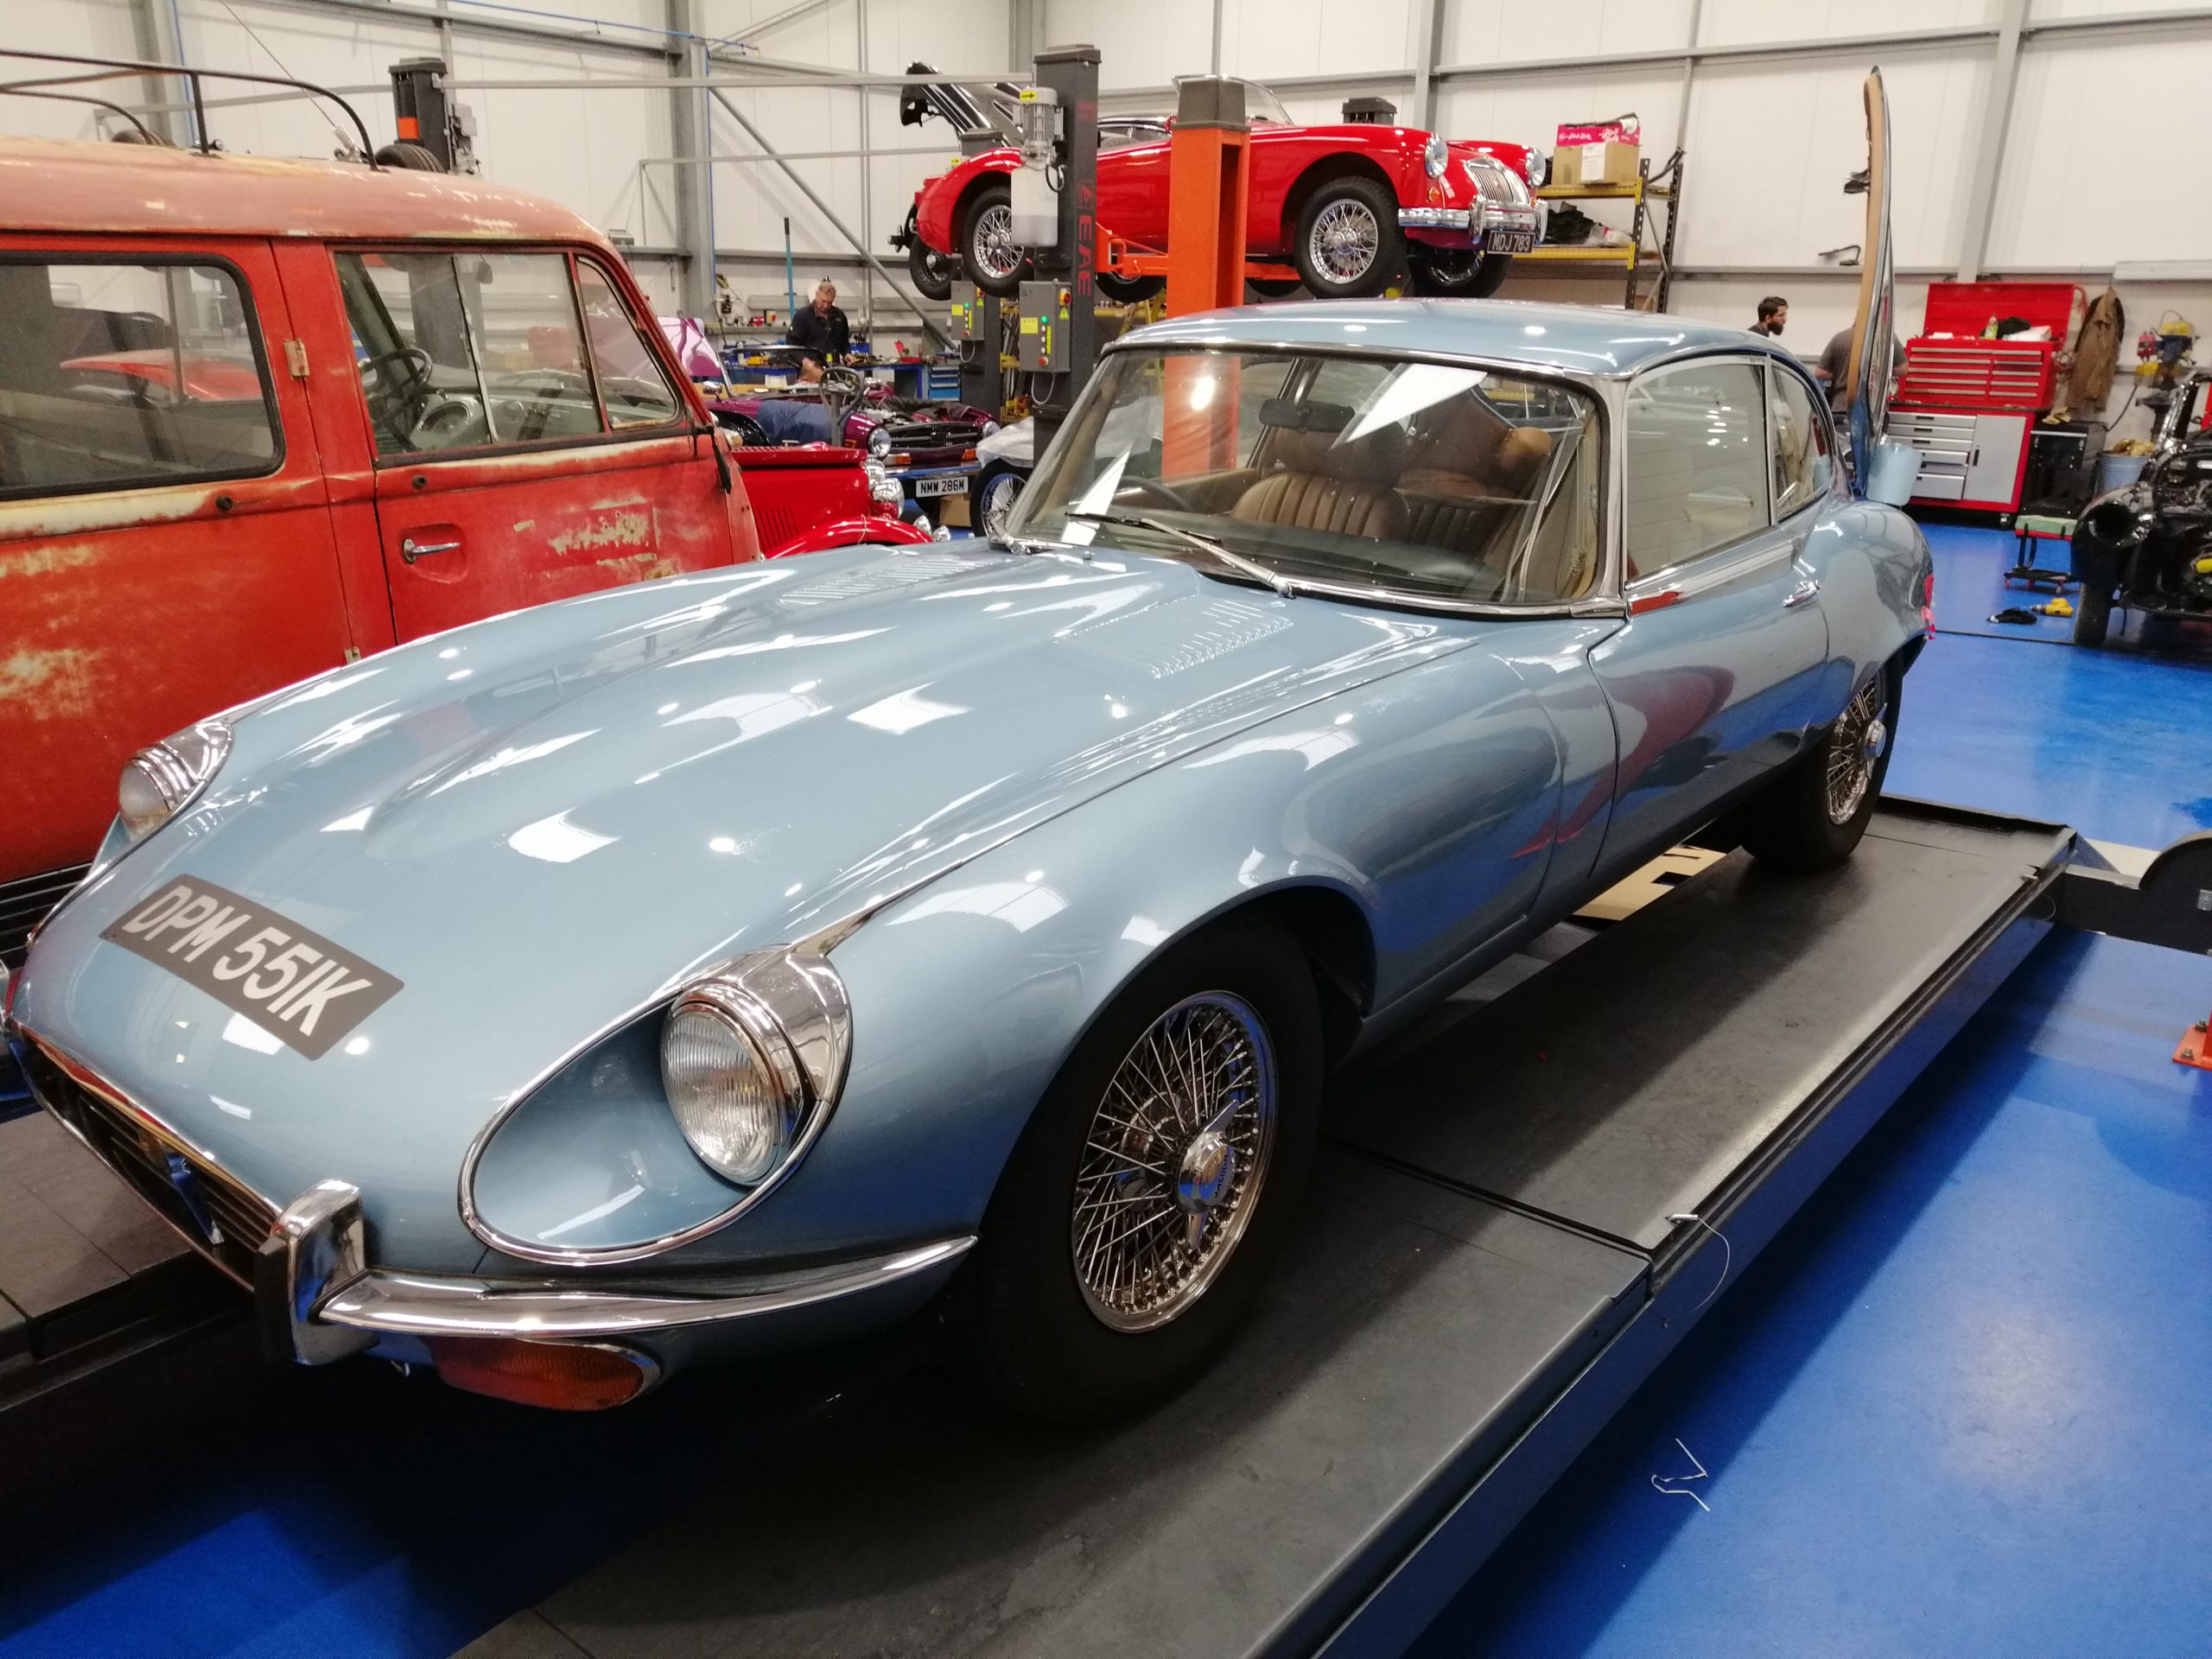
Our stunning 1972 Jaguar E-Type Series 3 is with us again for a range of repairs, fixes and upgrades.
To start with, the car’s not running. Therefore, our engine experts have her up on the ramp ready for closer inspection.
Dave, one of most experienced classic car technicians is changing the ignition. Once this is completed the engine should be able to be fired up. This will enable the team to start with various other fixes.
Tom, one of our specialist classic car technicians has repaired a couple of the cars more minor niggles. “There was a problem with the handbrake light” Tom explains. “We managed to tweak the switch and have sorted that out.”
Tom’s also investigated an issue with the accelerator panel and the windscreen washers. Both of which should now be rectified.
A new chrome rear bumper has also been fitted by Tom and Paul this week. The bumper was supplied by the customer and expertly fitted by our specialist technicians.
The car also has an oil leak. Tom has cleaned under the car, to give our engine expert Ady a better look at where the oils coming from. ” I suspect it’s coming from a washer between the engine and the oil relief valve” Ady’s told us.
We won’t know whether the fixes are successful until we get her engine back up and running. We have every confidence in our classic car experts. Let’s get this beautiful little sports car back on the road soon!
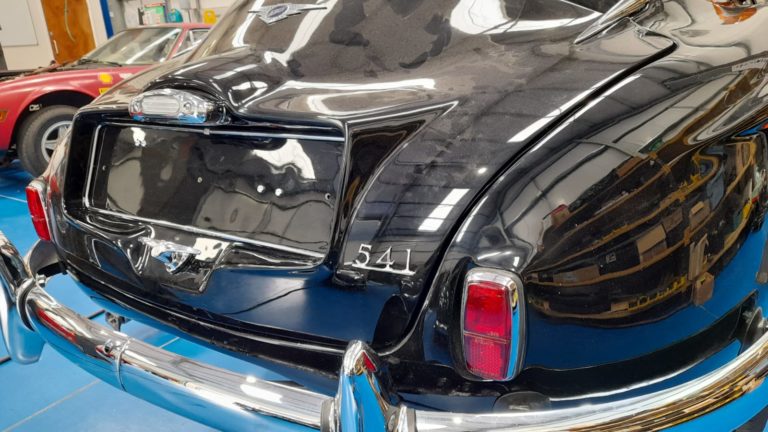
Our 1960 Jensen 541R is having some finishing touches done this week, courtesy of our specialist classic car technician Scott.
Scott’s drilled and fitted the iconic 541 badge to the rear of the car.
“I’ve also been working on things beneath the bonnet” Scott explains “I made up an oil line for the oil pressure gauge and re-routed and tidied up the throttle cable”.
Scott’s also attached the front of the side skirt and repaired and fitted the secondary bonnet catch.
“I’ve also made up this bolt for the choke” Scott shows us “and for the 1957 grey Jensen, I’ve made a rubber gasket for the bonnet badge”. Scott’s had to measure out the positioning of the bonnet badge using tape. He then drilled holes to fit the badge into position.
Scott’s also built up the door window channel on the near side. He’s then fitted the window itself. “I’ve also put the front quarter lights together” he explains “and then fitted them to the car”.
Working alongside Scott, our other specialist technician Paul has fabricated a boot panel for the black 1960 Jensen 541R. A new heater box has also been fitted by Paul.
Now all the bulky jobs are complete on the Jensen’s, we’ll be seeing a lot more of the finishing touches completed in the weeks that follow.
Because we have a few Jensen’s in for restorative work right now, these projects often work hand-in-hand with one another. It also means our technicians have become quite the Jensen experts!
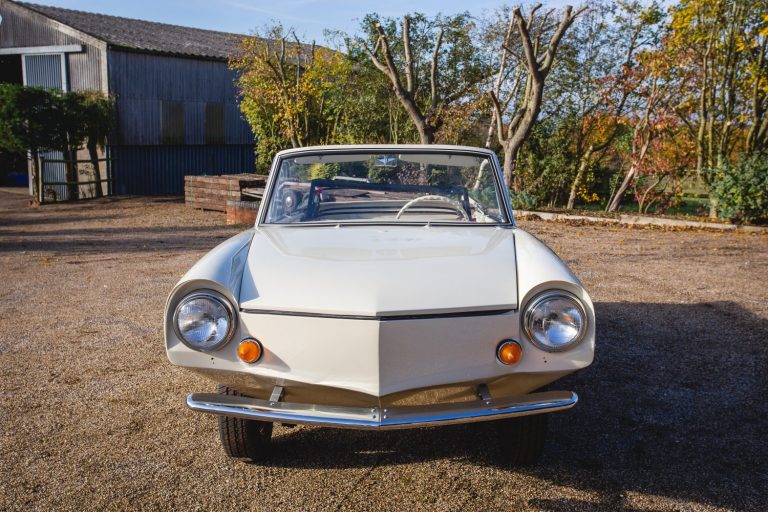
If you haven’t already, say hello to our Amphicar! Part boat, part car, this curious little vehicle can drive both on land and on water. Jovially referred to as ‘the fastest car on the water’.
The Amphicar was only in production from 1961 to 1968, so our 1965 model is an incredibly rare find. We’re so lucky to have the opportunity to be doing a full restoration on this intriguing little car (or is it a boat!?)
Along with returning the car to her former glory by doing a complete bodywork restoration, the team have also returned her to her original colour- ‘Beach Strand White’. We think she looks gorgeous!
Our Amphicar has been in the trim shop this week having her new roof fitted. Brian’s been working on the task. “I’ve fitted the locating pins around the roof edge” Brian describes “then glued and turned the corners of the roofs front rail”.
Brian’s then trimmed off any excess material and screwed the metal trim in place. The edges looking nice a neat now. “I then fitted the metal trim round the bottom of the back of the roof using Tenax fasteners” he explains.
“I’ve then glued flaps around the rear window frame” Brian continues “again adding the neat metal trim to smarten up the edges and also, to hold the window rubber in”.
Even though the roof was a ready-made, it still had to be custom fitted and therefore provided it’s own challenges! Brian told us how tricky it was to get the roof liner to fit. “When we make our own parts we can measure against the car and use those exact patters” Brian explains. “But, when it’s ‘off the shelf’ the product arrives and we have to work with what we’re presented with.”
Brian’s also fitted the back seat “I glued the rubber down first” he explains “then fitted the seat Kath and I have made onto it.”
Raise your hand if you want to take this swimmingly fun car for a test-dive!?
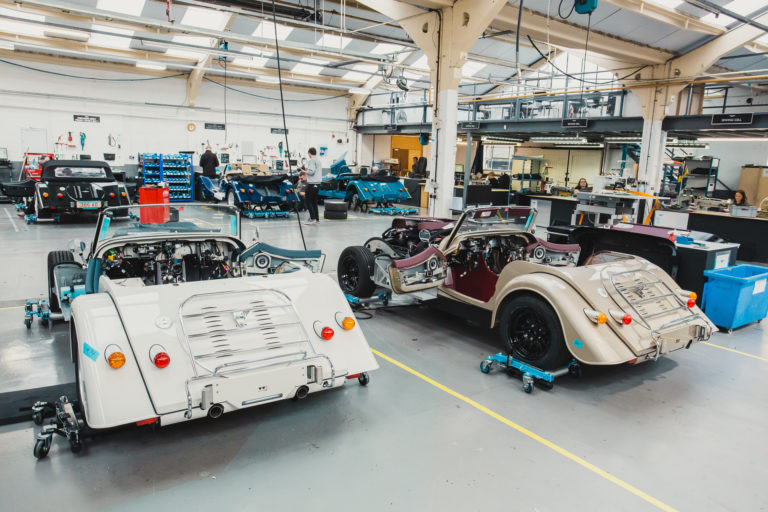
At the foot of the Malvern hills lies one of the worlds longest running motorcar production factories, Morgan Motor Company. A practice close to our hearts, Morgan values traditional craftsmanship, and still to this day hand-builds every car with not a single production line in sight.
Whilst on a trip to the Cotswolds, we had to take a look around the home of one of the most iconic British automotive marques.
The company was established in 1909 by H.F.S Morgan, who begun making motor vehicles with the now iconic, Morgan three-wheeler. Contrary to popular belief, it is not the chassis of Morgans that are made from wood. The chassis are aluminium; it is the bodywork that is formed from ash. Ash was chosen for its light weight, structural strength and flexibility.
Being hand-built, no two Morgans are ever the same. Every component needs to be manipulated to perfectly fit its intended vehicle. When metal, wood and leather collide, Morgan’s team of skilled craftspeople ensure the cars are assembled to the highest standards.
If you are ever in the Malvern area, we would thoroughly recommend taking a tour of the Morgan factory. You won’t be disappointed!
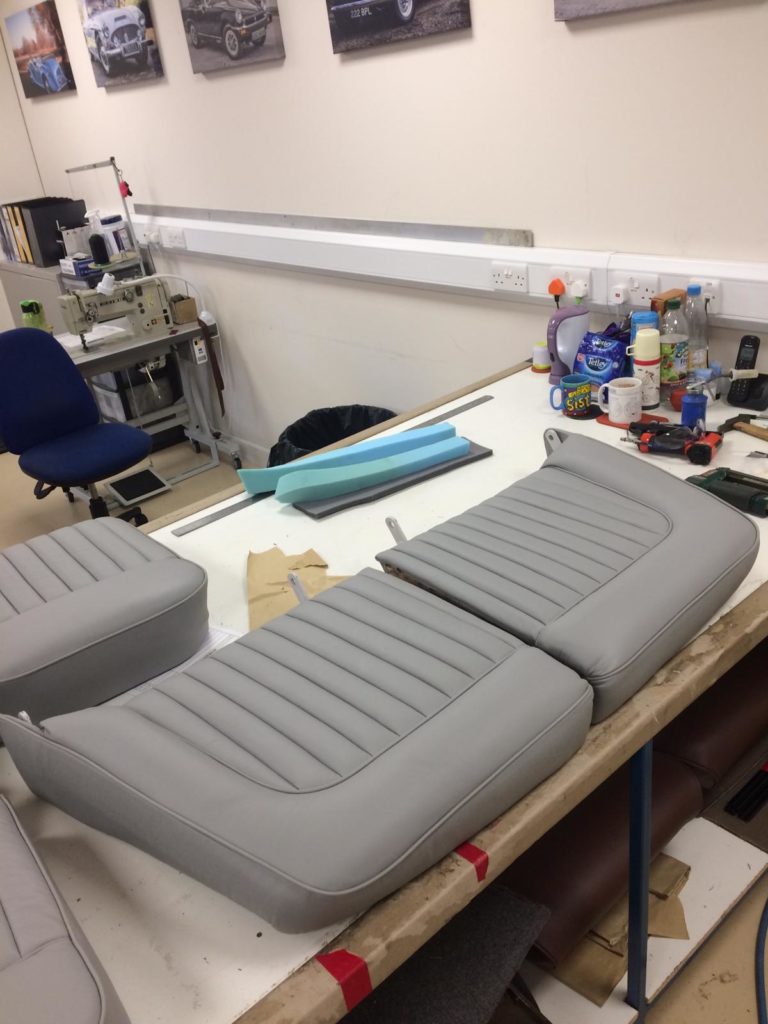
The exciting restoration project continues on our 1958 Jaguar XK150. This week the interior has been with our expert trim shop who have been working on the seats, and other interior panels.
Brian starts by cutting the foam to the right size for the front seat squab frame. “I then mark where the cover needs to sit” Brian explains “gluing the cover into position, sticking the calico flap in place”.
Brian adds extra foam bolstering, to give the seat it’s comfortable shape. He then pulls the second calico flap over the frame and pulls the cover into position.
Brian then begins gluing and stapling the top and side of the cover onto the frame. “I’ve glued the bottom edge of the outer side of the frame” he explains “gluing the outer flap, then tucking in the piping and gluing the inner flap”.
Brian then staples the inner edge and bottom flap neatly into place, carefully hiding the glue and staples from view.
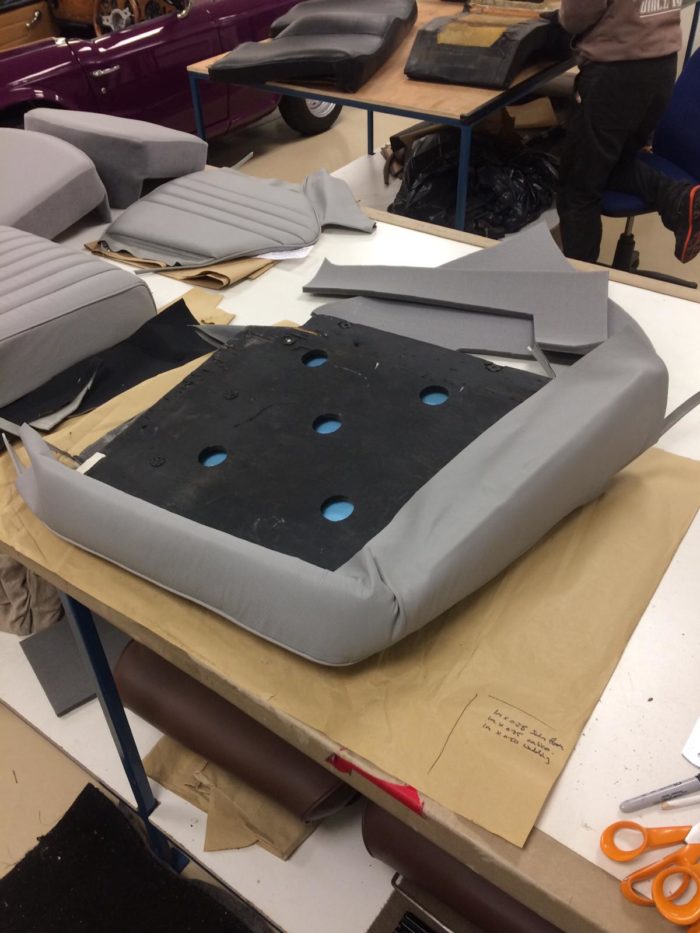
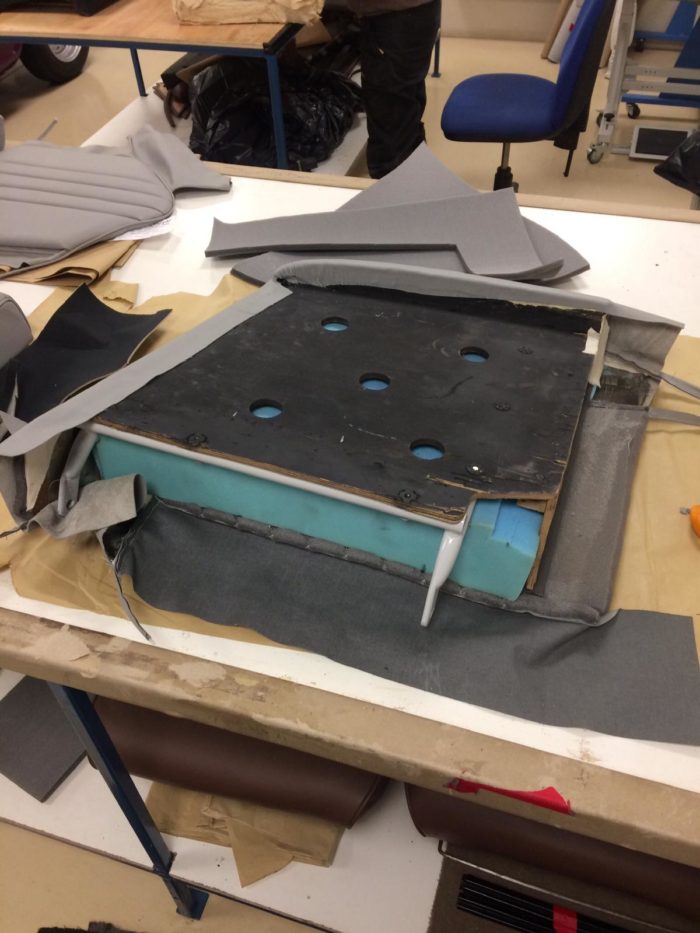
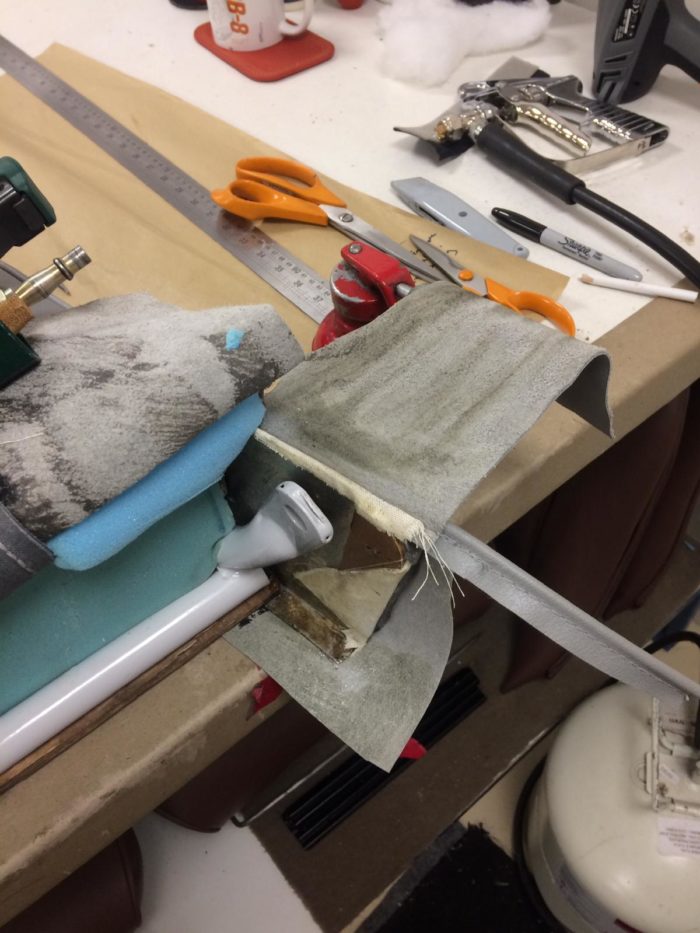
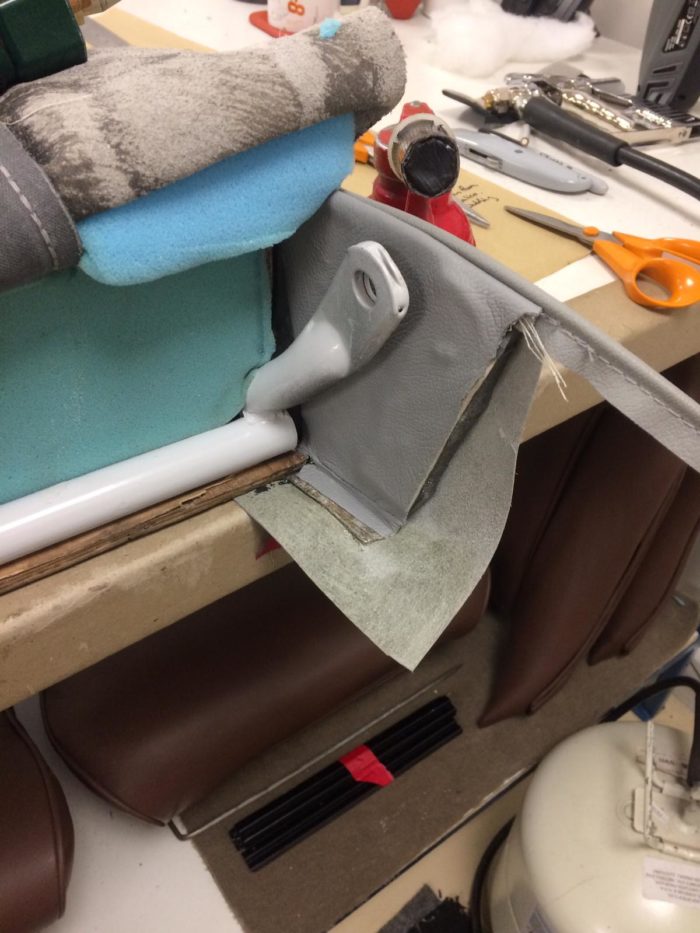
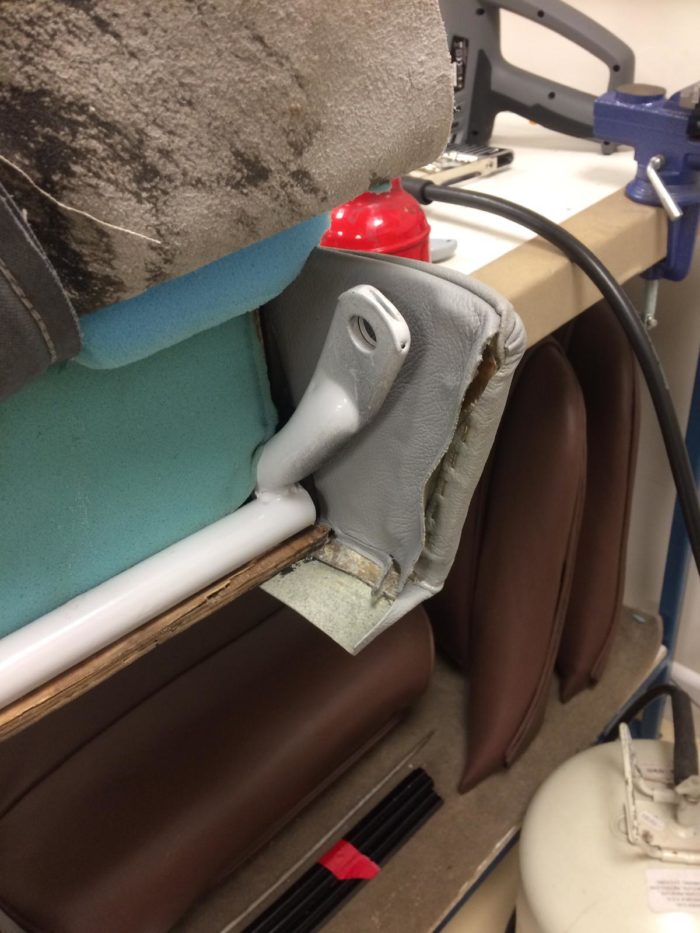
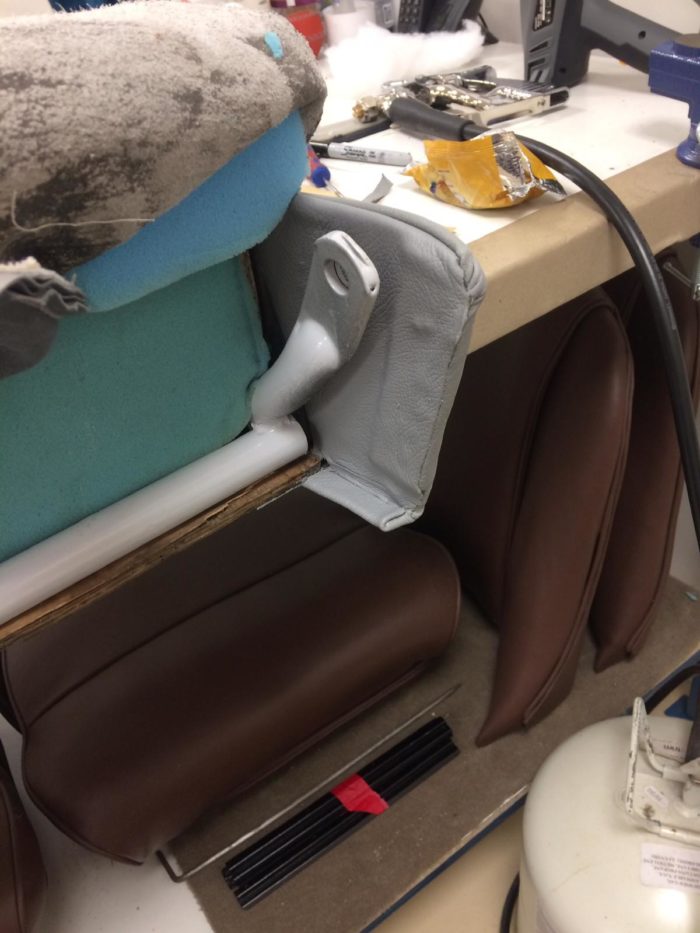
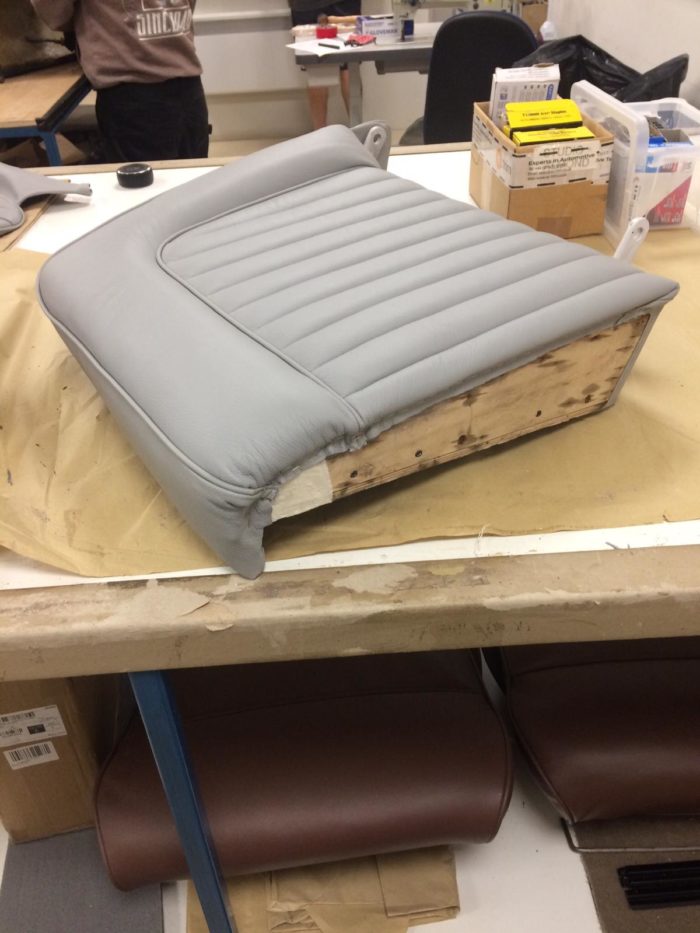
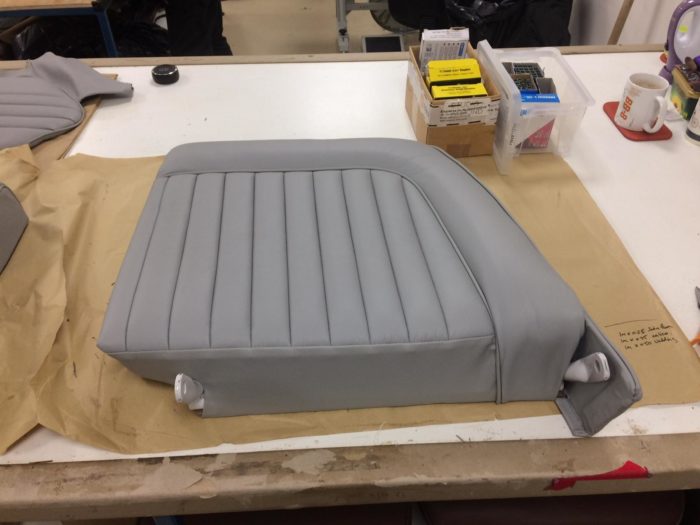
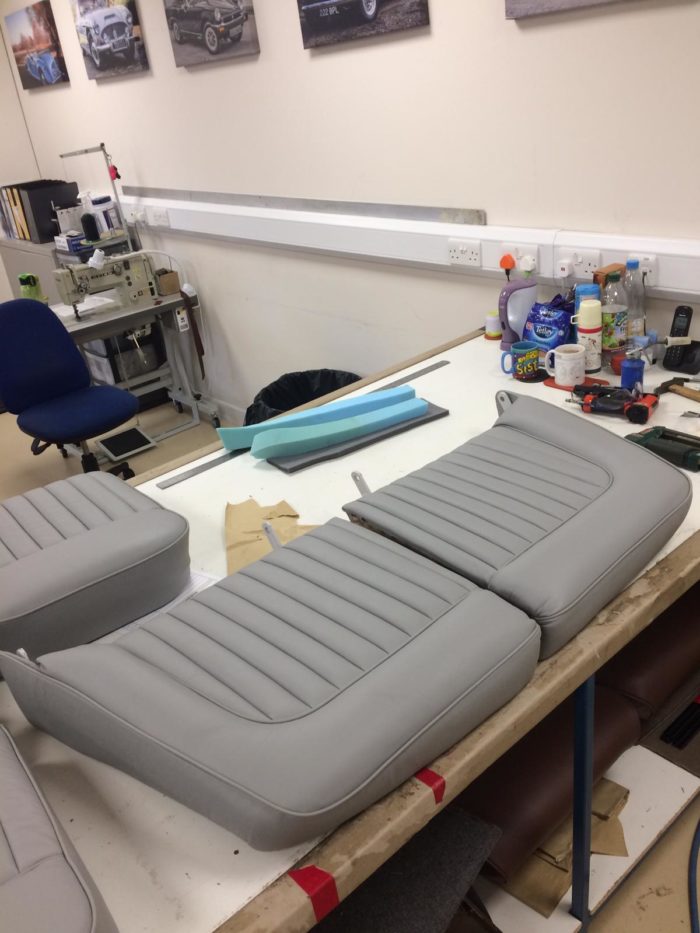
The back of the chairs is next up, where Brian tacks the fabric to the back of the frame. “I’ve made the side and top panels out of mill board” he tells us “finishing them off by covering them with vinyl”.
He then screwed the top and side panels into place.
Some other interior panels have also has Brian’s magic touch. Including the boot hinge cover, the transmission inspection plate and the petrol pipe cover. All hand crafted and finished in a matching vinyl.
All these sections and the seats are now ready to be fitted back into the car. How sharp does this interior work look?
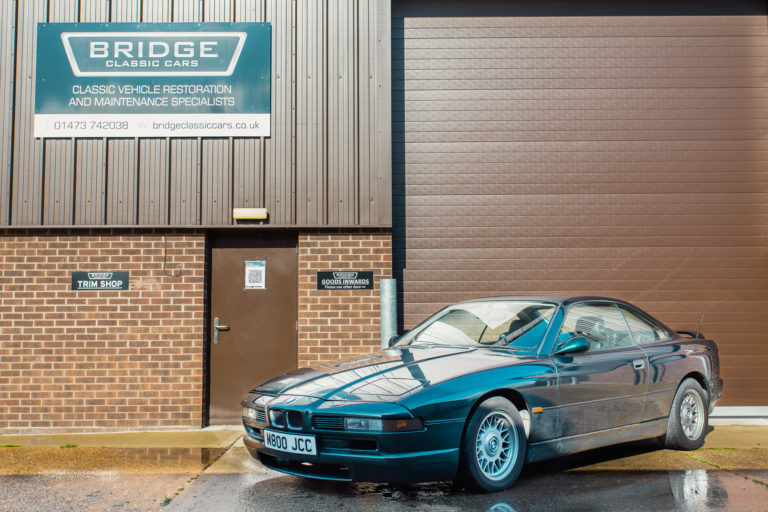
This exciting 1995 BMW 840 arrived at the workshop this week, ready to start an extensive restoration.
The outer body certainly needs some attention. Our in-house paint shop will be preparing the car for a full re-spray. This is to rectify all the scratches and marks in the paintwork. There’s also a fair amount of rust that’s been spotted. This will be sorted by our in-house body shop team before paint.
Along with external work, the interior will also be receiving some TLC from the Bridge team. The drivers seat is worn, so there are plans to visit our in-house trim shop to have this seen to. Along with a fair amount of electrical and mechanical work. The sunroof, aircon, the boot and door handles, the alarm system and the wing mirrors all needs looking at.
Until we inspect further, it’s always difficult to judge what else we may uncover. Any engine work is yet to be diagnosed. But, what we do know is that the under panel is missing from the engine.
We’ll be following this exciting restoration closely with lots of updates on our progress. Head to the Bridge Classic Cars current projects page to keep up to date.
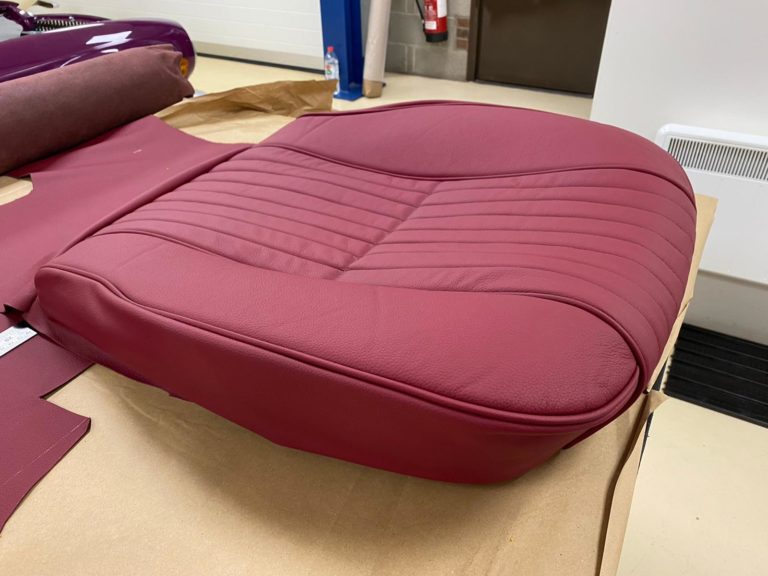
Kath and Brian in our in-house trim shop have been busy with our 1972 Peugeot 504 seats. They’re in to be fully reupholstered, so Kath first has to take the pattern from the existing seats by stripping away all the fabric ensuring she keeps it intact.
“The back panel was riveted in” describes Kath, “so in removing this I have to be careful not to rip or stretch the old fabric as I’ll be using these segments as a pattern for the new covers.”
While separating all the different parts, Kath also has to remove all the hog rings she finds along the way. She’s also removed the plastic trim from around the adjustment handles and the base of the seat.
Pictures like these are incredibly useful to the team to know the shape they’re aiming for.
“I removed the spring clips that keep the base in place” Kath explains. “I’ve also marked out all the positions of the parts so I can easily position them back together.”
Now all the parts are marked and separated, it’s time to start matching them up to the new leather.
Kath’s then begun work with the new leather sections. She starts by marking out the lines in the fabric to match the existing seats. “I marked out the leather to make the fluted face” Kath explains, “then marked out the lines across the back.”
Kath then cut the foam and marked out the lines on that too. Then, it was ready to start sewing the flutes.
Kath then begun work on some smaller segments of the seats. “I marked out the side bands, skirt and piping” Kath describes “then mounted the side bands onto foam.”
Kath then seals around the edges and trims off any excess, clipping the leather together to hold in place before it’s stitched up.
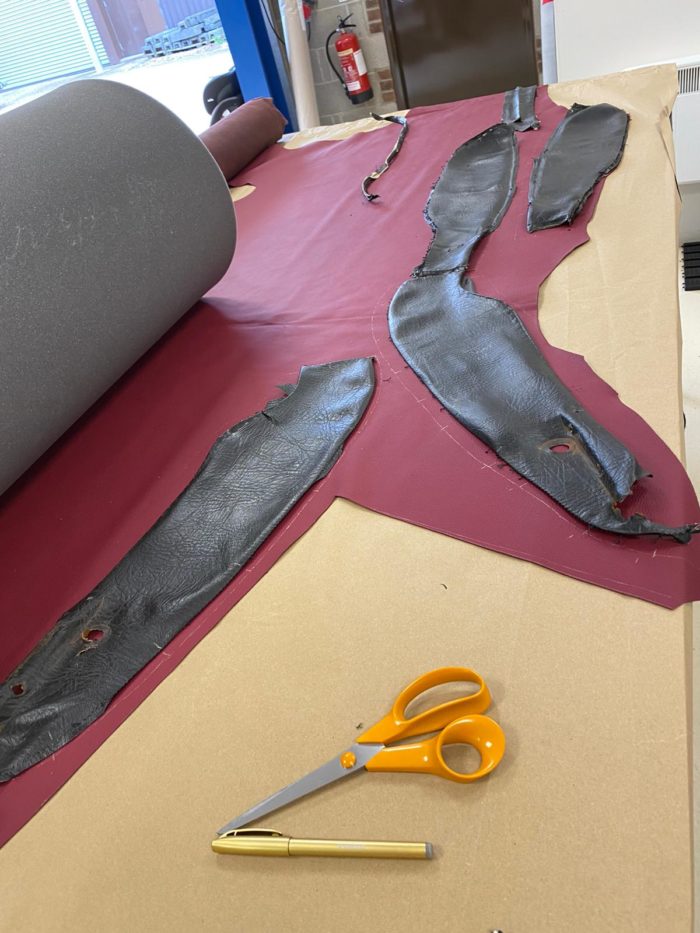
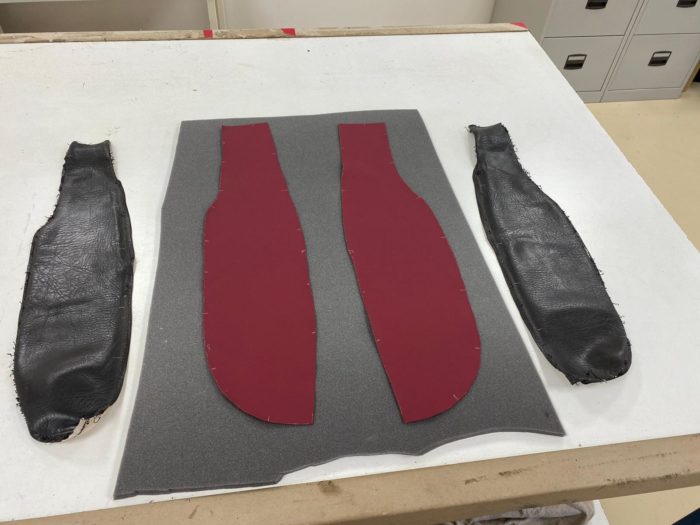
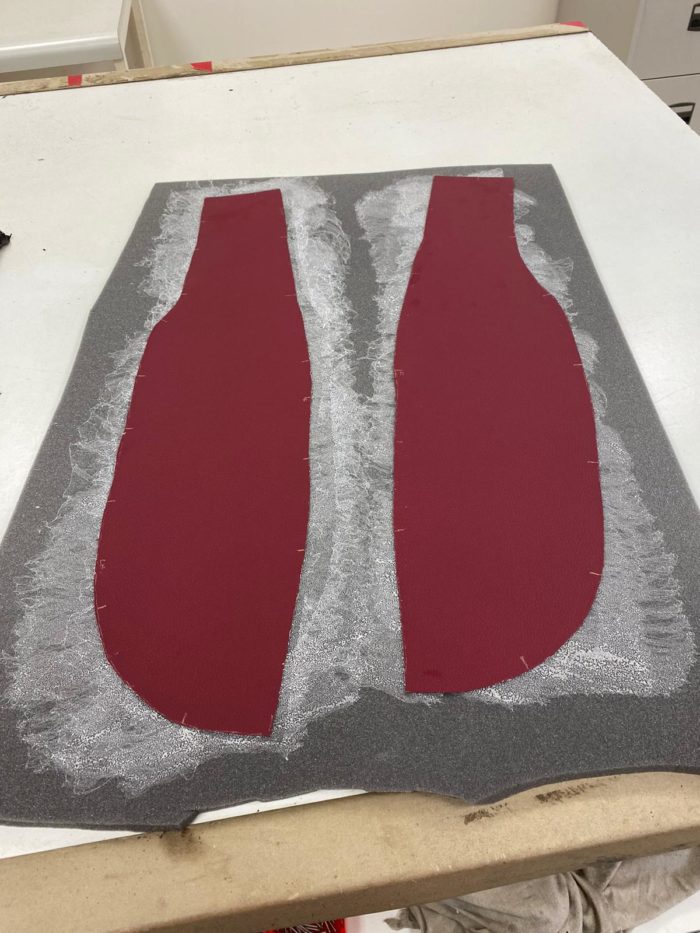
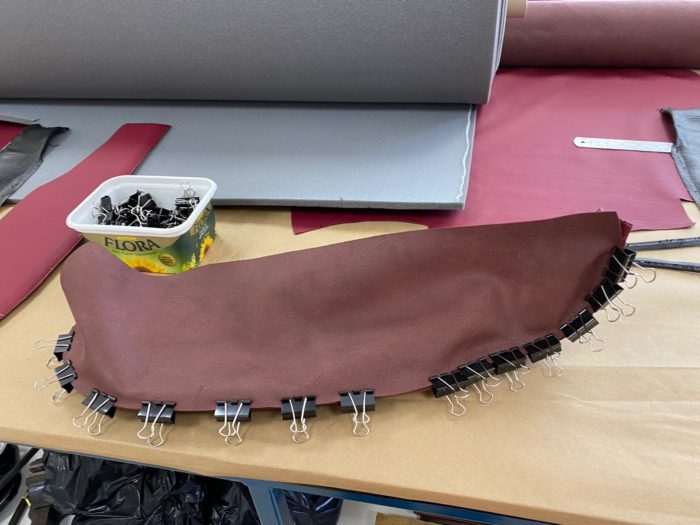
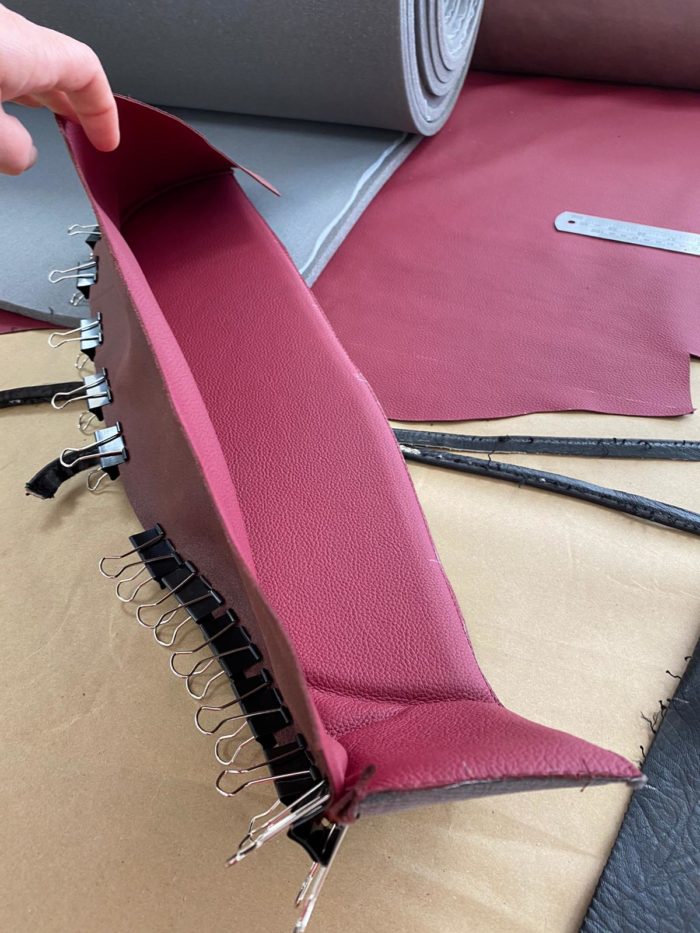
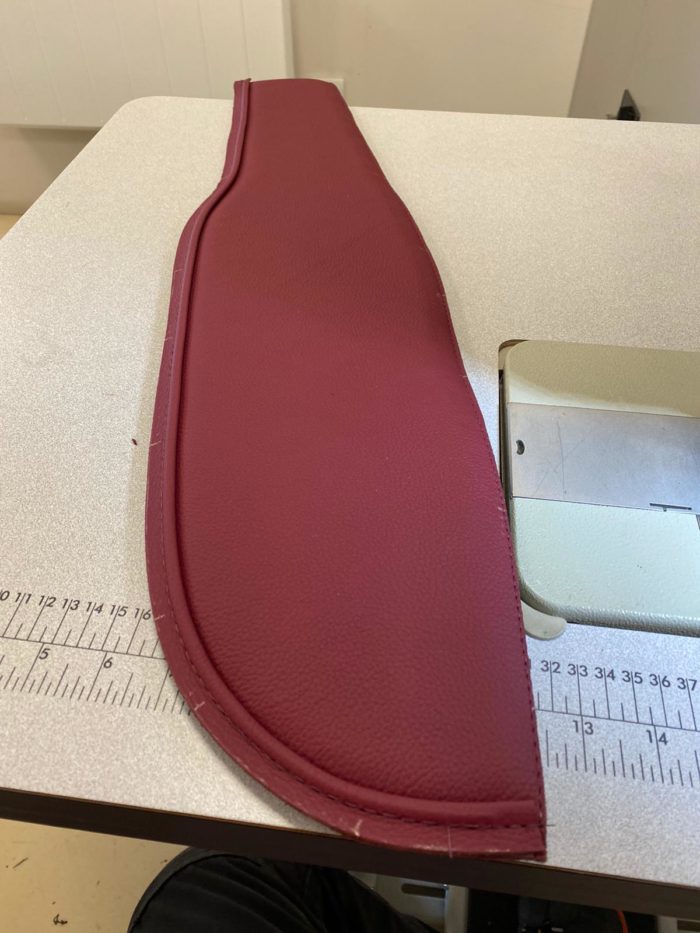
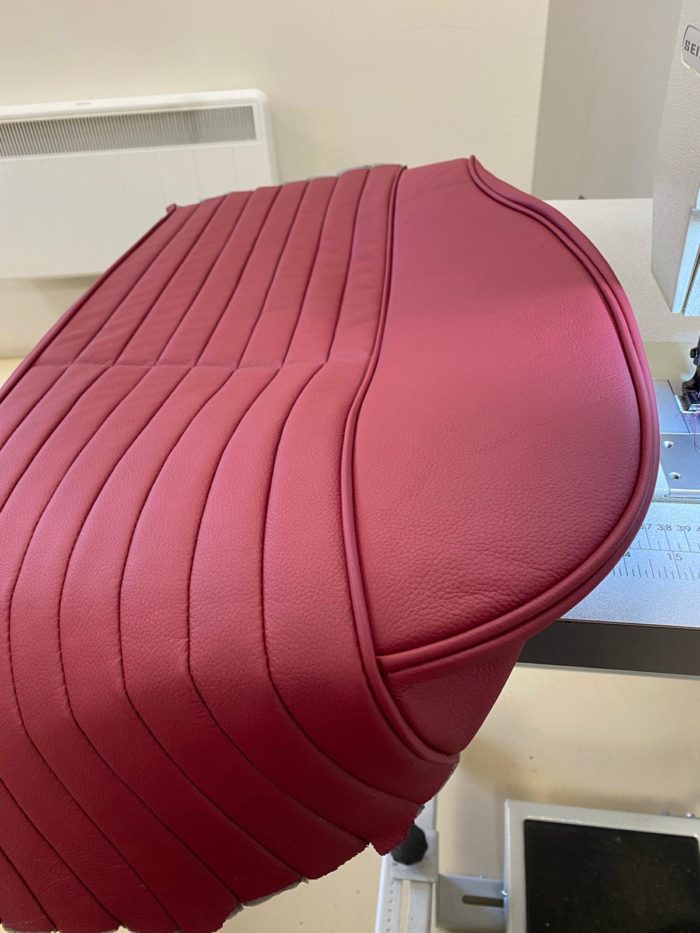
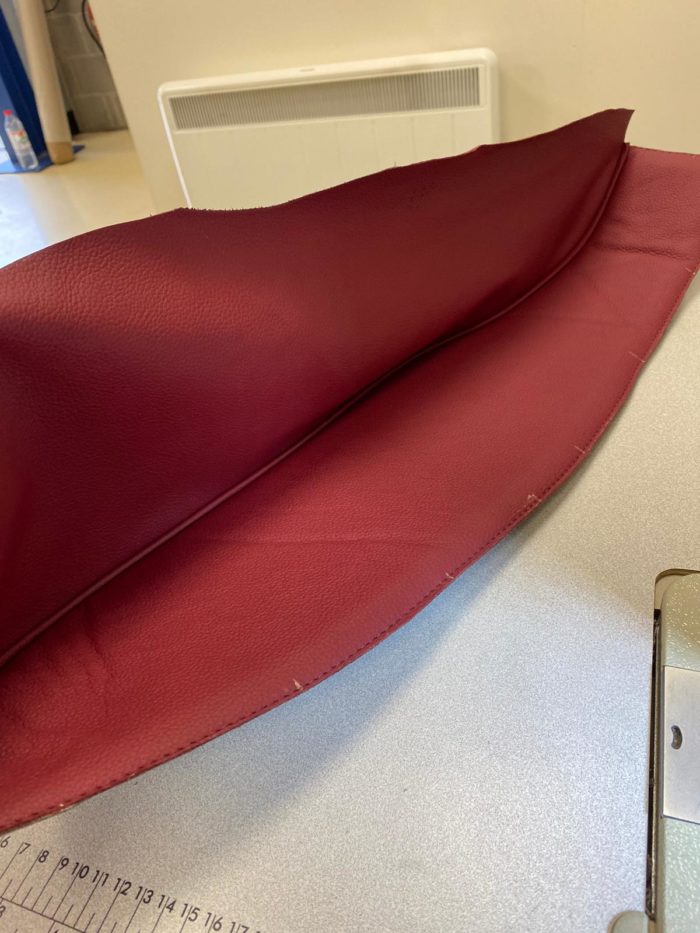
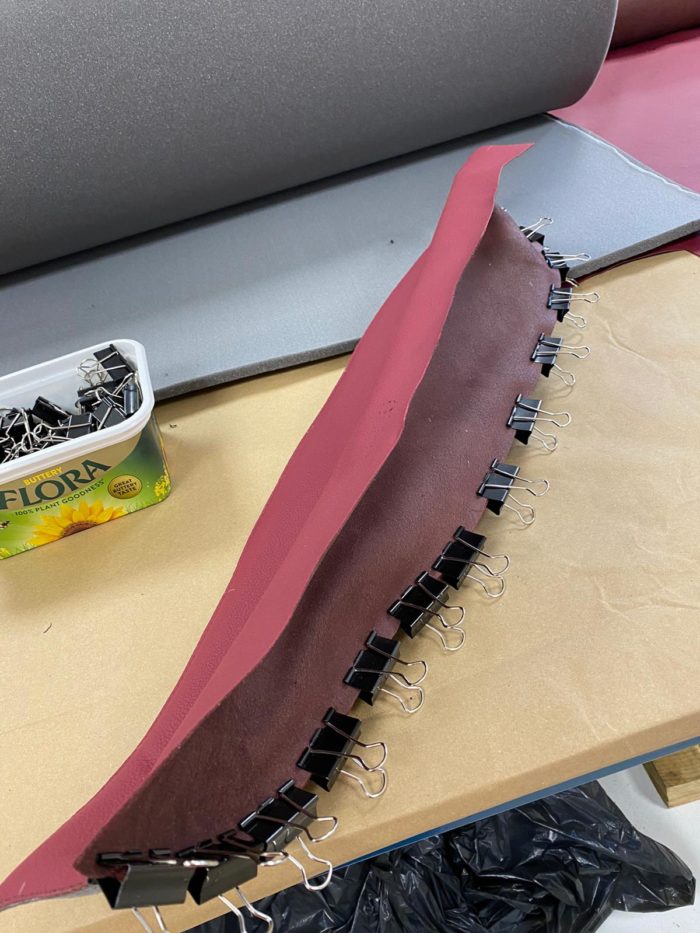
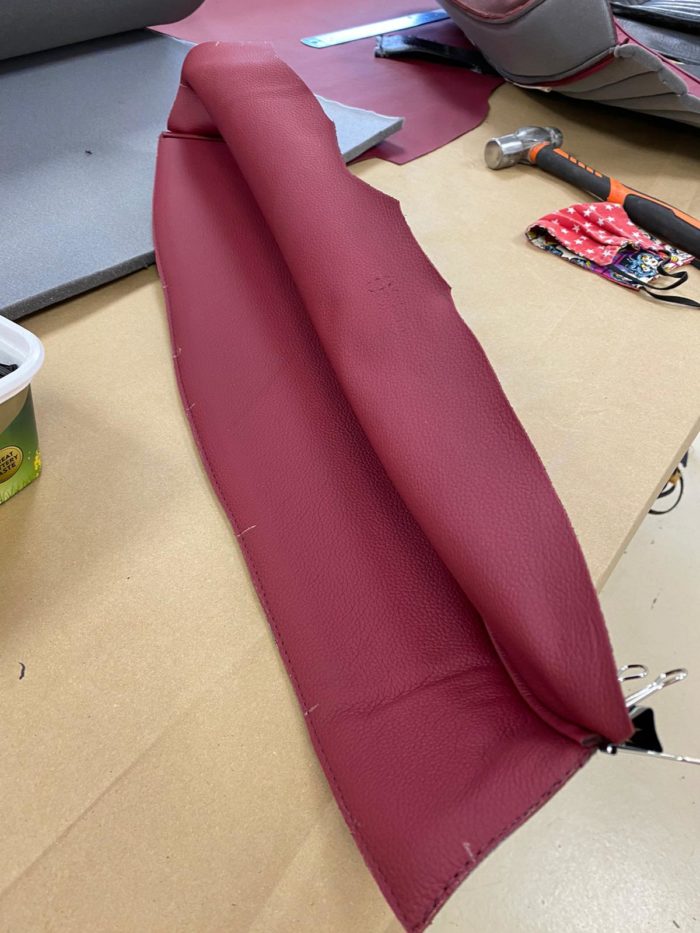
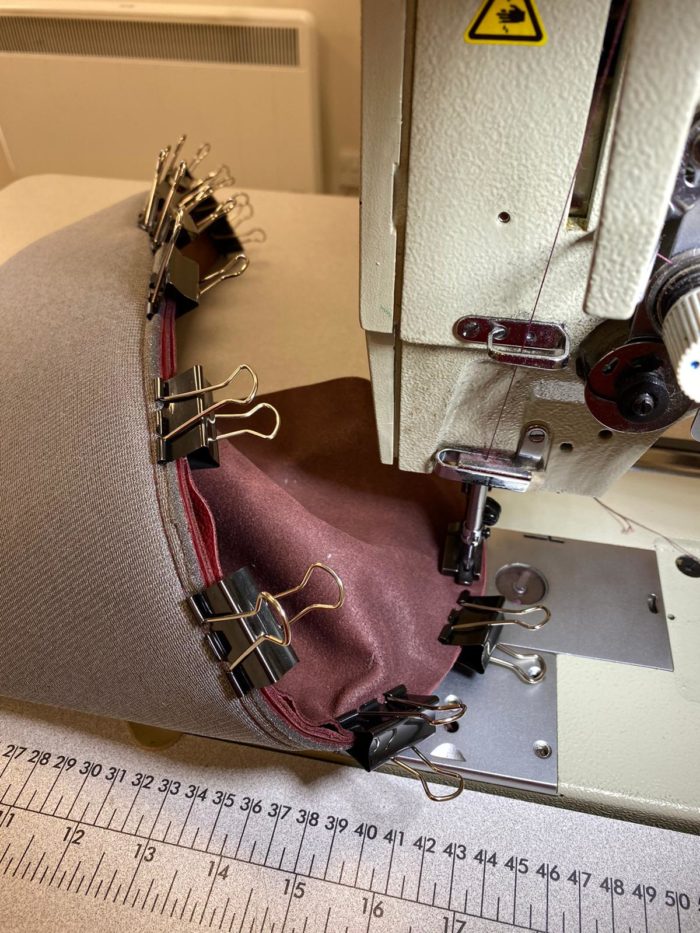
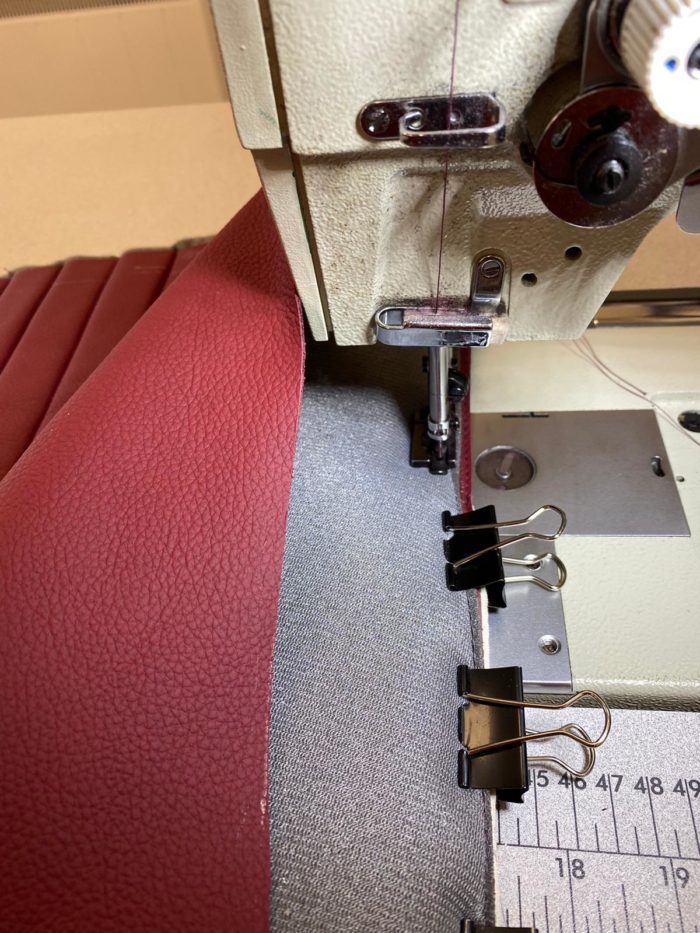
These sections are then attached to the base of the seat. Both sides are sewn on, then the back flap is also sewn in place.
Next up, Kath is sorting out the back panel of the squab. “I unpick all the original stitching” she explains, “again to use the pattern as a guide”.
The new leather is then marked out, stuck round with its edges turned and glued. “I then sew around the edges and trimmed off the excess fabric” Kath tells us.
Kath then does the same for the back seat squab. Using the existing leather as a gauge for the seats pattern, marking out the segments in the new leather.
“I then unpicked the seat cover” explains Kath. All the separate parts can then be used to cut out the sections in the new leather.
The individual parts were then cut out of the new leather with lines marked out for the seat to match the existing design.
Kath then put pipe around the edges of both panels. ” I sewed a calico loop and piping around the edge” she explains “so I can attach this section to the back of the seat and keep it in place”.
Kath then made a start on the edges of the squab, putting piping around the edge of the side skirt and clipping it to the front section. The cover was then fitted to the foam squab ready for the fluted panels.
“I clipped the edges ready to be sewn together” Kath explains, “then sewed all the separate panels together and fitted it around it’s foam base”.
The skills of our in-house seamstress Kath never cease to amaze us! Just look how beautiful this finished red leather seats are.
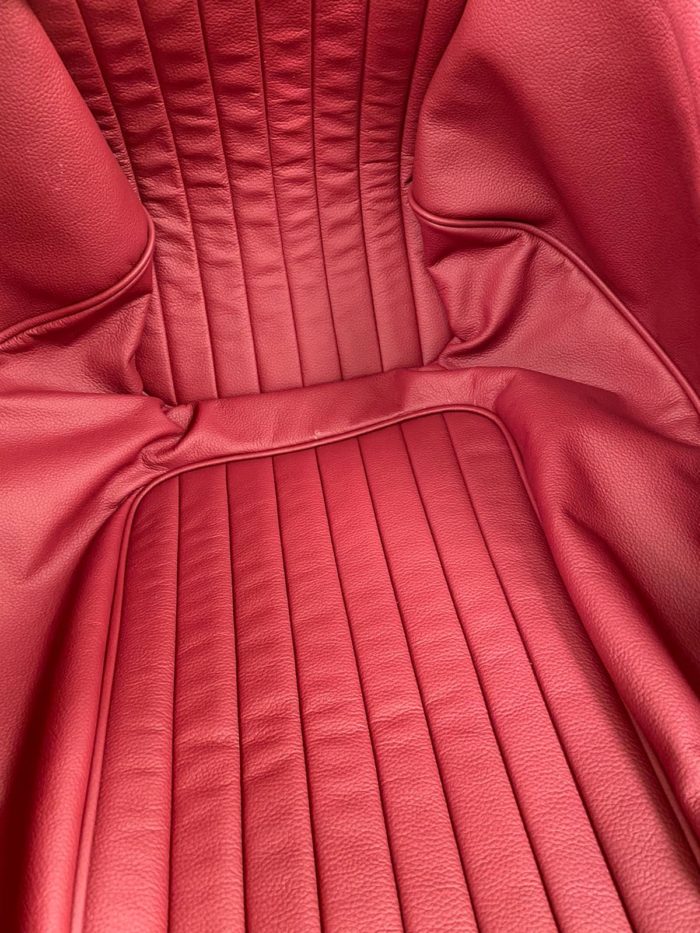
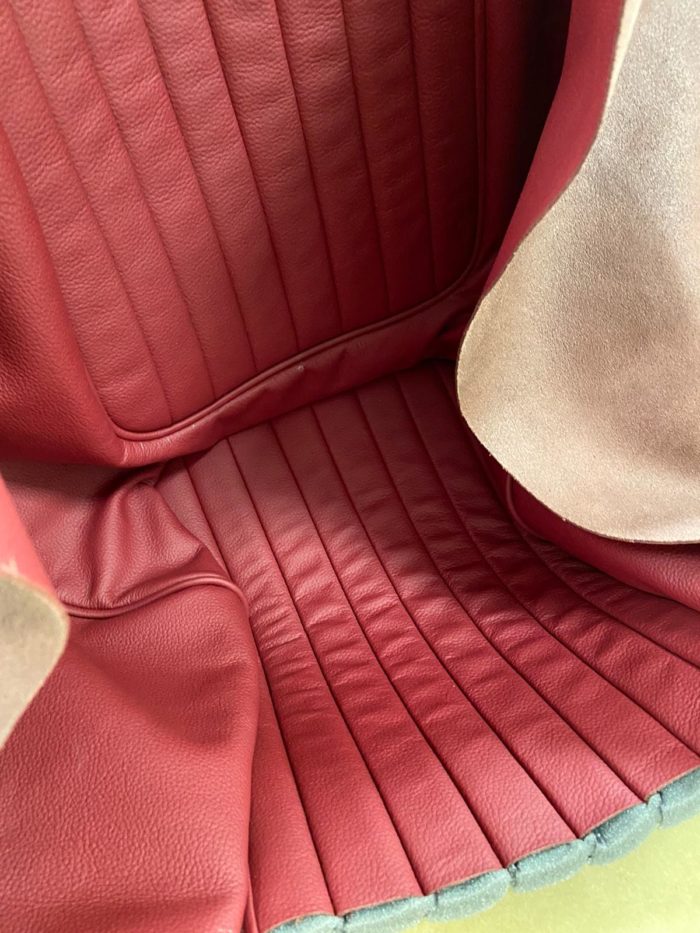
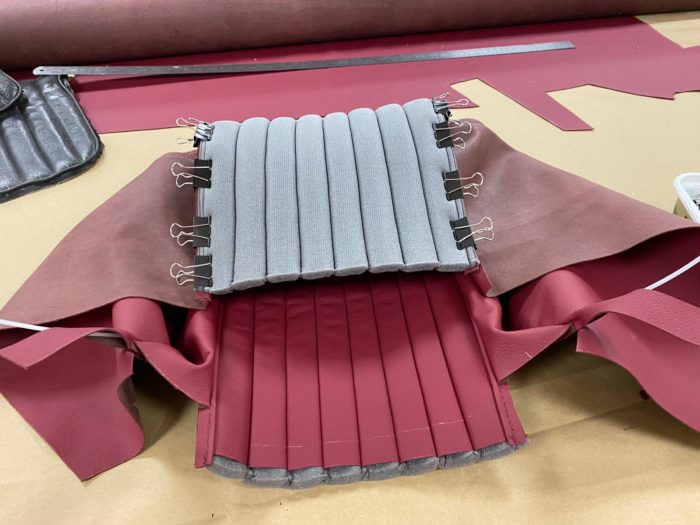
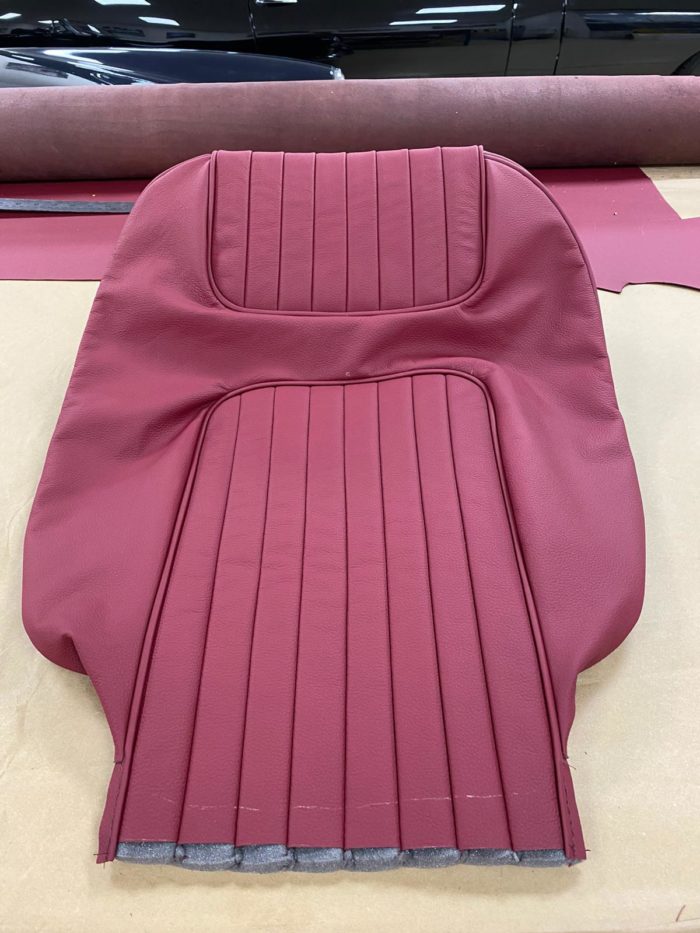
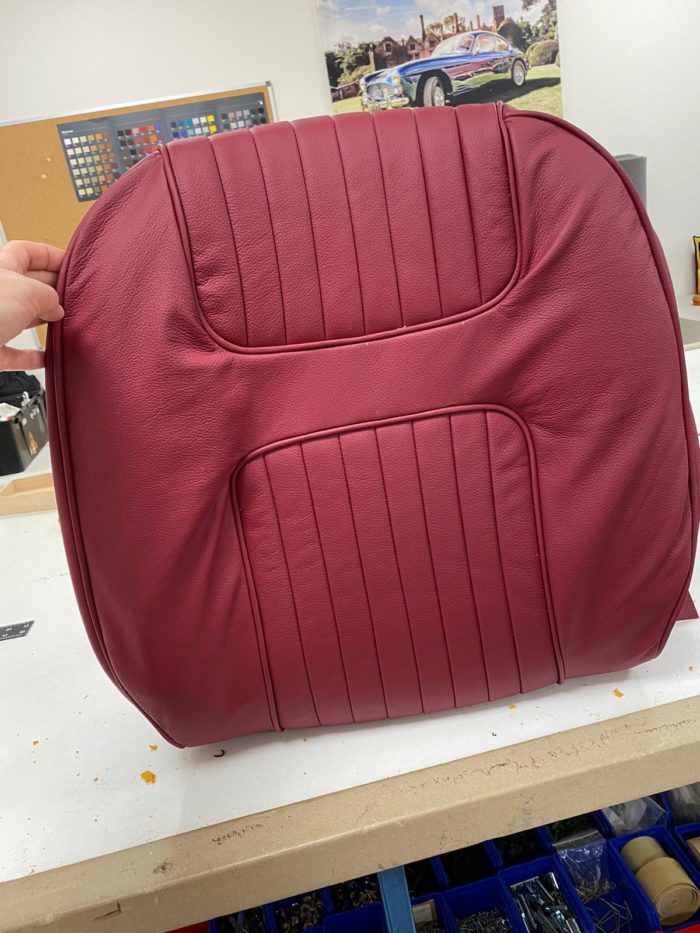
Brian then takes Kath’s seat covers and started fitting them to their new frames. “I’ve fitted the front squab to the frame” Brian tells us, “holding the fluted sections with hog rings”.
Brian’s also made new webbing straps for each seat and fitted these to their frames. He’s added extra foam to help pad them out some more too.
Brian’s then pulled the cover over tightly around the back of the seat and clipped it into position. The backboard has then been fitted into place.
We can’t wait to see them back inside the car, and give them a test ‘sit-down’!
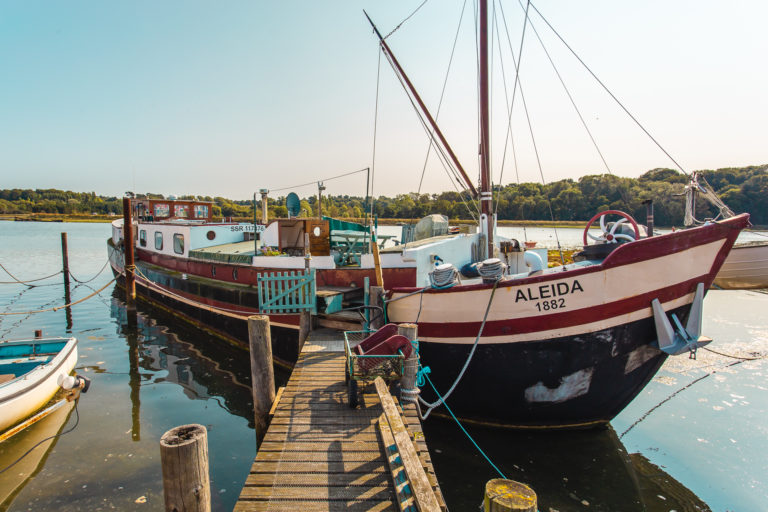
This week has seen four new arrivals into our showroom. One of which is a 90 foot boat! Unfortunately we couldn’t fit Aleda, the 1882 Dutch ‘Stevenaak’ Houseboat in our showroom, so we’ve had to venture out to her current mooring on the River Deben in Woodbridge, Suffolk.
We’ve also welcomed in two superb restoration candidates. Firstly our beautiful Lotus Europa barn find. What was obvious to us through the years of accumulated dirt was how good this car actually was. The interior is like the day it came out of the factory with no rips, tears or degradation through its long term storage.
Our second showroom vehicle which is ready for restoration is our Rover P6 3500S. Offered for sale at just £2750, this appreciating diamond in the rough is awaiting a new owner.
Last but by no means least is our little Ford Fiesta. An incredibly low milage example, this little Ford is a great, usable collectable car.
Read a full write up of all four vehicles via the link below.
www.bridgeclassiccars.co.uk/product-category/cars-for-sale
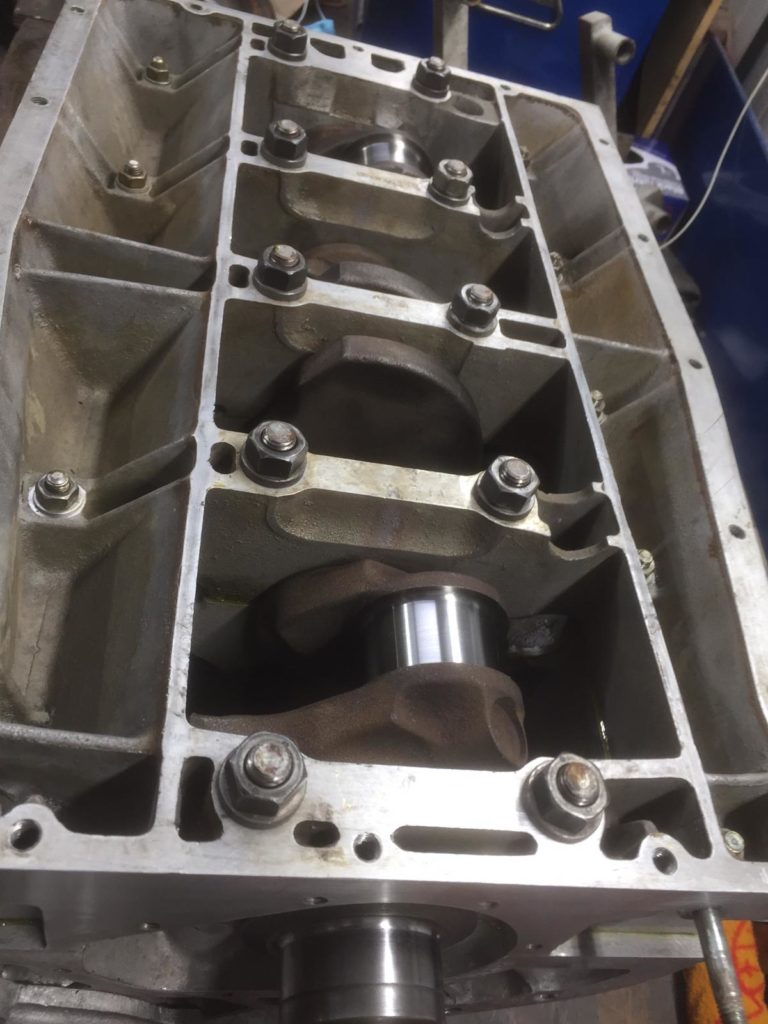
Our 1985 Lotus Esprit Turbo is back with us for a diagnostics and a possible full engine rebuild.
Our engine expert Ady has the whole engine out of the car, with many of its components removed for closer inspection. “When fitting the cylinder head to the cylinder block, you have to torque the cylinder head up to a certain lbs per ft.” Ady explains. “It was in doing this that I found that the thread in the cylinder block was completely stripped.”
Being an all aluminium engine means the wear and tear is so much greater on the threads. An aluminium engine does however give the Lotus Esprit Turbo its high-speed performance, so it’s swings and roundabouts one might say!
You can see the extent of the damage from the pictures of the parts shown below. The problems been rectified by putting a helicoil into engine.
Our spirited Esprit is longing to be driven down some winding Great British roads. We’re doing all we can to get her back to tip-top condition and return her to her owner as quickly as possible.
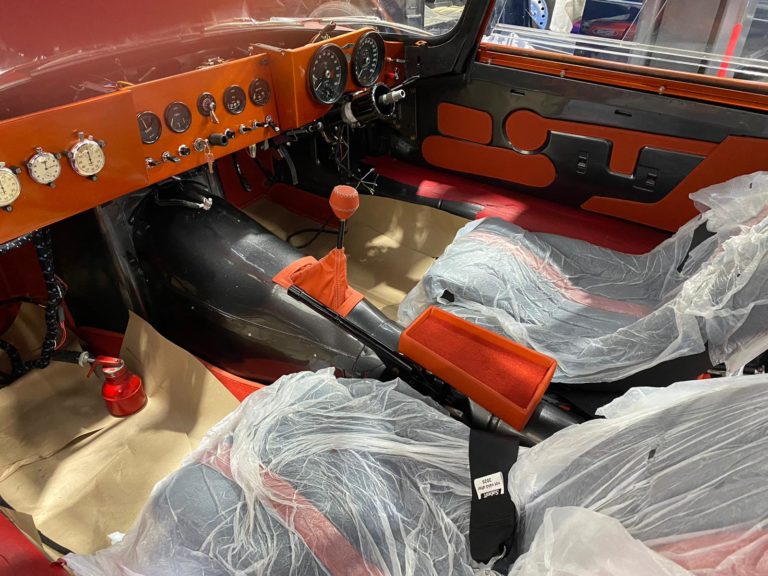
We’ve continued interior trim work on our 1967 Jaguar E-Type race car this week. Brian and Kath, our trim shop experts, have been making parts for the centre console.
“I made the base for the Jags chubby box out of ply wood” explains Brian. “I started by cutting all the separate sections, gluing them into position. Then screwing the finished box into the centre console.”
The leather was then marked out and cut to shape around the box. Foam’s been added around the edge to give the box a nicer shape. “I fitted the leather around” describes Brian, “then glued neatly around the edges.”
Kath’s been working on our race car too. She’s been making the pattern for the gaiter surround. “I mark out the pattern then transfer this to the leather” Kath tells us. “I then stick the edges neatly in place, cut out the centre and stitch the surround to tie in with the rest of the design.”
Kath’s then fitted the surround around the gaiter and added the gear knob she made earlier.
Brian’s then fixed the finished box into the centre console and covered the screws with a matching carpet panel. Now both parts are looking right at home in the race car.
That’s some awesome team work Kath and Brian – great job trim shop!
Bridge Classic Cars are award winning Classic Car Restoration and Maintenance specialists. Your pride and joy is in safe hands with our expert Classic Car Technicians. Take a look at our awards here.