Down to It – Working on the Steering Coupler of the 1968 Jaguar MkII 2.4
The next job to be done on the 1968 Jaguar MkII 2.4 by Bridge Classic Cars is to replace the steering coupler. This will help


The next job to be done on the 1968 Jaguar MkII 2.4 by Bridge Classic Cars is to replace the steering coupler. This will help
One of the jobs to be done on the 1968 Jaguar MkII 2.4 was to paint the wheels to a colour matched off white, just
If this isn’t one of the most beautiful cars then we don’t know what is. Finished in a beautiful shade of red with a grey
The 1968 Jaguar MkII 2.4 has been in the Bridge Classic Cars in-house paint shop where our paint expert Alan has worked his magic on
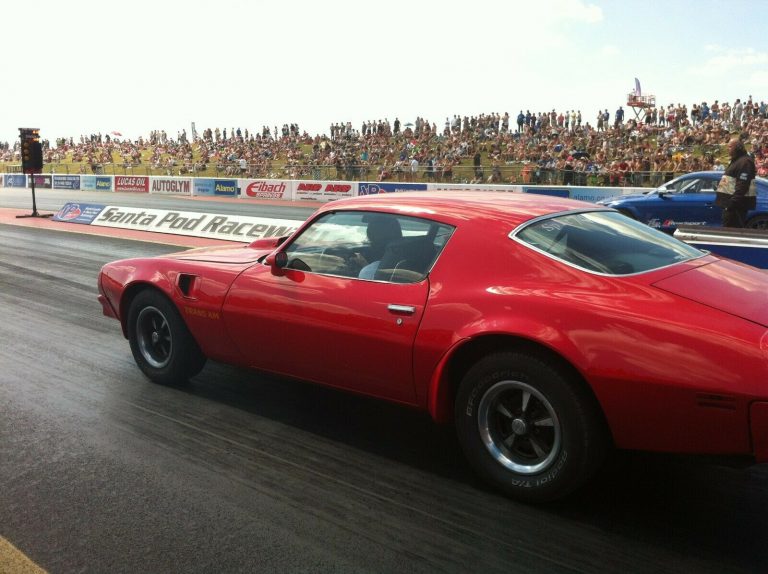
Coming soon to the Bridge Classic Cars workshop is this incredible 1974 Pontiac Trans Am Firebird. It seems that recently we’ve been seeing a fair
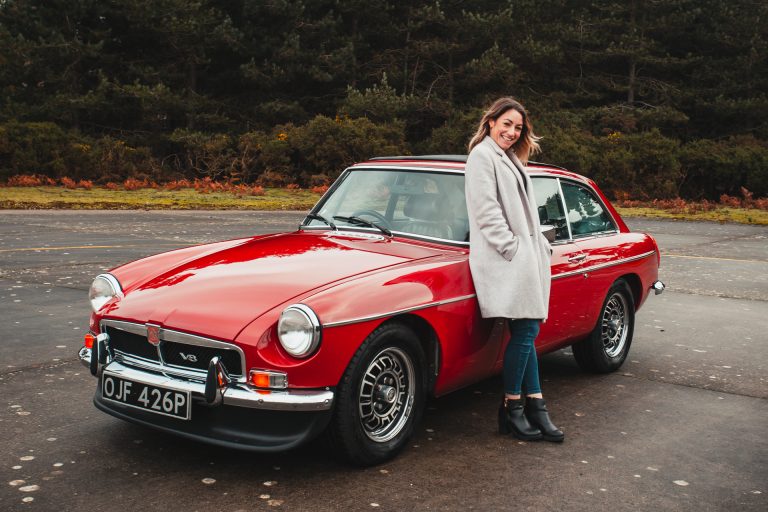
There’s always a buzz around a new competition car. Especially one as special as this… a 1975 MGB GT V8. This small, V8 powered British
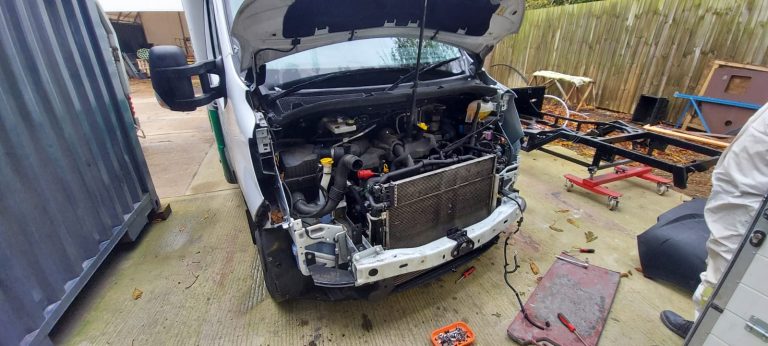
Chris, our in-house paint and body expert here at Bridge Classic Cars, has begun work on the 2021 Renault Master which belongs to one of
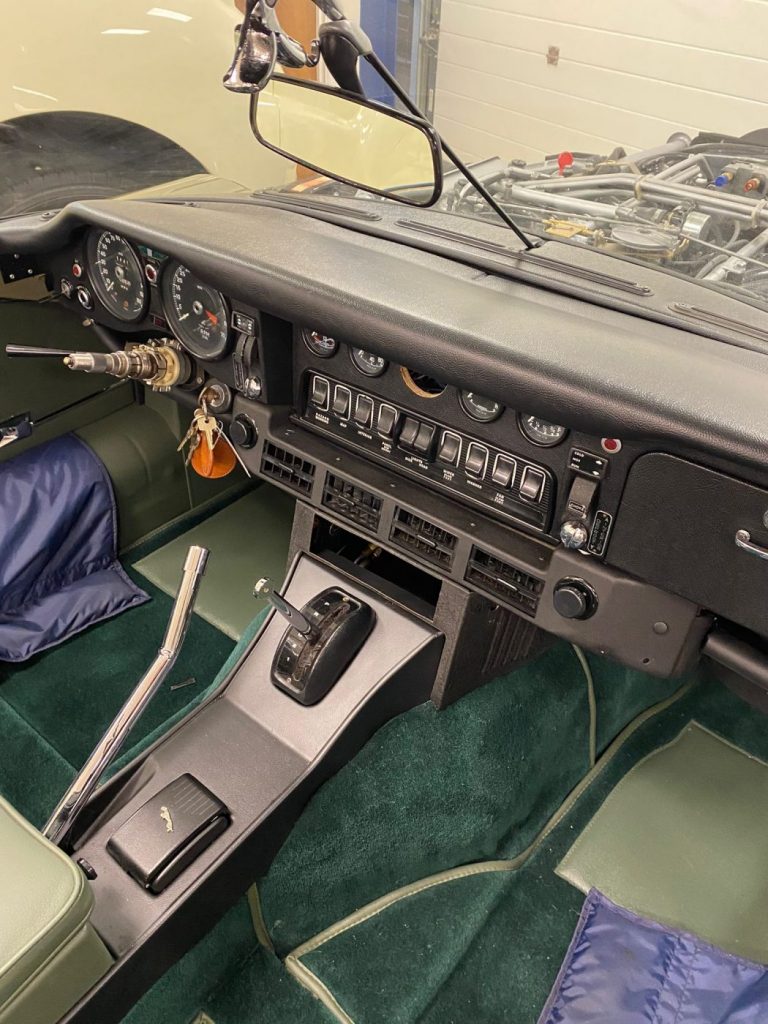
Brian, Kath and Lydia have been working on the next phase of the interior for the 1973 Jaguar E Type Roadster that Bridge Classic Cars
Bridge Classic Cars have today welcomed its latest guest to the Pettistree workshop. This 1934 Riley 12/4 Lynx has come to us all the way
Chris and the team in the Bridge Classic Cars in-house paint shop have been busy at work preparing and priming the 1955 Aston Martin DB2/4
The restoration technicians at Bridge Classic Cars have been busy working on a couple of jobs on the 1960 Jensen 541S before it goes to
The trim work on the 1955 Aston Martin DB2/4 is absolutely beautiful. Simple and elegant but there is quite a bit of it. These are
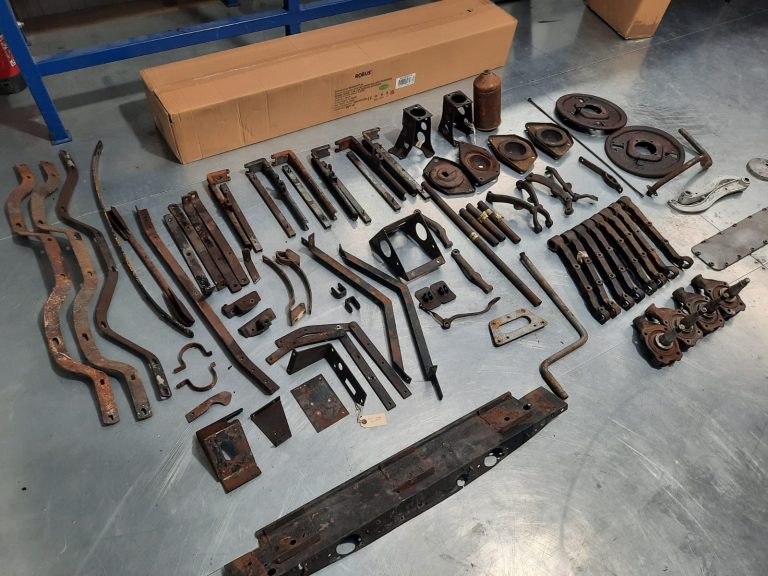
Mauro, has been working on getting all the relevant parts and pieces of the 1956 Jensen 541 ready to be sent out to local, trusted
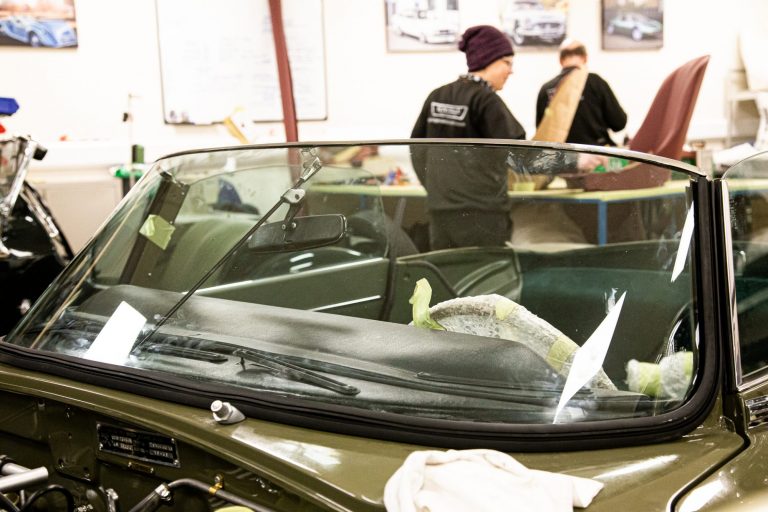
The windscreen of the 1973 Jaguar E Type Series III Roadster is now in the car! This moment has been a long time coming. The
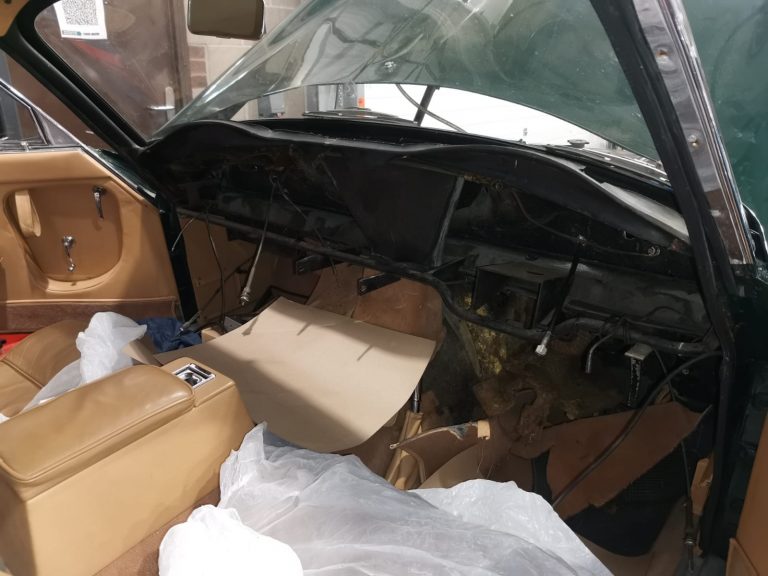
The 1962 Jensen 541S that is currently in at Bridge Classic Cars for some work has been handed over to our technician Tom to begin
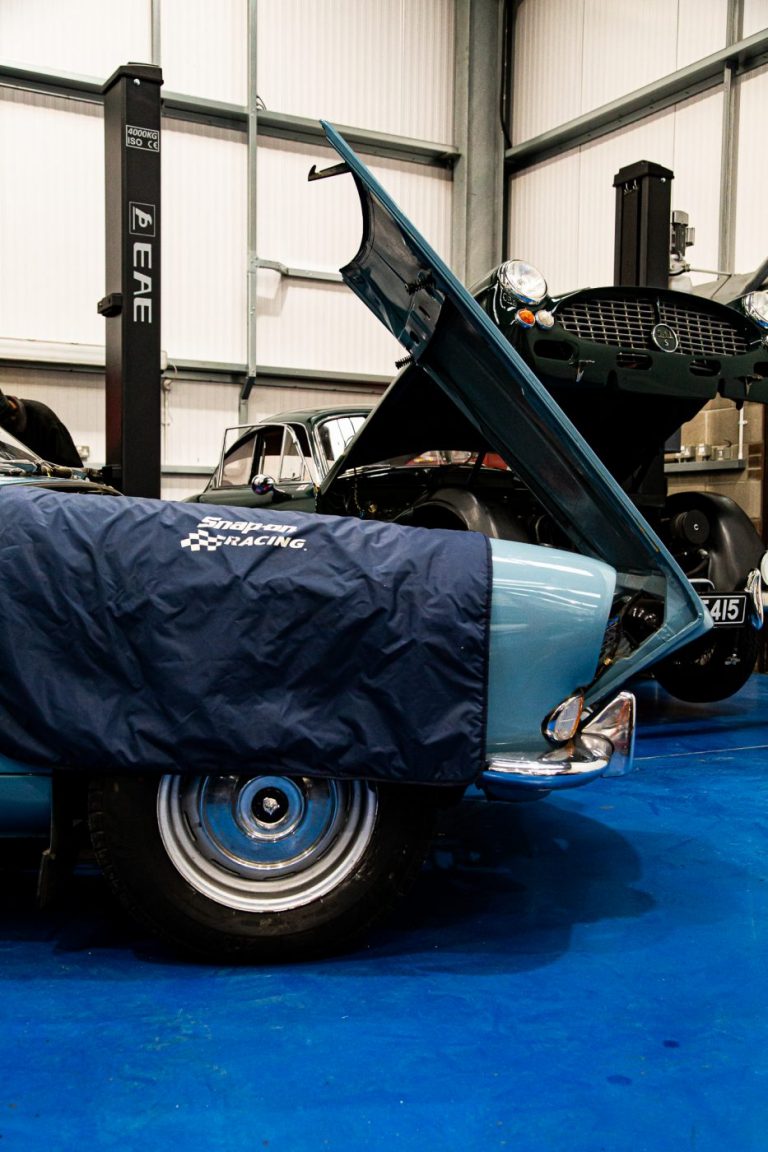
The cylinder head for the 1971 Jaguar XJ6 is back at the Bridge Classic Cars workshop. This has been away at a local specialist to
The carburettors for Gordon, our directors, 1977 Honda GL1000 Goldwing are back from blasting and have been freshly rebuilt. These are over at Chris Self
Jonn, one of our in-house restoration technicians here at Bridge Classic Cars, has been busy preparing both the car and the engine for the pair
Bridge Classic Cars have the honour of being the current caretakers of the incredible 1905 Riley 9HP believed to be one of only three remaining
Unfortunately, this 2021 Renault Master has had a bit of damage to the front end. The van belongs to our neighbour here at Pettistree, Suffolk
Jaguar. A legendary name in both performance and luxury. Just the name is enough to conjure images of elegant, long-legged coupes and saloons powered by
Bridge Classic Cars have been working on preparing the 1978 Jaguar MkII 2.4 to prepare it for the next phase of work to begin. Dave,
Jonn, one of the Bridge Classic Cars in-house restoration technicians, has been working on cleaning out the engine block of the 1971 Jaguar XJ6 currently
This 1977 MGB Roadster is in with Bridge Classic Cars for a full cosmetic restoration. That does involve a bit of cutting… Scott has worked
Brian, one of our incredible in-house trim experts here at Bridge Classic Cars, has been hard at work getting the interior of the 1973 Jaguar
Jonn, one of our in-house restoration technicians at Bridge Classic Cars, has been working his magic on this absolutely beautiful 1964 Triumph TR4. The TR4
Our in-house technician Jon has been busy working on the list of jobs to complete on the Glastron Sea Ray speedboat which belongs to our
The Hangar welcomed its latest resident. This unique 1970 Bristol 411. This car is being stored with us at our safe, secure and private storage
The teardown of components for sandblasting is a crucial step in any restoration. The parts need to be broken down into the their separate pieces
Kath and the Bridge Classic Cars in-house trim team have been continuing to fit-out of the 1973 Jaguar E Type Series III Roadster that we
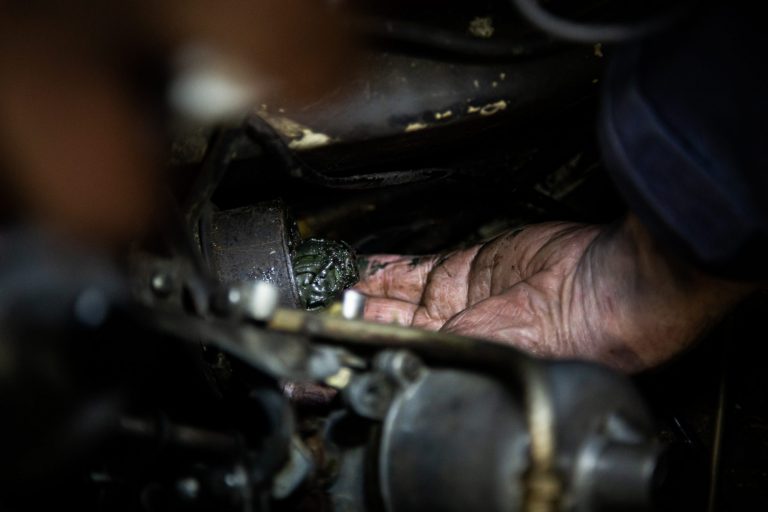
The next job to be done on the 1968 Jaguar MkII 2.4 by Bridge Classic Cars is to replace the steering coupler. This will help to tighten up the loose steering for its owner.
This job is being done by our master tech, Dave. Dave has a huge wealth of knowledge and experience working on classic cars so a job as delicate and crucial as this was given to him. Carefully, Dave began by removing the shaft from the coupler in order to gain access to the bushes and balls inside the steering box. As opposed to some MkII’s that we have worked on in the past, this MkII remains as a steering-box car.
After removing the original parts from the car, Dave began to check the new replacements would work with the car and were correct. Then, it was a case of getting everything back together and into the car. Dave took his time to make sure that every component cleared the steering box and its boot so it remained happy for many years to come.
After the job was complete, Dave manually checked that the box rotated as it should and also meshed together with as little play as possible thanks to the new parts.
There will be more updates soon as work continues on this stunning MkII 2.4.
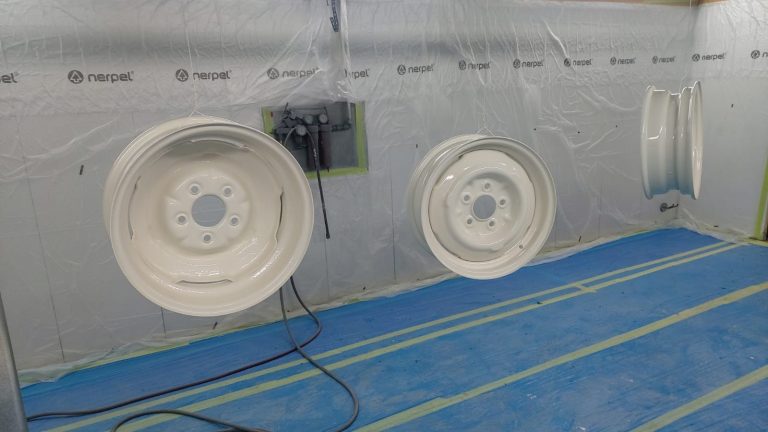
One of the jobs to be done on the 1968 Jaguar MkII 2.4 was to paint the wheels to a colour matched off white, just the same as the body. So, it was off to the paint shop under the watchful eye of our in-house paint expert Alan.
Finished in a healthy layer of primer, to begin with, the wheels were then prepared to be put in the booth ready for painting. Alan used our state of the art paint mixing computer to find the closest match possible to the existing paint of the MkII in order to get the best match.
Then, with the right amount of paint mixed up and in the gun, it was time to start laying down the first of many coats to get these wheels to look perfect. Alan took his time to make sure the paint fell evenly and was given enough time in-between coats to achieve the best results straight out the gun. And, as you can see the results are absolutely incredible.
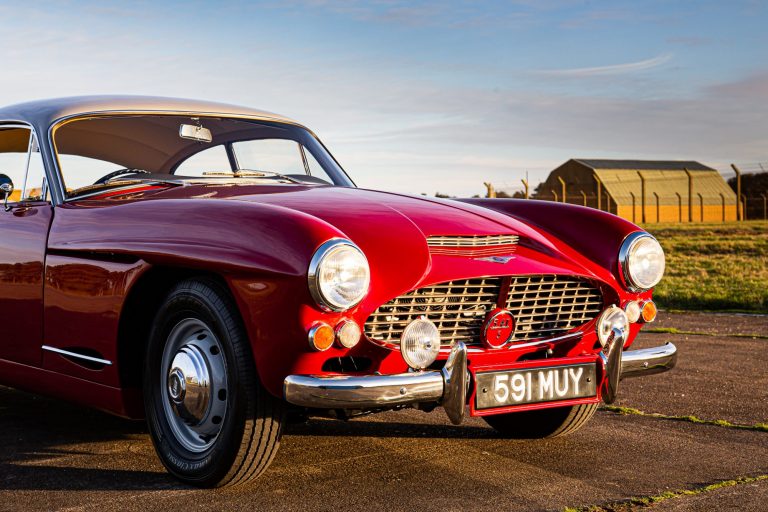
If this isn’t one of the most beautiful cars then we don’t know what is. Finished in a beautiful shade of red with a grey roof and camel leather, this 1960 Jensen 541S is definitely stealing the show at The Hangar. It is, of course, Peony Red.
Peony Red is one of the Jensen 541’s that Bridge Classic Cars has had the honour of restoring down to the smallest detail for its very special owner. There isn’t an angle where this car doesn’t look absolutely phenomenal. This afternoon it was transported from our workshop in Pettistree inside the enclosed vehicle transporter to our classic car storage facility, The Hangar. This is where Peony Red will be stored and cared for over the winter months by our in-house restoration technicians until the weather becomes more suited and the temperatures are perfect for driving such an incredible sports car.
While The Hangar was being readied for Peony’s arrival, Nick managed to grab some photos of this truly unique and one-off Grand Tourer in the sun while he could. These photos, couldn’t even do justice to just how incredible this car looks and sounds in the flesh.
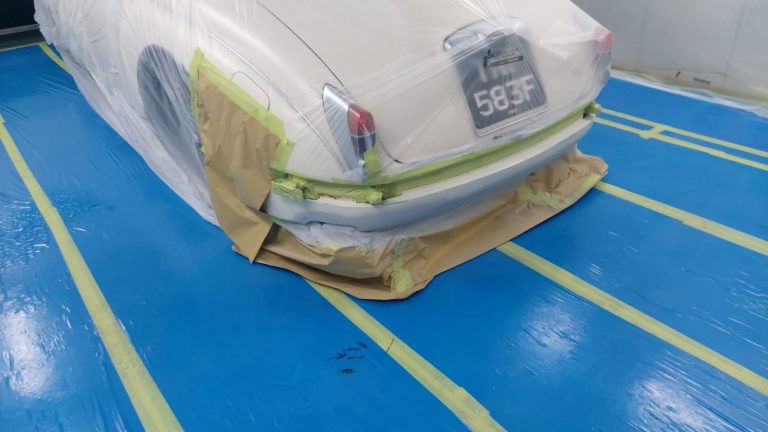
The 1968 Jaguar MkII 2.4 has been in the Bridge Classic Cars in-house paint shop where our paint expert Alan has worked his magic on the rear valance.
The valance had been coated with a thick black stone chip protection across the lower parts, so Alan pulled out his trusty DA sander and got to work. Carefully knocking back the stone chip, Alan exposed the paintwork underneath. Because of the thickness of the protection, Alan had to take it back quite a way. Once the area had been thoroughly cleaned down and smoothed out, Alan could begin his detailed and meticulous work.
Carefully, Alan applied the new stone chip to the area to protect the car from any possible marks or damage while it’s being enjoyed by its very lucky owner.
After the area around the new stone protection had been masked off, Alan carefully colour matched a small amount of paint to the rest of the car in order to seamlessly blend the new area into the existing rear panels and behind the rear bumper.
Coming soon to the Bridge Classic Cars workshop is this incredible 1974 Pontiac Trans Am Firebird.
It seems that recently we’ve been seeing a fair amount of classic American muscle cars! This Trans Am Firebird will be coming into us for some interior jobs to be carried out for its very lucky owner as well as a couple of mechanical jobs on the bright red Muscle car.
The in-house restoration teams will go through the car and assess any other items that may require attention before starting work on the list for the owner of the car.
Keep your eyes peeled for more on the 1974 Pontiac Trans Am Firebird soon here on the Bridge Classic Cars news page.
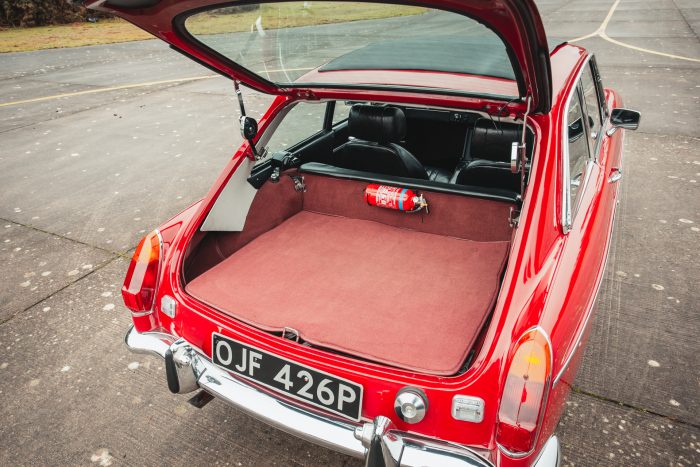
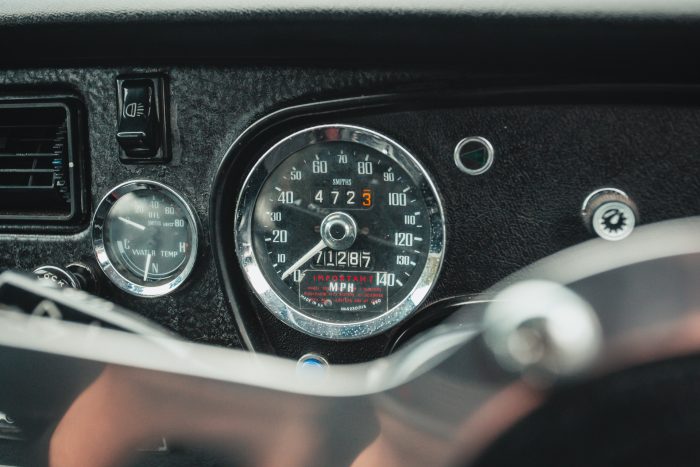
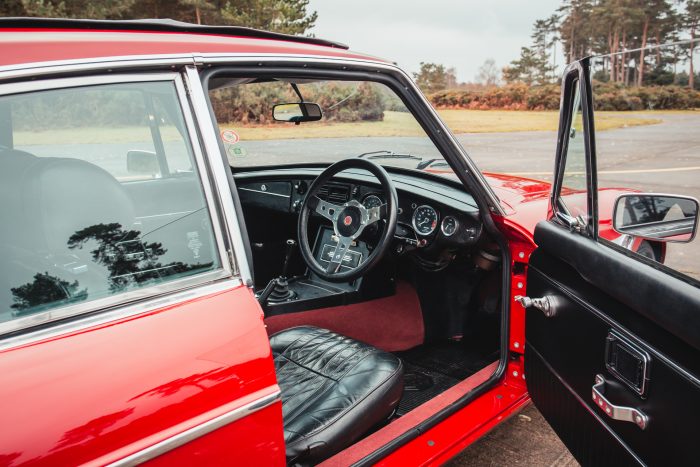
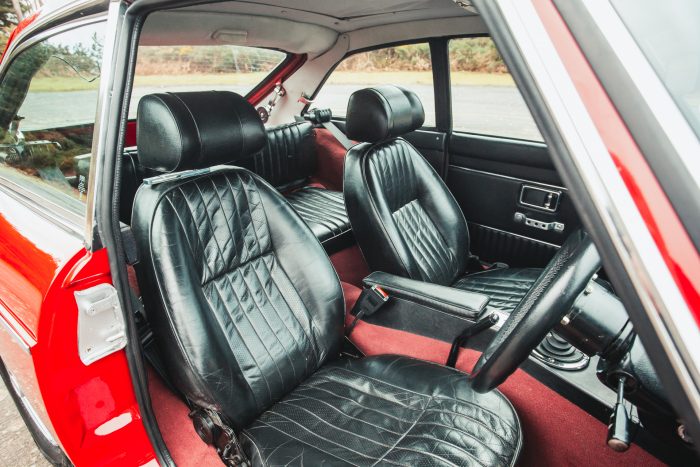
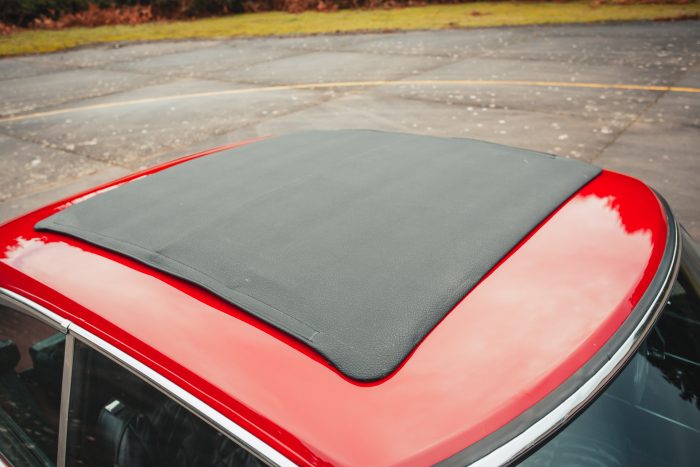
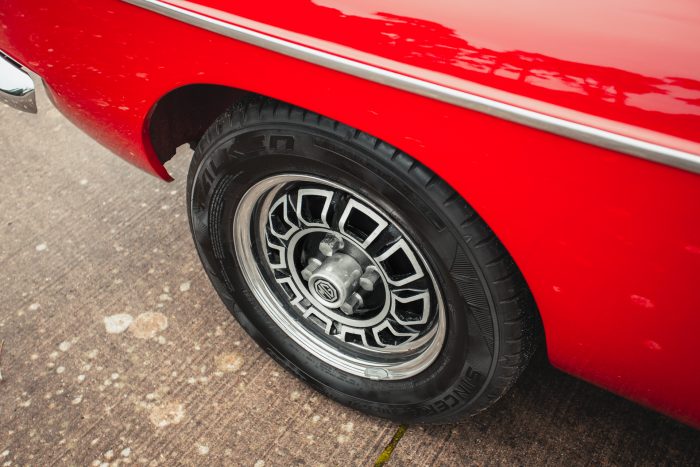
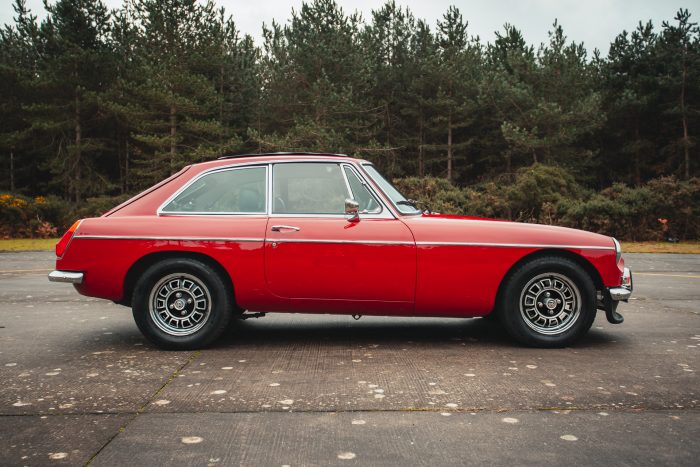
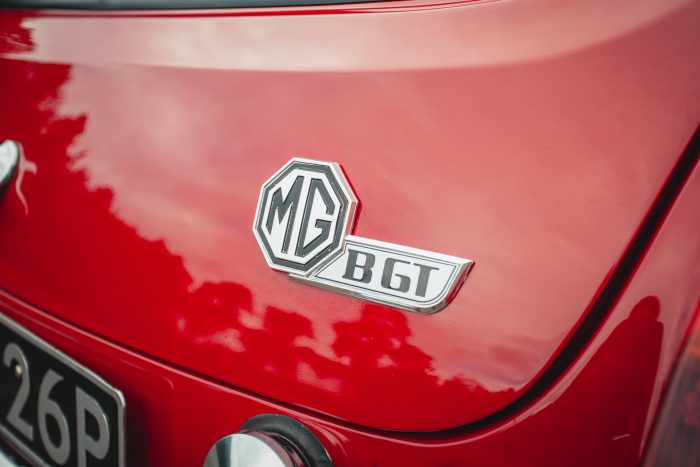
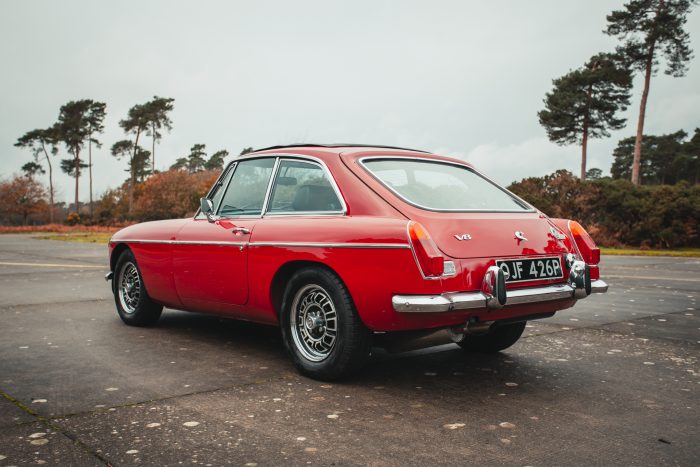
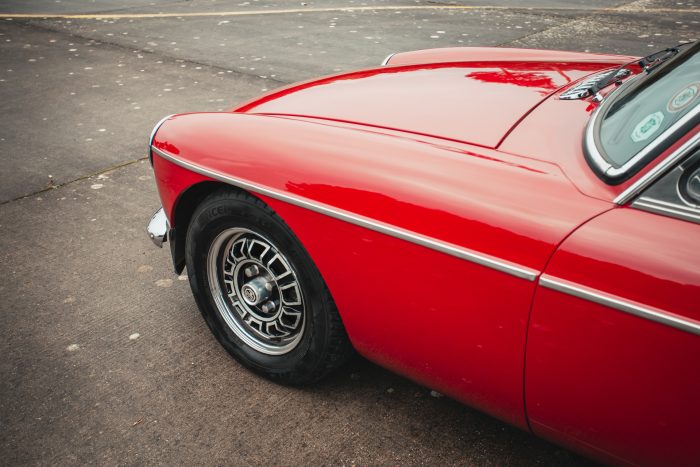
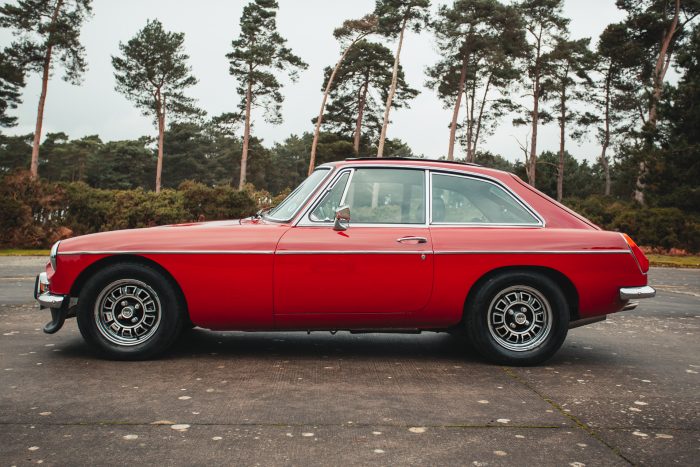
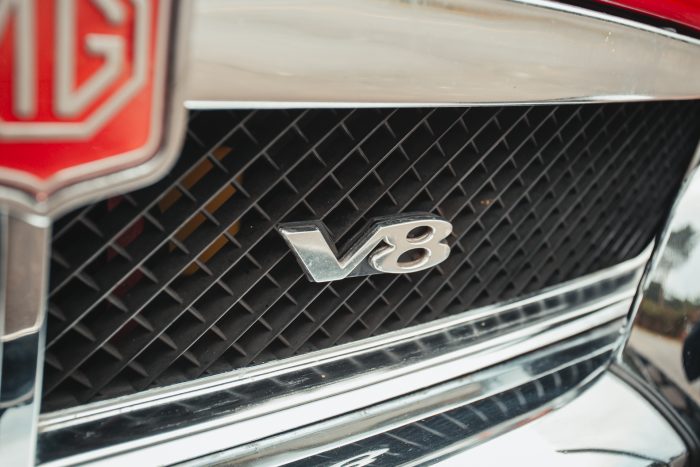
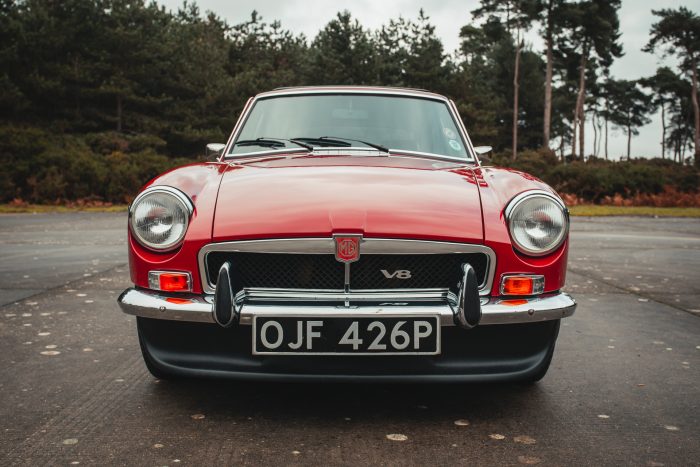
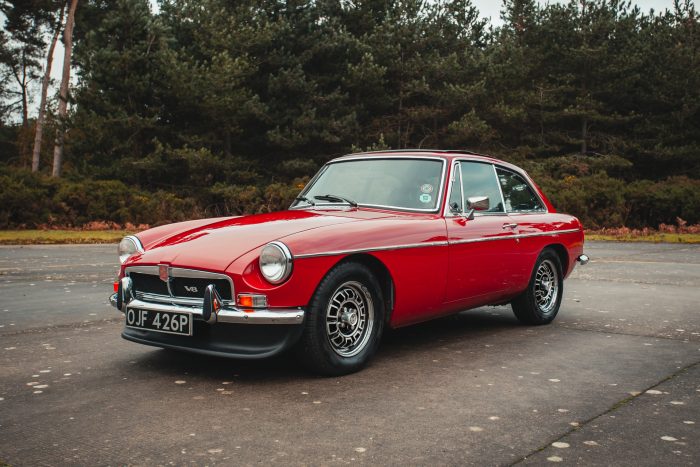
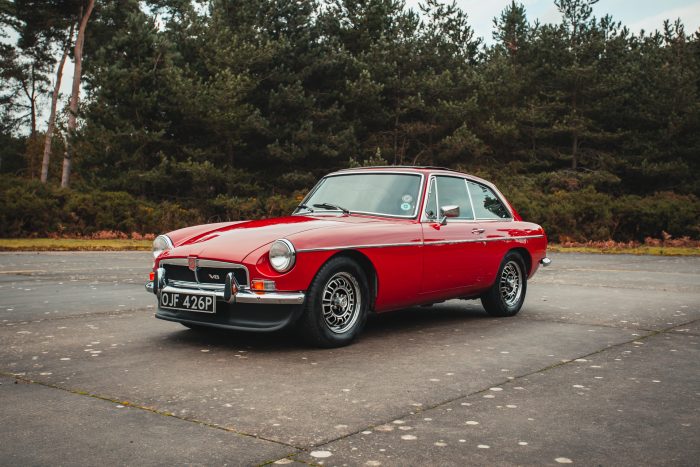
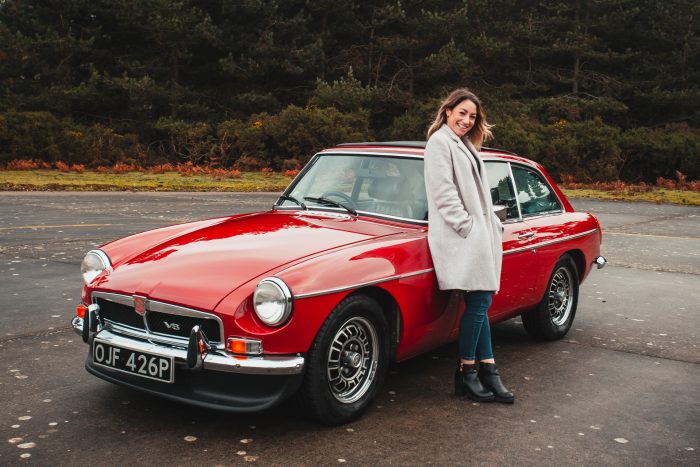
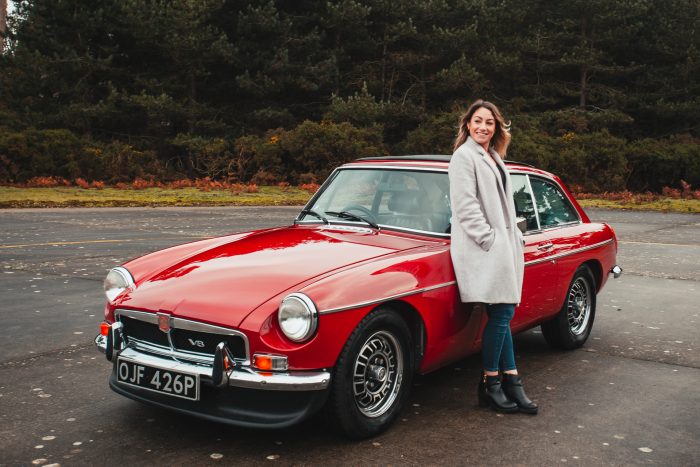
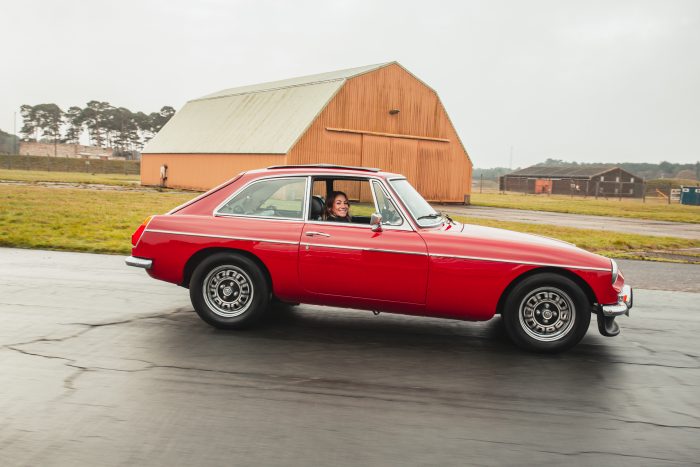
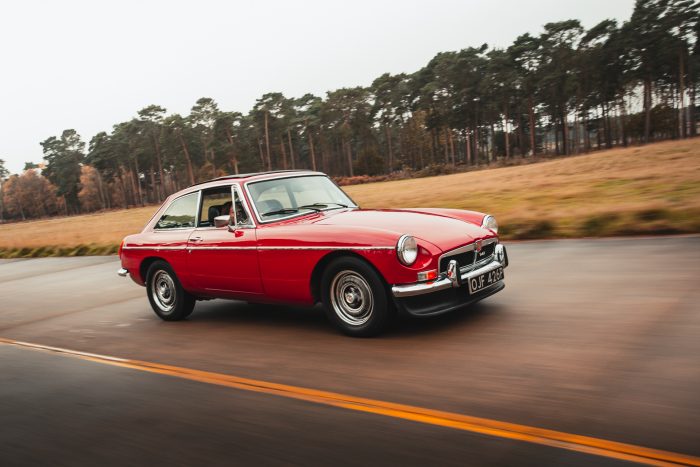
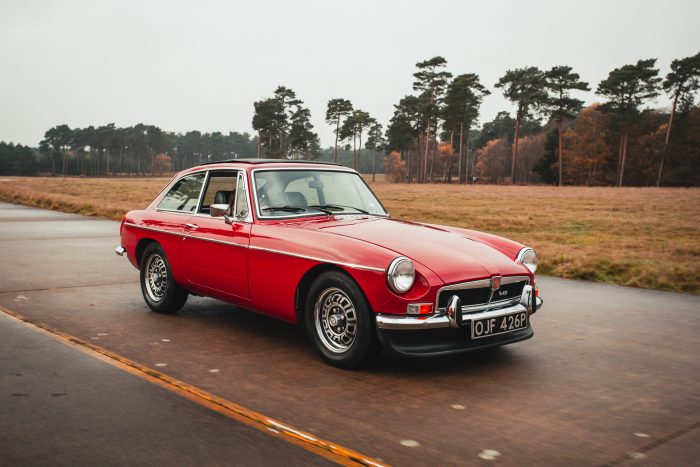
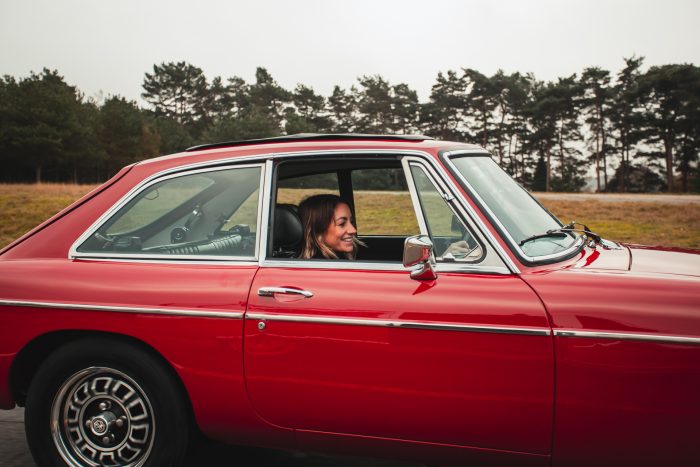
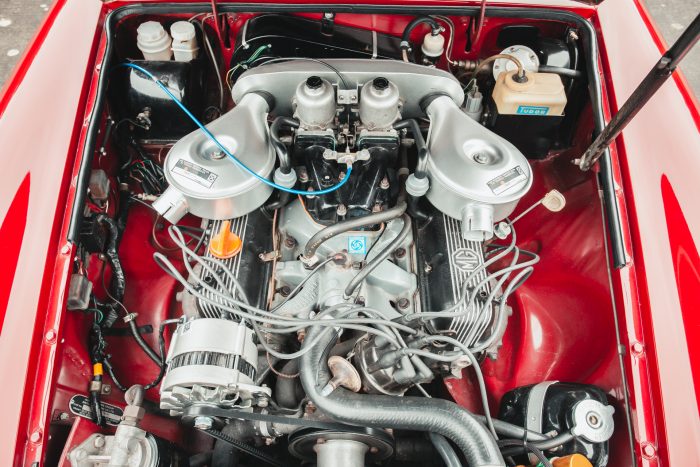
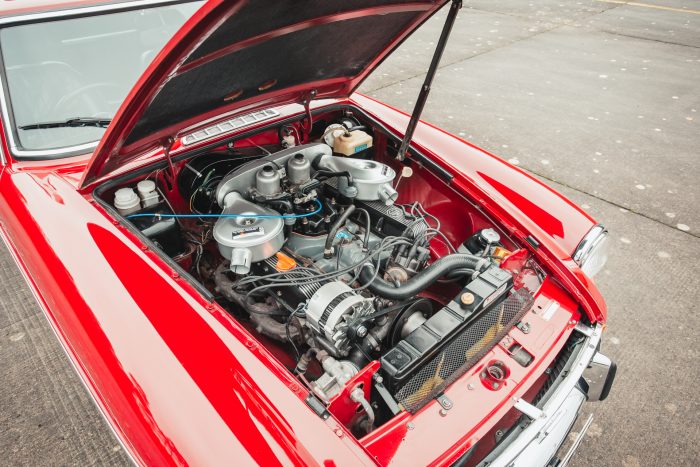
There’s always a buzz around a new competition car. Especially one as special as this… a 1975 MGB GT V8.
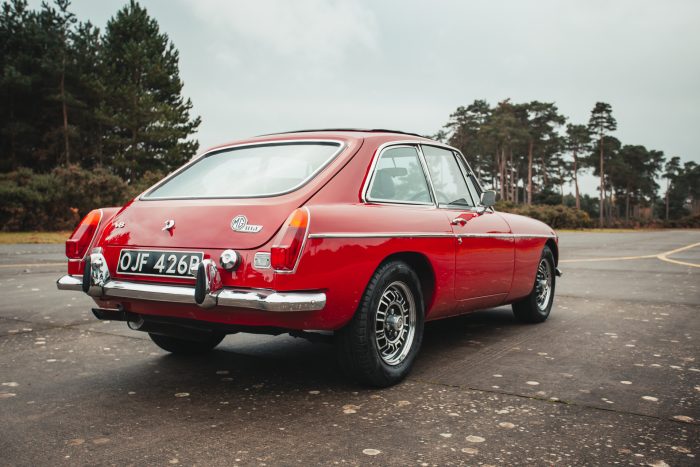
This small, V8 powered British sports car is the latest prize to be won through Bridge Classic Cars Competitions by one very lucky winner. This is the story behind the amazing photos and video of the car.
Although the winter morning was damp and the sun hid its bright rays behind grey lumbering clouds, it couldn’t dampen the spirits of the team ready to shoot the new competition car. The V8 burbled into life after it had been pushed out of The Hangar. Gently, the aluminium V8 warmed up on the tarmac. Making sure the pressures and temperatures were all correct before being driven to the South Loop, Charlotte eased the sports car into gear and pulled away from the shadow of the hangar.
The wonderful noise from the V8 wound its way through the trees in the Suffolk forest. The early morning light left the highlights across its vibrant, rich red bodywork soft but with a certain crispness from the moisture in the air. While photographing the car, you couldn’t help but fall in love with the simplicity of an MGB GT. It does however have a certain elegance and sophistication with that simplicity. The sloping back which then rolls into the bumpers that wrap around its rear and the long elegant bonnet that stretches towards the horizon but not to the scale where visible is difficult. Perfectly useable as a classic or even every day.
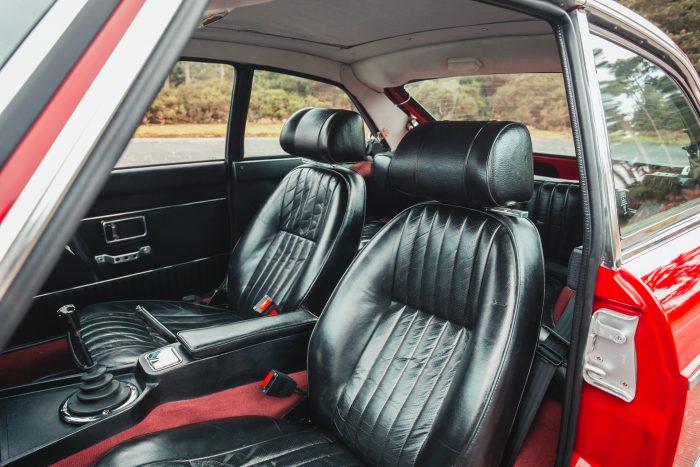
The interior shows the story of the car. The seats have a character to them that matches the personality of the car, they show that the car has been used and adored since its earliest days.
As the MGB moved out and Charlotte gently rolled it through the gears, the car has a majesty as it moved. A gracefulness that all MGB’s seem to have but is amplified by the low, ambling noise from its 3.5 litre V8. As the clouds grew darker and the sun drifted further and further away, it was time to take the car back to The Hangar. Ready, for it’s next lucky owner.
This 1975 MGB GT V8 could well be yours. Click the link below and enter now for your chance to win this and other dream classics with Bridge Classic Cars Competitions.
Chris, our in-house paint and body expert here at Bridge Classic Cars, has begun work on the 2021 Renault Master which belongs to one of our neighbours here in Pettistree.
The van had some front end damage which Chris and the team need to address. So, carefully they worked their way around the grille and bumpers to strip everything back in order to assess if any damage to any mounts had happened. Also, this needed to be stripped back in order to replace the broken pieces.
Whilst the front end was taken apart, Chris removed the bonnet of the van to remove a massive dent caused by the accident and then prepare it to be resprayed in order to match the van. As you can see, Chris does everything meticulously whether or not it’s a classic!
Brian, Kath and Lydia have been working on the next phase of the interior for the 1973 Jaguar E Type Roadster that Bridge Classic Cars calls Fern Grey. Now that the windscreen has been fitted and cured, it’s time to start getting the trim, dash and hood in place.
Using the original dash panels and A-Pillar trims, Brian stripped apart the panels ready to be recovered. The original foam for these pieces was in remarkably good condition so they were refreshed and reused. The trimming in the rich black leather however is all brand new. Brian selected a hide that compliments the rest of the interior but also matches closely what would have originally been used on the E Type’s to trim the pieces with.
Each of the panels and trims was hand-cut and finished by the Bridge Classic Cars in-house trim team to ensure the best fit. Including the dash pad which now that the windscreen is safely in place could be secured to the top of the dash after test fitting multiple times.
With all of the dash and trim around the windscreen fitted, Brian and the team began to work on getting the foldable hood mechanism in place. Checking the mounting points for the front and back of the hood, Brian began the task of gently manipulating the mounts to ensure the best possible fit as well as making sure each of the spars sat level and true. Thankfully after some skilled moving, the hood sat perfectly inside the gorgeous roadster.
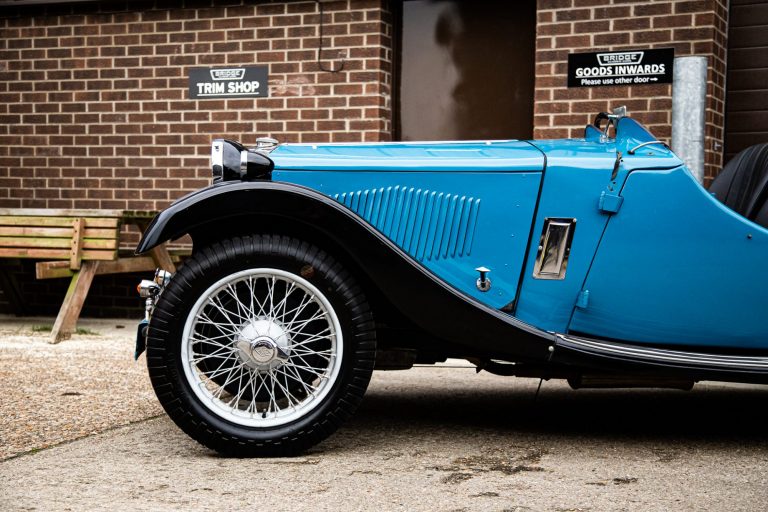
Bridge Classic Cars have today welcomed its latest guest to the Pettistree workshop. This 1934 Riley 12/4 Lynx has come to us all the way from South Africa where it has spent parts of its long life.
The car will be going in to be assessed by our in-house restoration teams to determine what jobs will need to be done to this classic tourer to get it into a useable and safe condition. The Riley is finished in an incredible French blue with a black interior. The 4 door tourer is a wonderful example of pre-war open-top travel in both style and comfort by a long-gone marque.
The car was cherished and used in South Africa being part of the local enthusiast groups and taking part in several classic car rallies. For now, the Bridge Classic Cars technicians will begin to reassemble the car to be able to check and confirm all parts and pieces for the 1930s tourer are there and in good order.
Expect to see more on this amazing 1934 Riley 12/4 Lynx on the Bridge Classic Cars news page.
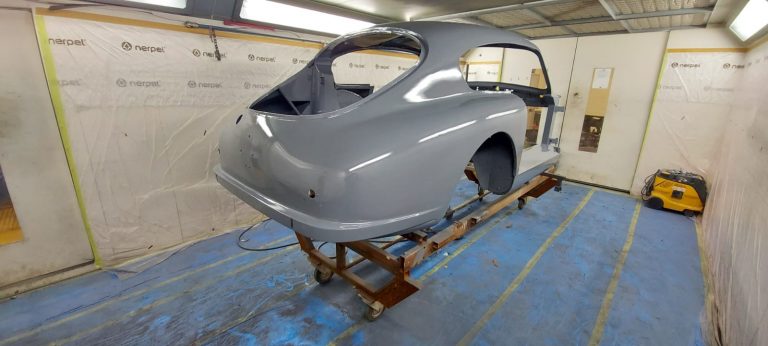
Chris and the team in the Bridge Classic Cars in-house paint shop have been busy at work preparing and priming the 1955 Aston Martin DB2/4 Mark 1 for the next phase in the restoration.
Chris and the team carefully prepared each panel and part individually to make sure they were properly prepped before entering the spray booth. Each part has been given a coat epoxy primer to help seal the material beneath which has been so carefully worked on by the Bridge Classic Cars restoration teams.
With everything primed, it was time to move on to the protective coating on some of the other pieces and parts of the shell. For the most durable protection against road grime and weather, the team here use Raptor Guard. Applied to specific pieces, it helps to protect any of the pieces from moisture and is well worth using for a classic that is destined to be used and enjoyed.
Whilst the primer and the raptor guard on the shell were left to cure, Chris began to prepare and spray Raptor on some of the floor panels, the transmission tunnel and other pieces which will be exposed to the elements.
The restoration technicians at Bridge Classic Cars have been busy working on a couple of jobs on the 1960 Jensen 541S before it goes to The Hangar for its winter storage.
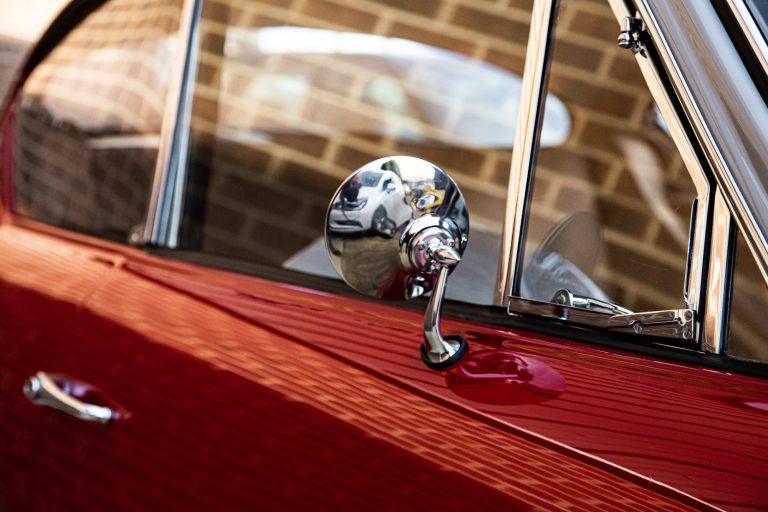
One of the most important jobs to be done was to fit a rearview mirror at the request of the owner. The mirrors for the 541’s did not come as standard, however, because of our history with their restorations, we managed to source a piece for the owners’ peace of mind while driving.
Carefully, the mirror was placed into the door at the right place after dozens of test fits to ensure the part sat properly and also looked right. The detailing on the mirror itself is a beautiful part of its story. With exposed, bright hardware and a simple flat disc but with the base coming to a sharply defined point, it looks completely at home on the 541.
There are a couple of other jobs to have a look at on Peony Red, which will you’ll be able to see about here on the Bridge Classic Cars news page.
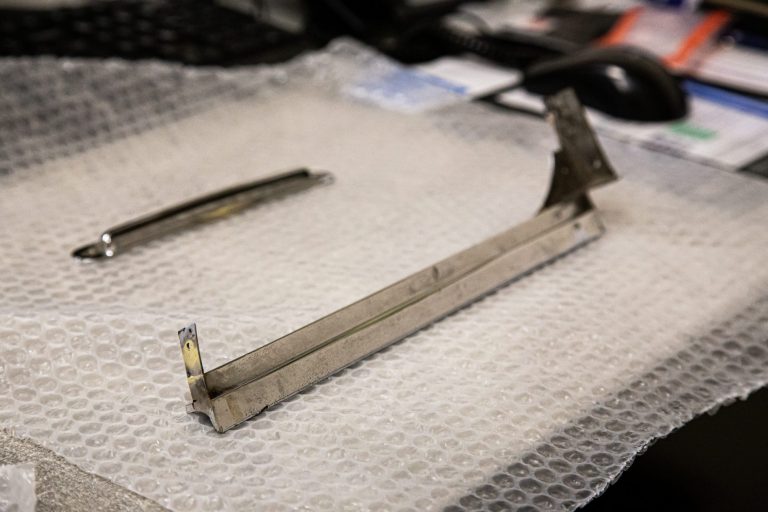
The trim work on the 1955 Aston Martin DB2/4 is absolutely beautiful. Simple and elegant but there is quite a bit of it.
These are the latest pieces of the DB2/4 Mark 1 to be sent out to a local specialist for replating and polishing. This is being done to make sure that every piece of the brightwork on this stunning 1950s sportscar will be uniform and stunning. Although they may seem small, every piece of the car must be perfect to match the work the team here at Bridge Classic Cars have done on the car during its restoration.
There will be more updates very soon on the 1955 Aston Martin DB2/4 very soon here on the Bridge Classic Cars news page.
Mauro, has been working on getting all the relevant parts and pieces of the 1956 Jensen 541 ready to be sent out to local, trusted specialists for refurbishment.
Bridge Classic Cars have a long history of restoring Jensen 541’s to a very high standard and this 1956 541 is to be no exception. The pieces of the car have been carefully dismantled down to their core components and assessed for condition and originality. Where possible, we try to keep the cars as original as possible but refinished and restored to go back on the car.
The pieces here have also been catalogued and photographed for record as well as detailed records of them being dismantled so that everything and their construction method is accounted for. Each component is dealt with individually to ensure that it safely comes apart and if not, can be taken apart and repaired to the exacting standards that Bridge Classic Cars holds its restorations to.
Soon, there will be more updates on the 1956 Jensen 541 during its restoration, so keep an eye out here on the Bridge Classic Cars news page.
The windscreen of the 1973 Jaguar E Type Series III Roadster is now in the car!
This moment has been a long time coming. The curving and elegant windscreen for the E Type is like a jewel in its crown. This completely bespoke Jaguar has been cherished by the in-house restoration teams at Bridge Classic Cars throughout its build so, having one of the final aesthetic pieces complete was a true milestone.
For windscreen removal and installs, we use a local specialist called Car Glass and Trim who we have worked with for many years. Their technicians came out to install the glass into Fern Grey with the same attention to detail and care as our very own technicians. With the windscreen and its seals in place, it was time to let the adhesives cure while Kath and Brian in the trim shop carry on fitting out the E Type.
The 1962 Jensen 541S that is currently in at Bridge Classic Cars for some work has been handed over to our technician Tom to begin preparing the car for its new components.
The first job for Tom is to strip the original wiring harness out of the car as we have ordered an entire new loom for the car to make sure all the electrical system works absolutely spot on. A key point for all classic cars. With such a handbuilt car, Tom has had to almost trace every wire individually from front to back in order to make sure everything is removed and safe. After this, each part of the harness is catalogued and stored just in case.
Next, Tom has removed the steering column which is due to be replaced on this particular car. For that Tom had to carefully remove the entire dash to gain access to the gear linkage which is controlled via the column. With everything disconnected and the dash out of the car, Tom could begin to also catalogue and assess each individual component.
There will be more happening on the 1962 Jensen 541S very soon so keep an eye out on the Bridge Classic Cars news page for more.
The cylinder head for the 1971 Jaguar XJ6 is back at the Bridge Classic Cars workshop. This has been away at a local specialist to be assessed and repaired ready for the car.
Some may remember that our in-house restoration teams found a large chunk of material missing from the leading edge of two valves in the front cylinder. Also, it was discovered along with this that a blown head gasket had been what caused the misfire and running issue noted on the straight-six.
In preparation, Jonn had cleaned up the entire engine block which was discovered to be completely packed with sludge in every coolant galley and water jacket. Jonn has spent hours clearing out all the debris and flushing through the engine block to ensure all is ok when the engine is finally fired up for testing.
Now, it is down to Paul to install the cylinder head on top of the straight-six. For that, he will prepare the new head gasket and double-check all tolerances before the head is finally bolted down.
Expect to see more on the 1971 Jaguar XJ6 here on the Bridge Classic Cars news page very soon.
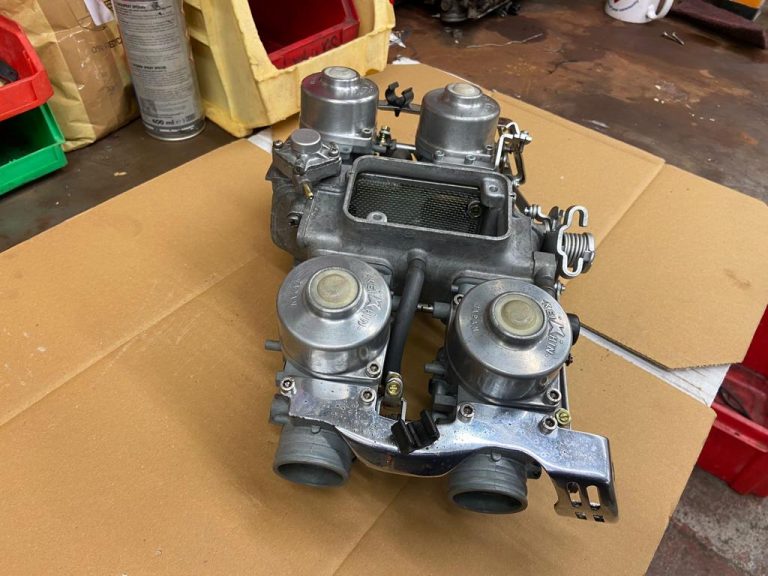
The carburettors for Gordon, our directors, 1977 Honda GL1000 Goldwing are back from blasting and have been freshly rebuilt.
These are over at Chris Self Motorcycles with the rest of the bike being restored and rebuilt back to its original condition. The carburettors on the Goldwing are crucial for the 1000cc horizontally opposed 4 cylinder so they have been completely gone through by Chris Self to make sure there is no residual dirt anywhere within the carburettors.
If you like classic motorcycle restorations, keep an eye on the Bridge Classic Cars news page for more updates on the 1977 Honda GL1000 Goldwing.
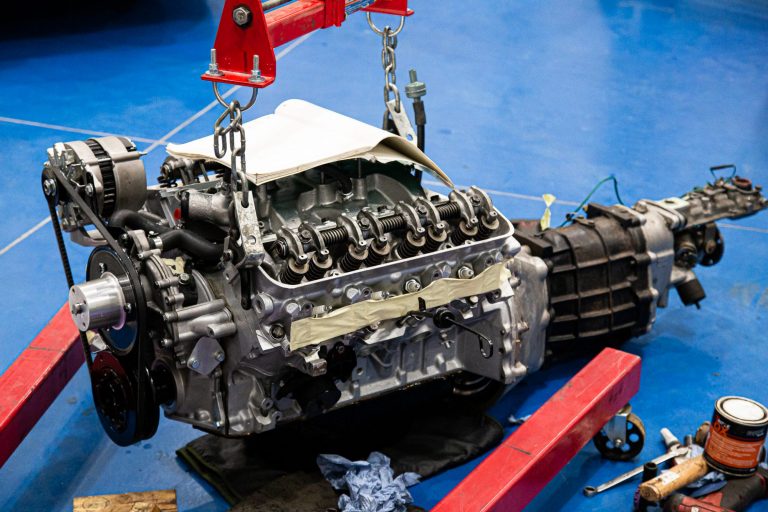
Jonn, one of our in-house restoration technicians here at Bridge Classic Cars, has been busy preparing both the car and the engine for the pair to be reacquainted.
Previously, after testing the 1973 MG B GT V8 our technicians found metal shavings in the oil after it was drained as part of our testing procedures. Since then, Jonn has replaced the bearings which had been found to be deeply grooved as well as fixing a problem with the oil pickup which had caused the issue in the first place.
Since that, the engine has been prepared to go back into the front of this beautiful purple sports car.
Keep an eye out here on the Bridge Classic Cars news page for more updates very soon on the 1973 MG B GT V8.
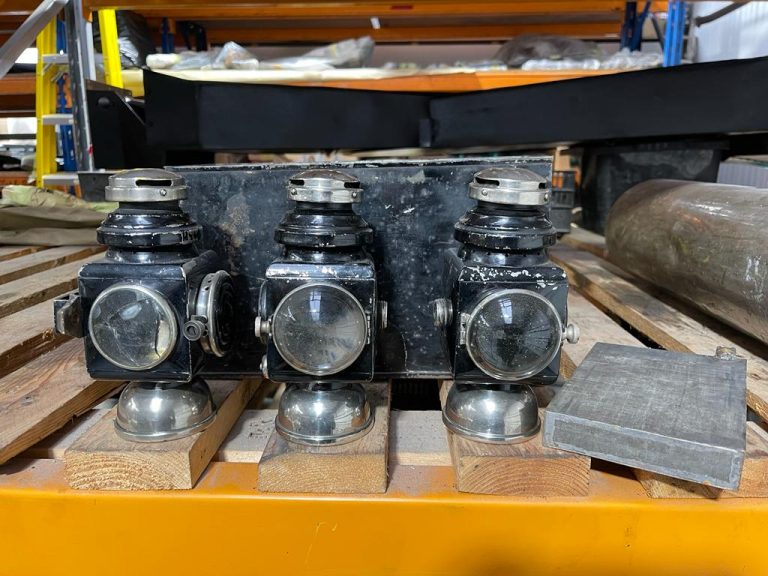
Bridge Classic Cars have the honour of being the current caretakers of the incredible 1905 Riley 9HP believed to be one of only three remaining in the world.
The car has many unique brass pieces which make up its antique charm. These irreplaceable pieces are being documented and catalogued ready to be sent off for refurbishment for the project. The pieces will be sent to a specialist of early brass automotive parts to be brought back to their former stunning glory.
Although the car is now 116 years old, it is an amazing reference piece for our restoration teams to look back on and see how these types of vehicle were handmade.
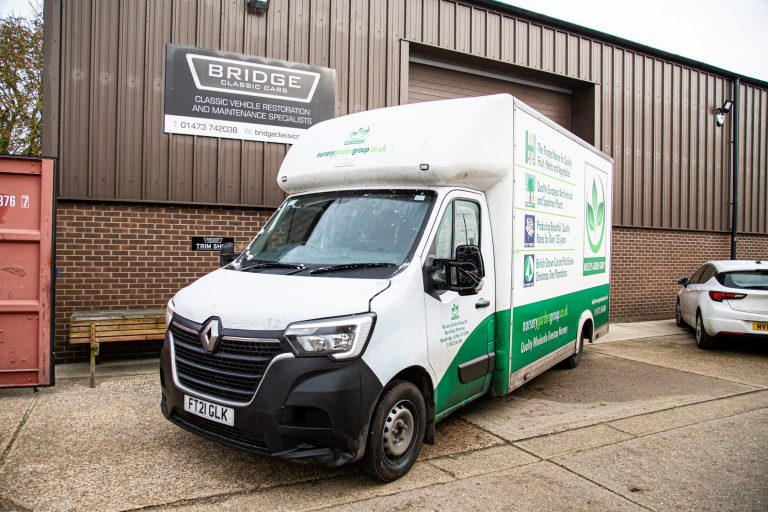
Unfortunately, this 2021 Renault Master has had a bit of damage to the front end. The van belongs to our neighbour here at Pettistree, Suffolk so we’re here to lend a hand and get it back into shape.
The van will be taken into the body shop where Chris, our head painter, will be working his way through the damaged pieces to remove the broken parts and replace them with brand new replacements. Bridge Classic Cars are part of the community here in Pettistree so we always like to help out our neighbours where we can.
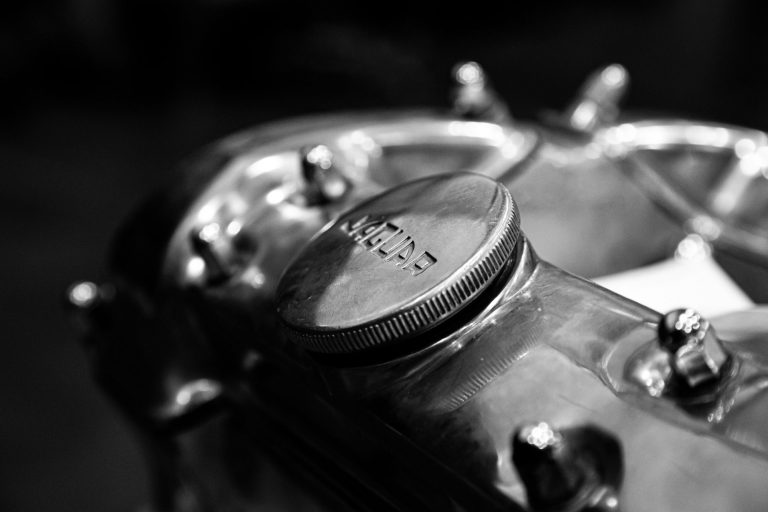
Jaguar. A legendary name in both performance and luxury. Just the name is enough to conjure images of elegant, long-legged coupes and saloons powered by the now infamous XK straight-six engine. But, what is the story behind this incredible powerhouse which lived 1000 different lives?
Debuting in 1949, the XK straight-six came with a sizeable 3.4-litre displacement, it was the brainchild of four very important icons in the Jaguar world. Sir William Lyons, William Heynes, Walter Hassan and Claude Bailey. The introduction of this engine however stretches back nearly a decade before. During World War II when the company still went under the name SS Cars, the team were actively seeking and developing replacements for its engine lineup so, during its wartime efforts they worked on the new powerplants for its post-war cars. Jaguar had begun to produce and develop the engine just after the nightmares of war had begun to subside at the end of the 1940s. The cornerstone of these engines was to be higher output, higher quality and higher style, thus the XK Inline-Six was born.
The XK engines first saw service in 1947 with the 3.2-litre units (XJ 6 Cylinder) but during testing of the engines, it was found they severely lacked low-end torque, so the blocks were bored out to 3.4 litres (XK 6 Cylinder) and were destined to be the beating heart of one of the most beautiful cars ever made, the XK120 which broke cover at the 1948 London Motor Show. This would then see the engines fitted to the upcoming MkVII’s and countless other models over its production run.
The cast-iron engine blocks were not the lightest but were highly durable. The construction techniques developed for this engine would push other manufacturers to refine and develop new and improved engines to try and match the level that Jaguar was achieving. Jaguar fitted special vibration dampers to the crankshaft of the engine to absorb and limit the number of frequencies travelling through the crankshaft and ultimately the XK’s split case engine design.
In 1951, Jaguar began work on developing the idea of a smaller displacement but still useable version of XK straight-six. The results for the 2-litre engine were mixed and by 1954 the engine had grown to become a 2.4-litre unit. The engine itself was actually shorted than the bigger displacement engines but remained under the same name and architecture. These engines would be put forward to power the upcoming stylish and sleek saloon, the MkI. The road engines were entirely carburetted until 1978 (the first year of road engines being fuel injected for the US market) but would use a combination of two or three SU’s. Webers or Zenith carburettors except for the MkII 240 which had a set of downdraught Solex units.
From this, all the subsequent Jaguar XK straight-sixes were laid out. Short block engines would make up the smaller displacements such as the 2.4 and 2.8-litre engines and the longer, more torquey powerplants would go anywhere from 3.4 to 4.2 litres by the end of its production. Jaguar officially retired the XK 6-cylinder in 1992 replaced by the newly developed AJ6 platform it used alongside the faithful XK until the AJ6 was then also retired in 1996.
During this incredible engines lifetime, it would see all manner of changes and applications. From racing to agricultural work. Le Mans to Leicester and beyond. This incredible piece of not only industrial design but of engineering excellence and durability should be remembered and revered for the legend it surely is.
Long live the XK Straight-Six.
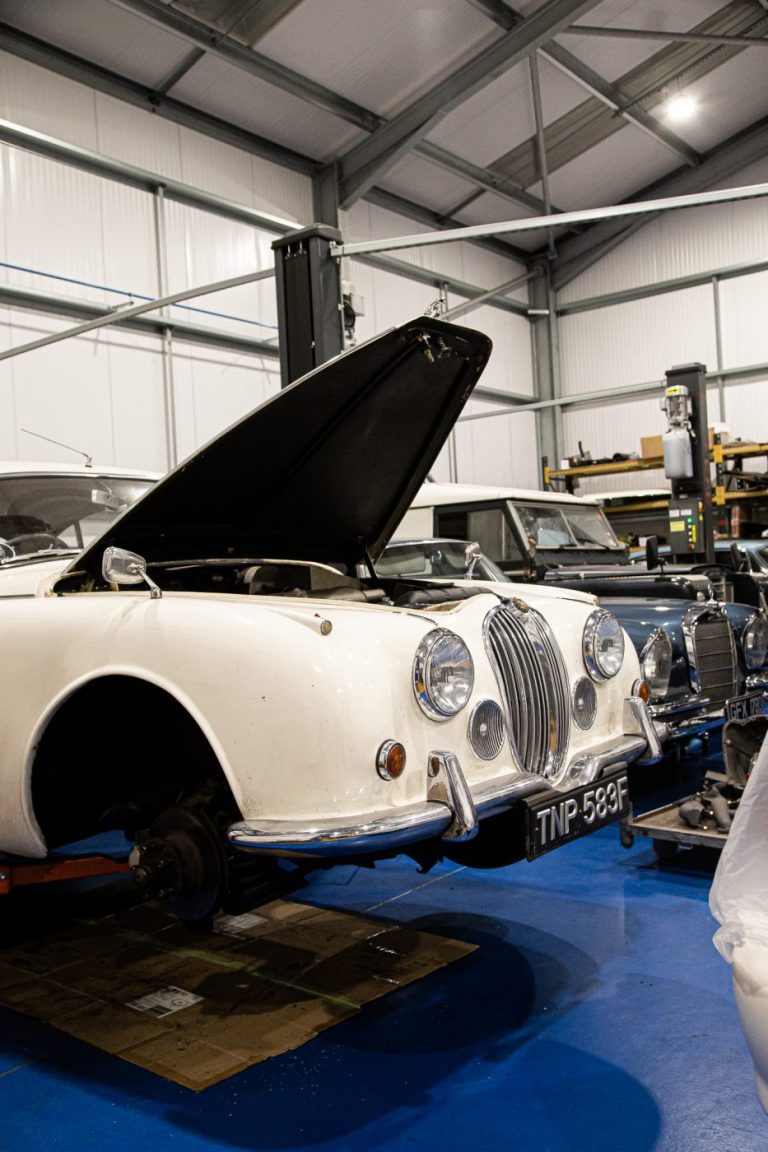
Bridge Classic Cars have been working on preparing the 1978 Jaguar MkII 2.4 to prepare it for the next phase of work to begin.
Dave, one of our most experienced in-house restoration technicians, has been working on removing the interior and other parts of the car to begin working through the mechanical jobs on this stunning MkII. Carefully, as each piece is removed from the car, it is then catalogued and safely stored for later during its rebuild.
For now, it’s carefully assess the areas of attention for the owner and coming up with a plan to deliver the best result.
Expect to see more on the 1968 Jaguar MkII 2.4 here on the Bridge Classic Cars news page very soon.
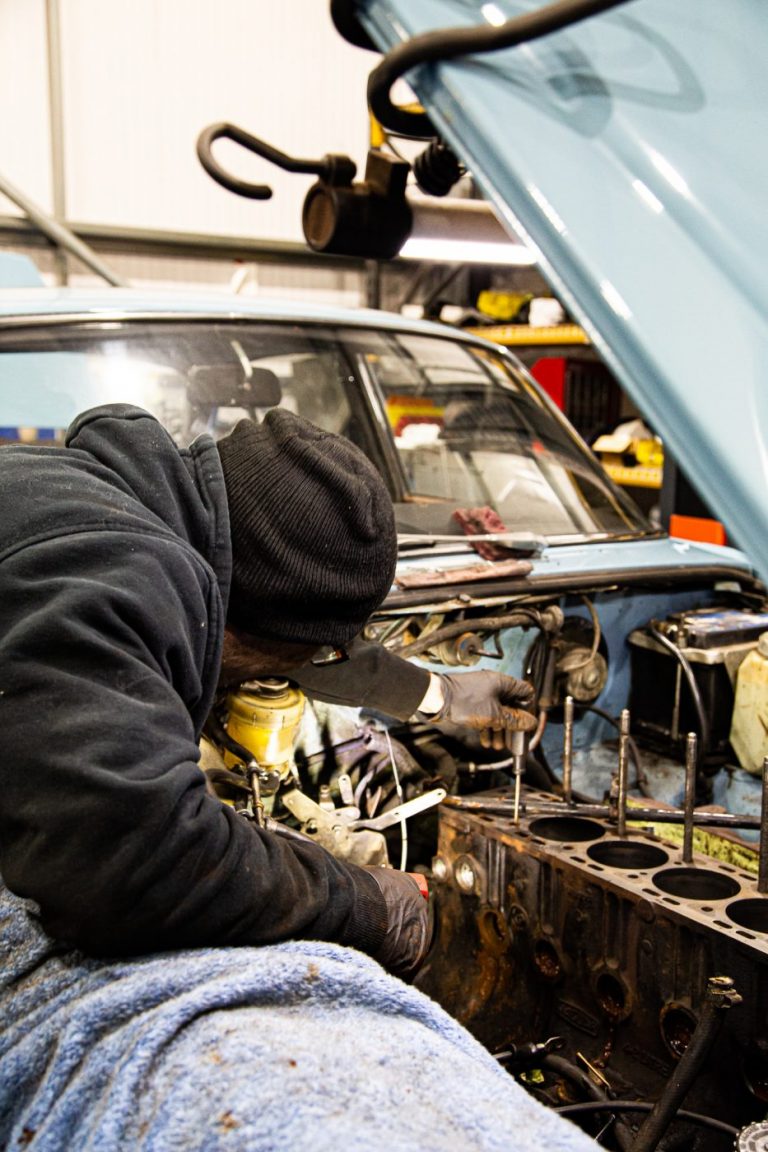
Jonn, one of the Bridge Classic Cars in-house restoration technicians, has been working on cleaning out the engine block of the 1971 Jaguar XJ6 currently in our workshop.
In the last update, Jonn had discovered the block of the straight-six packed with brown sludge.
Jonn has been working on thoroughly cleaning out every passage inside the engine as well as cleaning up the threads of the head studs. Jonn has methodically worked his way through the entire engine from front to back, cleaning and flushing through any remnants of the dirt.
With this complete, Jonn is confident that the engine block is now completely clear and ready for the next stage of the work to begin.
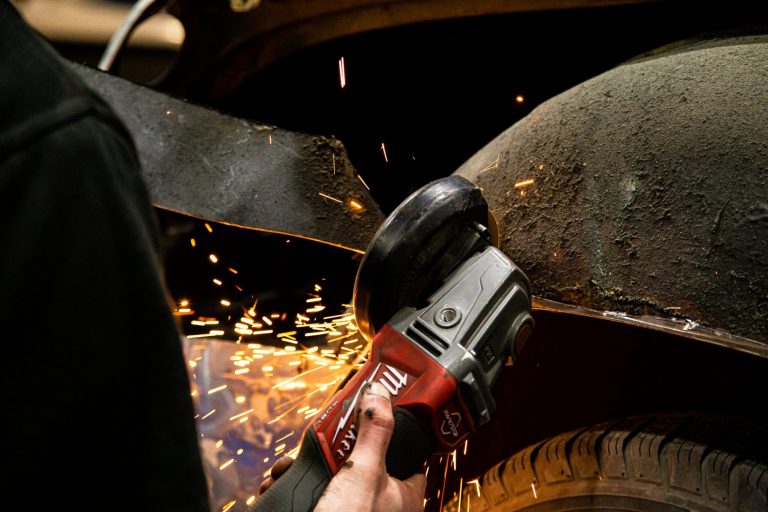
This 1977 MGB Roadster is in with Bridge Classic Cars for a full cosmetic restoration. That does involve a bit of cutting…
Scott has worked his magic on the passenger side of this amazing sports car over the last few weeks. Carefully removing any corroded metal on its flanks so that the new wings can be grafted in and secured. Now, it was time for Scott to begin work on the driver’s side. Much the same as the other, Scott only cut where was needed to remove the material and give enough room to comfortably weld the new panels in with very little distortion from the heat.
Using a thin cutting disc, Scott managed to create clean and precise cuts to remove firstly the original rear wing and then the structure and wheel arch behind it. These are needed to be removed and replaced with brand new pieces as part of the car’s aesthetic restoration.
Now, with the wings all on and cleaned up. It’s time to move forwards.
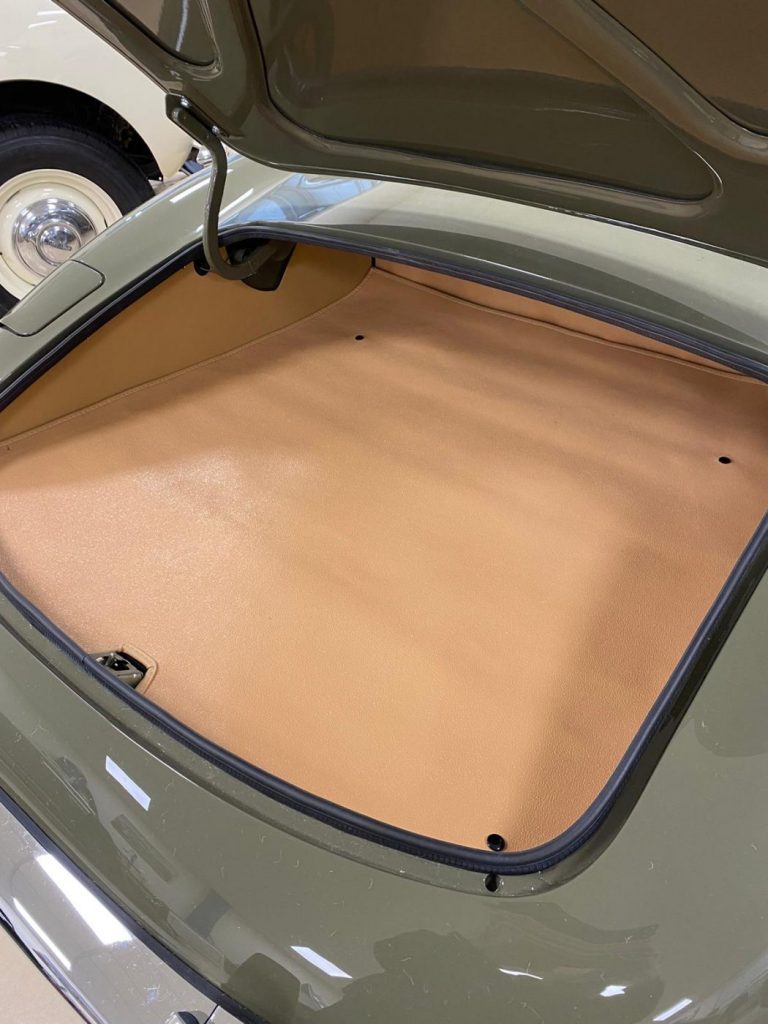
Brian, one of our incredible in-house trim experts here at Bridge Classic Cars, has been hard at work getting the interior of the 1973 Jaguar E Type Series III Roadster.
Brian and the trim team are going full force at the interior of the E Type we know as Fern Grey in preparation for its completion. Brian began by lining and fitting the new boot liner to the Roadster.
The boot of the E Type is actually rather large. This is due to its design as being a long-distance grand tourer. Carrying 2 people in as much comfort, luxury and speed as was possible was the name of the game when it came to the E Type’s original design brief. Throughout its development, that always remained the same. Brian, finished the boot of Fern Grey in a beautiful soft camel colour to compliment the smooth green of the bodywork.
Next, Brian and the trim team got to work on the convertible hood for the E Type. This is being entirely built from scratch around Fern Grey. Using original templates, Brian has managed to recreate the padding for the top rail where it will meet the elegant, wrapping windshield of the E Type.
Whilst working on his next piece of the puzzle, Brian has wrapped the transmission tunnel in the vibrant green carpeting that is found throughout the entire car from front to back. Hand edged in leather that matches the exterior, this gives another level of sophistication and style to Fern Grey that helps to compliment all the small details.
Small details such as the cubby/armrest. Brian has worked really hard on getting the fit and finish of the armrest cubby to such a level it almost deserves a story of its own. The entire assembly was handmade by Brian to ensure the best fit and the best surface on which to wrap the green leather. Neat, precise cuts in every opening allow for a brand new feel to this and the trims to fit tight and close to the cubby.
Expect to see much more on Fern Grey in the coming weeks here on the Bridge Classic Cars news page.
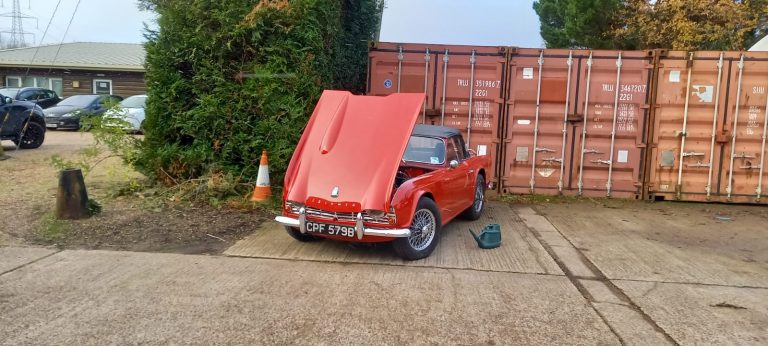
Jonn, one of our in-house restoration technicians at Bridge Classic Cars, has been working his magic on this absolutely beautiful 1964 Triumph TR4.
The TR4 has been completely assessed by the team here at Bridge Classic Cars so the first order of business is to make sure all the cooling system is in good working order. The team here felt it best to replace the original radiator with a freshly reconditioned piece to ensure this 1960s sports car remains happy and healthy on the most spirited of drivers.
Once the cooling system was handled, Jonn turned his attention to the carburettors. The carbs needed stripping down again once Jonn had run the engine to check the radiator/cooling system. The jets and seals were replaced on the twin-carb set-up to make sure the revvy 4 cylinder was getting all the fuel it needed for testing and for setting up.
Whilst under the engine bay, Jonn also removed the valve cover to inspect and adjust the tappets for peace of mind that everything in the top end of the engine was fighting fit and strong. With some small, minor adjustments Jonn had the TR4 happily running up to temperature before its road test by the team. We’re happy to report that no faults were found during its road test which means this gorgeous 2 seater is ready and poised for its next step.
Until that time, it will be stored at our secure and private Classic Vehicle Storage Facility, The Hangar, until such time that the next phase begins.
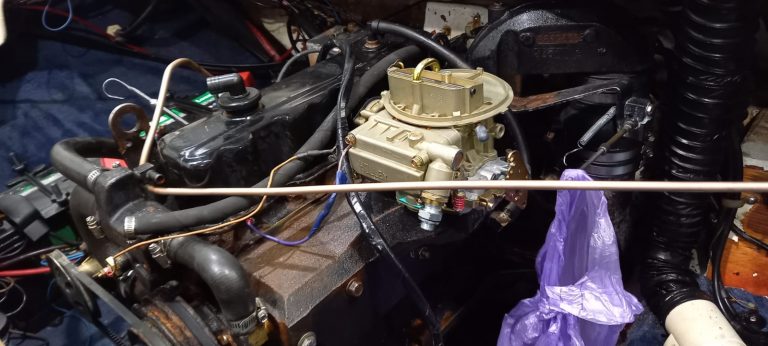
Our in-house technician Jon has been busy working on the list of jobs to complete on the Glastron Sea Ray speedboat which belongs to our director, Craig.
The next list of jobs to do is to work on getting the newly arrived carburettor in place and all of the throttle linkages hooked up to be able to control the speed part of the name speed boat. Jon methodically worked his way through each part of the linkage (which was very different to the previous unit) to make sure that everything fit up properly and also did not catch or snag on anything it shouldn’t do.
Also while he had the engine lid open, Jon made some new bracket plates for the hinge under the rear seat. He fabricated these using the old pieces for templates.
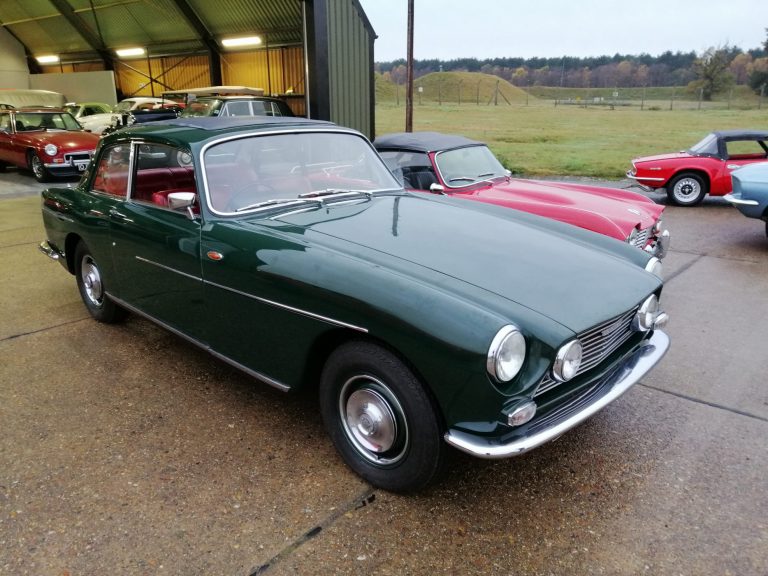
The Hangar welcomed its latest resident. This unique 1970 Bristol 411.
This car is being stored with us at our safe, secure and private storage facility, The Hangar, while it awaits its time at the Bridge Classic Cars workshop in Pettistree. This car has been acquired by ourselves for a customer who lives in Europe. This car will be taken to the workshops and some very special jobs to be carried out on this rare piece of British motoring.
The car itself is in stunning condition. The dark green paintwork is bright and even across its long elegant body. The interior is finished in vibrant red leather which has some marks that only add to its character and story. Overall, this is a stunning piece of automotive history which we are honoured to store and work on at Bridge Classic Cars.
Expect to see more very soon about the 1970 Bristol 411 on the Bridge Classic Cars news page very soon once this exciting project begins.
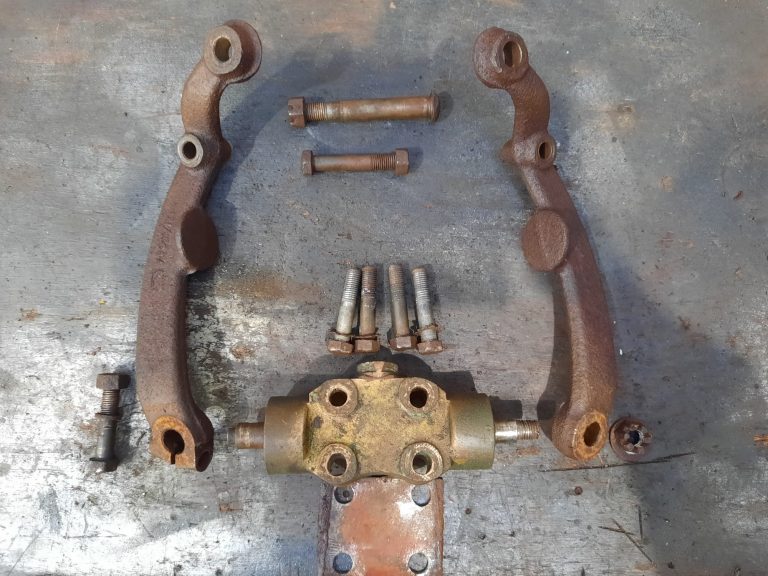
The teardown of components for sandblasting is a crucial step in any restoration. The parts need to be broken down into the their separate pieces in order to be properly blasted and cleaned but also different attention is sometimes required to different materials. Another part of this is knowing the fixing and the parts are in good or rebuildable order before they are sent out.
That’s why Mauro, one of our in-house restoration technicians has been hard at work carefully taking apart each of the components which will be sent away of the 1956 Jensen 541 for sandblasting. With a car as bespoke and handbill as the 541, it is important to carefully remove and catalogue all pieces that come off the car for later when the rebuild begins. Also, for reference to know exactly what is being sent out. That is something Bridge Classic Cars prides itself on with our restorations, the level of detail.
Each component, piece by piece was gently and sympathetically broke down to its constituent parts in order to be fully assessed before being labeled and photographed. These pieces will be sent to a local specialist to treat and revitalise before being returned to us at Bridge Classic Cars for the Jensen. The process allows the fresh metal underneath to breathe but also for our restoration teams to assess any imperfections or hidden damage to the components when they arrive back. As you can see with the Jensen, there are lots of parts with even more small fixings and components so it is crucial with a restoration as in depth as that of the 1956 541 that everything is as good as it possibly can be.
Expect to see more on the 1956 Jensen 541 being restored at Bridge Classic Cars very soon here on the News page.
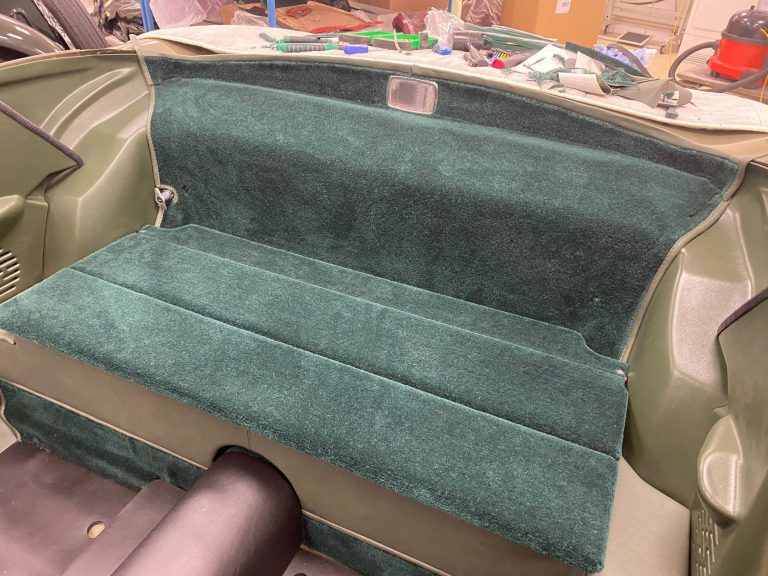
Kath and the Bridge Classic Cars in-house trim team have been continuing to fit-out of the 1973 Jaguar E Type Series III Roadster that we call Fern Grey.
Kath and Brian have been working the rear of the E Type to get the rear compartment entirely trimmed and installed into the car. Below the rear hatch is also trimmed in matching green carpet with leather accents. Kath and Brian test fit each piece multiple time to ensure that each component of the rear of the interior in Fern Grey worked together and had the right fit and finish.
After the carpeting and rear bulkhead had been trimmed, it was time to install the deck-lid which Kath had built for Fern Grey. This really finishes off the rear part of the interior and completes its bespoke look in some ways. Next up, Brian and Kath will be working their way forward into the cabin of Fern Grey by trimming the tunnel and footwells with that incredible thick green carpeting.
Bridge Classic Cars are award winning Classic Car Restoration and Maintenance specialists. Your pride and joy is in safe hands with our expert Classic Car Technicians. Take a look at our awards here.