In Summary – Round-Up of the 1977 MGB Roadster Restoration
As the restoration of the 1977 MGB Roadster nears its completion, we thought we would take this opportunity to look back at just how far


As the restoration of the 1977 MGB Roadster nears its completion, we thought we would take this opportunity to look back at just how far

The Bridge Classic Cars technicians have been fitting the final few clips, brackets and guards onto the 1977 MGB Roadster which is in our restoration

The final piece of the restoration of the 1977 MGB Roadster in the Bridge Classic Cars workshop at our Suffolk HQ have been fitted to
The restoration teams at Bridge Classic Cars have been working together for the first test fitting of the removable hardtop on Fern Grey. The bespoke
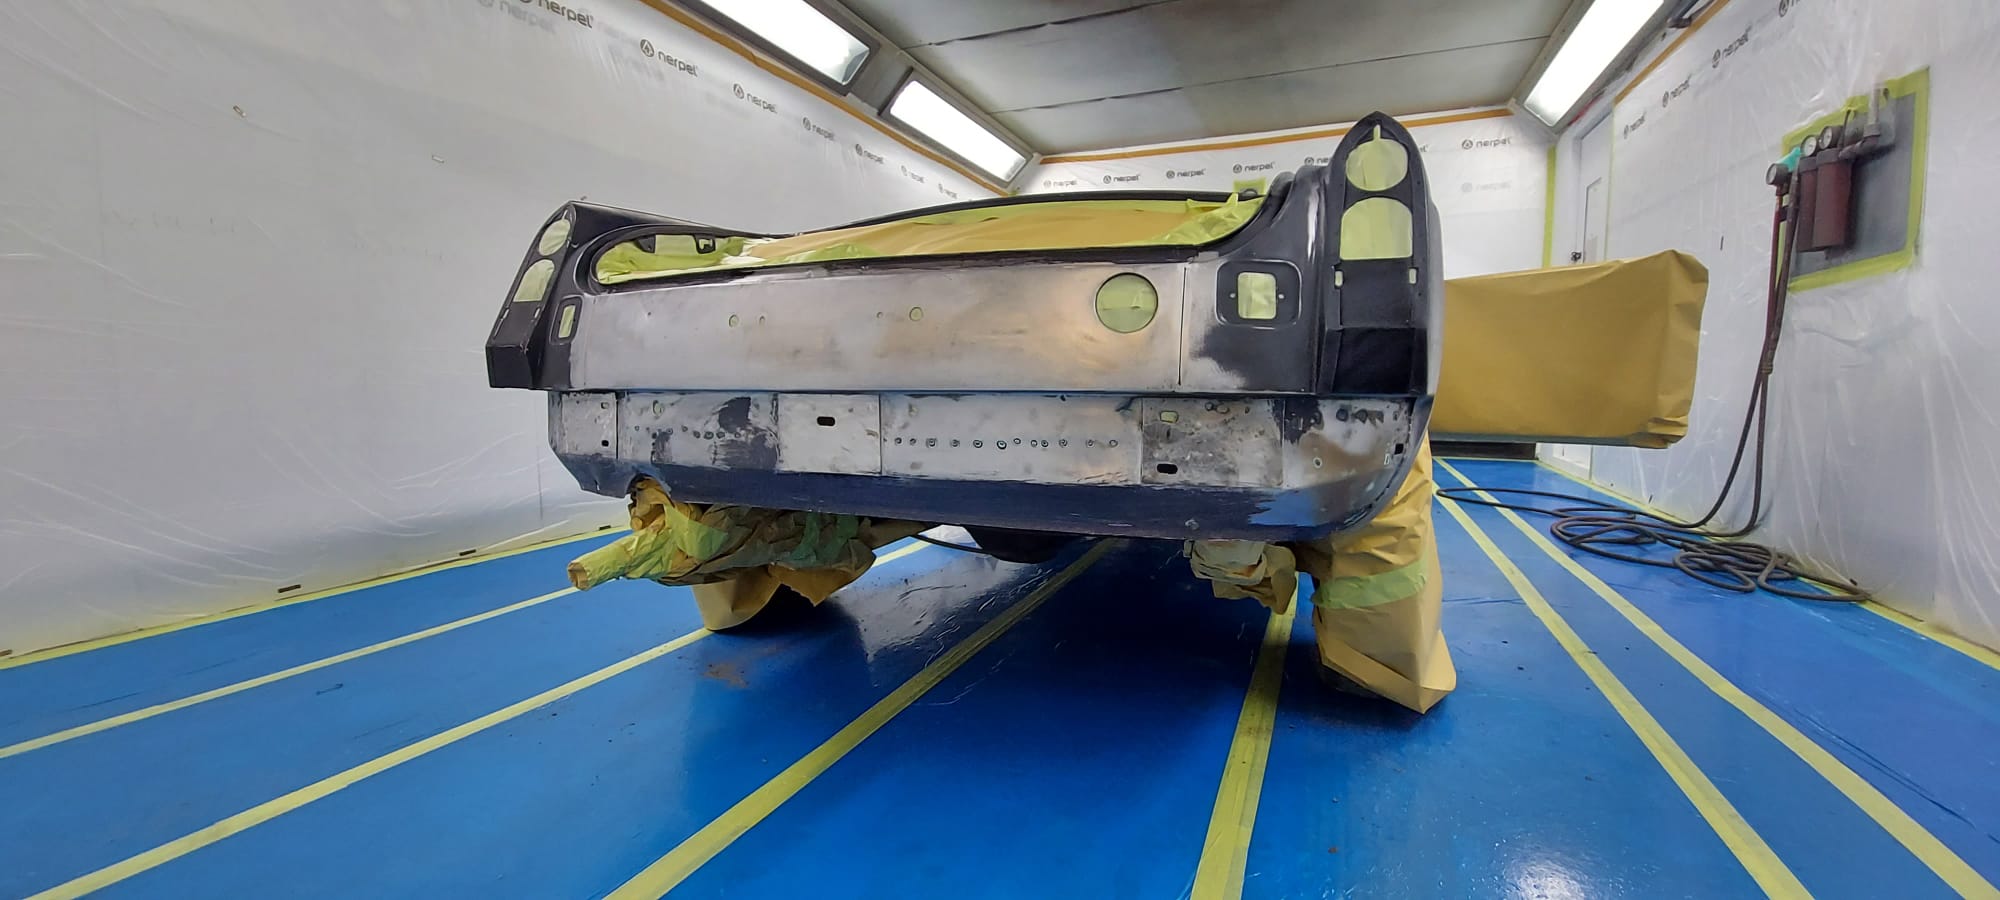
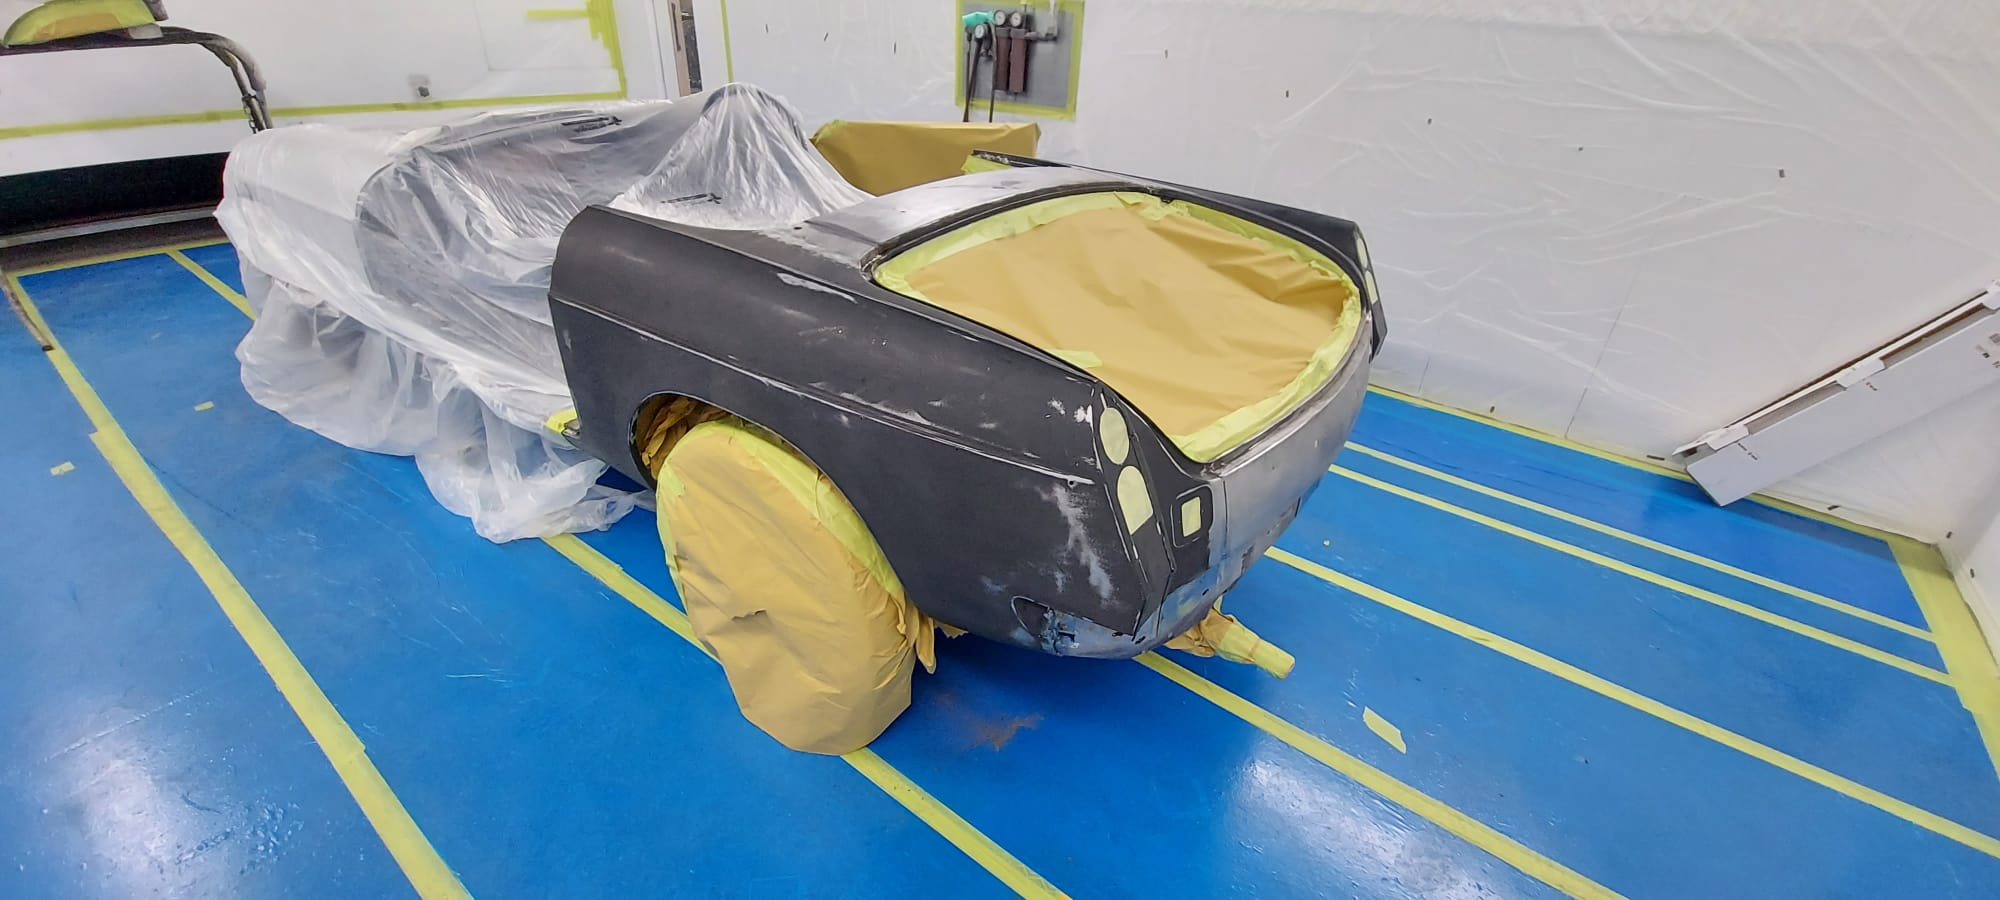
Alan, one of our paint and body experts at Bridge Classic Cars, has begun to refine and shape the bodywork of the 1965 Porsche 912
The in-house paint and body team at Bridge Classic Cars have been working on preparing to start work on the 1956 Jensen 541. The first
The 1969 Bentley T1 currently in the workshop at the Bridge Classic Cars Suffolk HQ is being worked on by our master technician Dave. Dave
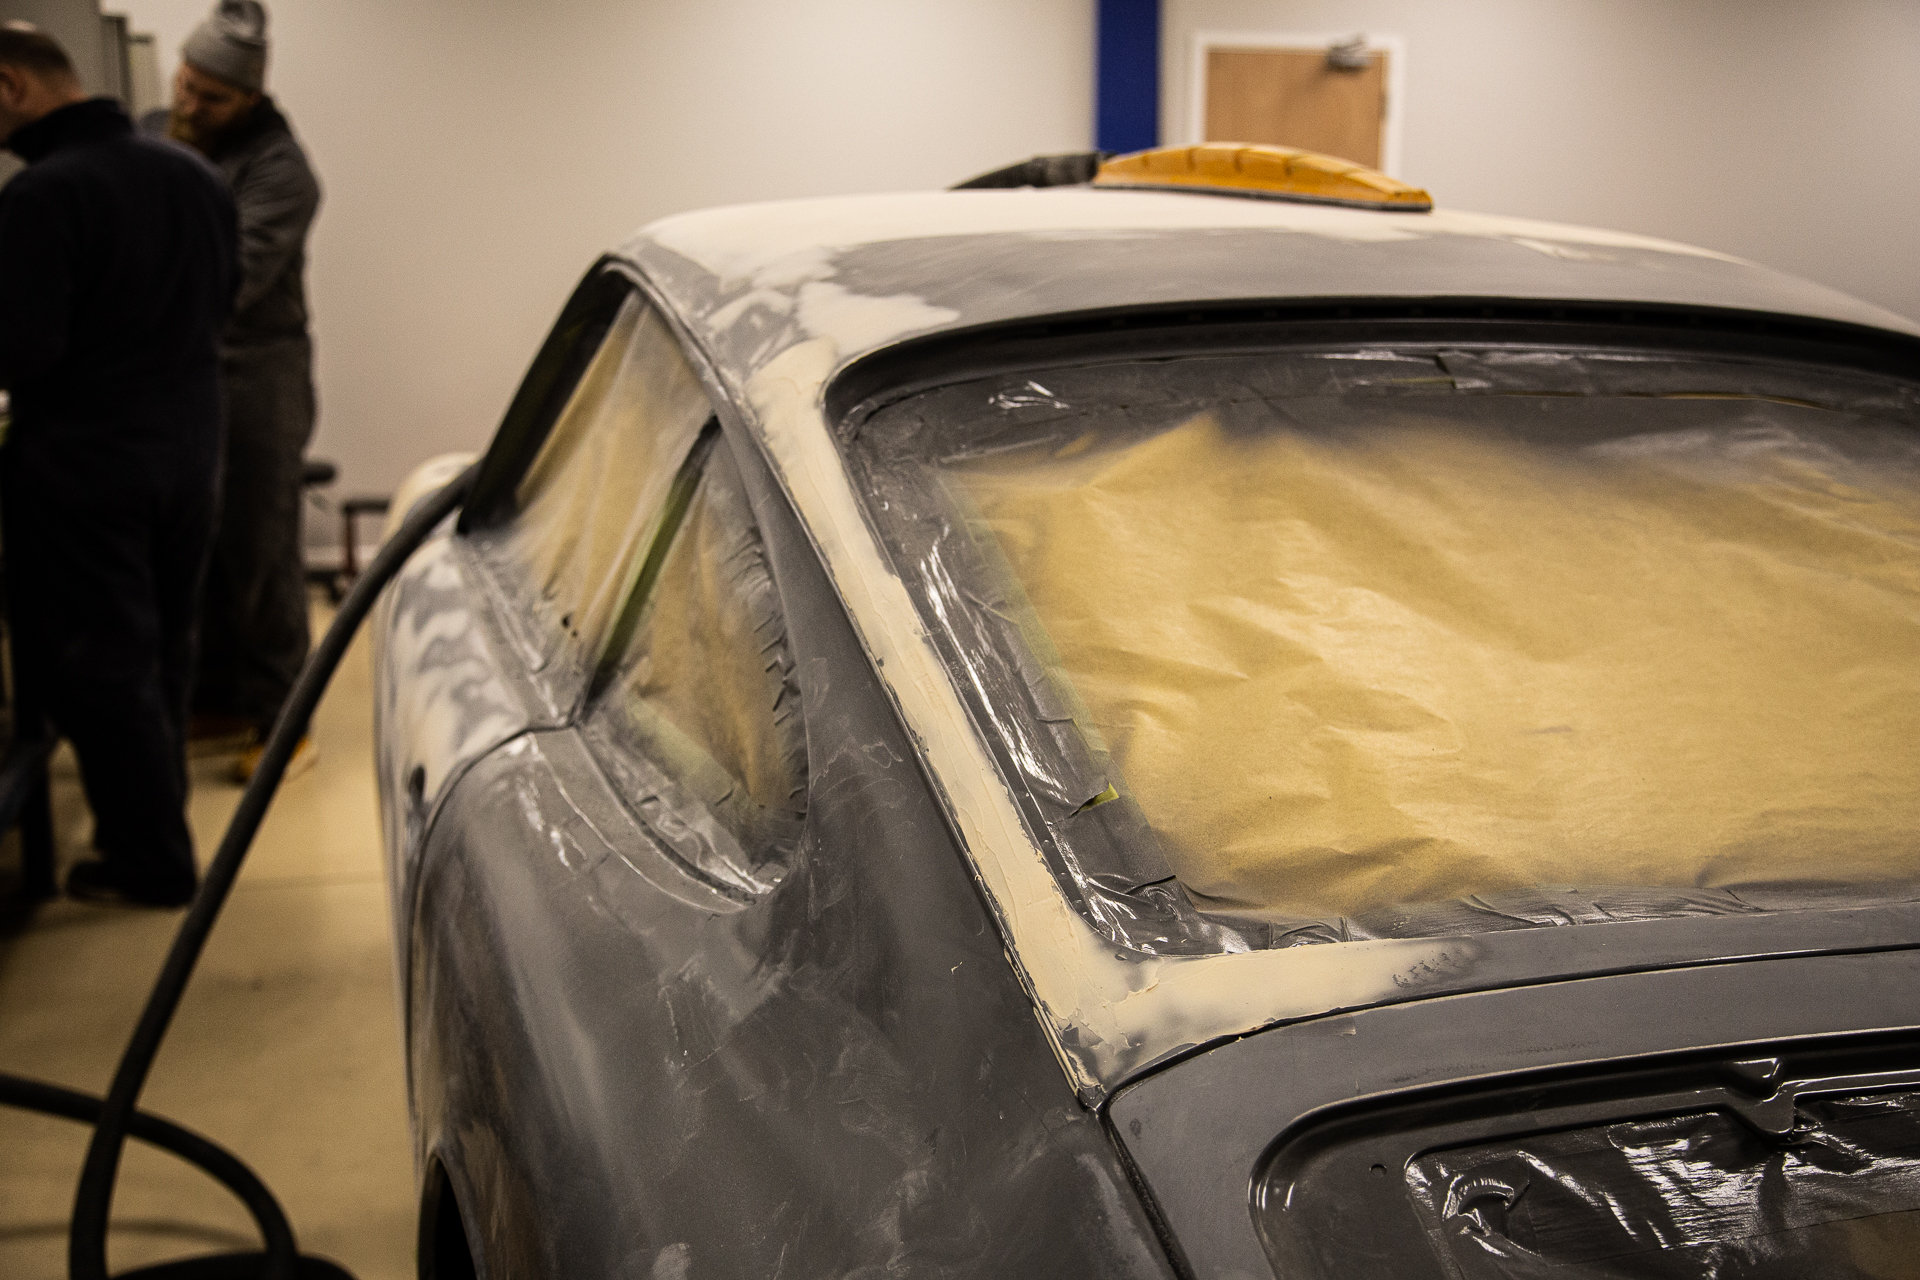
As the aesthetic restoration of the 1977 MGB Roadster in the Bridge Classic Workshop at our Suffolk HQ gets closer to completion, the in-house trim
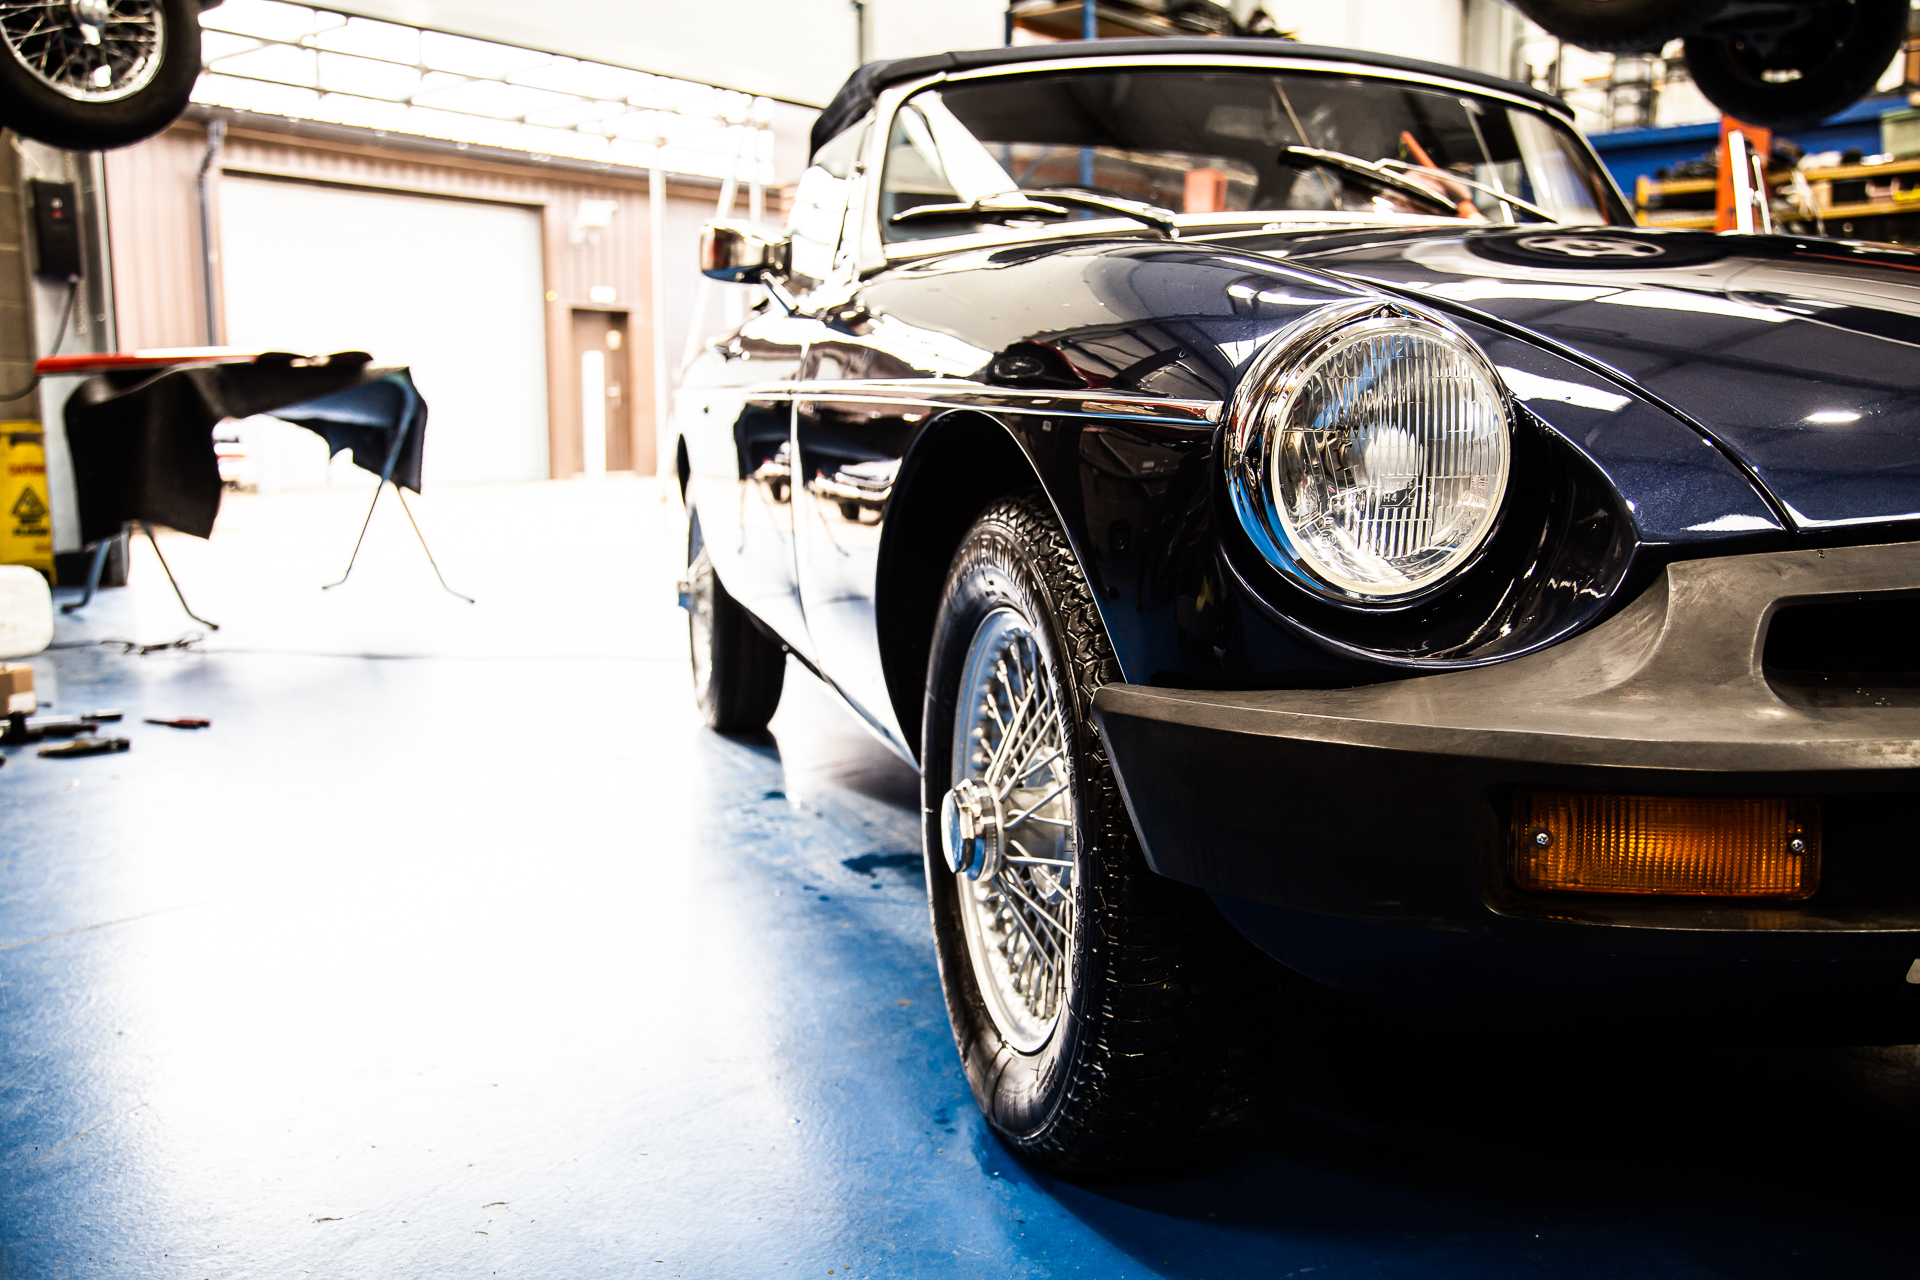
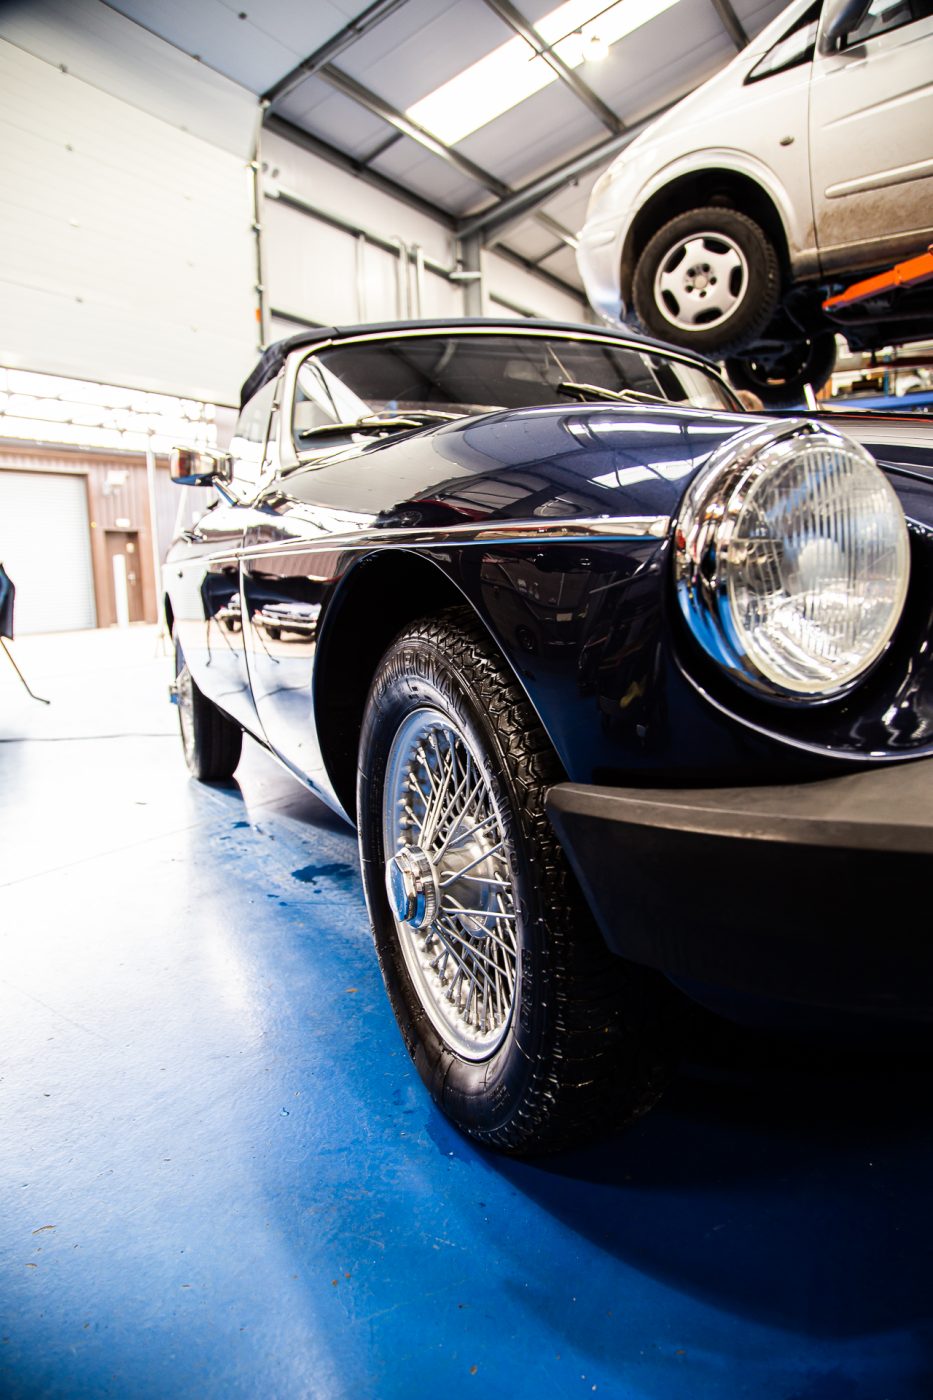
As the restoration of the 1977 MGB Roadster nears its completion, we thought we would take this opportunity to look back at just how far this beautiful sports car has come during its time in the Bridge Classic Cars workshop.
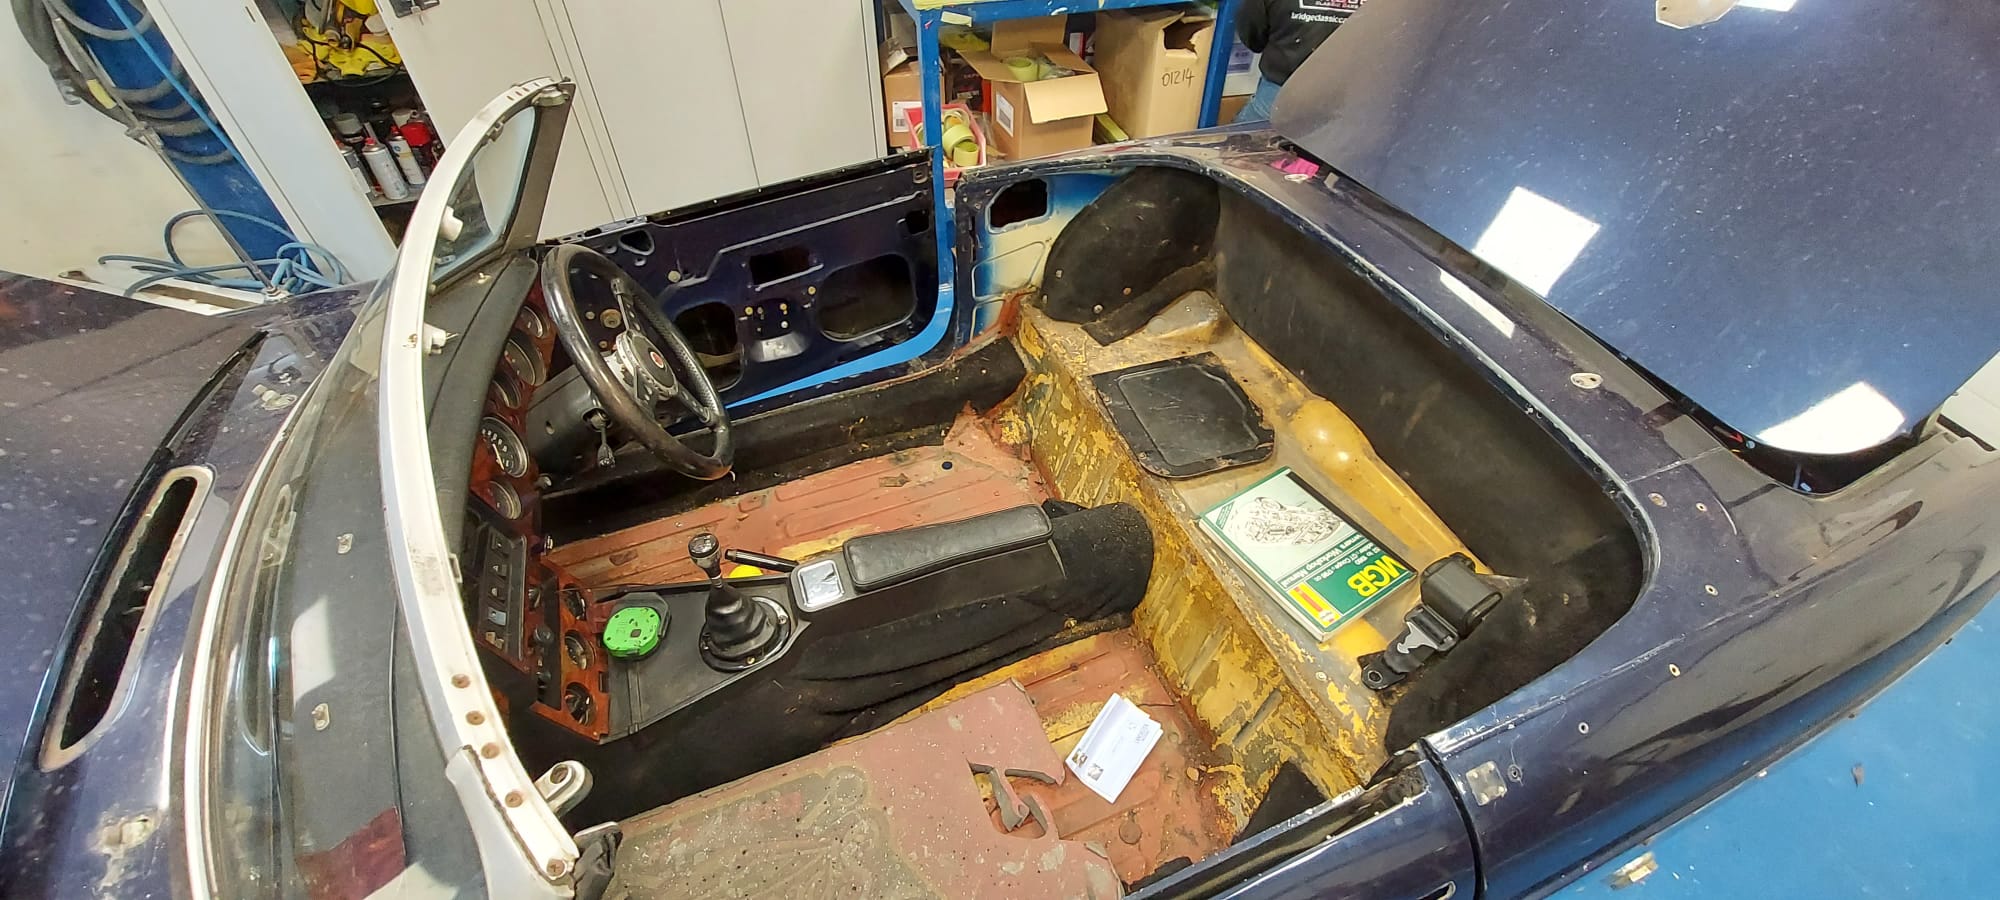
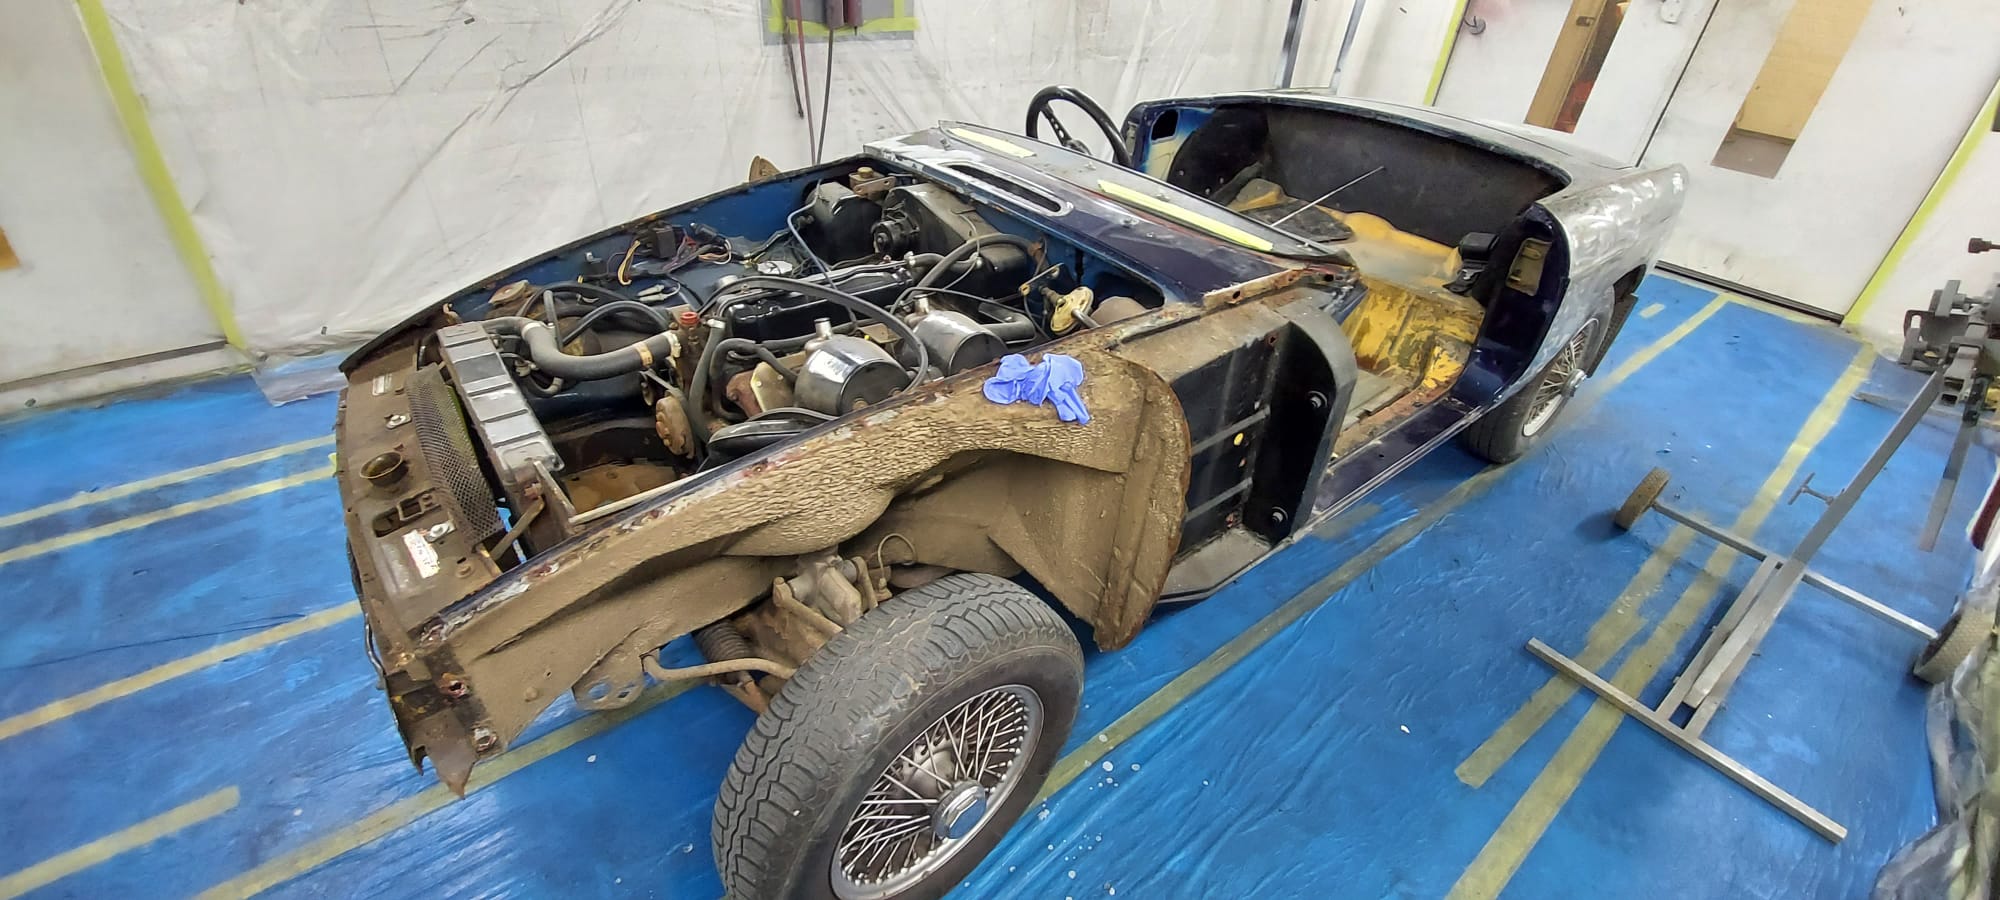
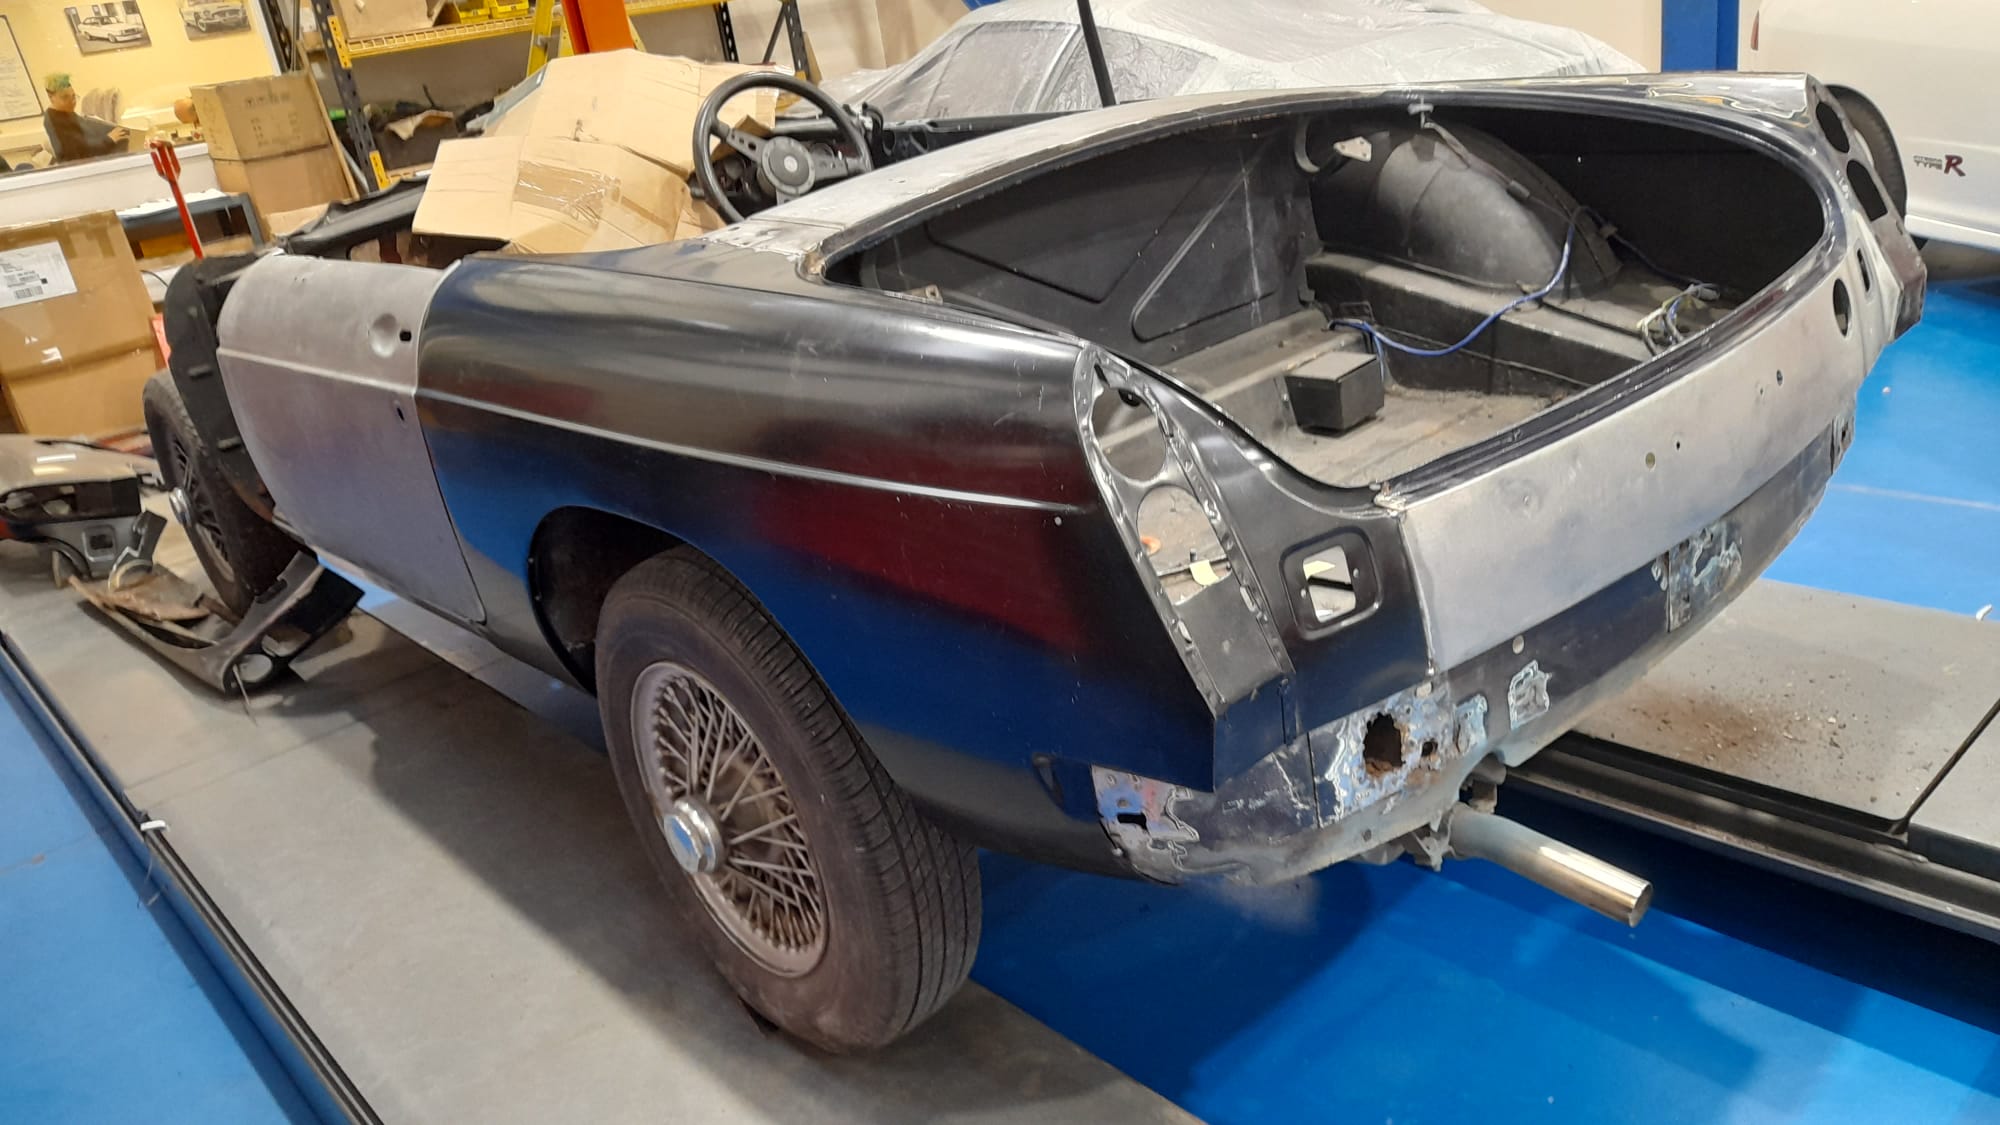
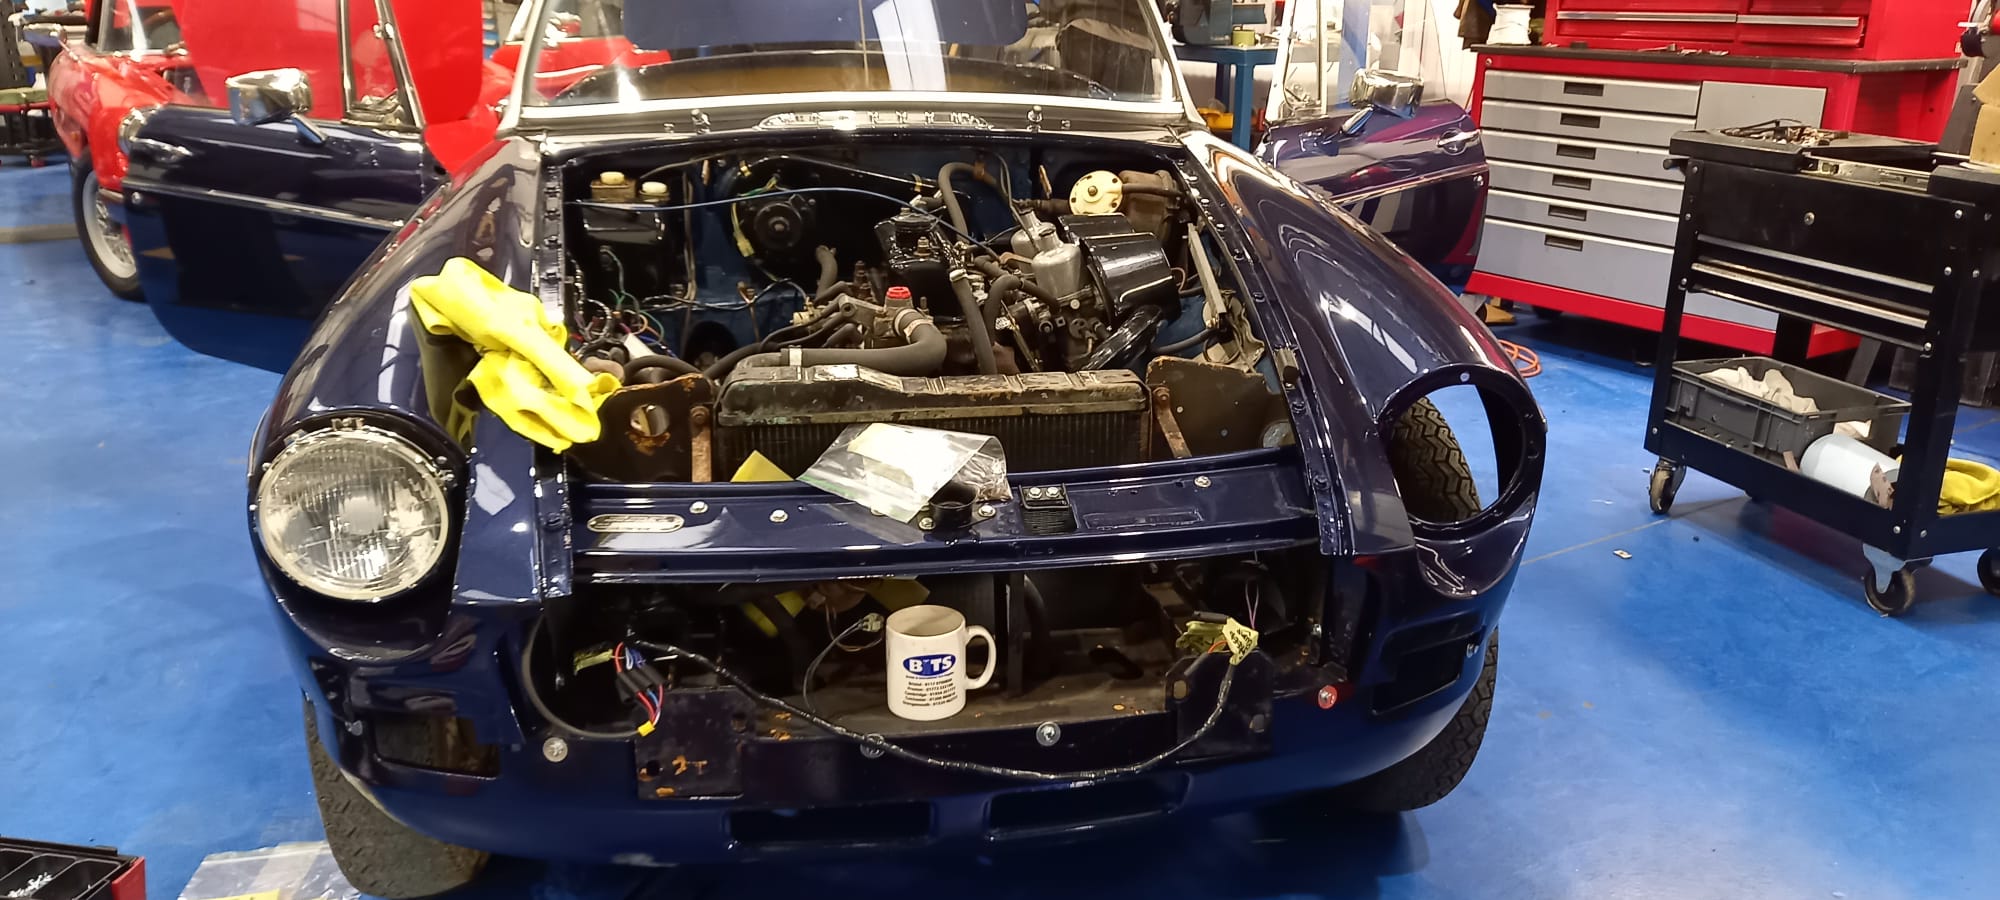
The car arrived at our Suffolk HQ looking aesthetically tired. The paint had begun to fade and there were a few areas where the corrosion had begun to bubble through along with the interior beginning to fade and the wooden fascia being torn and loose. The first stop for the car was our paint and body team.
Chris worked on completely stripping the shell and every single body panel back to bare metal. The best way and the only way to ascertain the condition of the material underneath.
Once the panels had been entirely stripped of their old paint, Chris could not find any areas which would not need attention due to the condition of the metal underneath the paint and body filler being in a much poorer state than first anticipated.
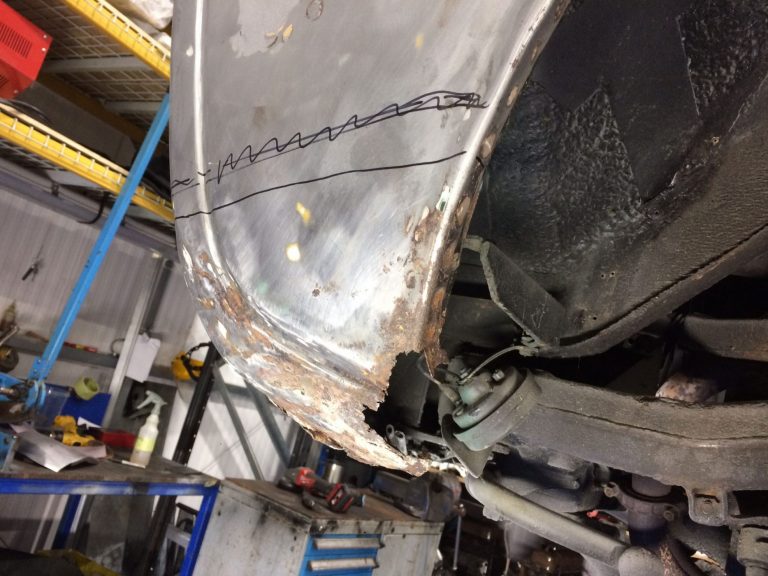
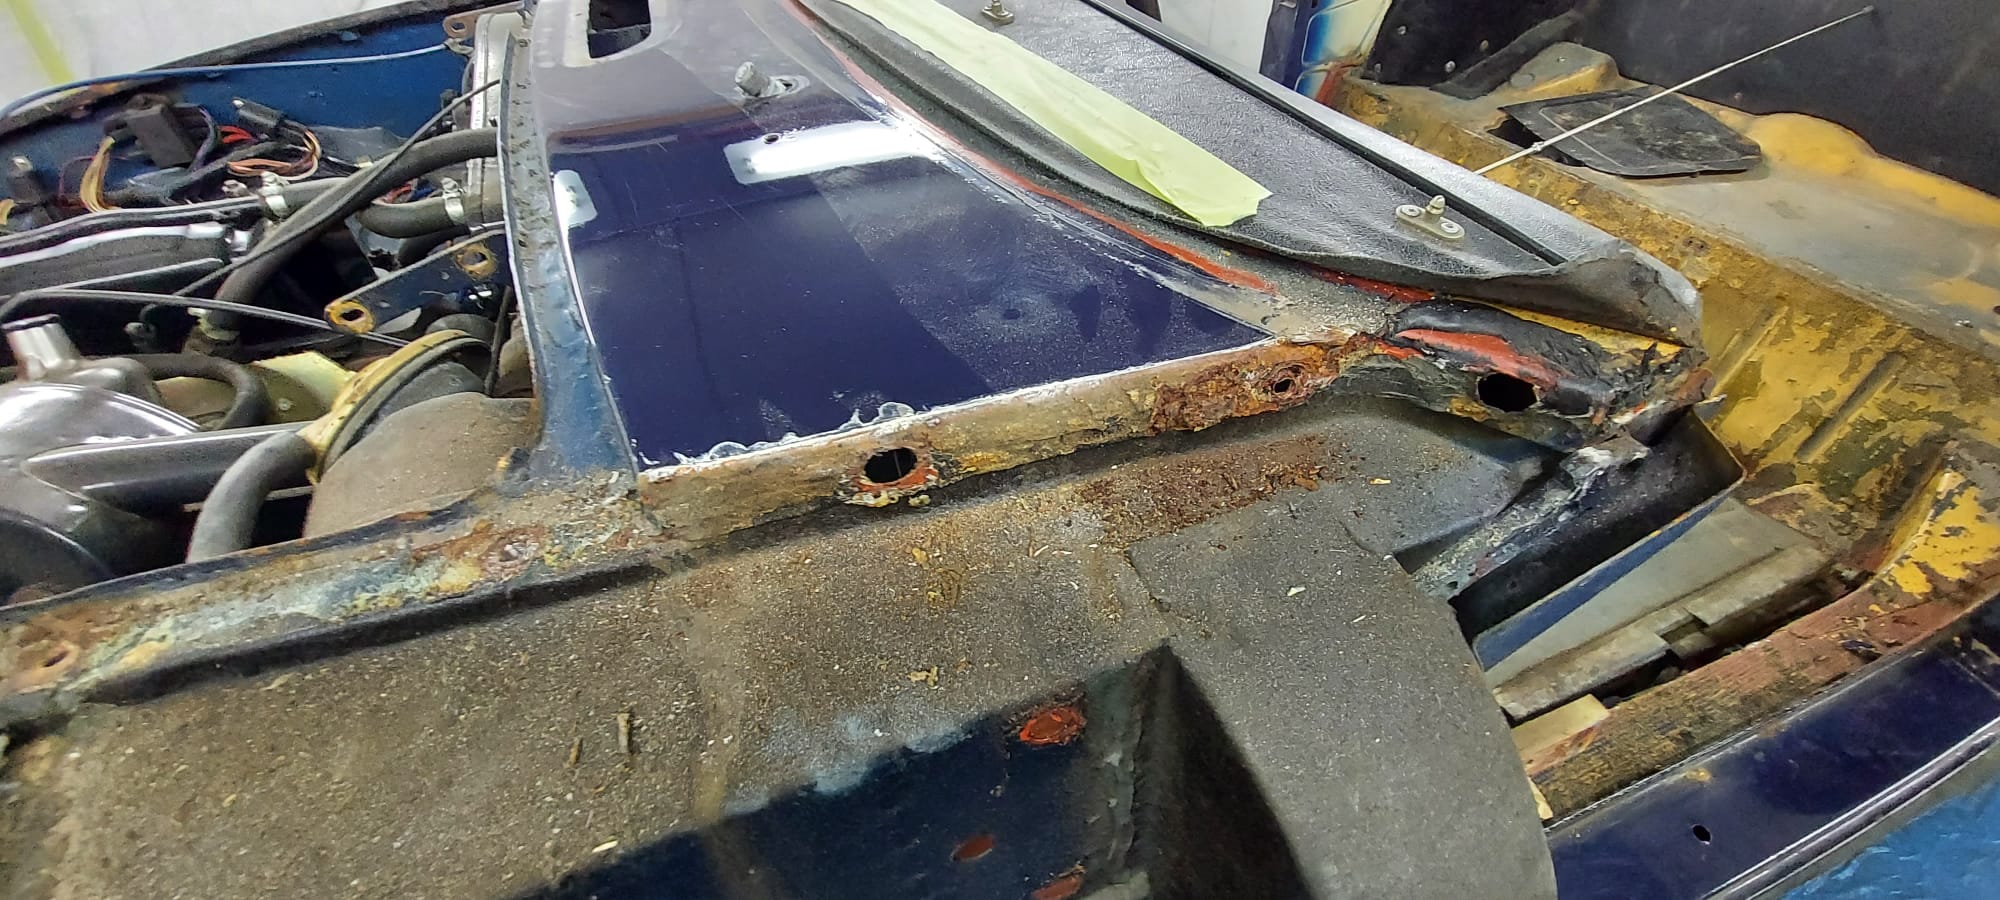
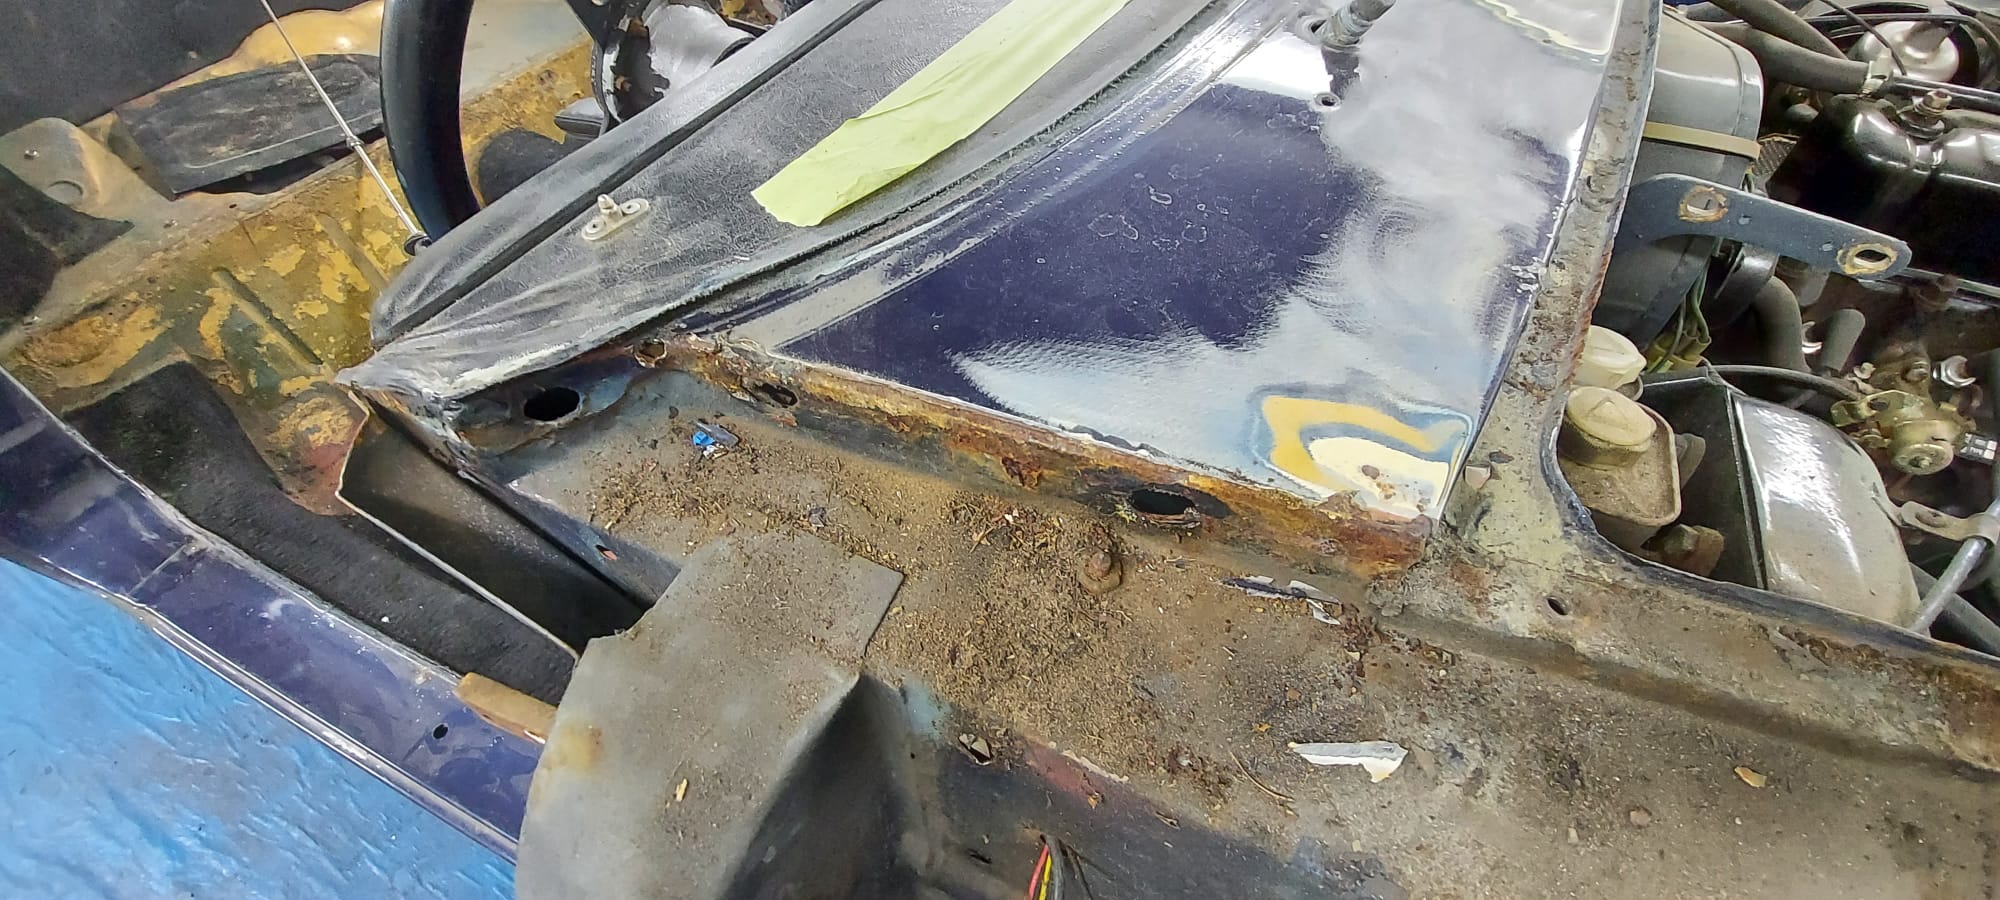
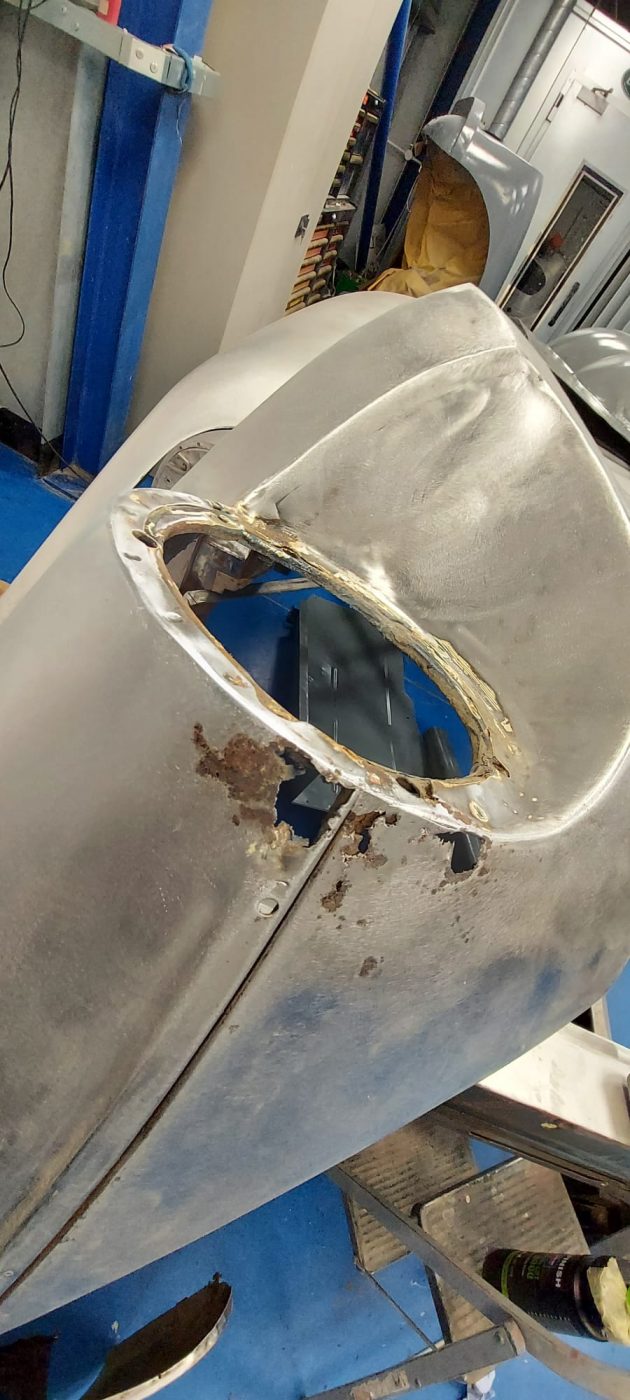
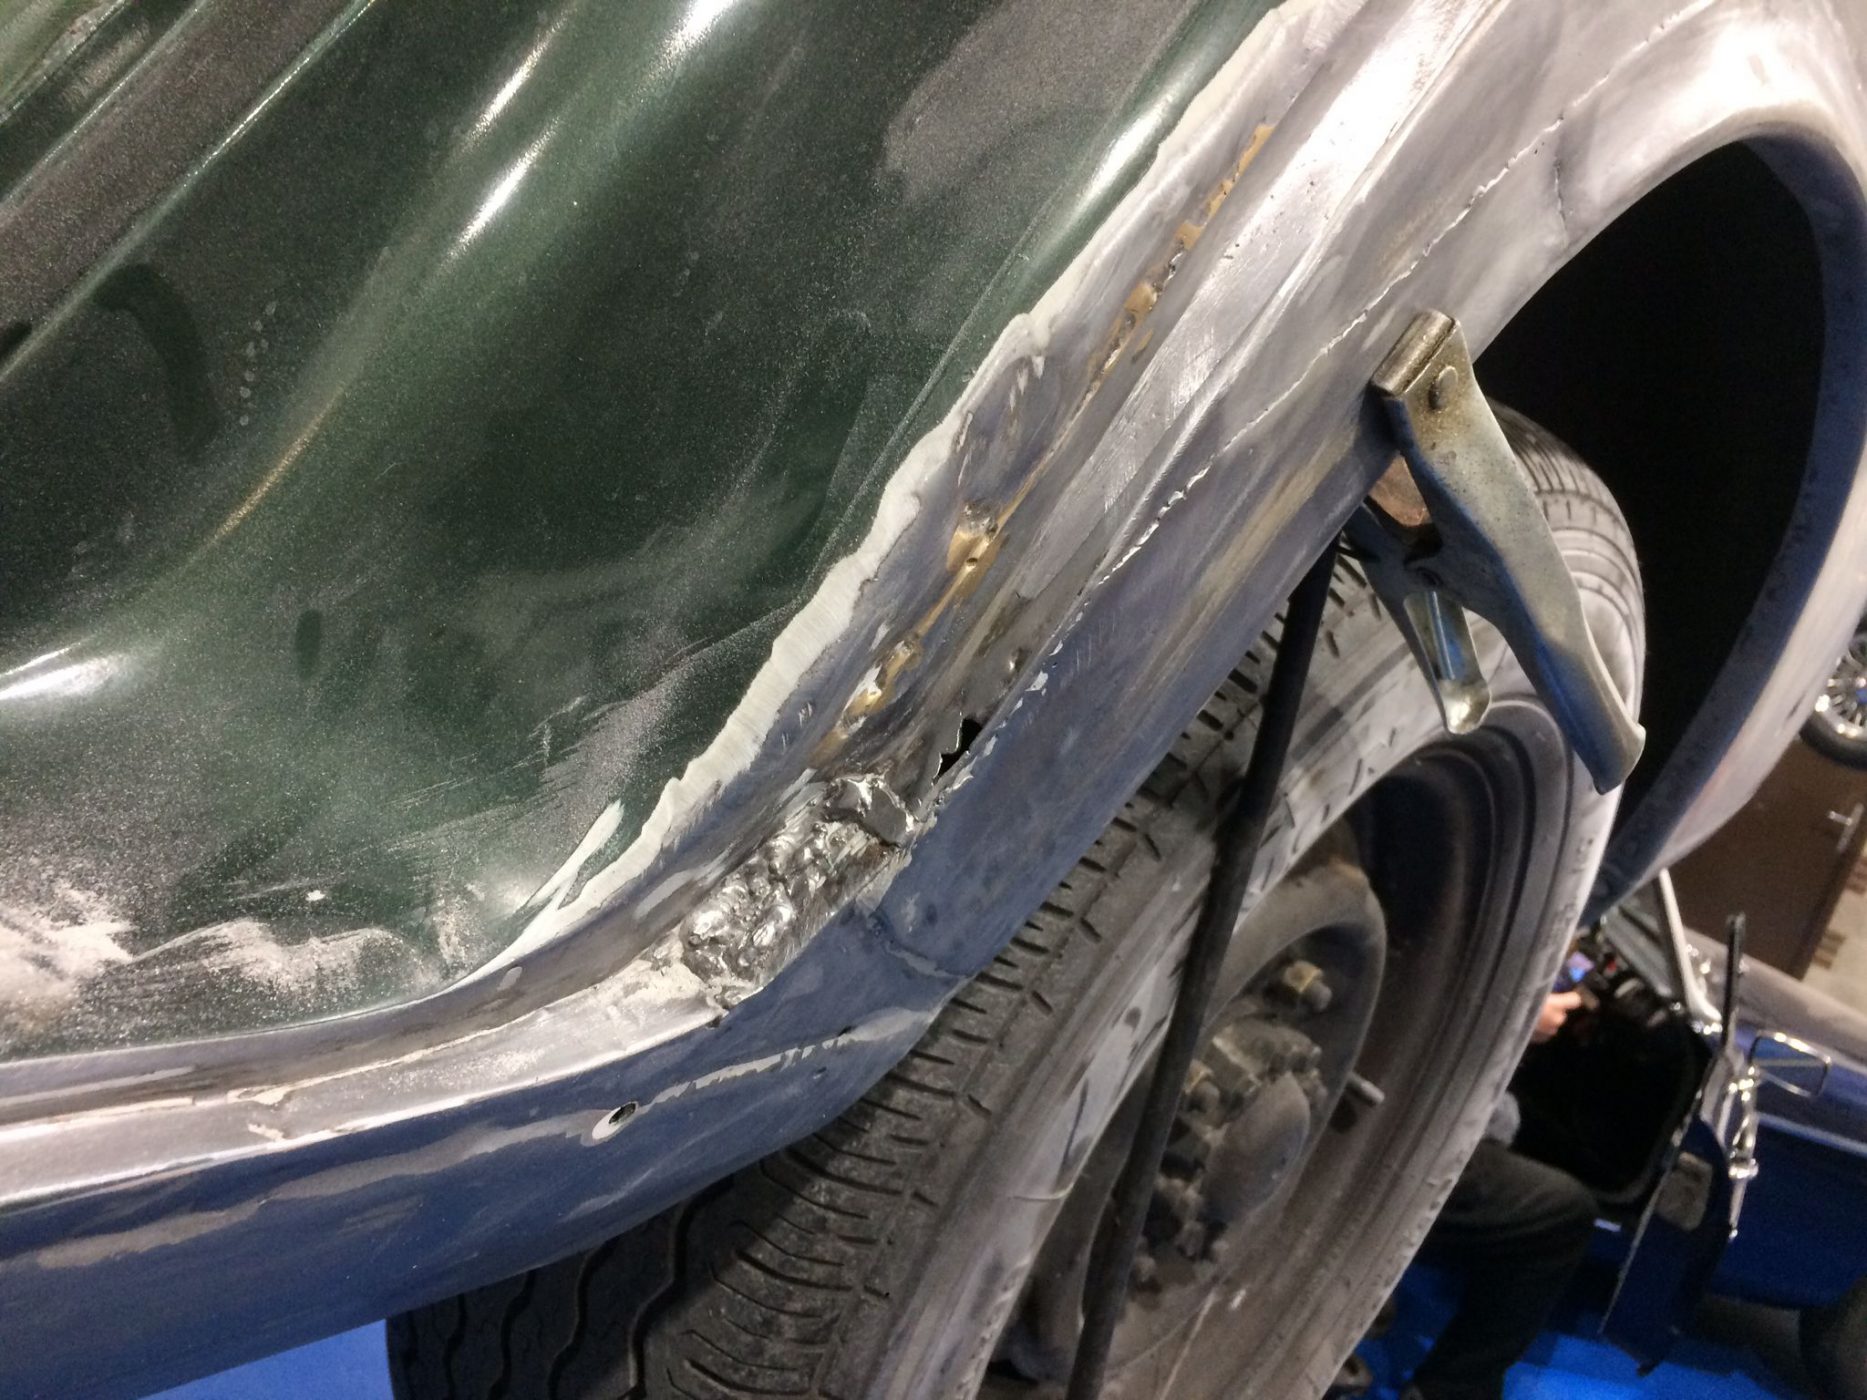
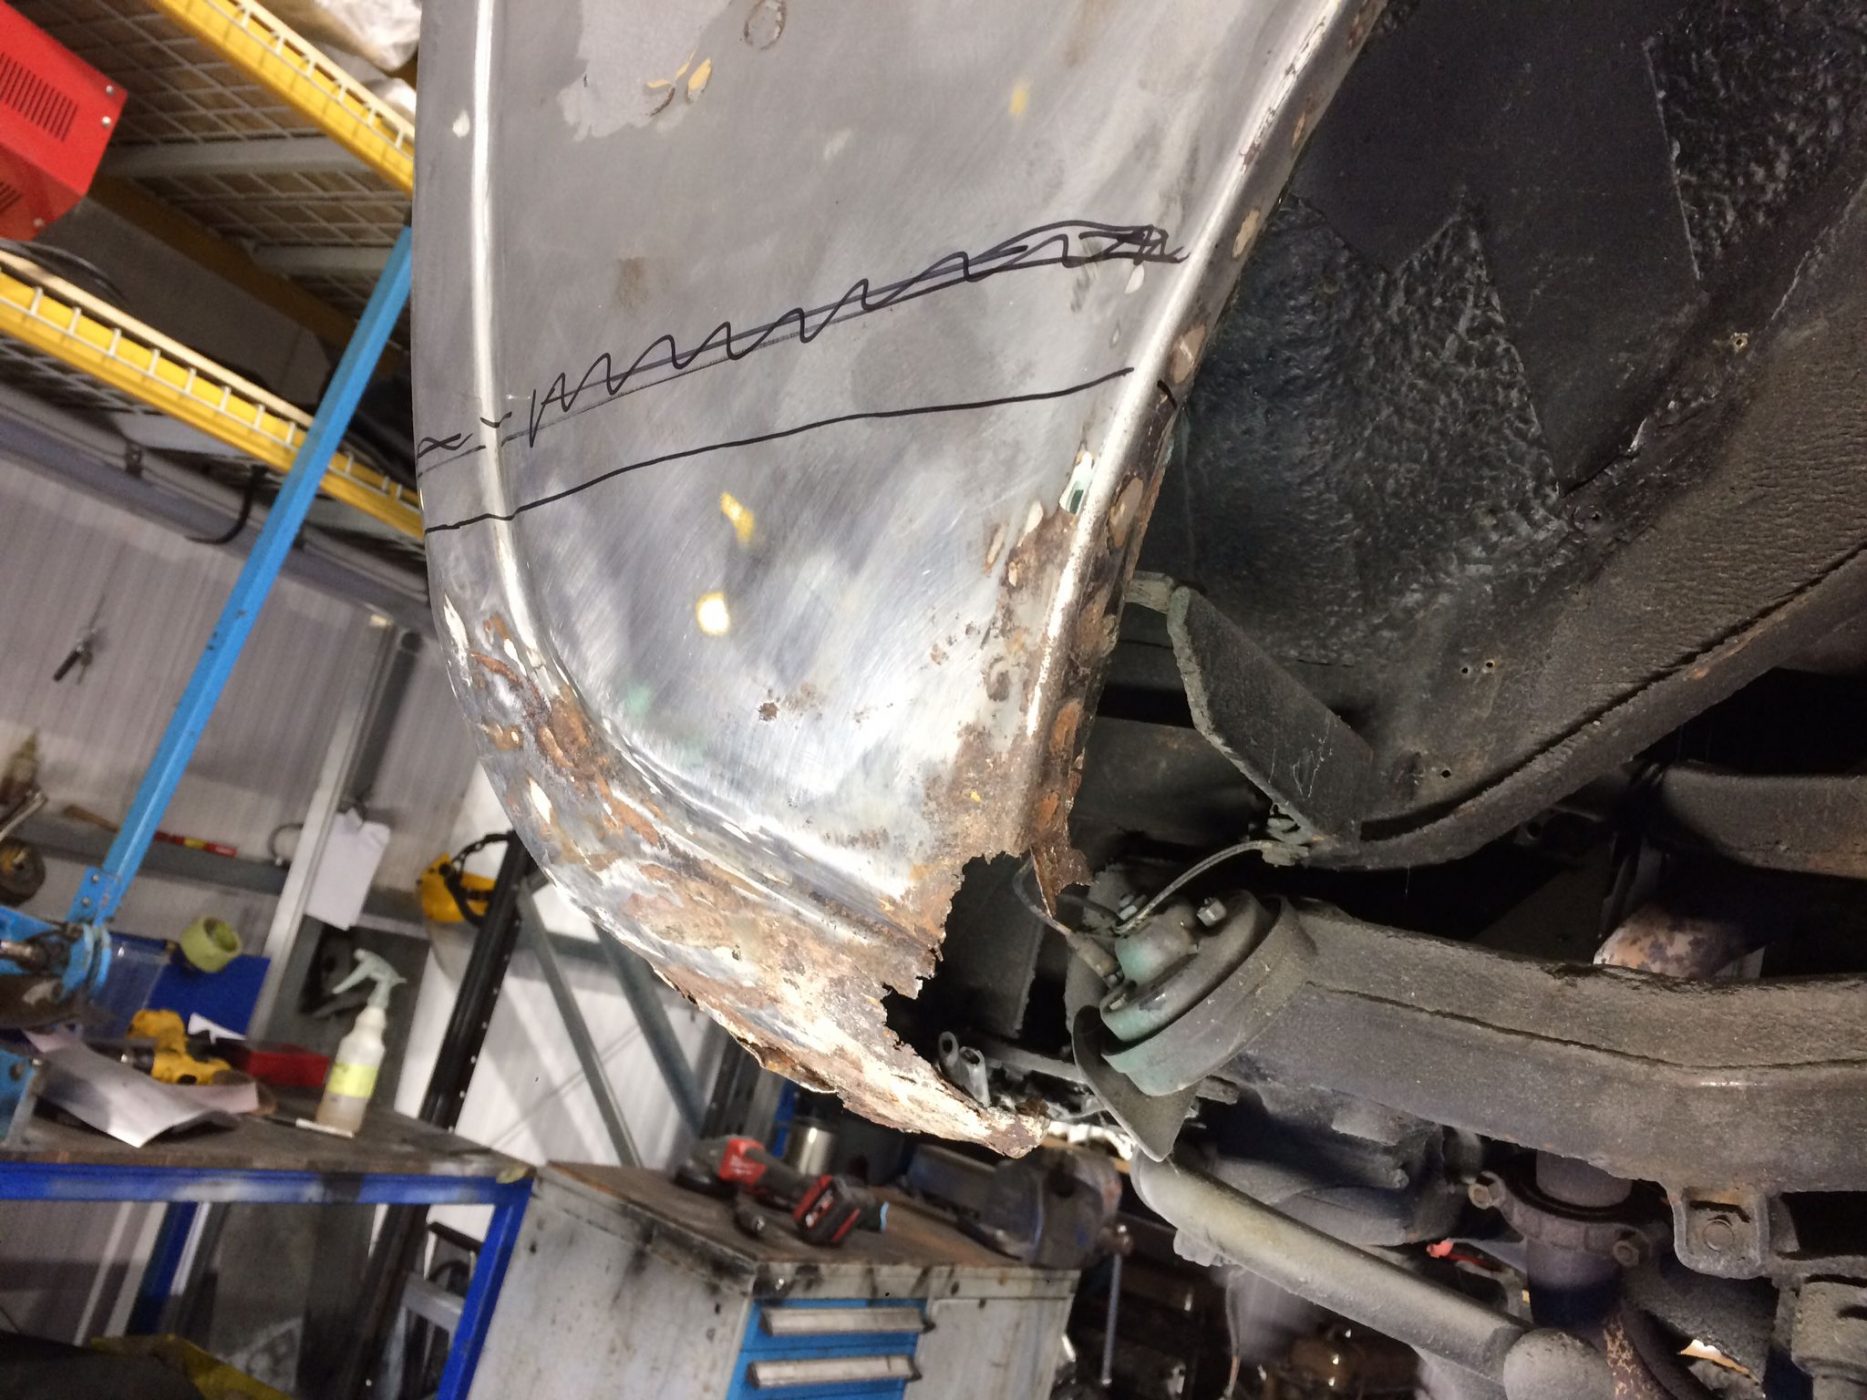
The paint and body shop found multiple areas with corrosion and filler on the bottom sections of the car and around the front wings, both on the inner flanges and the recesses of the headlights. This, would all need to be rectified for the car to have not only the aesthetic restoration we had been asked to carry out for the customer but for it to carry the Bridge Classic Cars name.
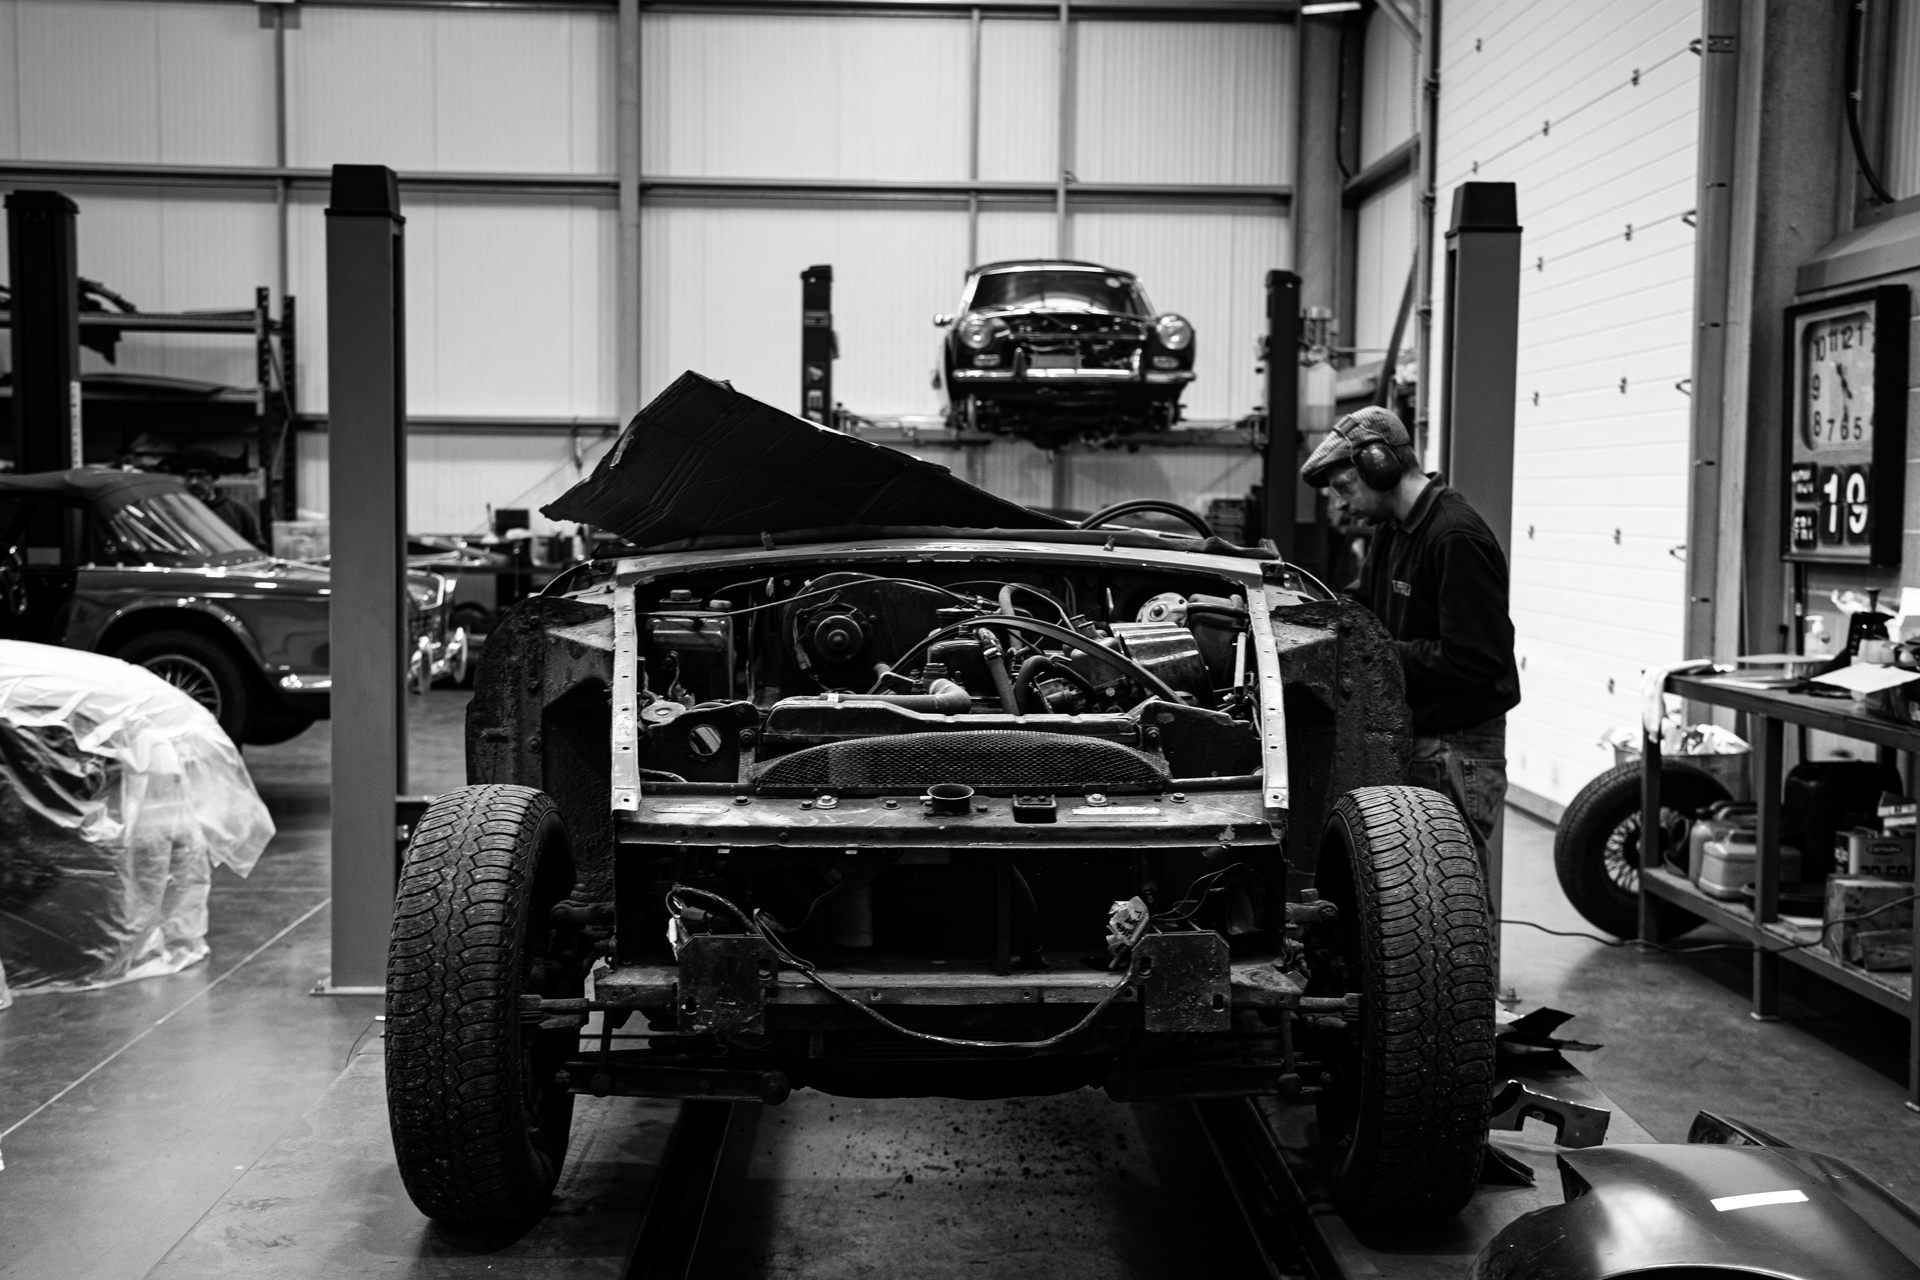
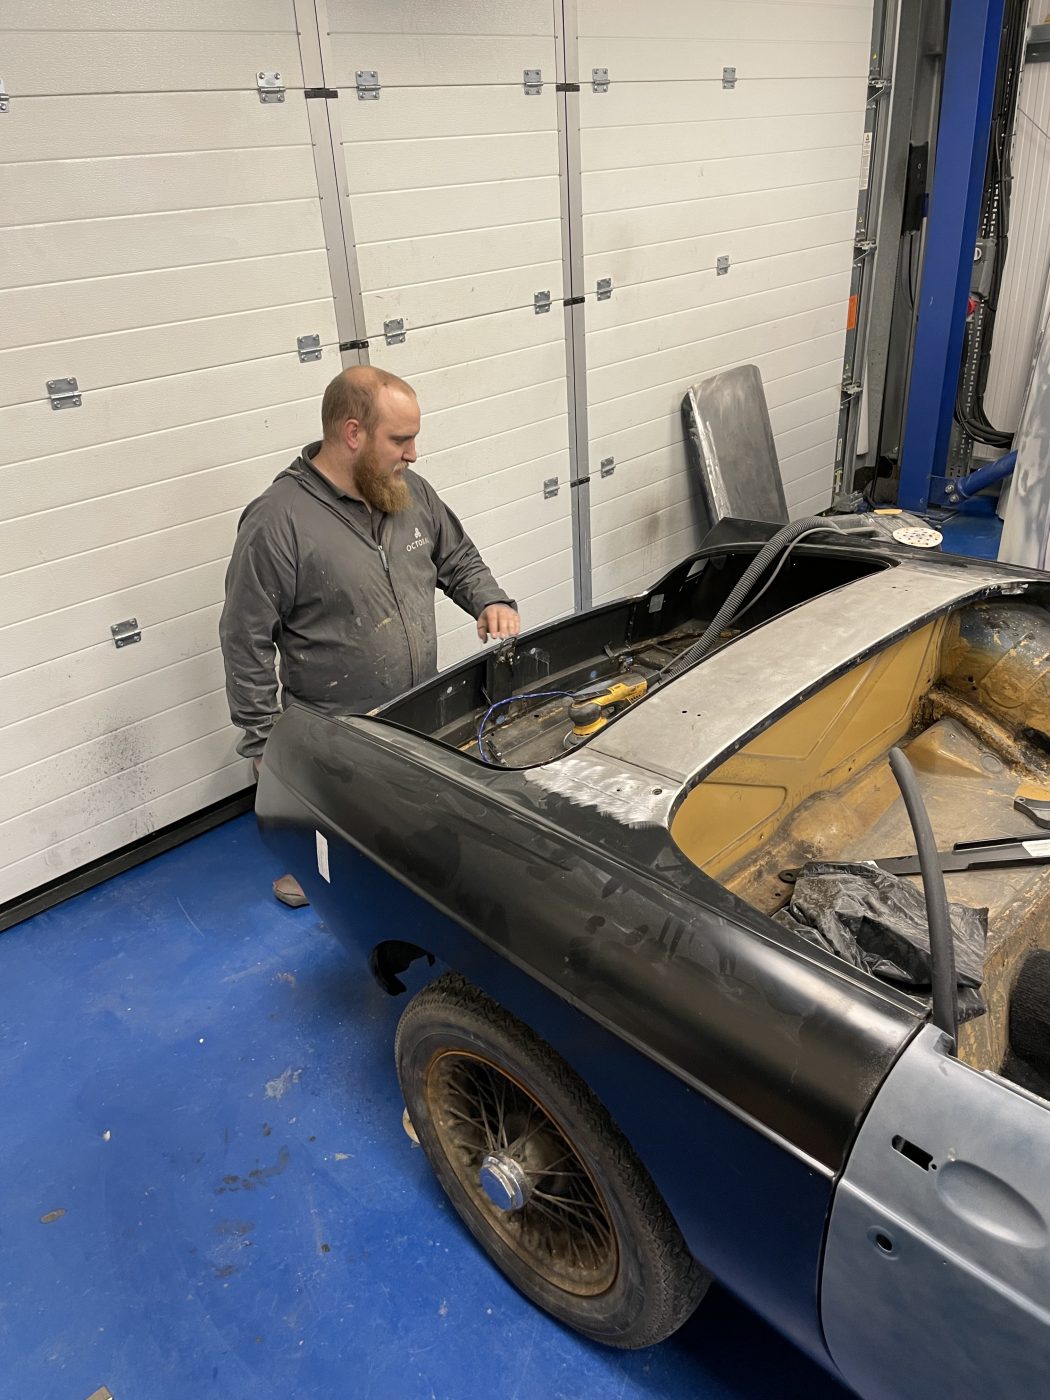
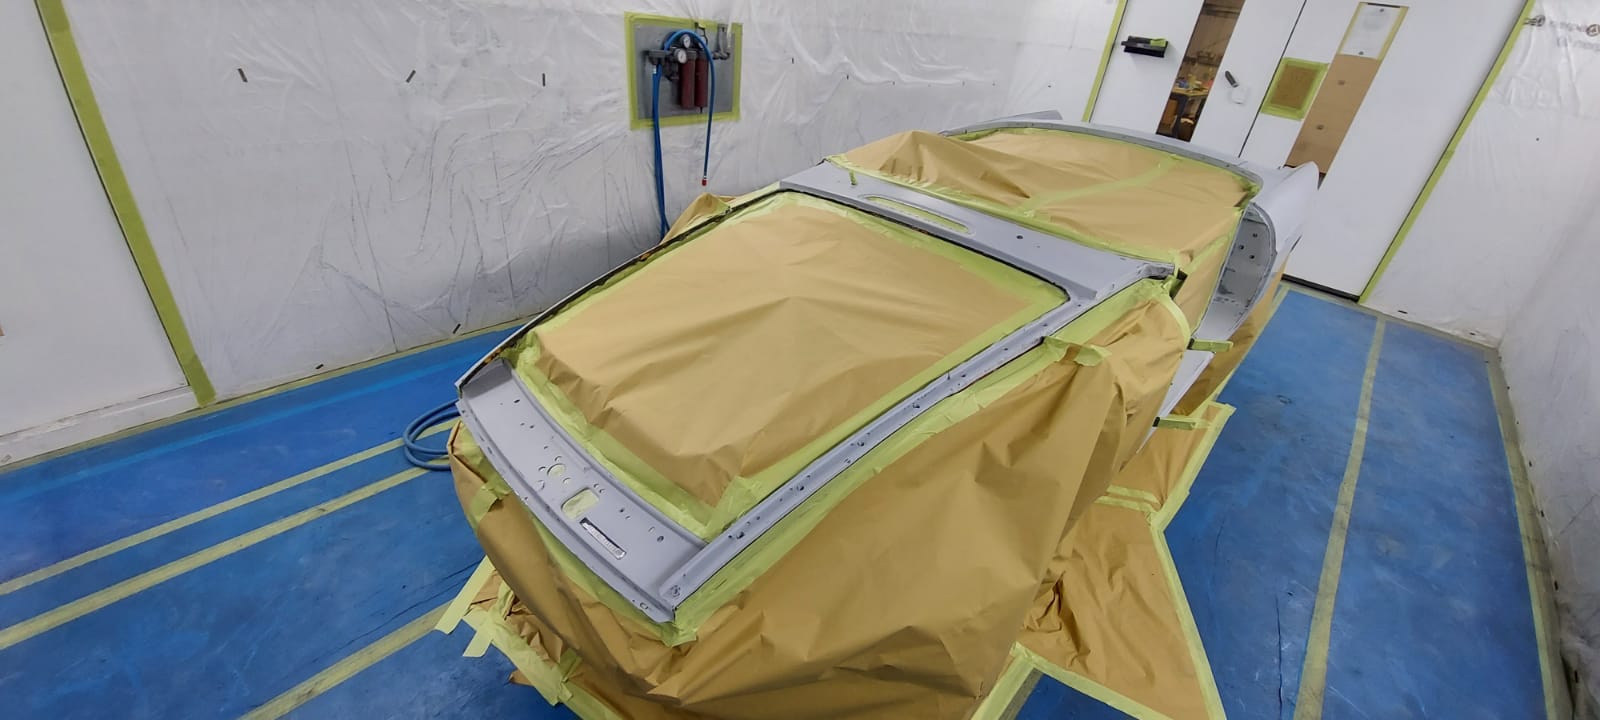
Whilst the panels and other pieces were being worked on in the Bridge Classic Cars in-house paint shop, the shell of the Roadster was transferred into our main workshop for our restoration technicians to begin removing and replacing the affected body panels.
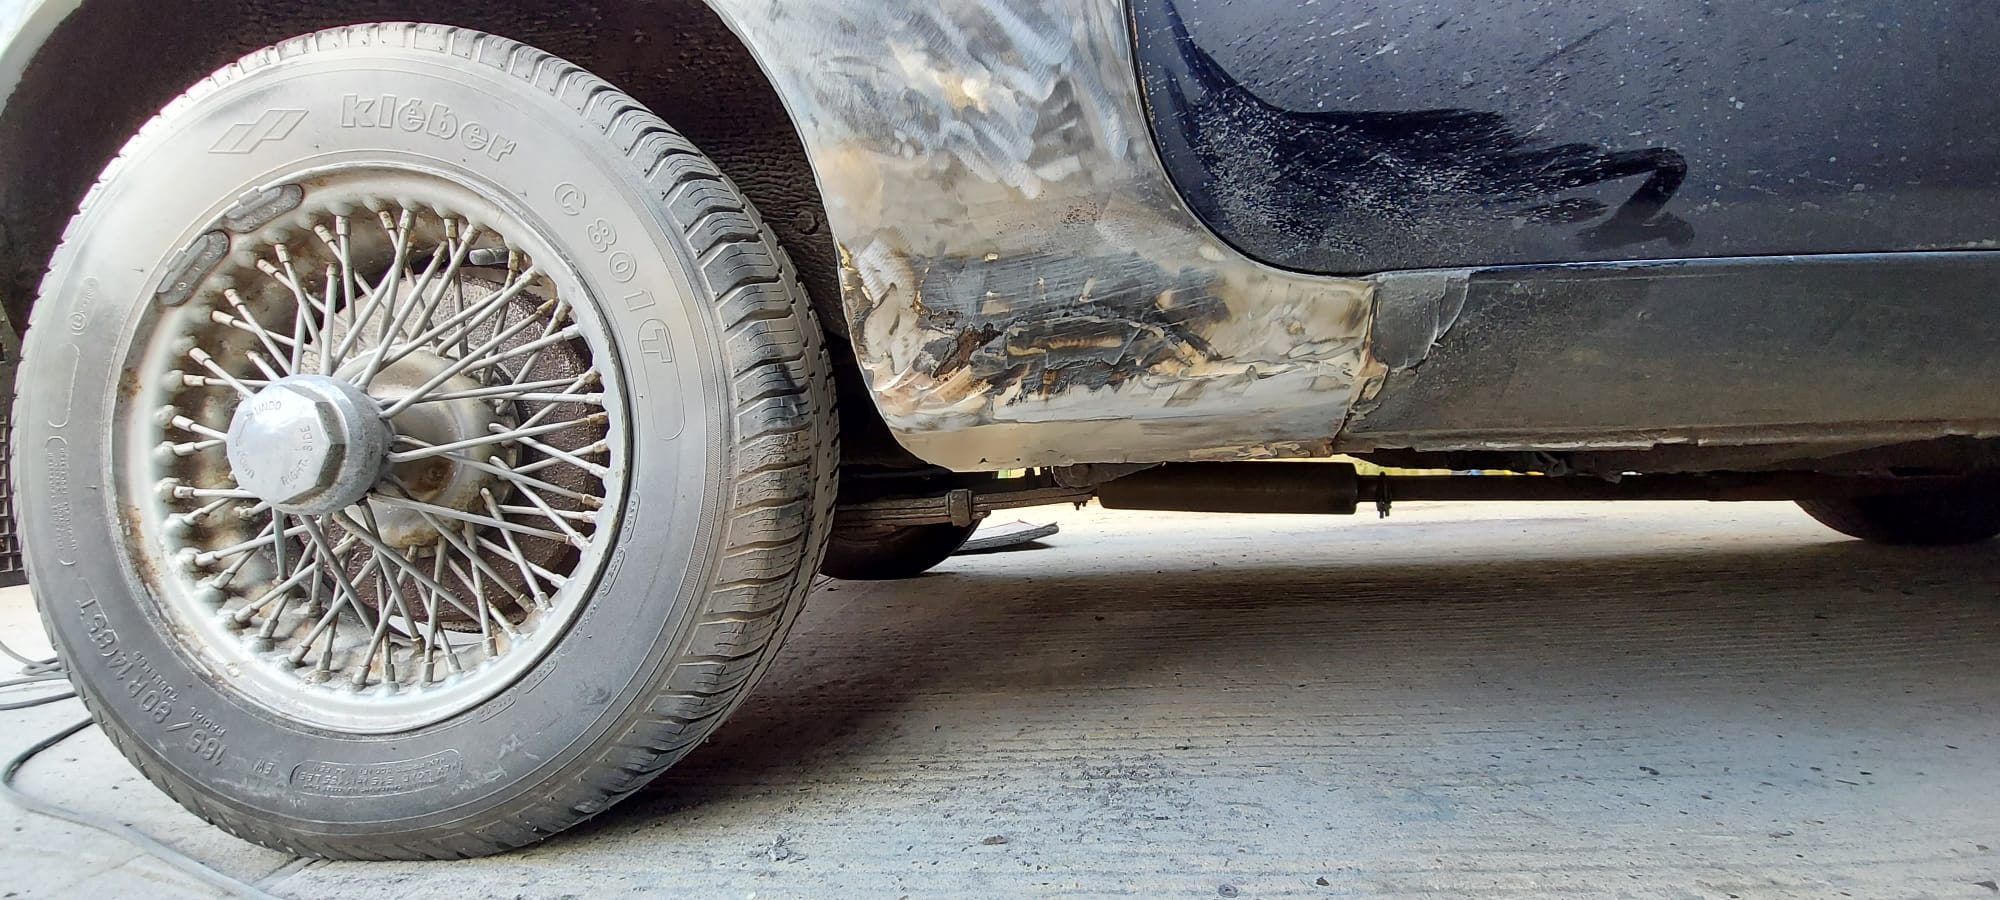
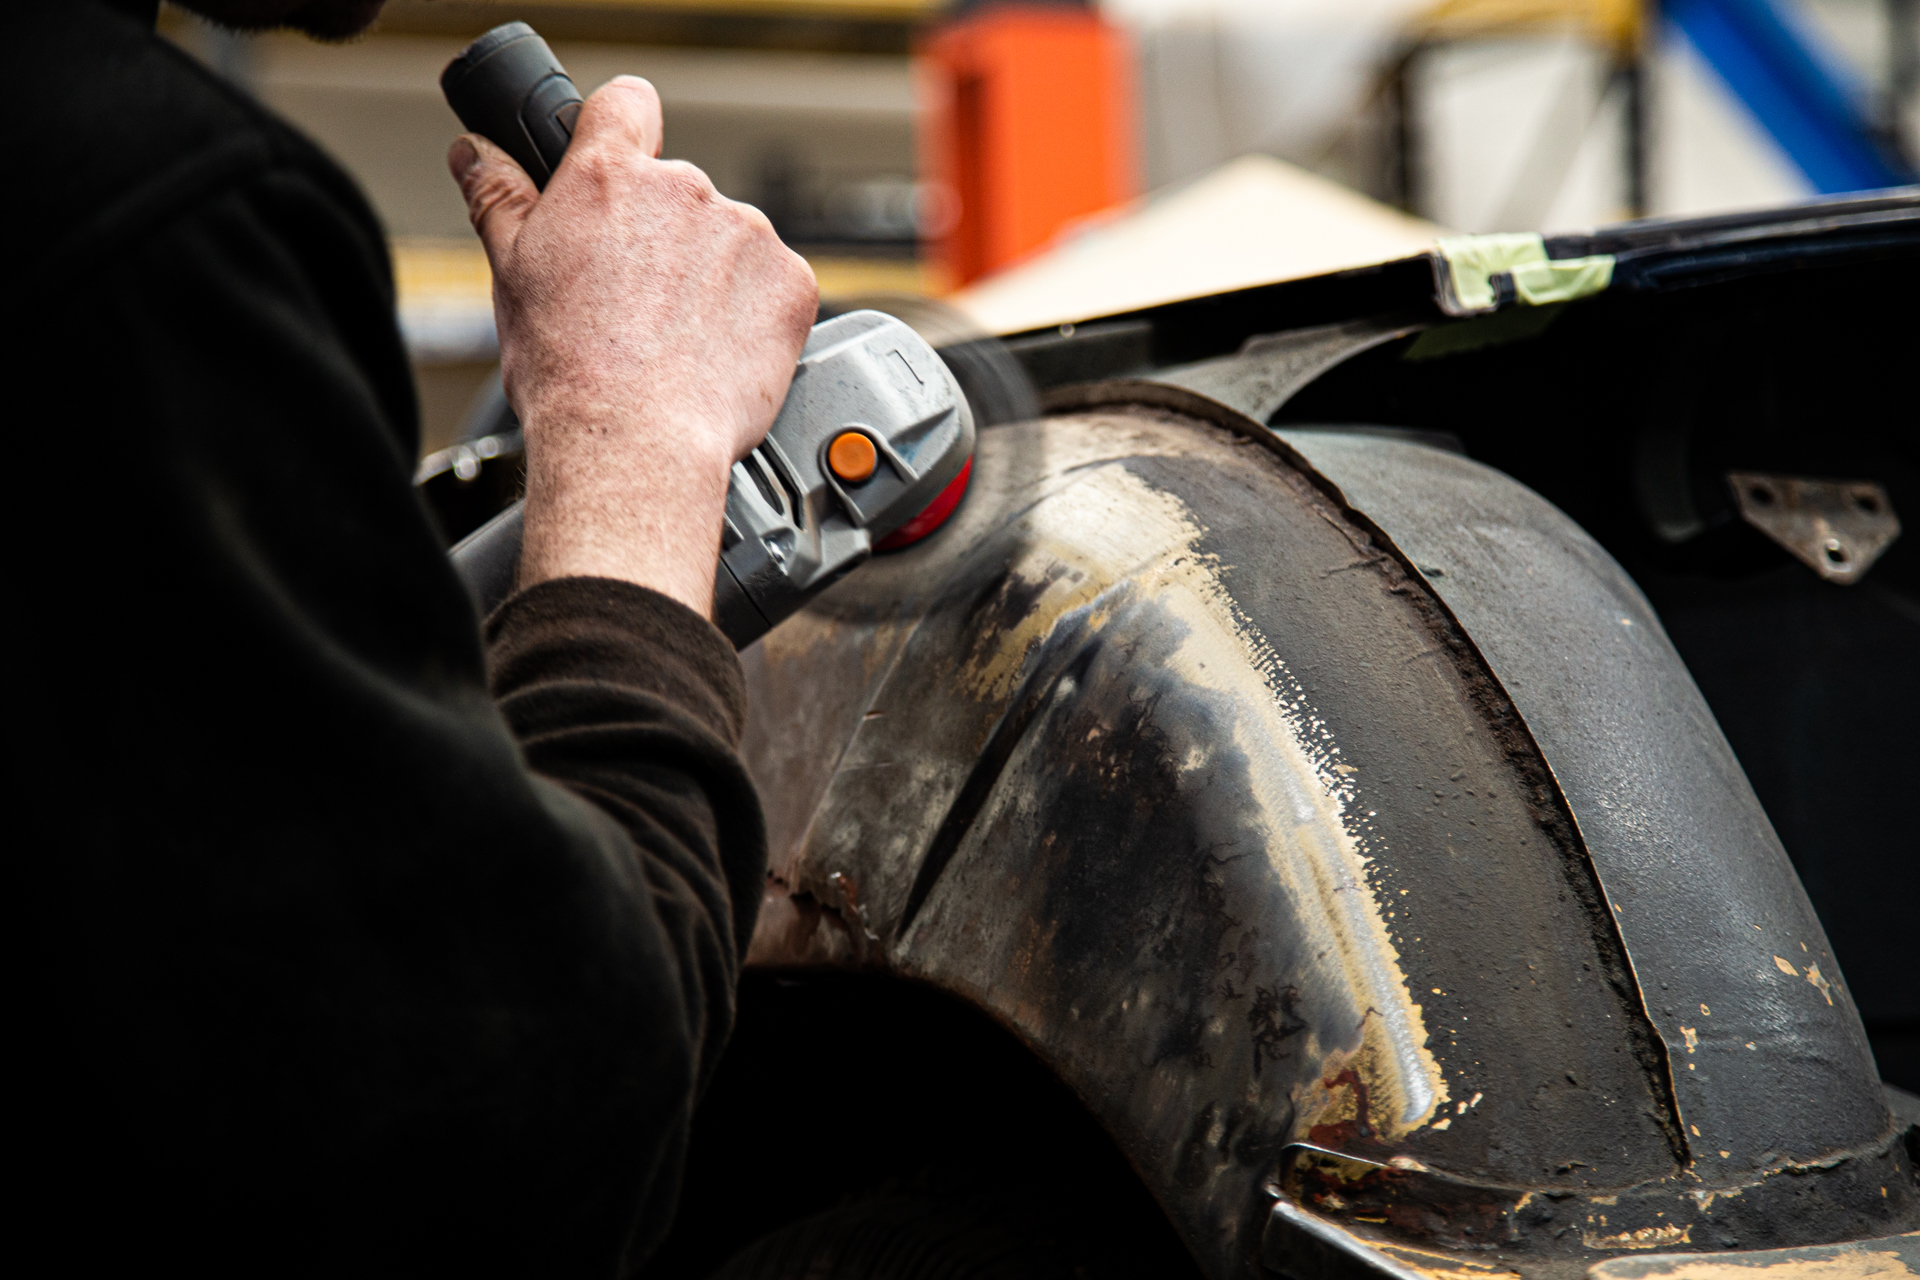
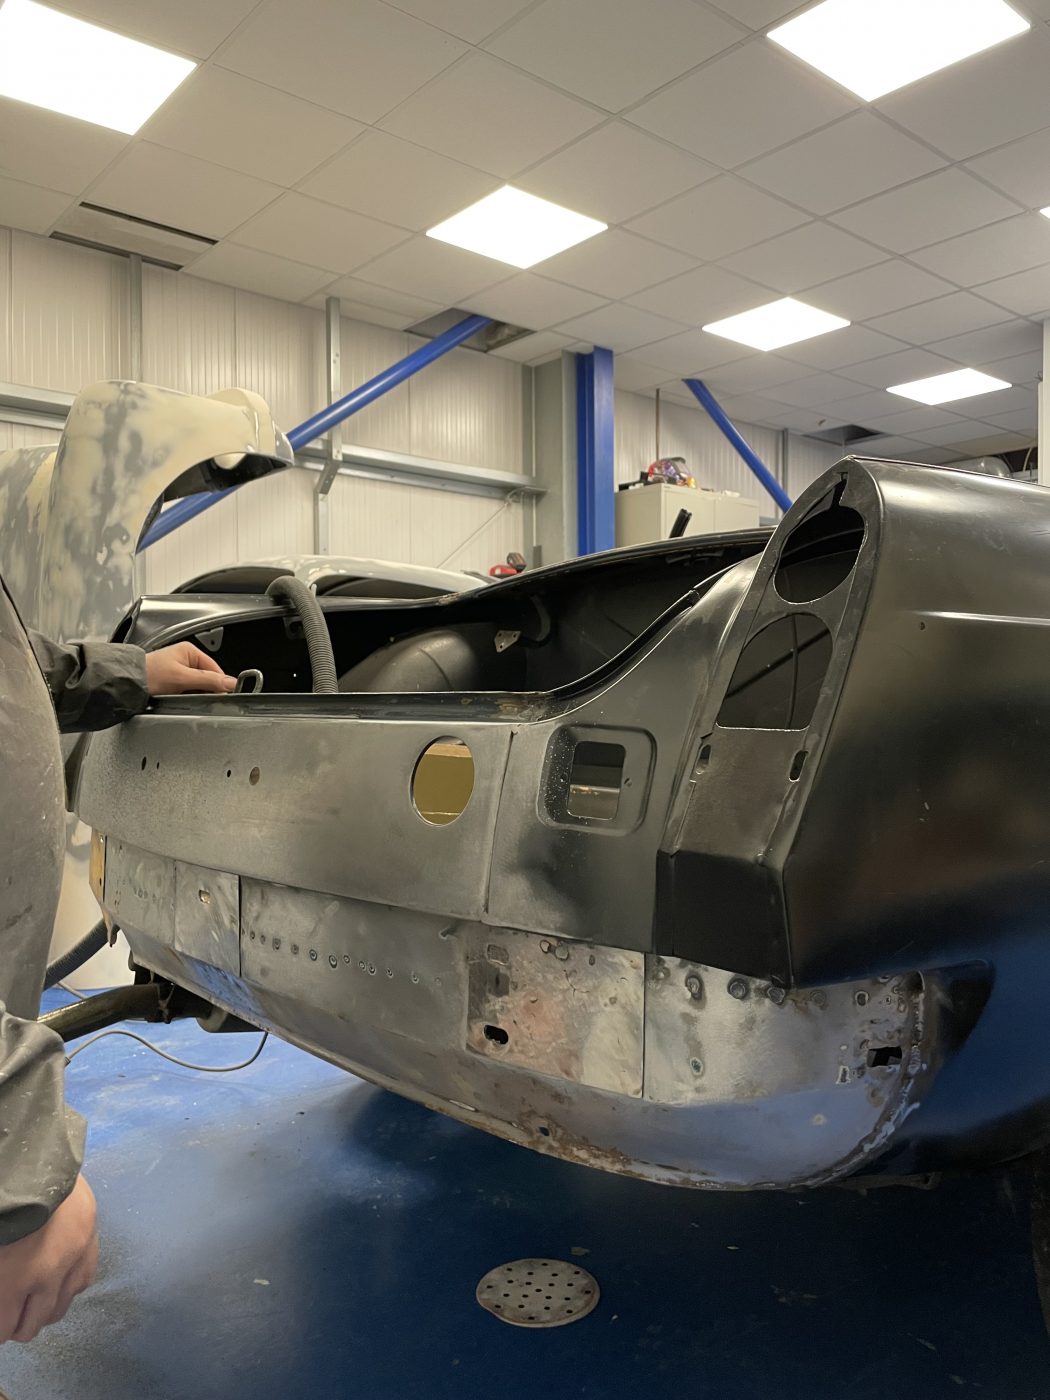
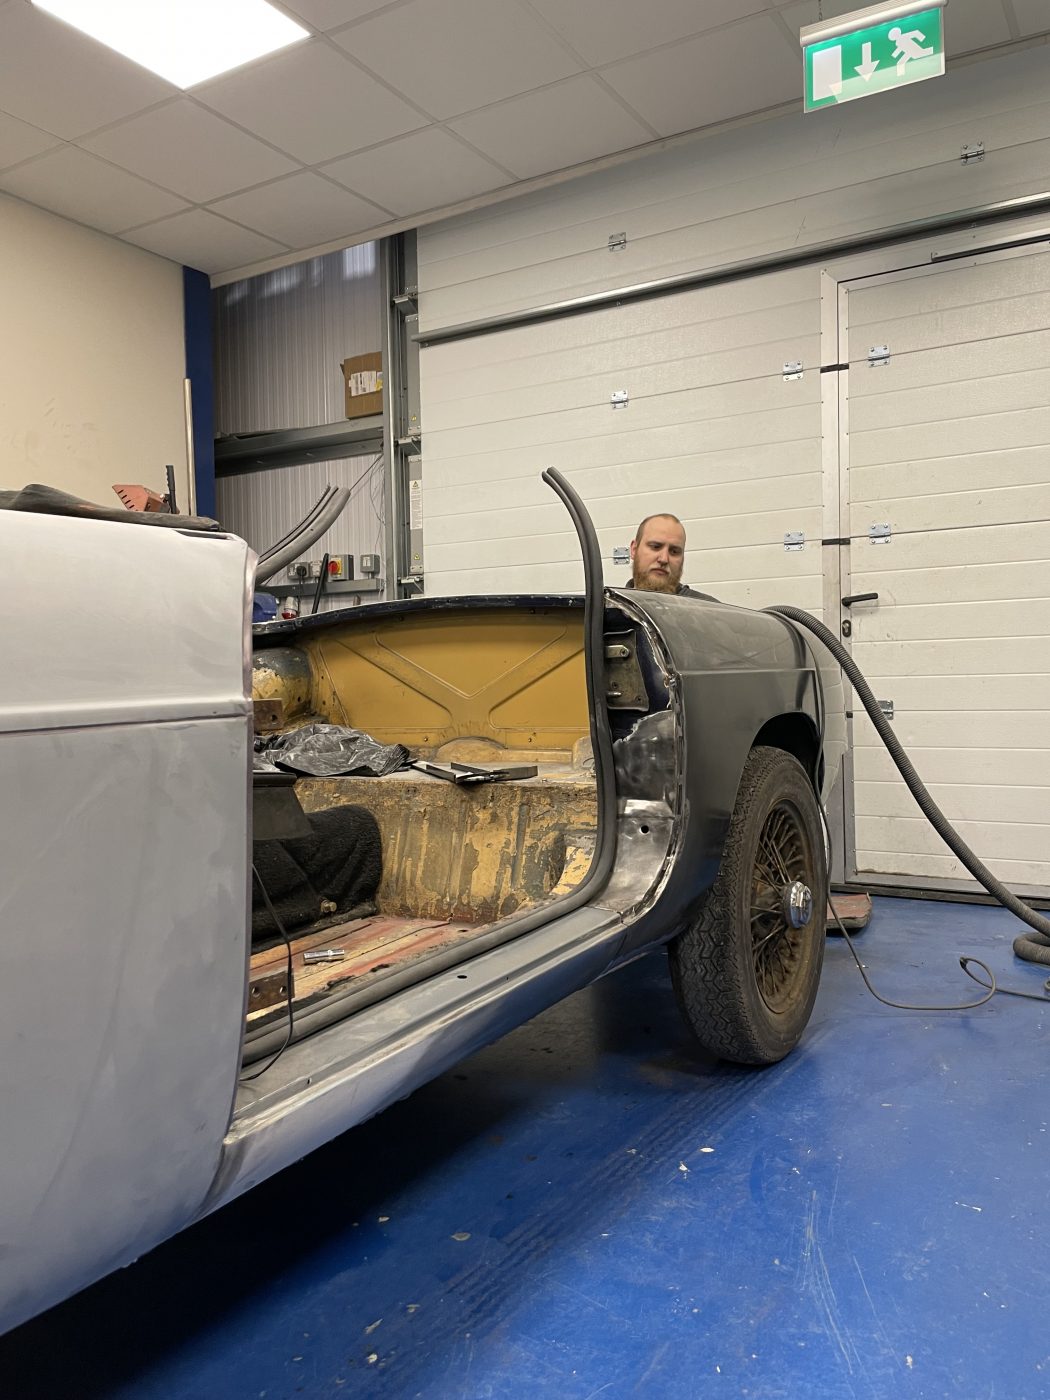
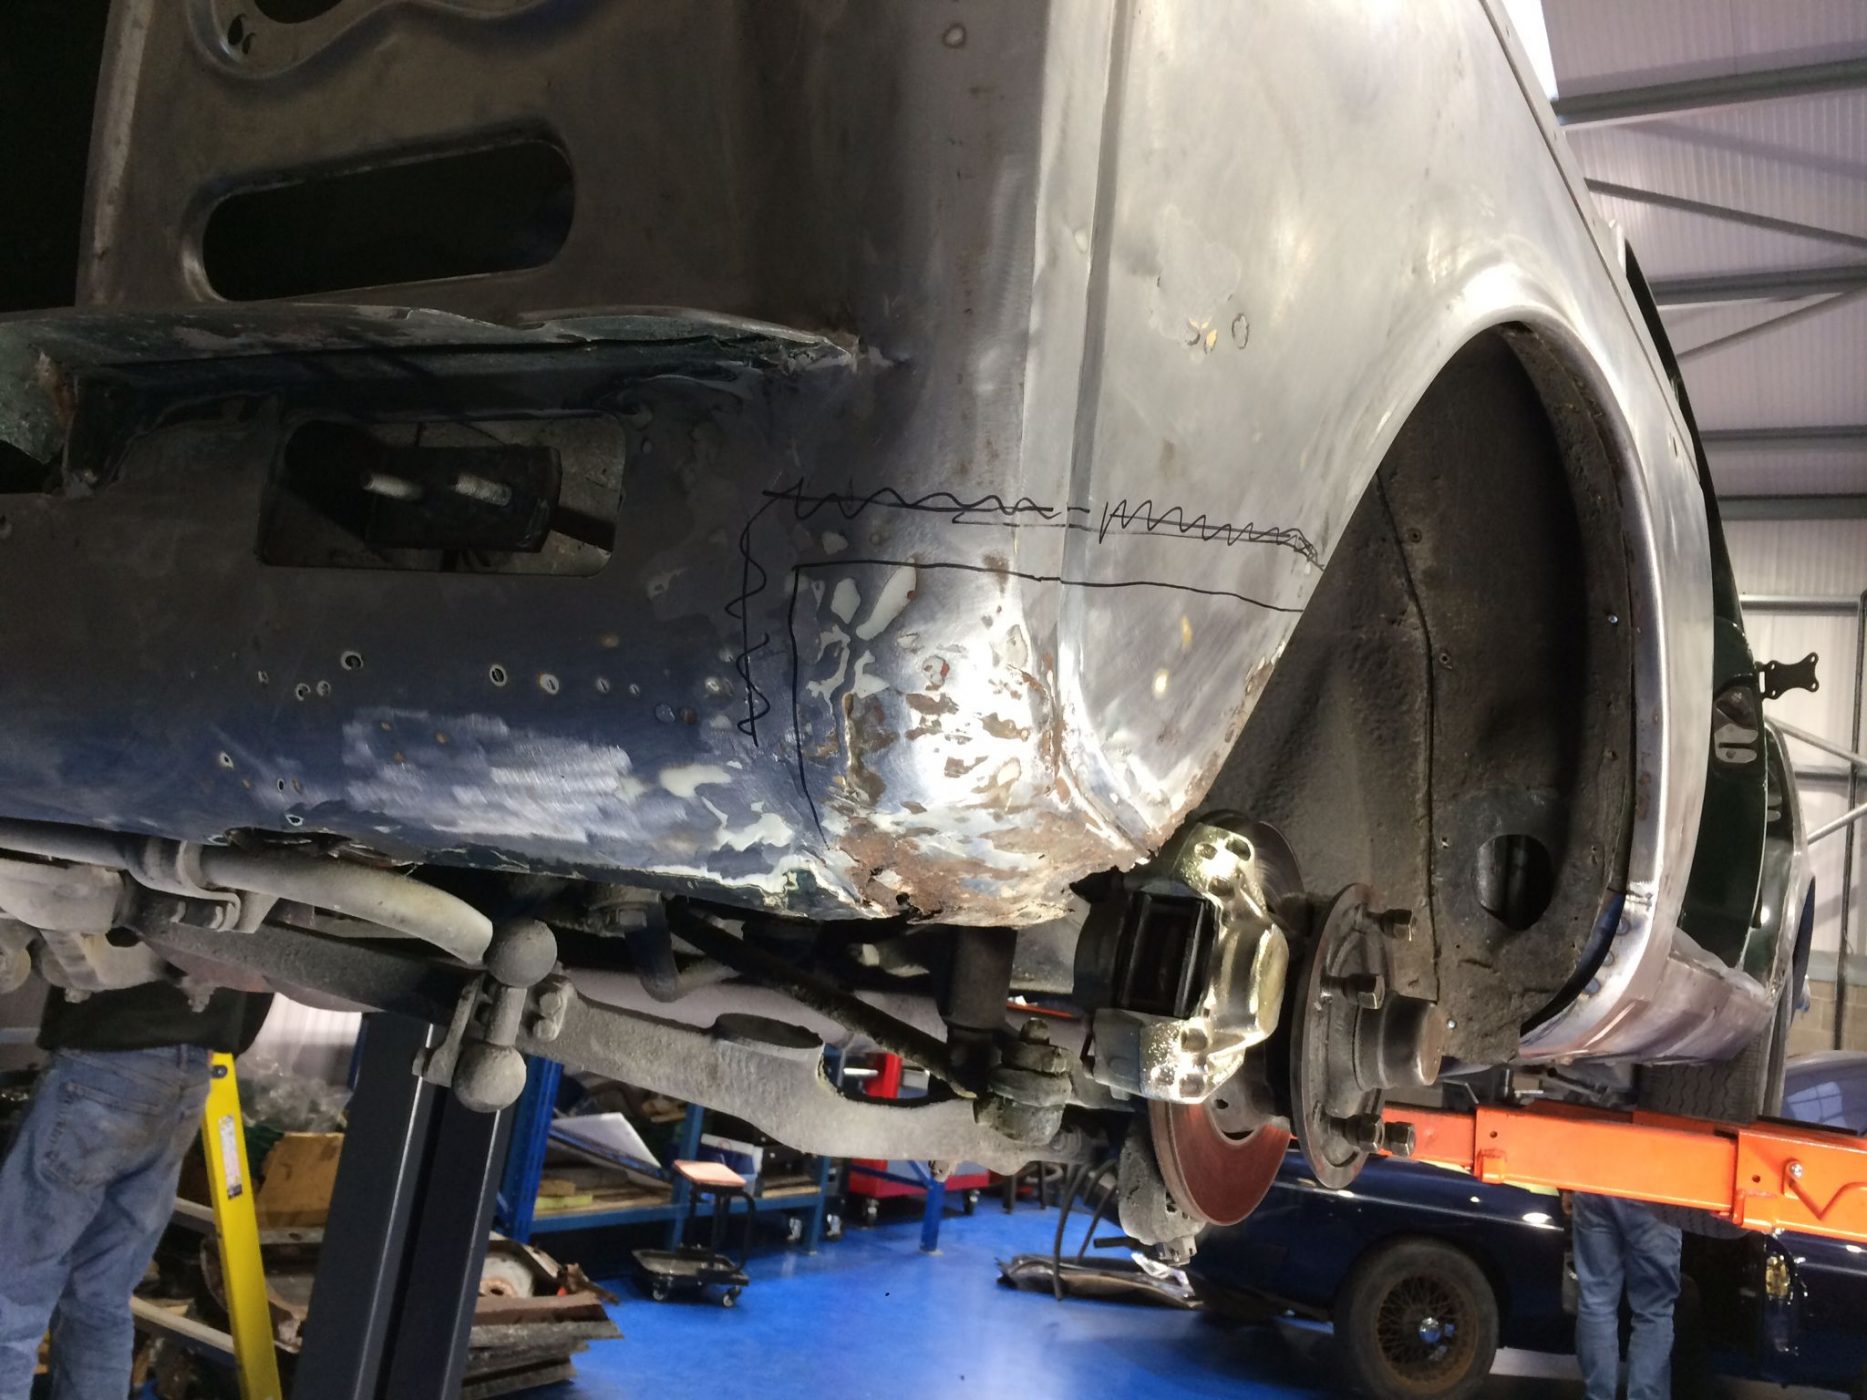
Our technician Scott took on the task of getting every single part of this MGB Roadster back to being purely metal. Carefully, he worked his way through the rear quarter panels to remove them from the car. Making sure to take note of any body line, bracket and opening in his cuts. Once the extensive corroded metal had been cautiously and sparingly cut out of the car, he could then begin preparing the classic sports car for its new panel work.
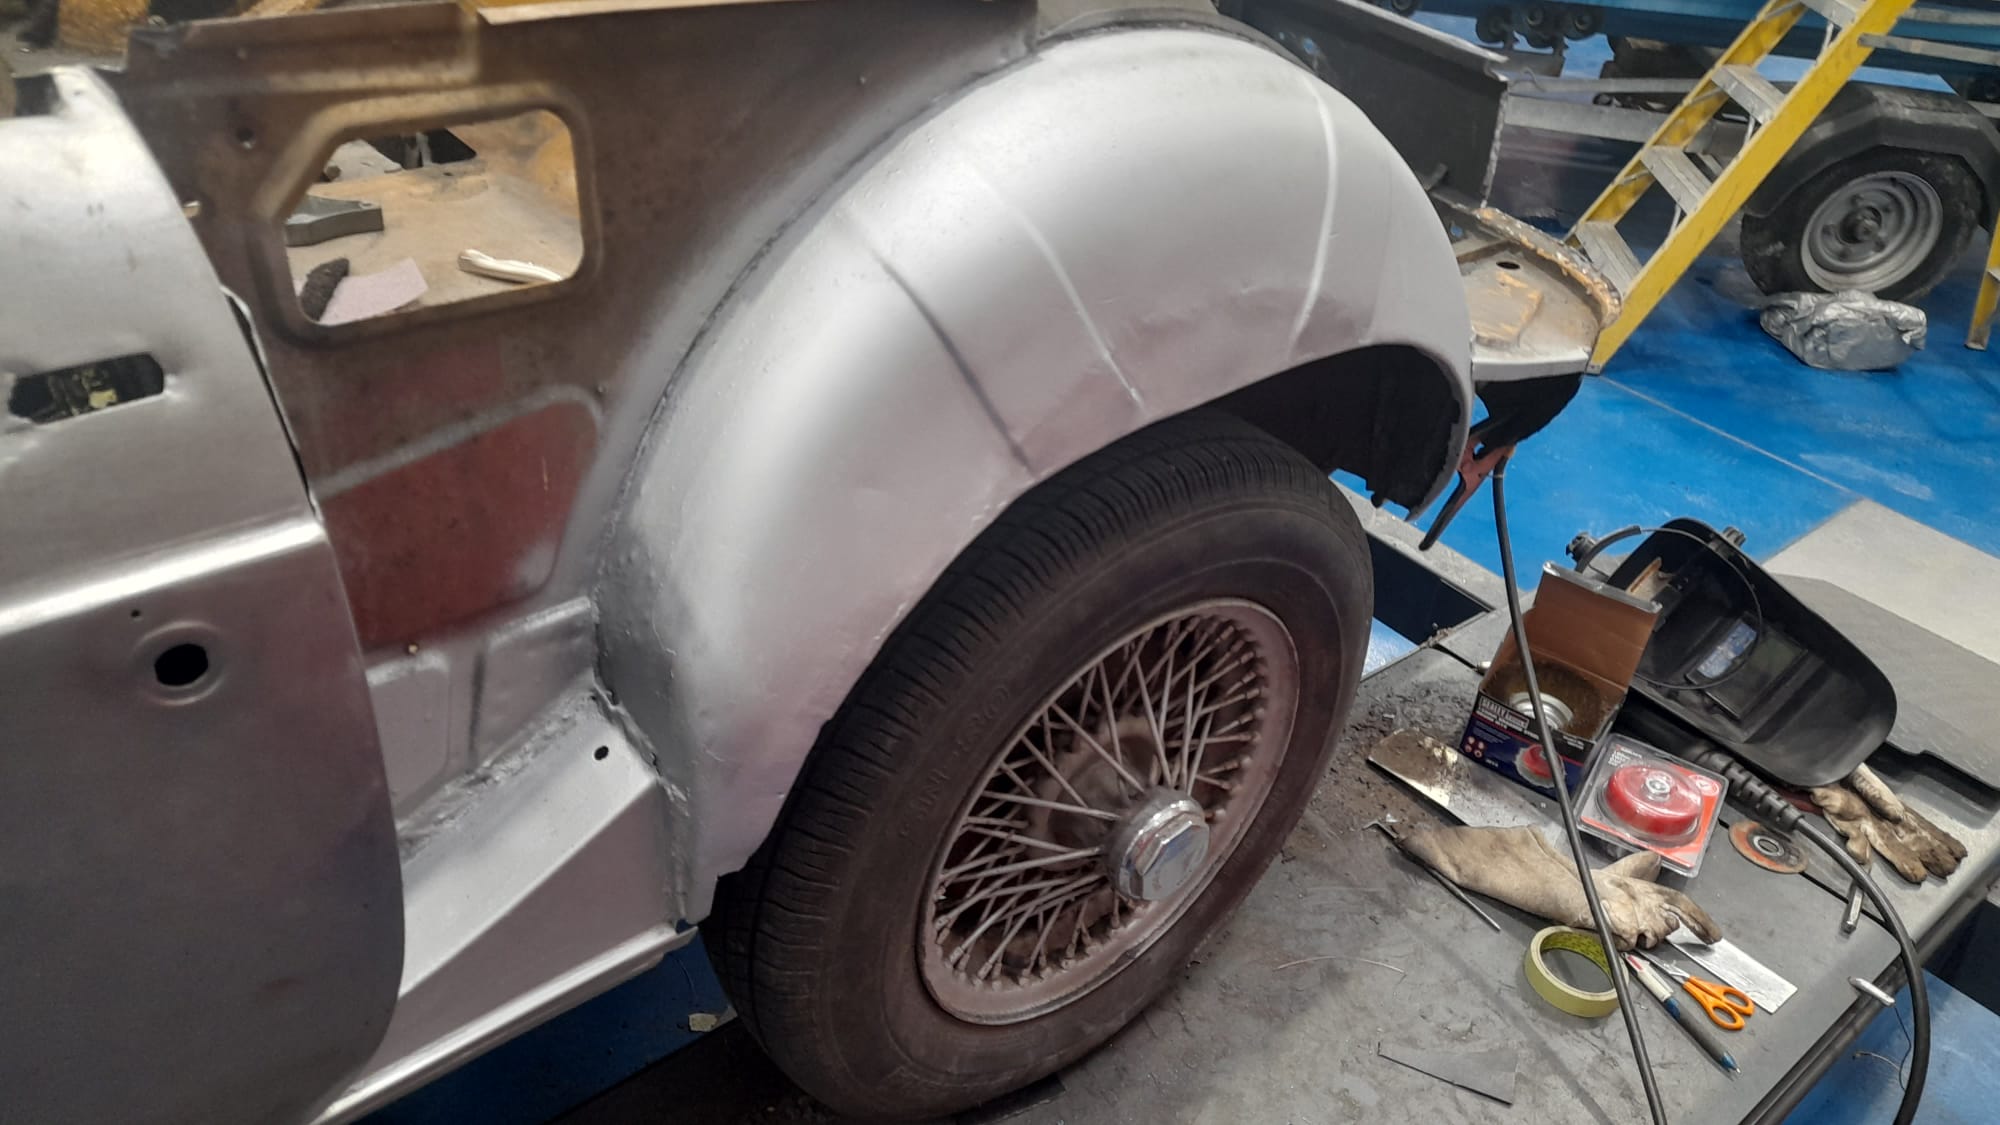
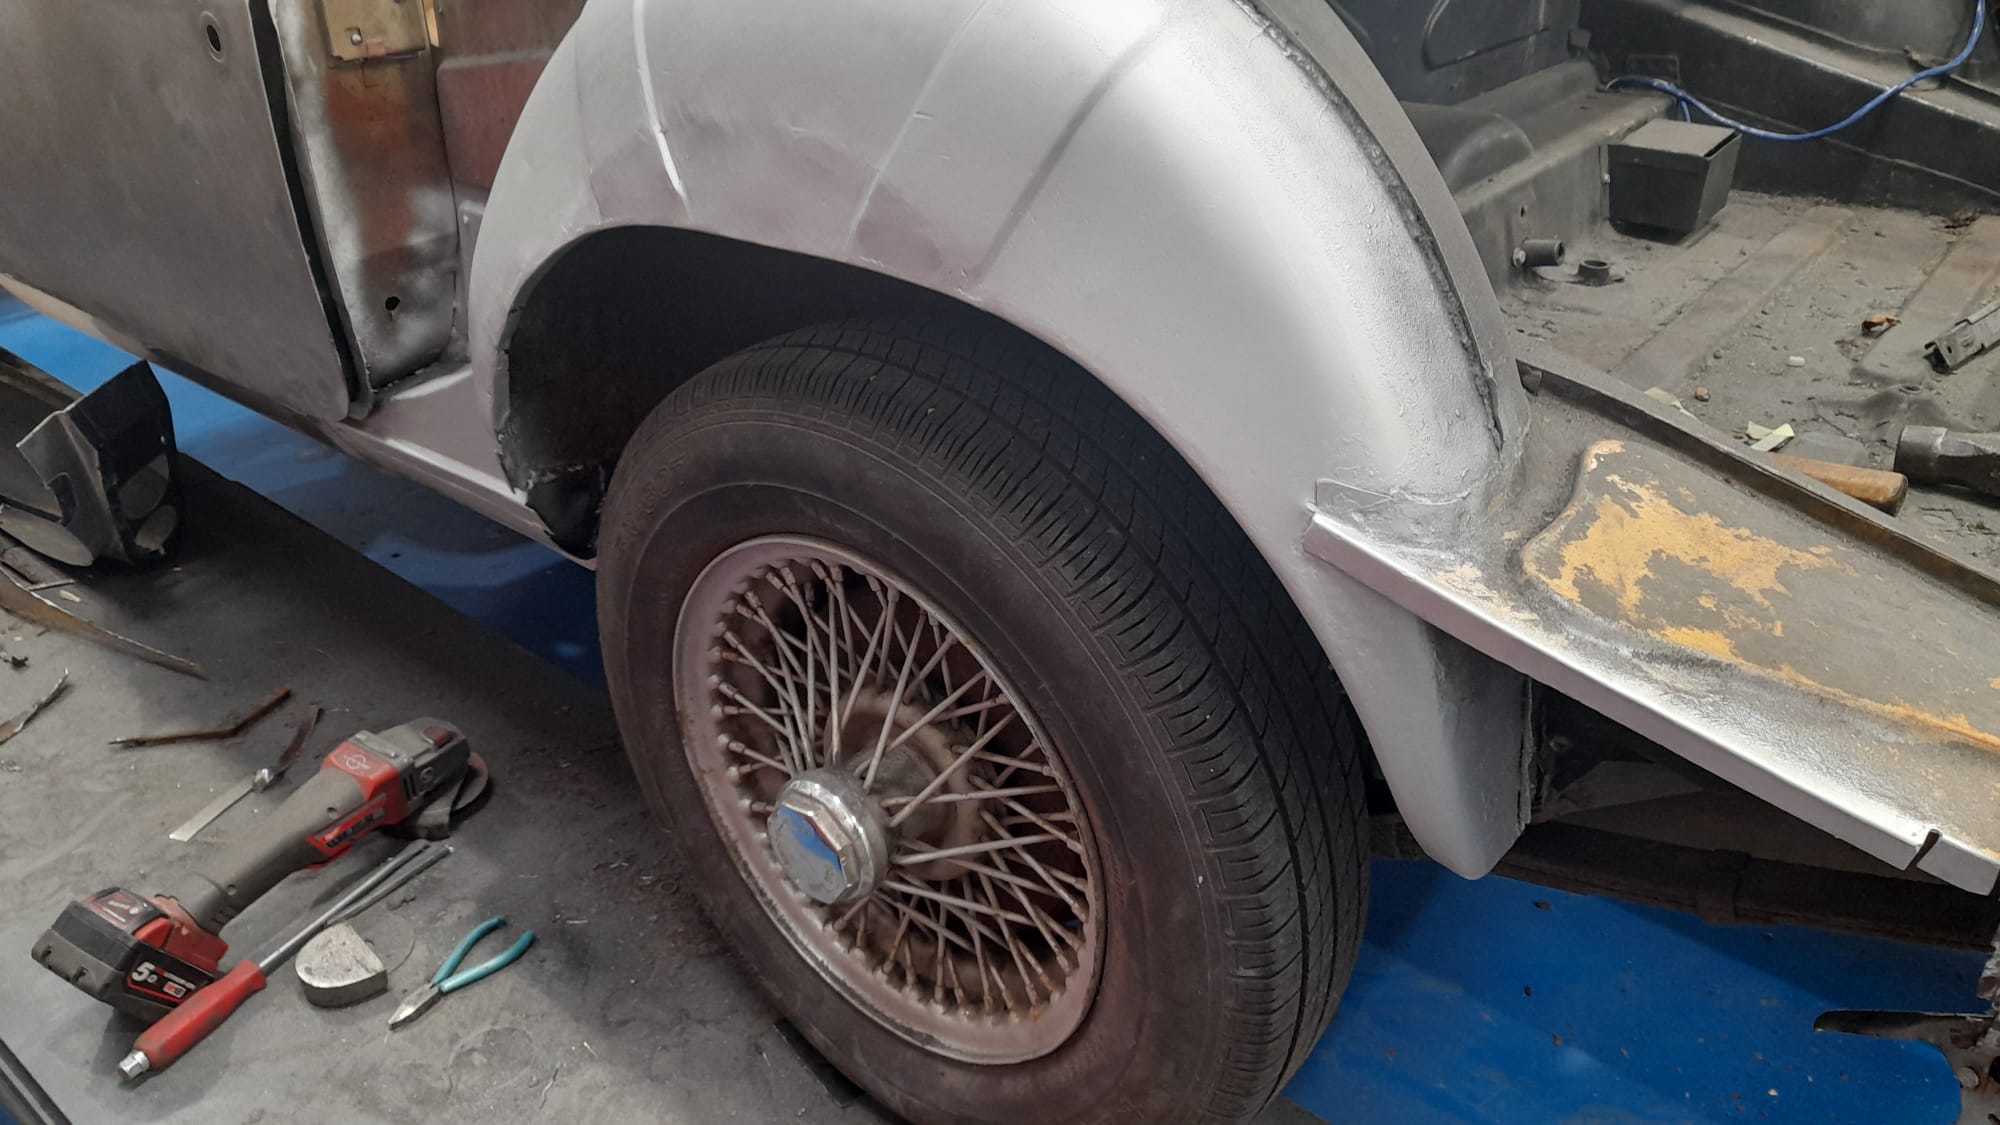
As with many reproduction panels, they take a certain amount of finessing and manipulating to get them fitting perfectly for the car. This is where our Bridge Classic Cars technicians truly shine. Scott, skillfully and sympathetically trimmed and moved the panels for the new rear quarter panels before refitting them onto the car on top of the freshly rust prepared area.
Scott fitted the car with its new panels on by methodically spot-welding them, as it would have been done originally, to avoid any warping which would cause excessive movement in the panel and therefore extra work by our body team.
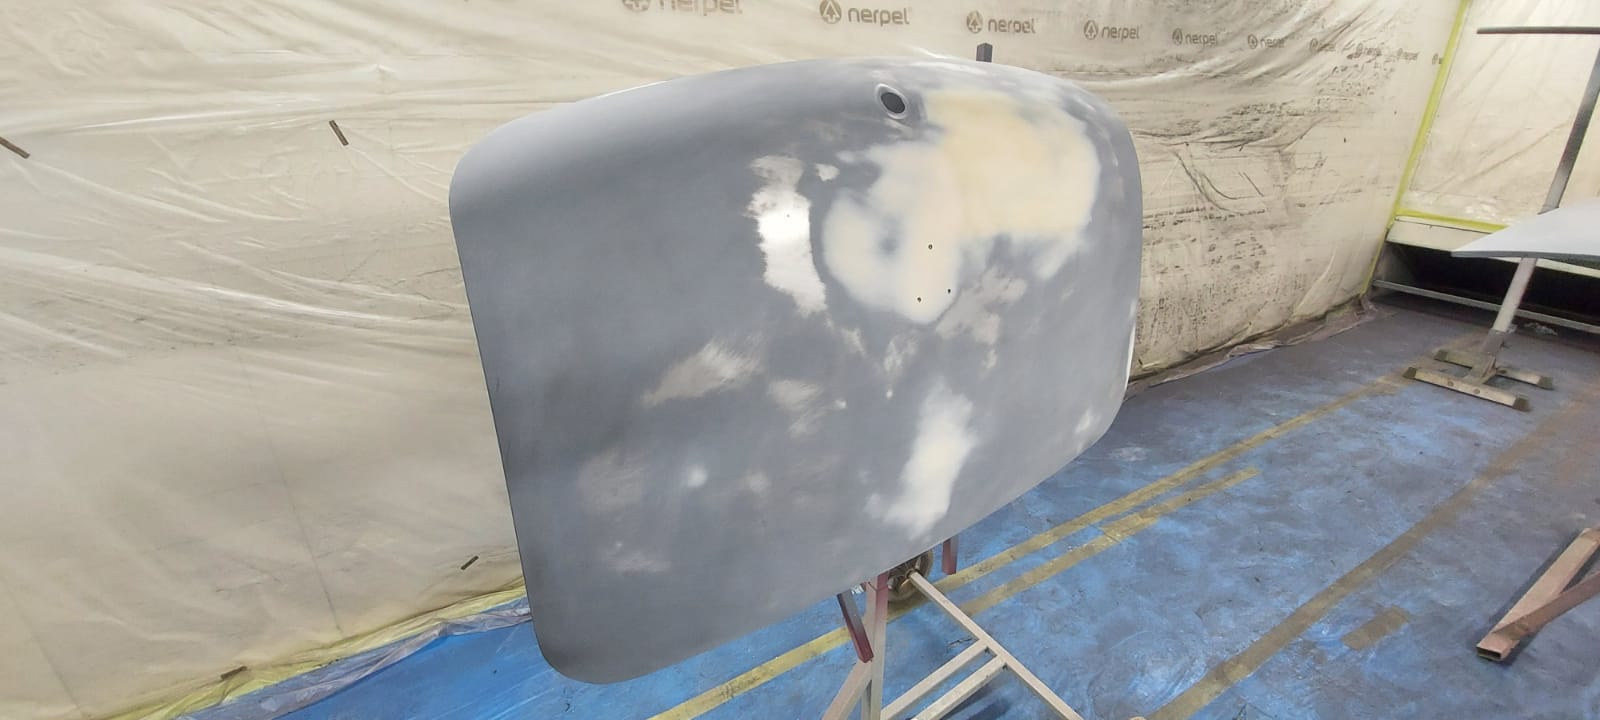


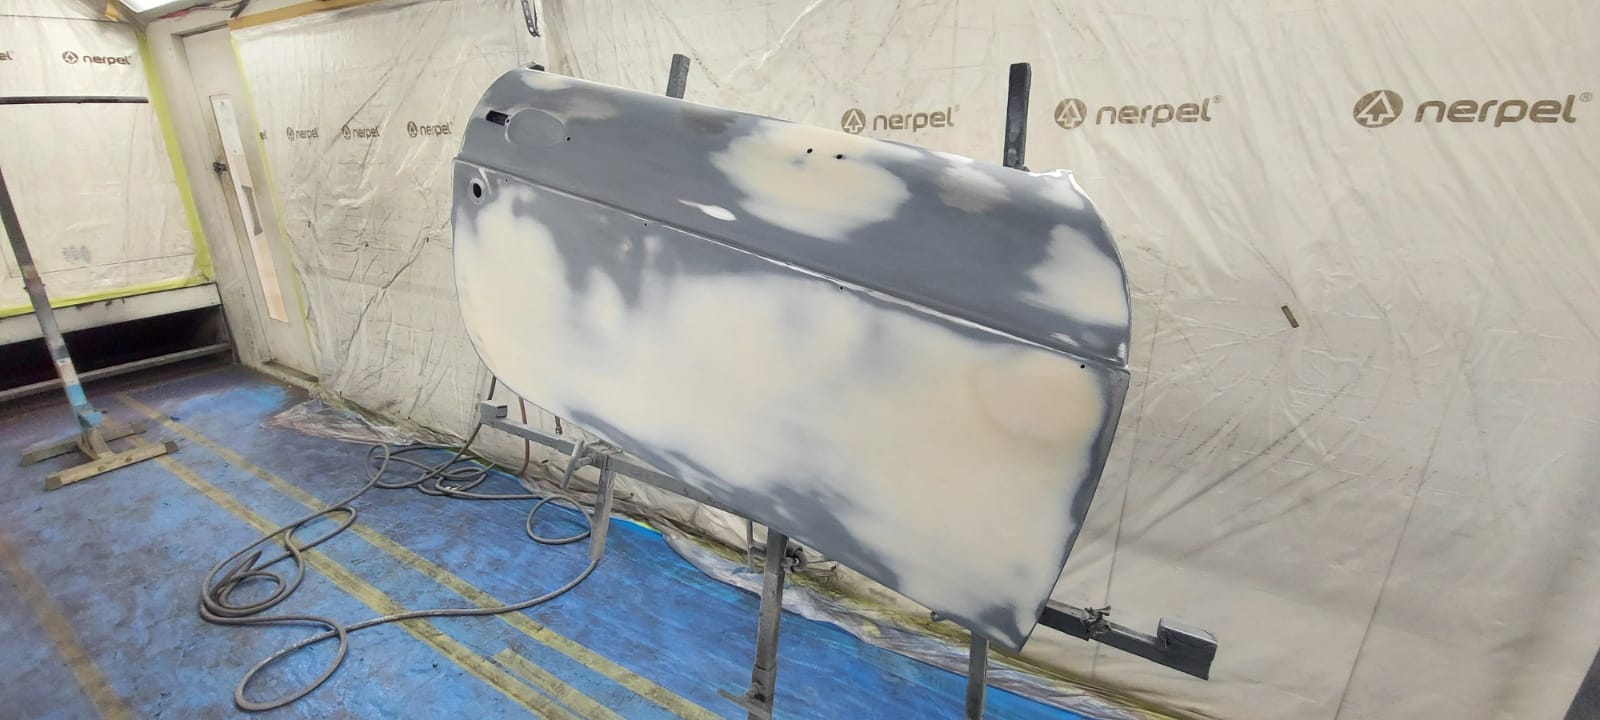
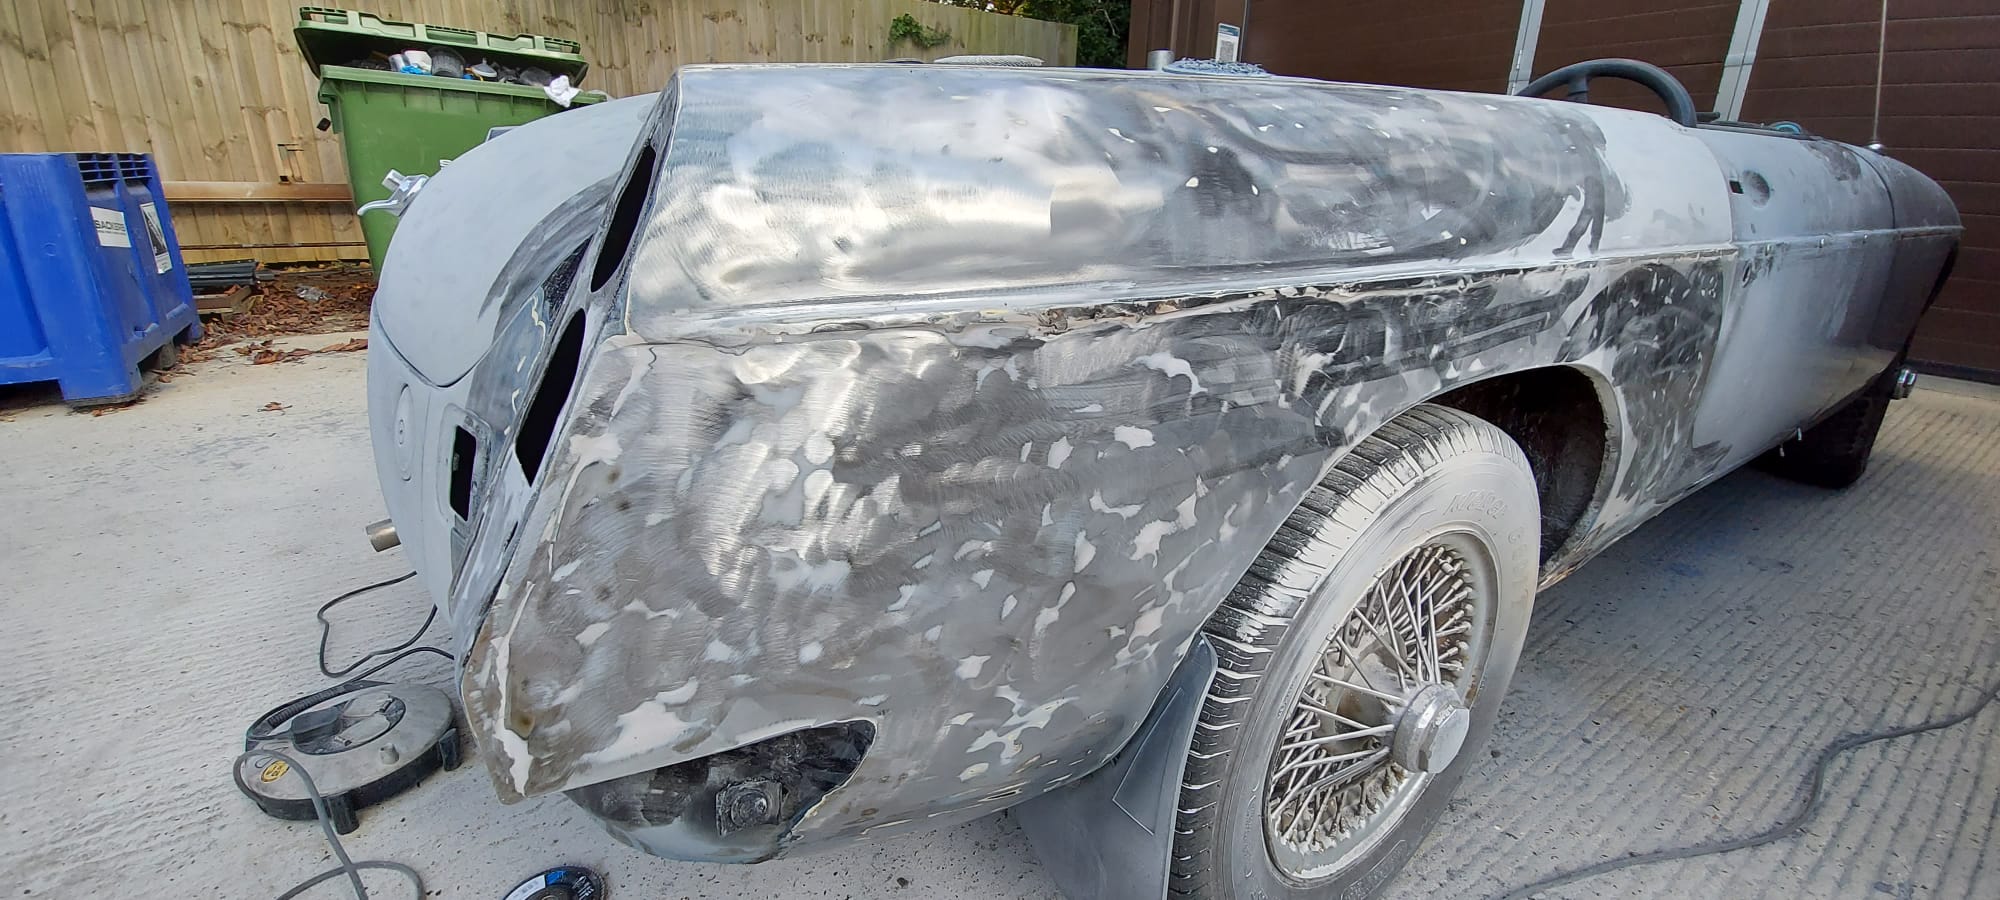
Whilst the shell of the car was in the Bridge Classic Cars workshop, some of the panels were being worked on by the body team. Chris worked the panels to make sure everything was in the best shape as possible. This involved multiple rounds of priming, sanding and minimal filler shaping. This was repeated multiple times in order to get the best possible result.
All of this was being done to create the best, most uniform shape to bring together the new and old panels together.

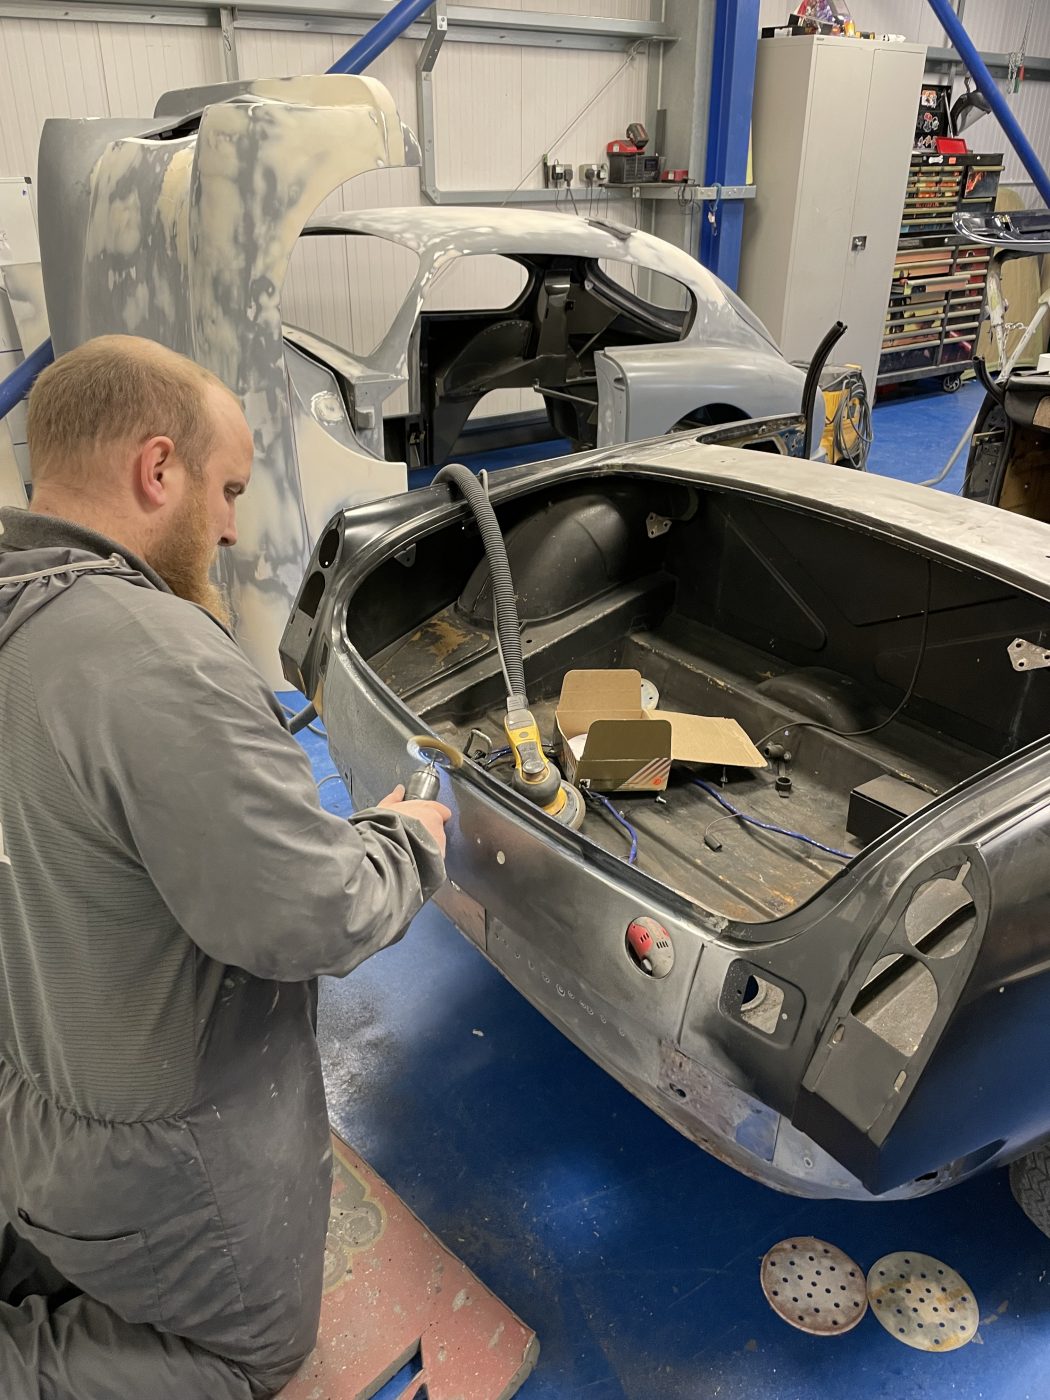
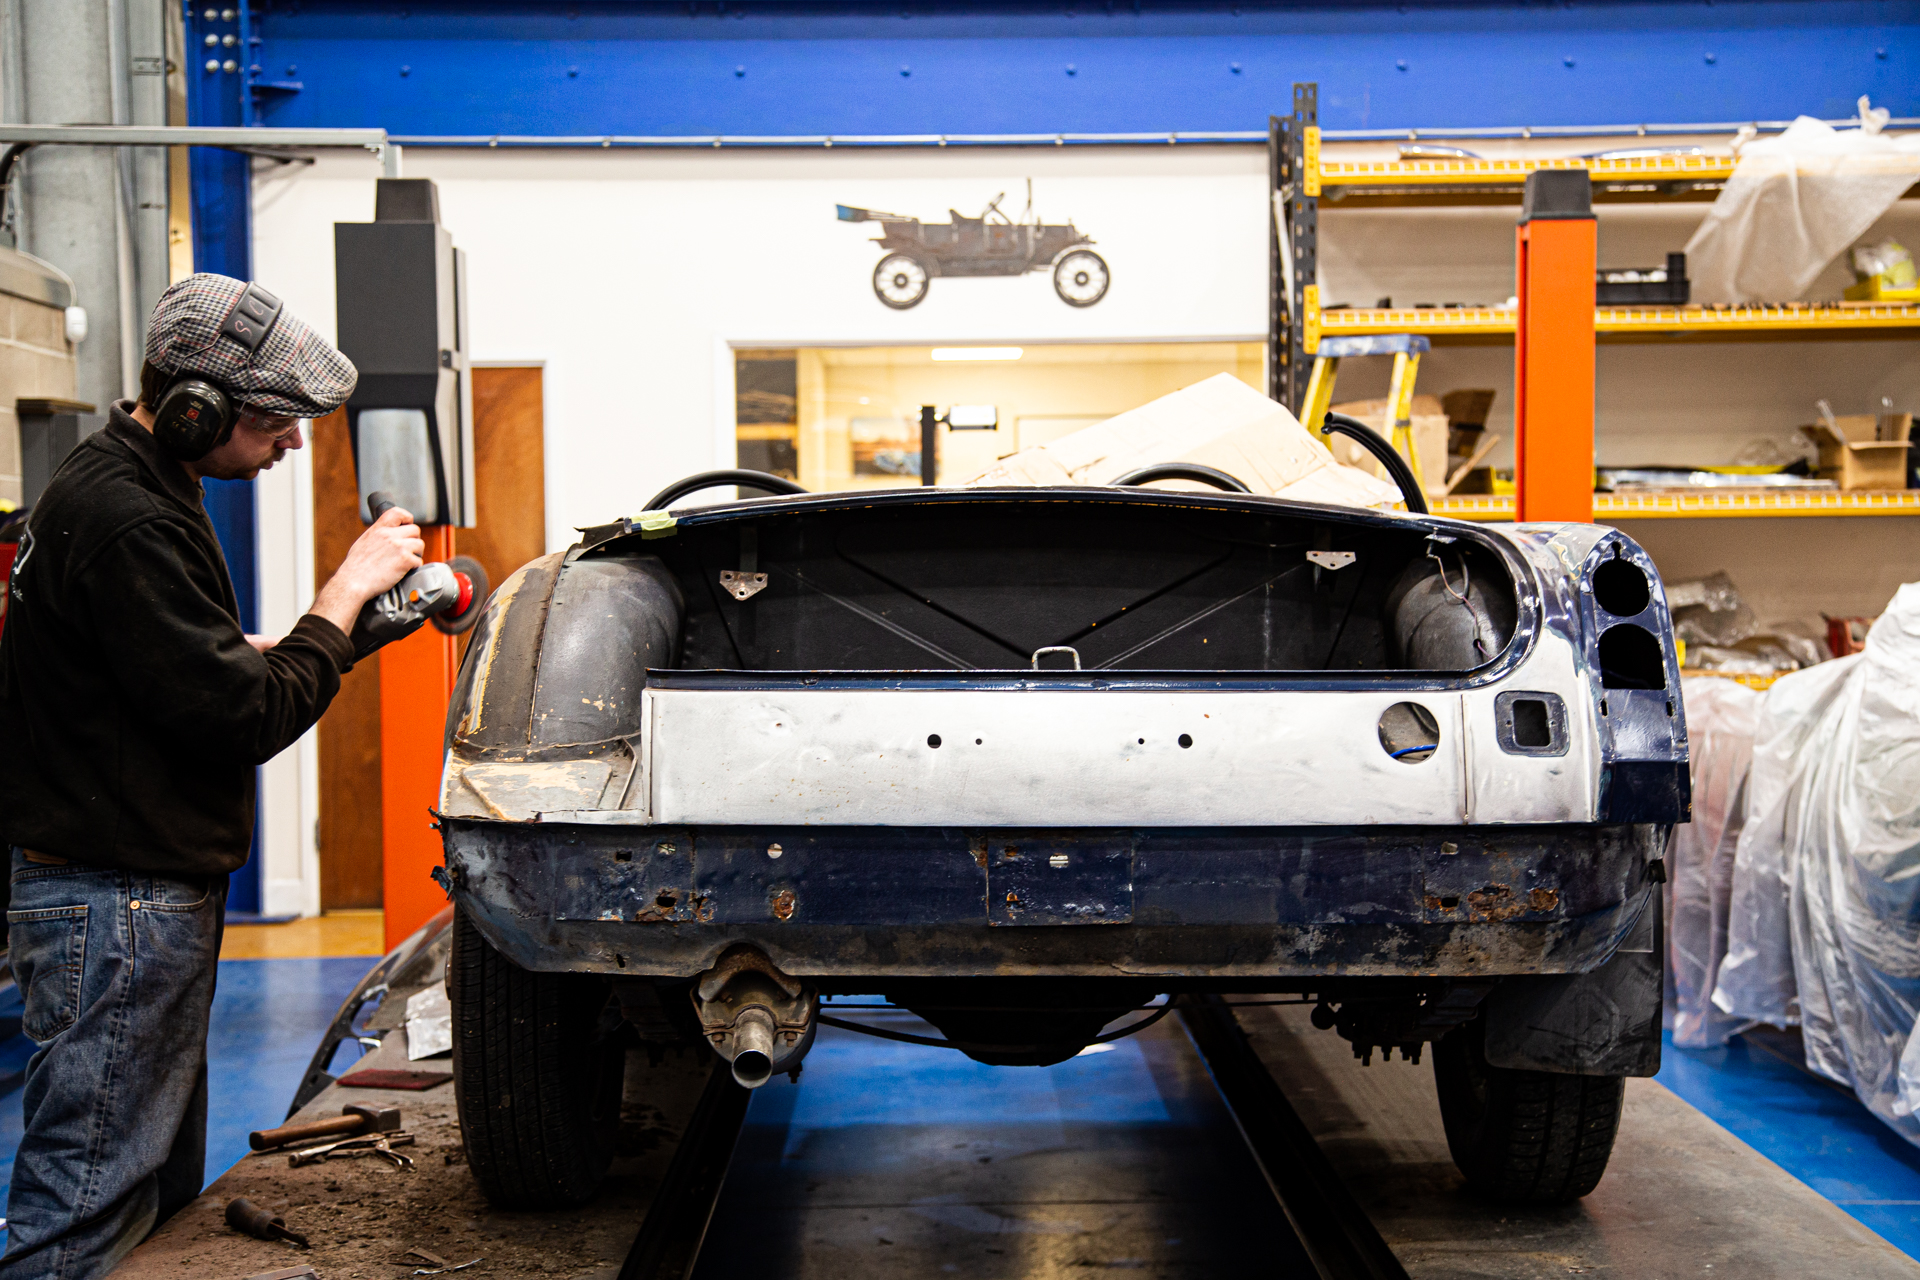
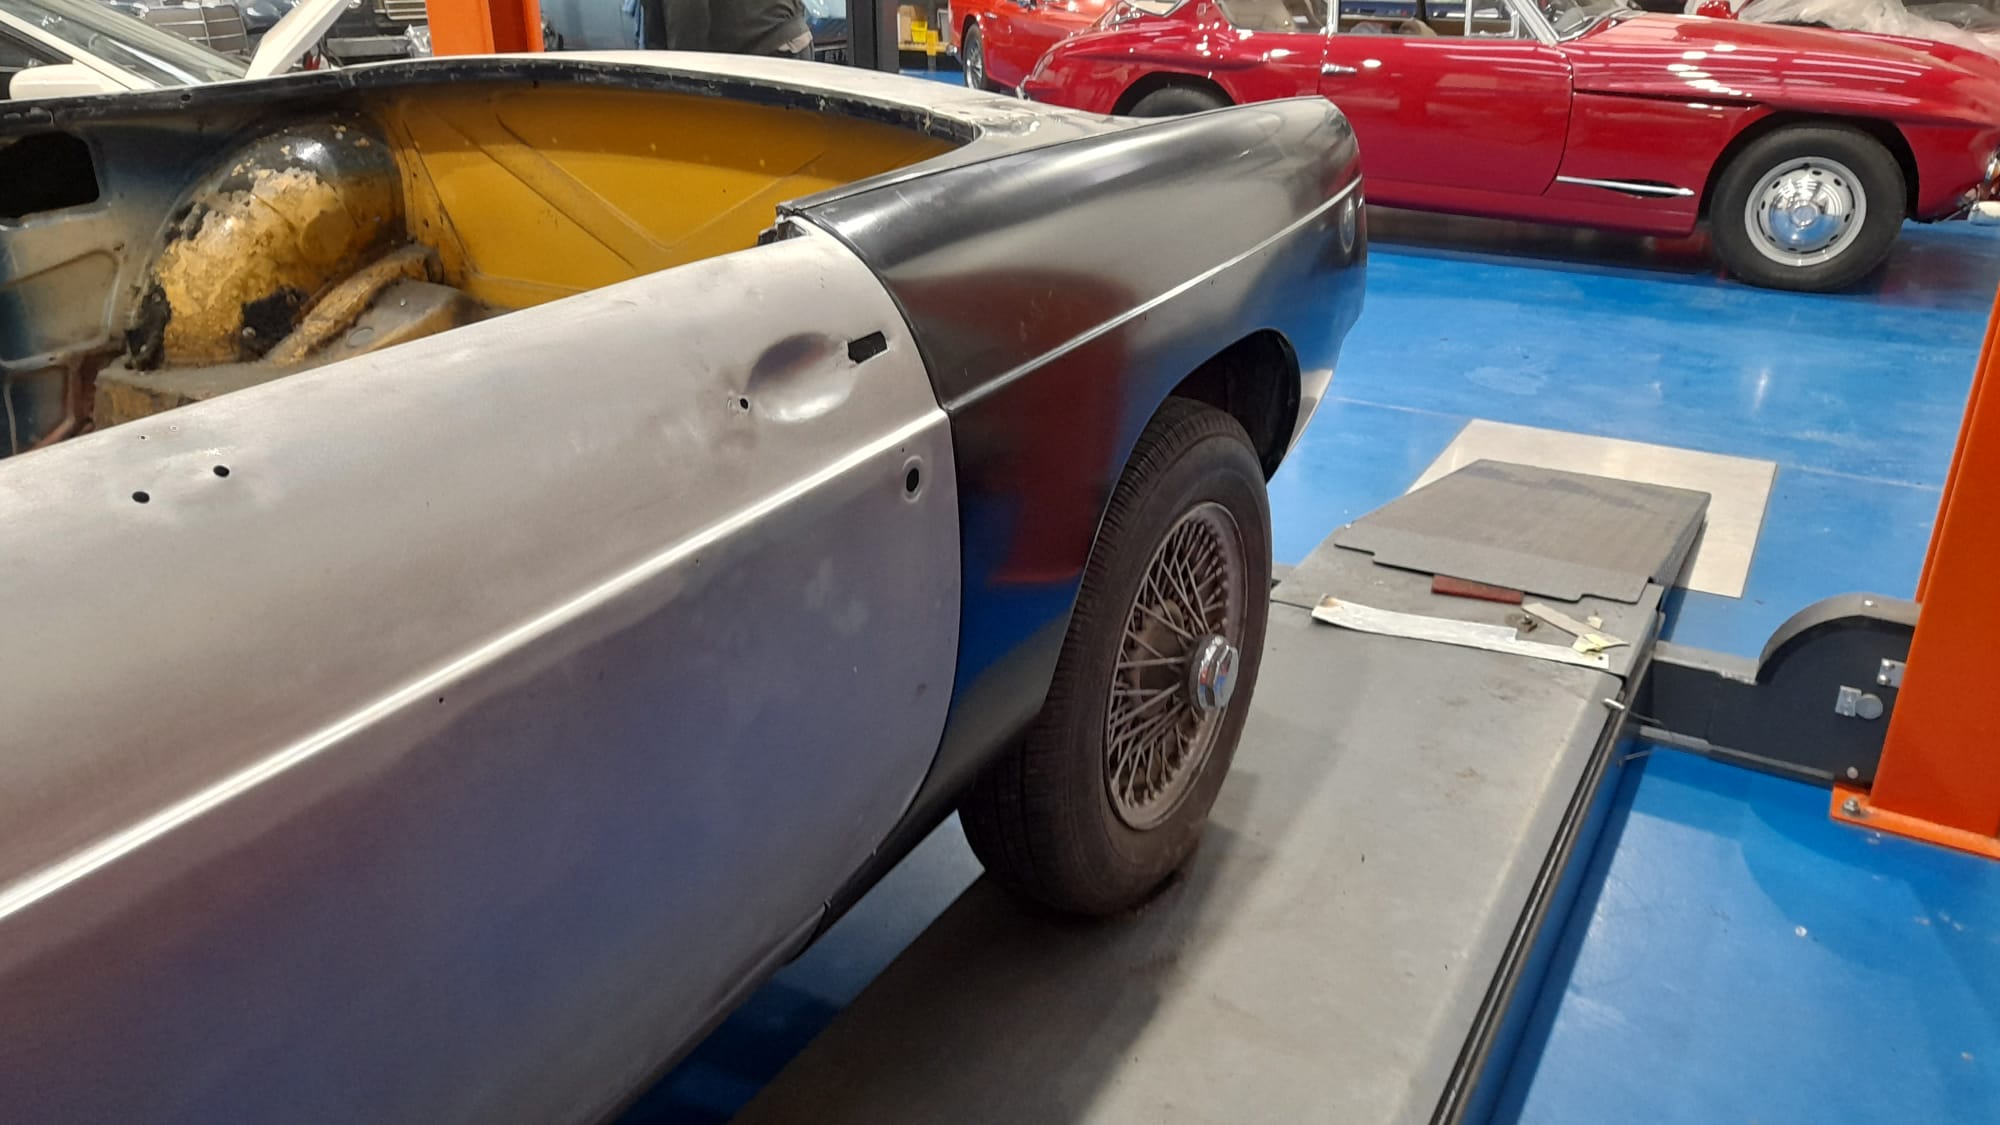
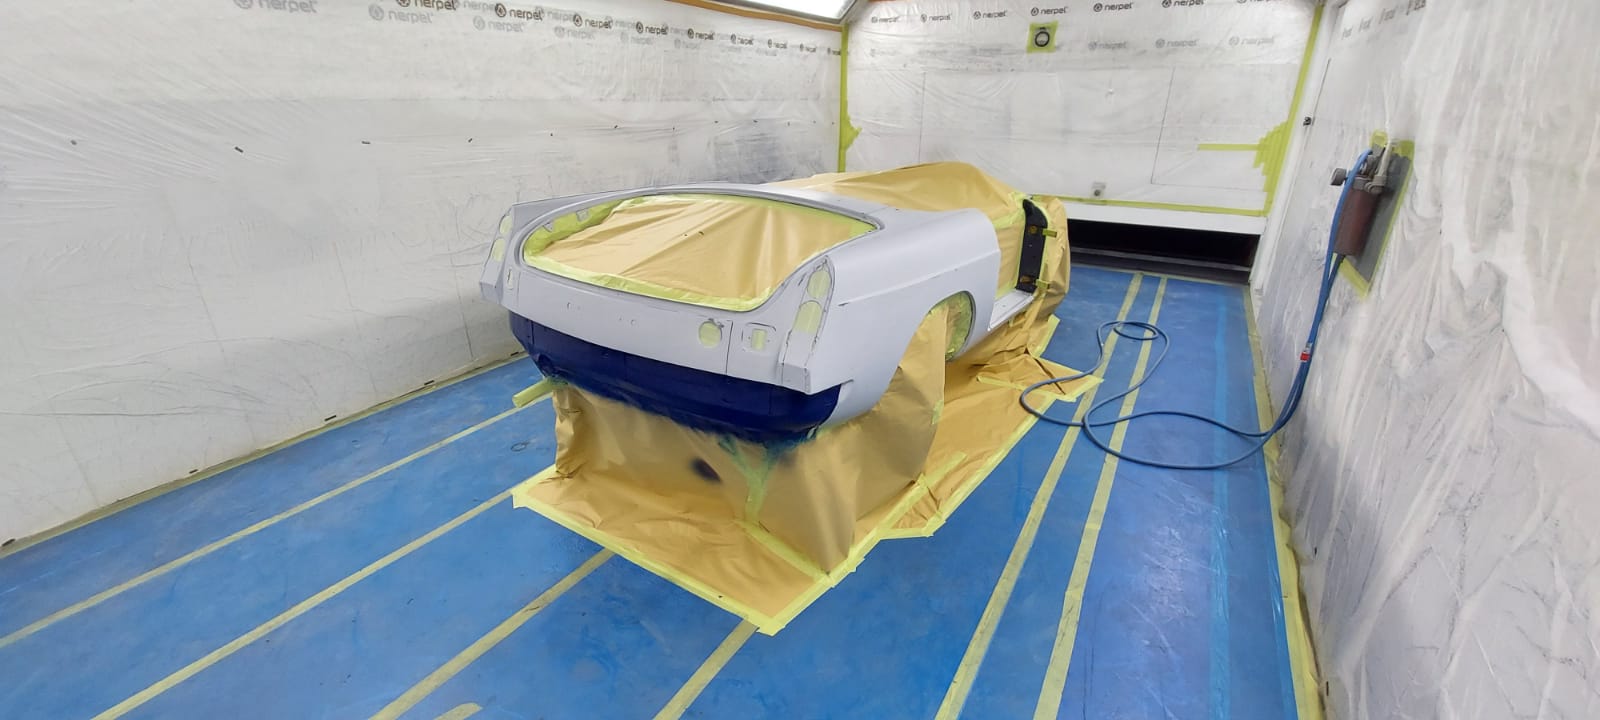
Once the body shell had its new rear quarter panels fitted by our in-house restoration team in the Bridge Classic Cars workshop, it was given back to our paint team.
Chris worked on preparing the back end of the 1970s convertible. This involved preparing the metal to be ready for accepting the epoxy primer. The rear end of the car involved hours of hand sanding inside of every recess and compound shape by the in-house team here at Bridge Classic Cars before heading into our spray booth.
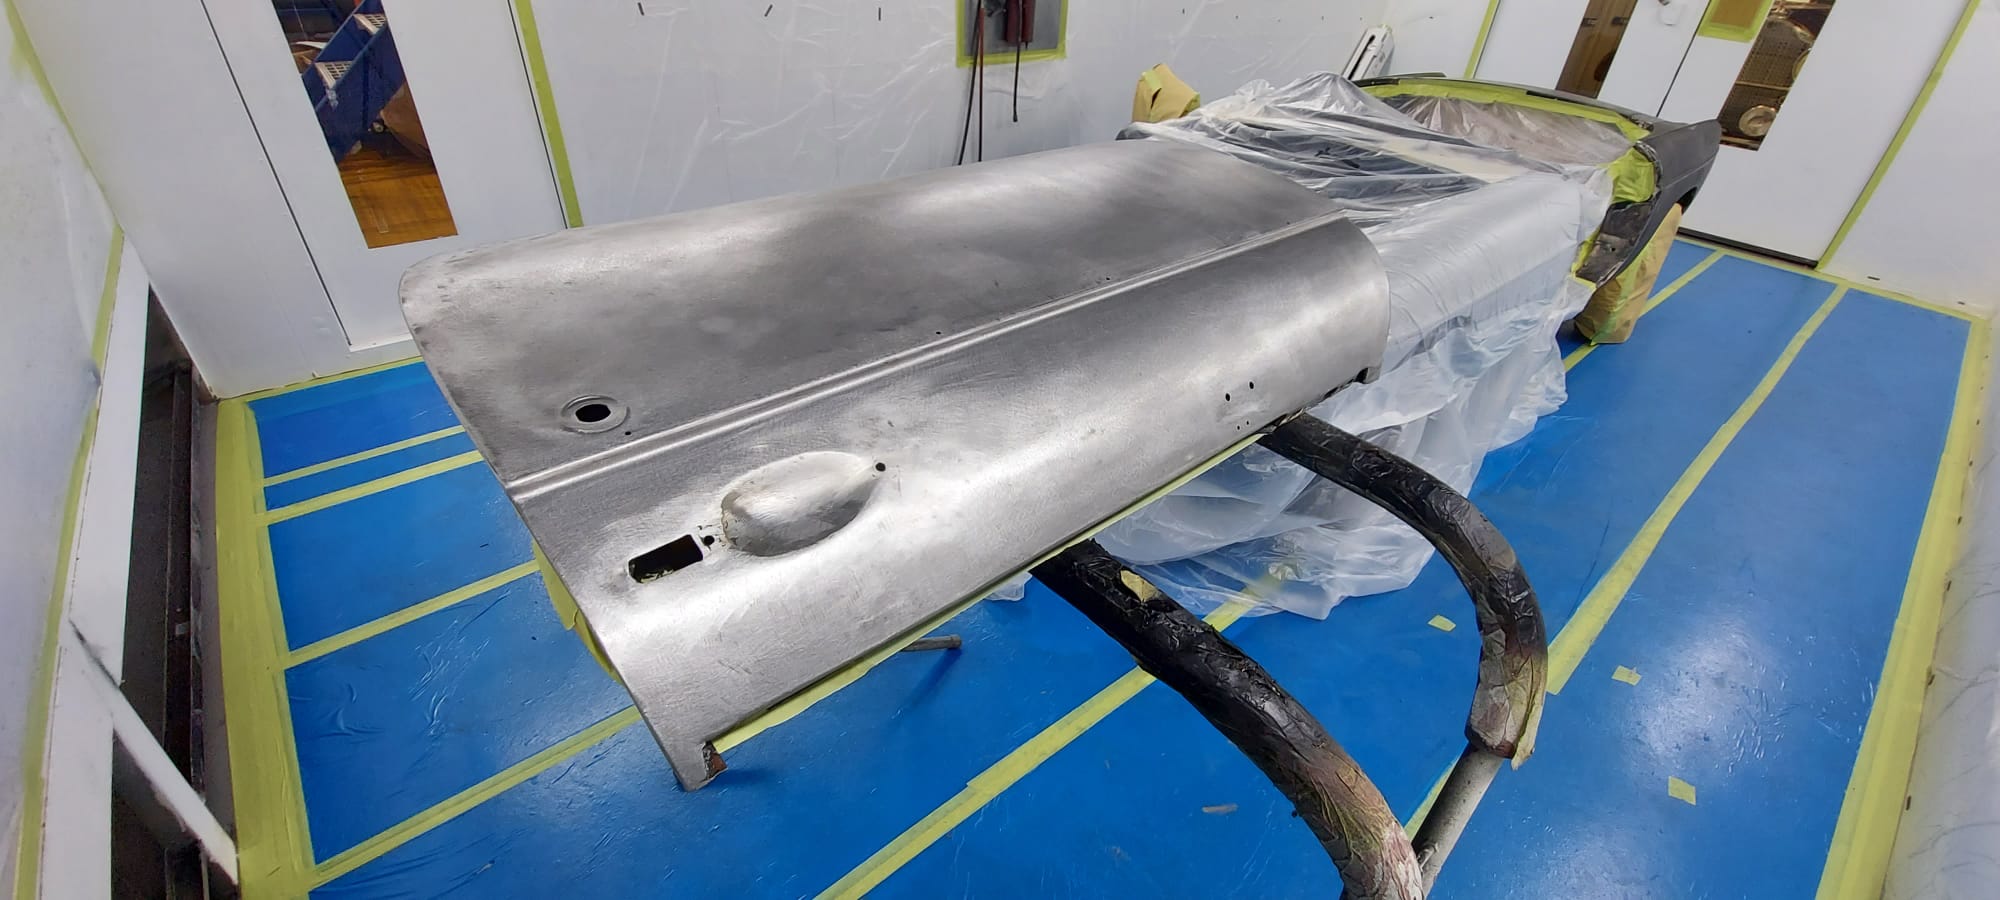
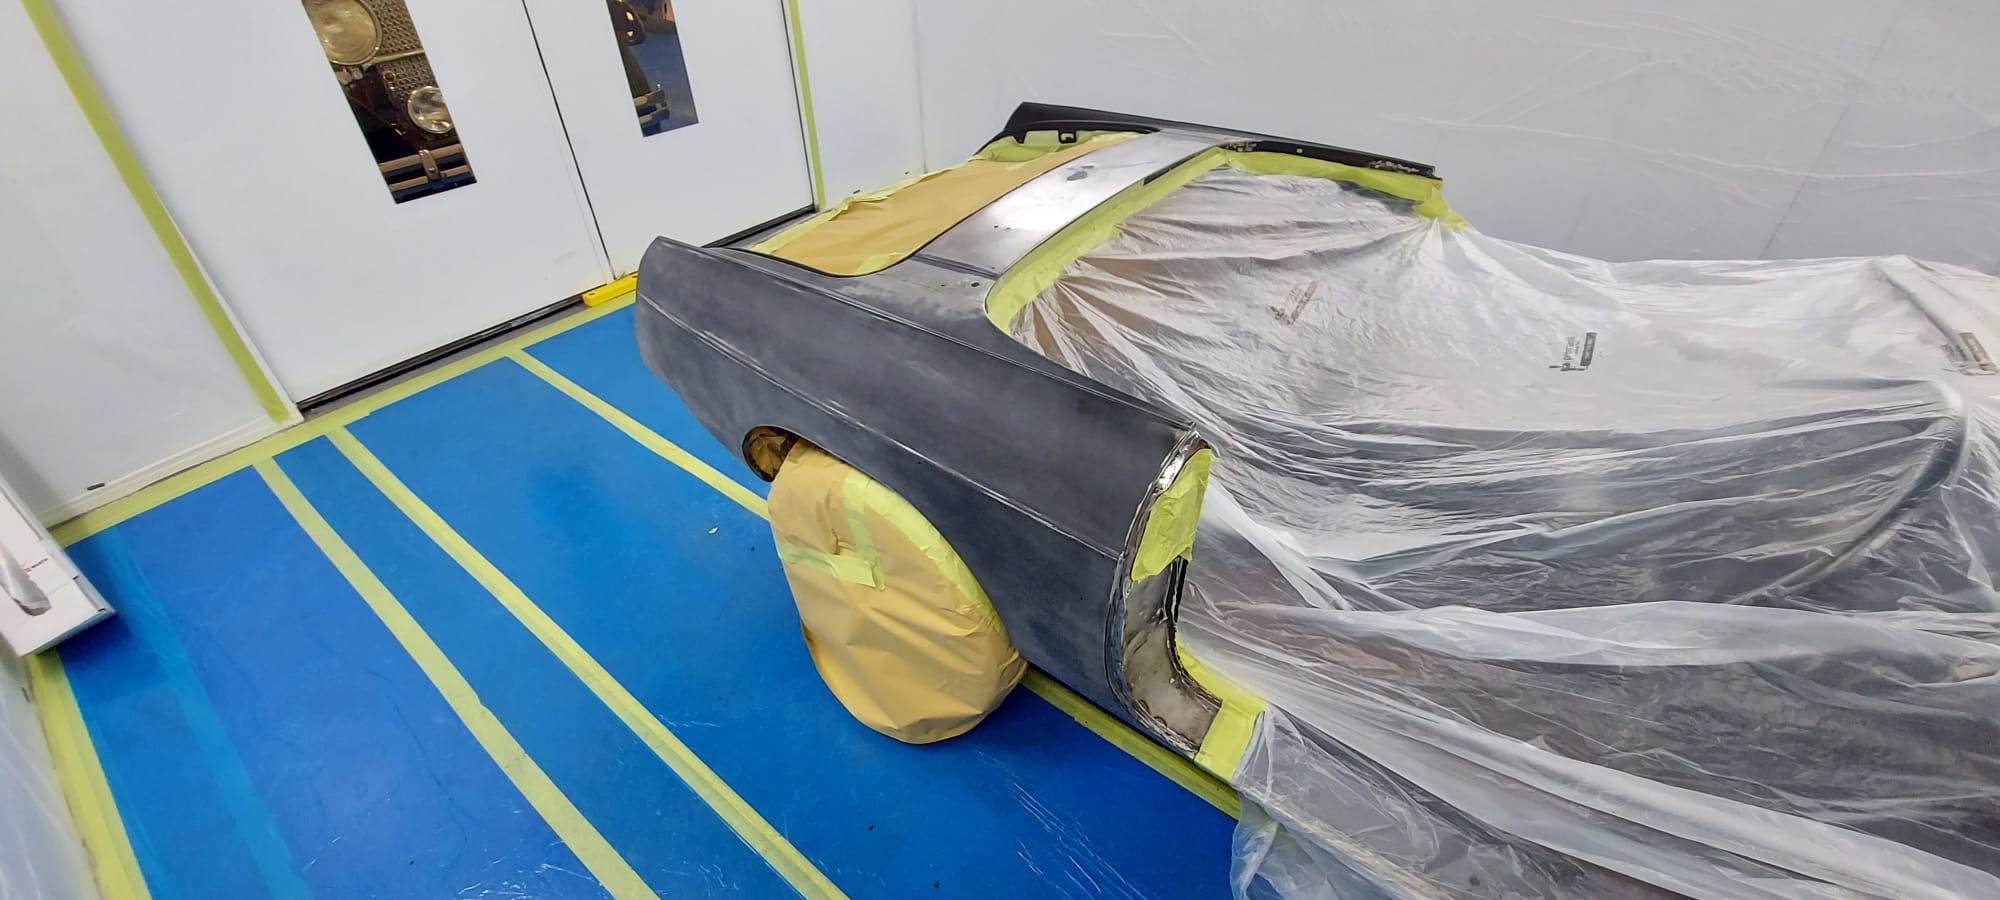
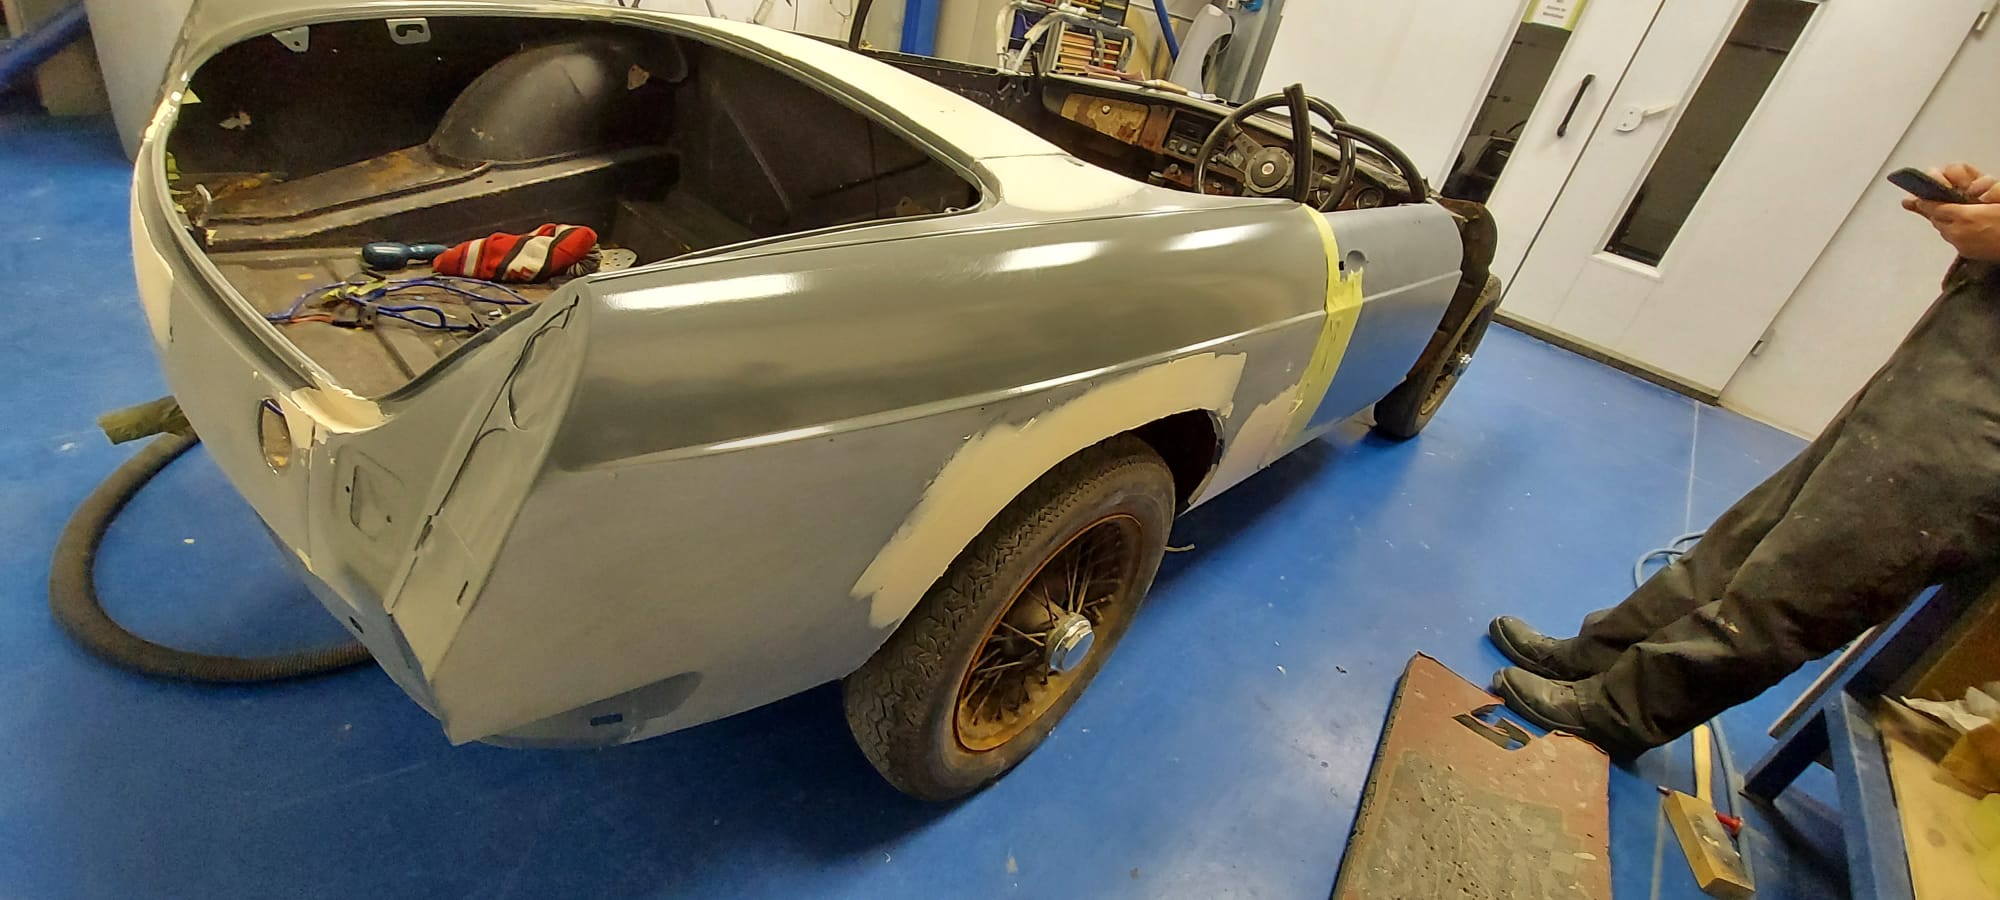
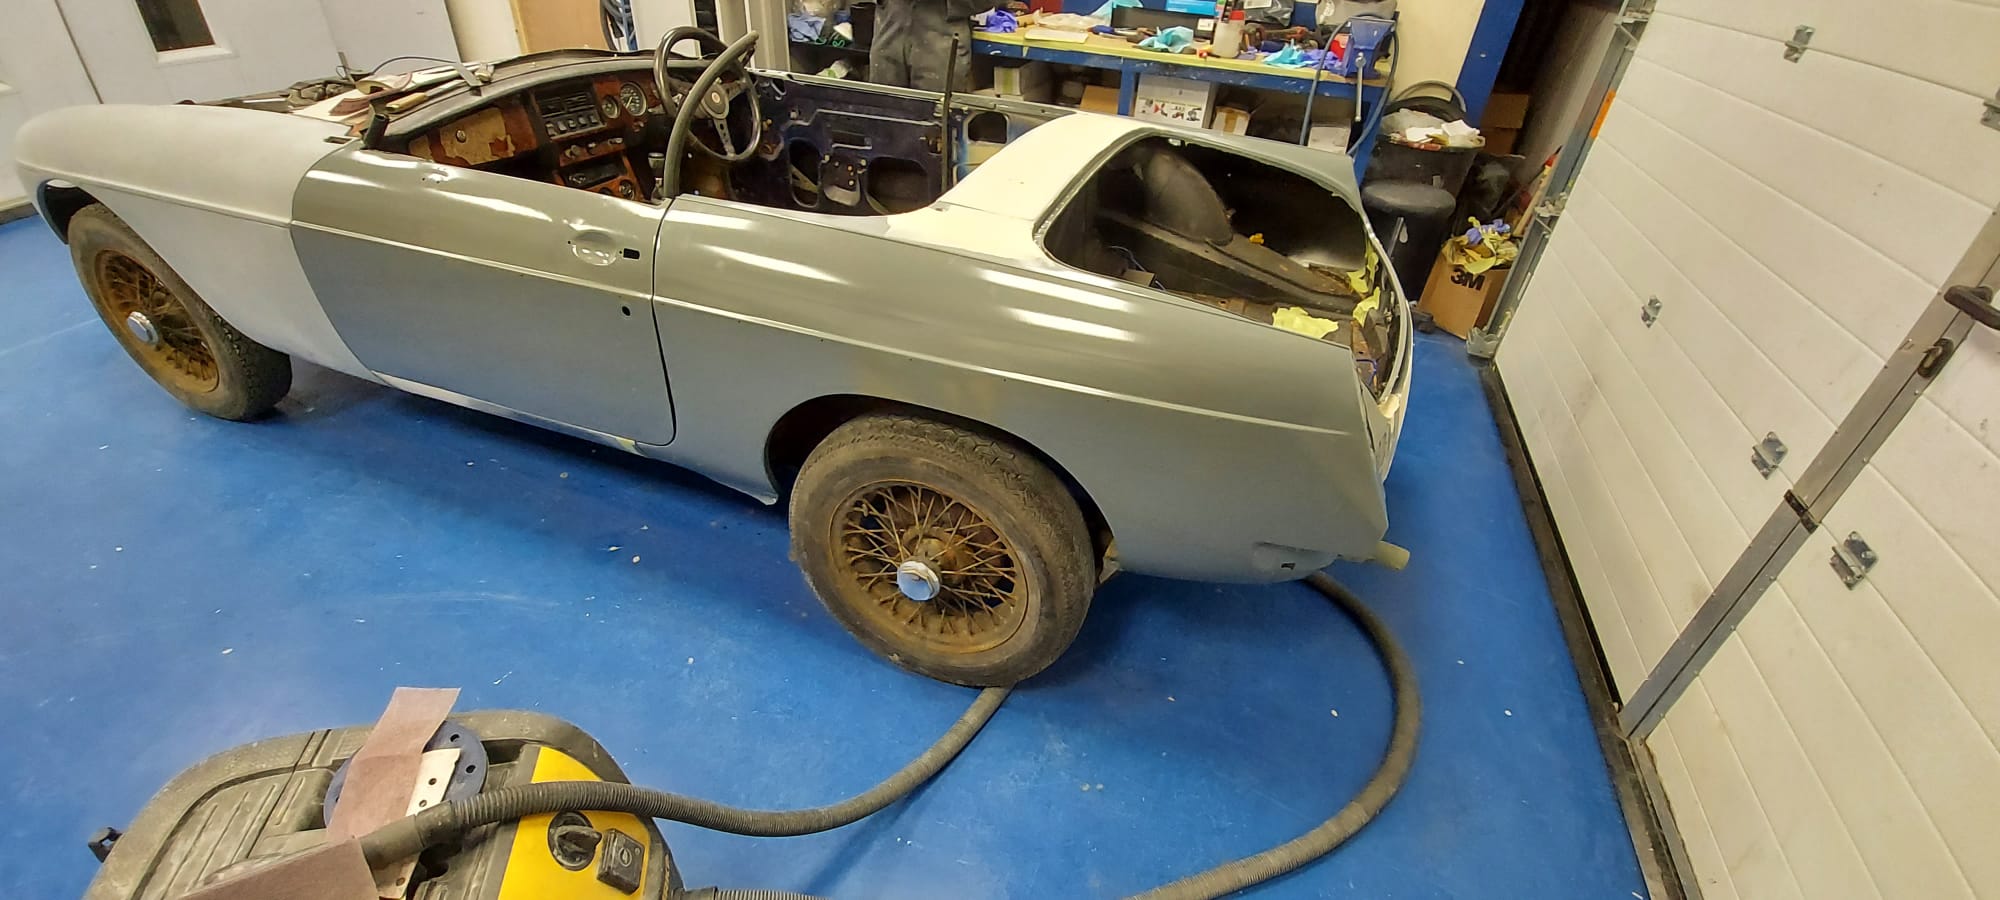
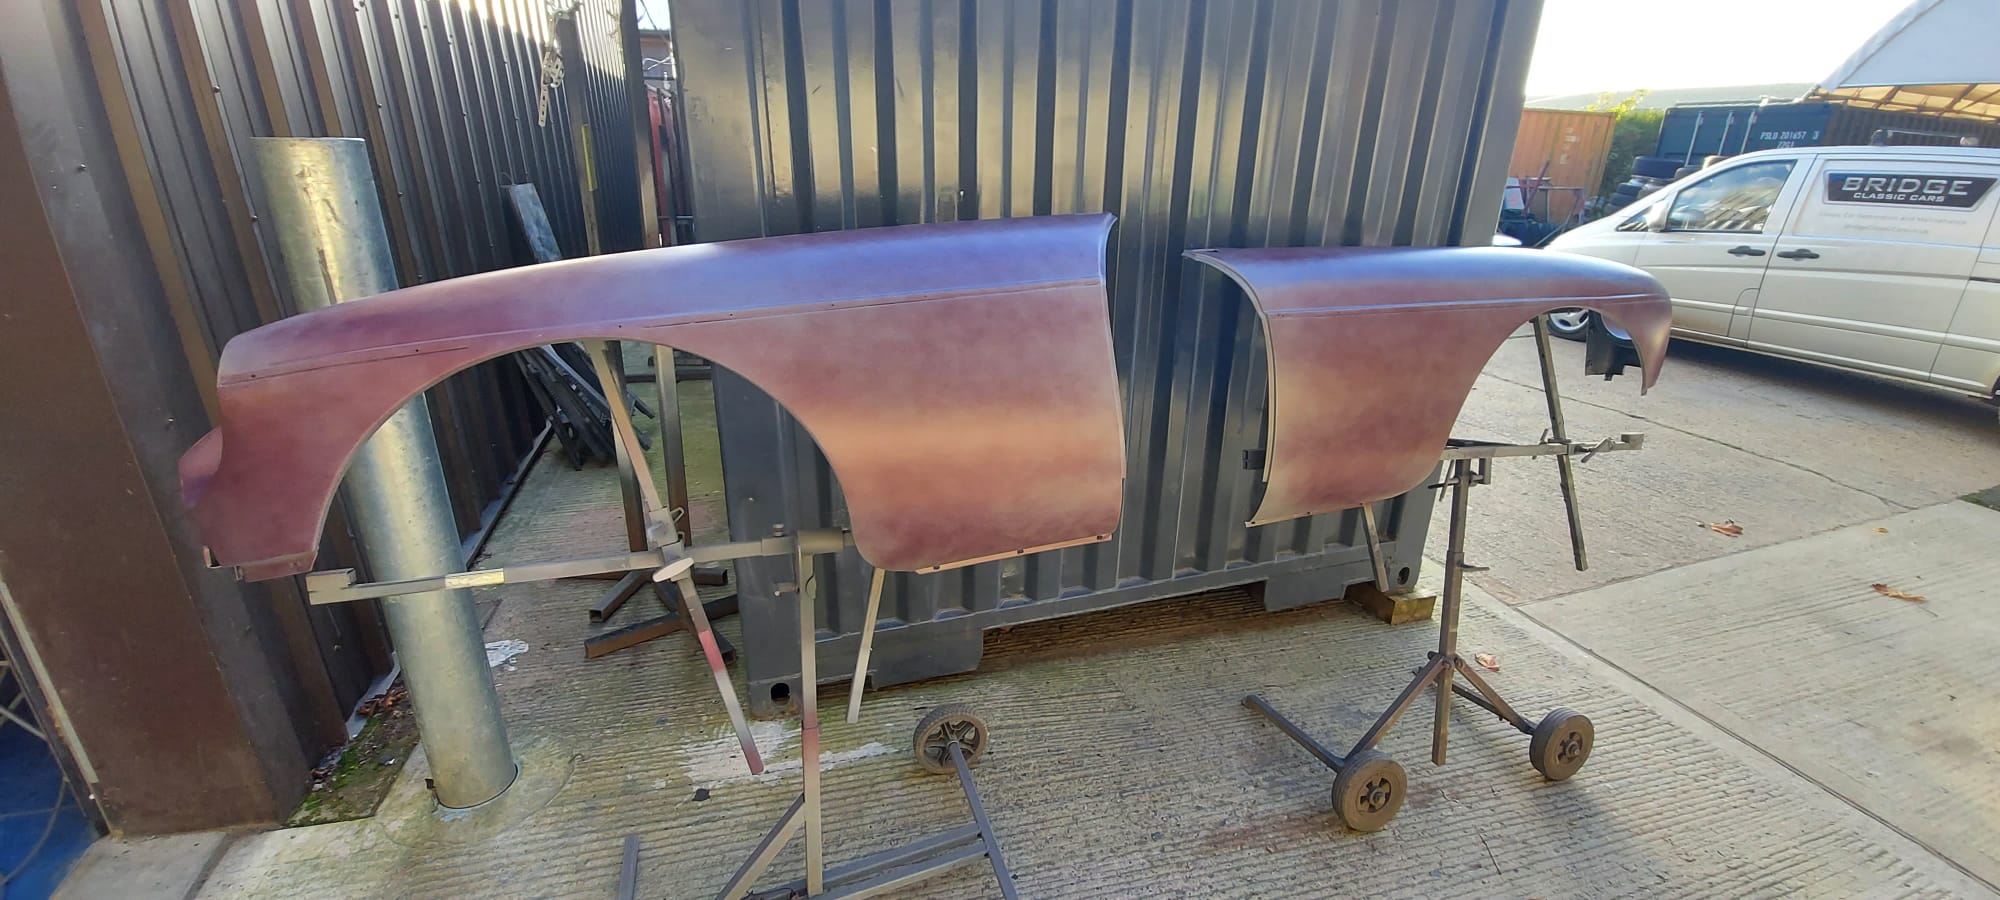
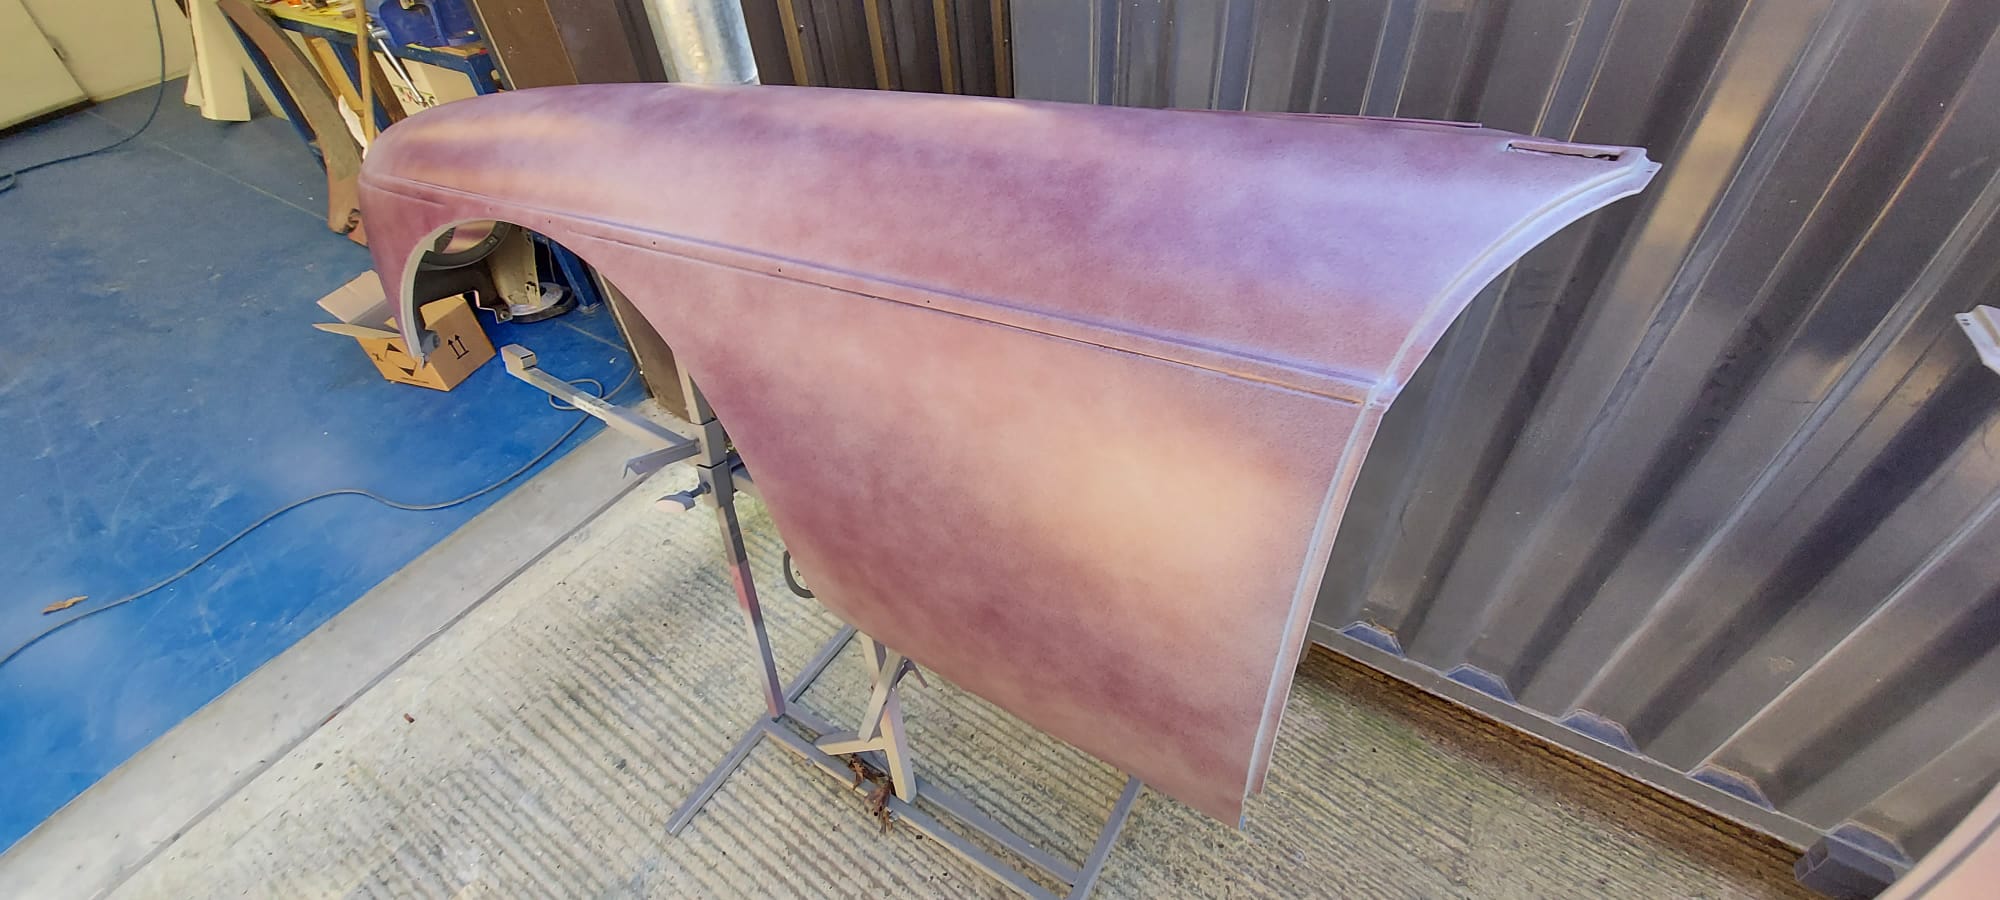
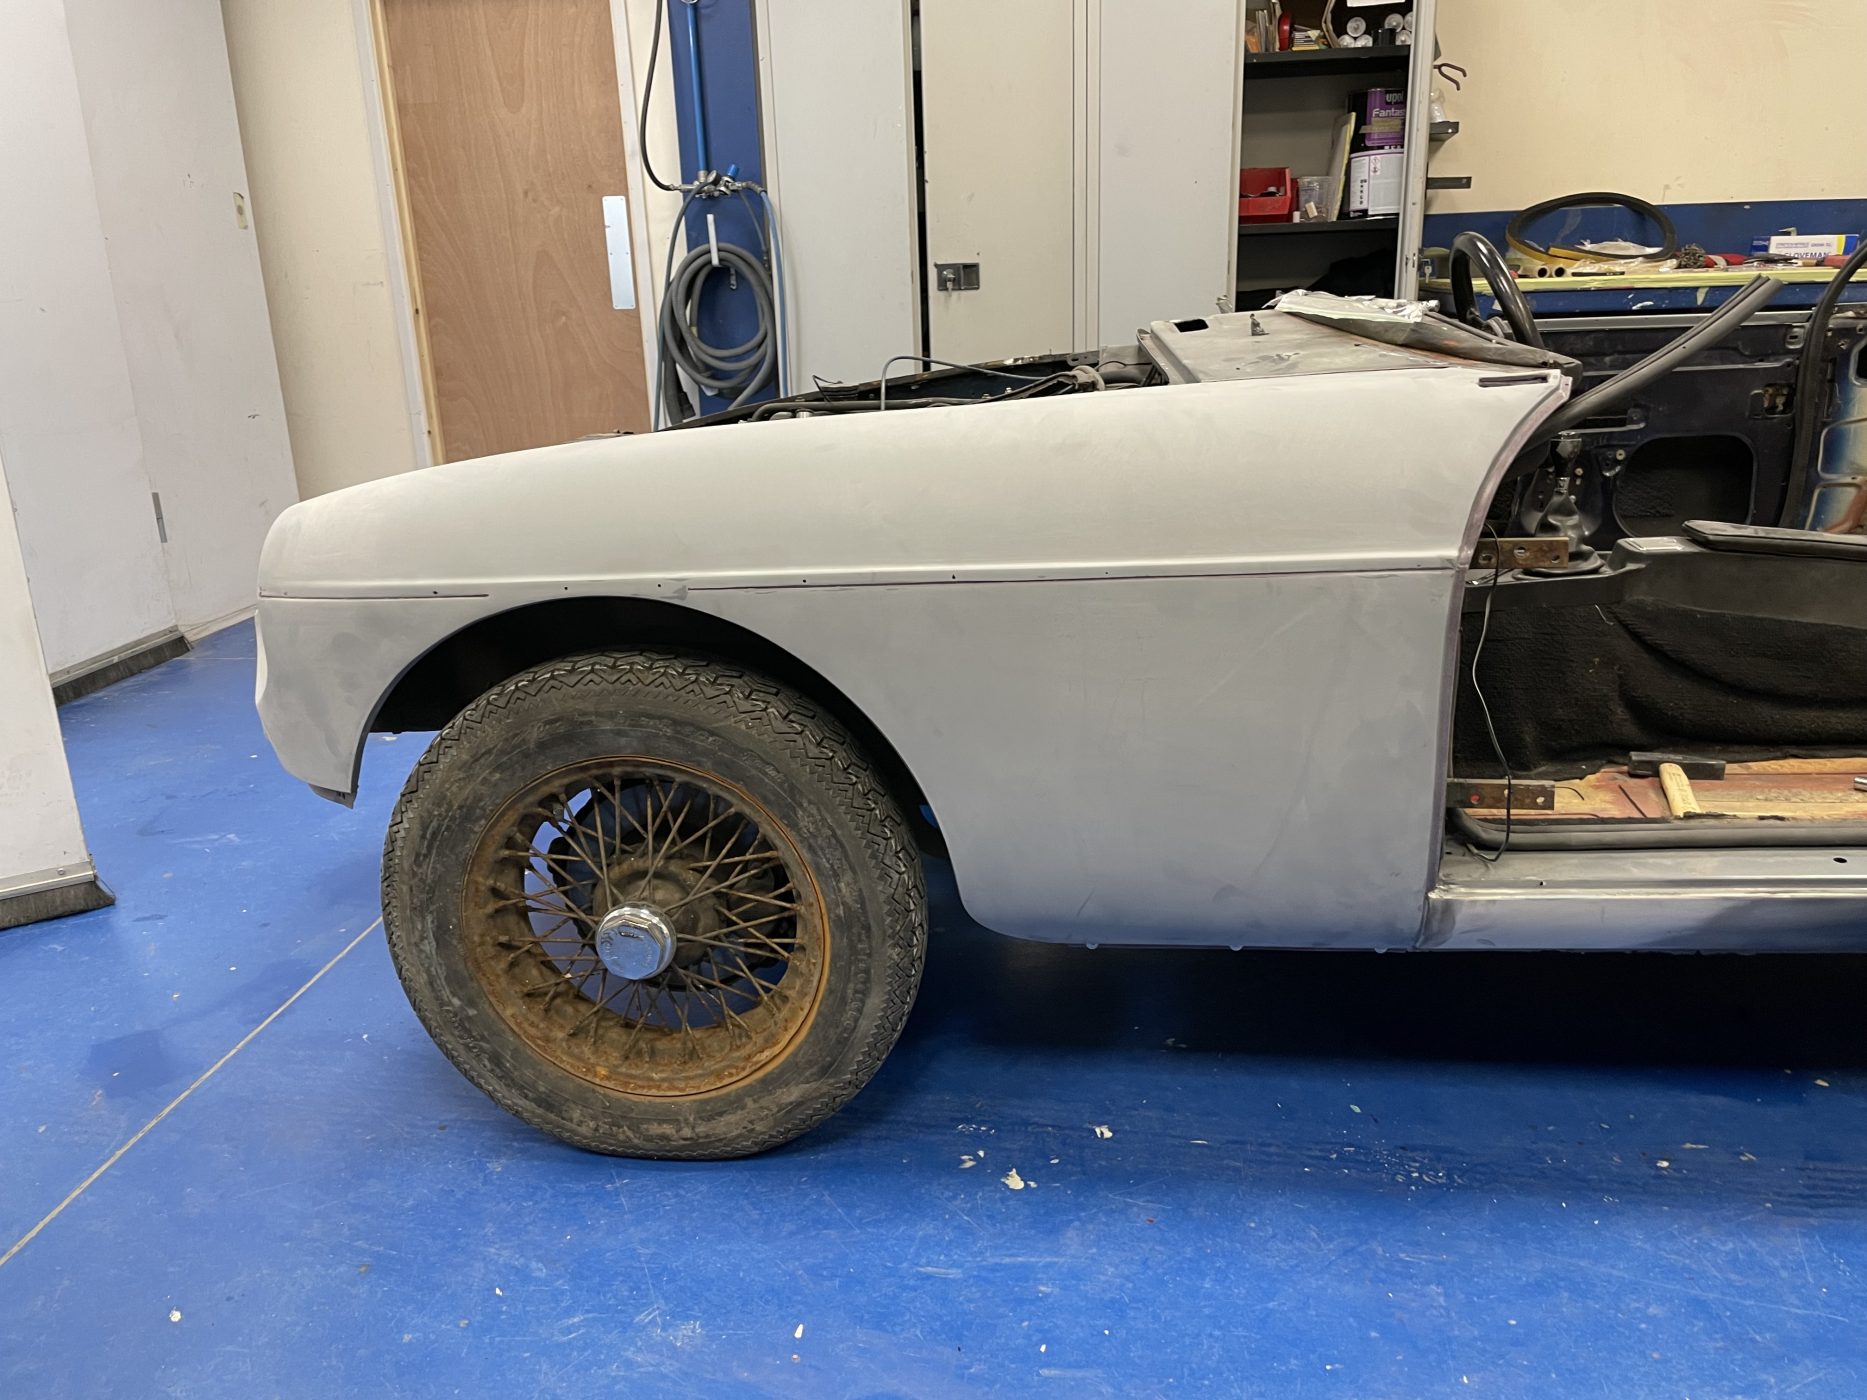
With the rear end of the car now in its first layers of epoxy primer by our paint body team, Chris could then begin getting all the panels on the car uniform and ready for its first colour coats to go back onto the car.

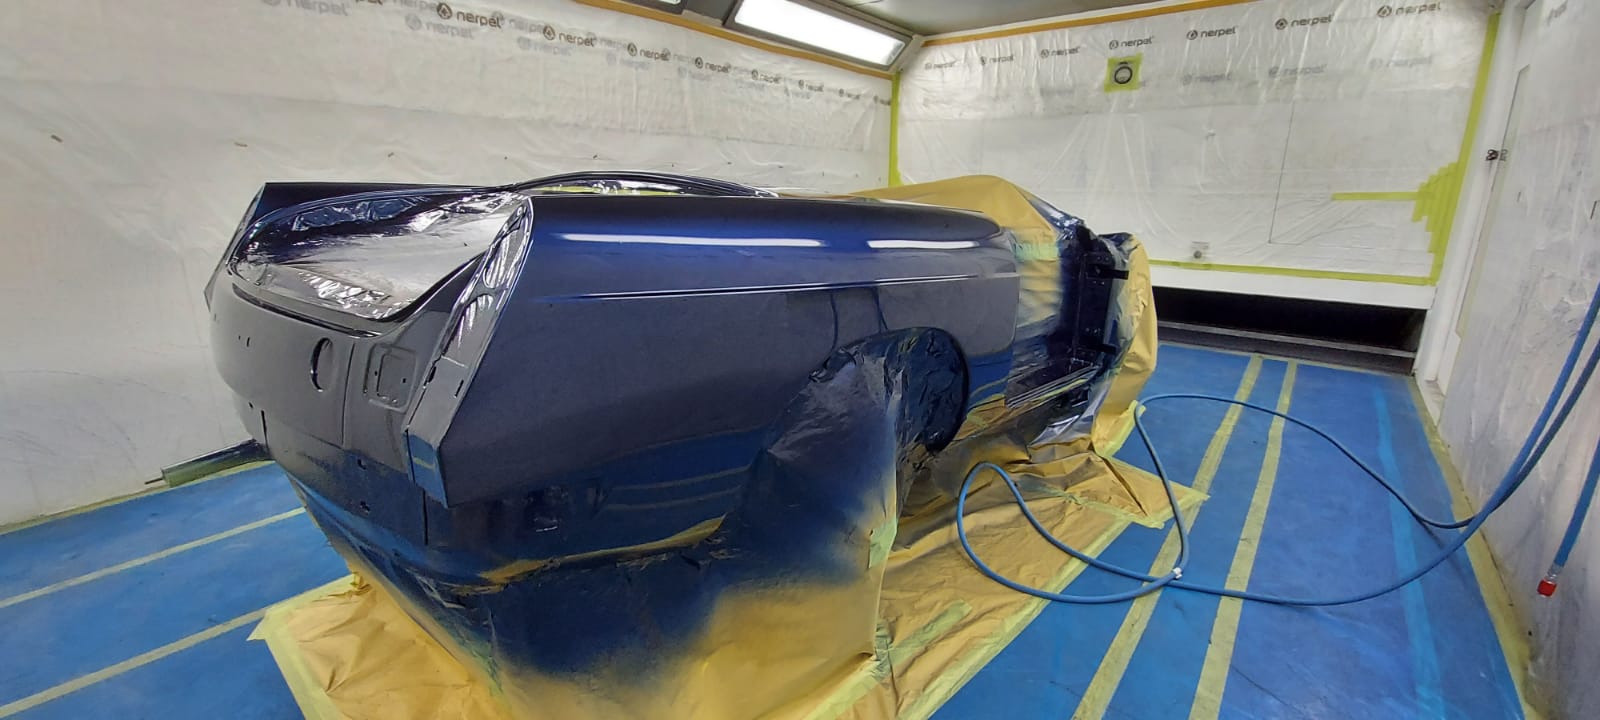
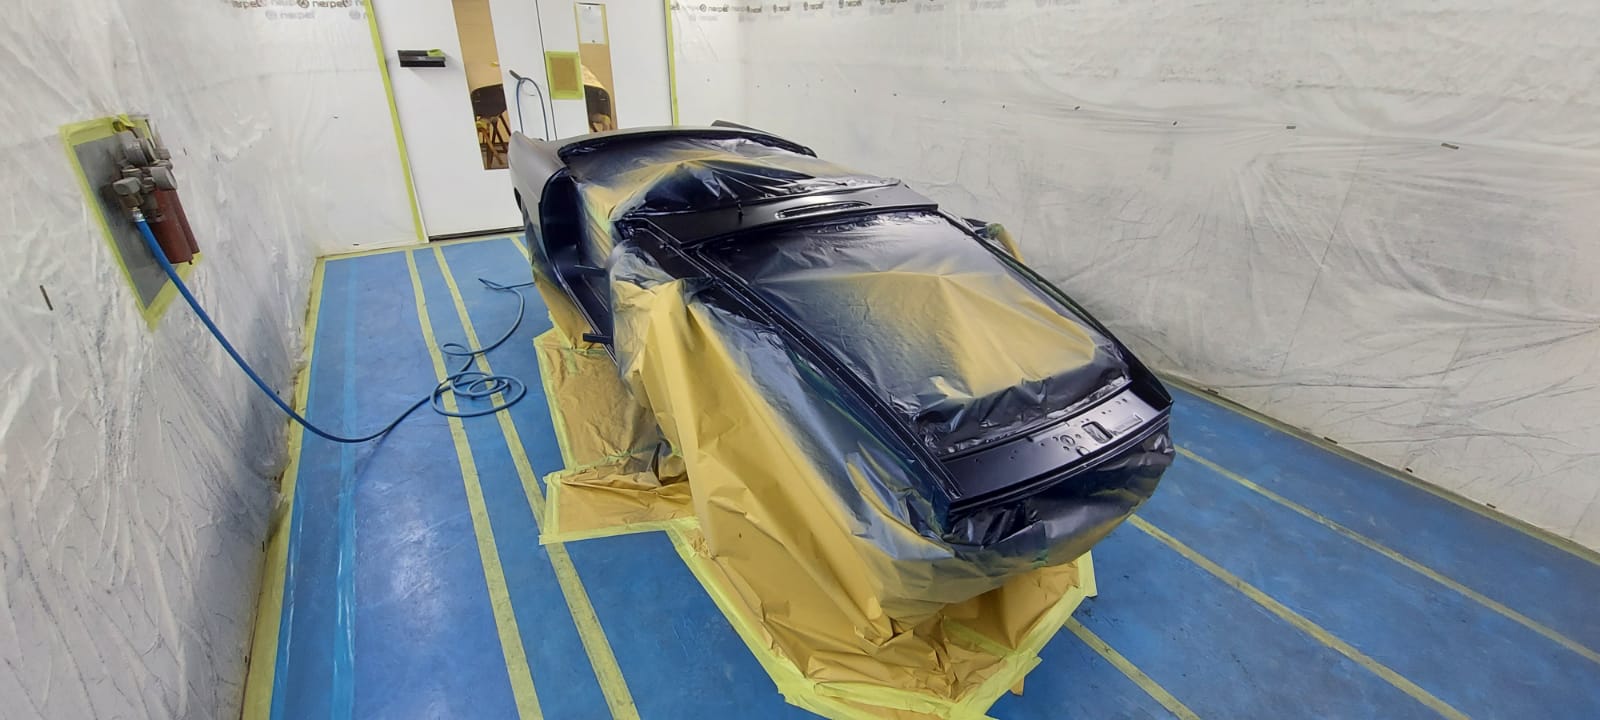
Now that the body was in perfect order, straight and true, it was time for Chris to get the MGB Roadster into our paint booth.
All of the hours of hard work getting every panel in the best shape and meticulously cleaned and prepared have led up to this very point for the 1977 MGB Roadster. Chris laid down the first layers of paint onto the car to allow the panels to set up for the next coats to go onto the bodywork.
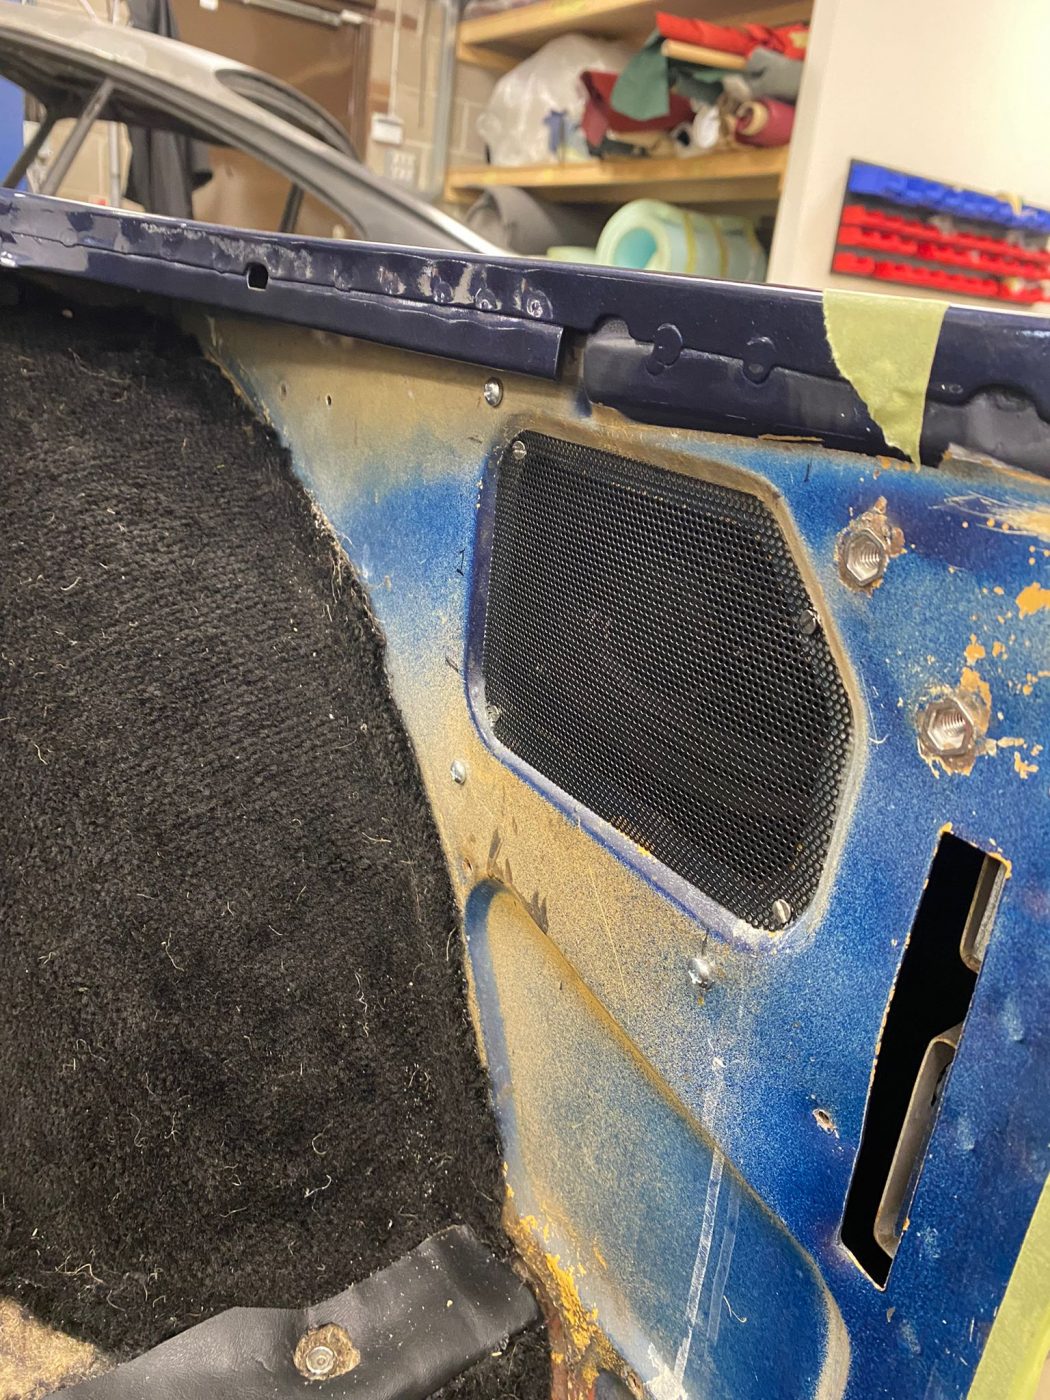
Whilst our paint team were hard at work getting the exterior of the car into pristine order, the trimmers were in another department focusing on the interior of the MGB Roadster.
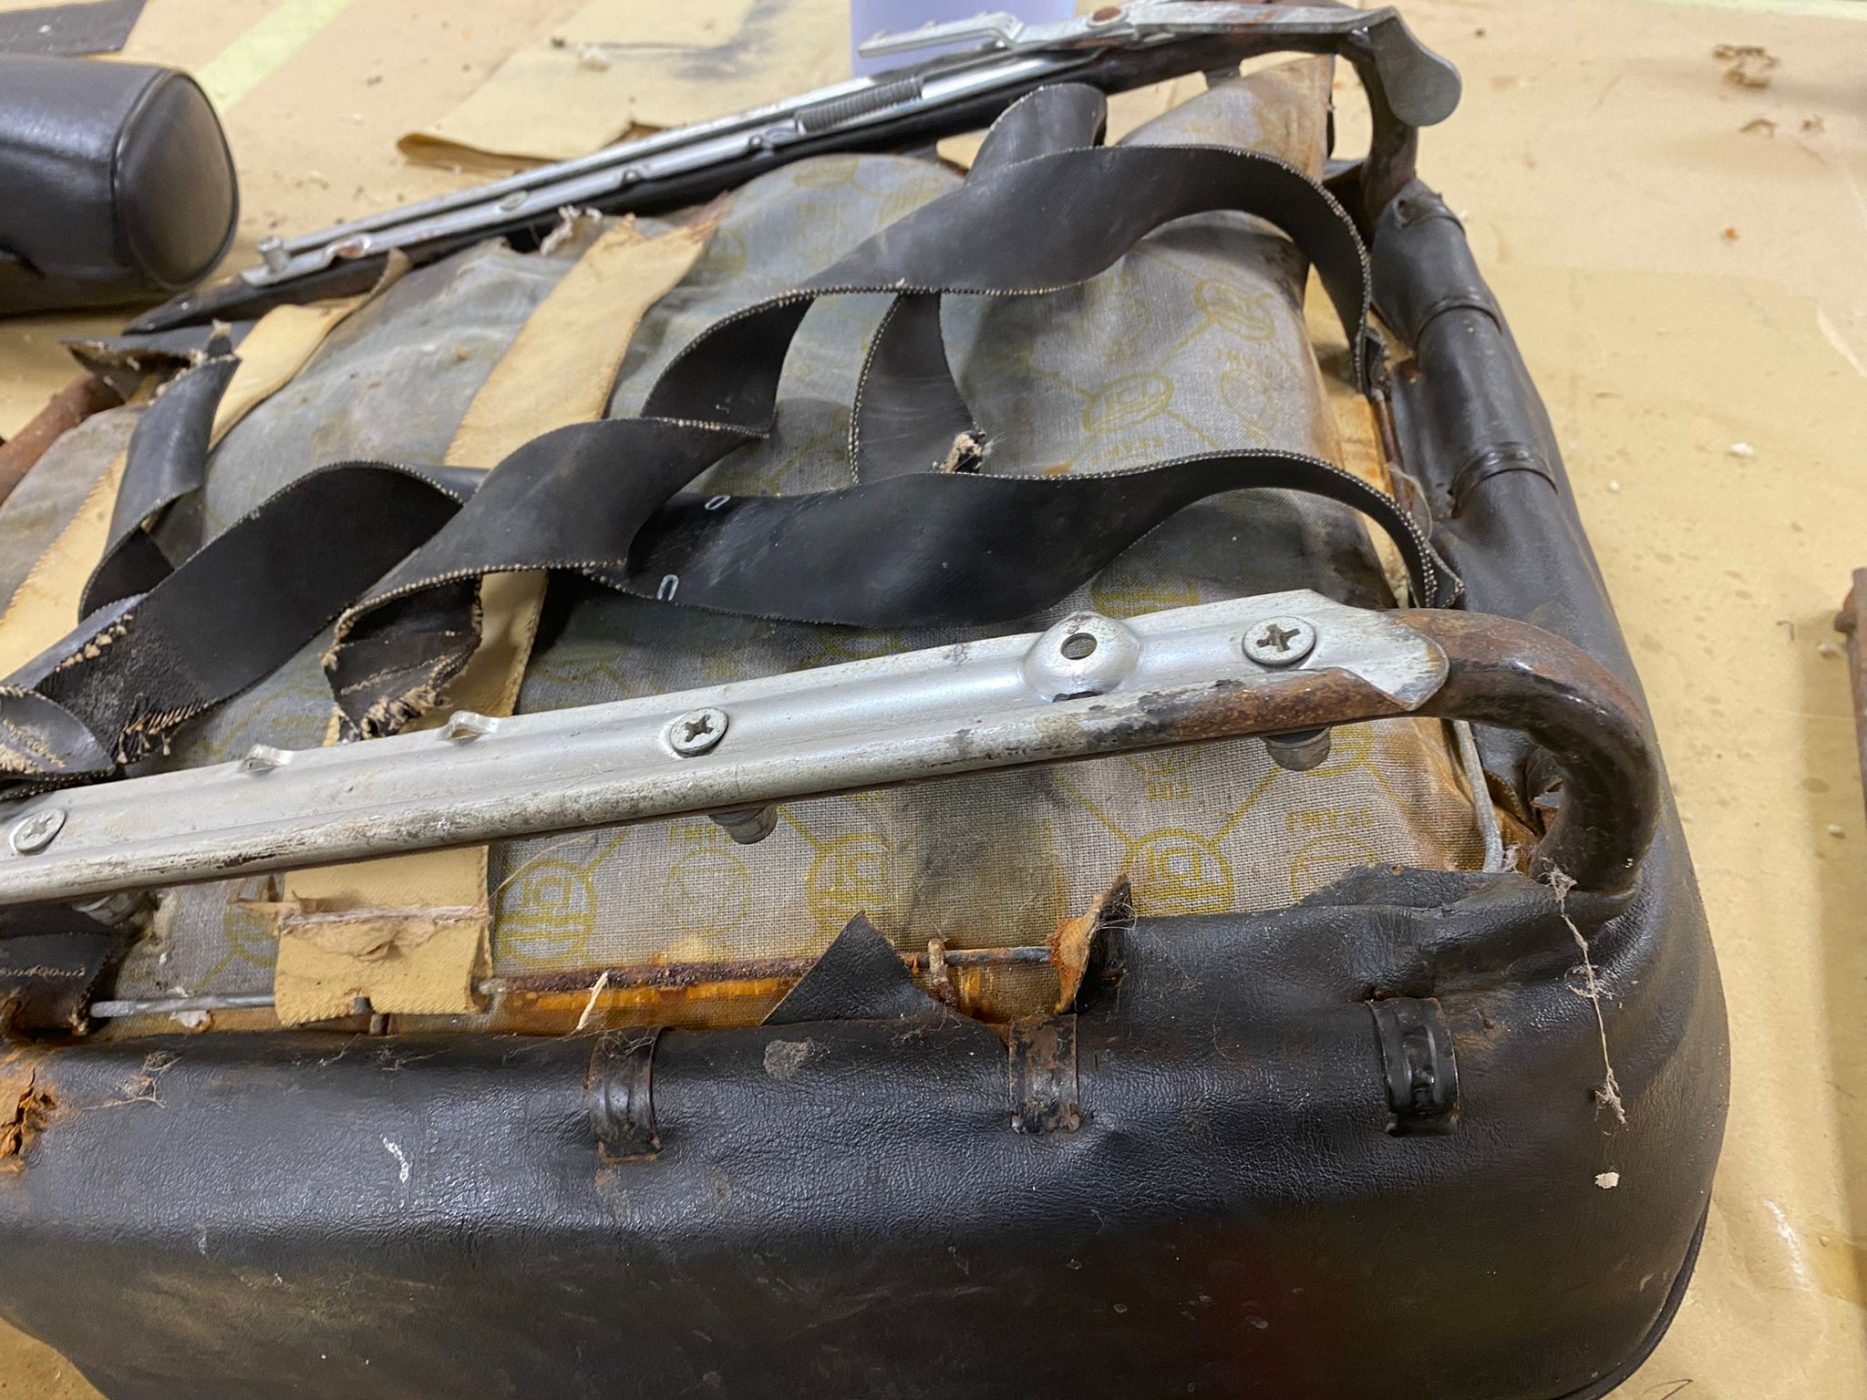
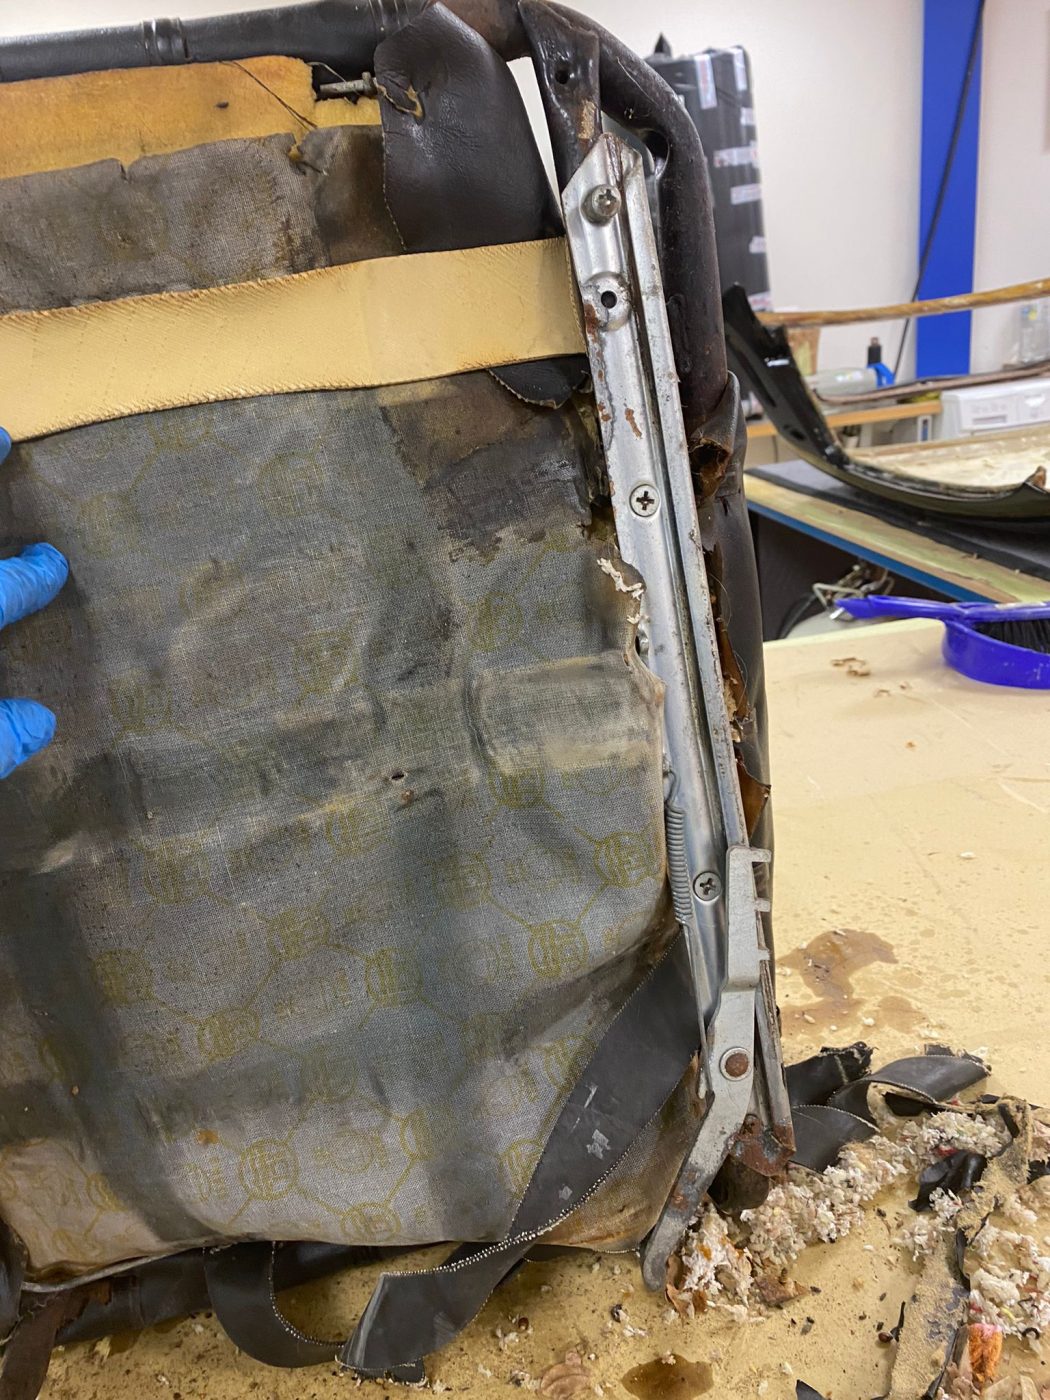
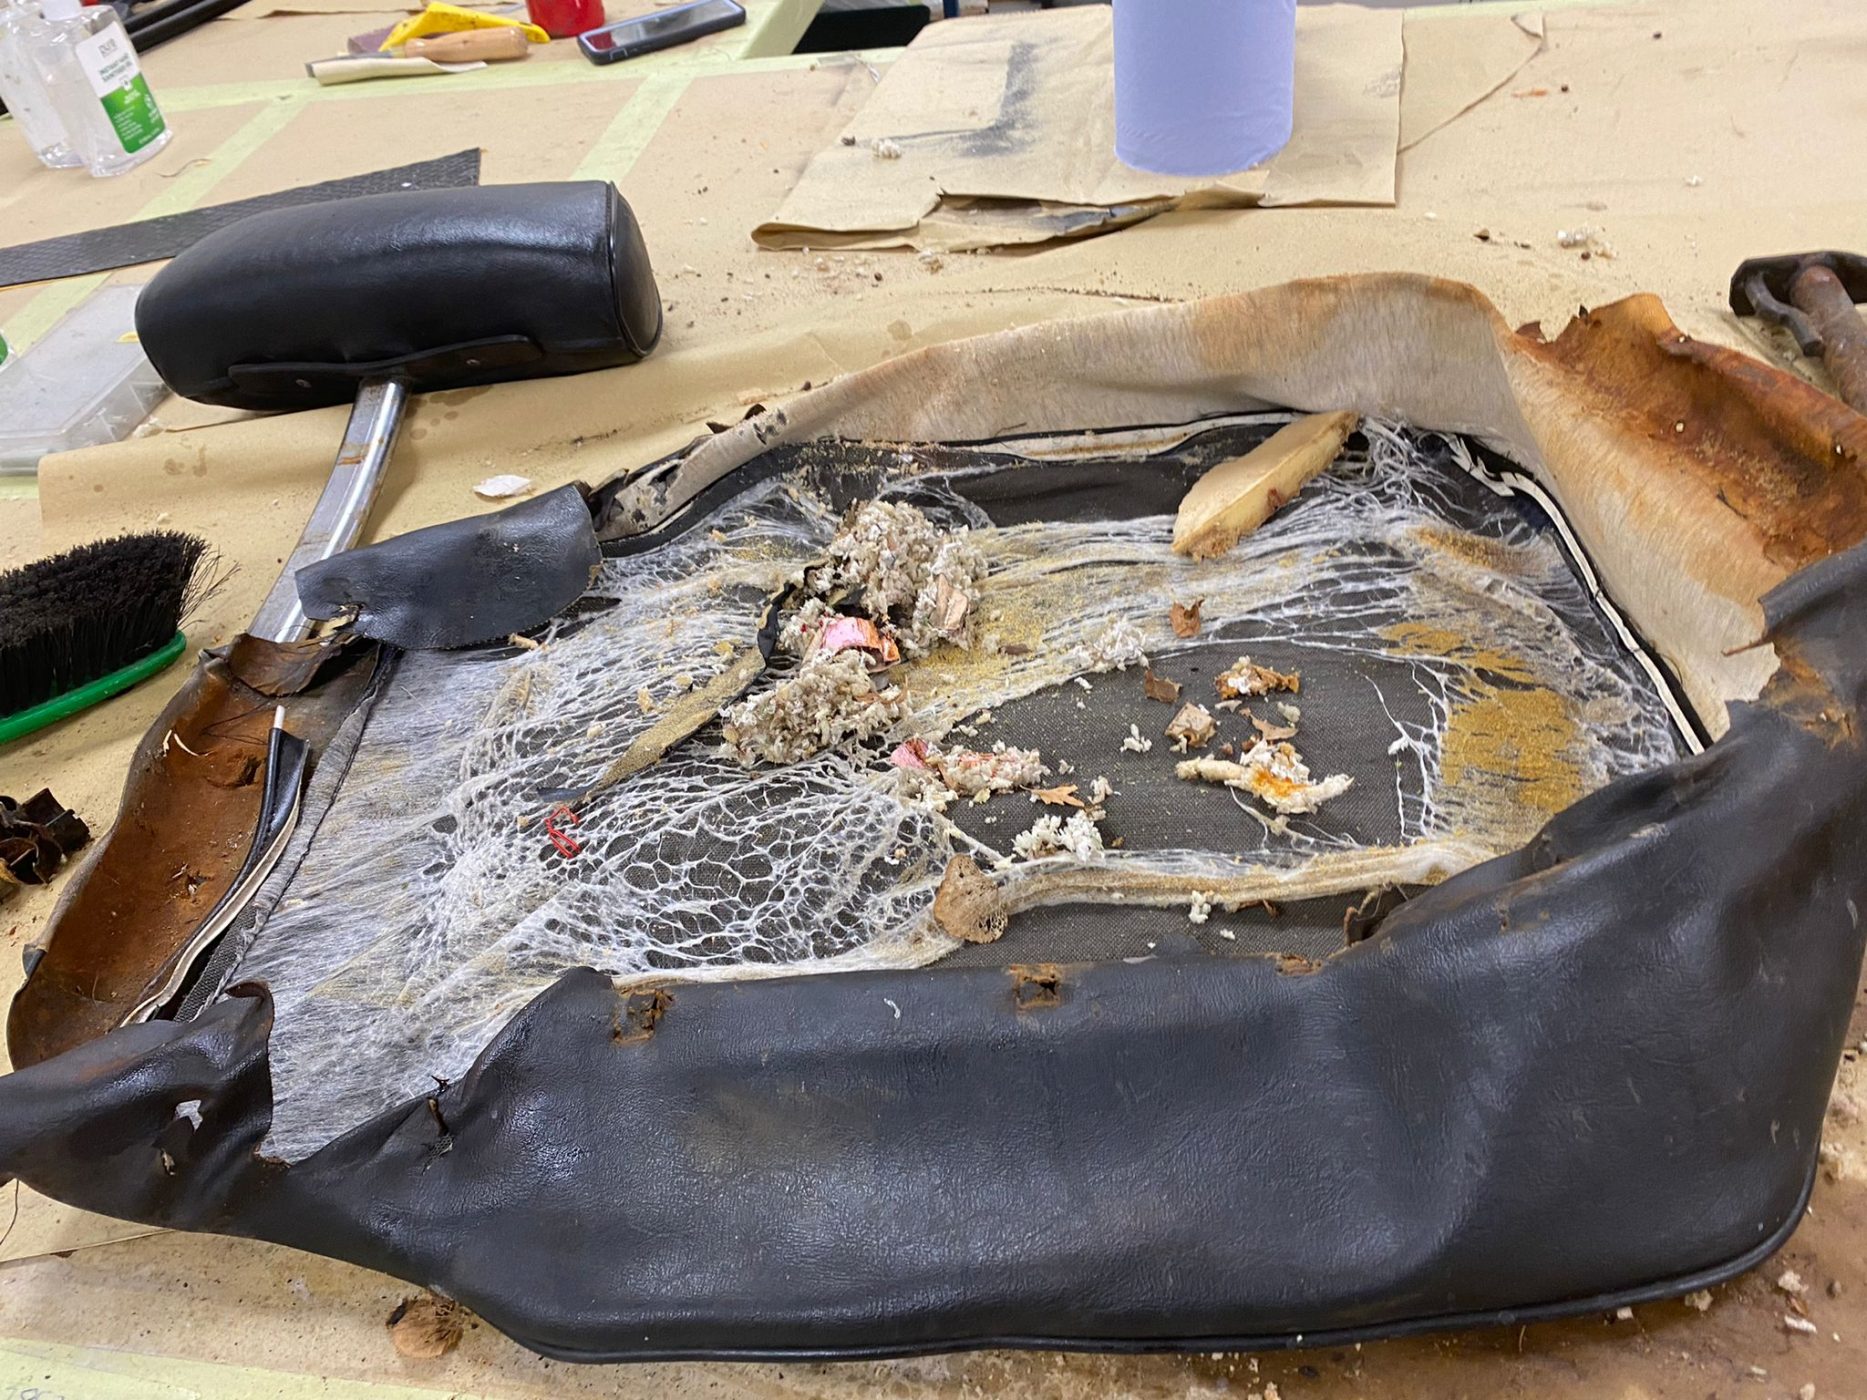
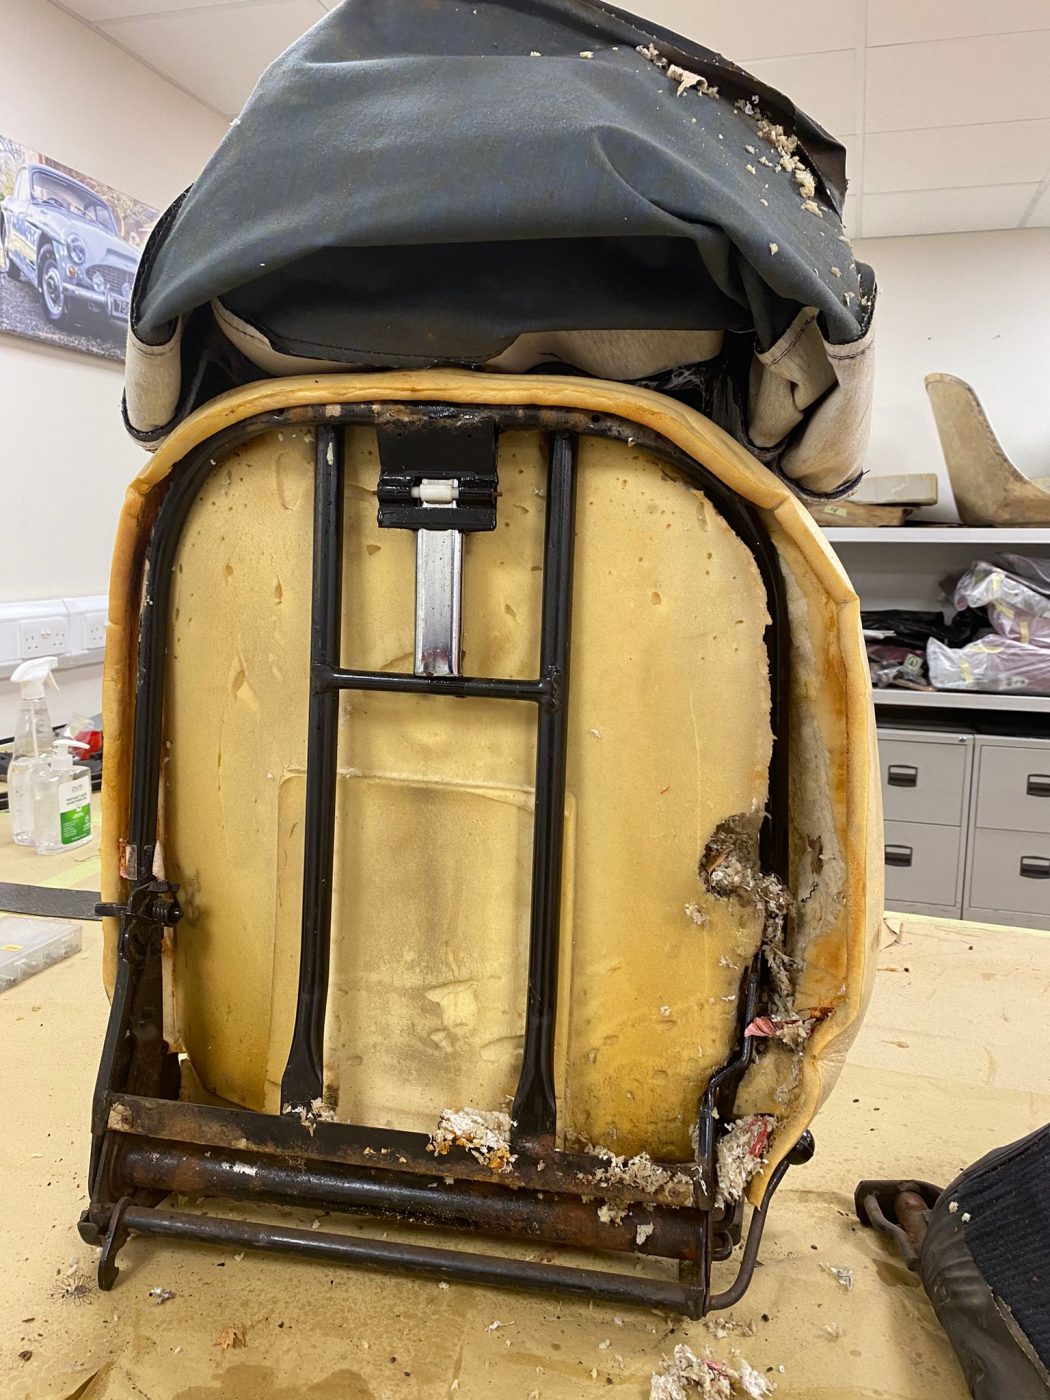
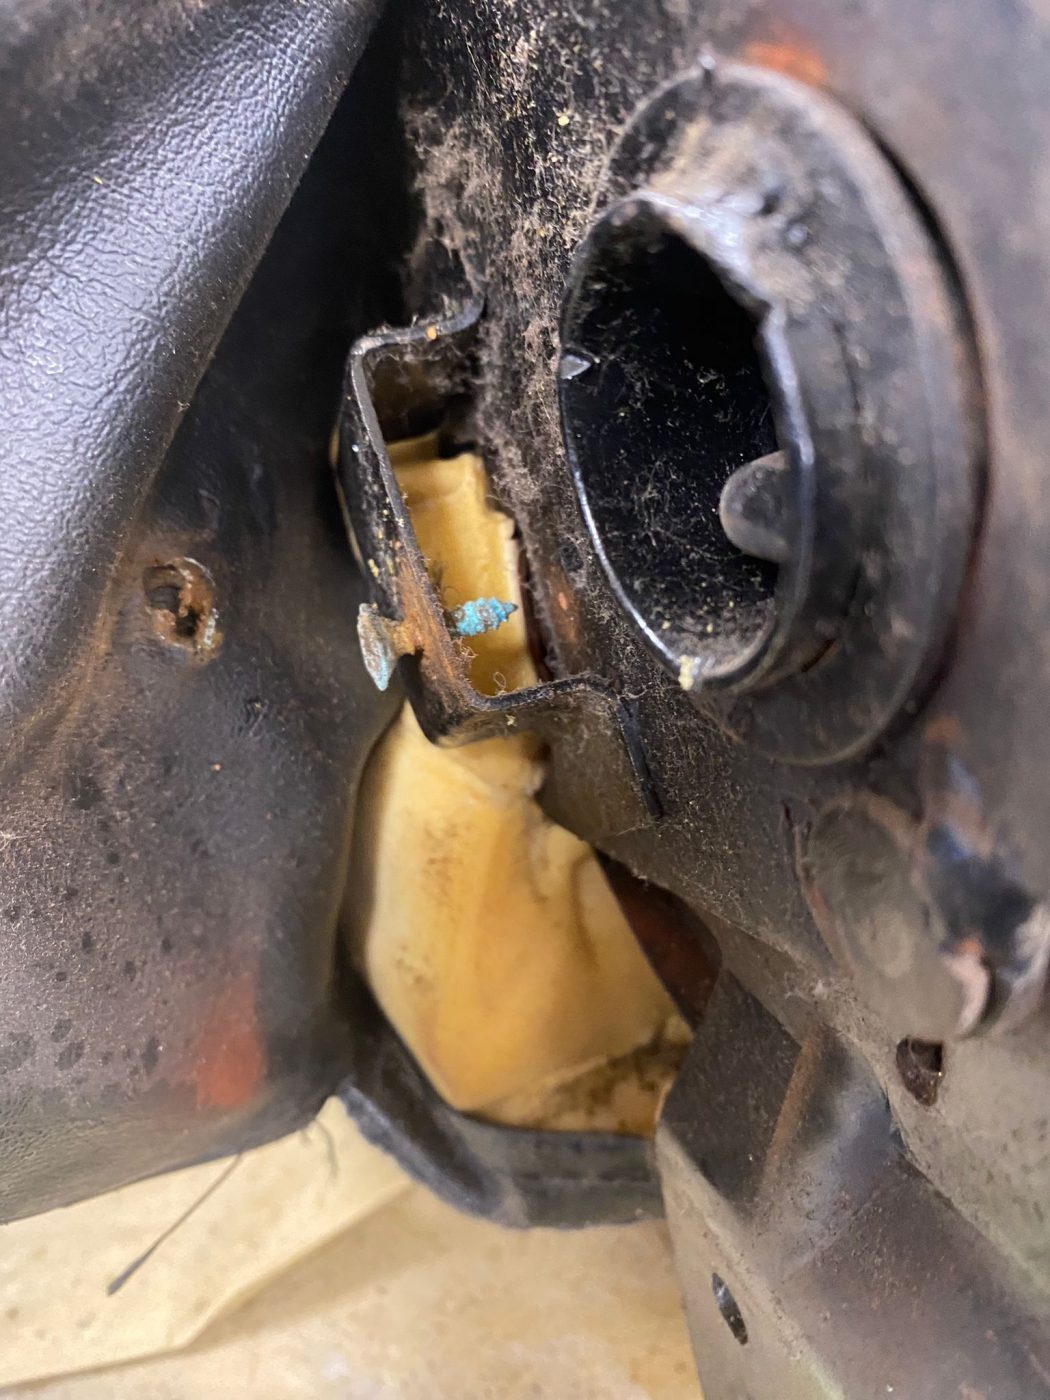
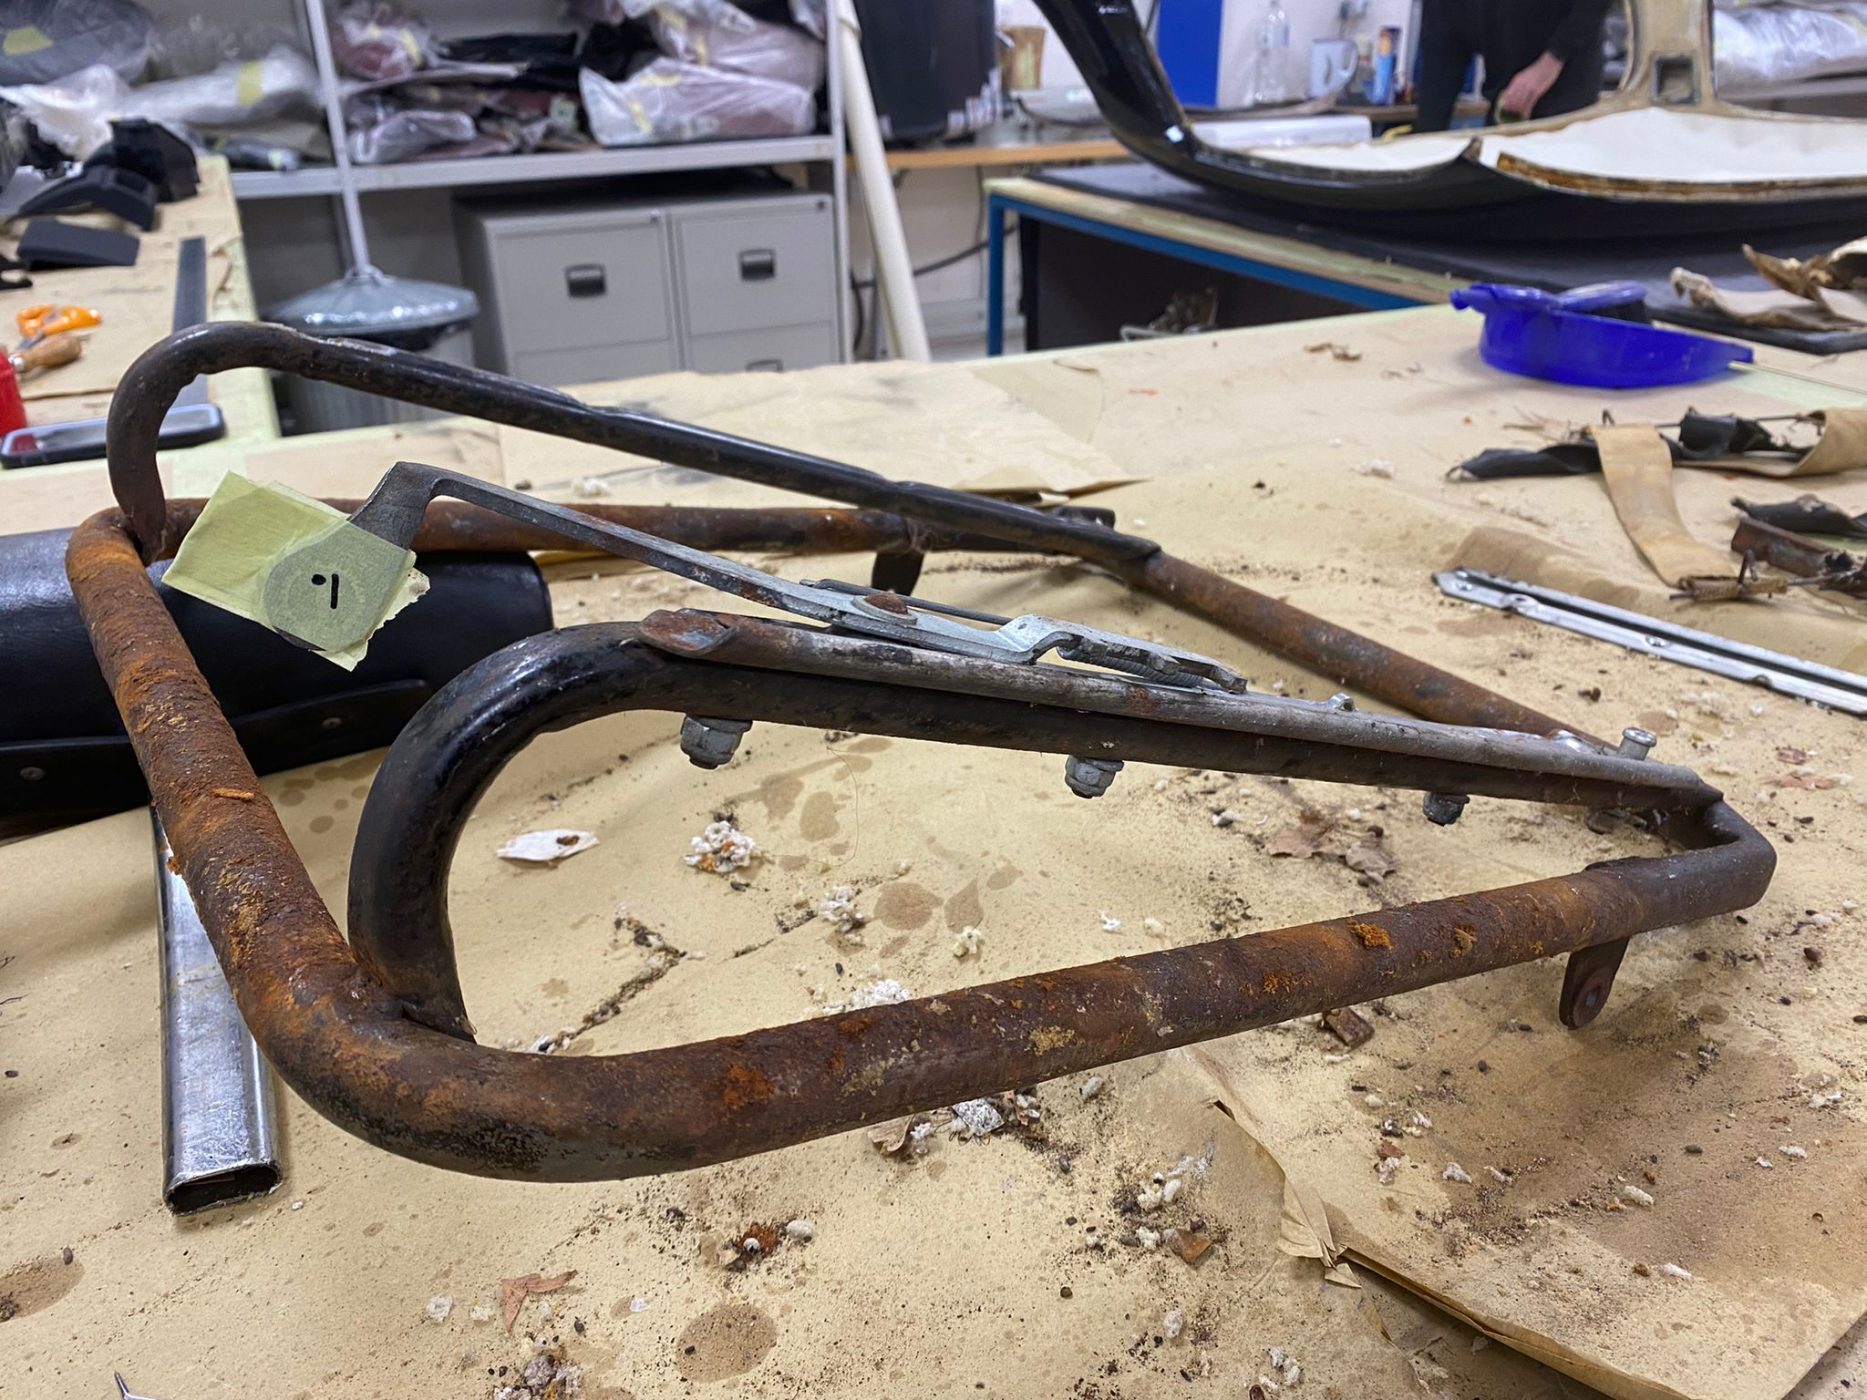
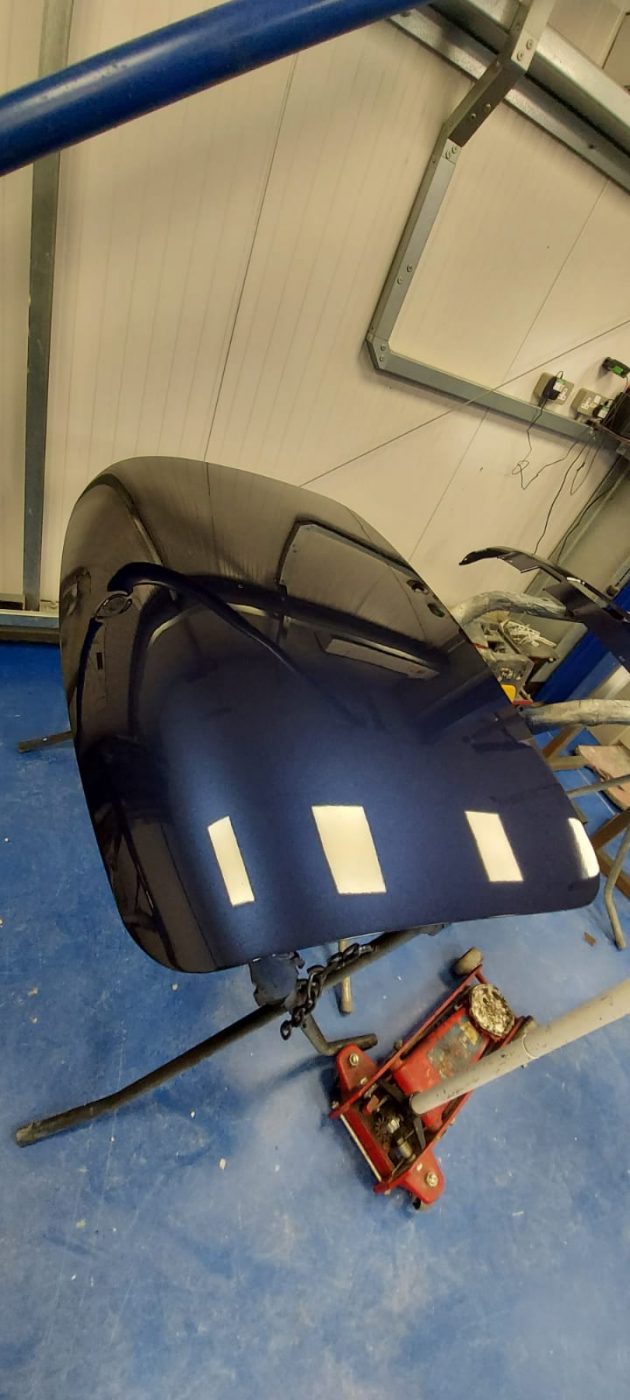
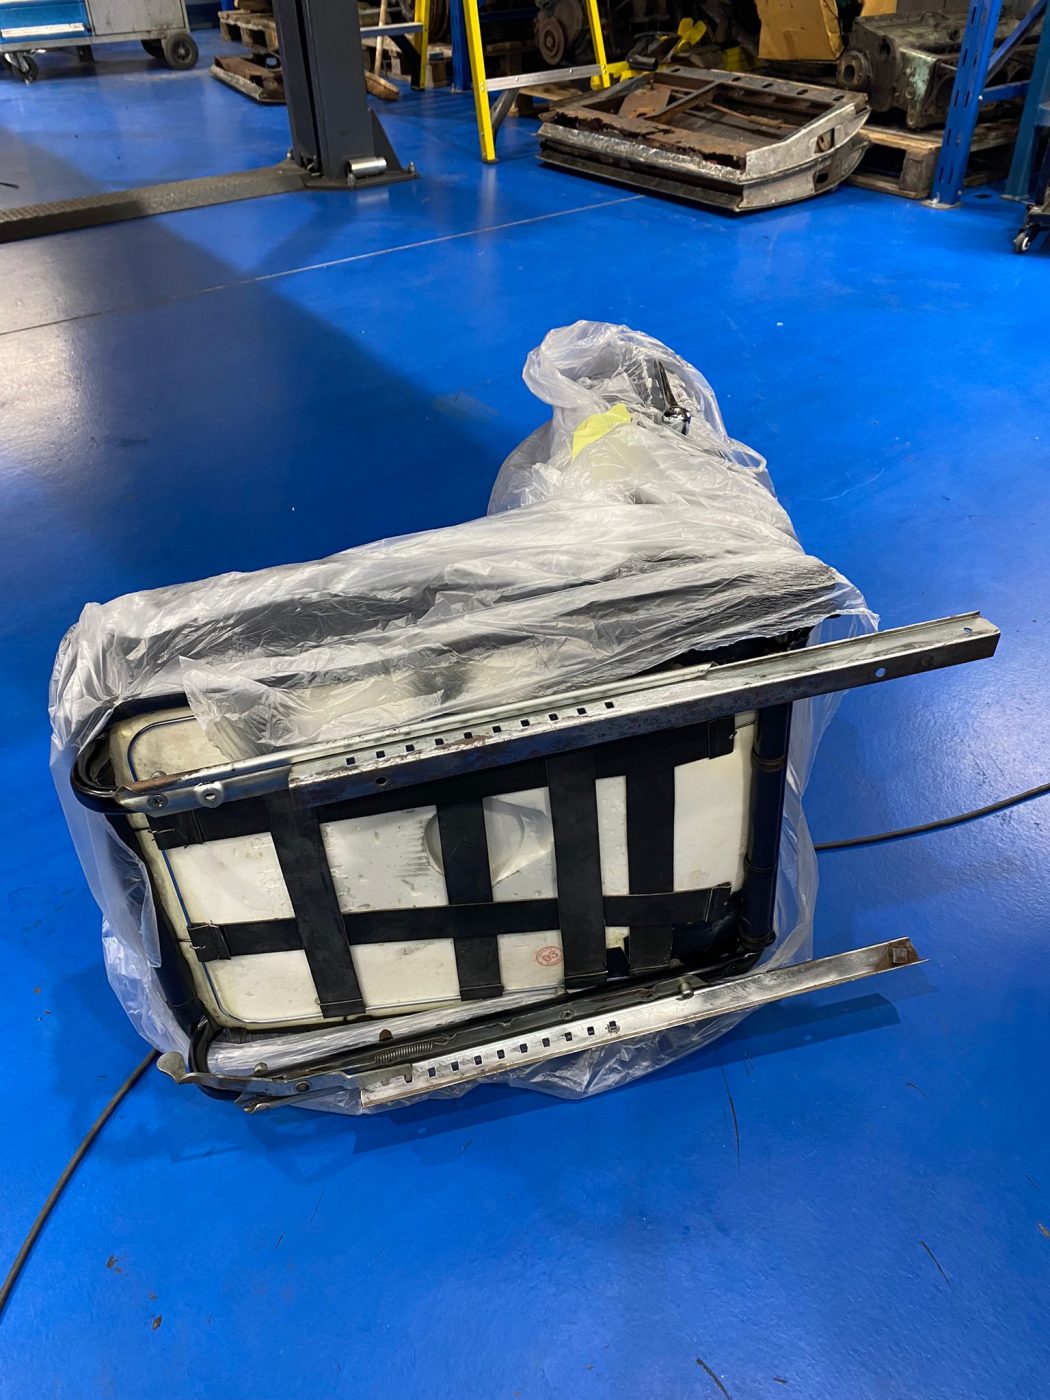
Brian carefully dismantled the entire interior of the car including the seats all the way down to their bare components. The frames and mechanisms were to be reused upon request. He took extra care when removing hardware from the corroded frames. With everything disassembled, he could begin work cleaning up the frames and refinishing them in gloss black to match the new pieces being put onto the car.
Alongside the work that Brian was doing in the Bridge Classic Cars in-house trim shop, Chris in the paint shop kept working on the various panels and pieces for the 1977 MGB Roadster.
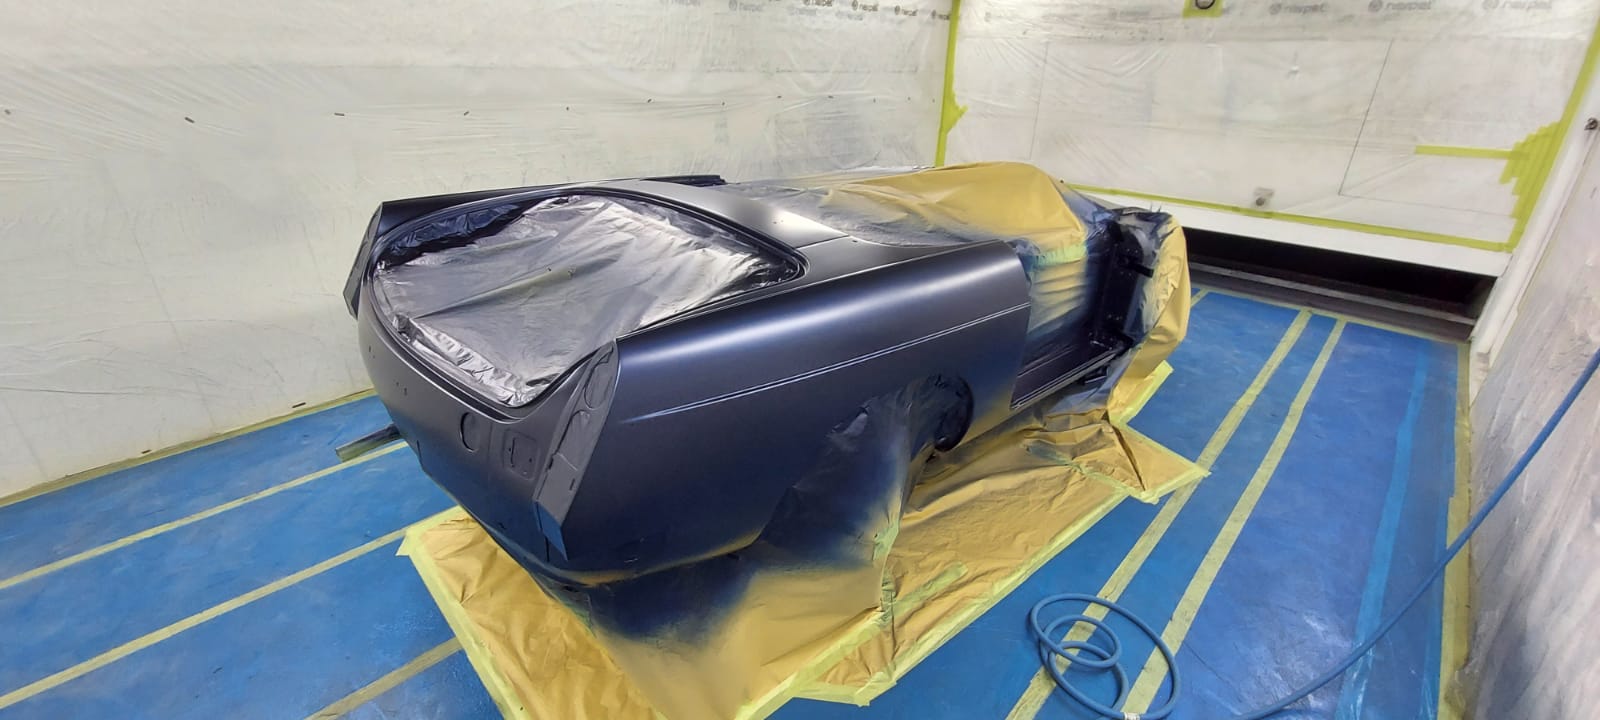
The blue paintwork was laid onto the panels individually to make sure that it was even and deep. The panels were then taken into the preparation room, for hours of colour sanding and preparation before finally, the paint team took the panels back into the booth to be clear coated with a new UV resistant clear coat.
With the paint cured and the clearcoat hardened, the paint team completed the final sanding and polishing before handing the car over to the workshop for our restoration technicians to begin reassembly.
Our technician Mauro took over the project to begin getting the car back together. The technicians in the workshop had worked on assessing and inspecting every component that came off of the car during disassembly whether they could be refurbished or if new pieces would need to be sourced.
Many hours of polishing, sanding and refinishing had gone into being able to reuse as many pieces as possible for the car.
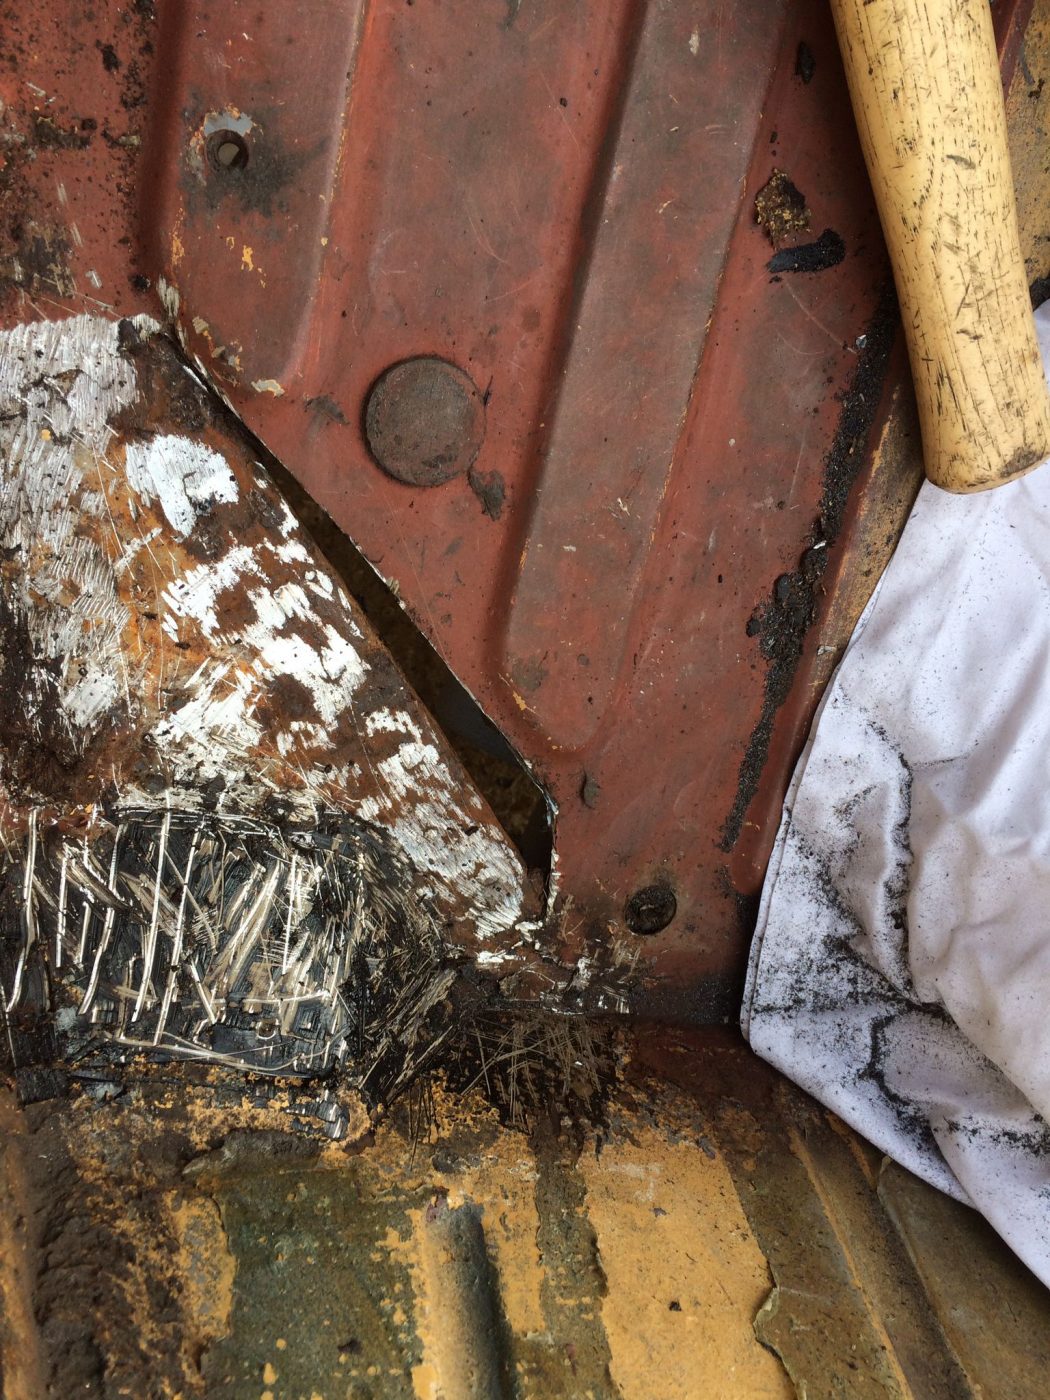
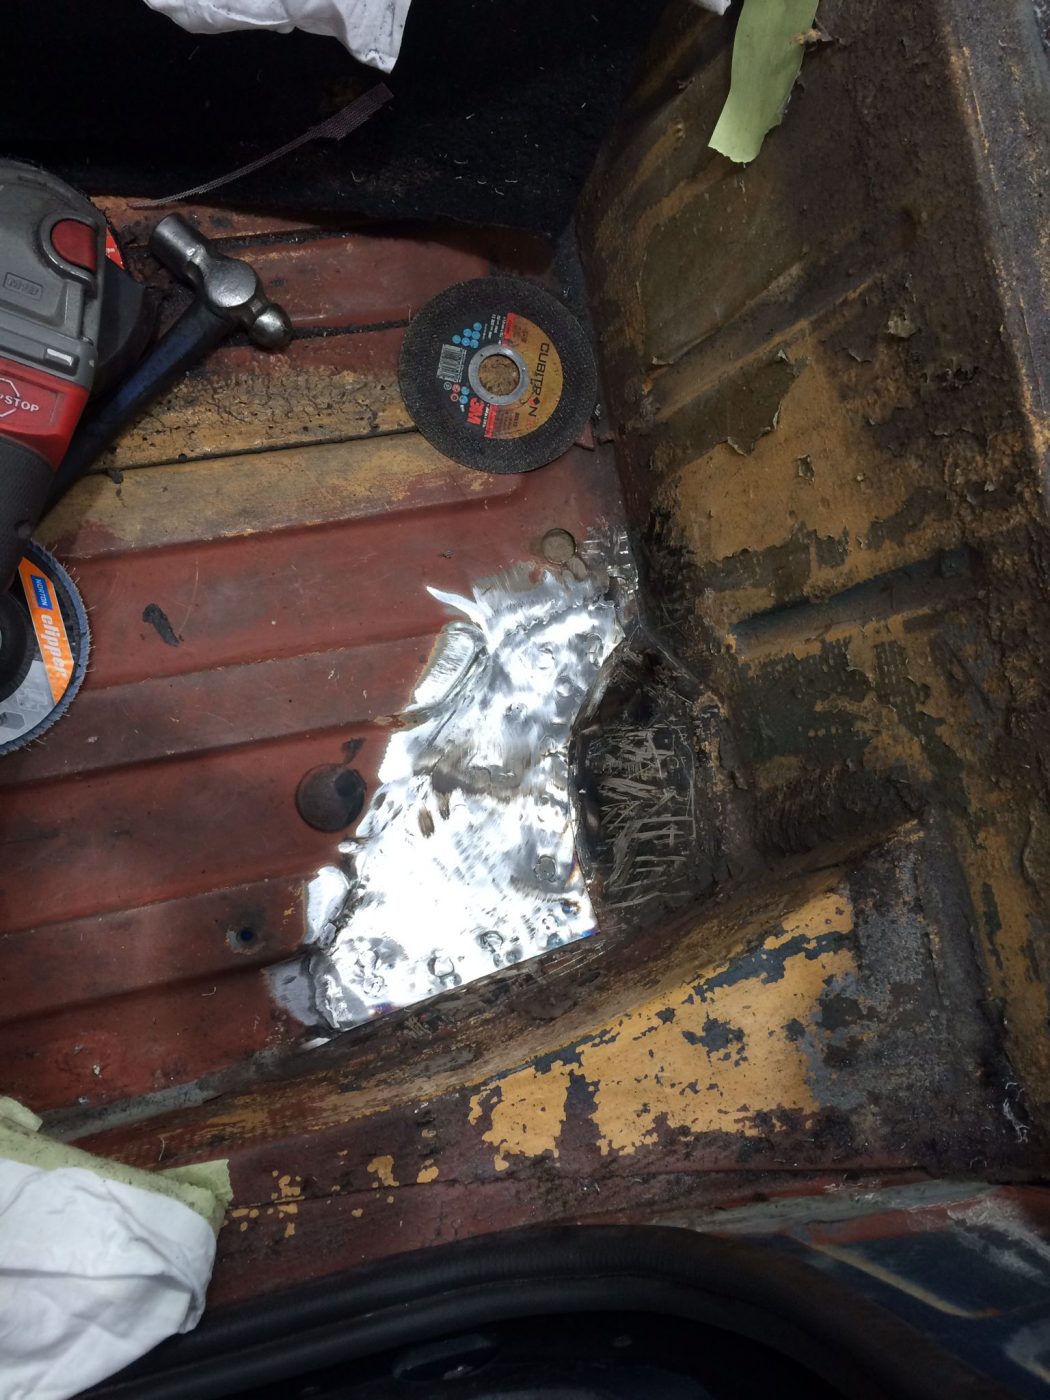
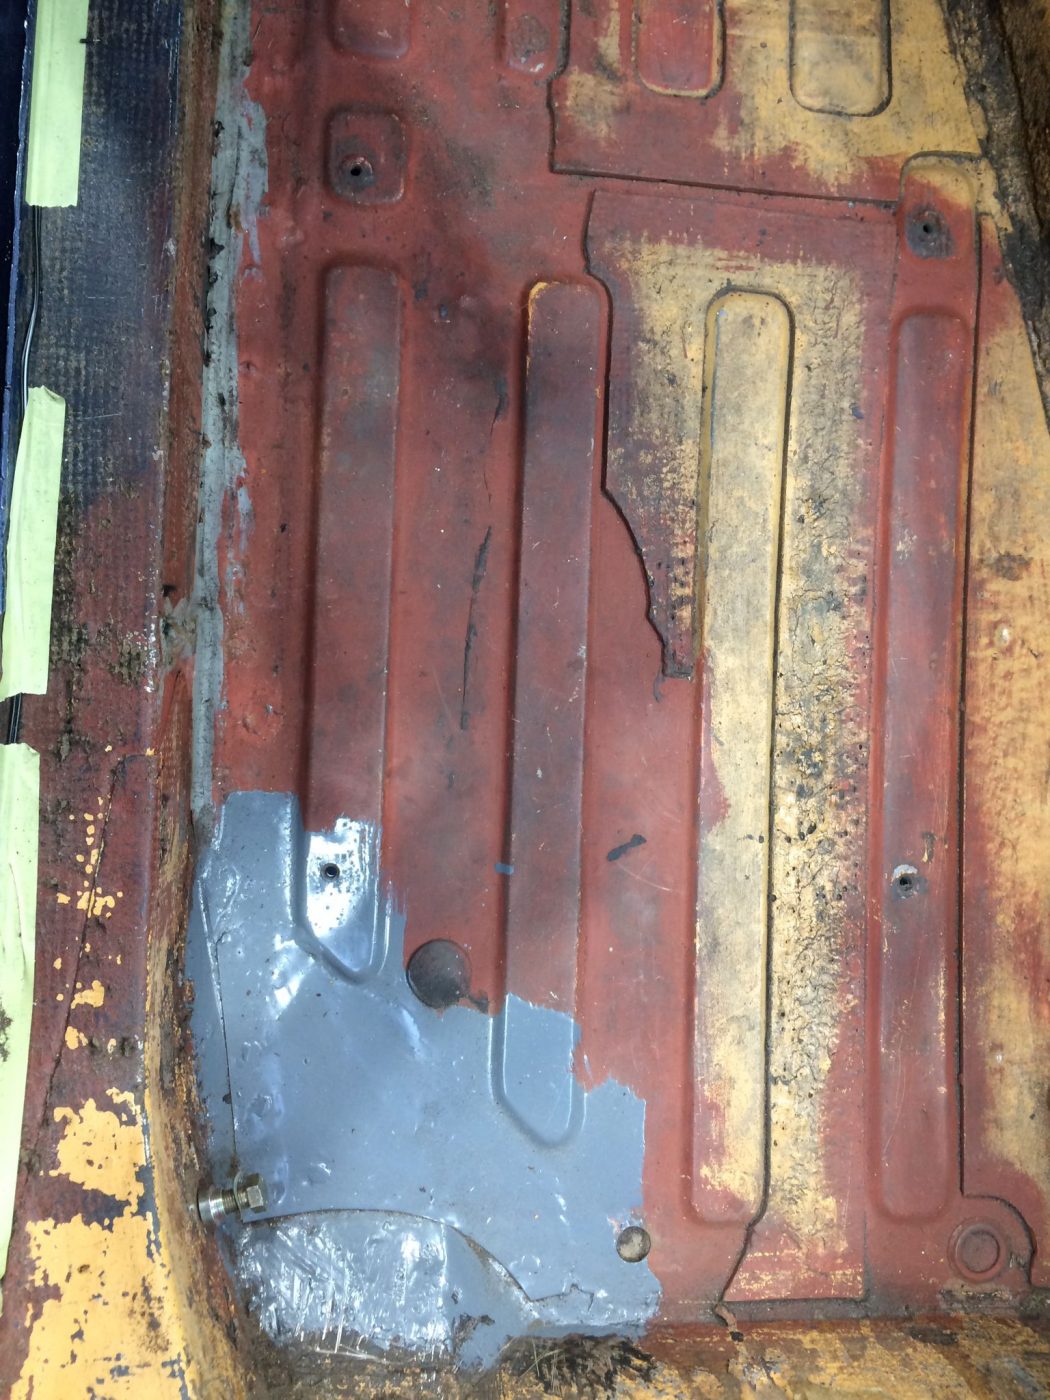
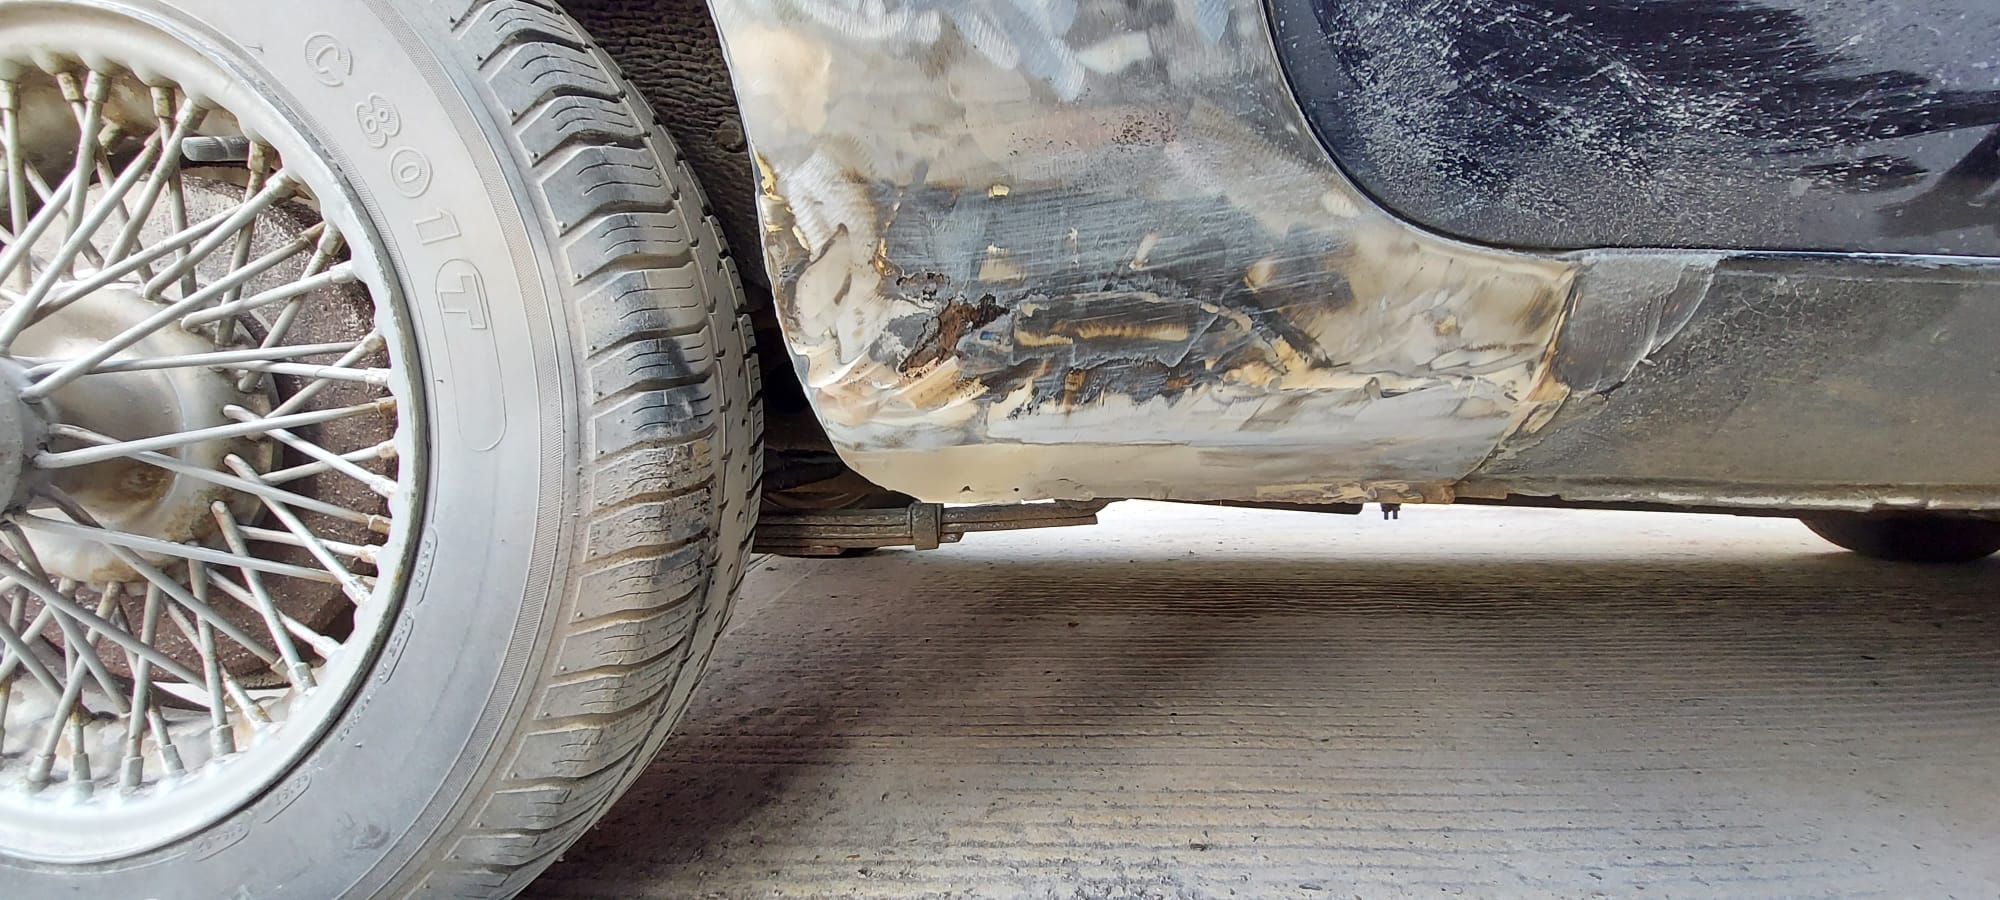
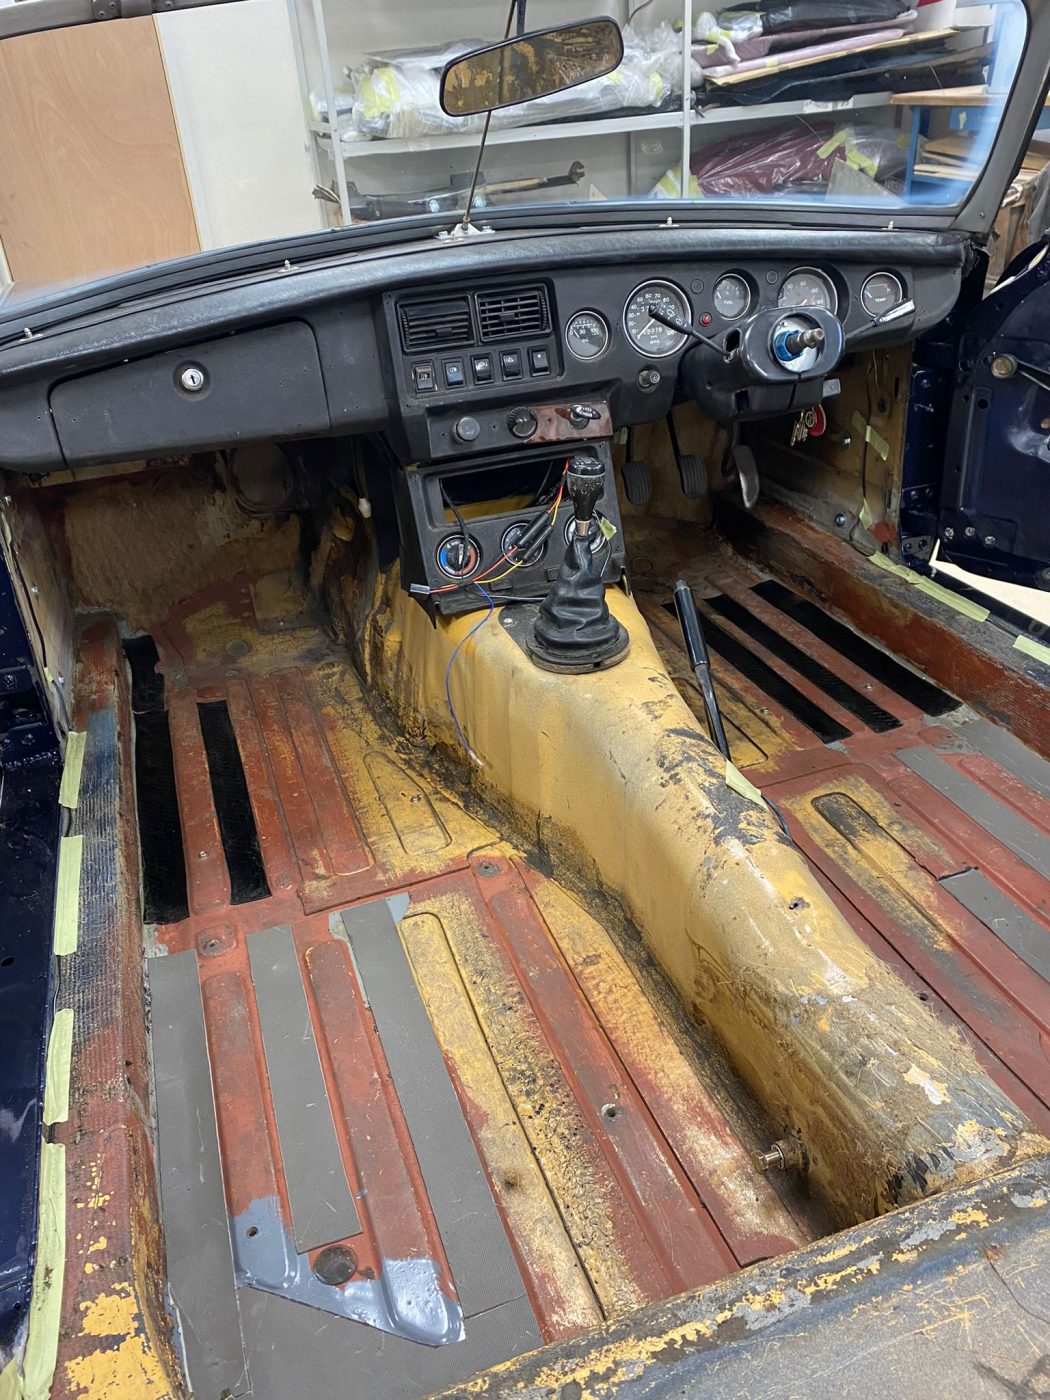
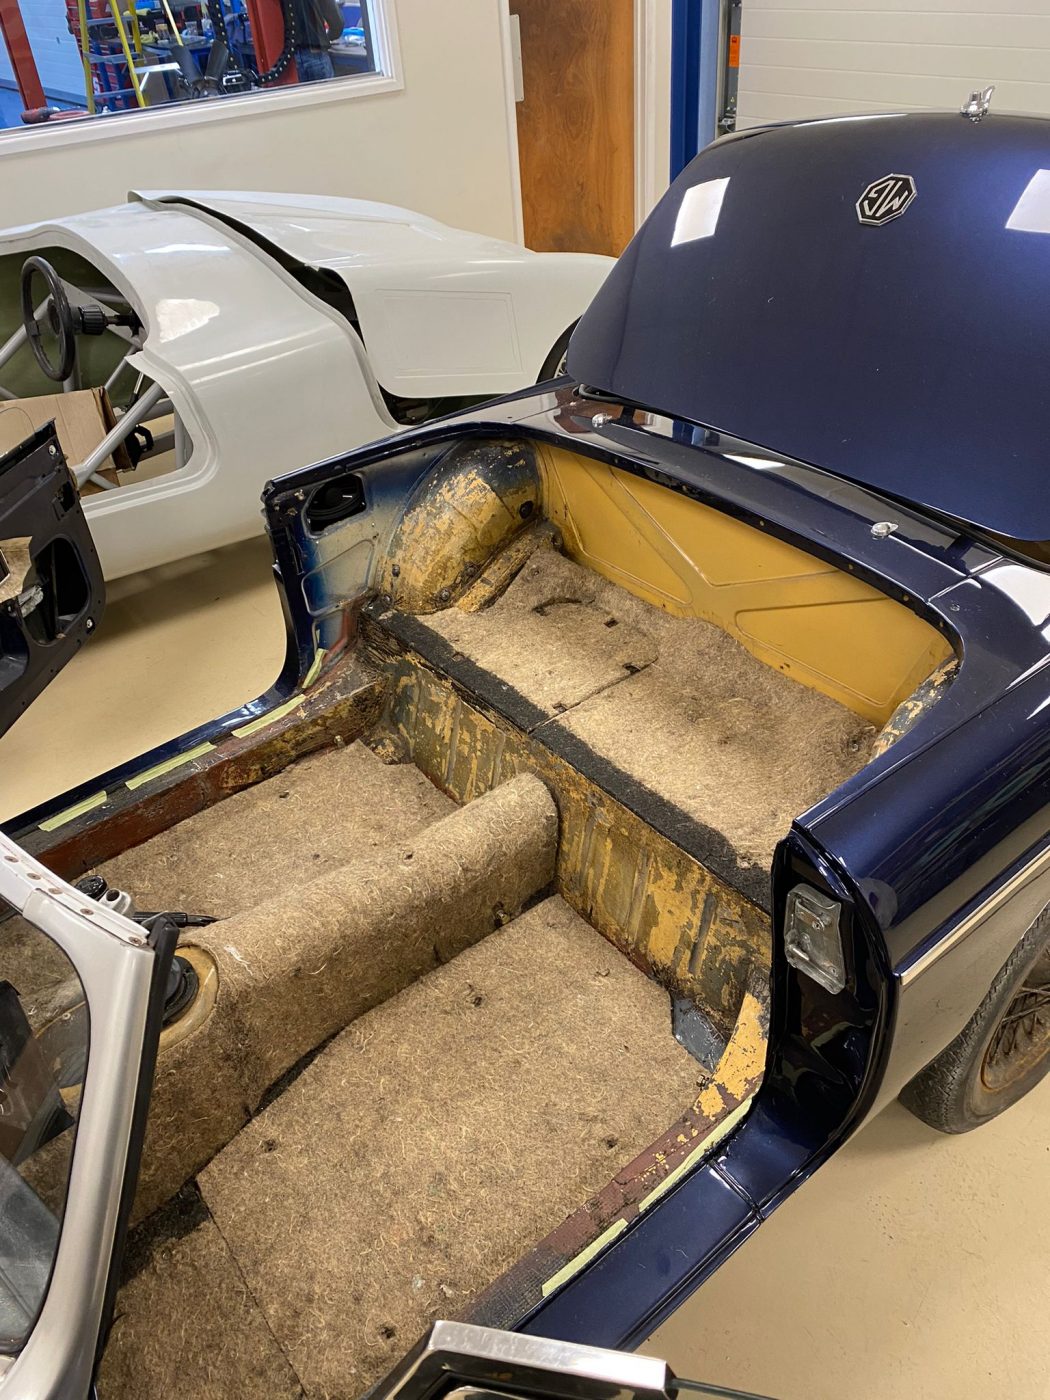
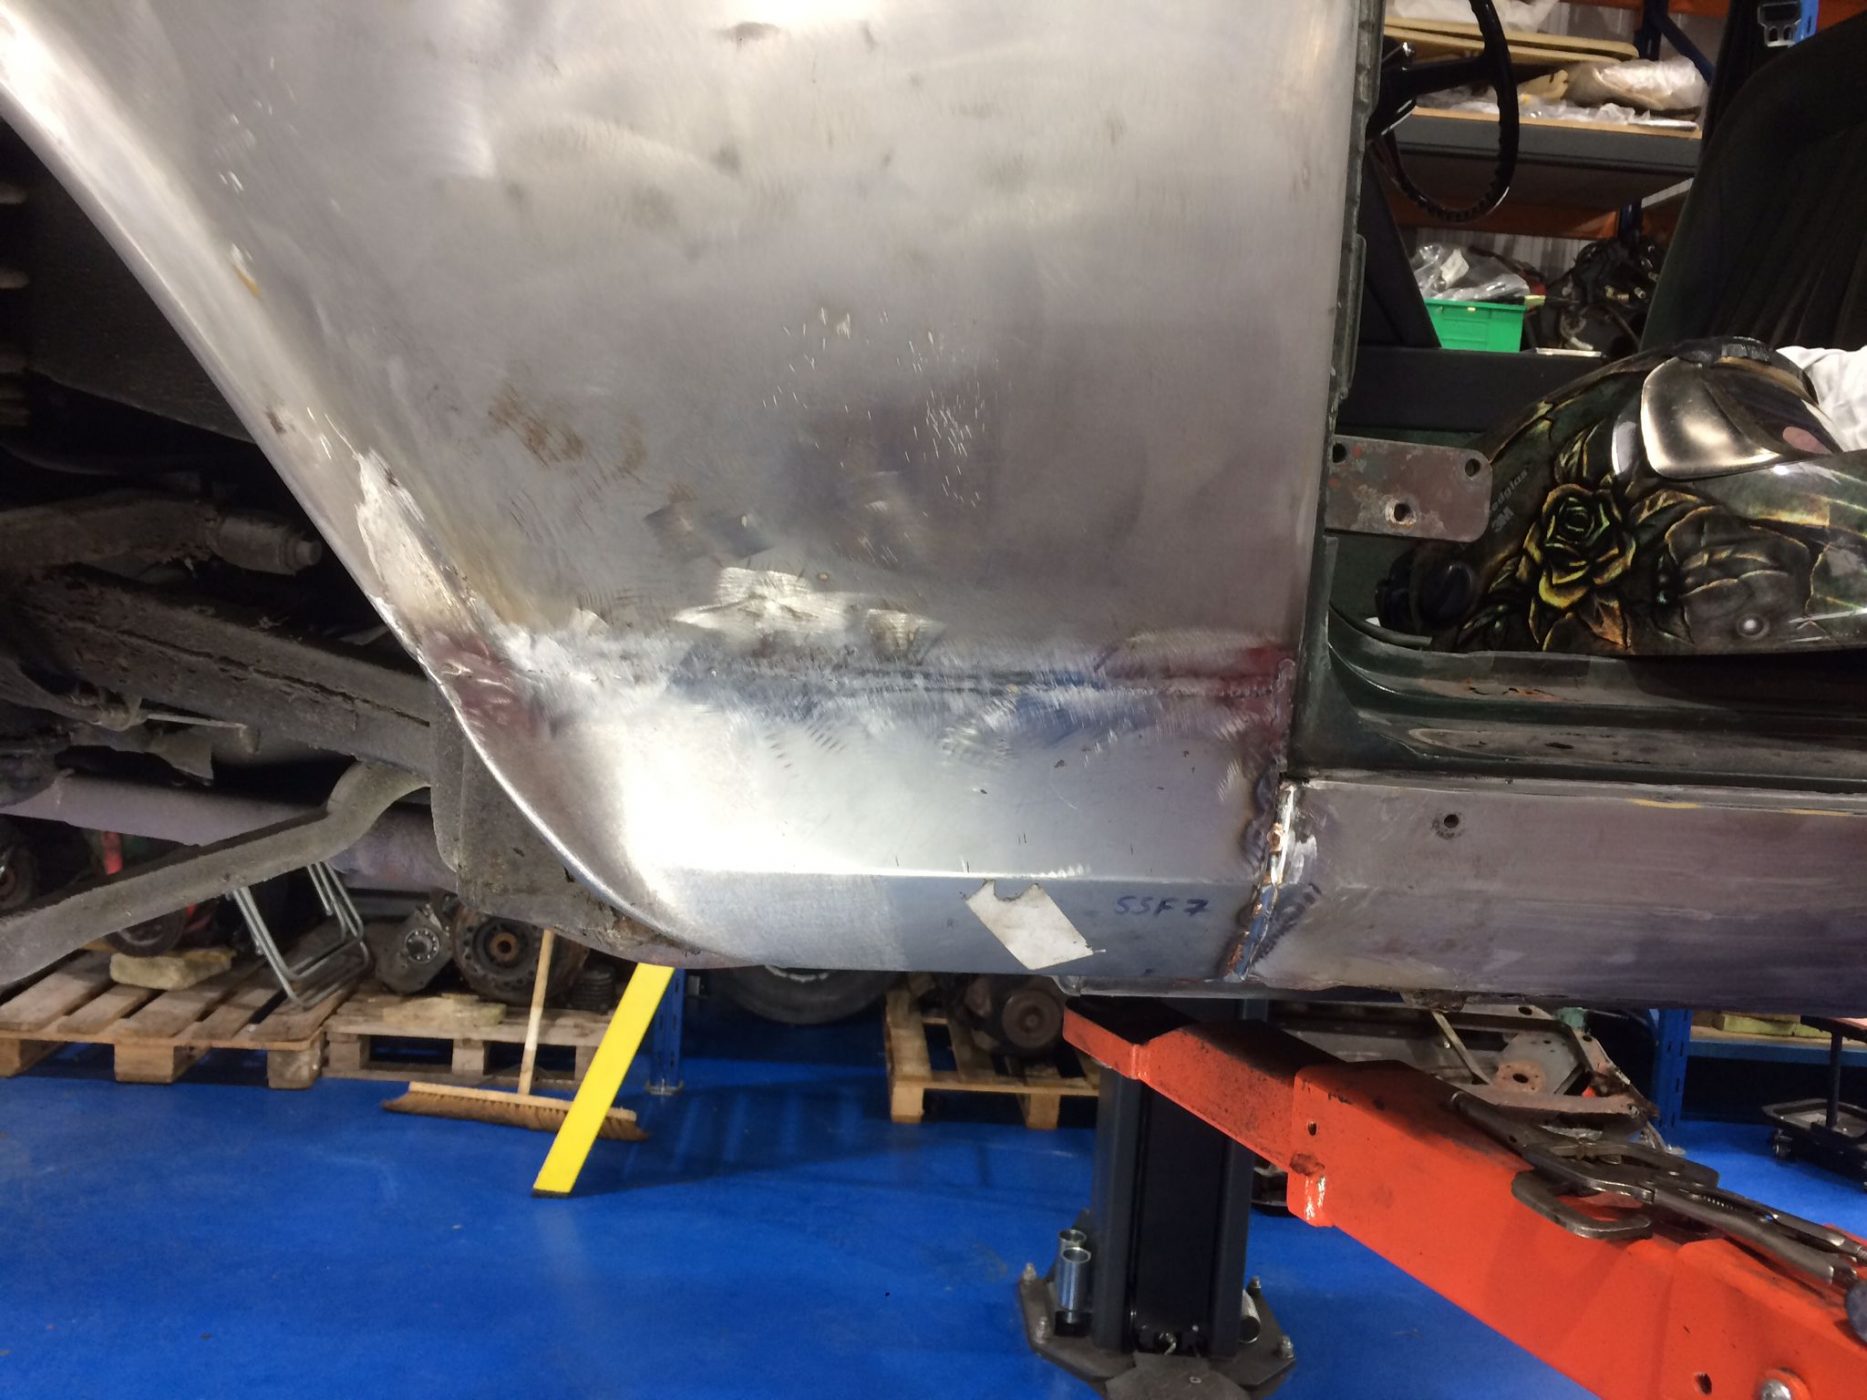
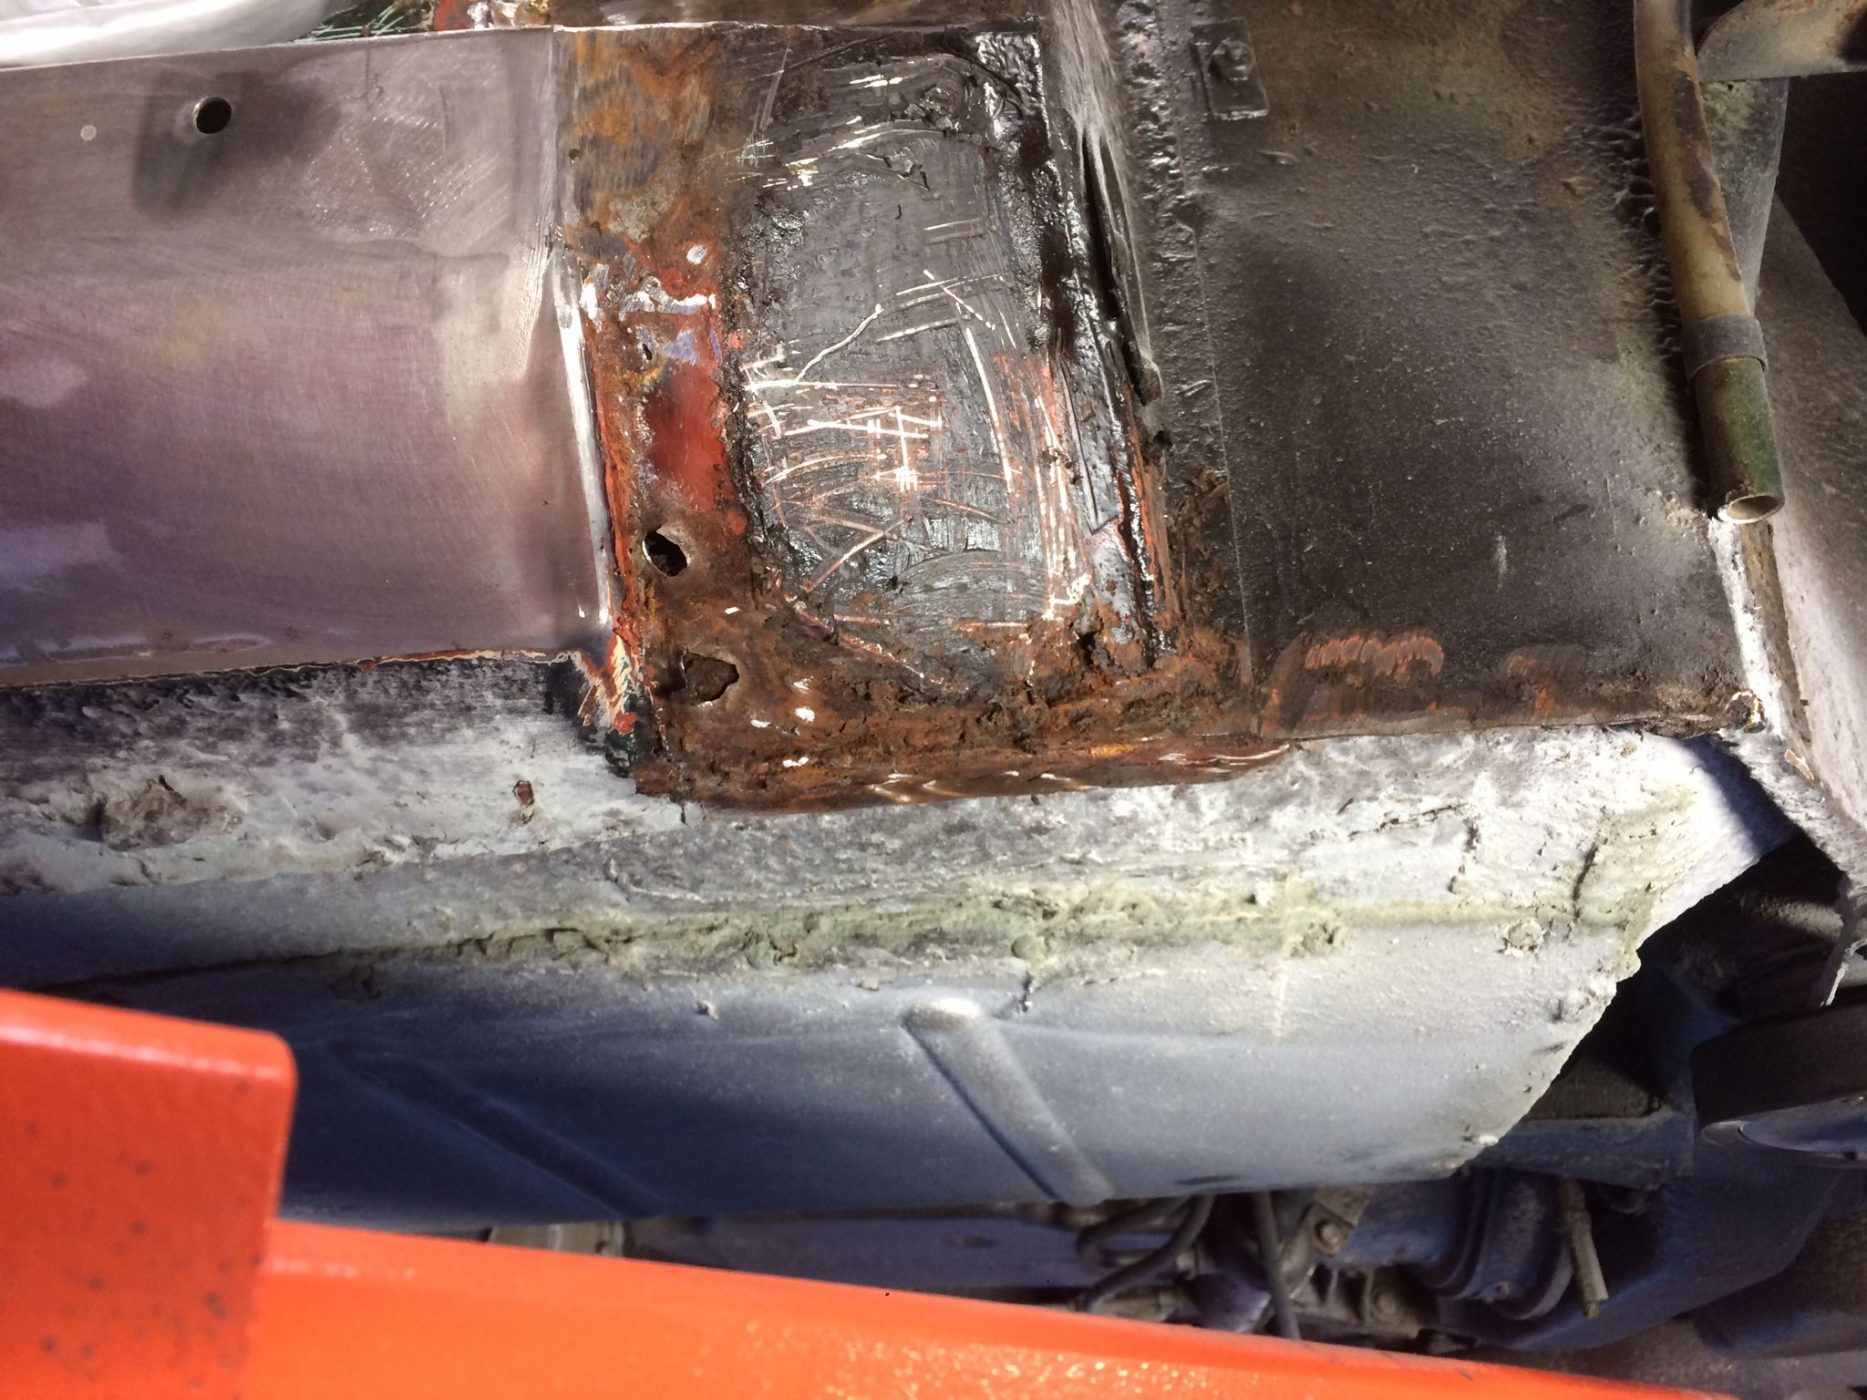
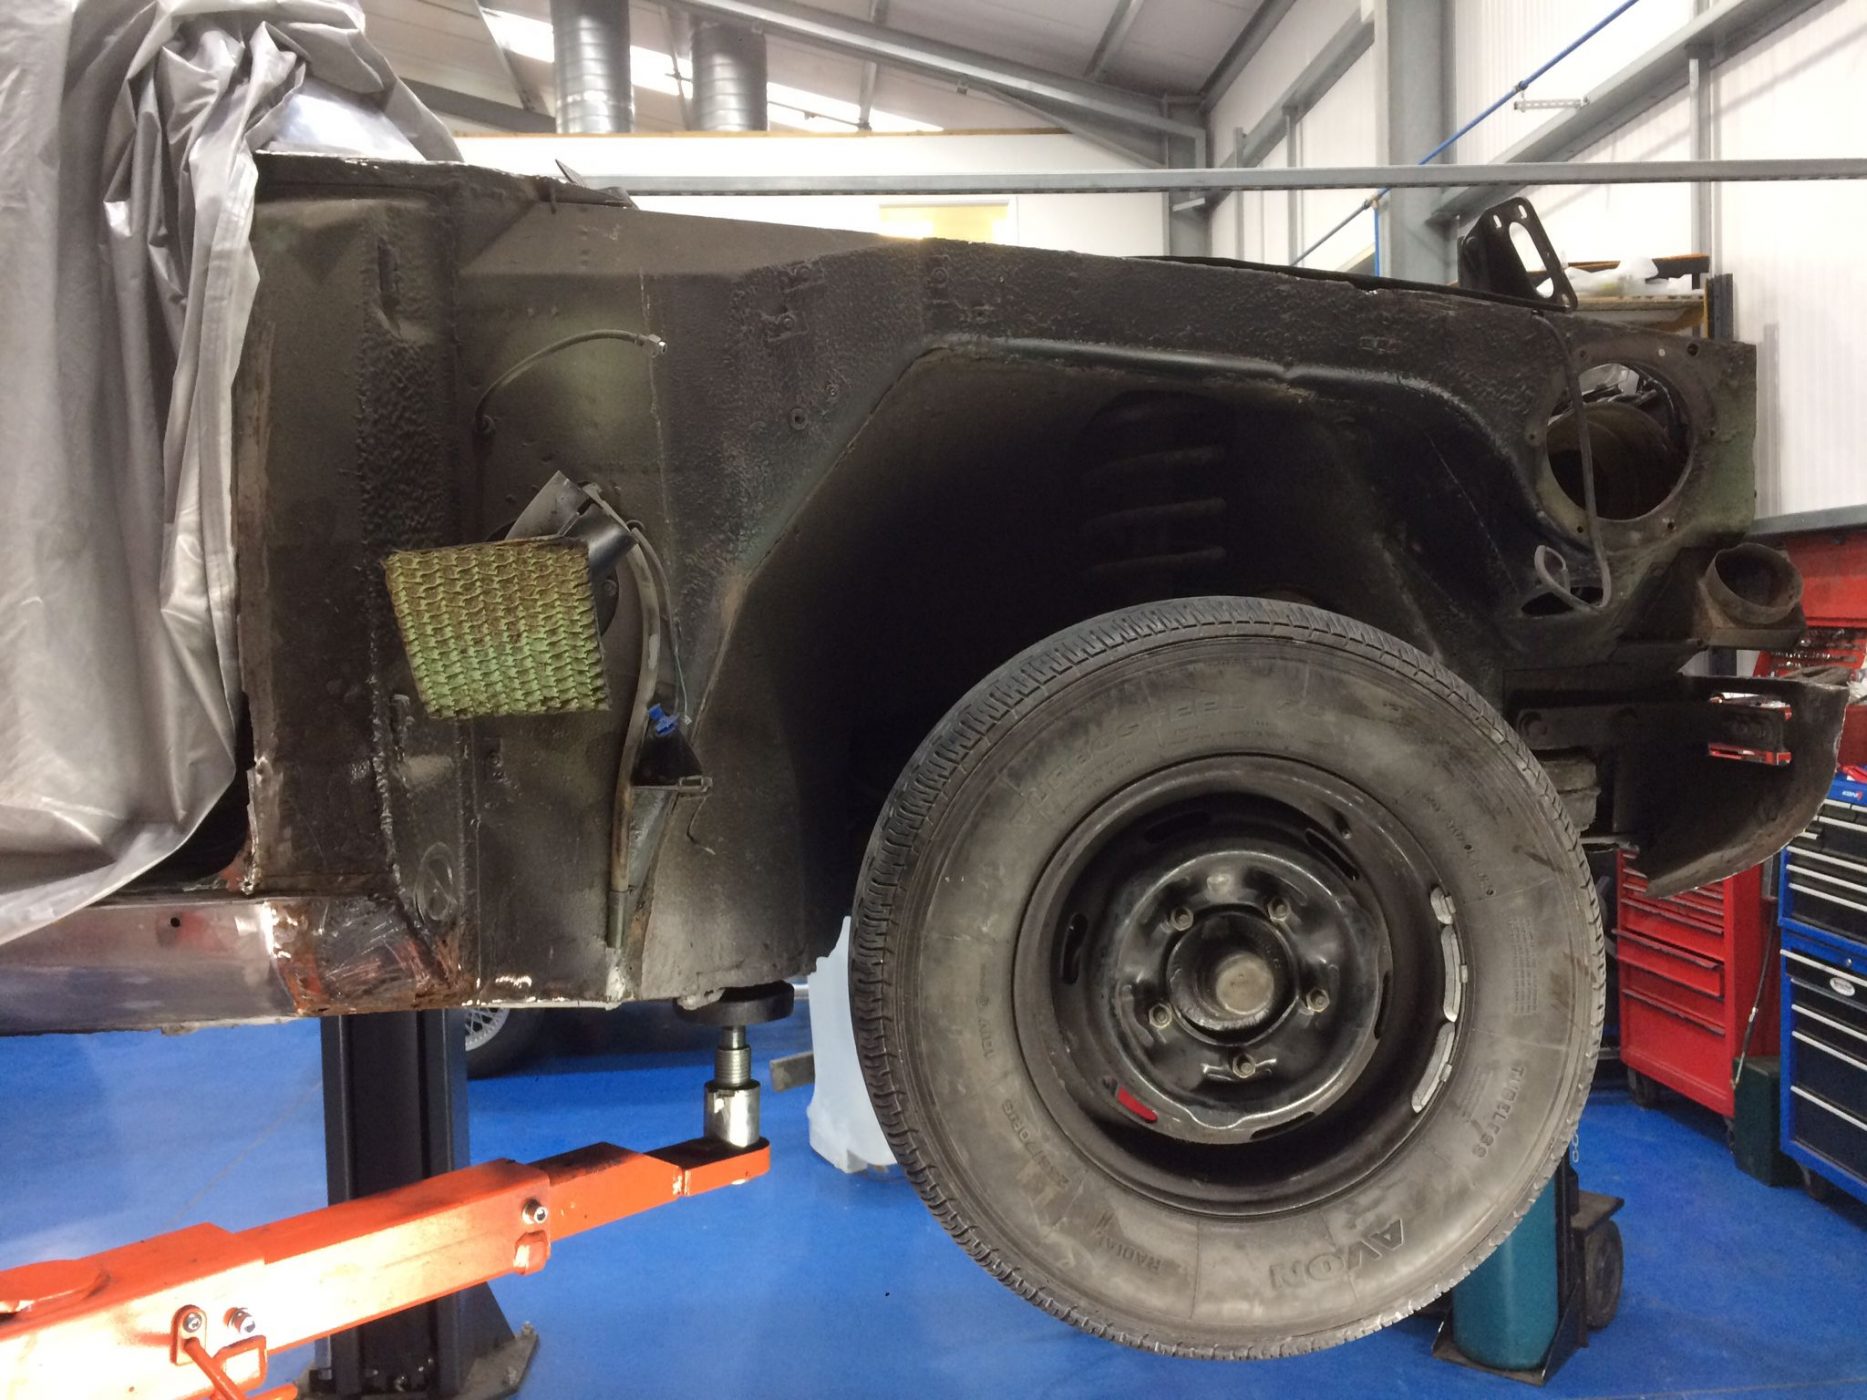
With the car inside of the restoration workshop, our senior technician Dave could get the floor pan of the Roadster into a better condition. One area, in particular, needed a small patch panel welded into the car.
Cutting out only what needed to be on the car to make sure the material was absolutely rock-solid on the car. After the new piece had been cleaned and prepared, a thick layer of seam sealer was used in order to stop any moisture from getting in between the new panel and the old.
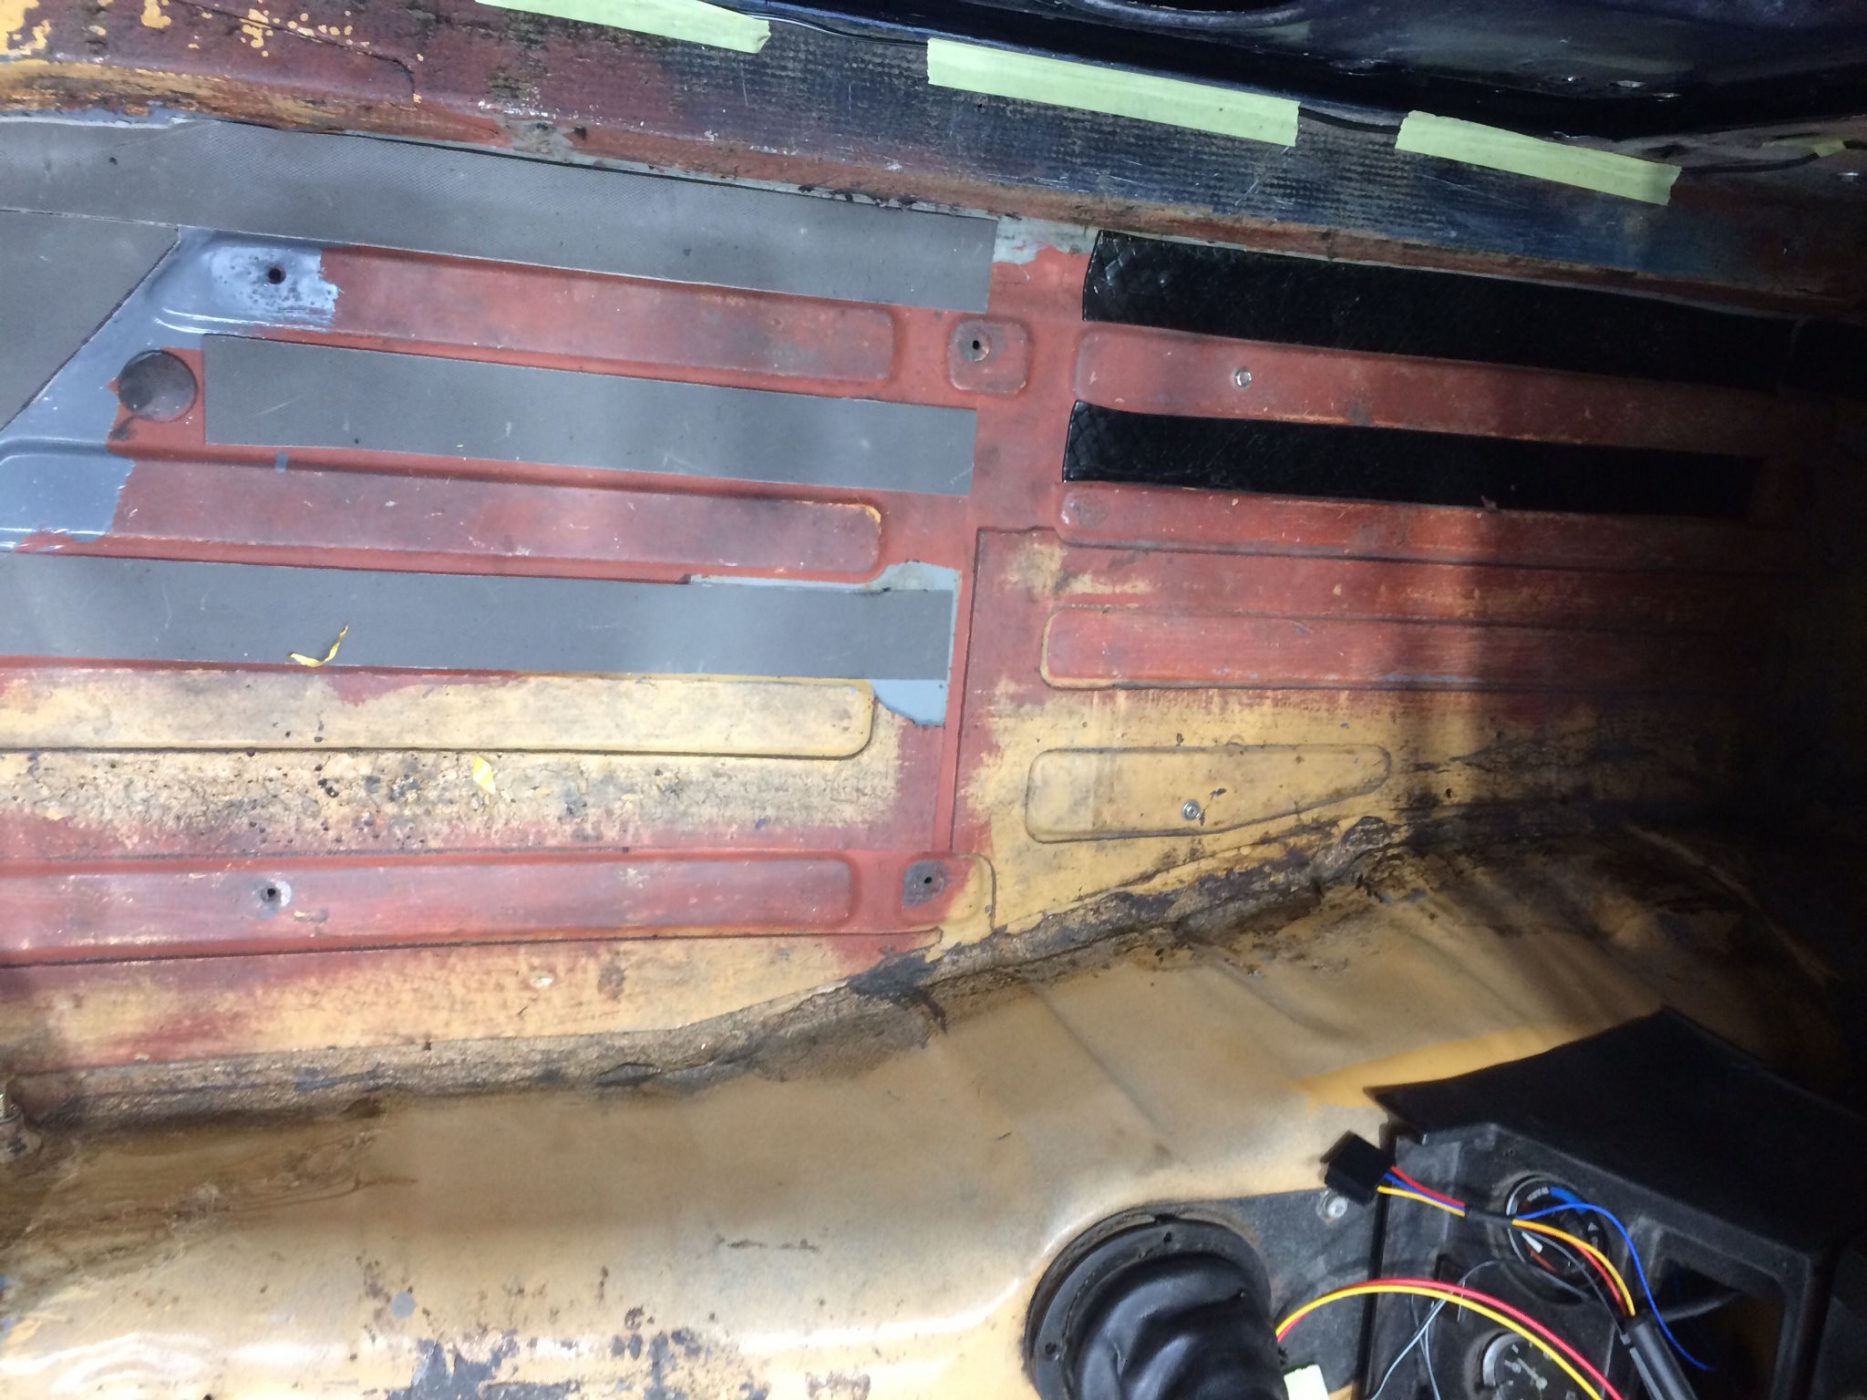
With this job done, our workshop began the process of getting the new sound deadening into the MGB Roadster.
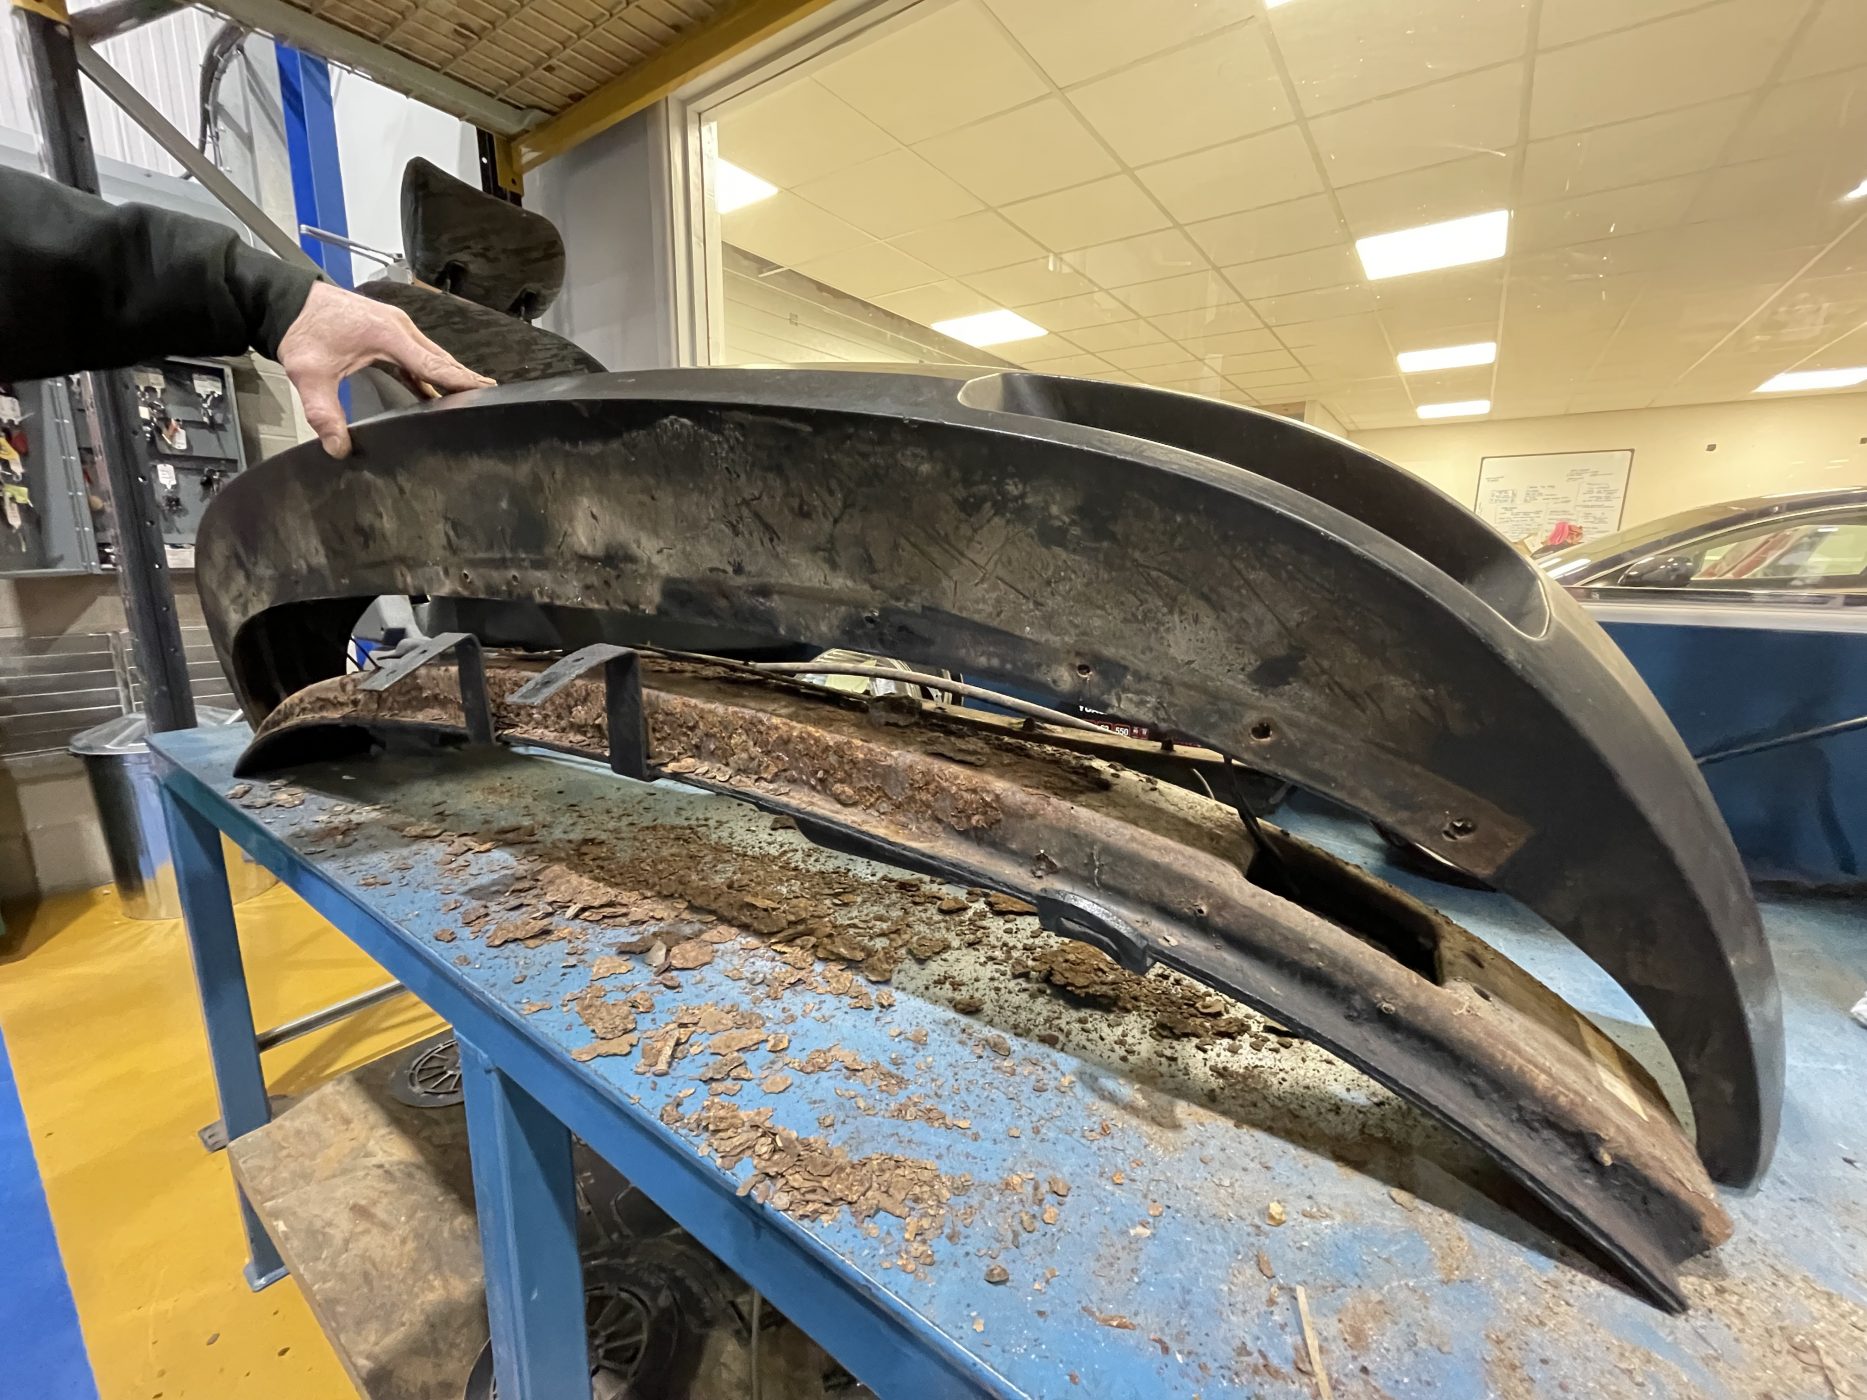
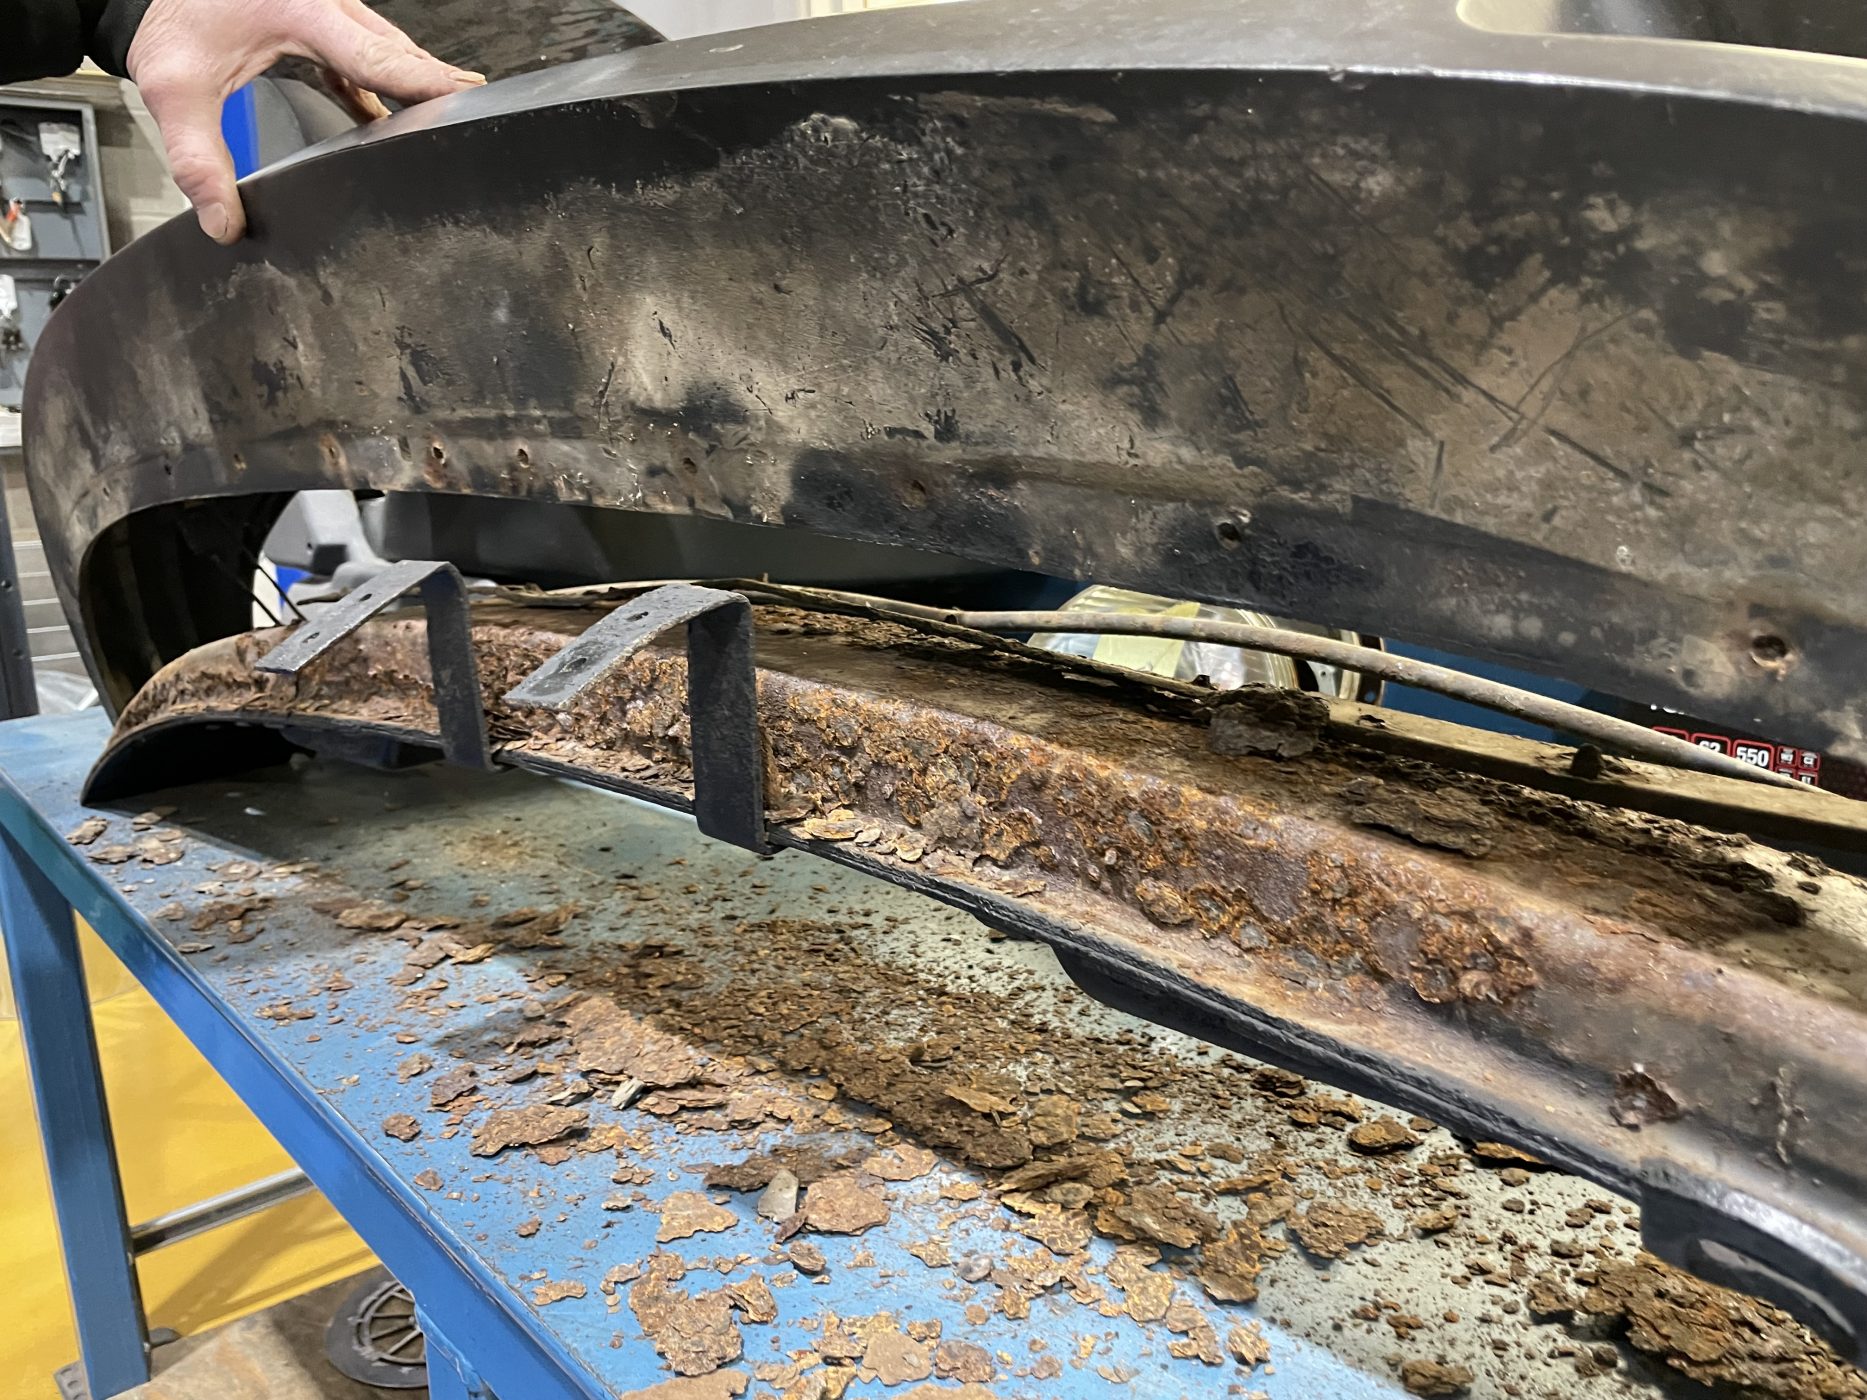
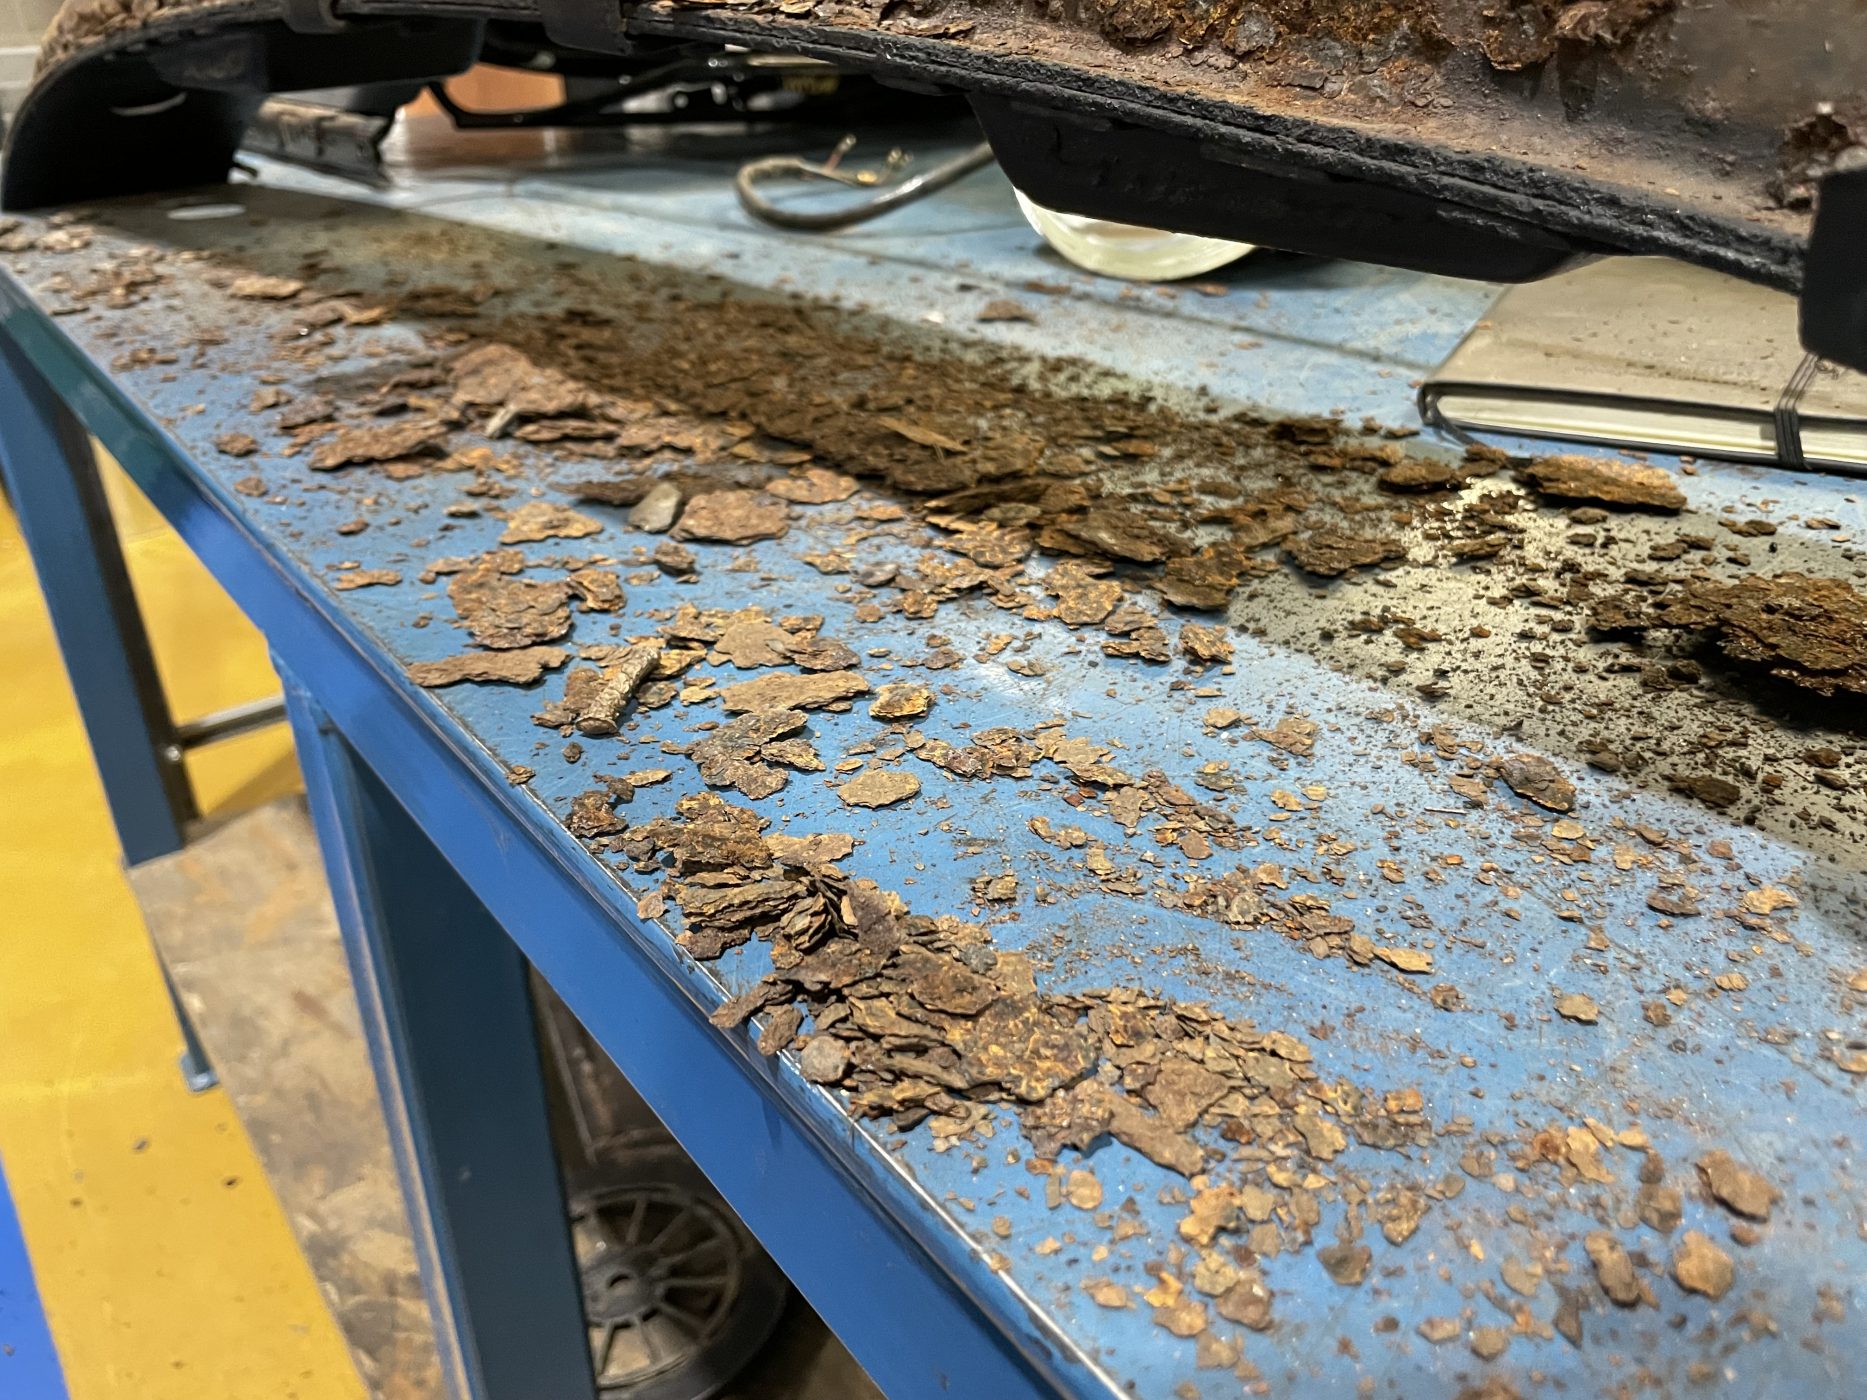
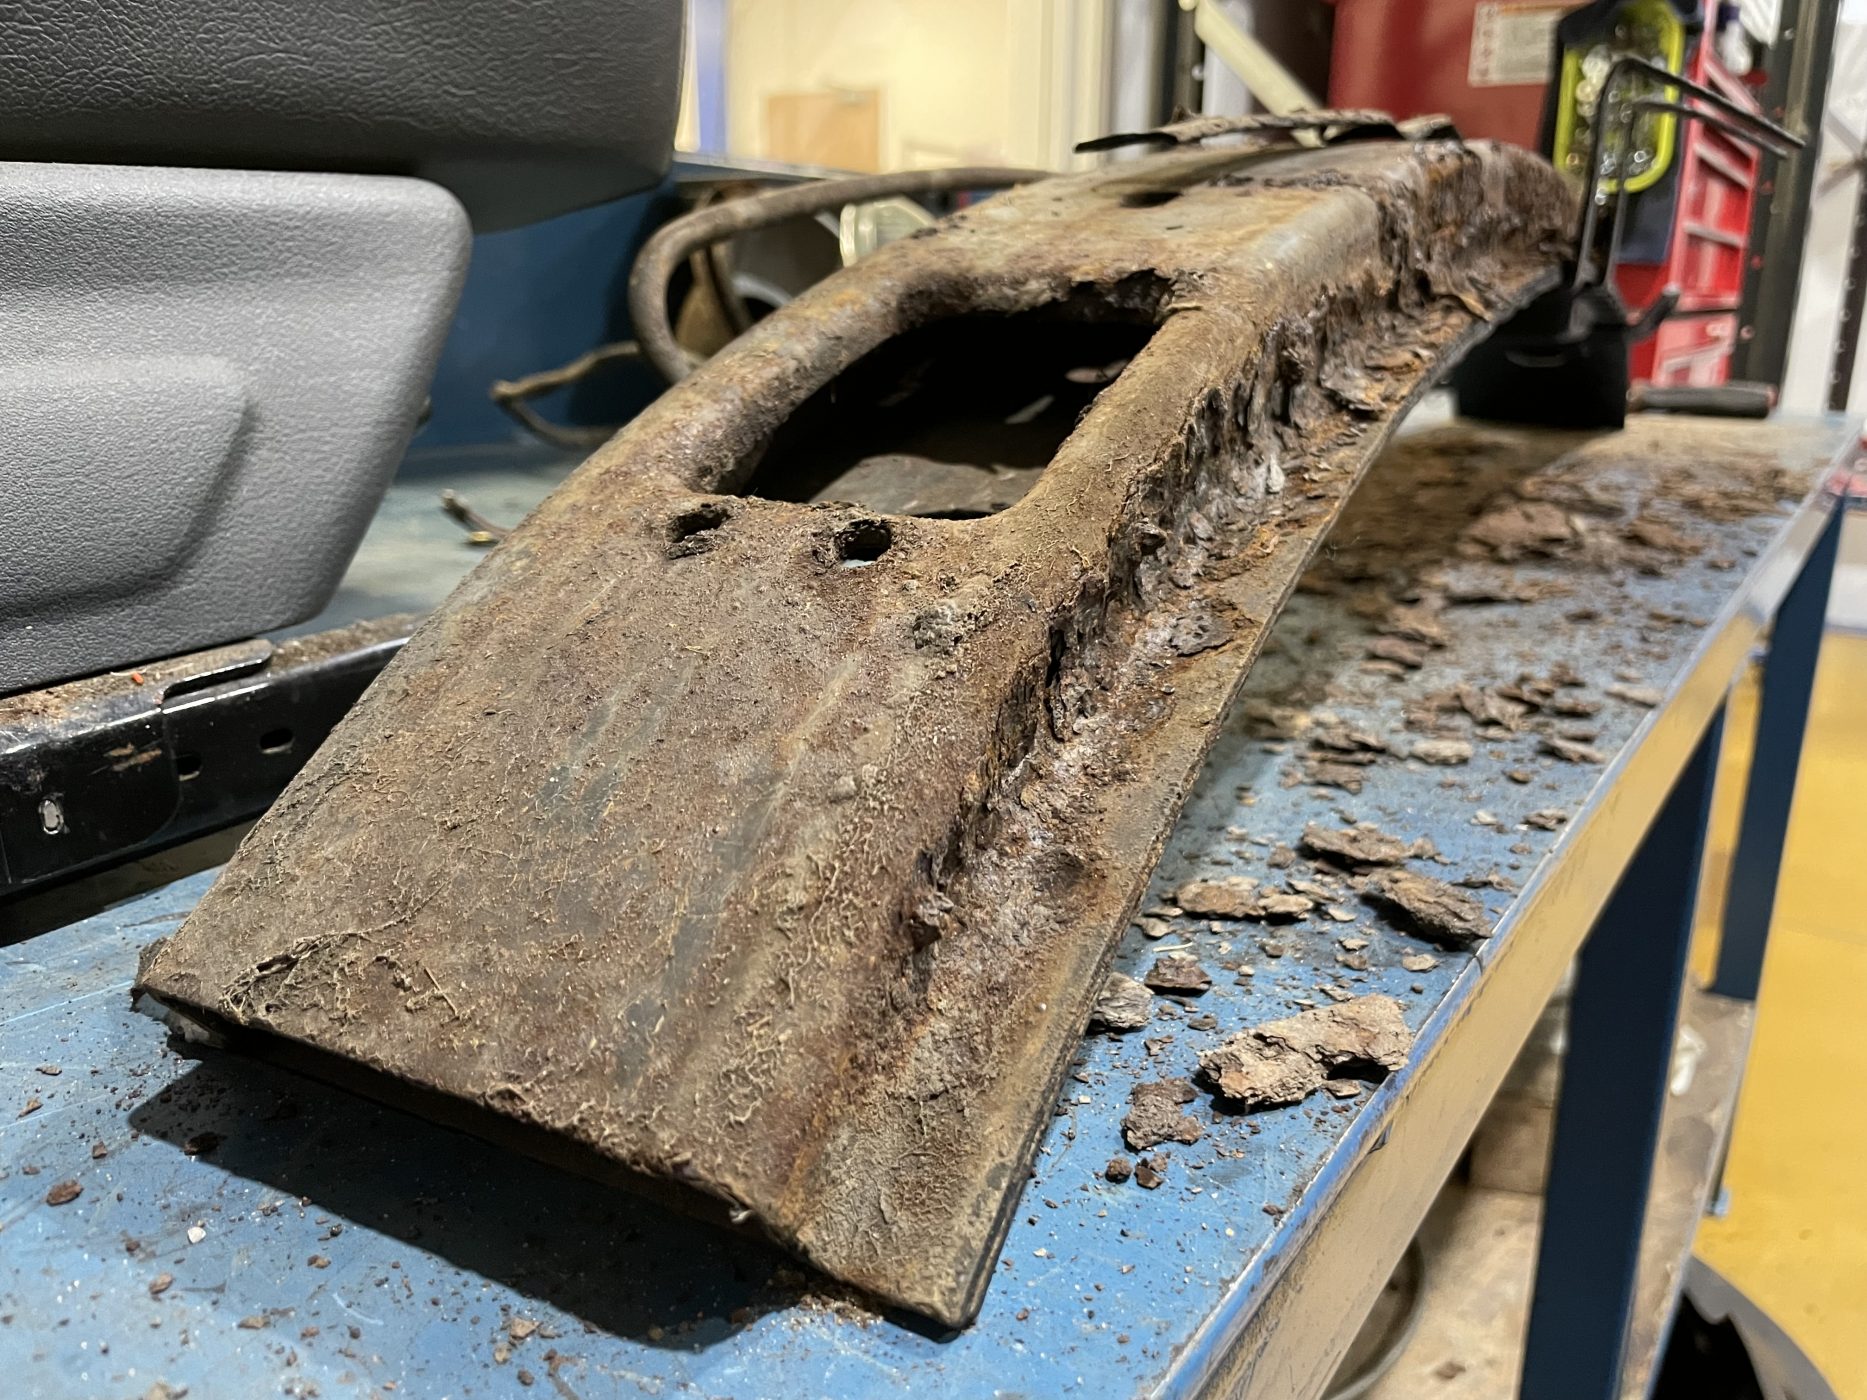

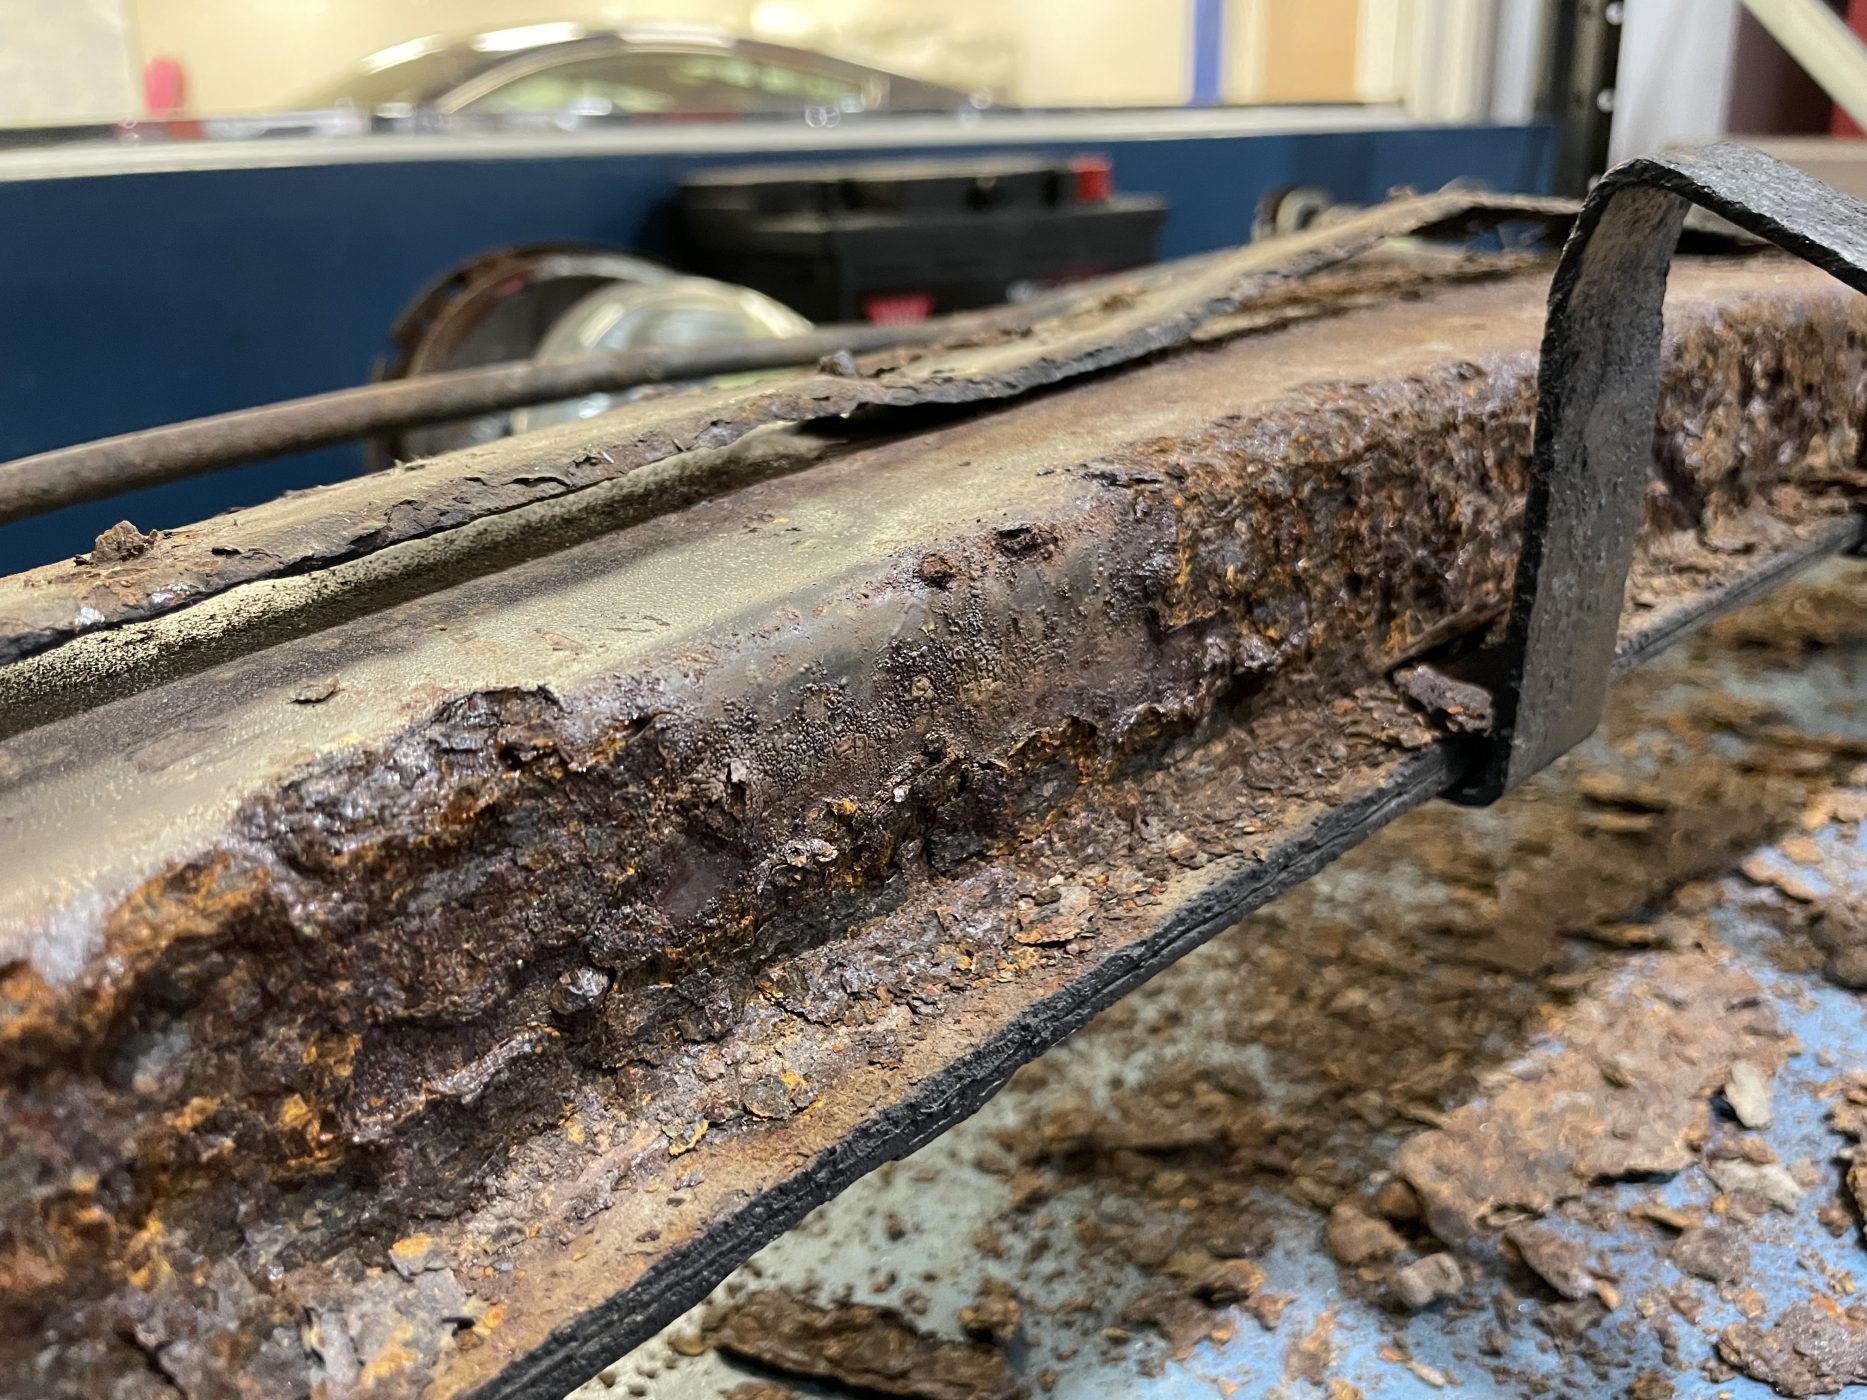
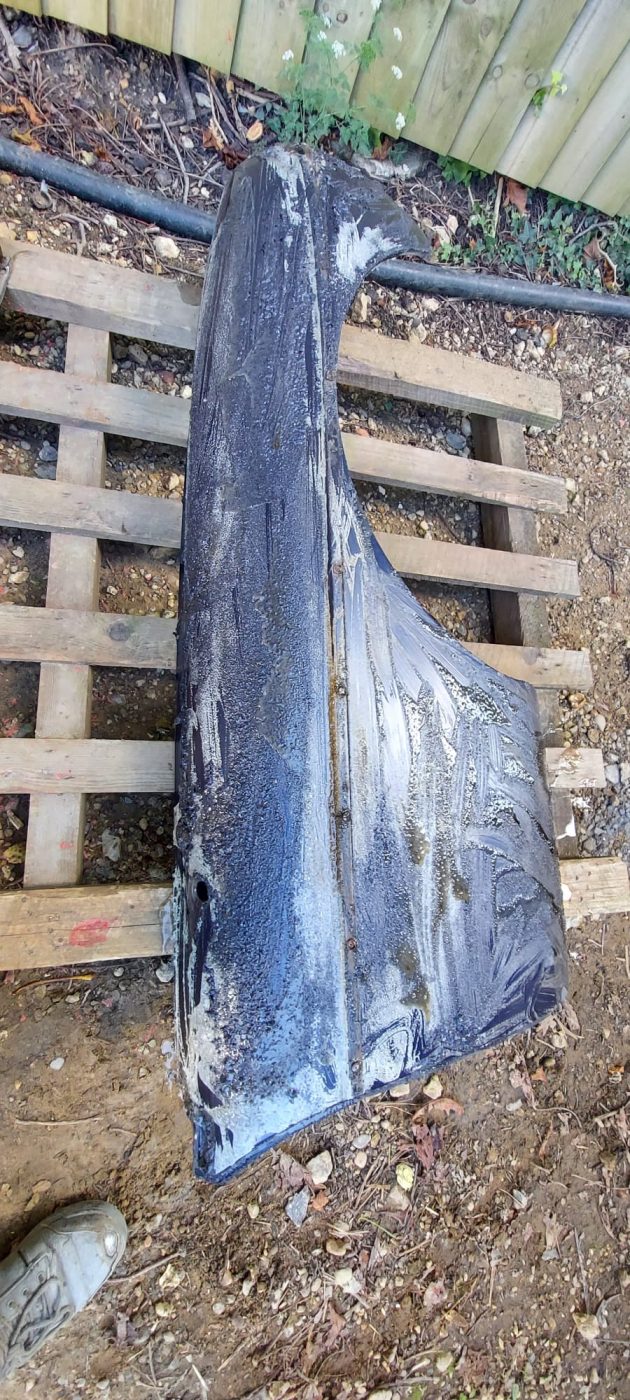
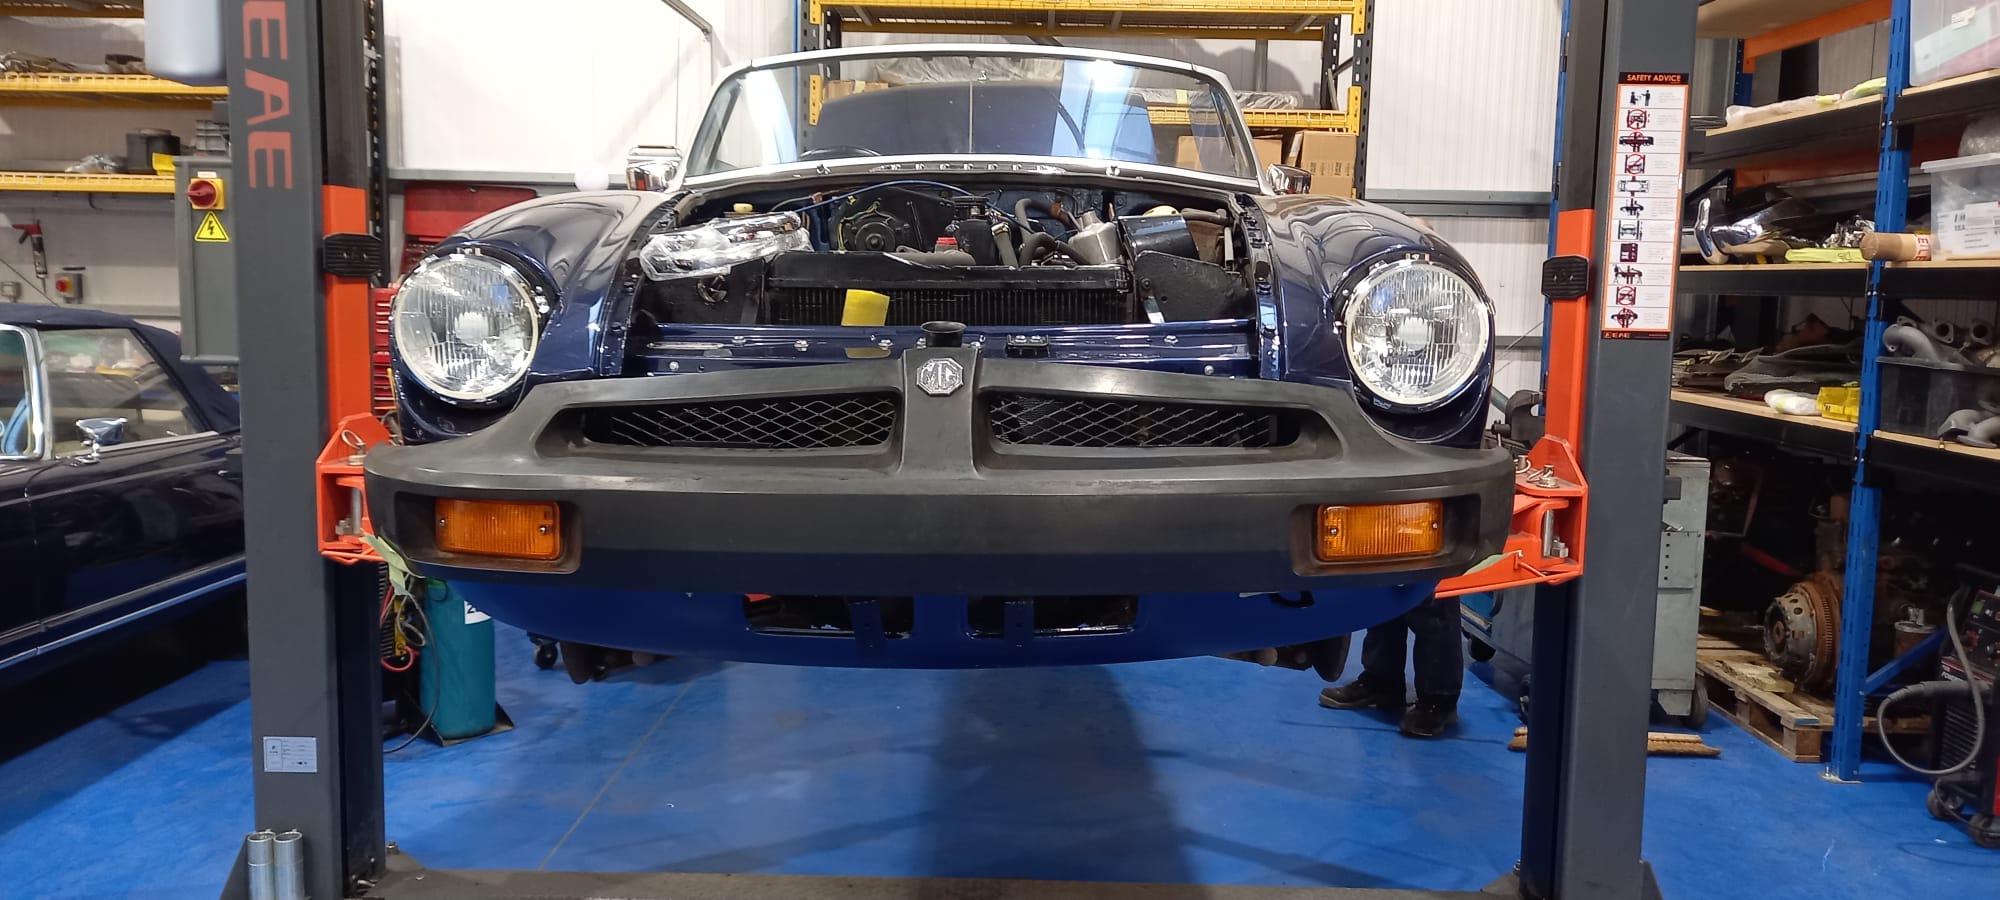
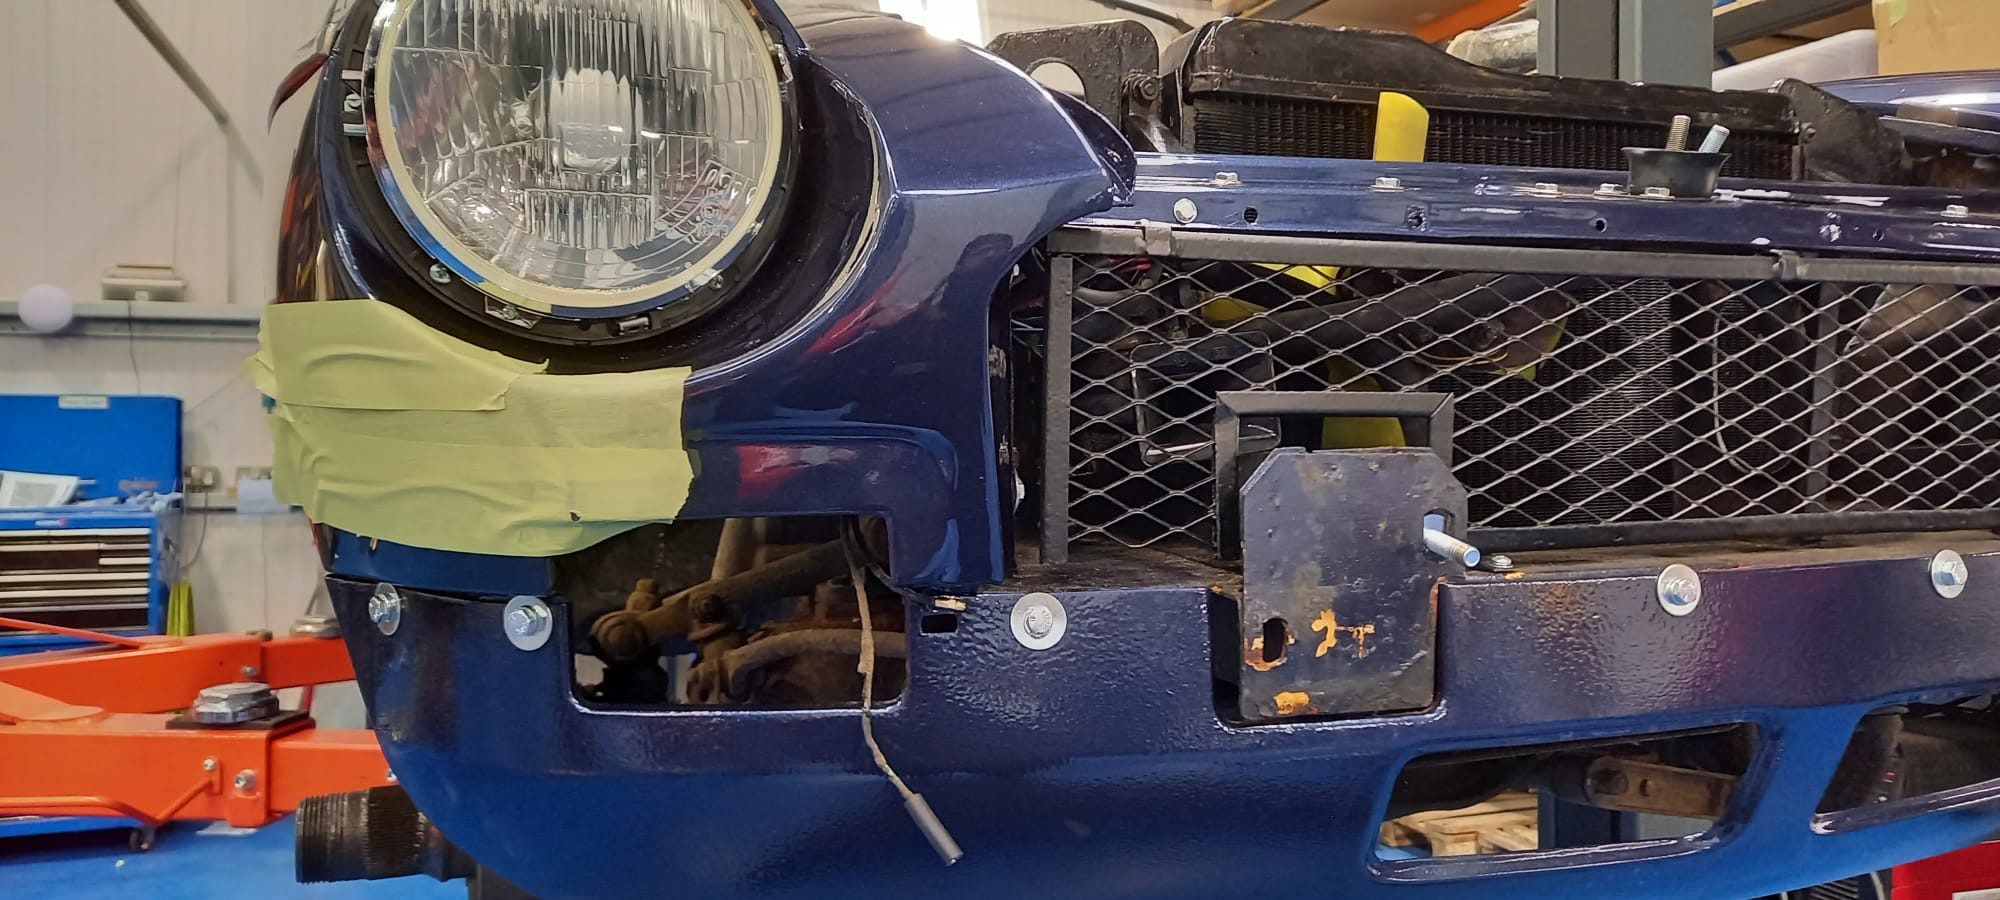
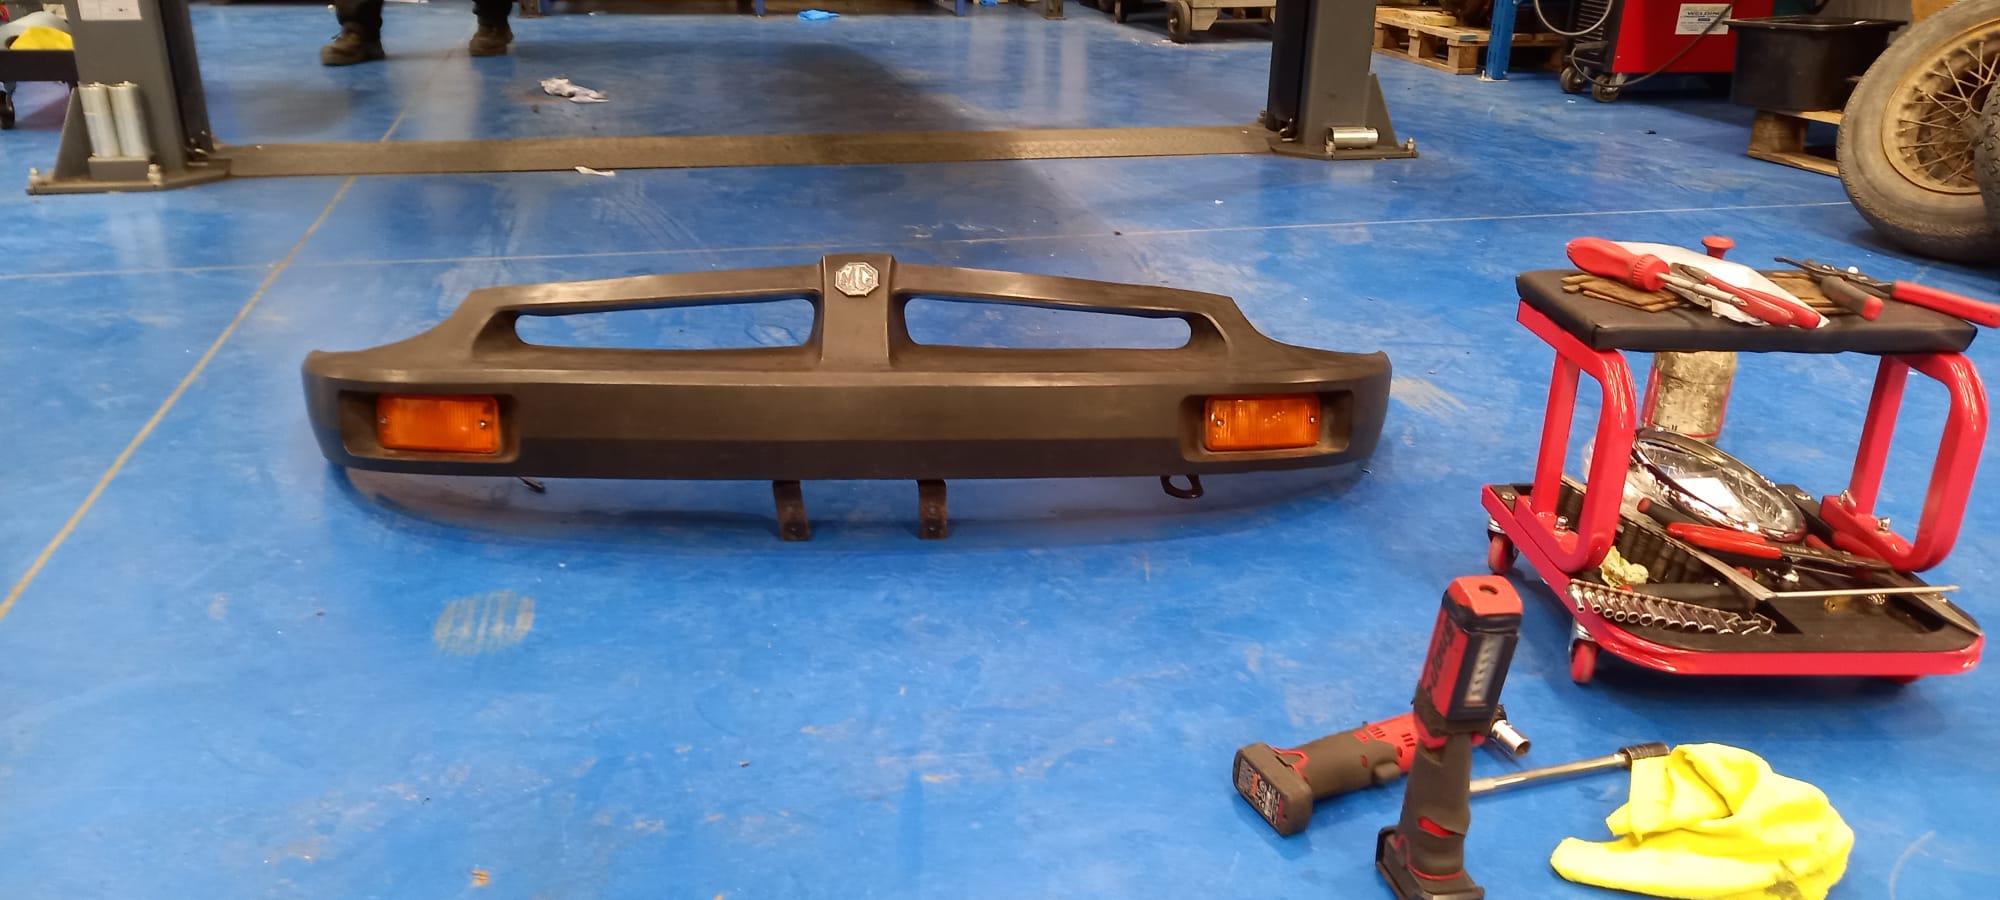
Whilst getting the car reassembled in our workshop, our technician Jon discovered an issue with the front bumpers. We had removed the bumpers from the car during the cars teardown but had not entirely disassembled it. There were some areas of corrosion on the back of the piece which were treated and neutralised but whilst trying to refit the bumper, he took the whole piece apart to work on aligning the piece to the car.
That is when we discovered the front side of the bumper supports were heavily surface corroded. The decision was taken to clean up the originals as during inspection and assessment the corrosion had not gone through or compromised the piece in our technician’s opinion. So, Jon began the work of carefully cleaning up the piece and coating it in a layer of rust proofing to protect it for many years to come.
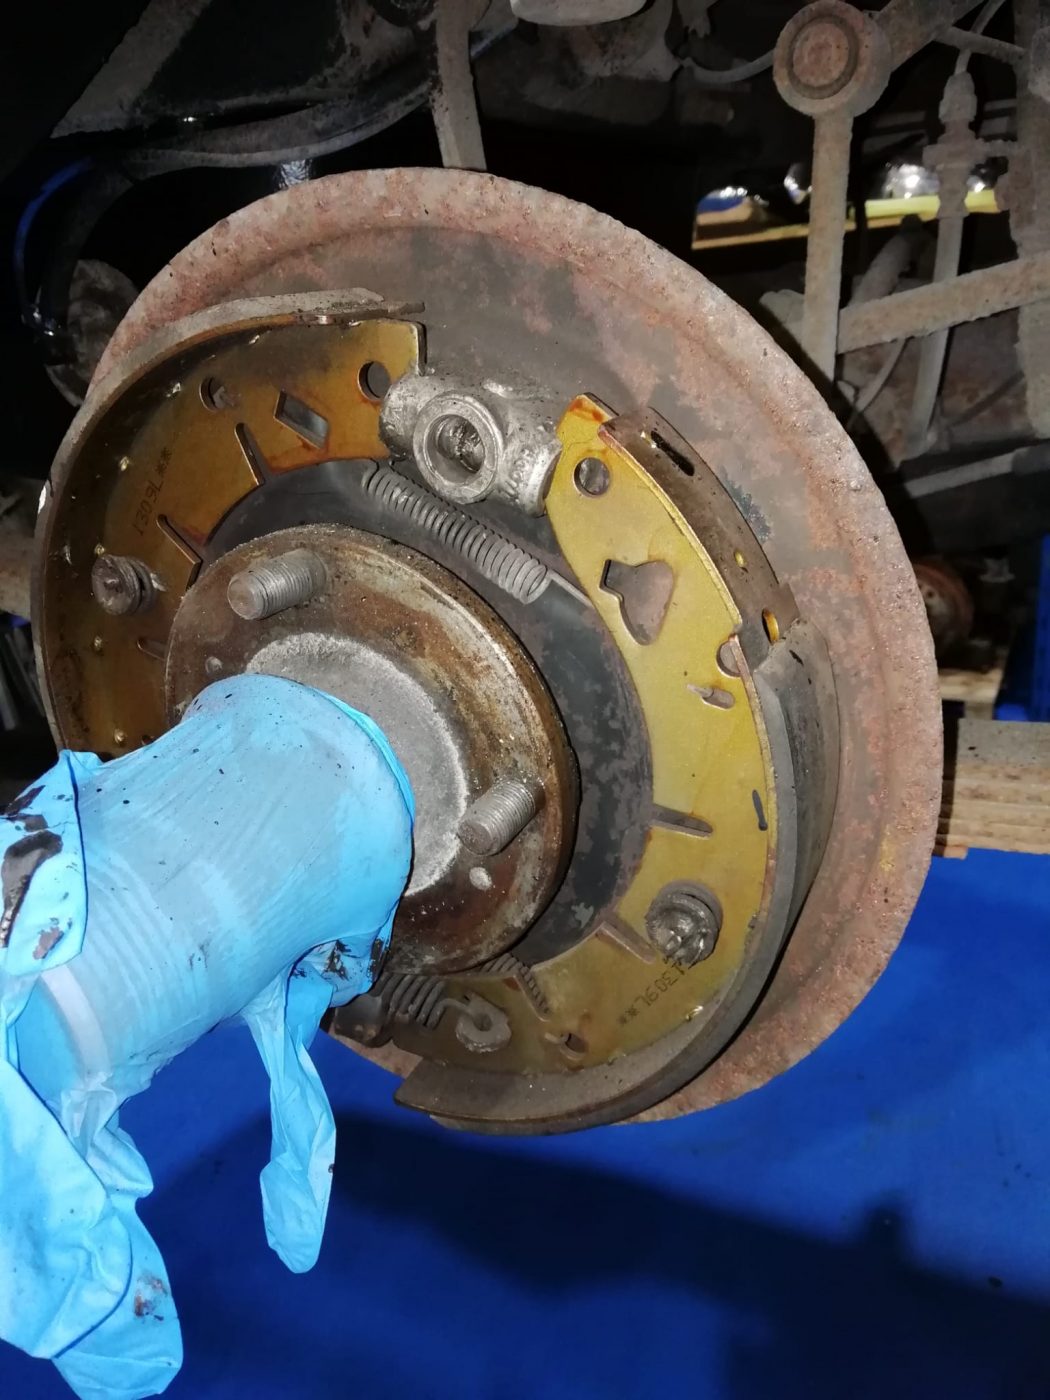
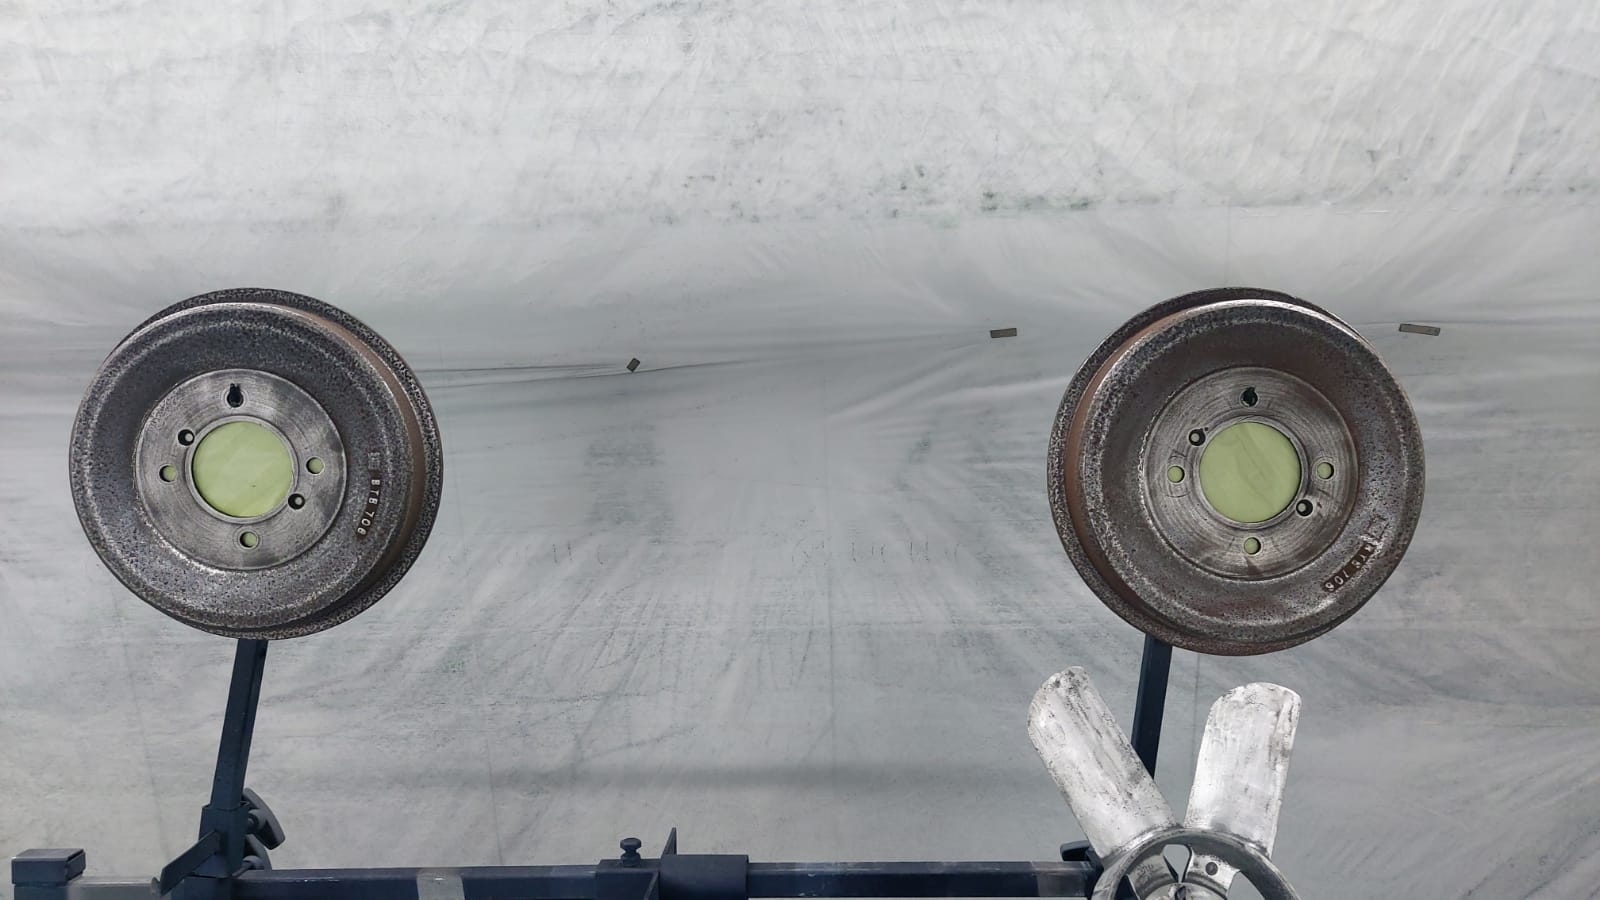
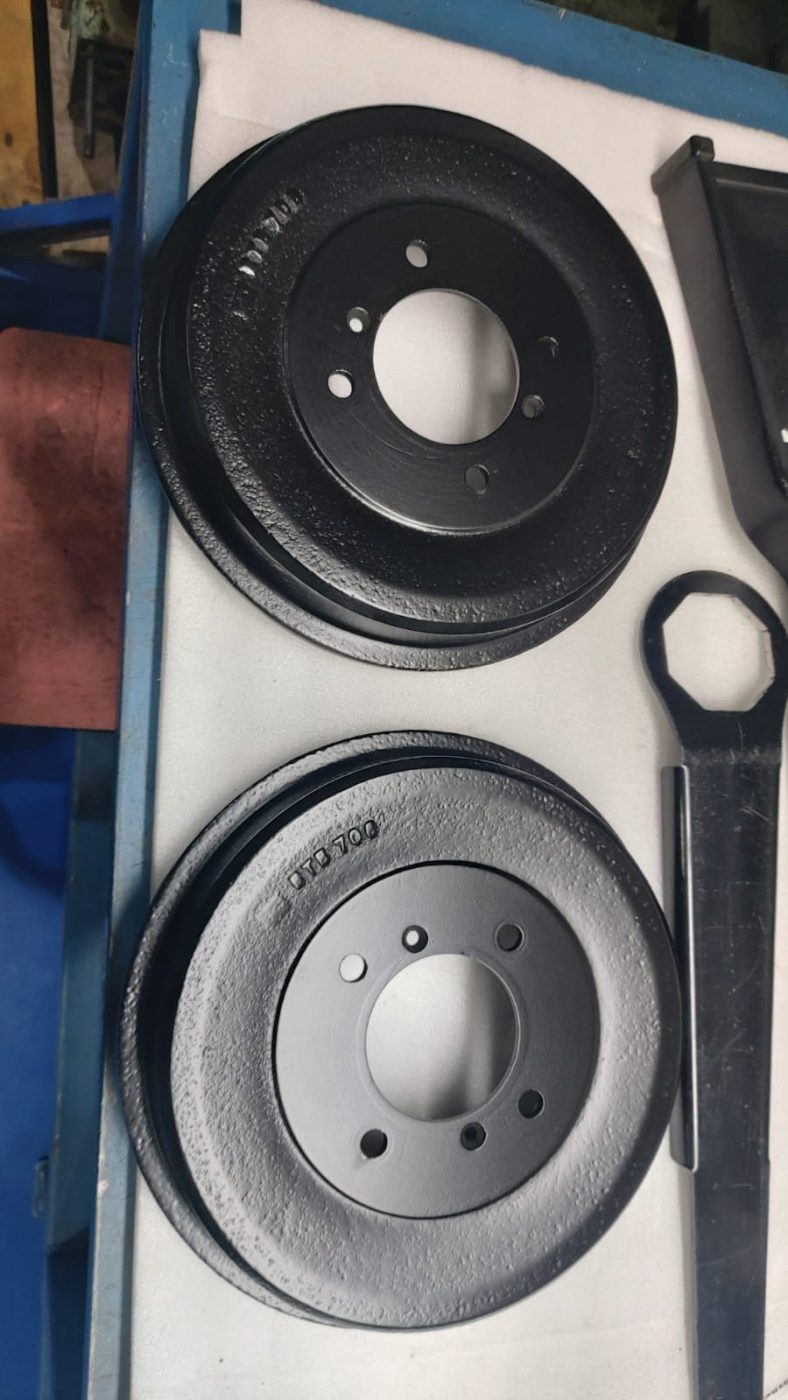

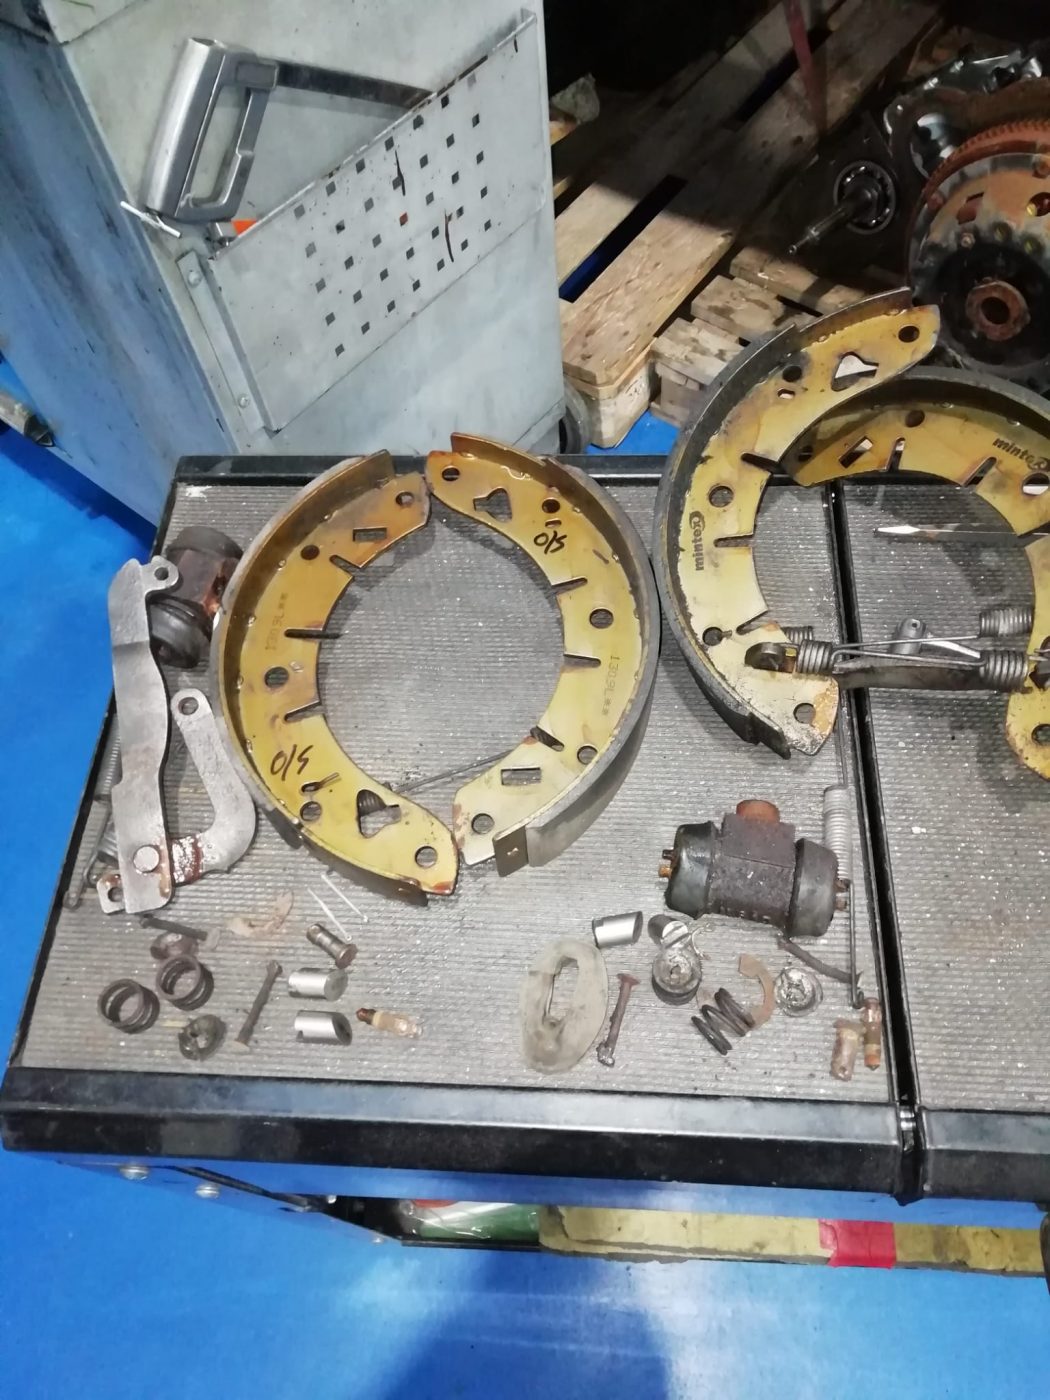
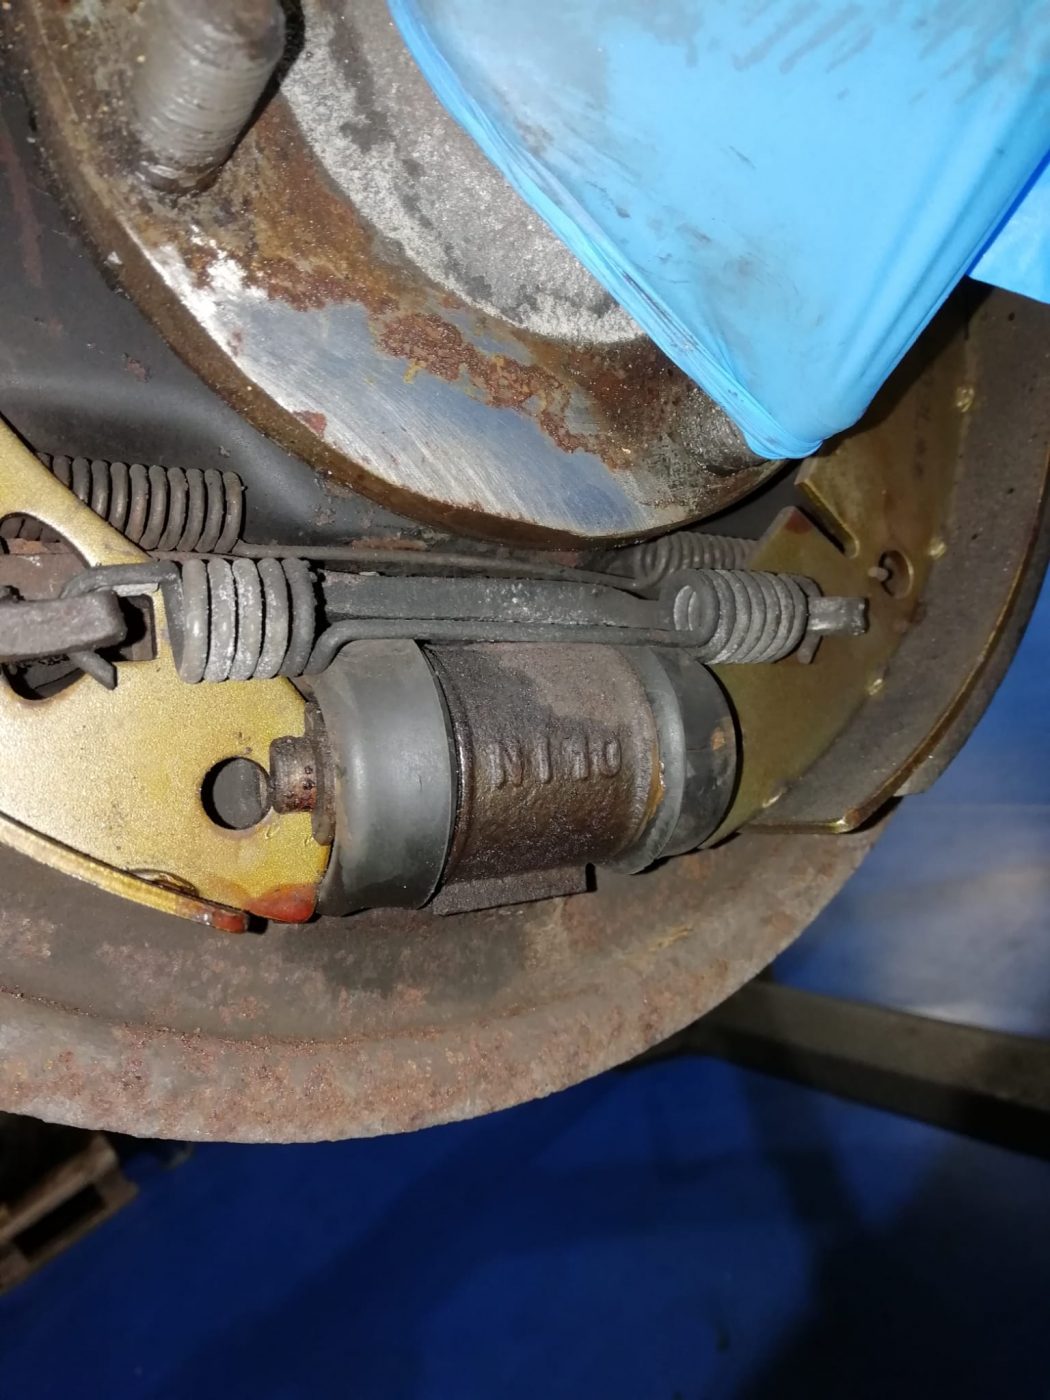
During the cars rebuild, the technicians found both rear wheel cylinders on the drum brakes were leaking and needed to be replaced. Whilst in there, our technicians had the drums refinished in a satin black coating.
The shoes and springs could be reused. But, some of the adjusters and hardware were very close to seizing and would make it difficult to adjust the brakes in the future which is something that routinely needs to be done. So, these parts were changed during the rebuild of the brakes.
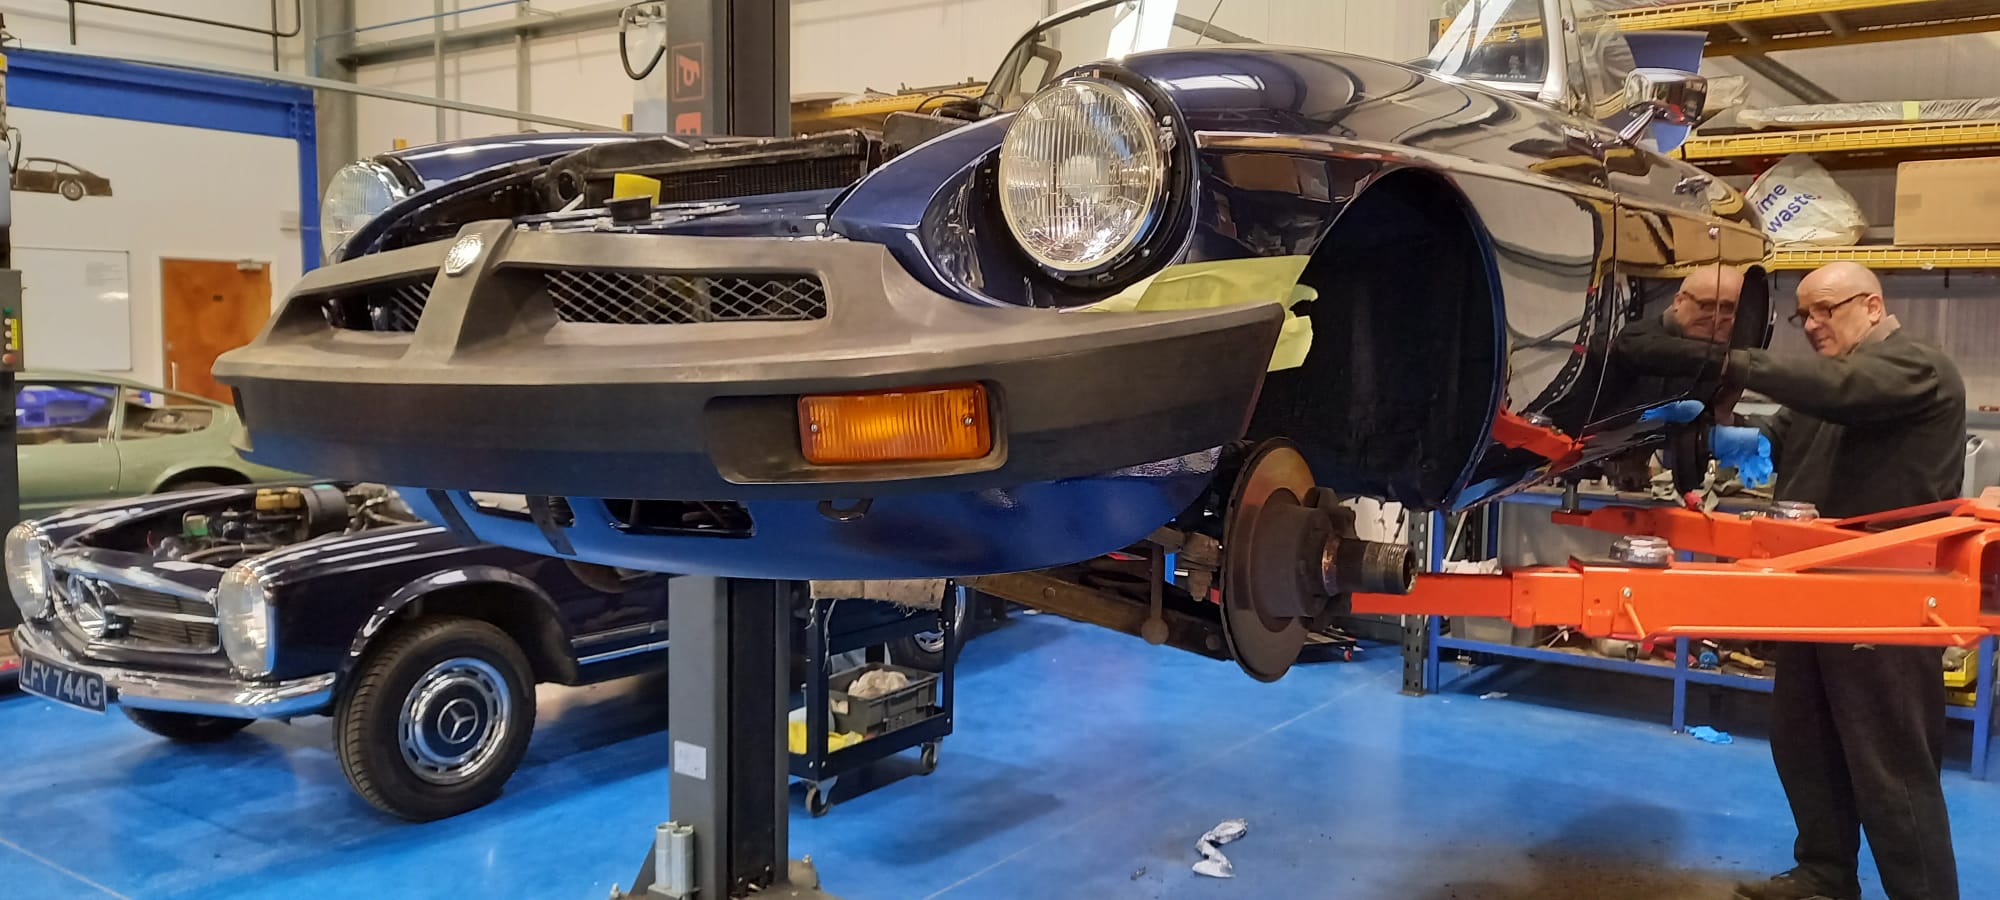
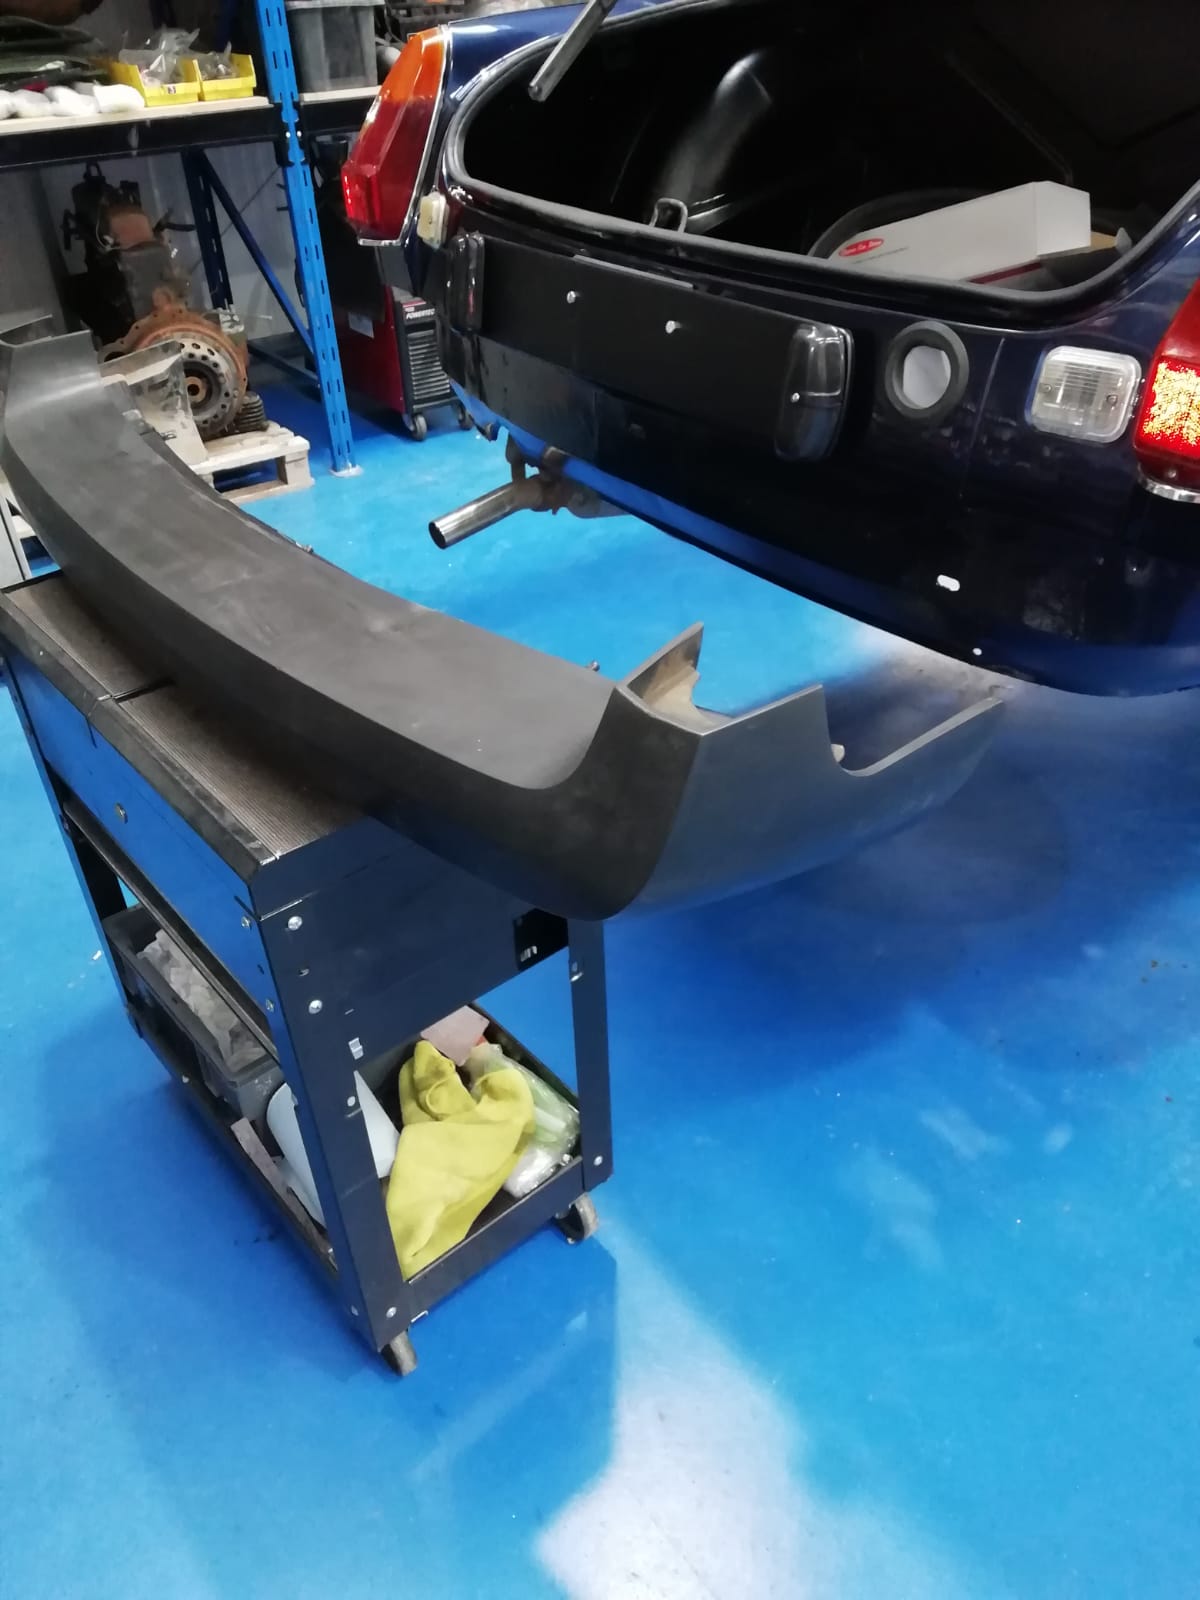
While Paul was fixing the brakes at the rear of the 1977 MGB Roadster, Jon was working on getting the newly repaired and refitted bumpers back onto the car.
This was a crucial part of the reassembly of the car, because it is the point where all the body lines and panel gaps converge. They also need to fit tight to the body but have enough room to move slightly and not risk damaging the paintwork underneath. So, for this, Jon created a set of custom mounts and brackets to adjust the front bumper to a place in which it was visually happy and space away enough from the body of the MGB.
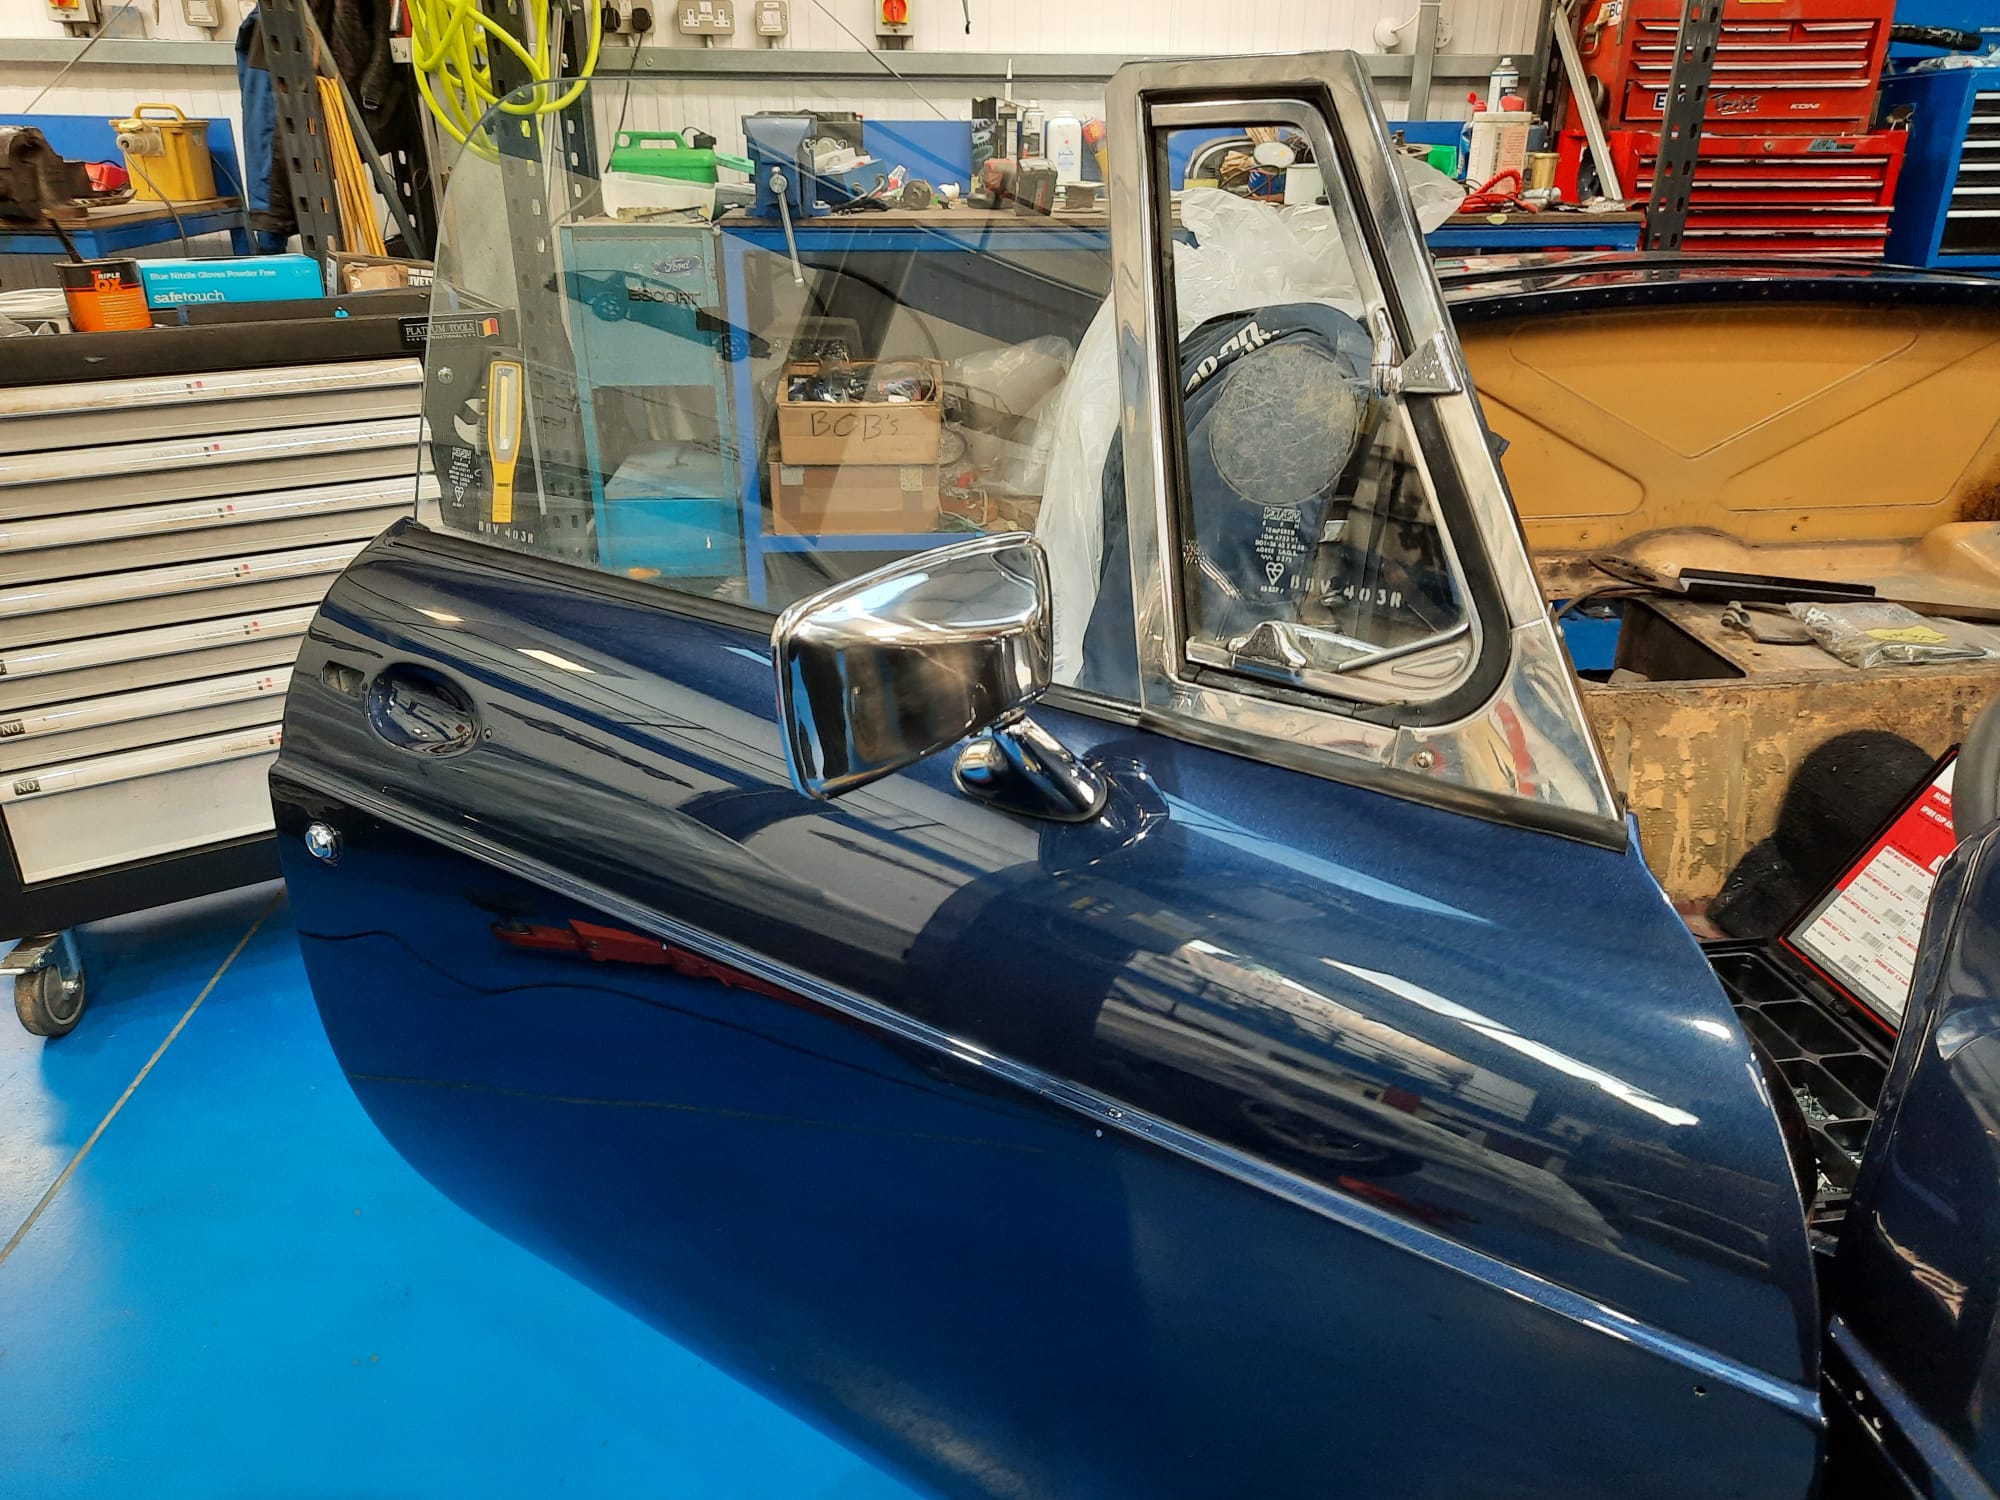
At the same time, new wing mirrors were fitted to the car due to visible dents.

With the reassembly of the MGB Roadster complete in the workshop, it could then be turned over to the trim shop to work their skill on the interior of the Roadster.
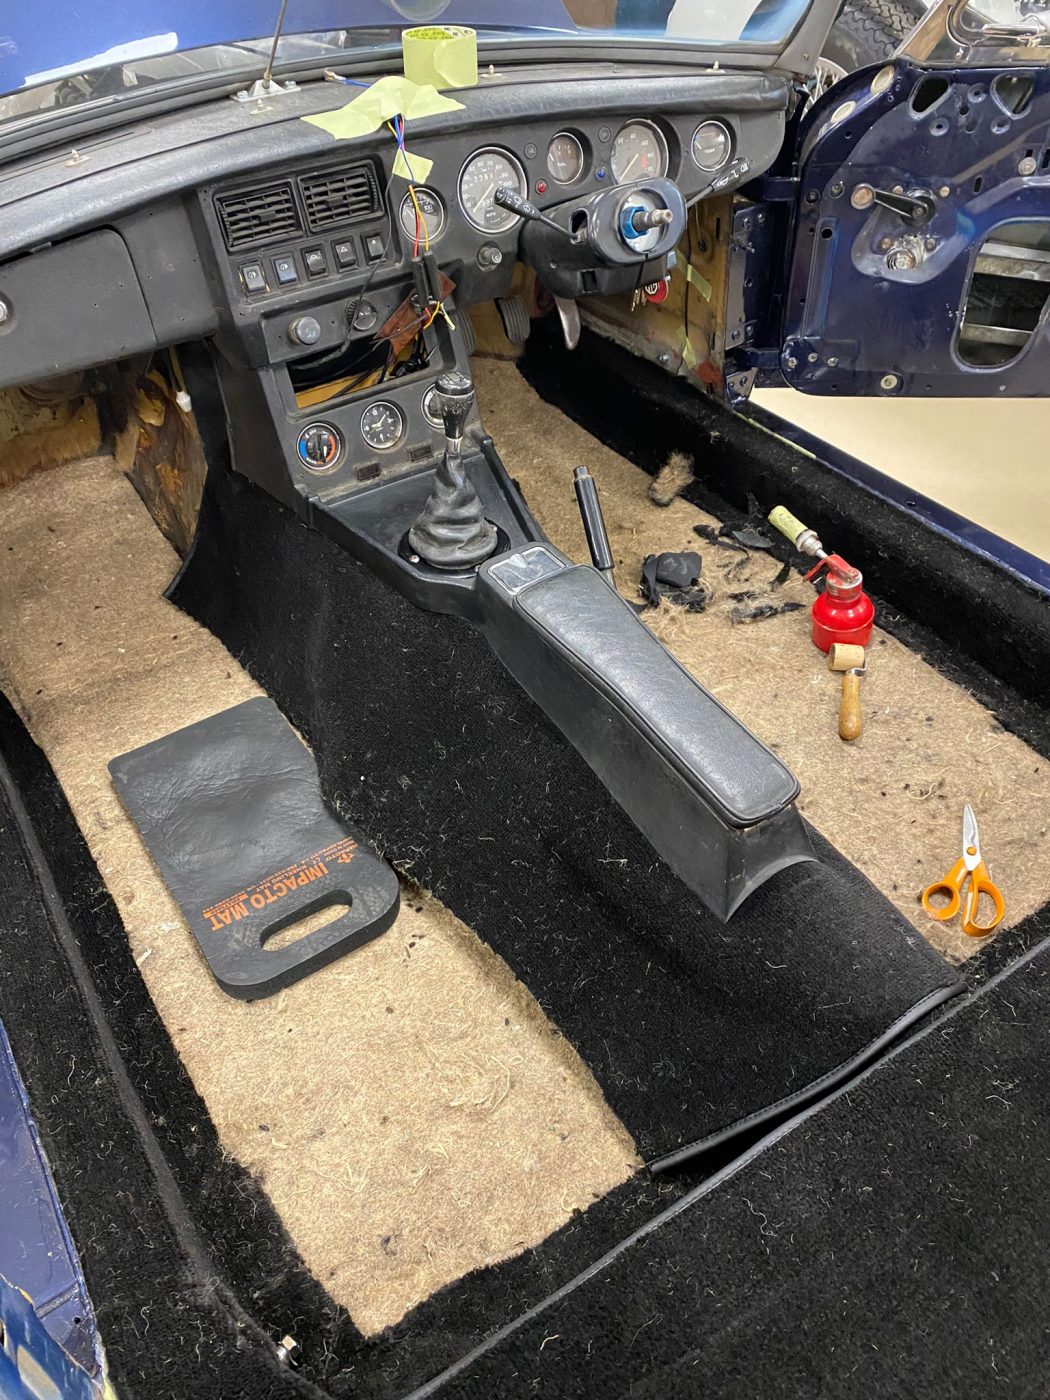
With the floors now completely finished and solid, Brian could begin installing the sound deadening material into the car. This is laid down like sheets of carpet, and placed into areas of the car that can carry vibrations and noise into the cabin. He skillfully put the deadening material in as if it were carpet. Trimming each piece for the perfect fit to the piece next to it.
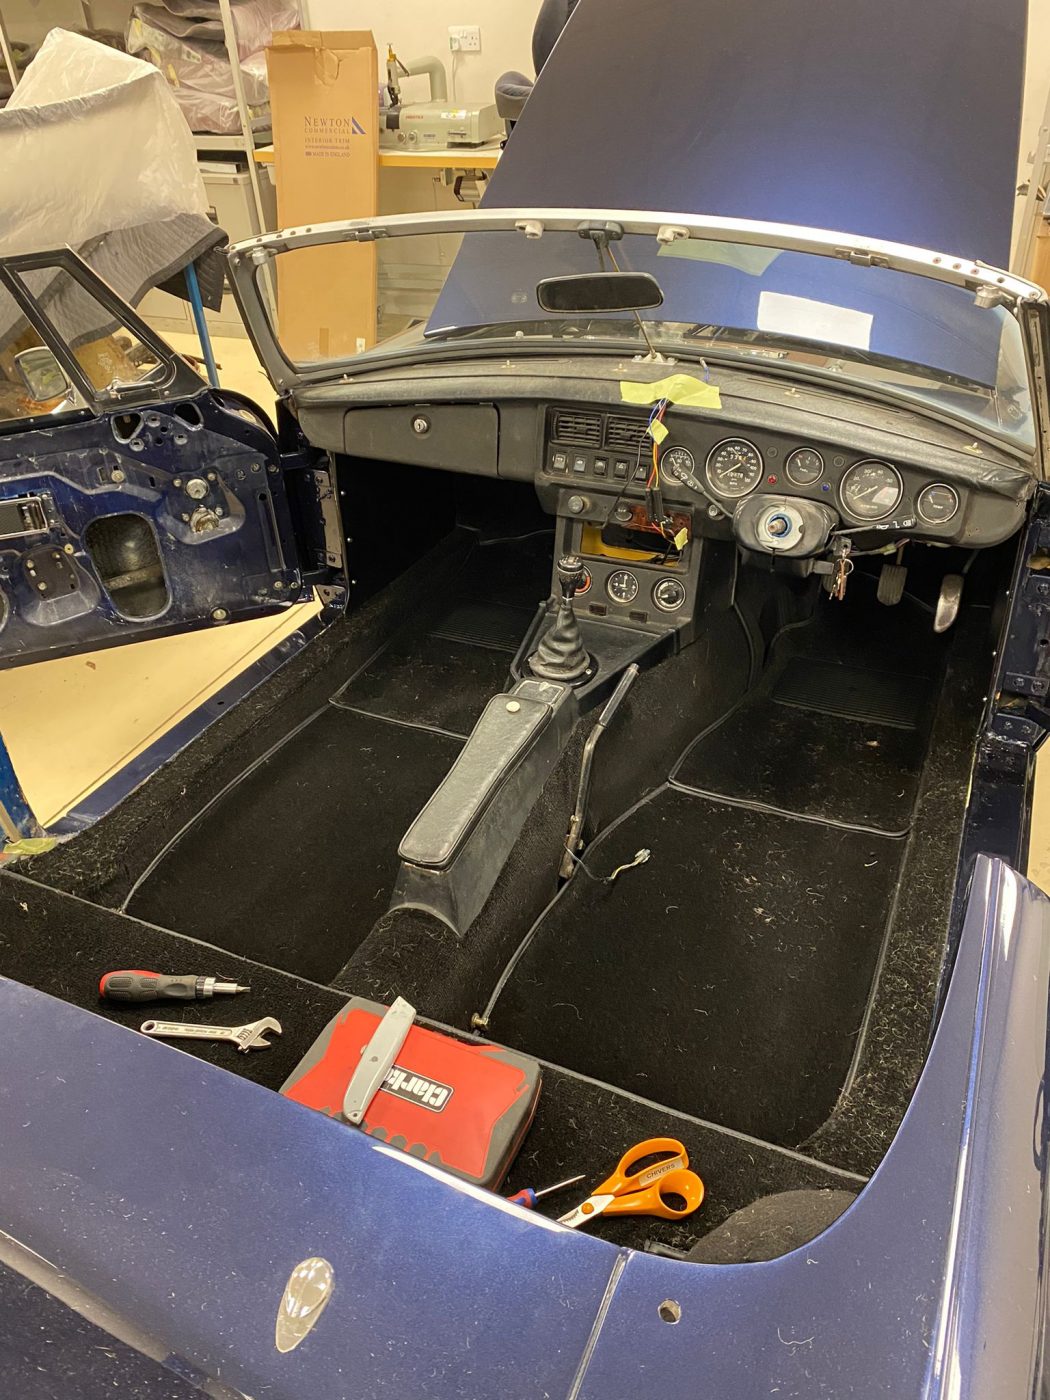
Then, it was time to fit the carpet kit for the MGB.
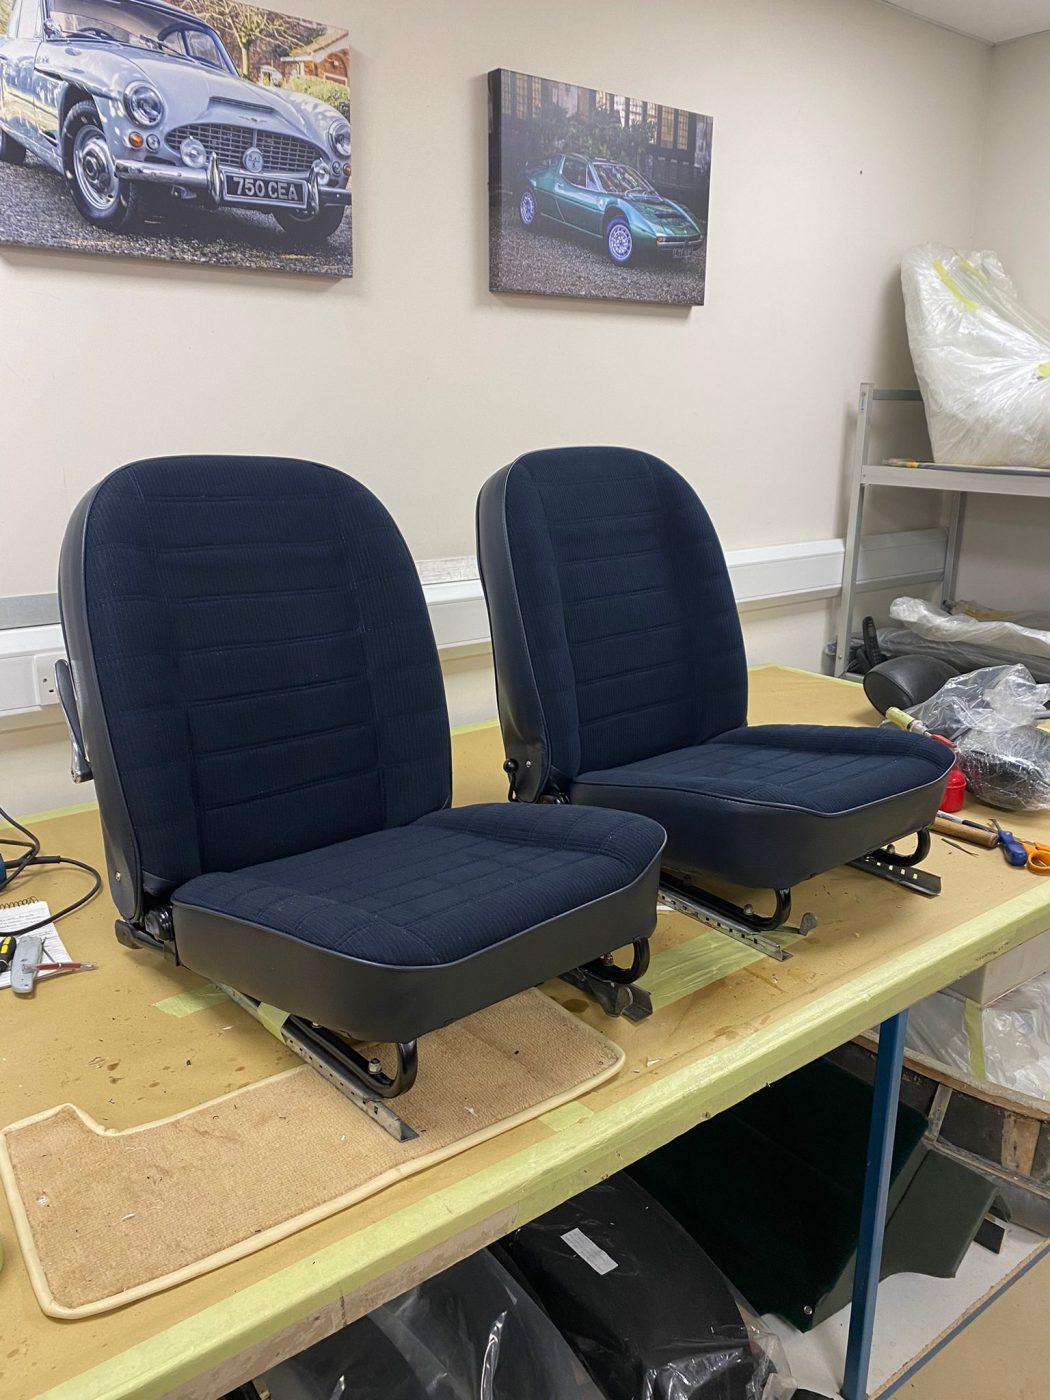
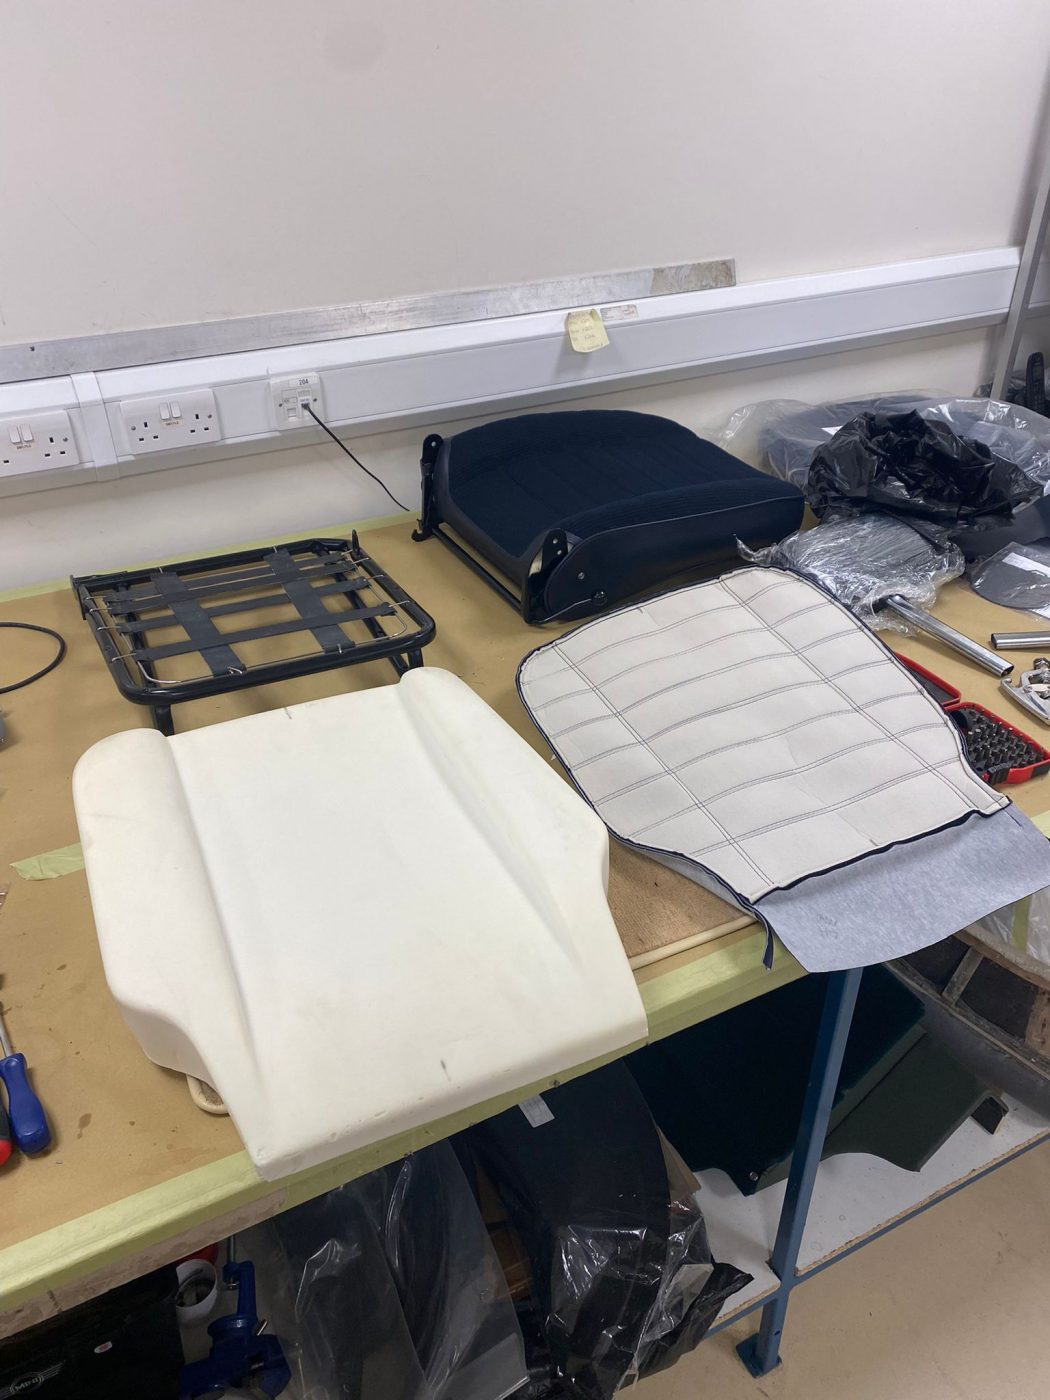
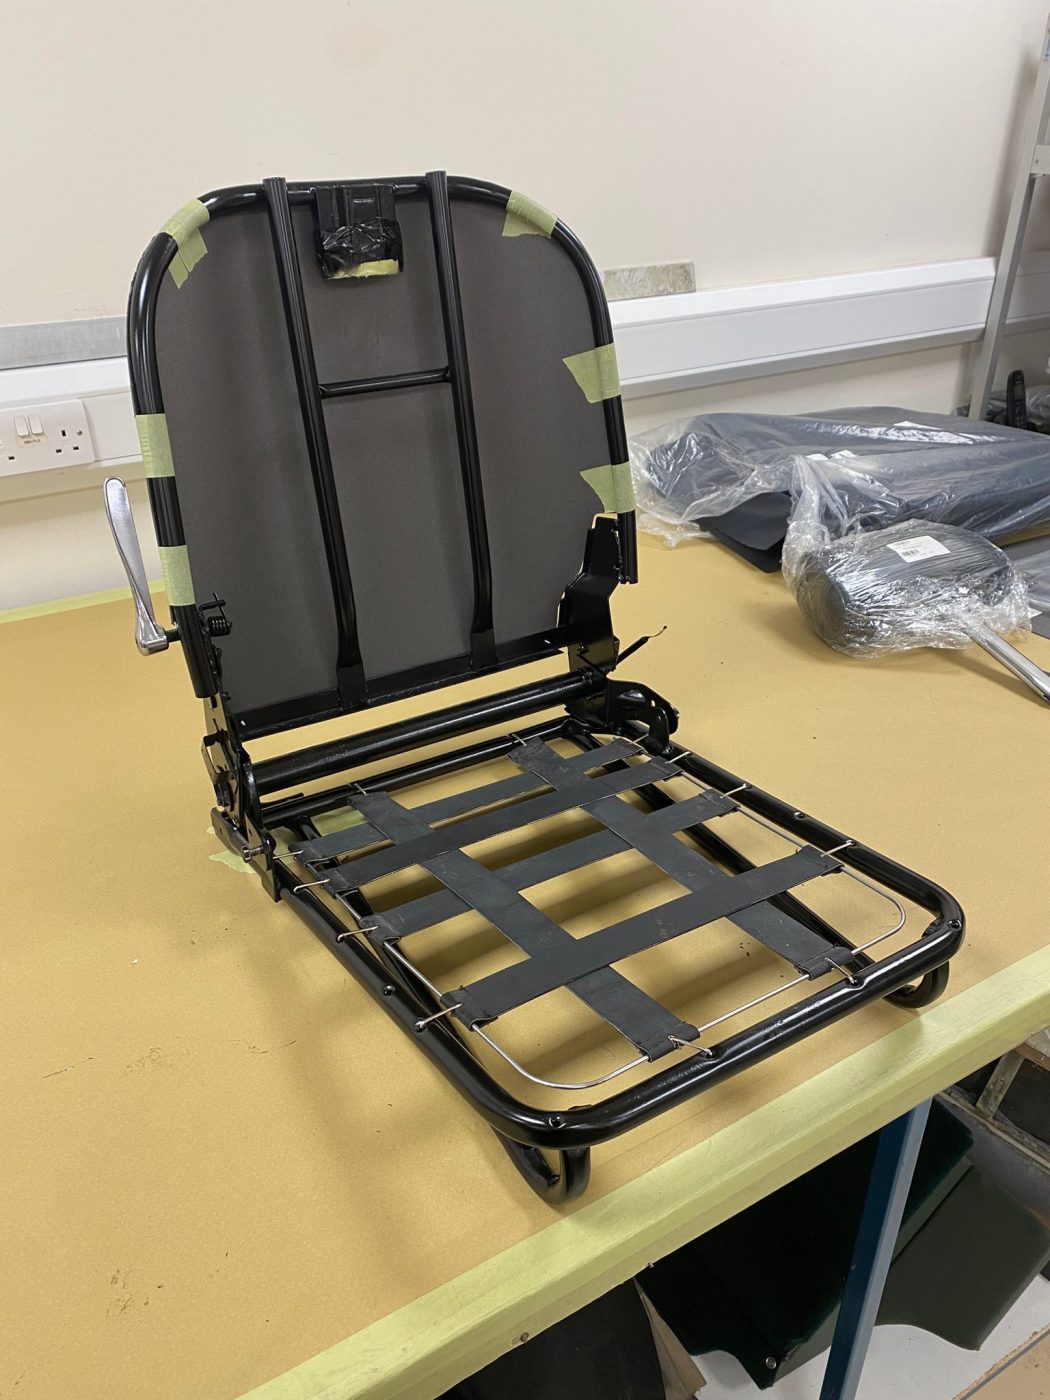
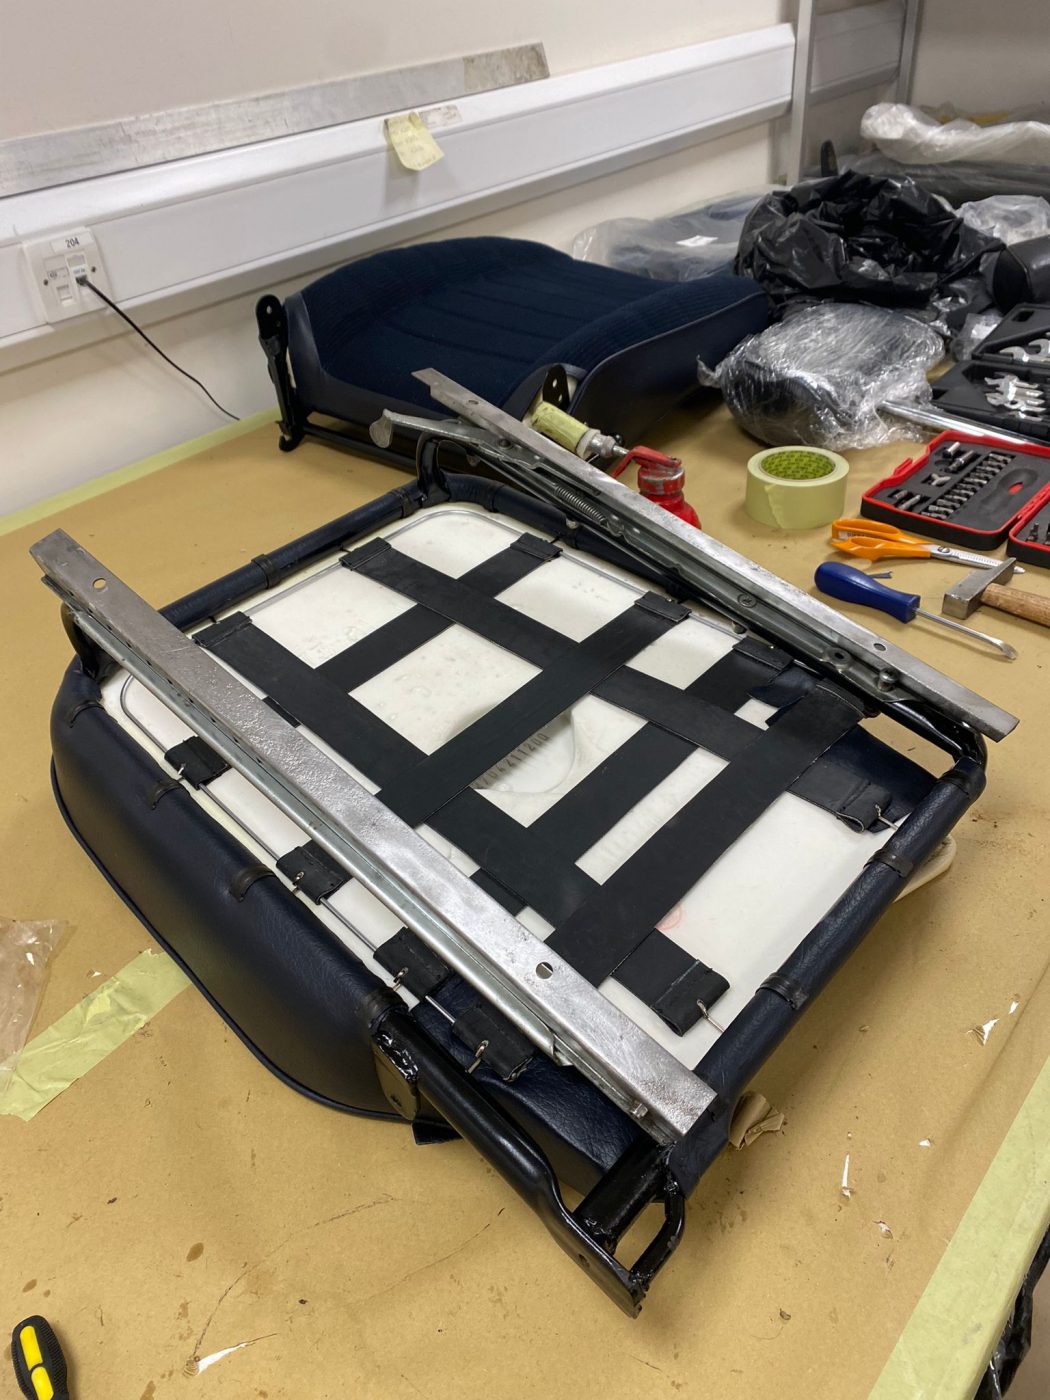
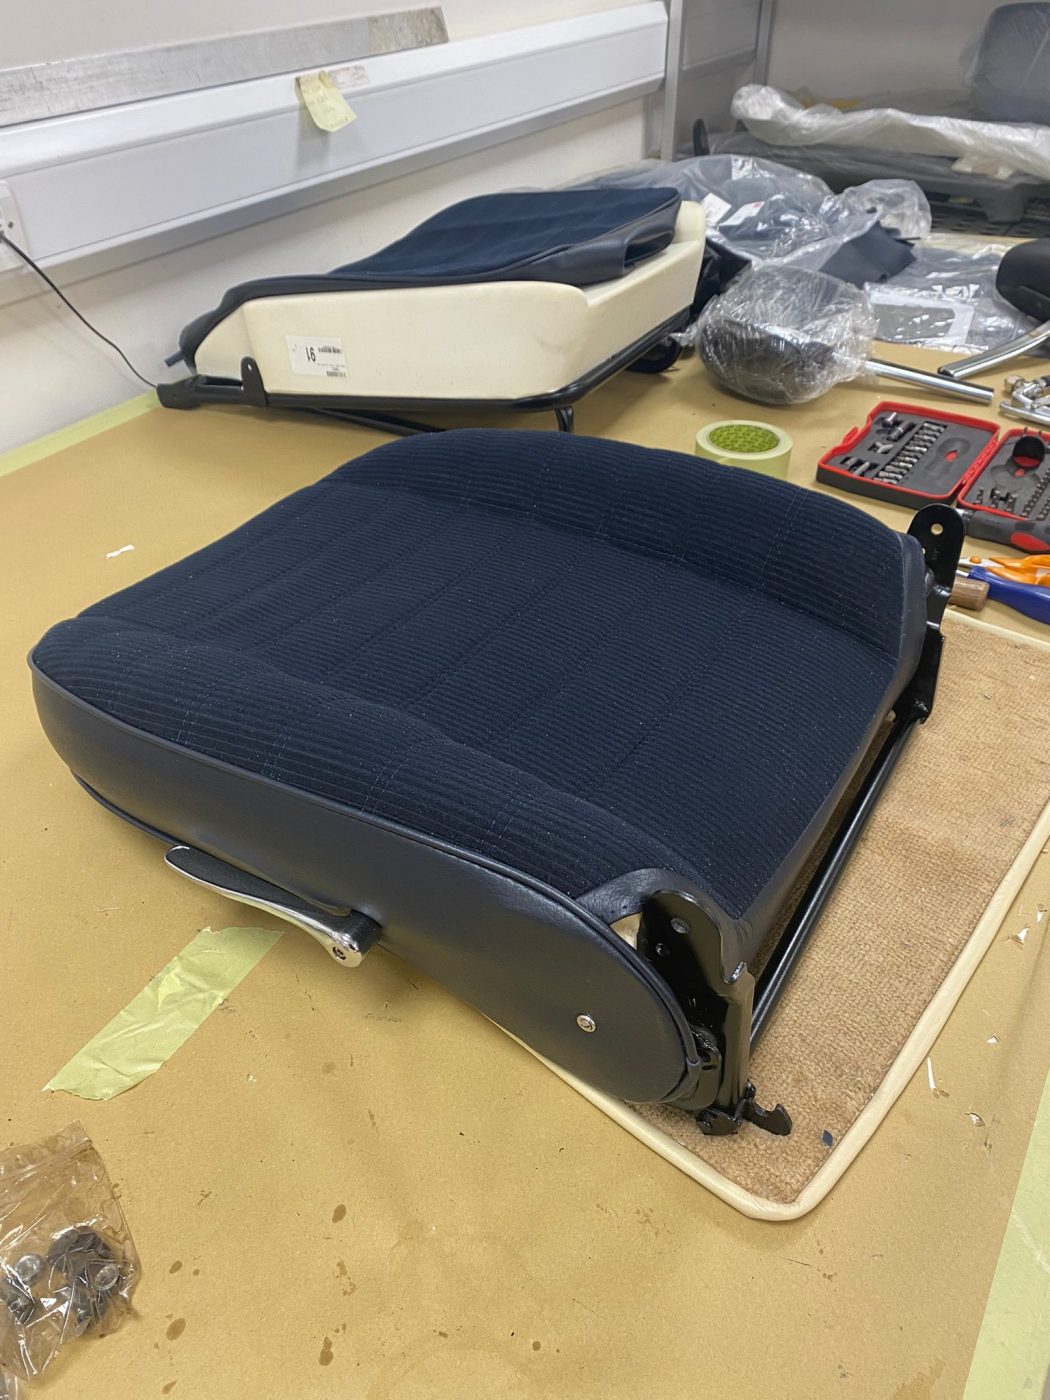
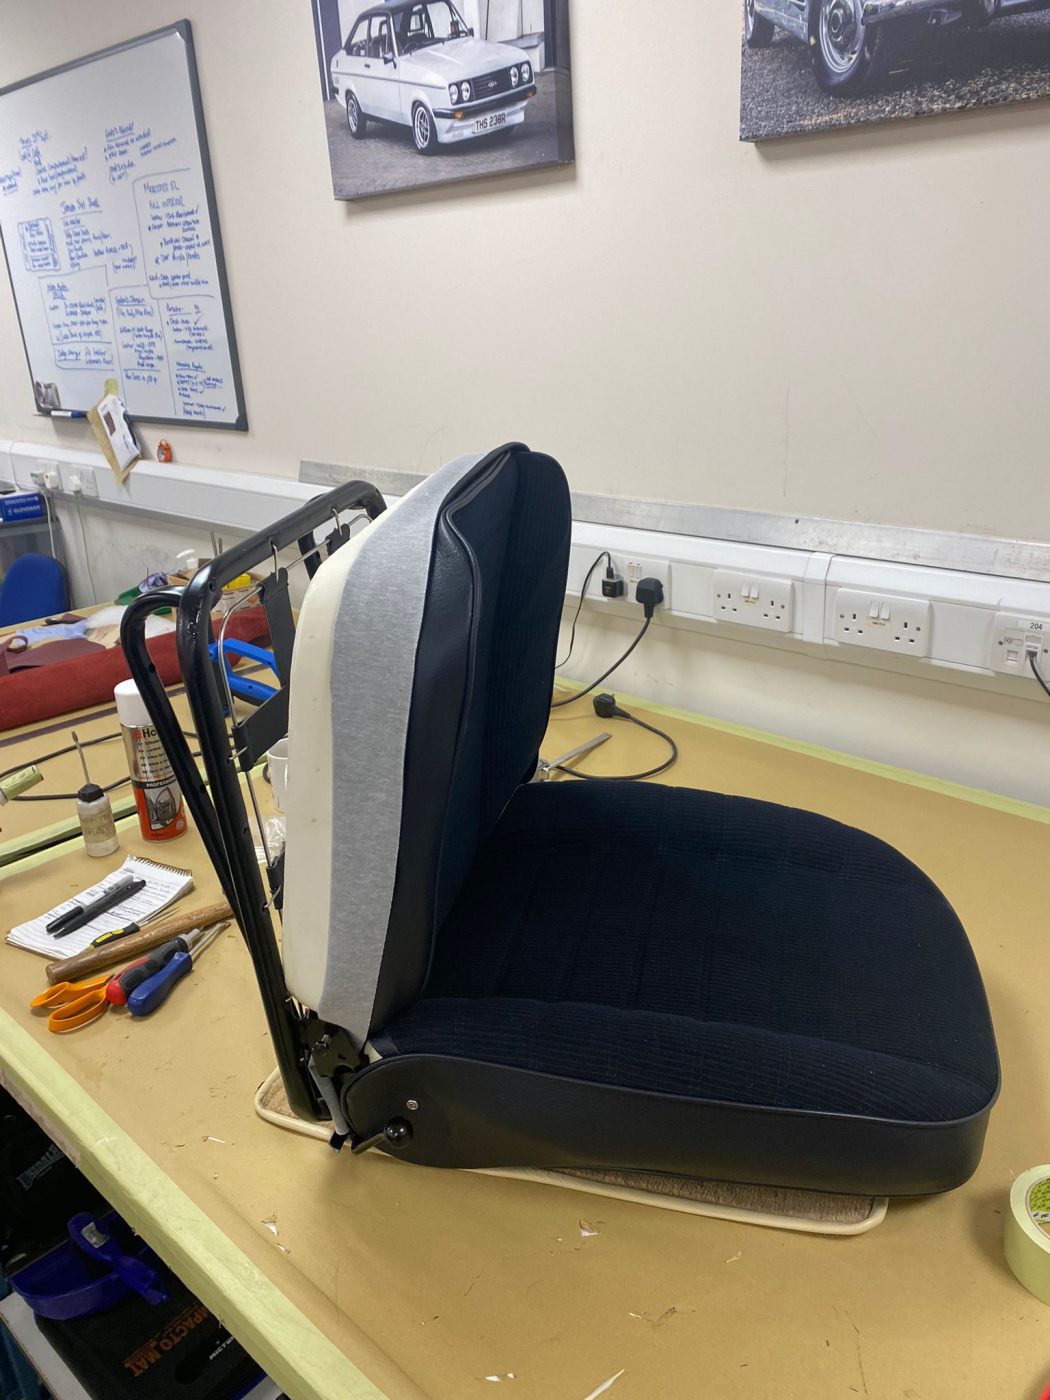
When the original seats were torn down and the frames completely refurbished, Brian had the task of recovering the seats for the Roadster.
Piece by piece, he fitted the covers and new padding to the original frames. Managing to work the new covers onto the seats with a perfect fit and finish.
This stage was done a while back, so the seats were carefully wrapped and put into storage awaiting the next part of the story of the 1977 MGB Roadster with Bridge Classic Cars.

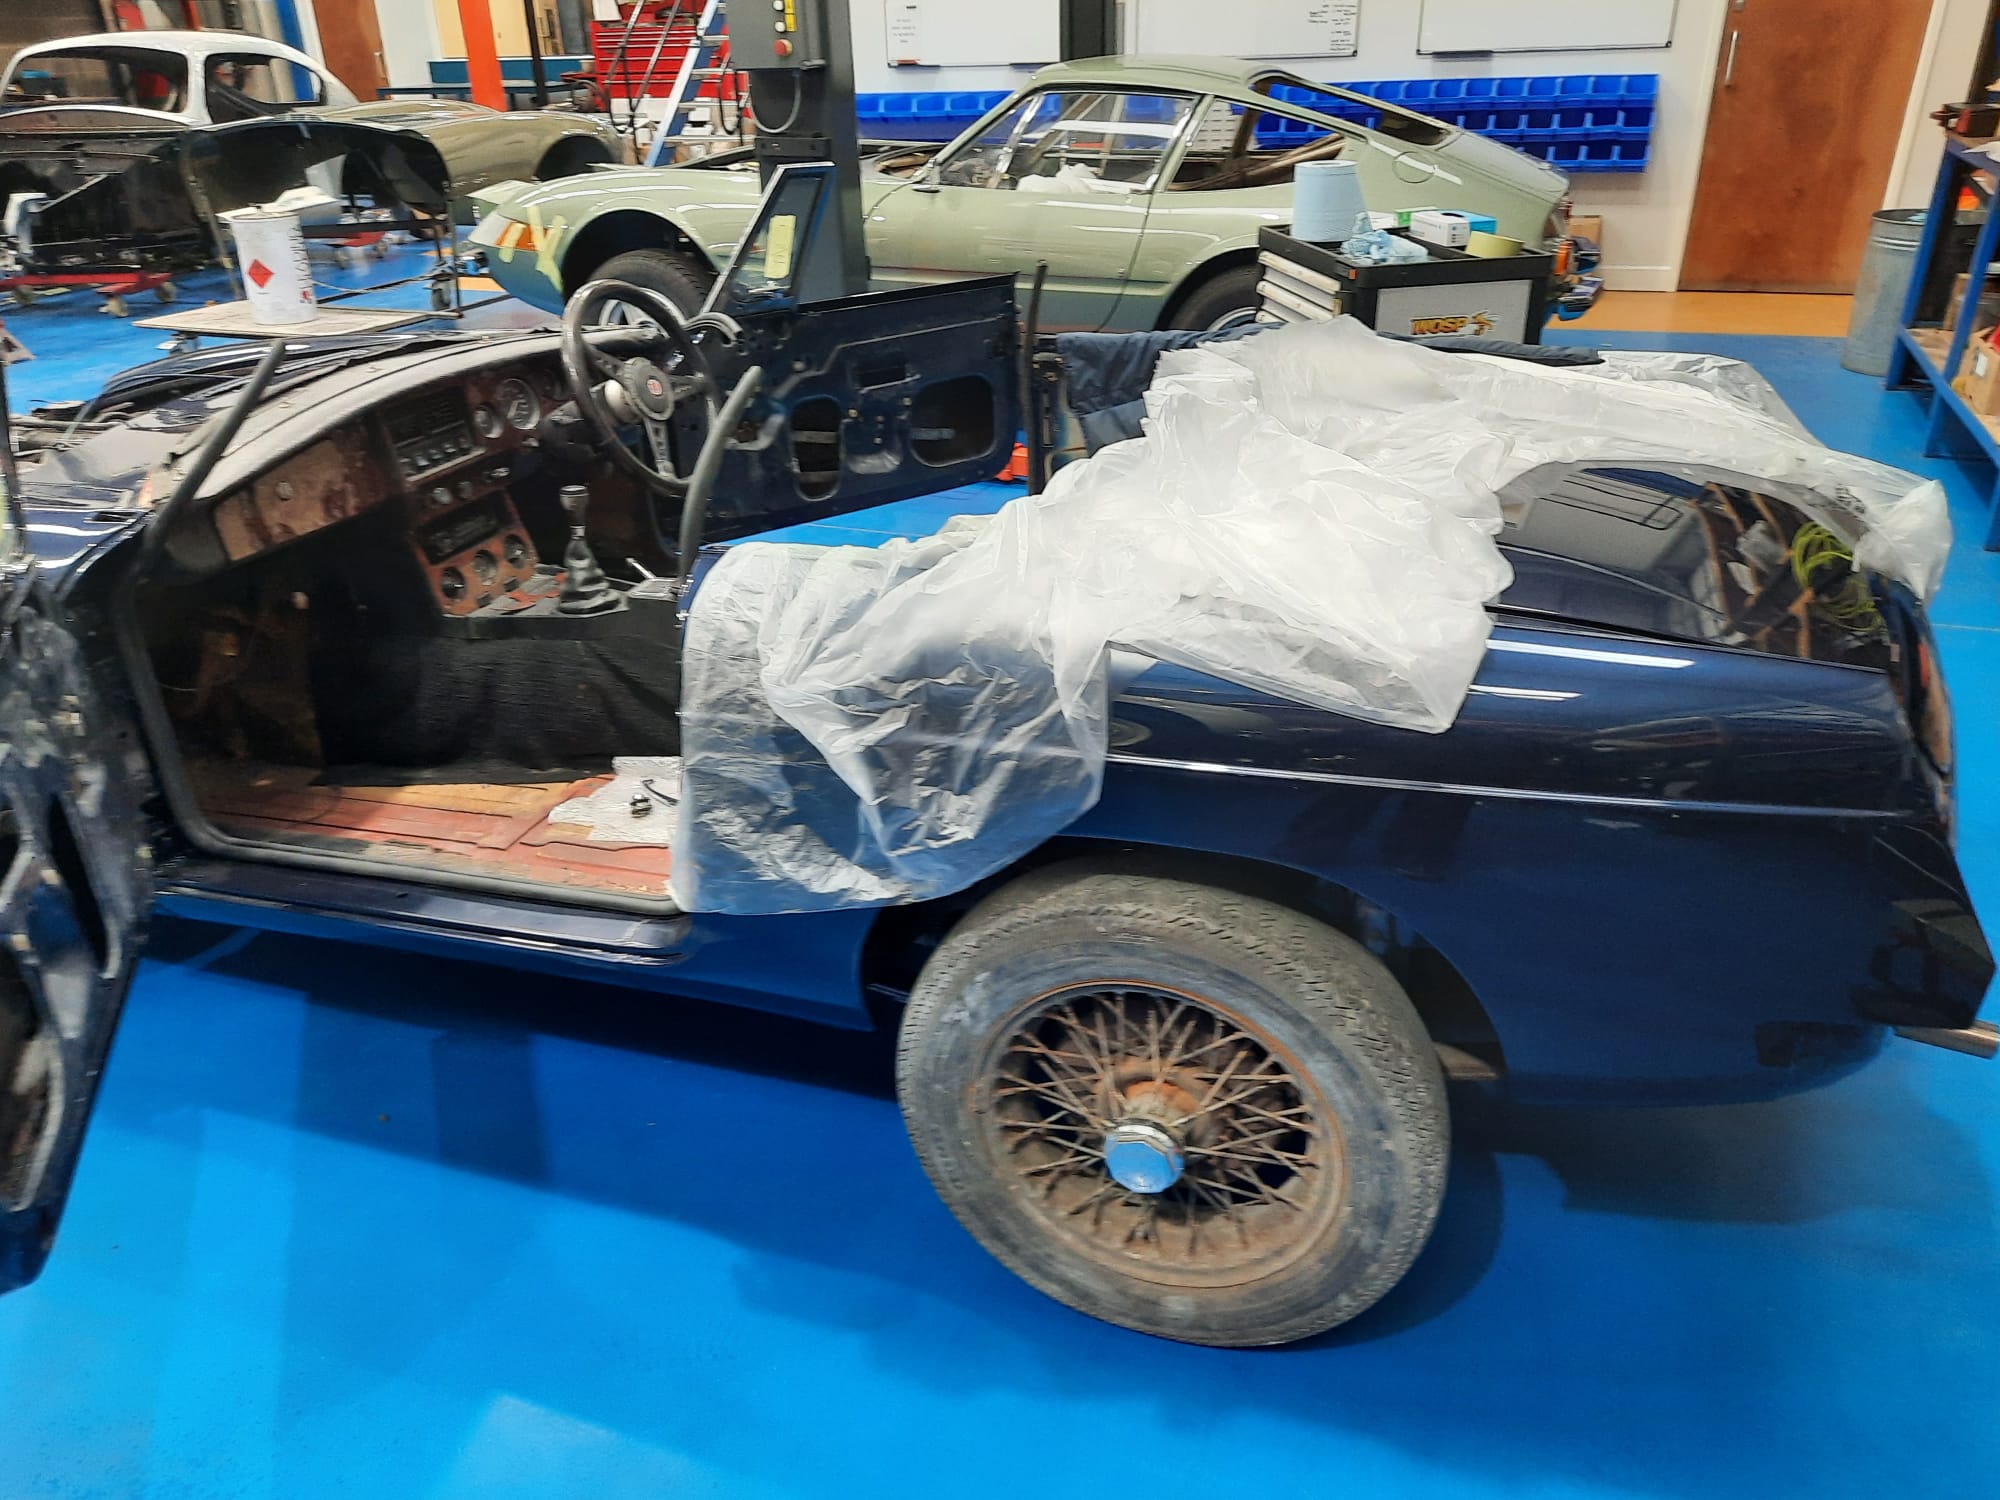
The time had come for the final stage of assembly to begin on the Roadster. The car was moved back into the workshop from the trim shop to begin this process.
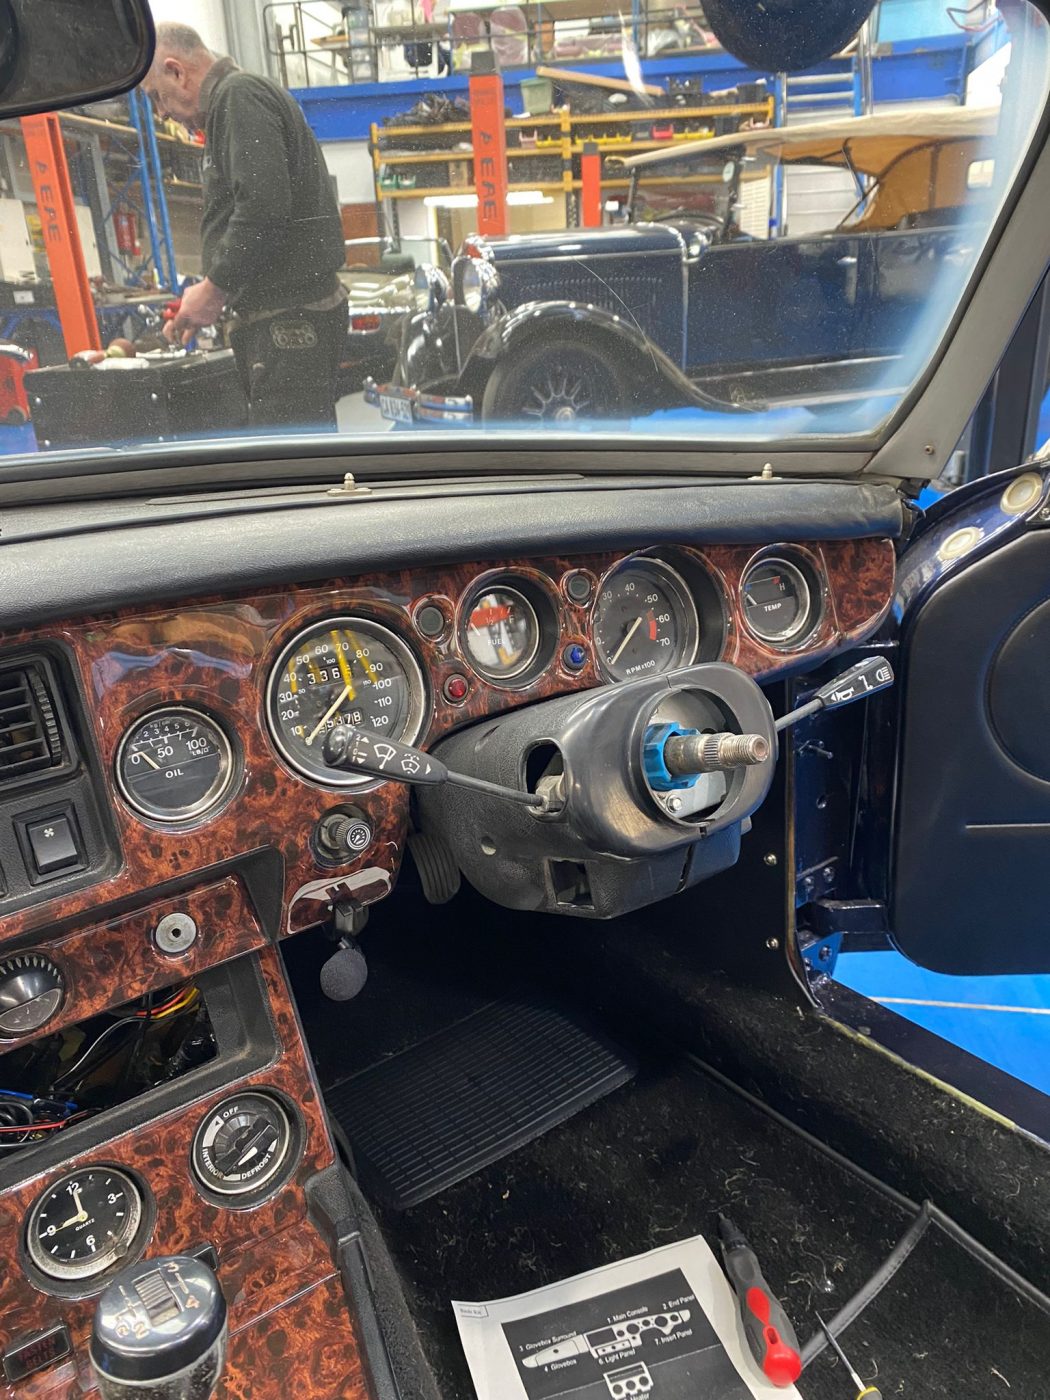
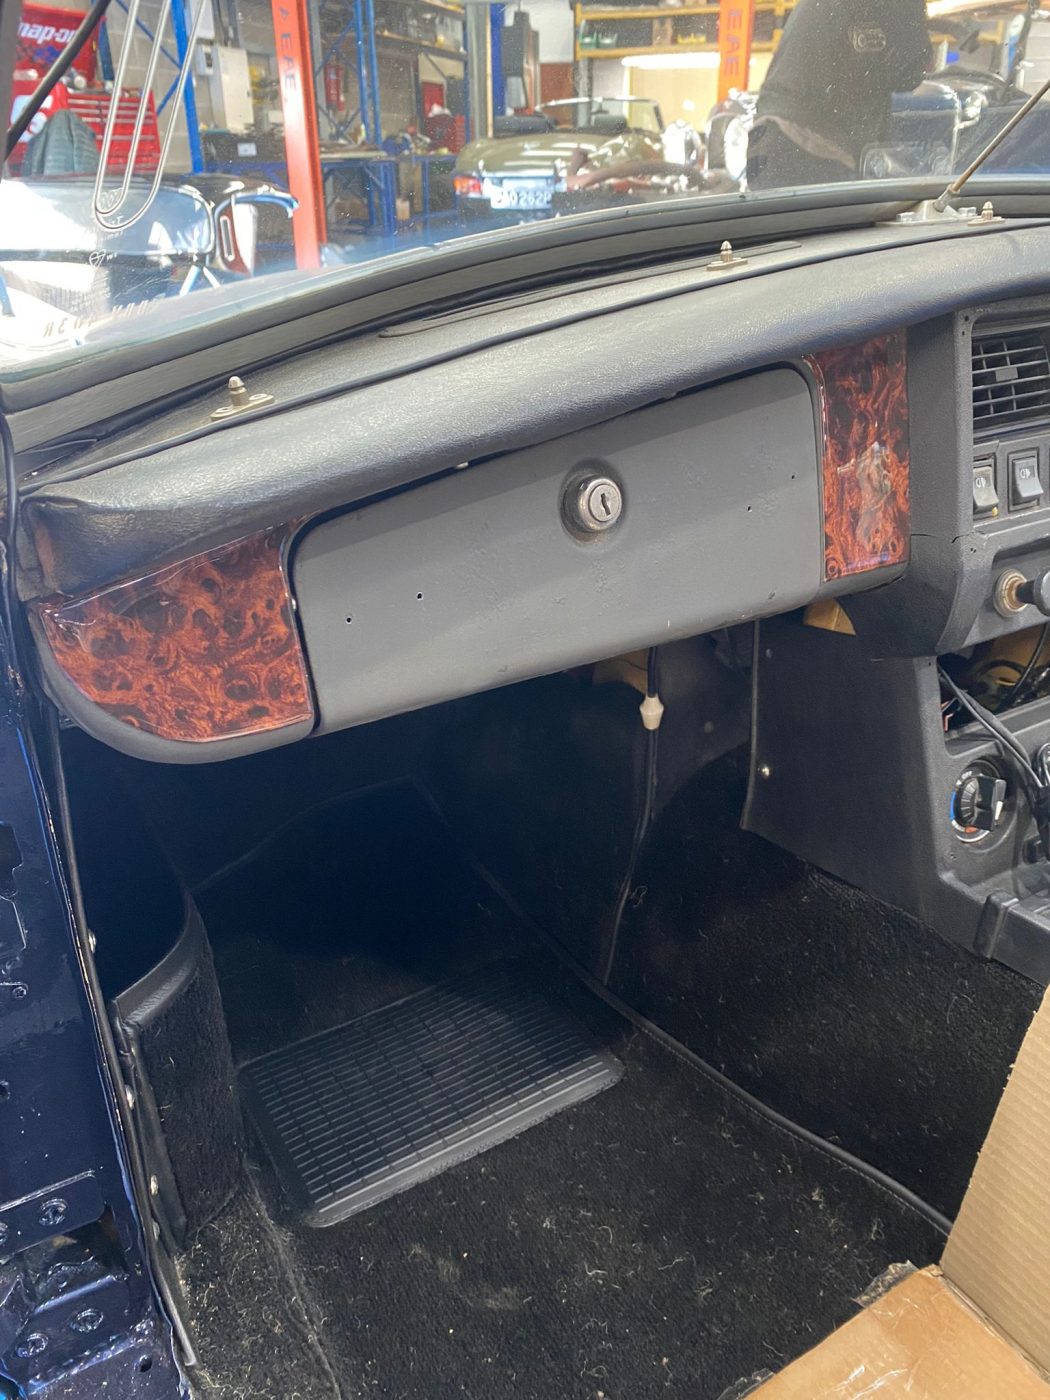
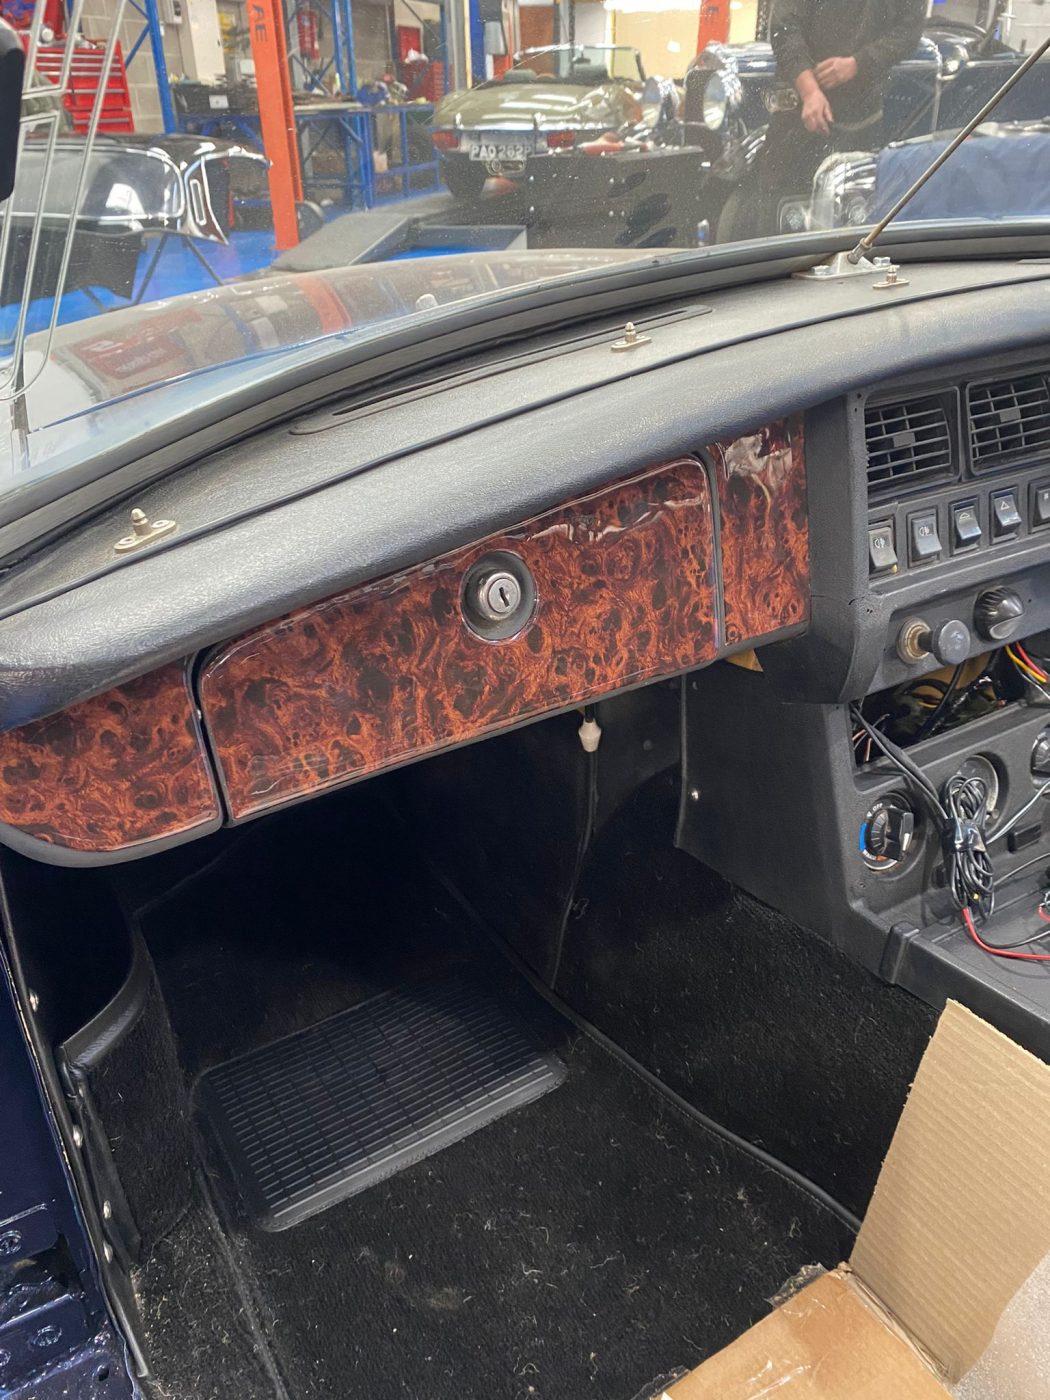
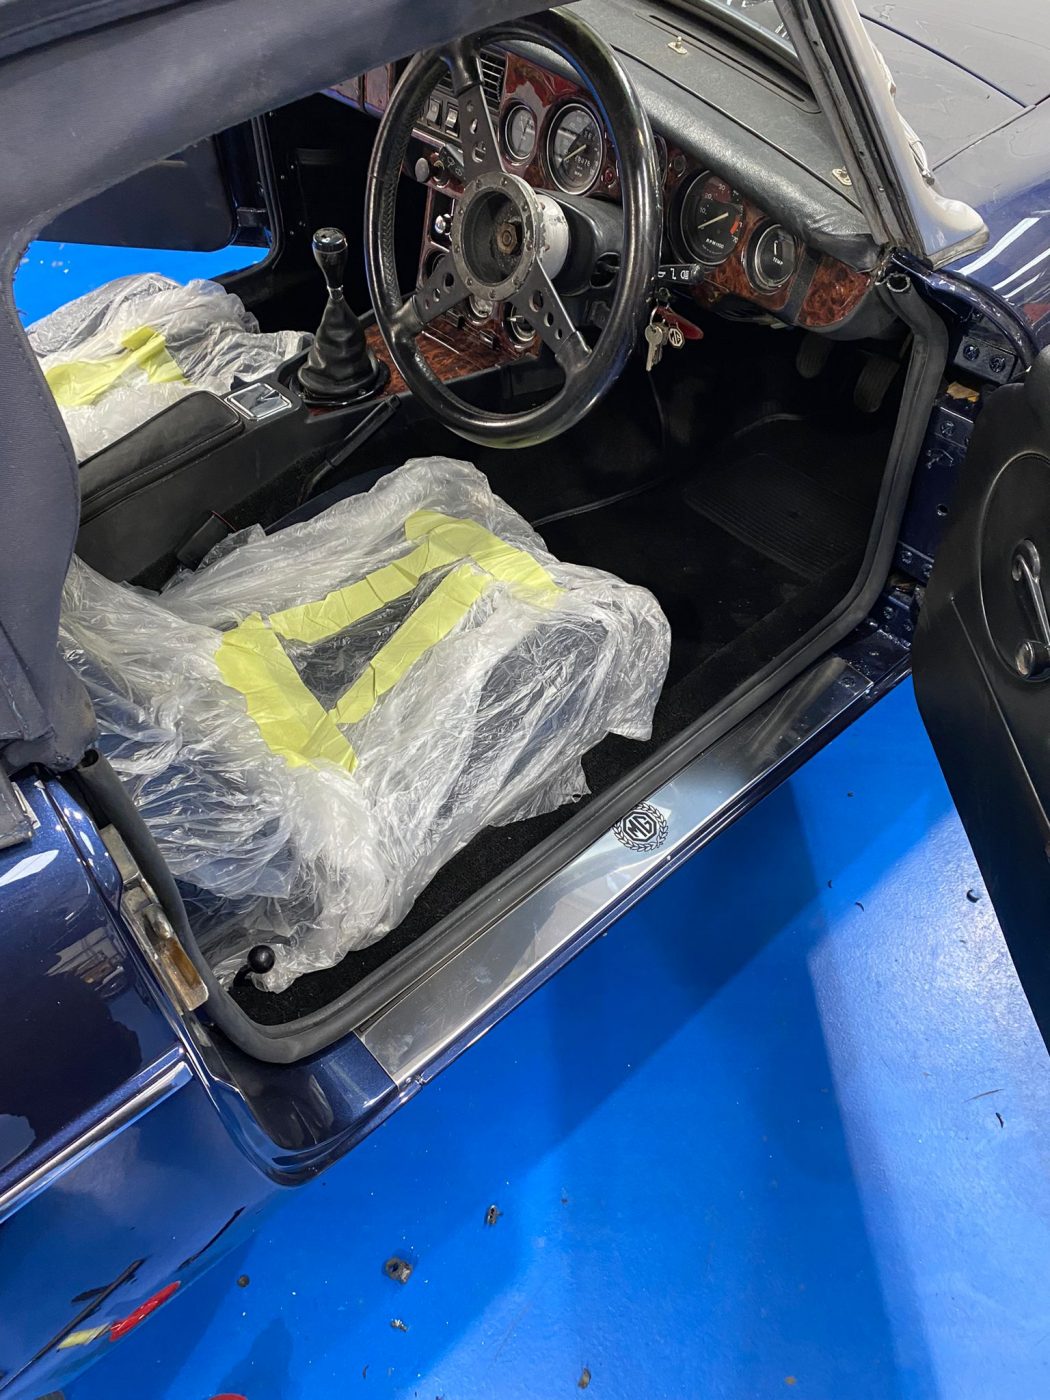
Brian set about fitting the wood kit into the car. Test fitting each piece to make sure the fit was perfect. No overlap or short sides, each piece on the car exactly how it should be.
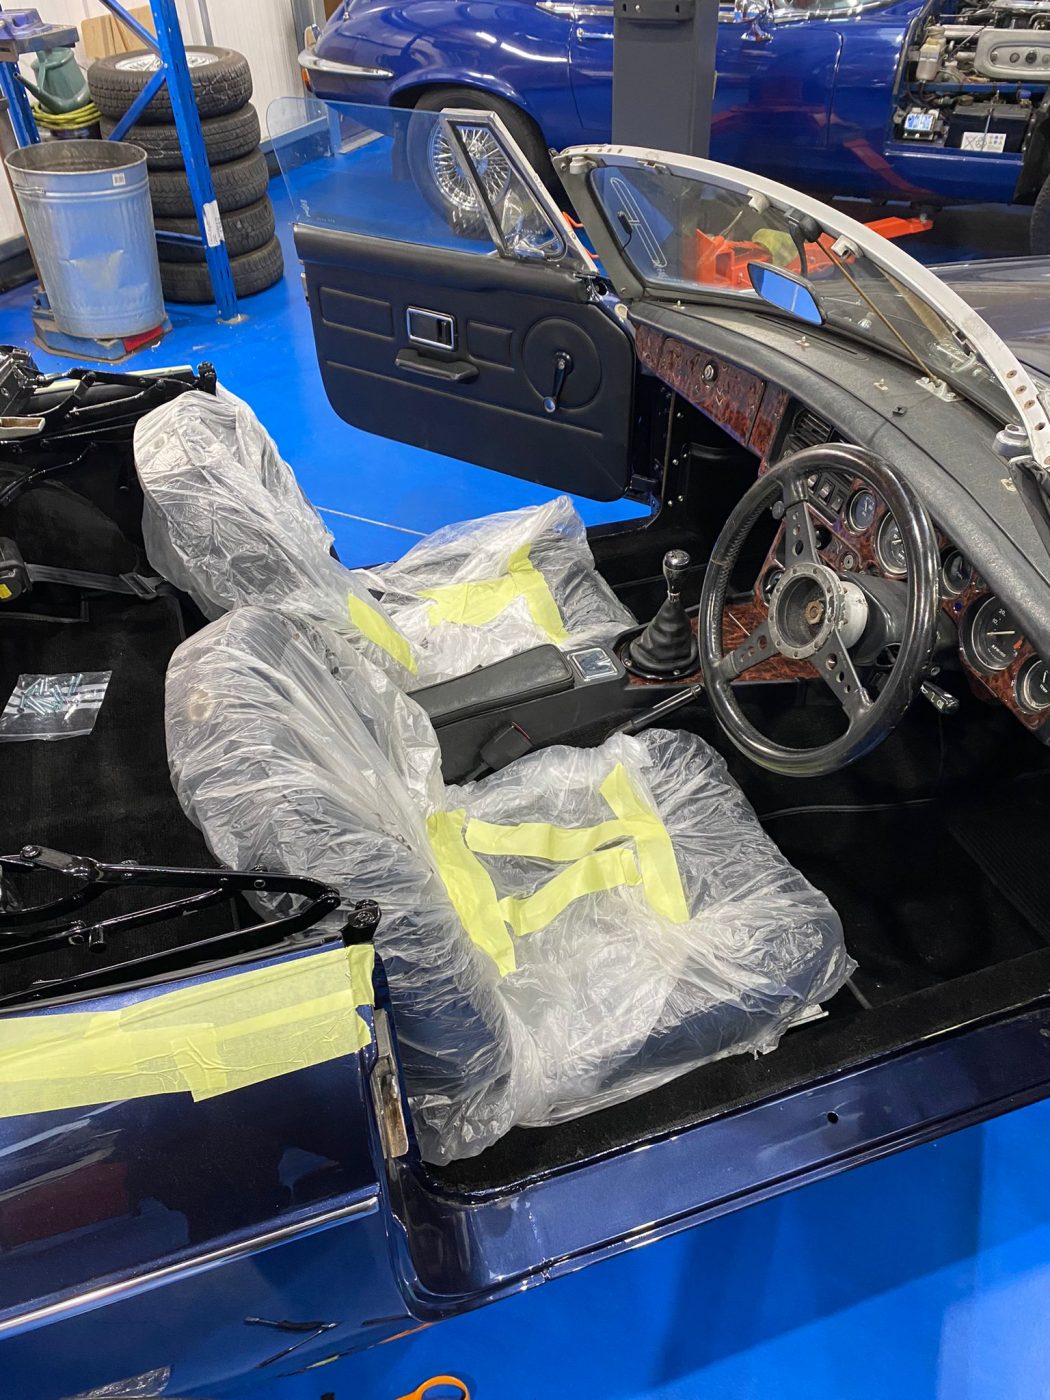
With the wood kit in the car, he could then turn his attention to the seats. With their protective wrappings still on, he took the seats out of storage to have their runners fitted. This also involved preparing the hardware in the car. He cleanly and neatly made the cuts in the new carpet to get the piece to line up just right in order to match up with the hardware.


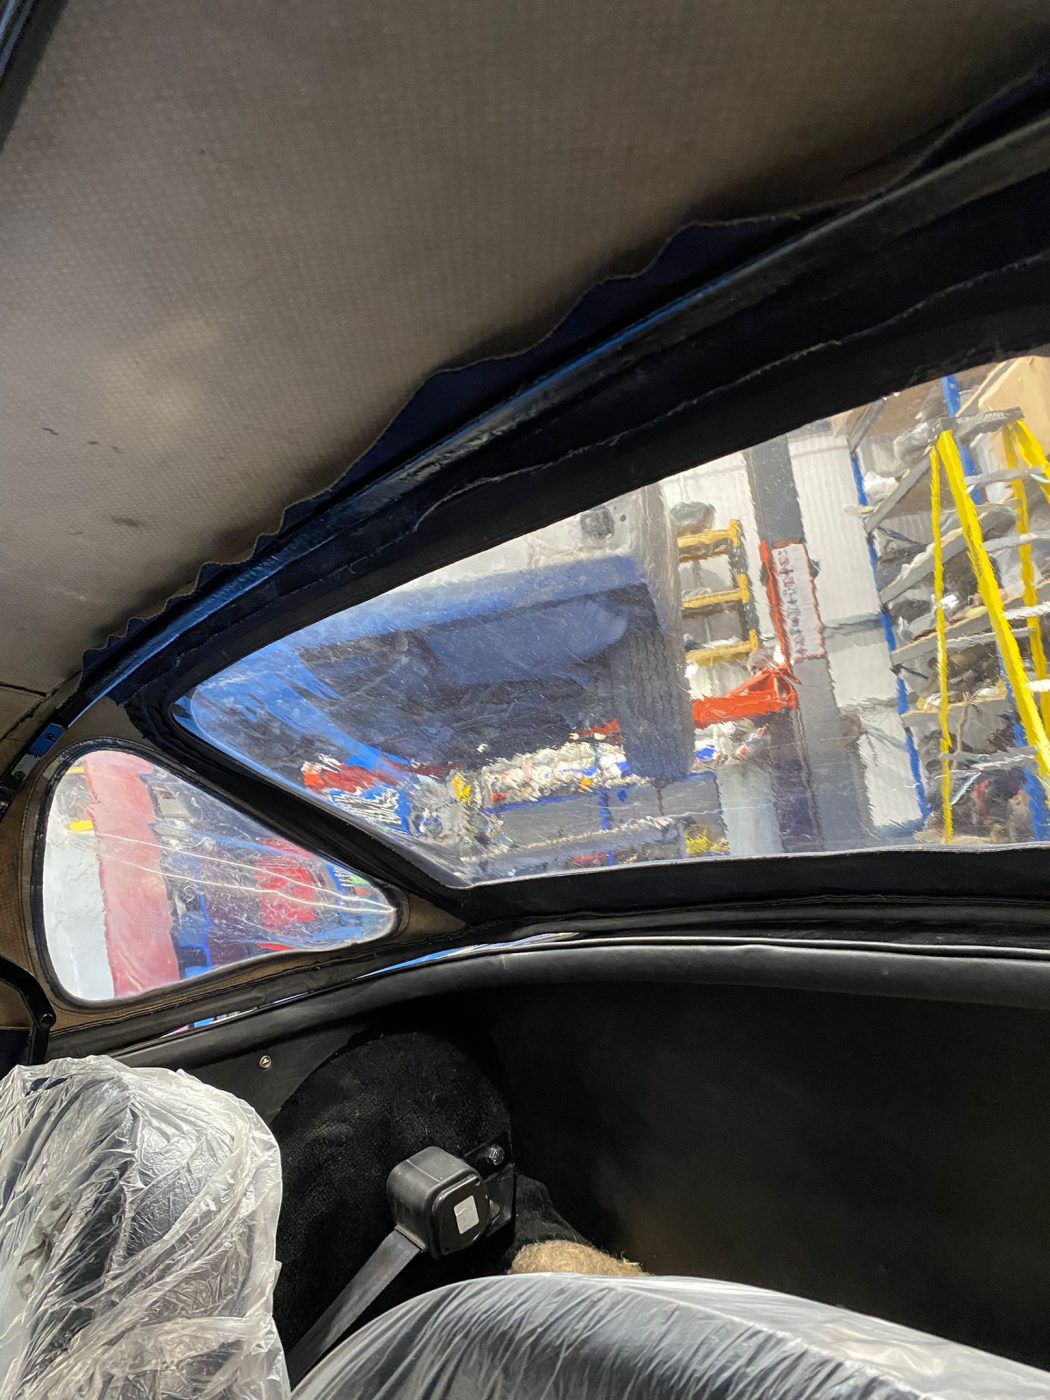


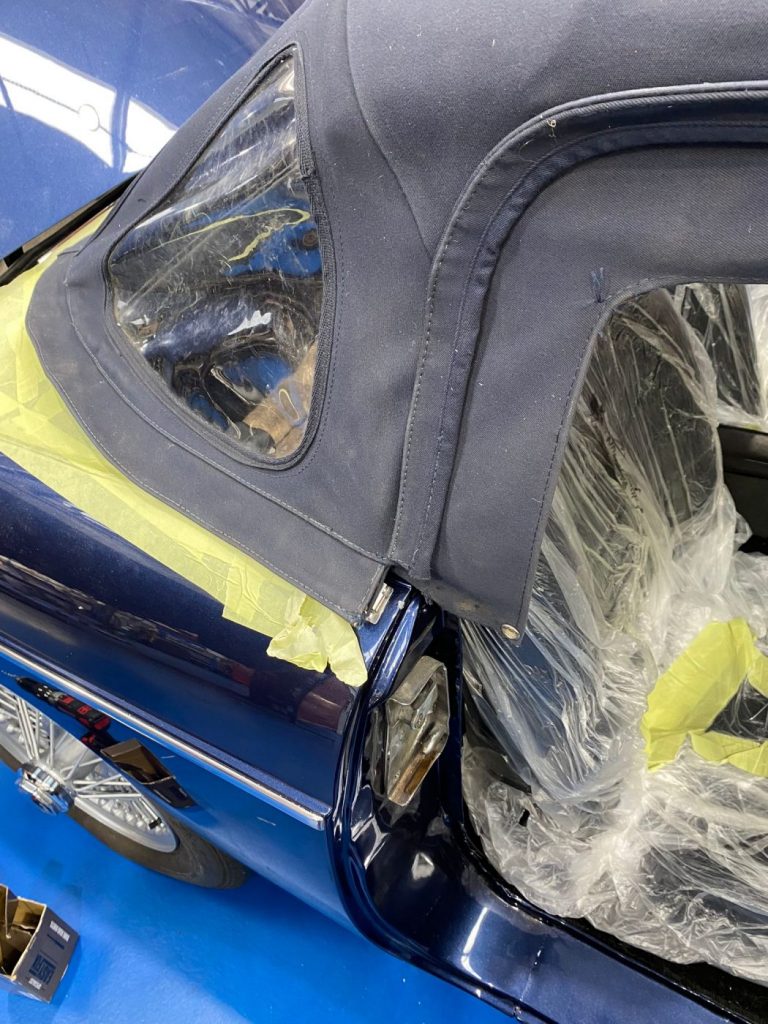
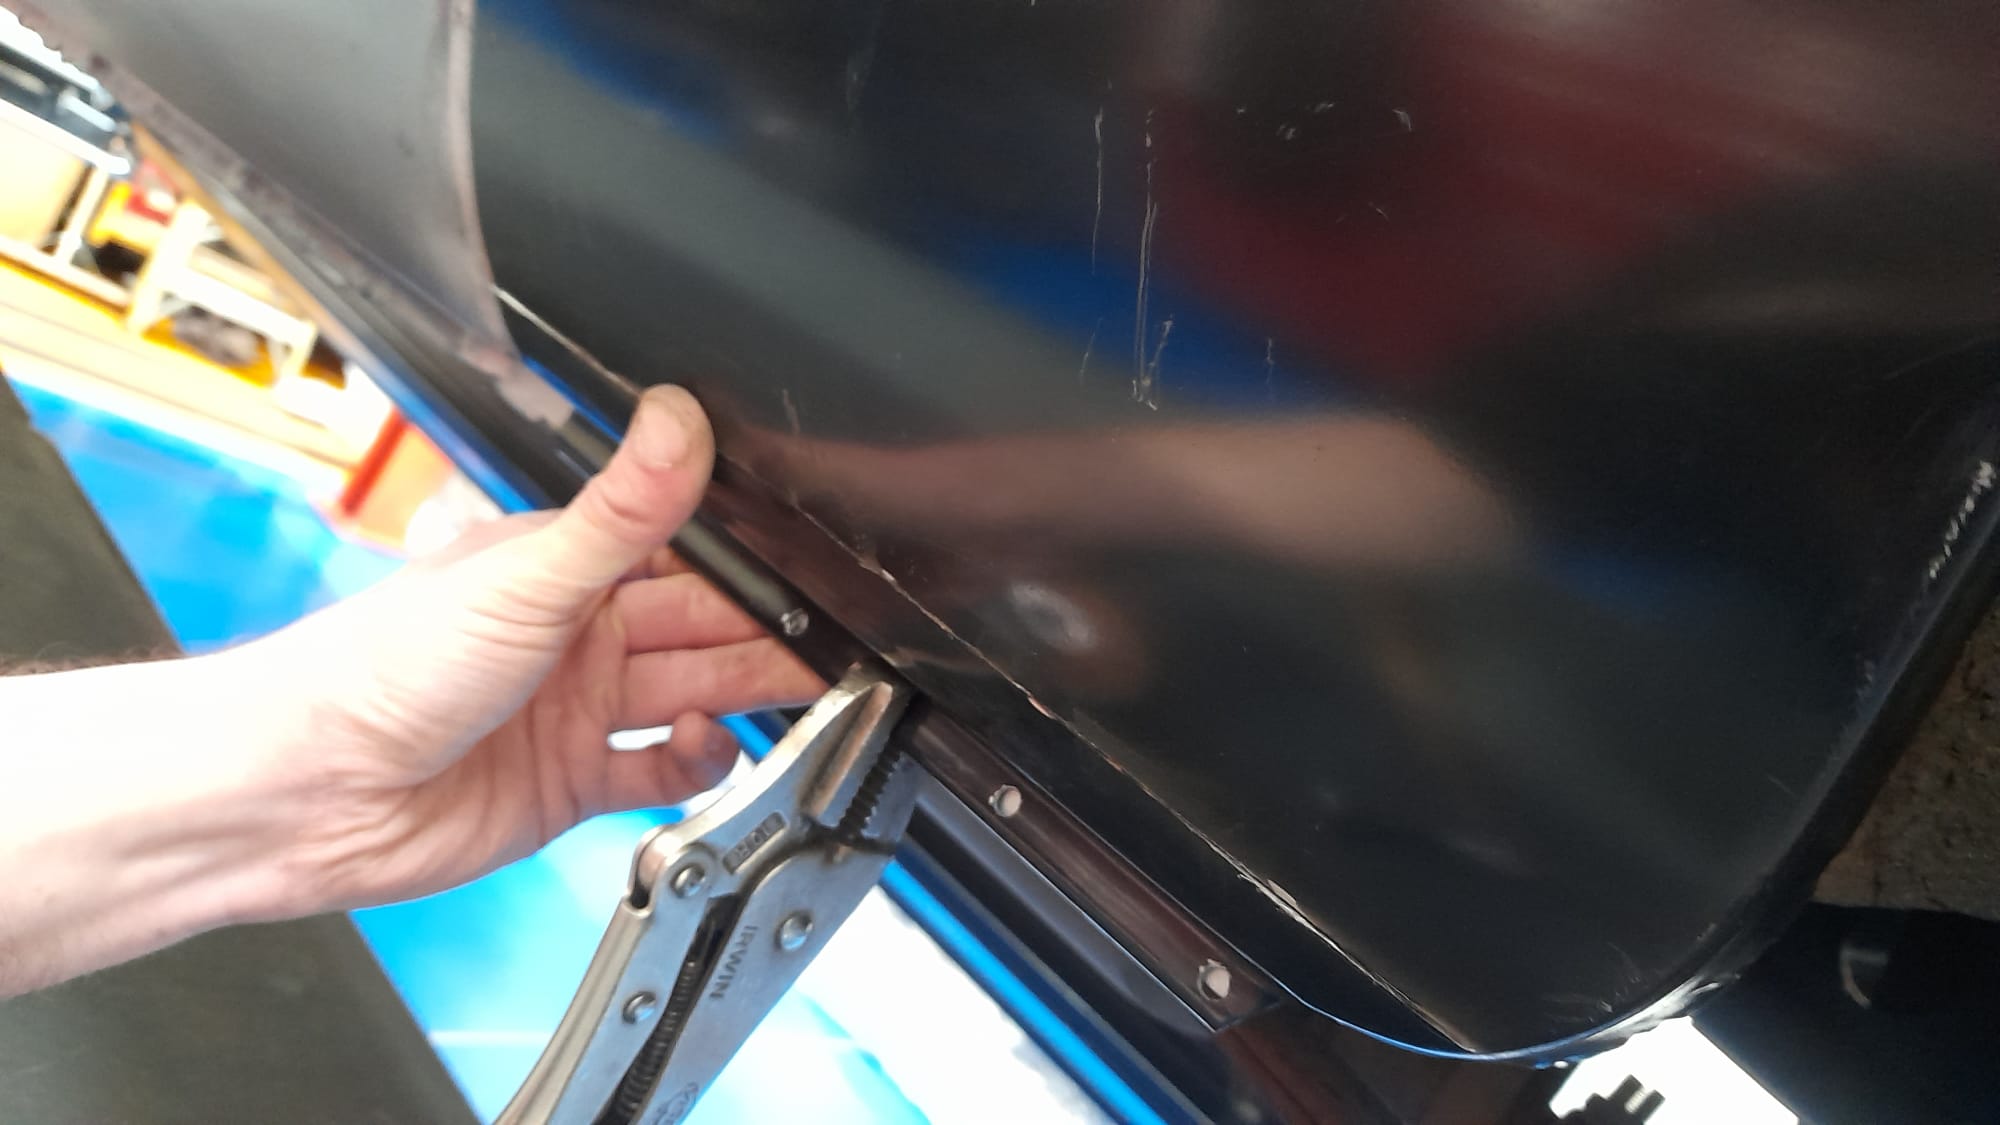
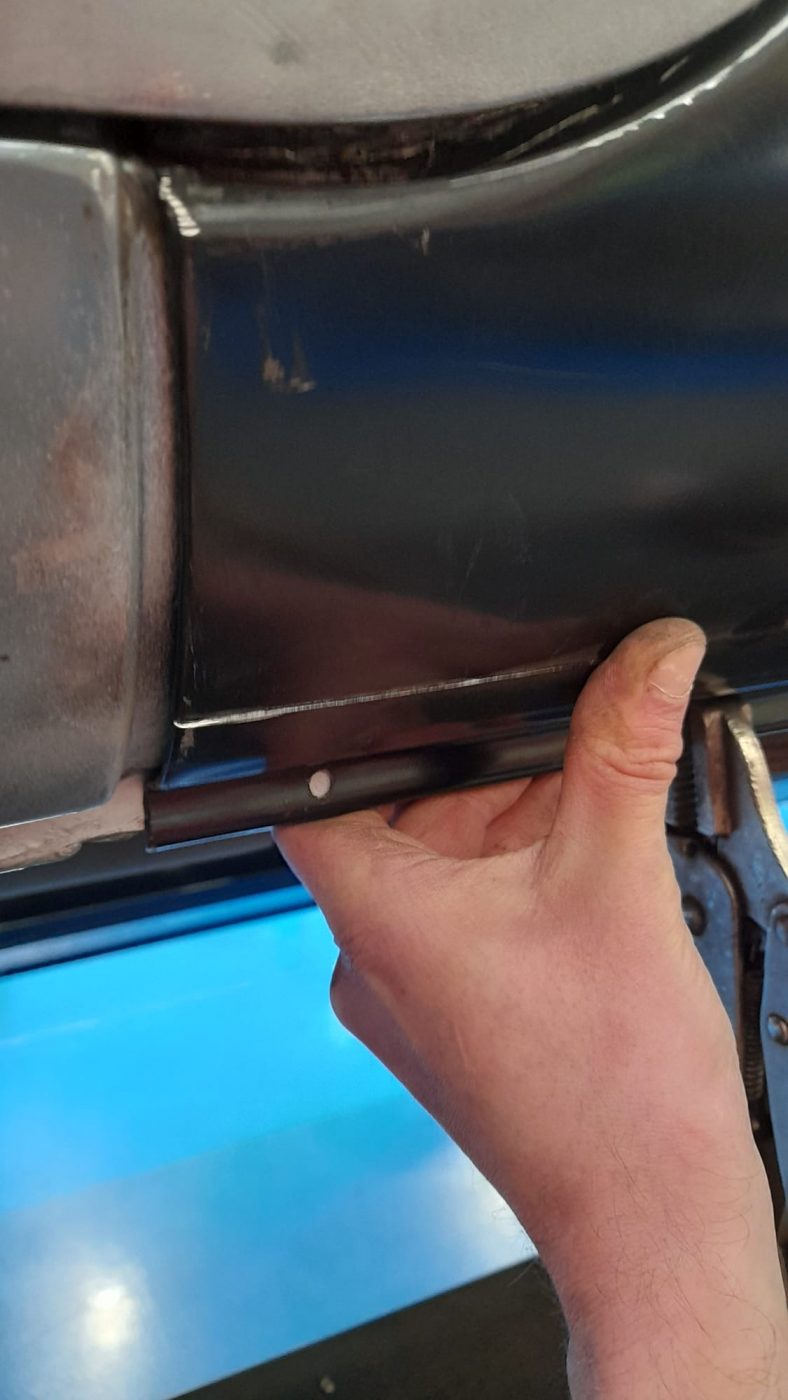
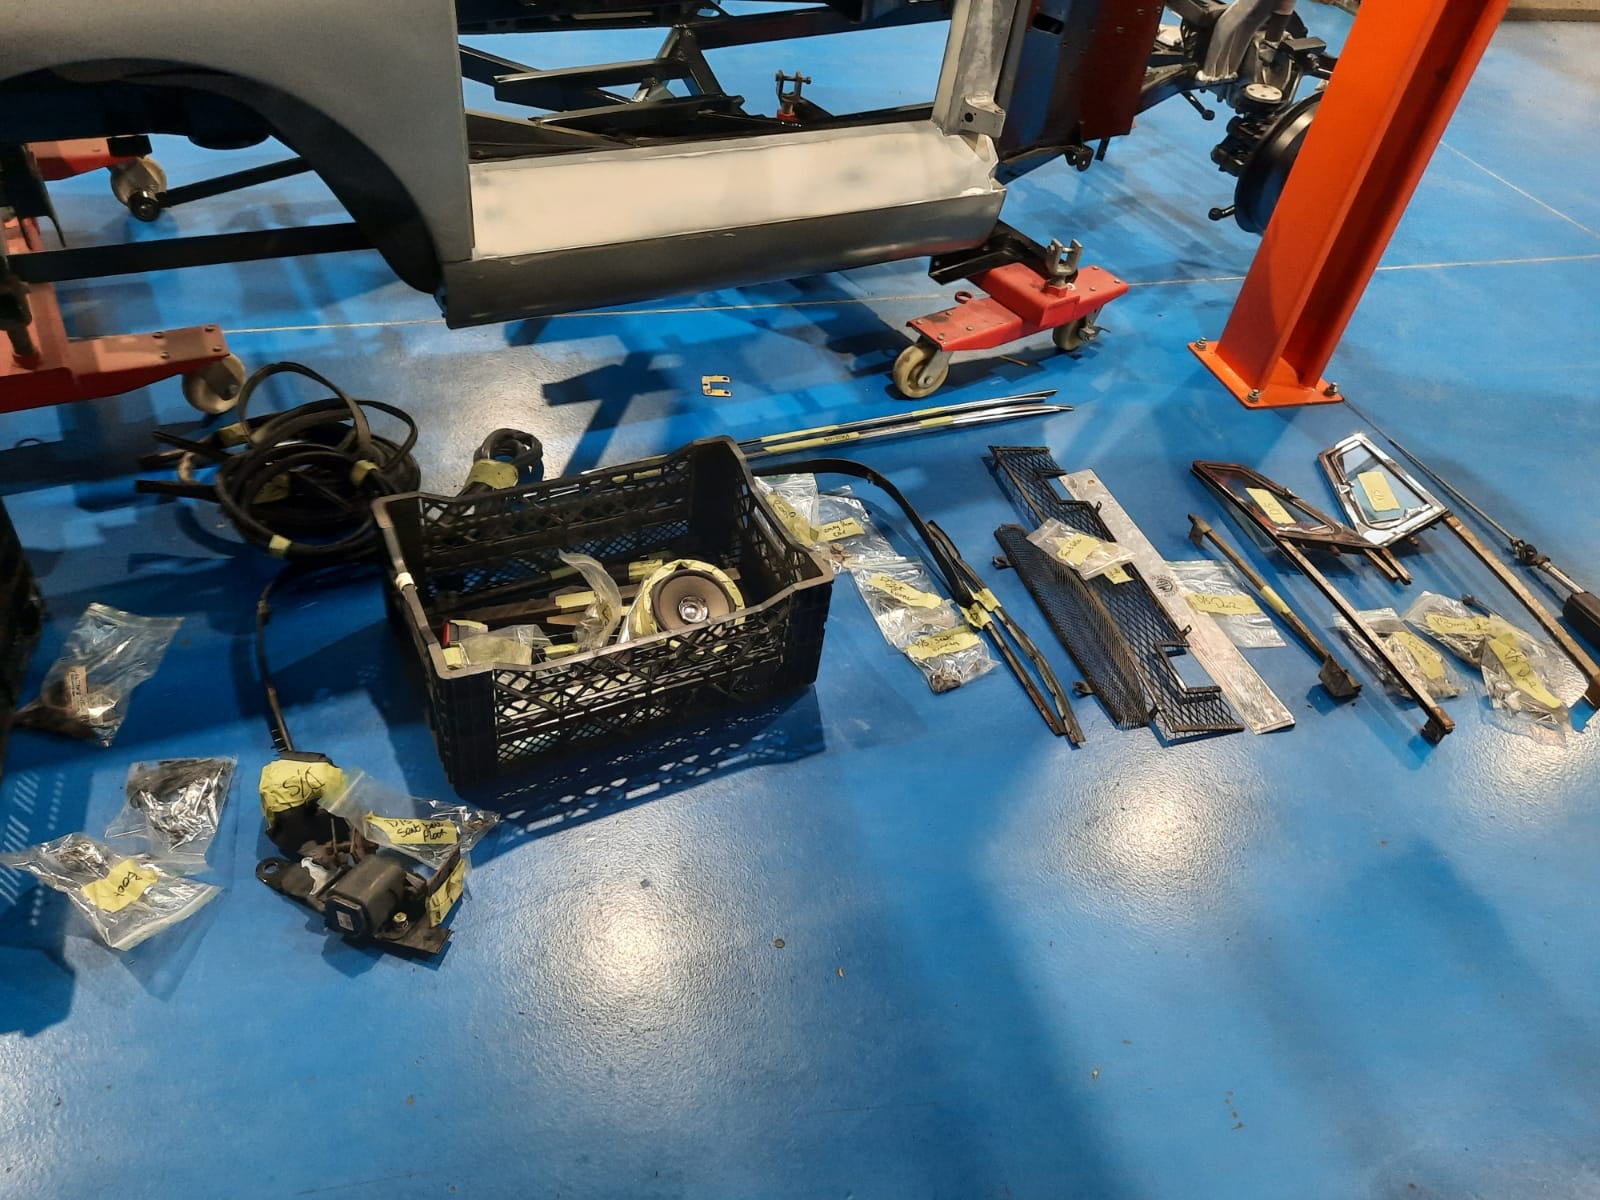
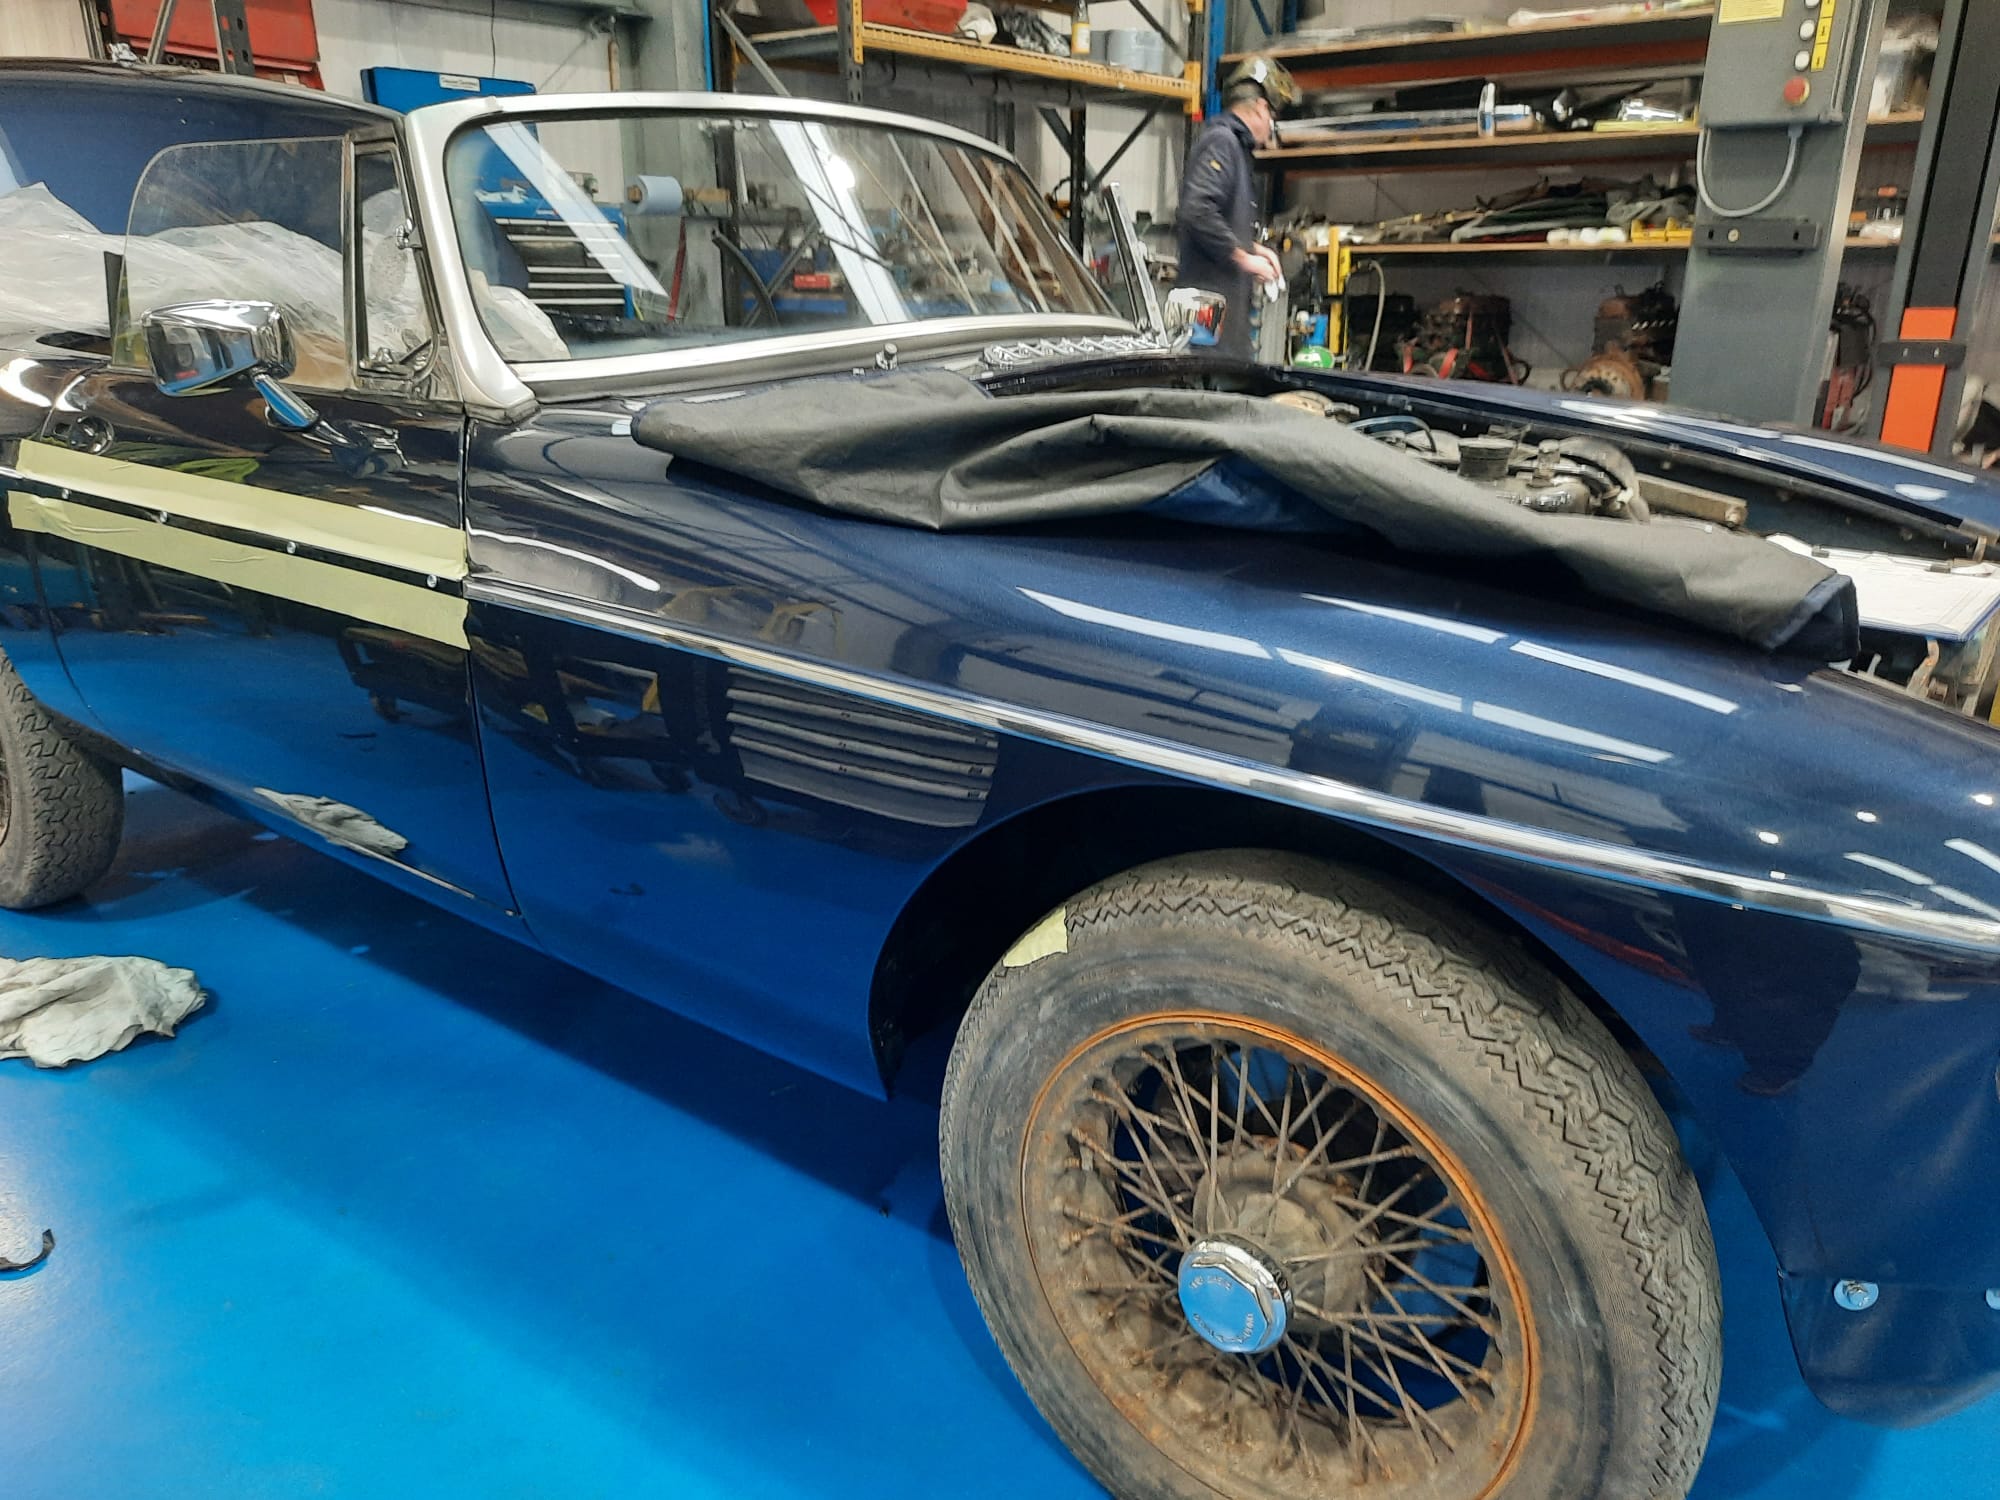
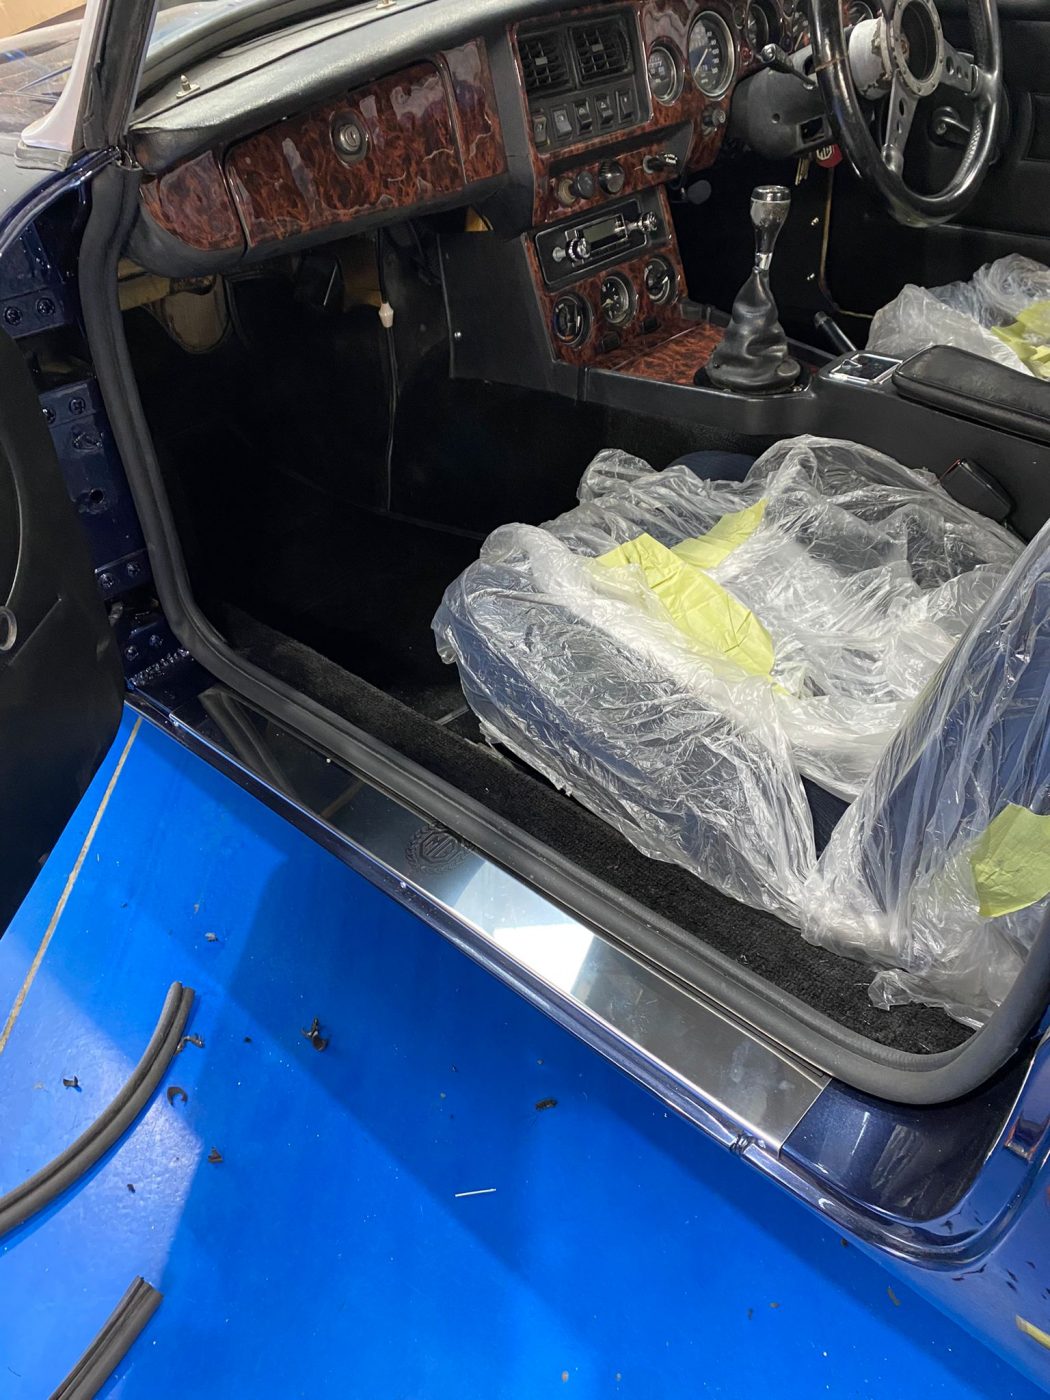
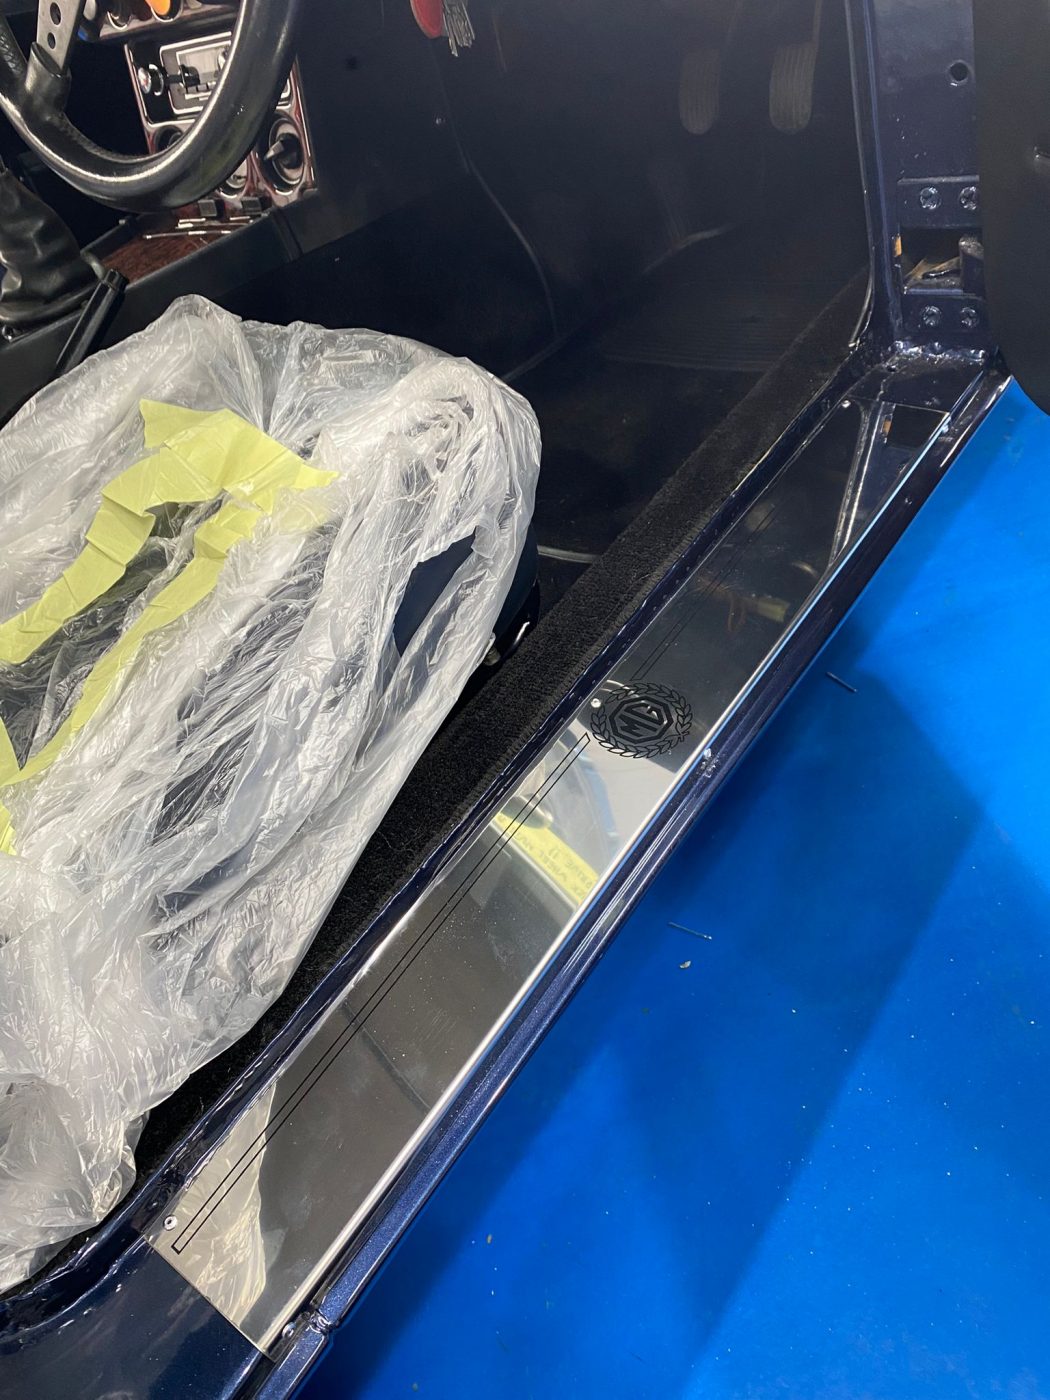
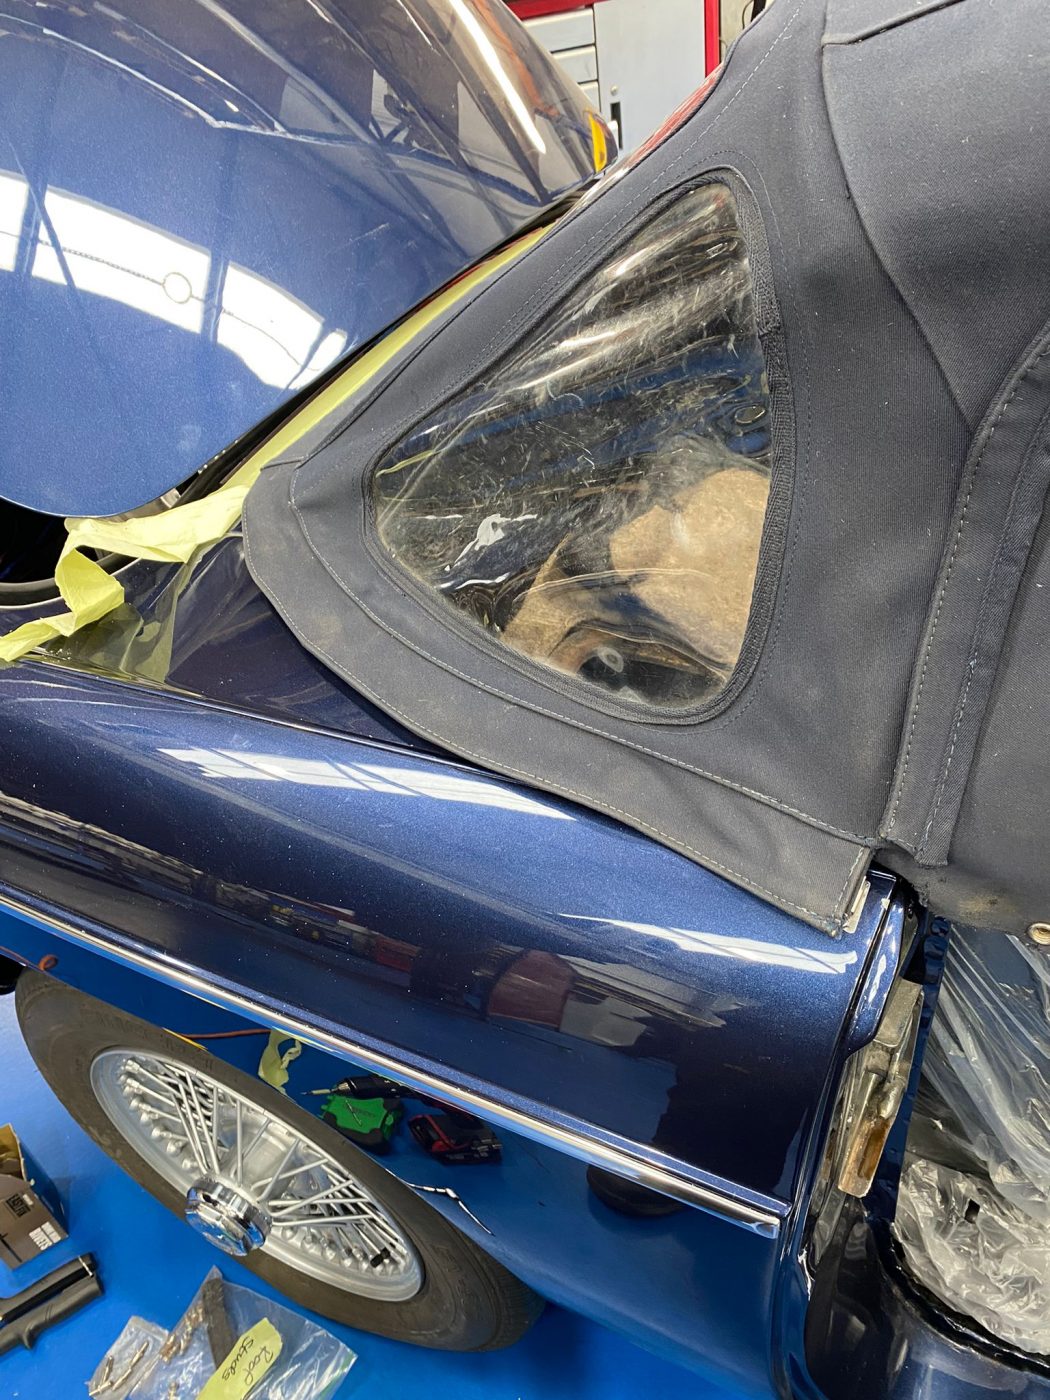
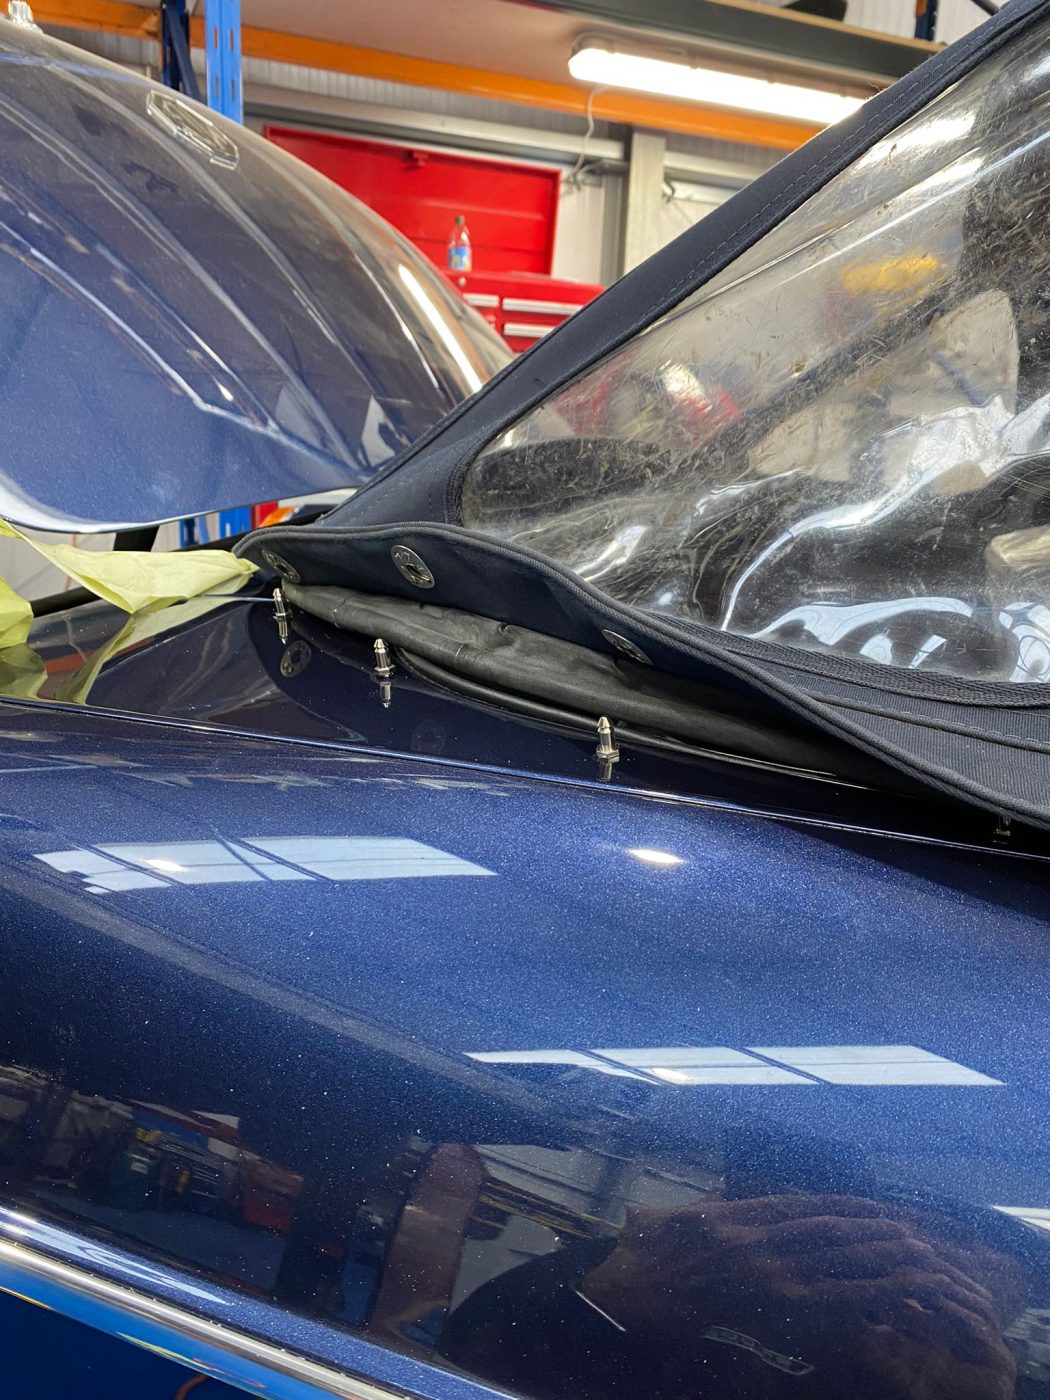
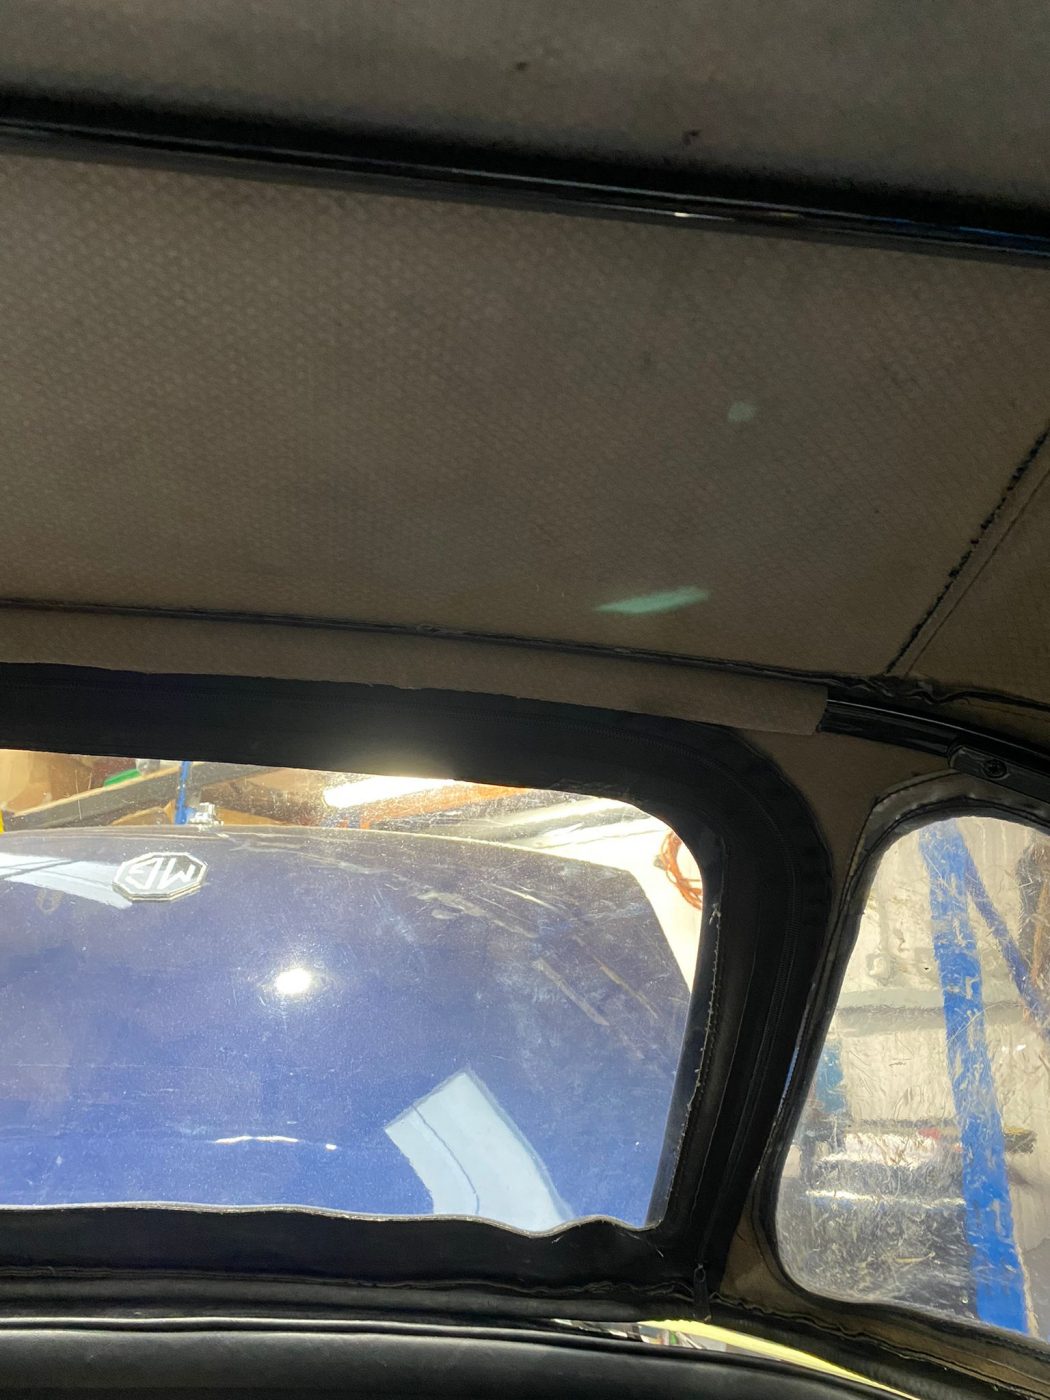
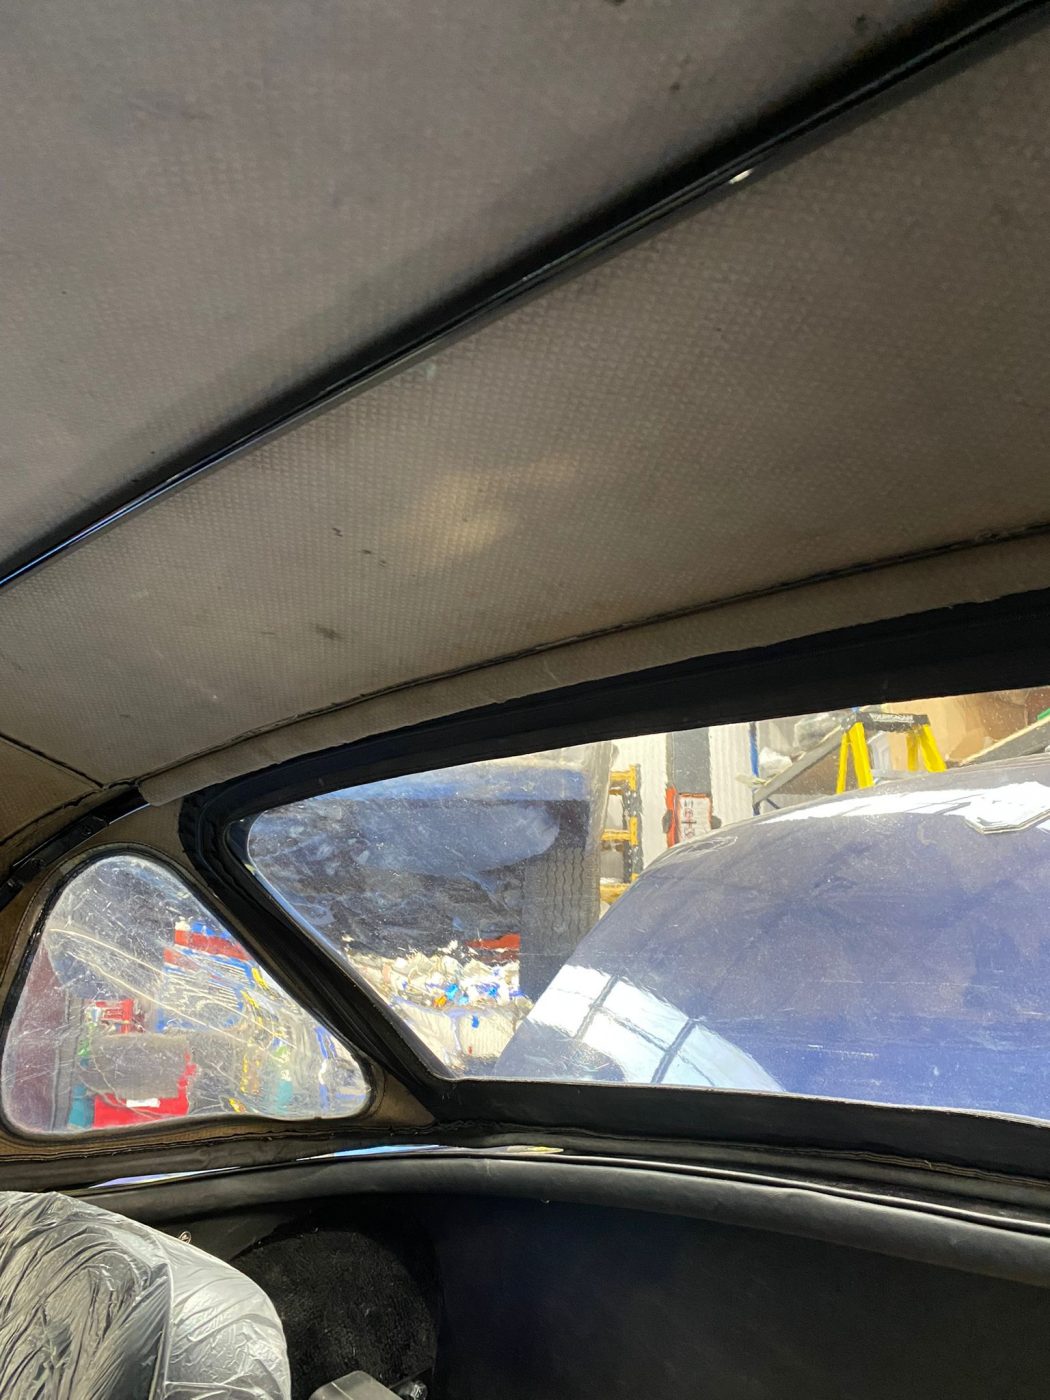
Some of the final steps in the assembly of the Roadster involved seals, sills and the installation of the original hood.
Keeping the original hood was done at the request of the customer. The team refitted the convertible top but replaced the rear screen due to splitting and cracking. With that done, Brian then worked on getting the hood fitted to the refurbished hood frame.
With the sill plates in place, our restoration workshop could begin to install the necessary door seals and fittings.
There was just one more thing to do before it was all done.


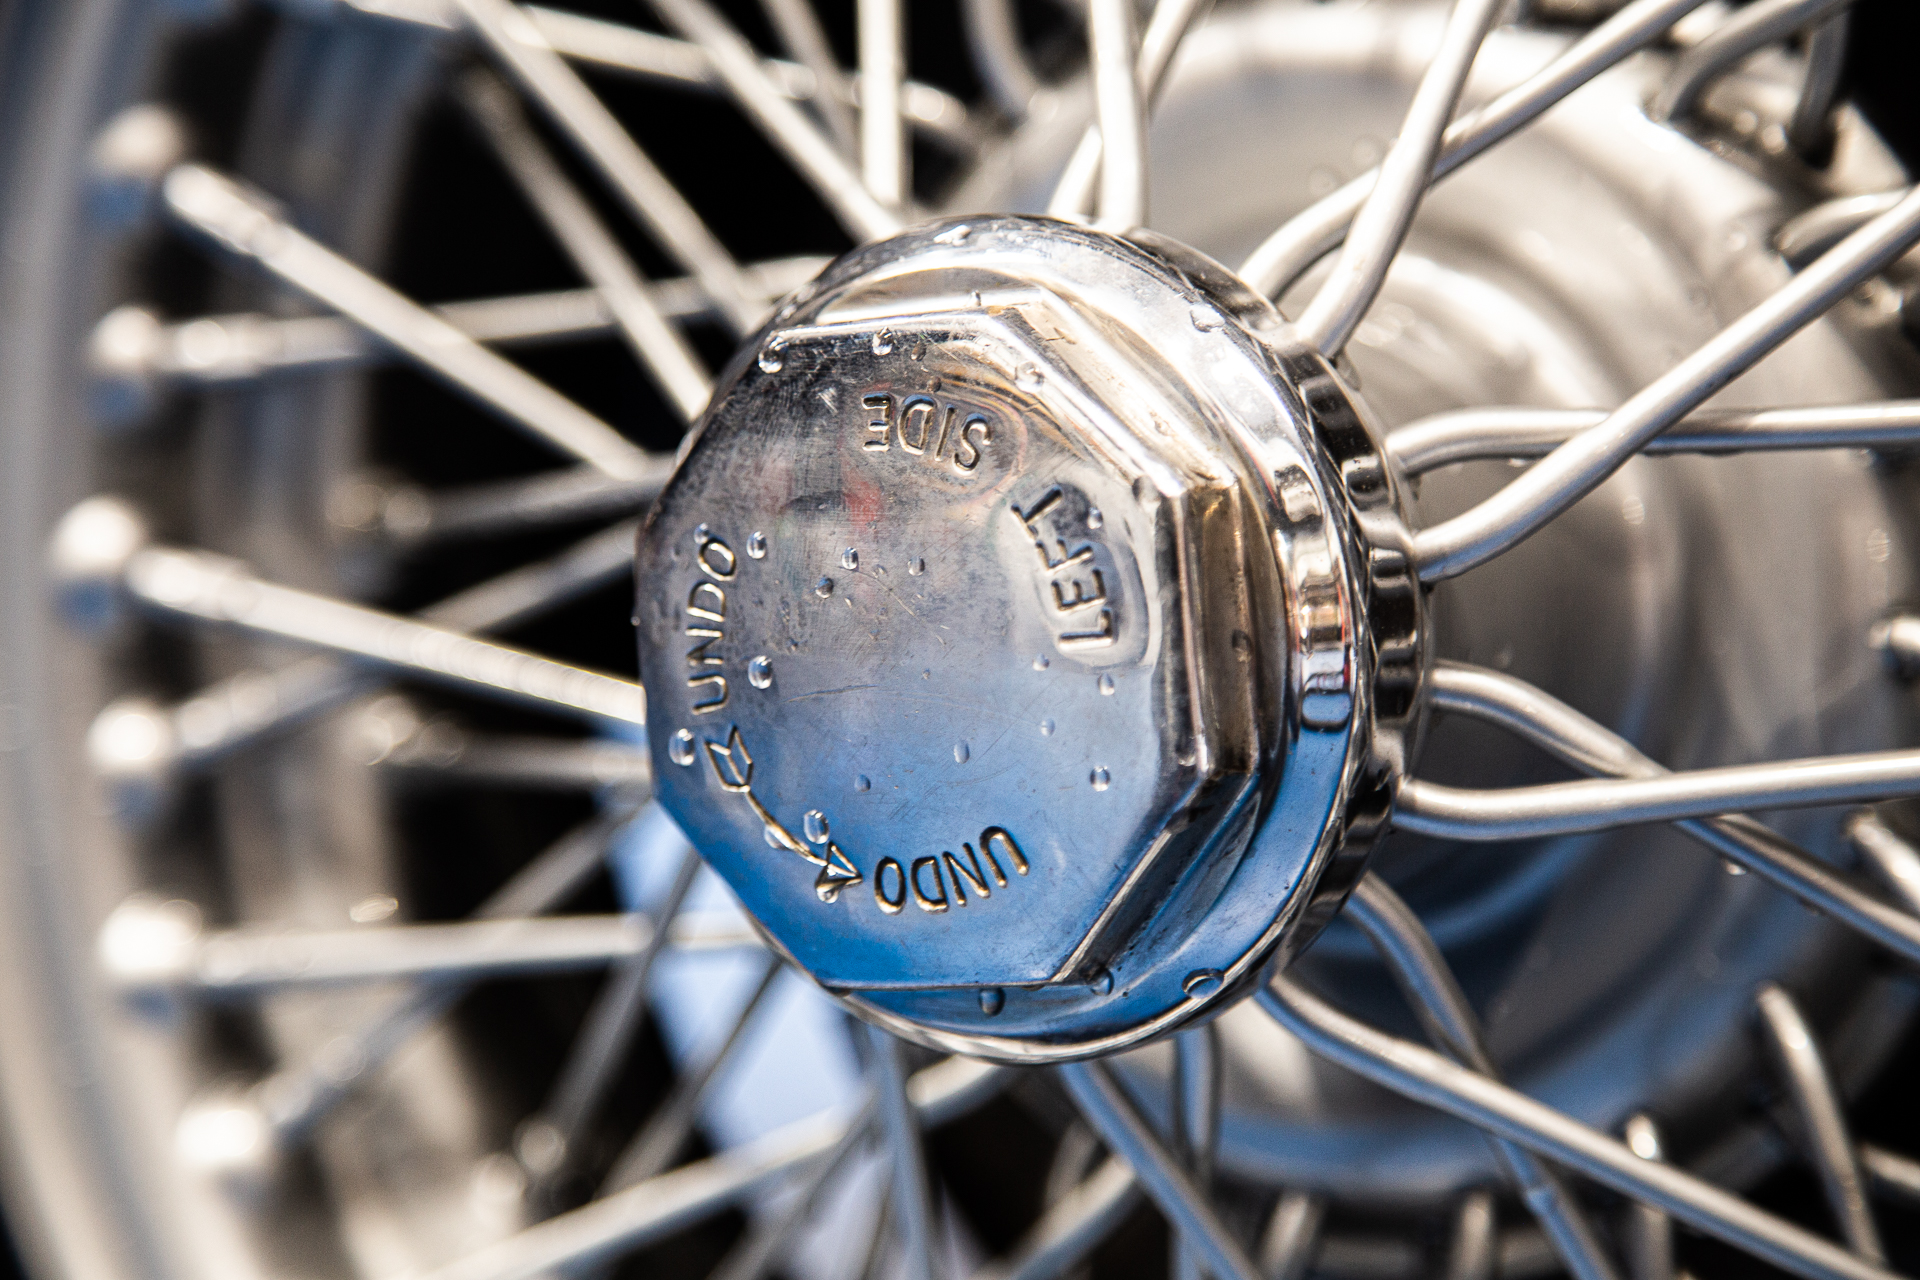
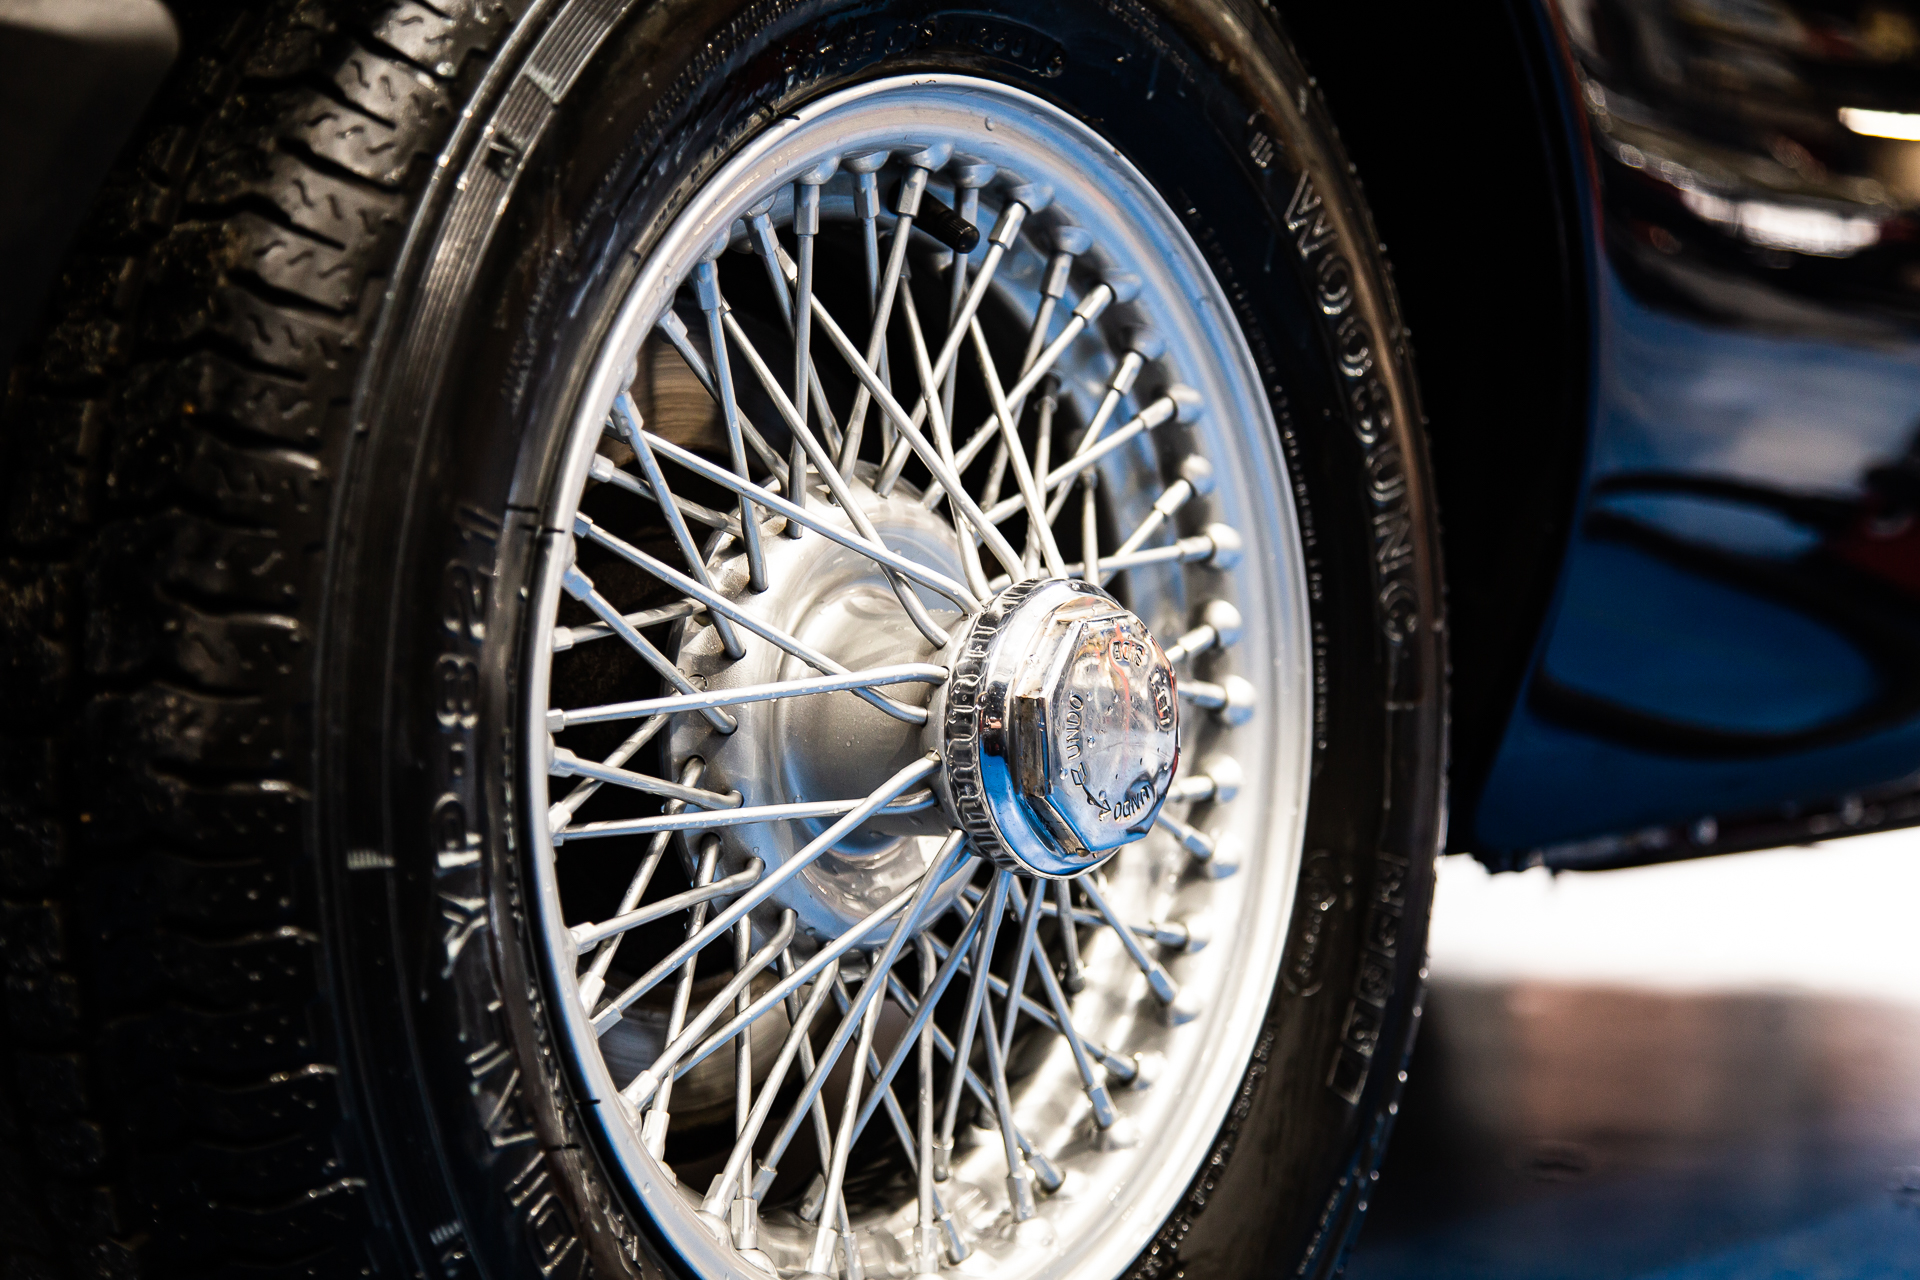
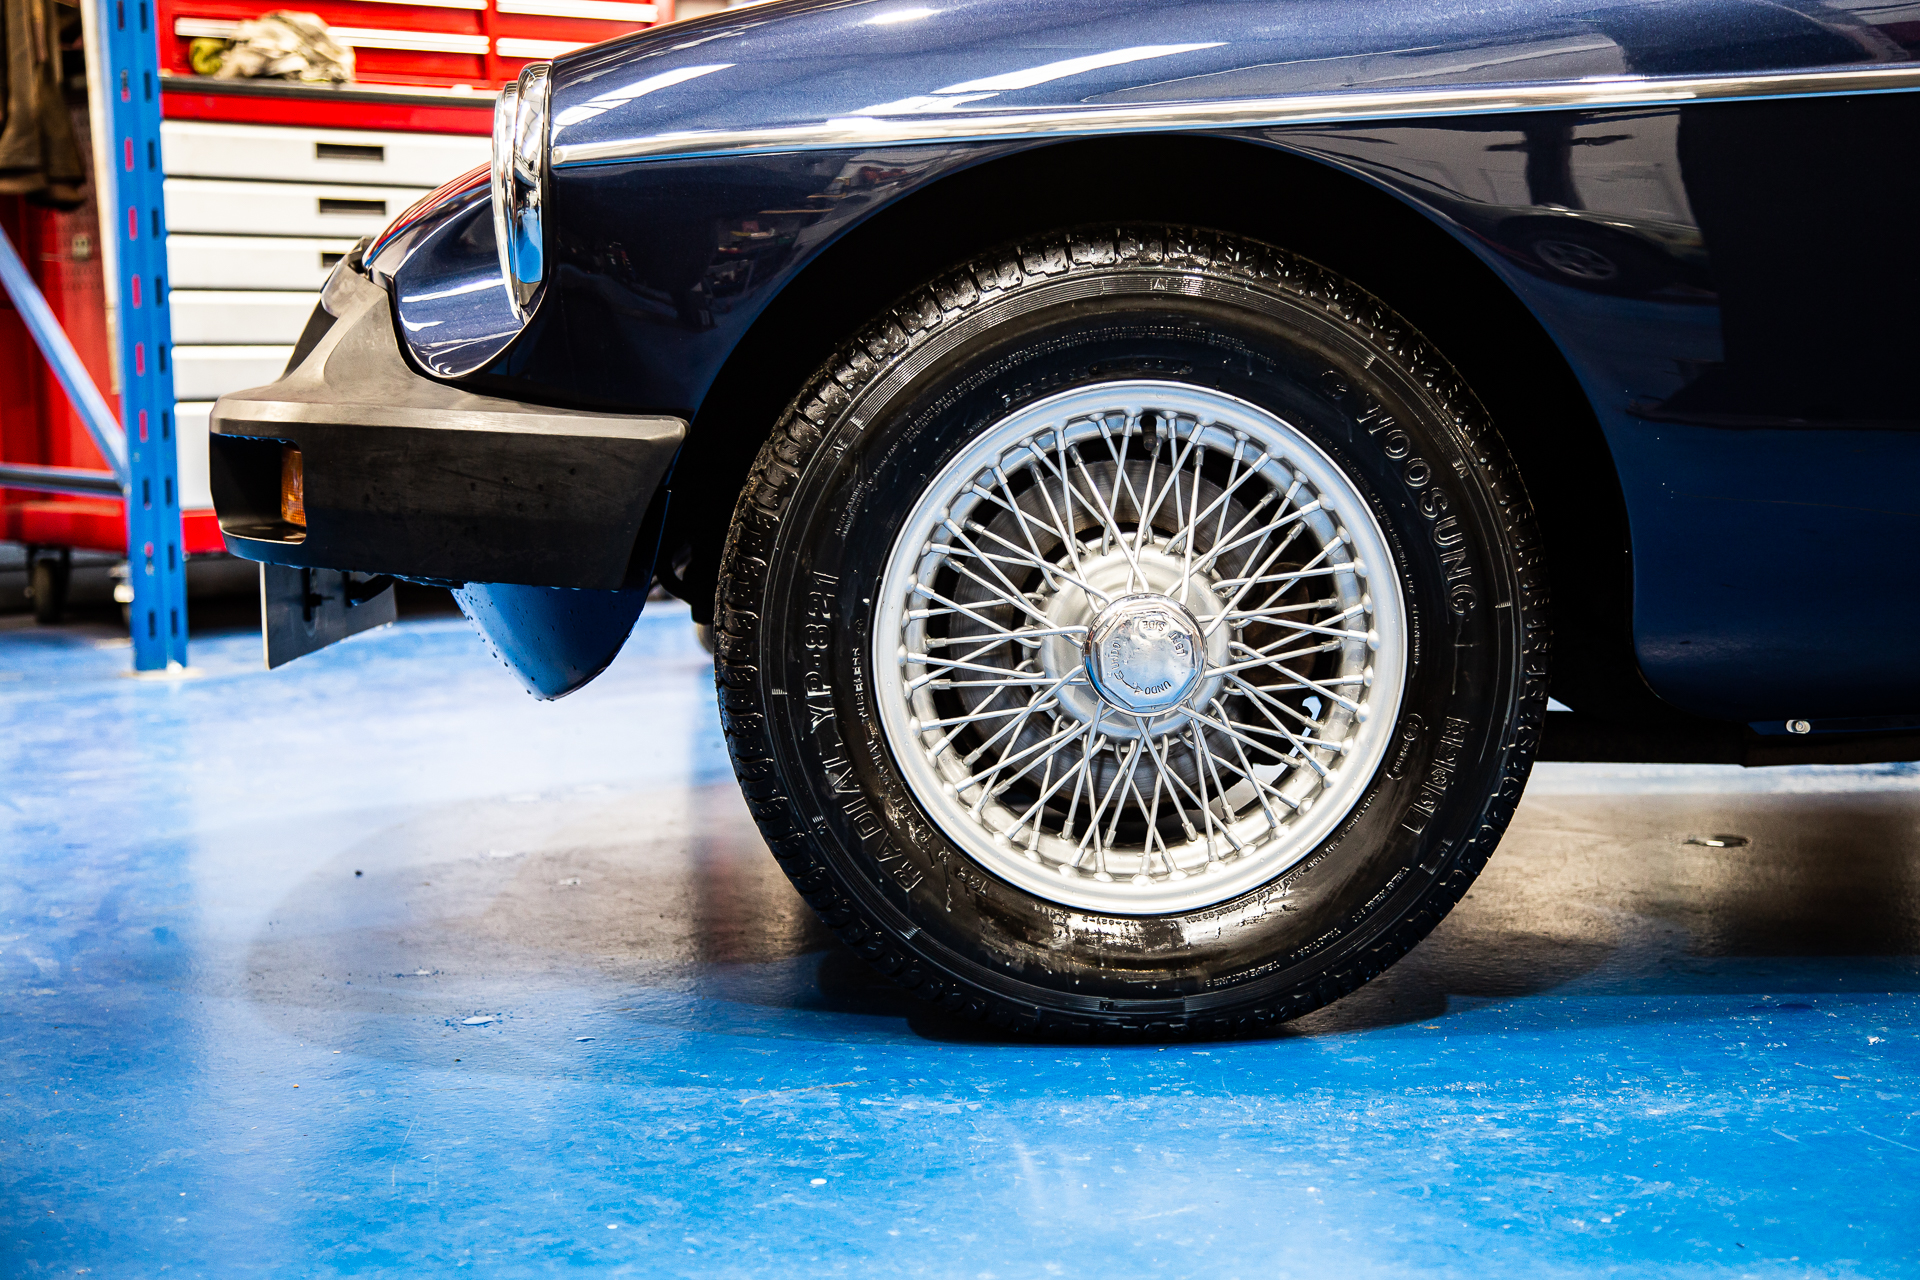

The wire wheels. An iconic and crucial part of any MGB.
We had the wheels for the car professionally sandblasted and powder coated.
The final phase of hours if not days of sanding and grinding by the technicians, the relentless tweaking and moving to get pieces aligned, The precision of our trim shop to make sure an off the shelf interior was fitting for a hand-finished car.
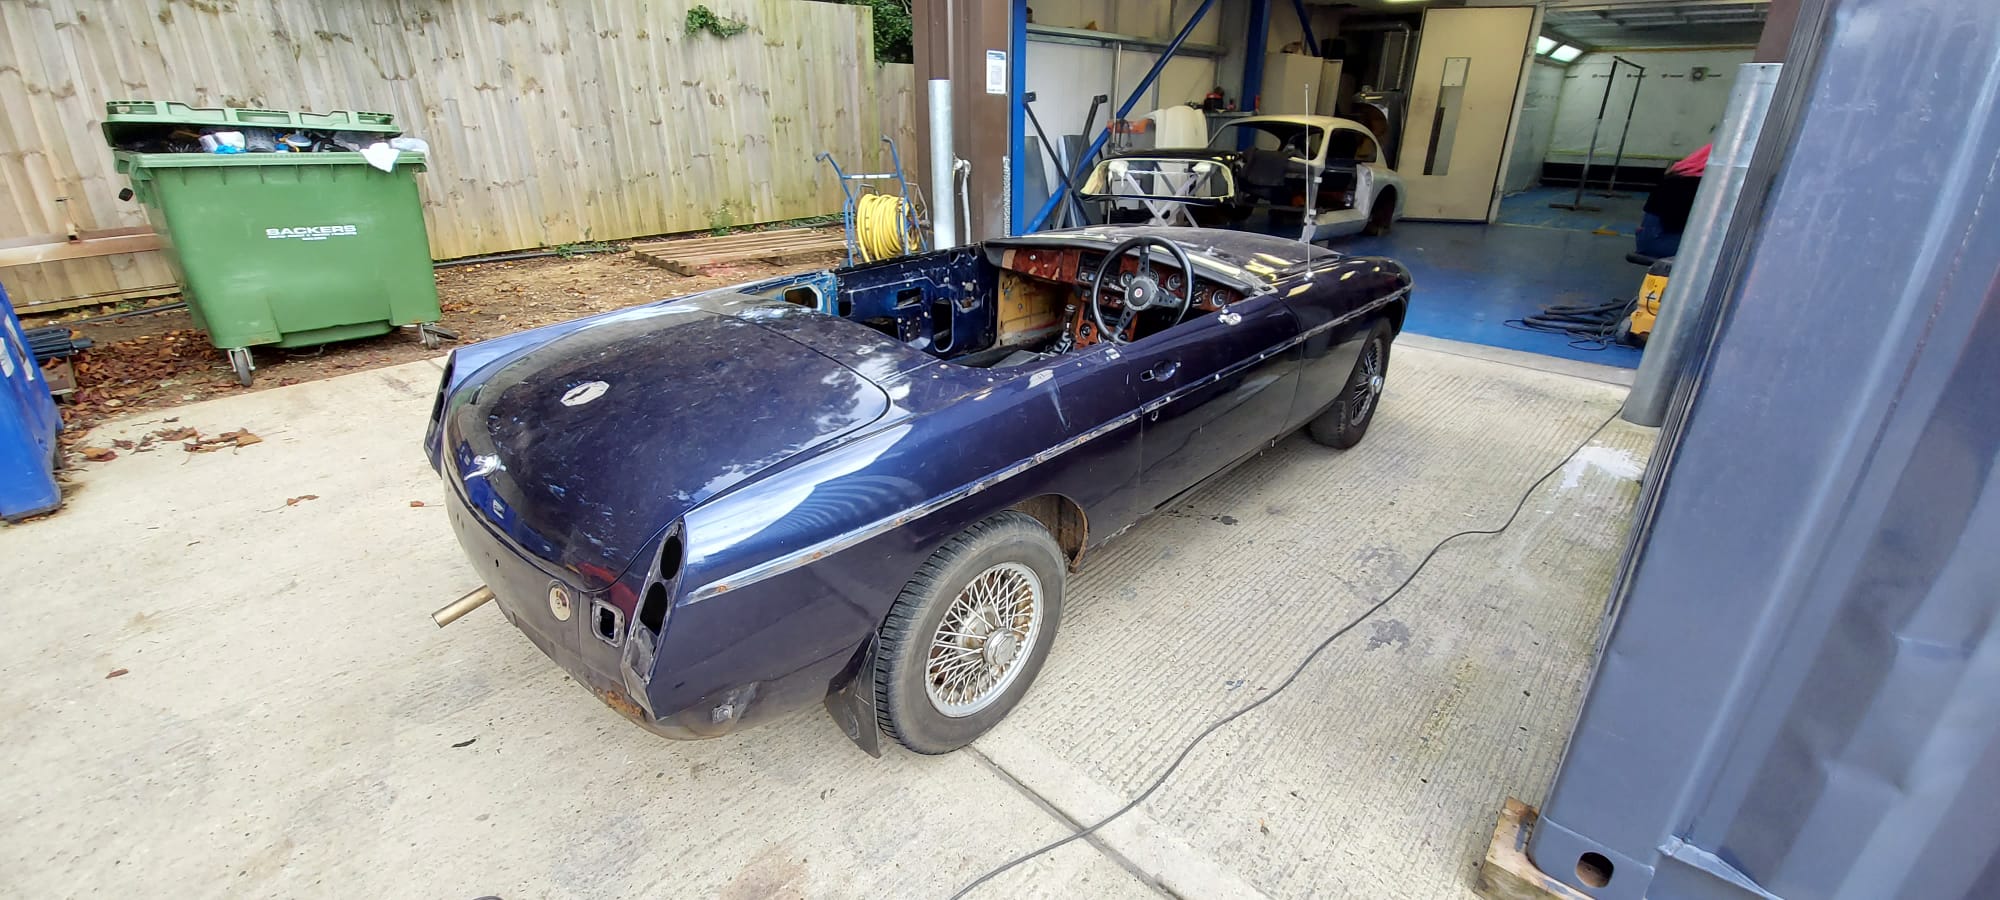
Now, with the wheels on and all the jobs ticked off the sheet. It was time to get the 1977 MGB Roadster fully valeted and clean before we have to say goodbye after it has been tested.
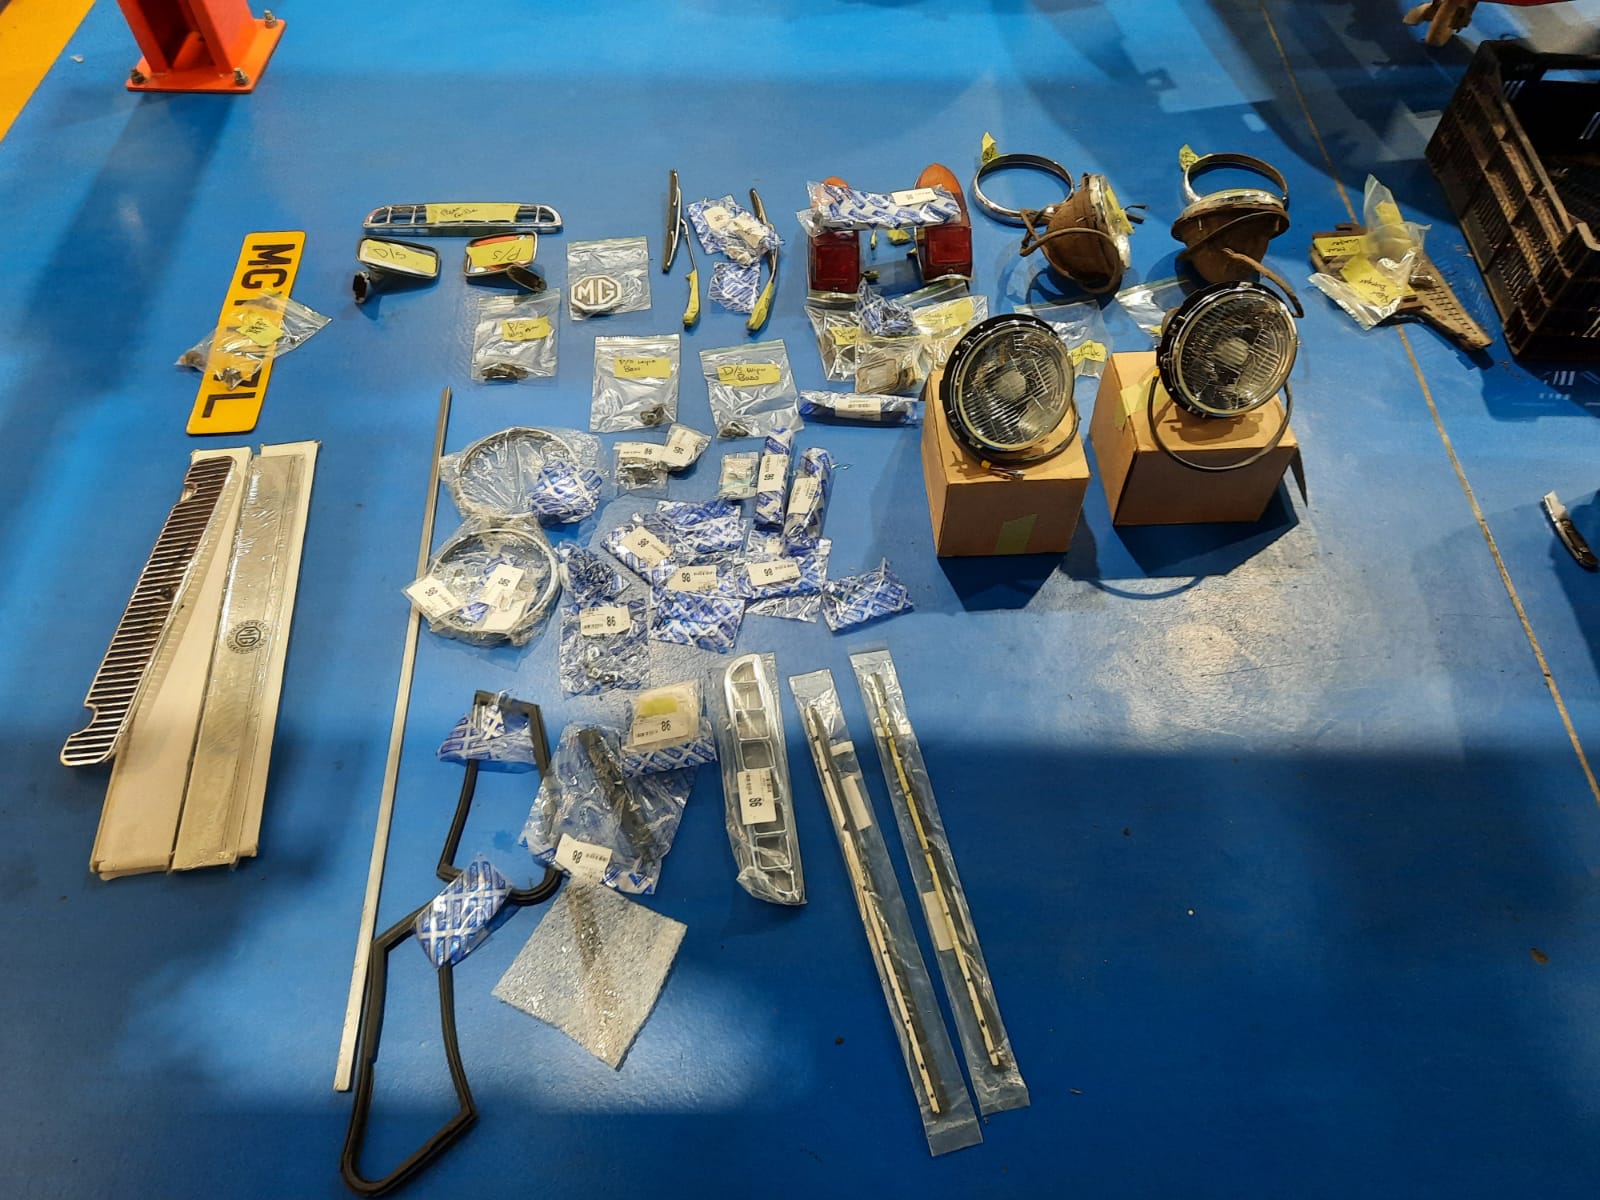
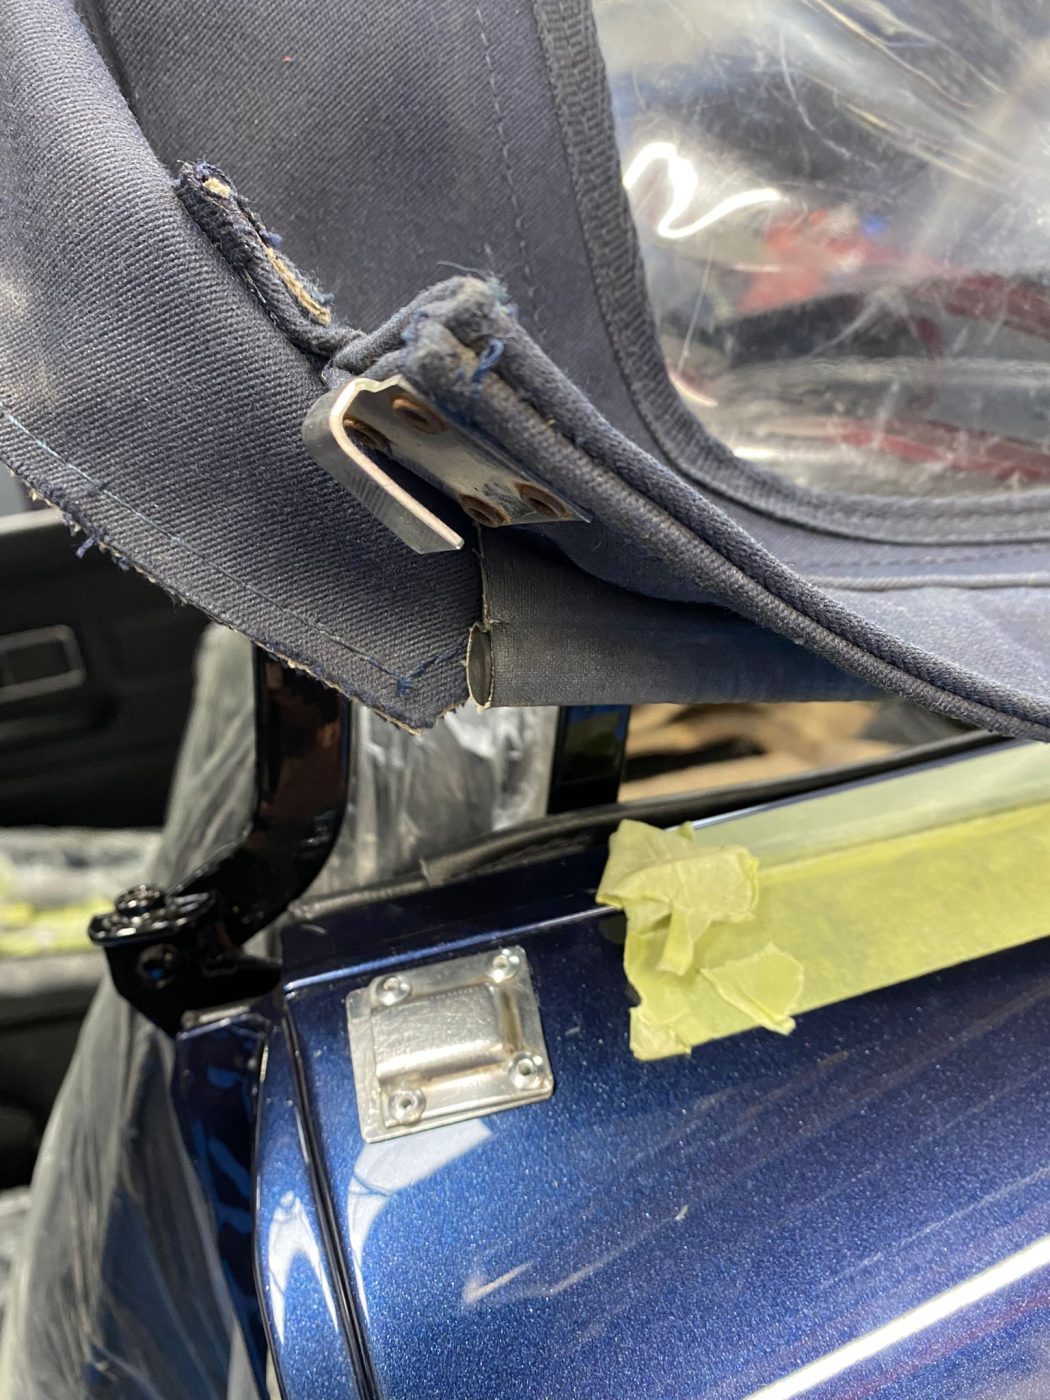
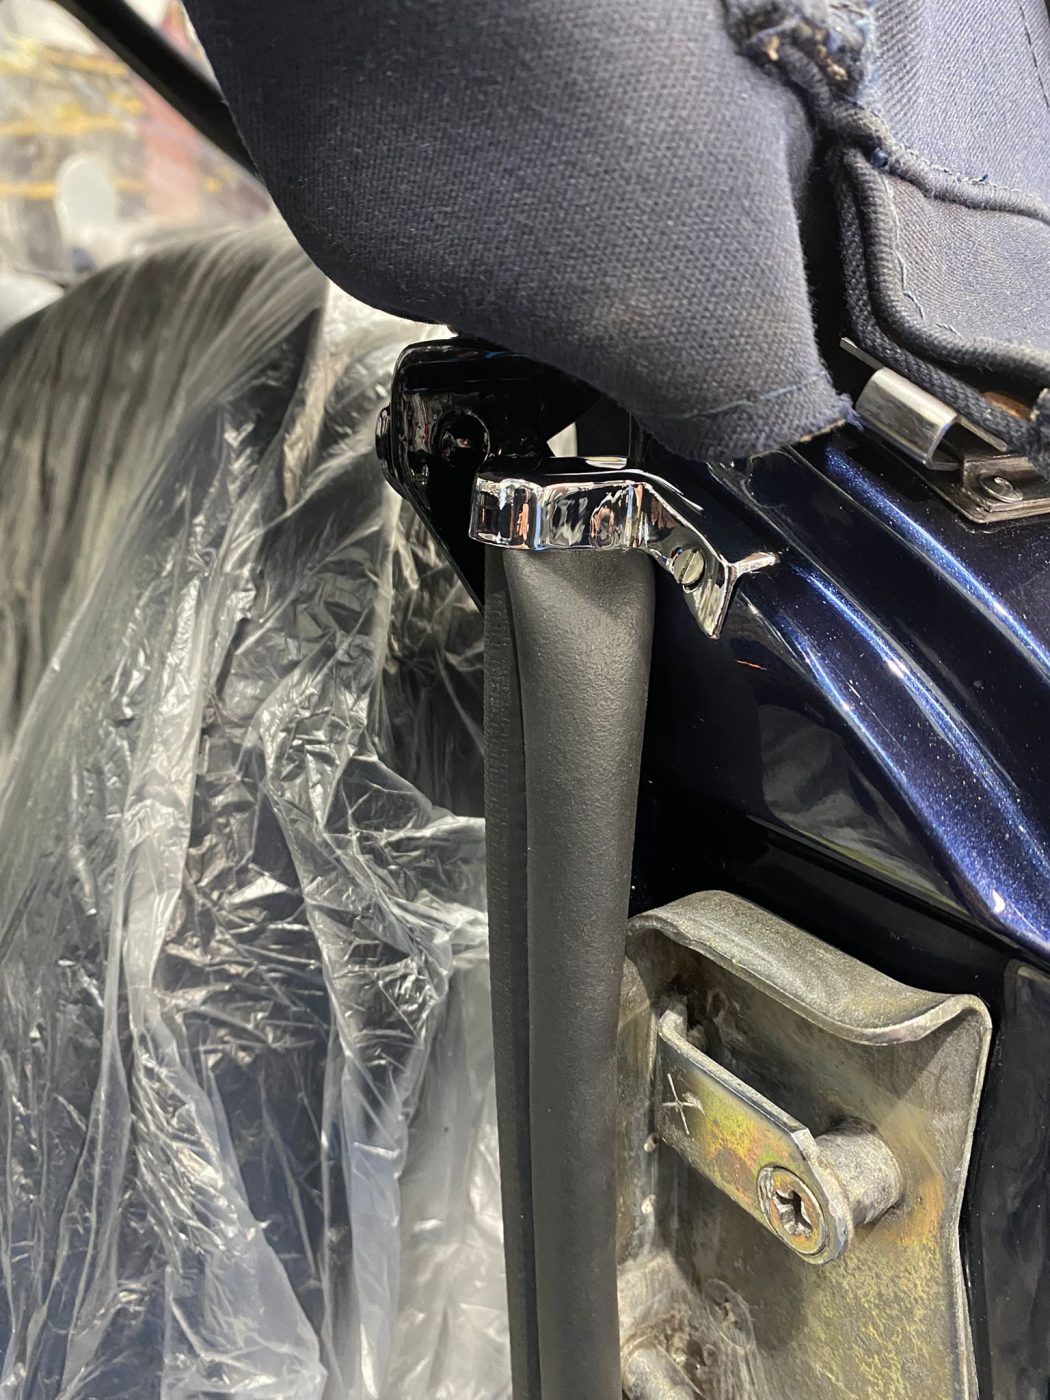
The Bridge Classic Cars technicians have been fitting the final few clips, brackets and guards onto the 1977 MGB Roadster which is in our restoration workshop.
Paul worked alongside our trim team to the new hood studs secured into the body of the 1970s convertible. This could only be done once the original convertible hood was put onto the refurbished frame.
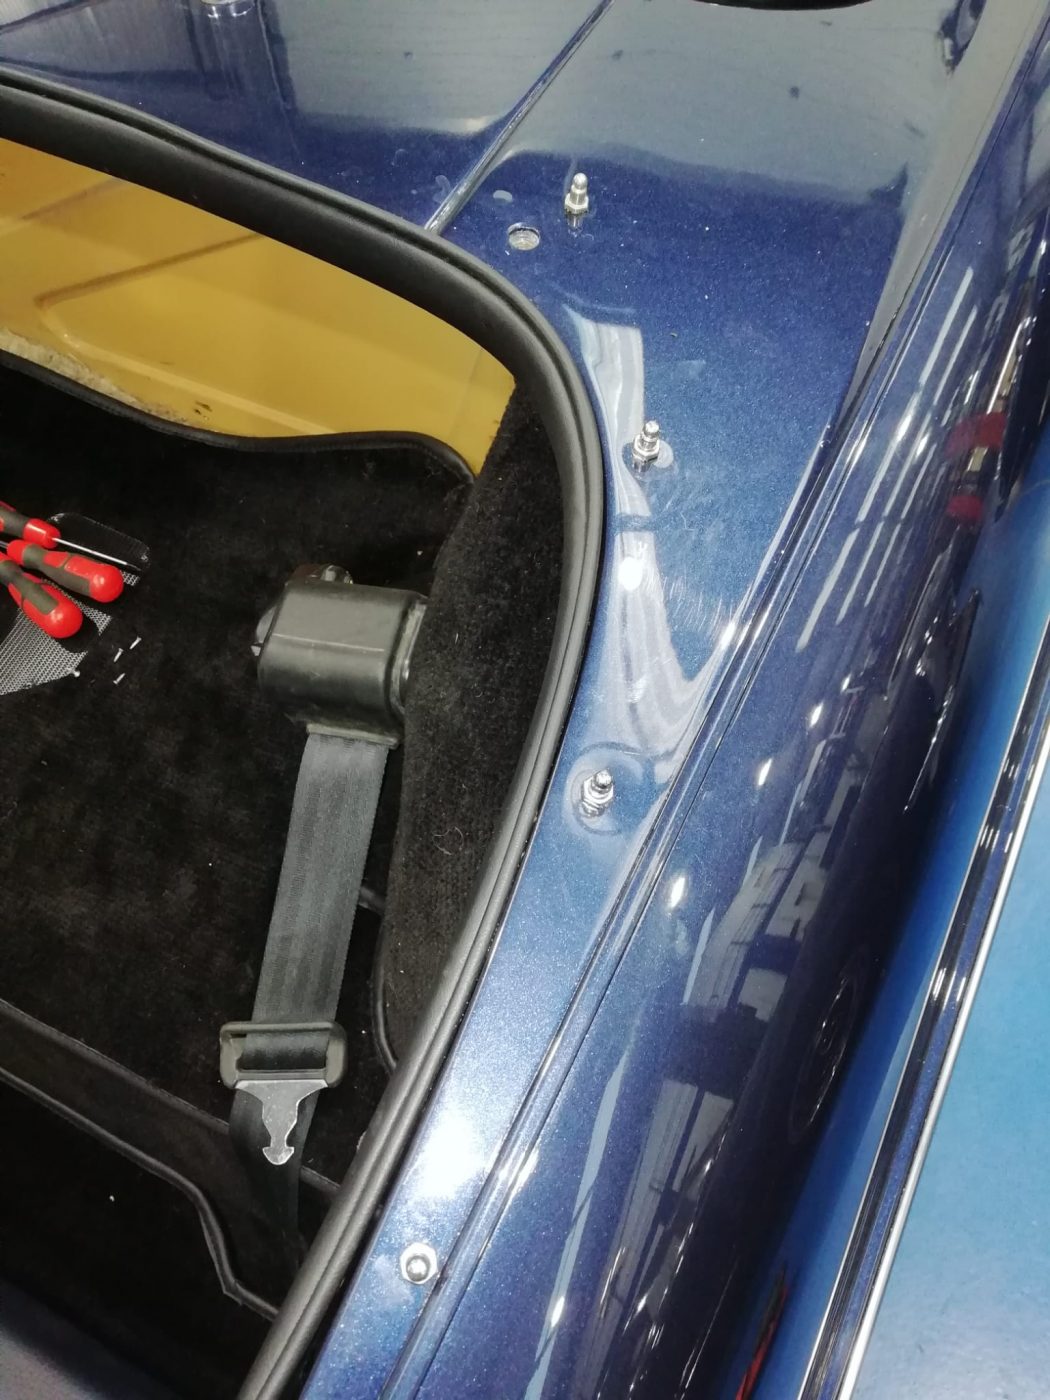
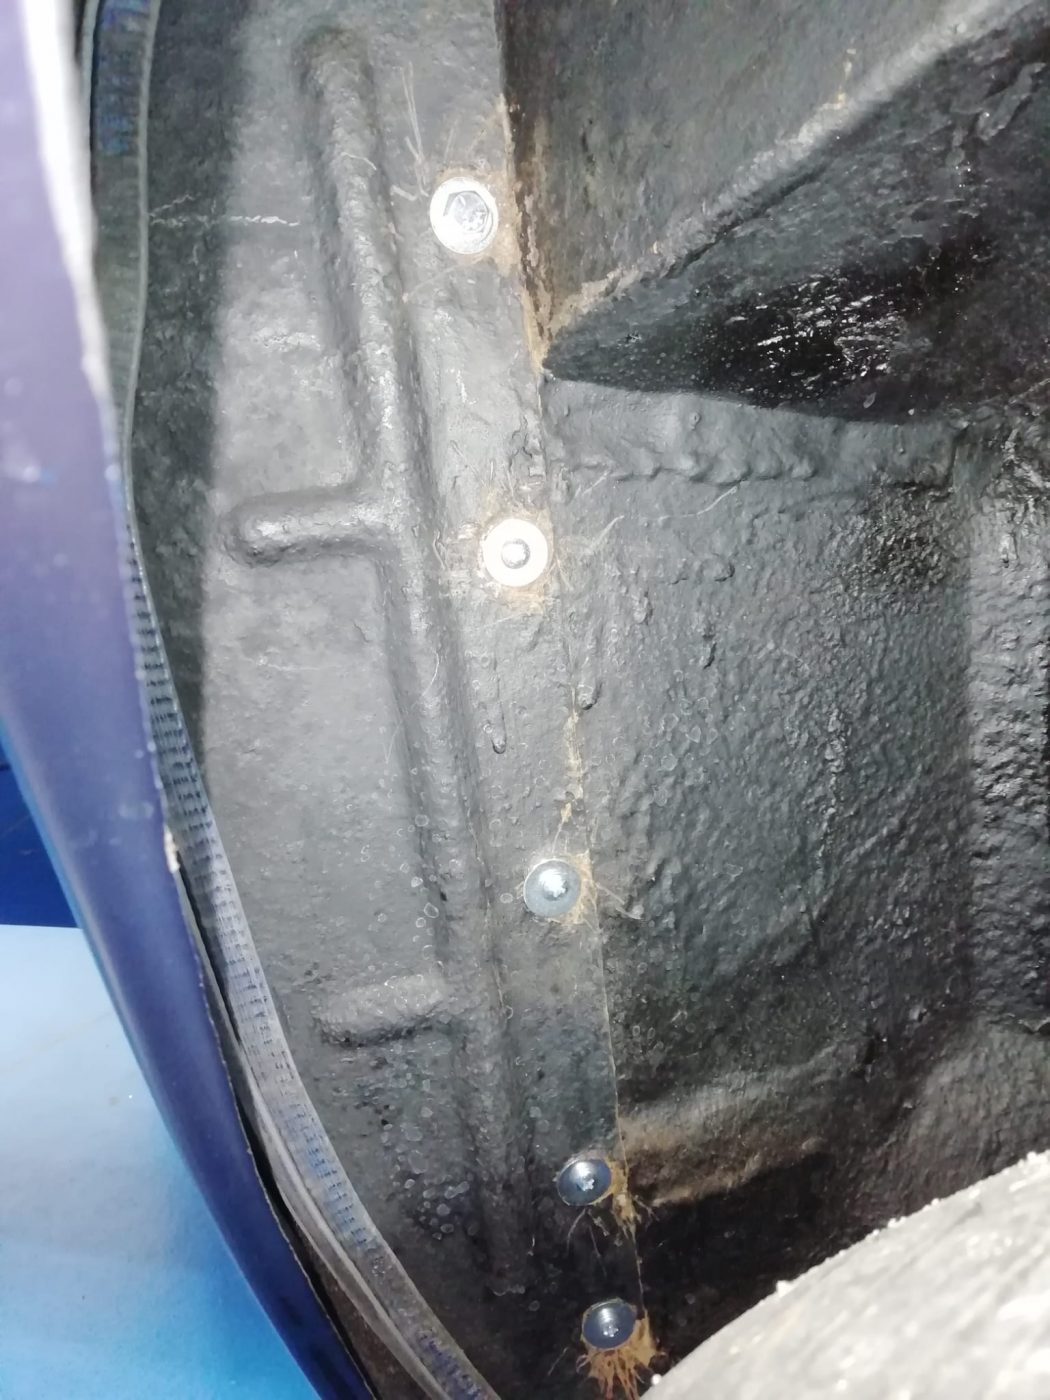
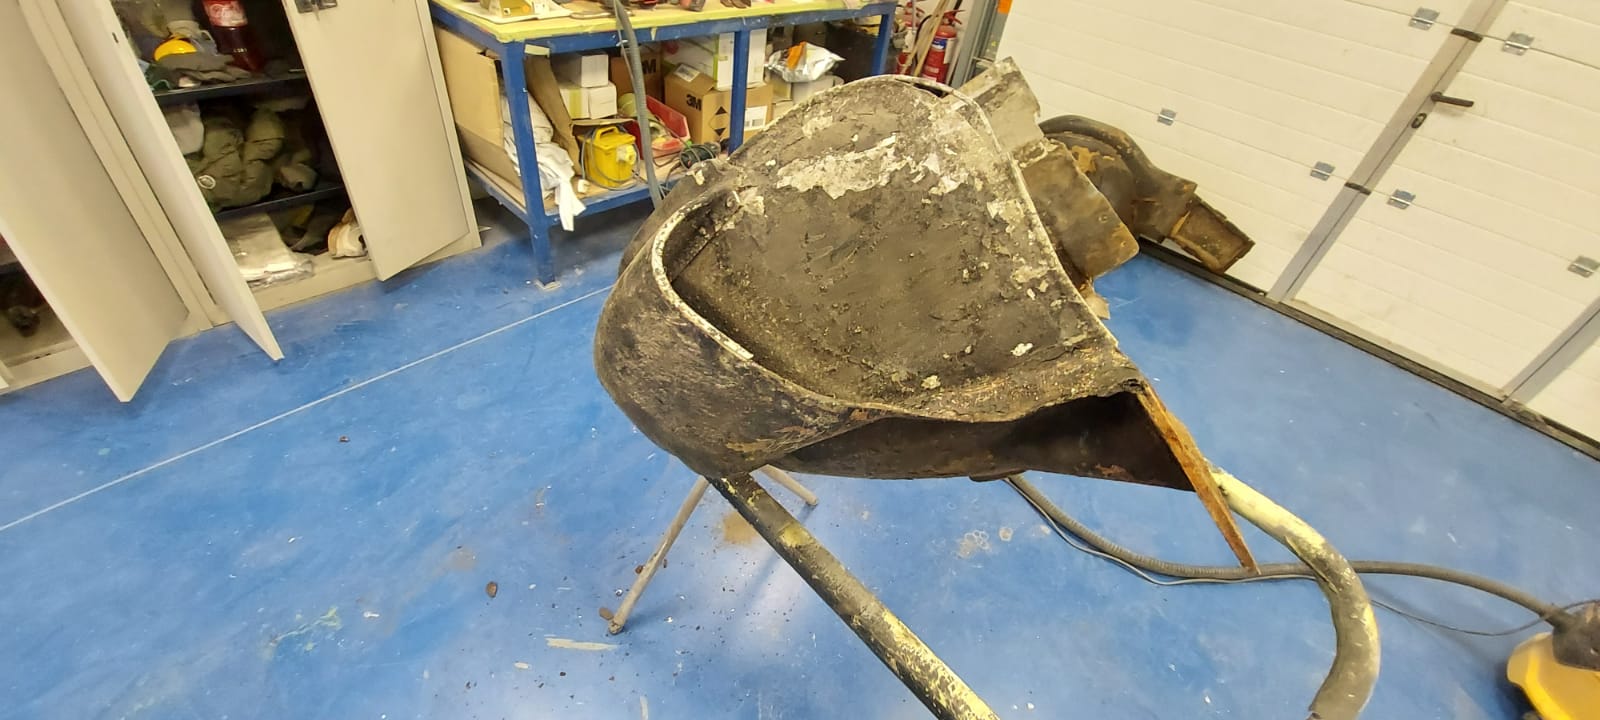
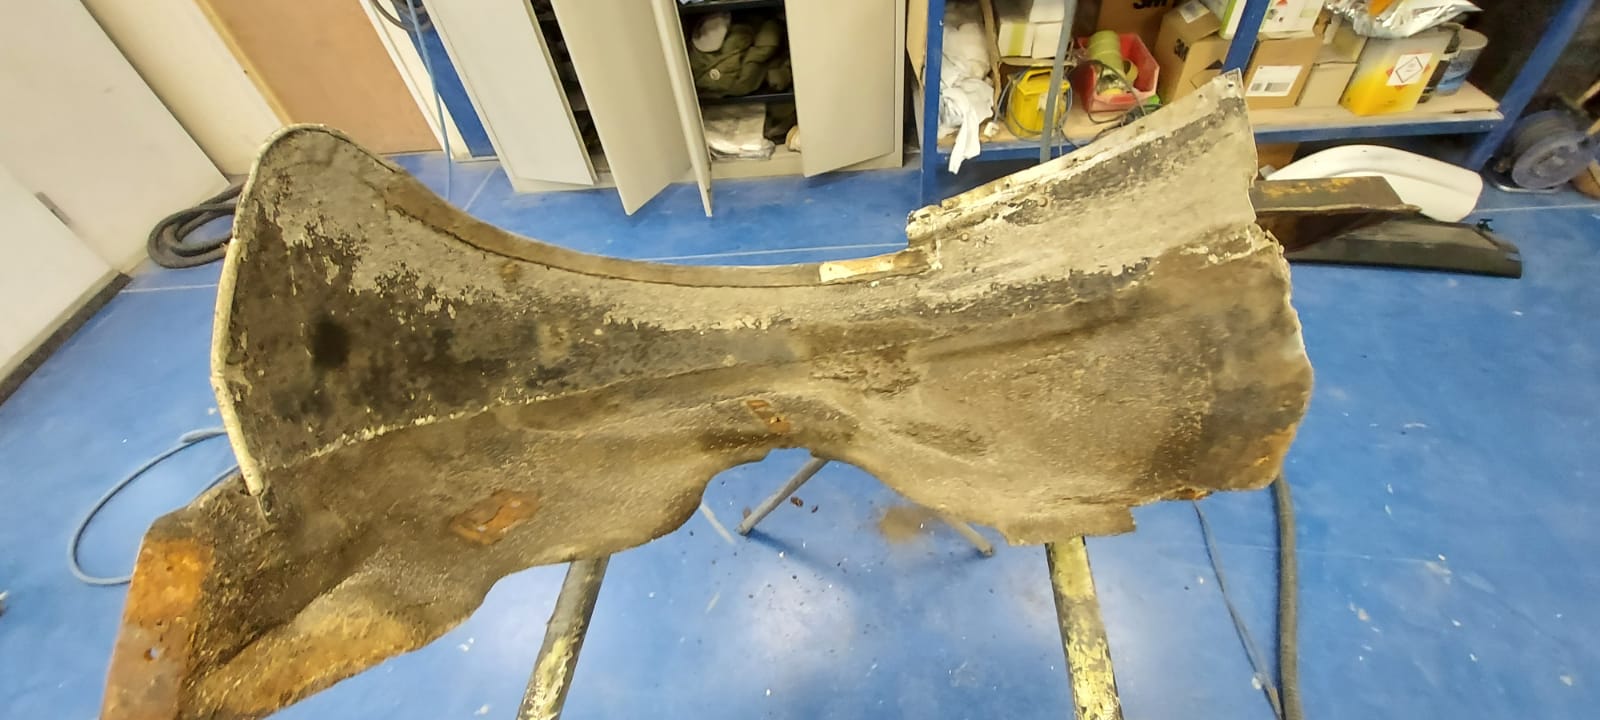
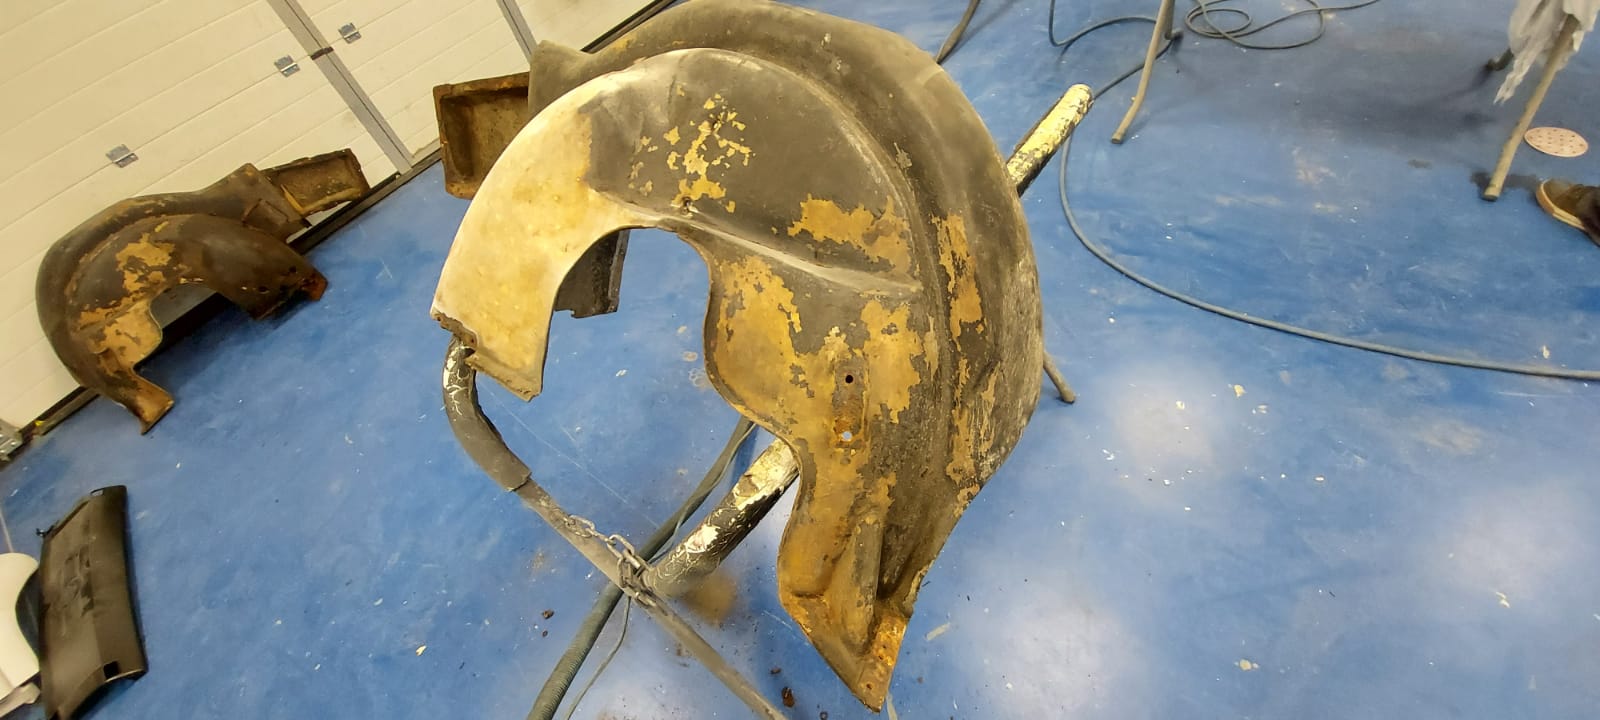
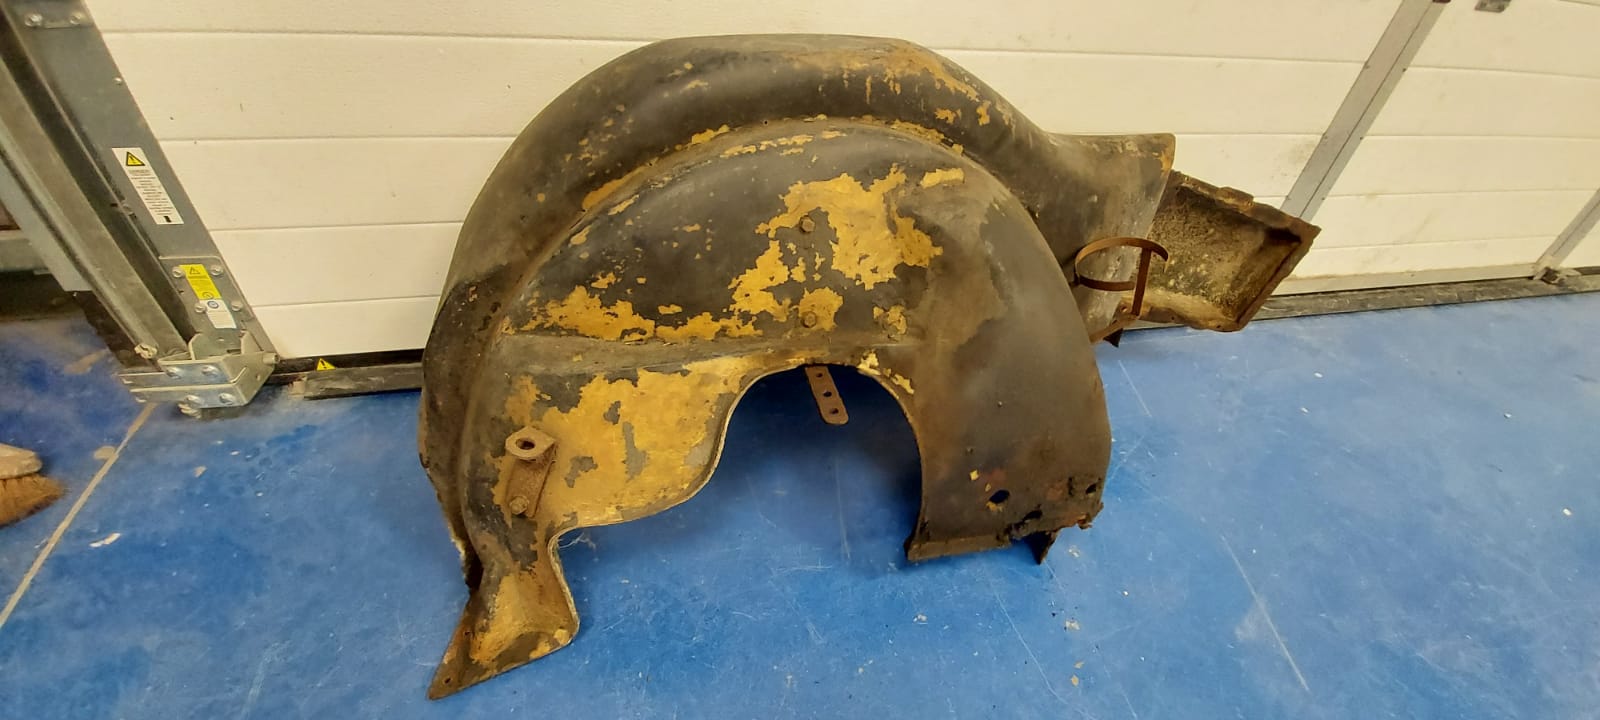
Once the hood studs were in place, the technicians could then move on to the final parts of the car. One of those is fitting the inner wheel arch guards onto the car. This has to be done before the team road test the car before its hand over.


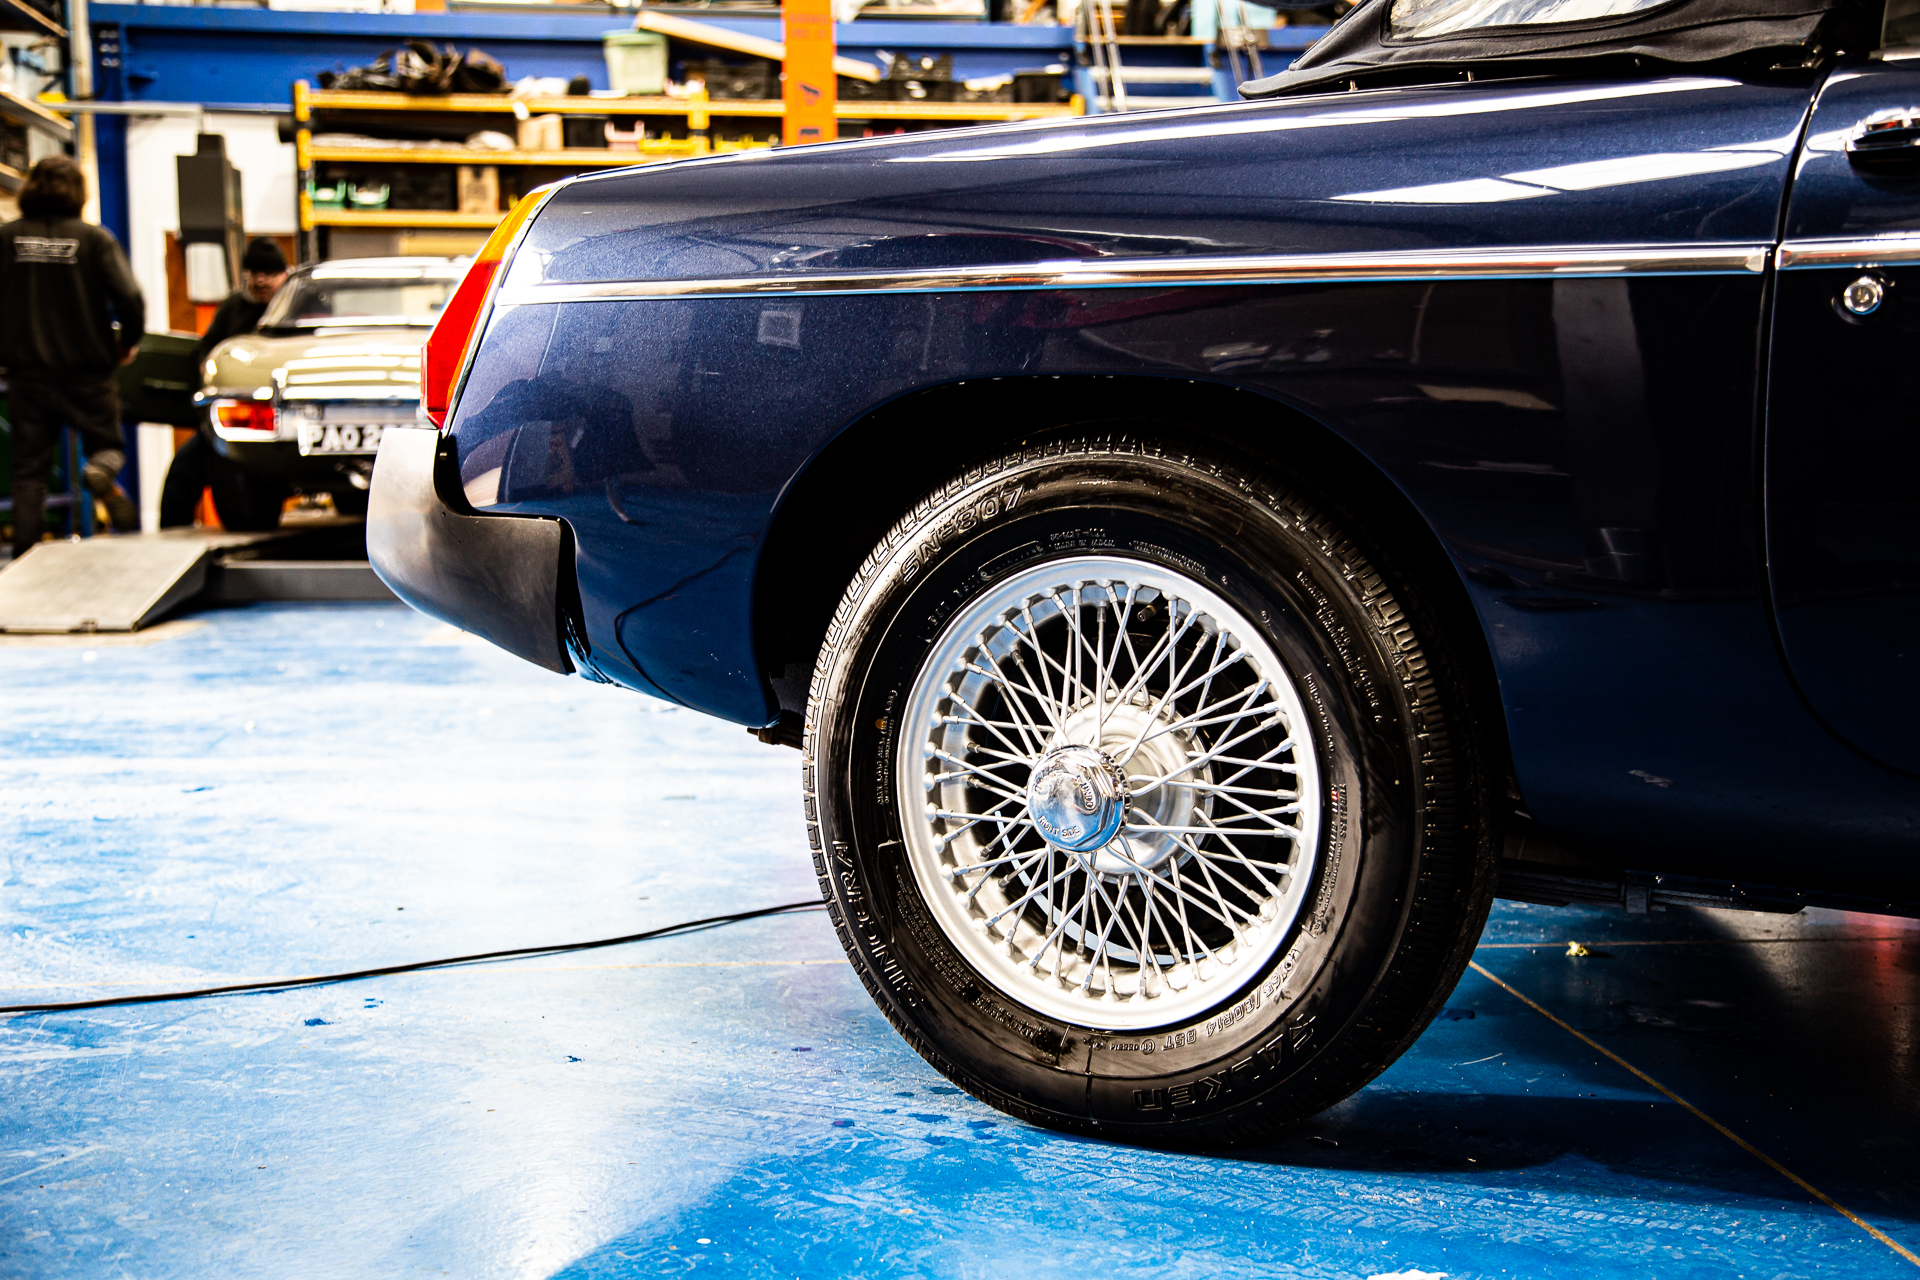

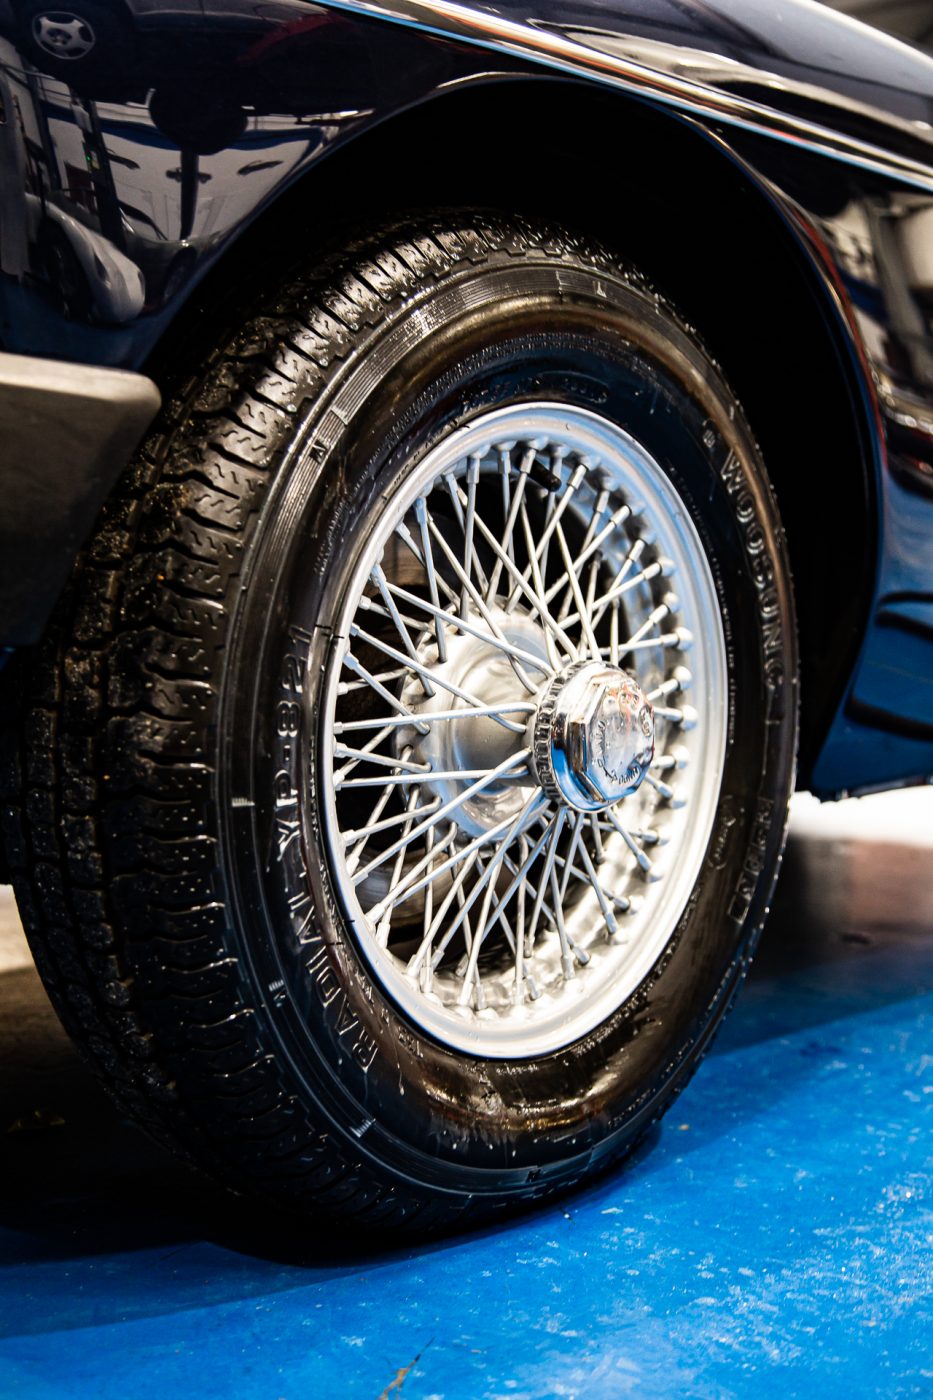
The final piece of the restoration of the 1977 MGB Roadster in the Bridge Classic Cars workshop at our Suffolk HQ have been fitted to the car. The completely refurbished wire wheels.
The wheels are now fitting to the huge amount of work done by the whole team here at Bridge on the Roadster to get it looking like a million dollars. With the wheels now on the car, it can have its full valet carried out by Viper Auto Valet, who will go through the entire car (including the wheels) and get everything look better than new.
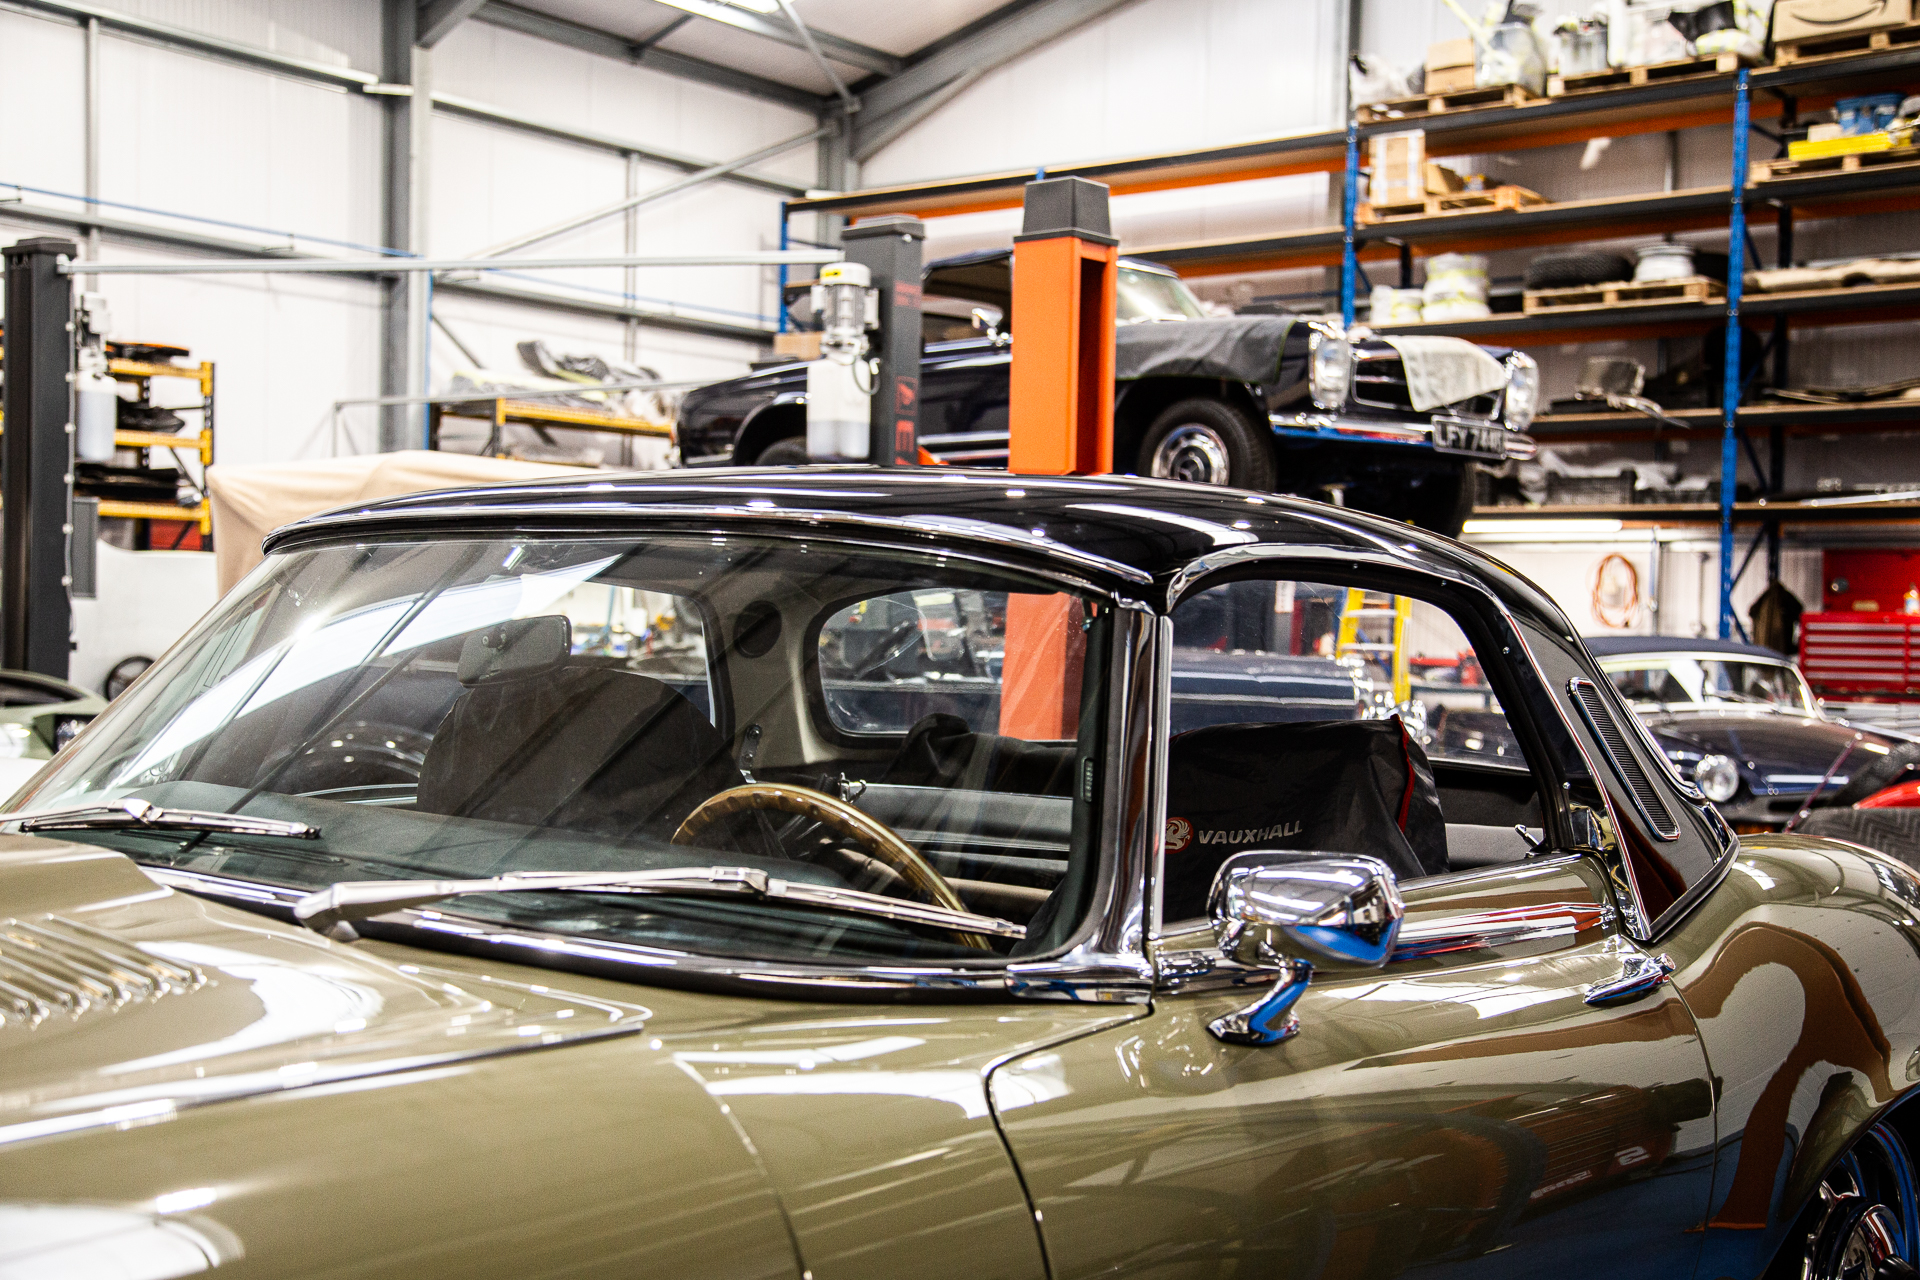
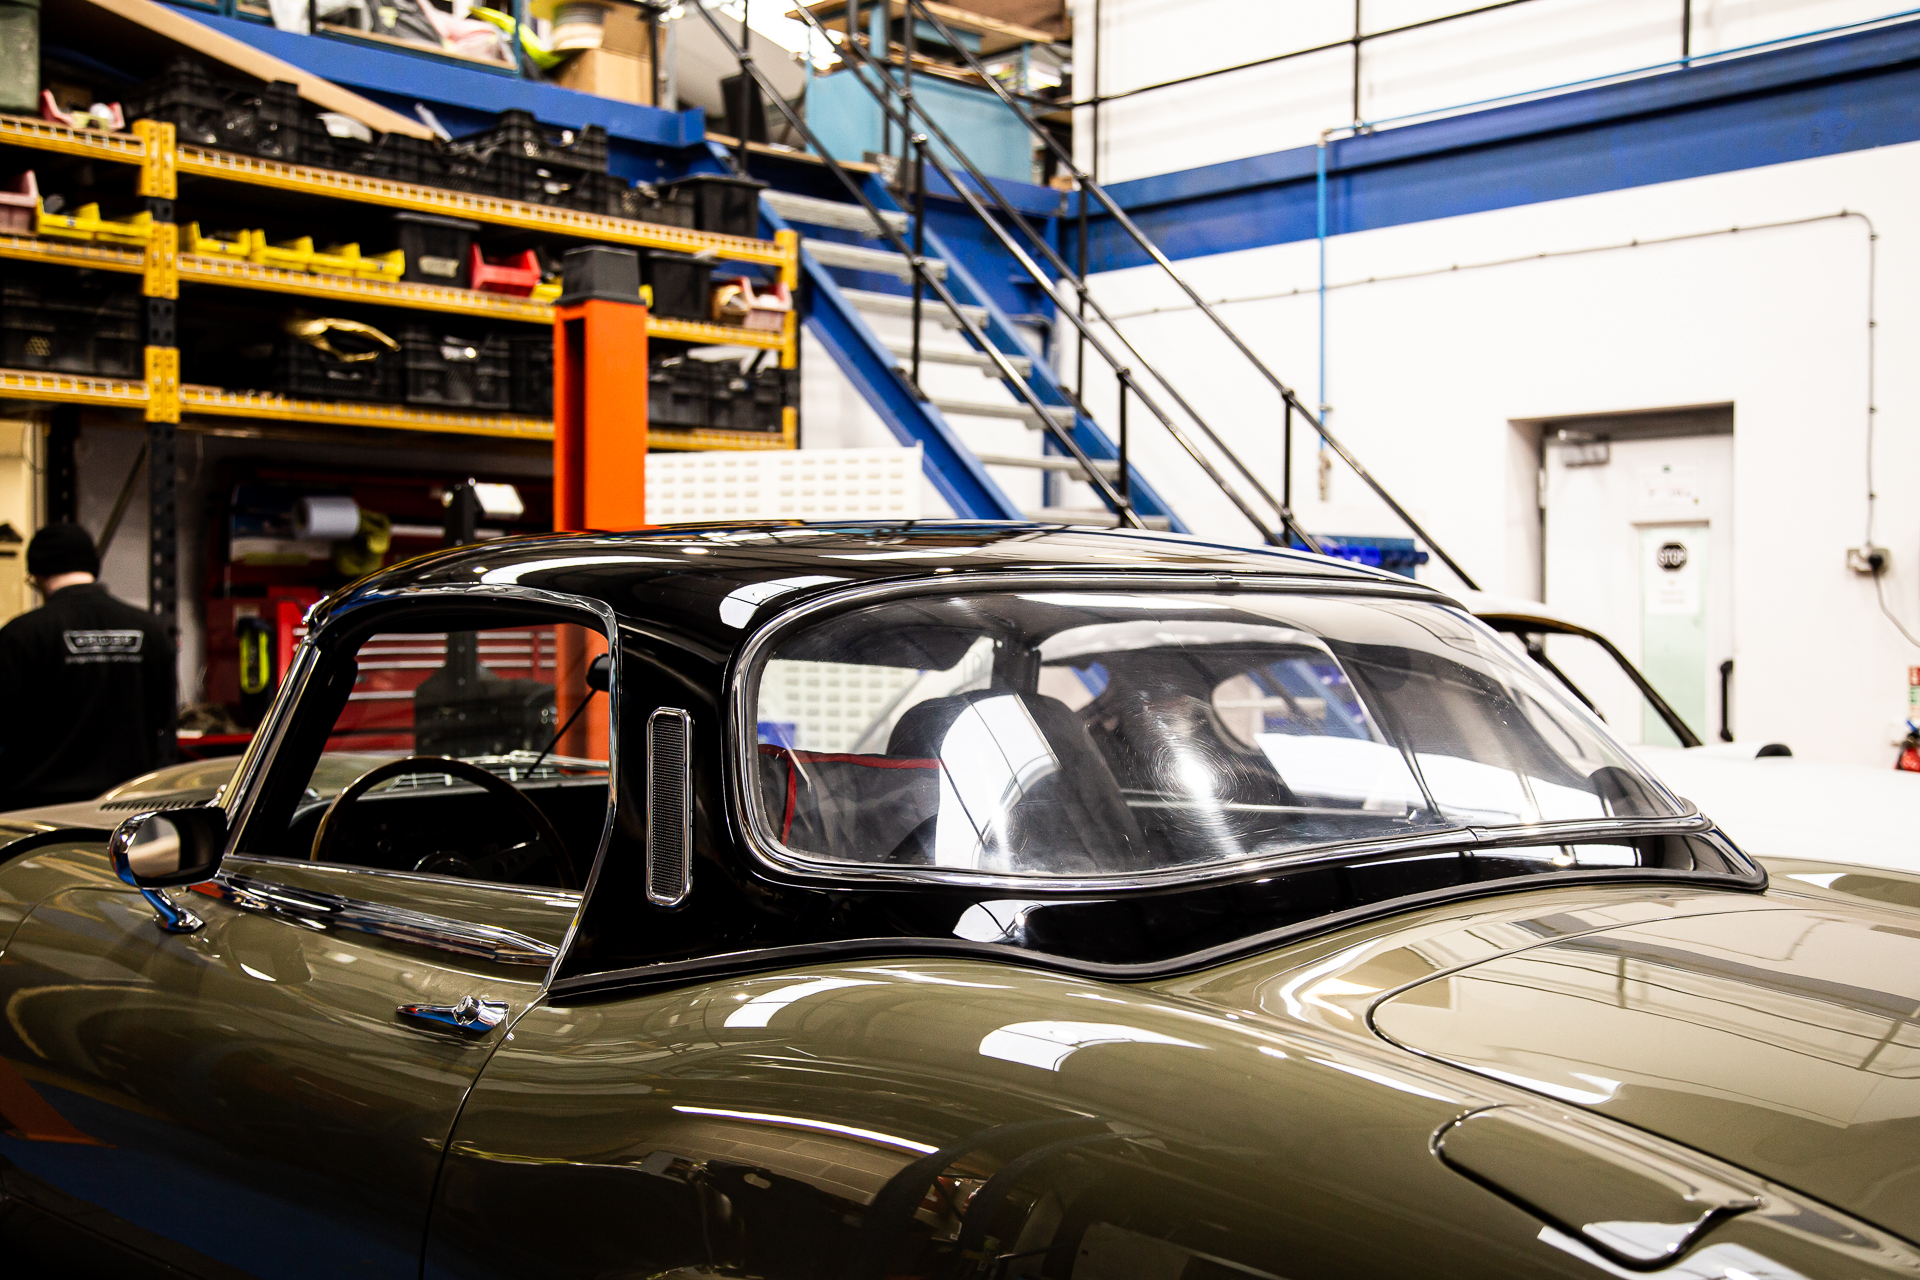
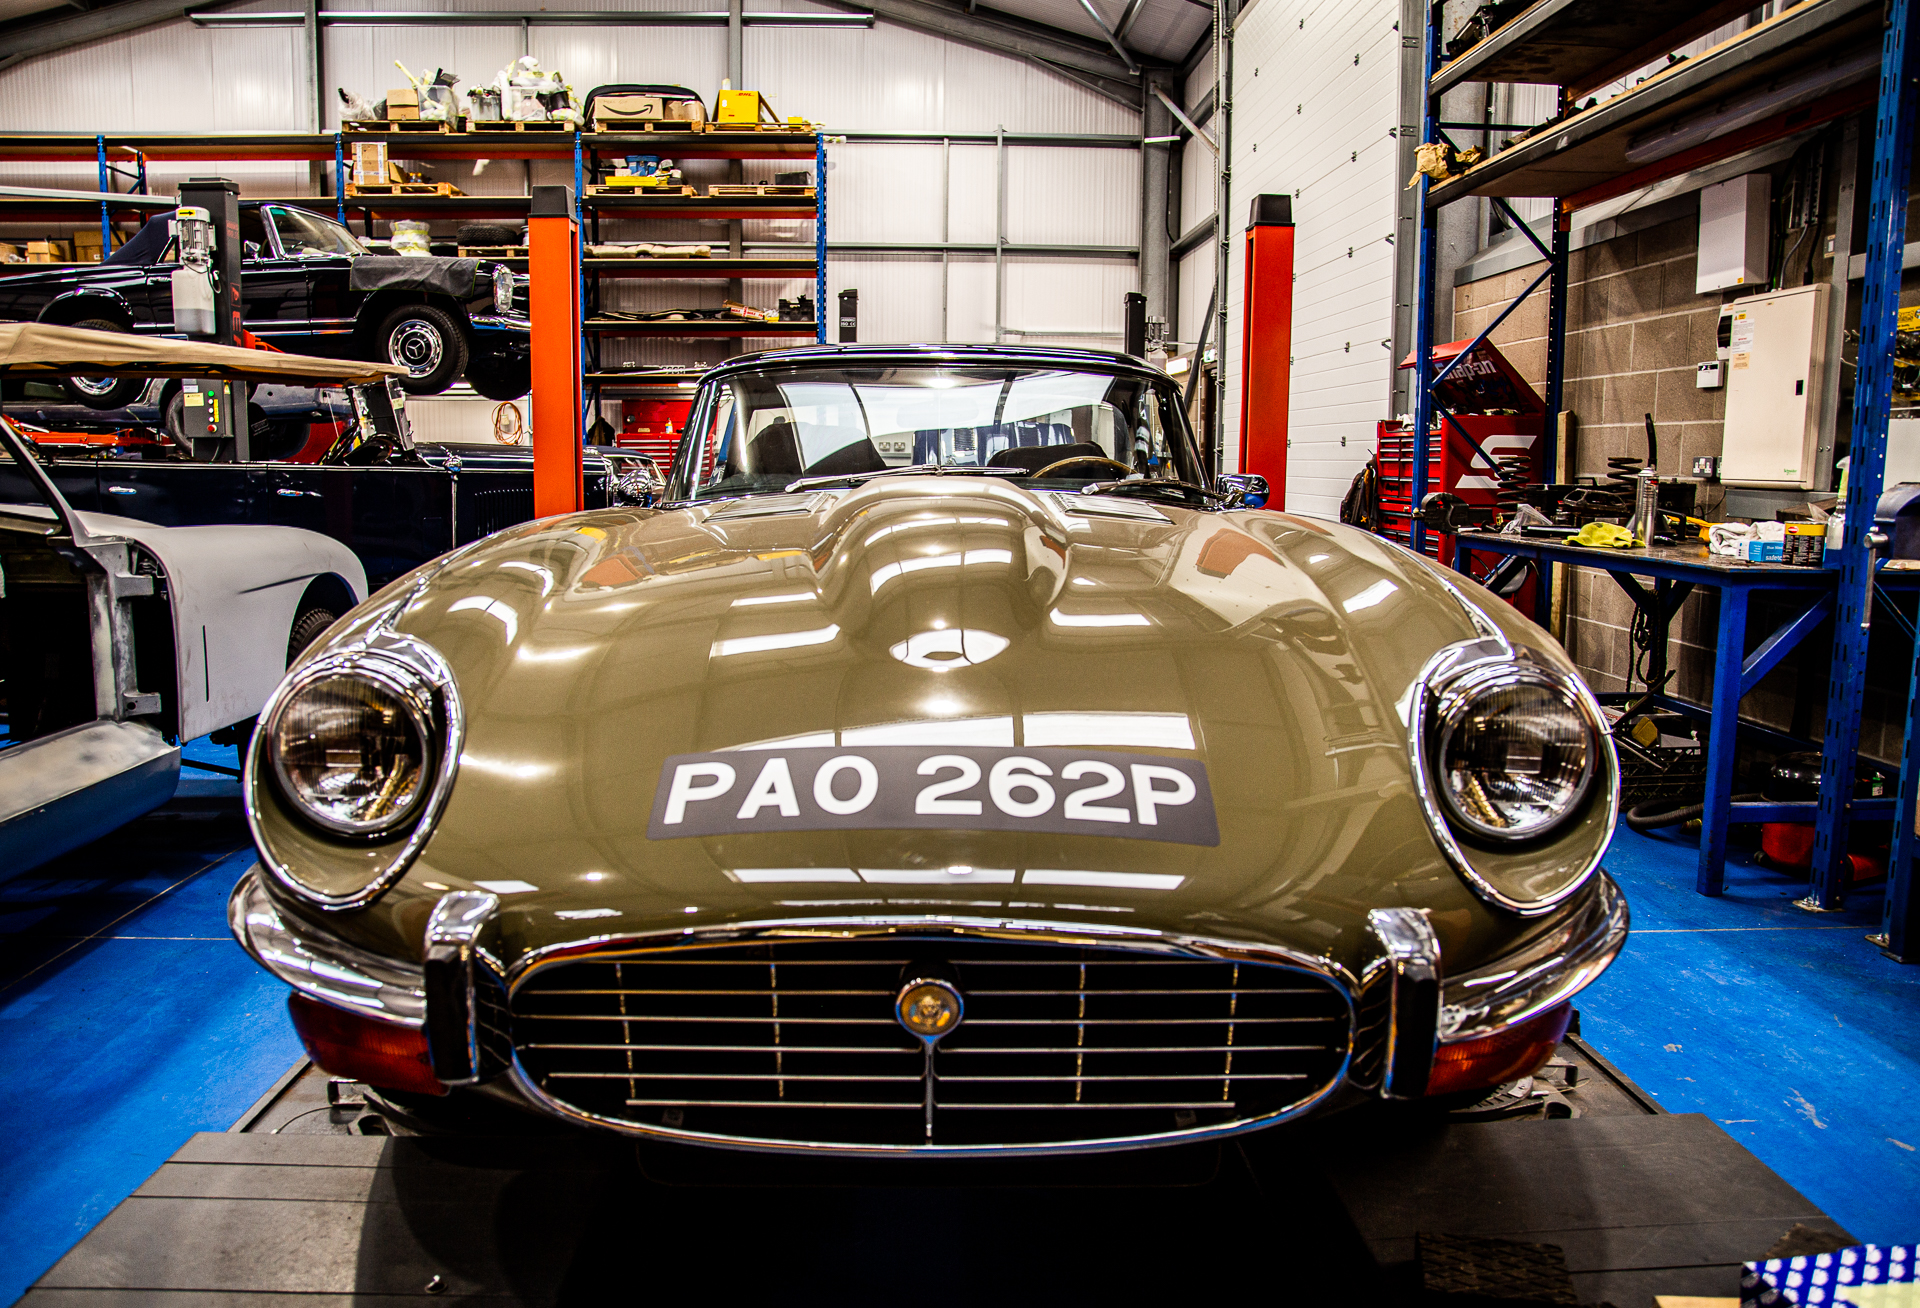

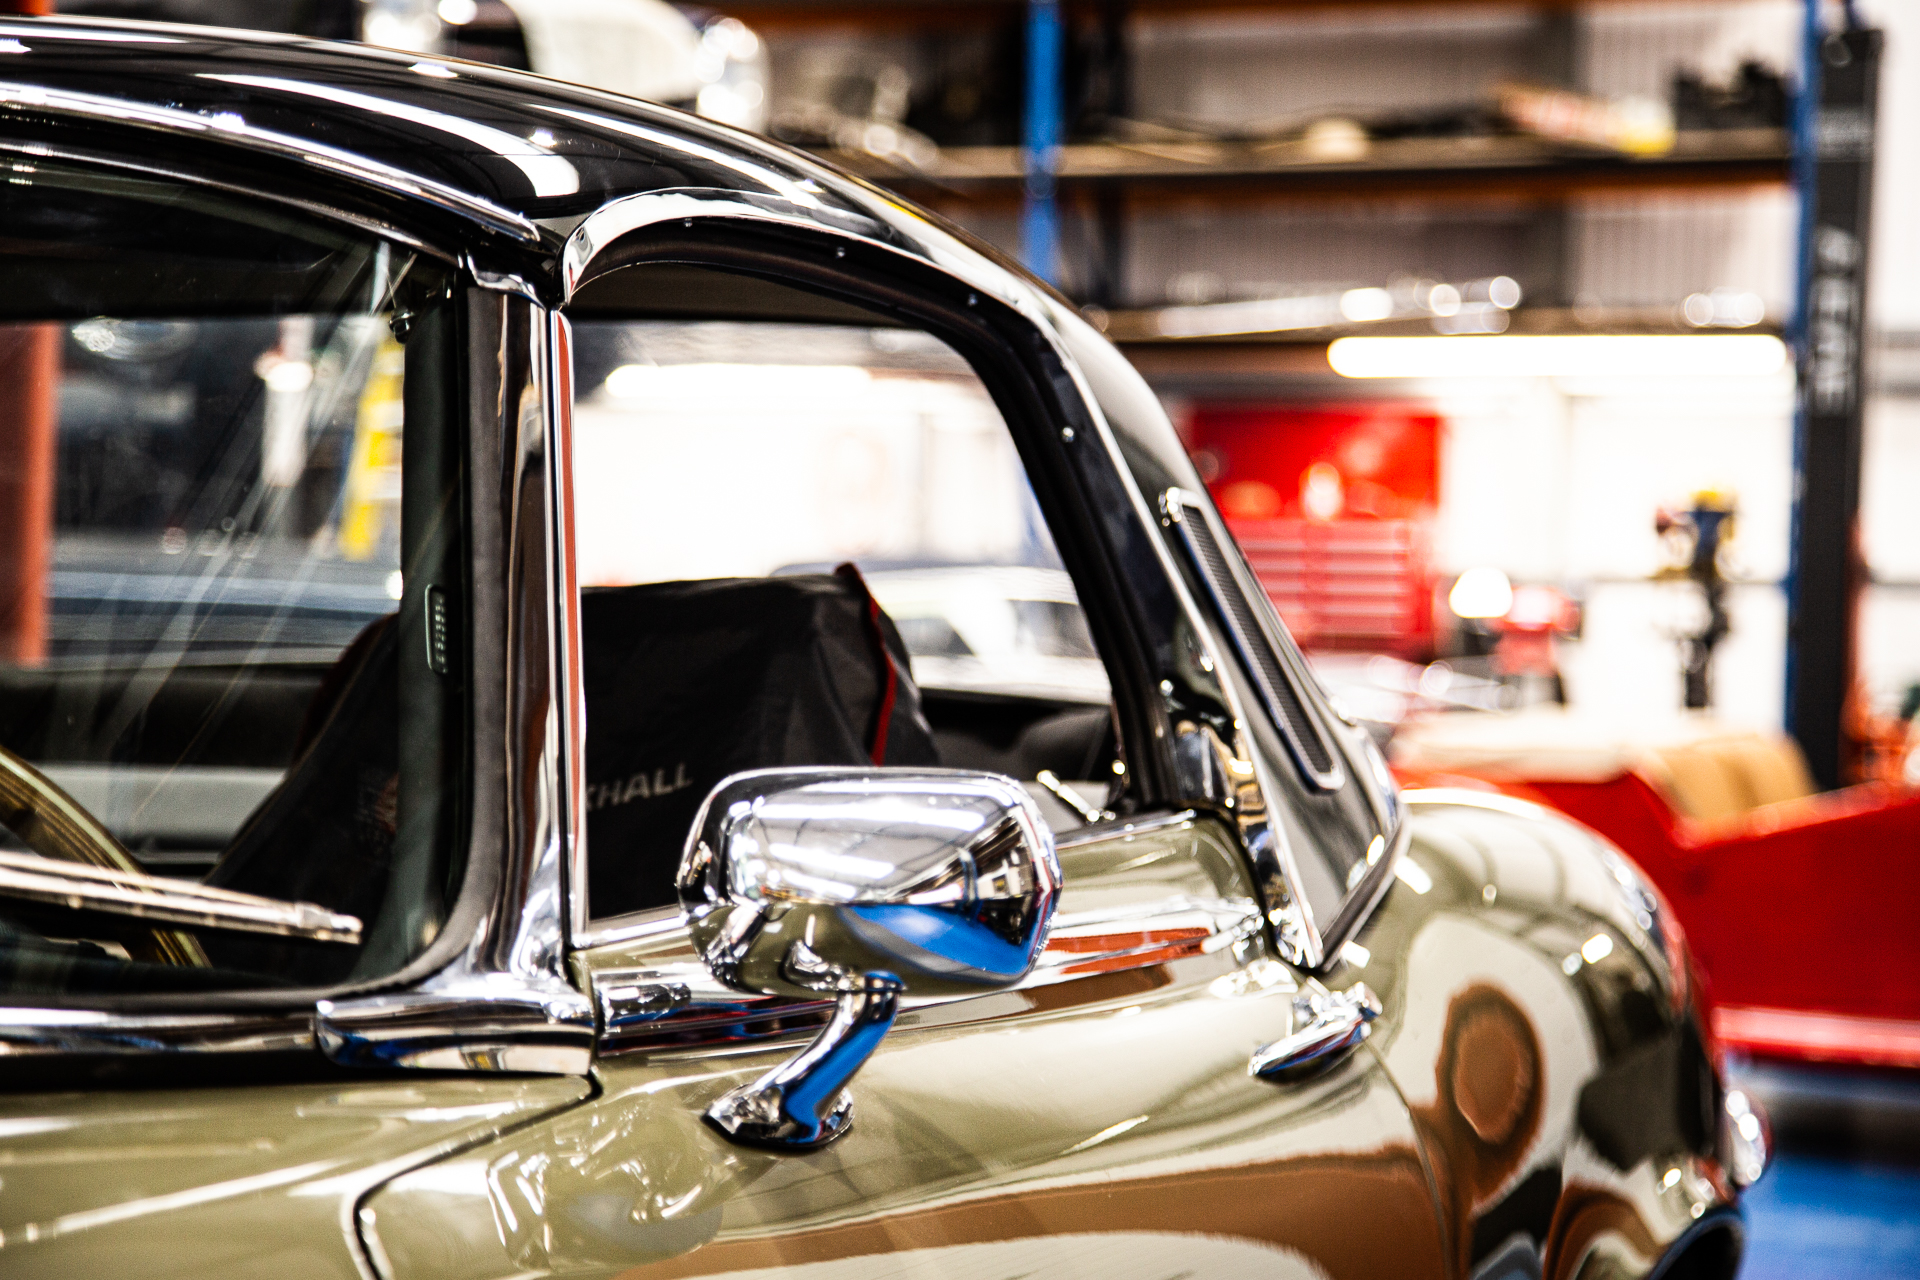
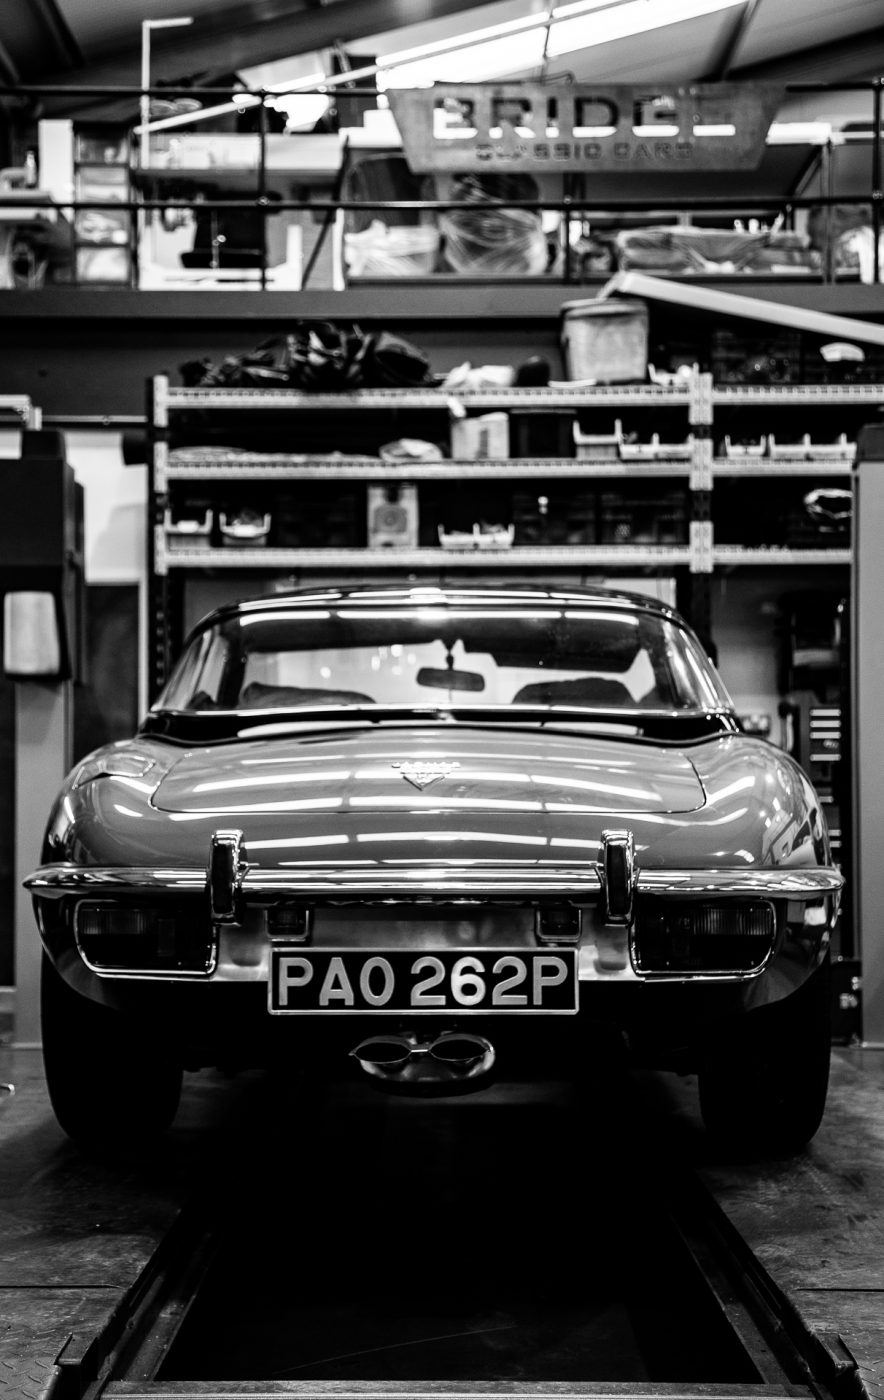

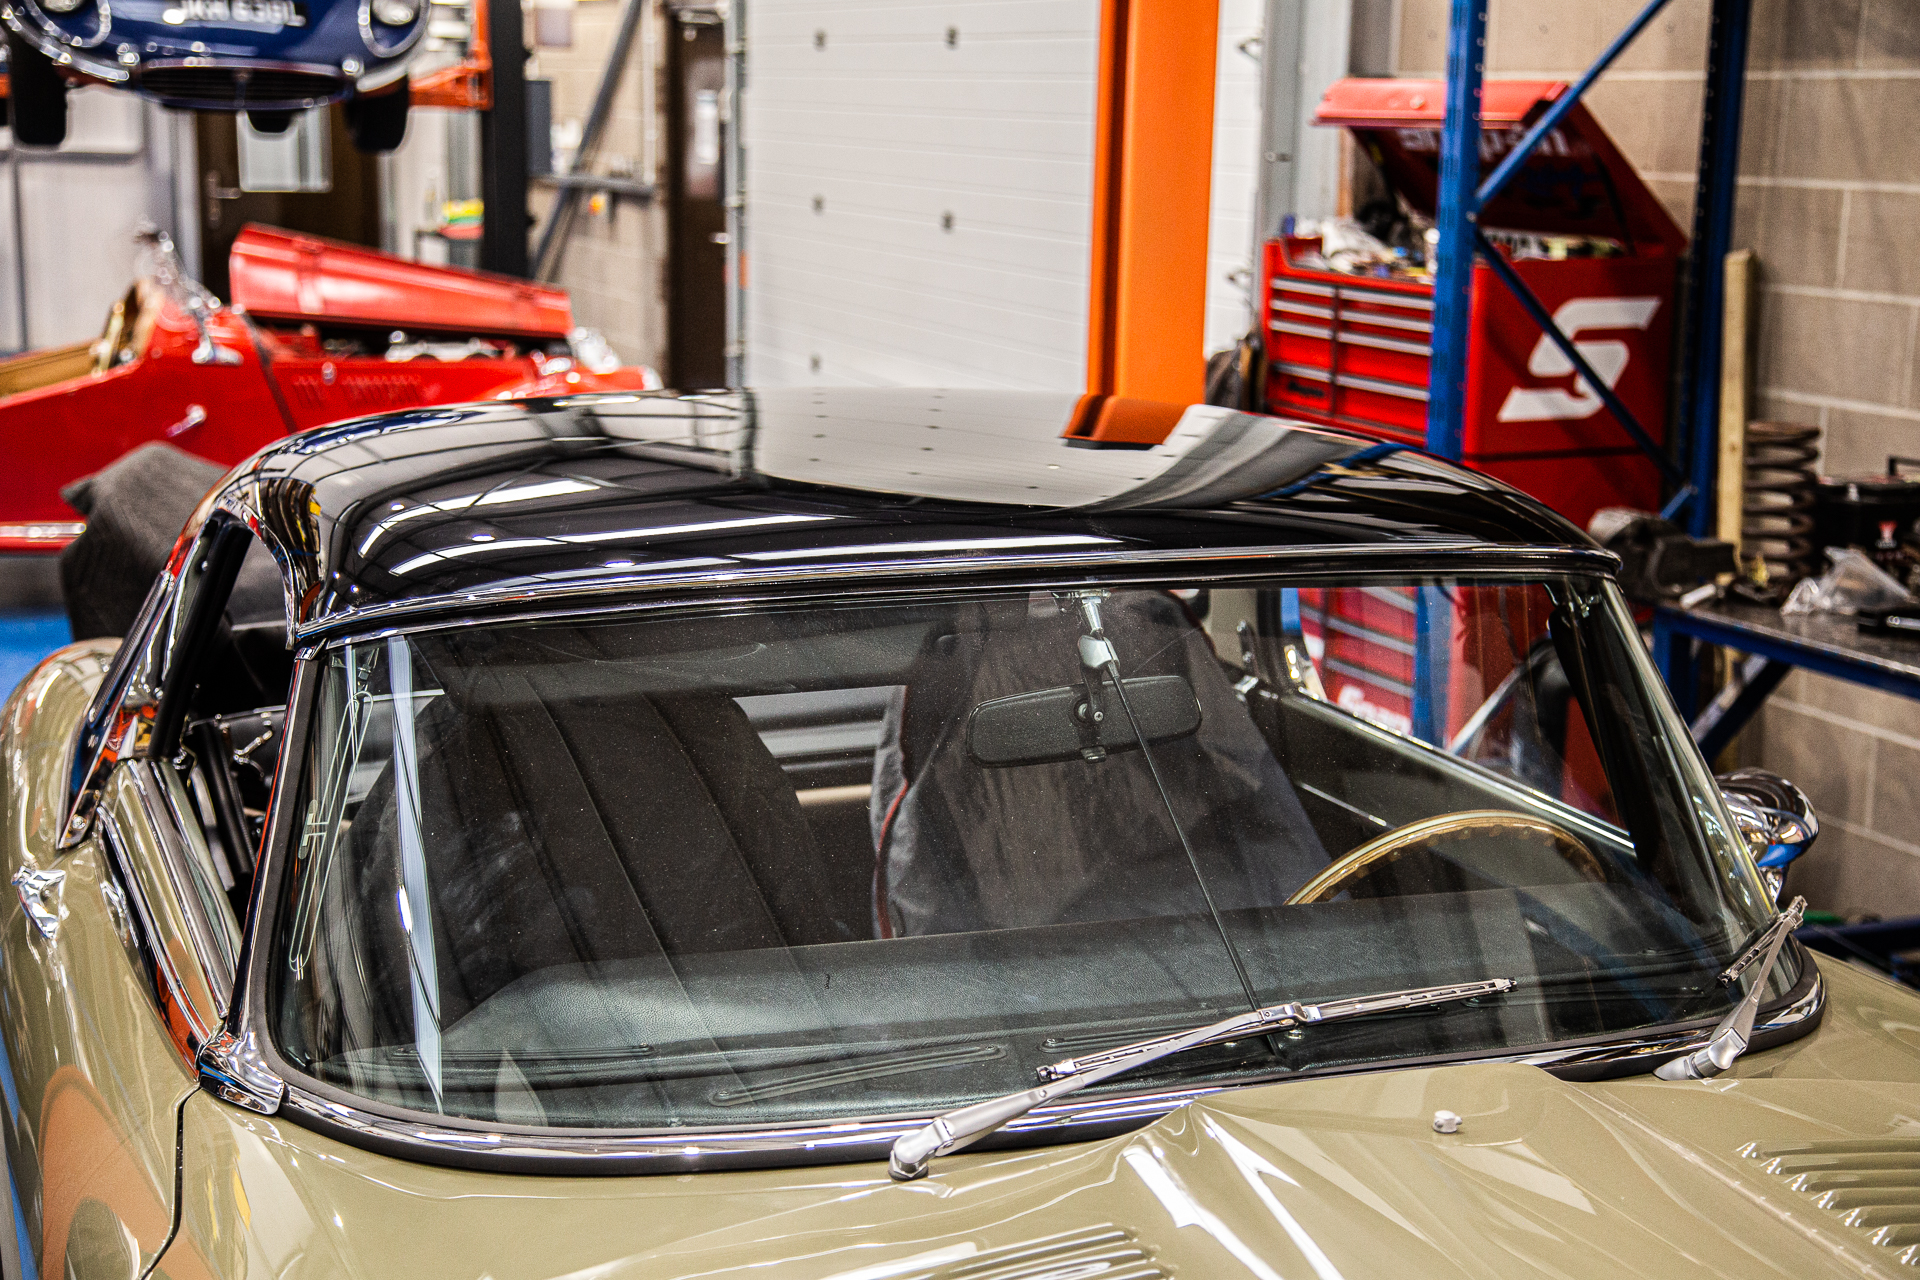
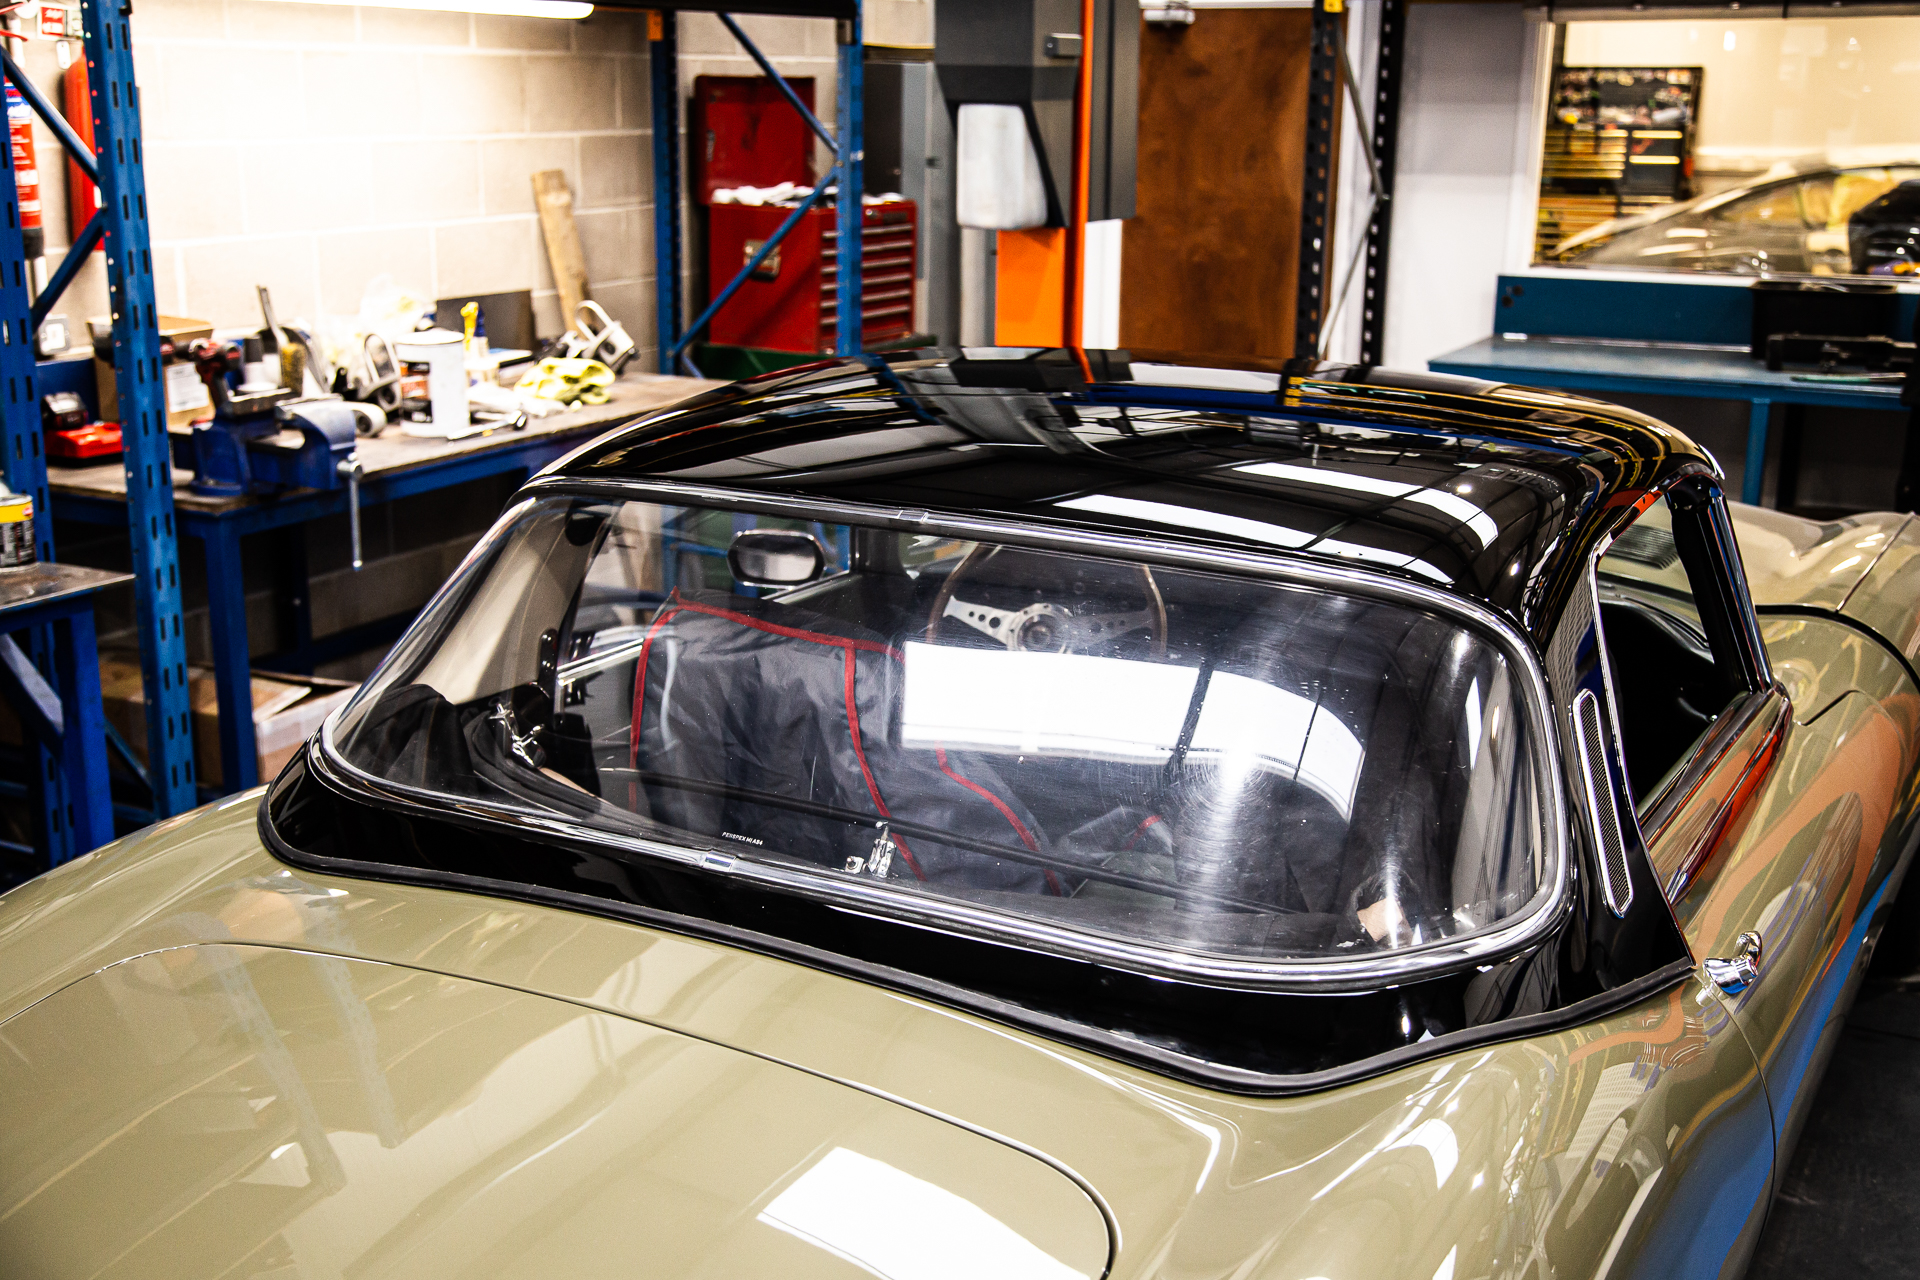
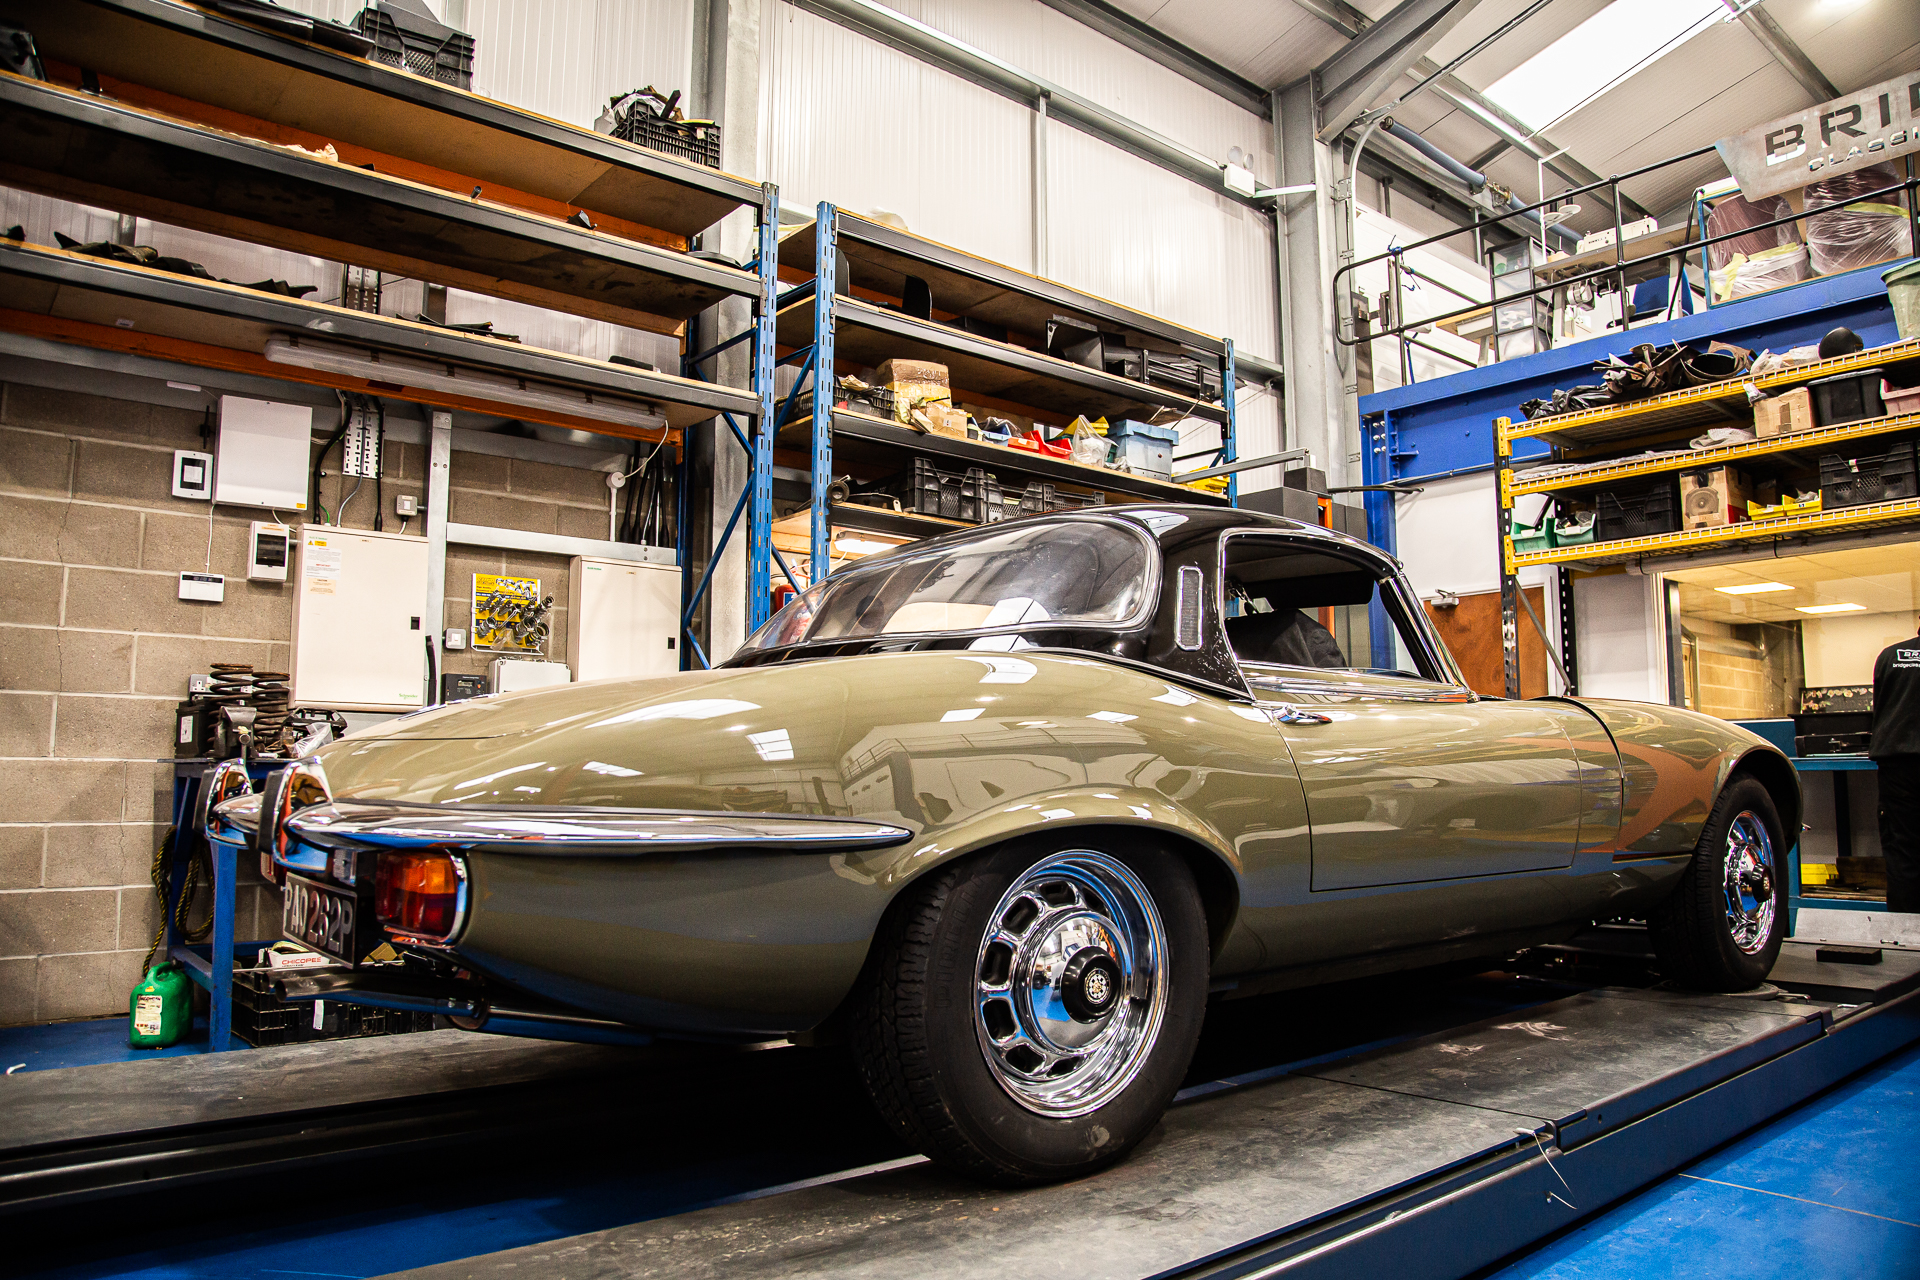
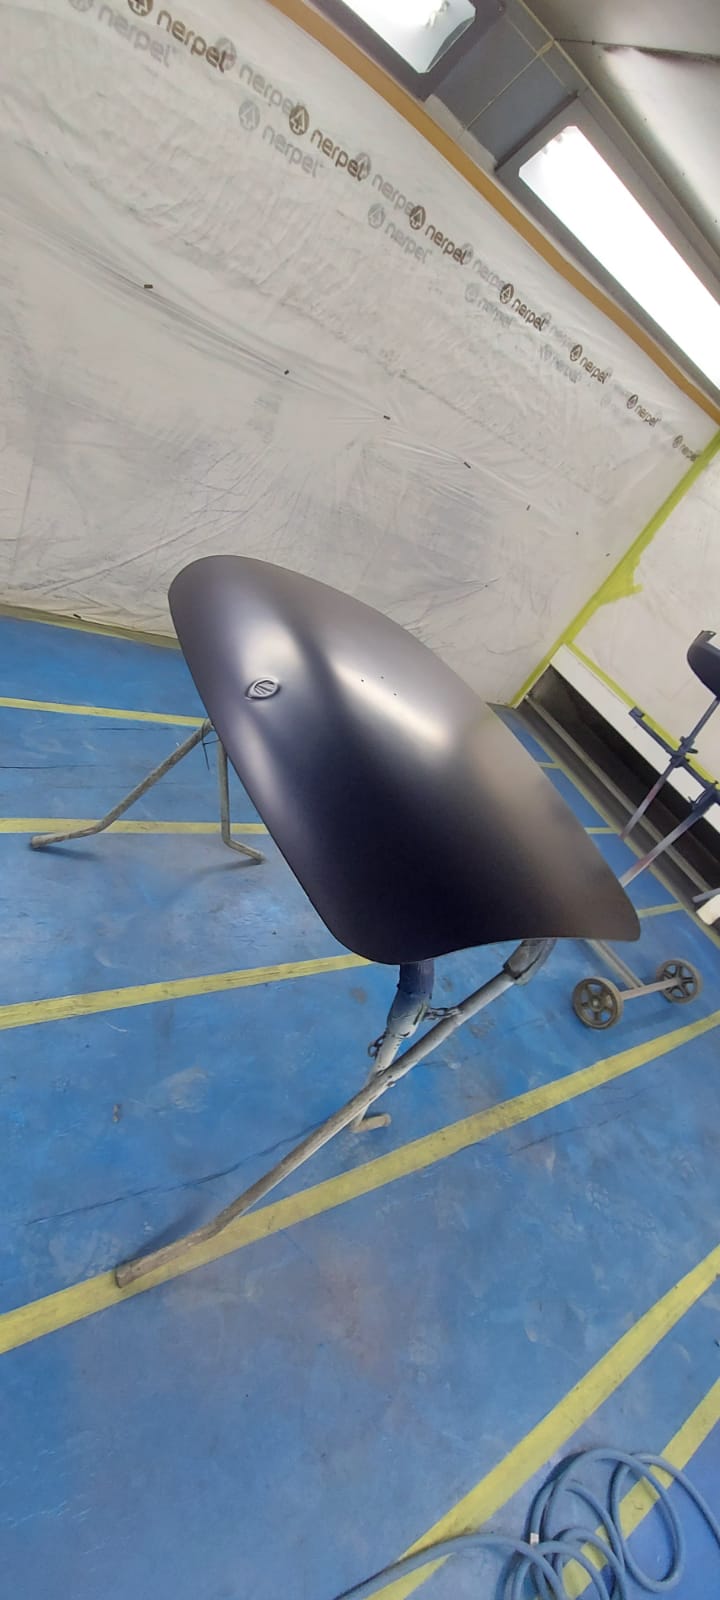
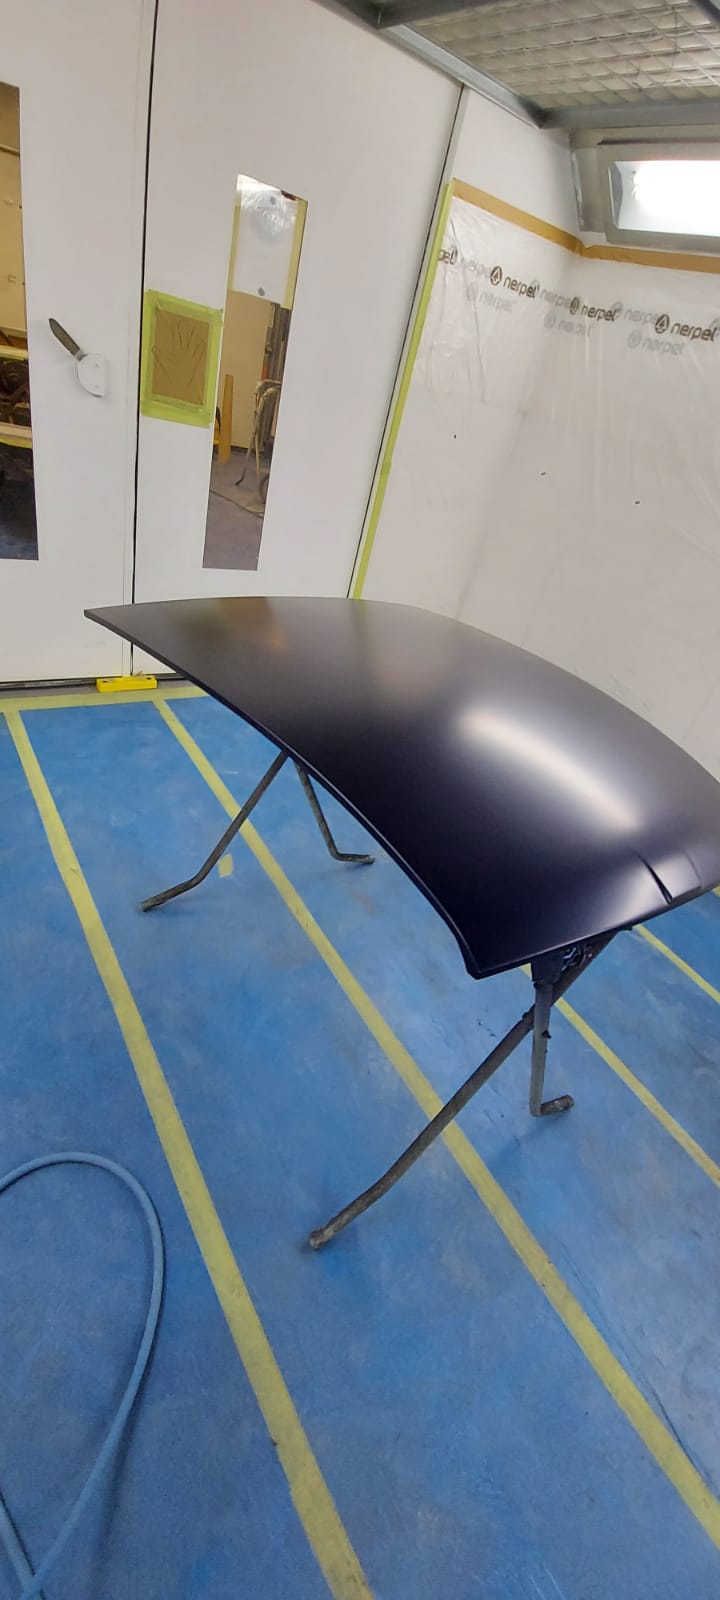
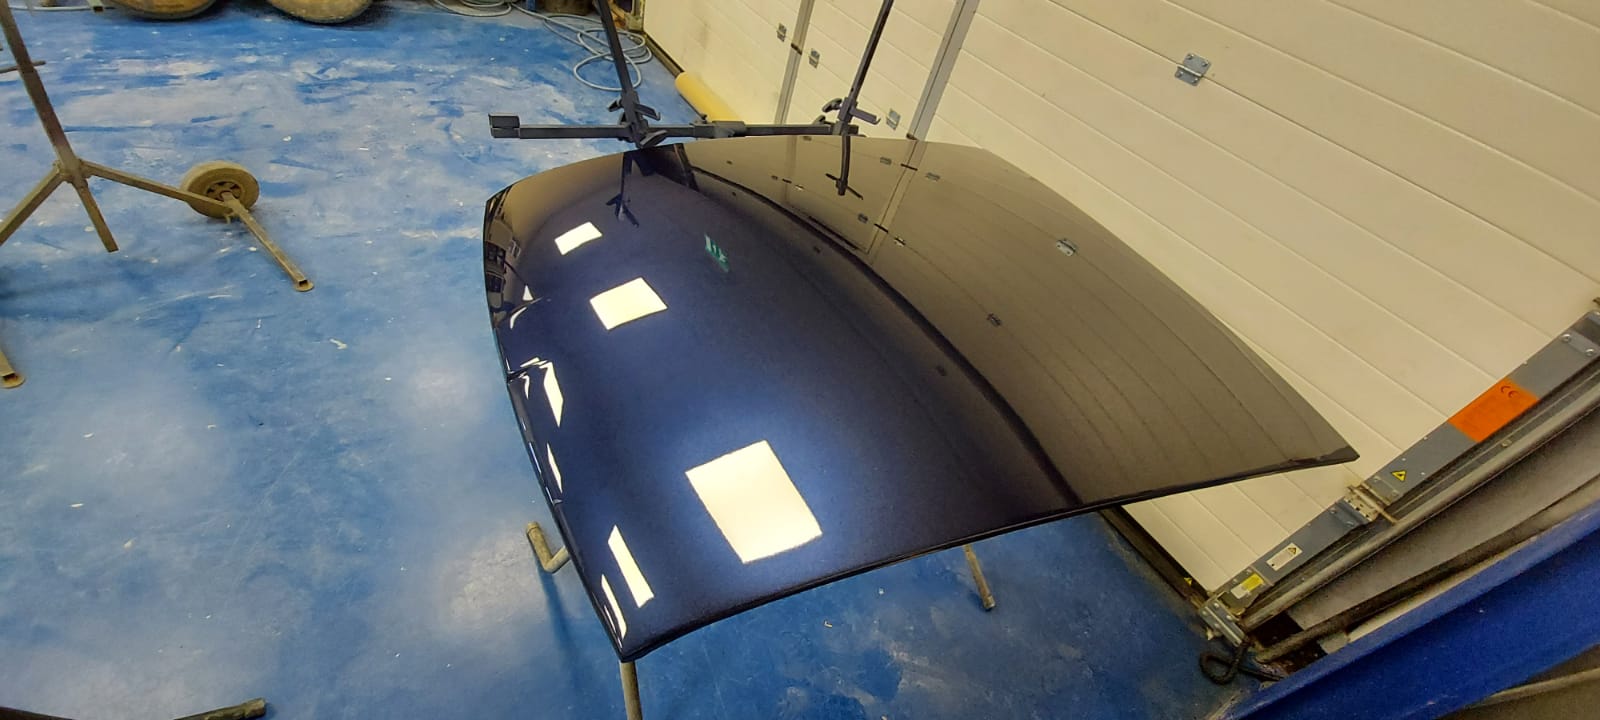
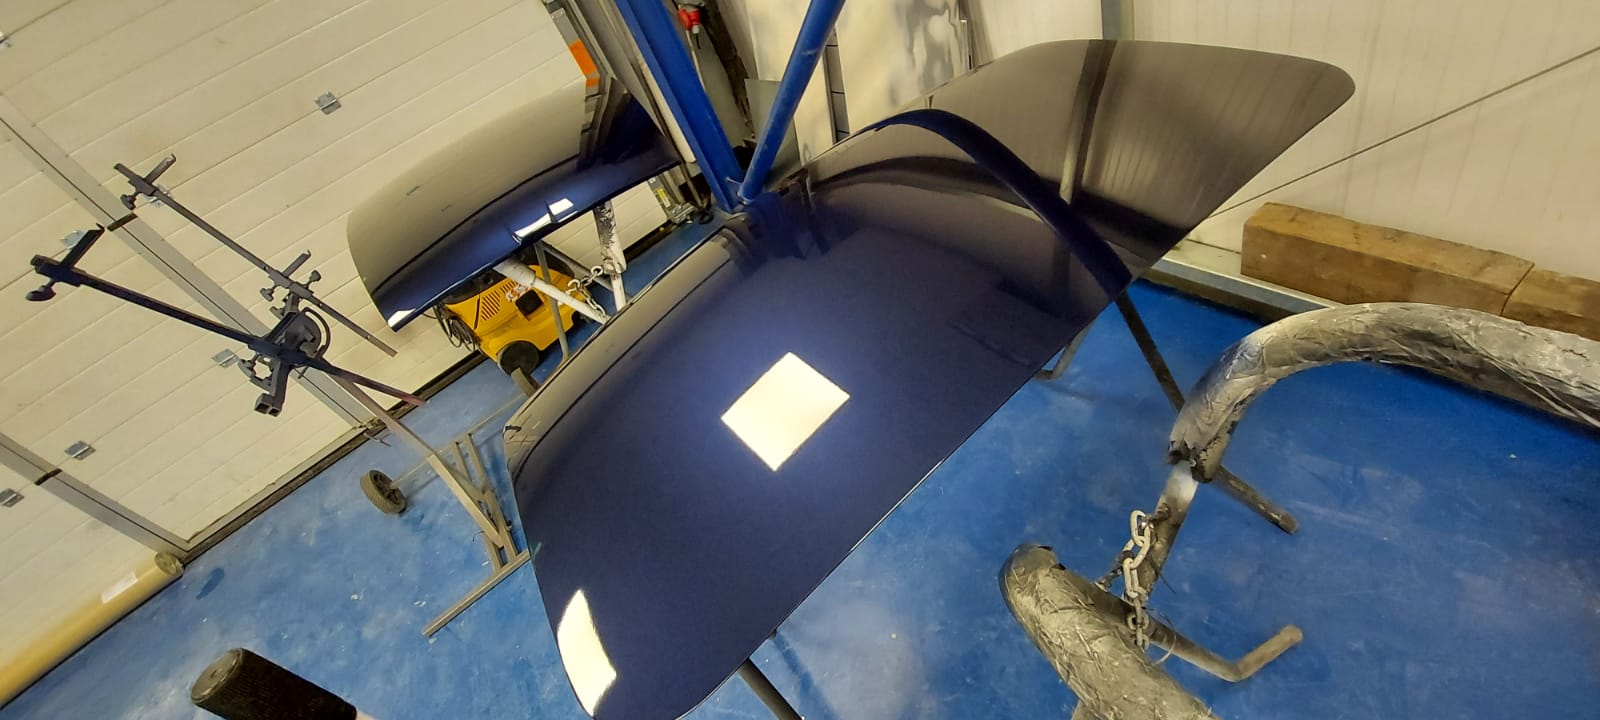
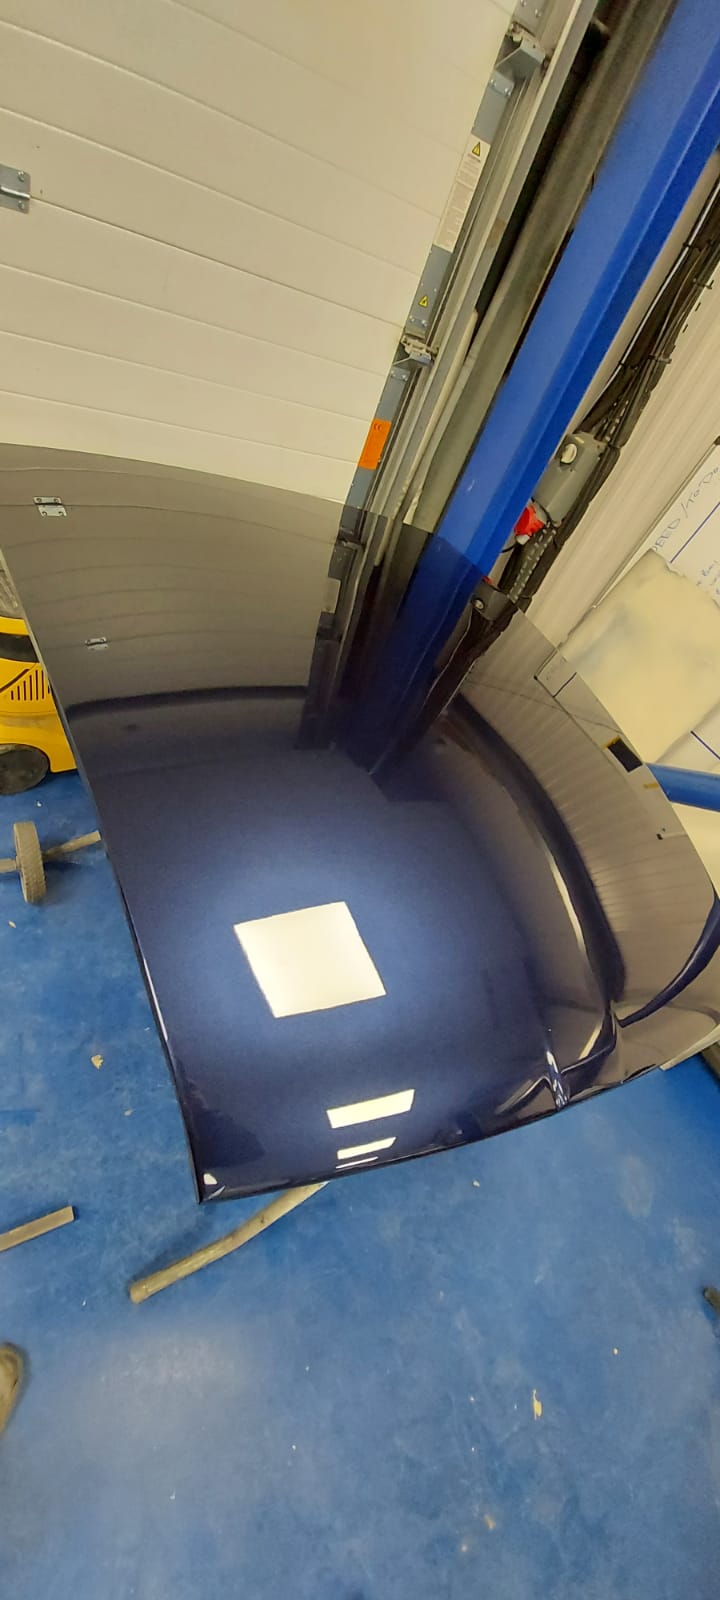
The restoration teams at Bridge Classic Cars have been working together for the first test fitting of the removable hardtop on Fern Grey. The bespoke 1973 Jaguar E Type Series III Roadster being built at our Suffolk HQ.
The hardtop has been completely restored by the team here at Bridge Classic Cars and gone through by every department. Brian, our head trimmer, worked alongside our other restoration technicians to get all the trims, seals and hardware onto the roof. Then, gingerly slip it over the back over the car and down into place.
This has to be done so that Brian can check to make sure all of the brackets and fittings line up perfectly between the body and the roof.
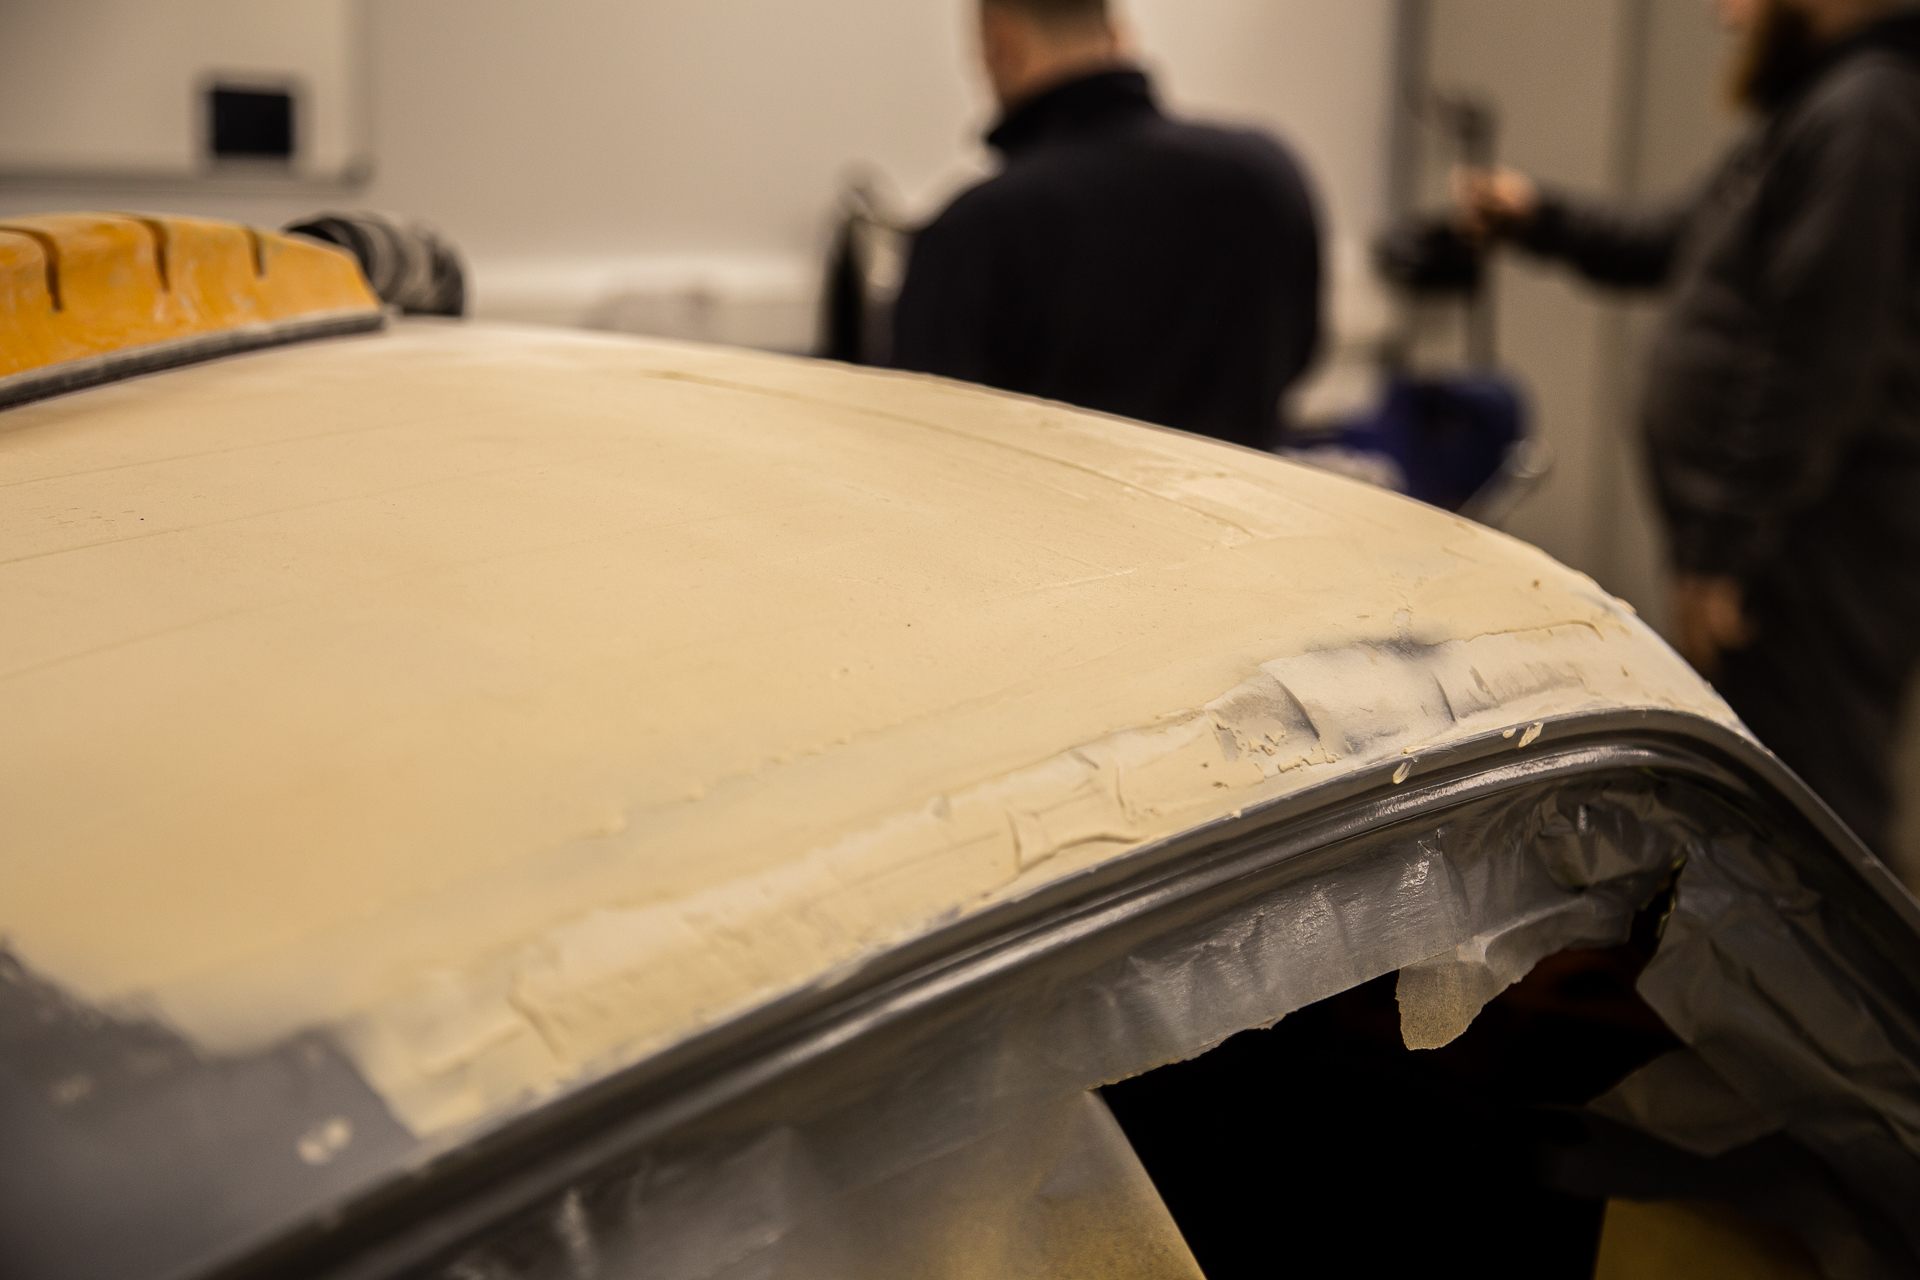
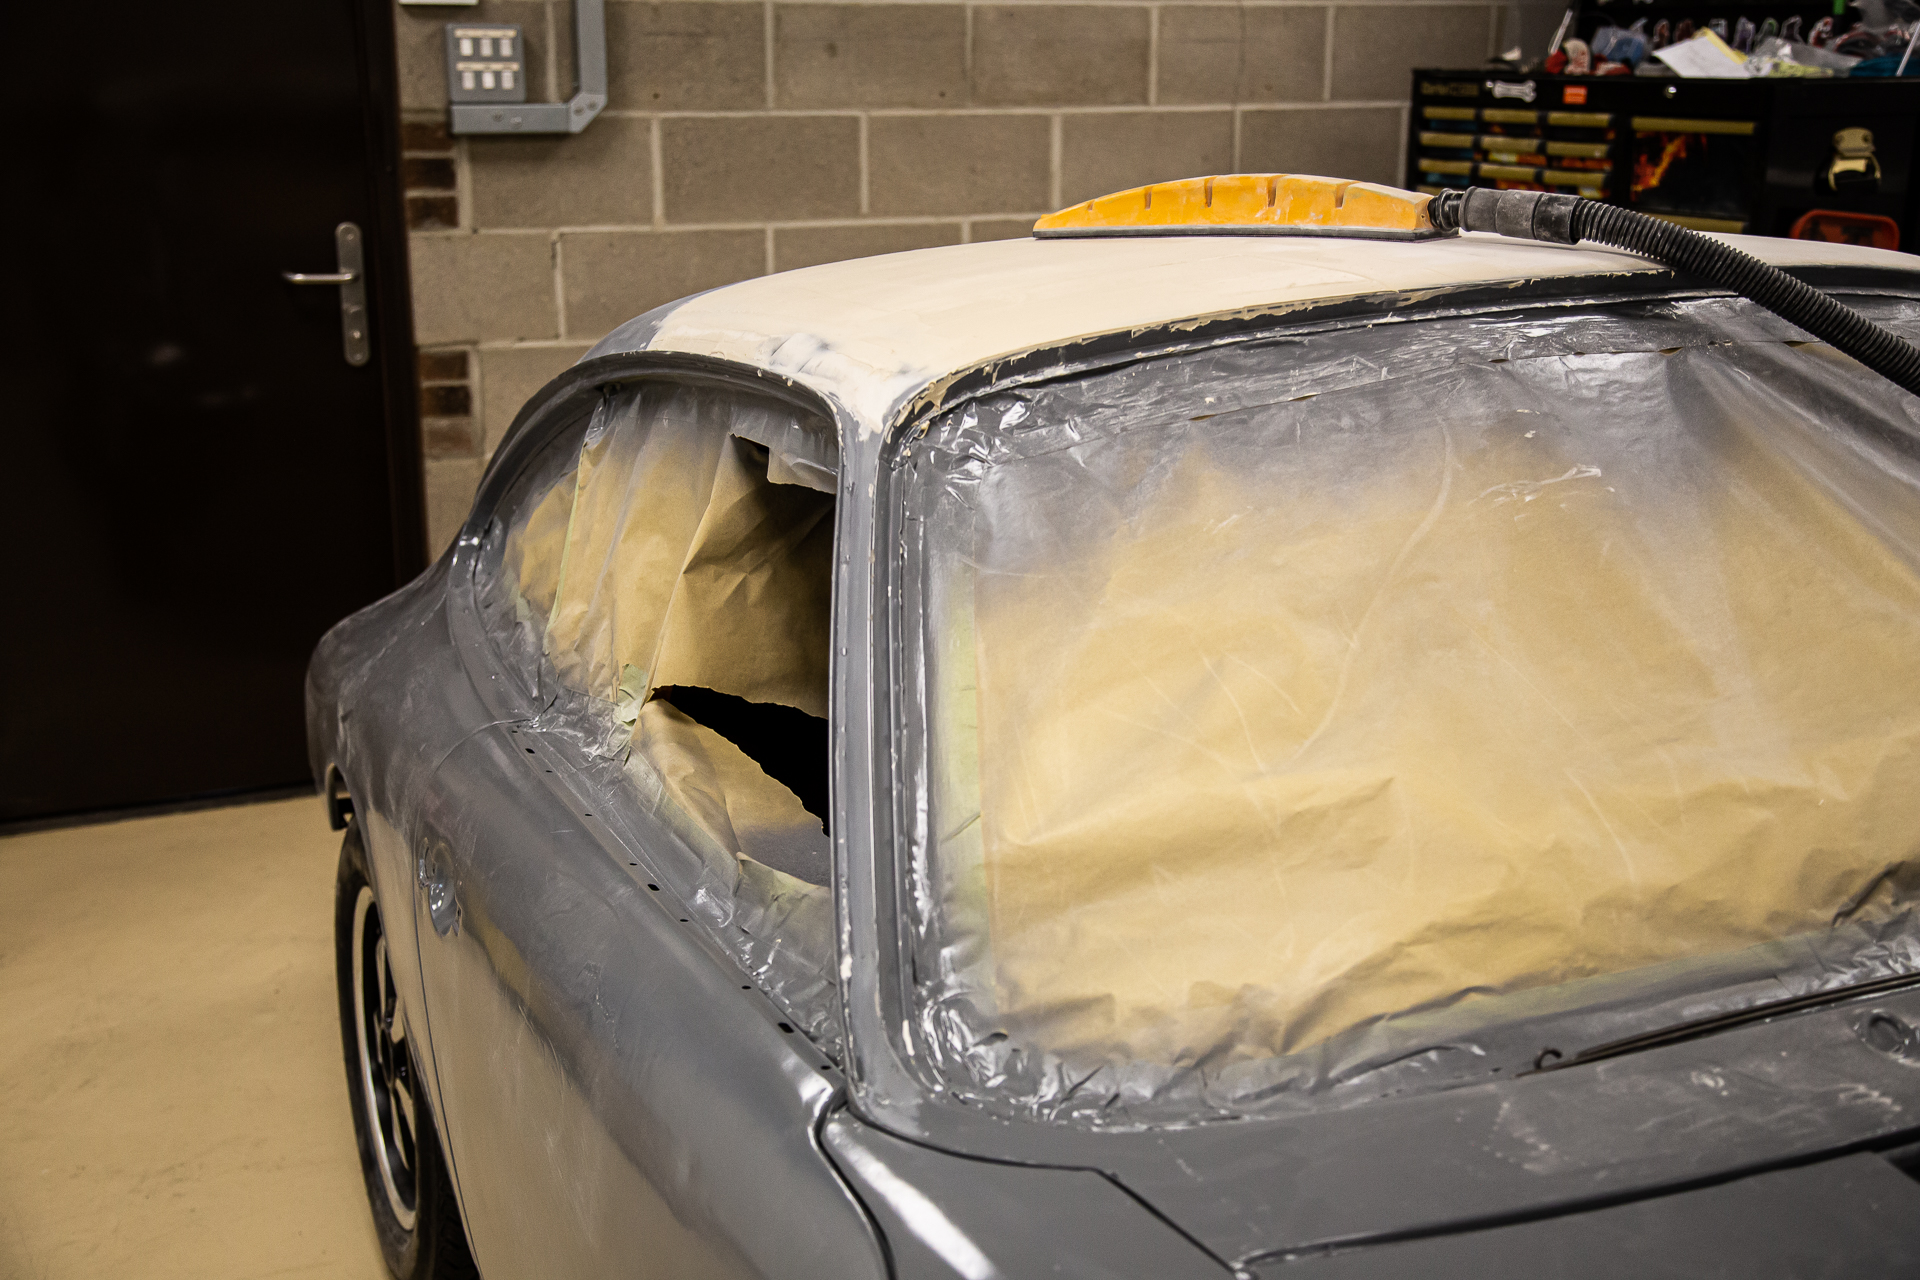
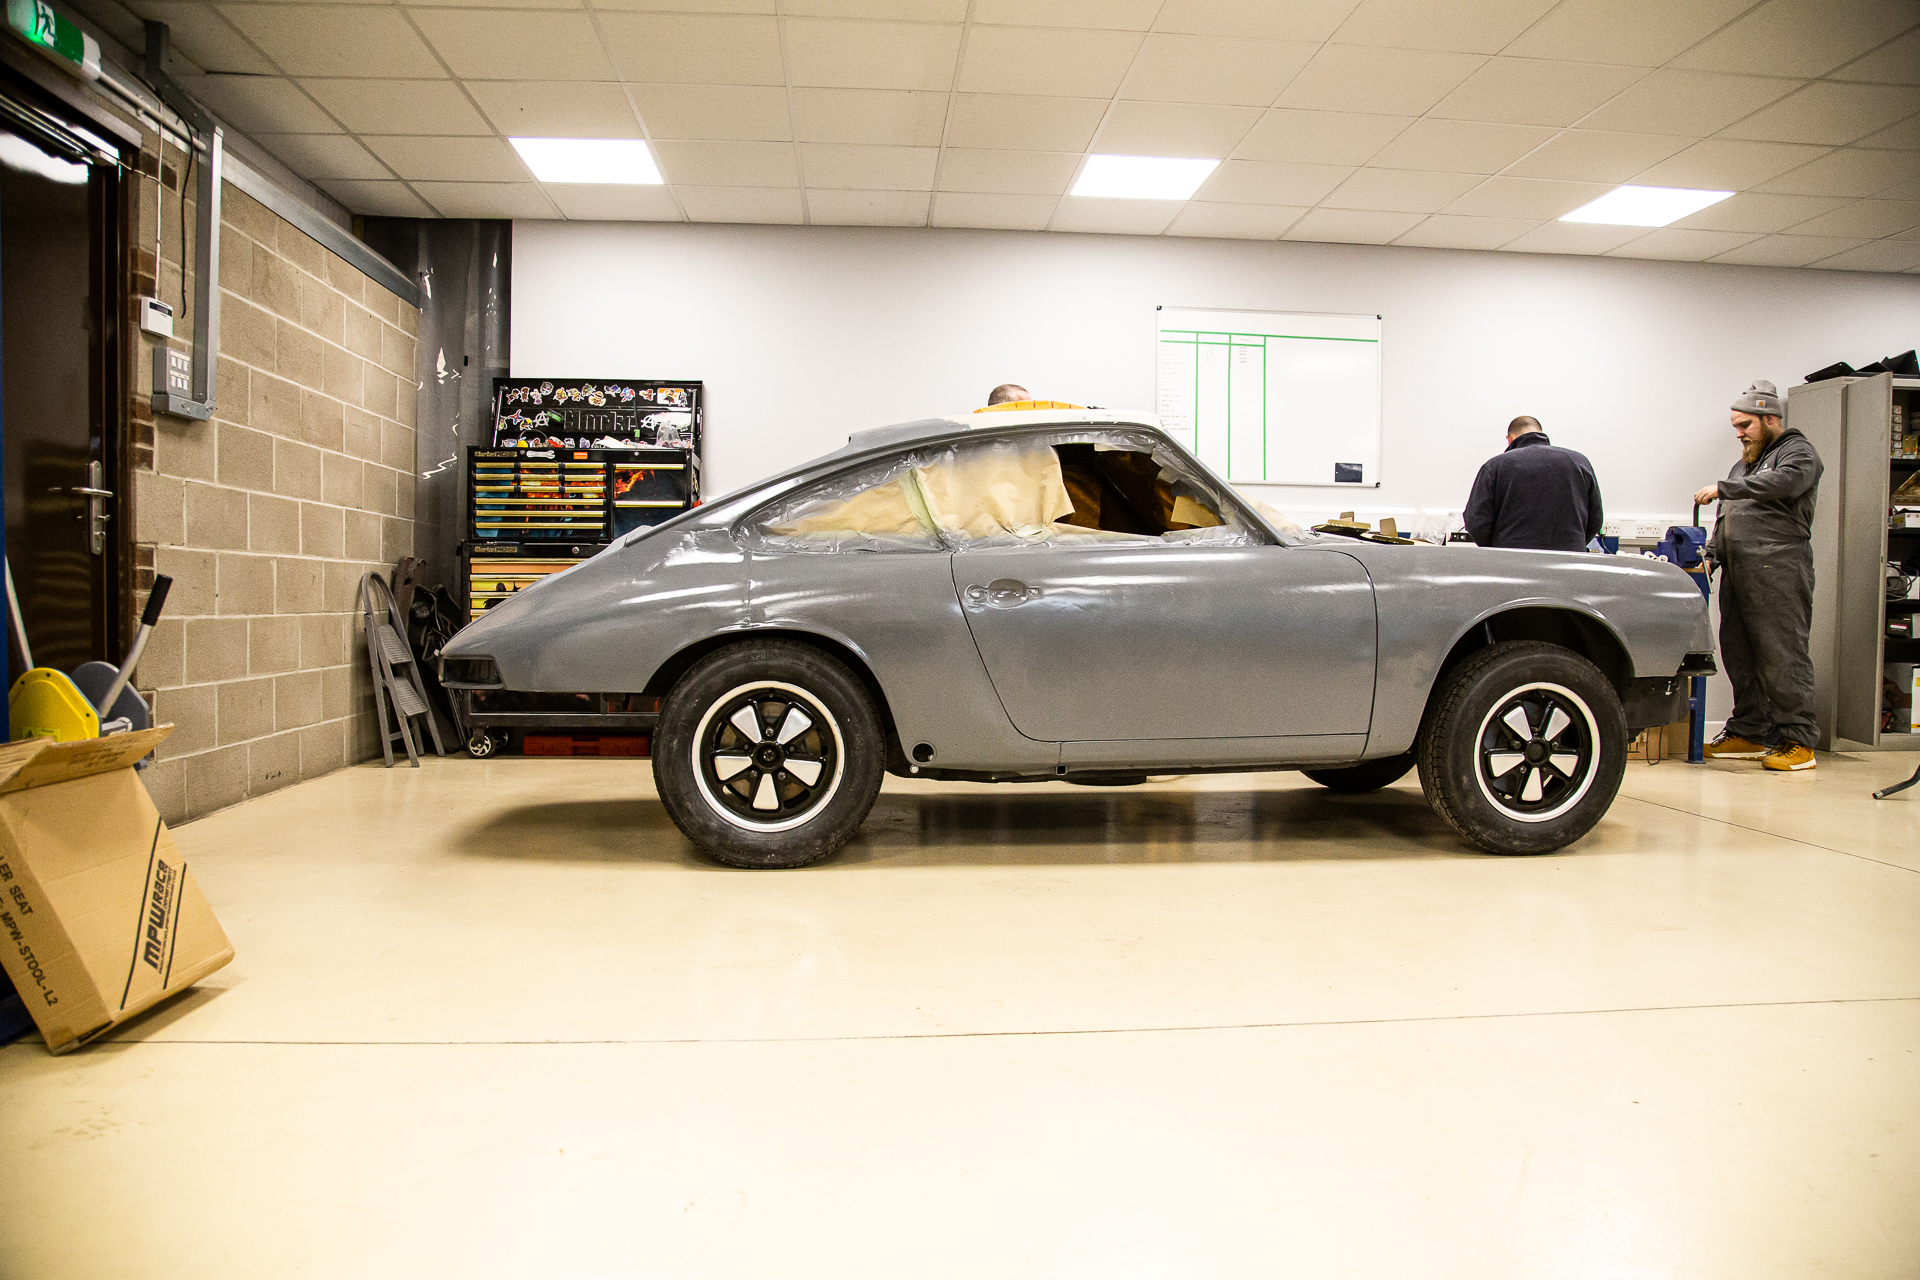
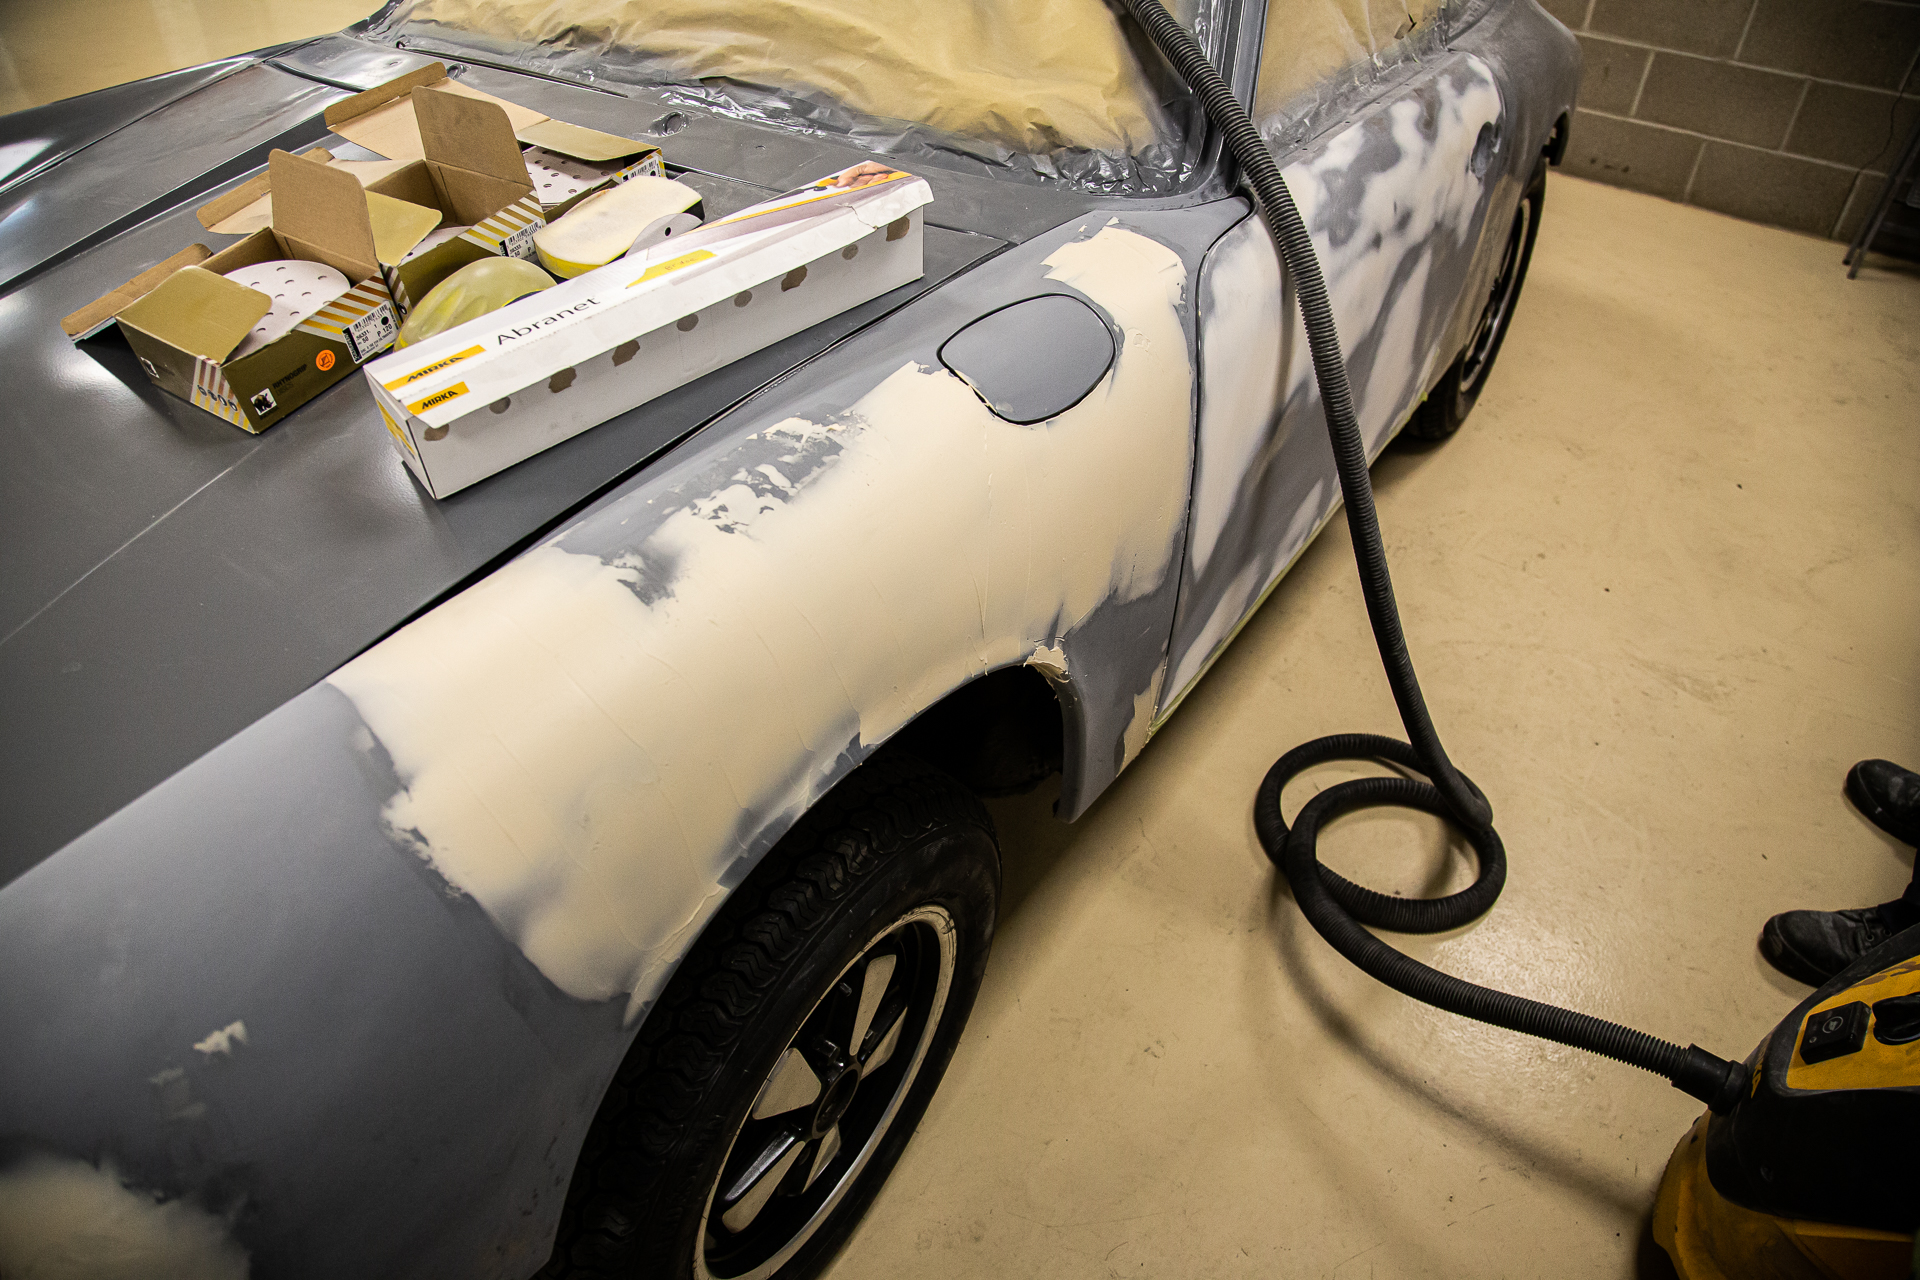
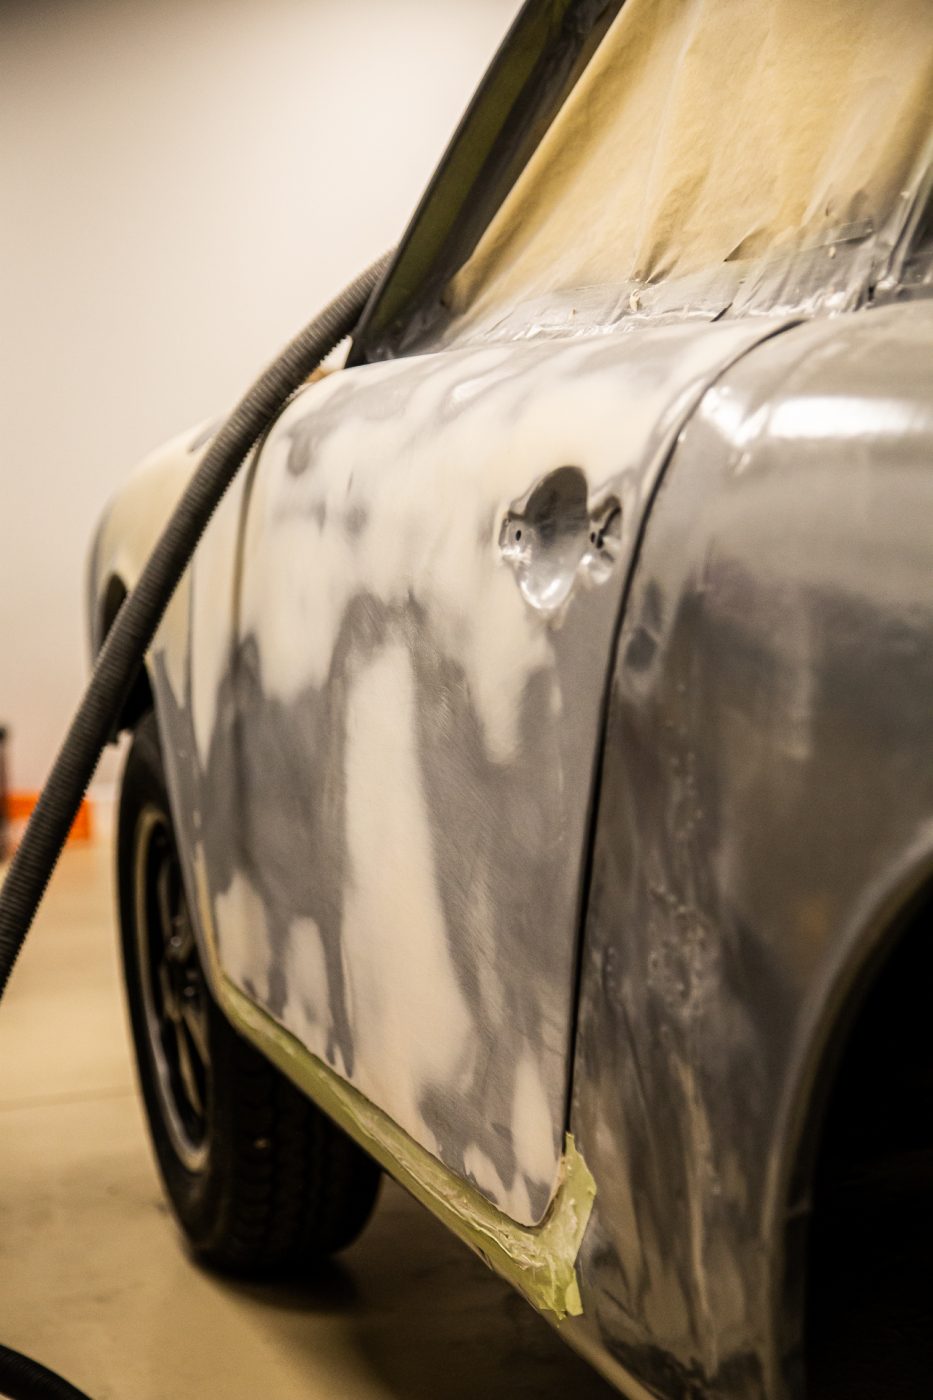
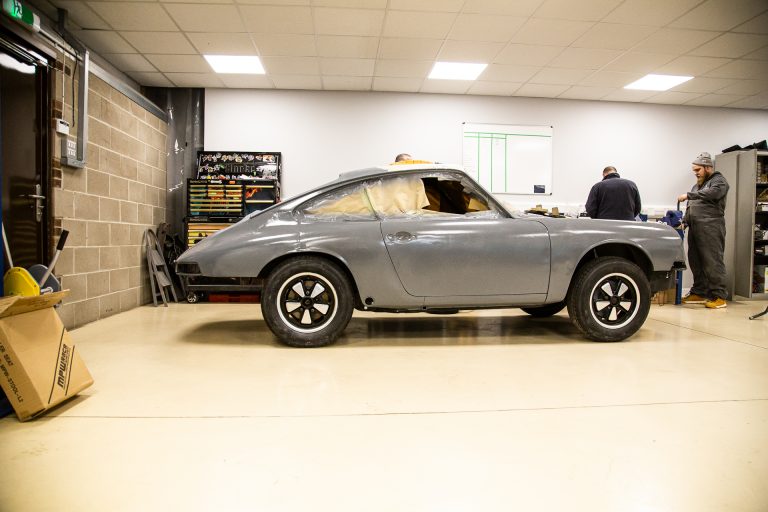
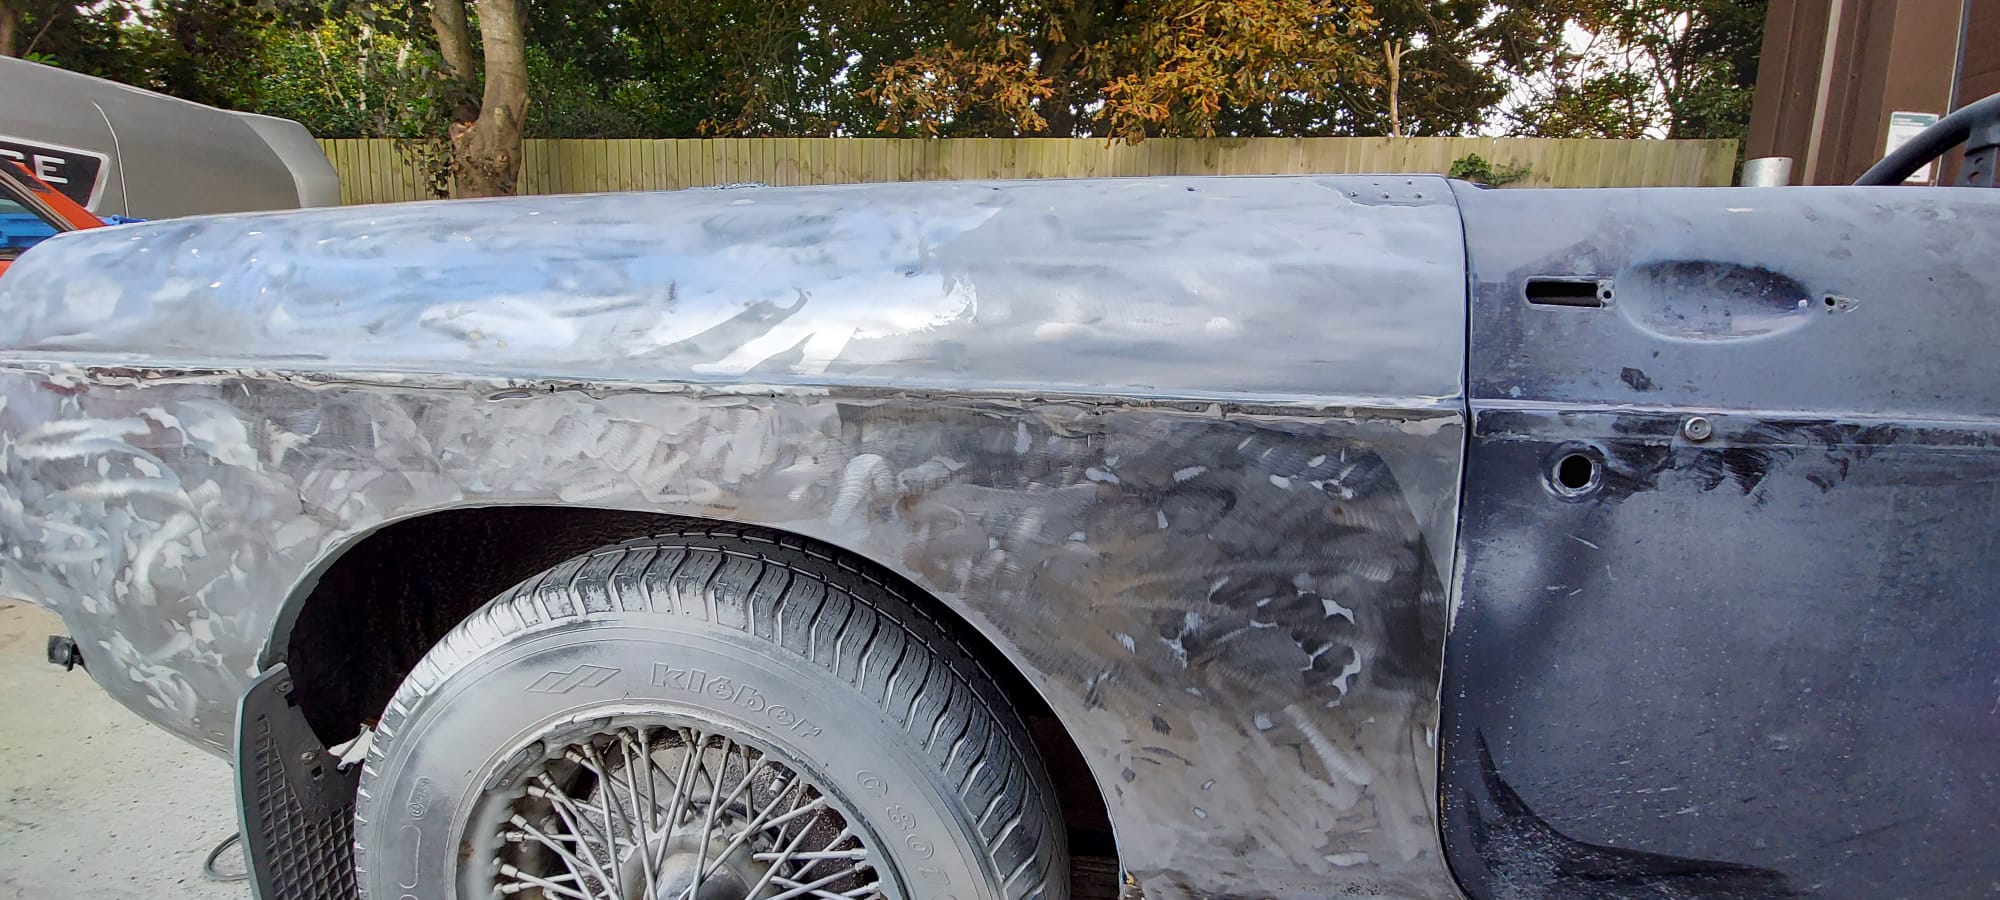
Alan, one of our paint and body experts at Bridge Classic Cars, has begun to refine and shape the bodywork of the 1965 Porsche 912 for our team to finish the body and paintwork on the car.
After the car came out of our in-house spray booth, it was moved into our new prep area to begin filler work and sanding. Alan mixed up the body filler to be put onto the car, but 99% of this will be removed from the car. It’s used as a guide more than anything.
Firstly, Alan sanded down the primer on the car to reveal any low spots on the panels which will need attention with the filler or by working the metal.
Then, it is hours of sanding and finishing the panels before the whole sequence begins again to ensure that this incredible air-cooled 912 to be perfect.
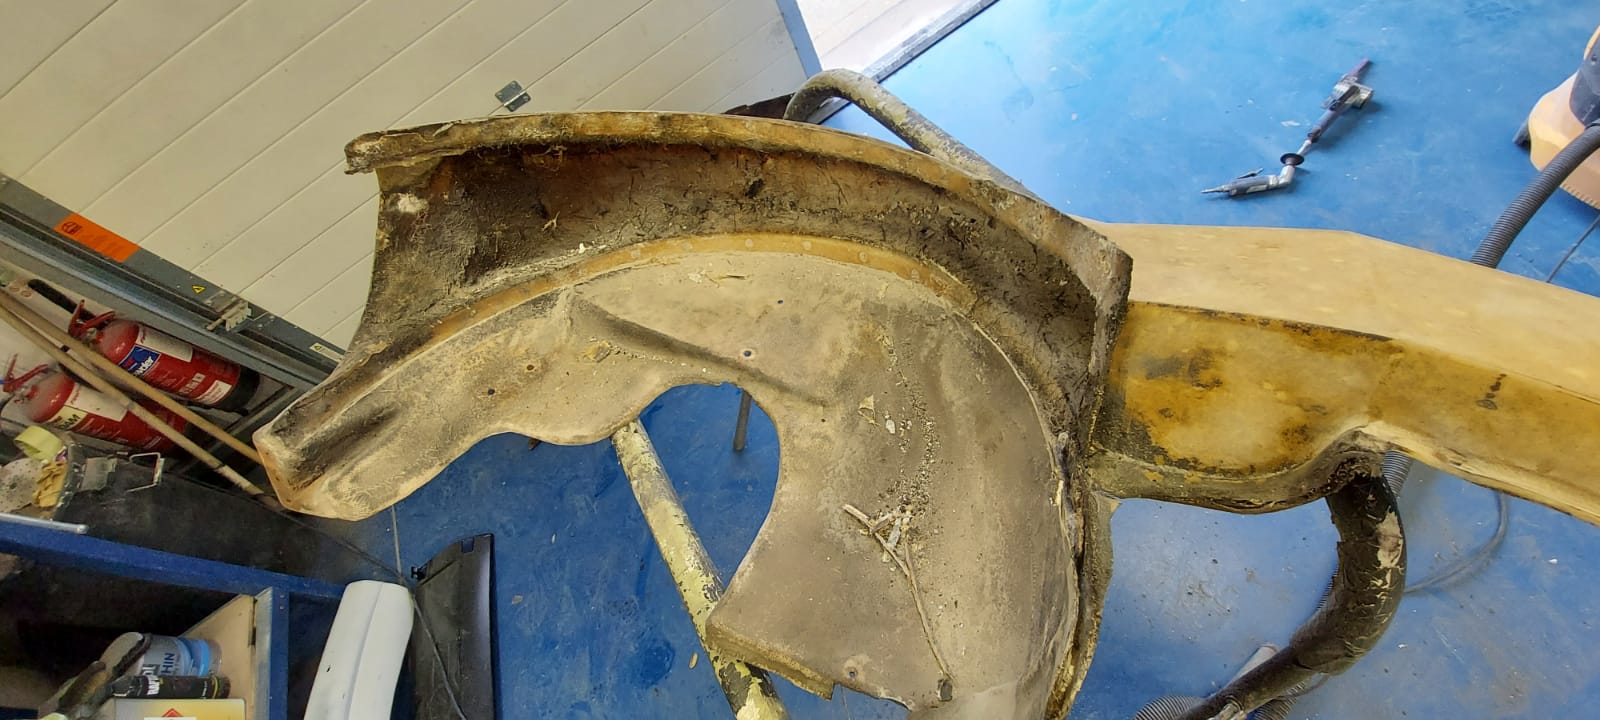
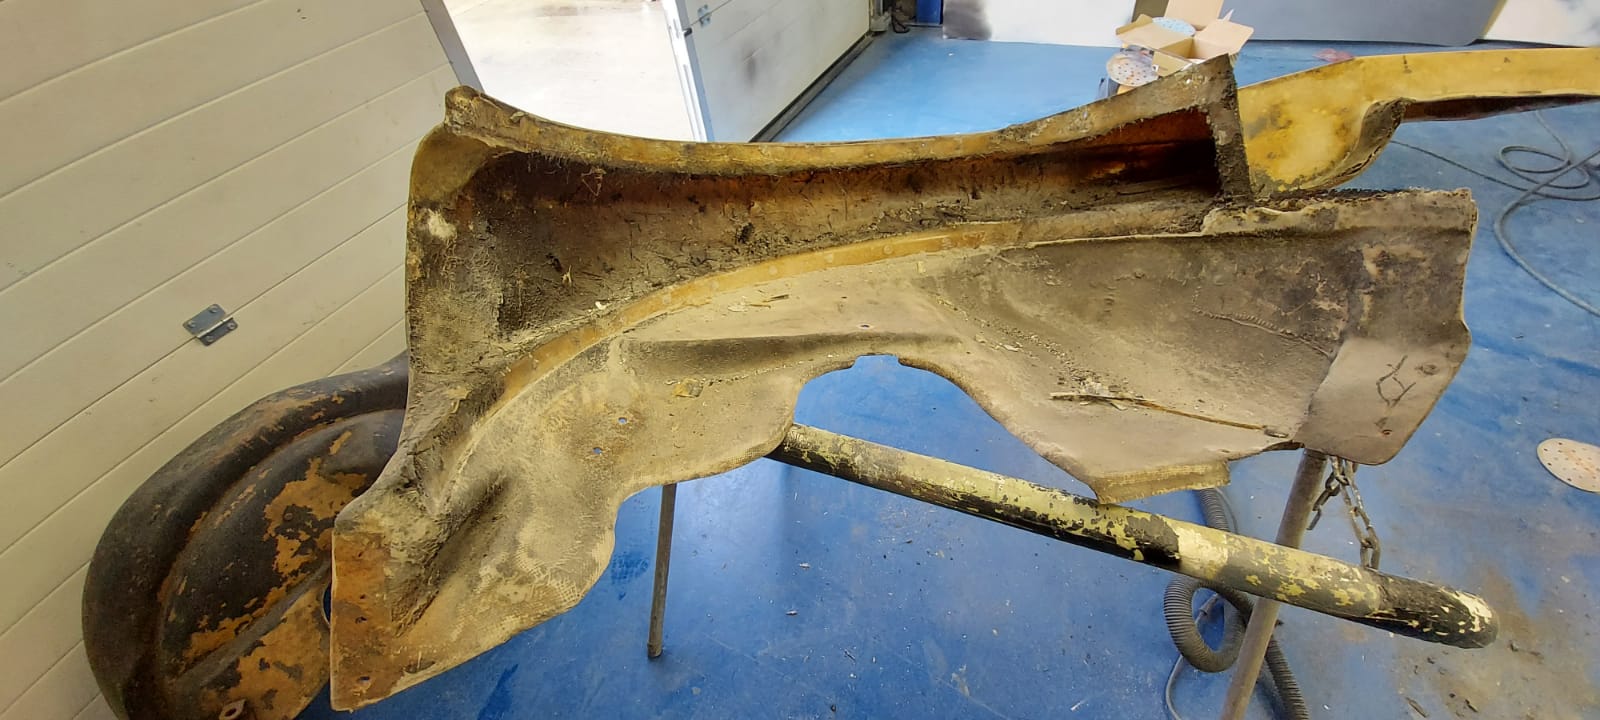
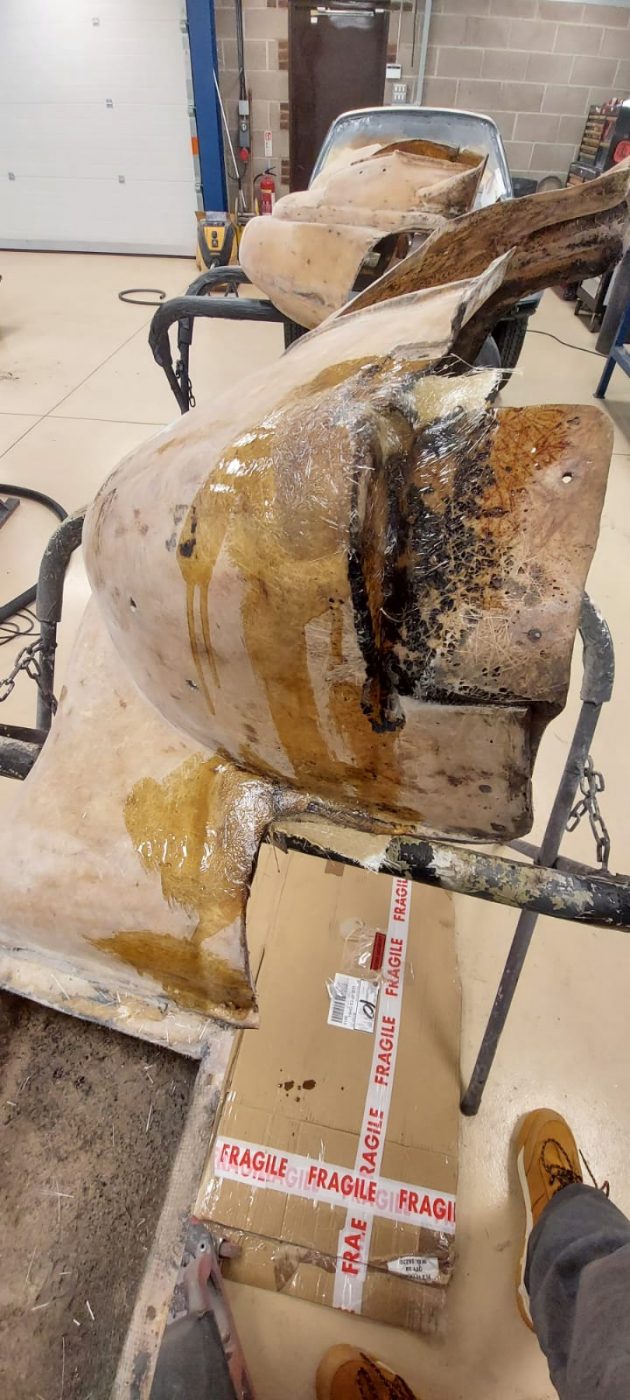
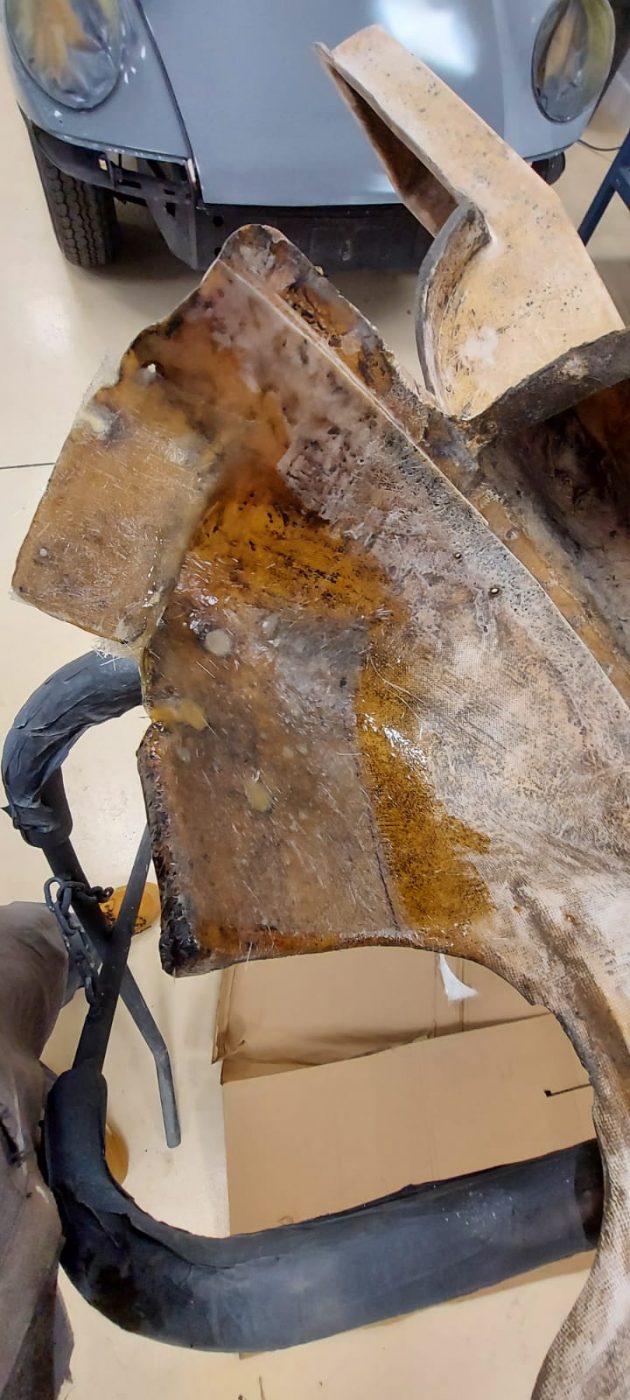
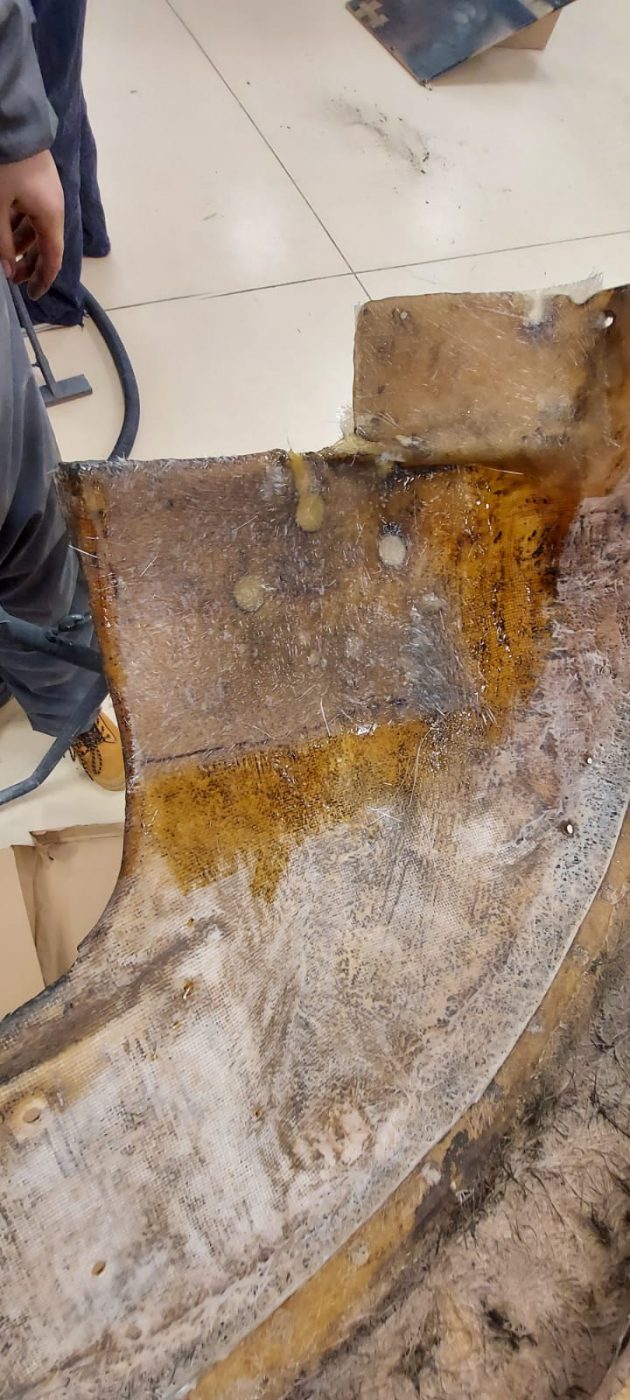
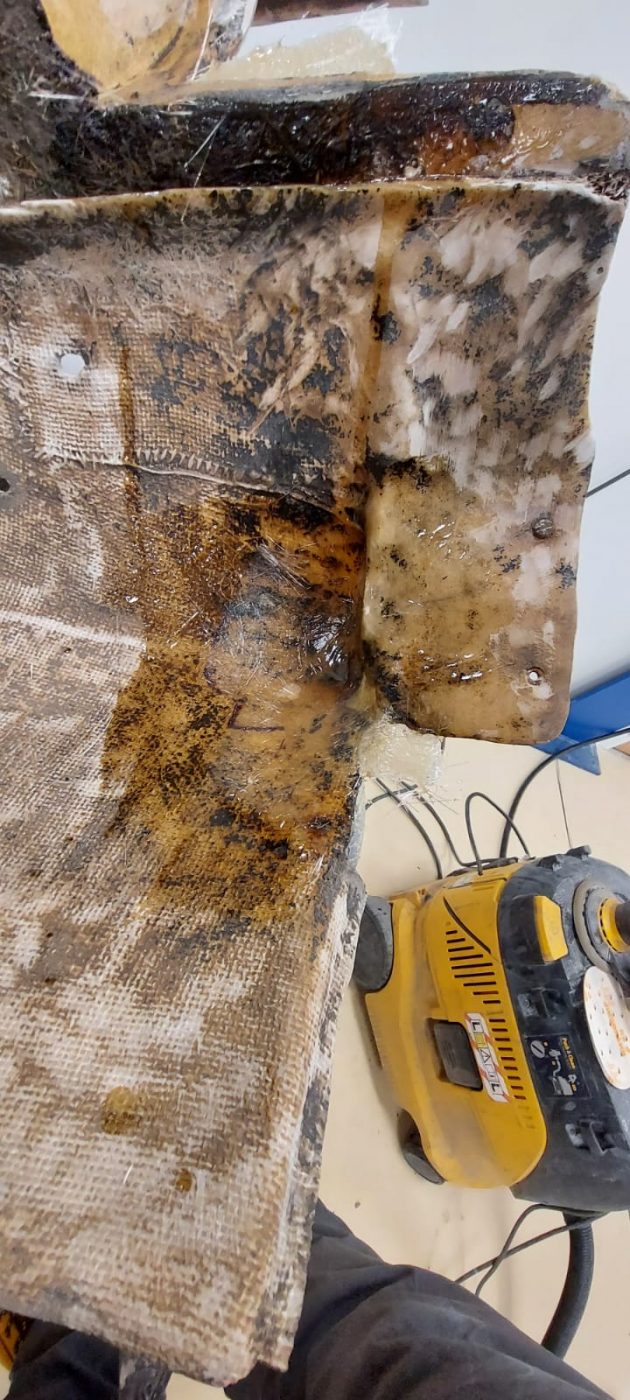
The in-house paint and body team at Bridge Classic Cars have been working on preparing to start work on the 1956 Jensen 541.
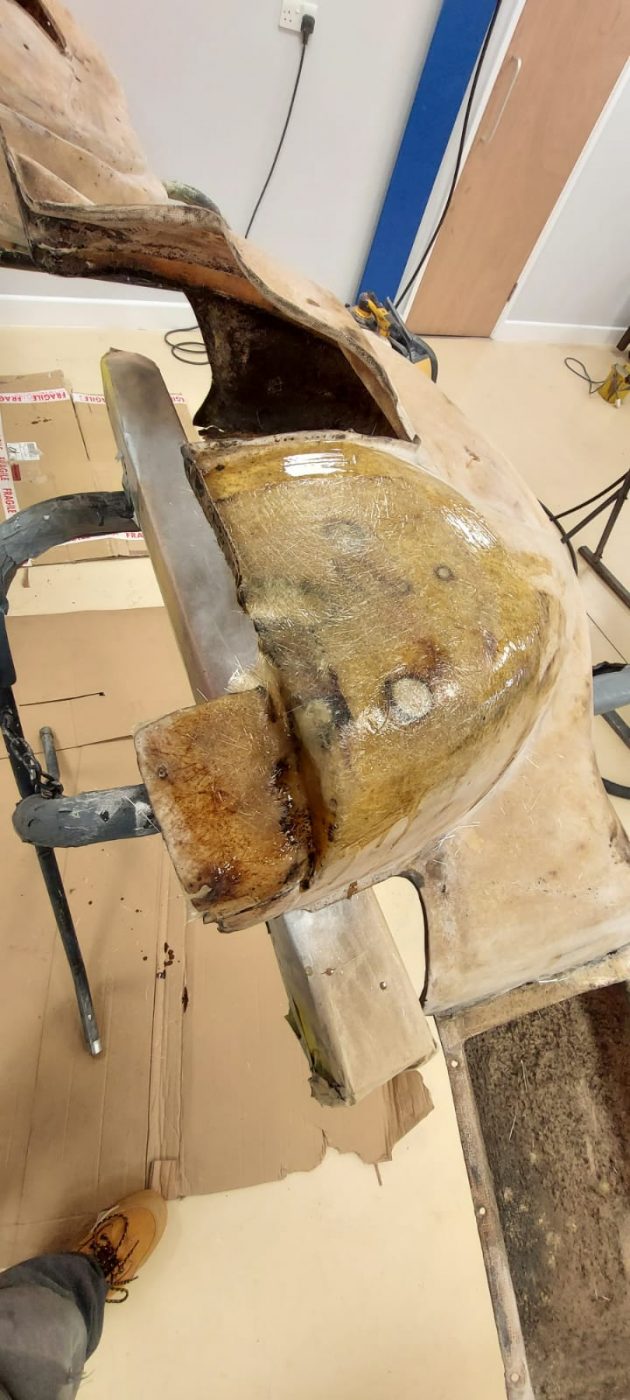
The first stage is to get the wheel arches for the car sanded down and ready for when they eventually go into the paint booth. First, though, the team had to perform some repairs. One of the benefits of the Jensen 541’s fibreglass construction is that repairs can be easily performed on these amazing classic GT cars.
Then, once the resin had cured for the repair the team could begin sanding and fairing the pieces to make sure every surface and recess of it is perfect and ready for the time when it all gets its first coats of primer.
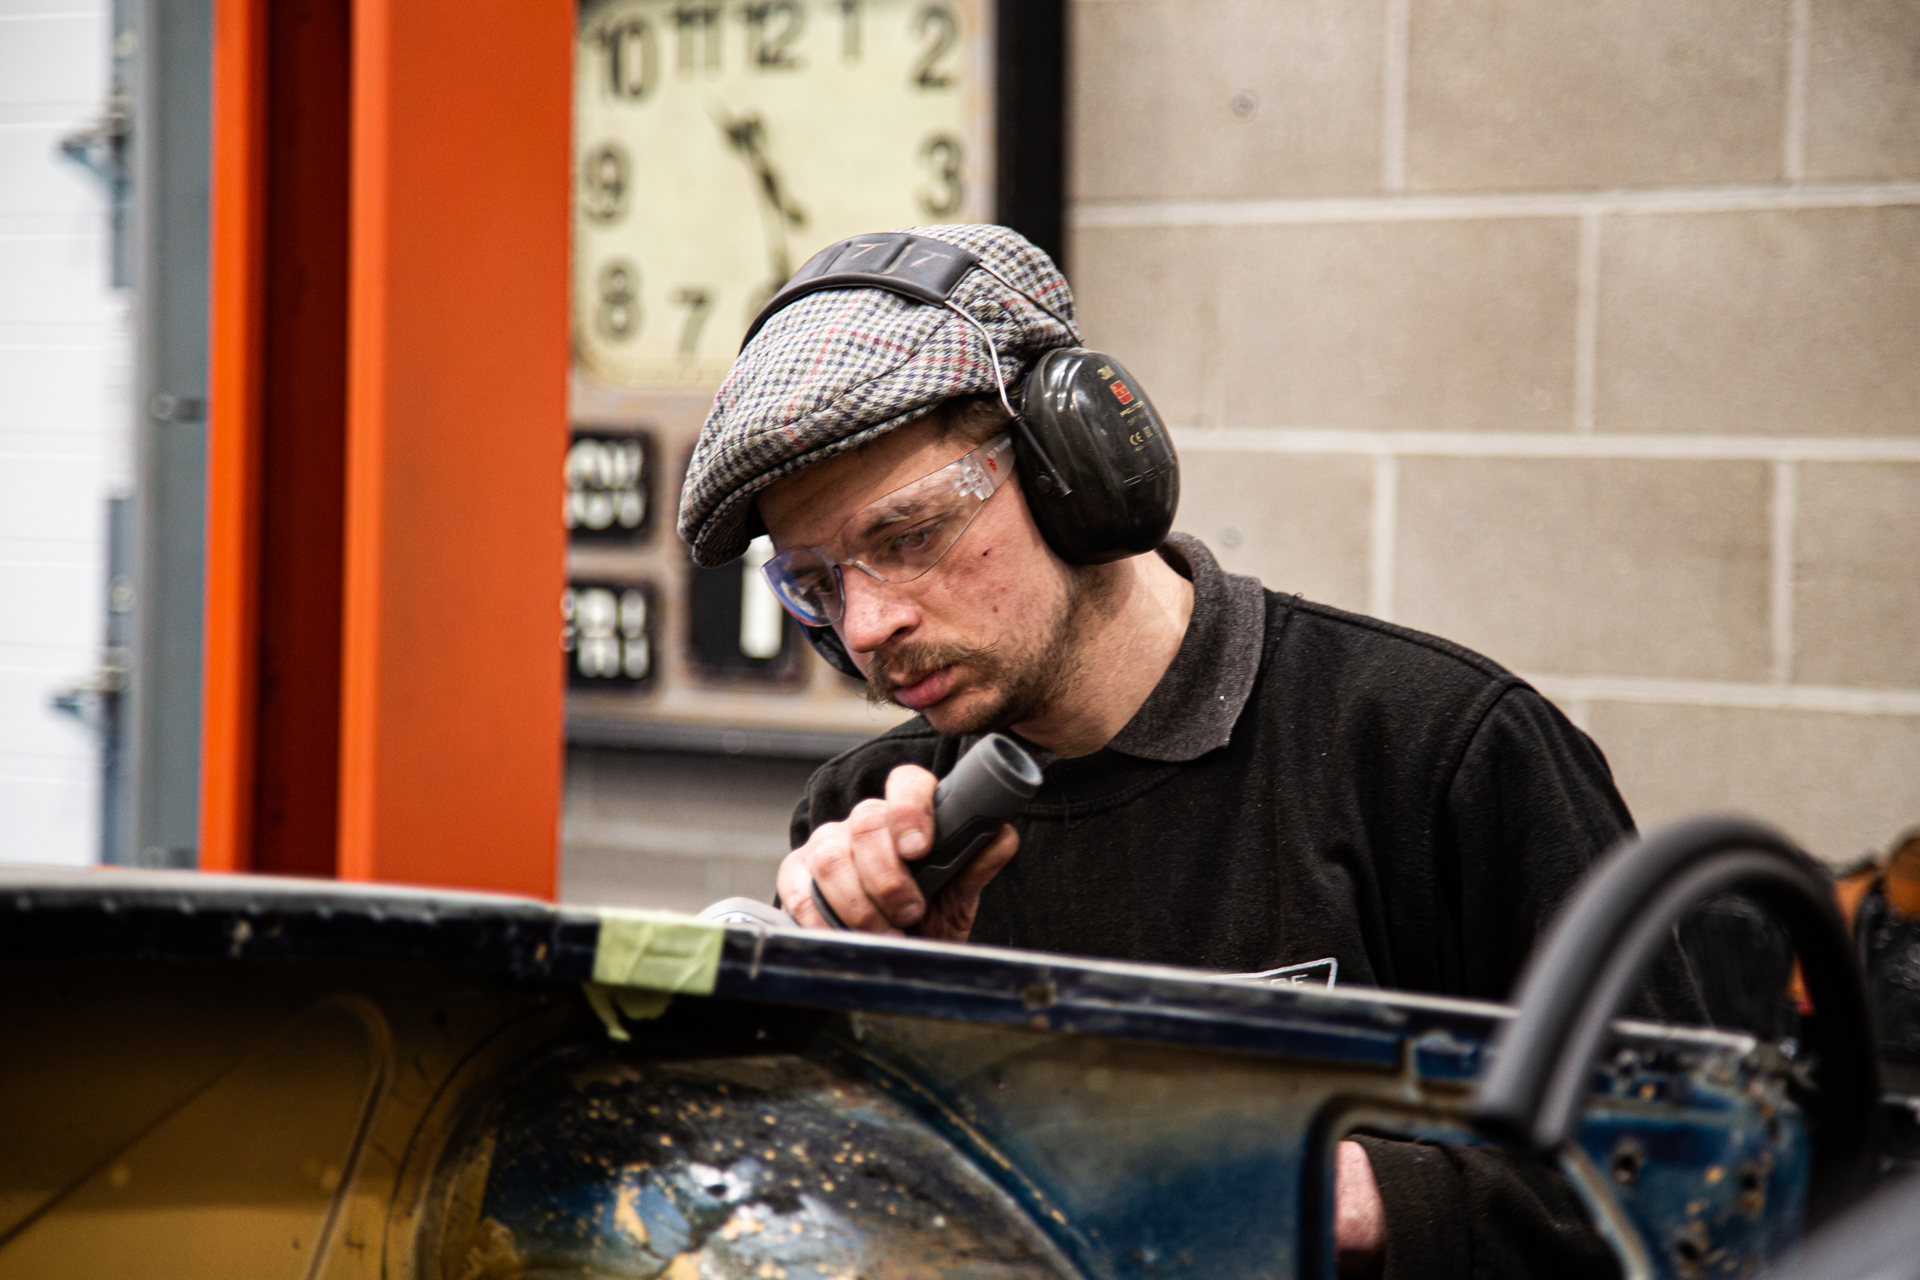
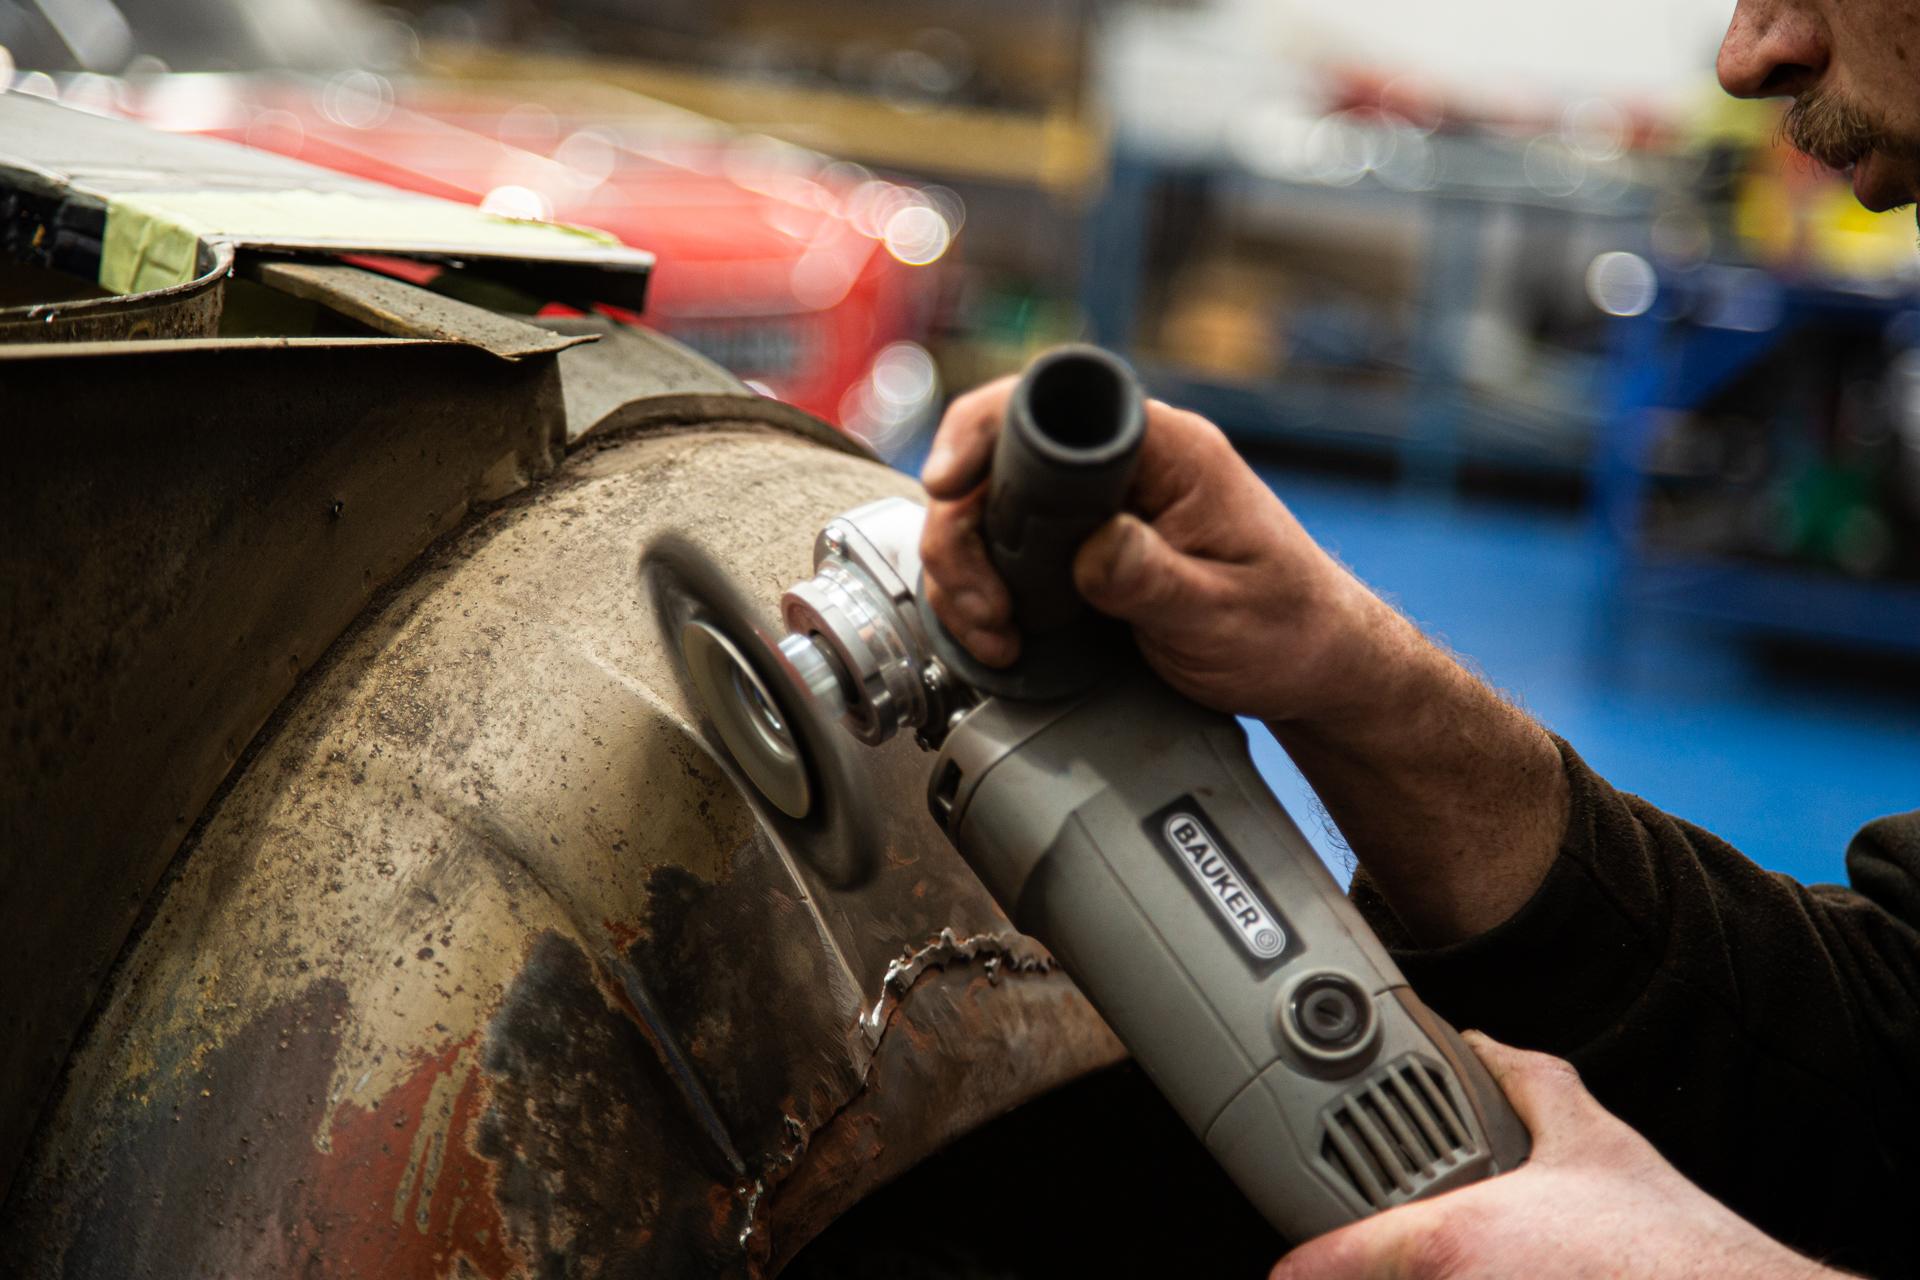
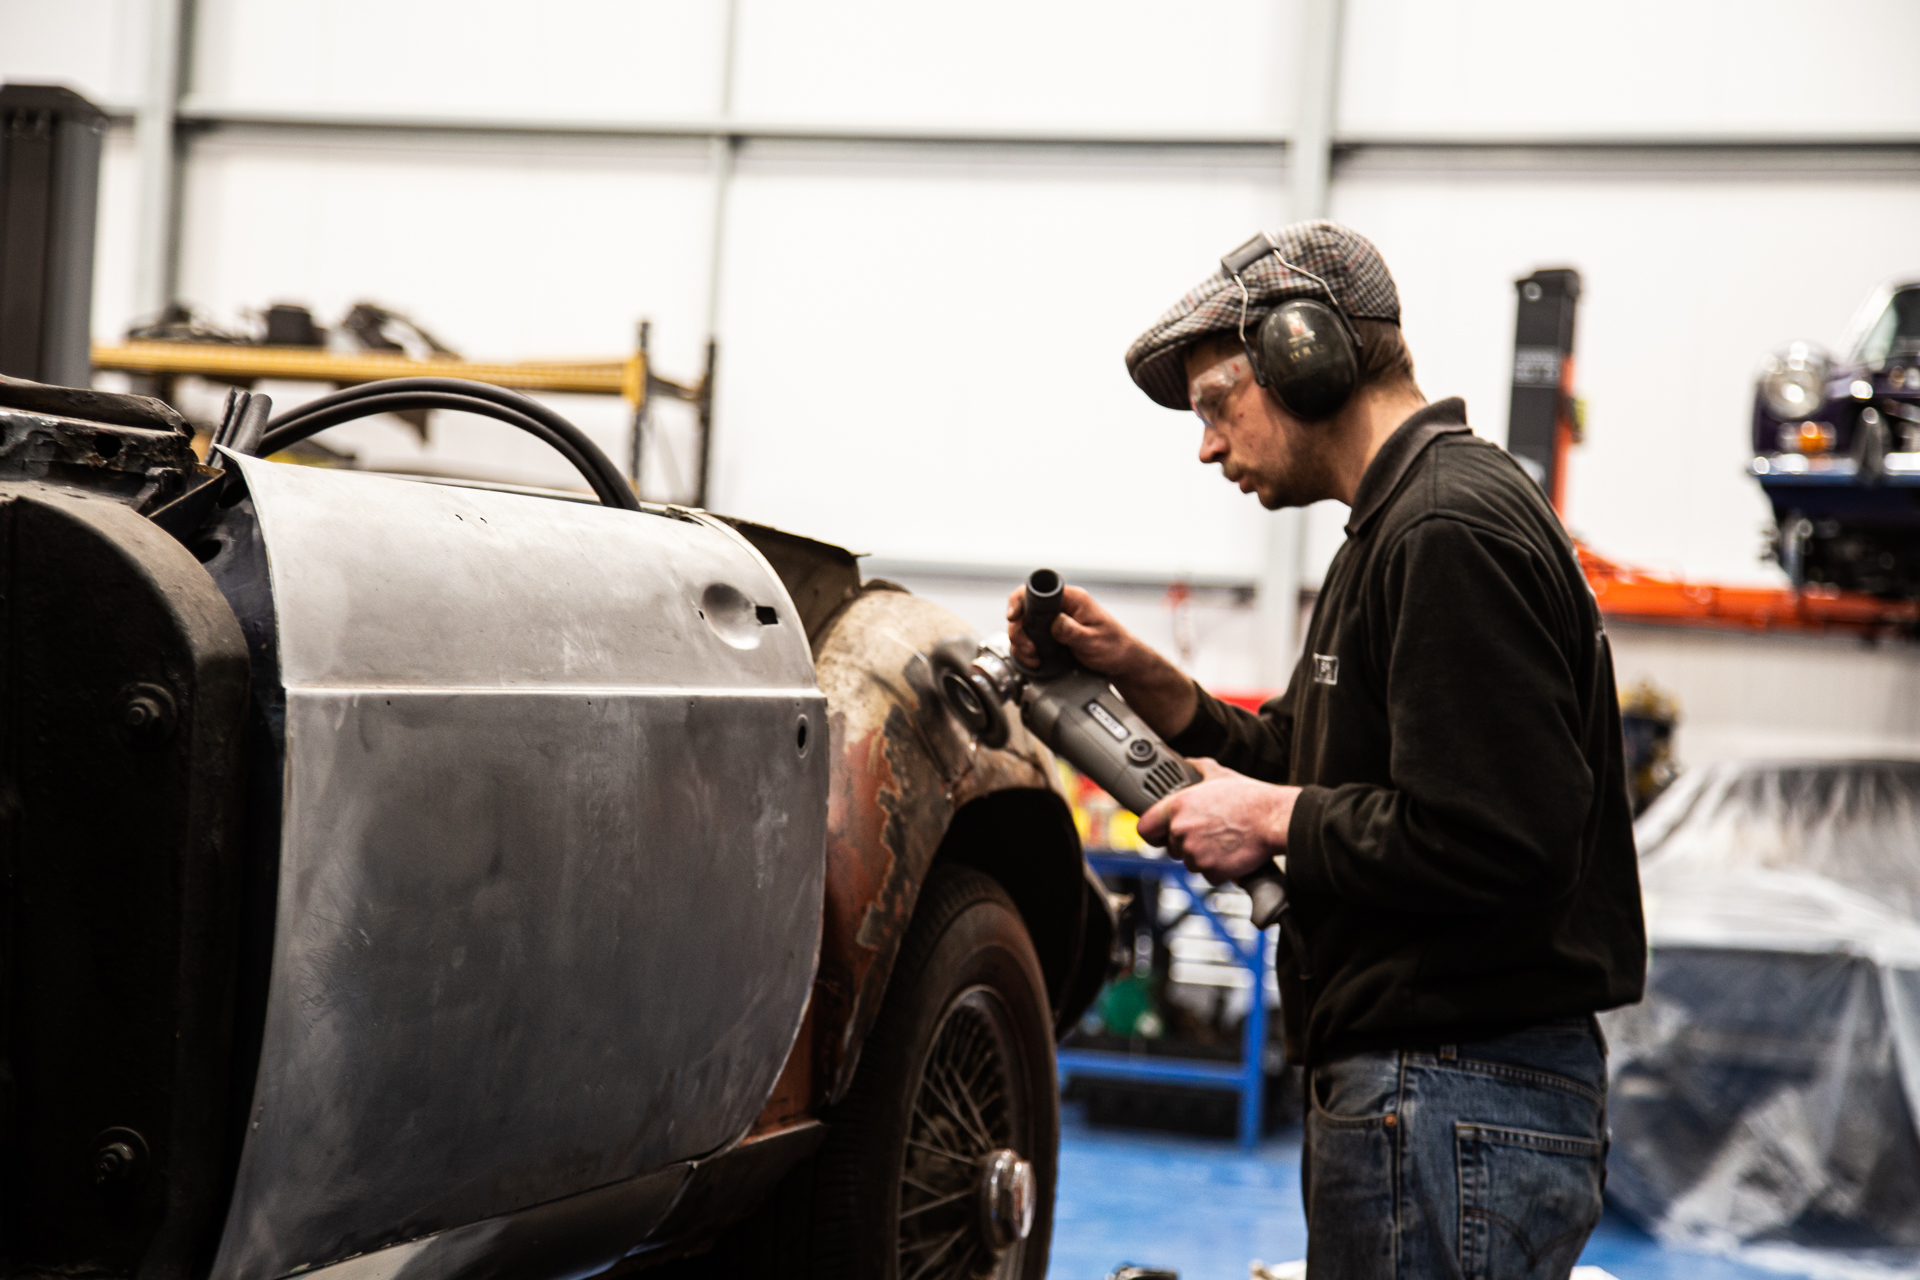
The 1969 Bentley T1 currently in the workshop at the Bridge Classic Cars Suffolk HQ is being worked on by our master technician Dave.
Dave is working on cutting out all of the low lying corrosion issues on the fabulous classic Bentley. We have sourced various panels and pieces for the car but Dave has been working on creating small patches where the piece itself is still sound around the corrosion.
Dave has been meticulous with checking the condition of the panel as a whole before cutting into it and again, is only cutting the areas that need urgent attention or will do in the very near future.
The project is moving along quickly as every day more of the car is saved and replaced so that this amazing Bentley can be around for many years to come.


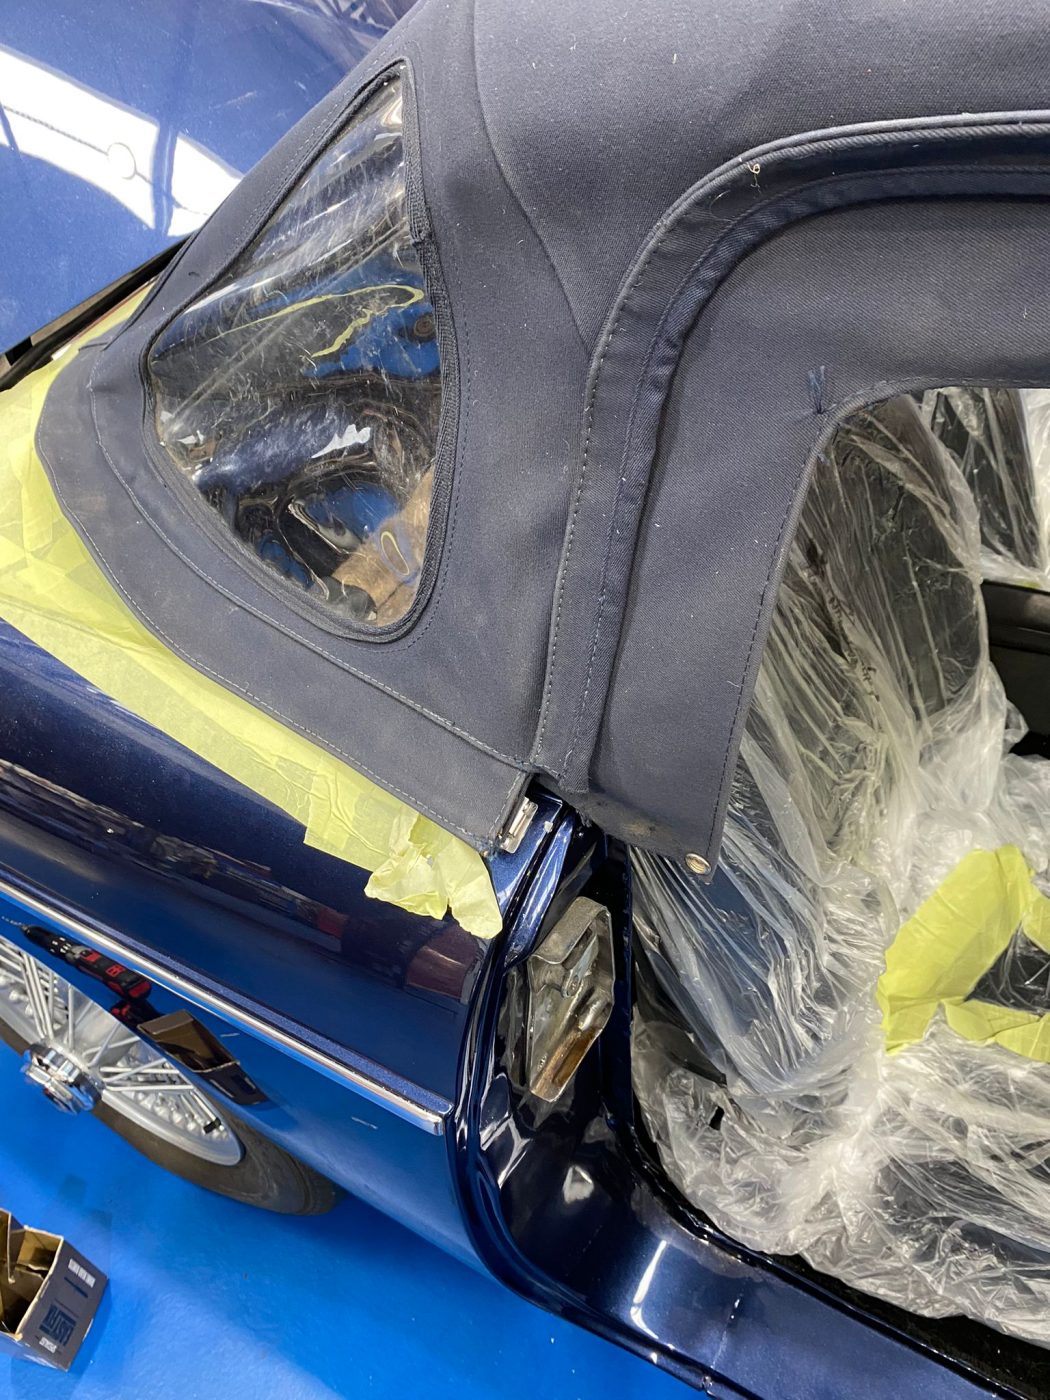
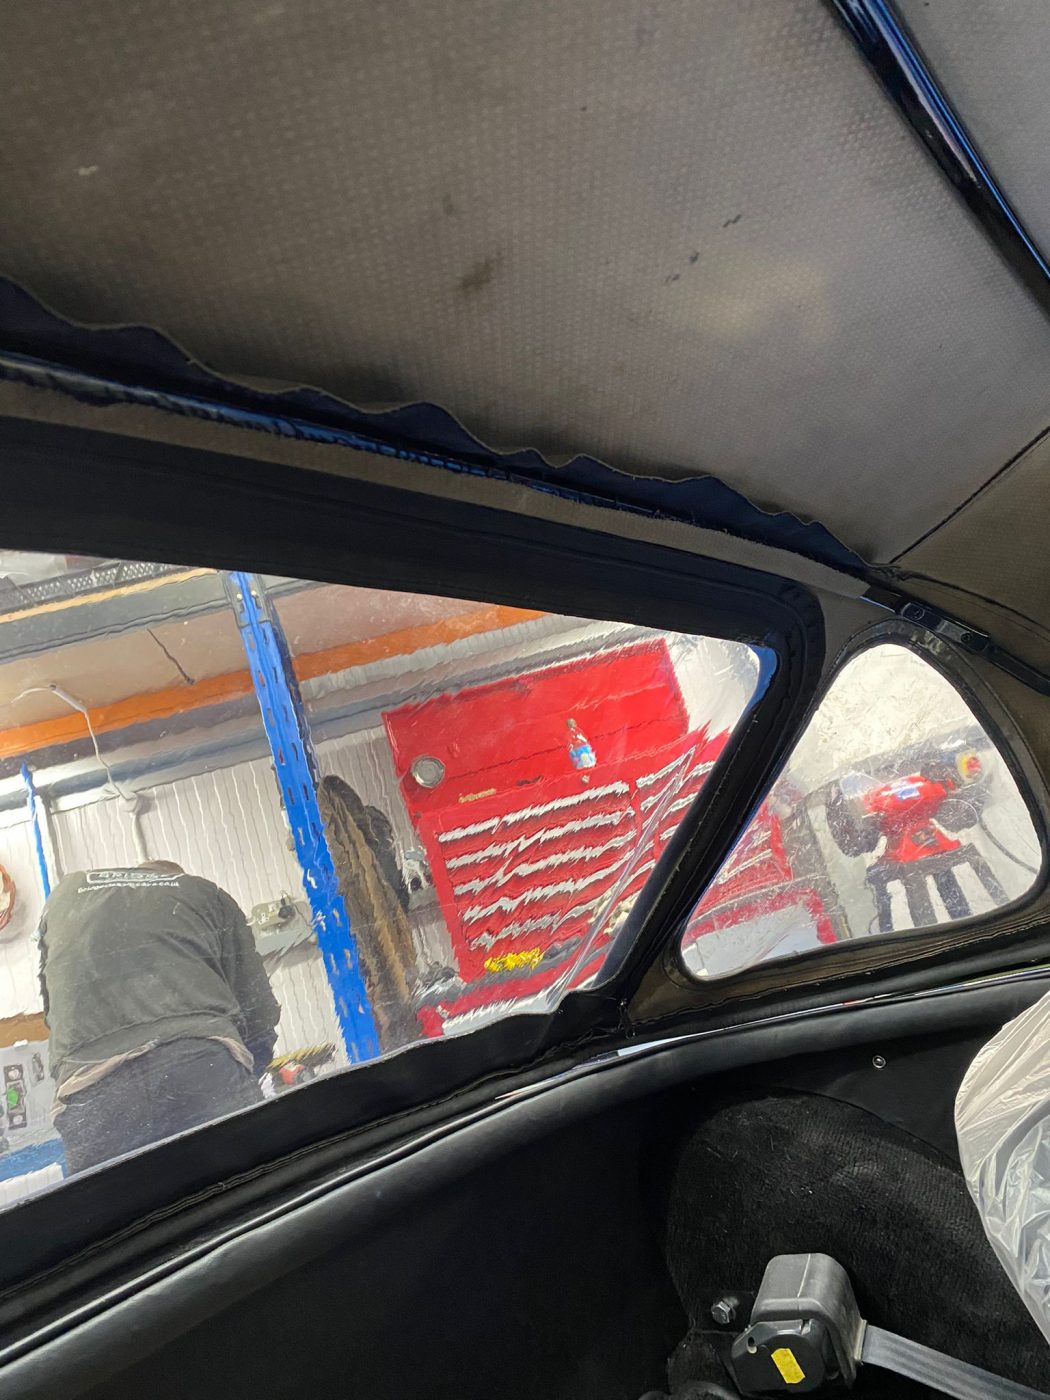

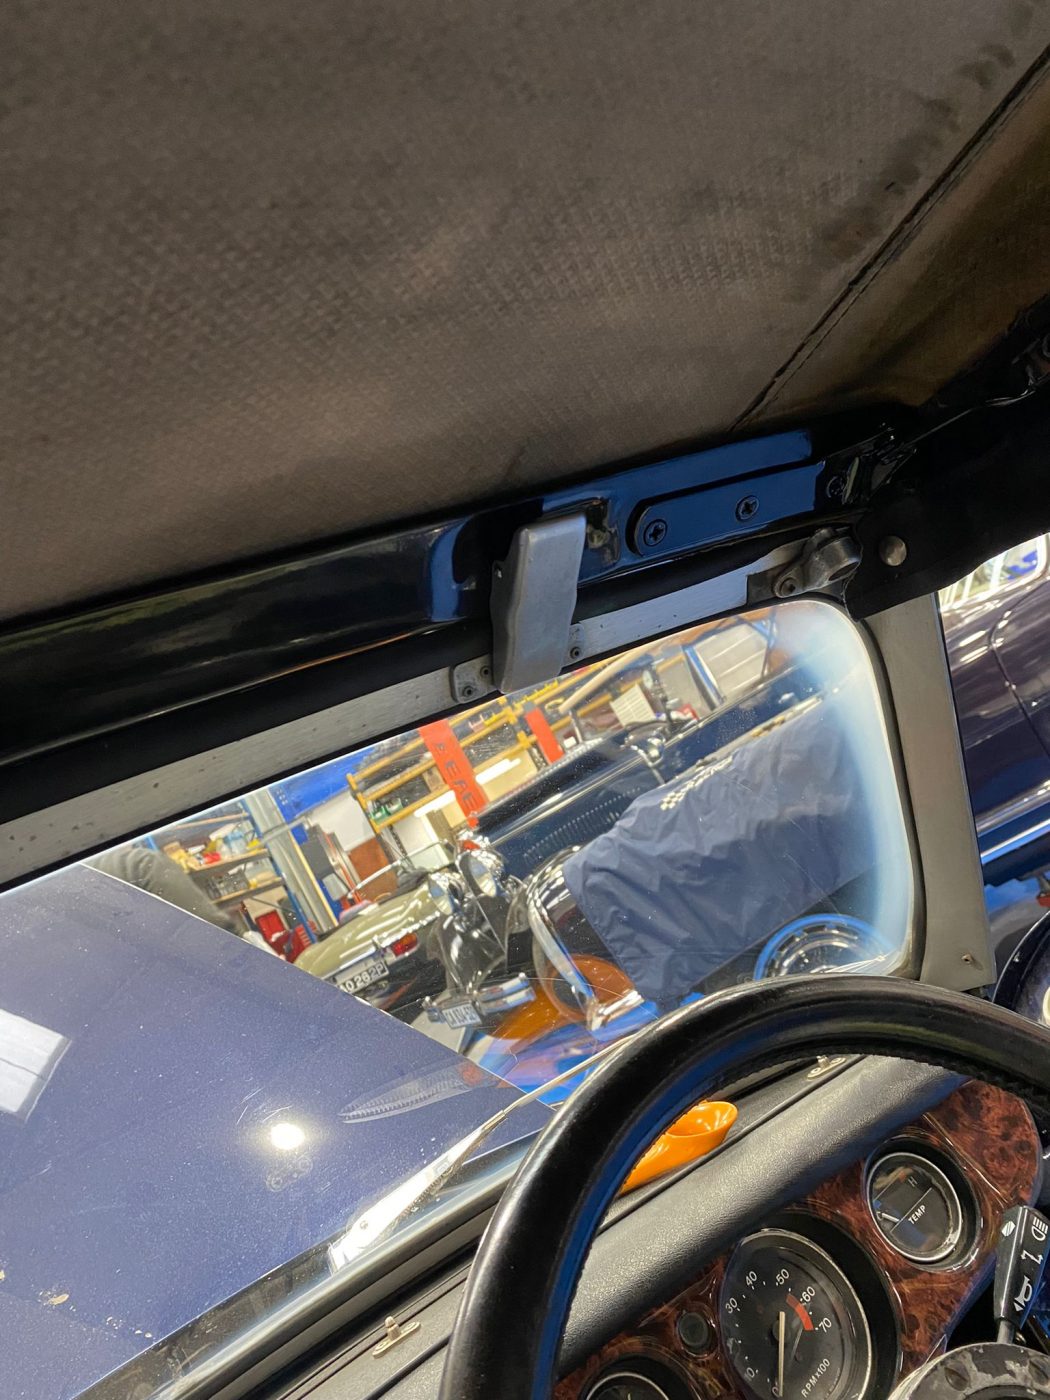
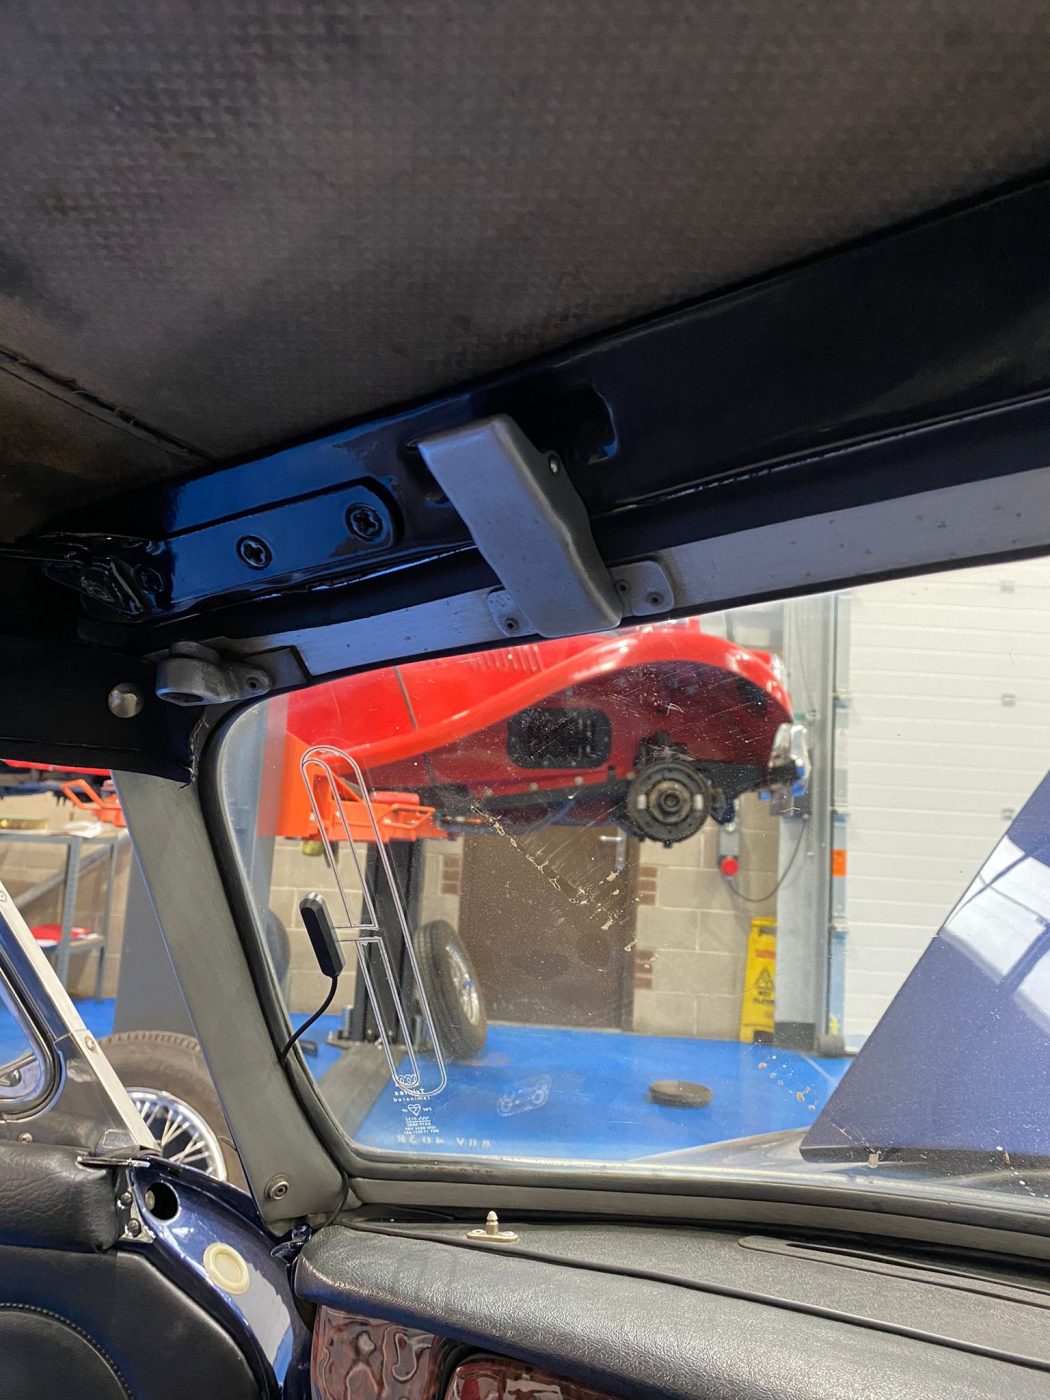

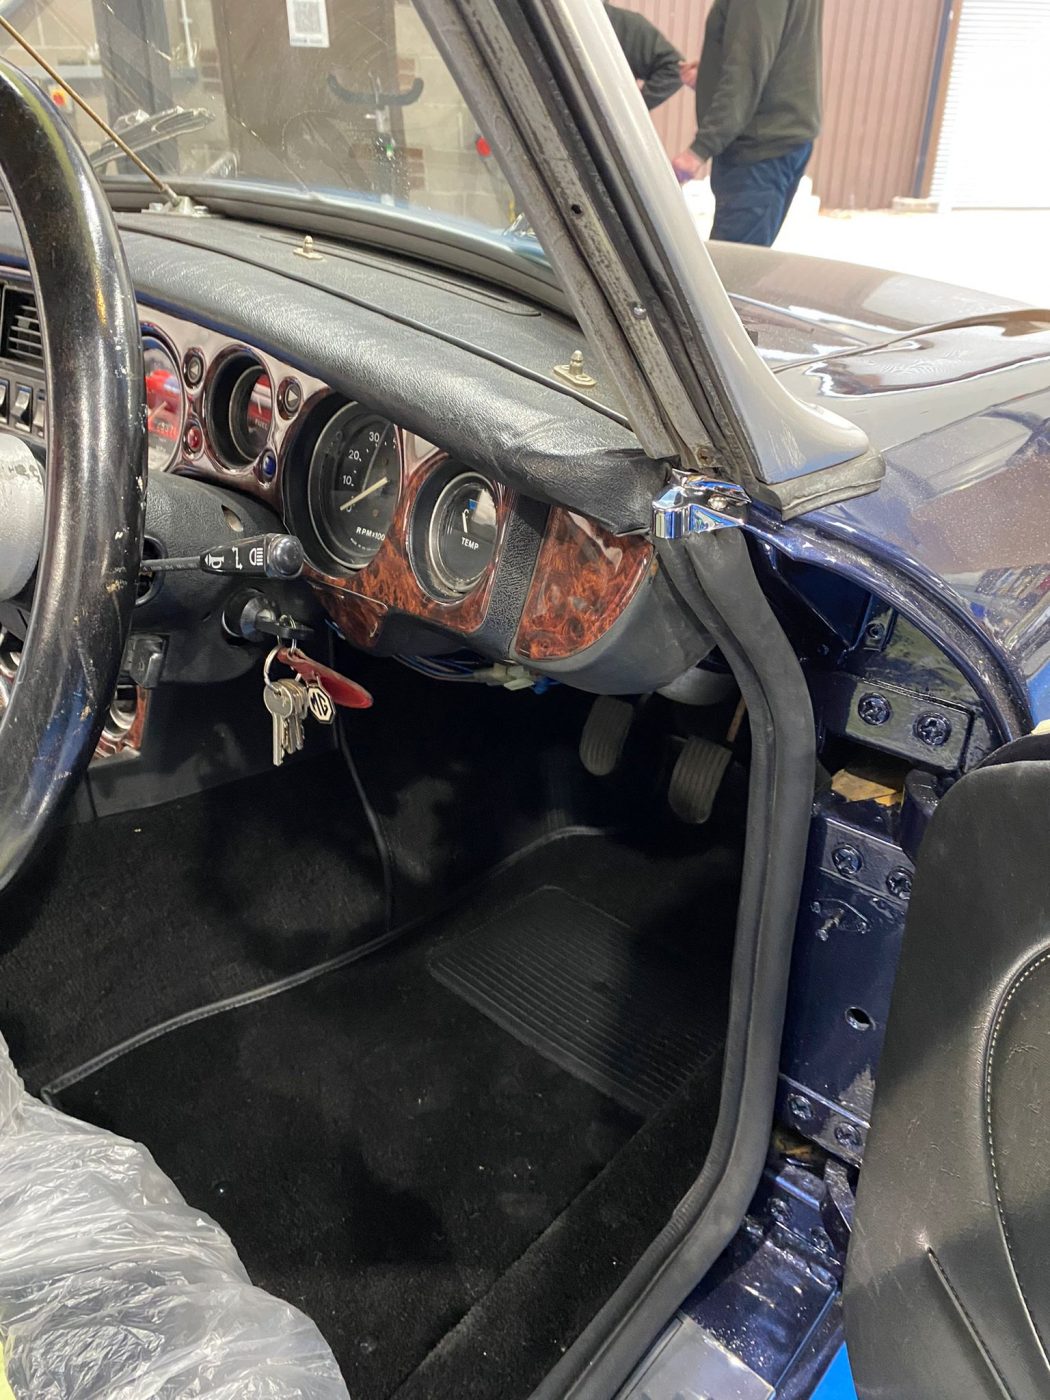
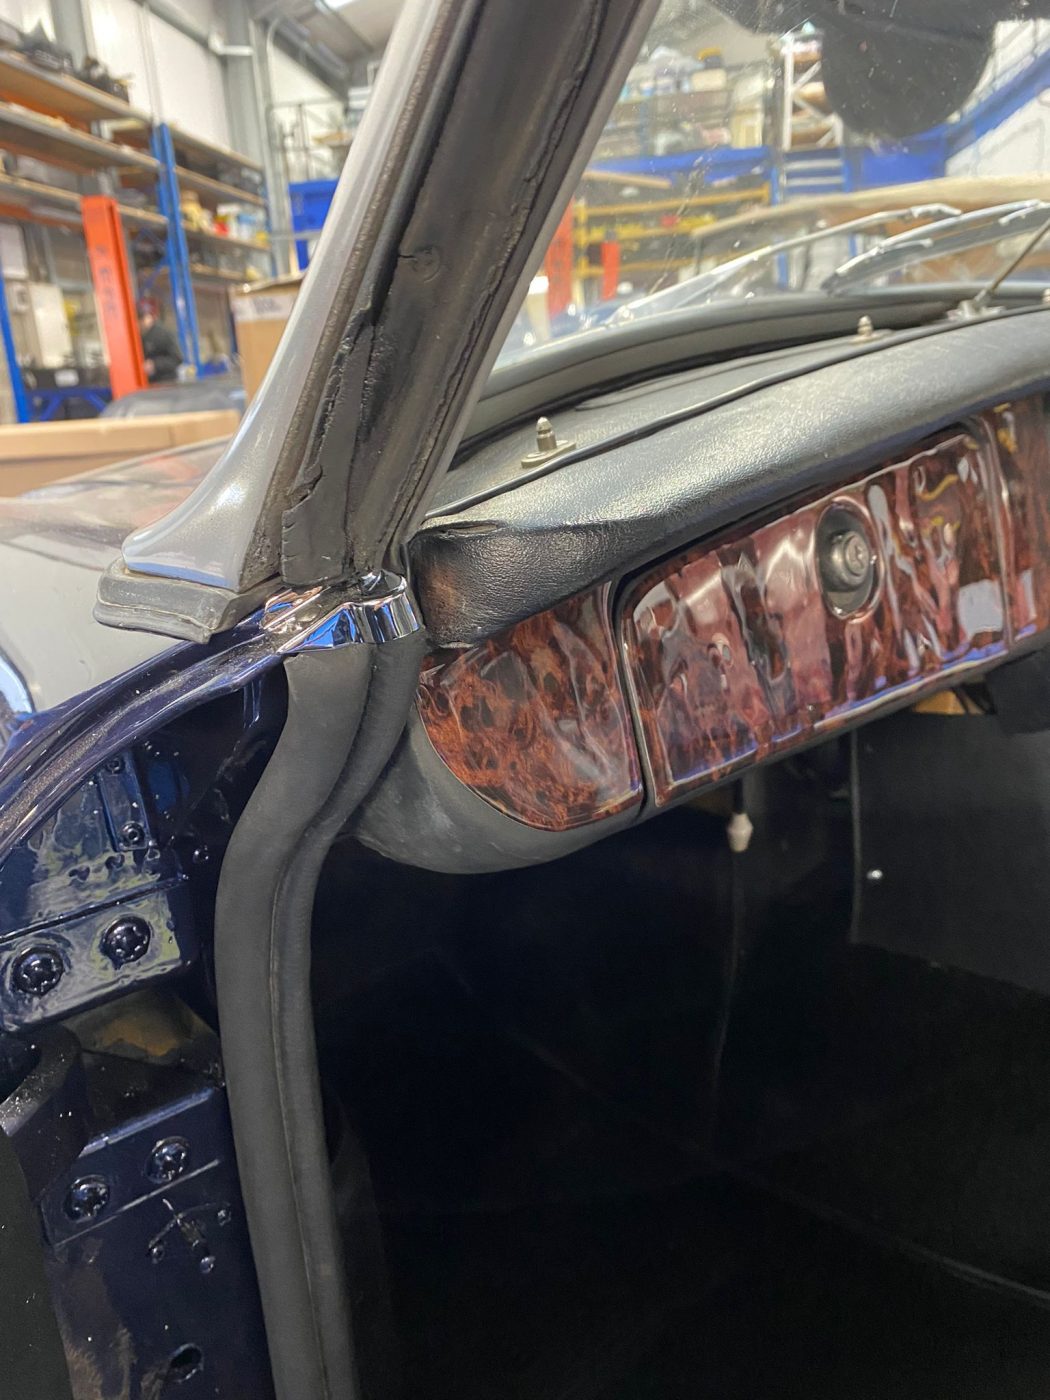
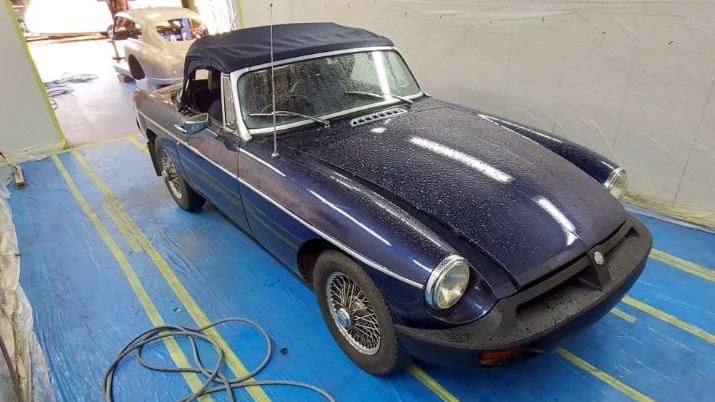
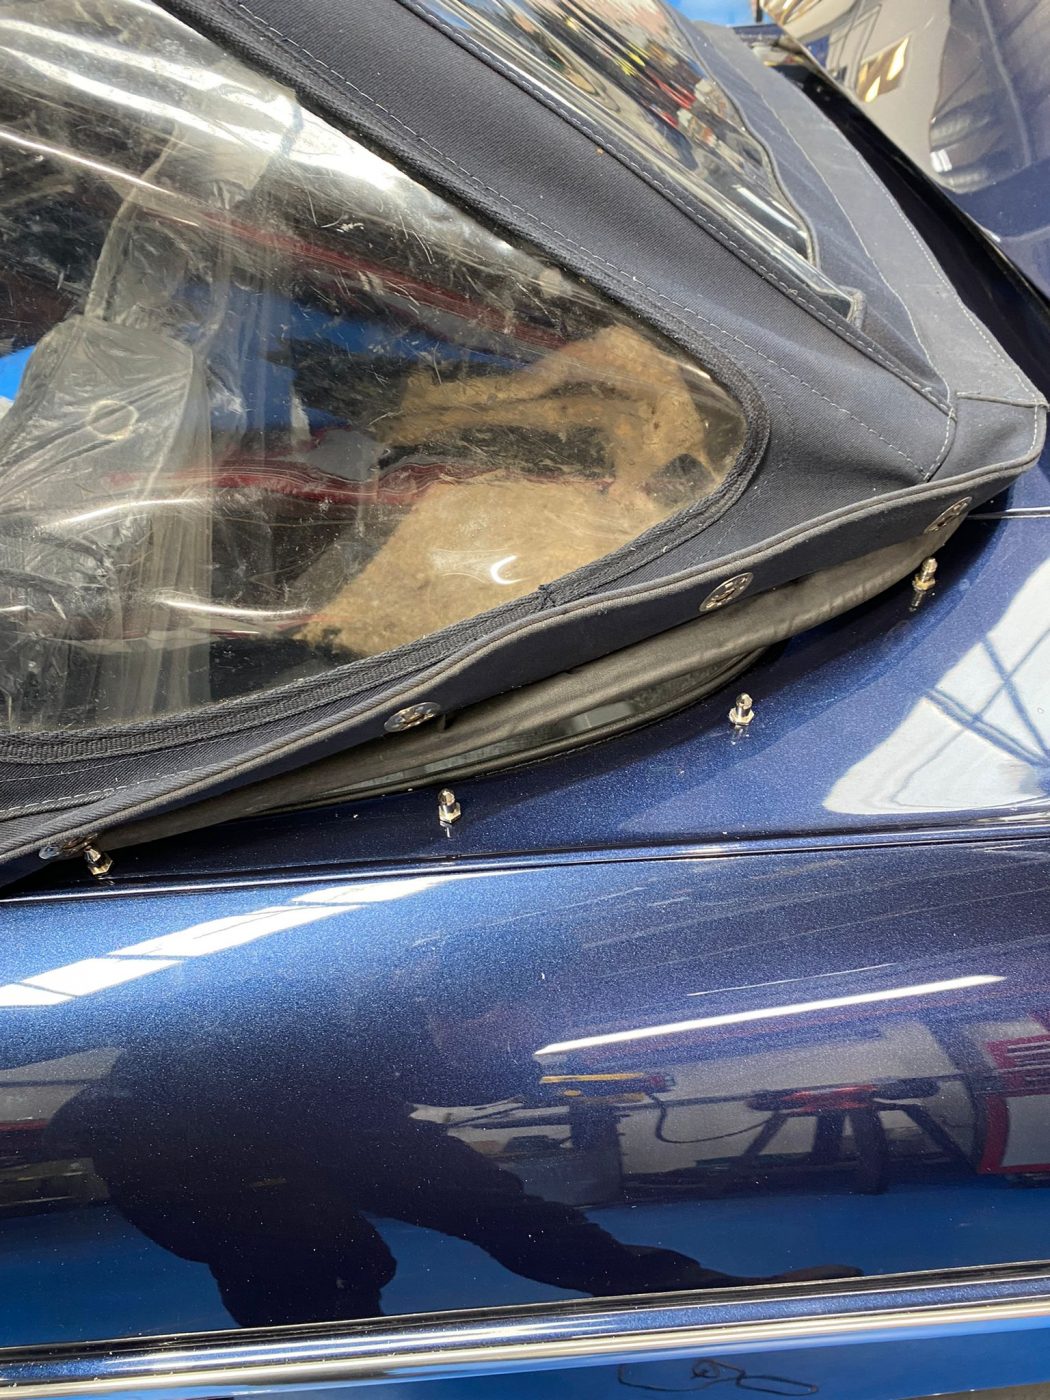
As the aesthetic restoration of the 1977 MGB Roadster in the Bridge Classic Workshop at our Suffolk HQ gets closer to completion, the in-house trim team have been finishing off the final parts and pieces for the car.
Brian, our lead trimmer, has been working on getting the original hood fitted back to the car at the customer’s request. Not only did that involve stretching and fitting the hood over the newly refurbished hood frame but also replacing the rear screen with a brand new high-quality replacement we had sourced for the project.
With the hood now stretched over the frame, Brian could begin making sure all the associated clips and brackets for securing it to the car were in the correct place and correctly fitted to the car. Installing convertible hoods is somewhat of an art form but with Brians years of experience, he can stretch and refit an original hood to make it look as good as new.
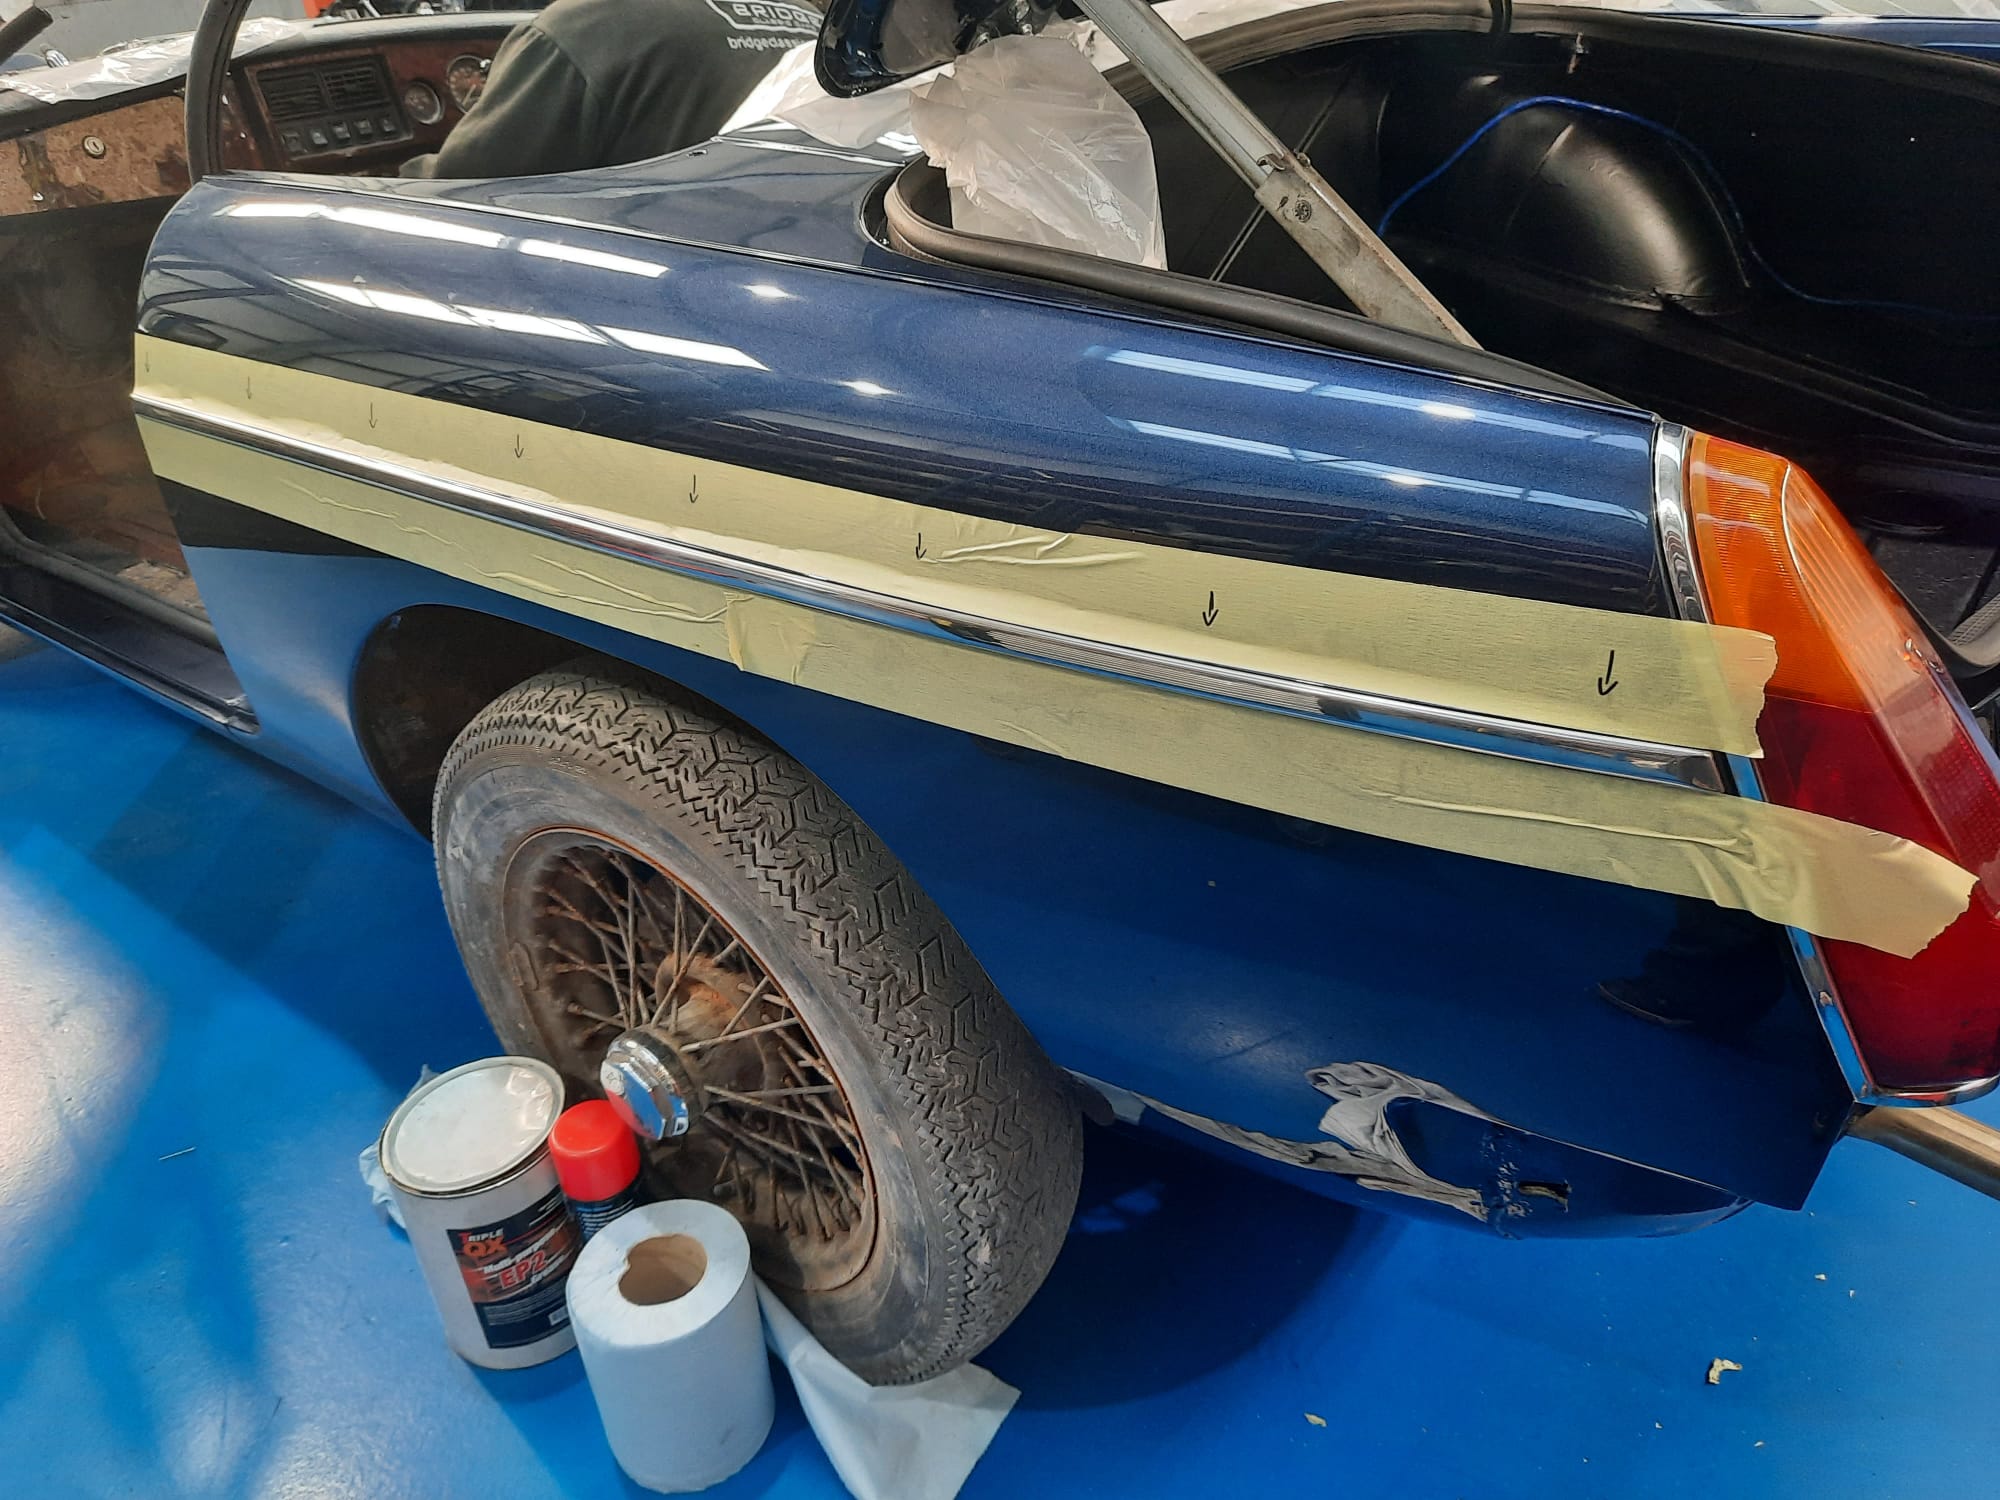
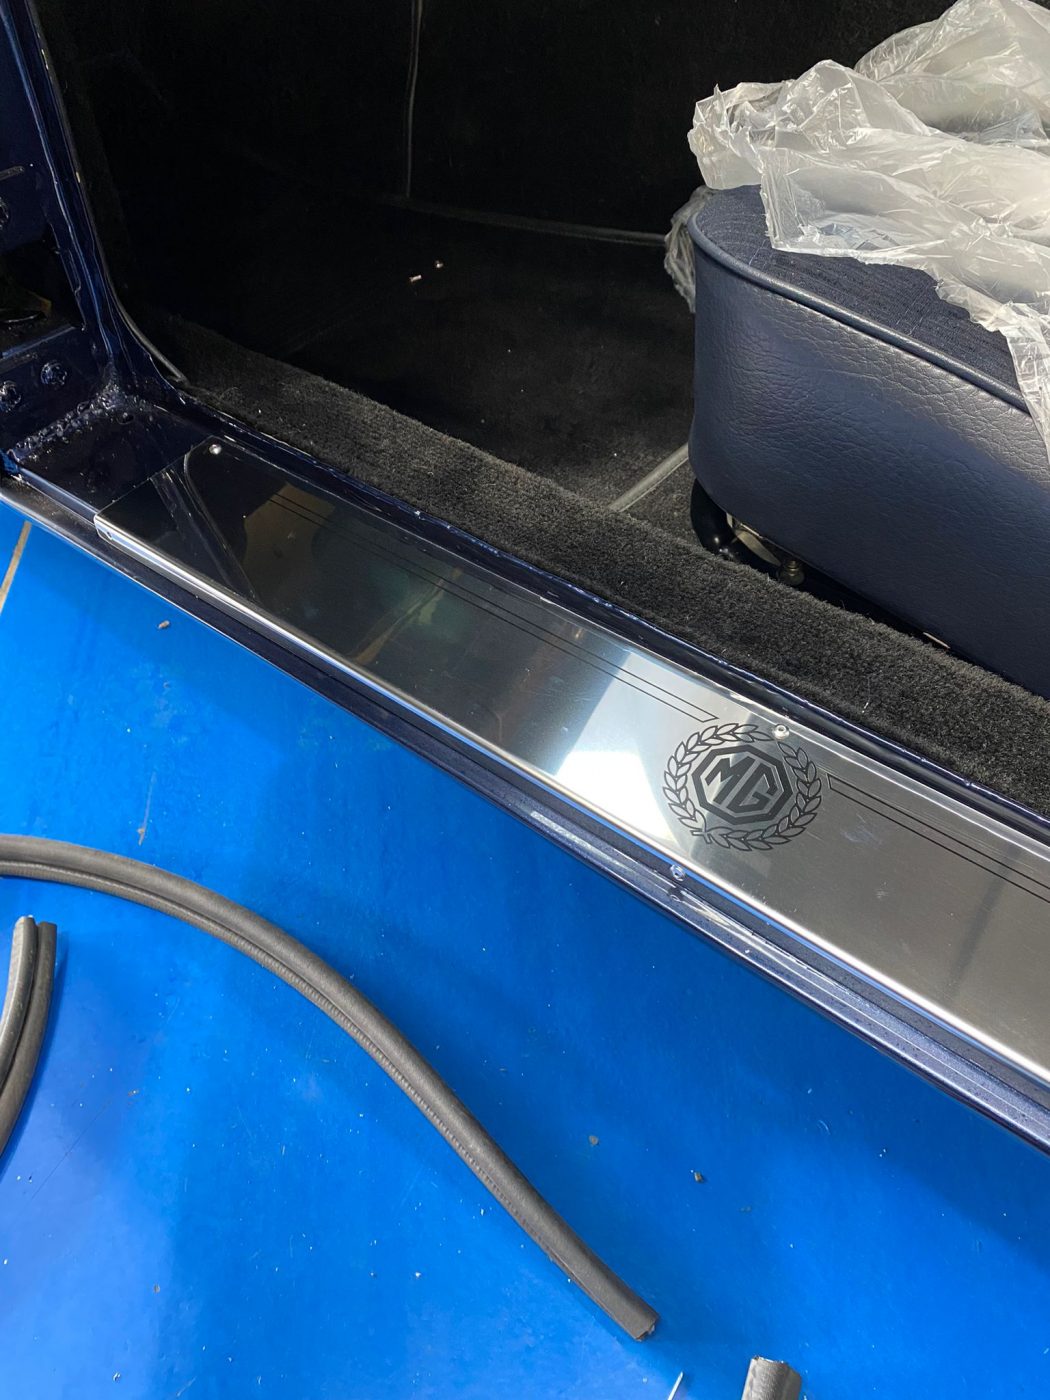
One of the final pieces on the car that needed to be completed was the decorative sill plates. These highly polished pieces were riveted to the sills, as they were originally, to finish off the amazing work that Brian and Lydia in our Bridge Classic Cars trim shop have done on the car.
