Our trim shop have been dedicating their efforts to our Ferrari Daytona recently, which is one of the largest nut and bolt restorations we have in currently.
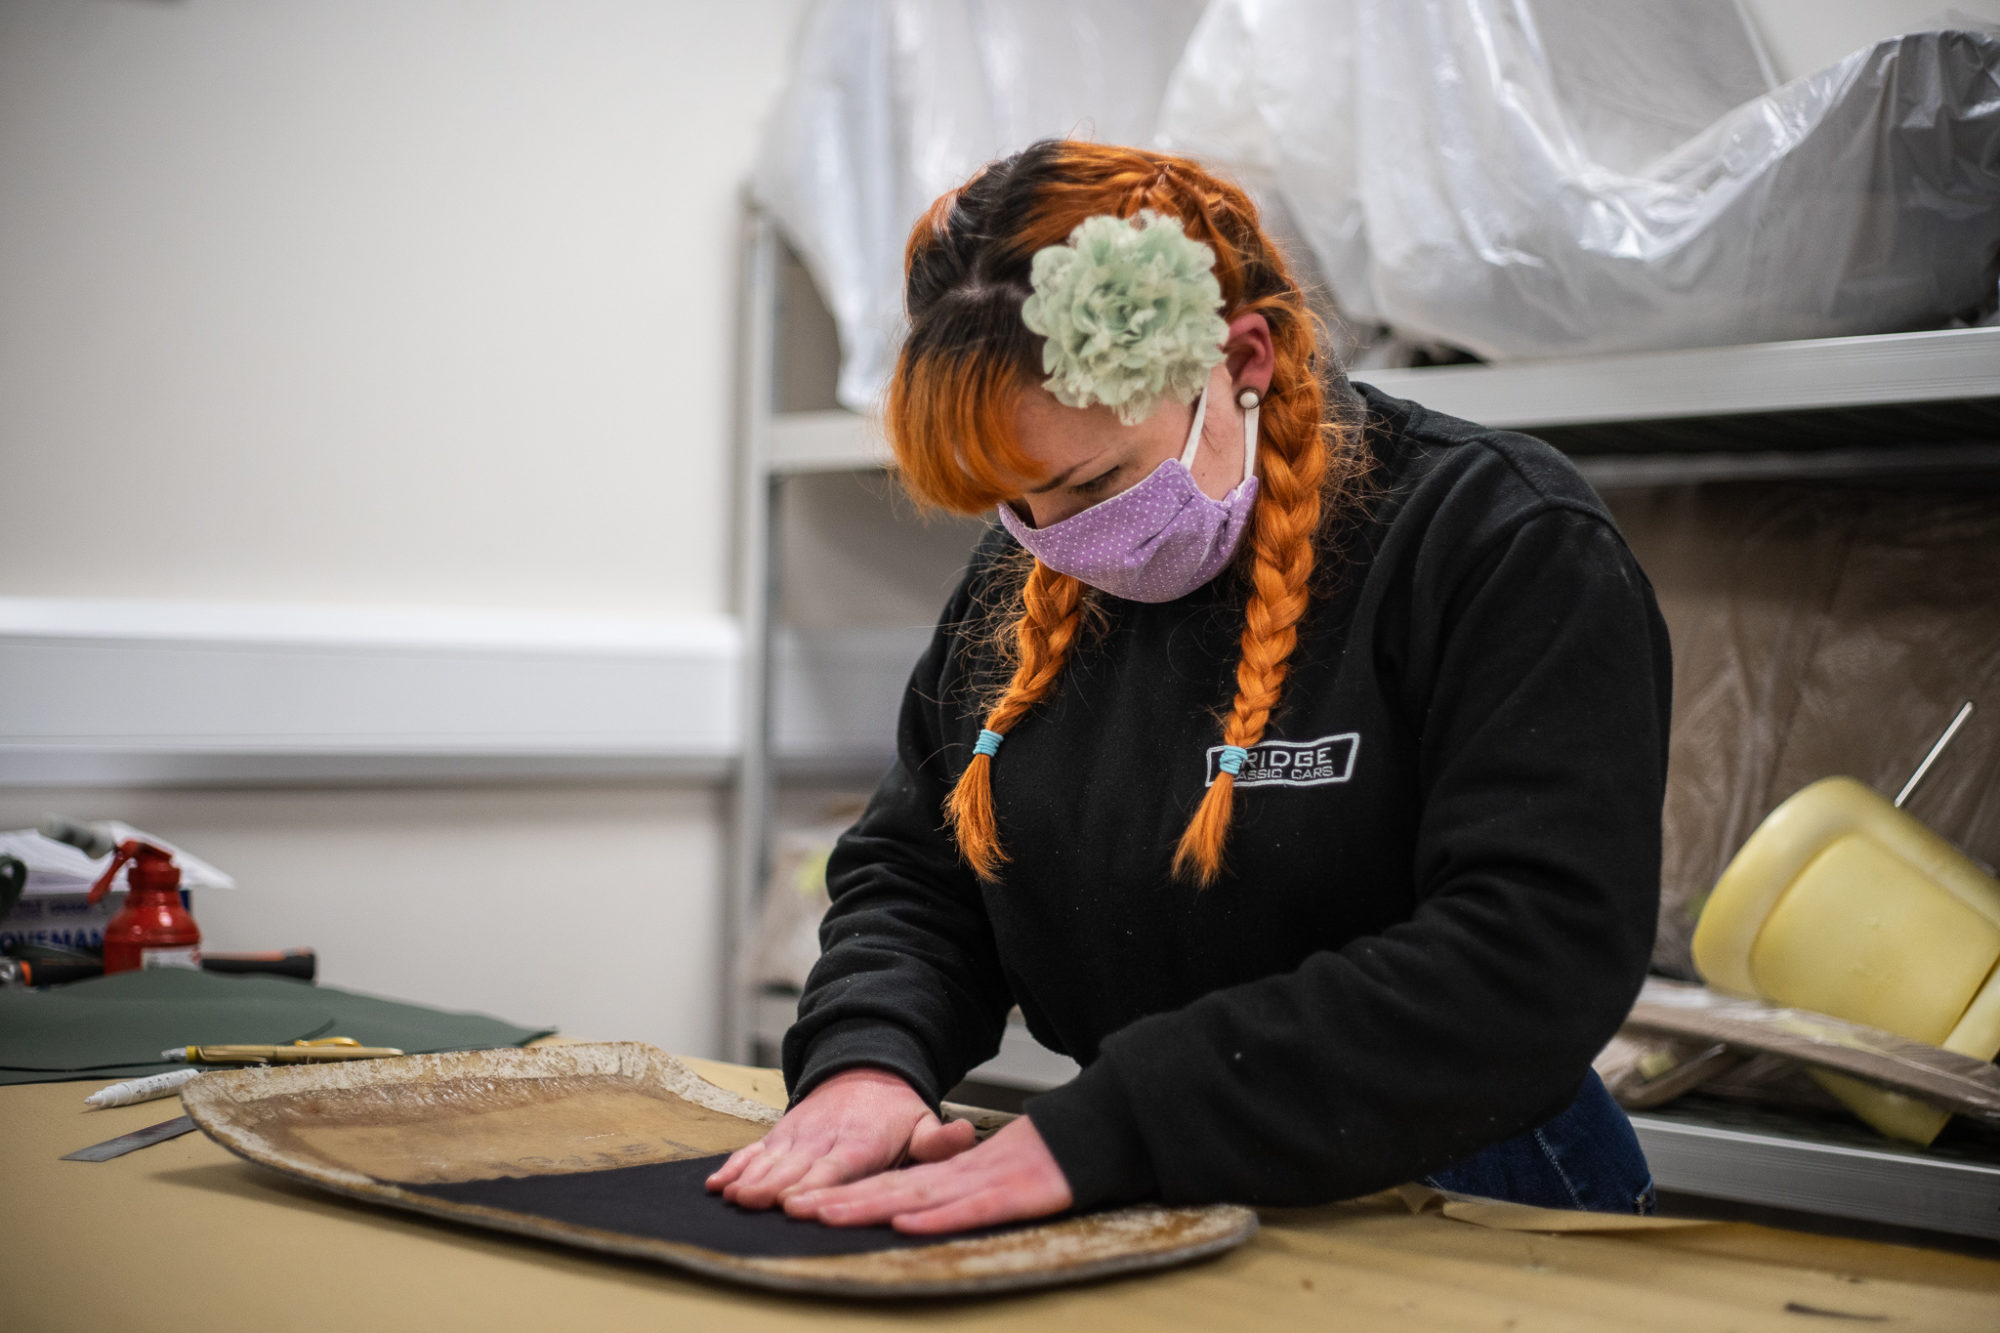


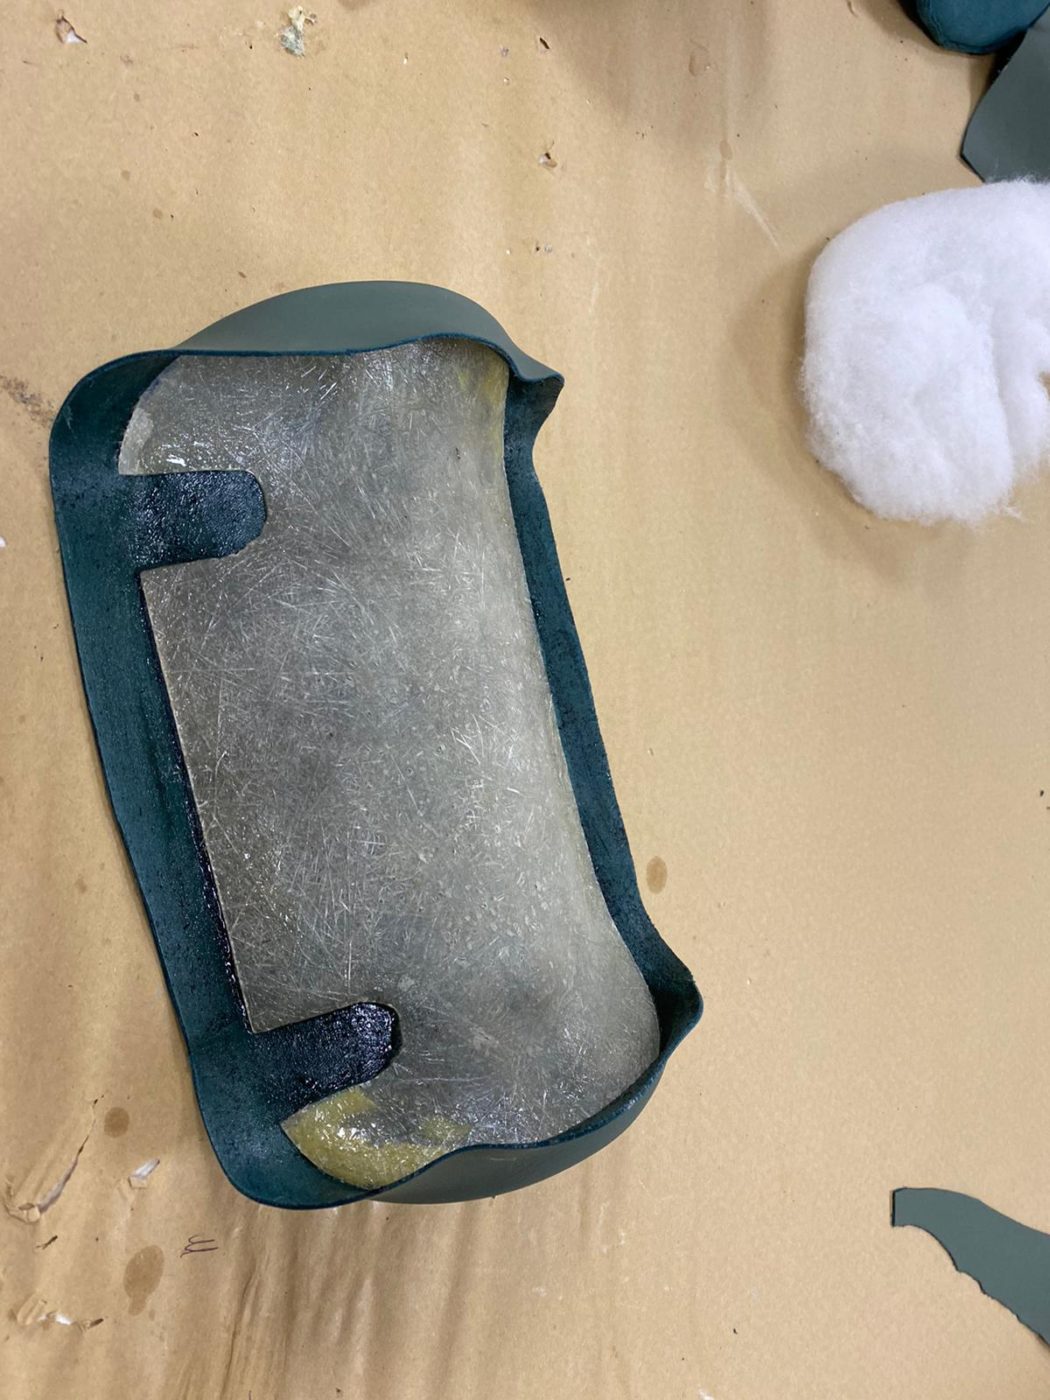
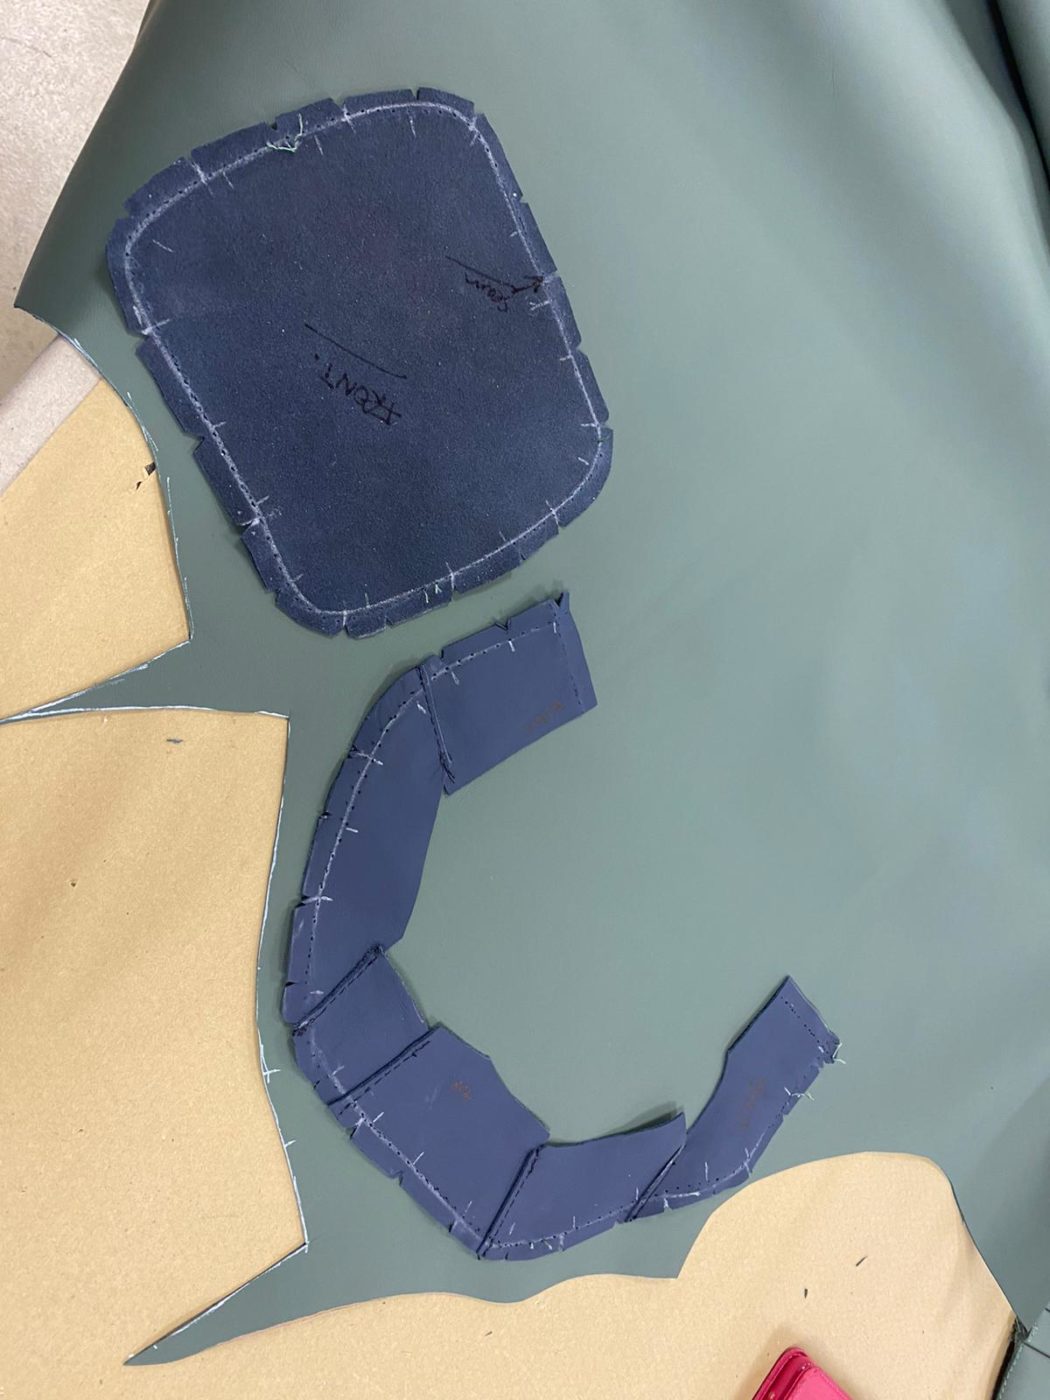
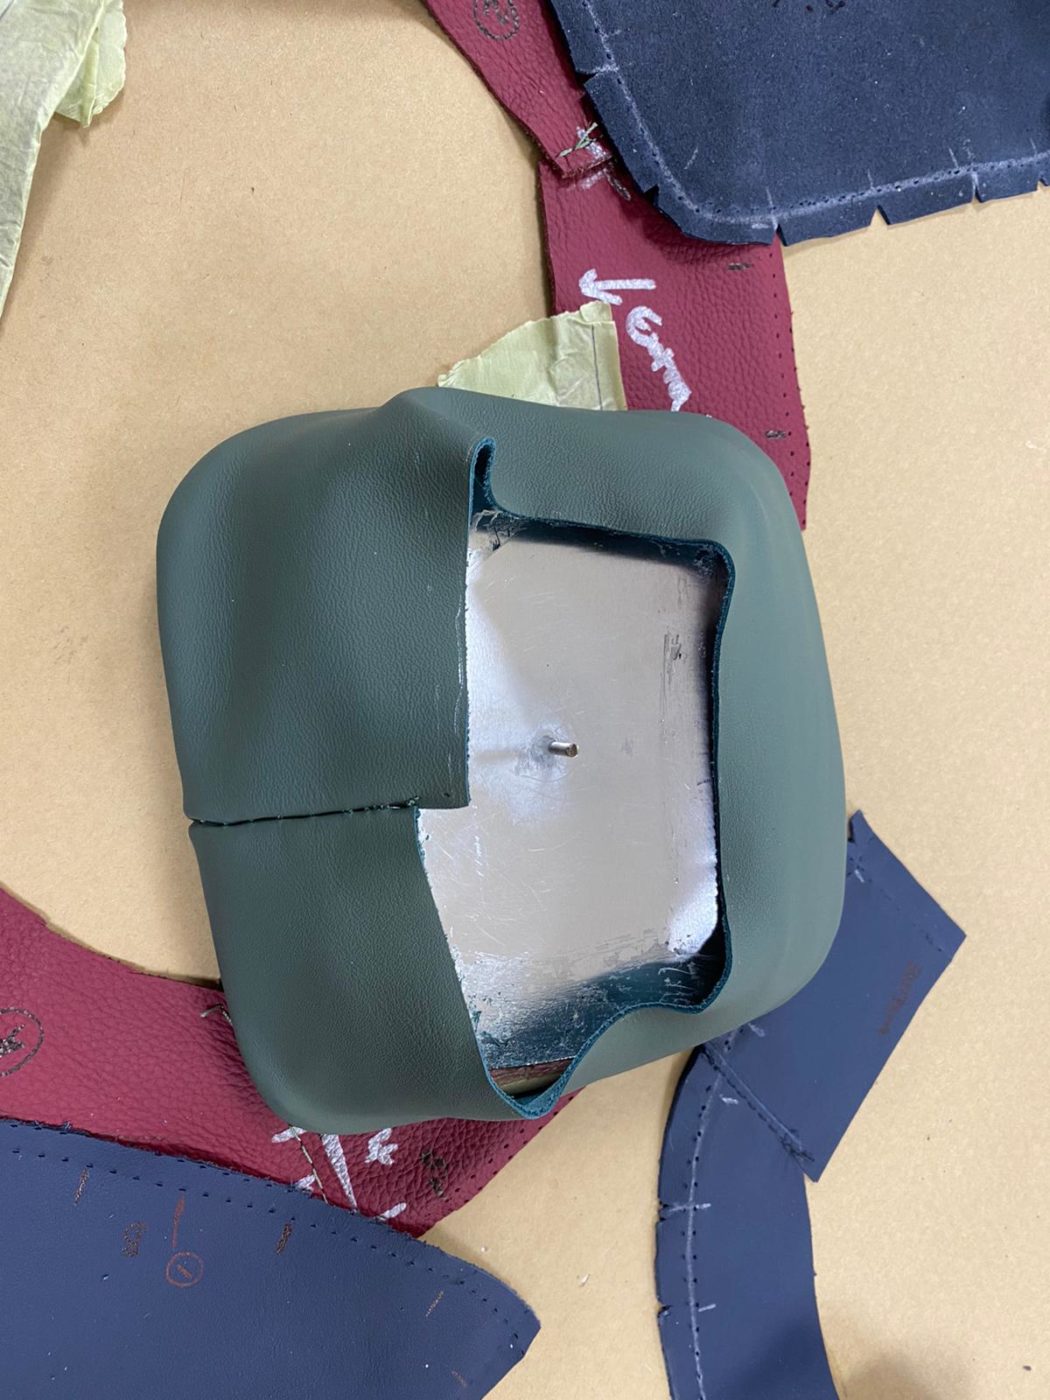
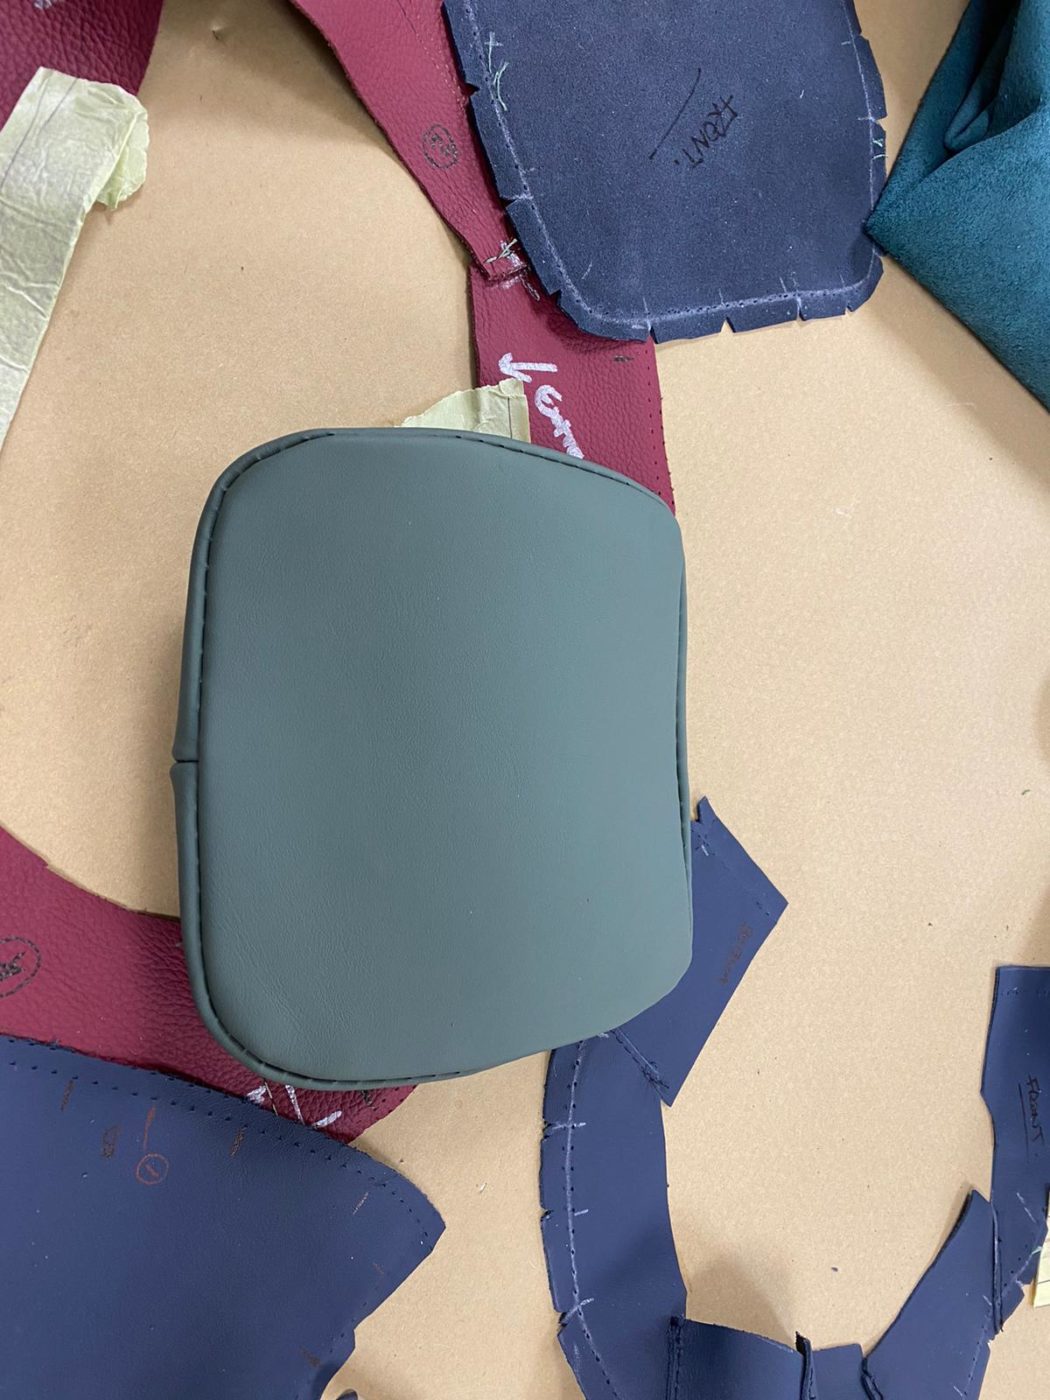
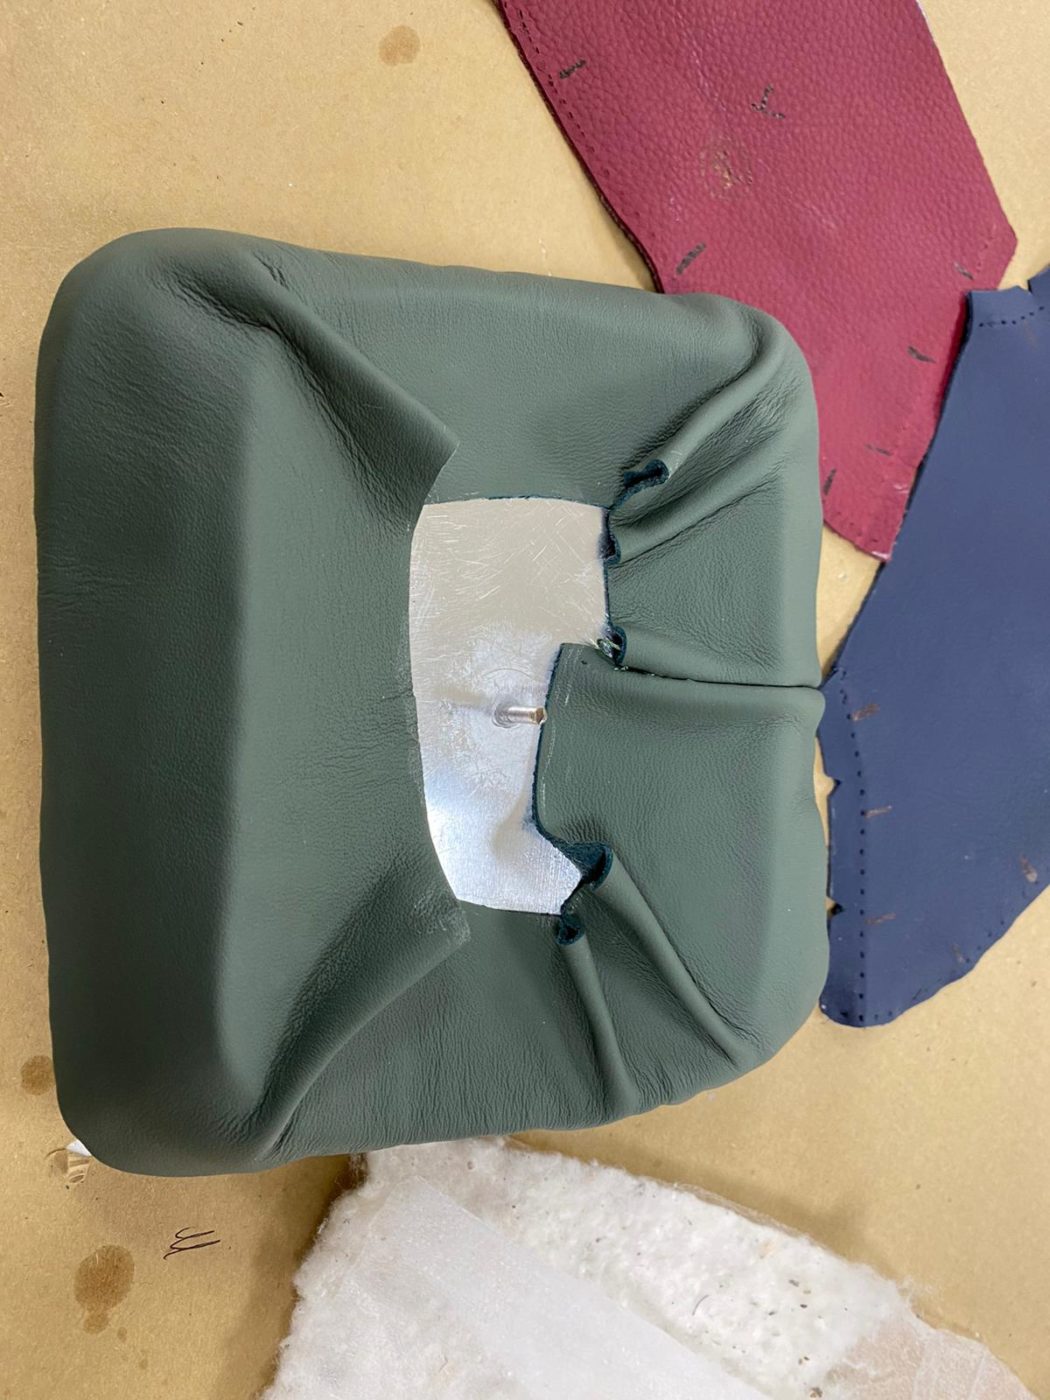
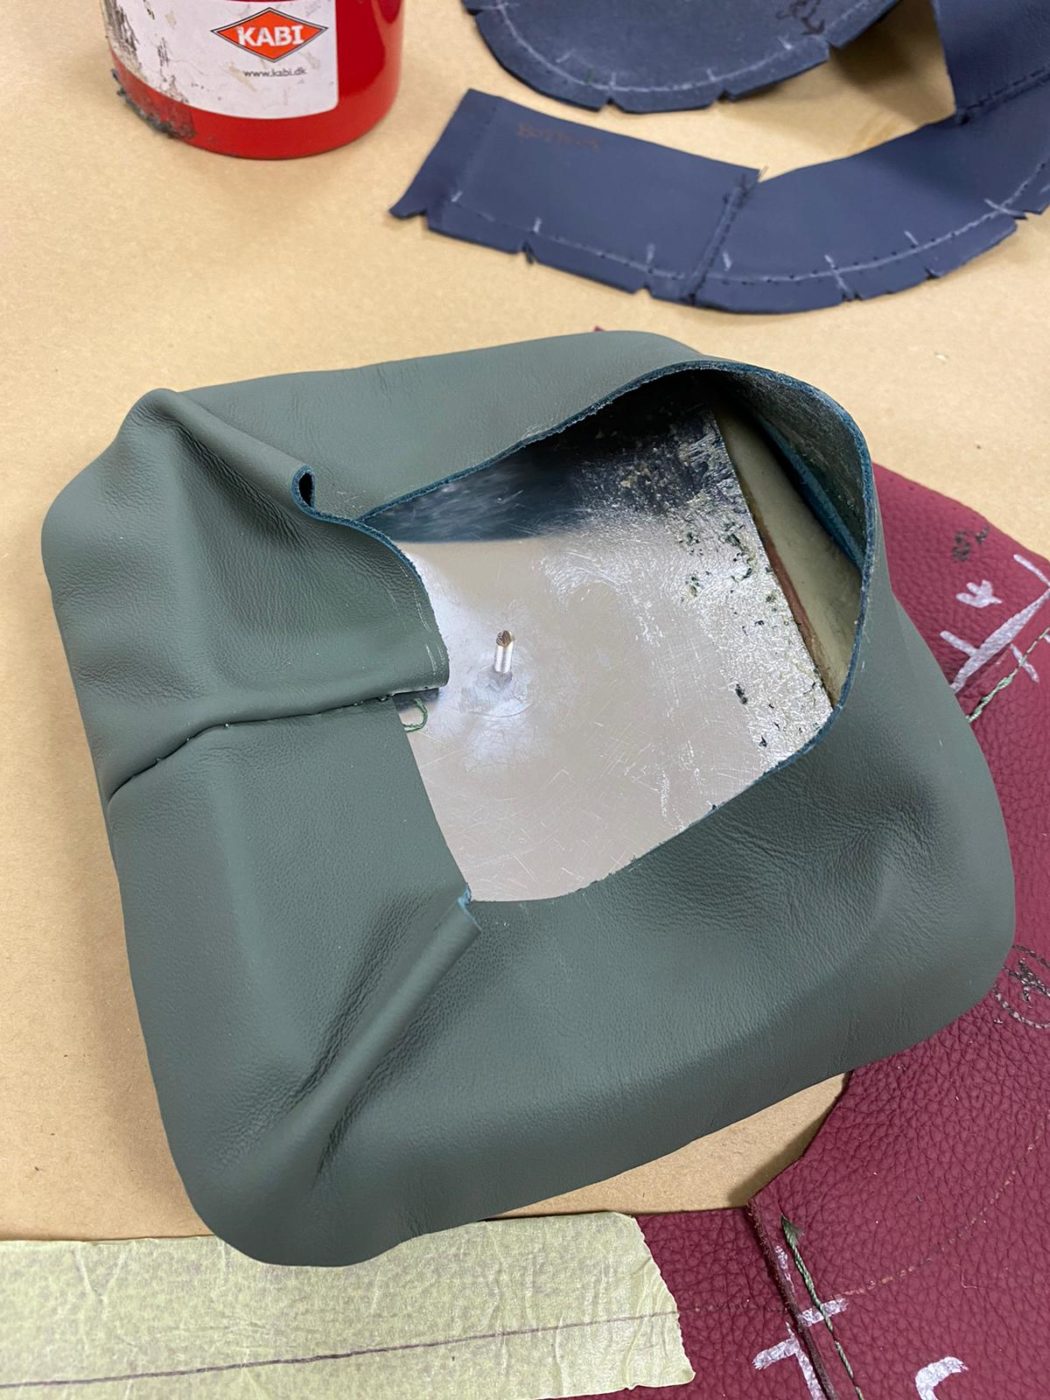
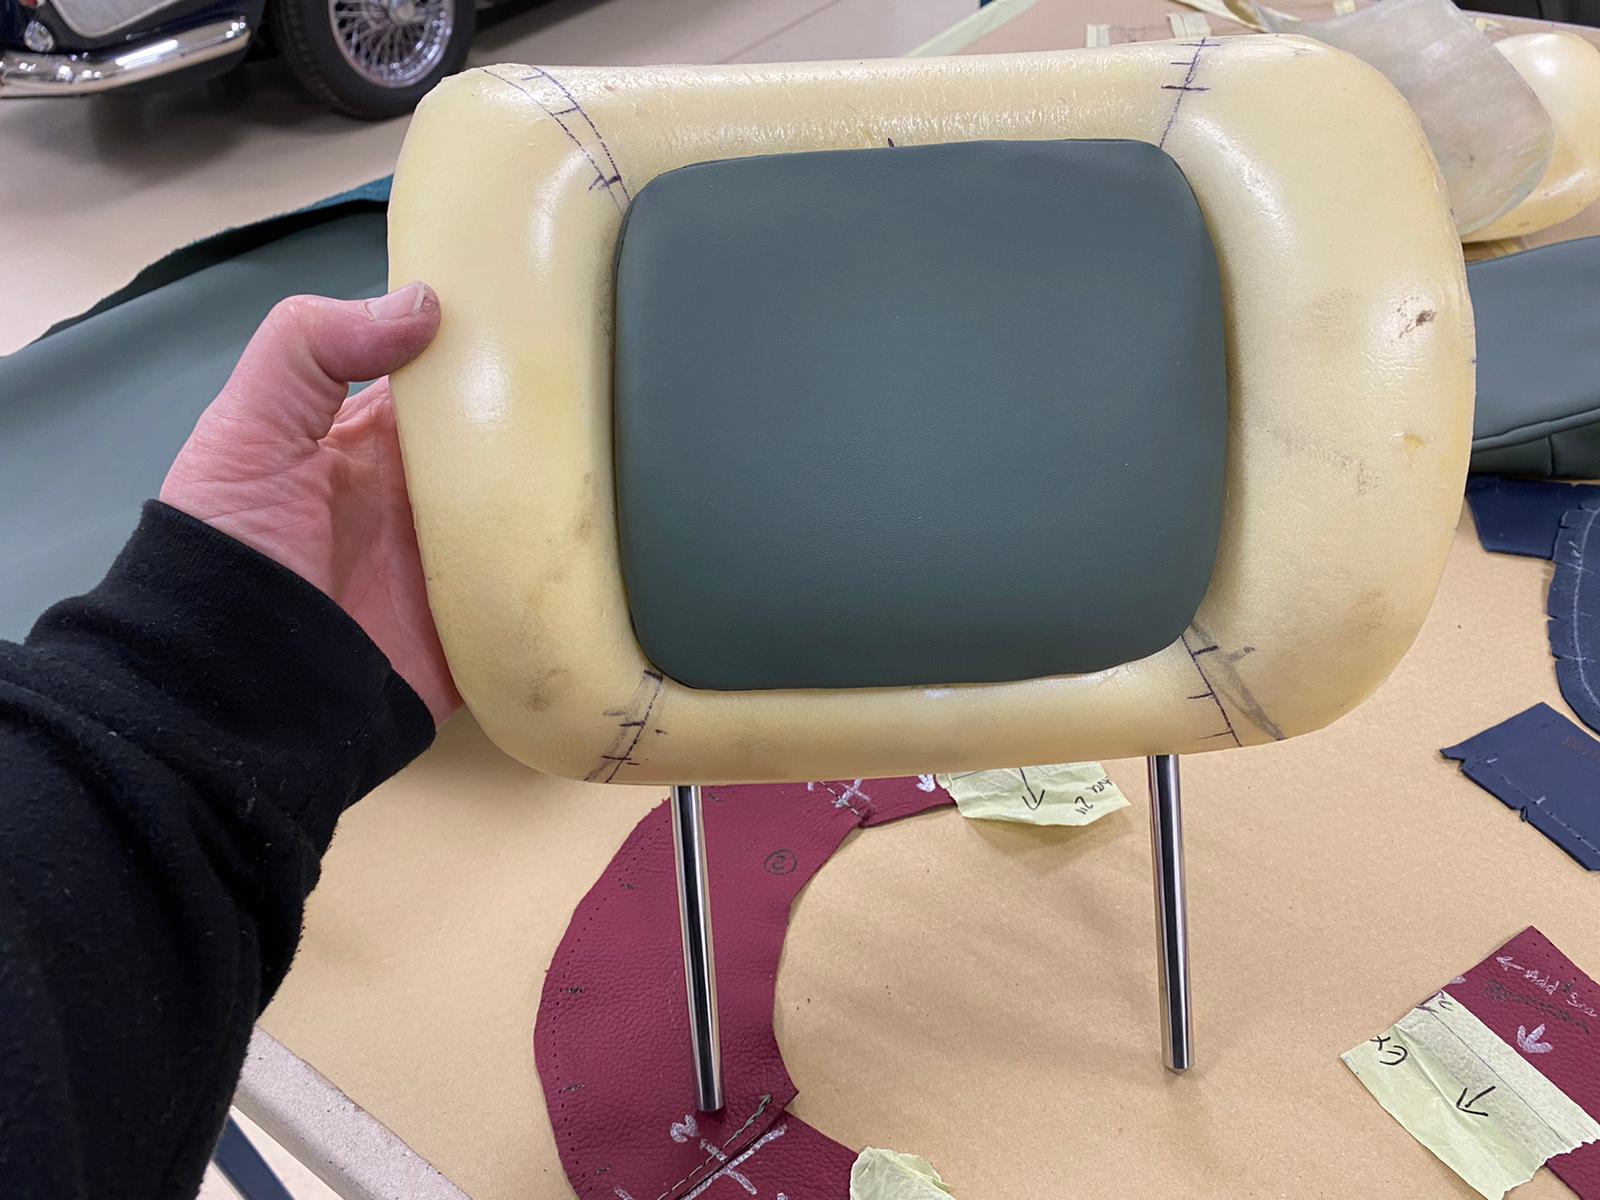
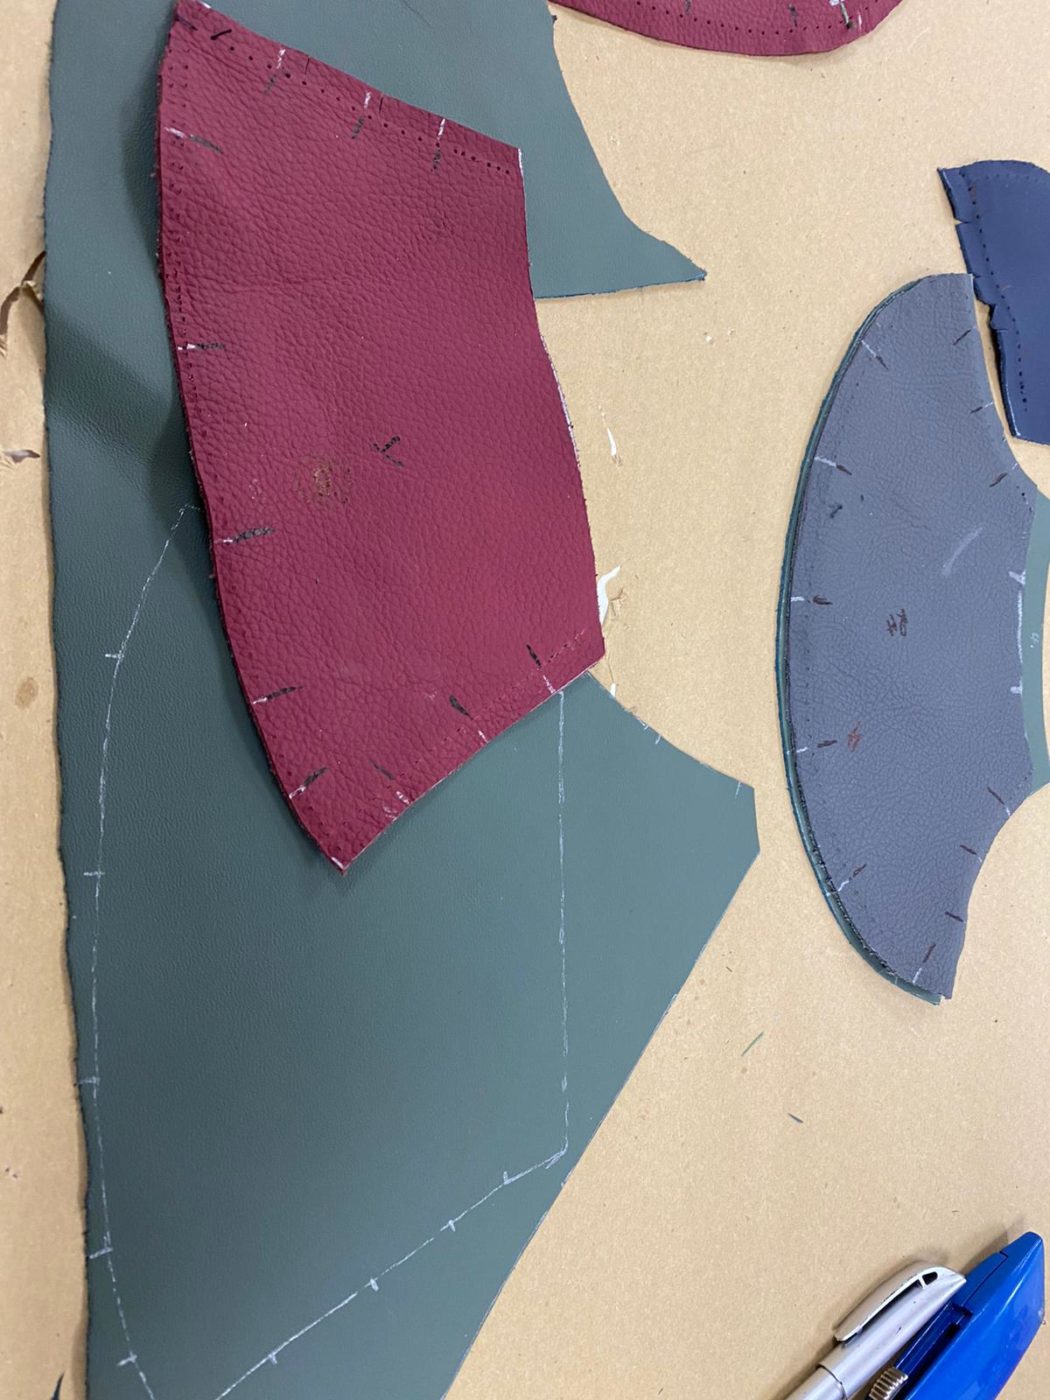
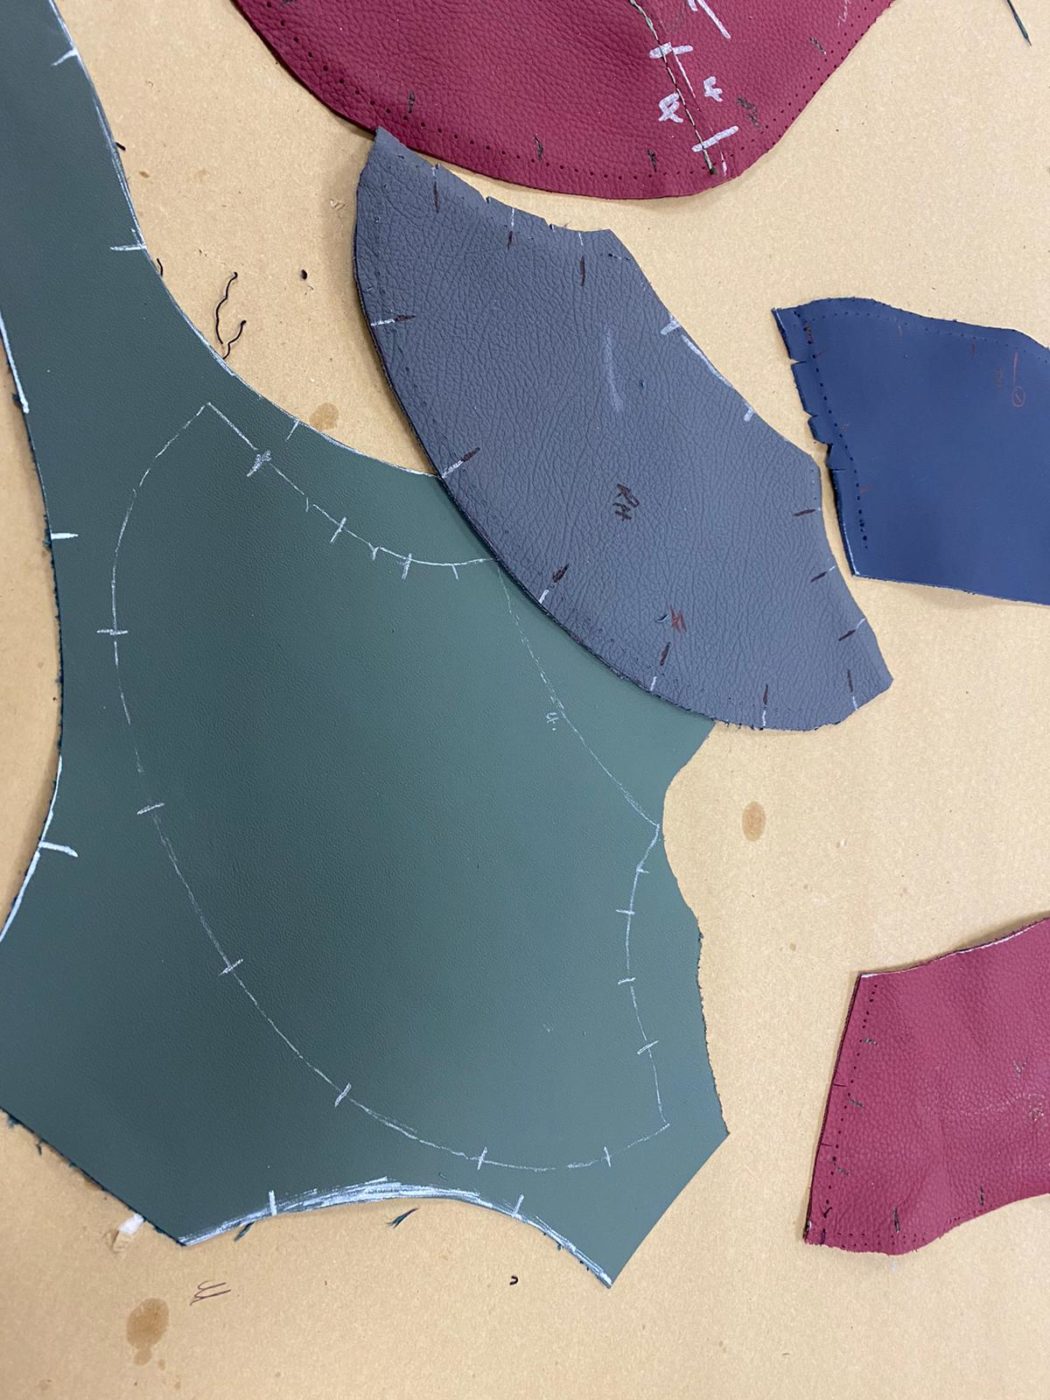
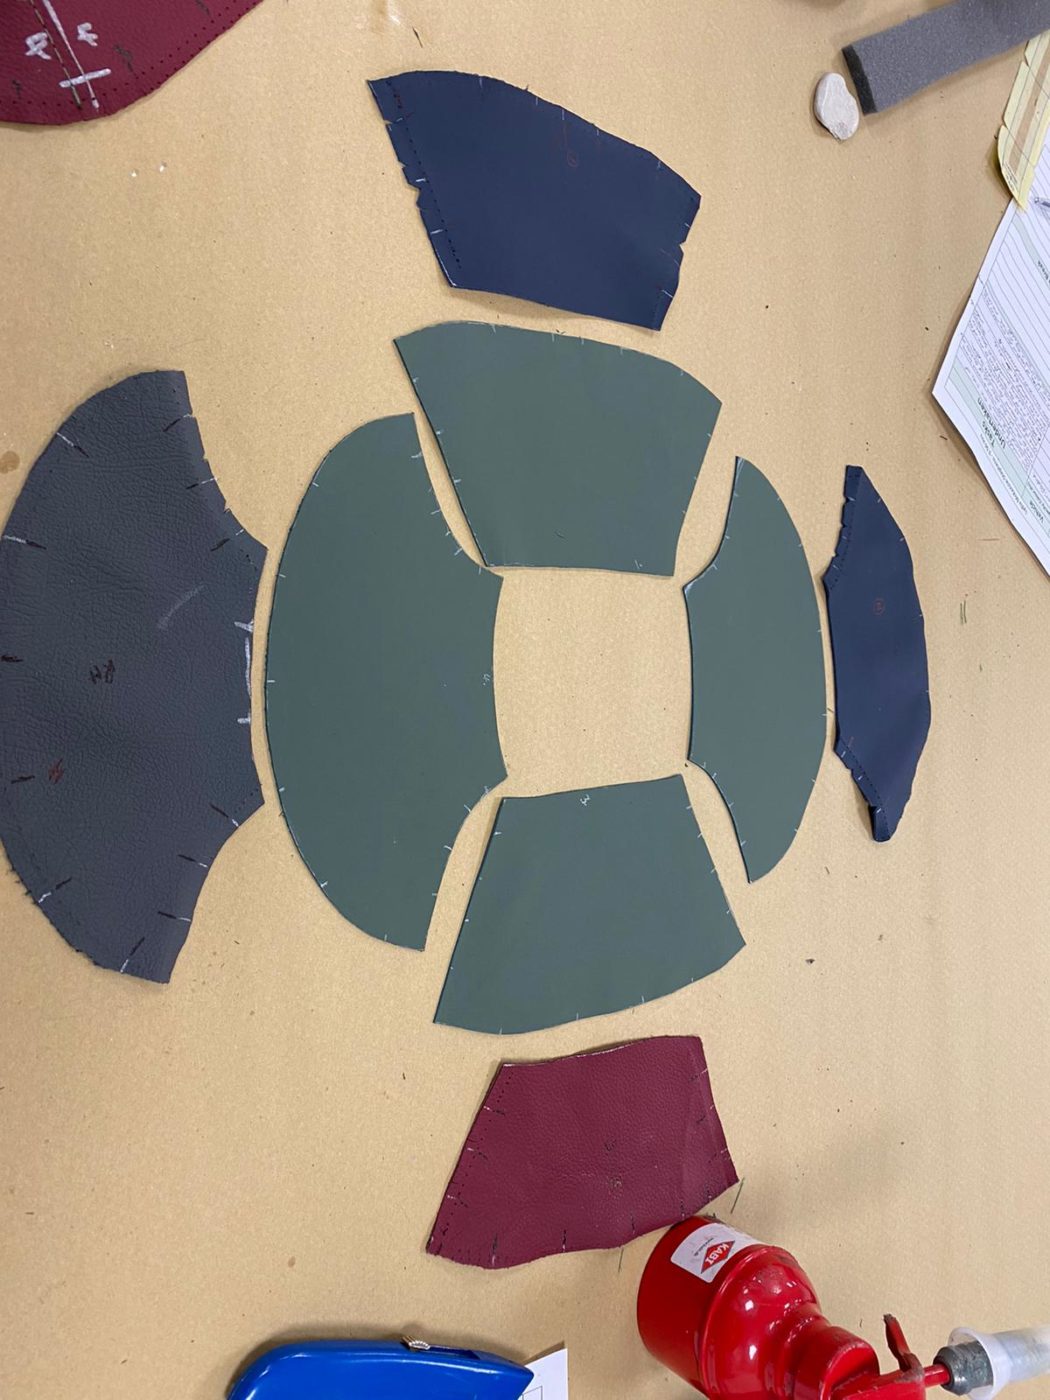
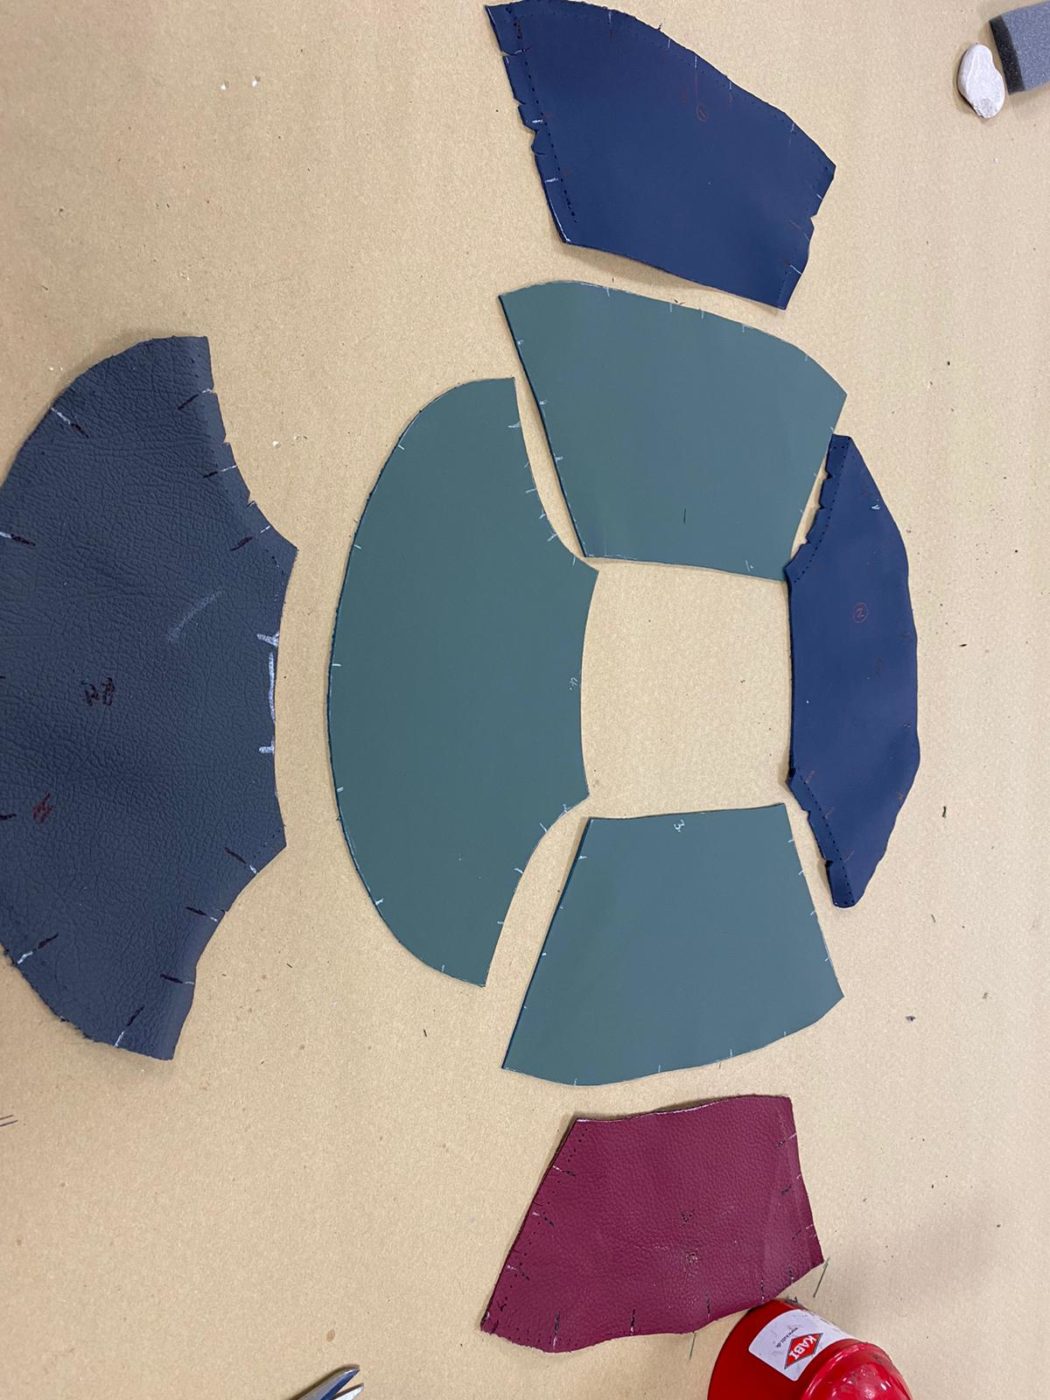
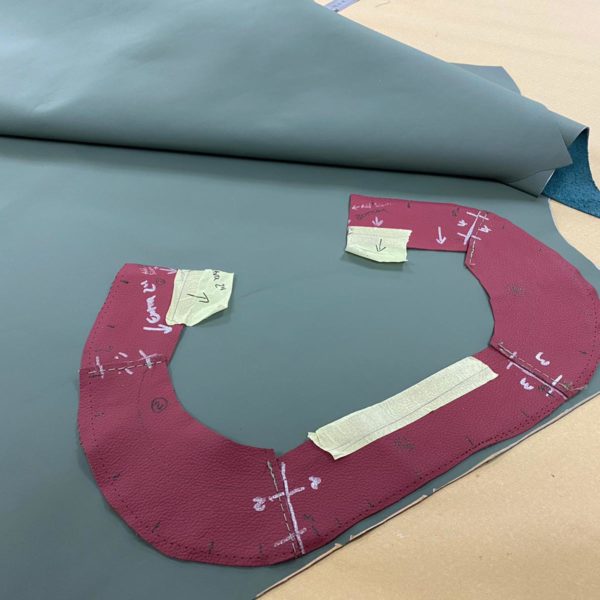
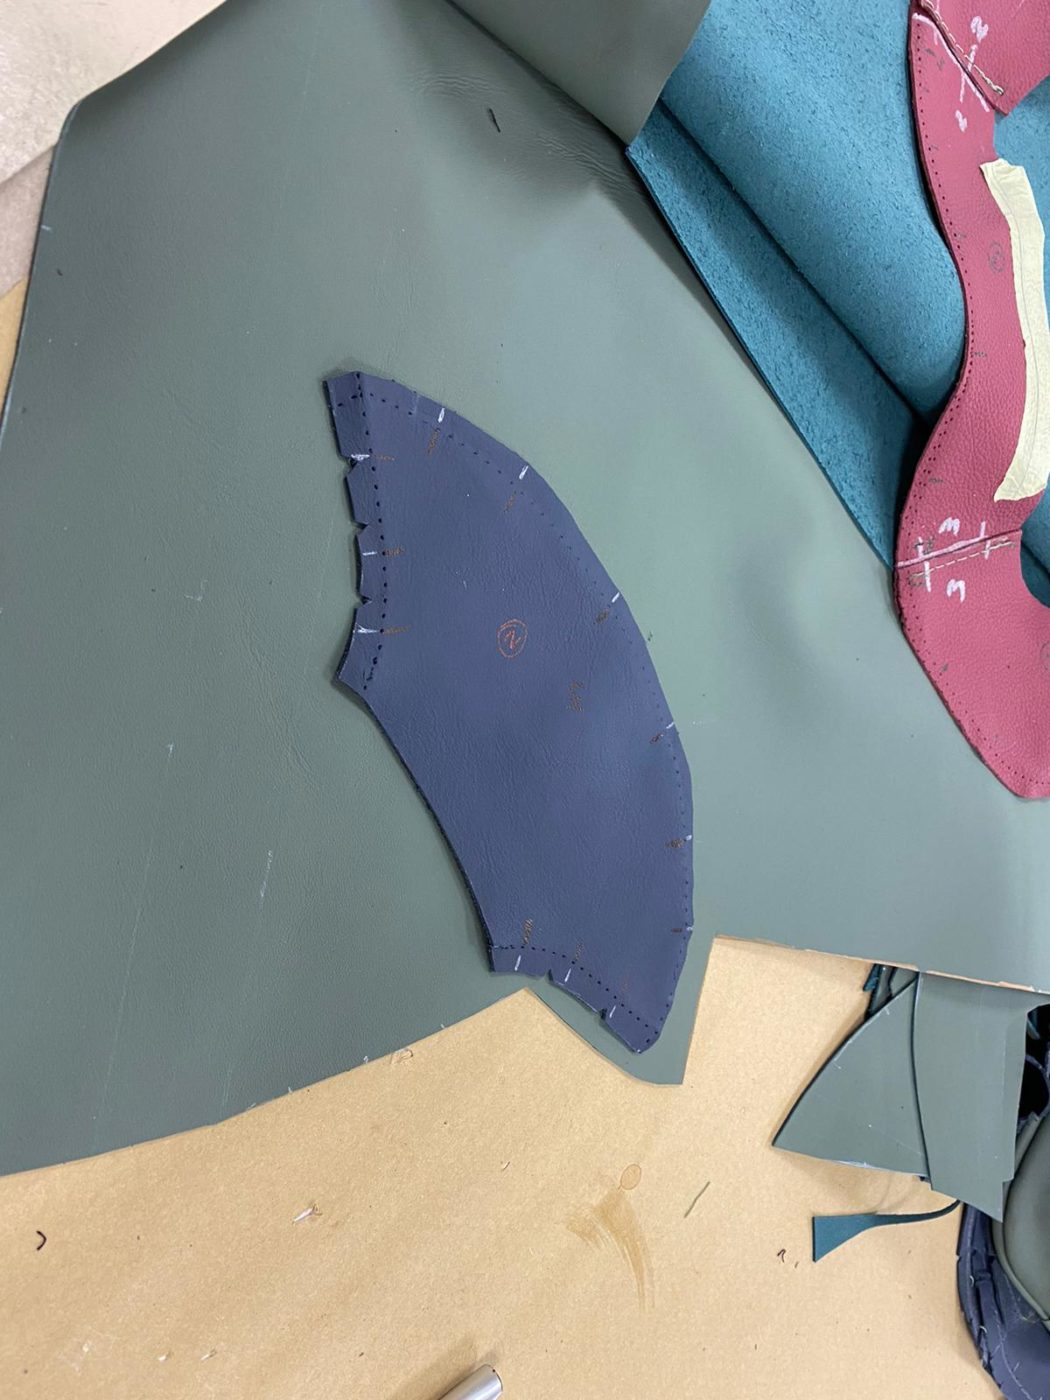
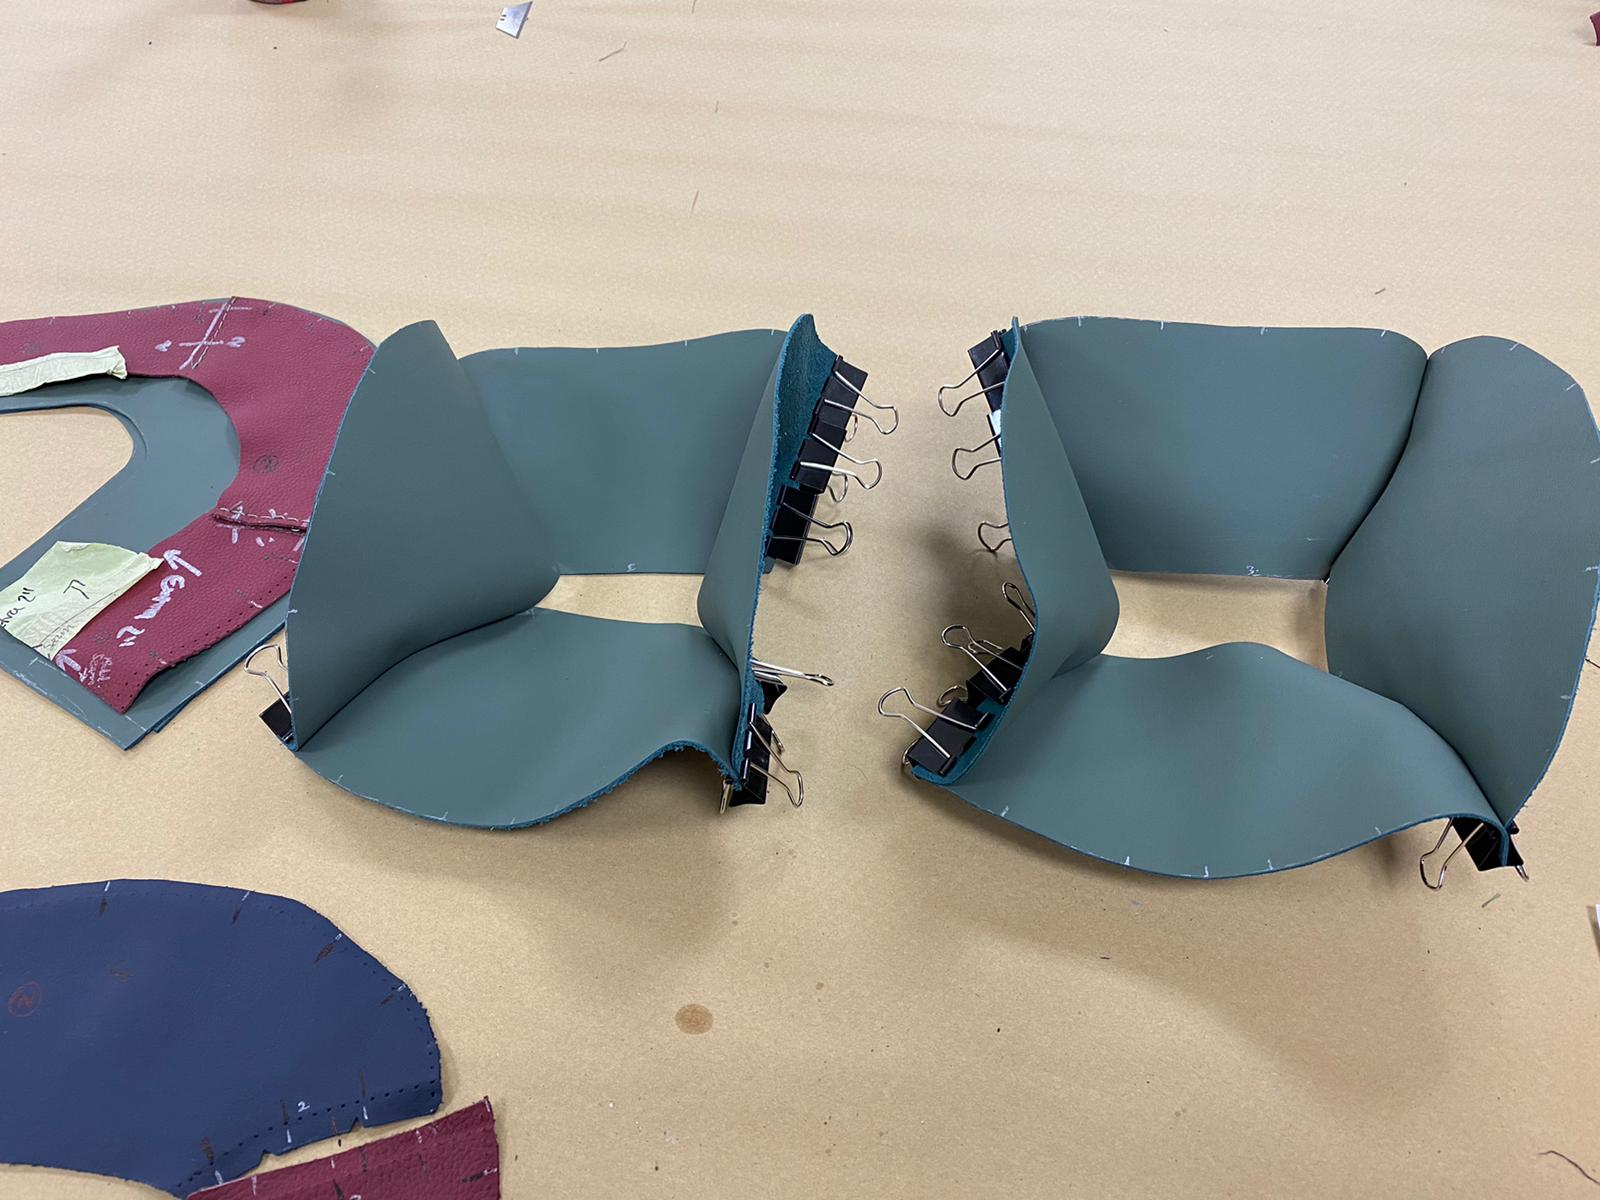
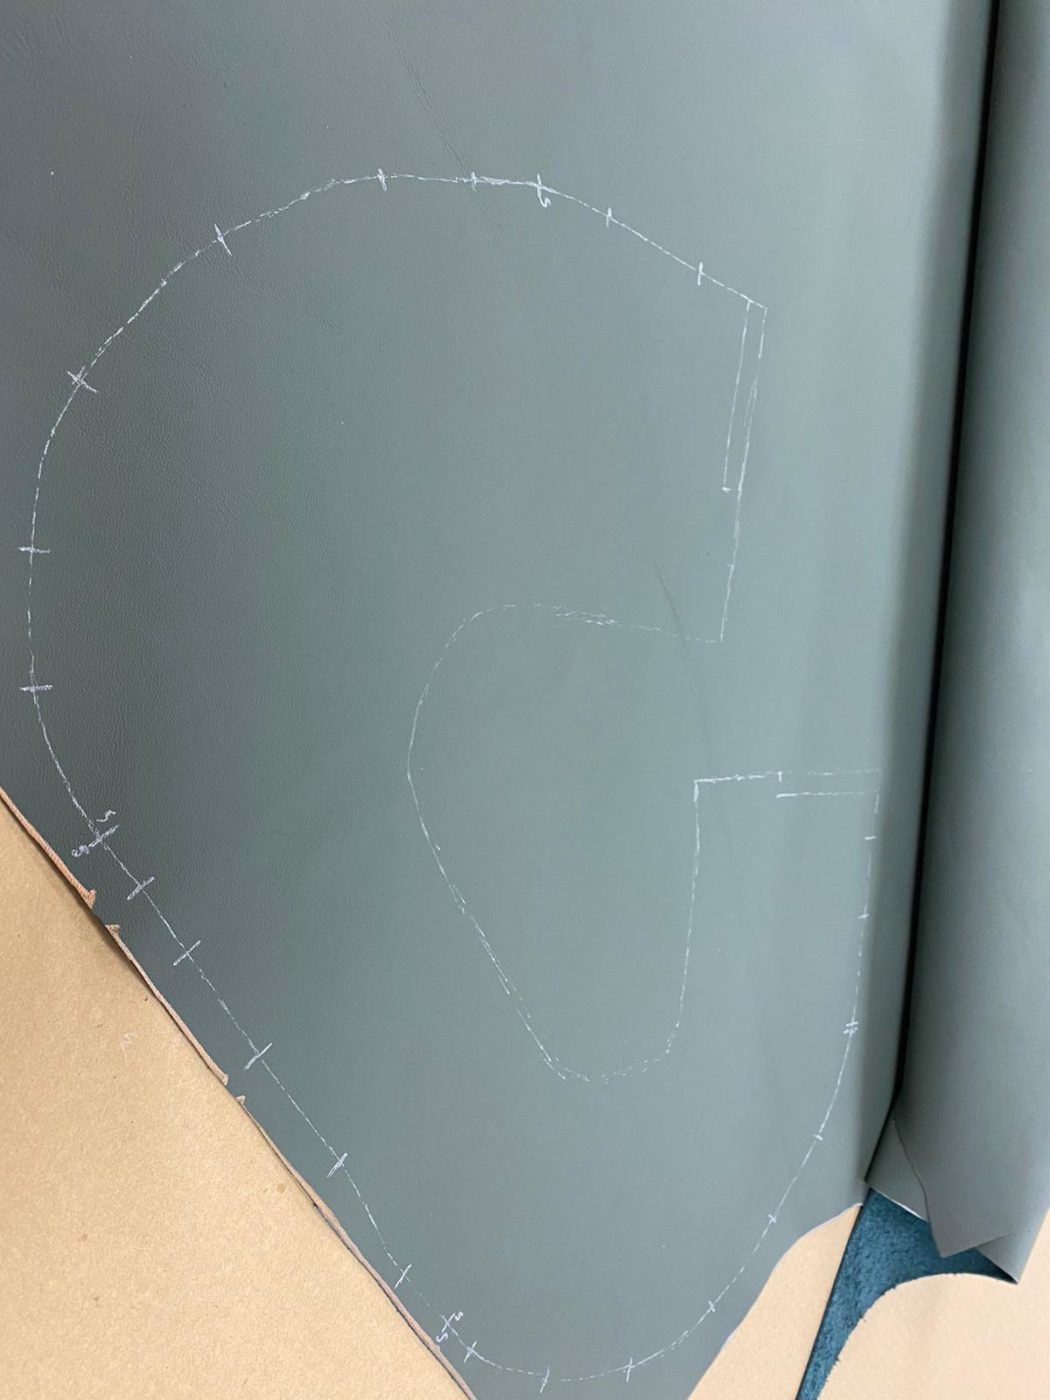
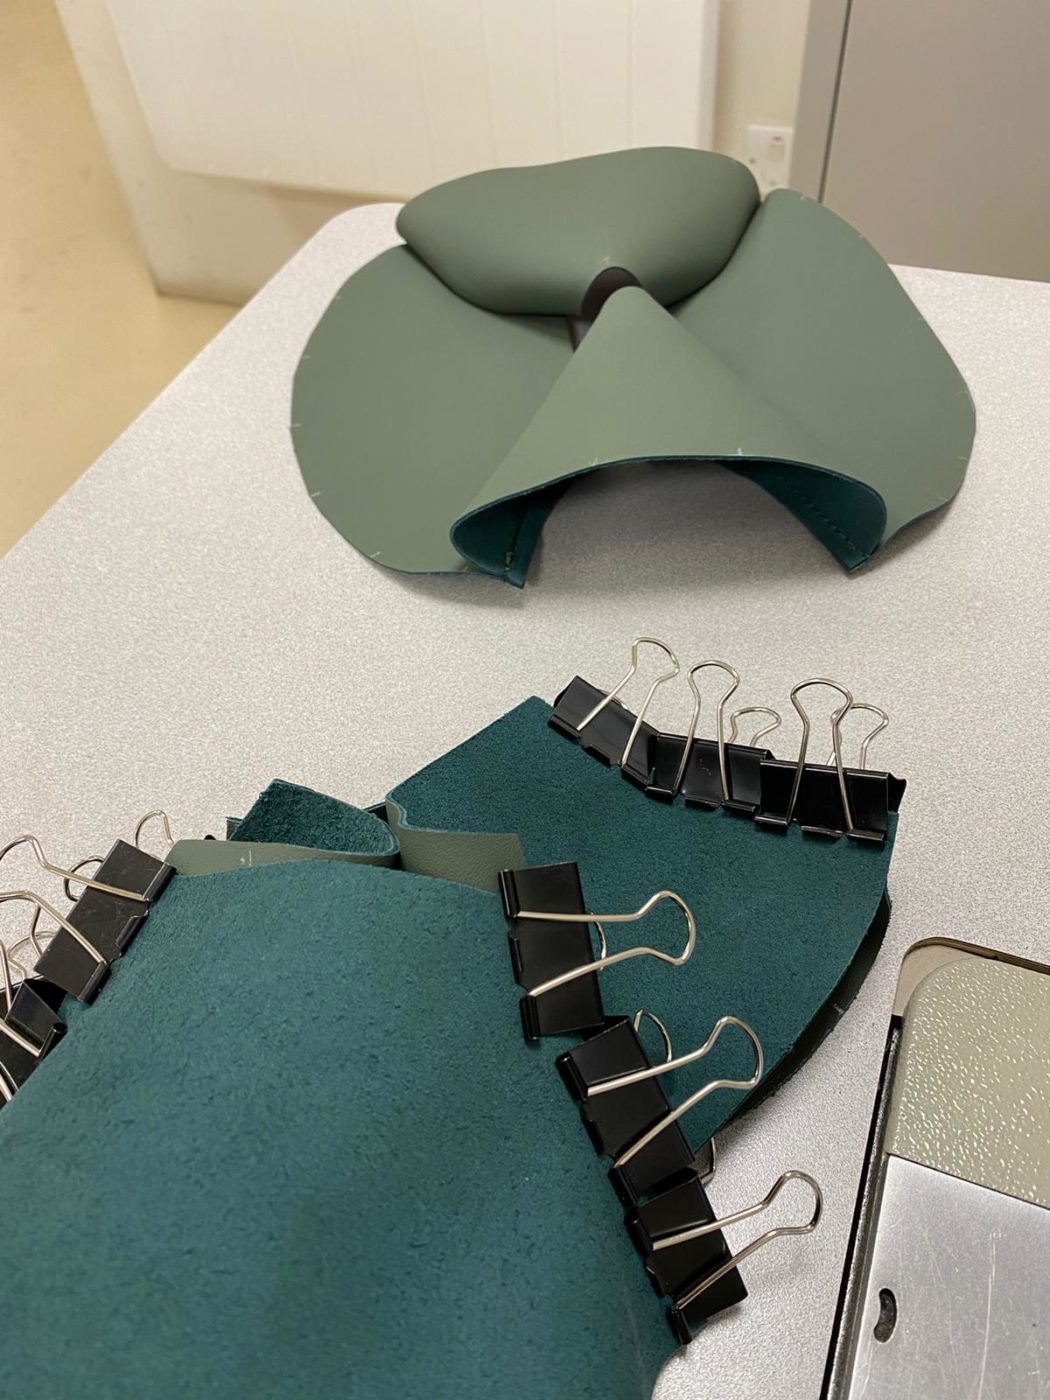
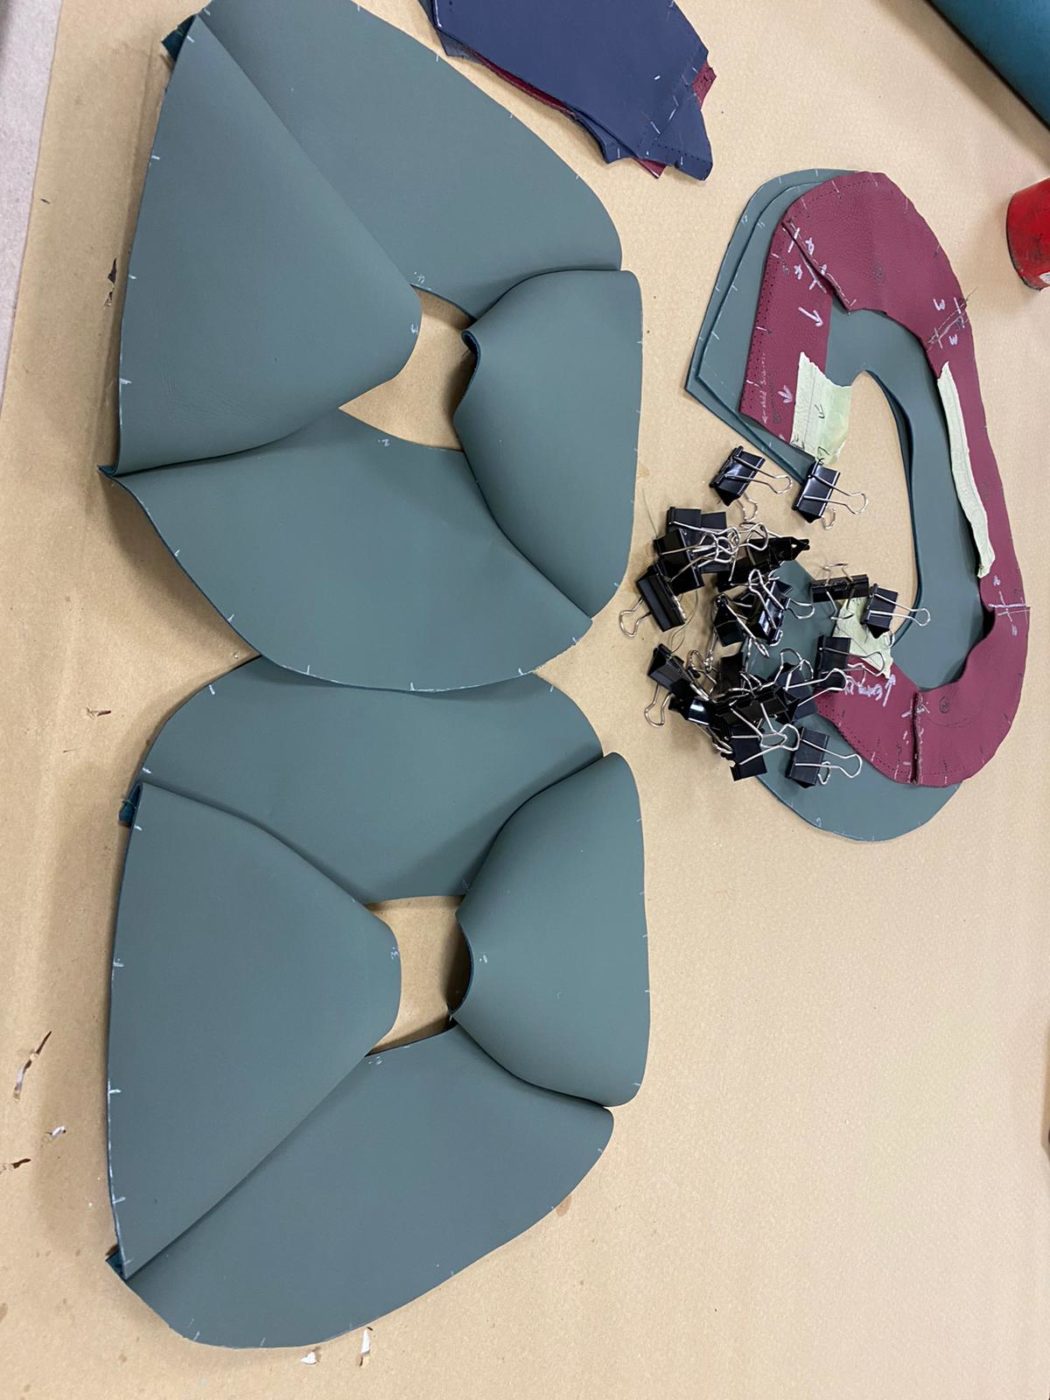
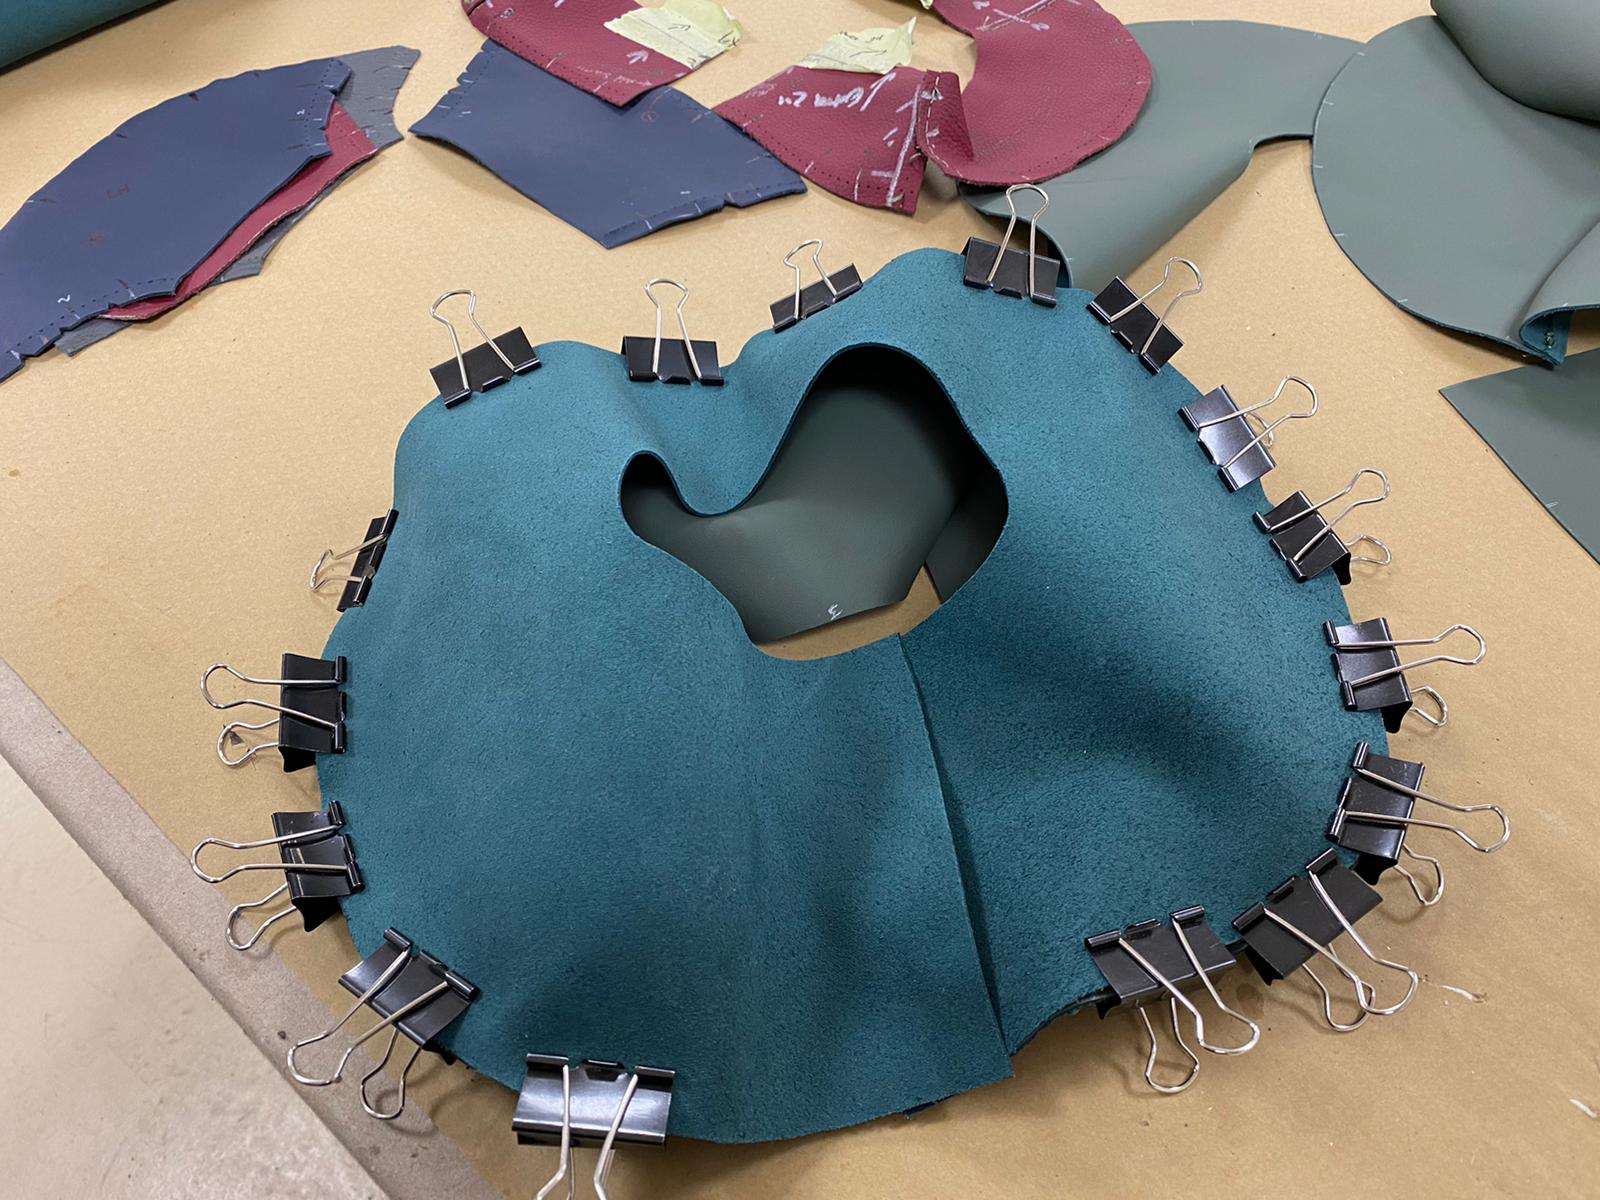
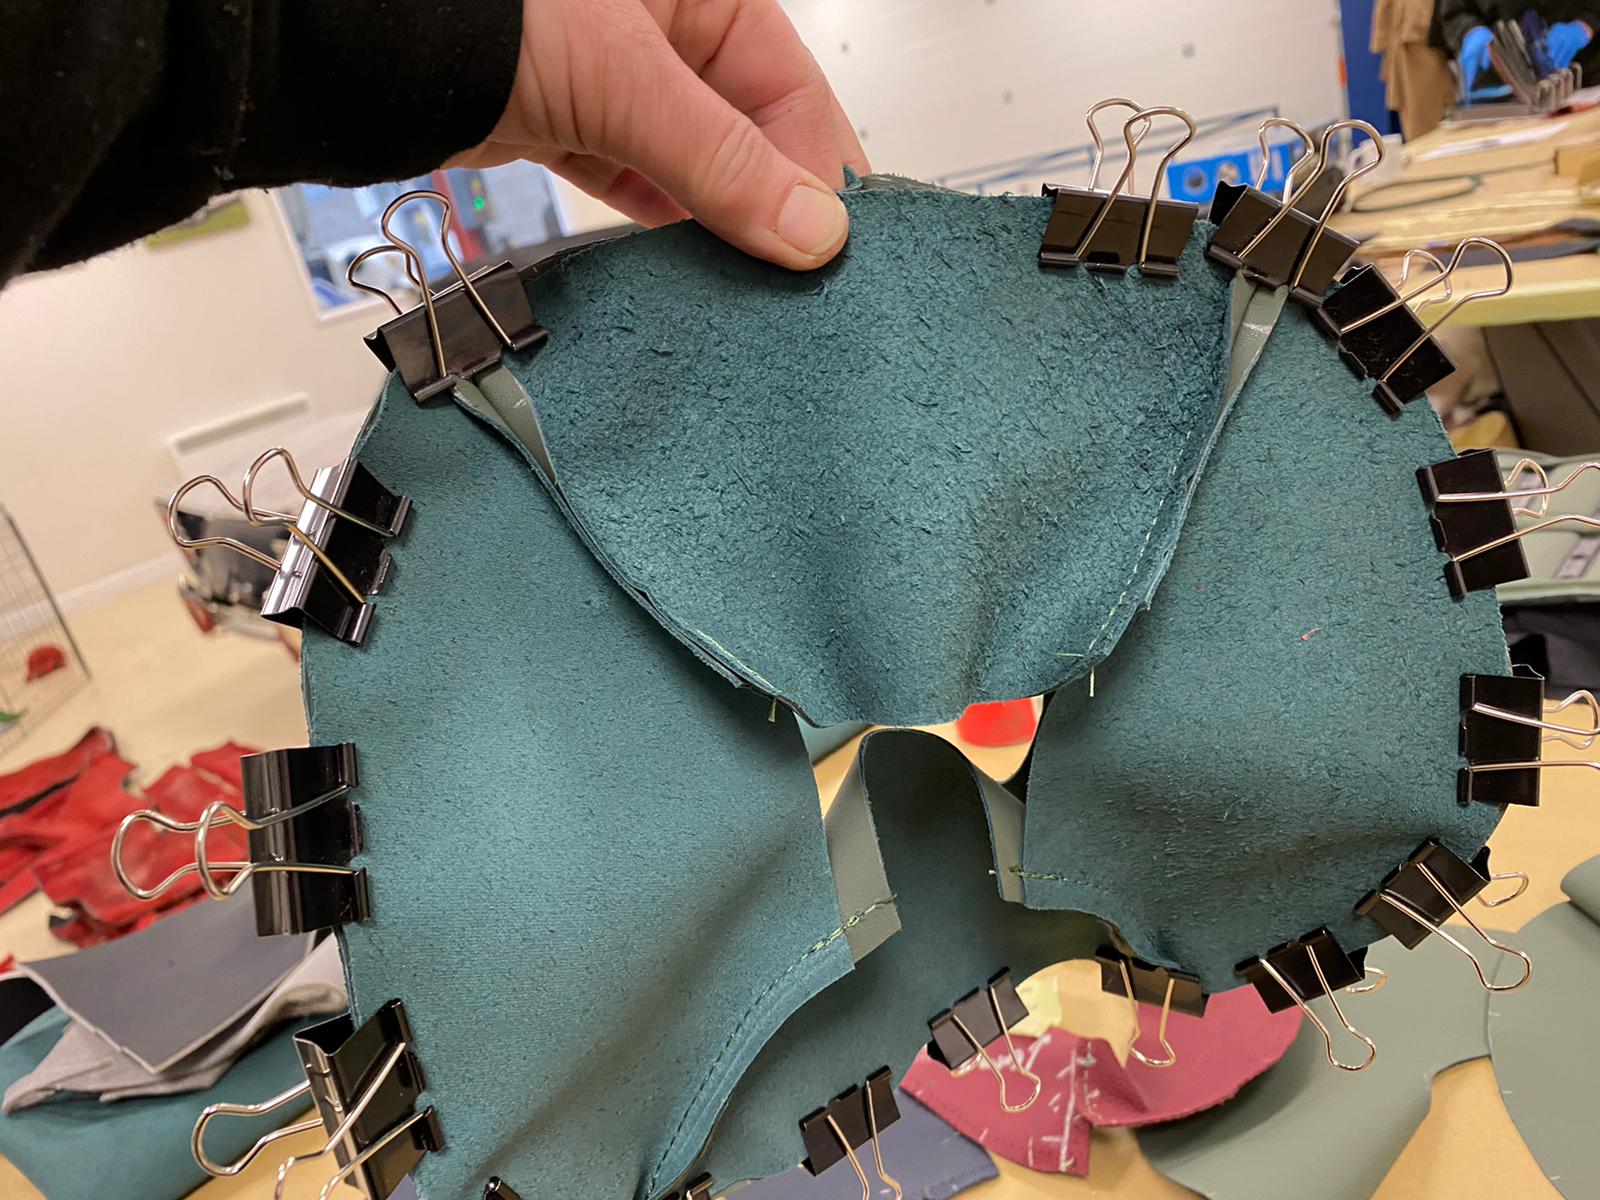
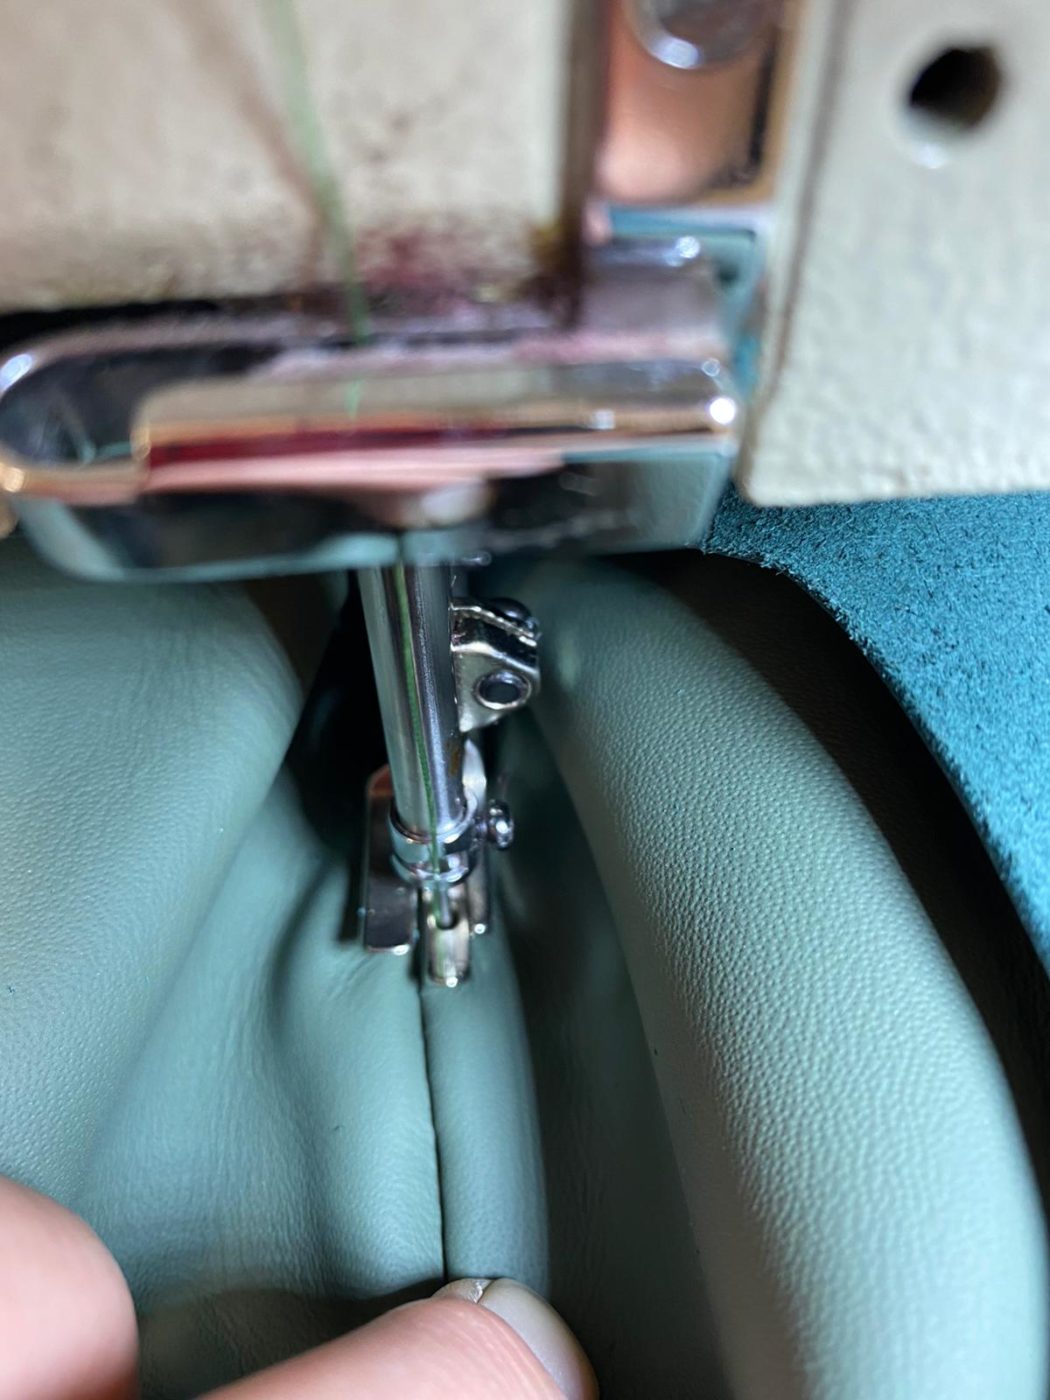
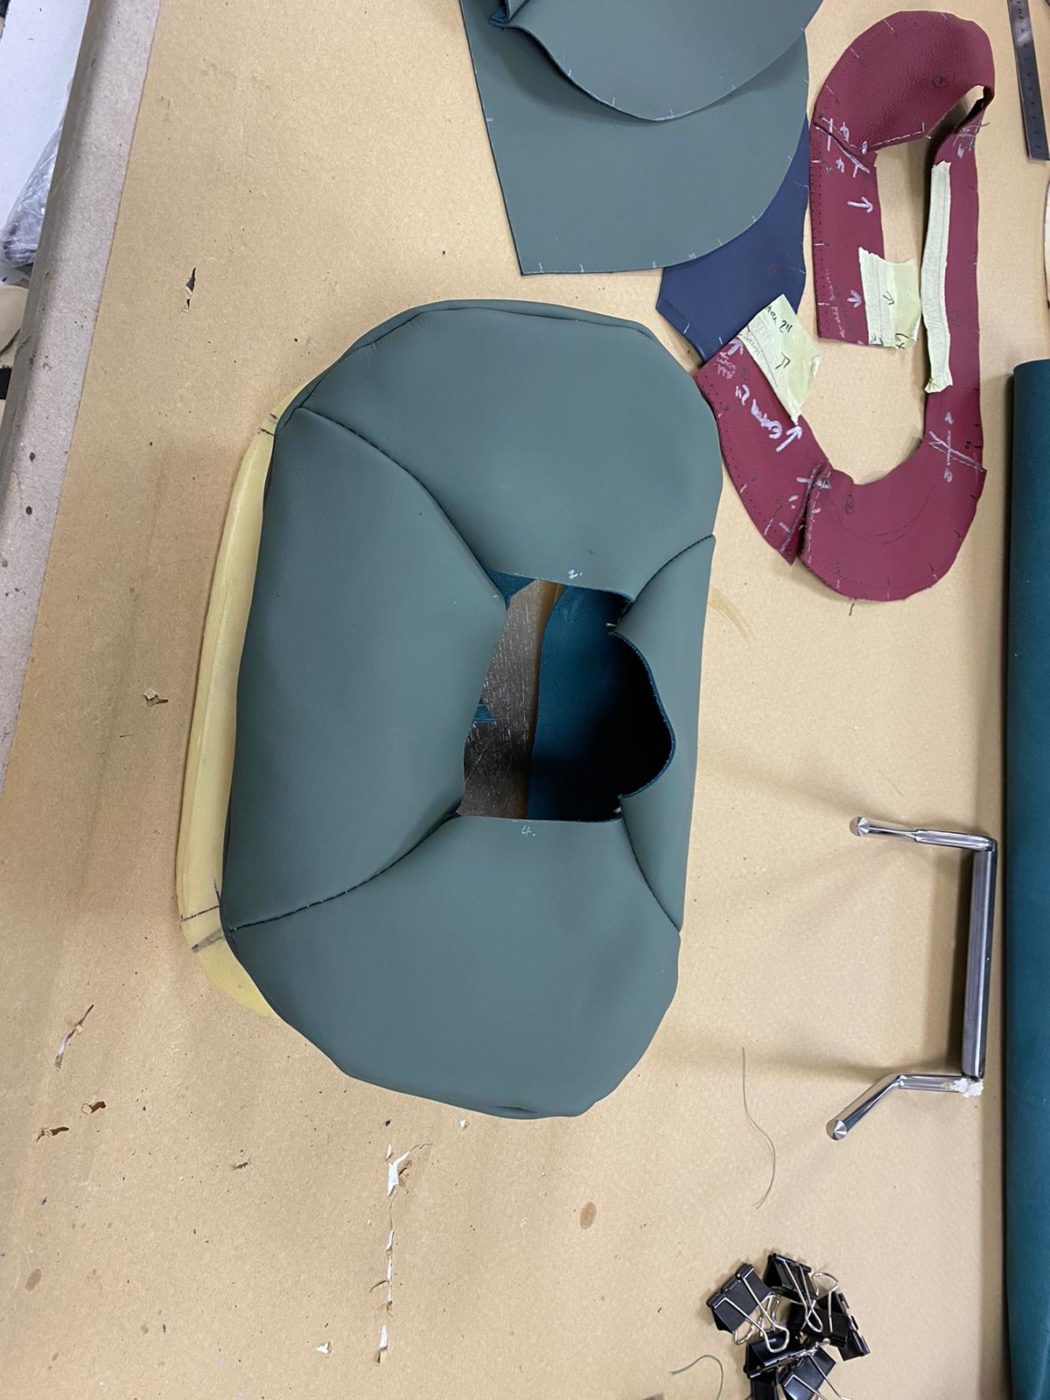
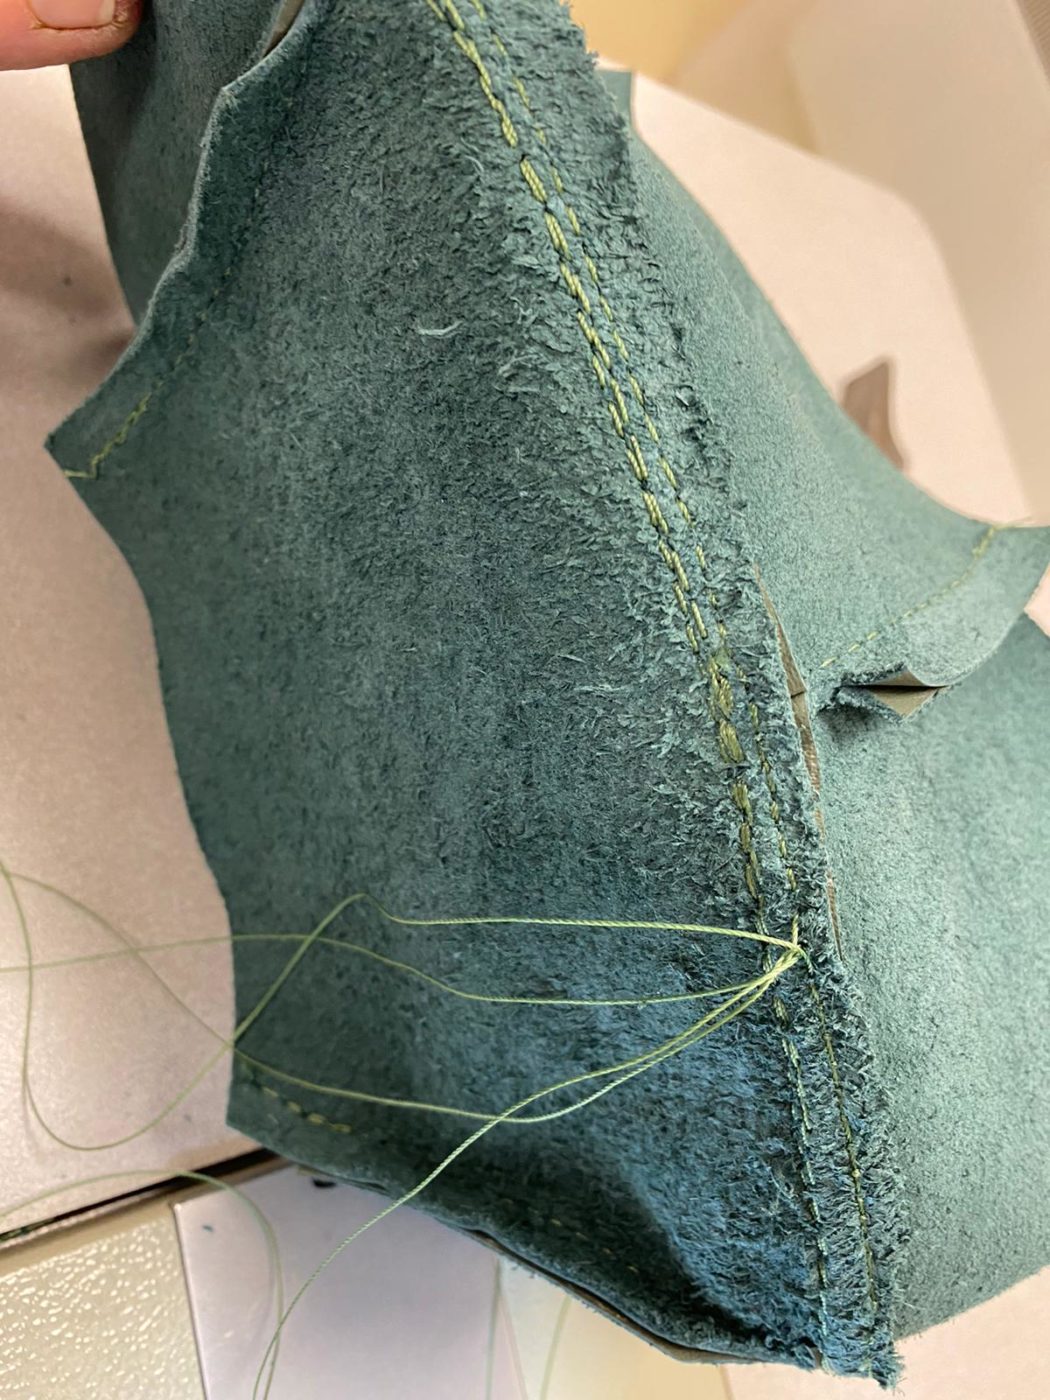
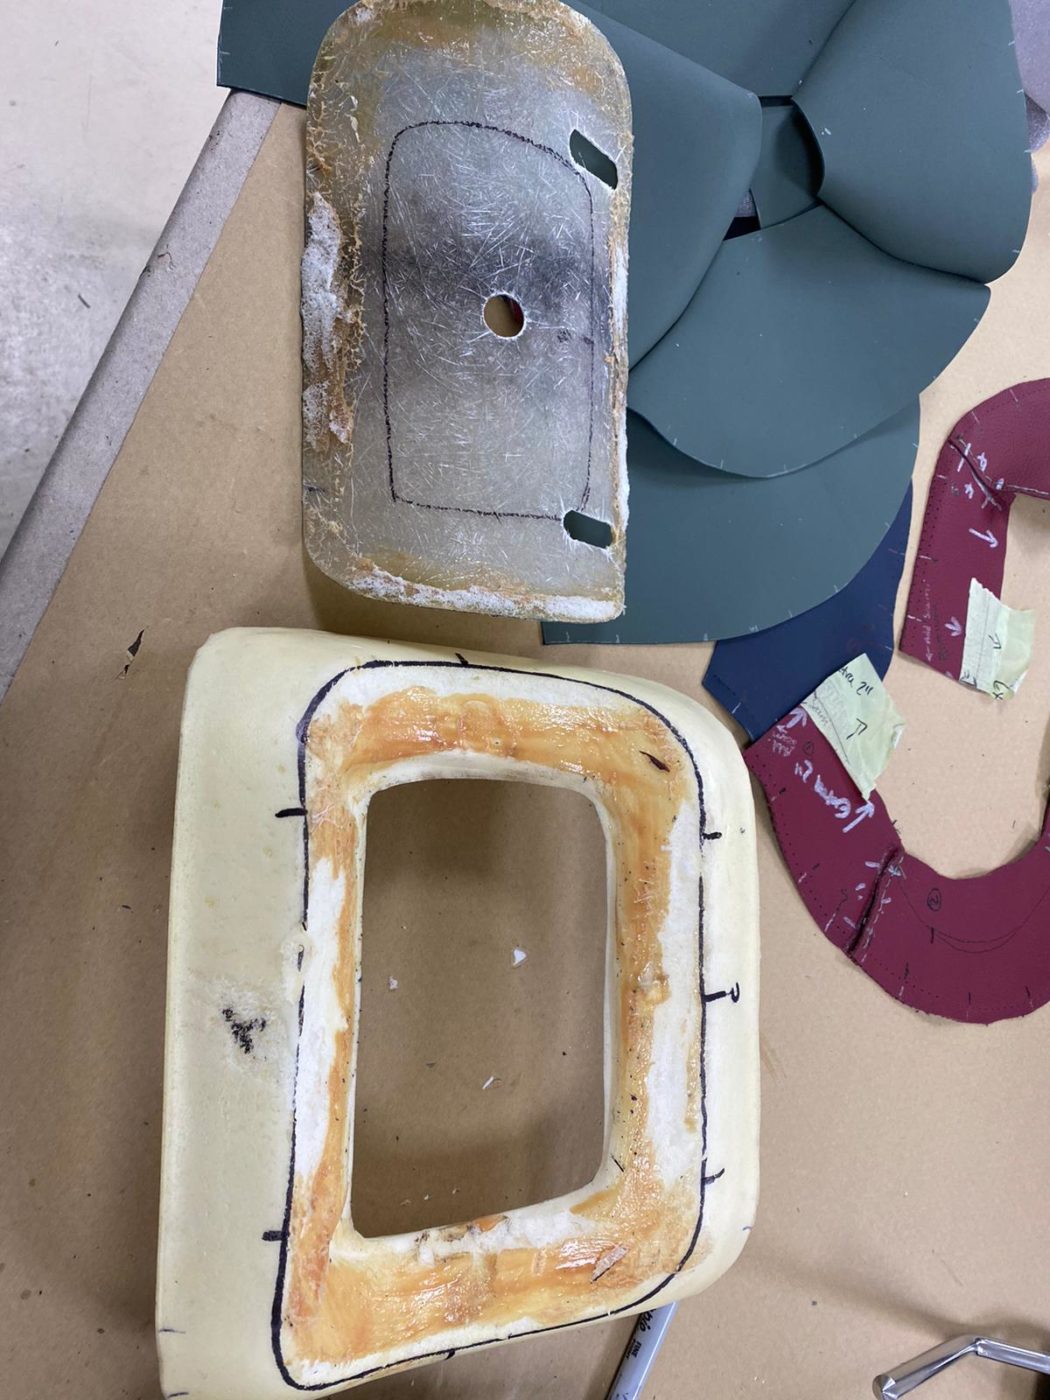
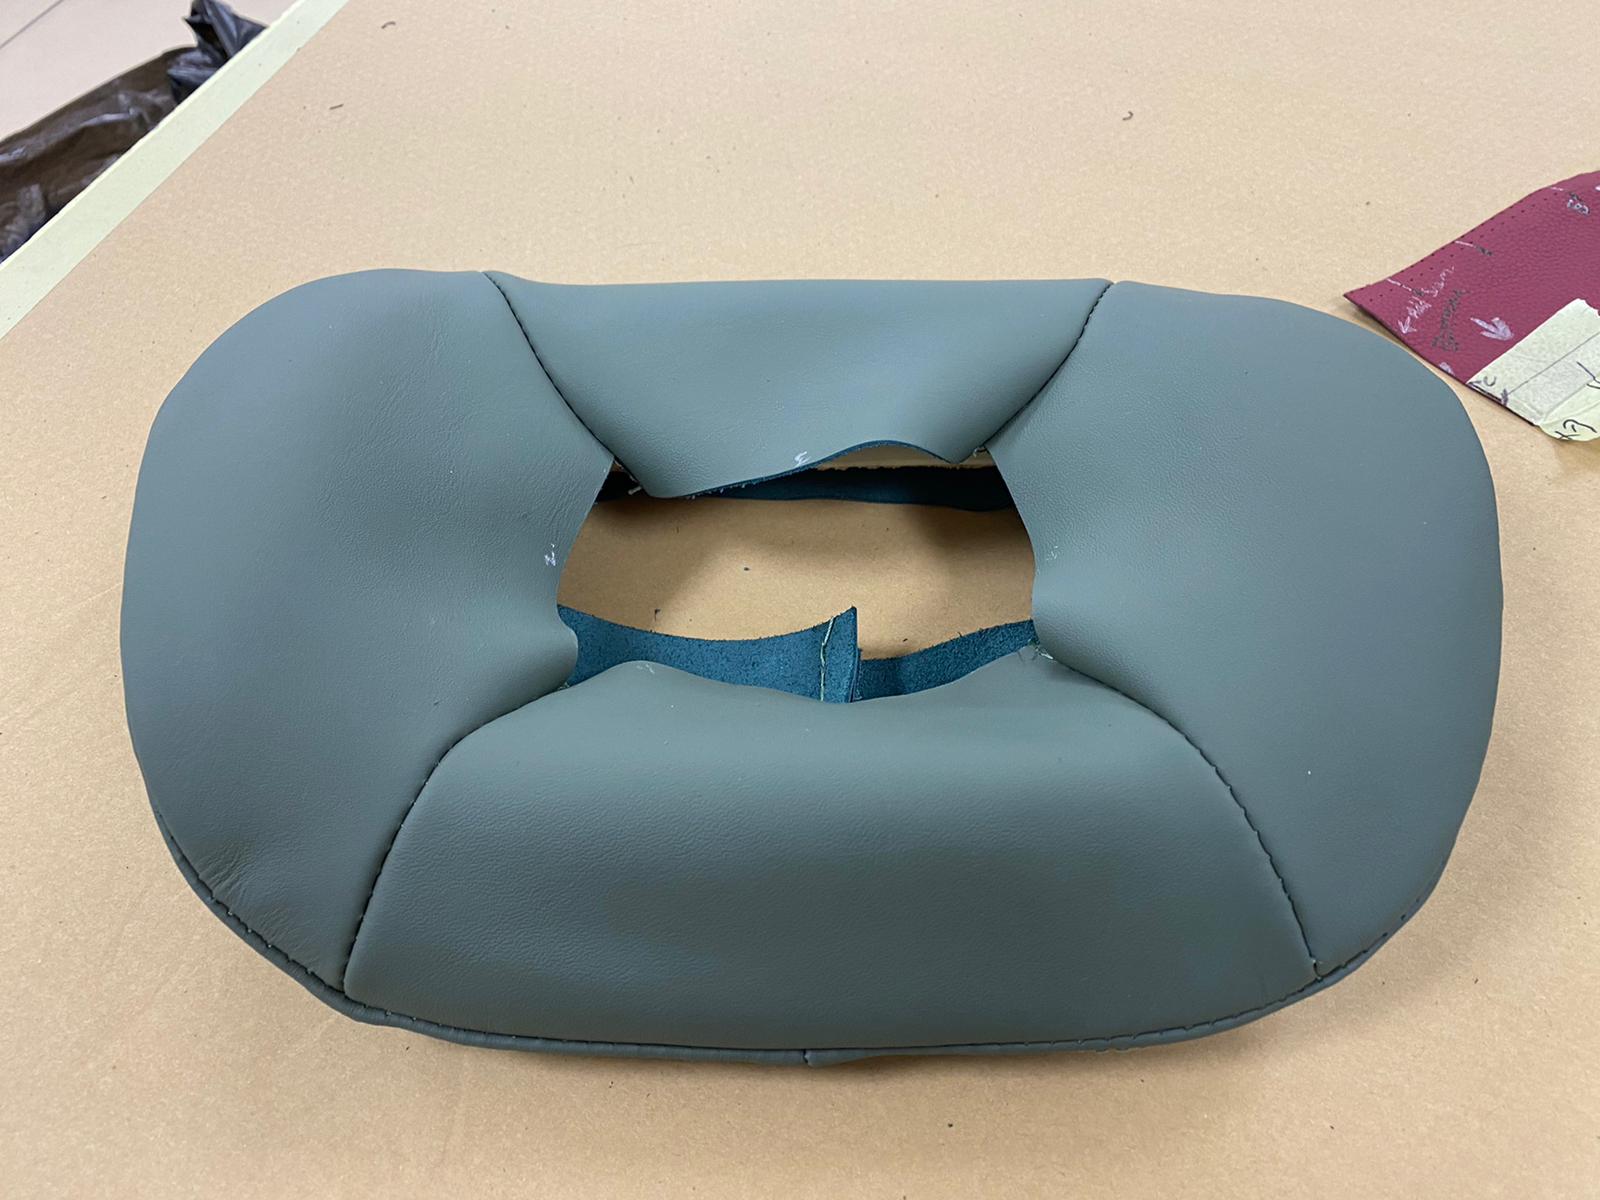
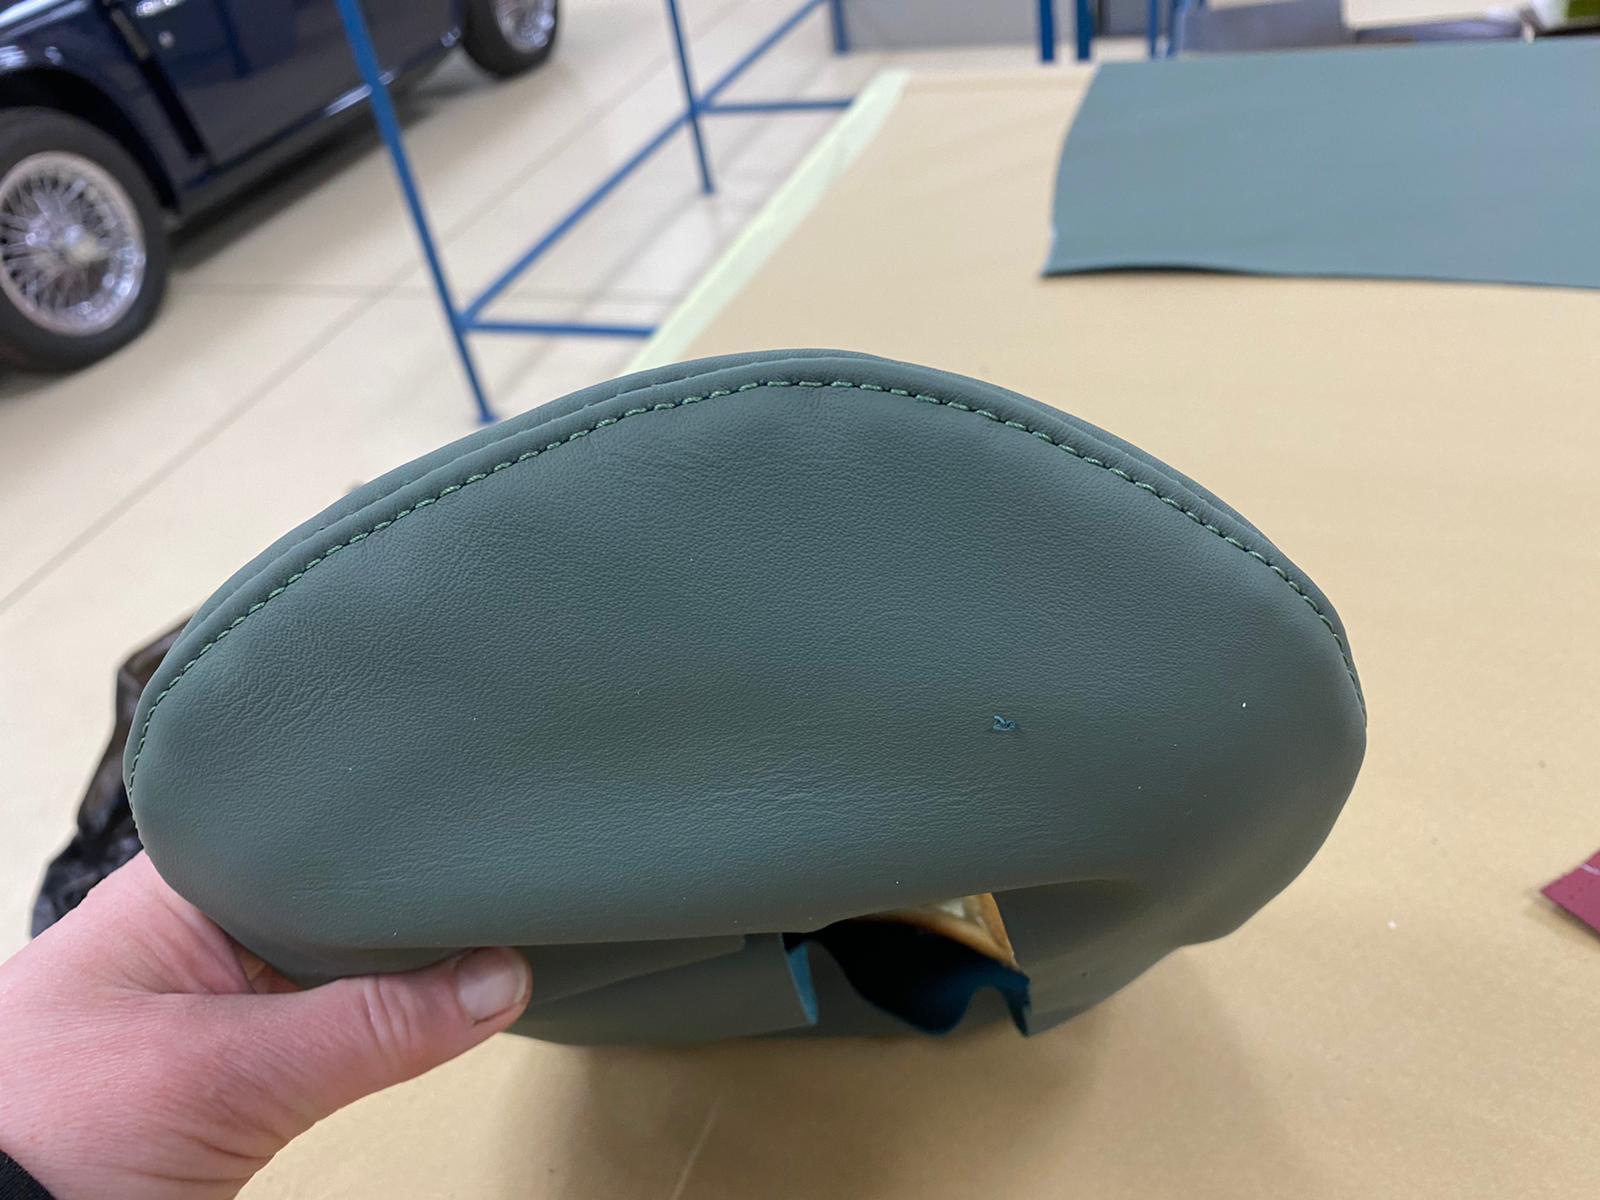
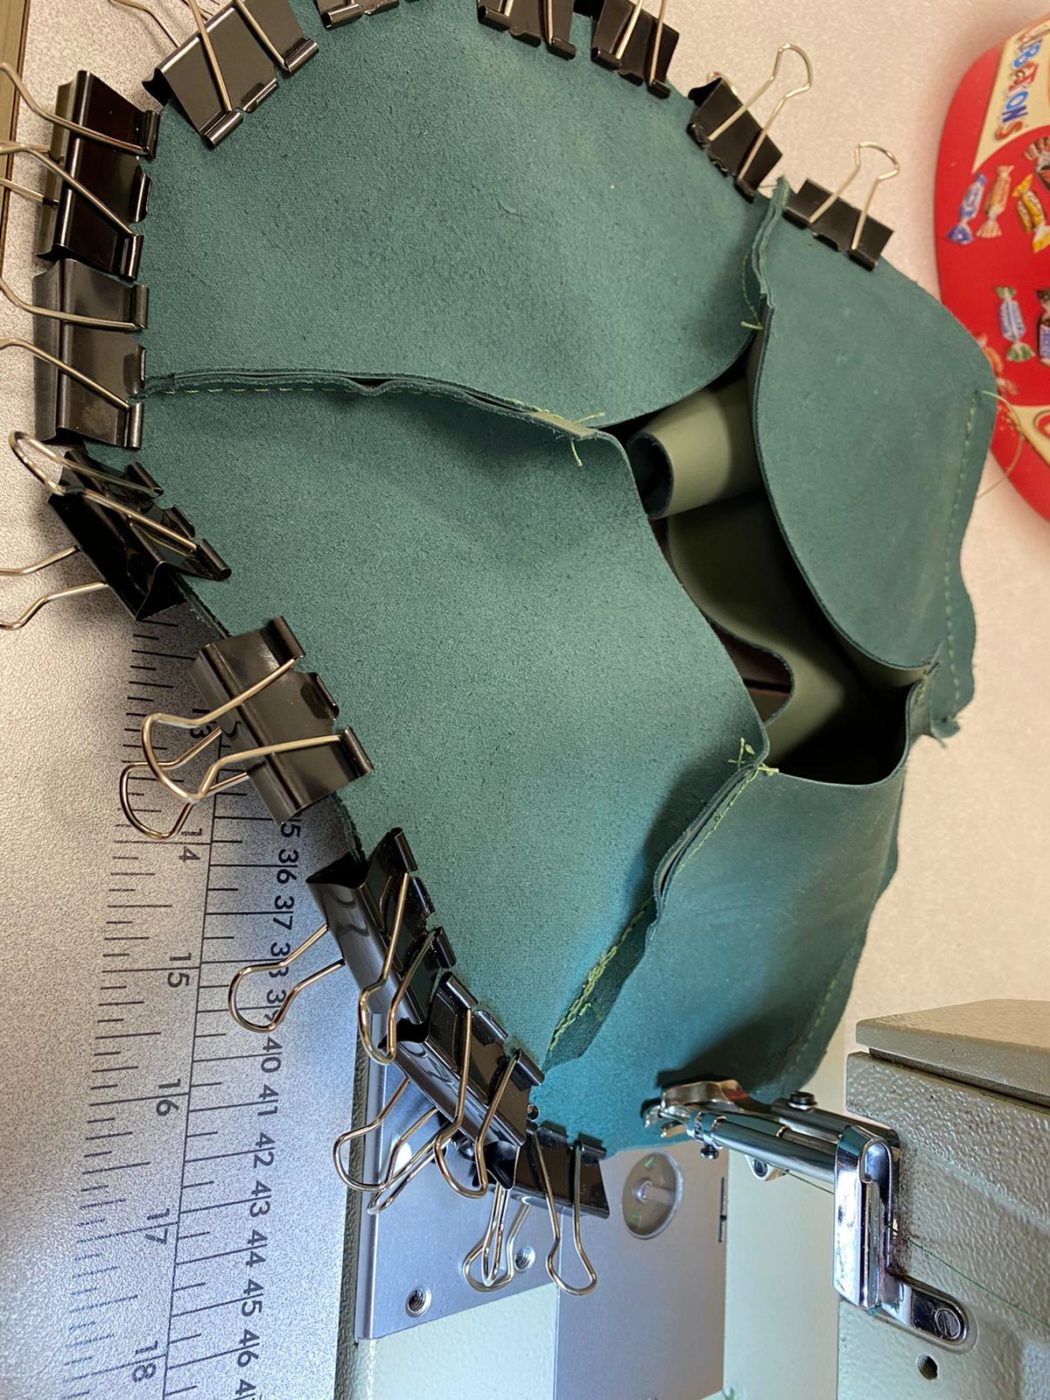
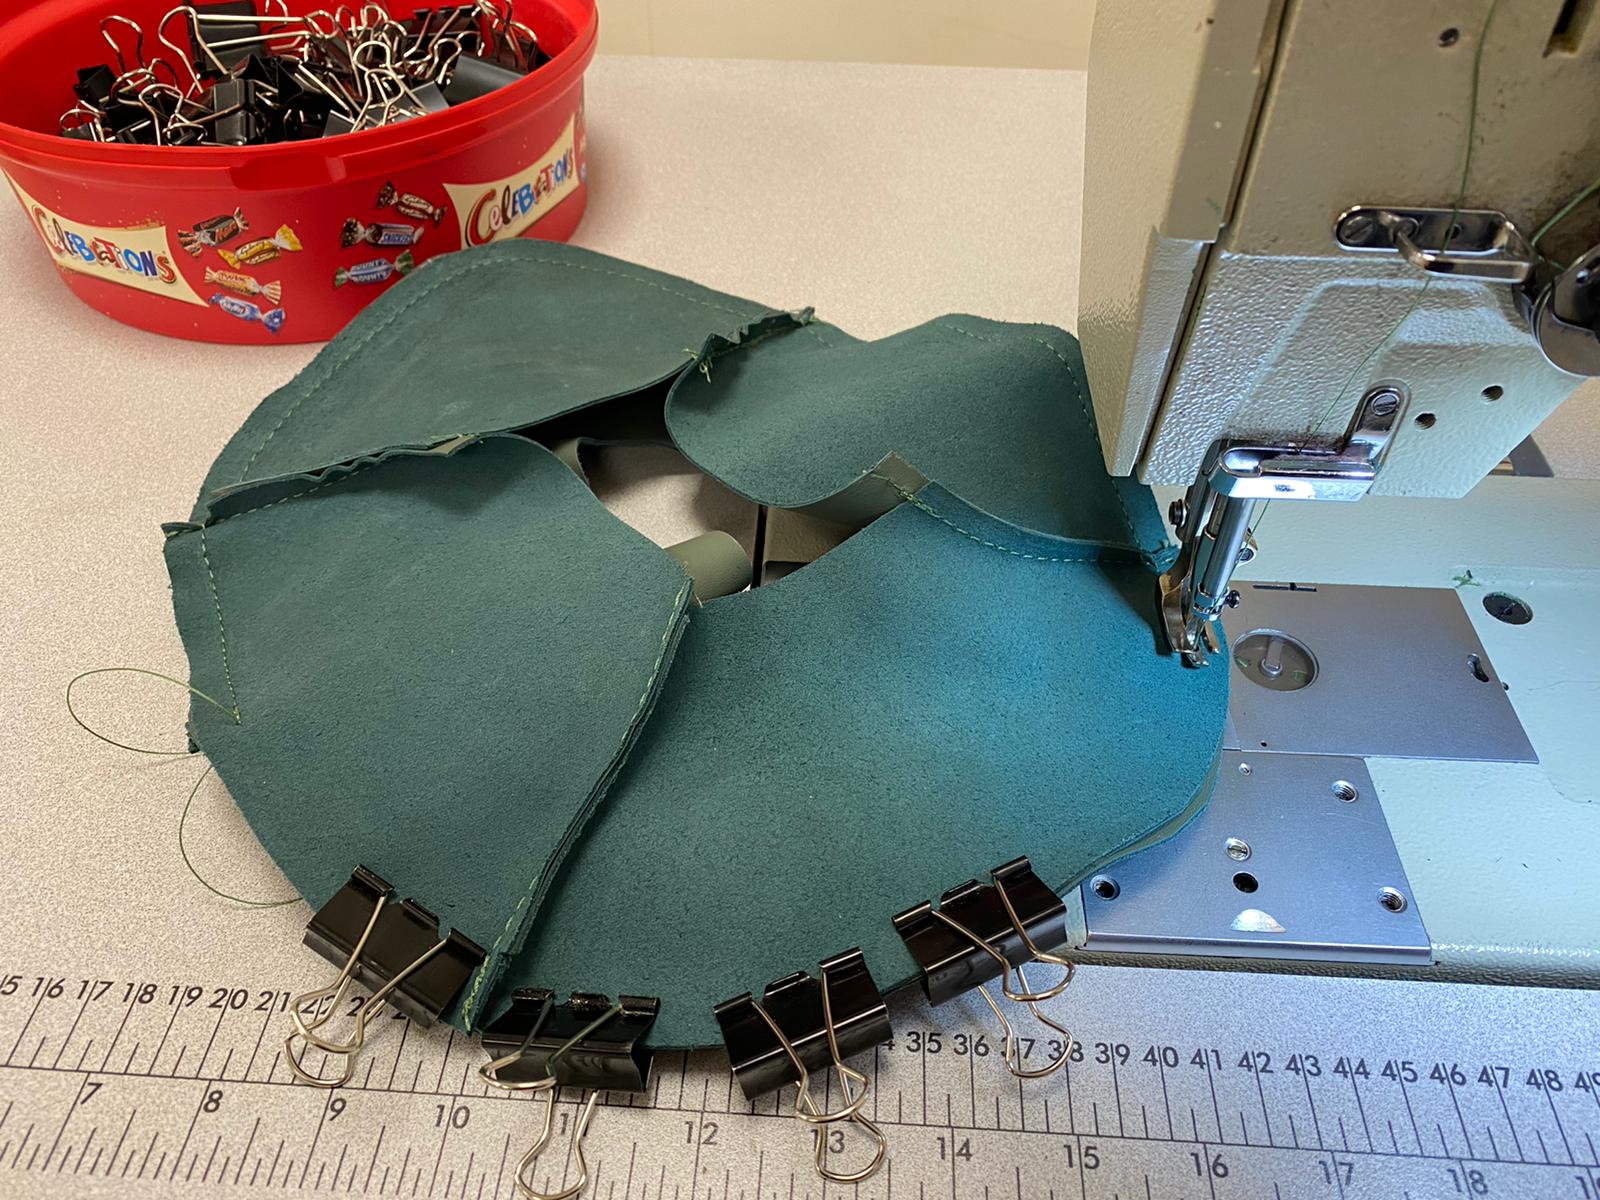
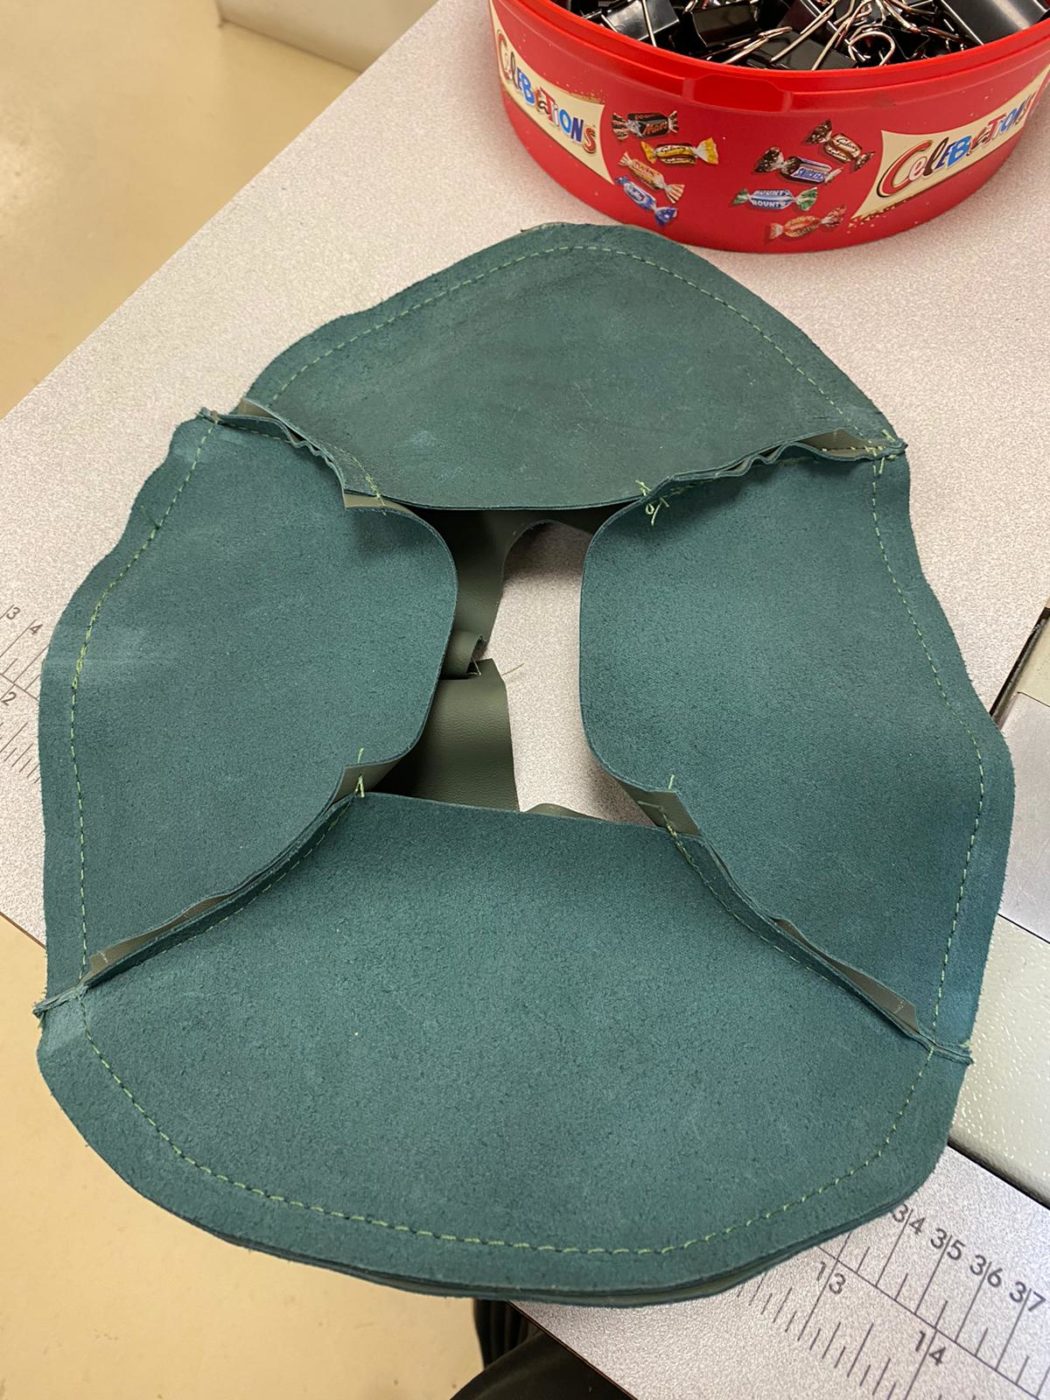
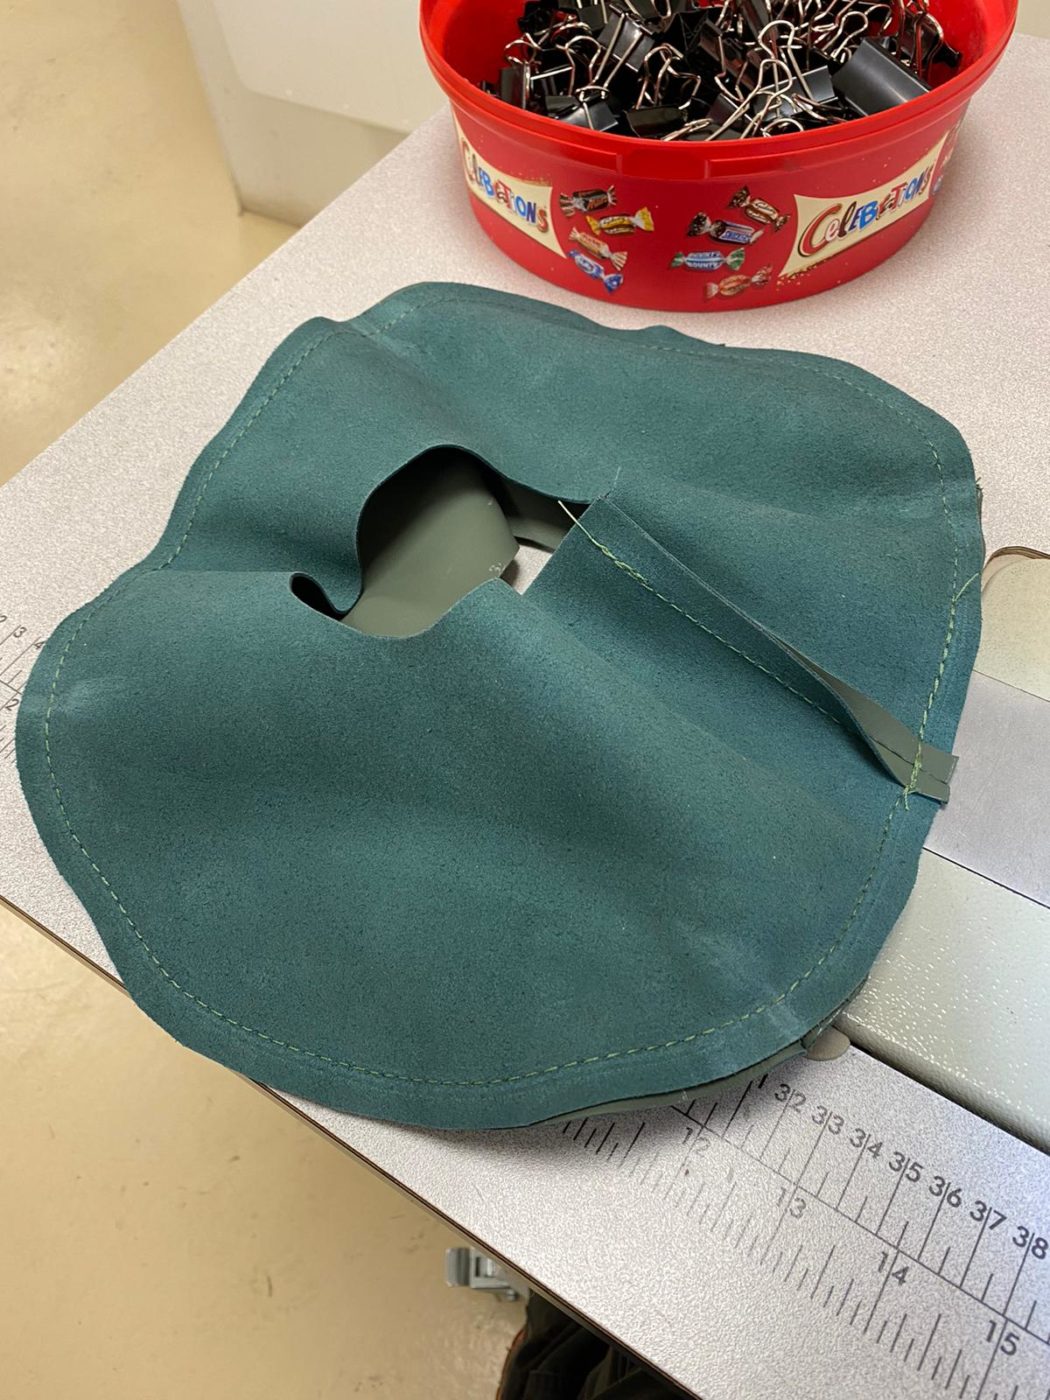
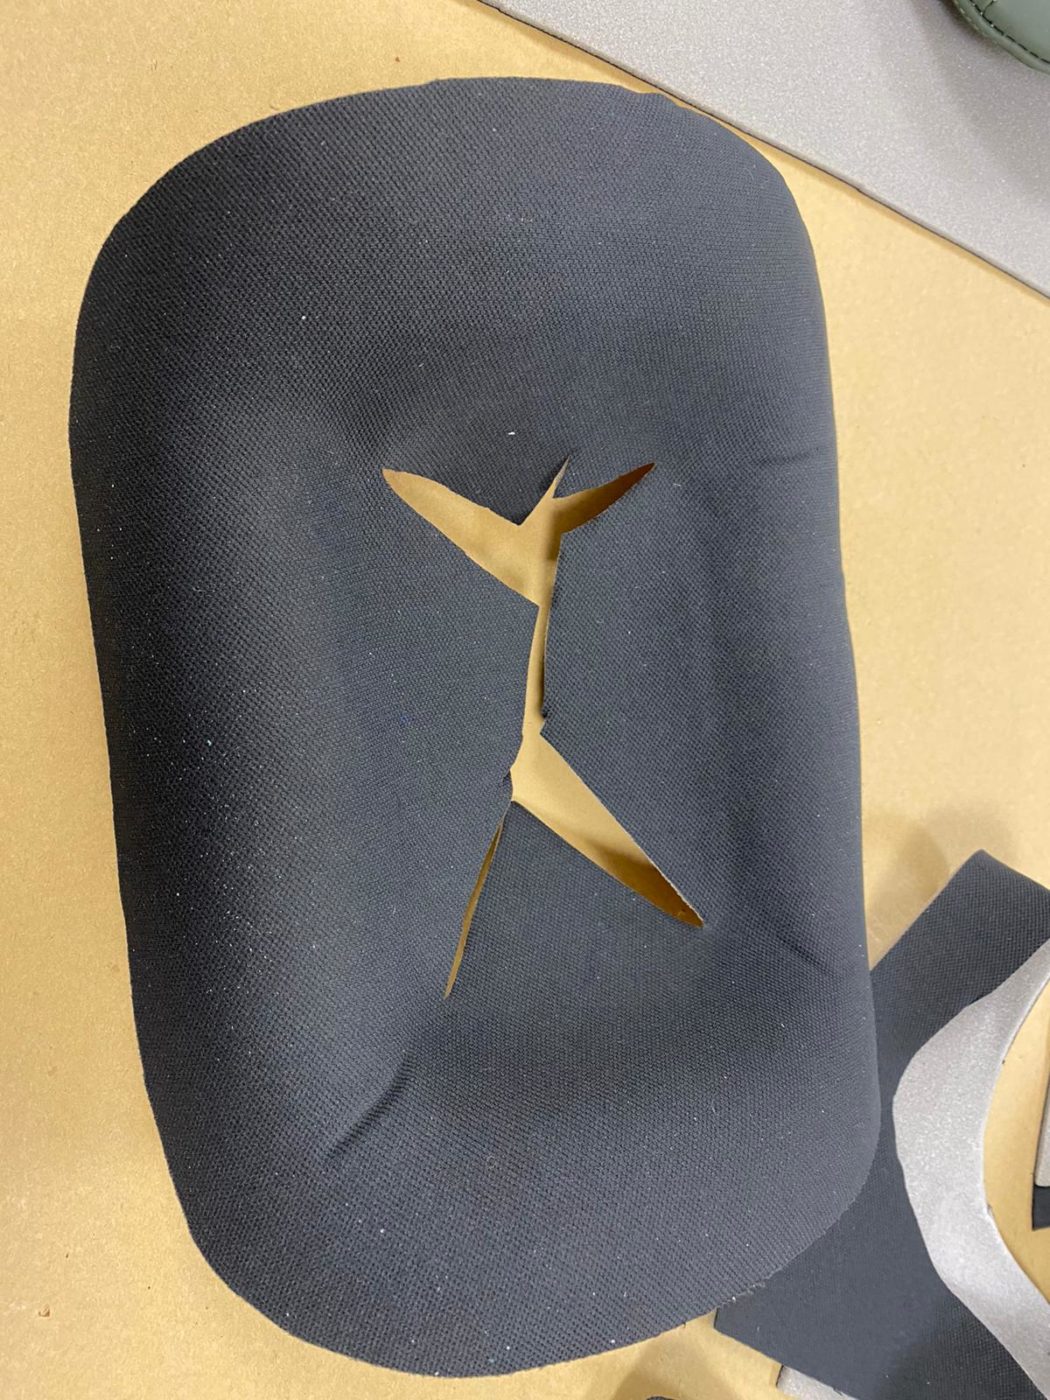
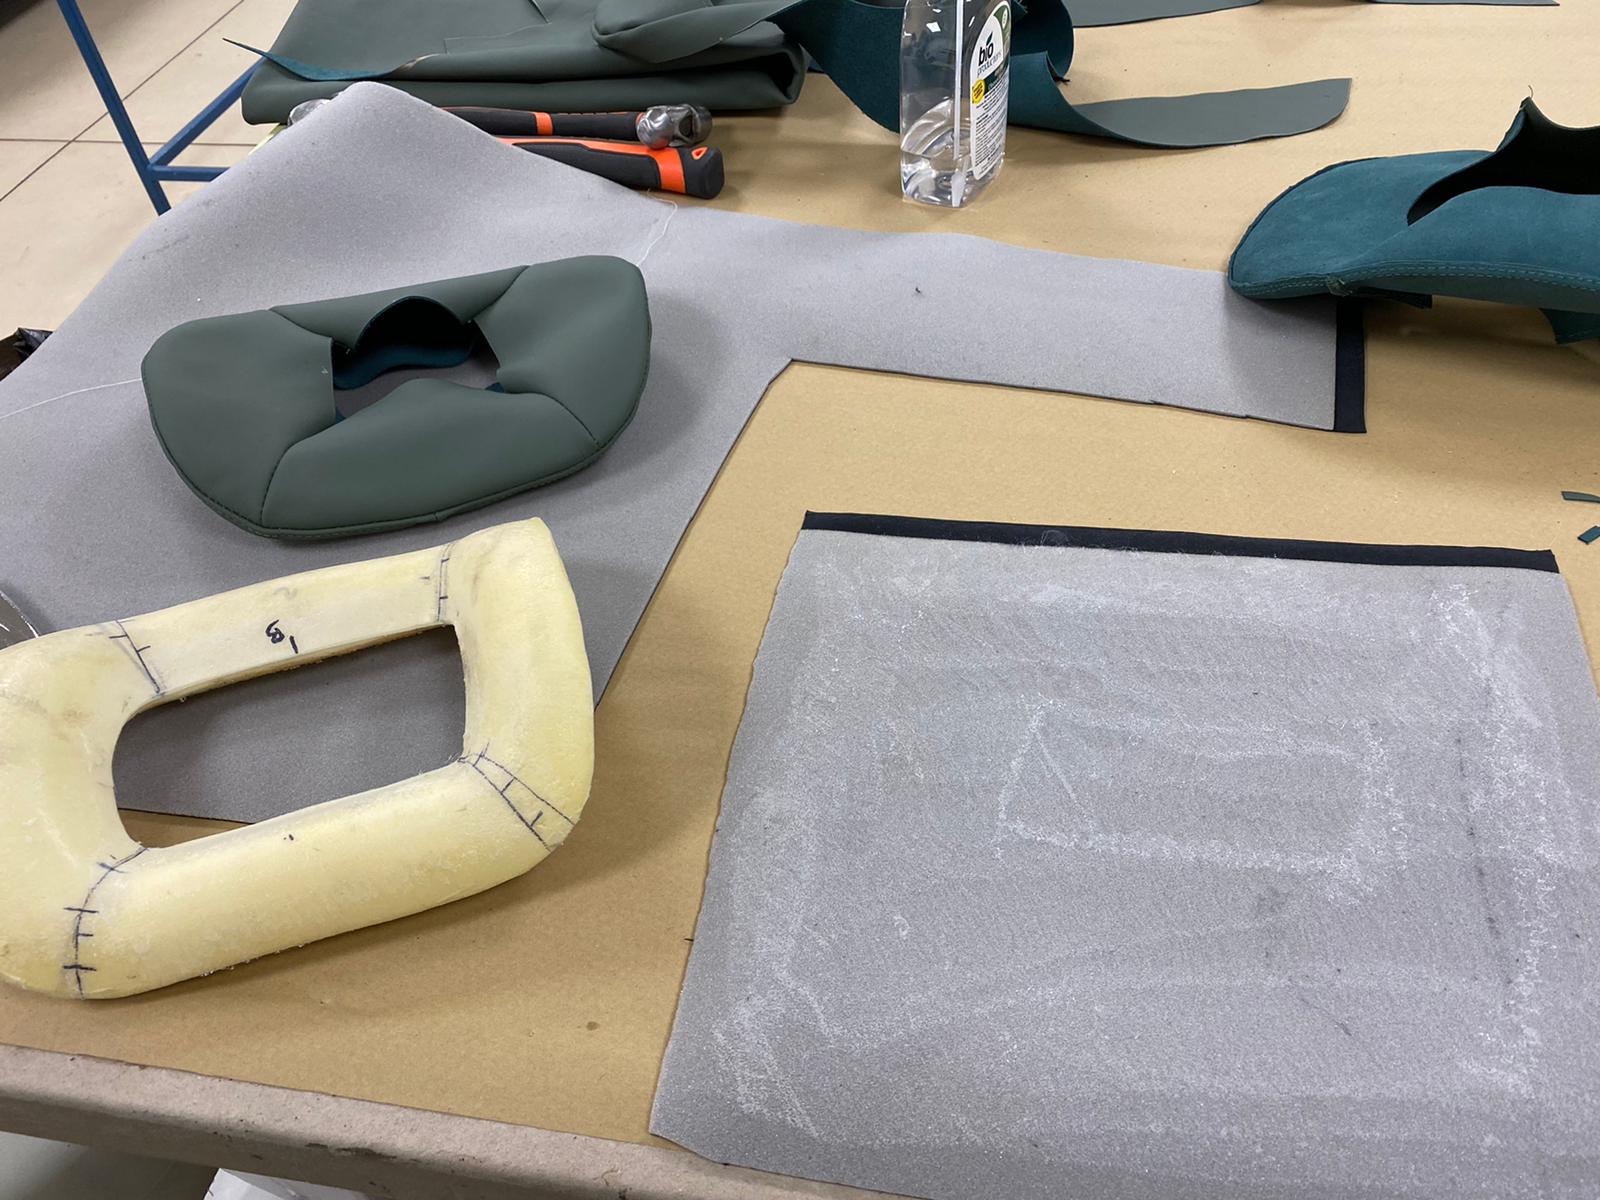
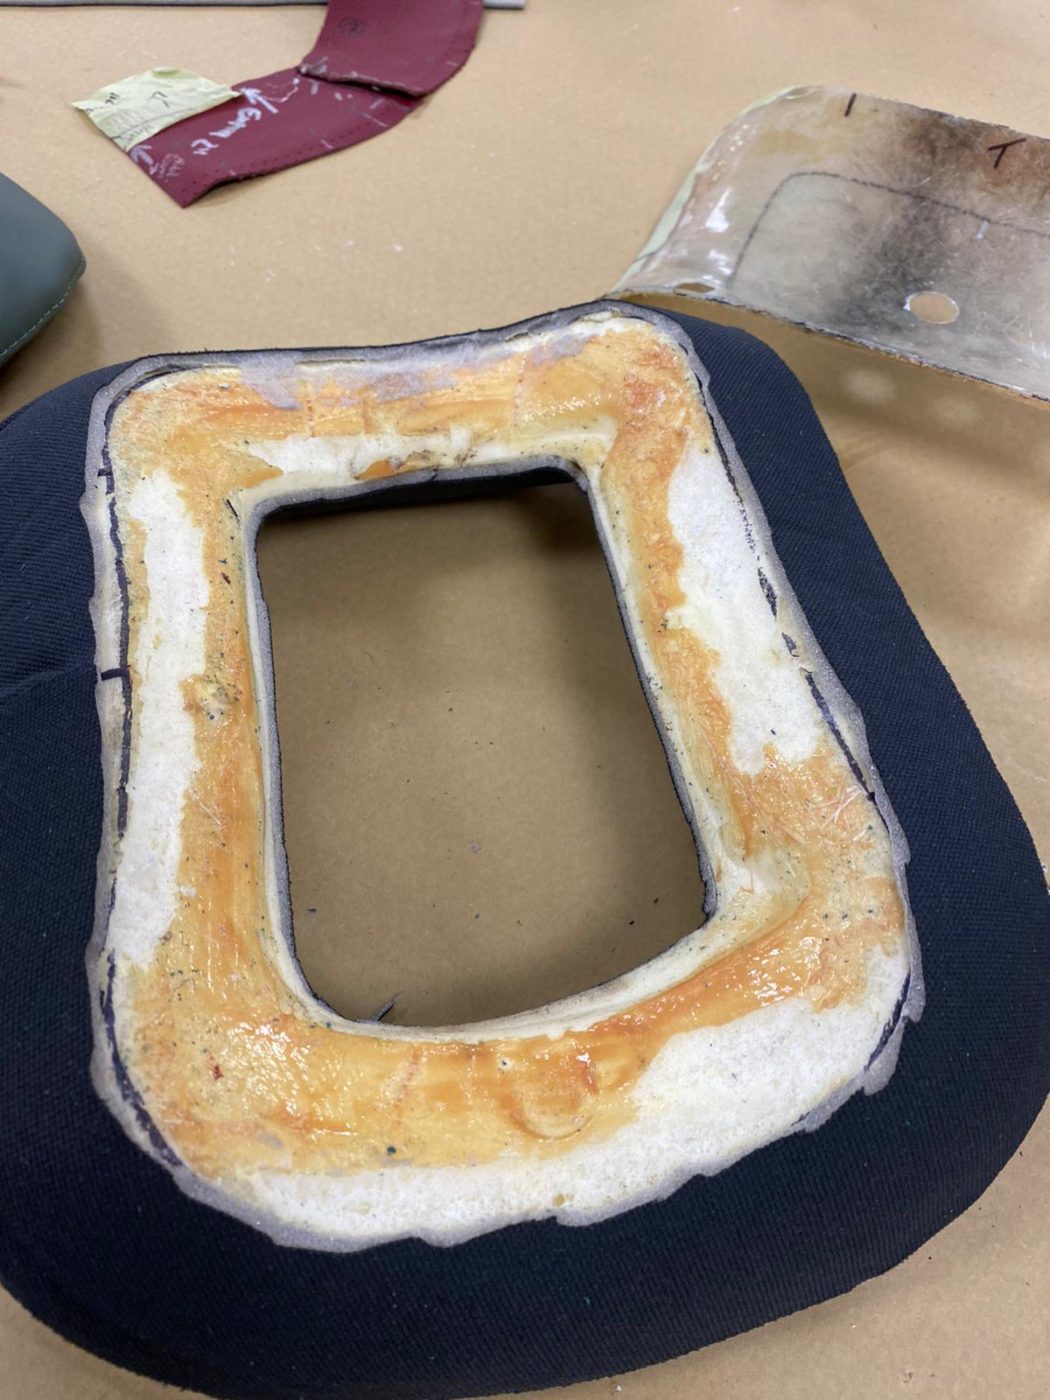
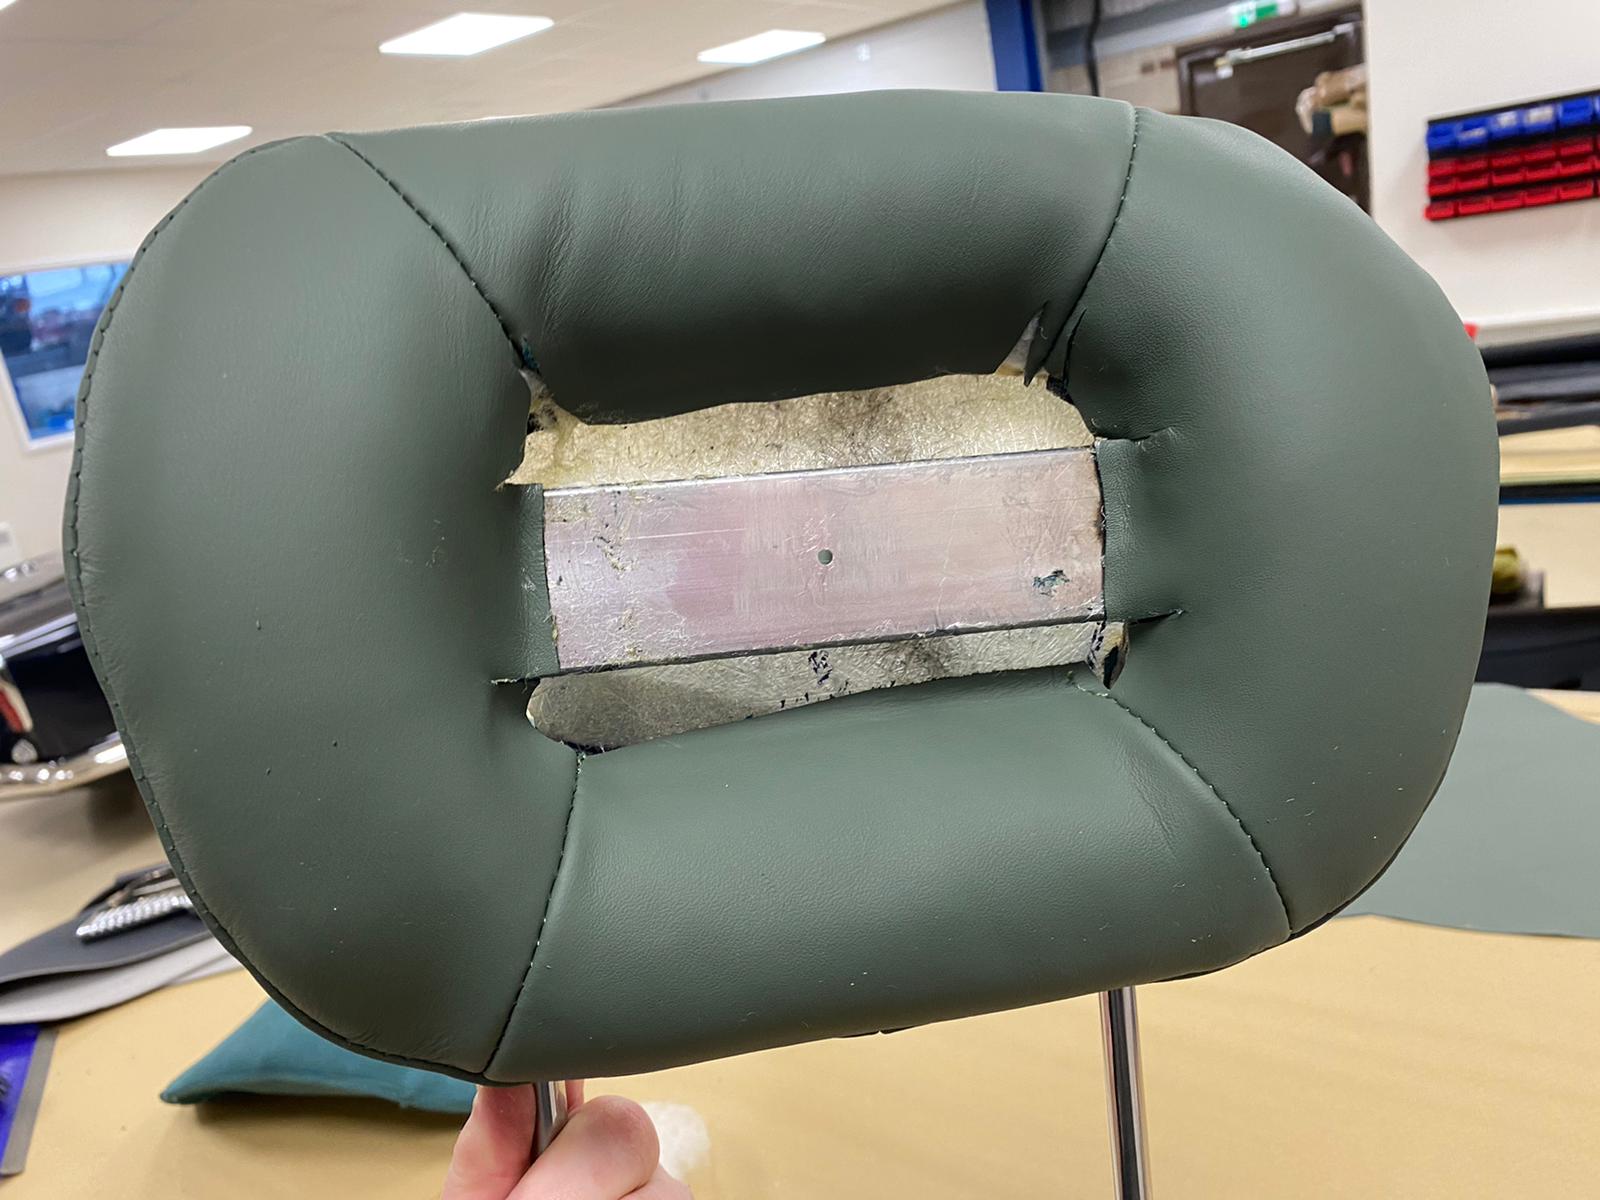
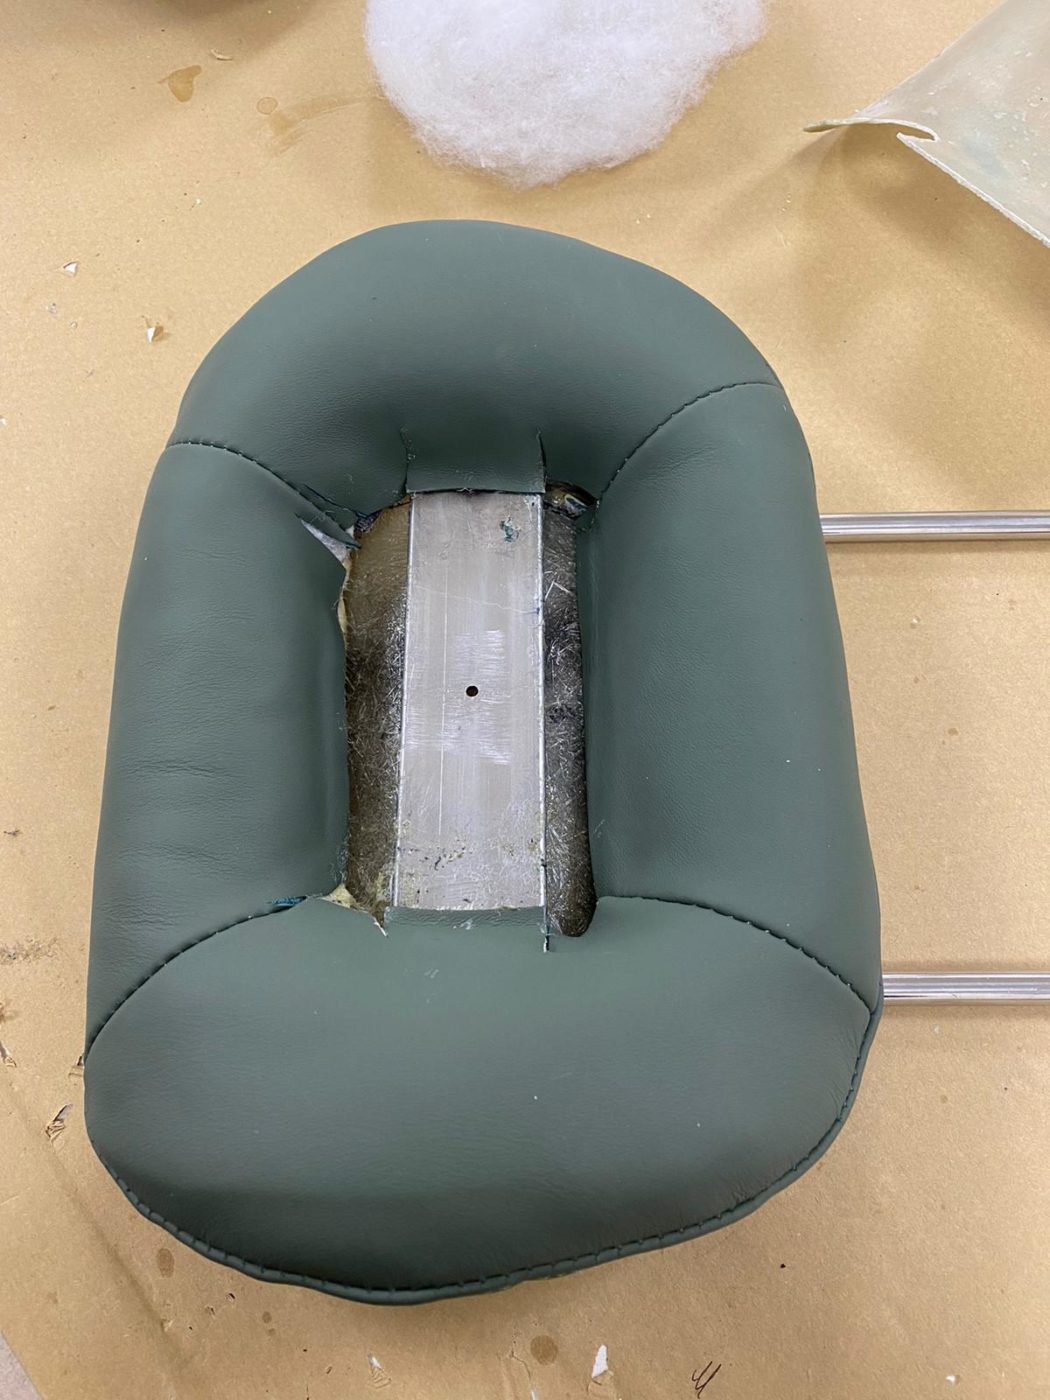
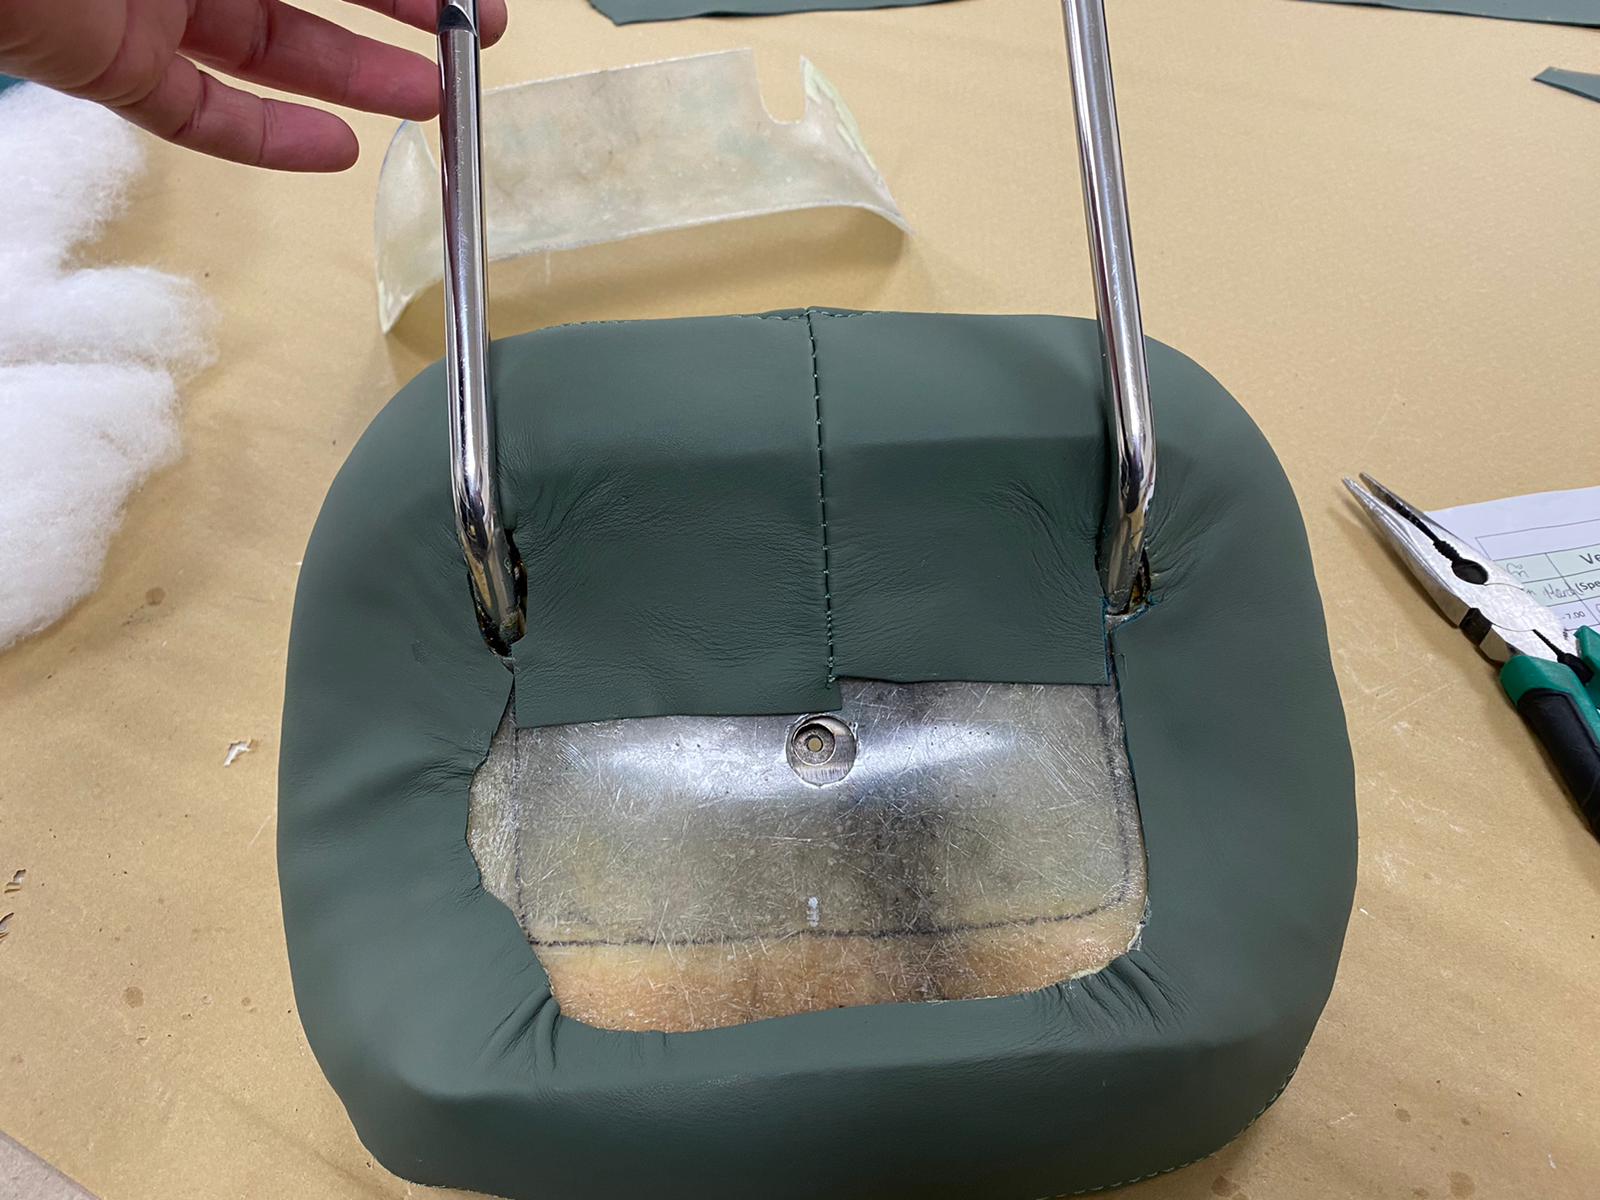
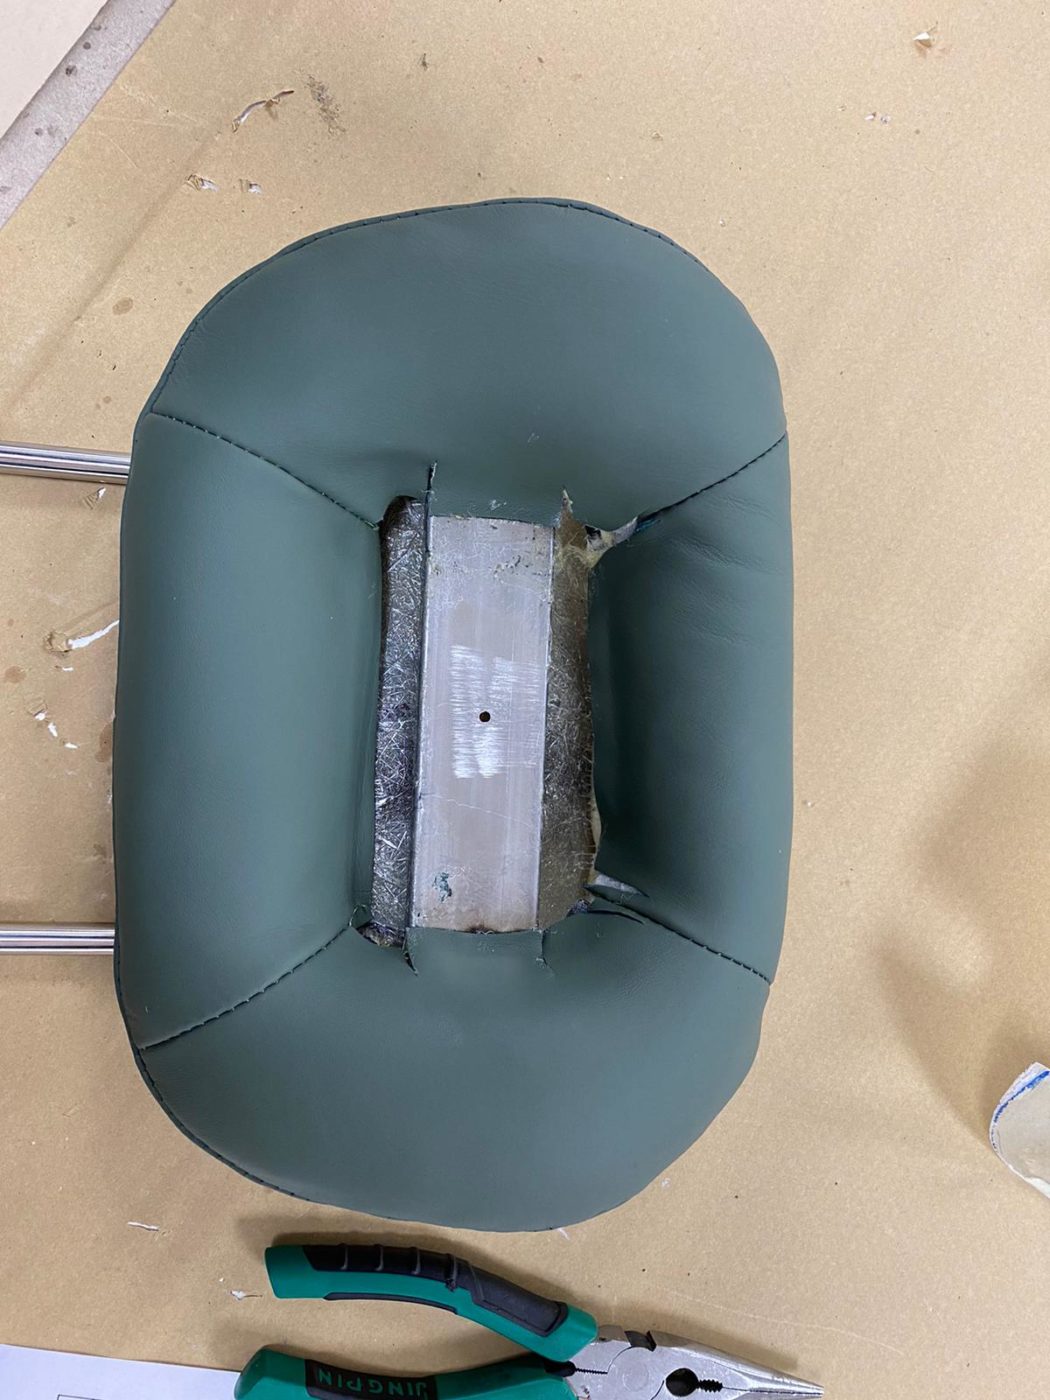
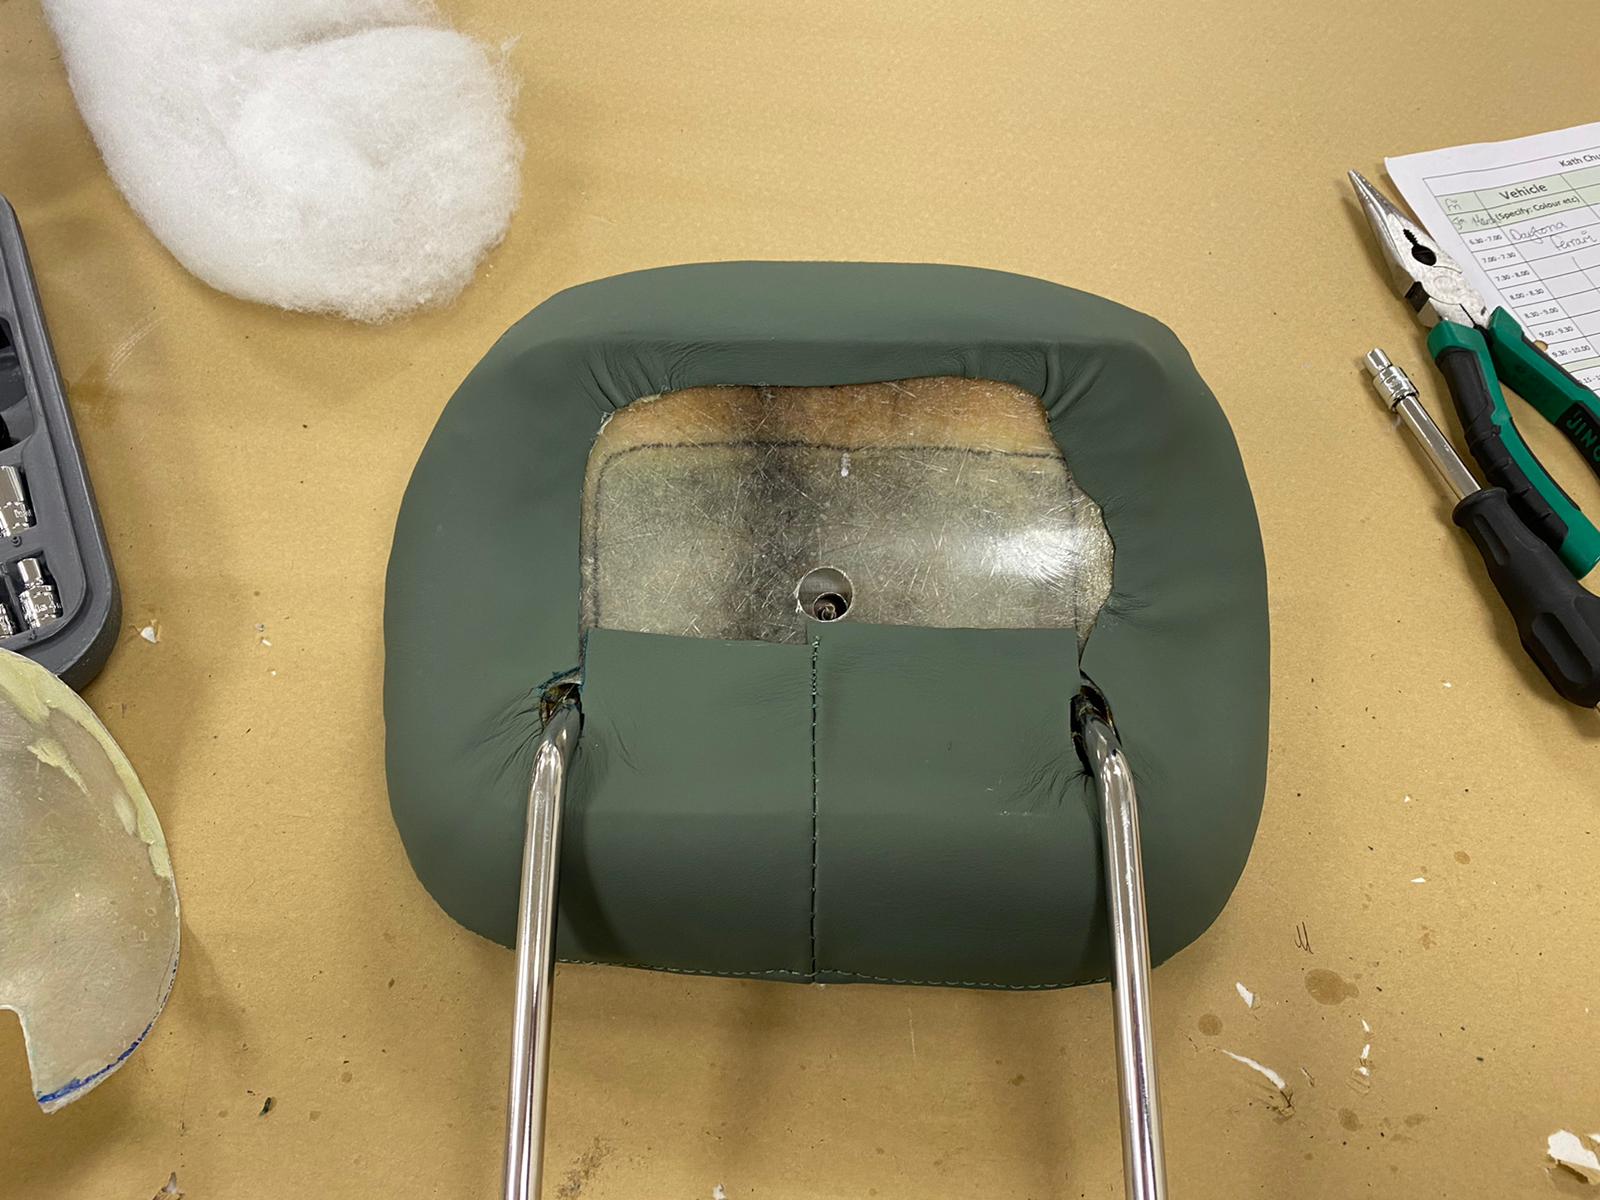
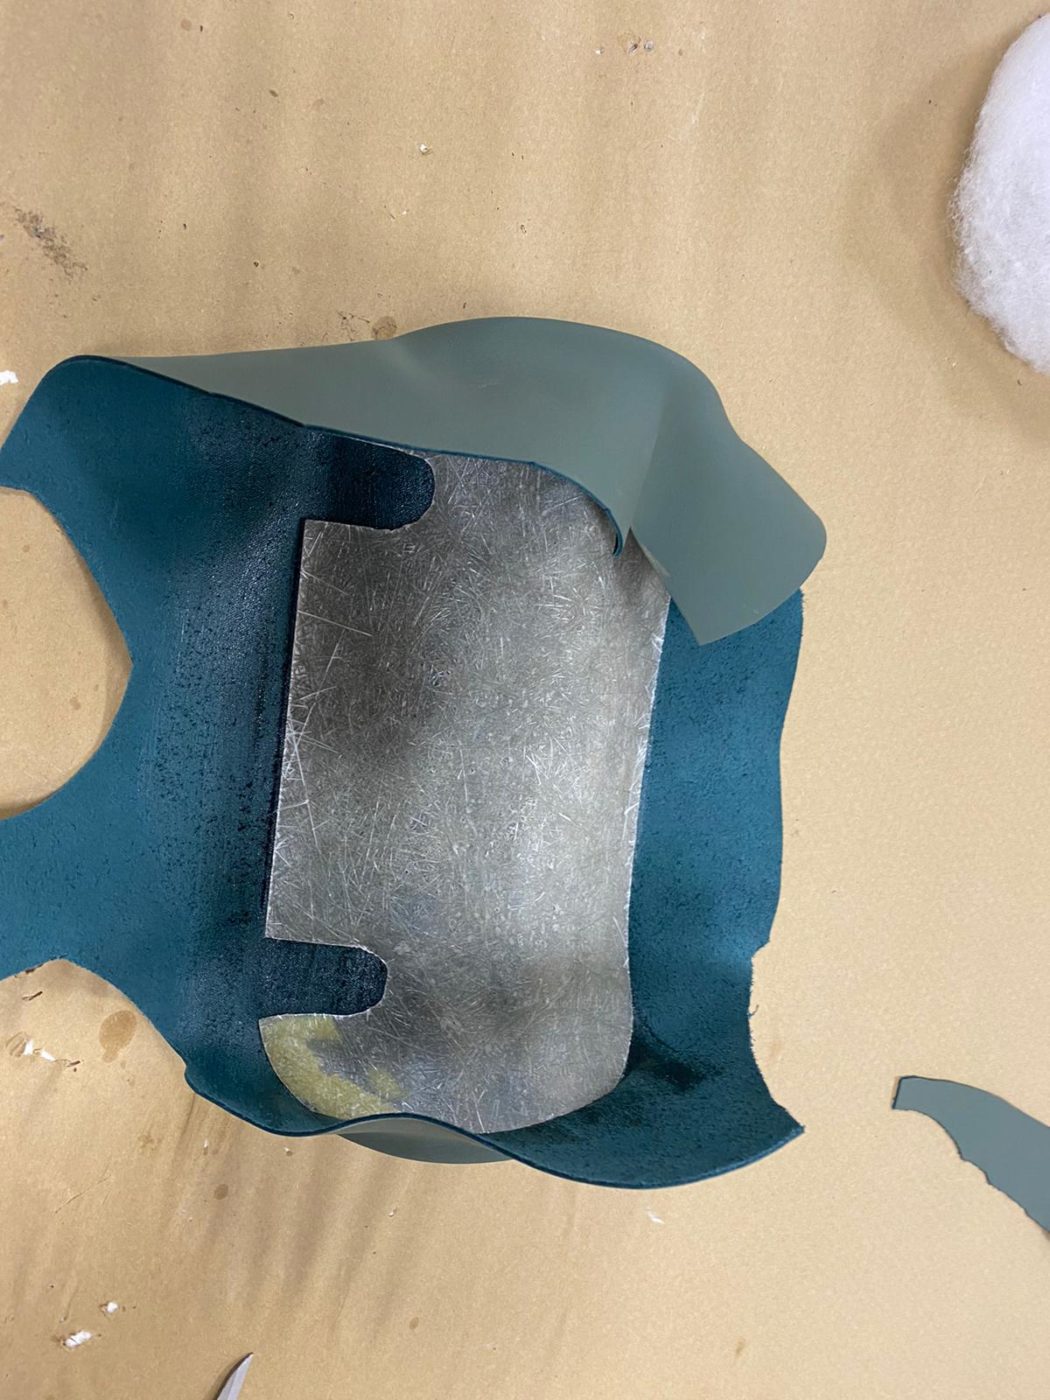
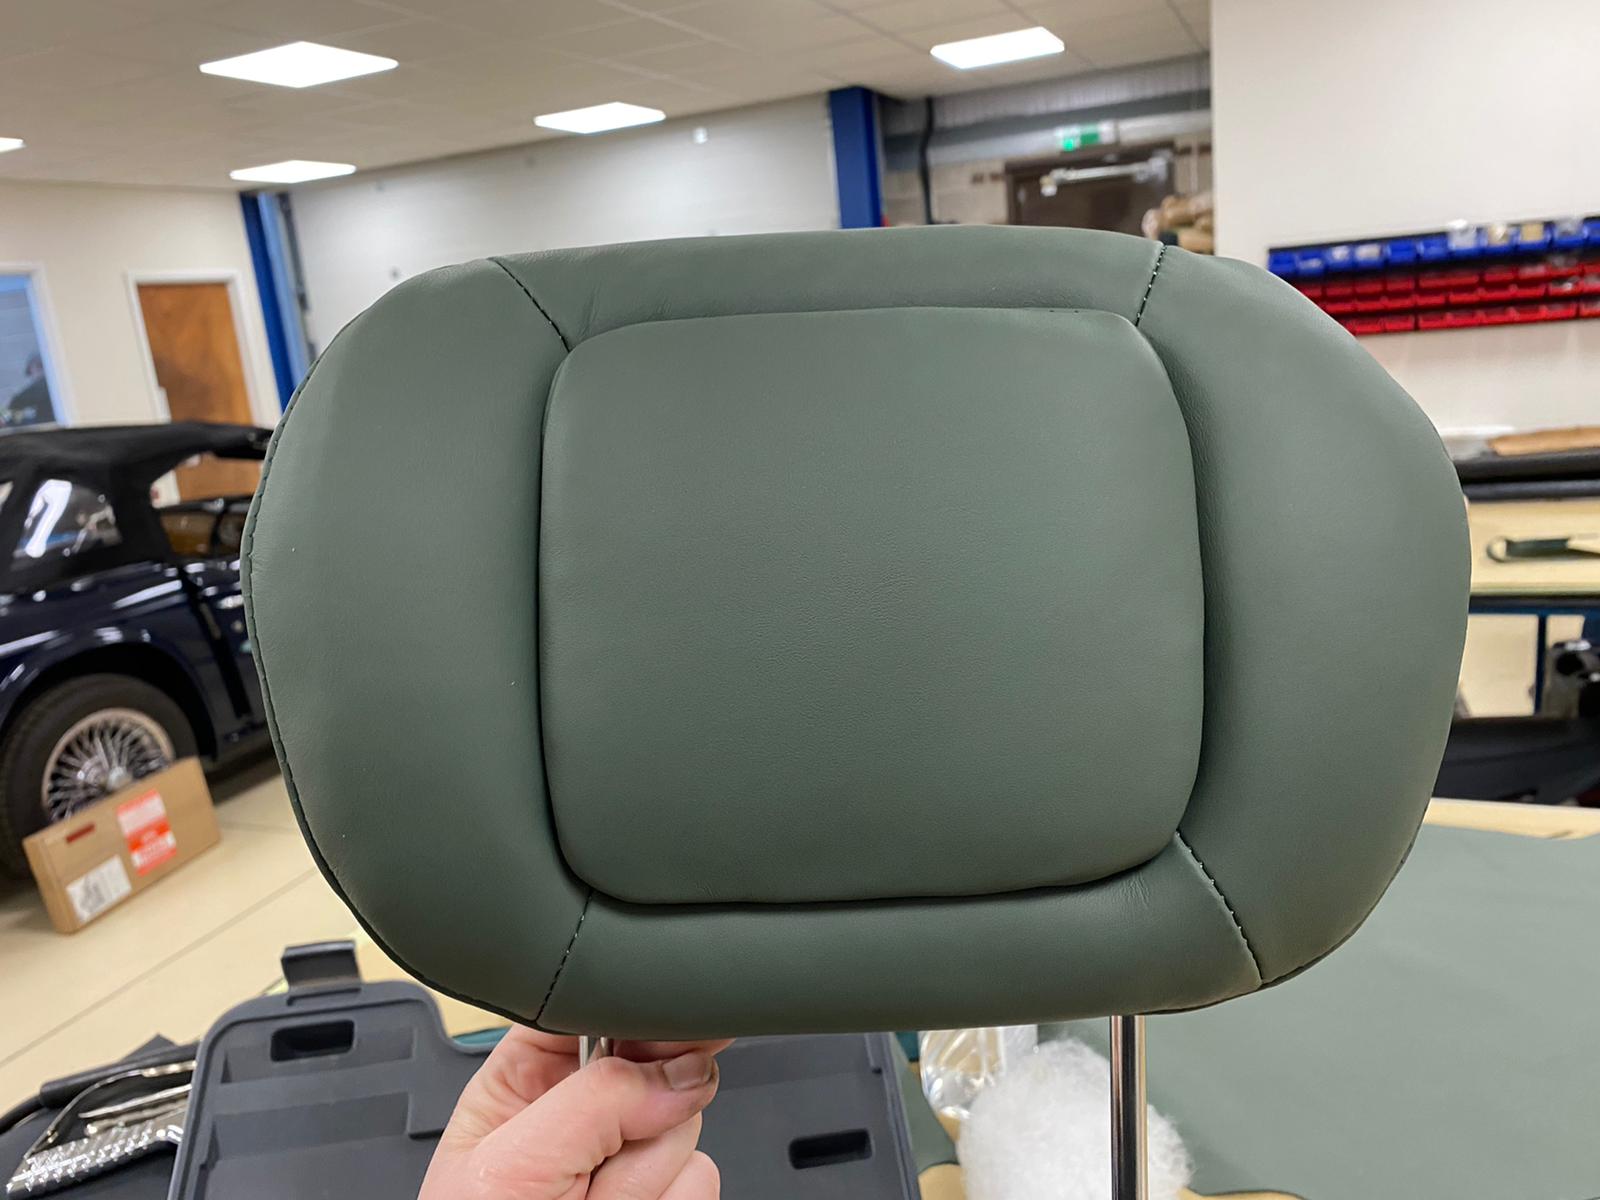
Kath had already made the template cover for the Daytona headrest, and has now made the final copy using her own template. She began by unpicking her template and marking out a new one in the green material, which she then sews together and fits to the inner section of the head rest. Kath glues in place the excess material and pulls is taught. She then marks out the other parts which she clips together to sew. Adding a skirt to the outer section, Kath then adds a top stitch around the outer edge and sews all the pieces together. The next step is to then fit the foam inside and put all parts together. The foam rests are padded out with an extra 3mm of foam to ensure comfort and support. Once this is all complete, the same process is mimicked for the other head rests. Kath also needs to cover the back of the head rests in her next step.
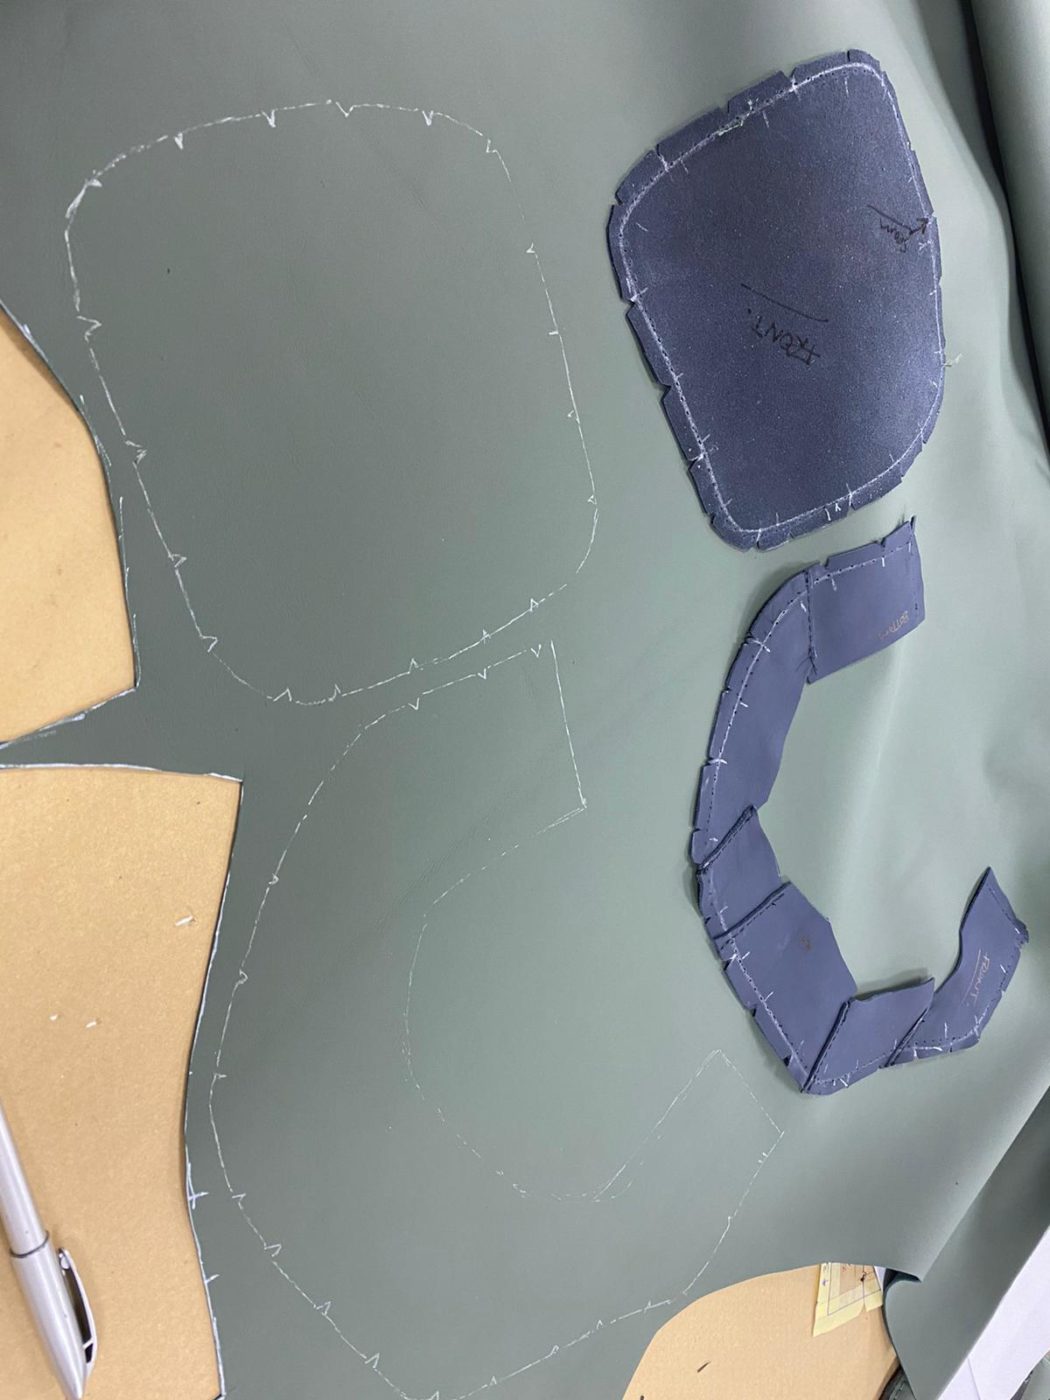

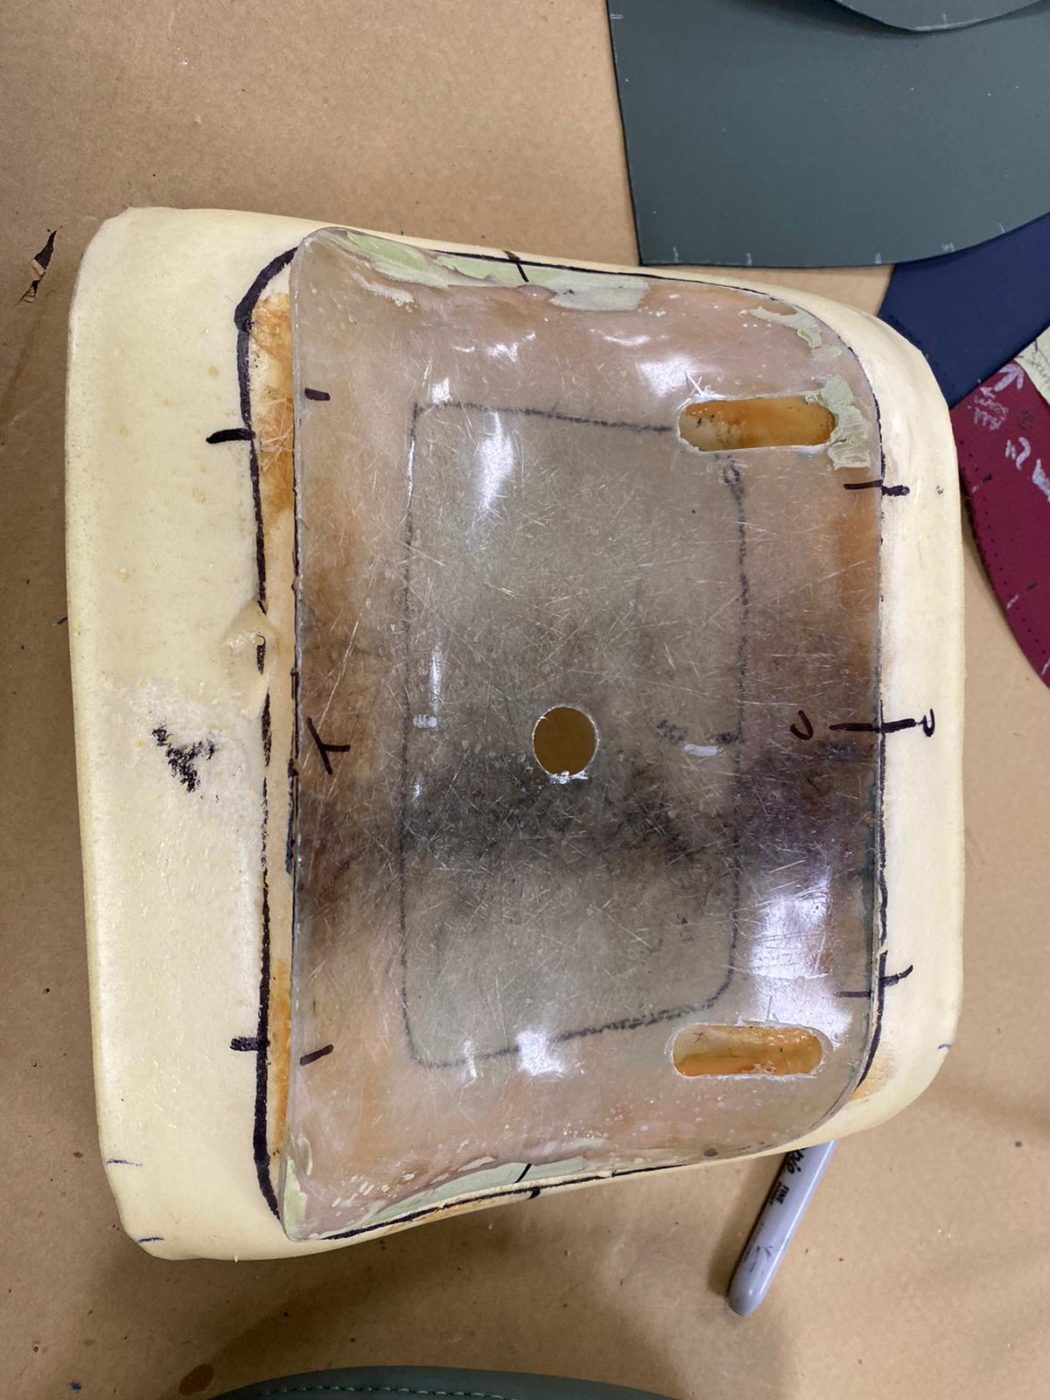

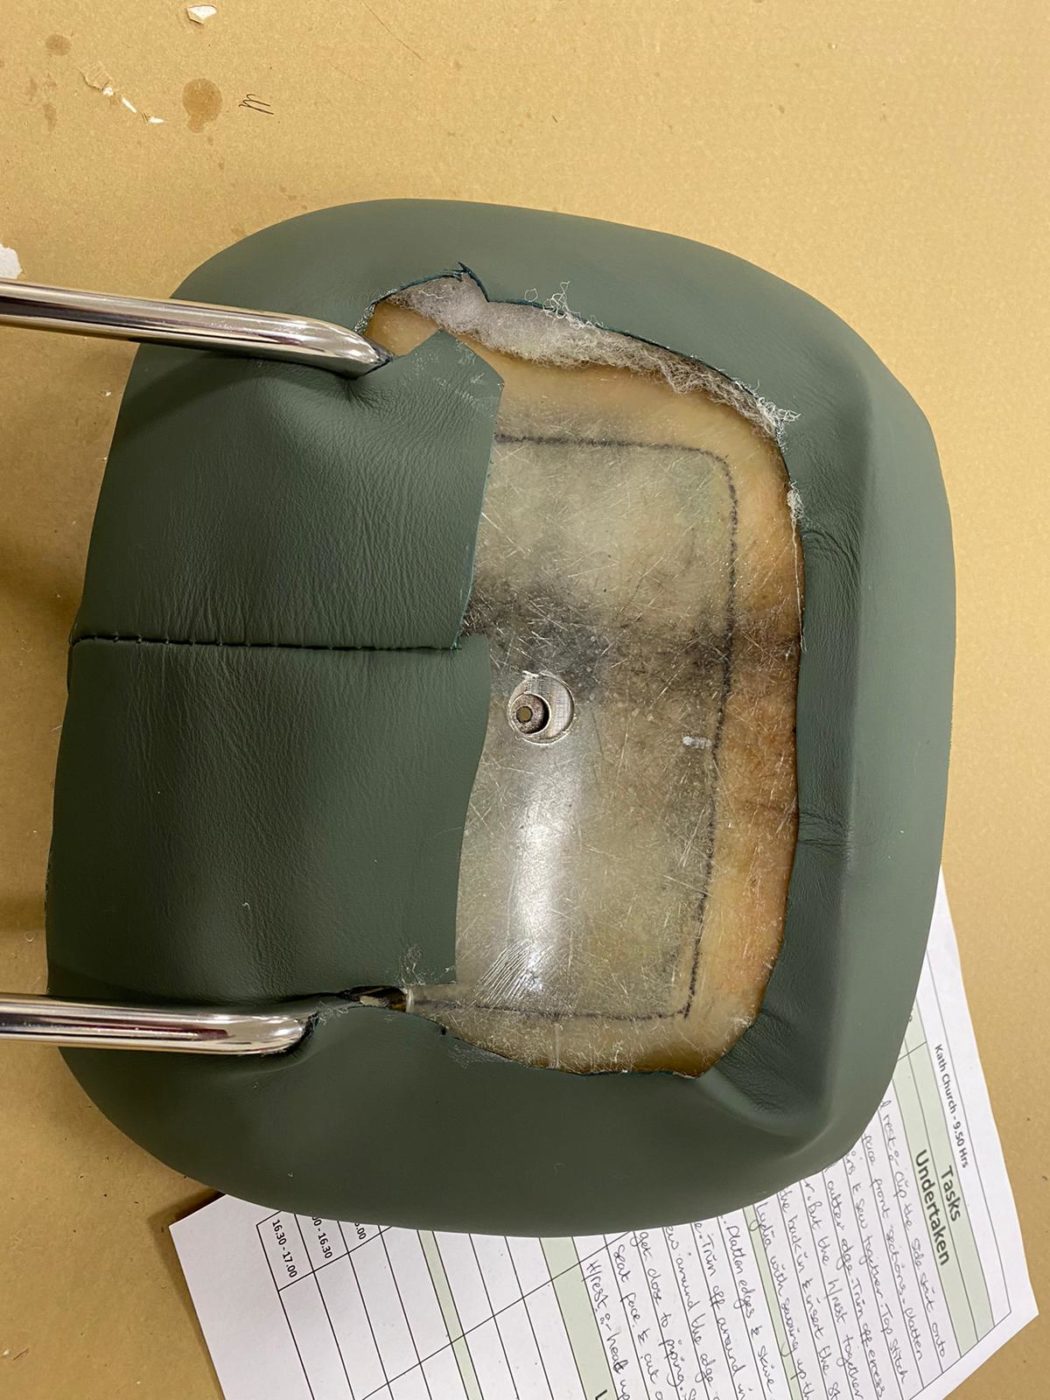
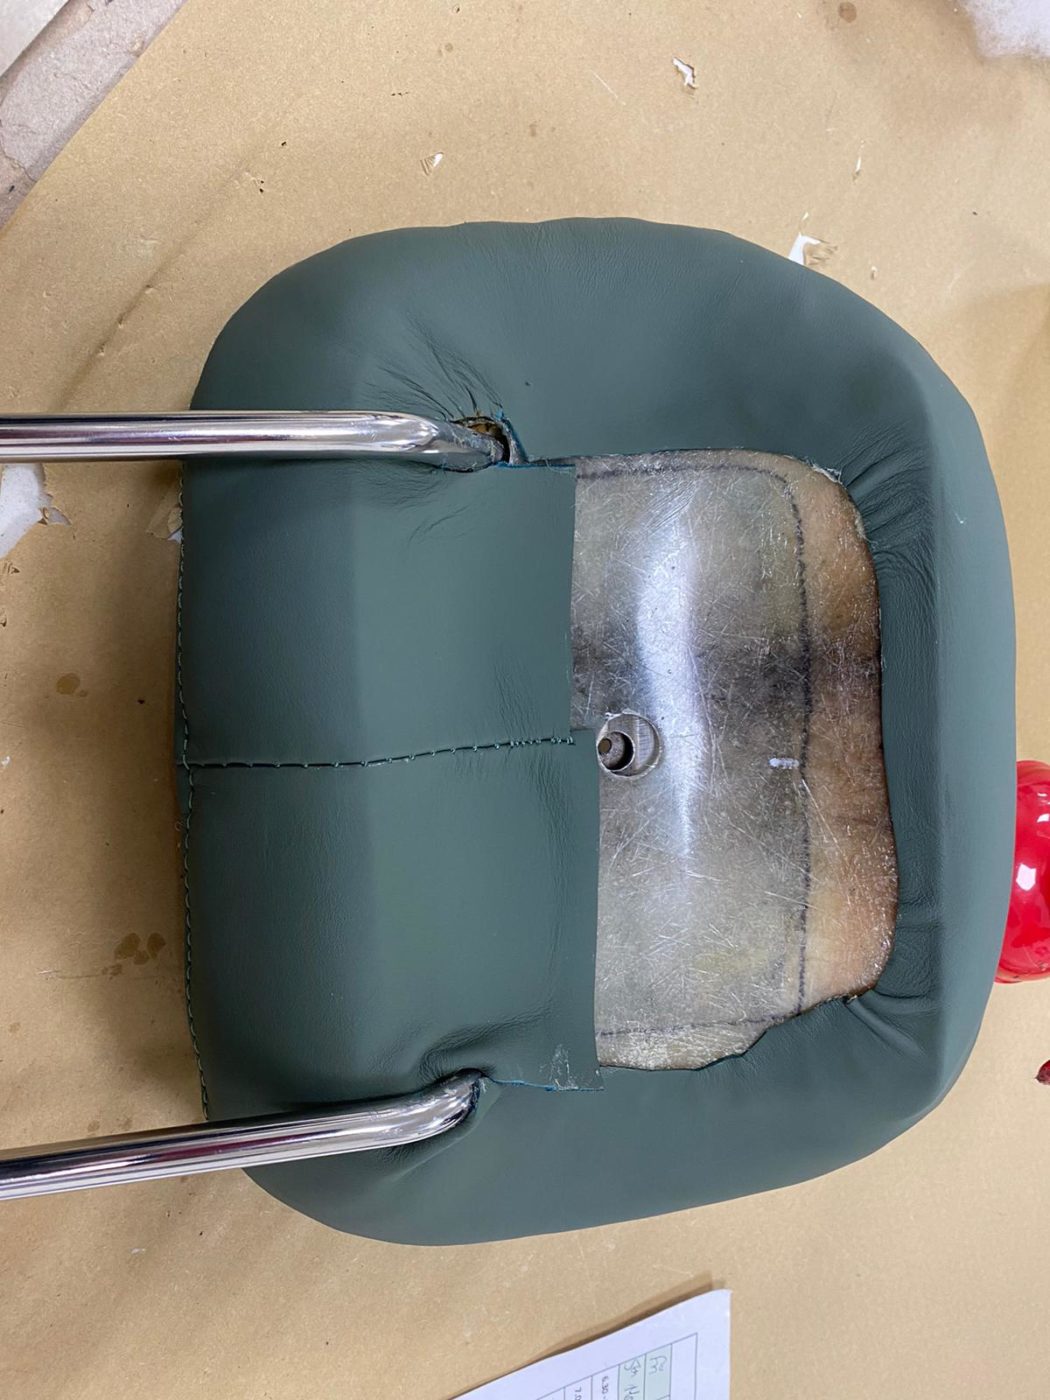
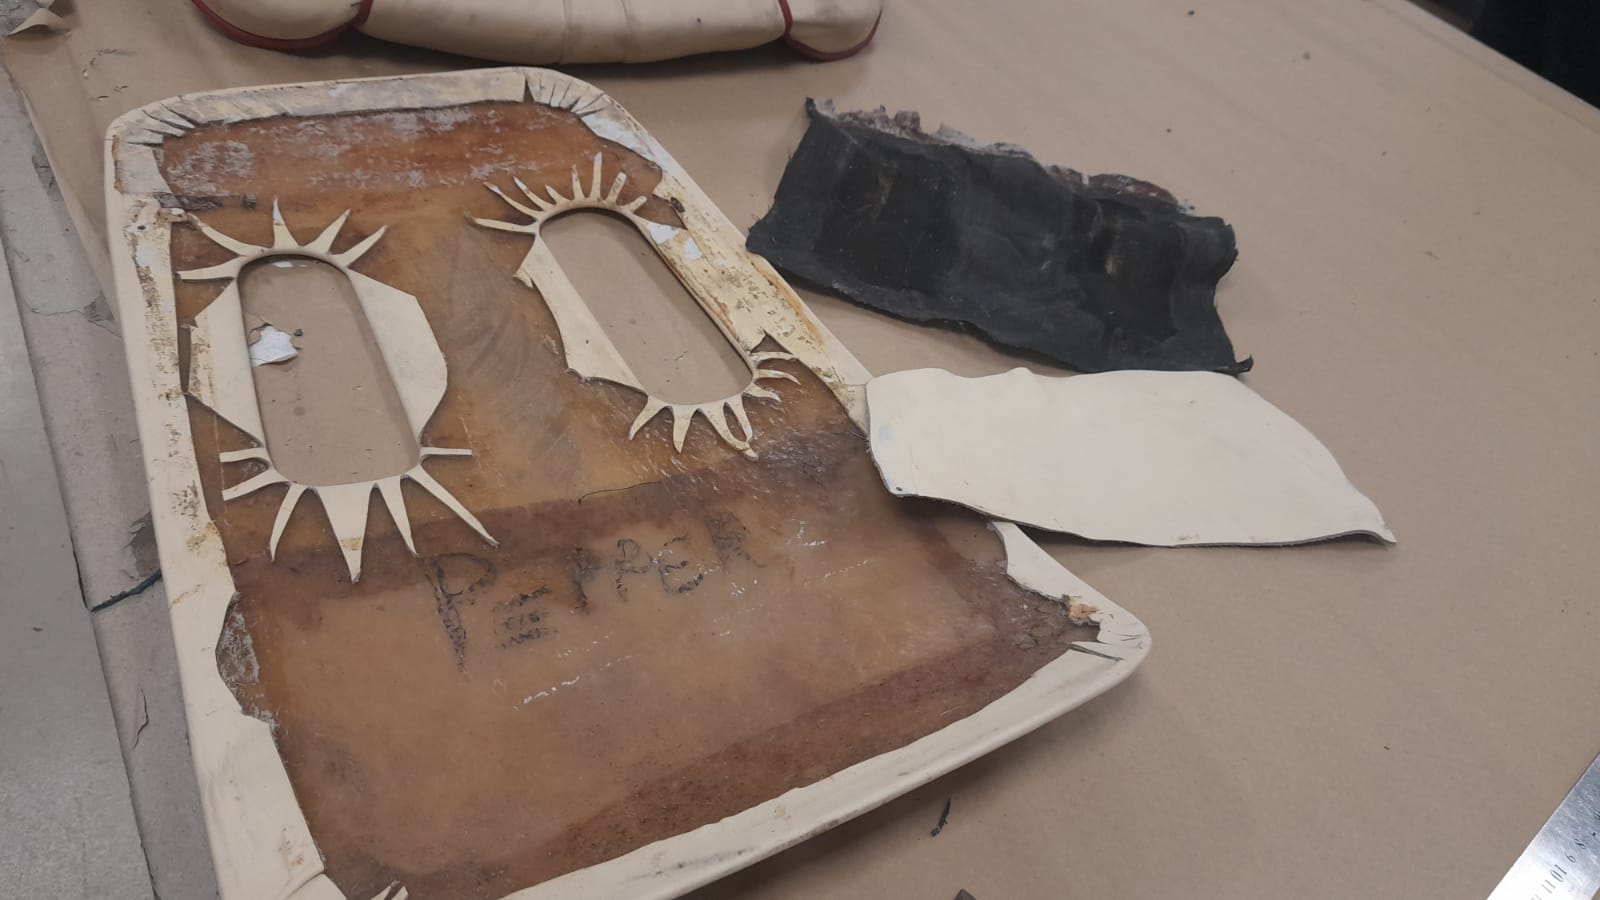
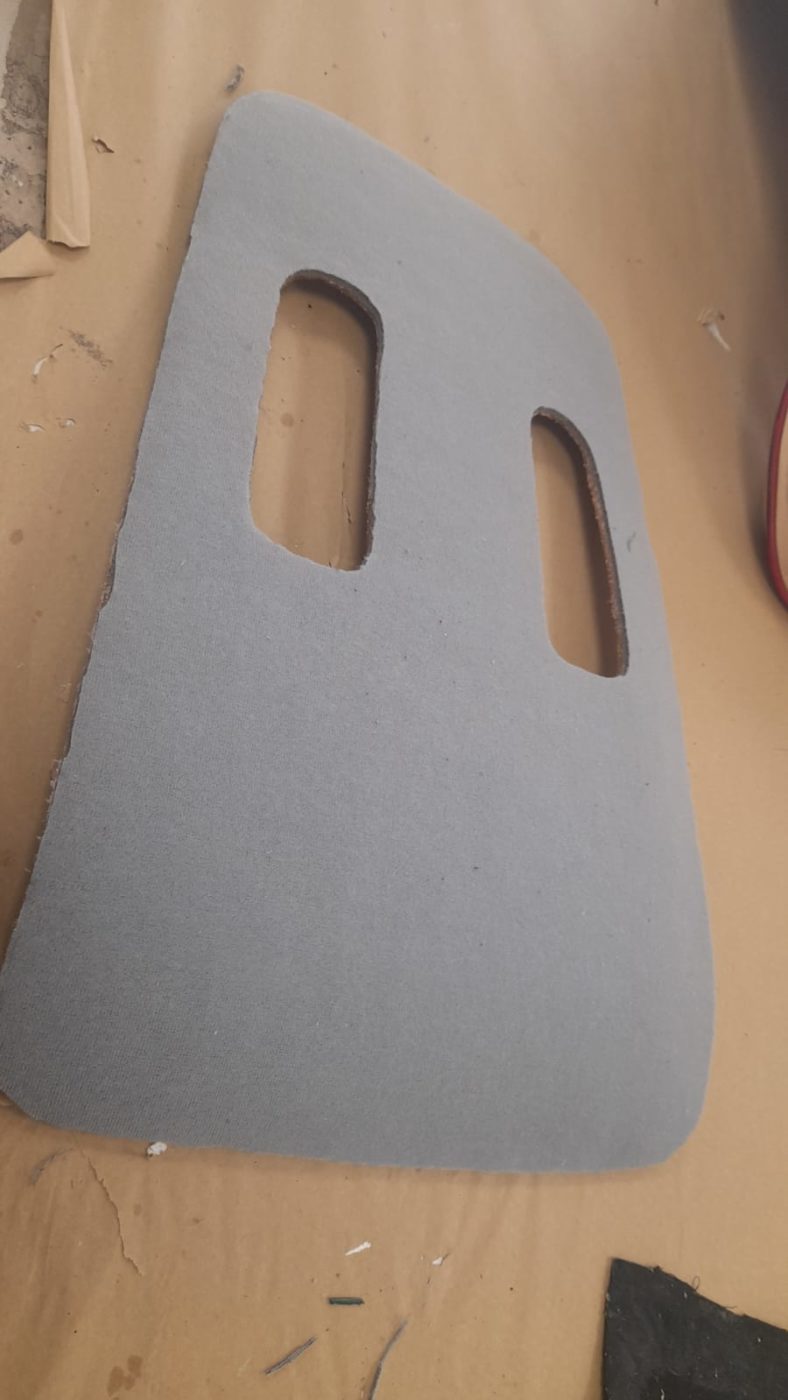
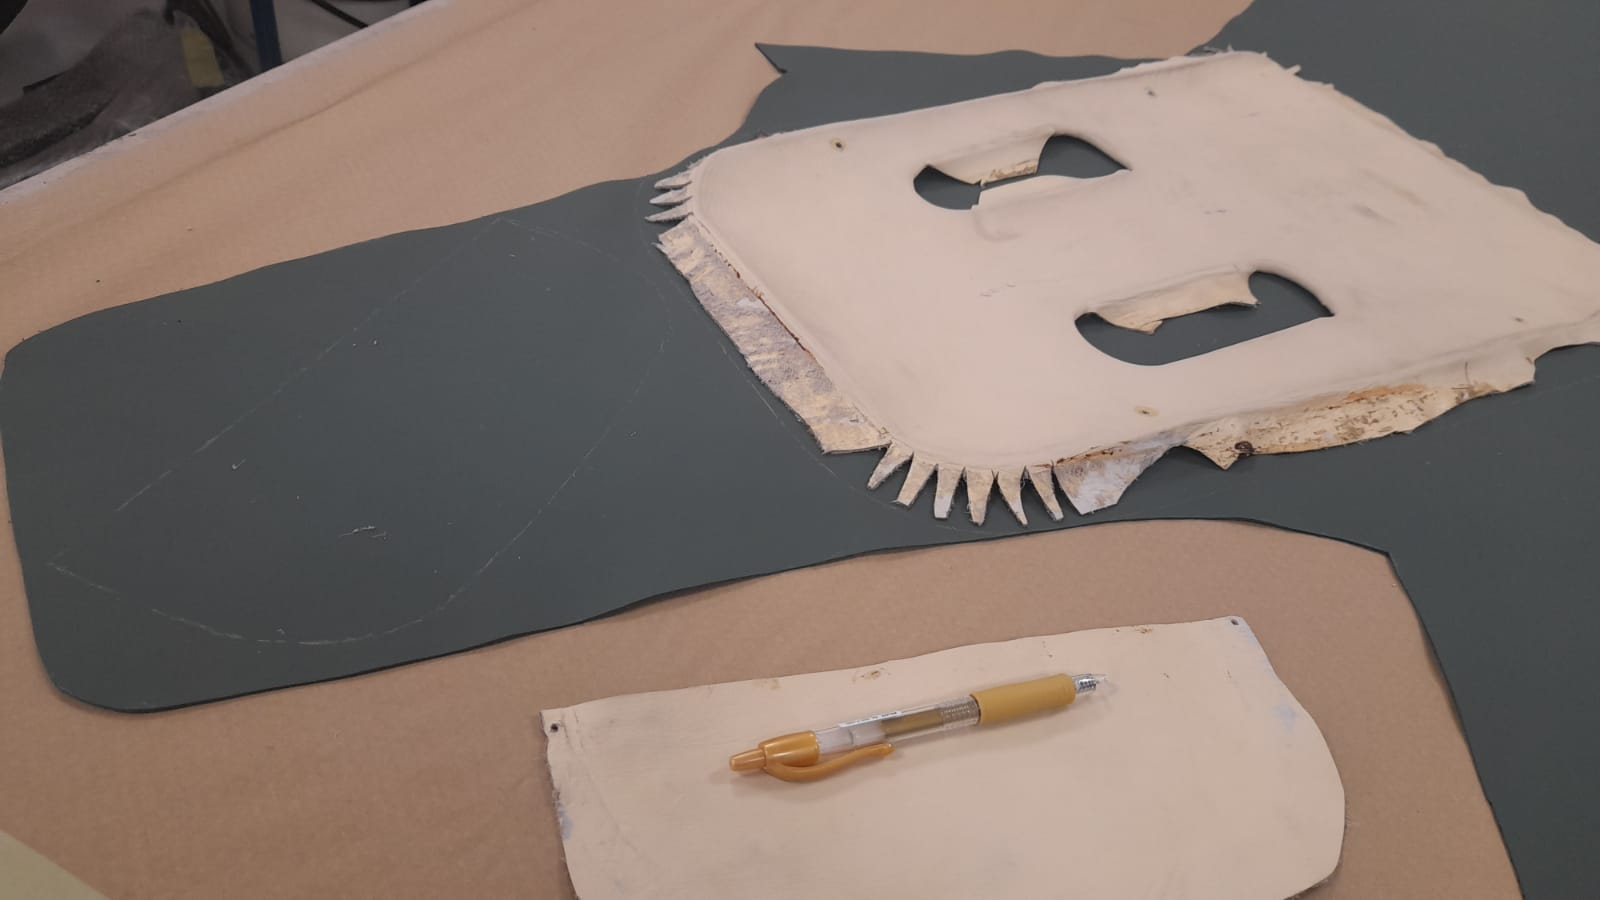
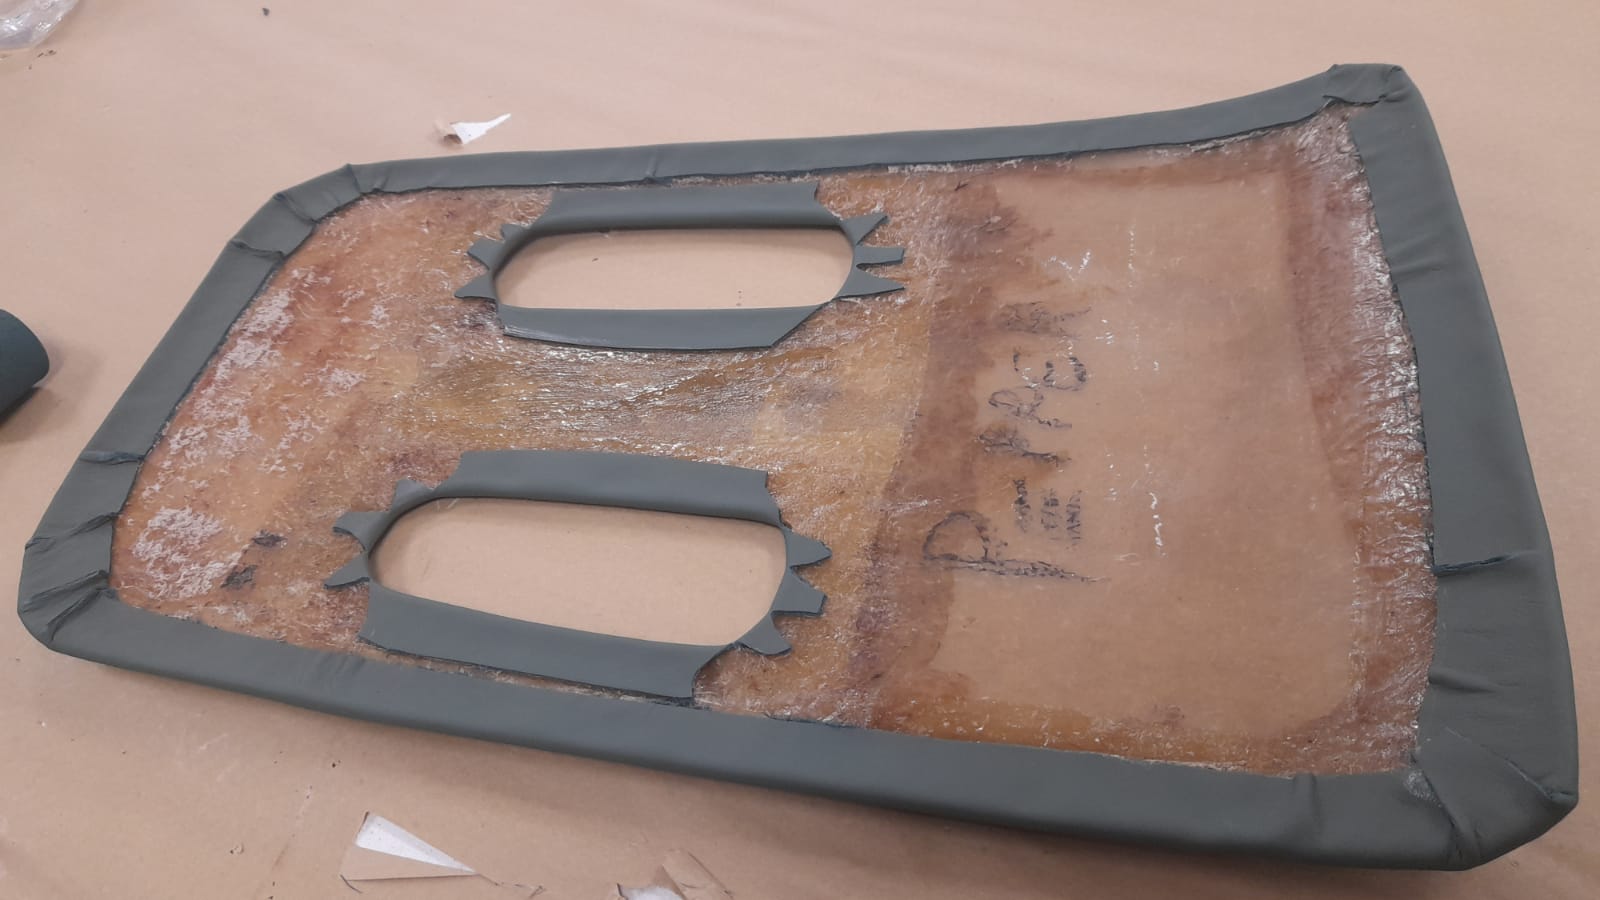
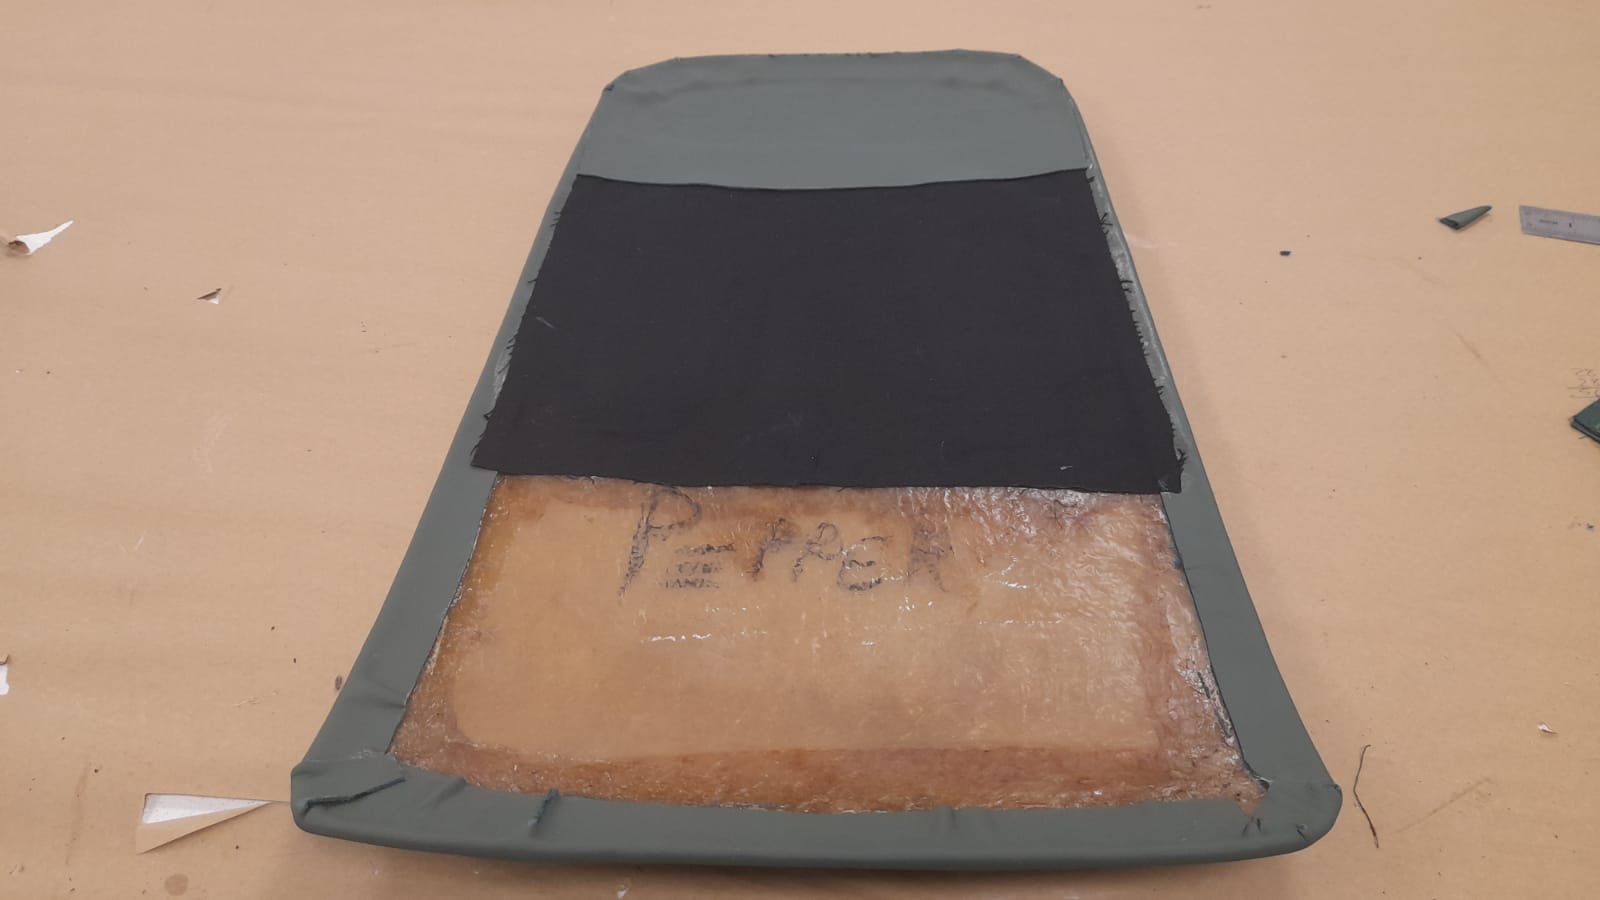
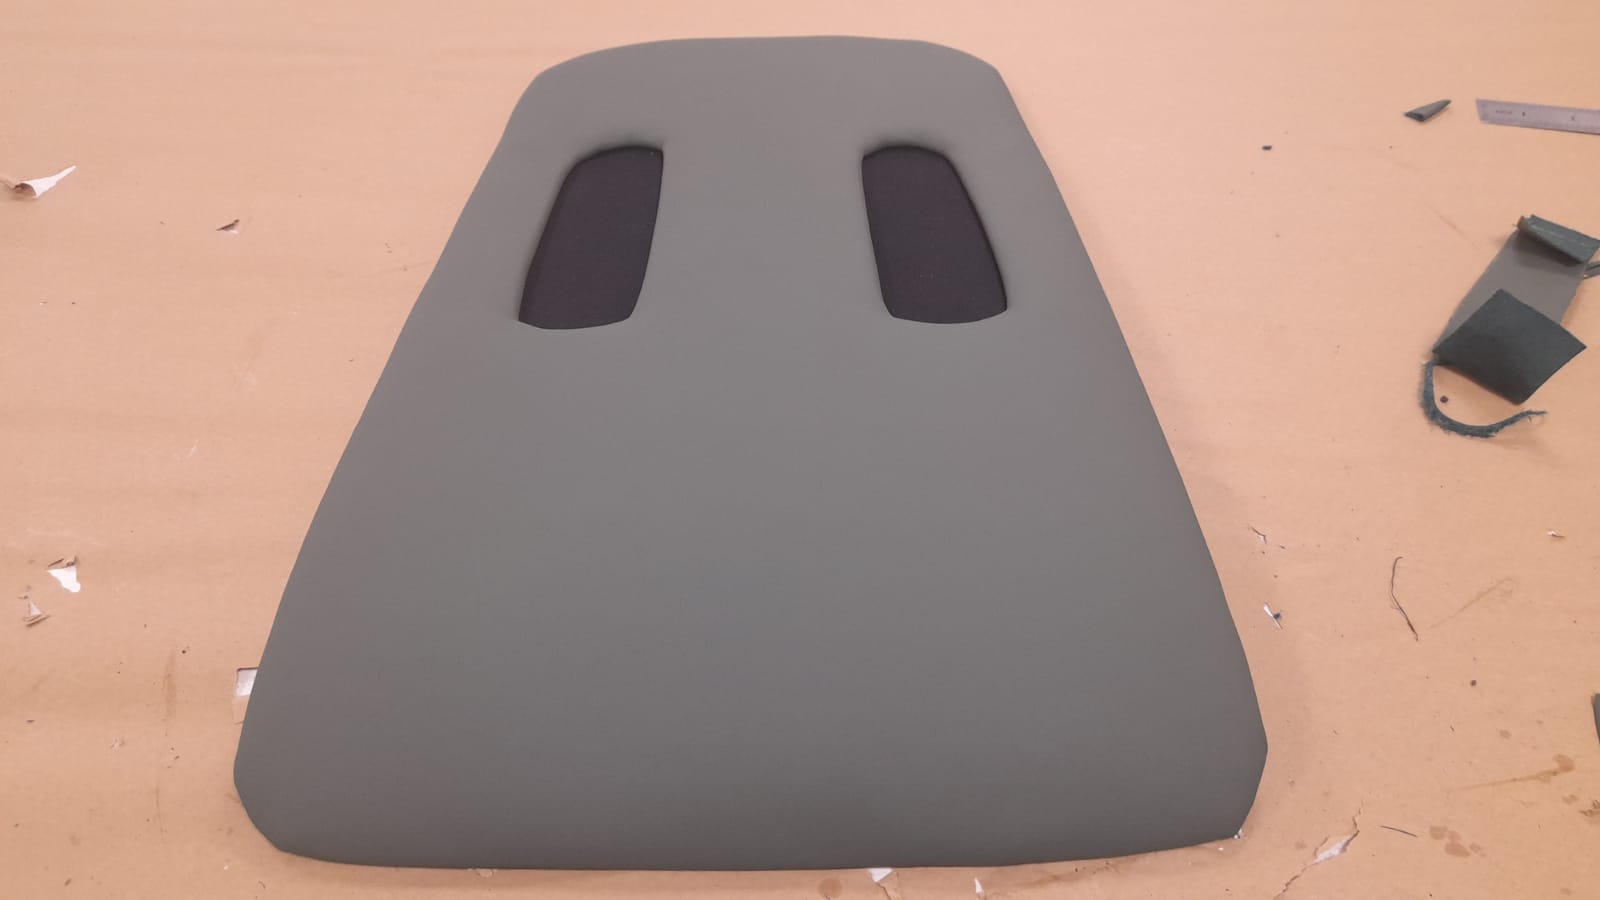
Lydia has been concentrating on the back boards of the seats. She has unscrewed the back panel from the frame and taken off the old leather, calico and fibreglass. She’s glued on the headlining foam to the face of the fibreglass backboard once and taken all the original fabric off. She then drew around the original covers onto the new leather hide to create the new covers. Lydia then glued the leather into place on top of the foam and sealed around the edges underneath. After this, she trimmed it into place around the cut out sections. Then she glued a piece of black calico onto the back for the cut outs and another piece of leather on top of this.
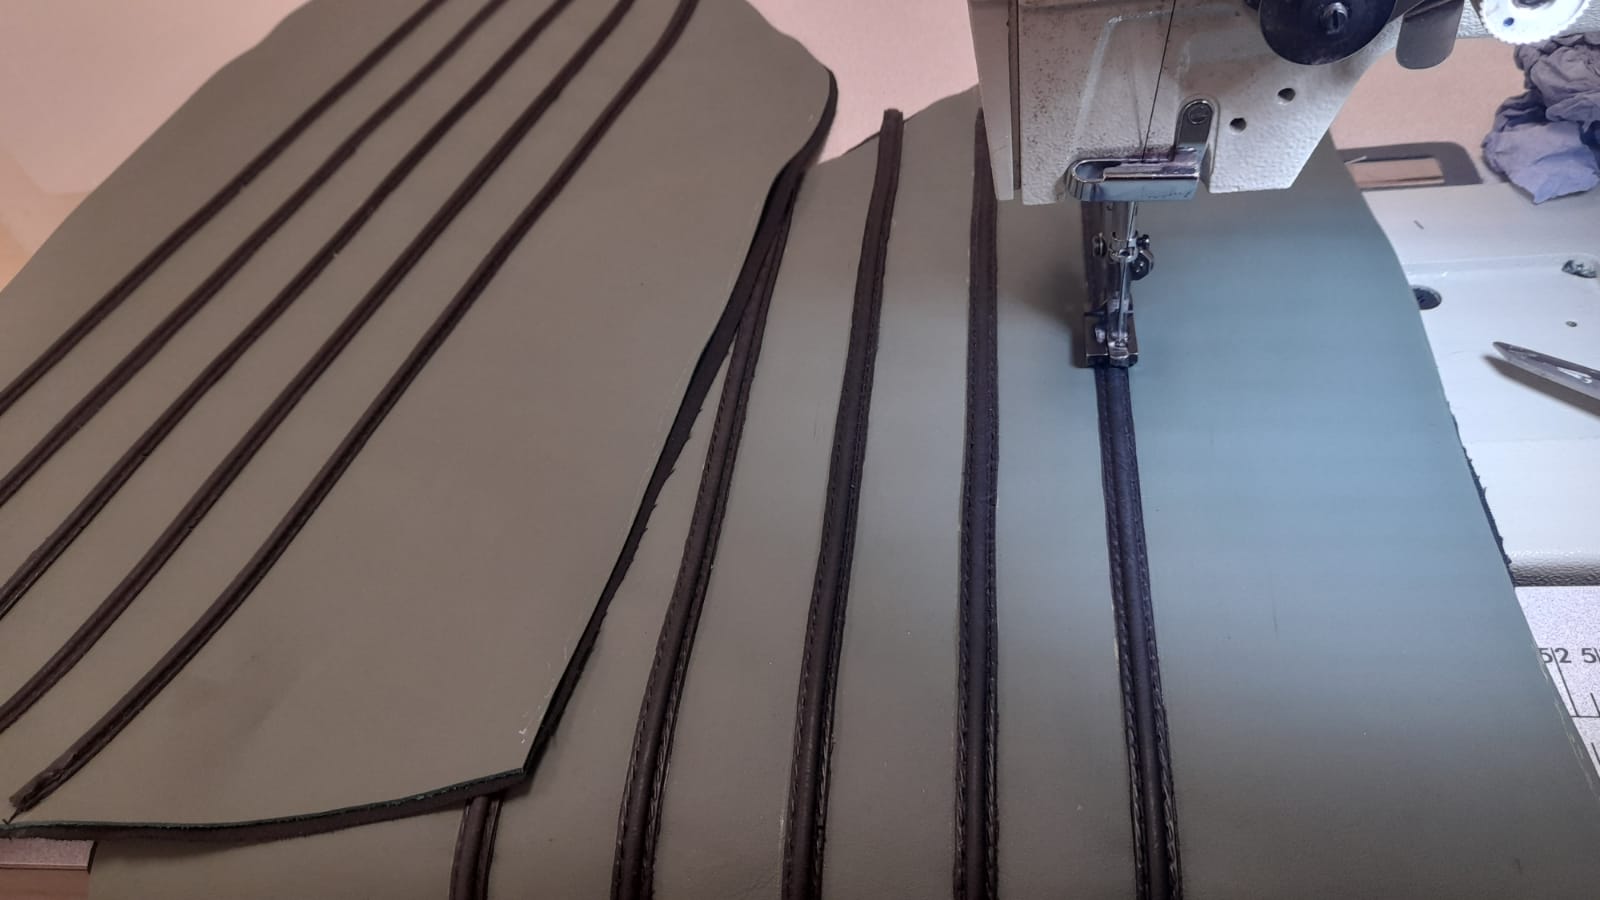
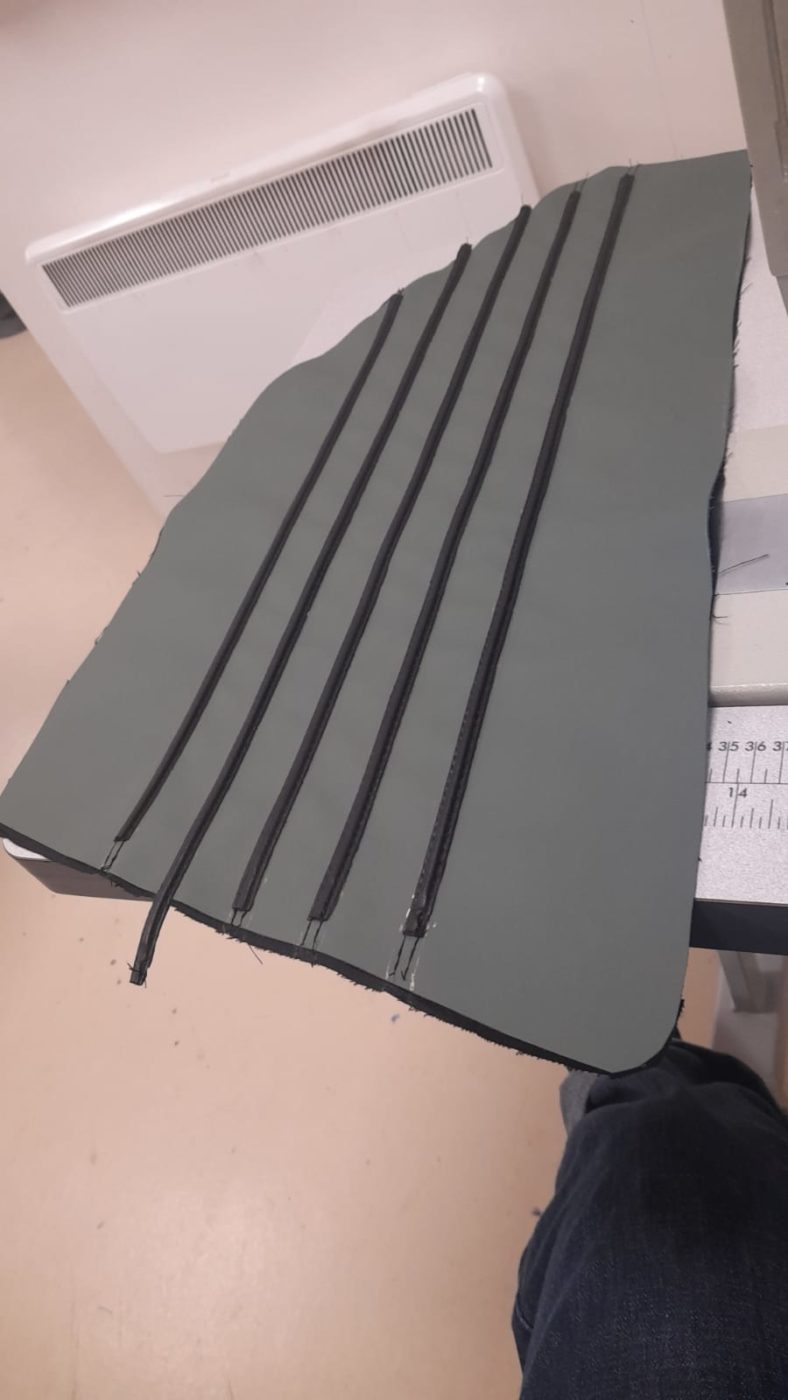
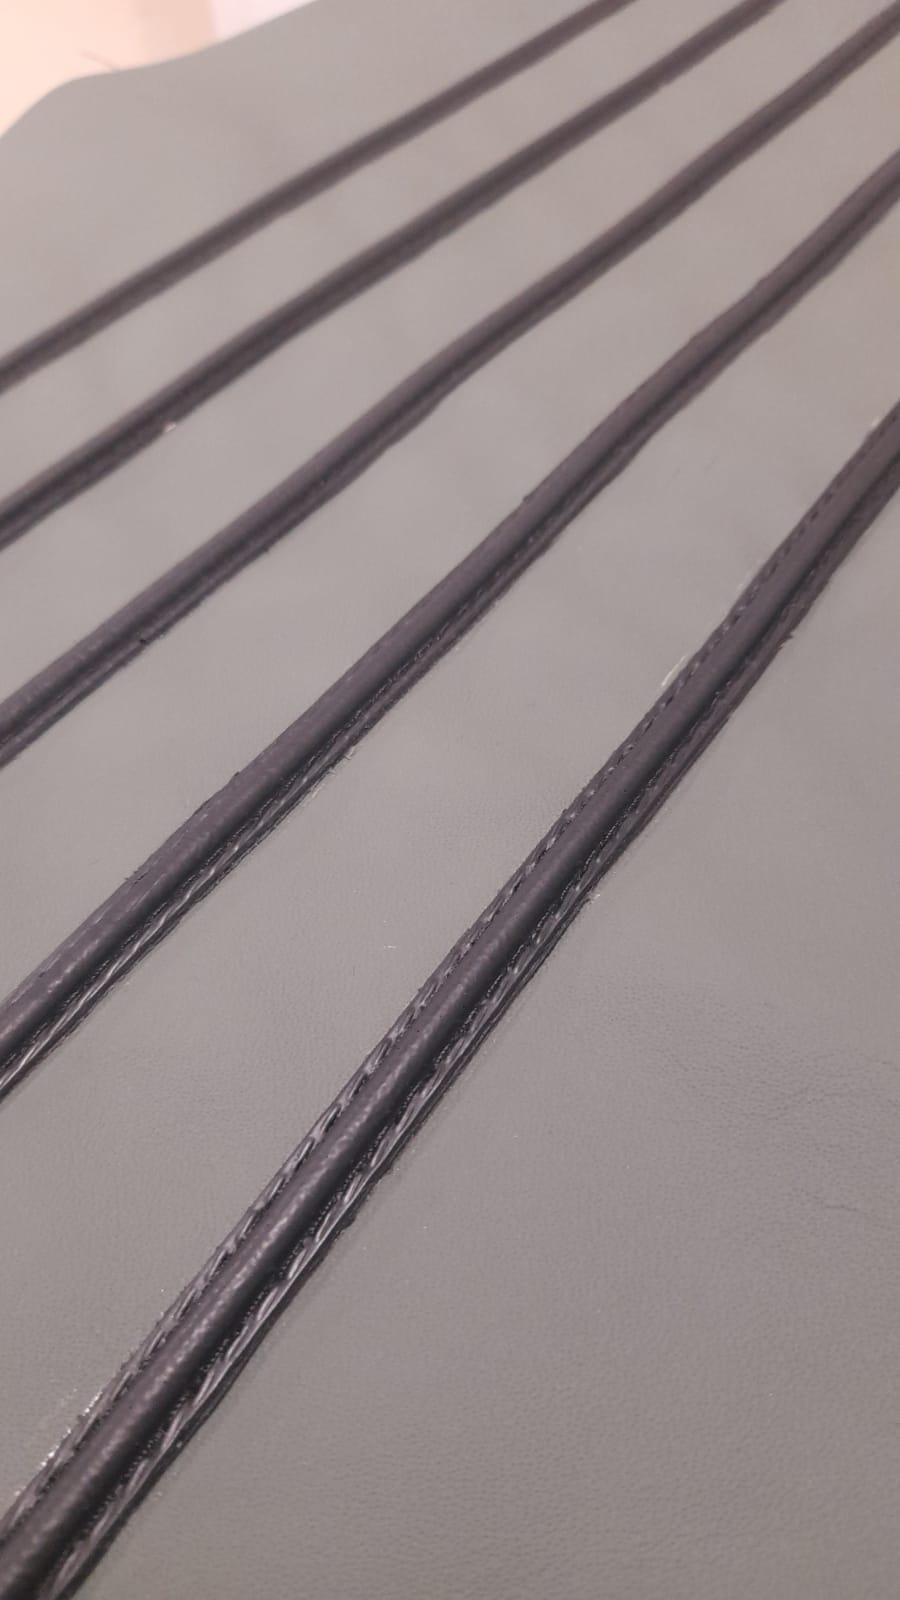
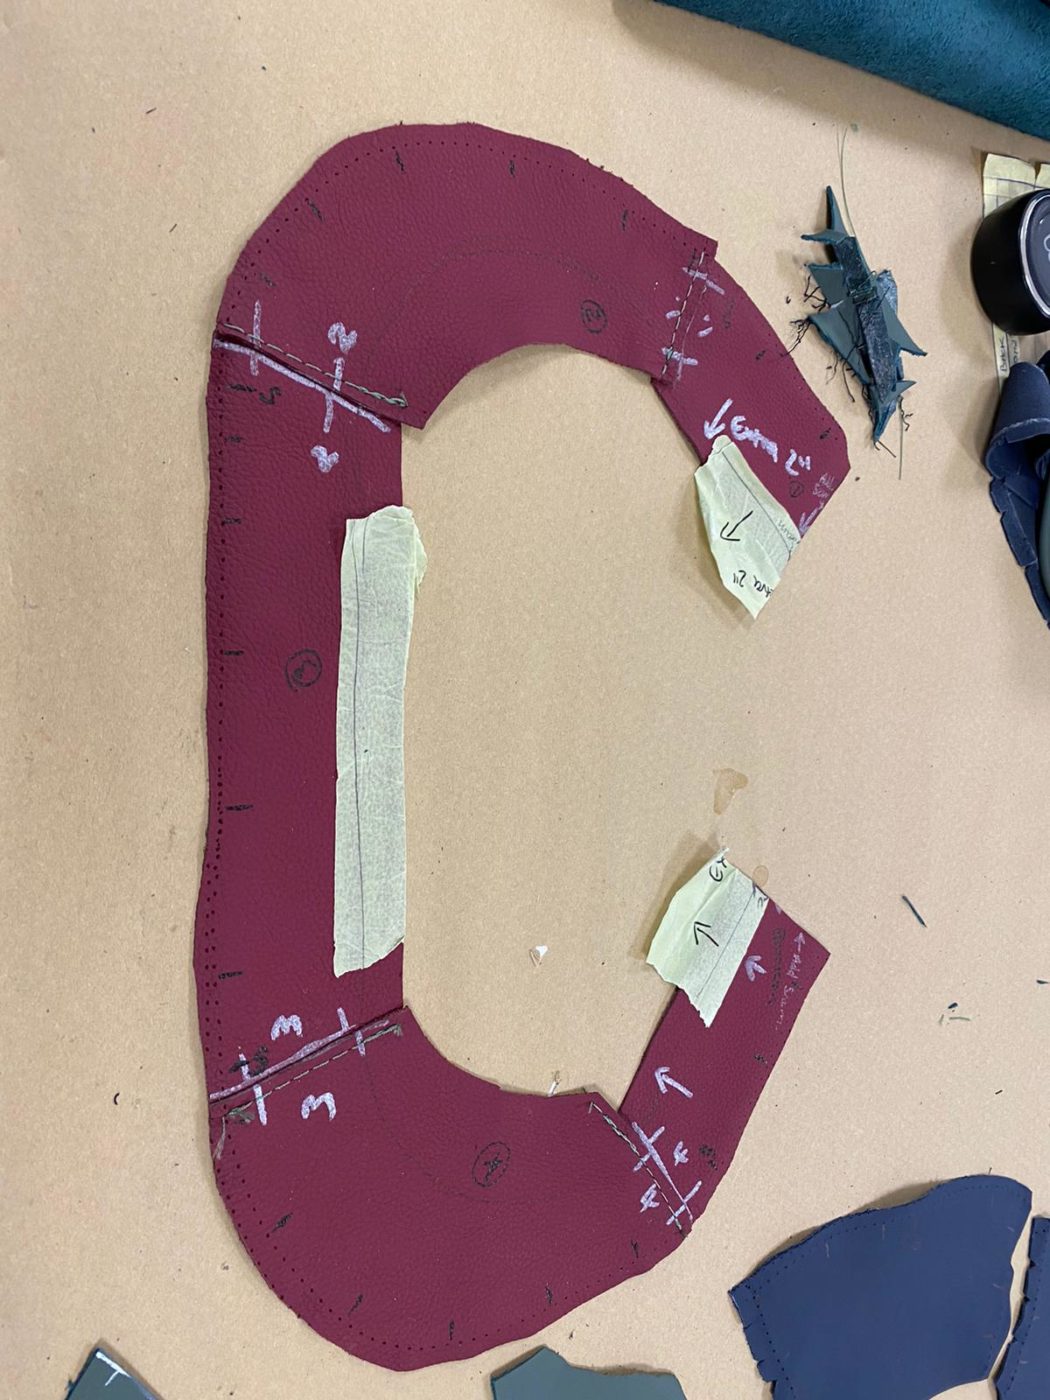
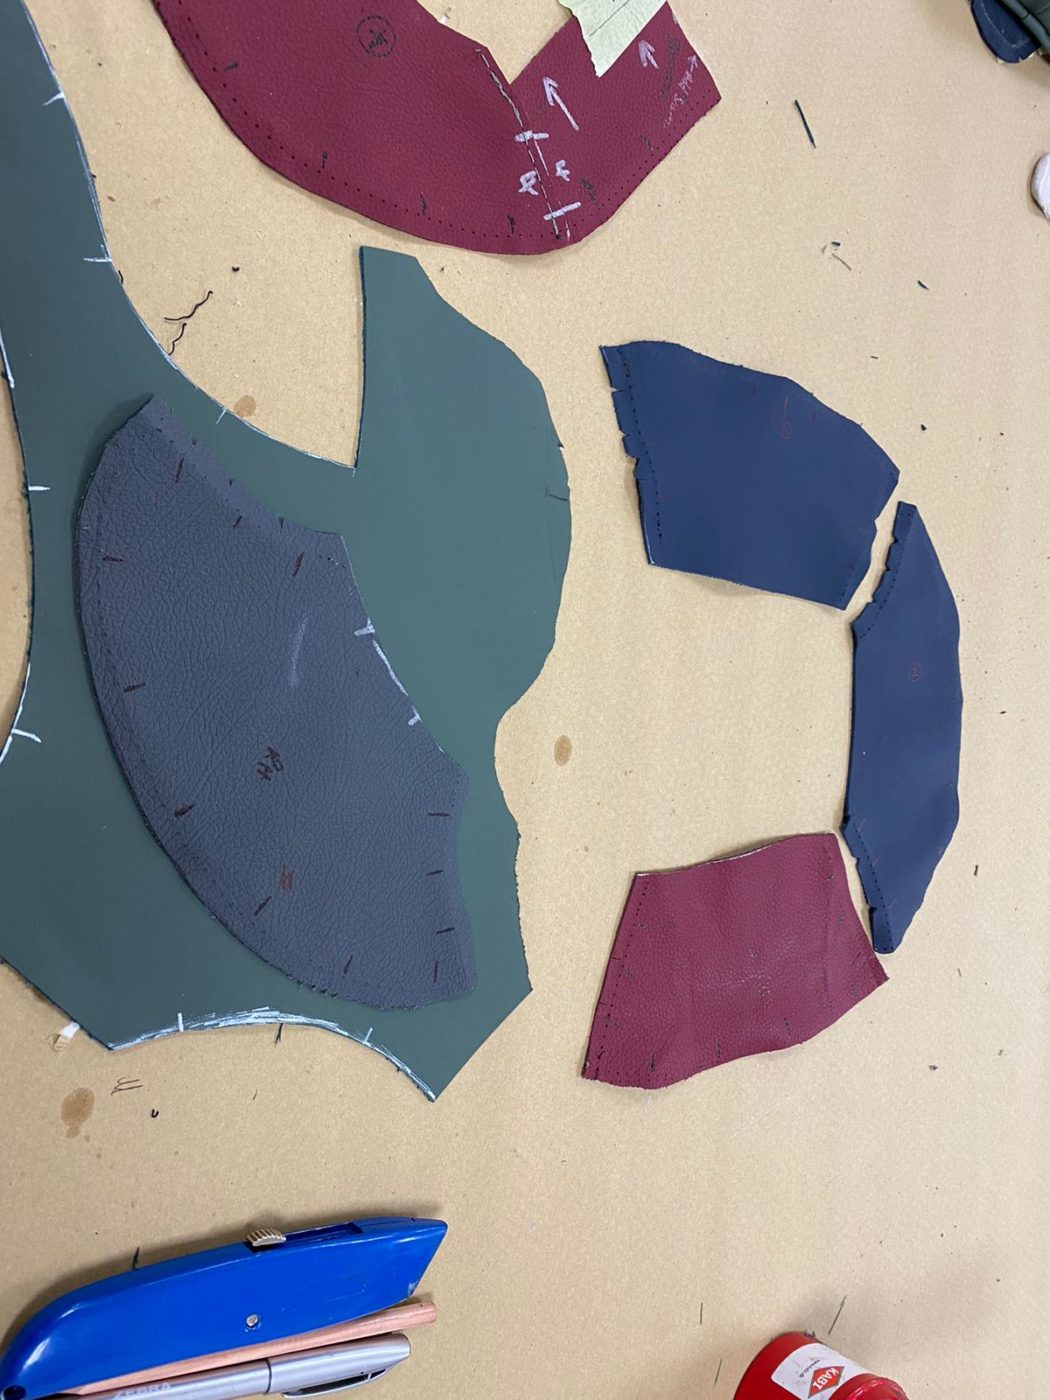
Lydia has also been sewing inset strips for the door panels to add to Brian’s Daytona instalment which can be seen below.