Grinding away that surface corrosion
Lydia has been helping with the progress of the 1951 Riley RMB. There was surface corrosion on the inside of one of the original wings


Lydia has been helping with the progress of the 1951 Riley RMB. There was surface corrosion on the inside of one of the original wings
Brian has been re-covering another piece from the 1963 Bentley S3 Continental. This time, the glovebox. He started the process by removing the original covers
This 2000 Honda S2000 is a returning modern classic. It came into us back in March this year for some cosmetic work, with patches of
Dave has installed these original UV lights under the dash of the 1954 Jaguar MK VII. The blue/purple looking lightbulbs are called black lights and
Here’s a big update on the 1955 Aston Martin DB 2/4. Clinton has been continuing his work on the car and has given us the
Unfortunately our Riley RMB chassis is suffering badly with internal rust and corrosion building up. On the surface it looks to be in a relatively
It may be some time before we see our 1987 VW Golf GTI in the workshops but having been sitting outside and open to the
Yesterday we had an unexpected new arrival in the form of a blue 1961 Alvis TD21. Unfortunately, this classic had broken down and was on
You may have heard about Jaguar re-producing the 1953 Le Mans-Winning Jaguar C-Type. It’s been a conversation in the classic car world for several months
Ady has now finished rebuilding the engine on the 1973 MG B GT V8 and so it’s now ready to be fitted into the car.
John has been investigating the wiring on the 1968 Jaguar E-Type Series 1.5 4.2. It’s clear to see that it has been tinkered about with
Scott has been continuing his work on the 1973 Jaguar E-Type Series 3. This time around he’s been fitting up the front frame onto the
The work on the 1982 Porsche 911SC is now complete. The Porsche has been in the trim shop after coming into us at the end
Chris has been busy polishing the paintwork on the doors of the 1998 Honda Integra Type R, while it’s sitting in the workshop having other
After huge amounts of work from Matt sanding, filling and more sanding, and then transferring it into the paint booth for priming, the 1983 Ford
Some exciting news on the 1955 Aston Martin DB 2/4 project. After discovering the original paint colour on the back of the glovebox while it
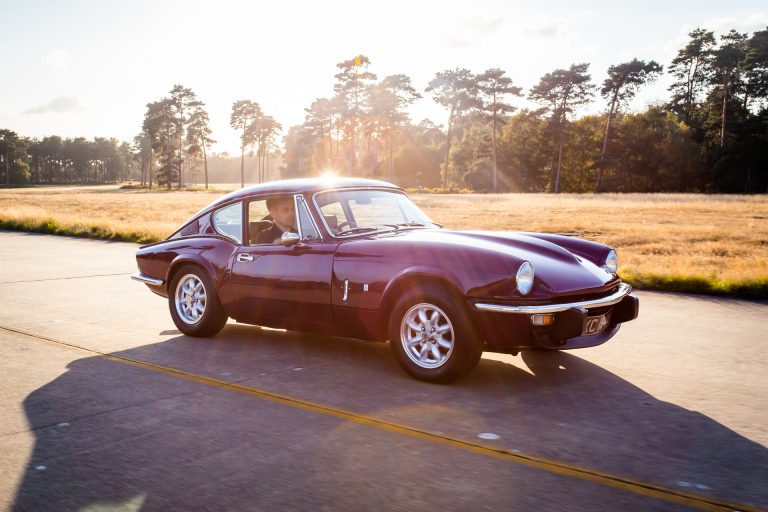
Last night was the launch of our competition to win a magenta 1974 Triumph GT6. As I write this post, over half of the tickets
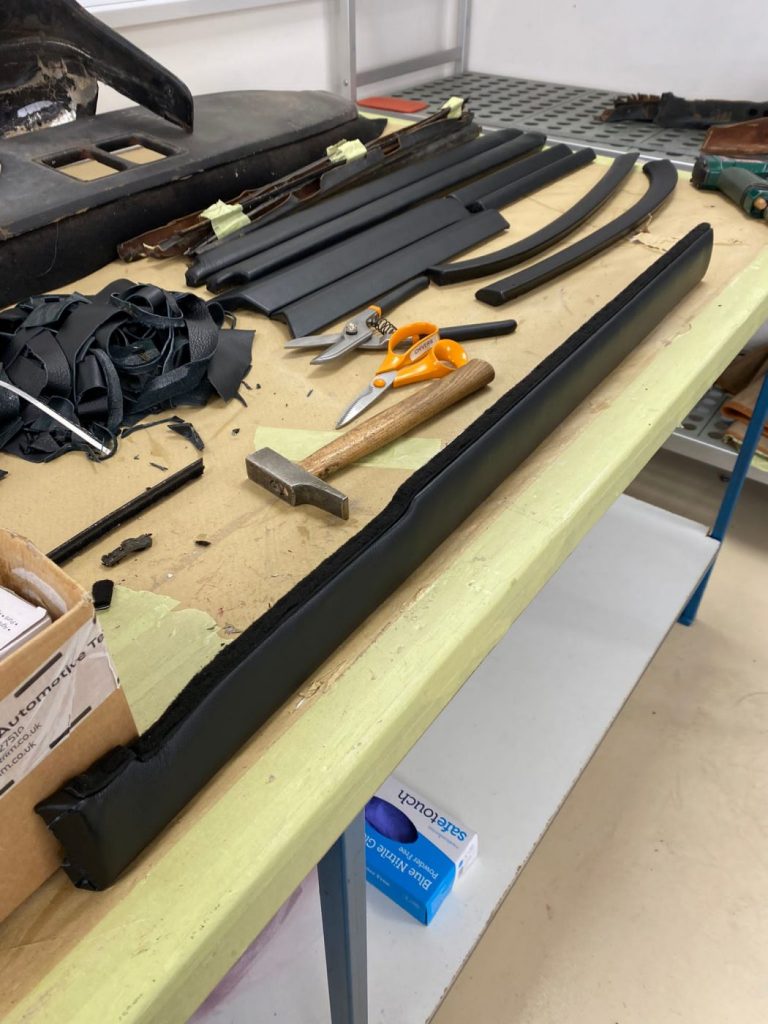
Brian has been re-covering more panels for the 1963 Bentley S3 Continental. This time it’s been dash panels, the instrument cover, door cappings and various
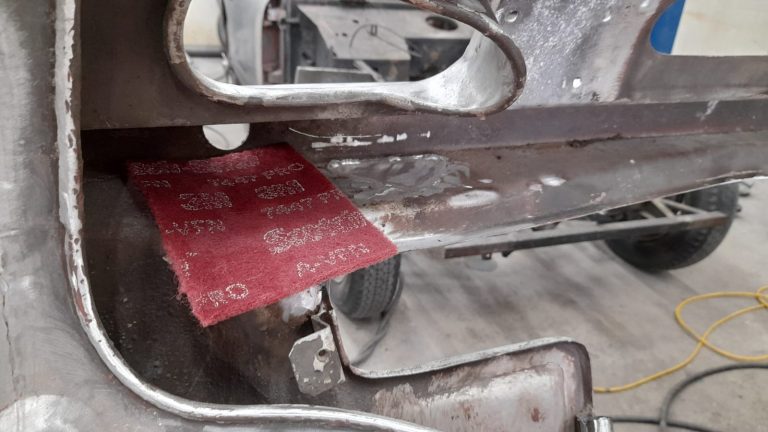
Lydia has been getting the bonnet of the 1955 Aston Martin DB 2/4 a step closer to the paint shop. The front inside edge had
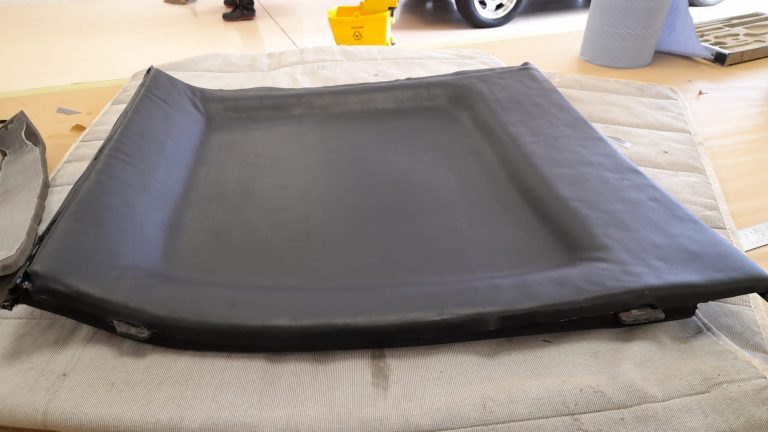
After having a new clear PVC window sewn into the original hood of the 1989 TVR SII 2.9 V6, the rest of the roof needed
After coming back from the sandblasters, the chassis of the 1951 yellow Riley RMB is looking a little corroded so James is going to have
The stitching had started to pull away on our Porsche 911 SC steering wheel. Kath has stripped the wheel of the existing leather and successfully
This green 2003 Vauxhall VX220 has just arrived with us. It was actually bought from us back in 2019, so it’s back on familiar ground.
You might have seen from yesterday’s blog posts that we have bought a “run-around” car, a green 1998 Volvo V40. Well after getting a much-needed
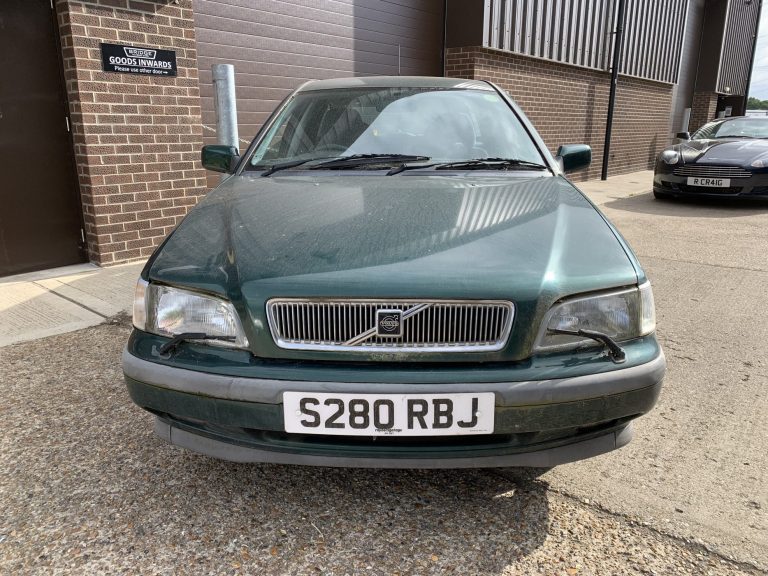
We’ve just bought this 1998 Volvo V40 to use as a run-around car for the business. It will be used a lot for filming the
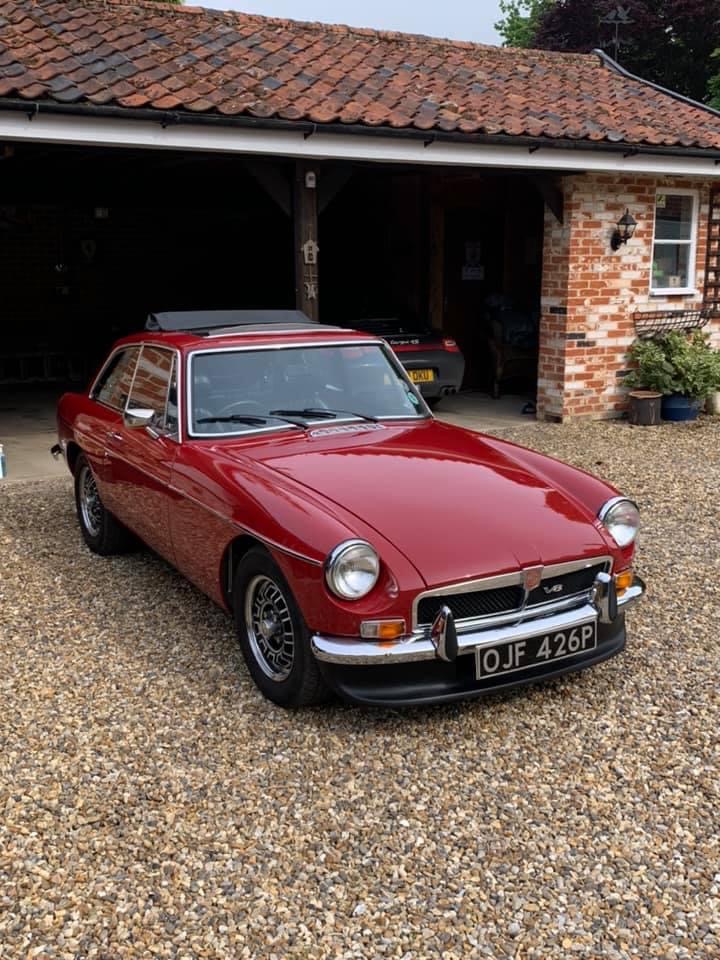
Potentially arriving at our workshop is the red 1975 MGB GT V8.
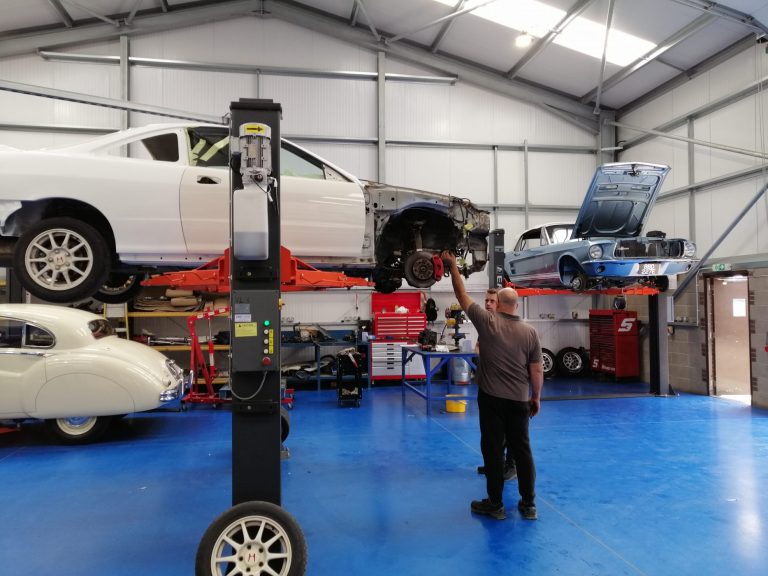
After last being seen in the painting bay, the 1998 Honda Integra Type R is now in the workshop! Paul is now taking care of
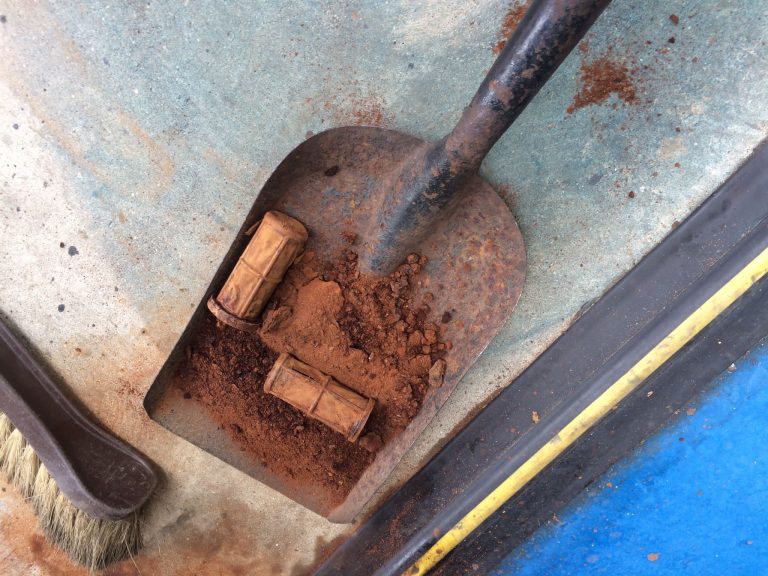
You may have seen the blog post from last week about the fuel line problems that Dave discovered on the 1971 Jaguar XJ6. If not,
James has been continuing his work on the yellow 1951 Riley. The air vent for the second panel was sandblasted last week, so could be
This 1982 Porsche 911 has recently arrived. The list of jobs that need addressing is the following: the door-bins need fitting, the leather restraint straps
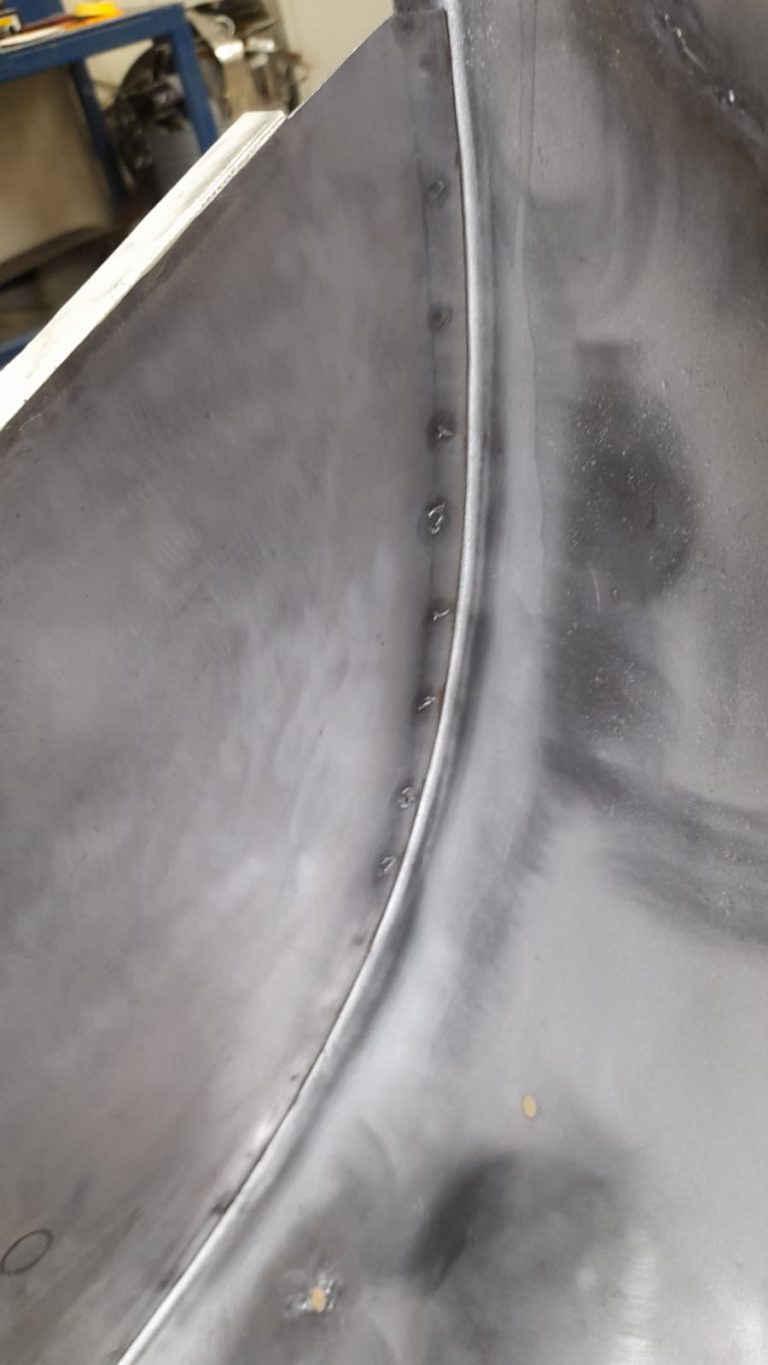
Lydia has been helping with the progress of the 1951 Riley RMB. There was surface corrosion on the inside of one of the original wings round the edges of the spot welds done by James. Lydia did this with various-sized grinding attachments on a drill. A small step in the process, but a vital one, nonetheless, since we don’t want that surface corrosion getting worse or showing through the paint when it goes into that stage.
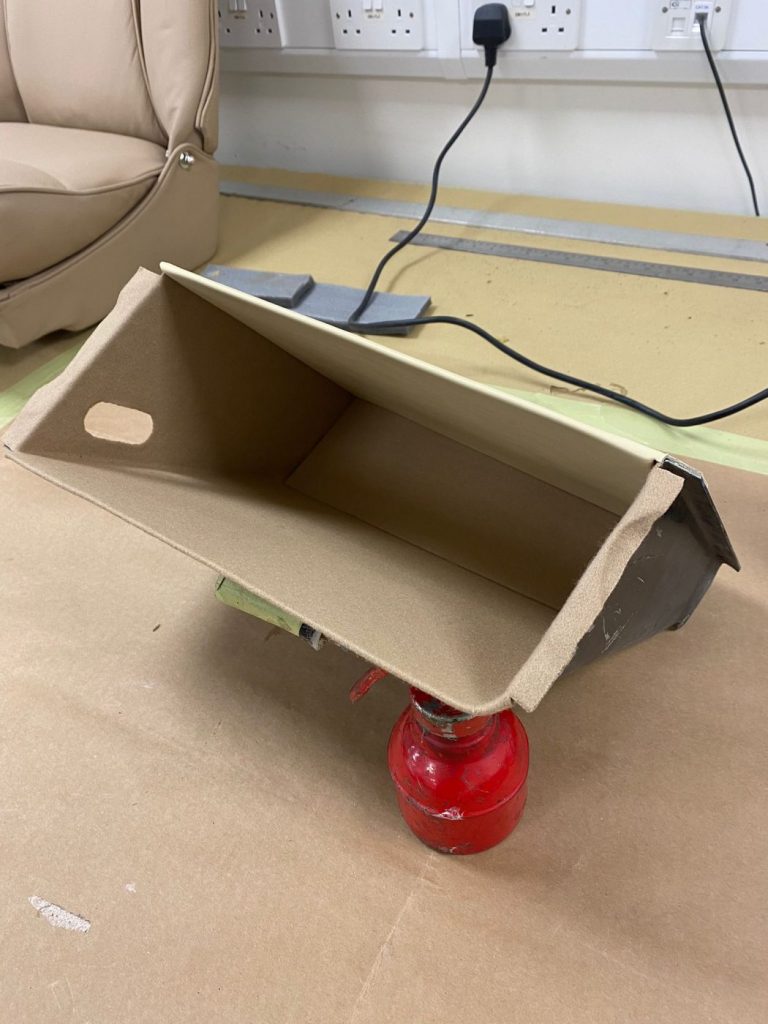
Brian has been re-covering another piece from the 1963 Bentley S3 Continental. This time, the glovebox.
He started the process by removing the original covers from the metal box that makes the glovebox. He then used these original pieces as patterns on the new fabric, headlining fabric for most with one piece of leather. The headlining fabric pieces were glued onto the inside of the glovebox first, with the back piece having board underneath the material to give it structure and stability. Once this was all glued into place, Brian put the leather piece onto board as well, before glueing it onto the metal. All the material was wrapped around the edges to give a neat finish. Another piece of the Bentley interior finished!
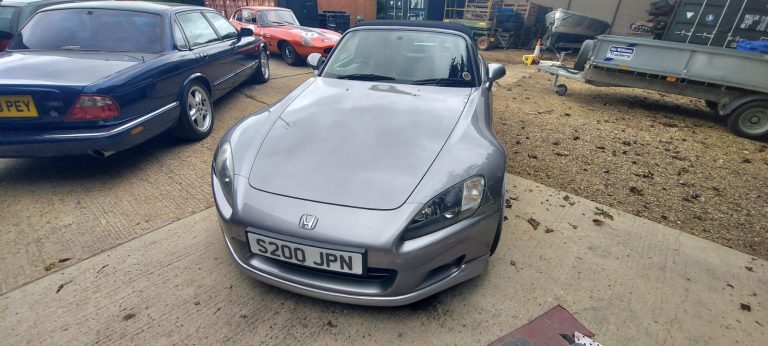
This 2000 Honda S2000 is a returning modern classic. It came into us back in March this year for some cosmetic work, with patches of corrosion and paint chipping away on the wheel arches, boot, bonnet and side panels. You can read about the process in full, in previous blog posts on this car.
This time around, it came into us for preparation work and painting on the front bumper and wing. This is called a SMART repair, which stands for Small Medium Area Repair Technology. It’s simply where a small area of the car is repaired instead of replacing the whole panel. Another great job done by the paint shop guys!
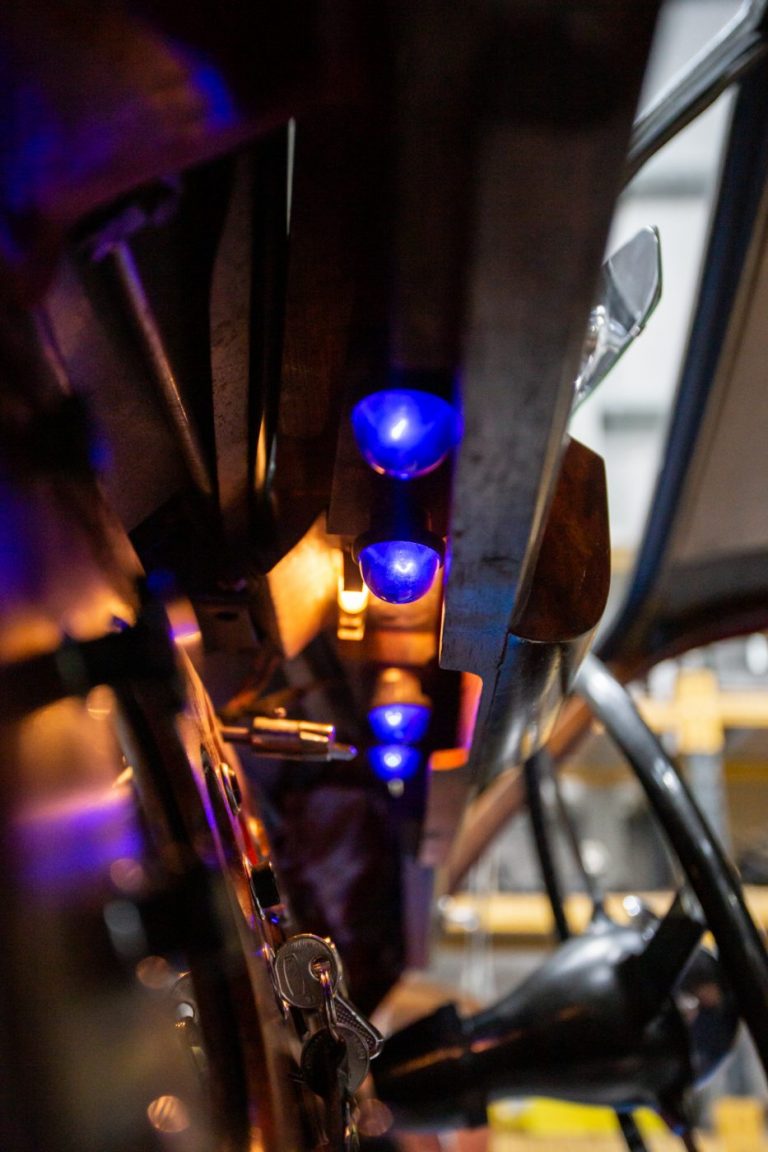
Dave has installed these original UV lights under the dash of the 1954 Jaguar MK VII. The blue/purple looking lightbulbs are called black lights and the white numbers and markings on the dials will be painted in a substance such as radium (but we’re not 100% sure on whether it is radium). So then, in the dark with the lights on, the dials will glow. Most cars have backlights, so this is a really lovely feature of the vehicle.
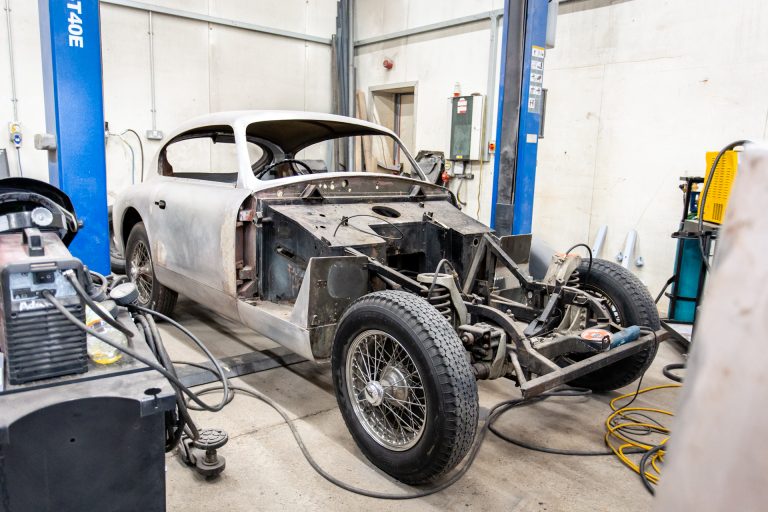
Here’s a big update on the 1955 Aston Martin DB 2/4. Clinton has been continuing his work on the car and has given us the low-down on what has been done recently.
If we start at the rear of the vehicle, he’s finished putting the four corners in, the outside edge of the boot lid was corroded so this has been repaired with fabrication and welding, a new boot hinge has been created and Clinton is waiting for parts to arrive to complete the boot. One bigger change to the boot has been the removal of two large handles on the boot. When the car arrived with them on, we thought something wasn’t quite right, so we went on a visit to Stratton Motor Company because they had a DB 2/4 in their own showroom. It was there that it was confirmed that the handles should not be on the boot lid.
The front “pod” of the car on the right-hand side had to be repaired due to corrosion. The guys in the fabrication and welding bay are now waiting for the inside of the bonnet to be painted before they can fit the inner frame parts back in. The doors also need looking at as they won’t shut properly.
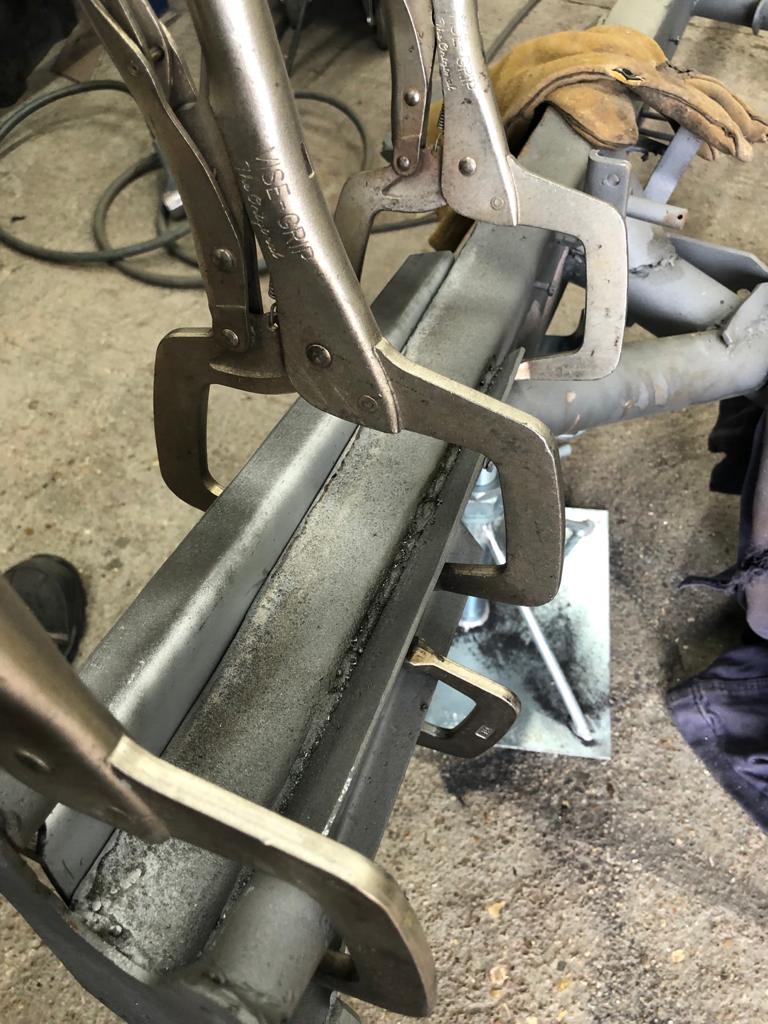
Unfortunately our Riley RMB chassis is suffering badly with internal rust and corrosion building up. On the surface it looks to be in a relatively solid state but when tipped up on one end large clumps of rust falls out.
This is a bit unexpected but most certainly needs to be addressed.
Having discussed the matter with the Riley’s owner we have decided to chemically dip the chassis. The chemical dip process works very well on cars and chassis’ and will remove paint, rust and underseal from complete car shells or individual panels. Its chemical formulation strips away contaminants from all internal and external areas.
James has also been fabricating the new strengthening panels on the chassis and subframe.
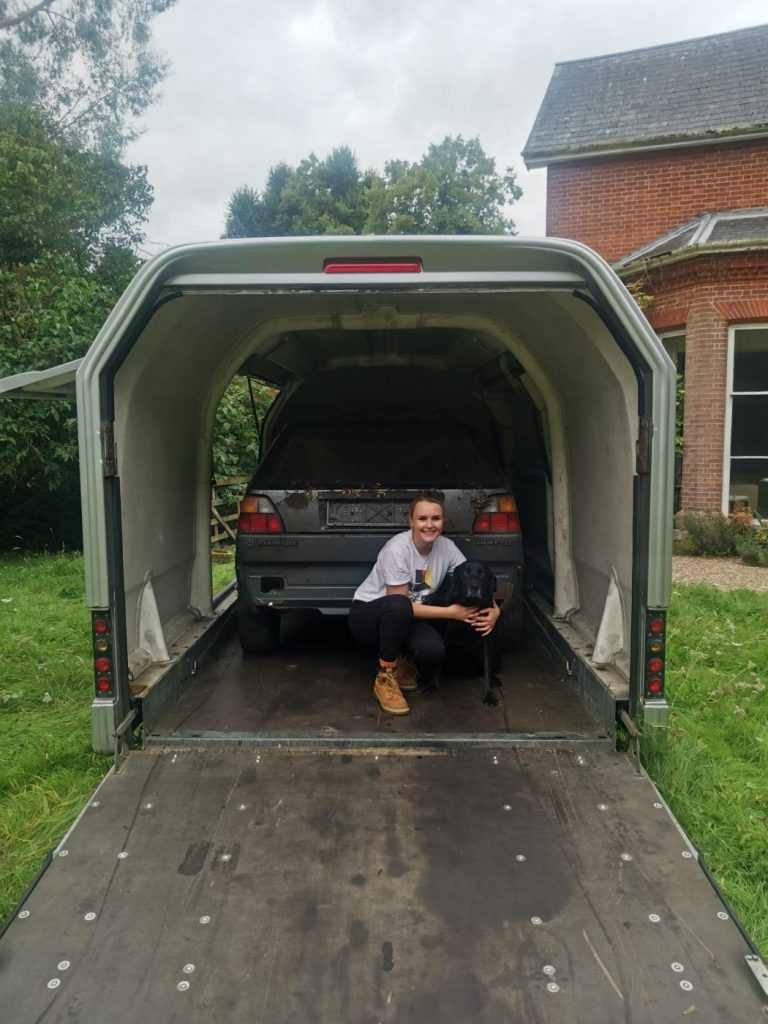
It may be some time before we see our 1987 VW Golf GTI in the workshops but having been sitting outside and open to the elements since 2007, we thought it was best to get the car inside and away from the wind and the rain.
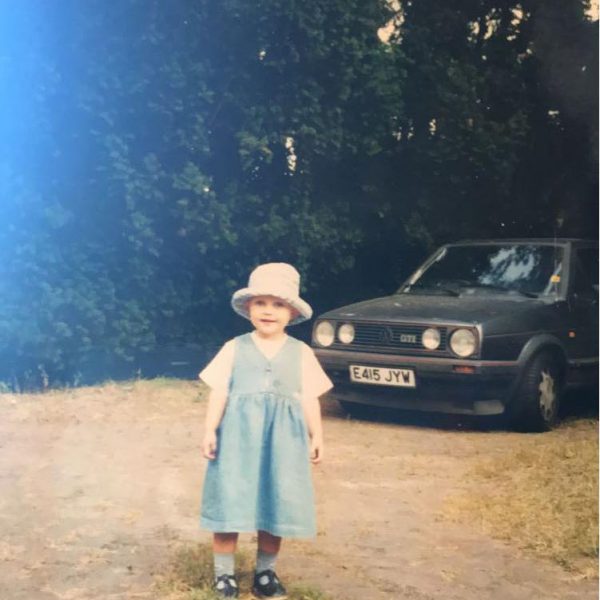
Having been owned by the same family for many years Alice has decided to get her father’s the car back on the road for many more years of enjoyment.
After a little bit of tree surgery in order to get the van through the gates, Tom and Mauro have managed to pull the car out and successfully loaded (him) in to the trailer.
Now safely tucked away in the Hangar, our first job will be to thoroughly clean the car, inside and out. This way, we can see work is involved in the restoration or re-commission of this modern classic.
With a small window of opportunity in the trim shop diary Kath and Brian have got to work in removing the very wet, and very mouldy interior trim. We’ll return all of the interior to the workshops for a full assessment and clean and we hope to be able to rescue as much of it as possible.
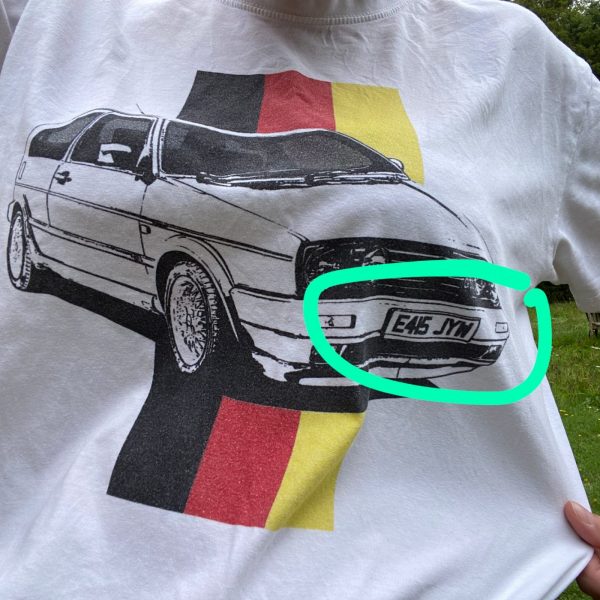
Check out the T-shirt that Alice was wearing in the image above. The wheels aren’t the same but the number plate sure is!
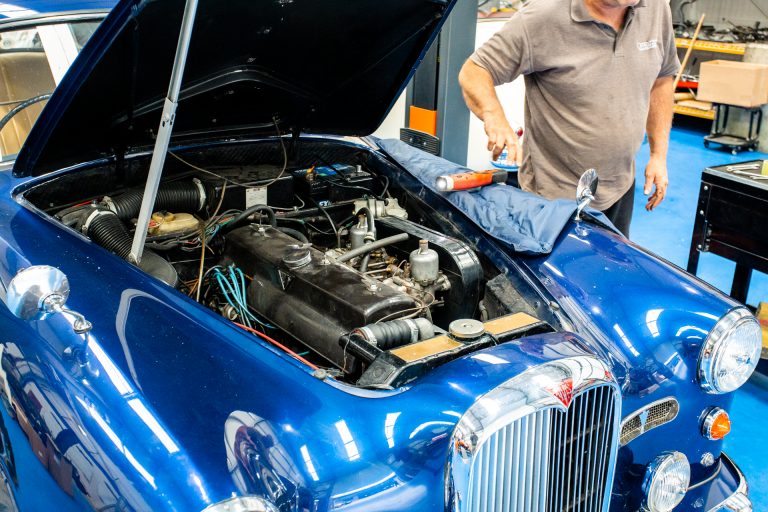
Yesterday we had an unexpected new arrival in the form of a blue 1961 Alvis TD21. Unfortunately, this classic had broken down and was on its way to a show which the owners are hosting. They’d traveled down from Wales and had attended a wedding on their trip in the area. On their way across to Oxford, the Alvis stopped working.
This gorgeous classic ended up being brought to us for our technicians to look at. It was found that the starter motor wasn’t working, so it was swiftly sent off last night to be repaired. We’re now just waiting for its return. Well done so far to the technicians for being so quick with diagnosing the issue. Let’s hope we can get it to Oxford in time!
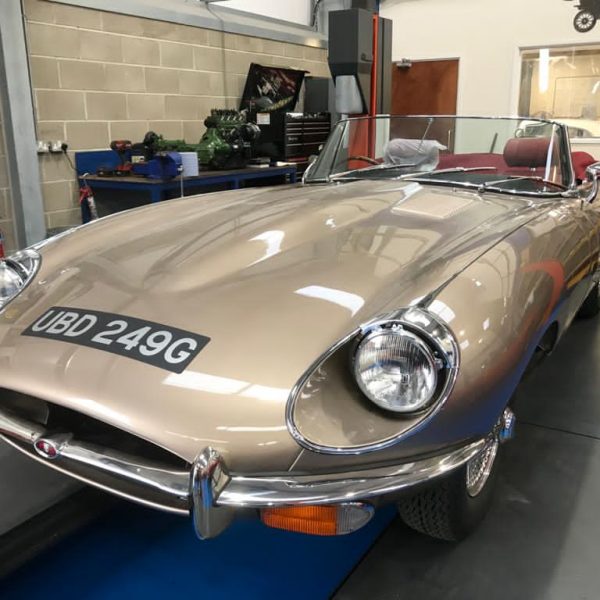
You may have heard about Jaguar re-producing the 1953 Le Mans-Winning Jaguar C-Type. It’s been a conversation in the classic car world for several months now and this weekend, the first one will be out in the public eye for everyone to see.
There will only be a small number of the cars produced and they’ll come with a pretty high price tag…
Most of the design and build will be like the original, however, there will be a few changes due to modern-day safety standards. The new C-Types will be made of a thicker gauge metal because the originals were made so thin they could practically fall apart after racing. As well as that, there will be a built-in removable roll hoop, a safety lining in the fuel tank, a fire extinguisher and a smaller steering wheel than the original, to make it easier for the driver to control. Harnesses will also be able to be securely mounted thanks to a new rear cross member.
We’re extremely familiar with E-Types now, having had so many in our workshop, we’re looking forward to seeing how the new C-Type looks.
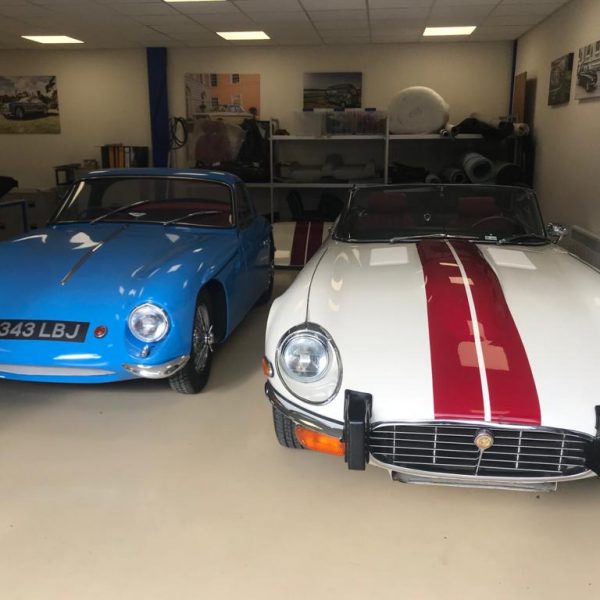
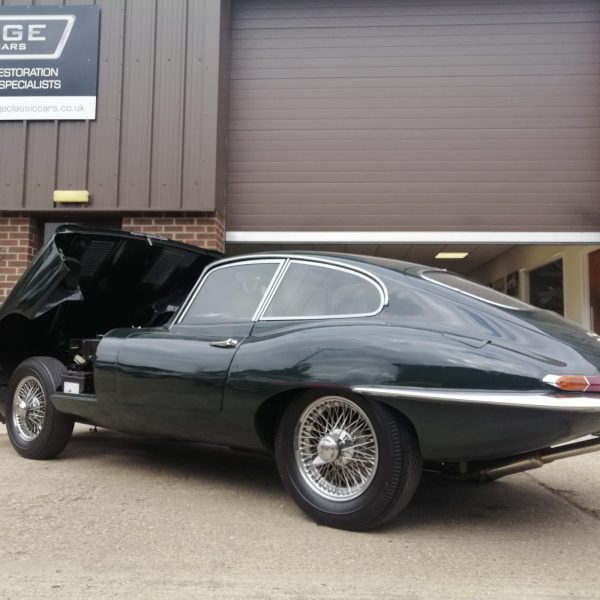
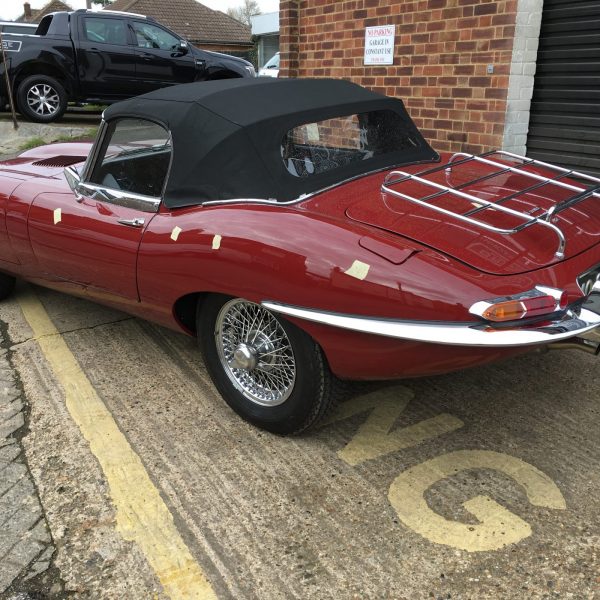
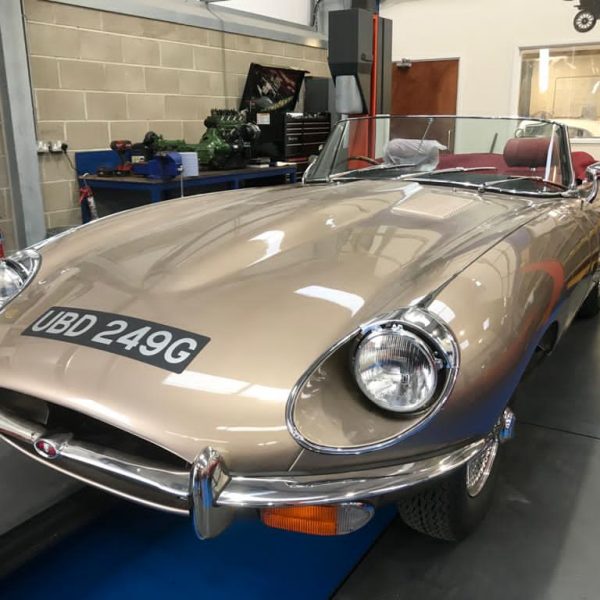
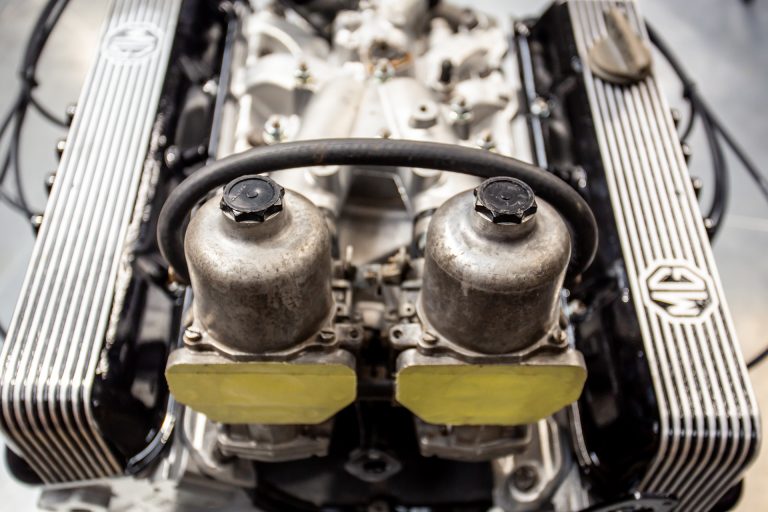
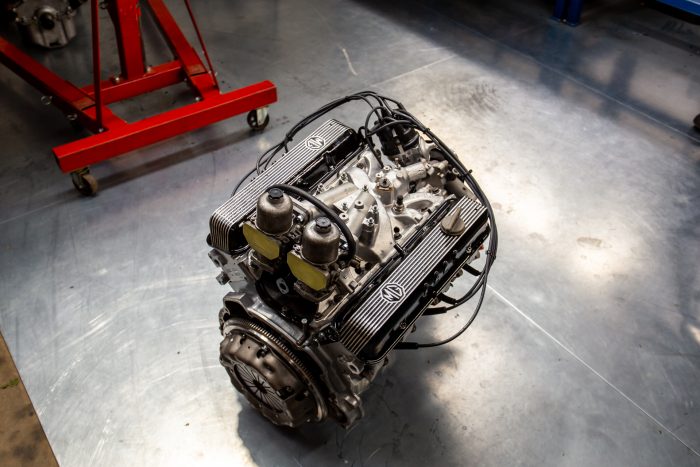
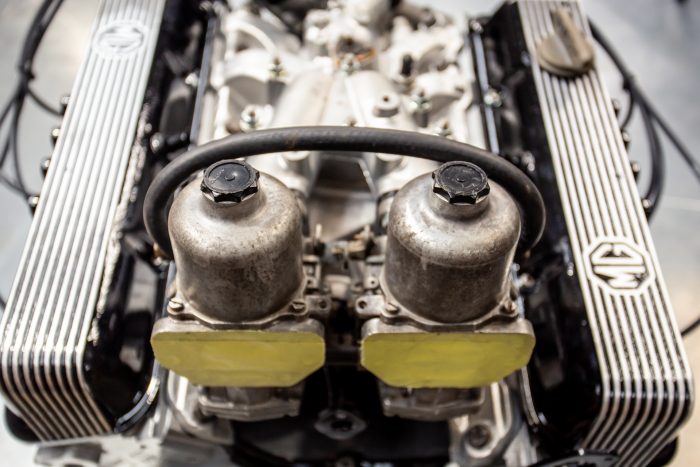
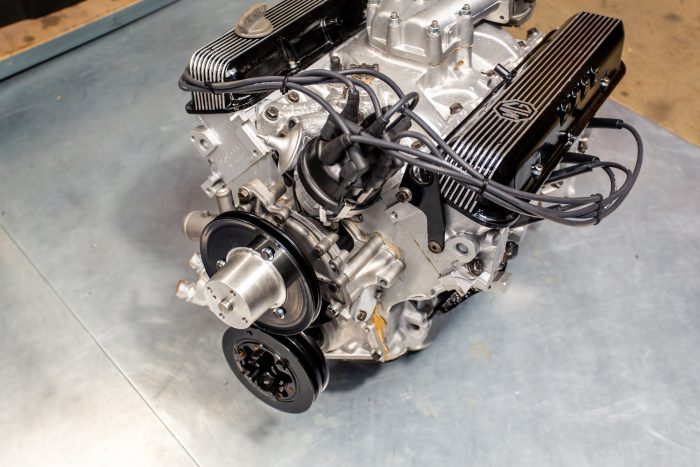
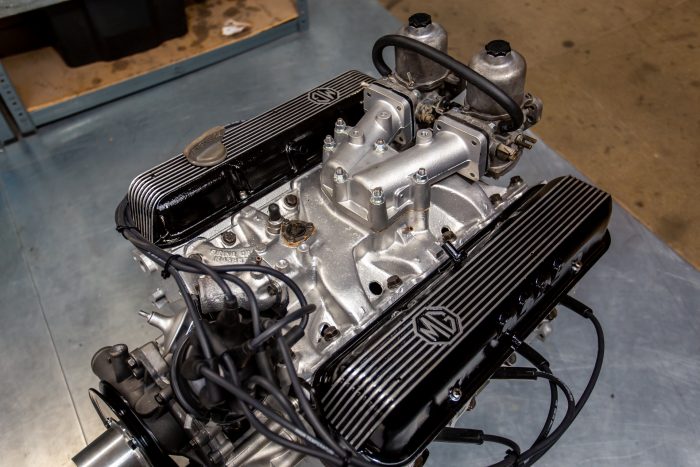
Ady has now finished rebuilding the engine on the 1973 MG B GT V8 and so it’s now ready to be fitted into the car. As well as painting the engine beforehand, Chris also painted the rocker covers for Ady. You can read about the painting of the engine that Chris did in the paintshop here.
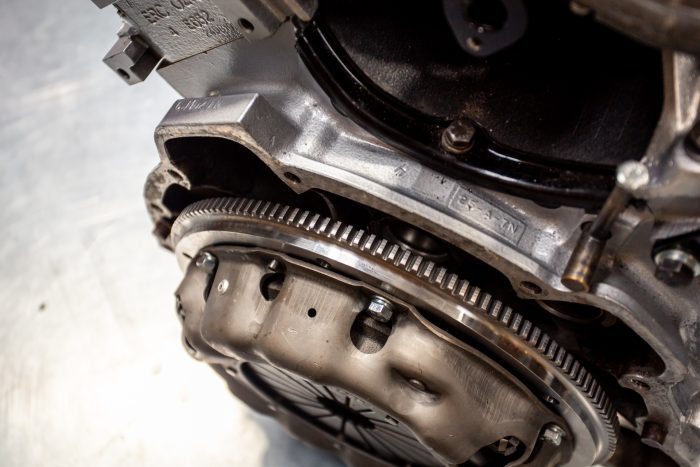
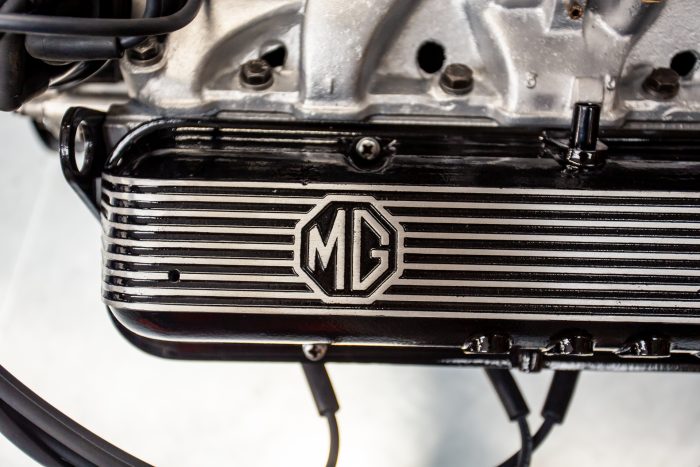
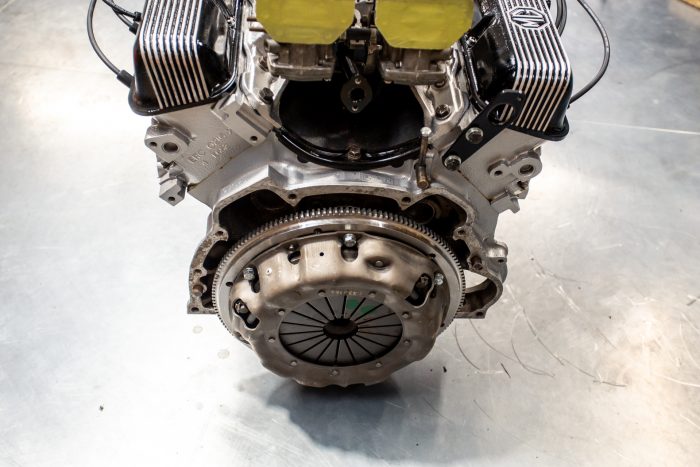
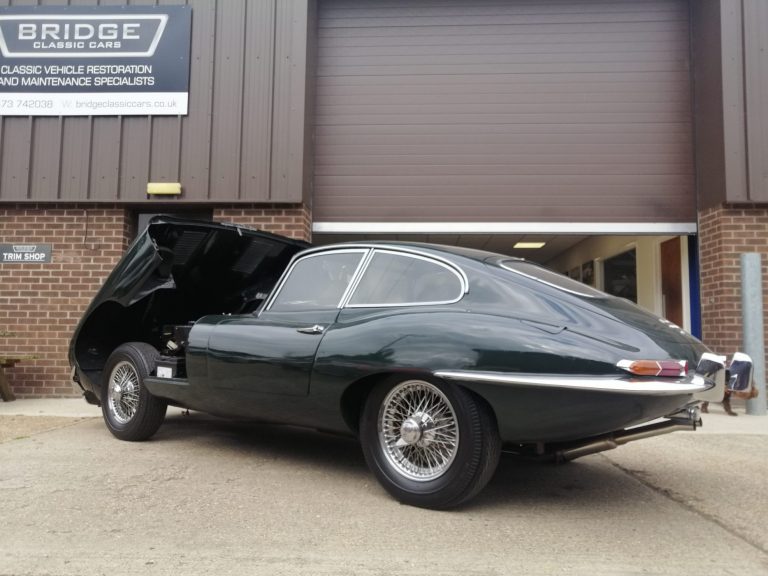
John has been investigating the wiring on the 1968 Jaguar E-Type Series 1.5 4.2. It’s clear to see that it has been tinkered about with before and unfortunately, the wiring is questionable.
Because of this incorrect work on it, John has put in a new alternator and a new regulator because the alternator wasn’t charging before. He also found that the ignition switch is incorrectly wired, which meant that the amp meter burnt out as a consequence. He’s tested the ignition switch and found that there was a pair of twelve volts wired together that were causing damage to the amp meter.
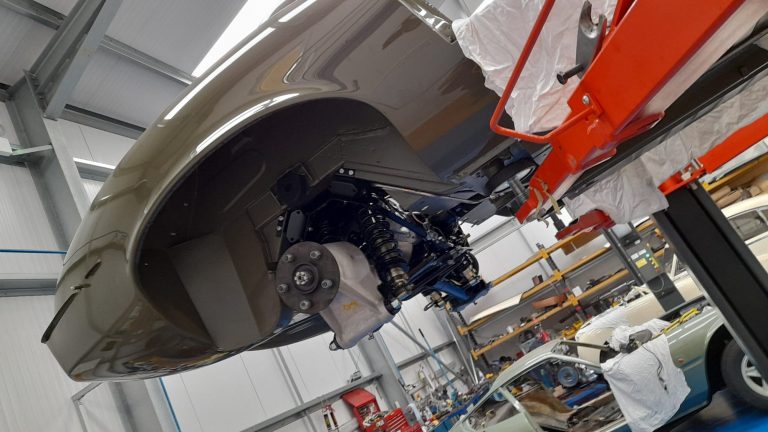
Scott has been continuing his work on the 1973 Jaguar E-Type Series 3. This time around he’s been fitting up the front frame onto the body shell, rebuilding the front suspension and brakes and fitting them, with all new bushings and ball joints, fitting the front hubs with new wheel bearings, fitting the steering rack, fitting front shocks, fitting easy-bleed (to make bleeding the rear brakes easier), fitted left and right front to rear wiring loom/harnesses, fitted the front torsion bars, fitted the fuel lines under the car, new rear axle mounting/hub stops and fitted the rear axle.
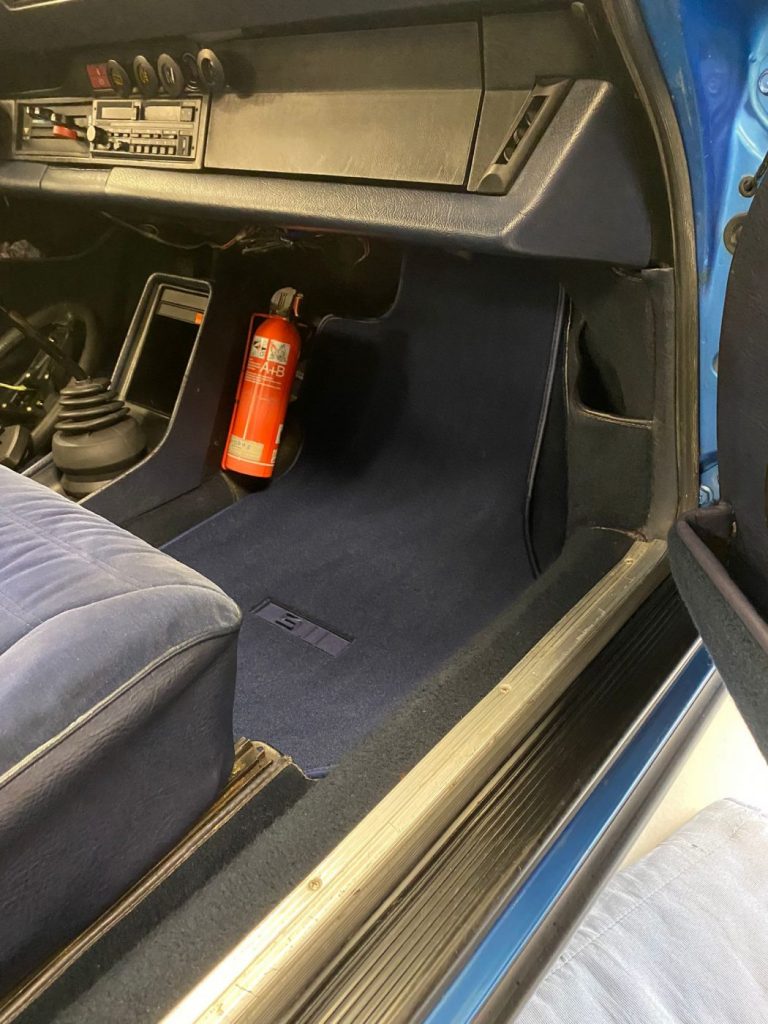
The work on the 1982 Porsche 911SC is now complete.
The Porsche has been in the trim shop after coming into us at the end of last week, getting its original upholstery freshened up and put back in. When it came to us, the carpets weren’t in, the door cards weren’t attached correctly, the pockets for the doors weren’t attached at all, there were a few bits of carpet panel that were loose and the stitching on the steering wheel had come undone. Kath has been busy resurrecting all of these issues over the last couple of days. As you can see, as well as creating interiors from scratch, the trim shop team are also perfectly capable of putting original ones back into good shape if customers prefer to not have a complete overhaul. If this is something you would be interested in for your classic car, please don’t hesitate to contact us.
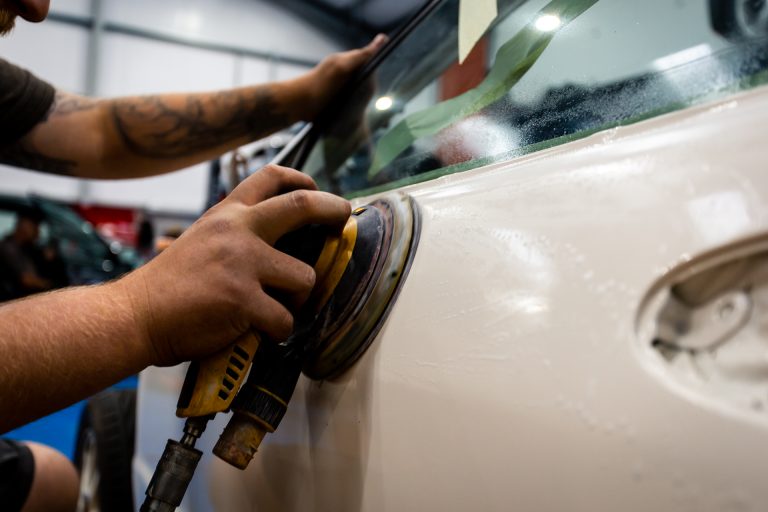
Chris has been busy polishing the paintwork on the doors of the 1998 Honda Integra Type R, while it’s sitting in the workshop having other work done to it.
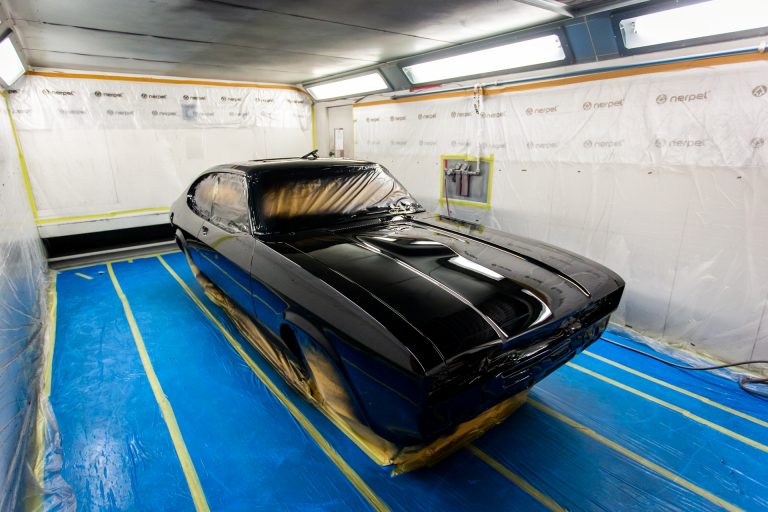
After huge amounts of work from Matt sanding, filling and more sanding, and then transferring it into the paint booth for priming, the 1983 Ford Capri 1.6 LS has now been painted! After turning up to us with the exterior looking a little worse for wear, it’s now back to looking fantastic. The final step will be to polish the new paintwork. Great work from Matt, I’m sure you will agree.
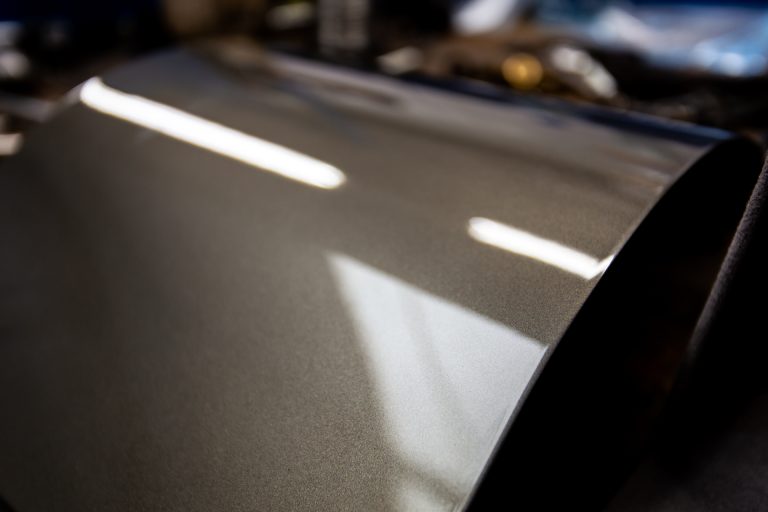
Some exciting news on the 1955 Aston Martin DB 2/4 project. After discovering the original paint colour on the back of the glovebox while it was being stripped apart back in May, the guys in the paint shop have now managed to match it up very closely. You can see in the photos the new paint sprayed onto metal next to the original paint on the back of the glovebox. We’re looking forward to seeing the car painted now! Keep your eyes peeled for progress on that…
Last night was the launch of our competition to win a magenta 1974 Triumph GT6. As I write this post, over half of the tickets have already sold, that’s over 3,000, leaving only under 2,000 left. So, if you want to be in with a chance of winning this stunning classic car, be sure to head over to our competitions website to get your tickets before they all go. And at £5 per ticket, that’s an absolute bargain!
If you click on the link above, you’ll also be able to find out more information about the GT6, along with more photos and a video.
Brian has been re-covering more panels for the 1963 Bentley S3 Continental. This time it’s been dash panels, the instrument cover, door cappings and various other panels. The process for all of them involved taking the original black leather off, followed by any foam that was on the panels, and then sanding off the old glue left behind on the wood and metal forms. Brian used the original leather pieces as patterns to mark out around on the new black leather. He replaced the original foam with new 3mm foam. The foam was glued on first and then the leather wrapped over it. Some of the panels, as you can see, just have leather covering them.
Lydia has been getting the bonnet of the 1955 Aston Martin DB 2/4 a step closer to the paint shop. The front inside edge had a lot of red oxide left on it so Lydia went about removing as much as she possibly could with thinners and a red scotch pad. There are some parts that aren’t budging so James will look at grinding those out.
After having a new clear PVC window sewn into the original hood of the 1989 TVR SII 2.9 V6, the rest of the roof needed a bit of attention. The two panels that create the roof in front of the hood has black vinyl covering the underneath. This had various cracks running throughout due to age and wear and it was coming unstuck at the edges. The first decision made was to try and re-glue the edges down, clean off the dirt below the edges of the vinyl, try and glue the cracks together and paint any non-black edges, to take a sympathetic approach so it fitted in with the wear and tear of the rest of the car. However, after Lydia started to try this approach, she wasn’t happy with the results so decided to take the old worn-out vinyl off and start again. Before the vinyl was taken off, the rubbers were peeled off very carefully and with a blade where it was tricky to do by hand. Any remaining glue that was left on the fibreglass was sanded off and cracks in the fibreglass were filled. 3mm foam was cut out and glued on first, making sure to press into the edges and corners to get the shaping right. New black vinyl was then cut out, using the original pieces as patterns. The vinyl was glued over the 3mm foam and pressed into the edges and corners again. You can see in the photos below where the original vinyl was coming away from these edges, which is why it was so important to make those edges as sharp as possible. Lydia went around the sides of the panels to make sure the exposed edges of vinyl looked neat, trimming along the way with a blade. The last step was to re-glue the rubbers on.
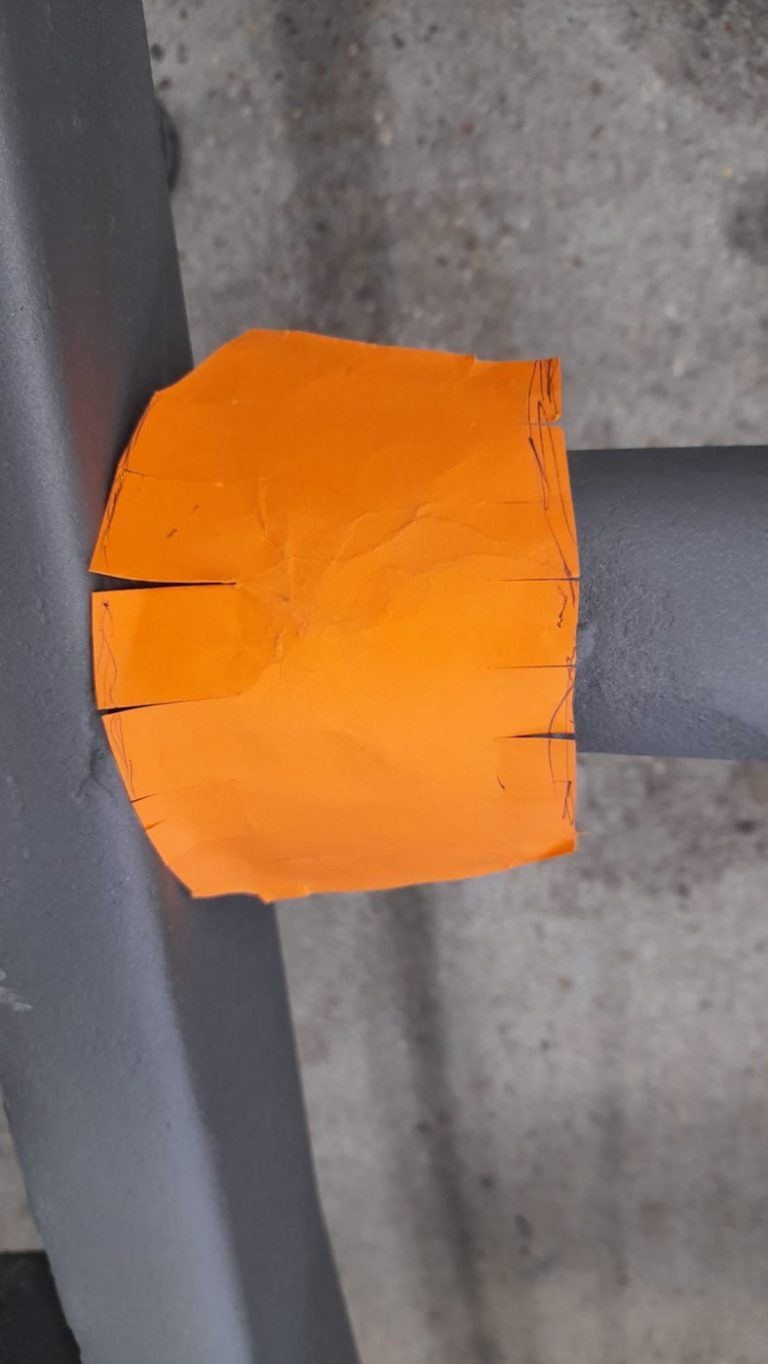
After coming back from the sandblasters, the chassis of the 1951 yellow Riley RMB is looking a little corroded so James is going to have to repair these sections. Lydia has begun the process by making cardboard templates of these parts, cutting where necessary to get the shaping right. These templates will be used by James to mark out around on the new metal. The original corroded metal will be removed and the new will be welded into place.
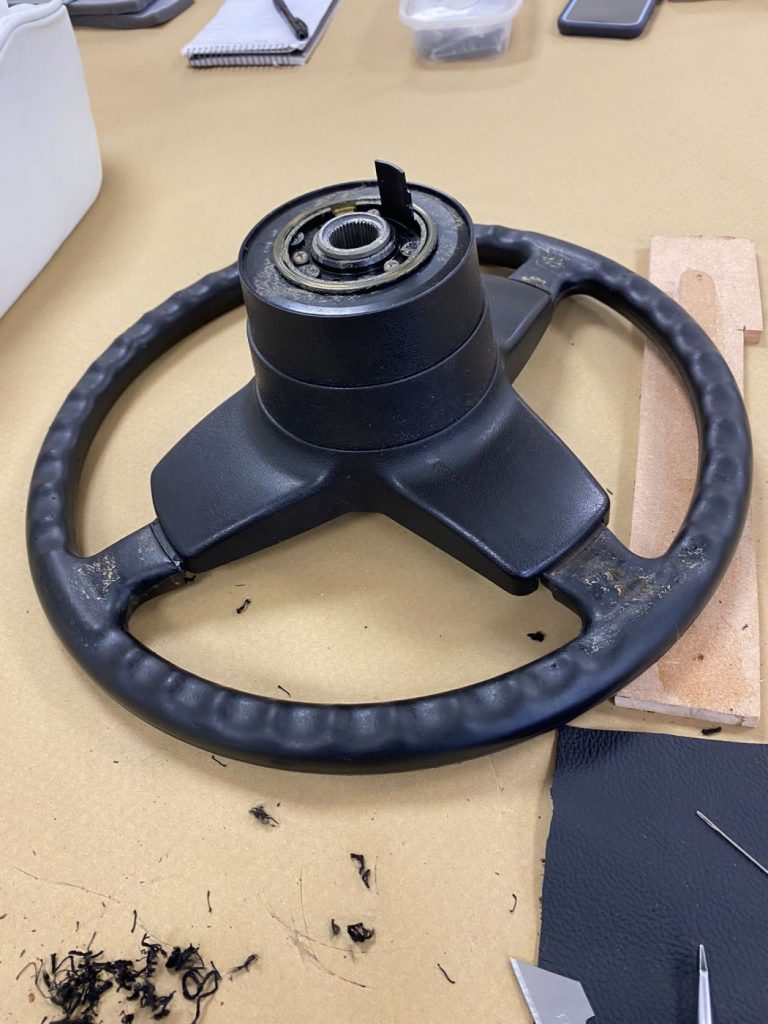
The stitching had started to pull away on our Porsche 911 SC steering wheel.
Kath has stripped the wheel of the existing leather and successfully managed to re-stitch it back in to position.
We fully expected to have to recover with new leather but once off the wheel we could see that the integrity of the leather was still beautiful so decided to keep with the originality.
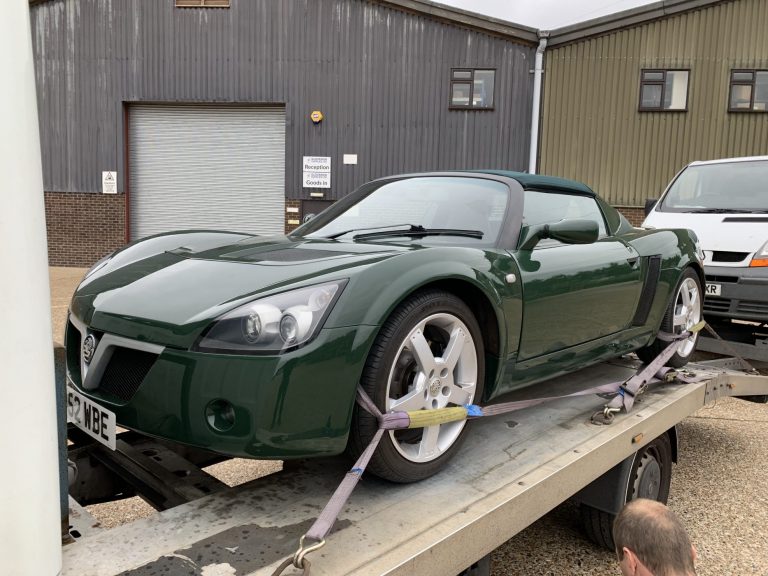
This green 2003 Vauxhall VX220 has just arrived with us. It was actually bought from us back in 2019, so it’s back on familiar ground. It’s only in for a small number of reasons: there’s a squeaking noise when it goes over bumps, which could be down to suspension issues, the customer wants it serviced and put through an MOT and it’s going to get a pre-delivery inspection.
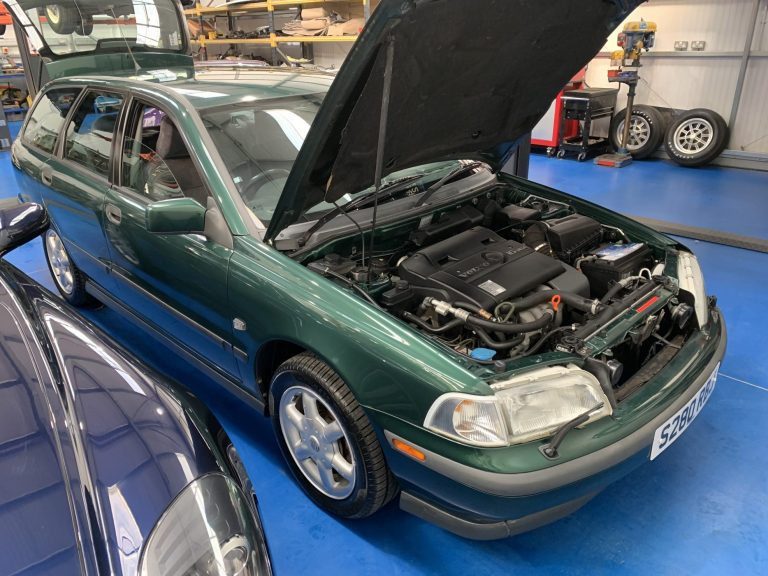
You might have seen from yesterday’s blog posts that we have bought a “run-around” car, a green 1998 Volvo V40. Well after getting a much-needed clean, our “run-around” car is going to have a service in our workshop to check over everything.
We’ve just bought this 1998 Volvo V40 to use as a run-around car for the business. It will be used a lot for filming the competition videos, the ones you see when each one launches, where Charlotte is seen driving the cars and talking about them. It’ll be getting a good clean for sure!
After last being seen in the painting bay, the 1998 Honda Integra Type R is now in the workshop!
Paul is now taking care of it and has taken everything out of the engine bay.
He’s also repaired and welded the chassis section where the captive nuts cover is.
As you can see, the radiator and air conditioning condenser are in desperate need of repair so these will be overhauled prior to being refitted.
You may have seen the blog post from last week about the fuel line problems that Dave discovered on the 1971 Jaguar XJ6. If not, here’s a link straight to it. Here are some more photos and another video to show just how bad the problem turned out to be.
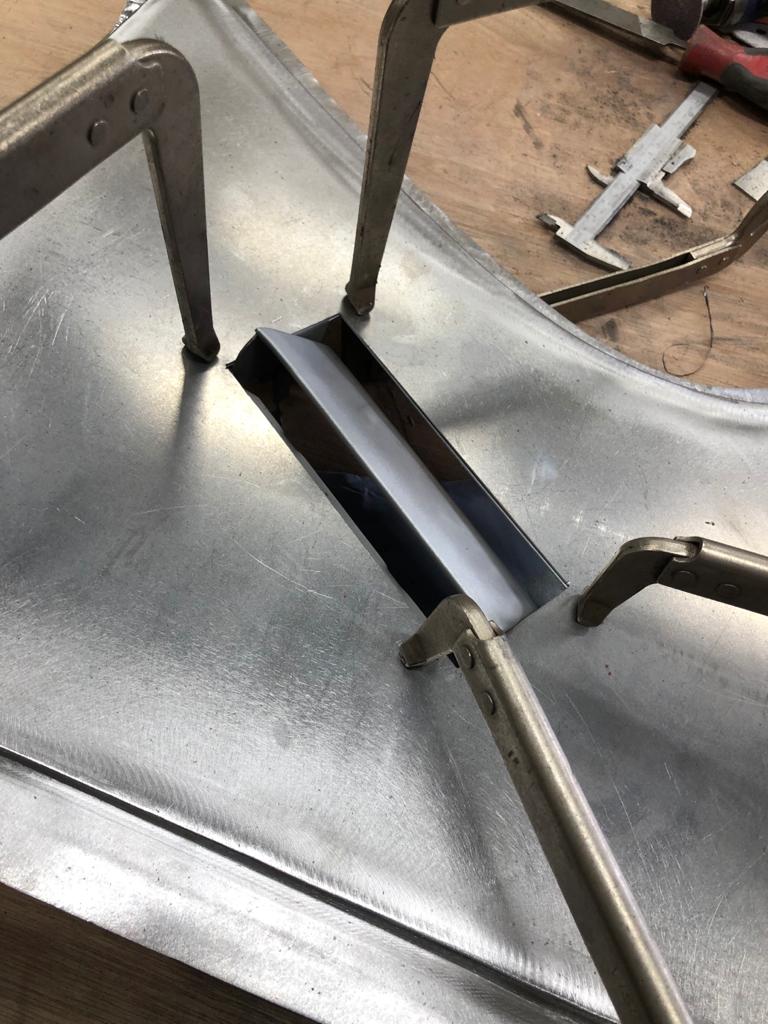
James has been continuing his work on the yellow 1951 Riley. The air vent for the second panel was sandblasted last week, so could be welded into its new surrounding. James then used the finished one to determine how much metal to trim off the end. Back in July, he had to do some welding repair work on the left-hand wing. He’s now repaired the other wing. The subframe came back from the sandblasters and showed how much corrosion there was. James has started to make cardboard templates for the parts that need replacing, to mark out new pieces of metal for fabrication.
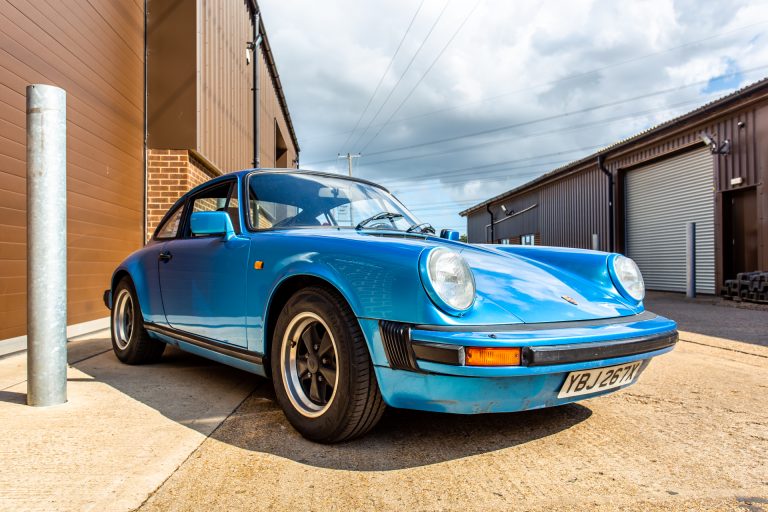
This 1982 Porsche 911 has recently arrived. The list of jobs that need addressing is the following: the door-bins need fitting, the leather restraint straps on the rear seat need fixing, the upholstery needs reviving with some form of treatment, the passenger window needs fixing because it’s stuck, the steering wheel needs re-stitching, the under-dash panels need to be stuck back down and/or repaired, a battery cut-off switch needs to be put in and the battery is flat so needs to be put on charge.
The first stop will be the trim shop.
Bridge Classic Cars are award winning Classic Car Restoration and Maintenance specialists. Your pride and joy is in safe hands with our expert Classic Car Technicians. Take a look at our awards here.