S2000 Welding And Rust Repair
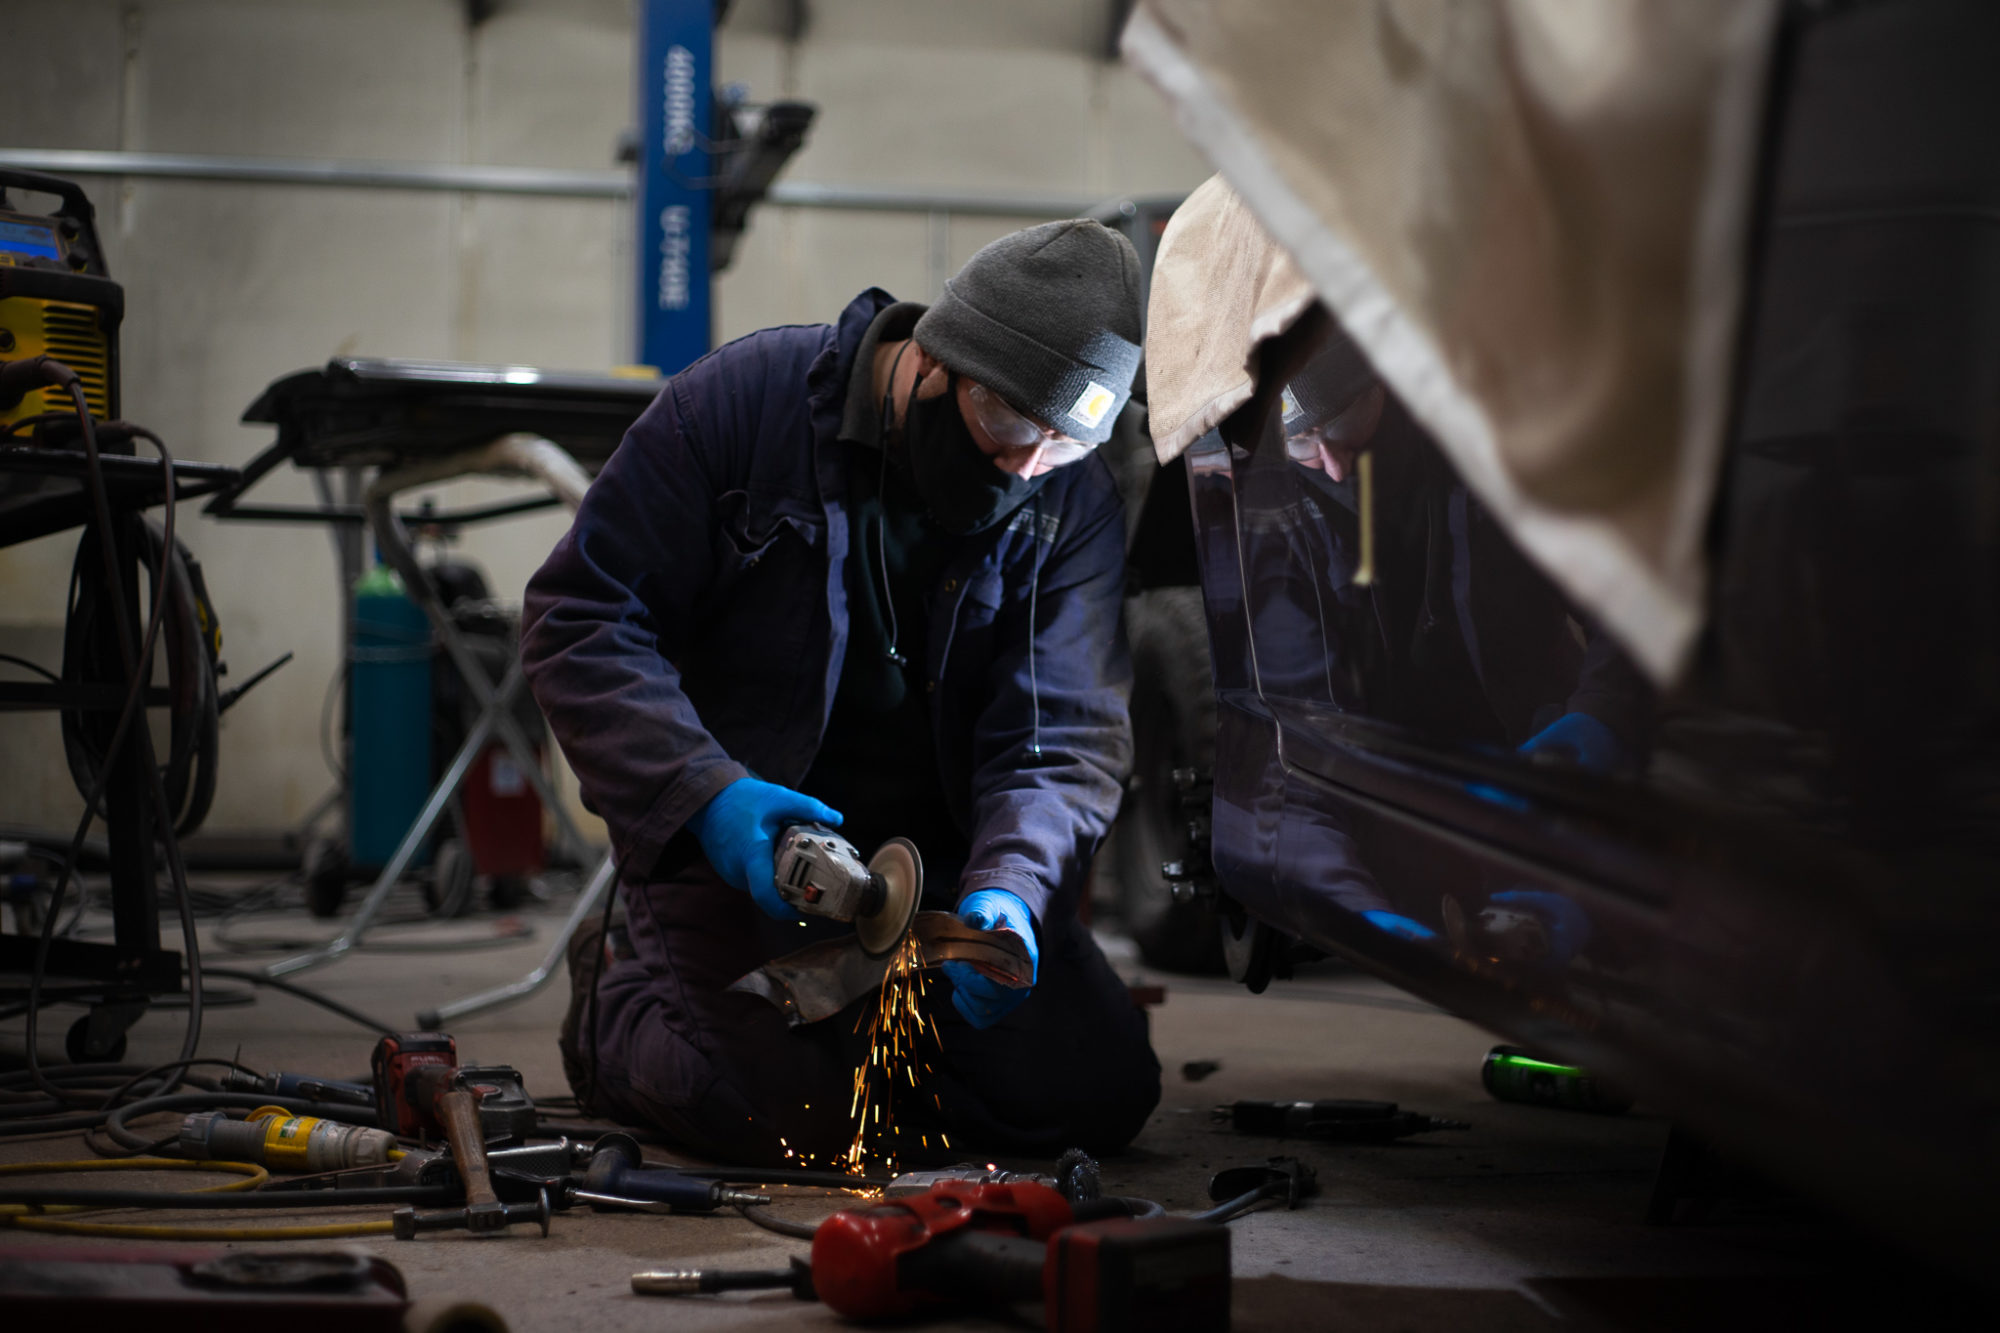
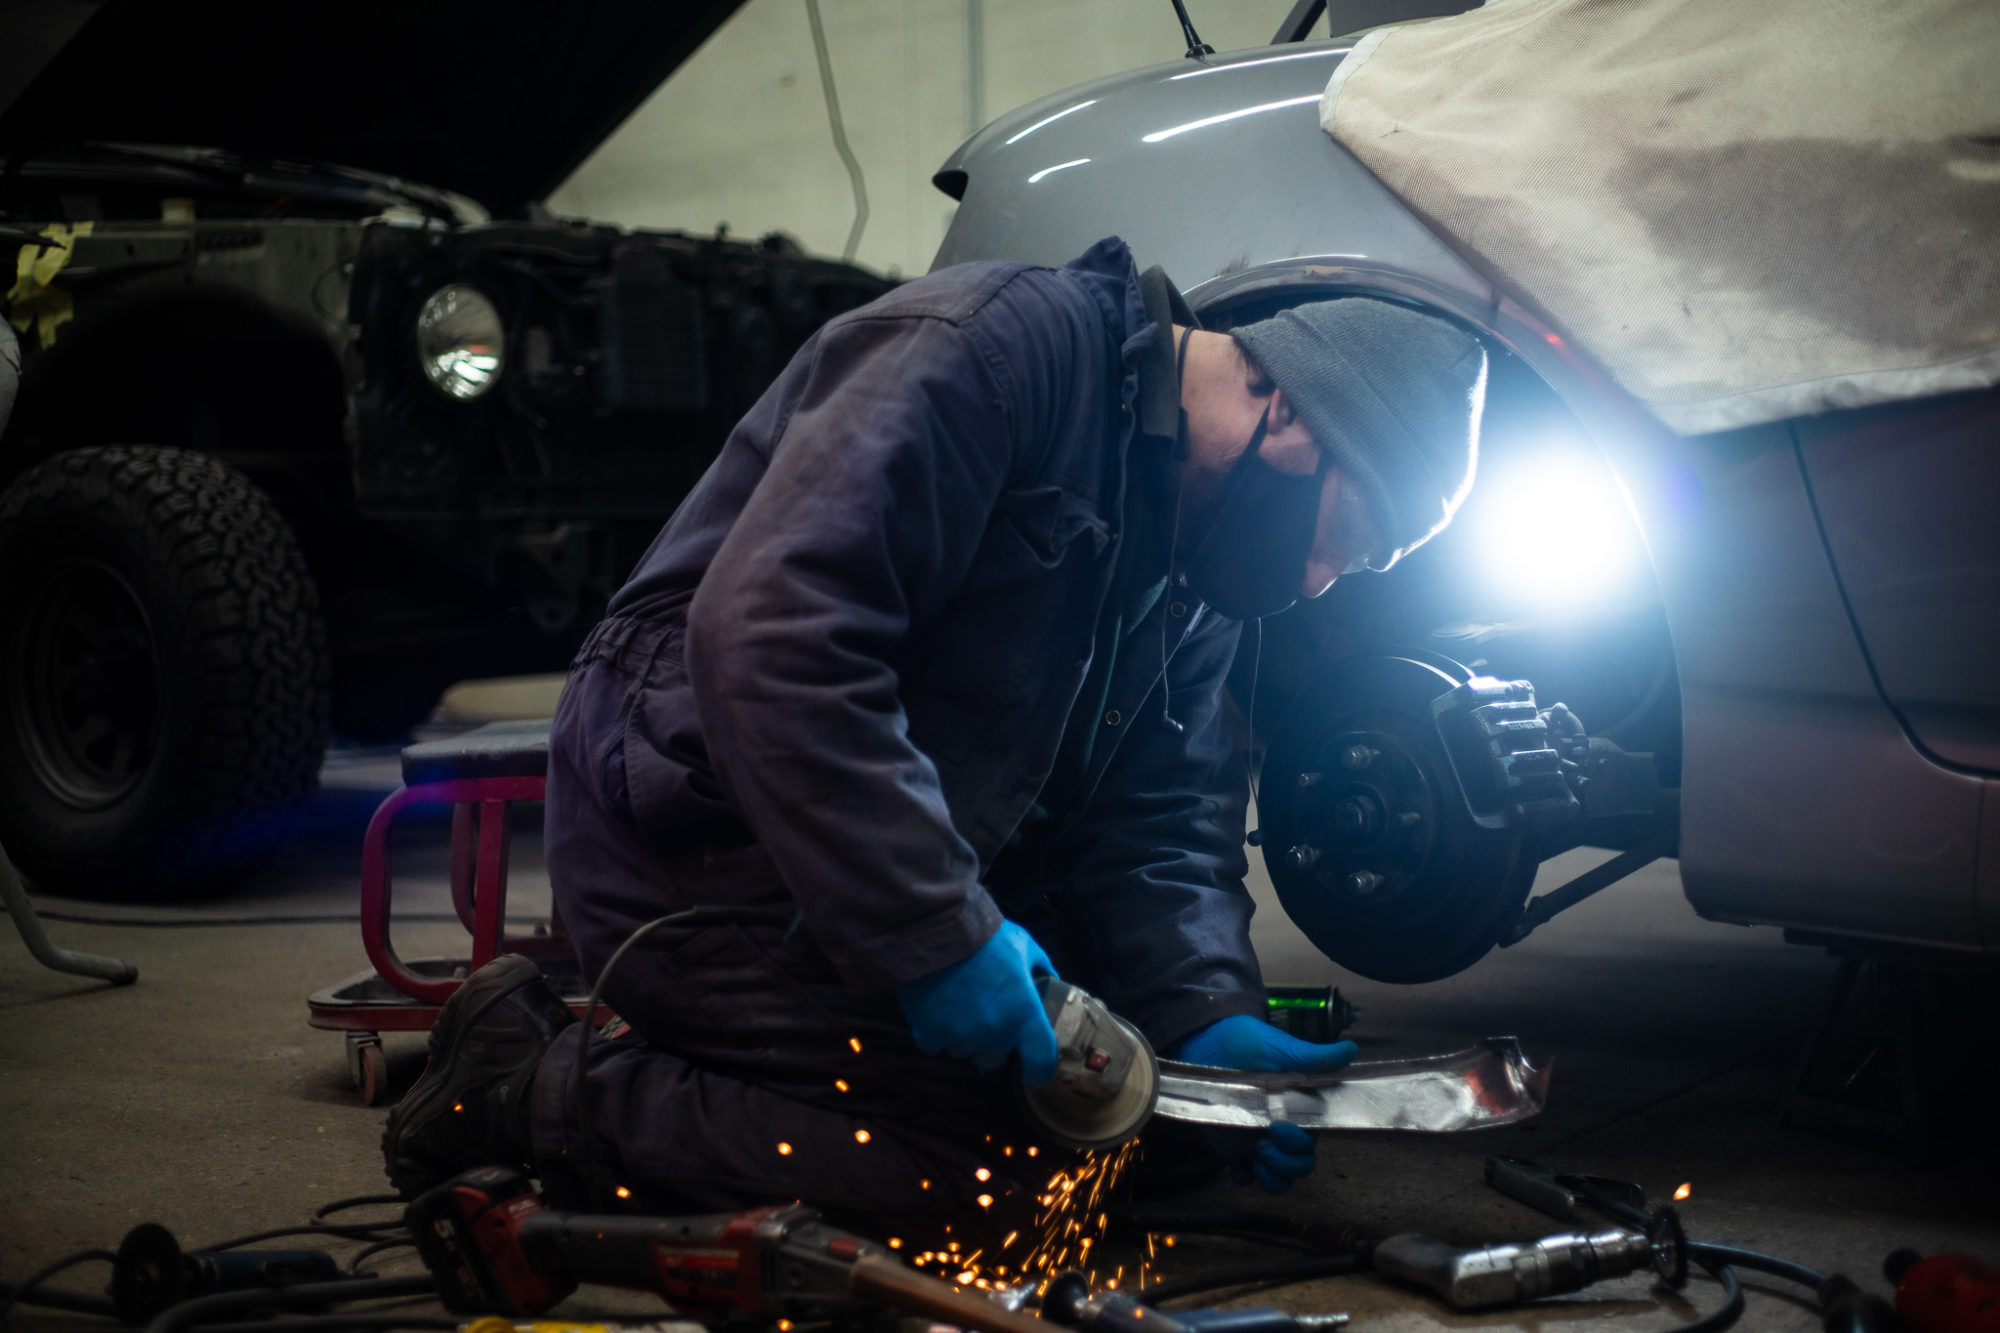
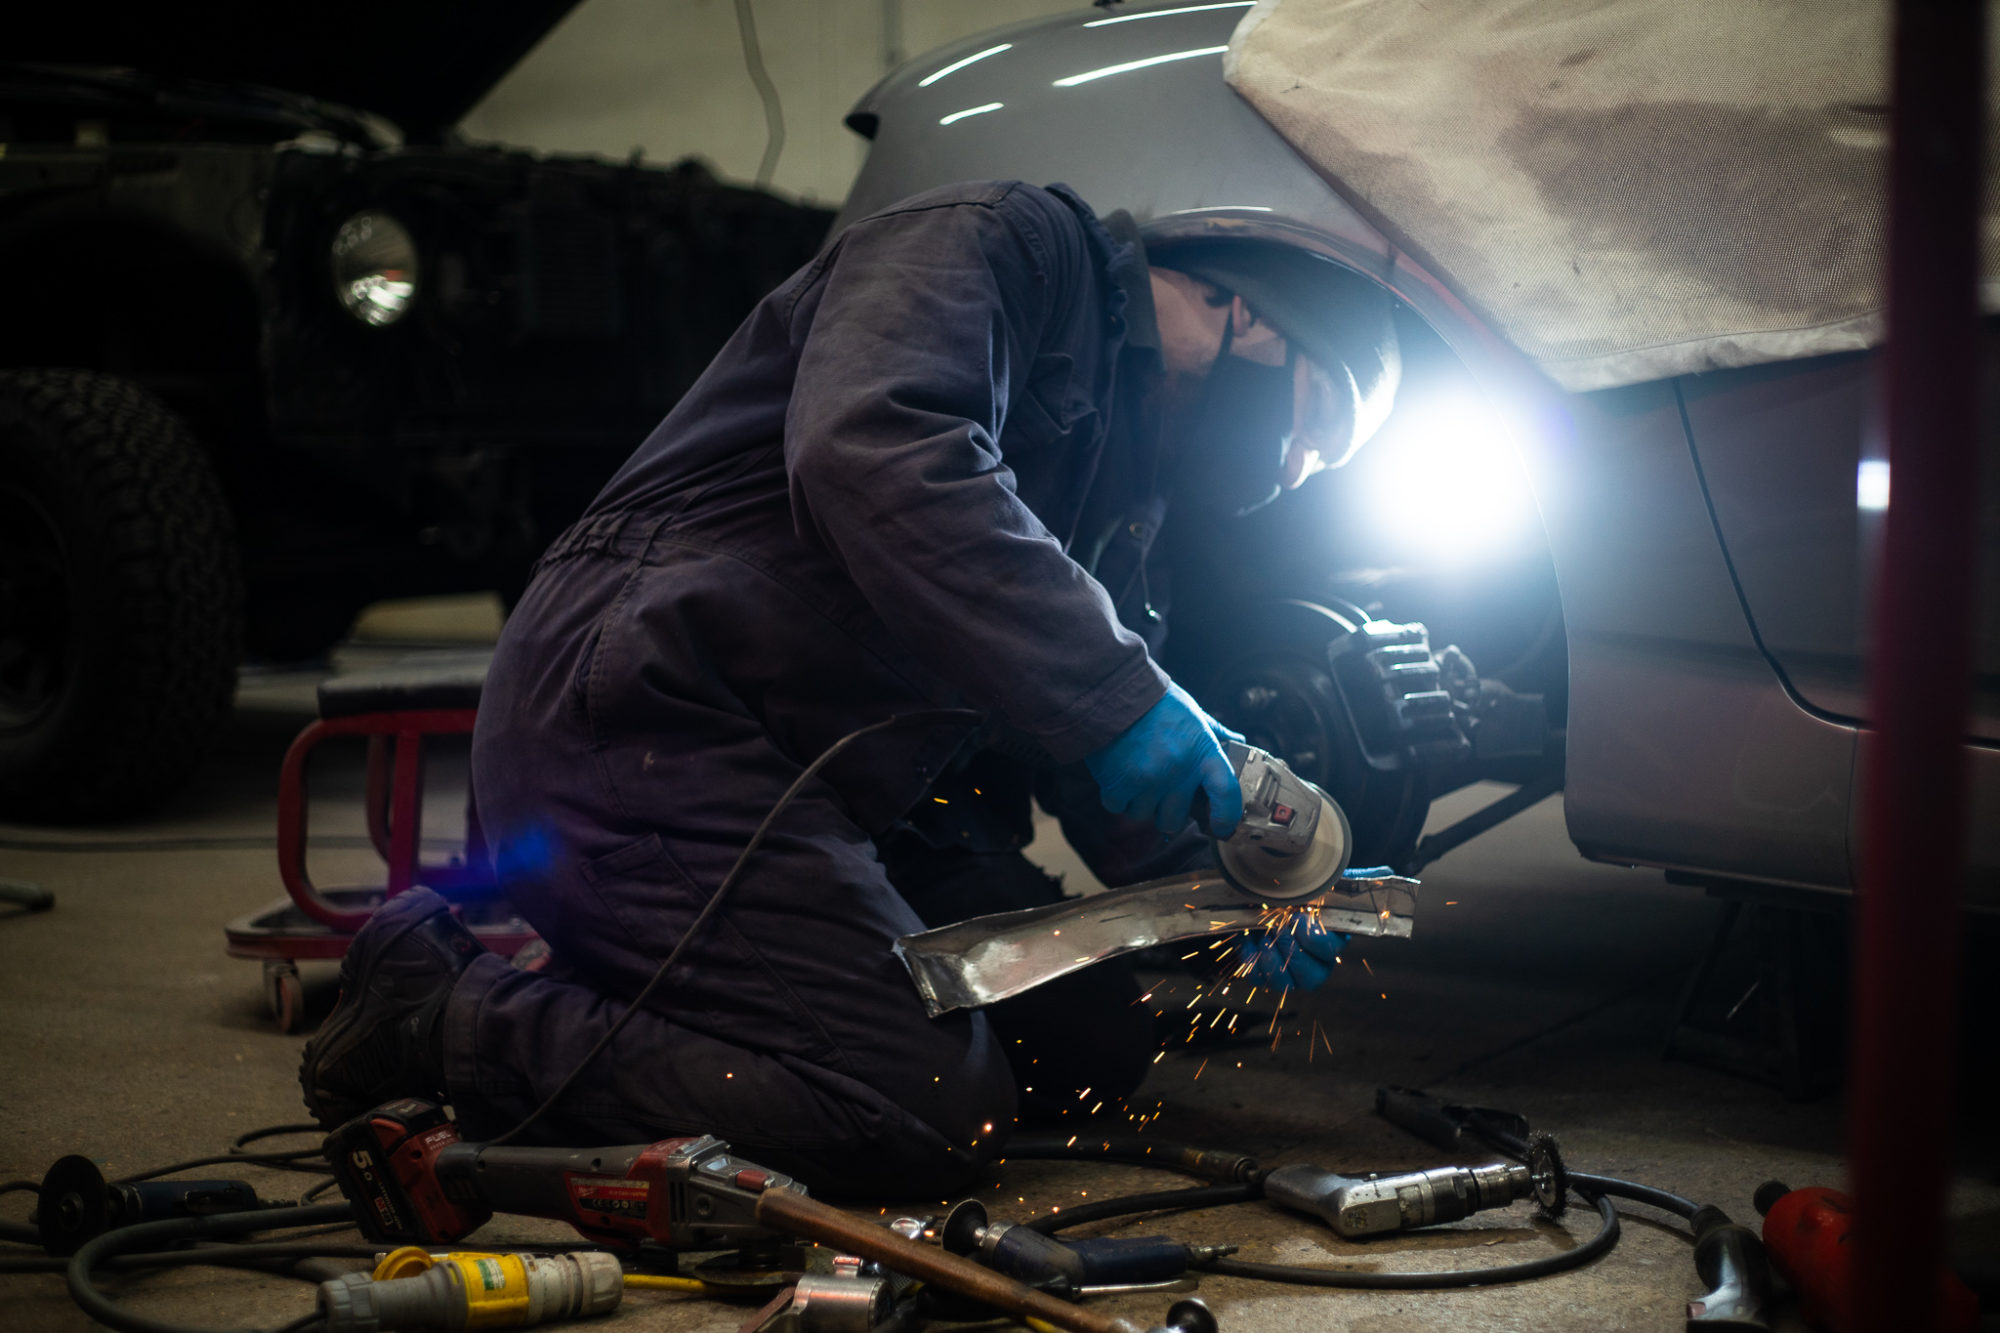
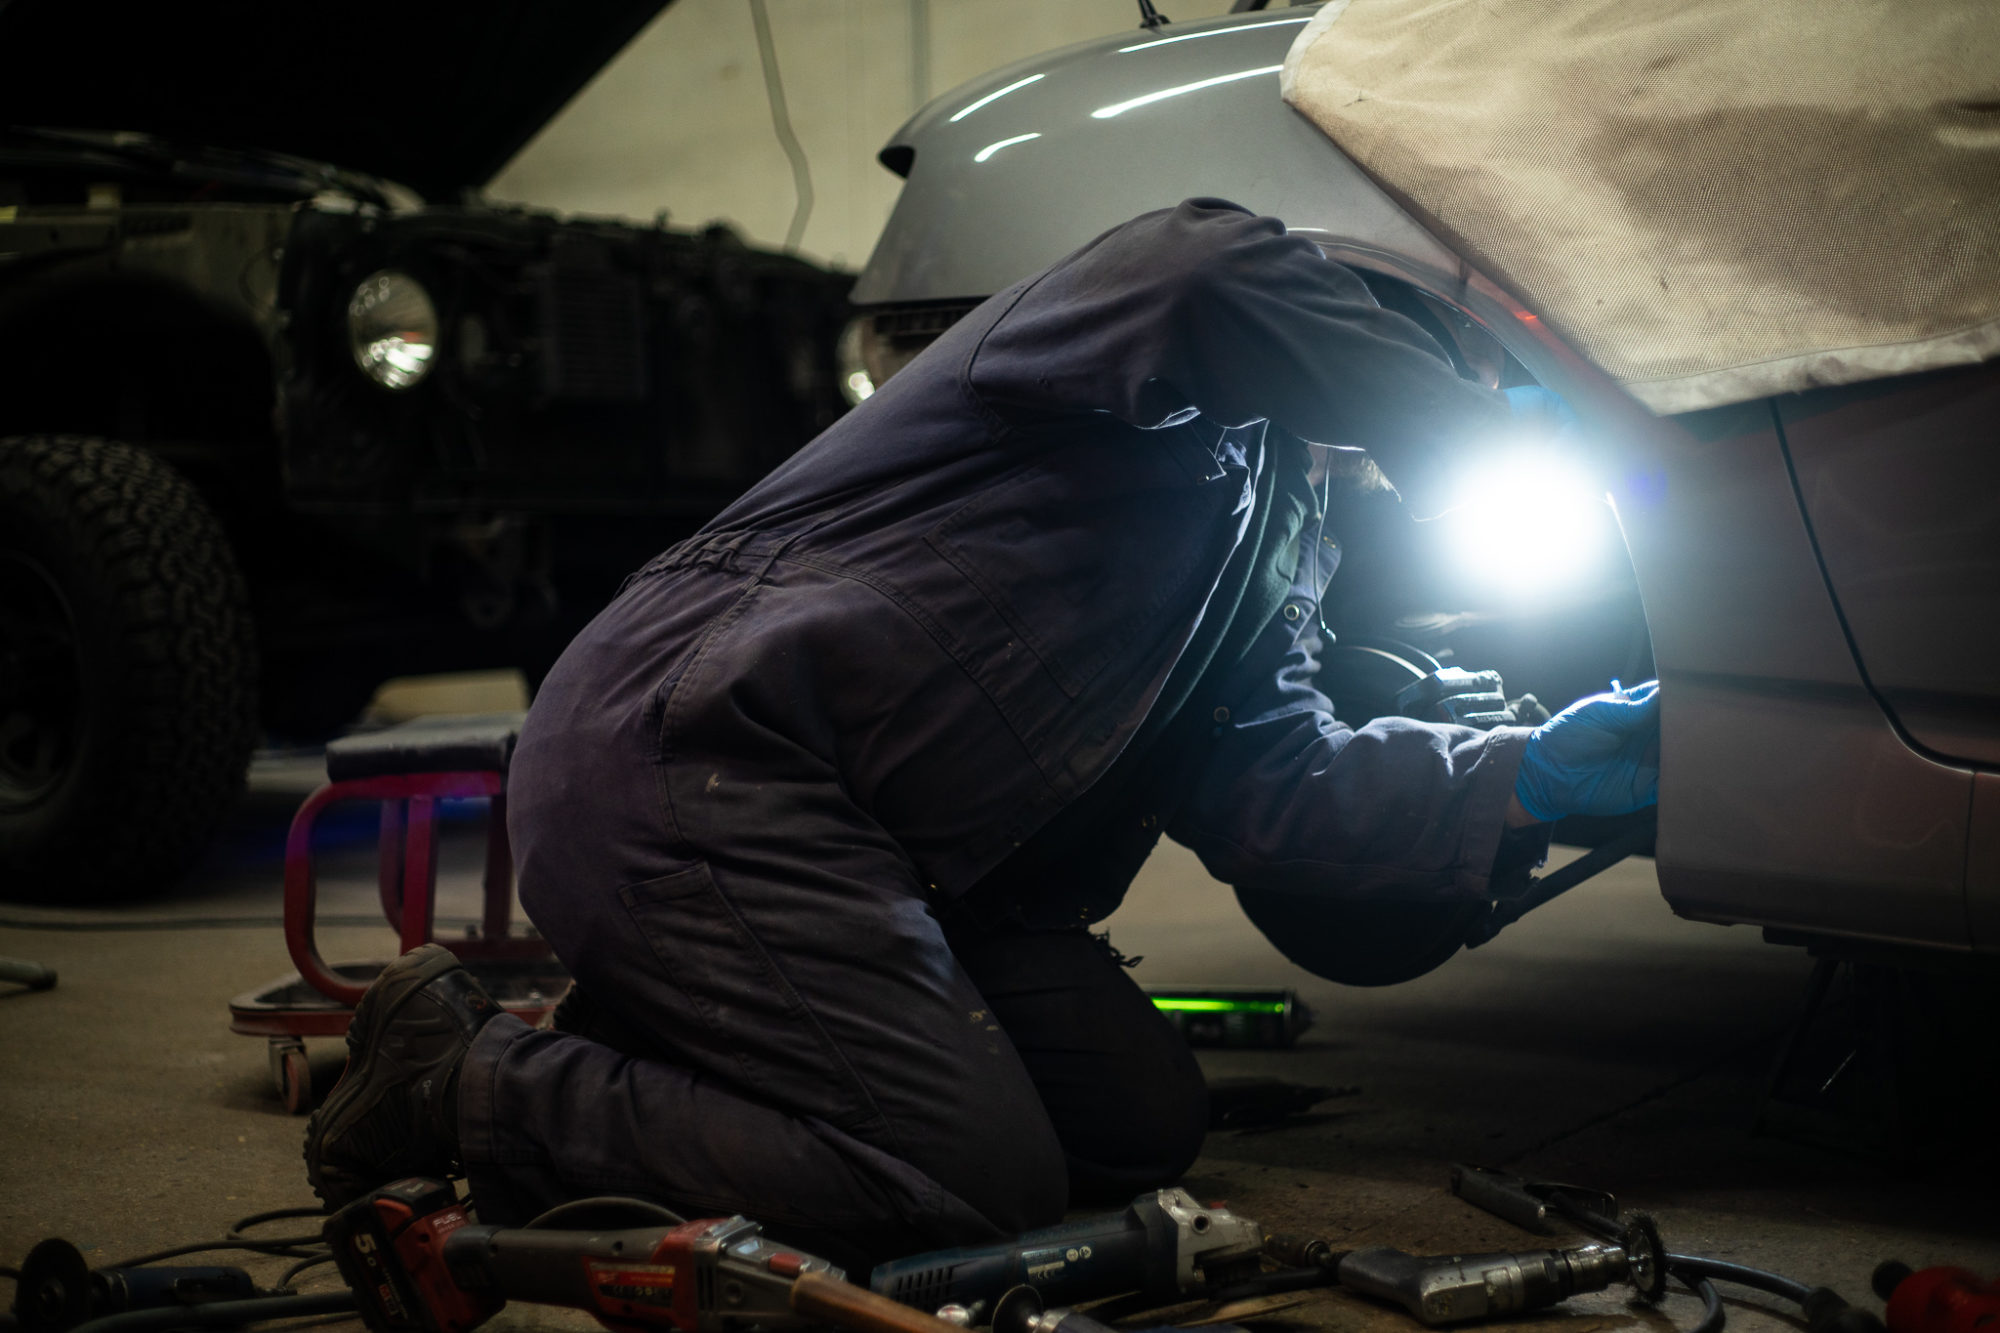
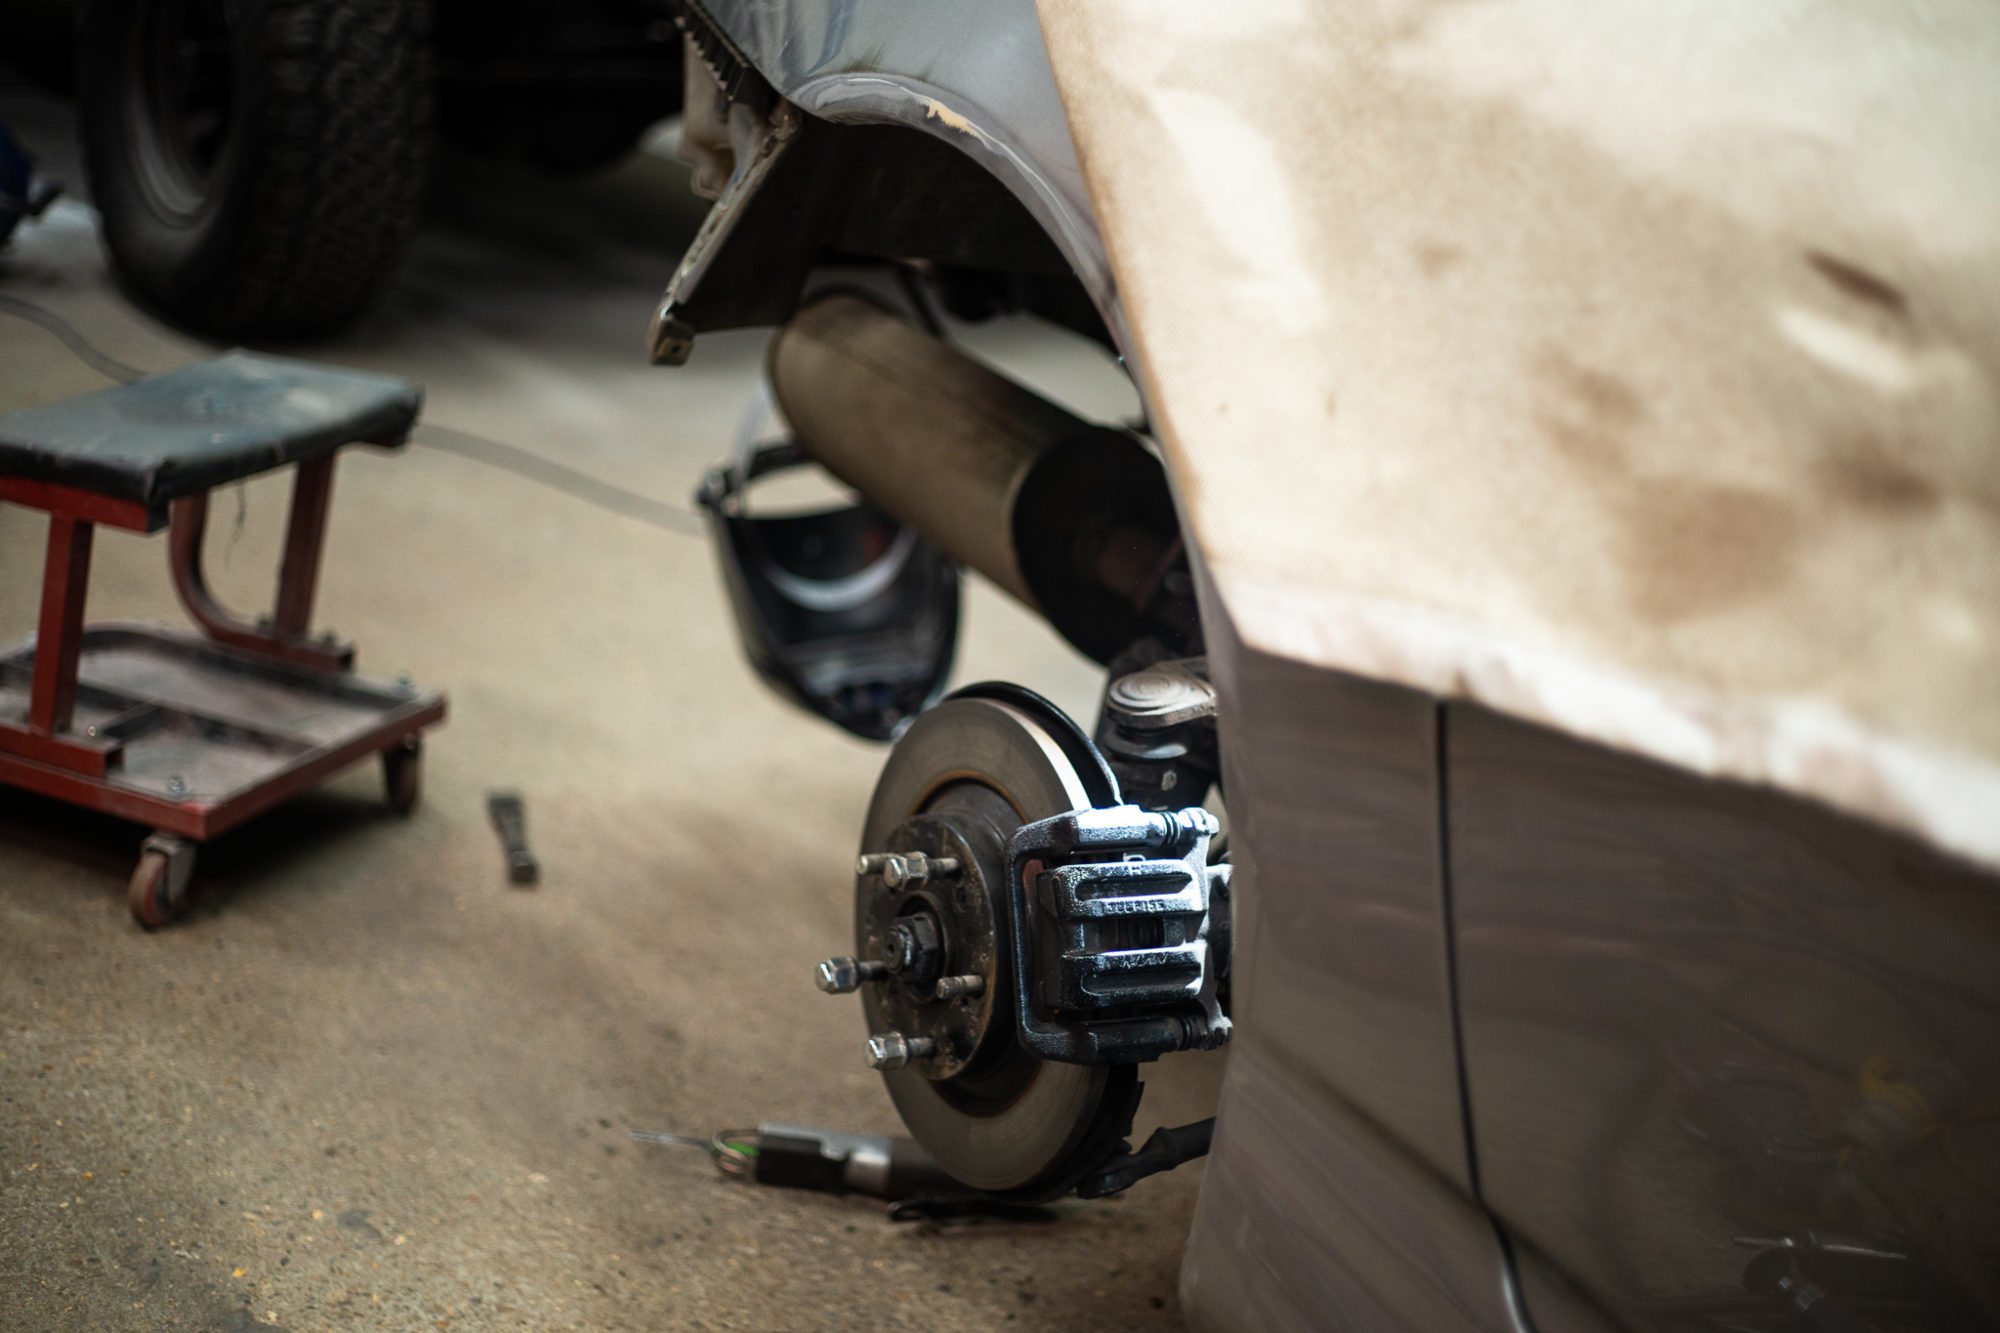
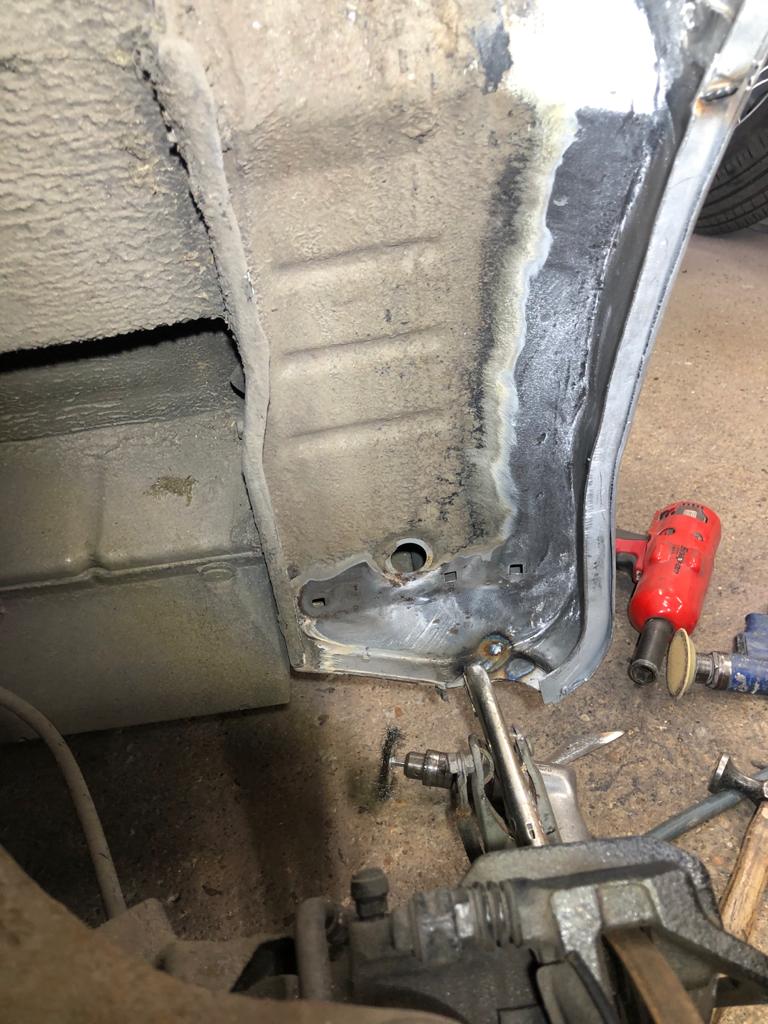
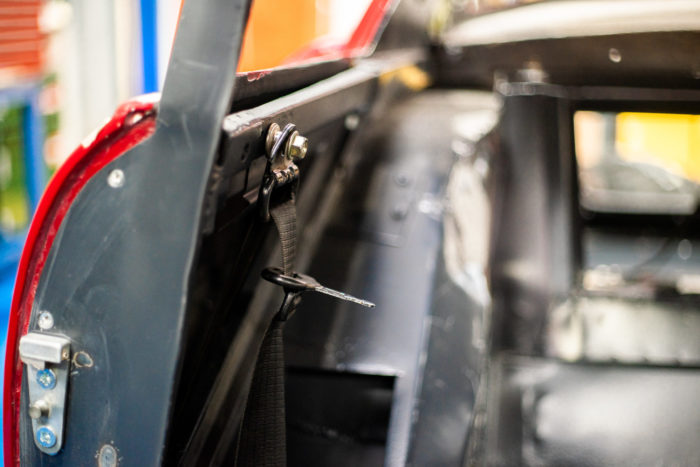
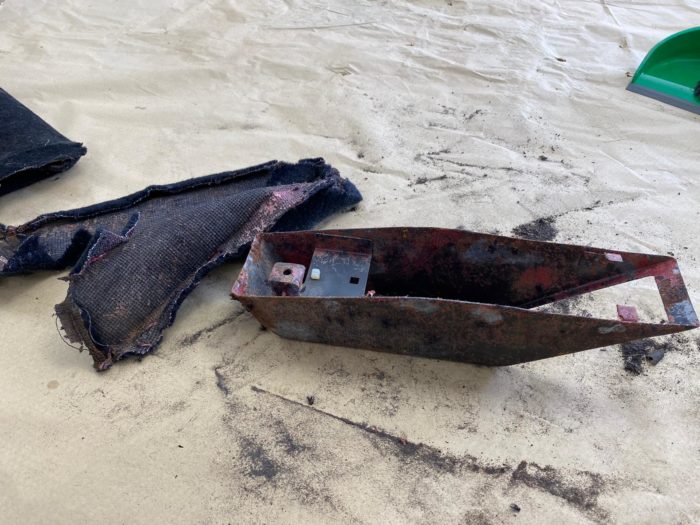
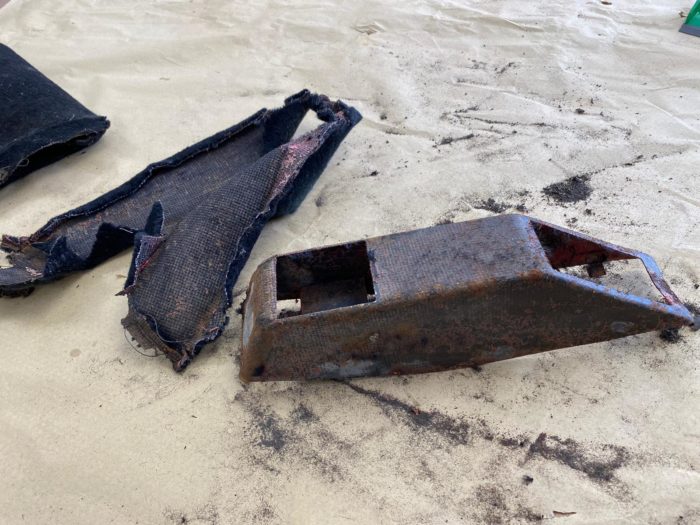
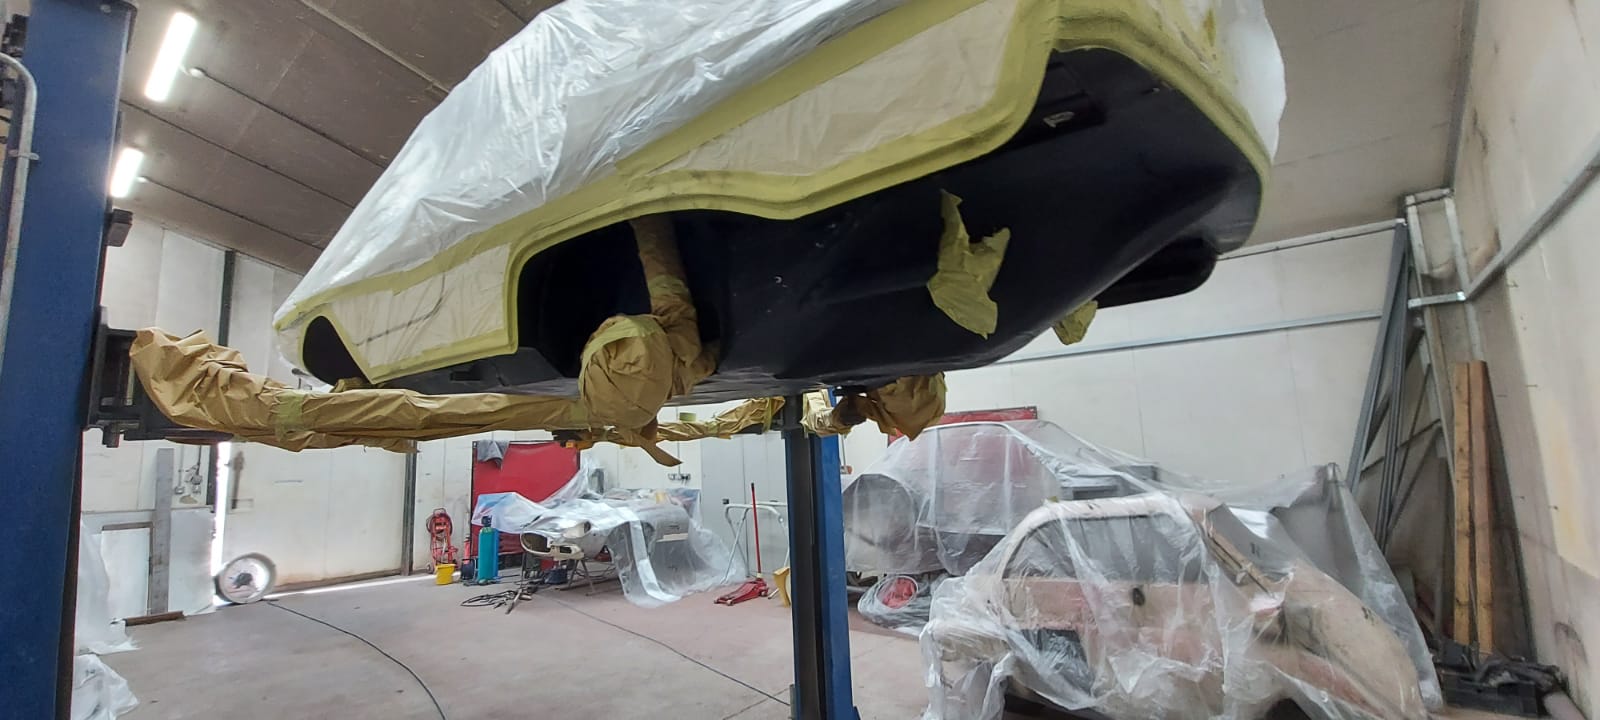
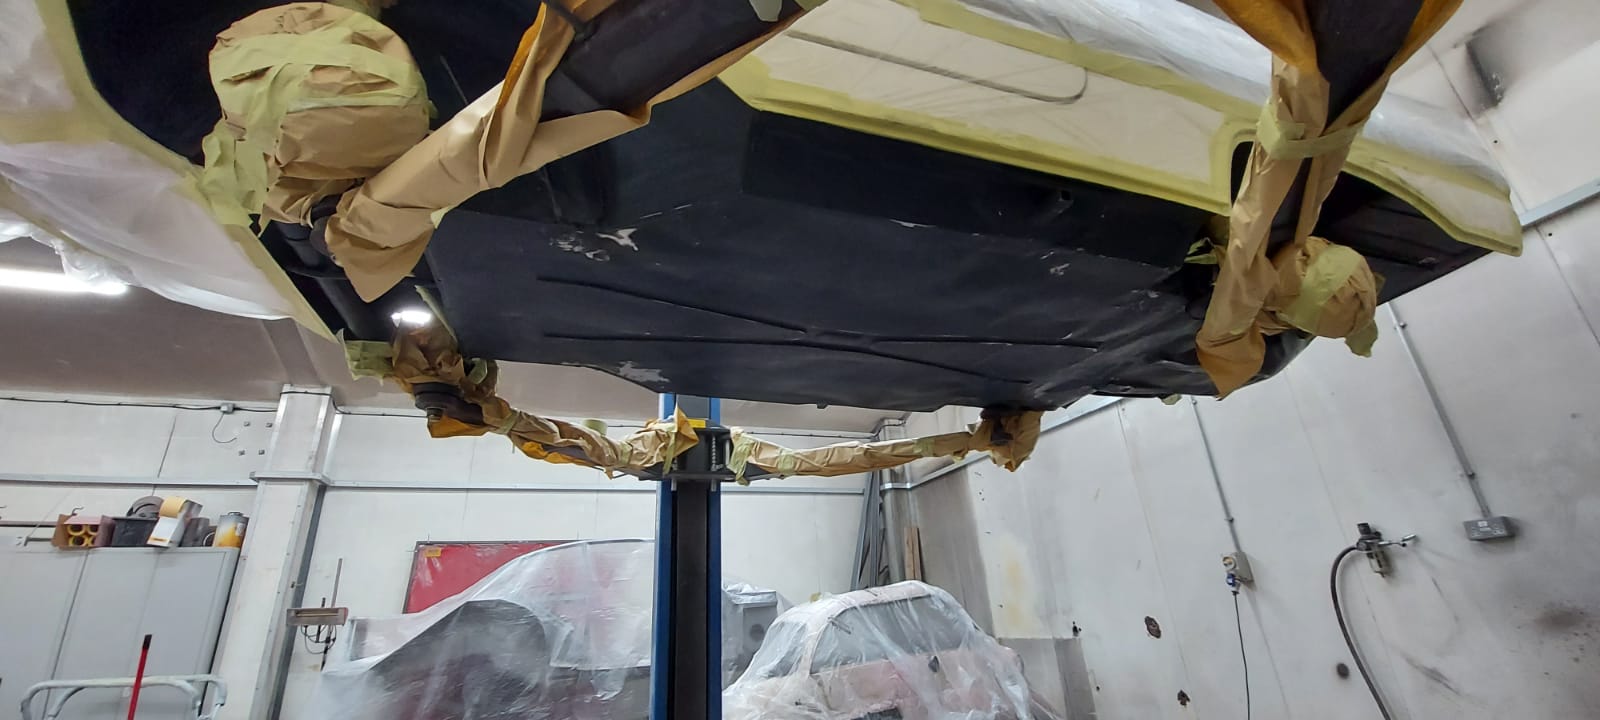
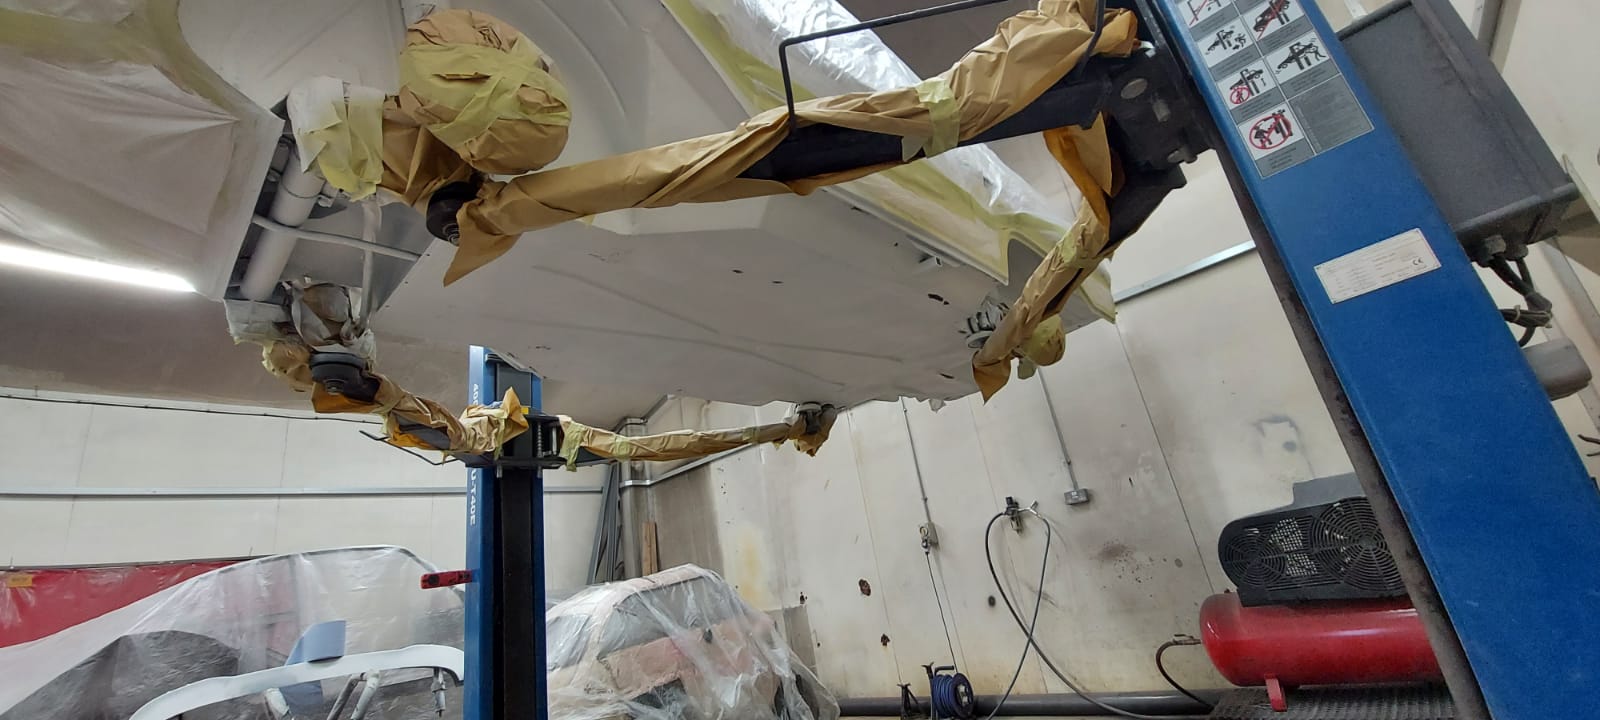
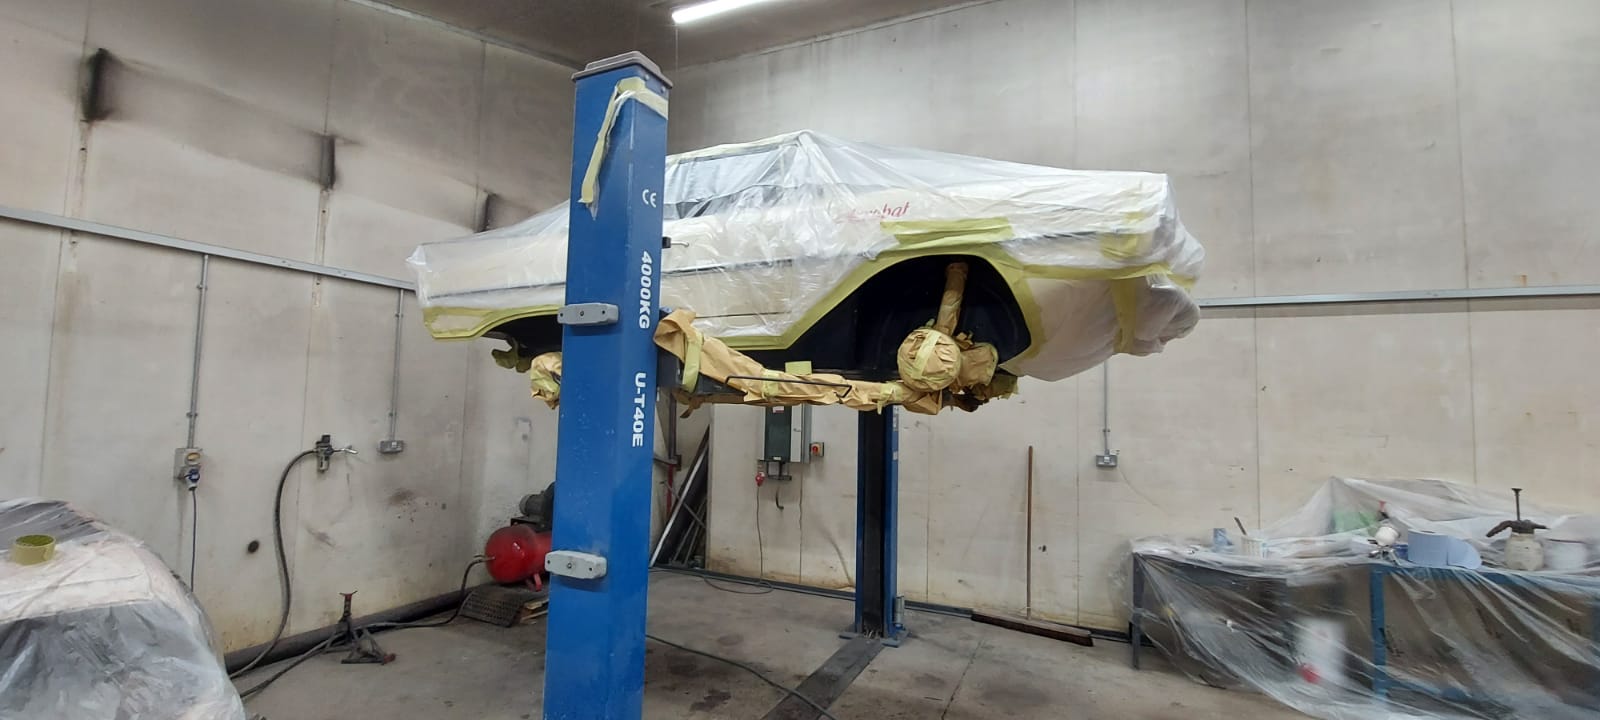
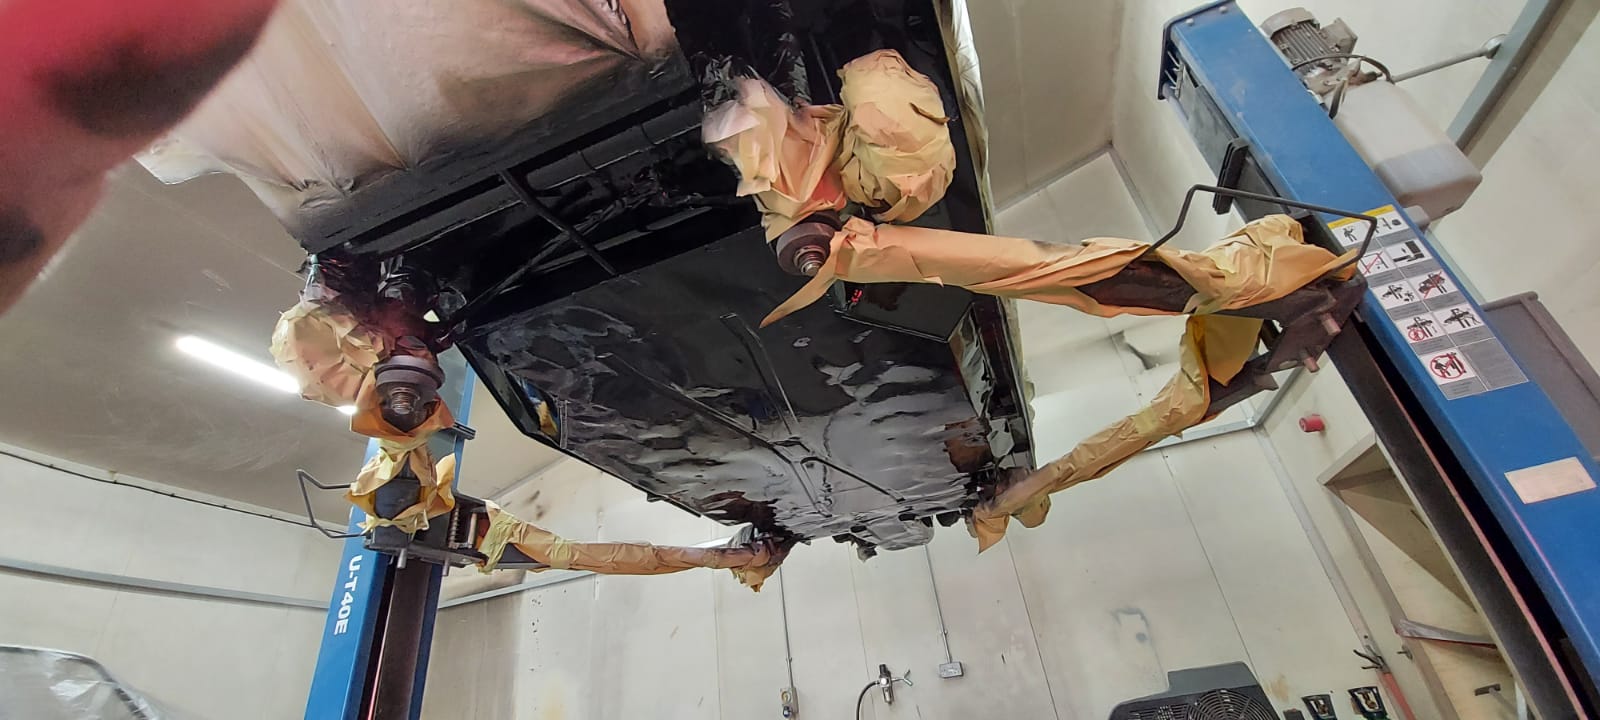
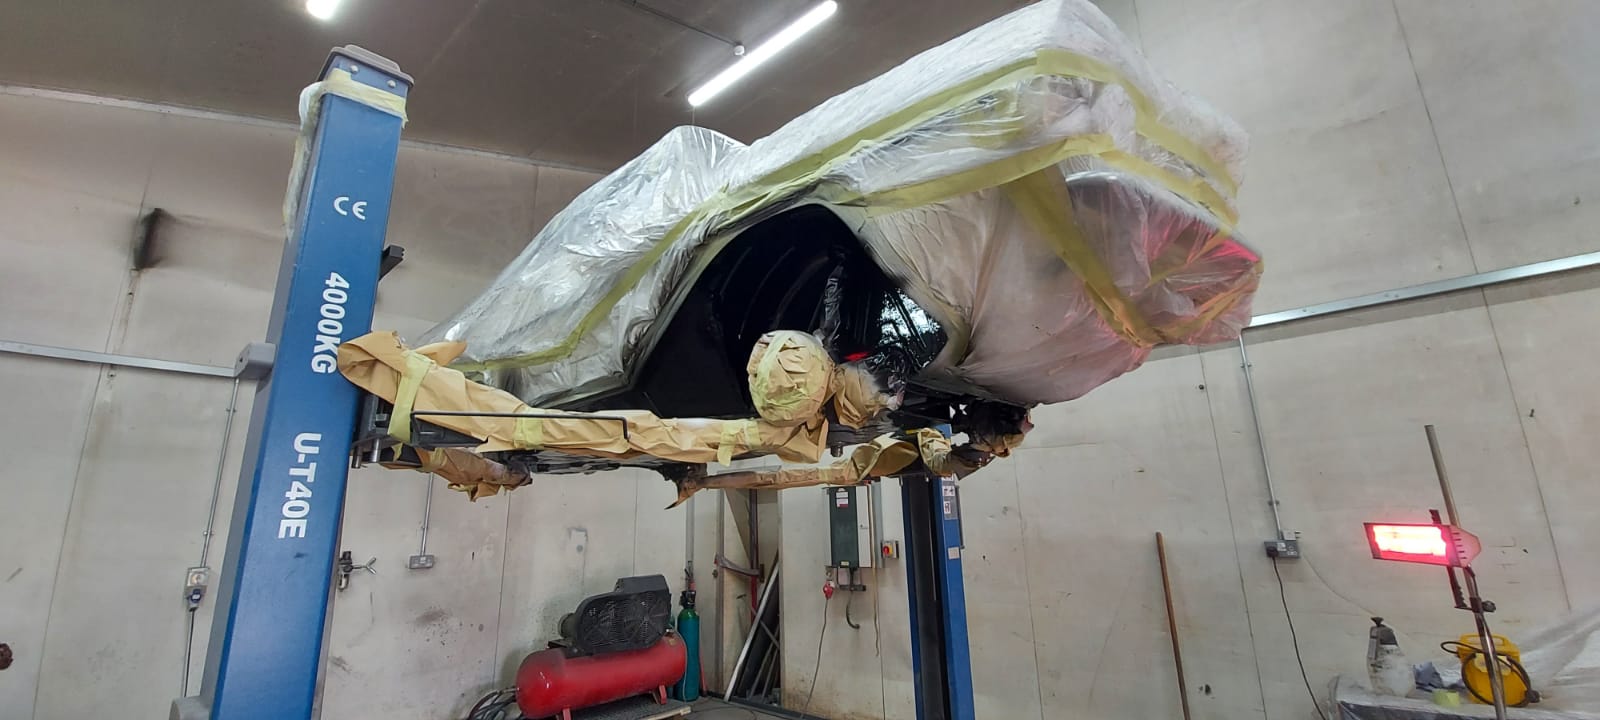
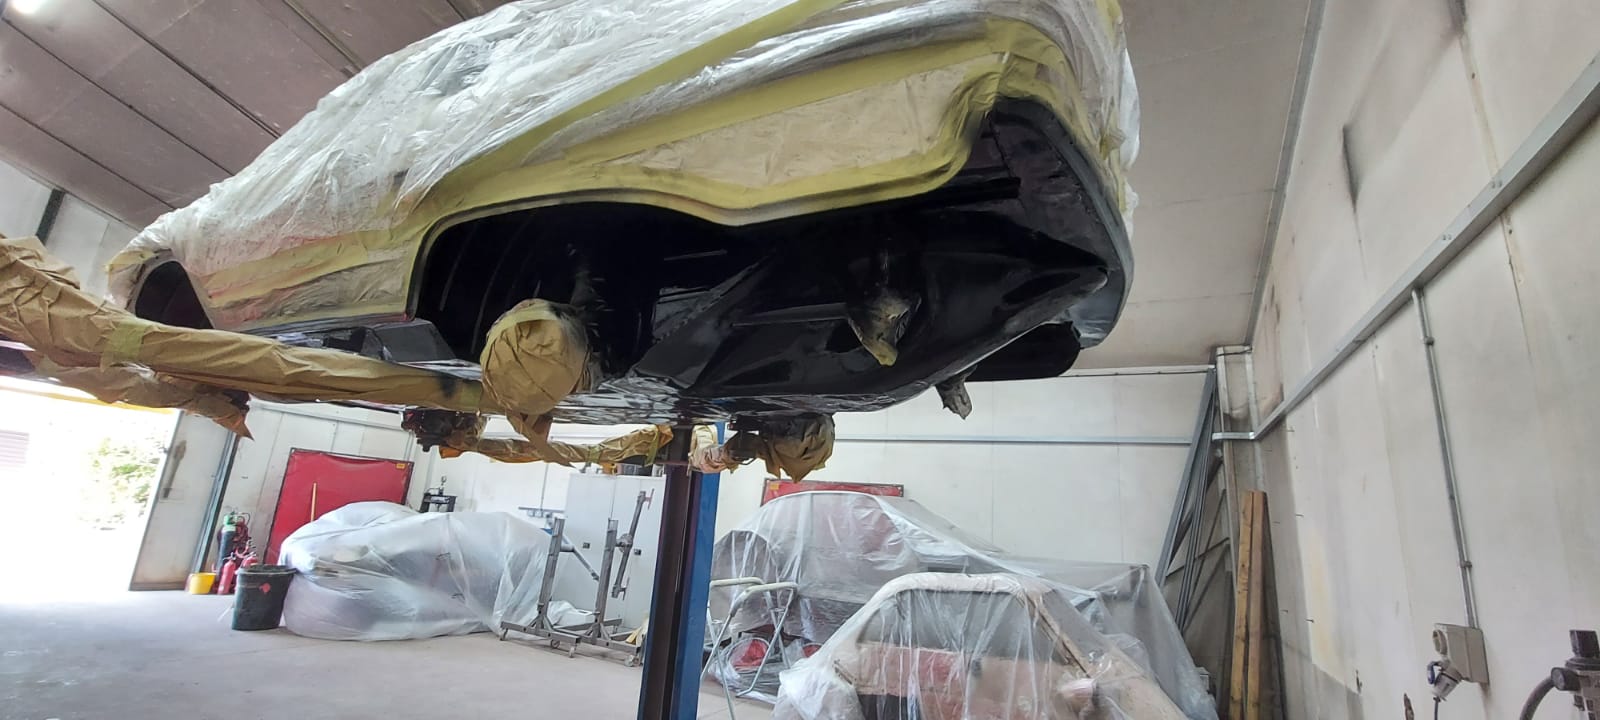
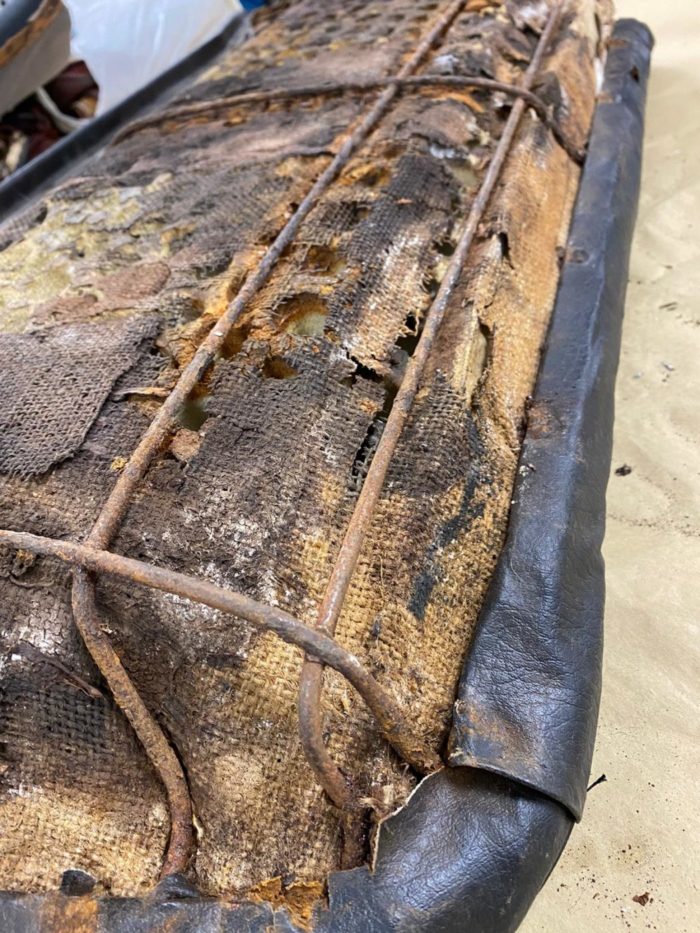
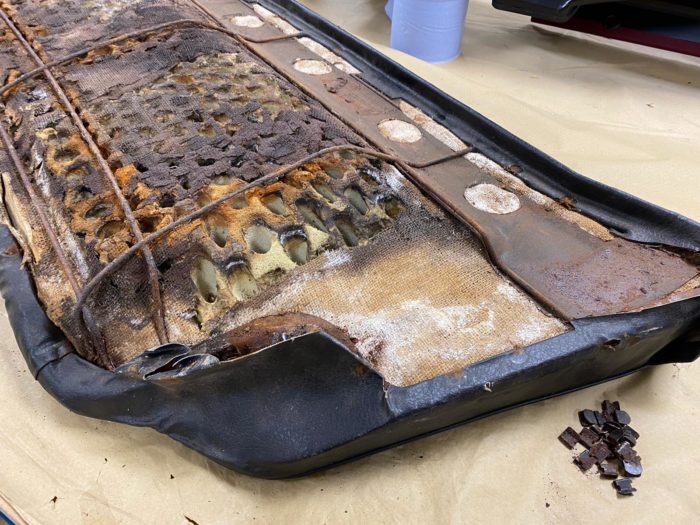
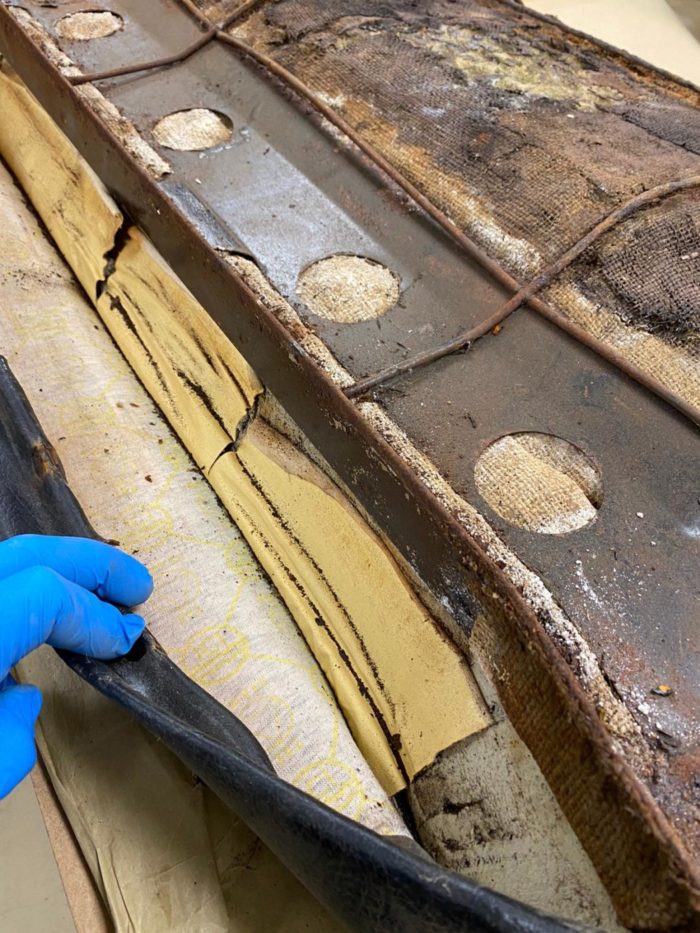
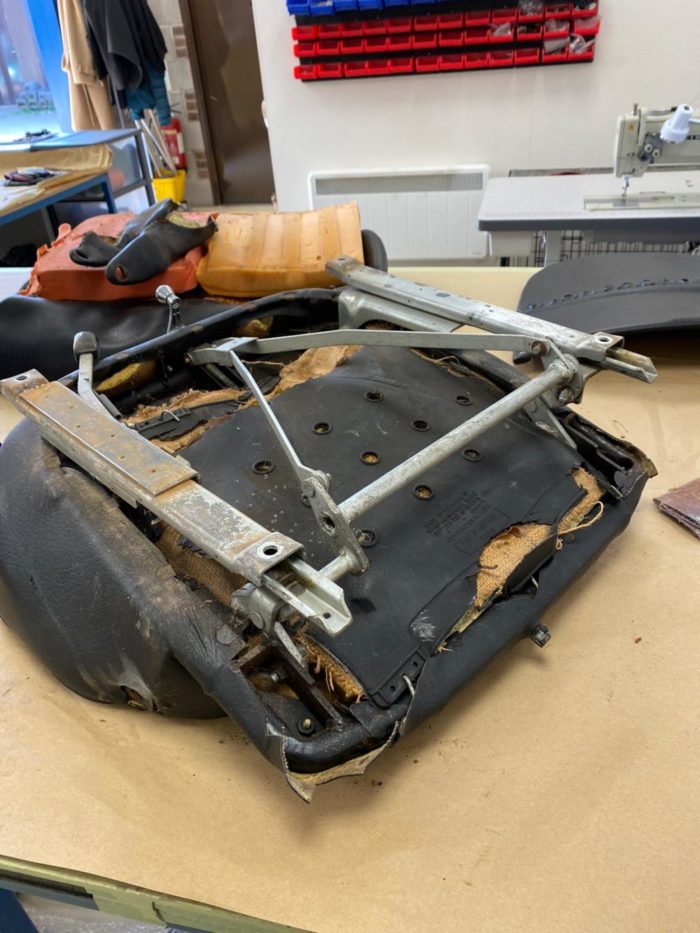
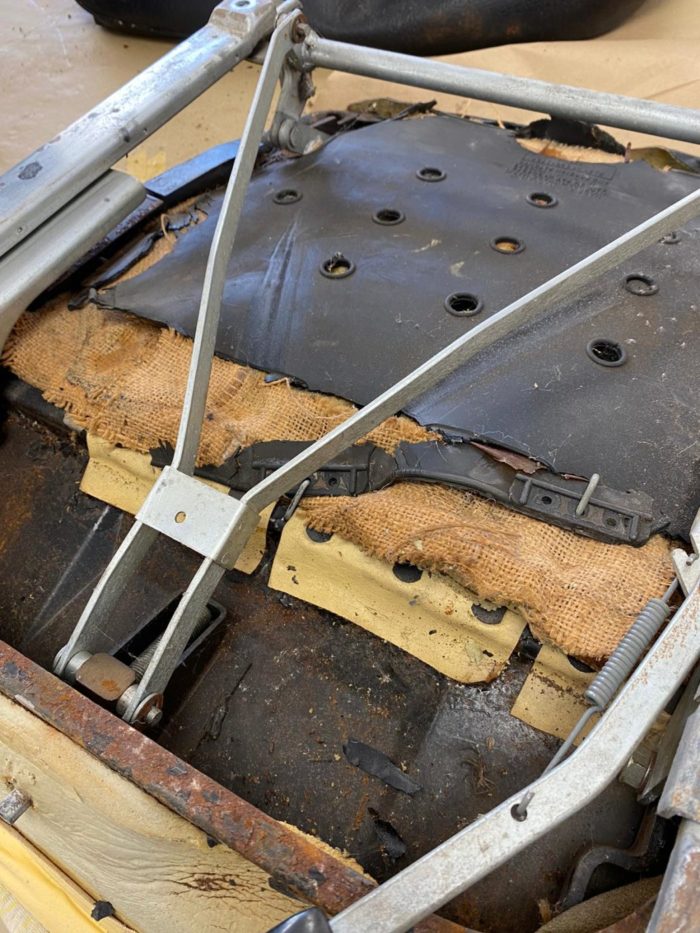
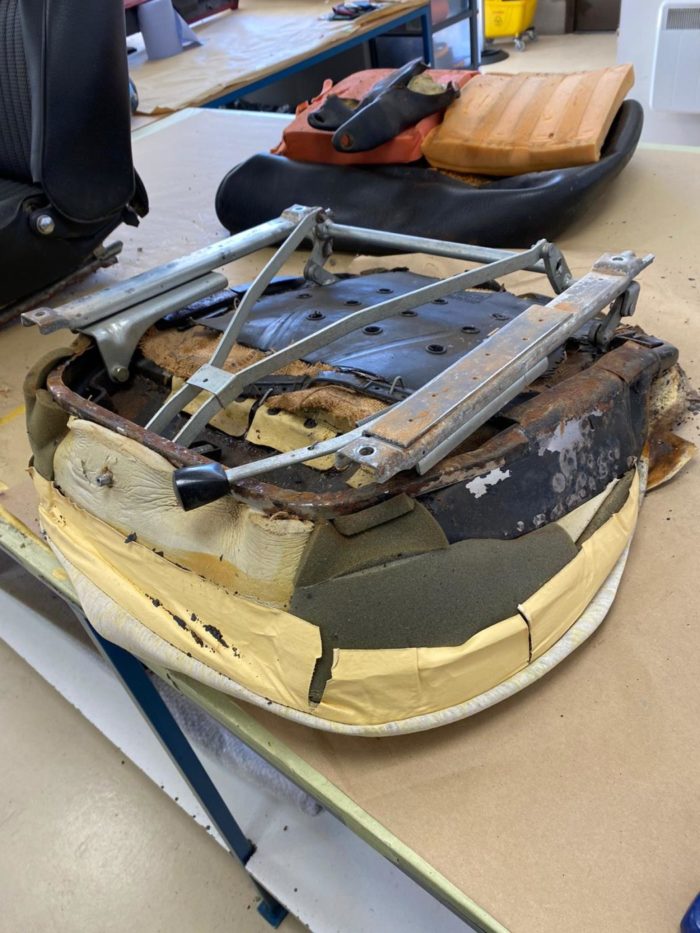
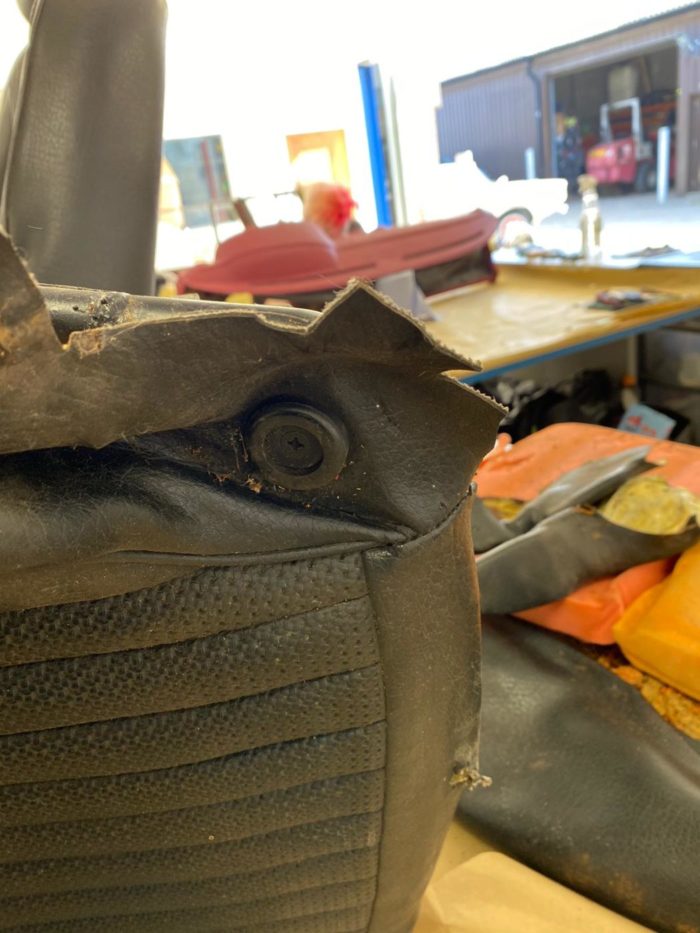
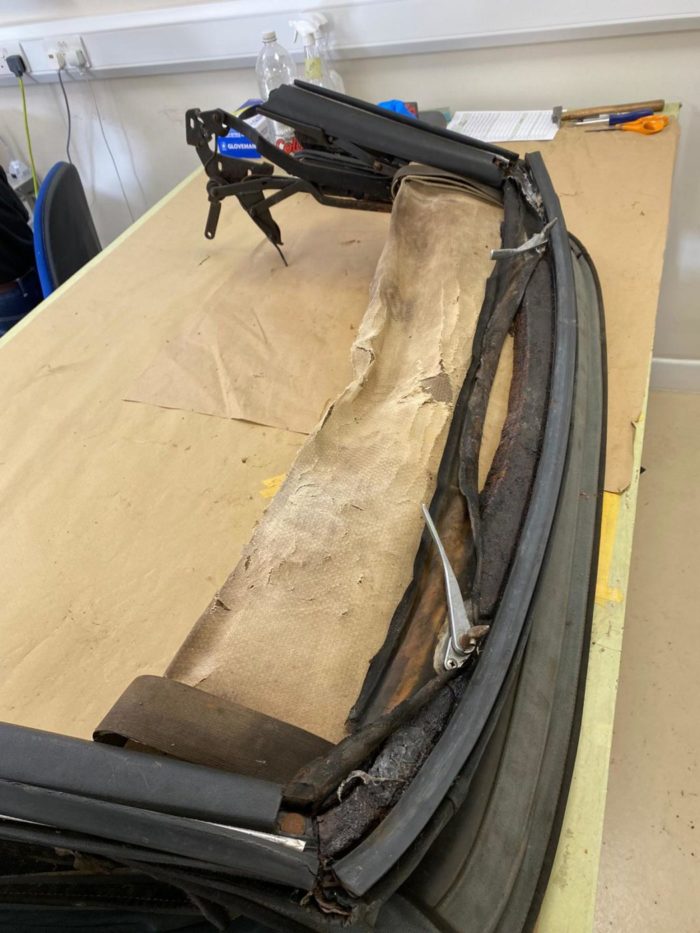
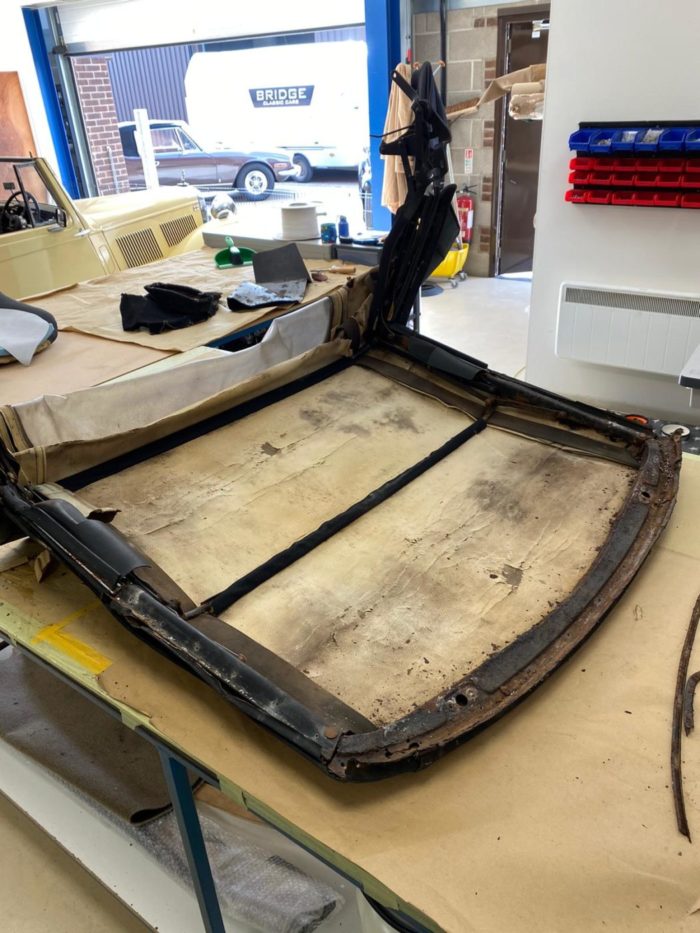
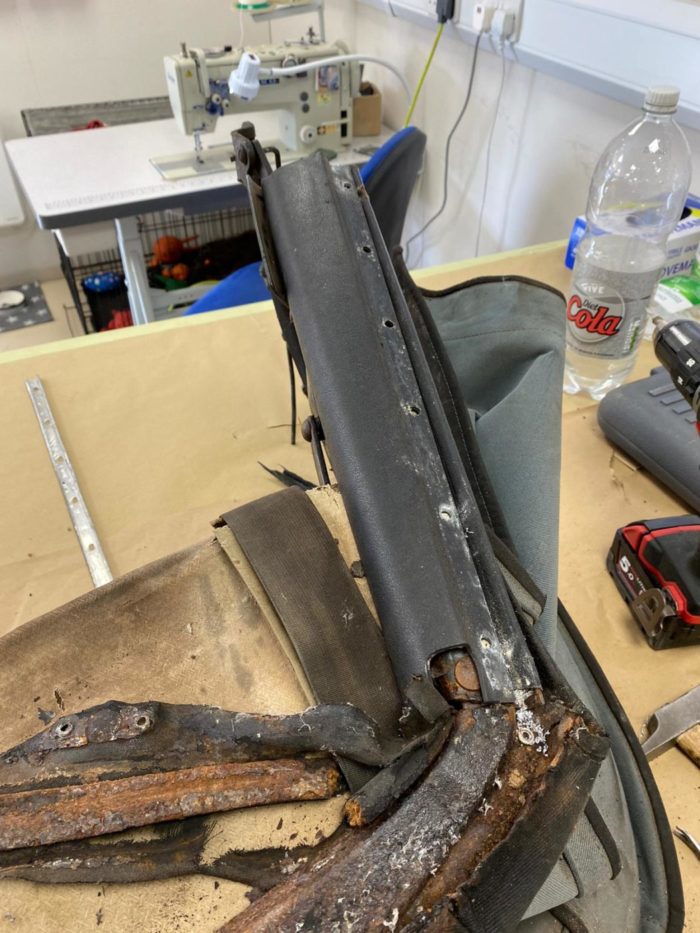
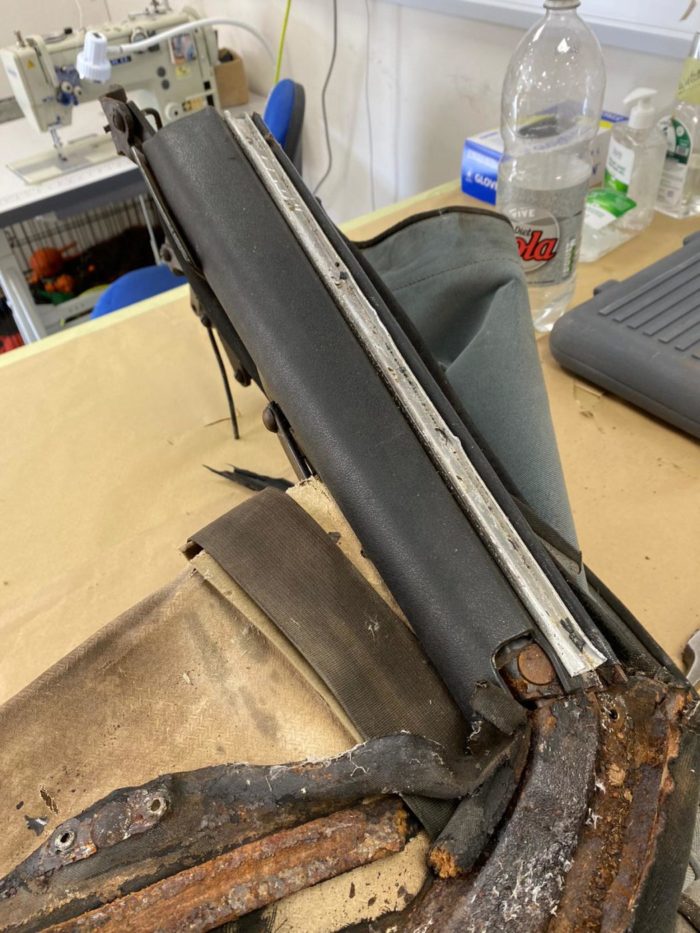
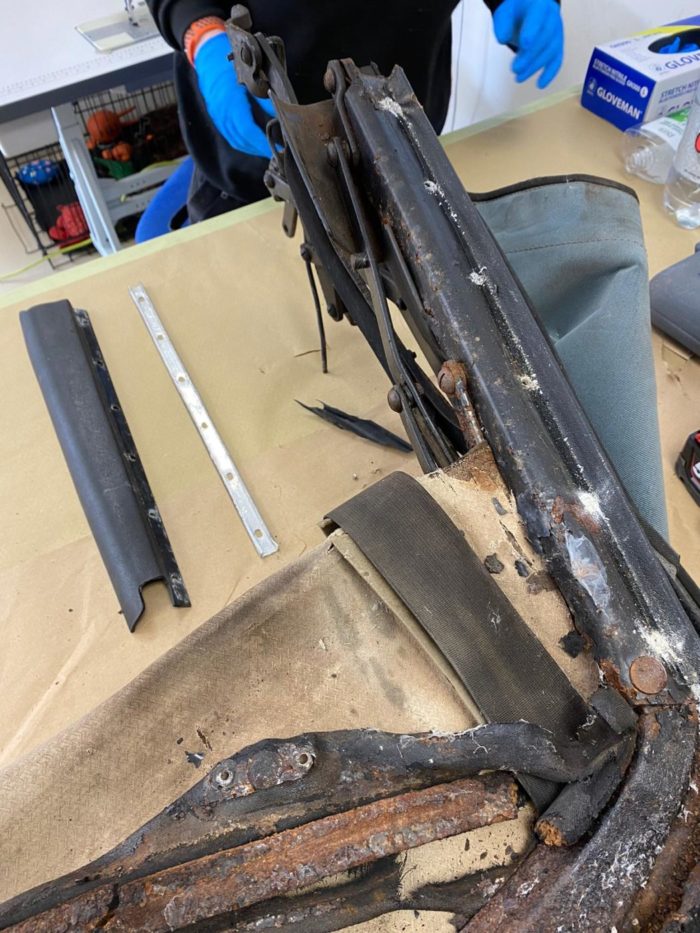
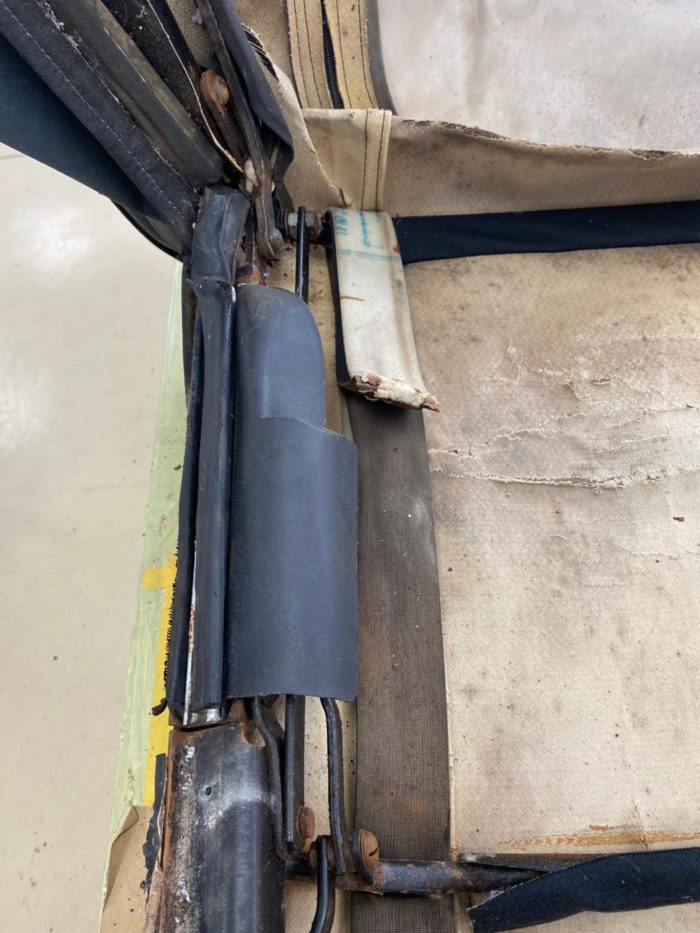
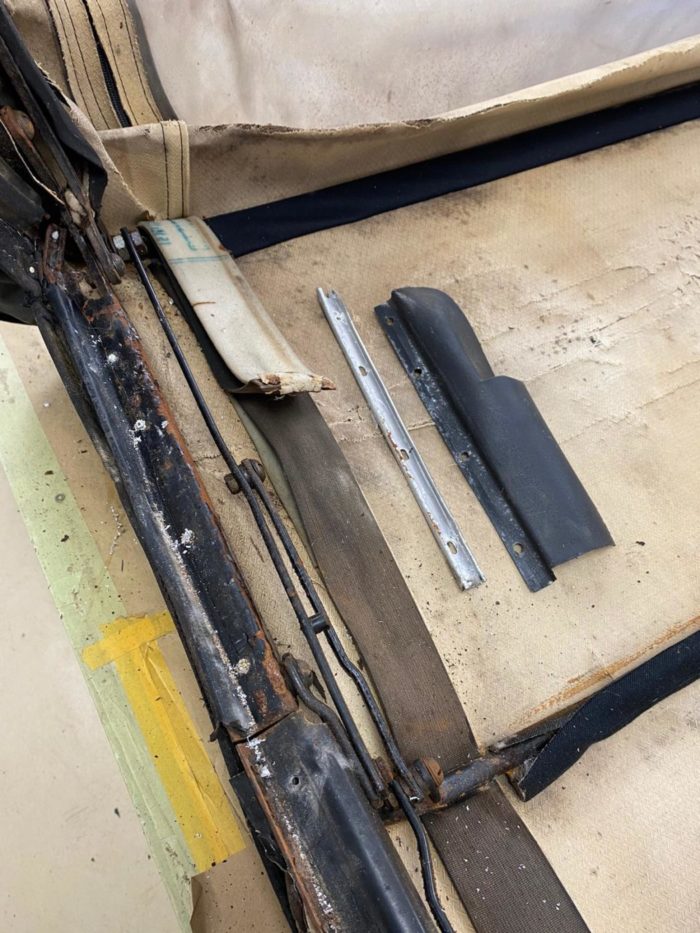
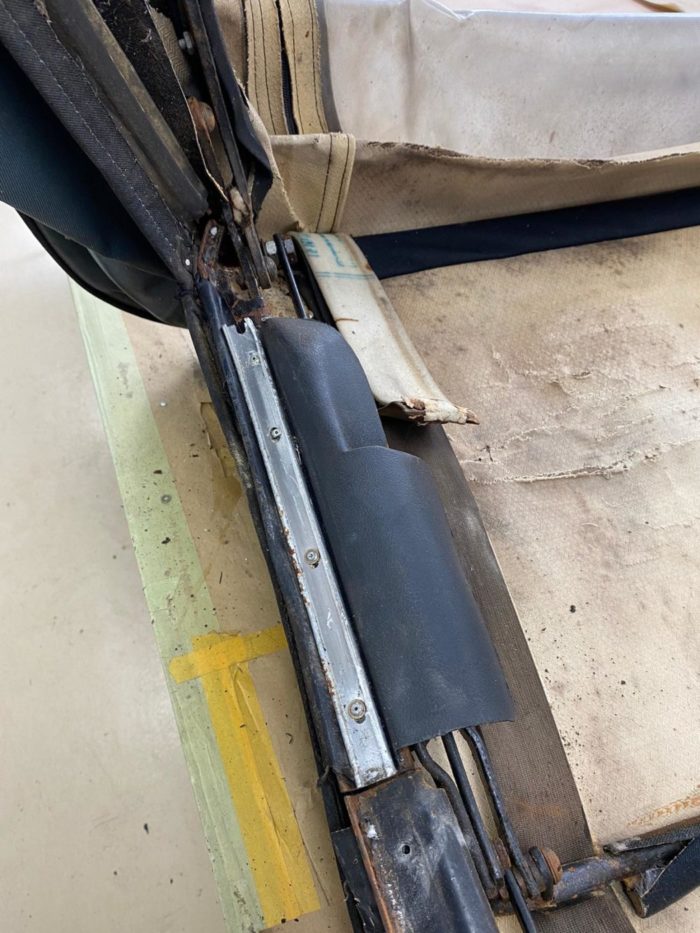
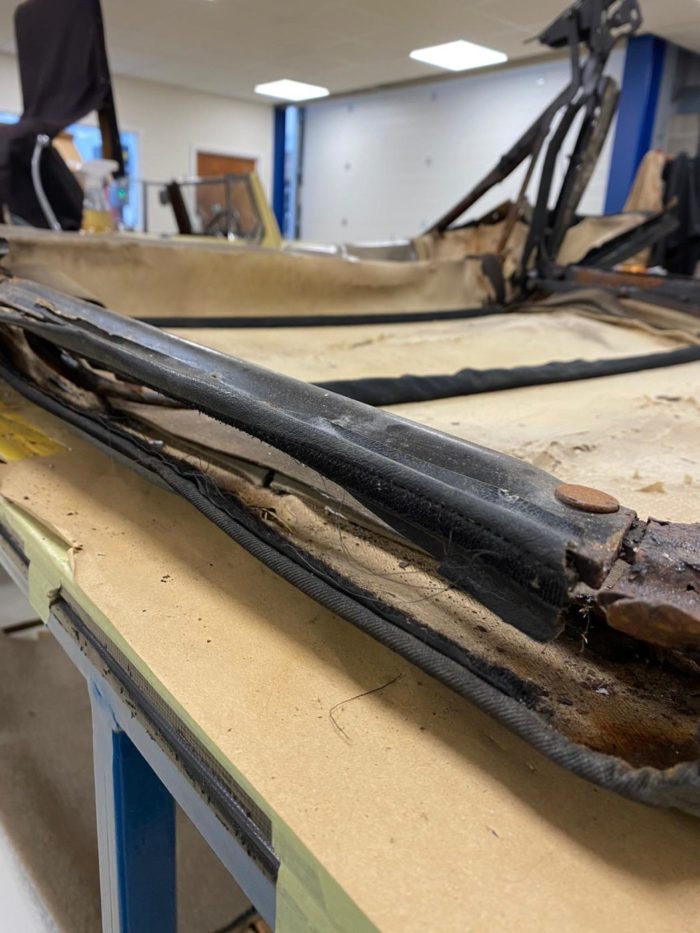
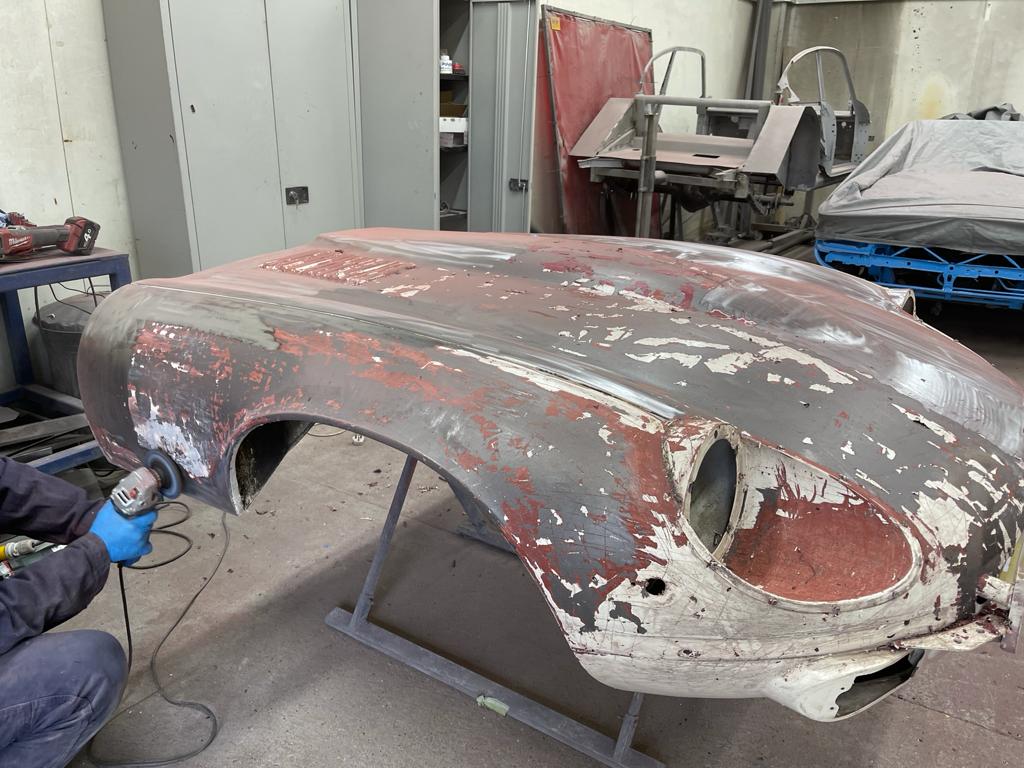
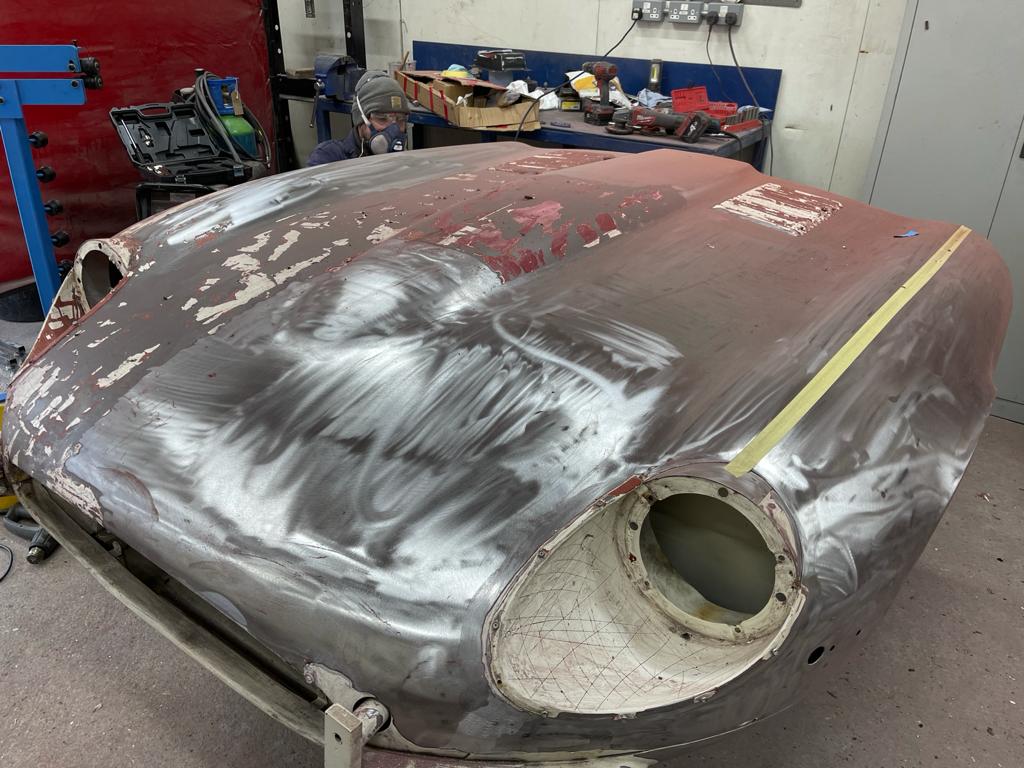
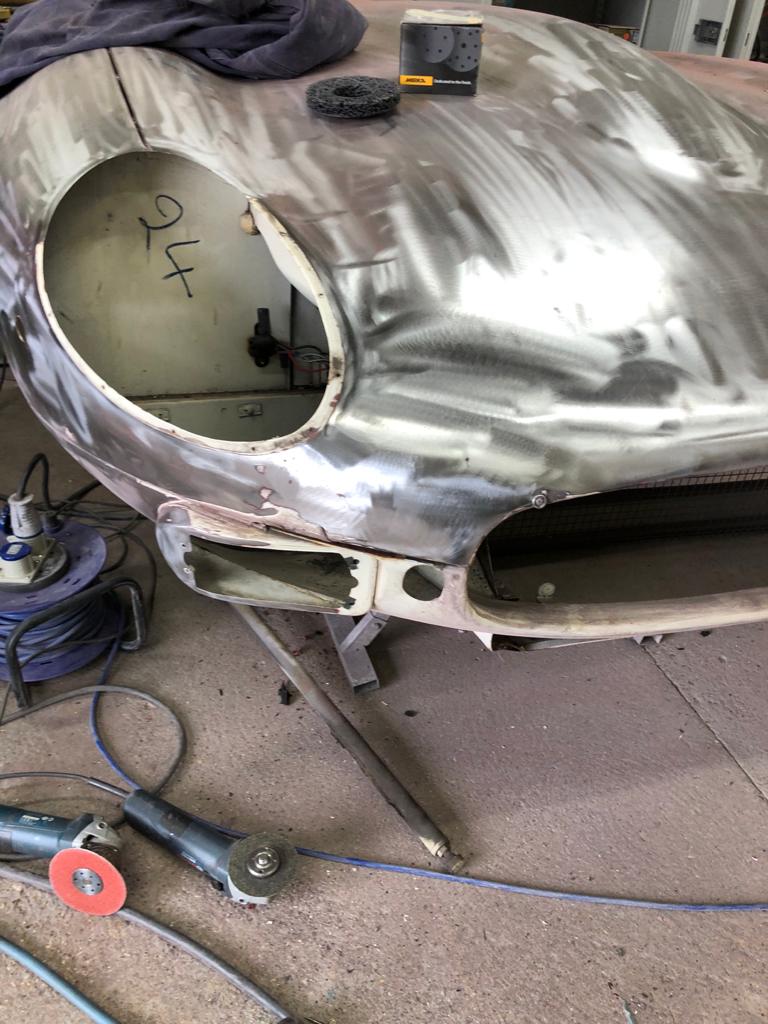
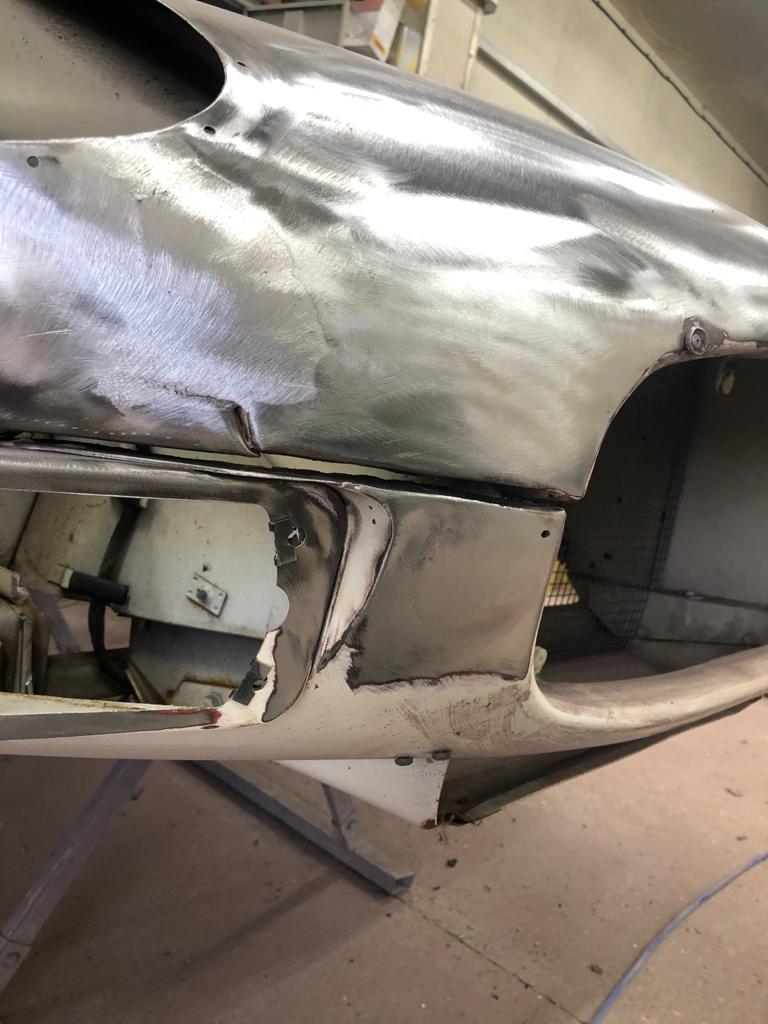
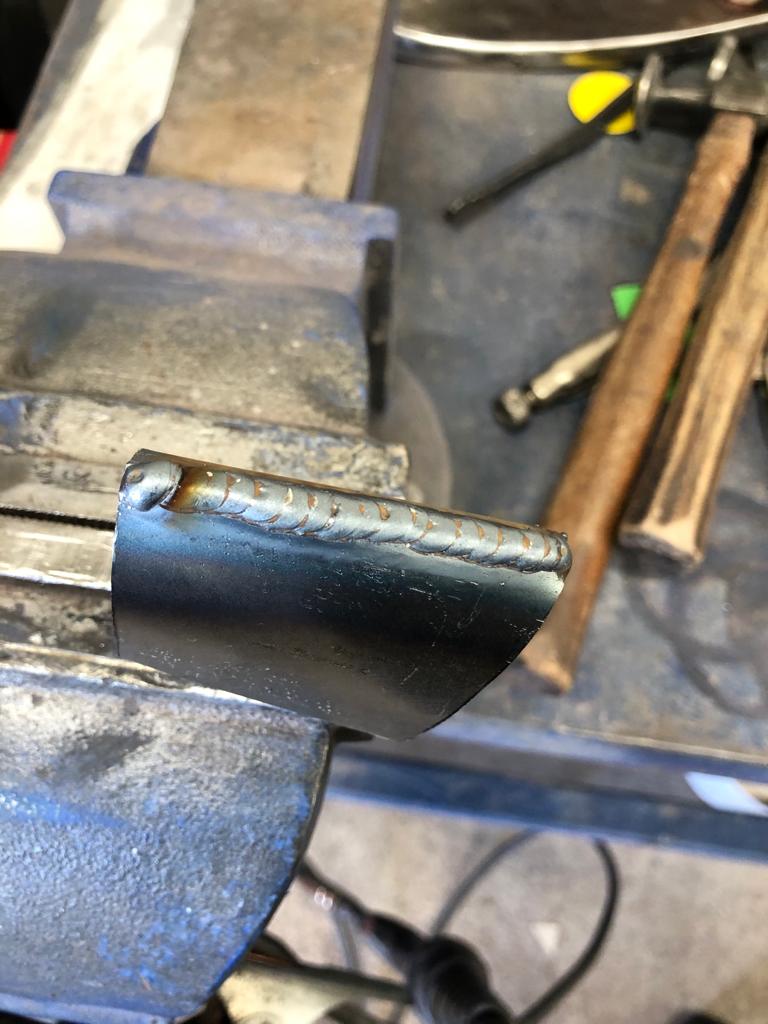
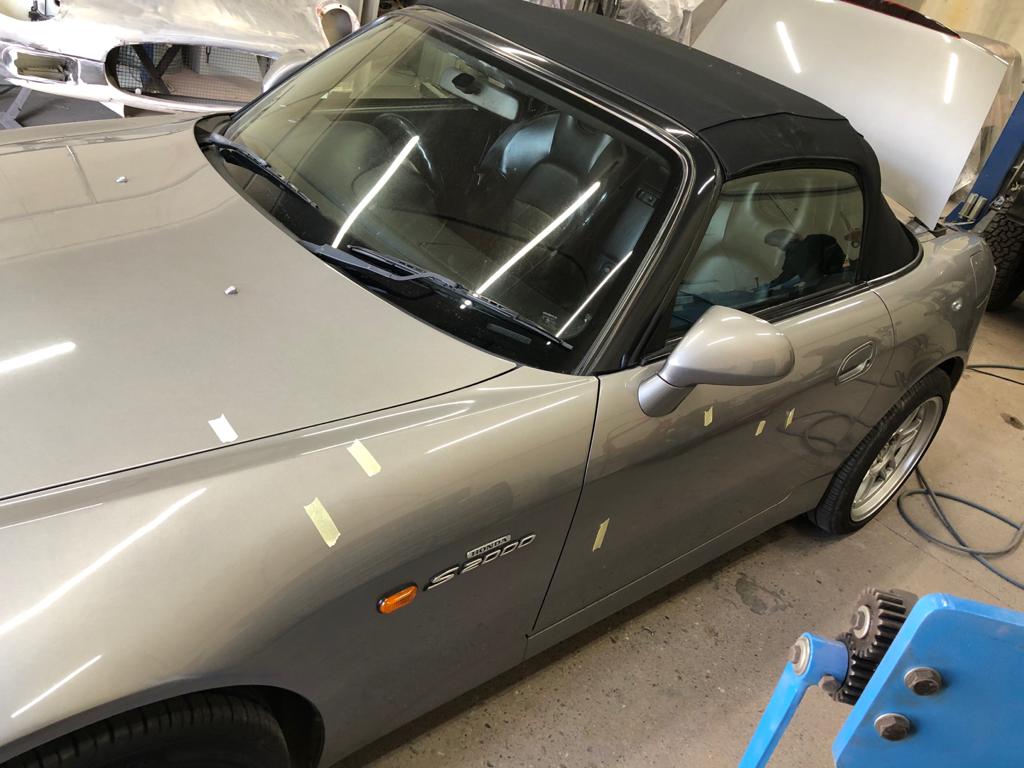
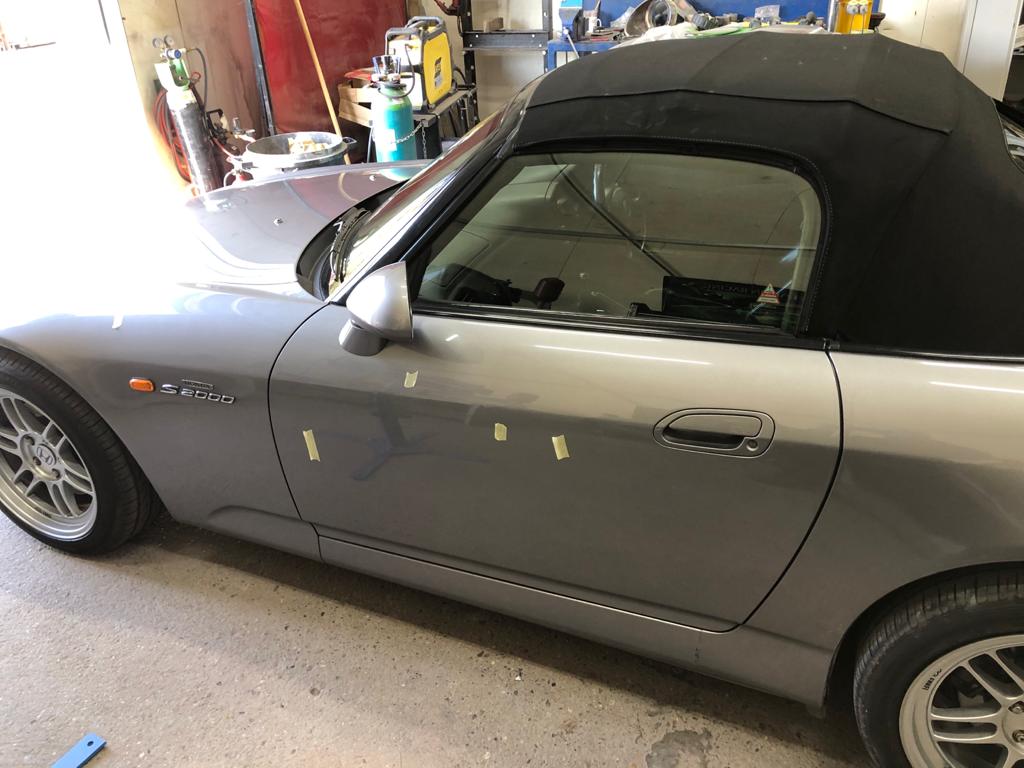
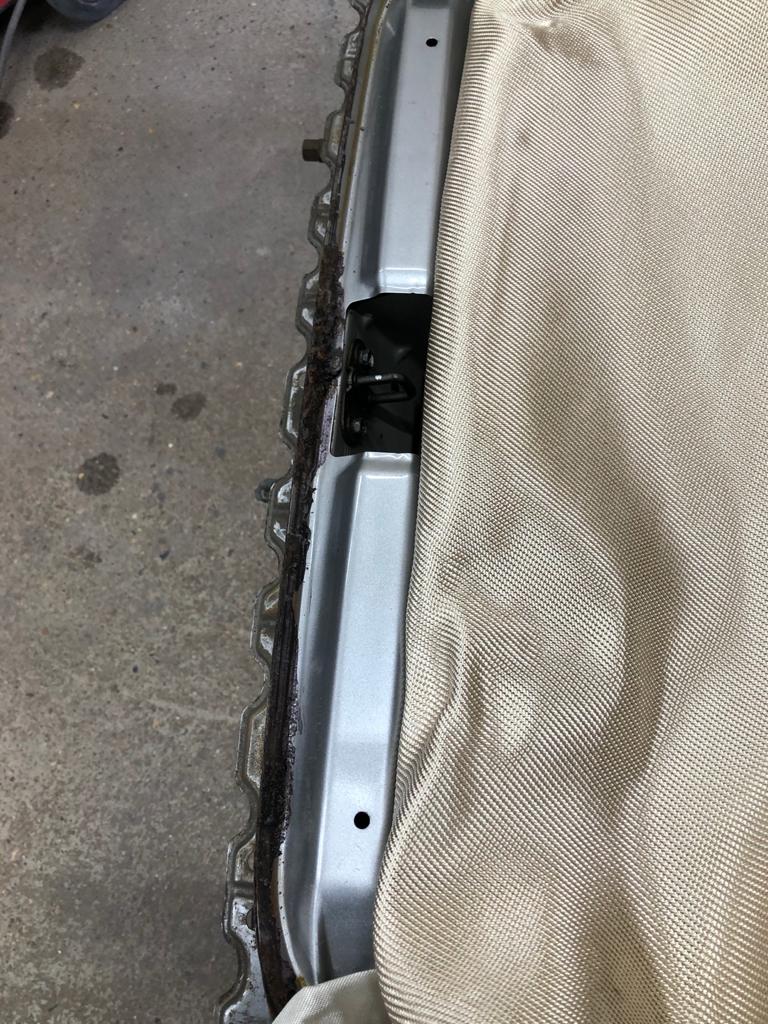
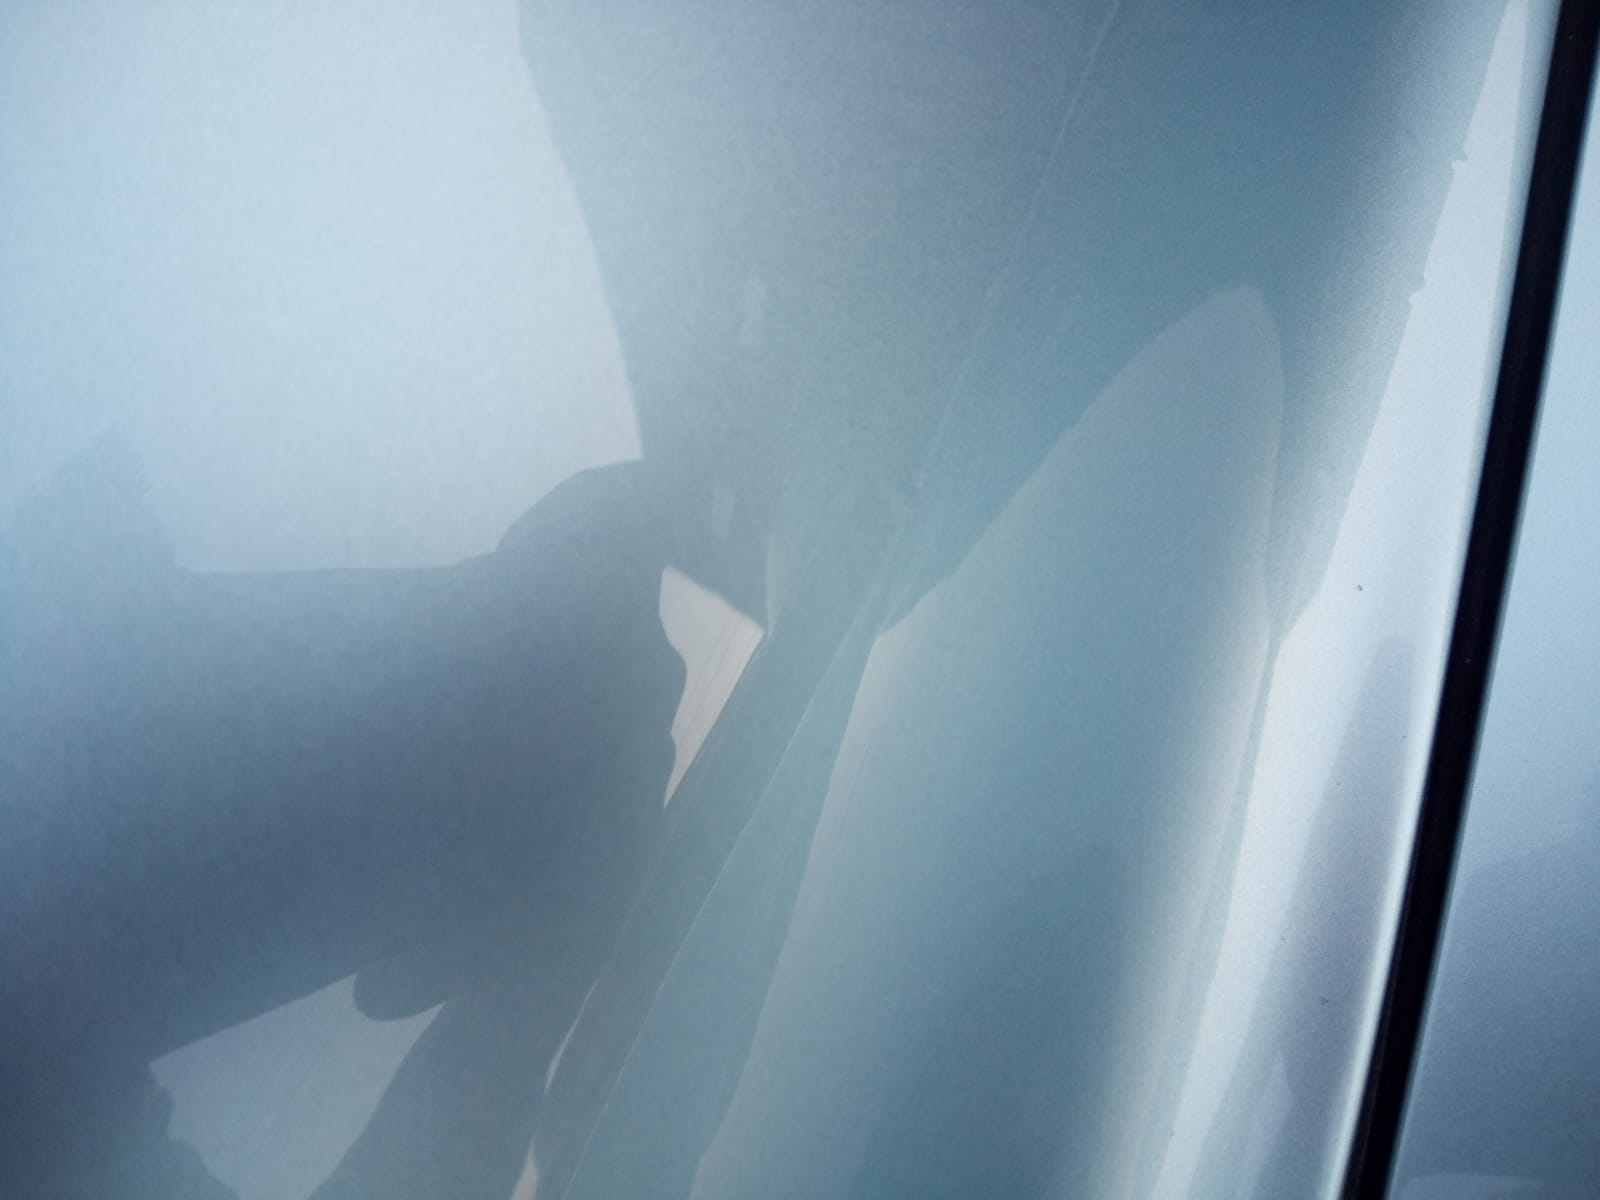
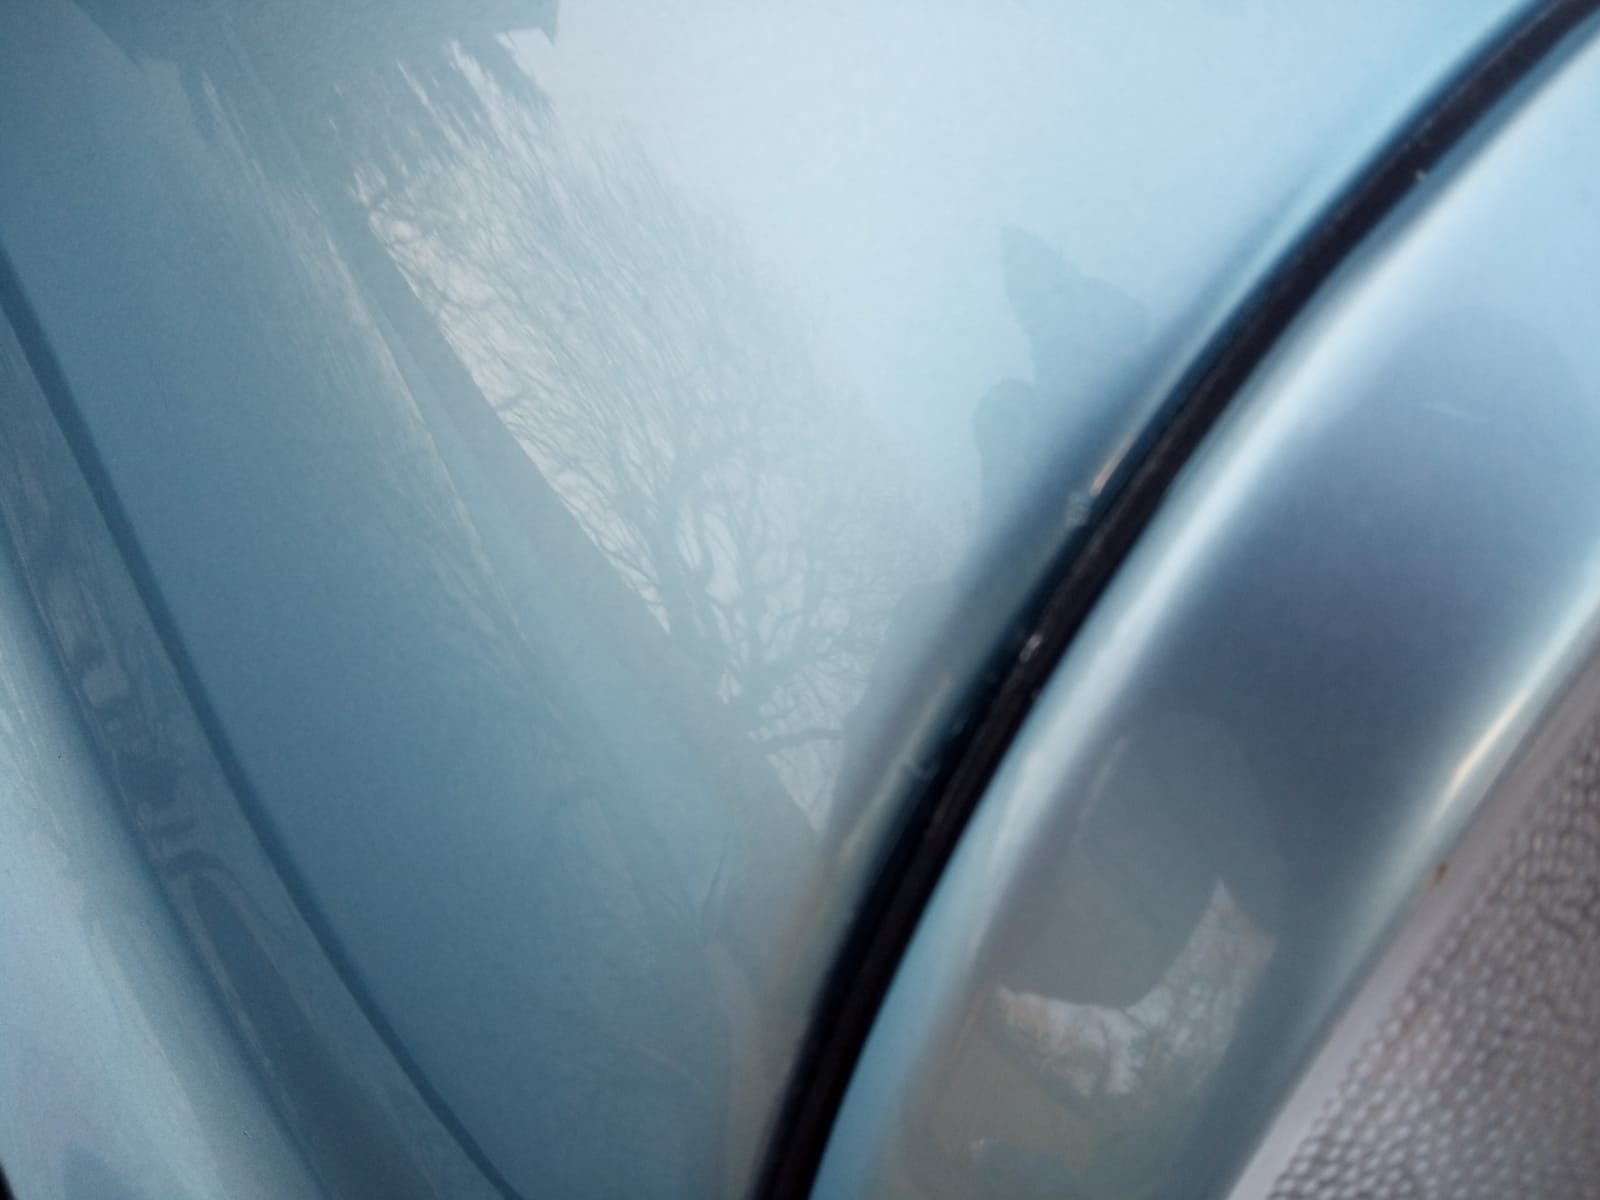
Our Honda S2000 is a modern classic from the turn of the millennia. Following on from our last update, James has been focusing on rebuilding


Our Honda S2000 is a modern classic from the turn of the millennia. Following on from our last update, James has been focusing on rebuilding
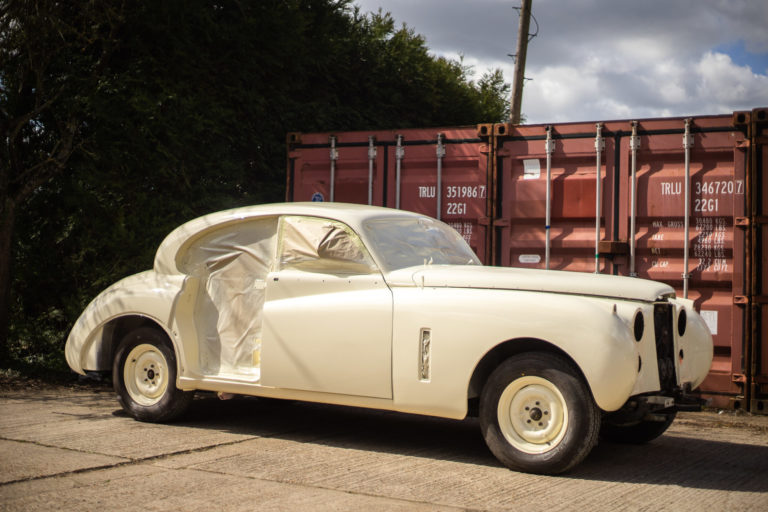
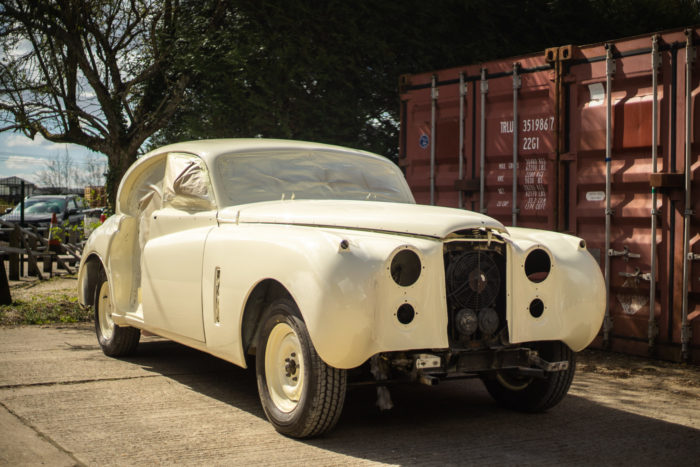
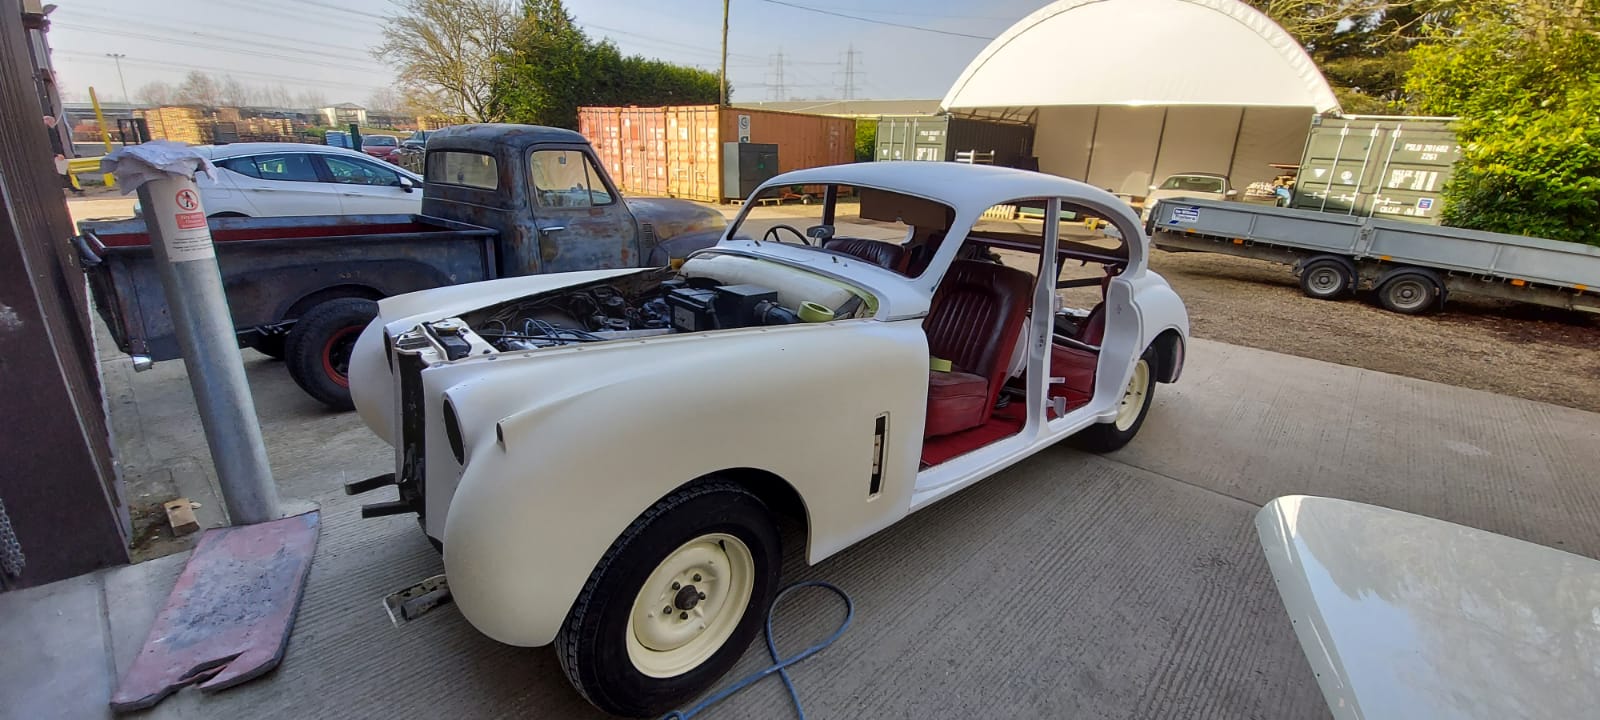
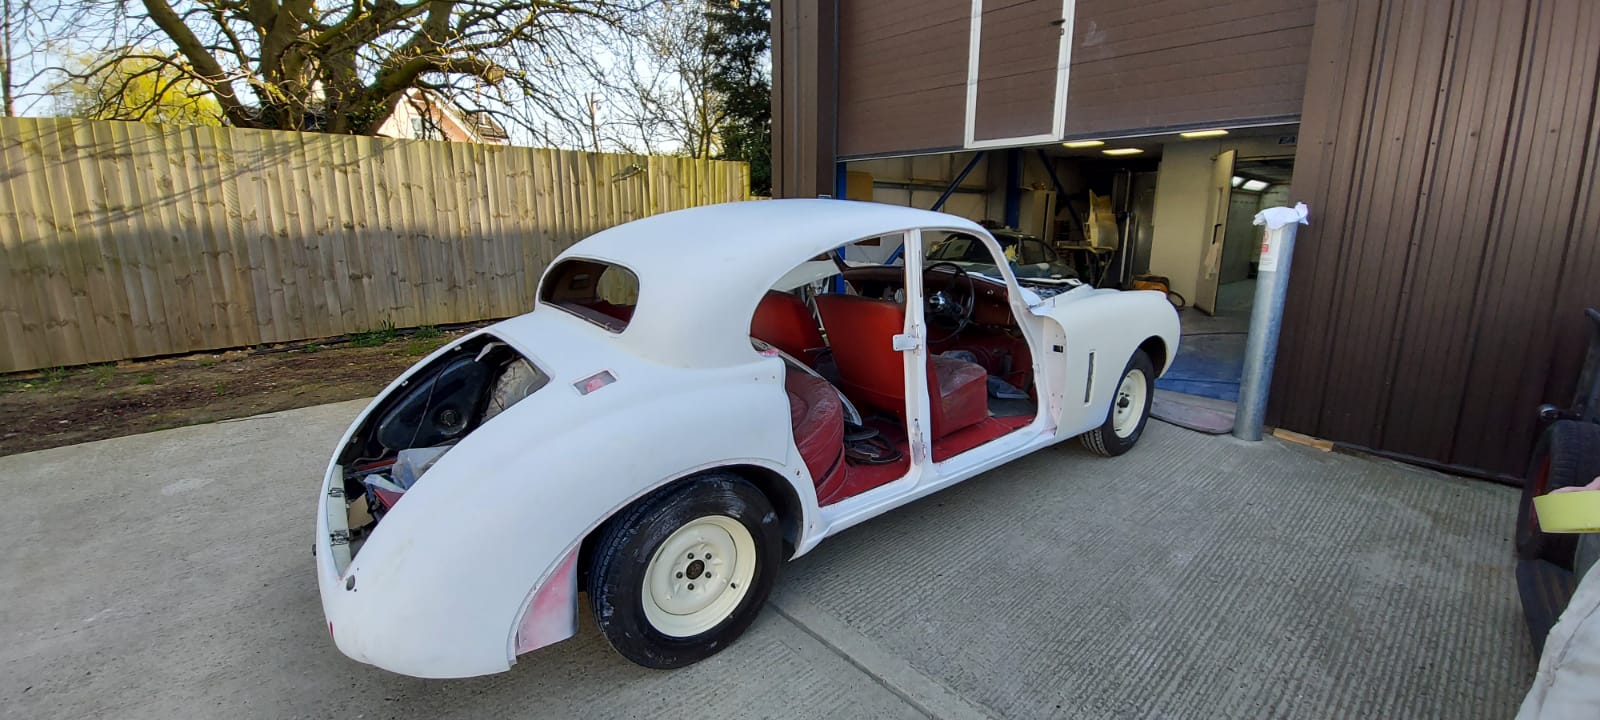
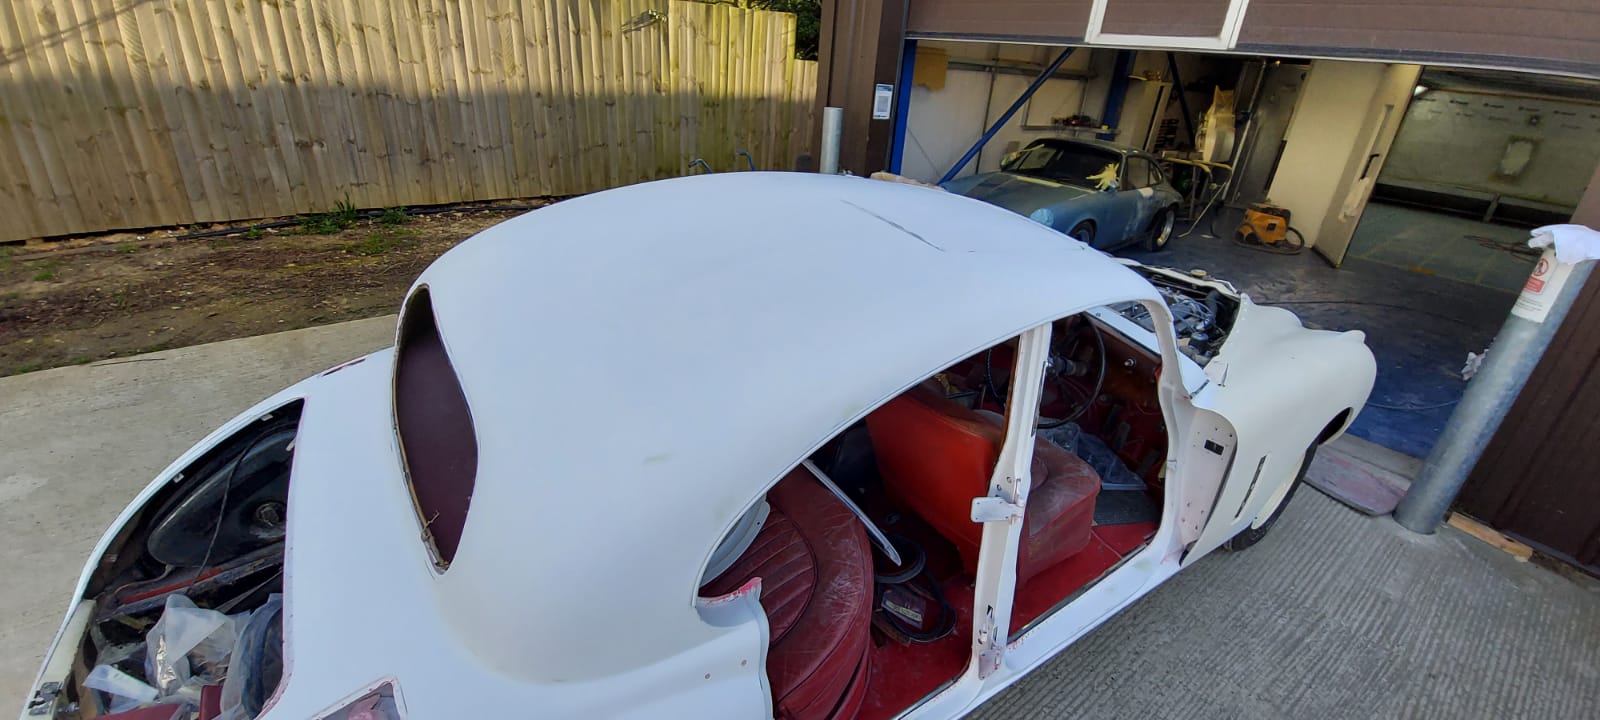
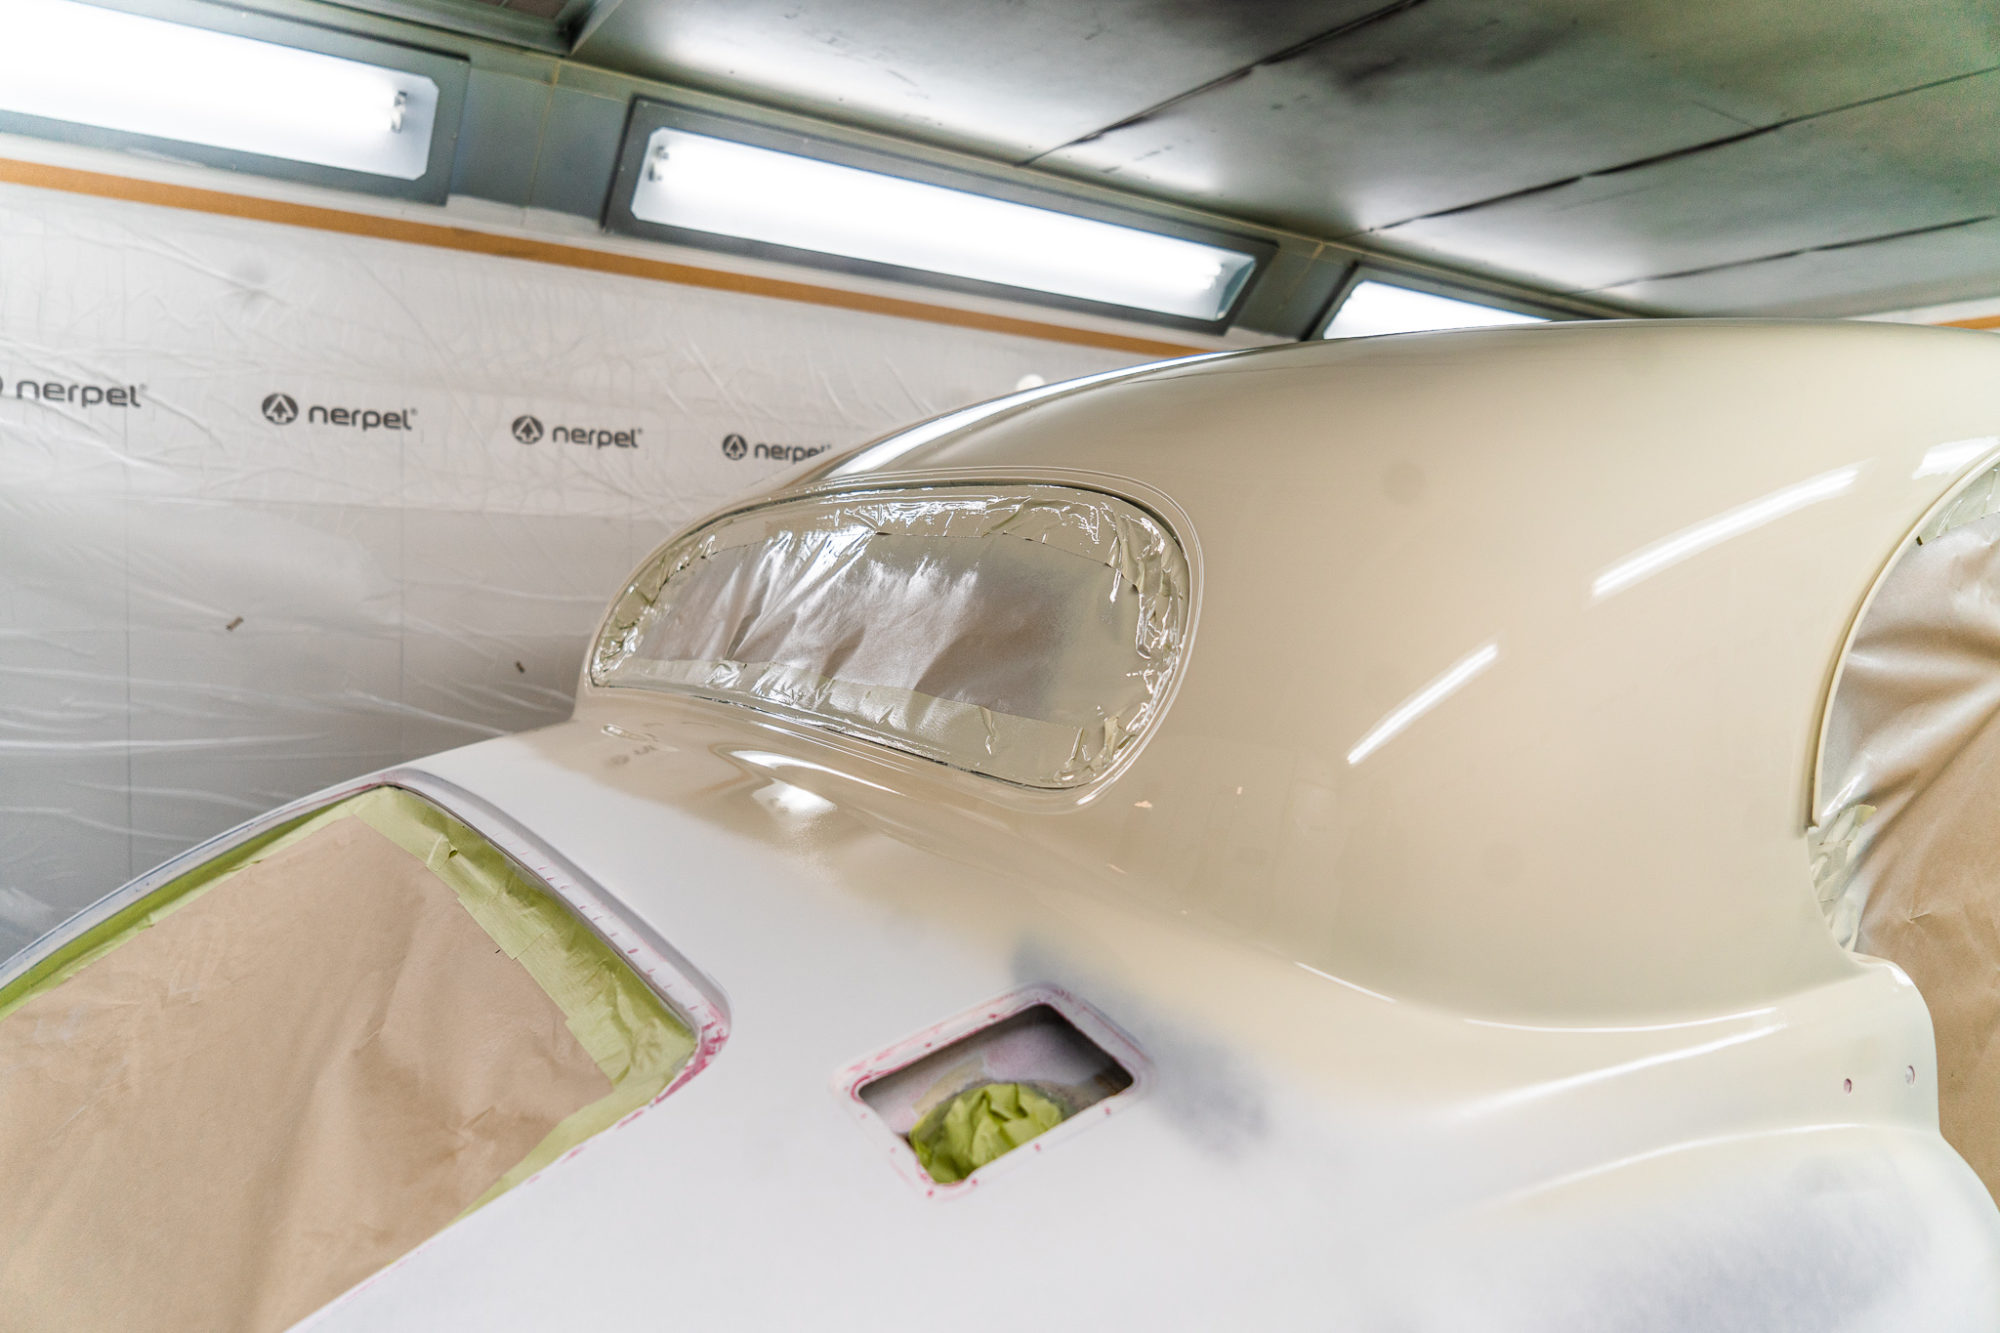
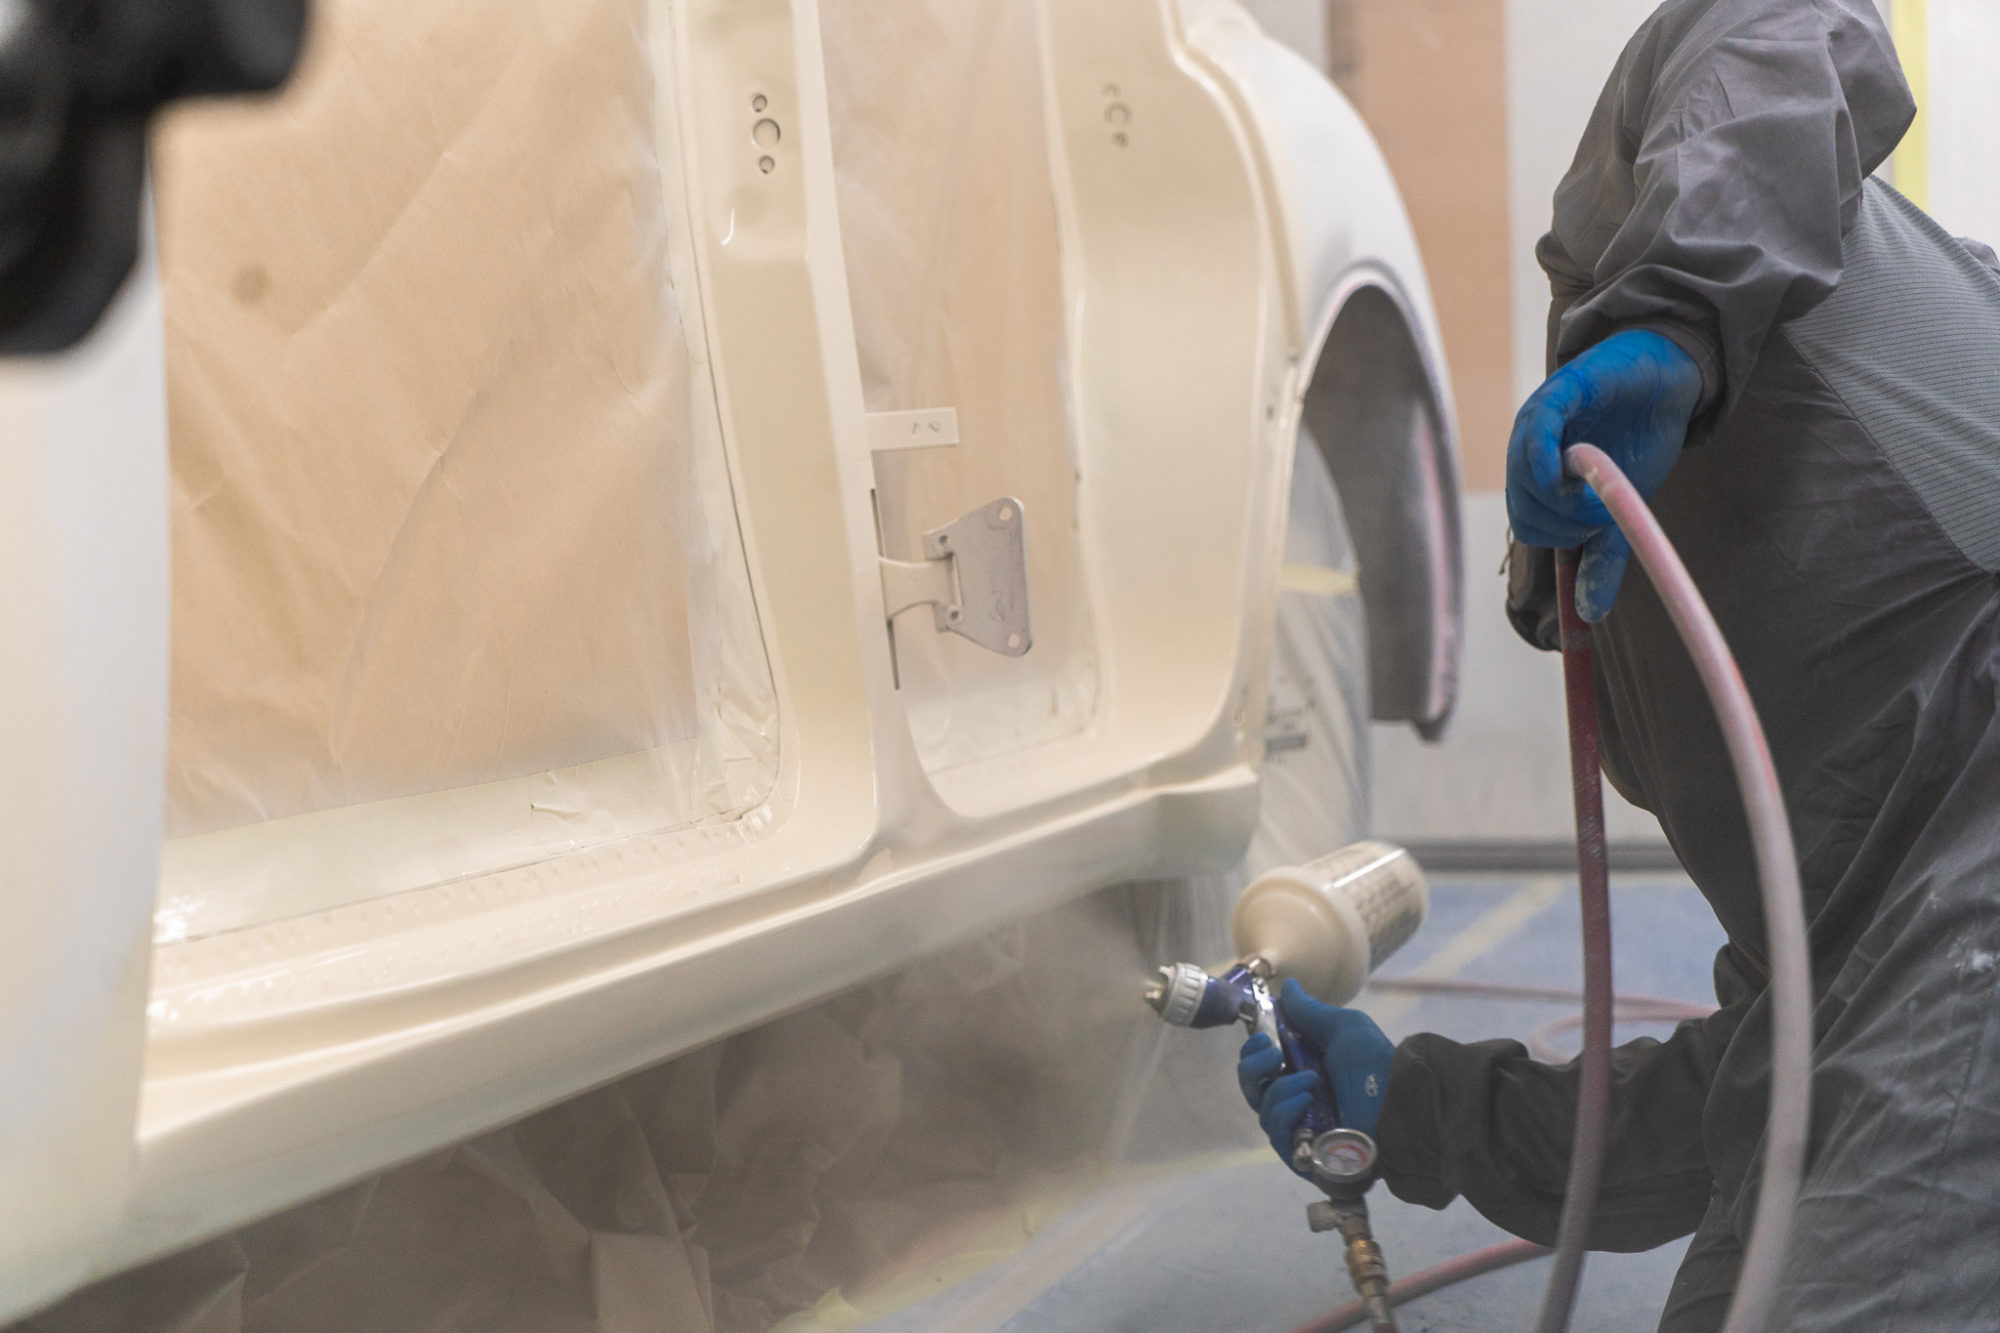
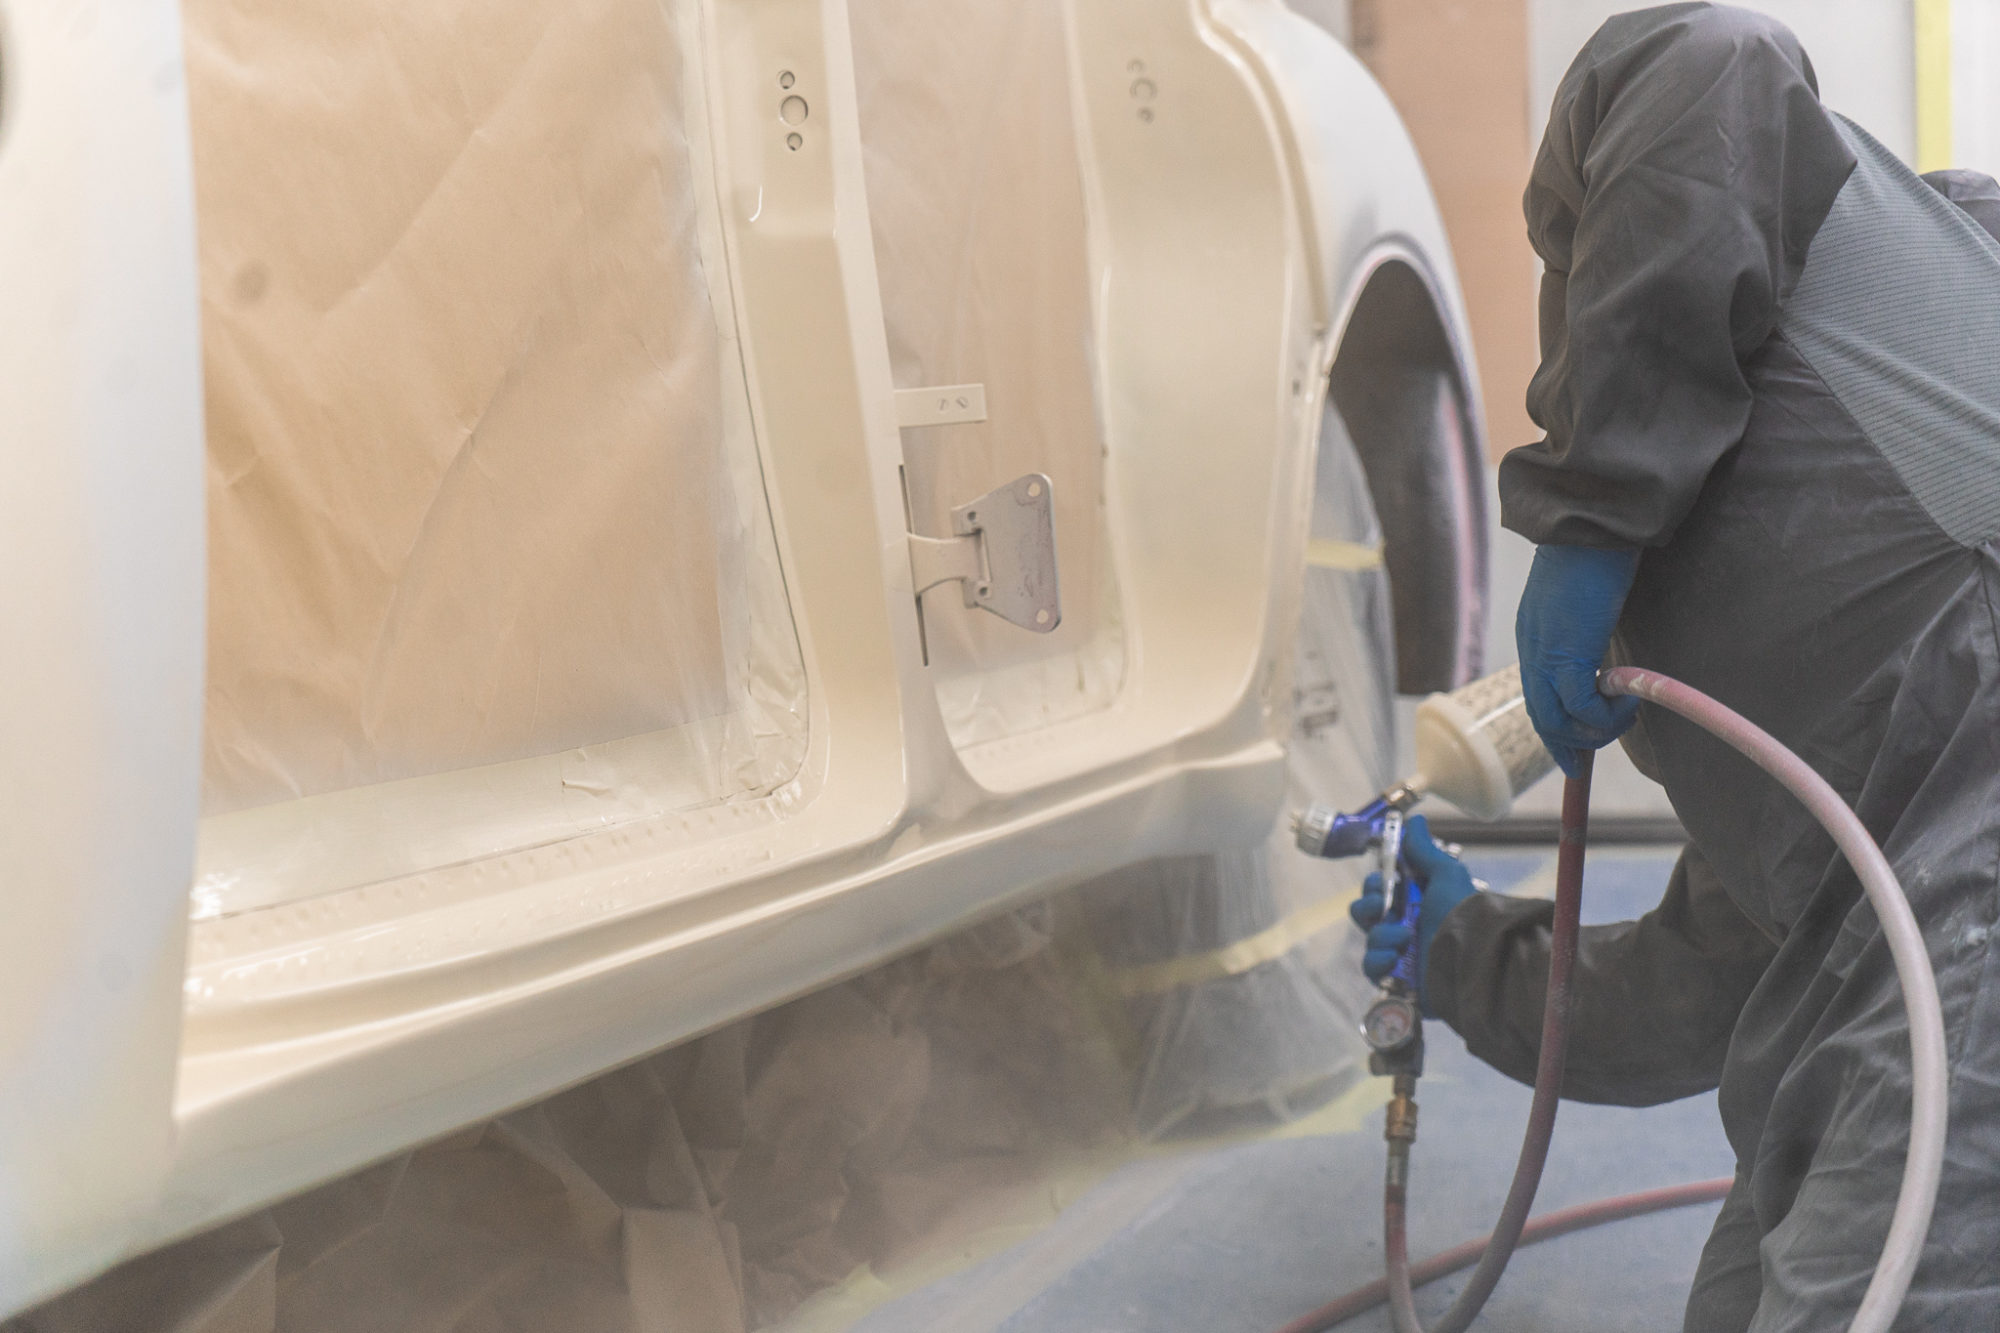
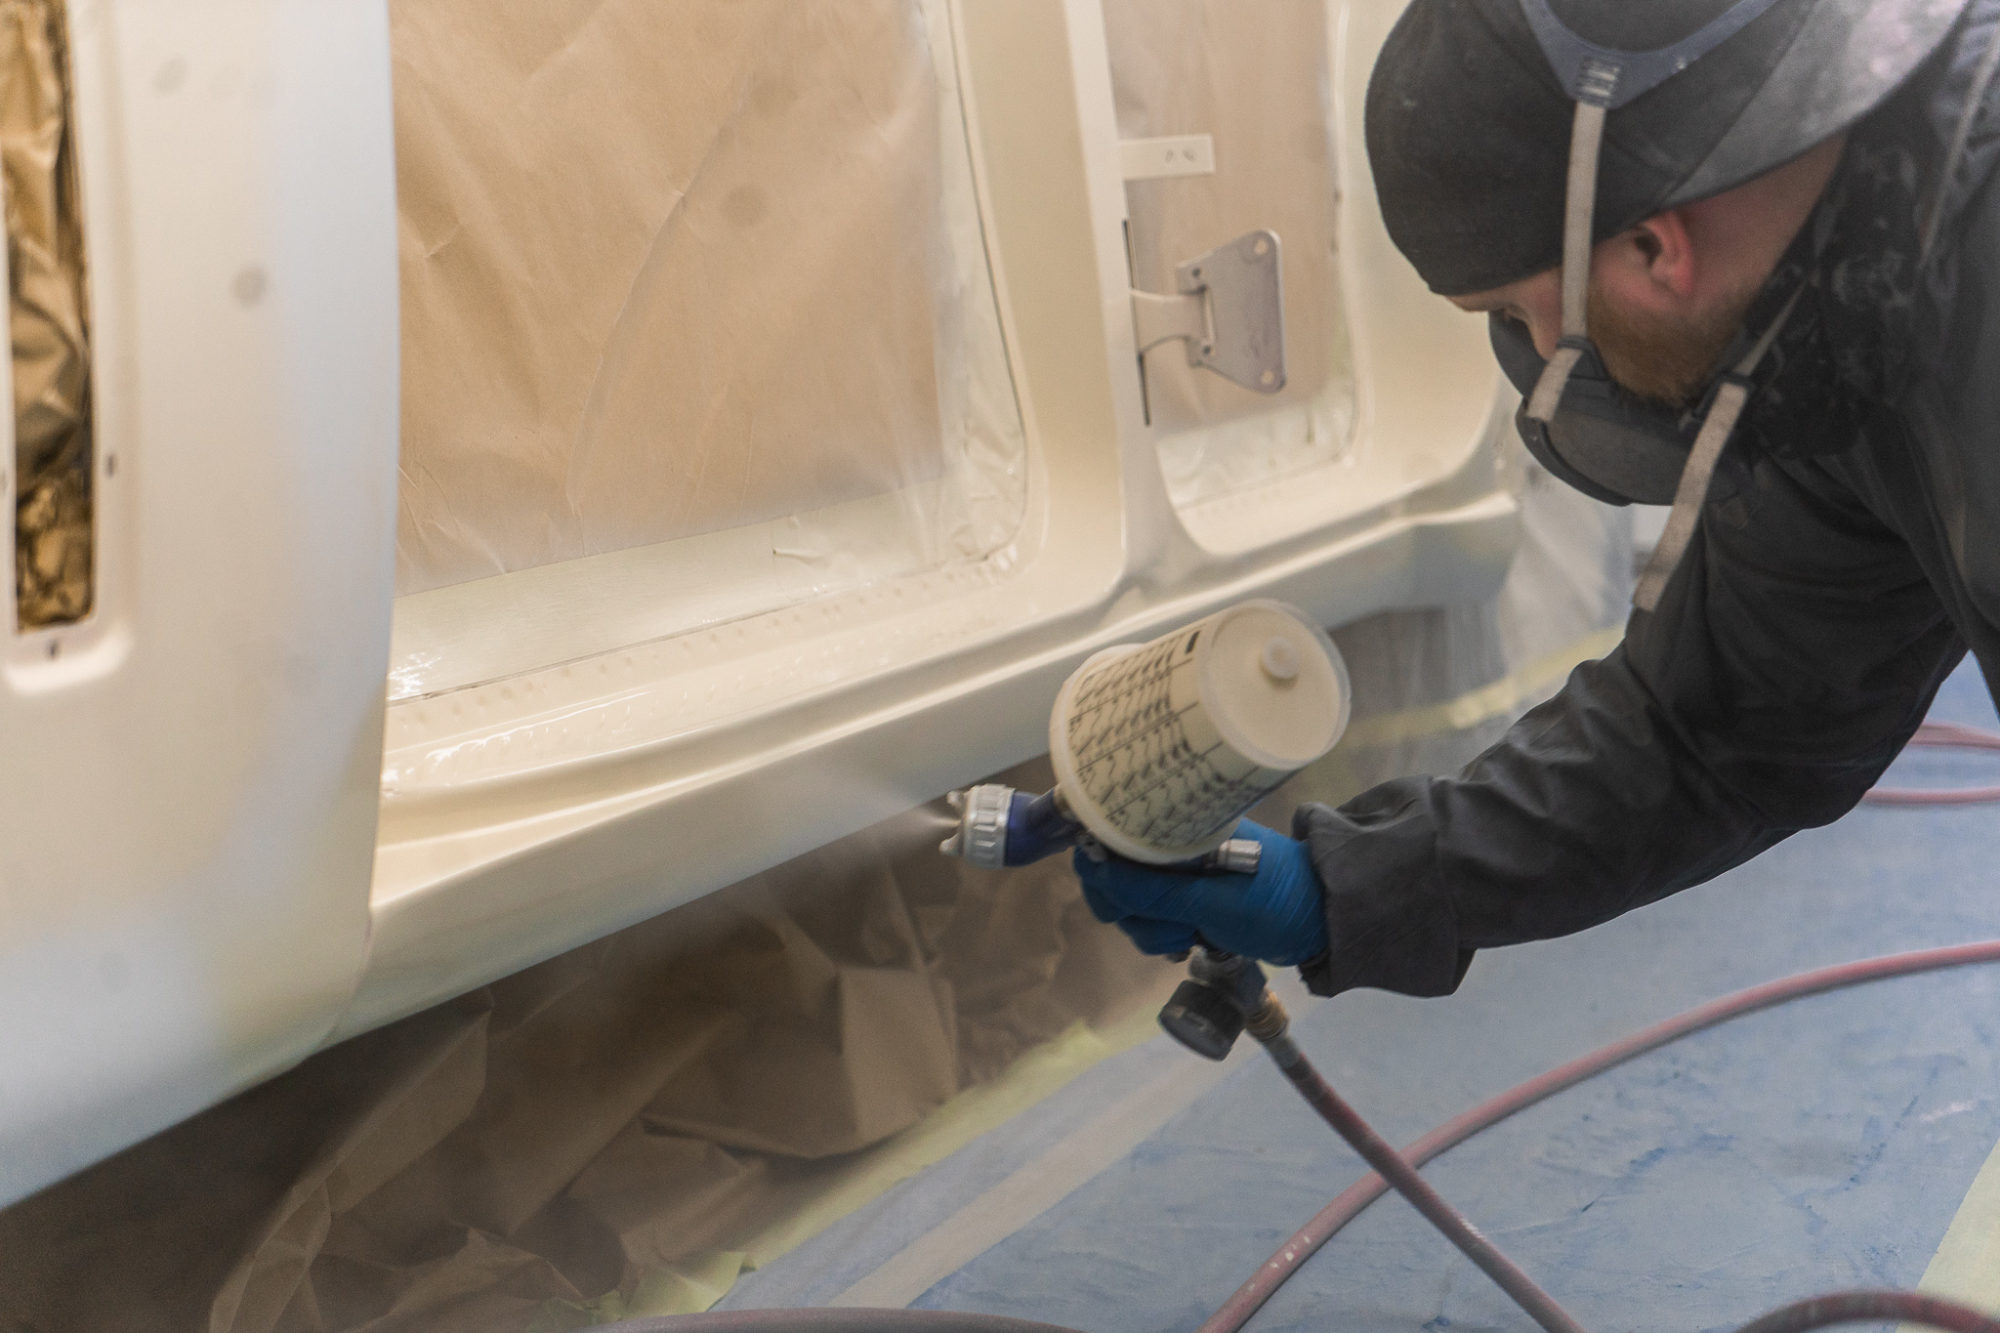
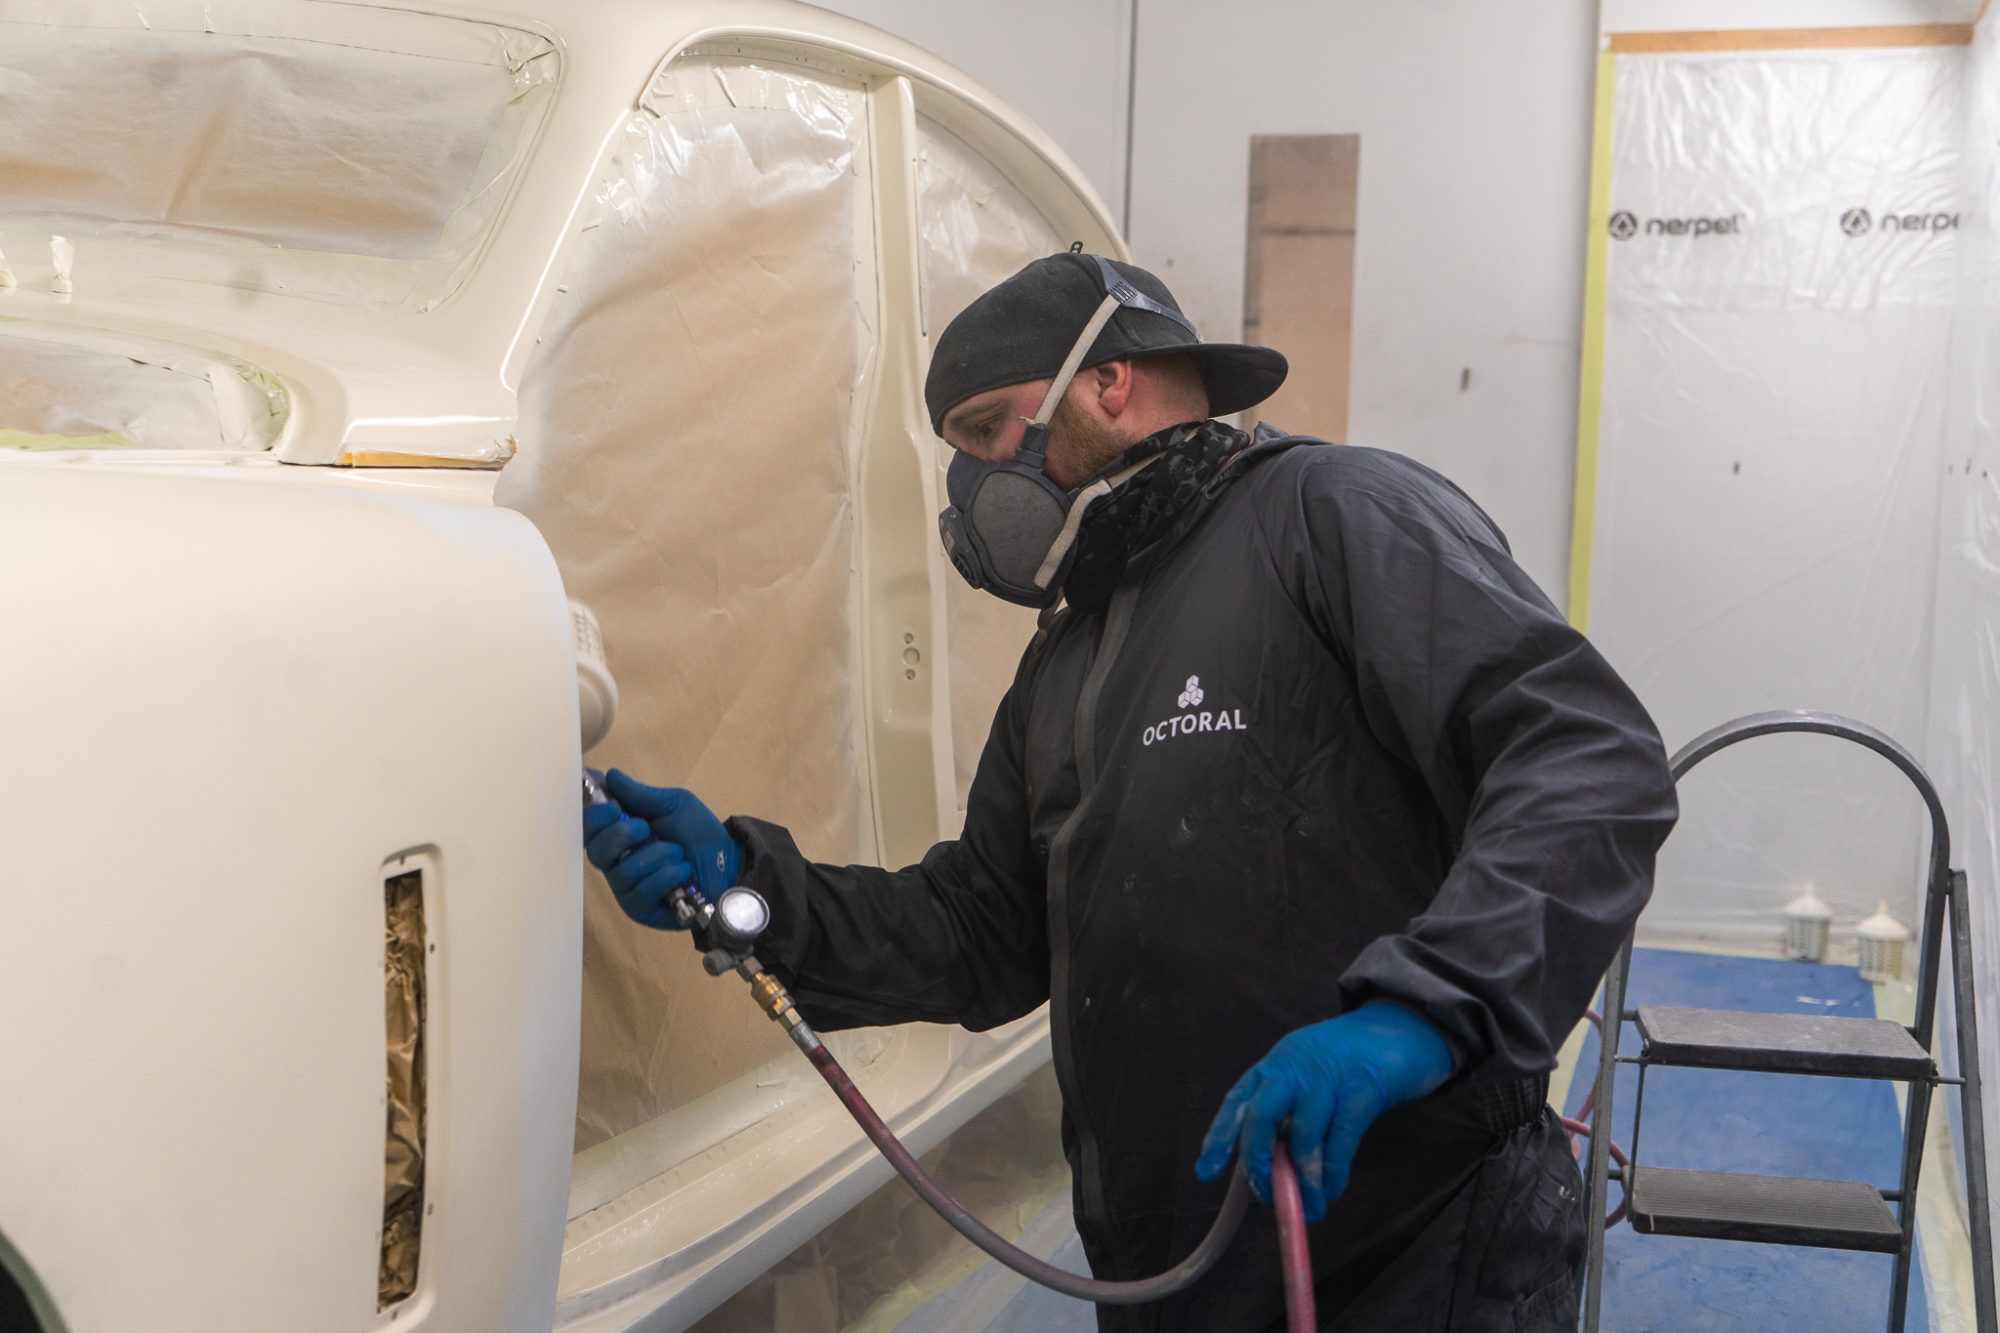
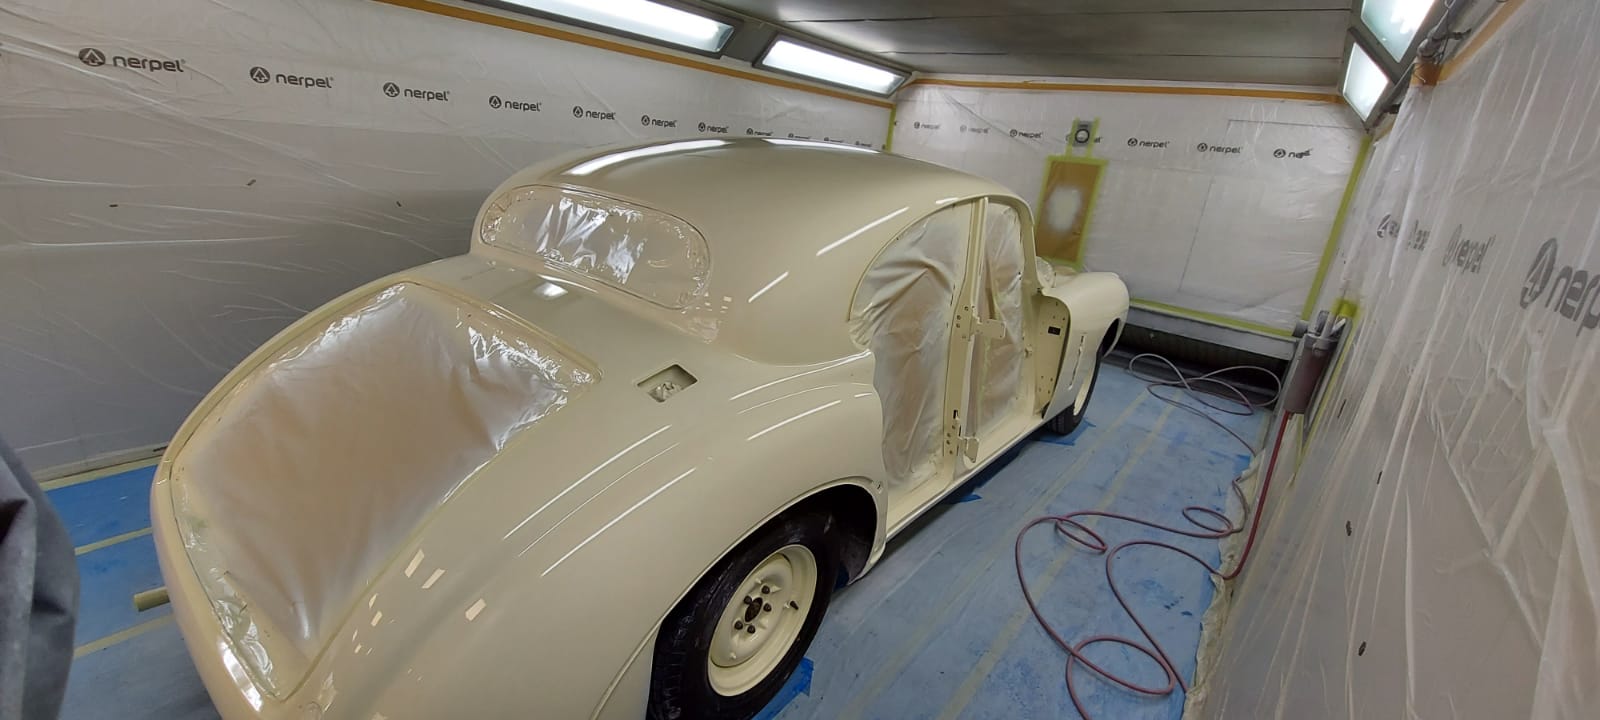
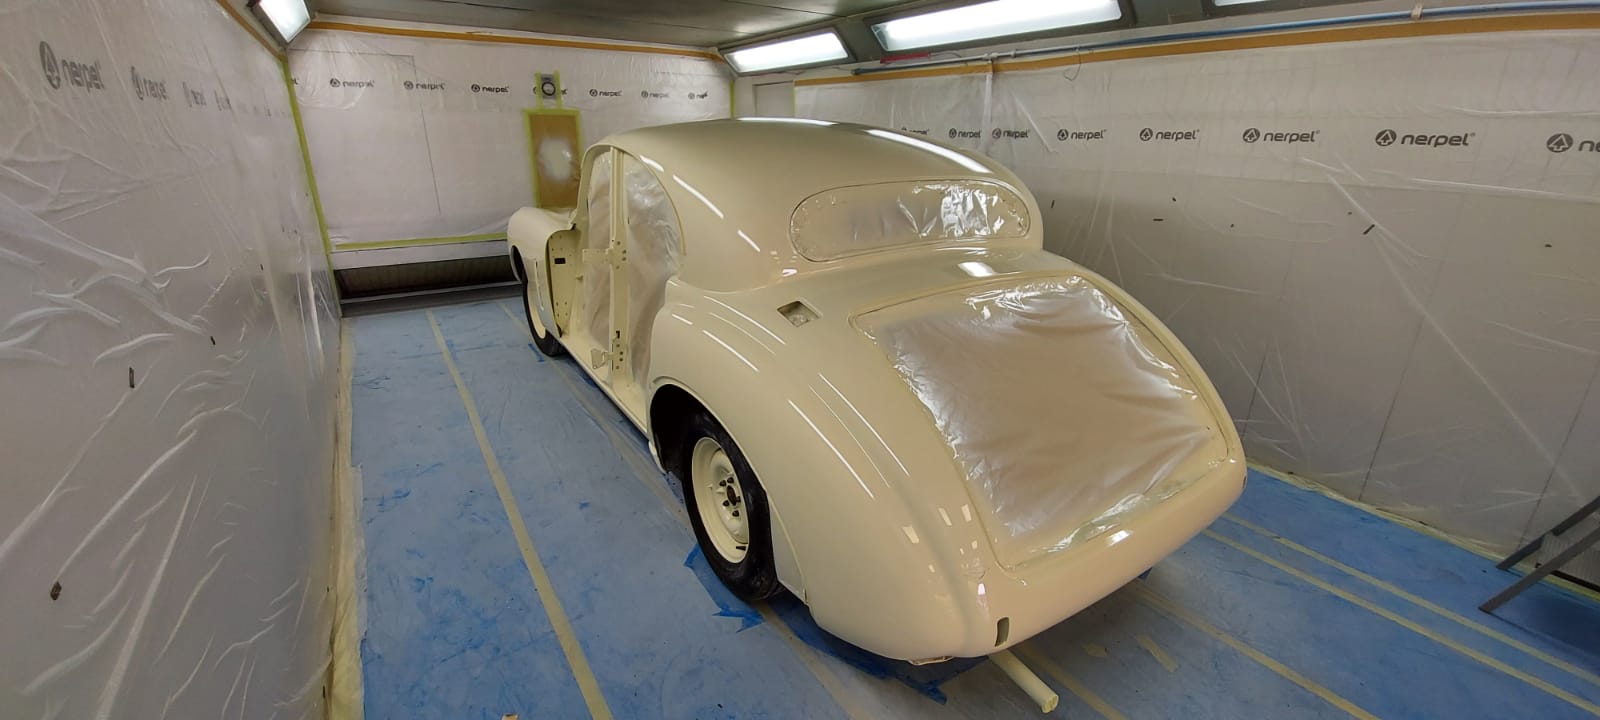
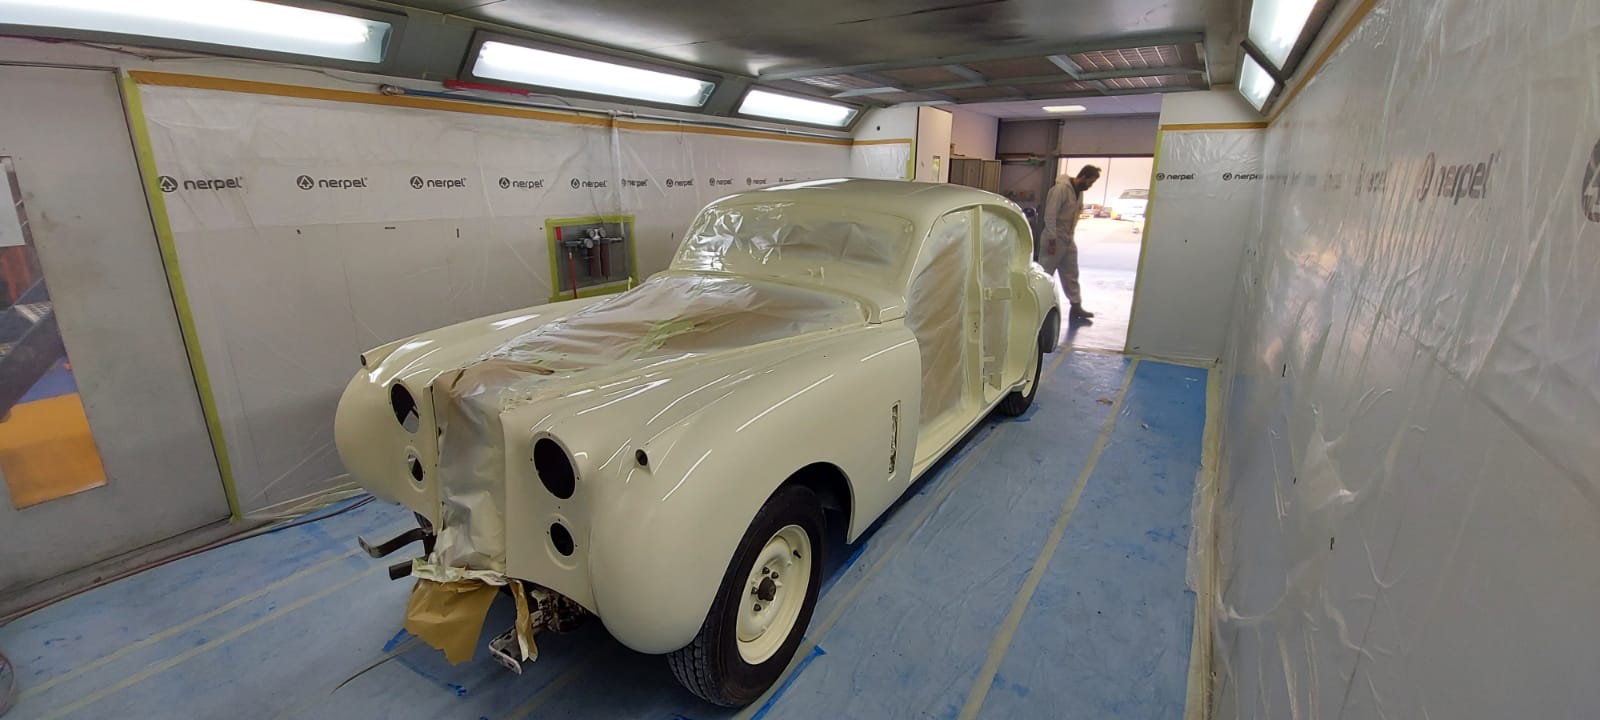
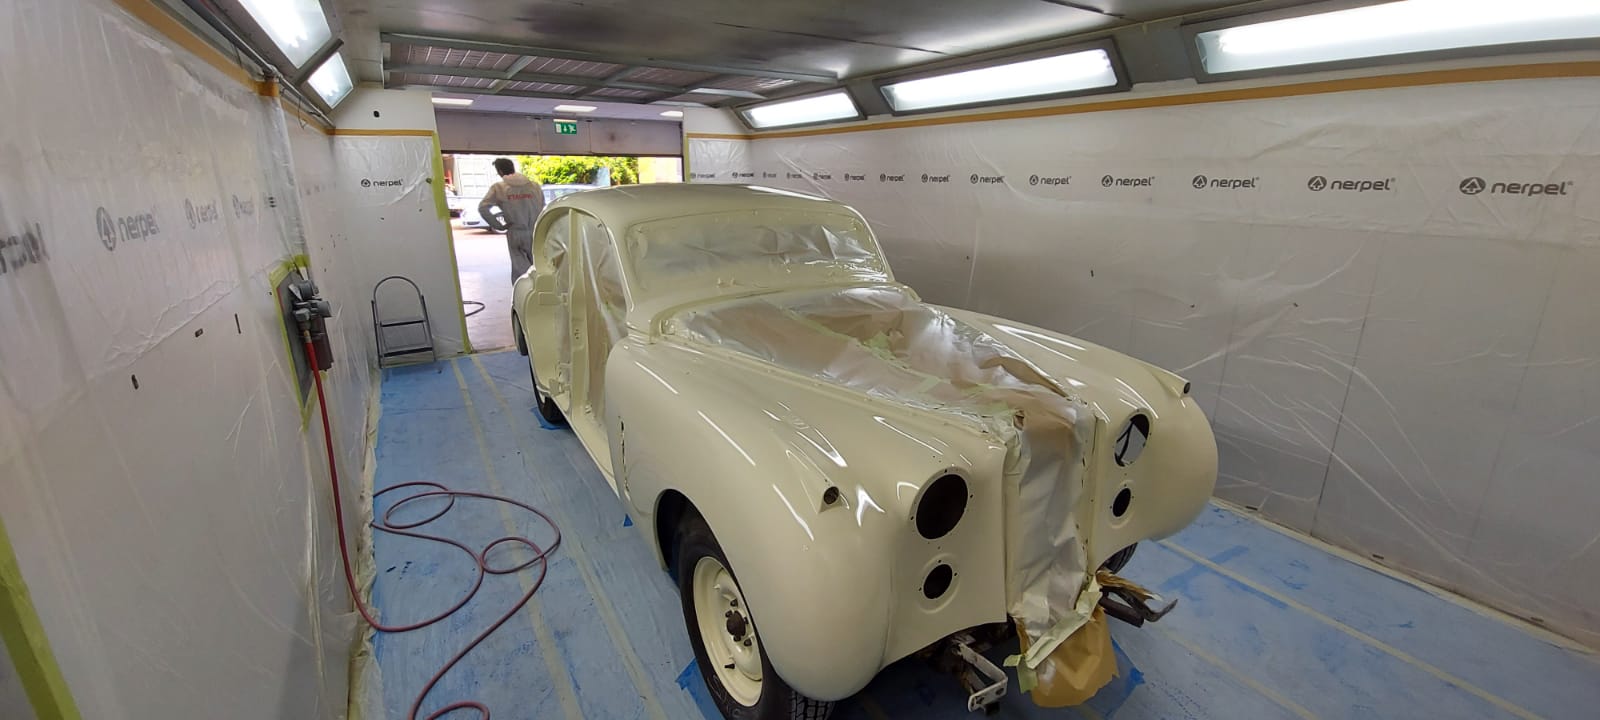
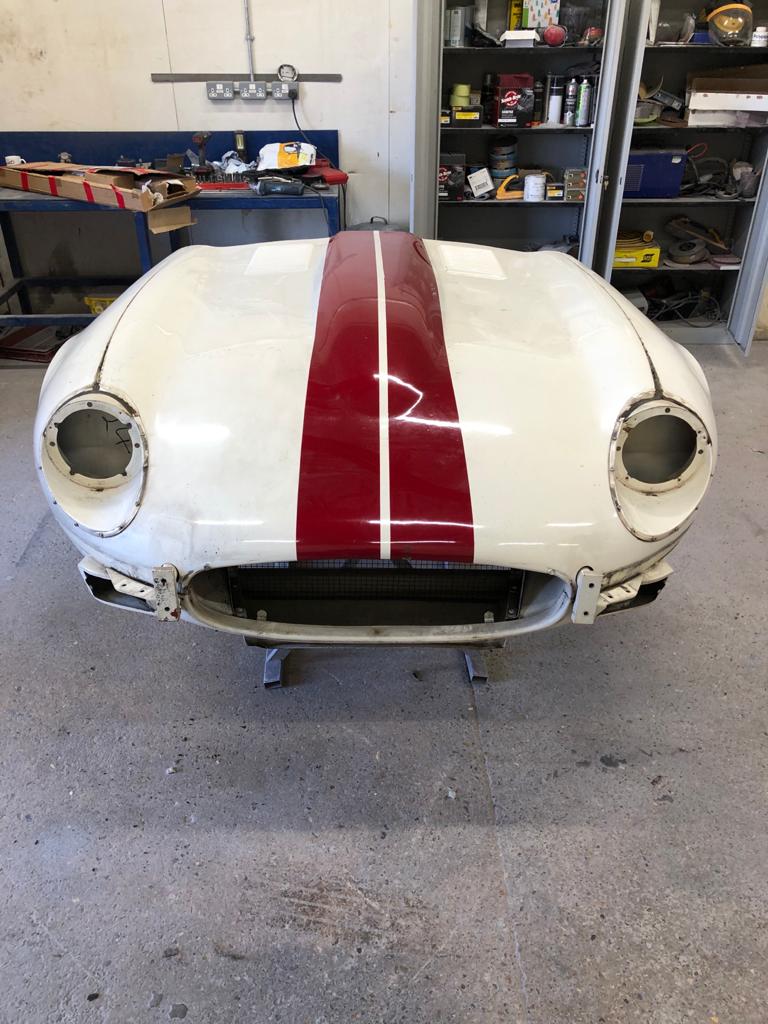
Our stunning 1954 Jaguar MKVII has been full painted and the panels have been smoothed and flattened. The rest of the body now needs to
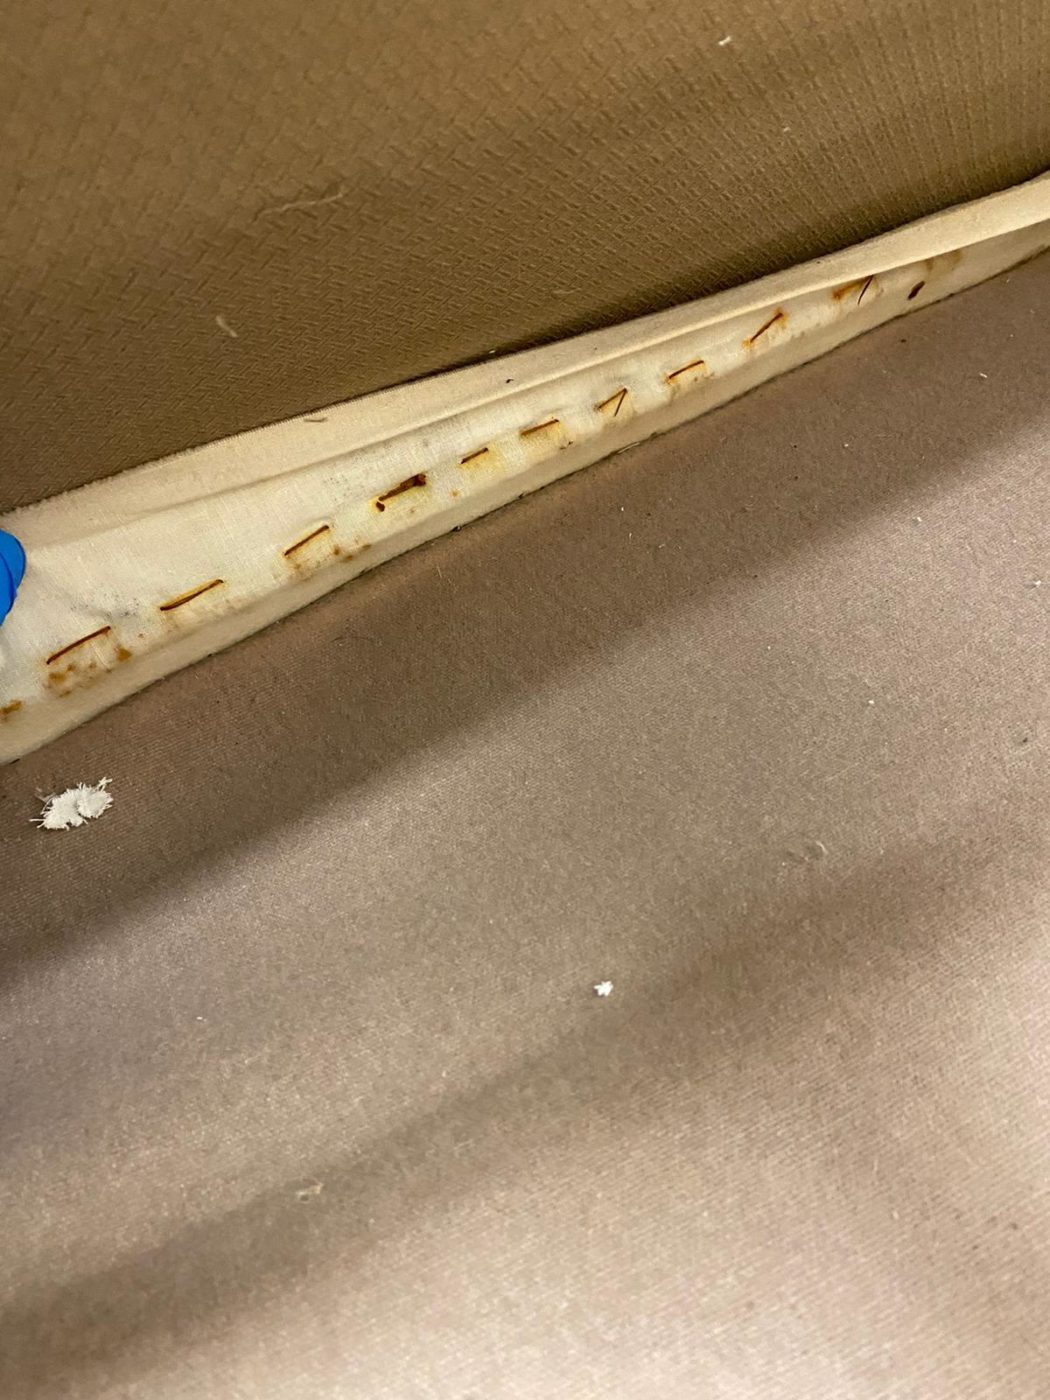
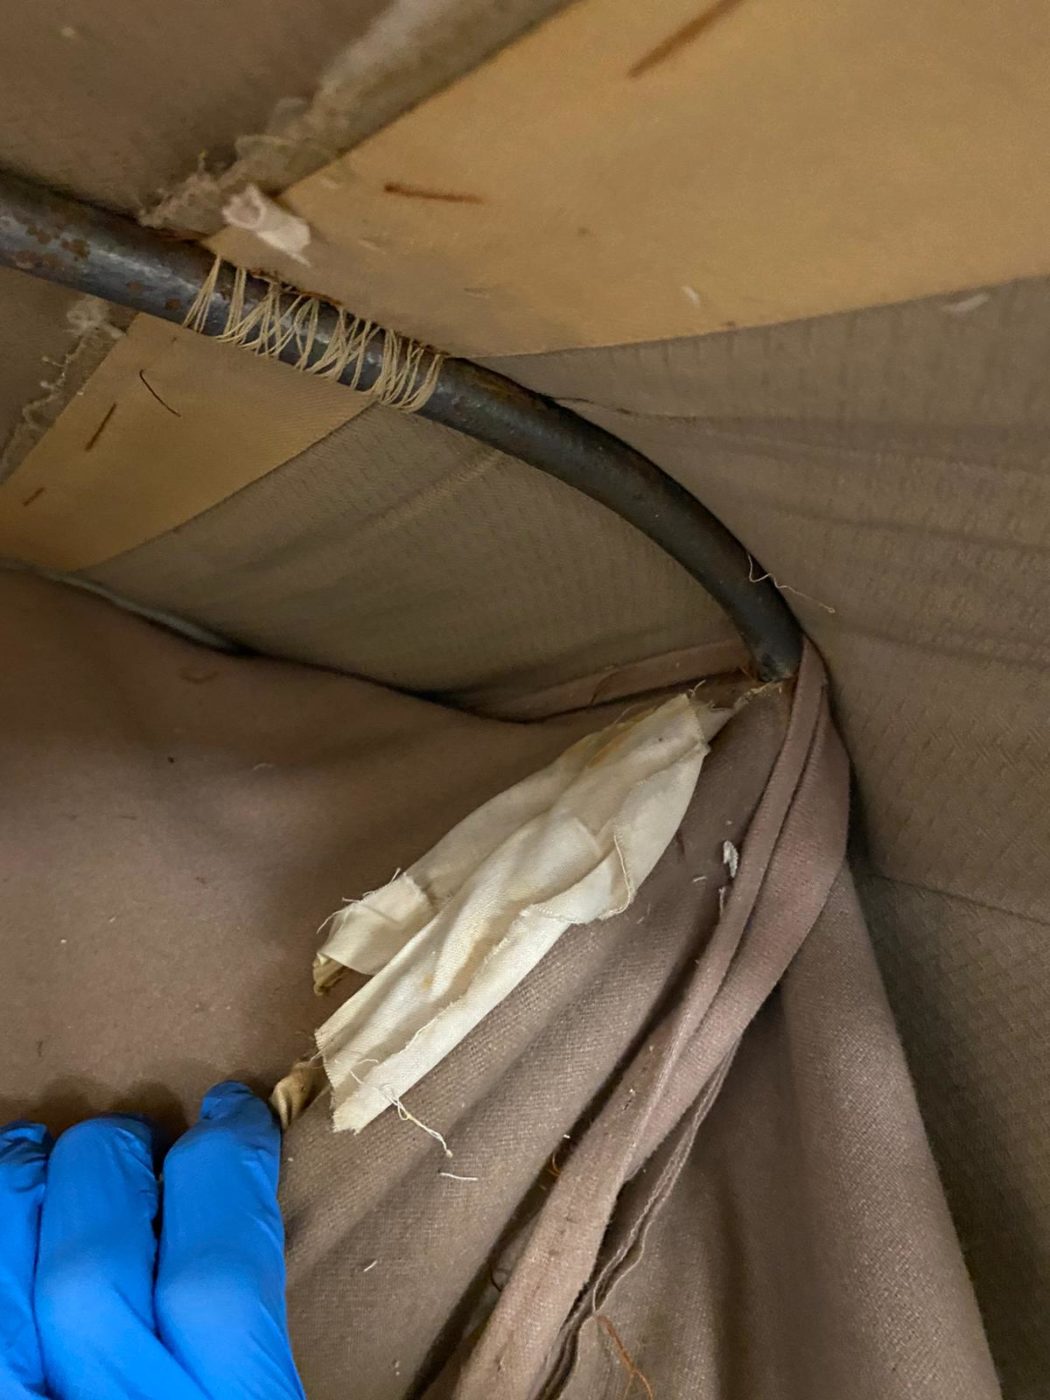
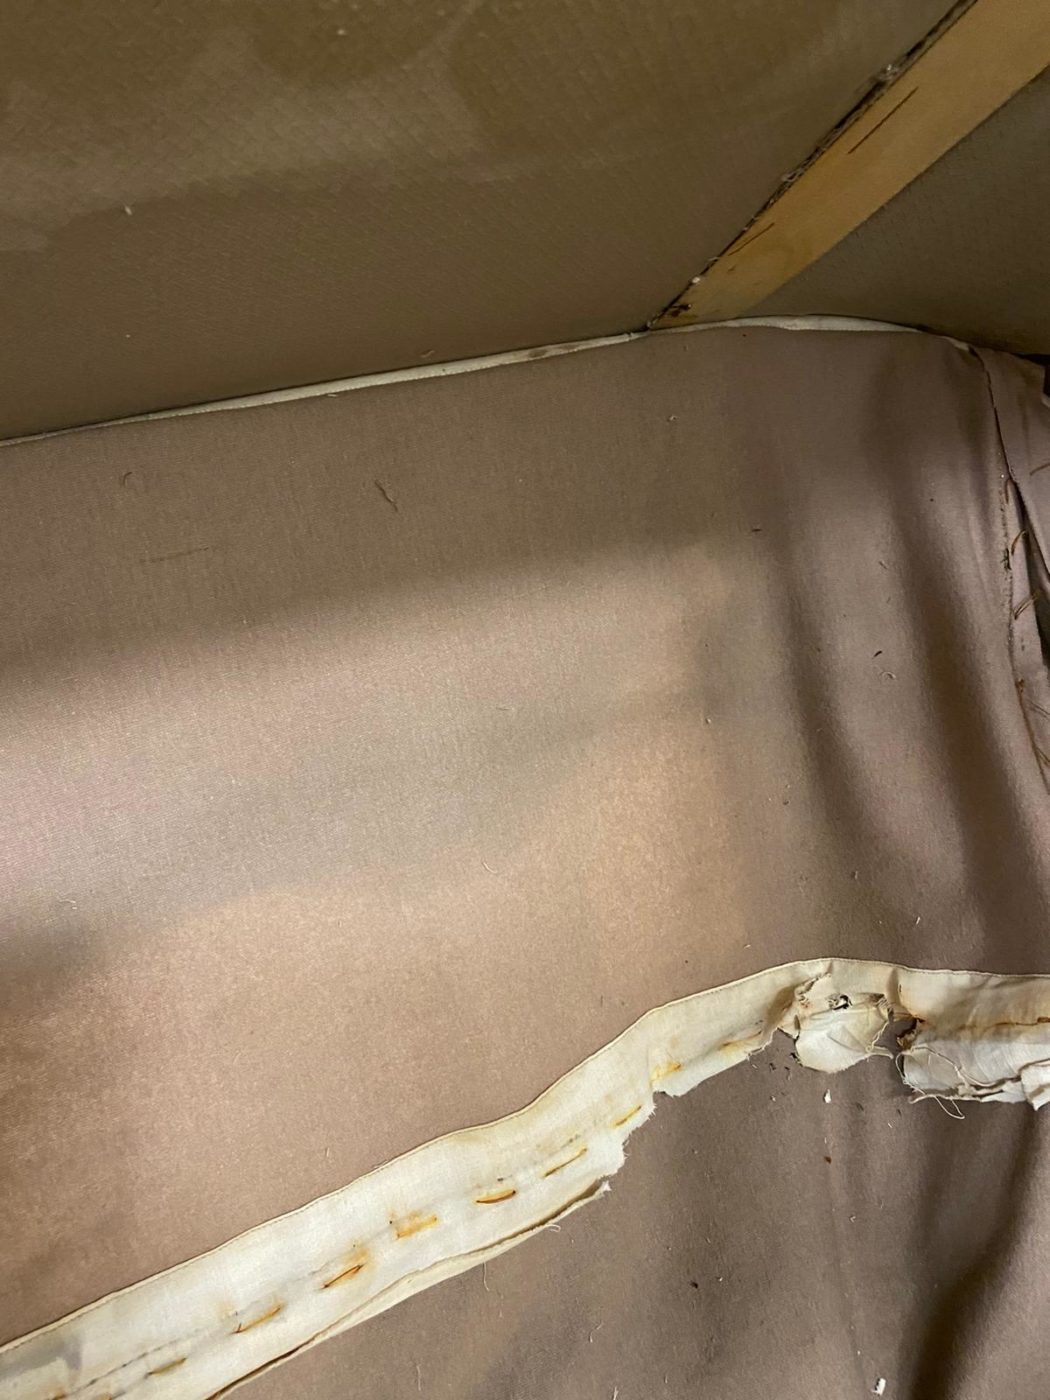
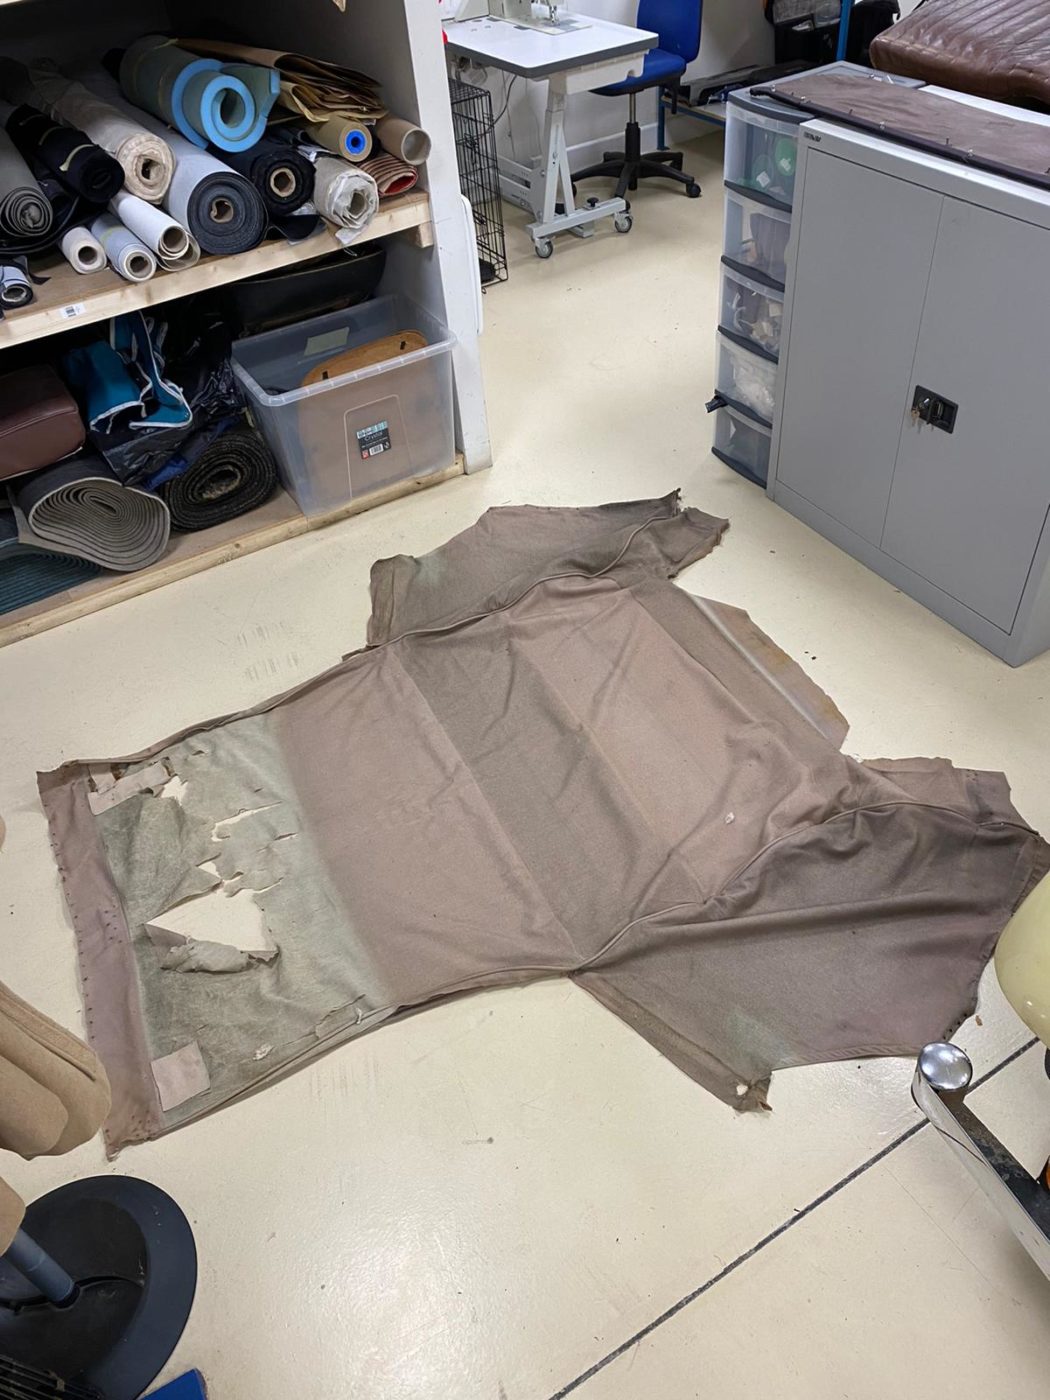
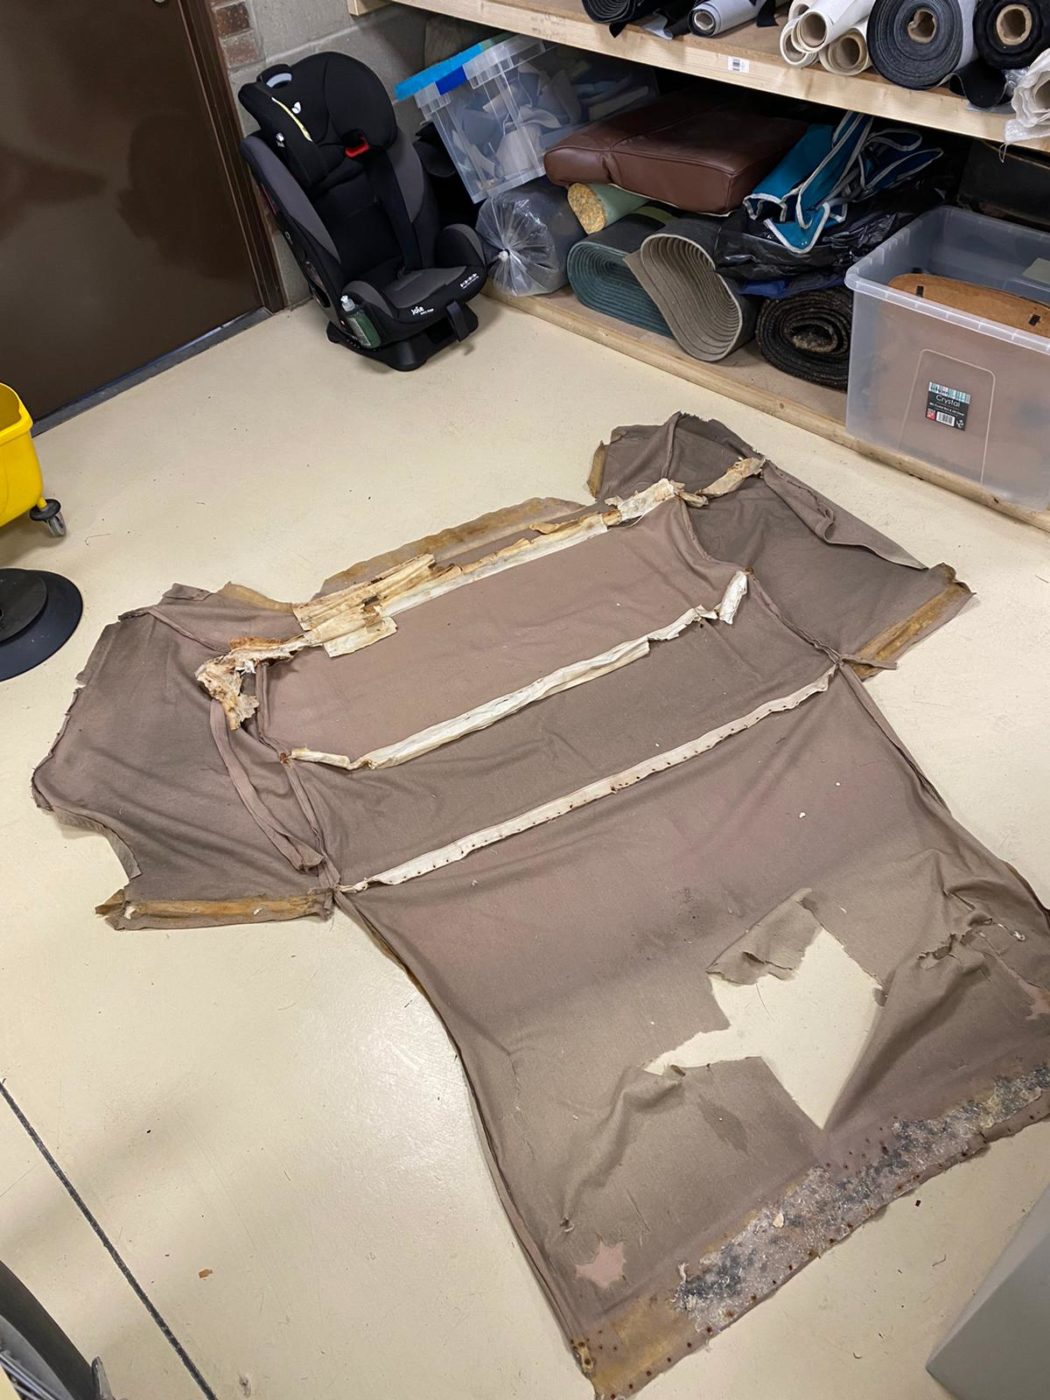
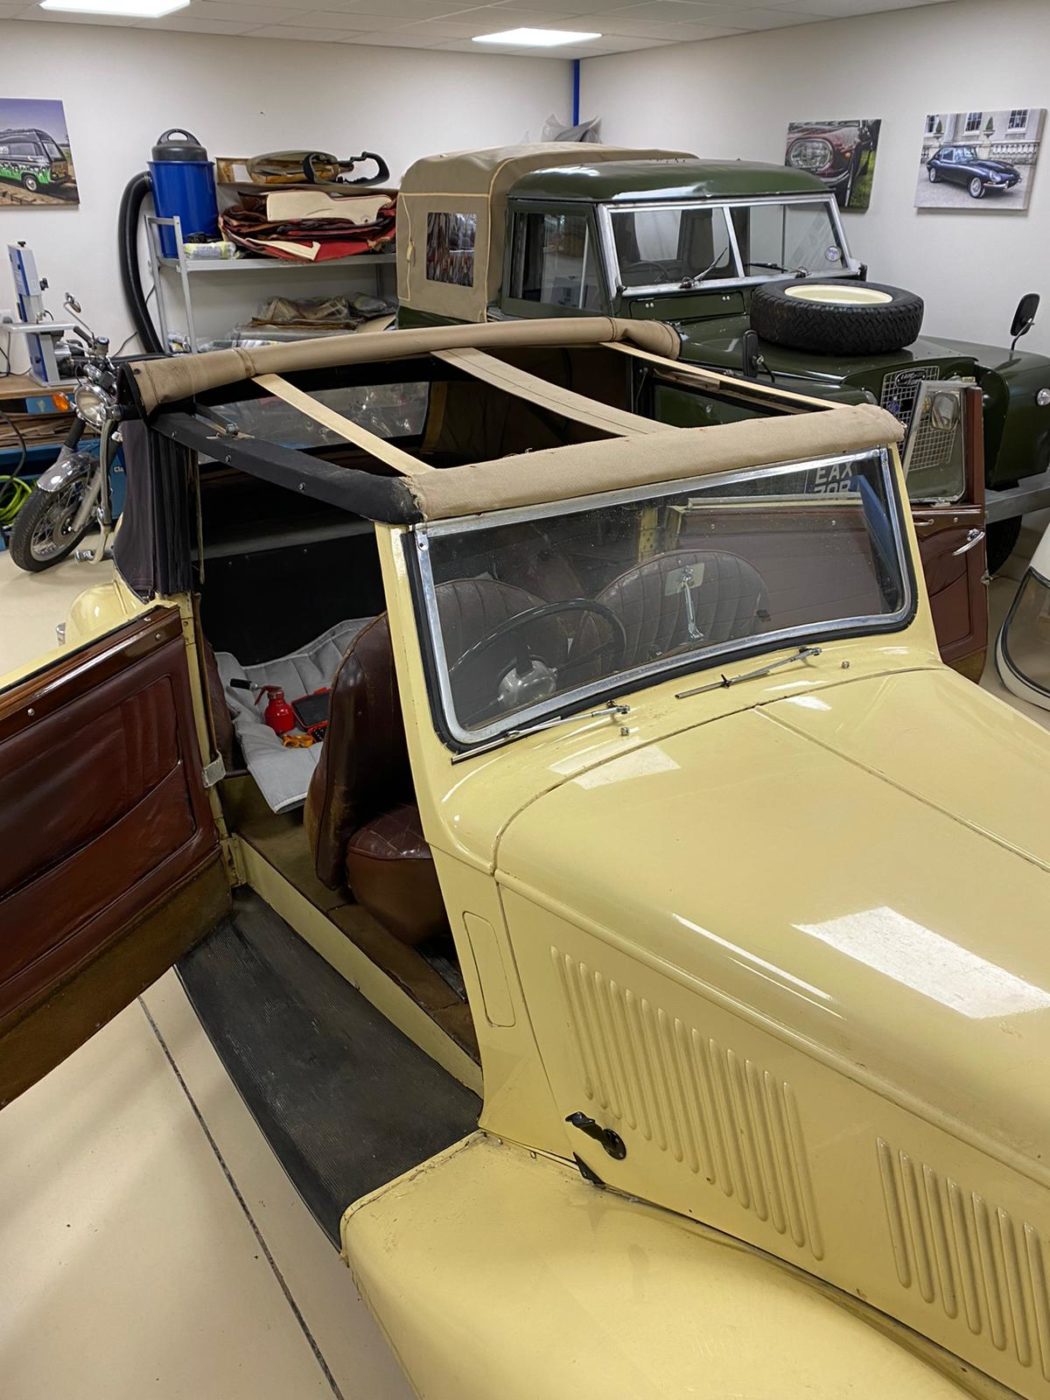
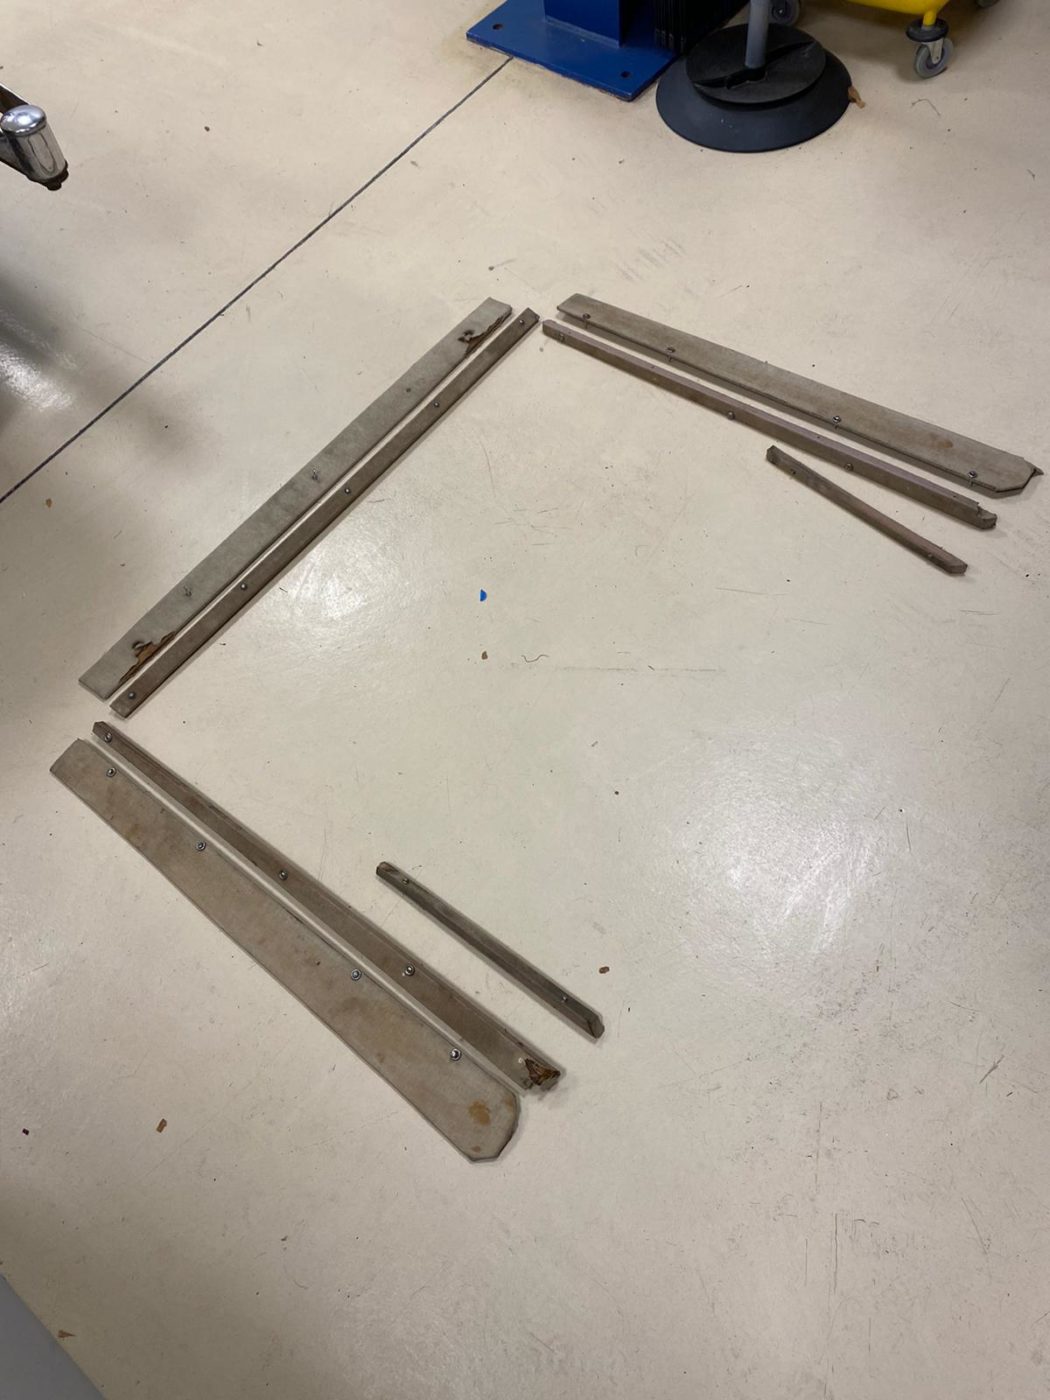
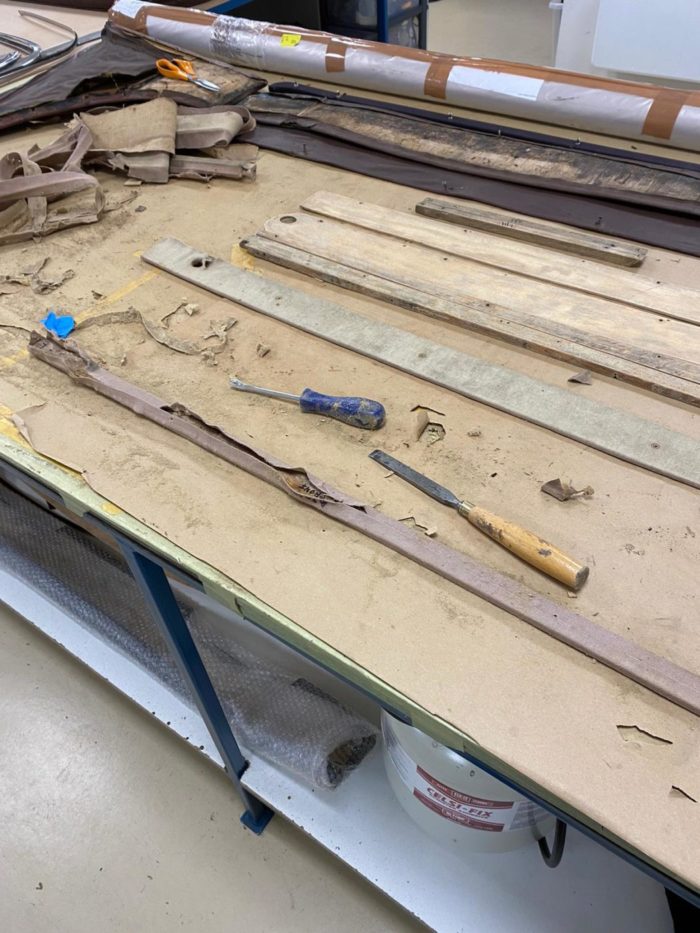
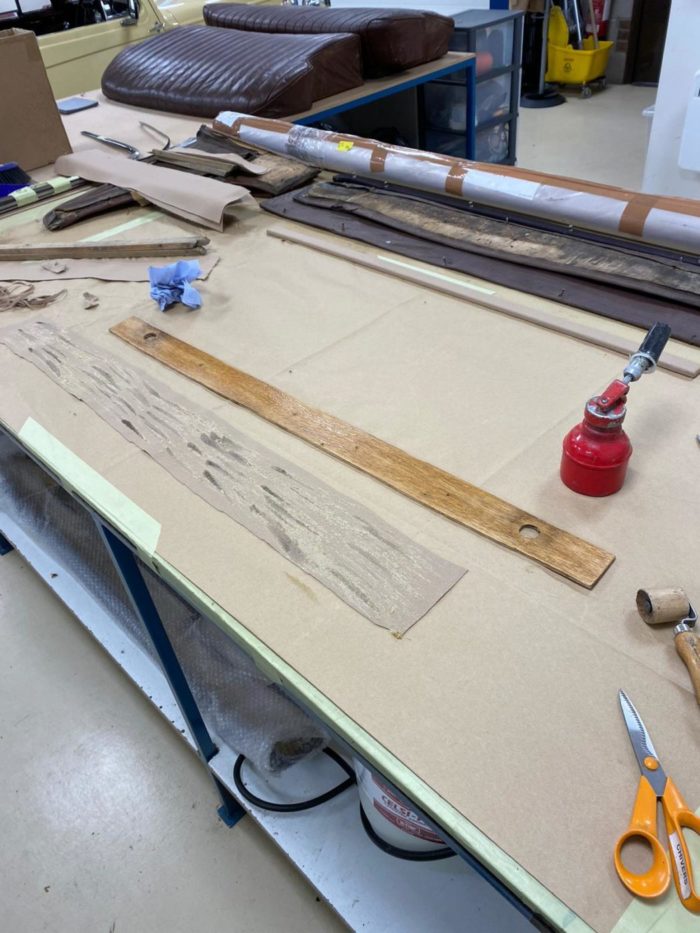
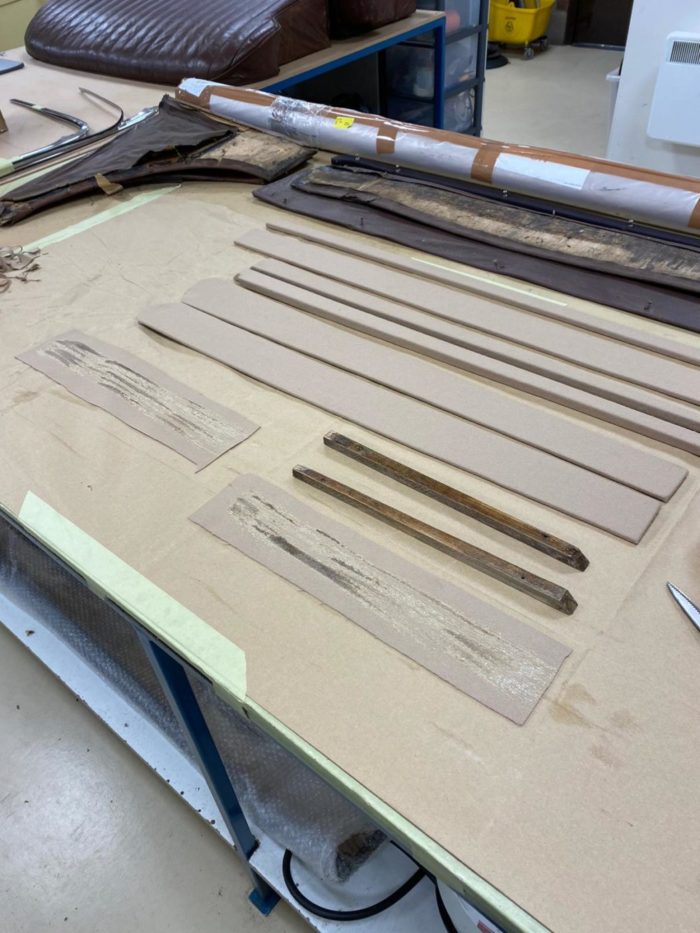
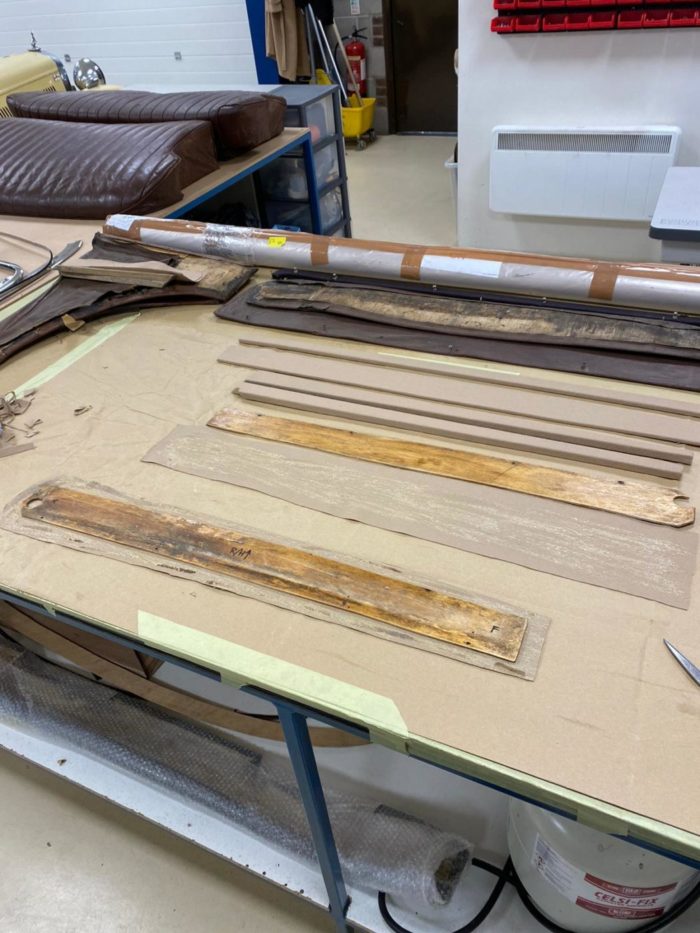
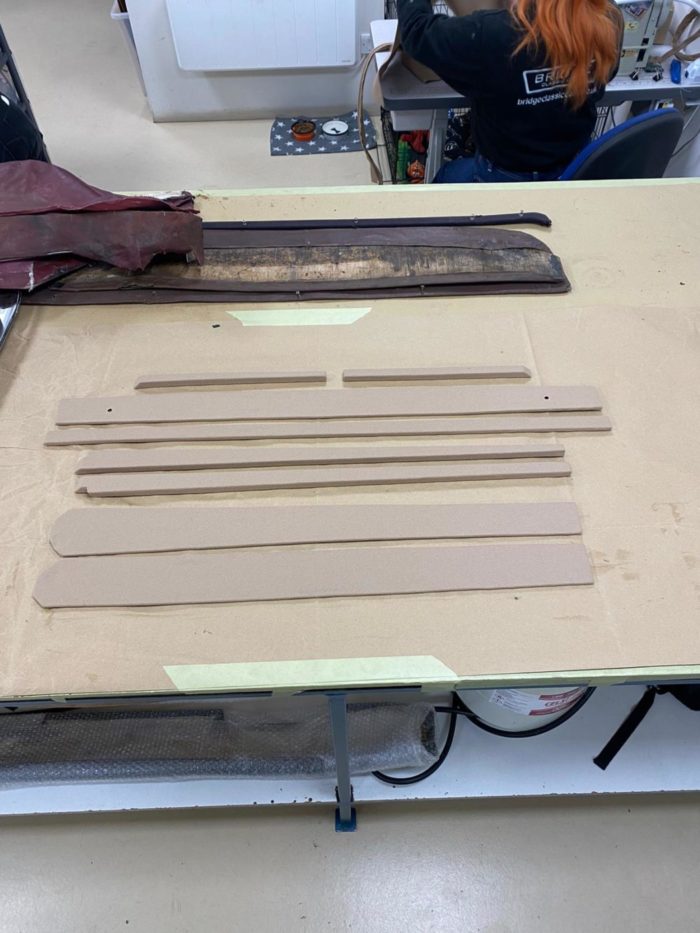
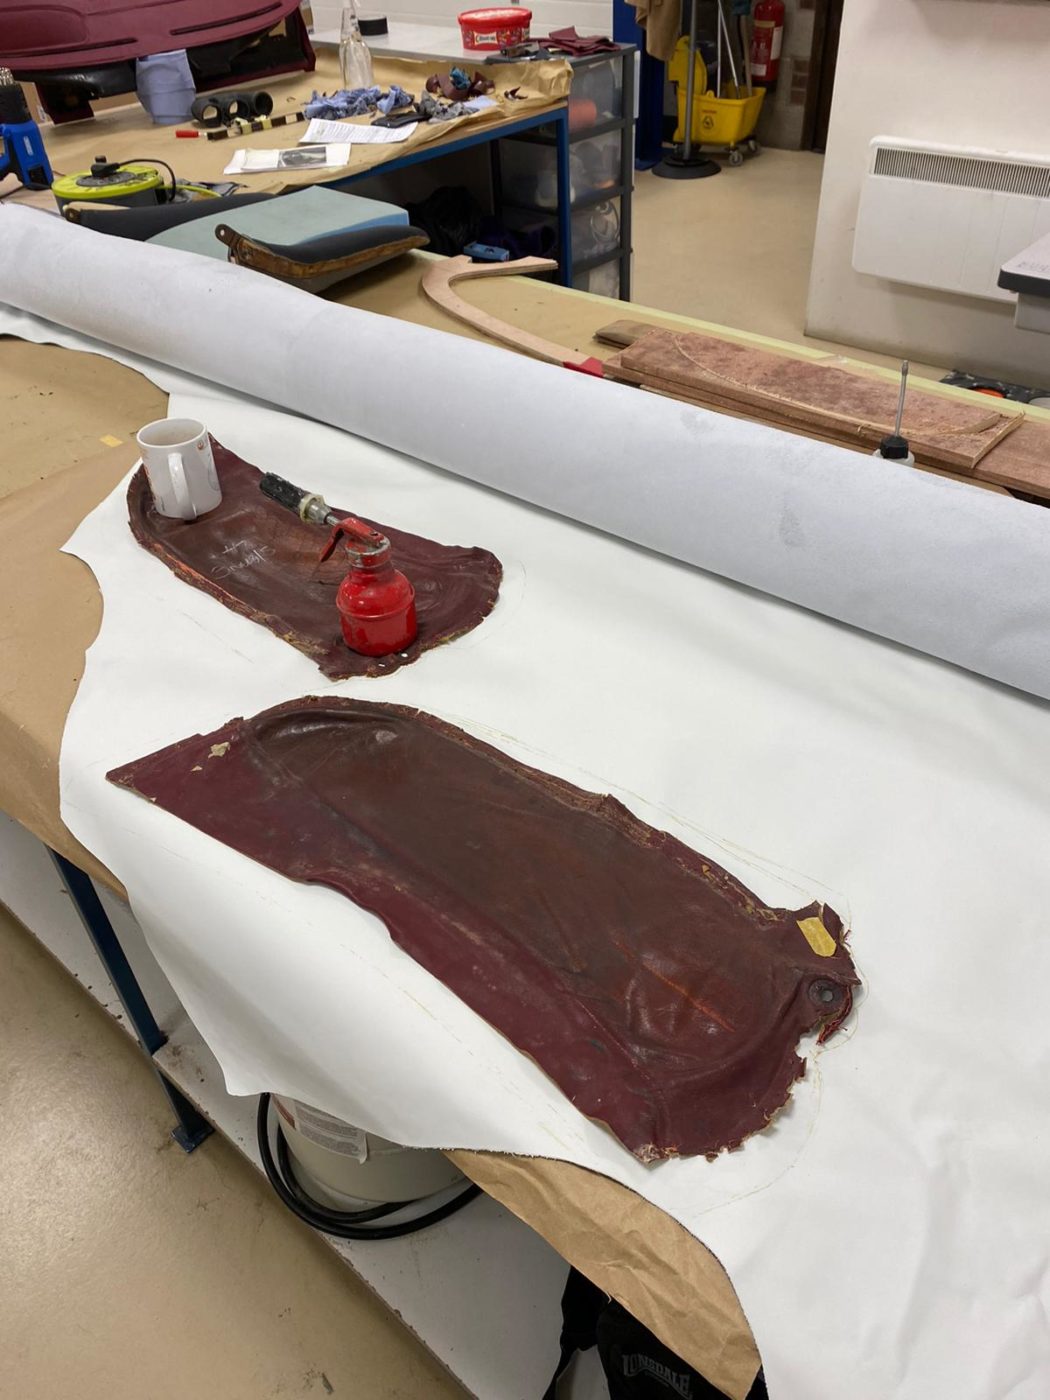
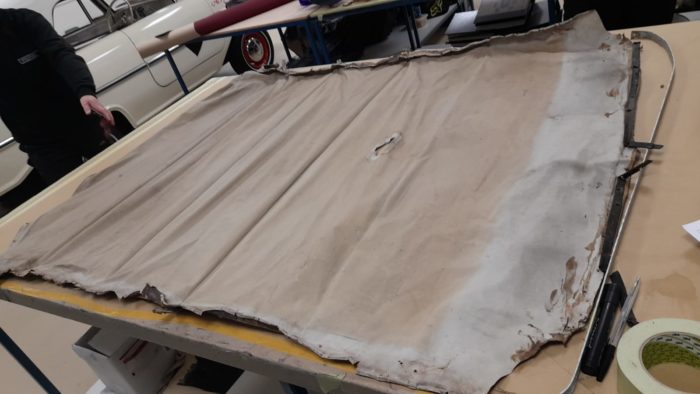
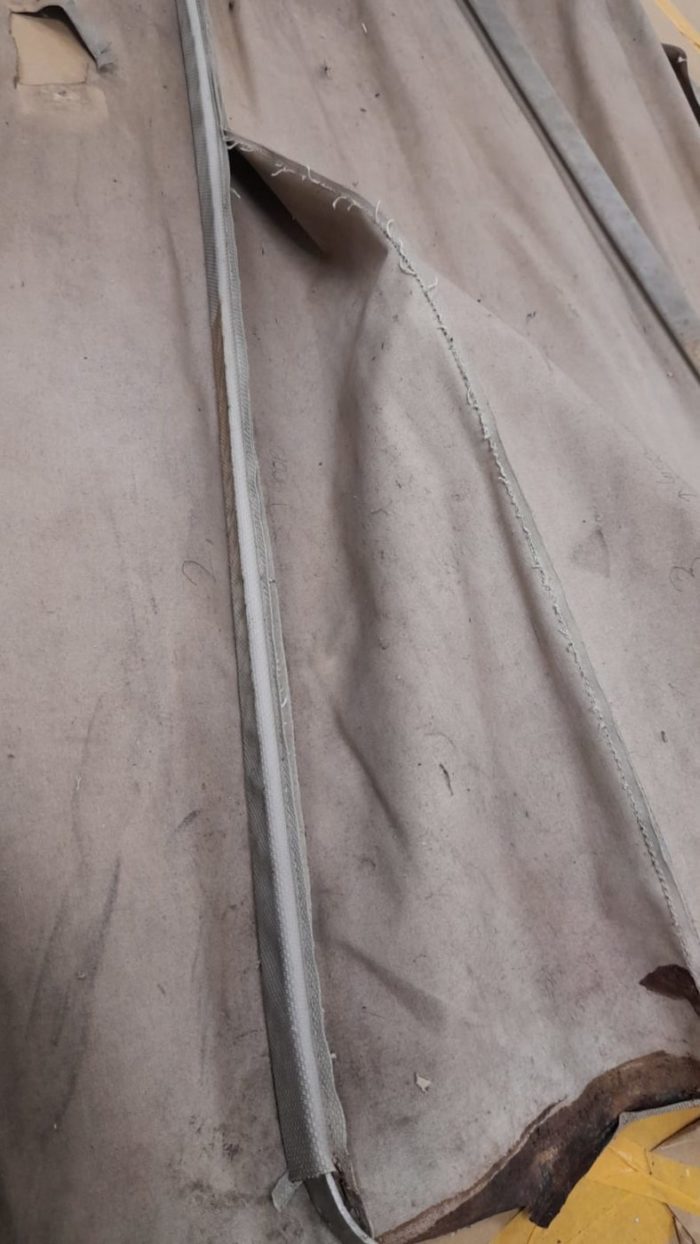
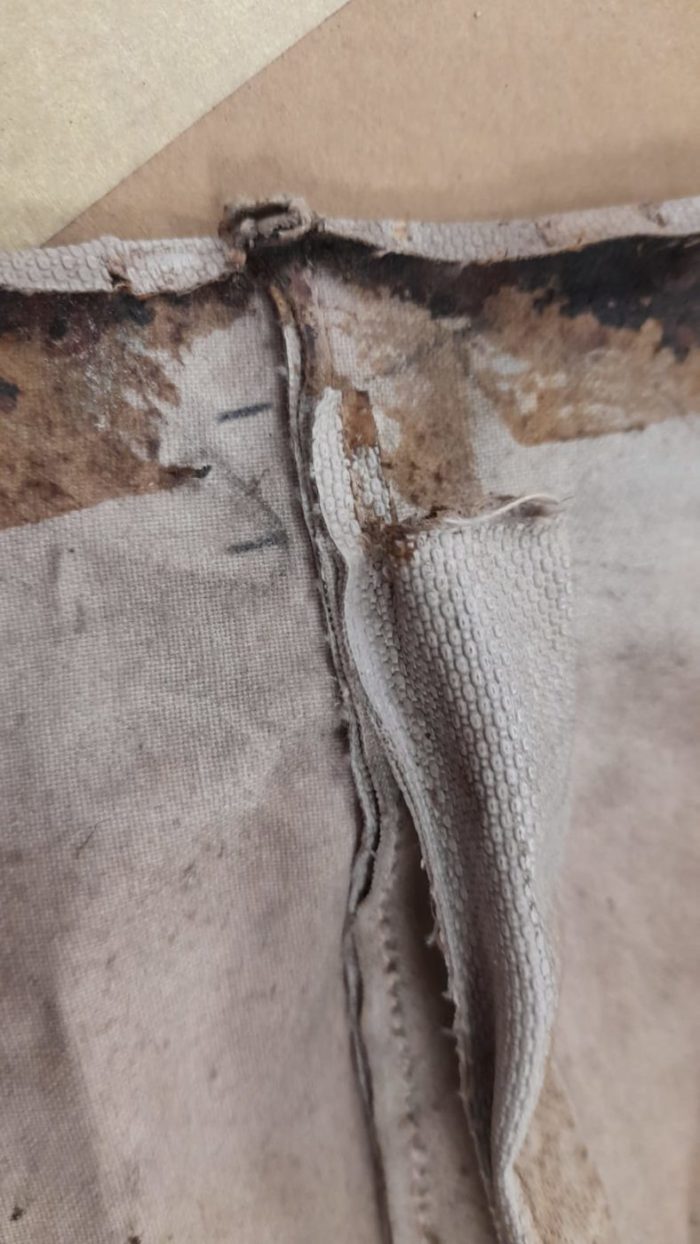
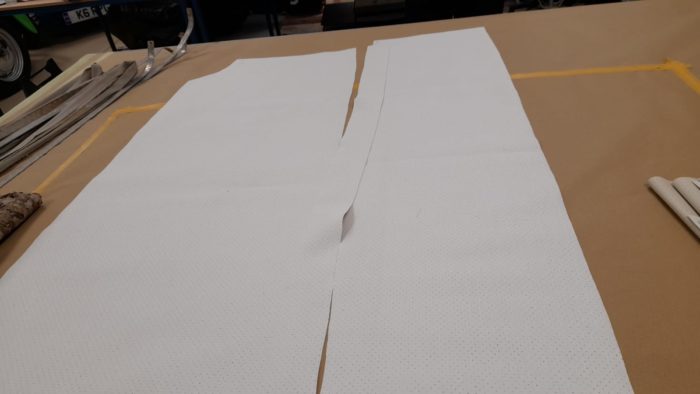
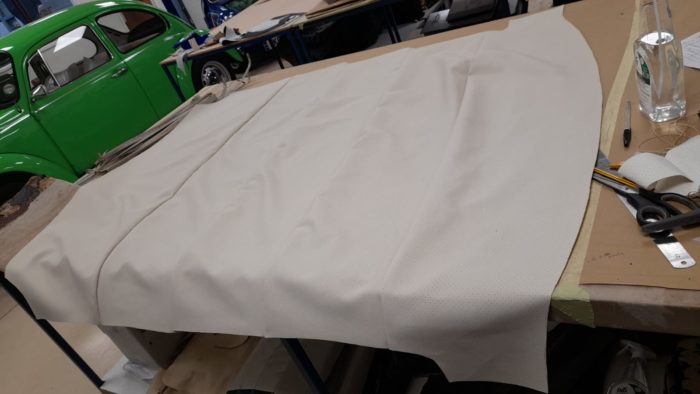
Our 1940 Alvis came in last week to have its hood restored and that process has begun today. Brian and Lydia have been taking apart
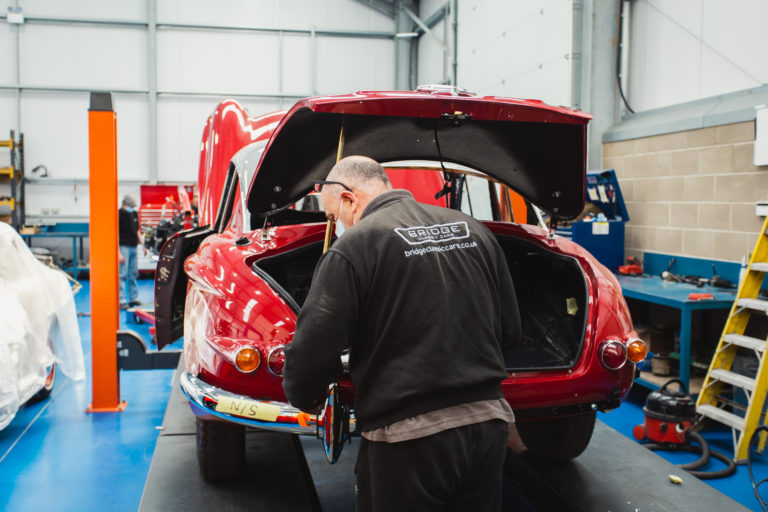
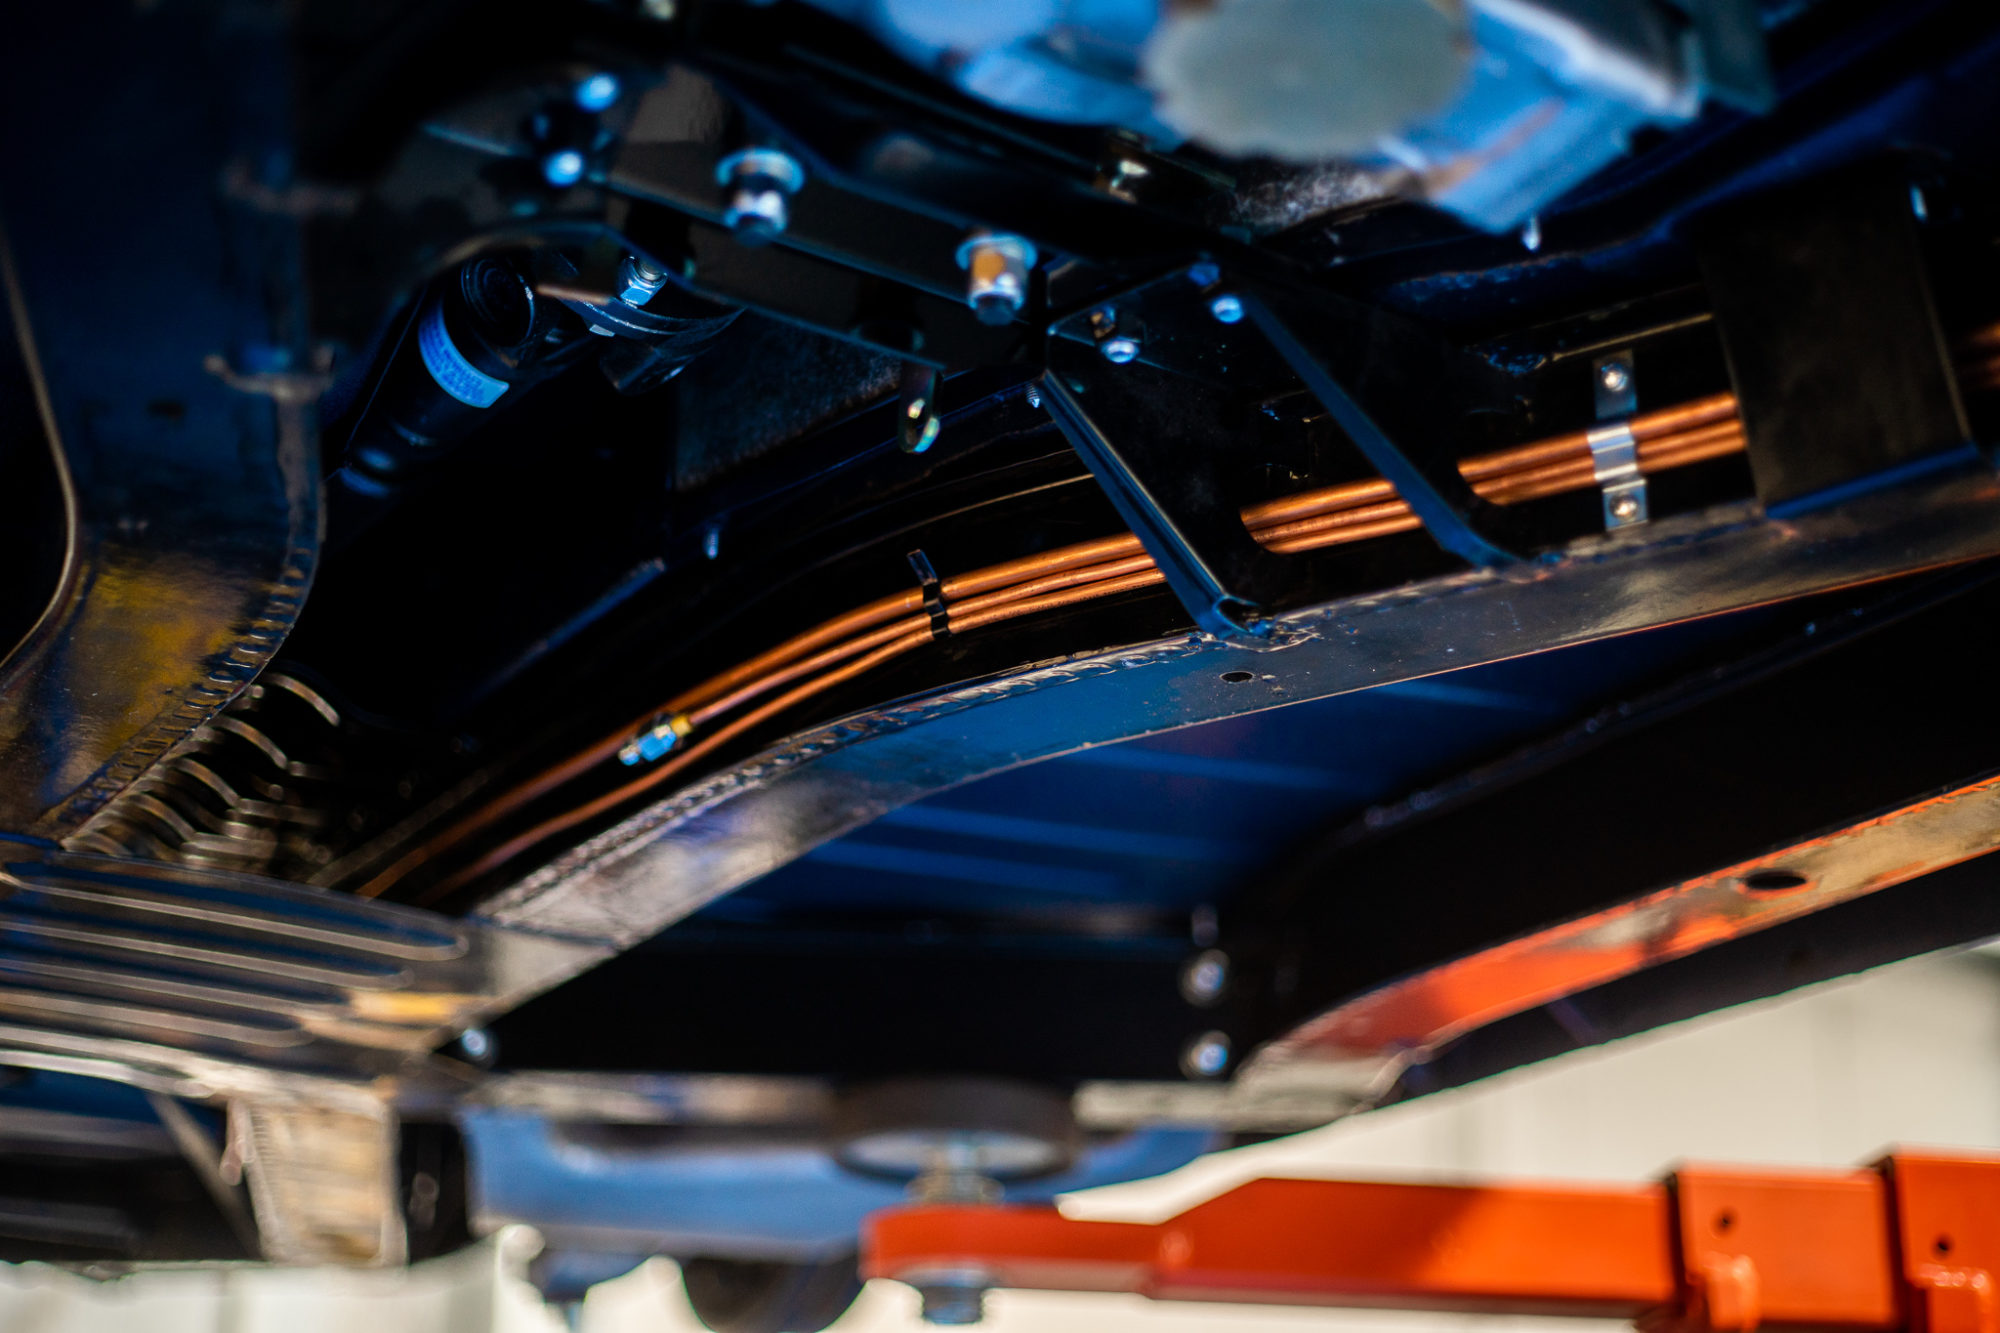
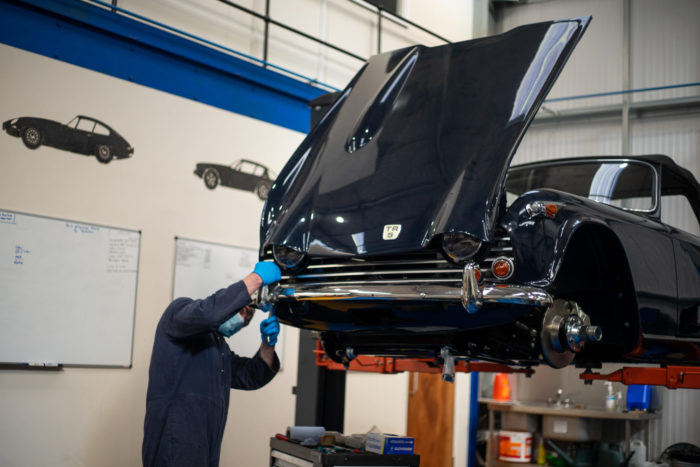
Our classic Triumph TR5 is progressing well through its nut and bolt restoration. Mauro has recently fitted the fuel and brake lines as well as
Our 1960 Peony Red Jensen is coming along well. With the continuation of chrome fitting, Paul has been making an fitting seat belt strengthens to
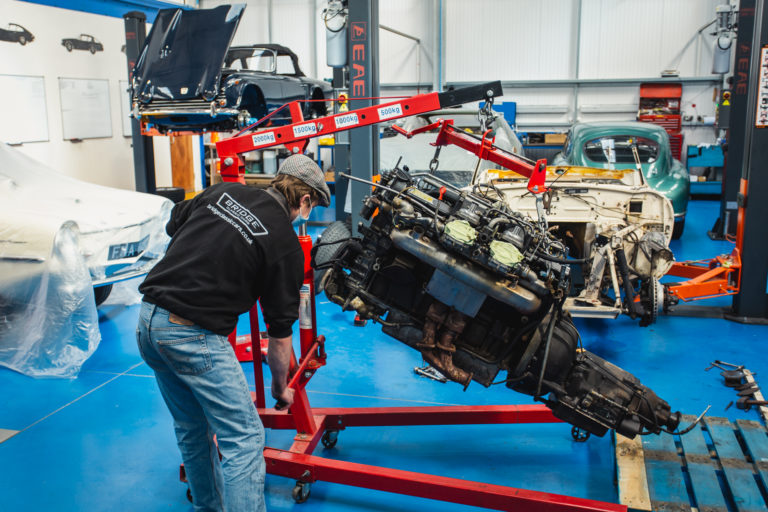
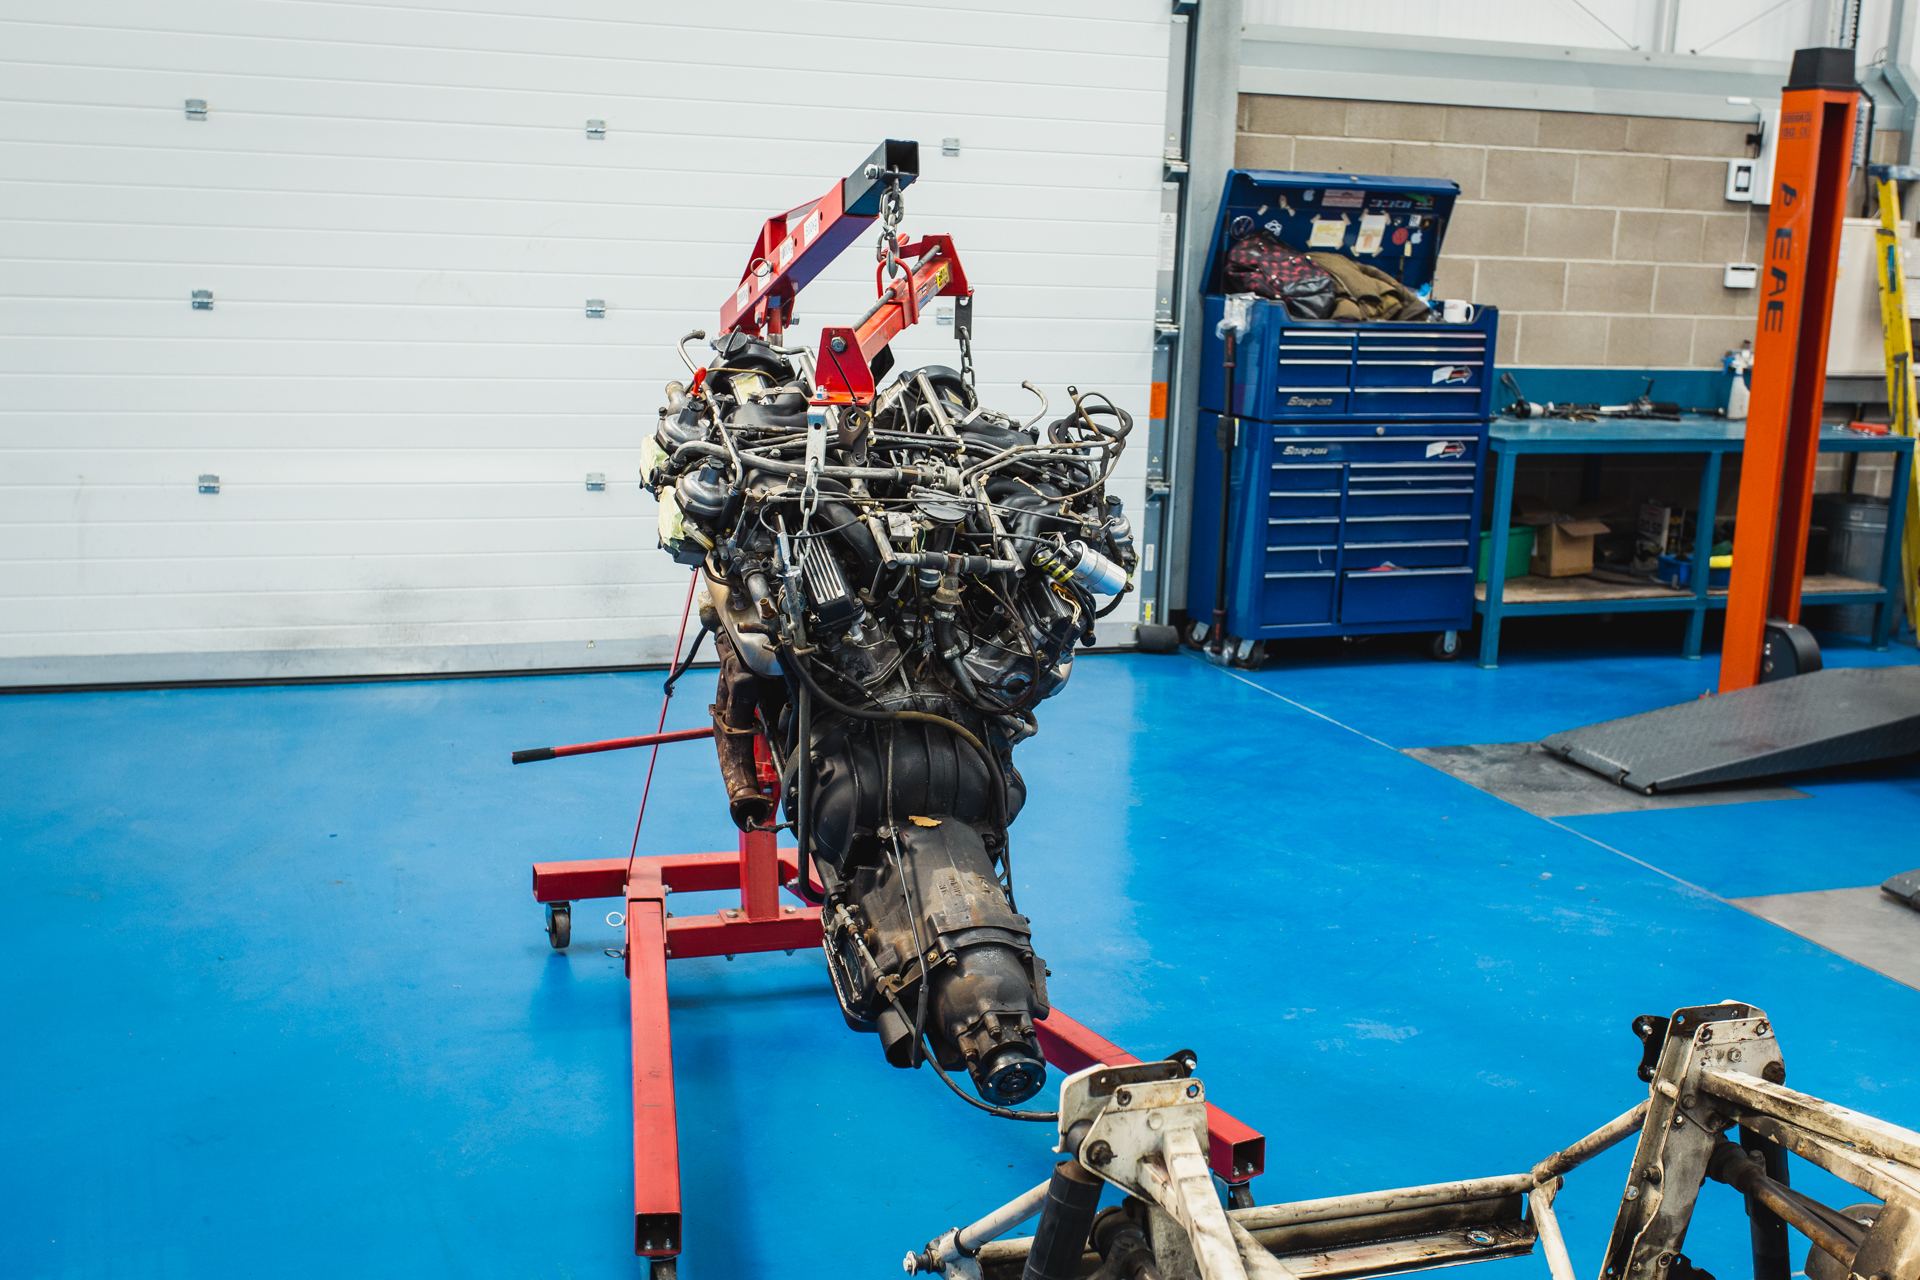
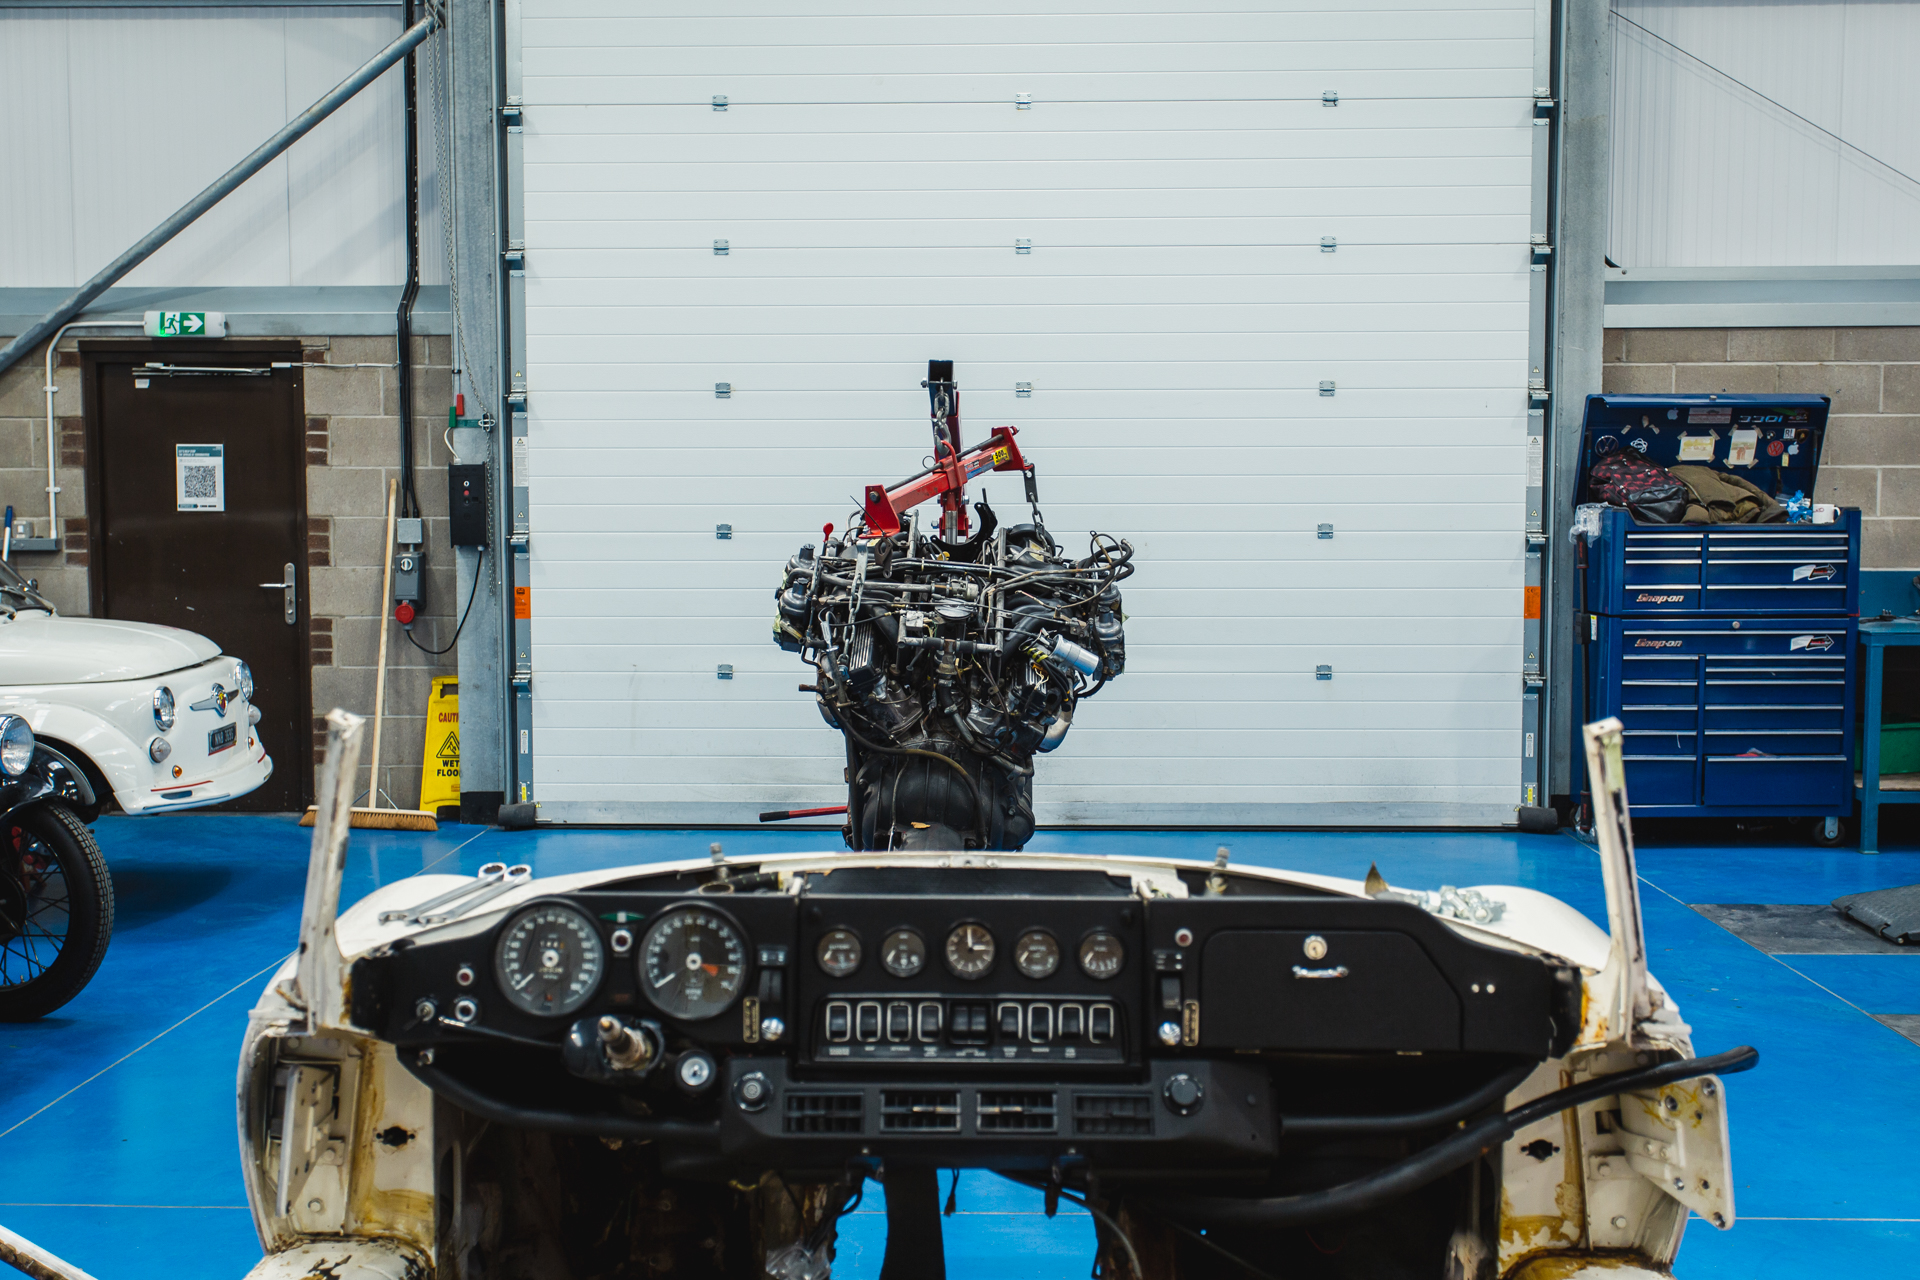
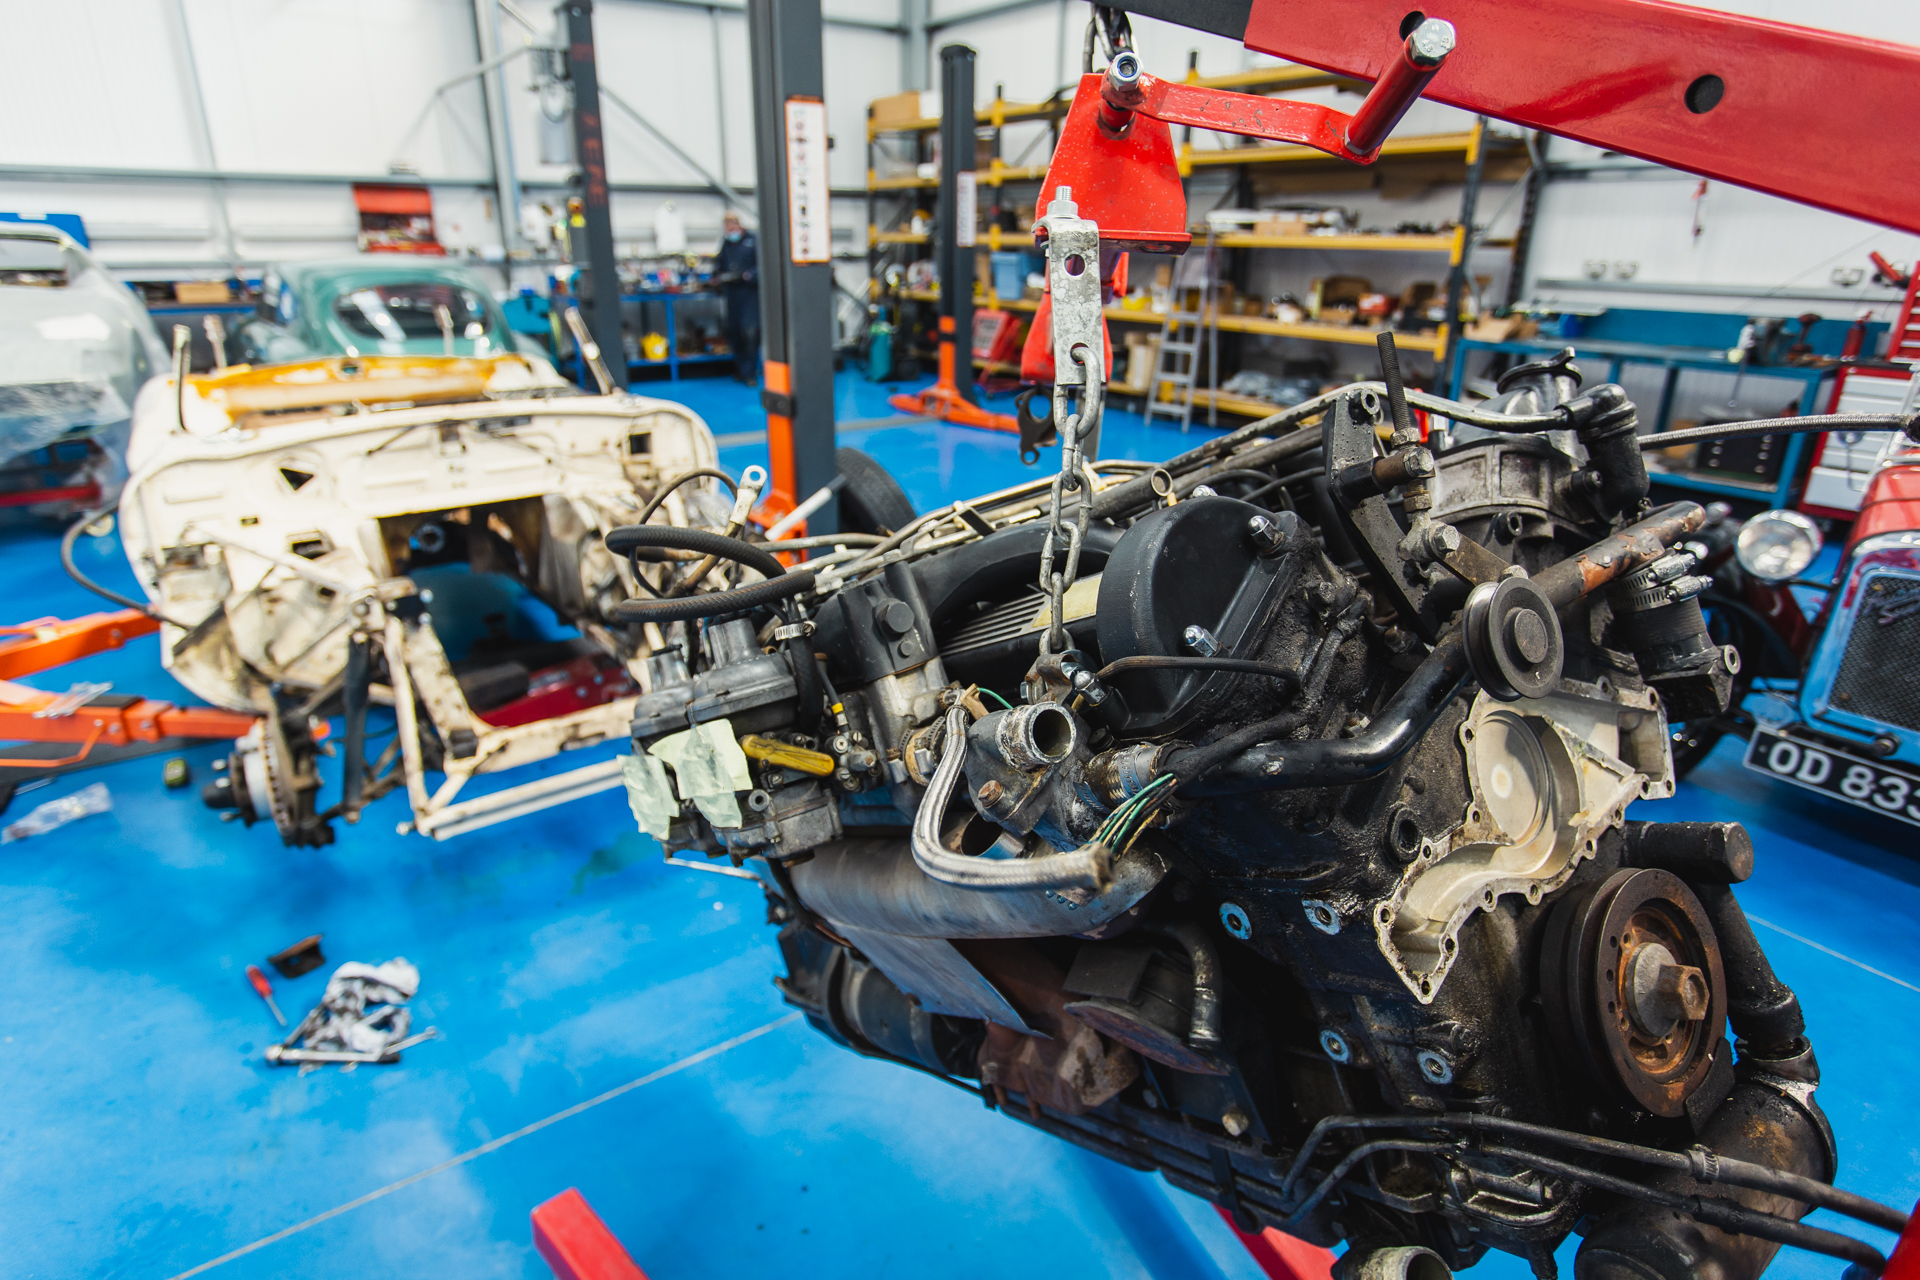
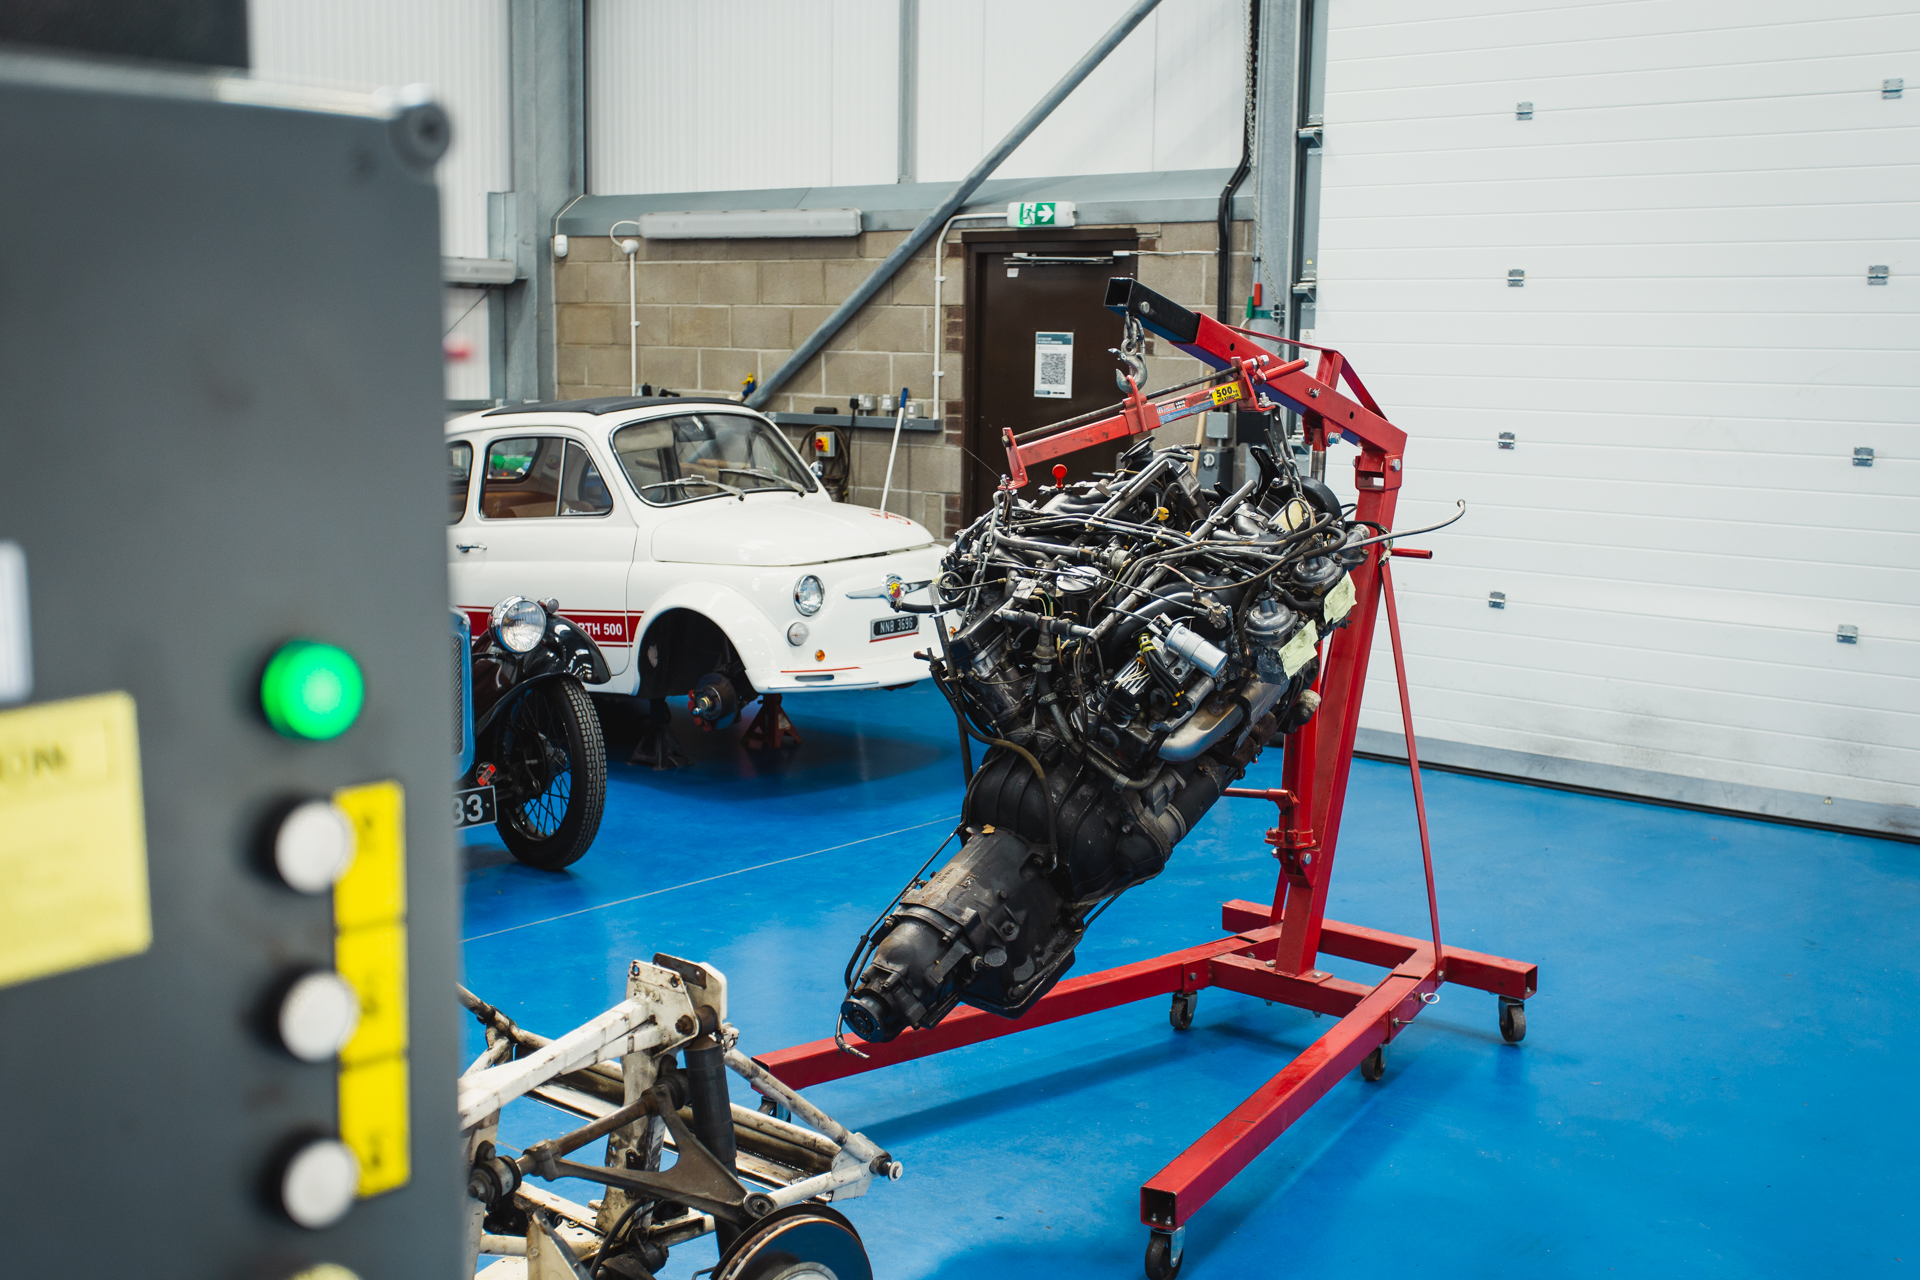
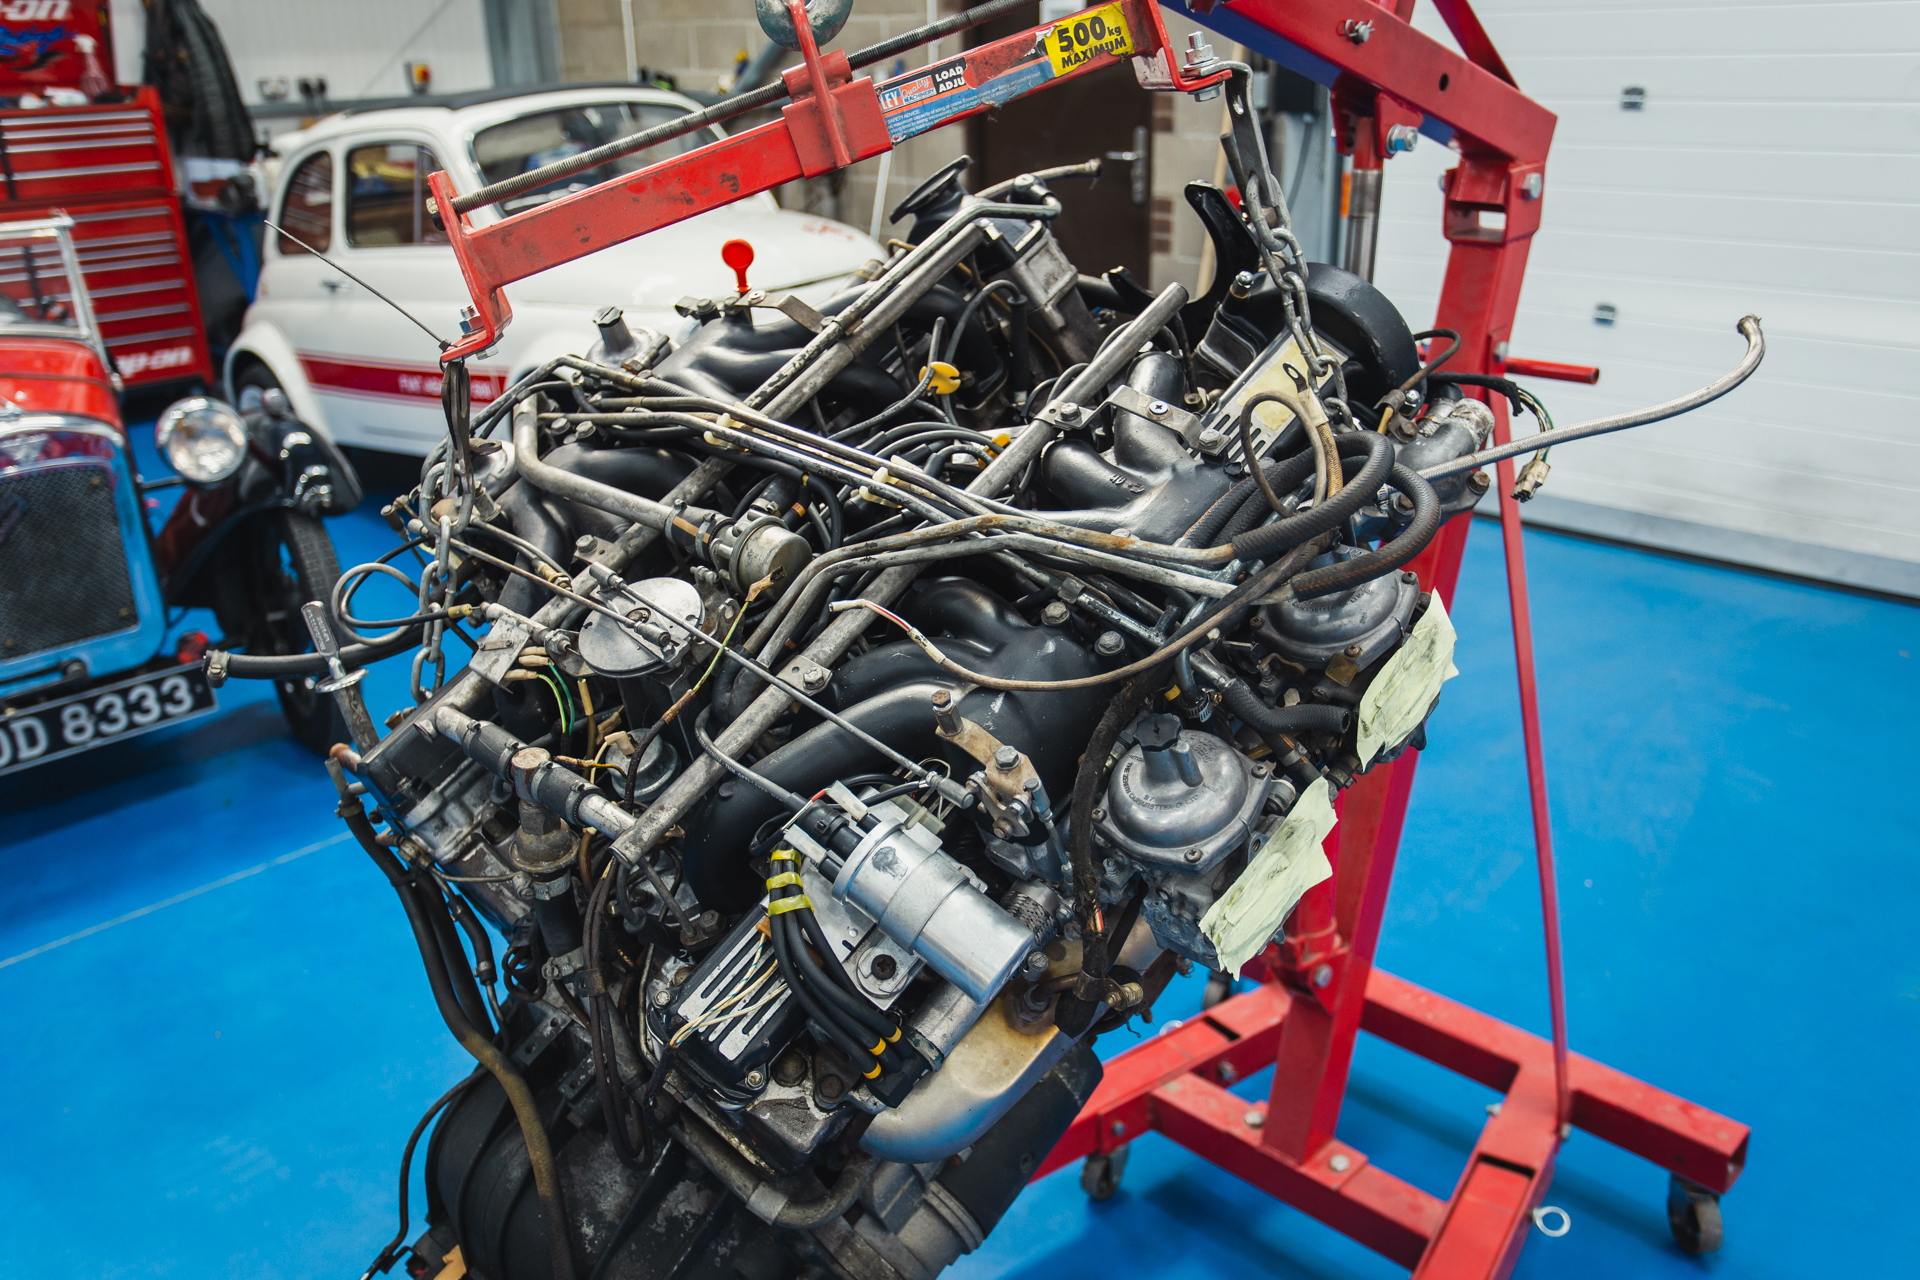
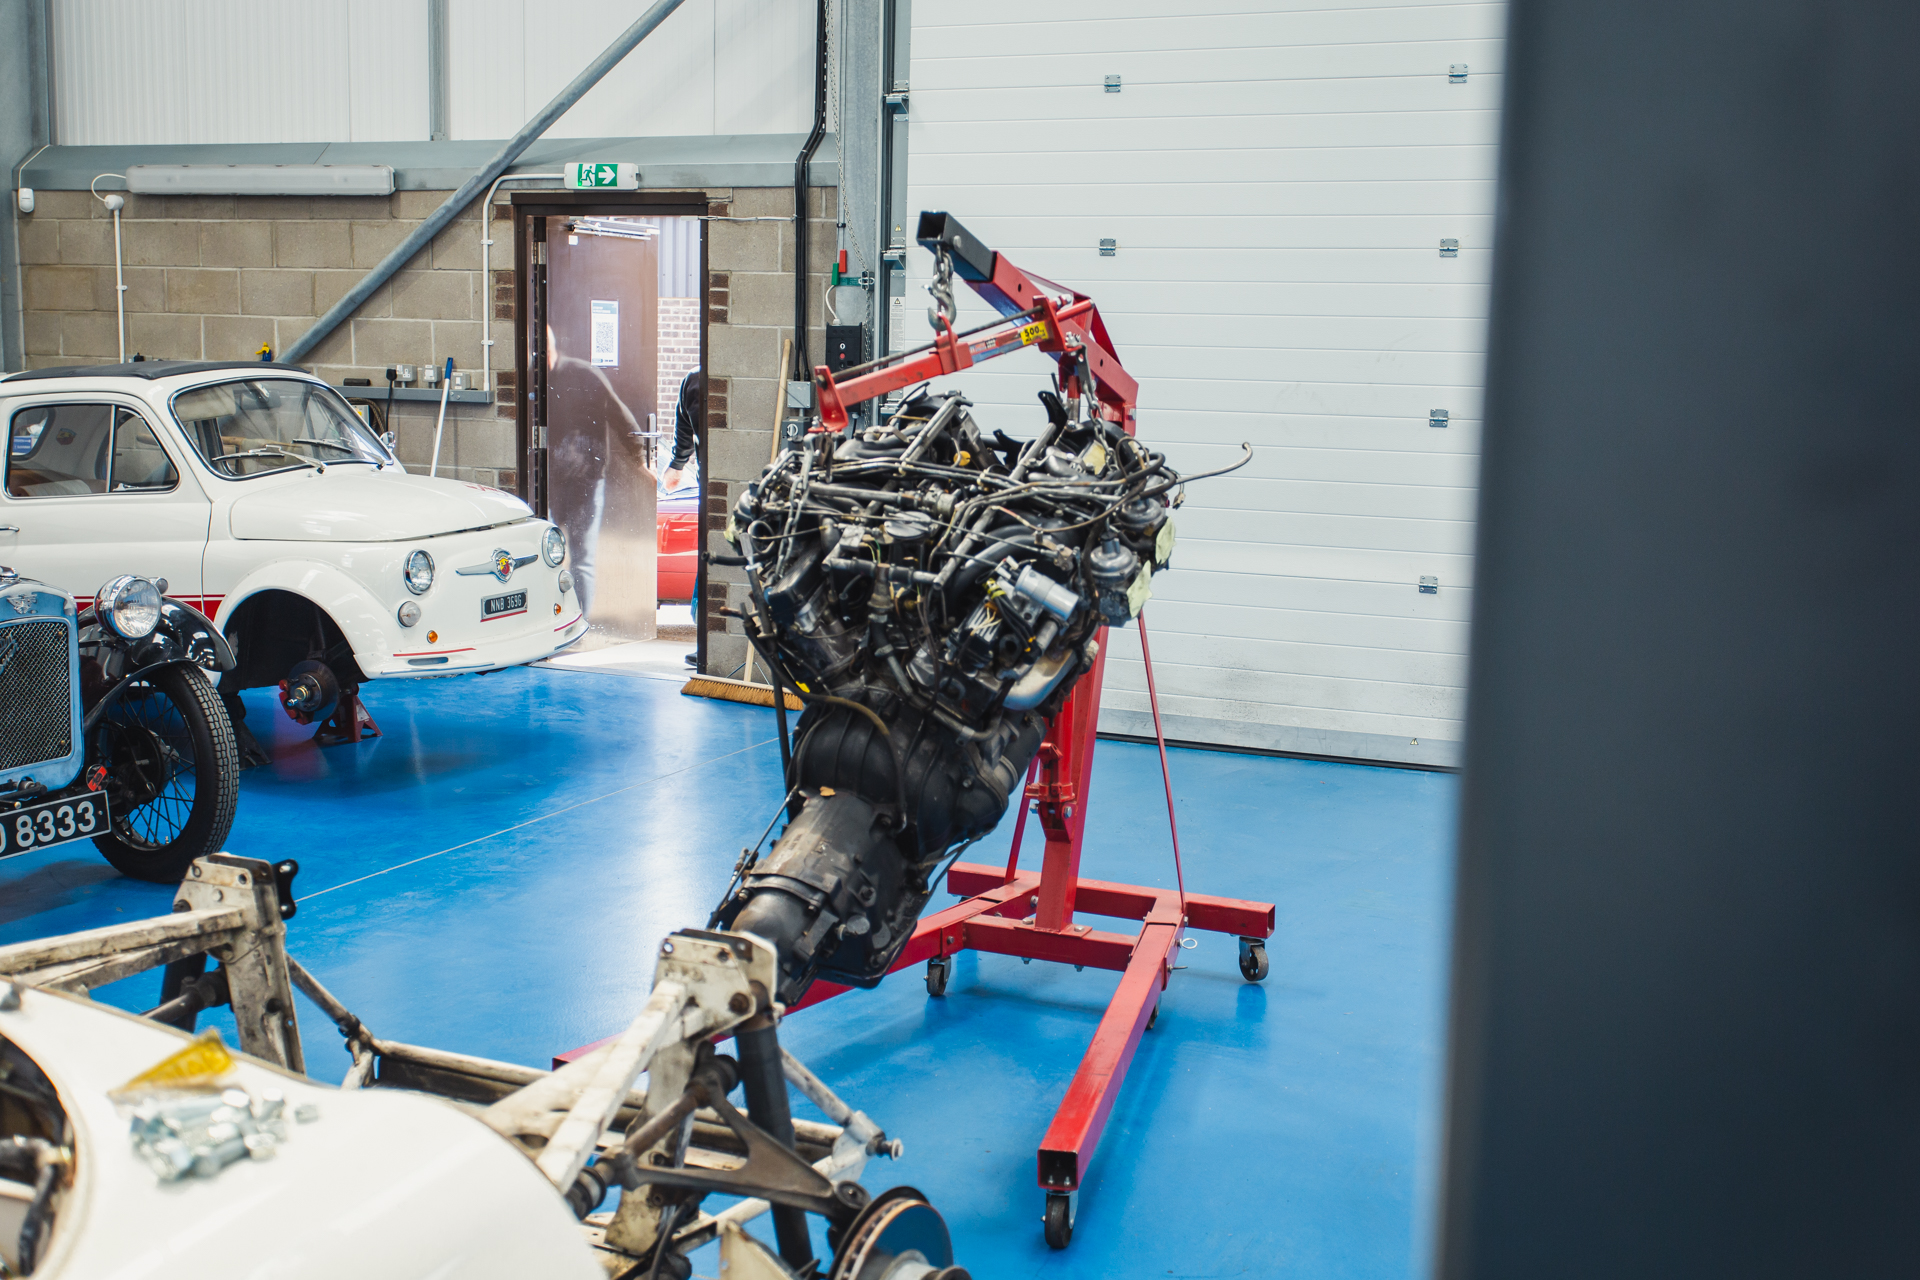
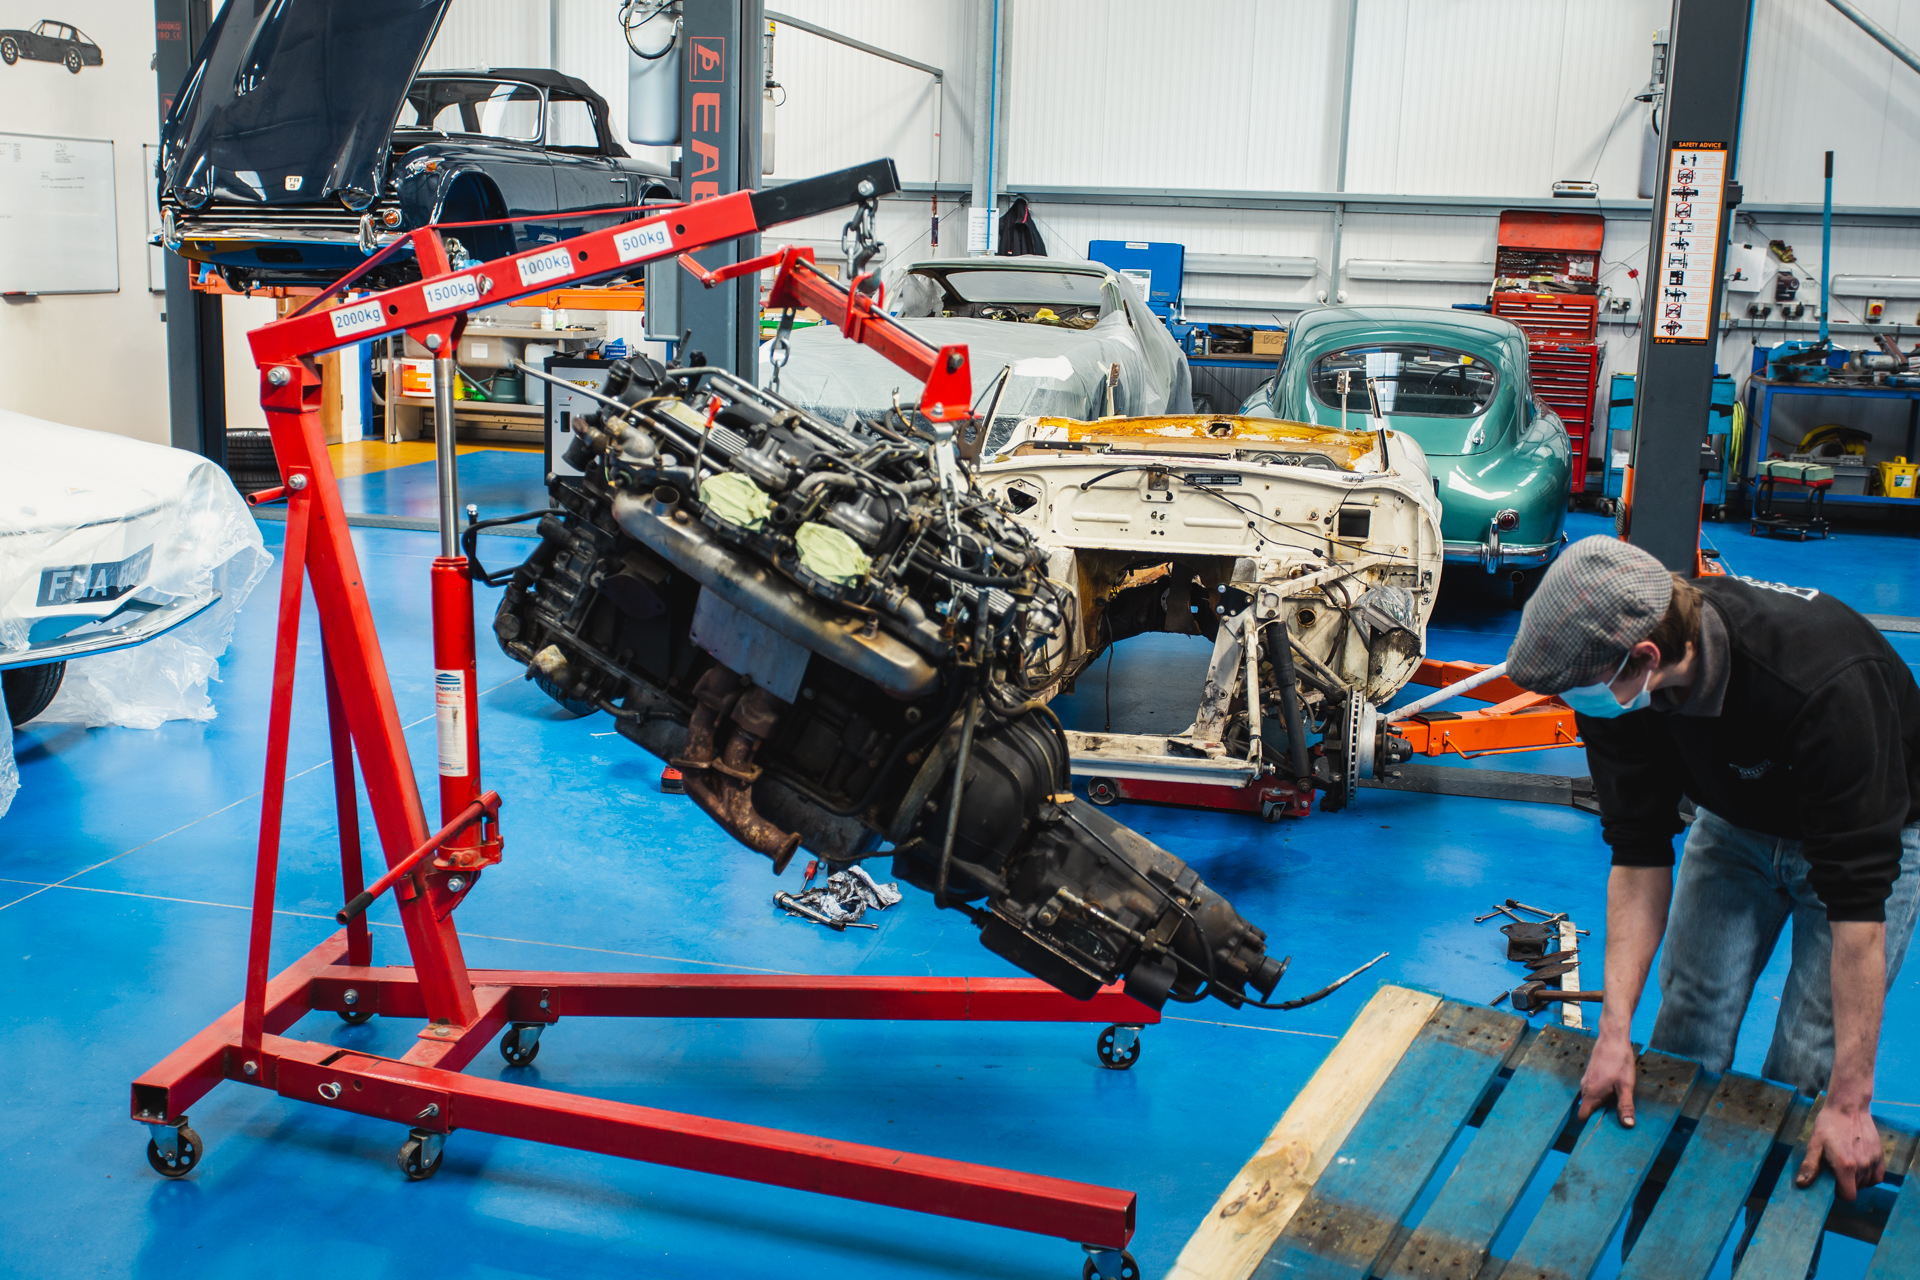
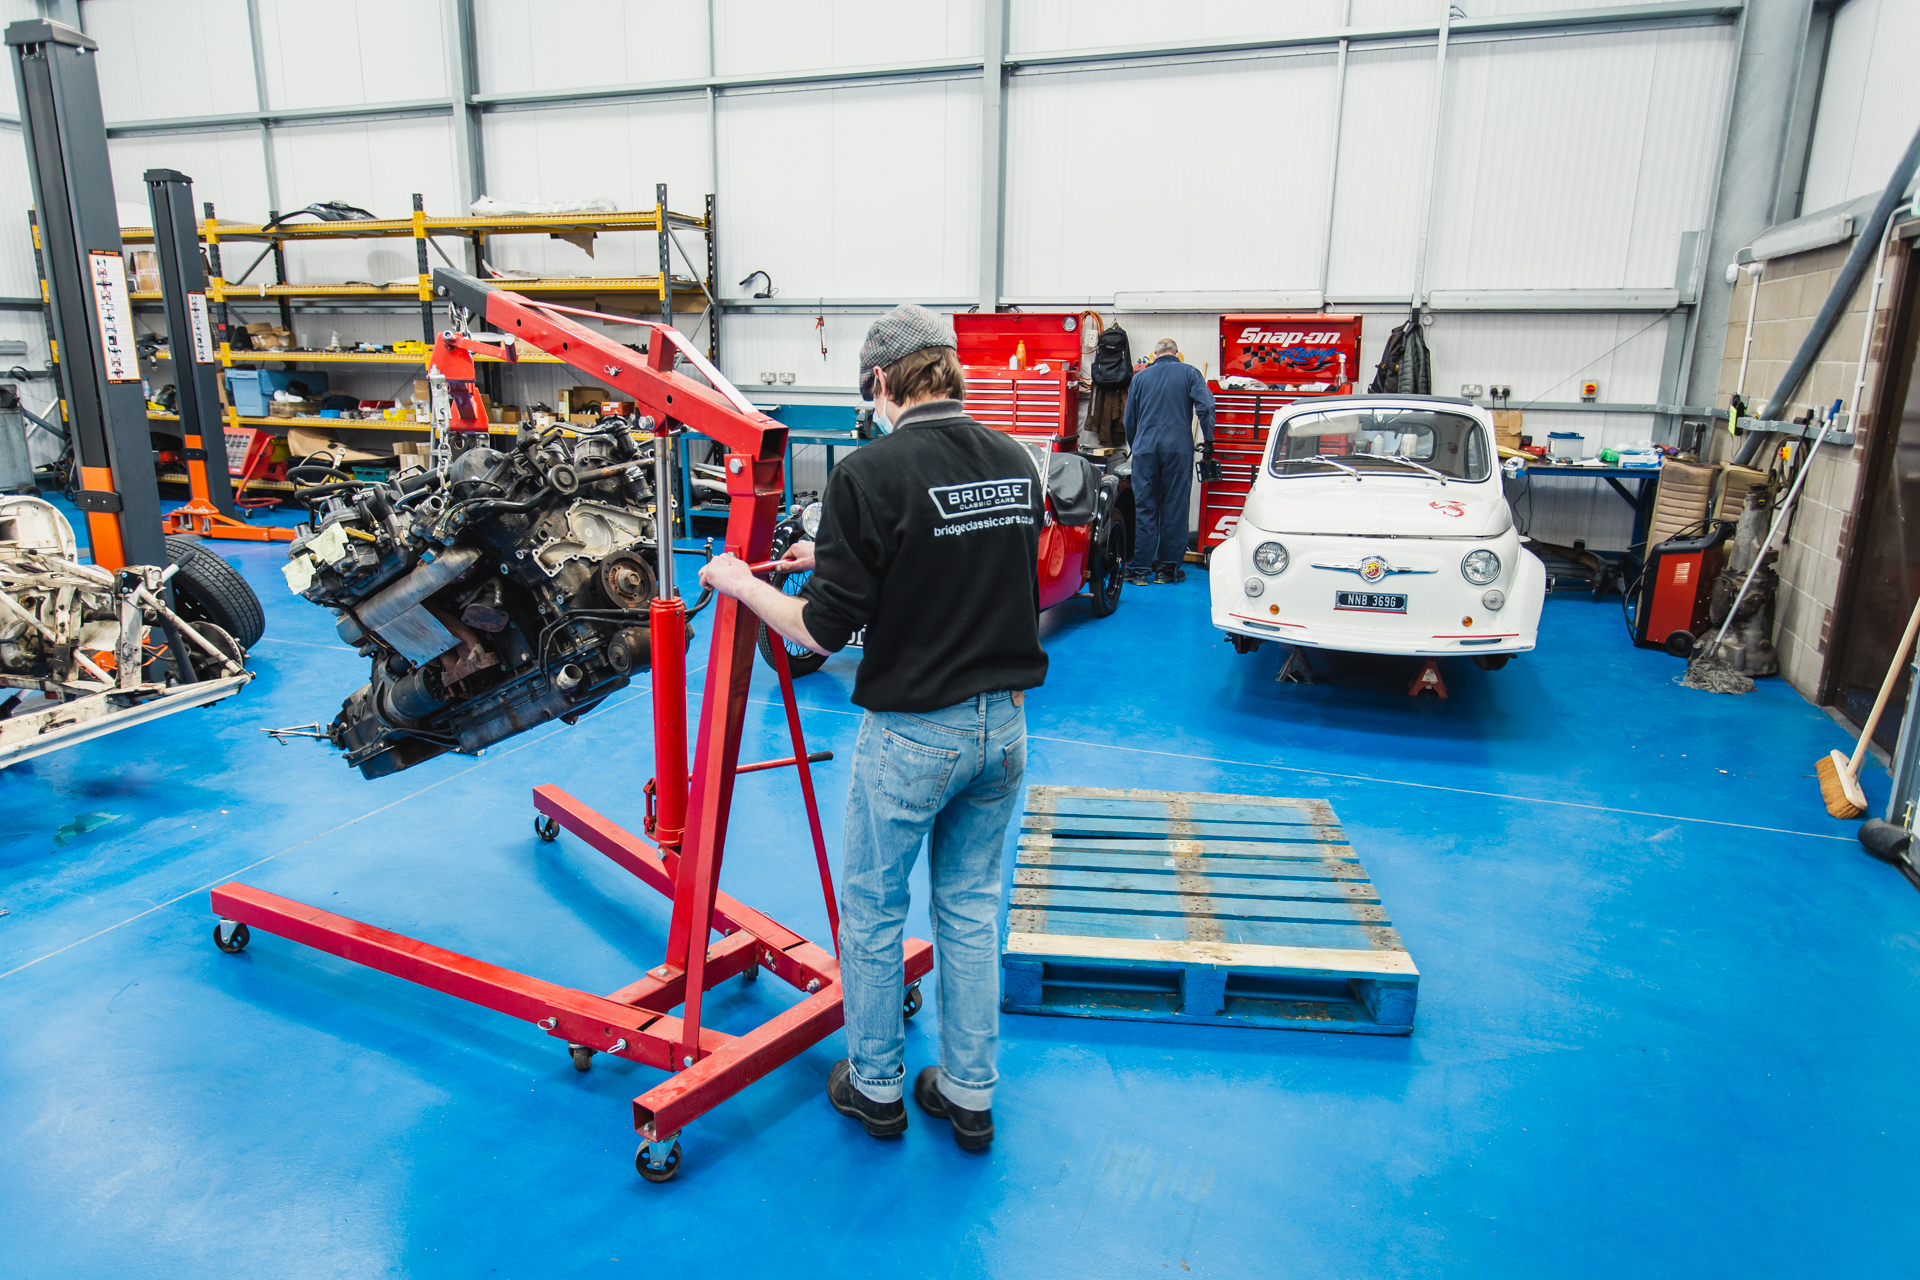
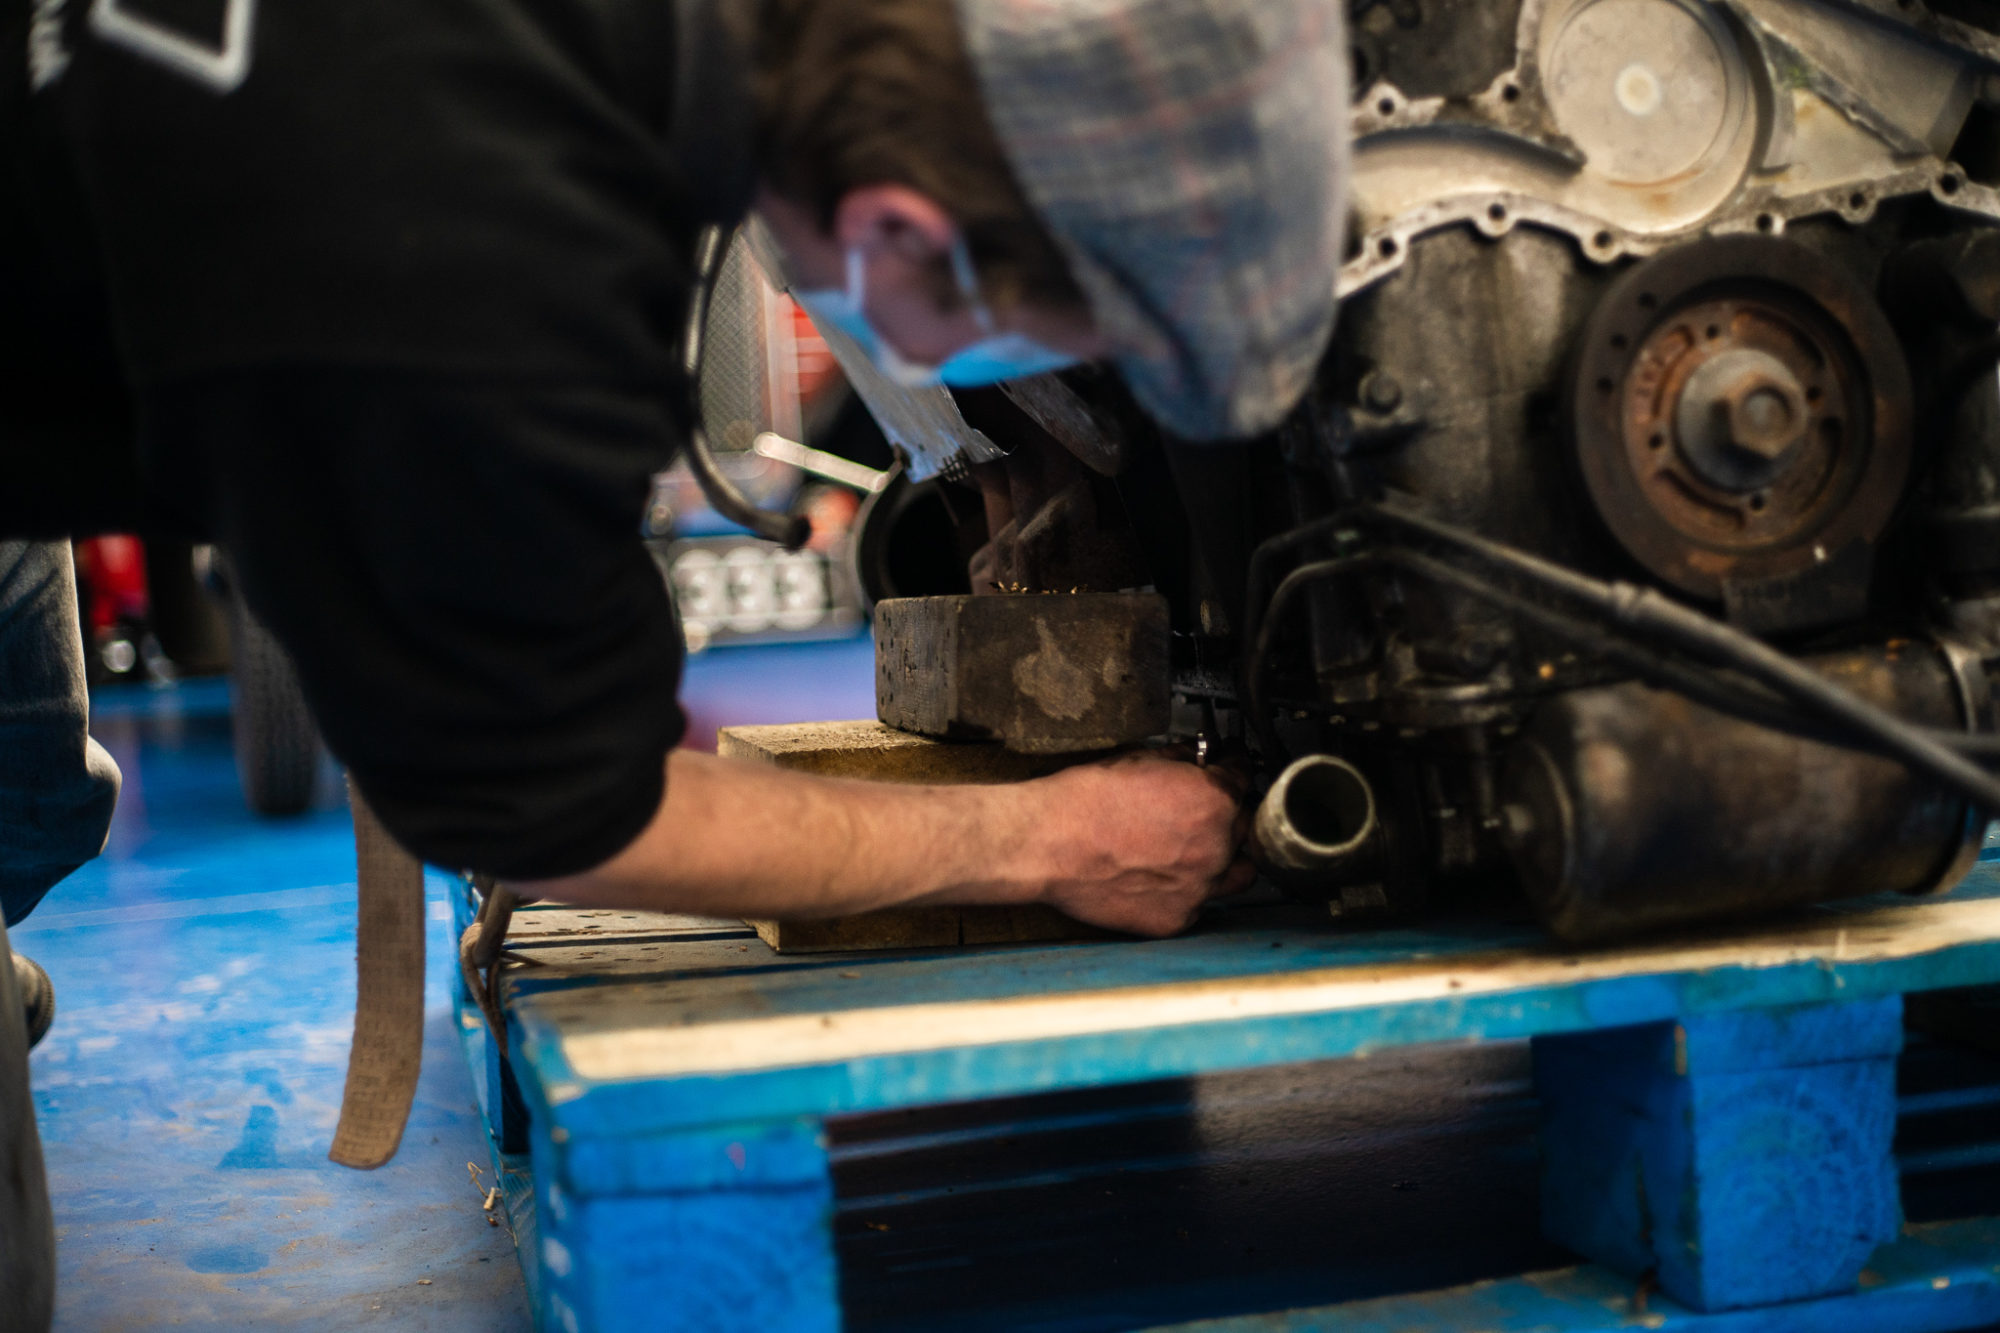
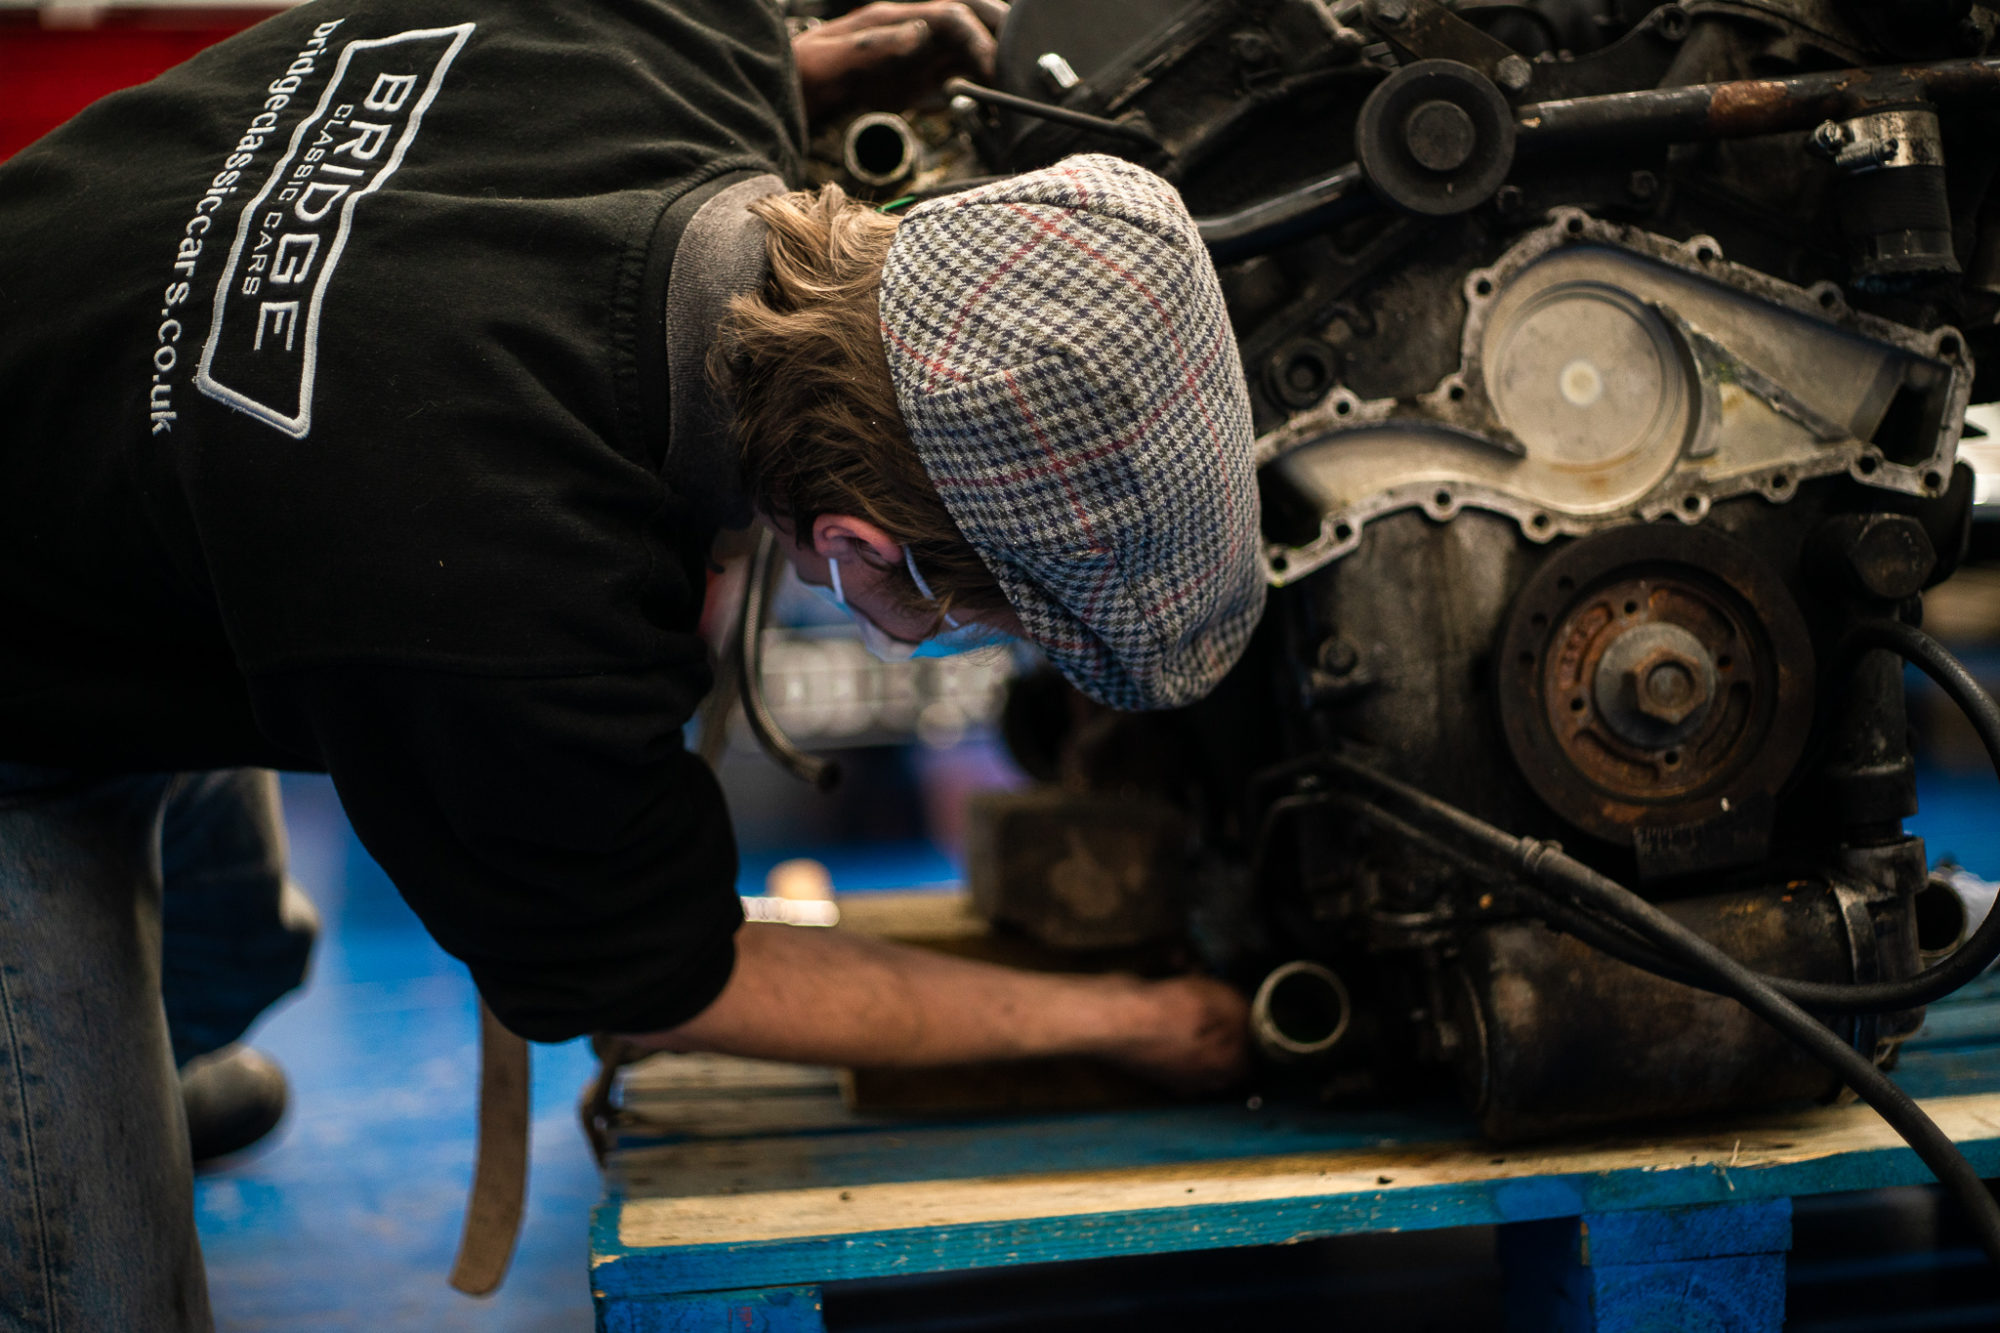
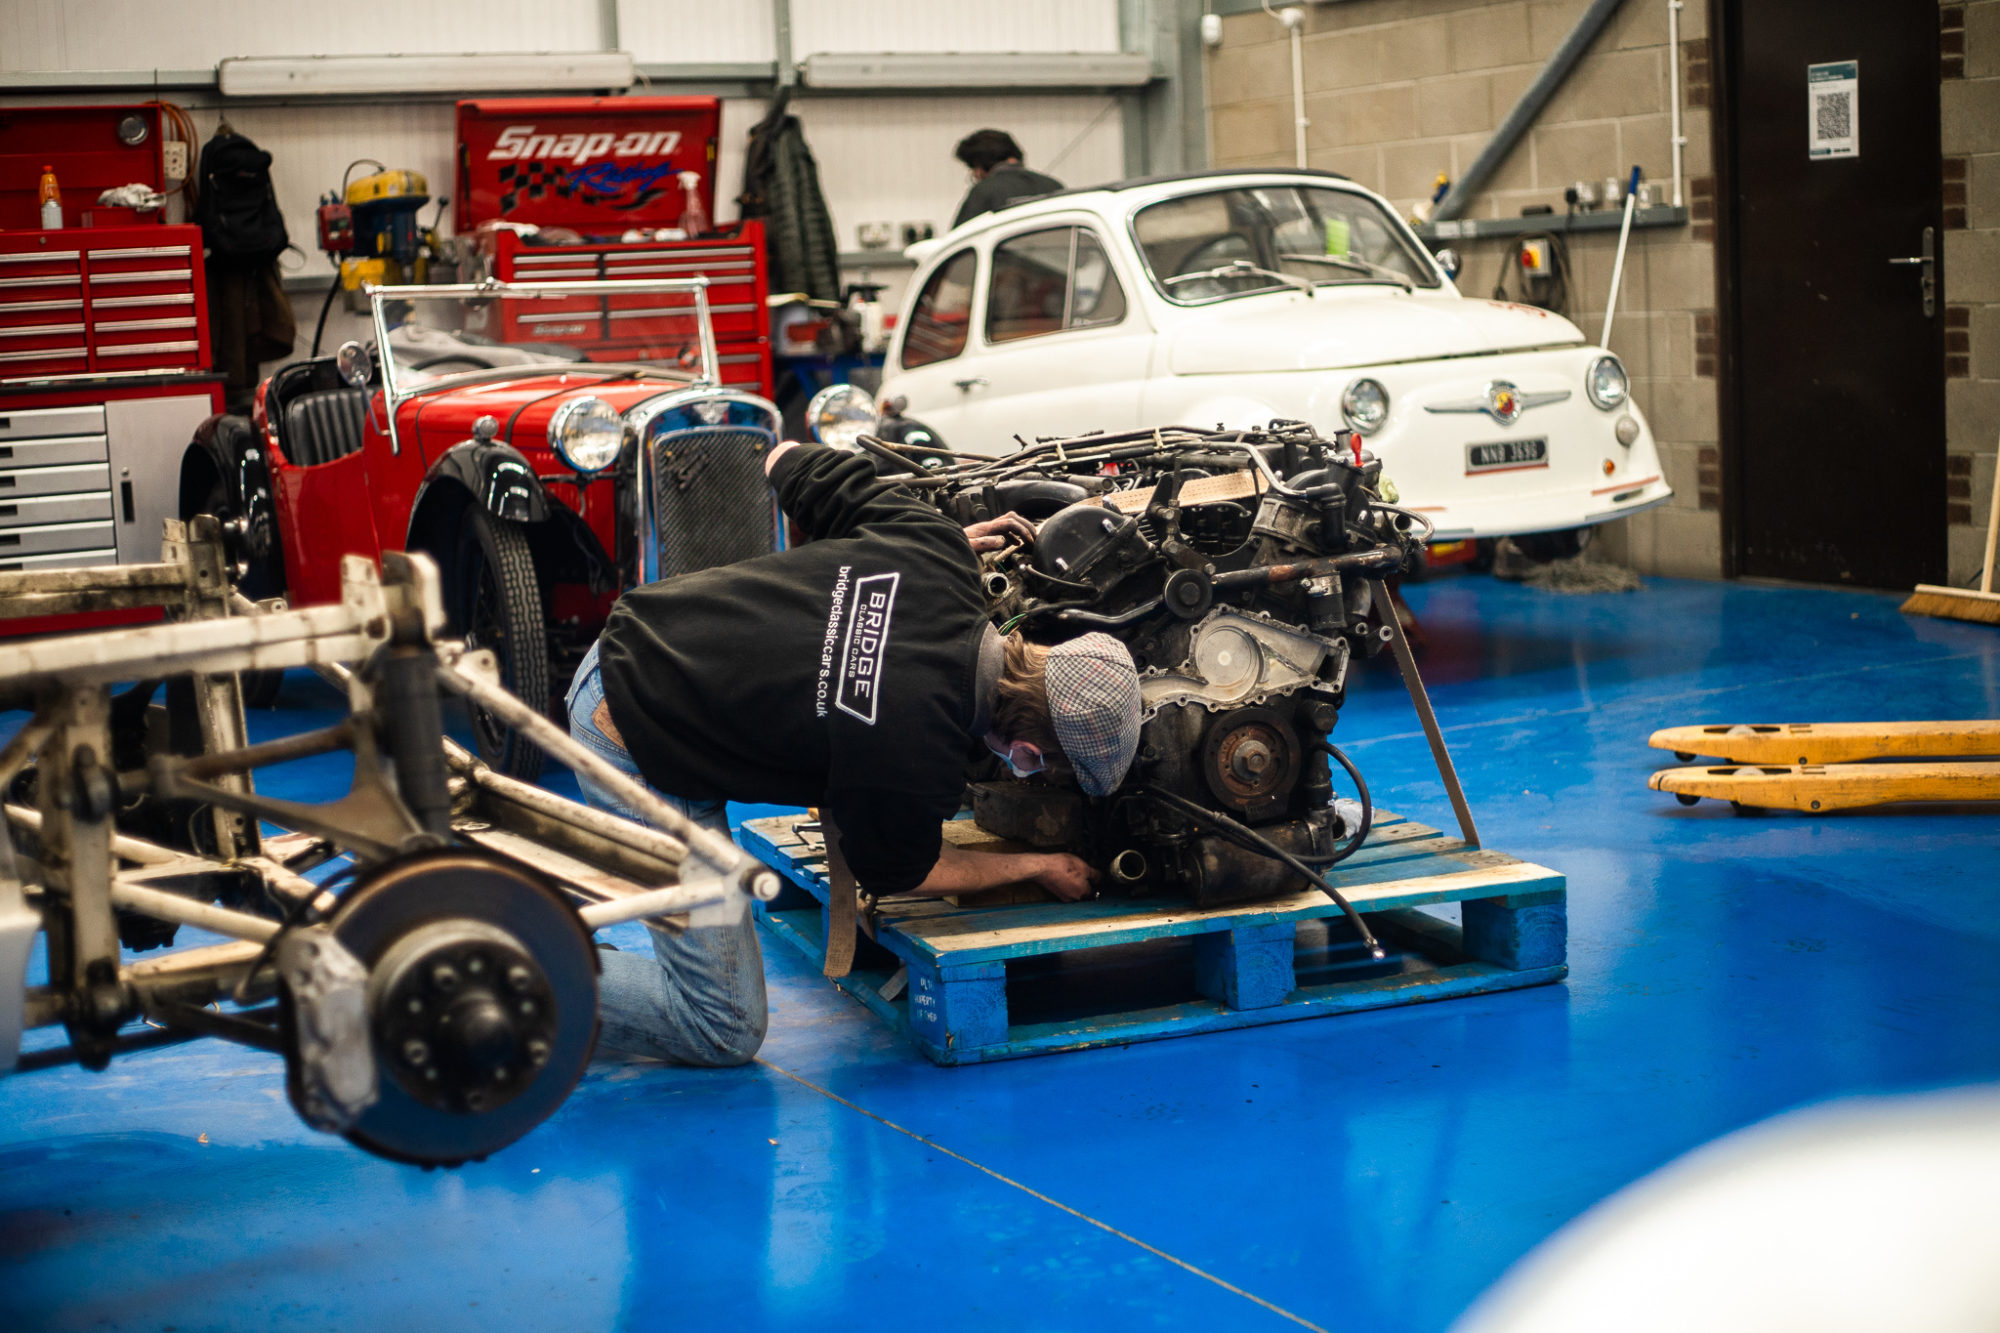
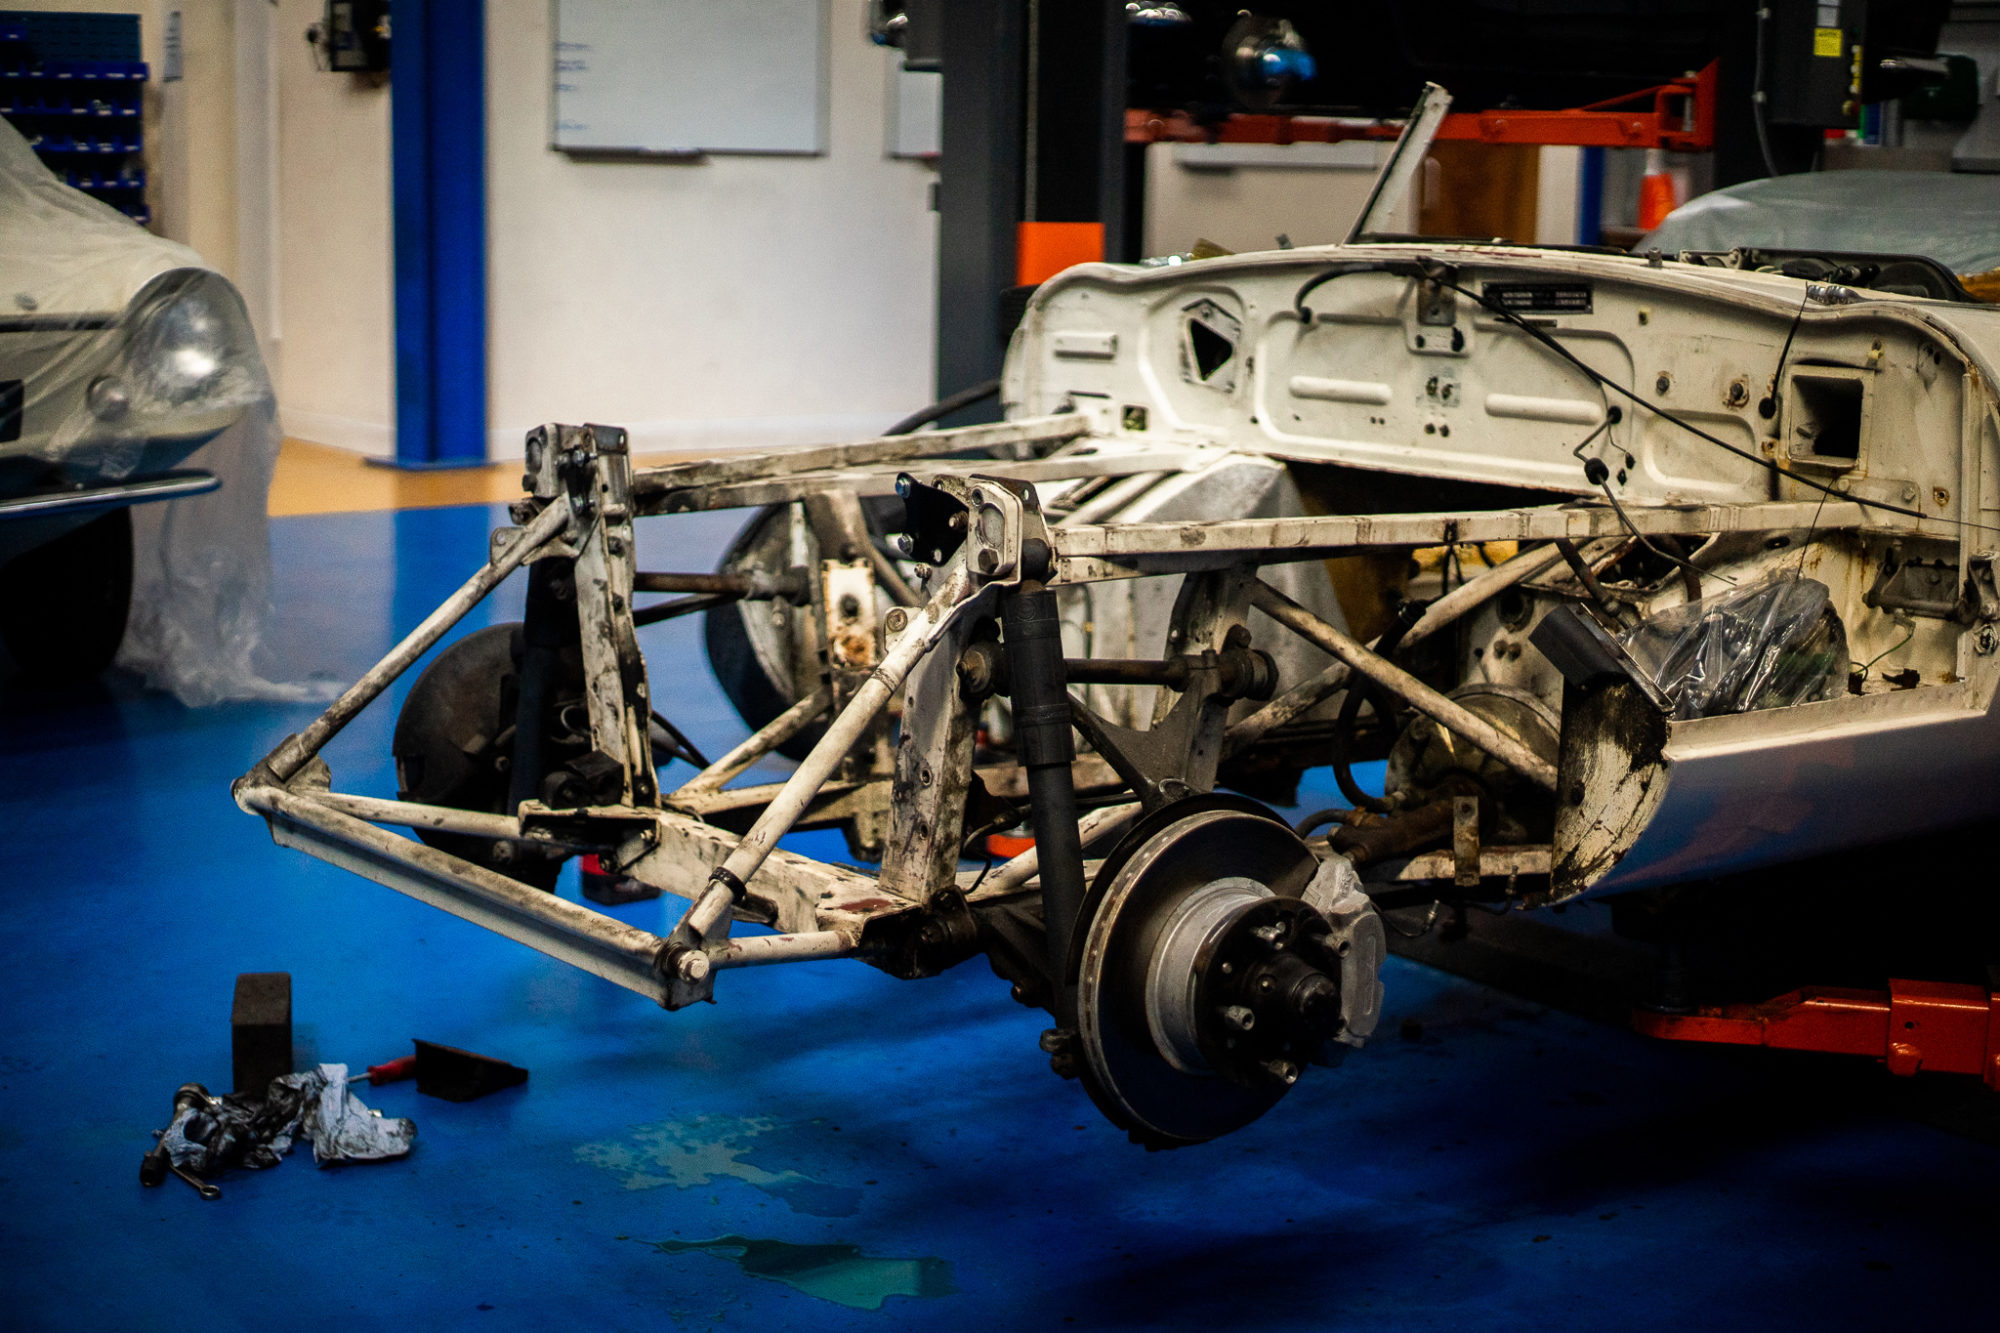
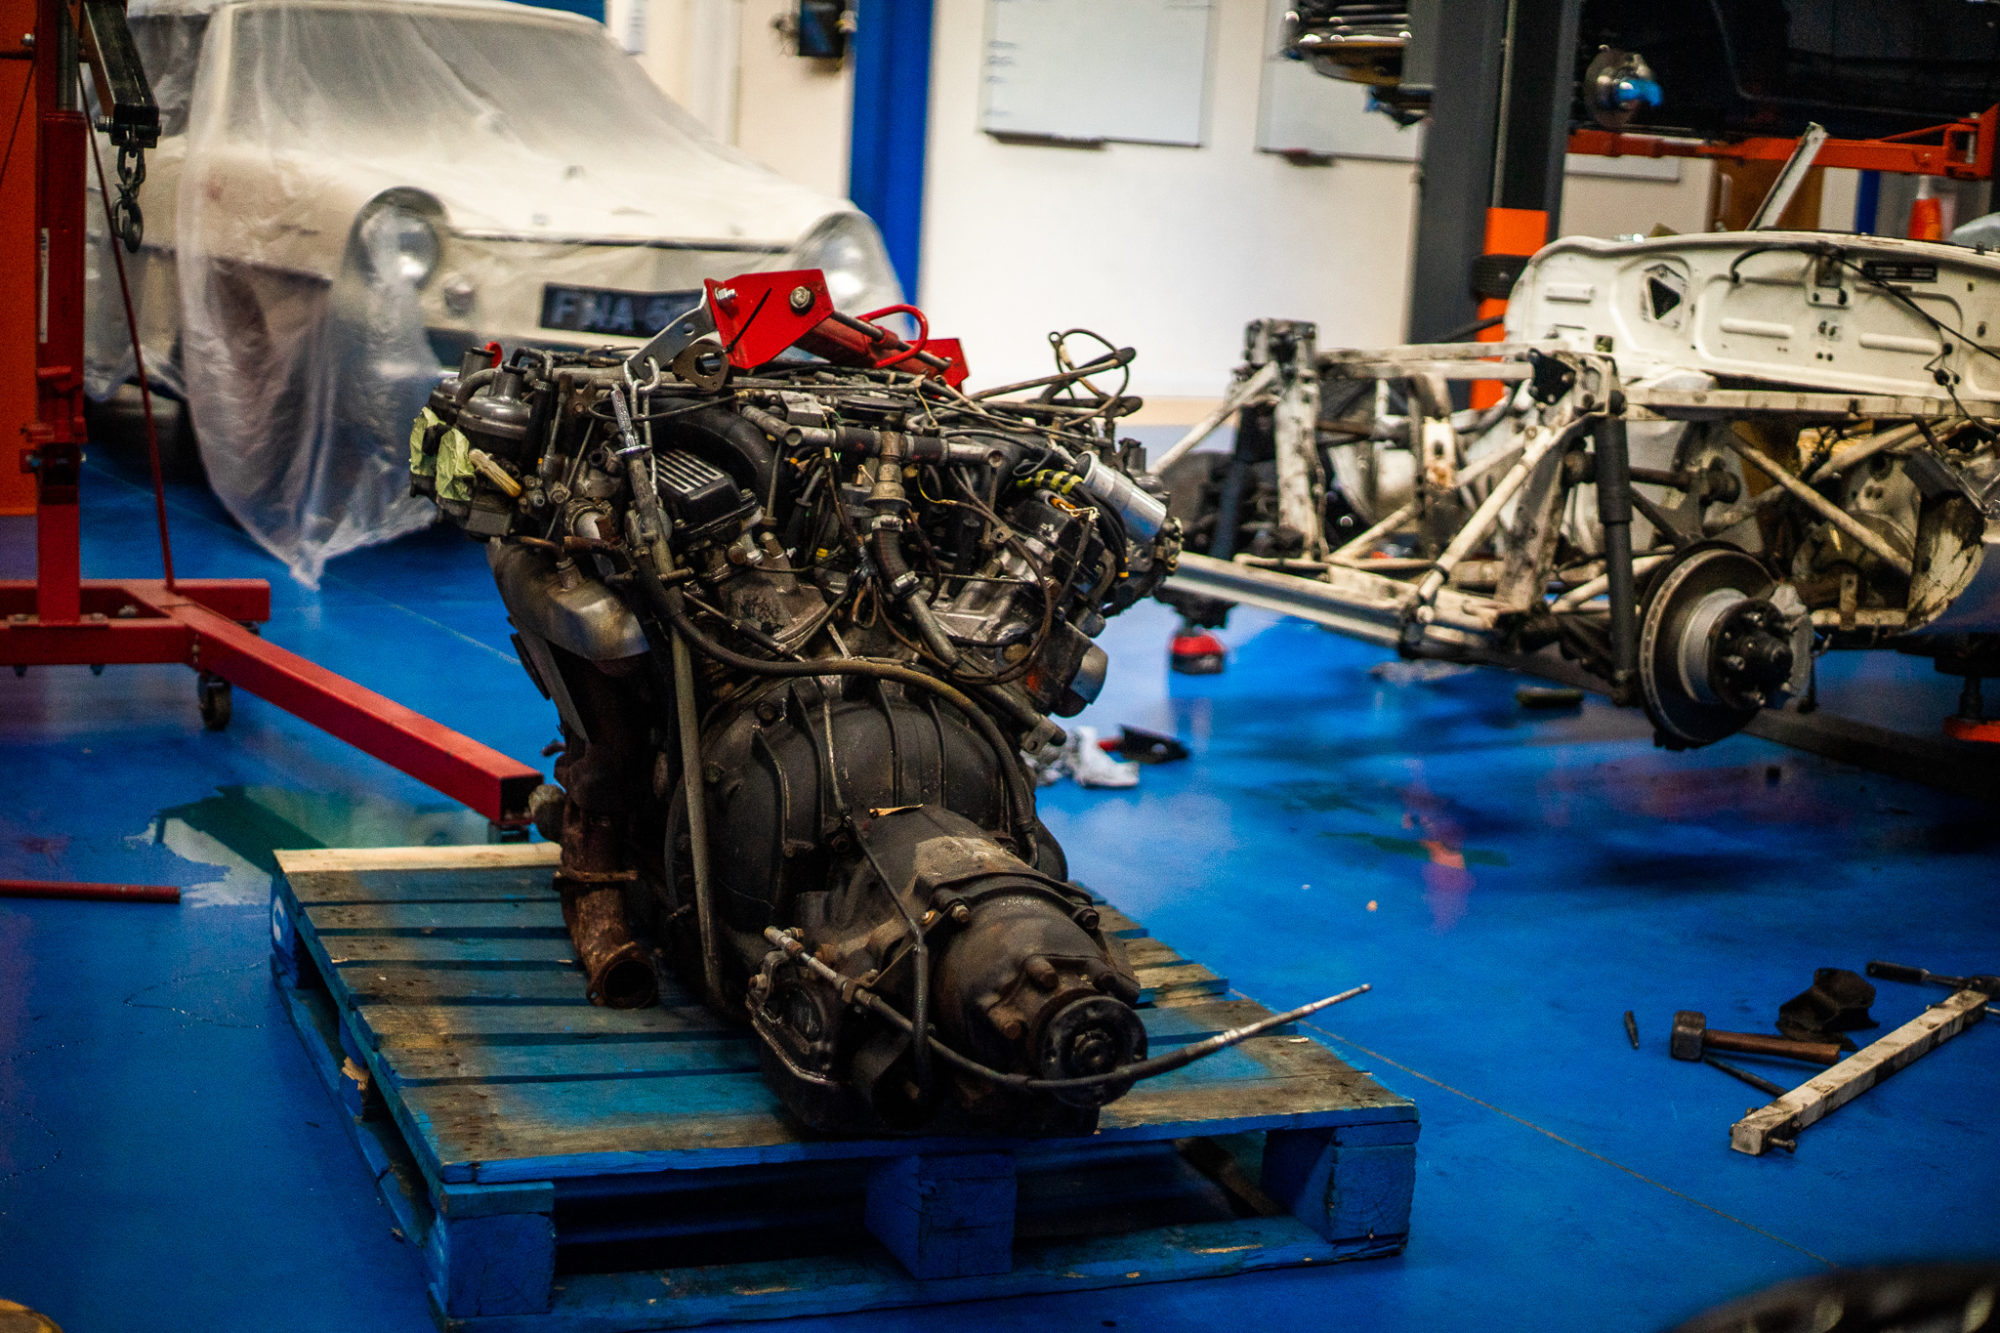
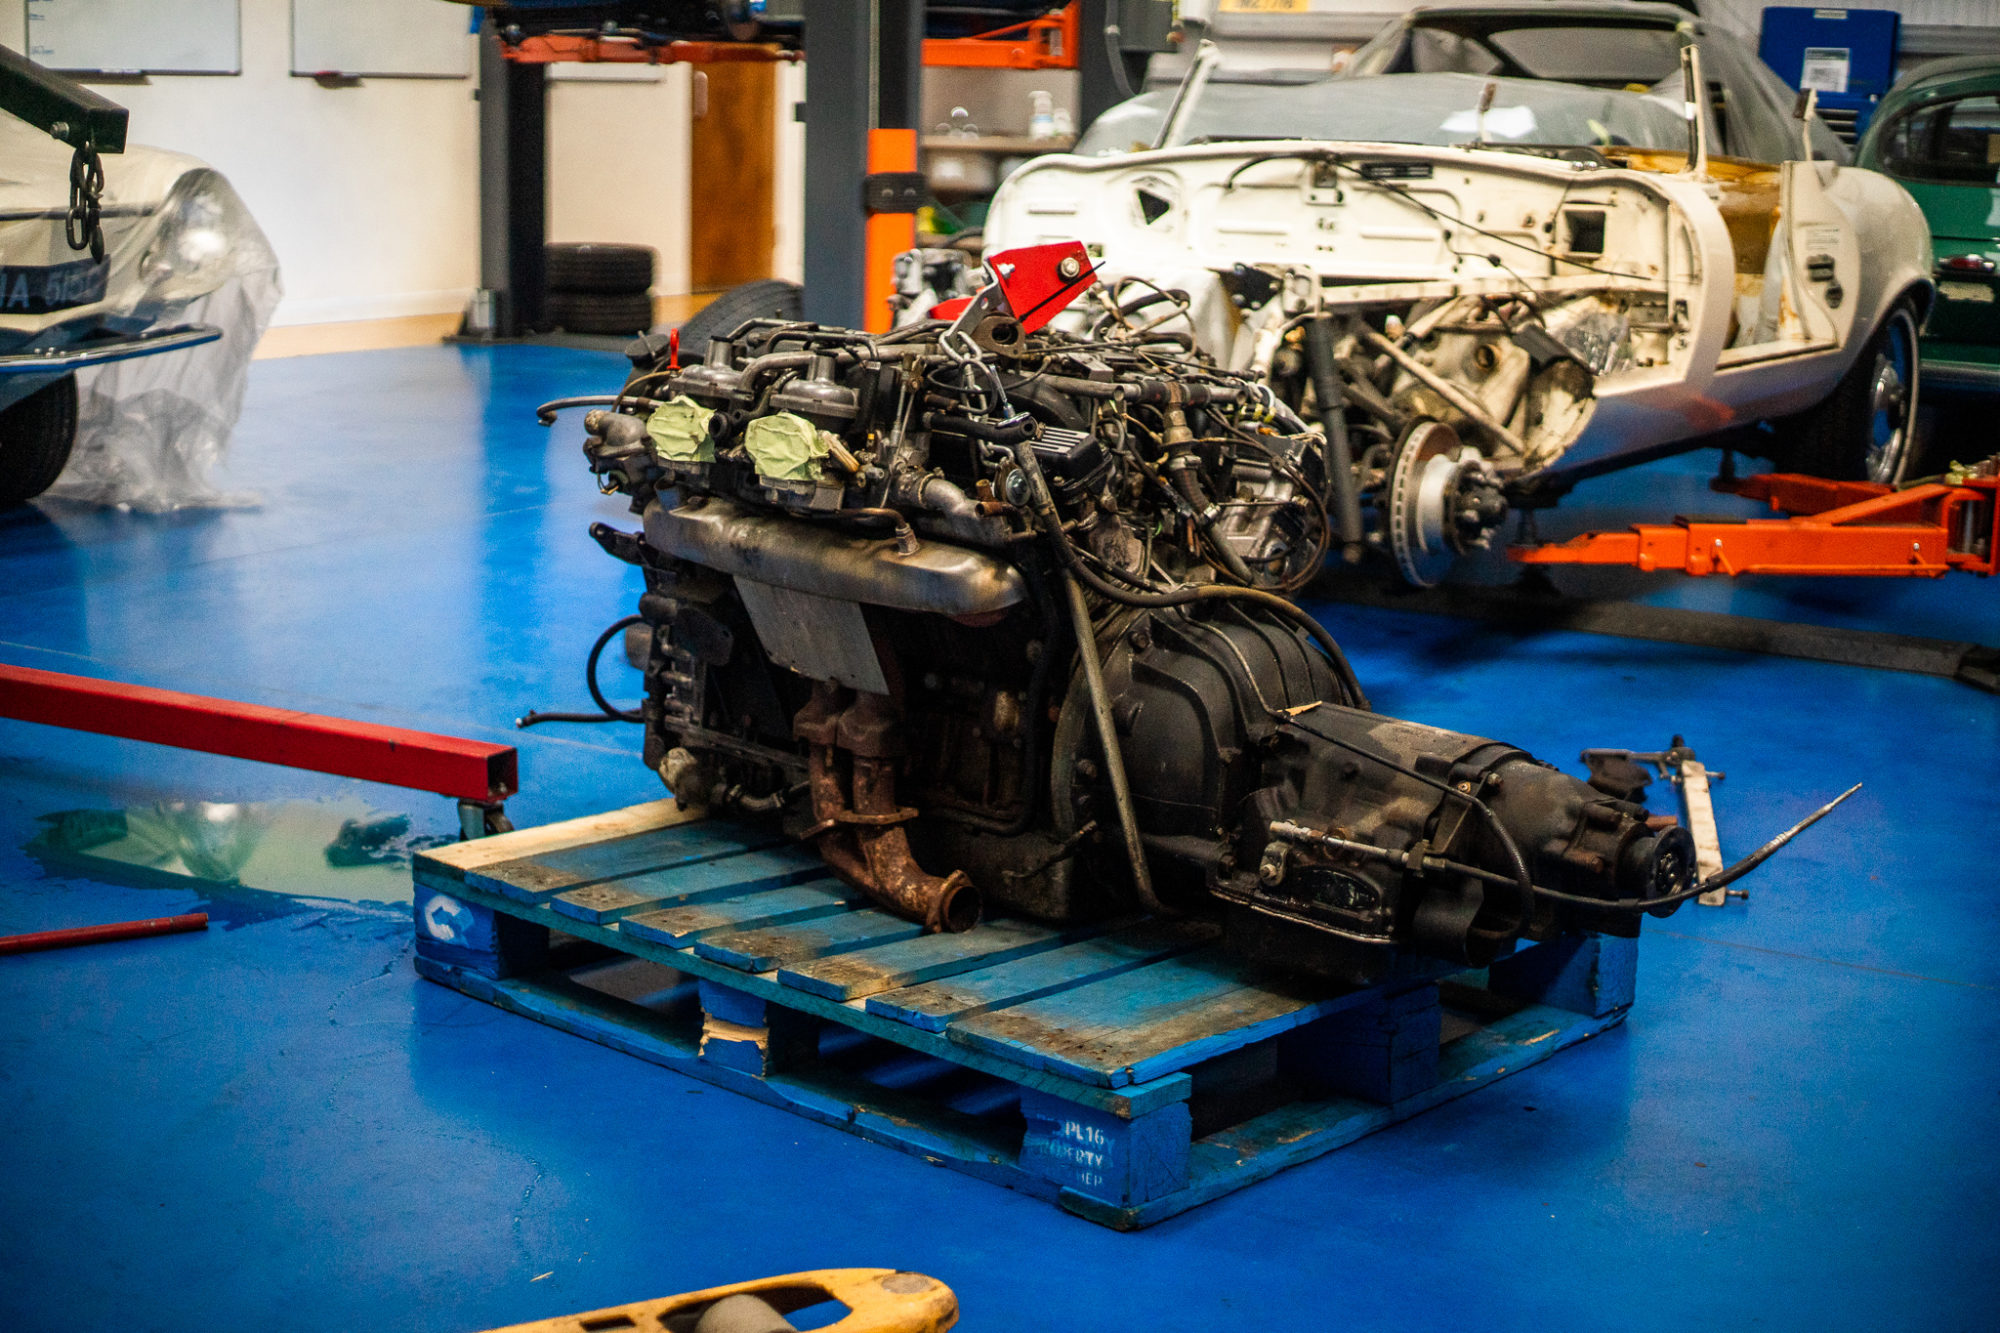
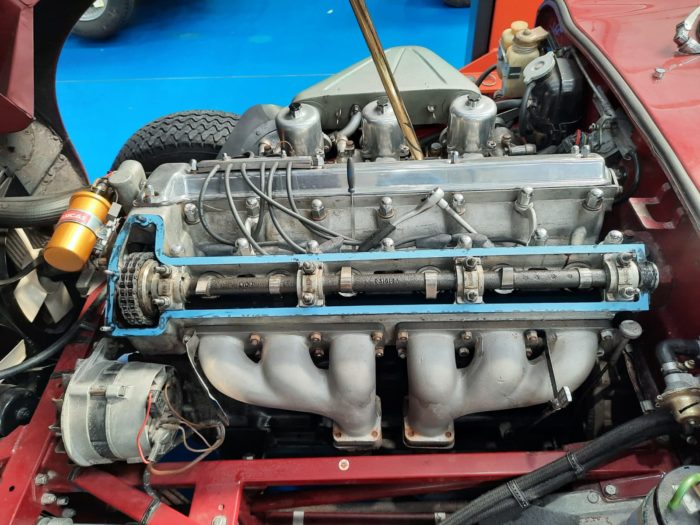
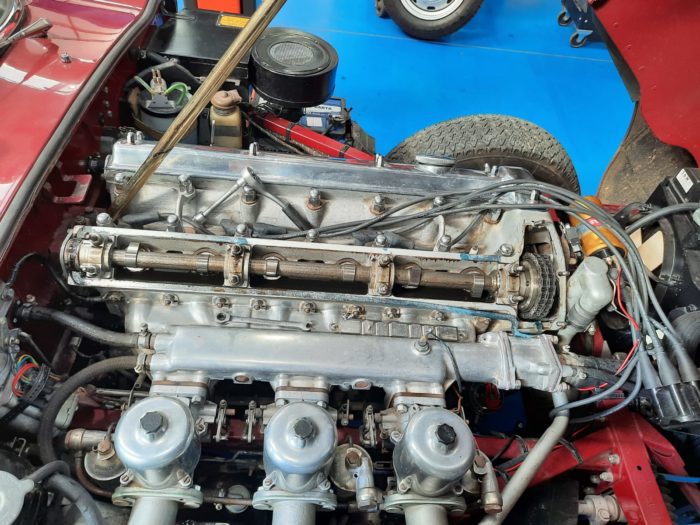
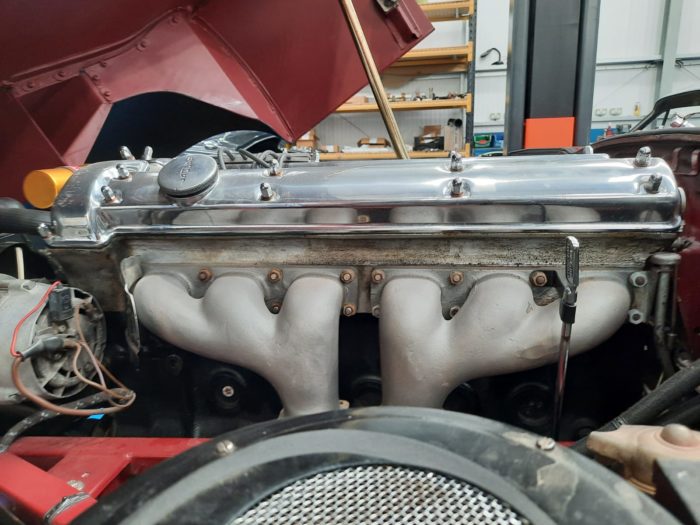
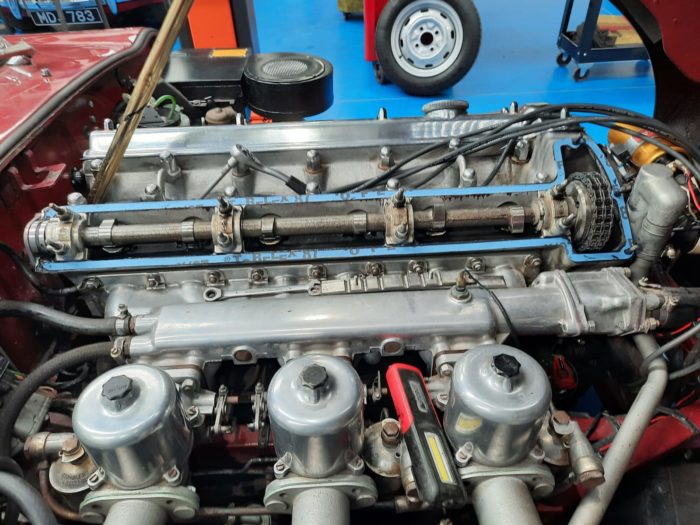
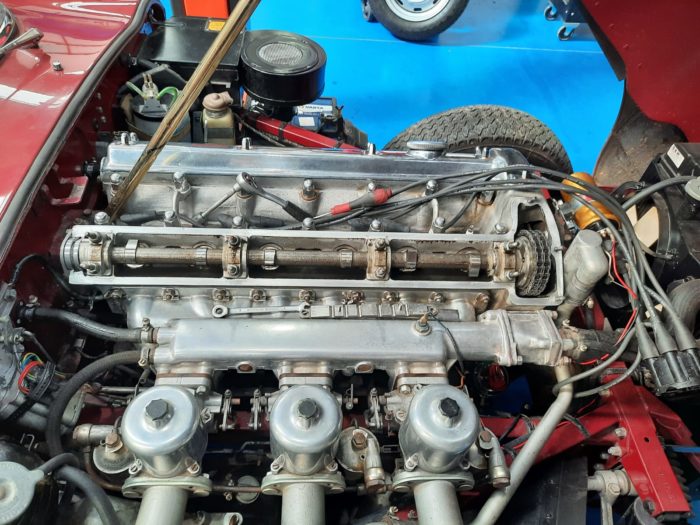
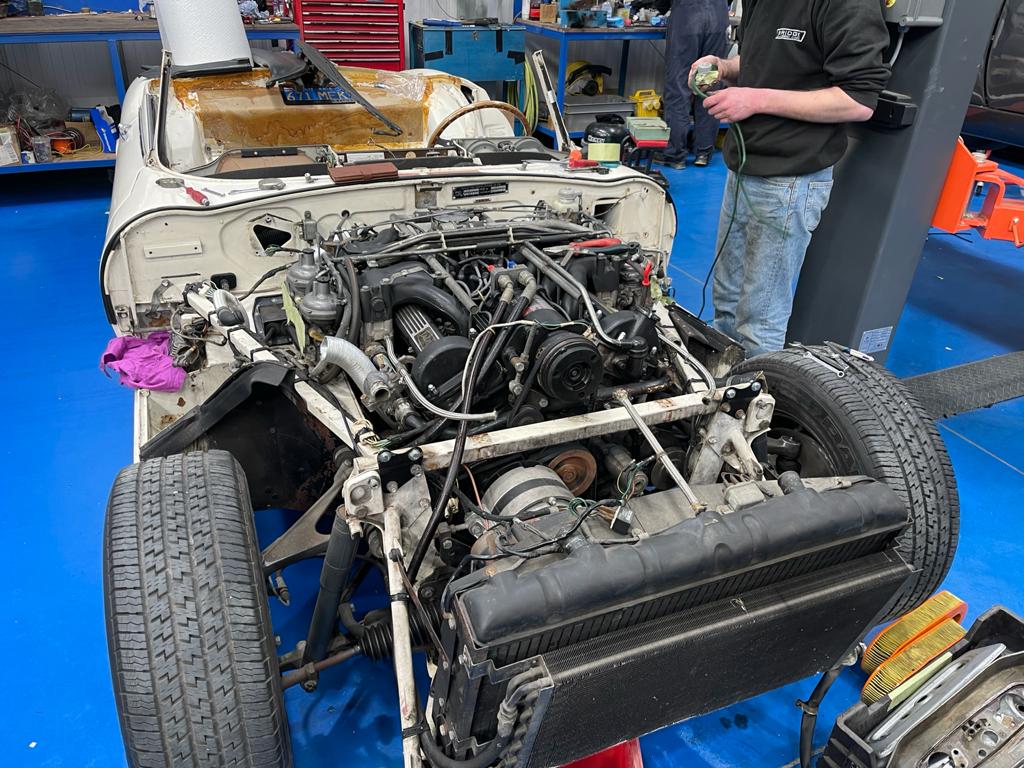
Our 1973 Jaguar E-Type from Beverly Hills has had its engine removed today so that it can be sent off to be rebuilt. Scott has
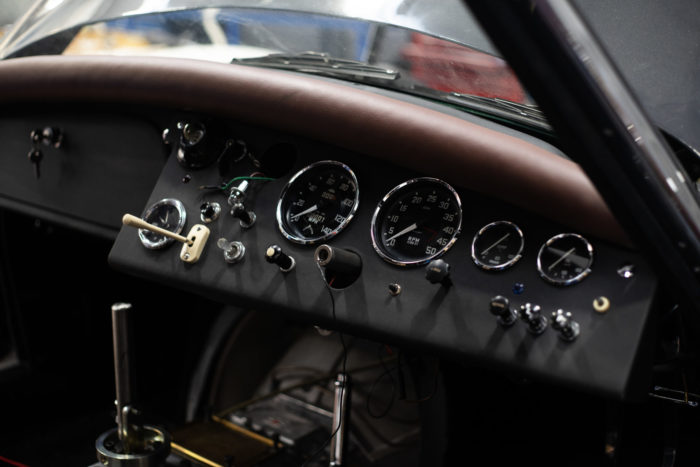
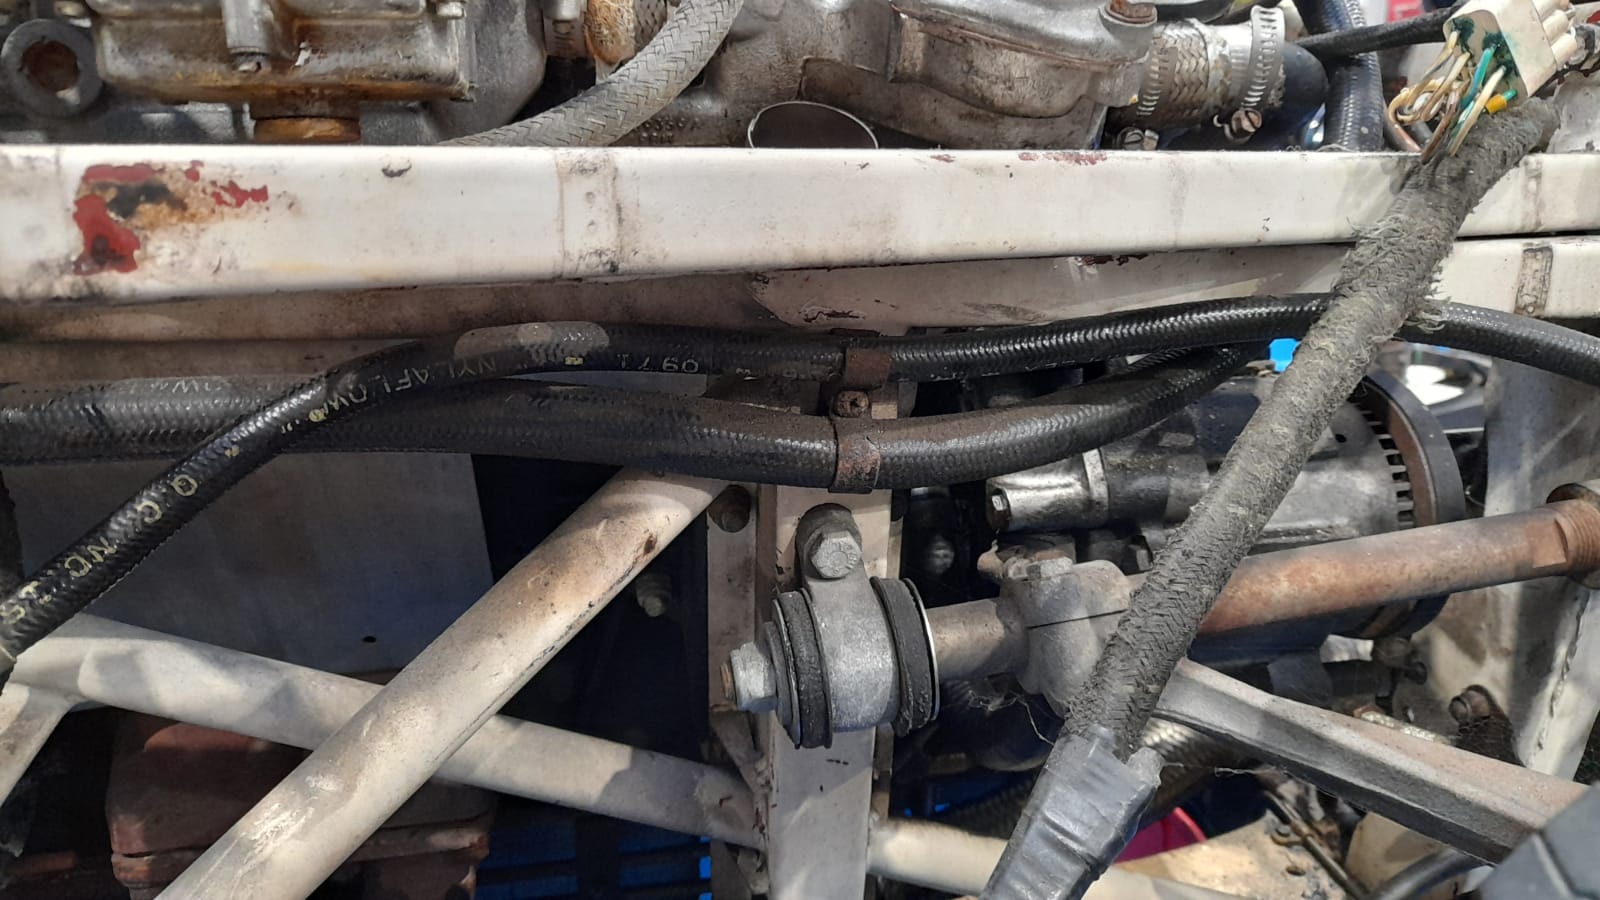
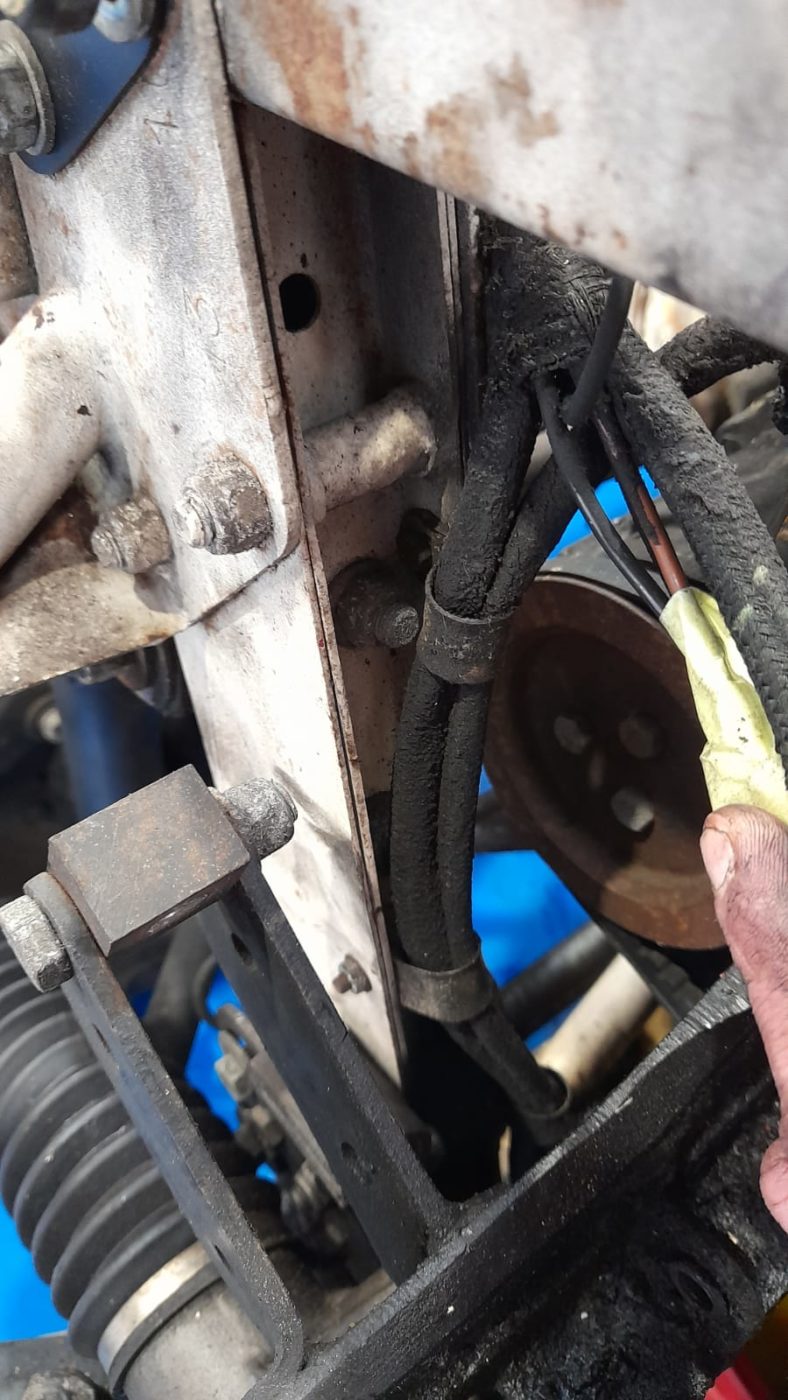
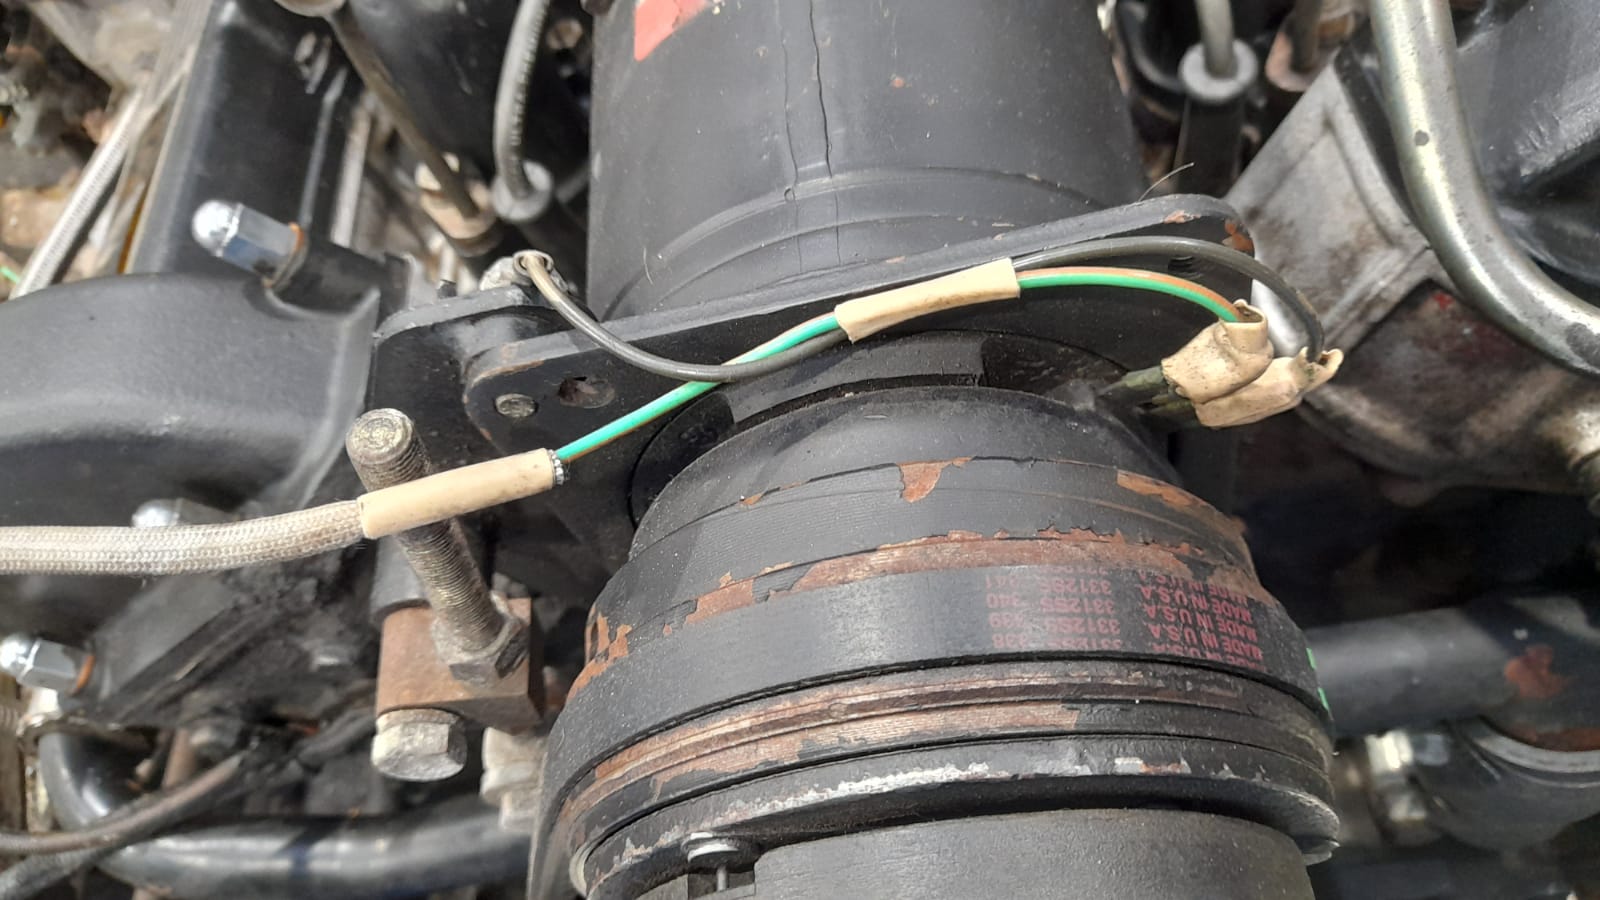
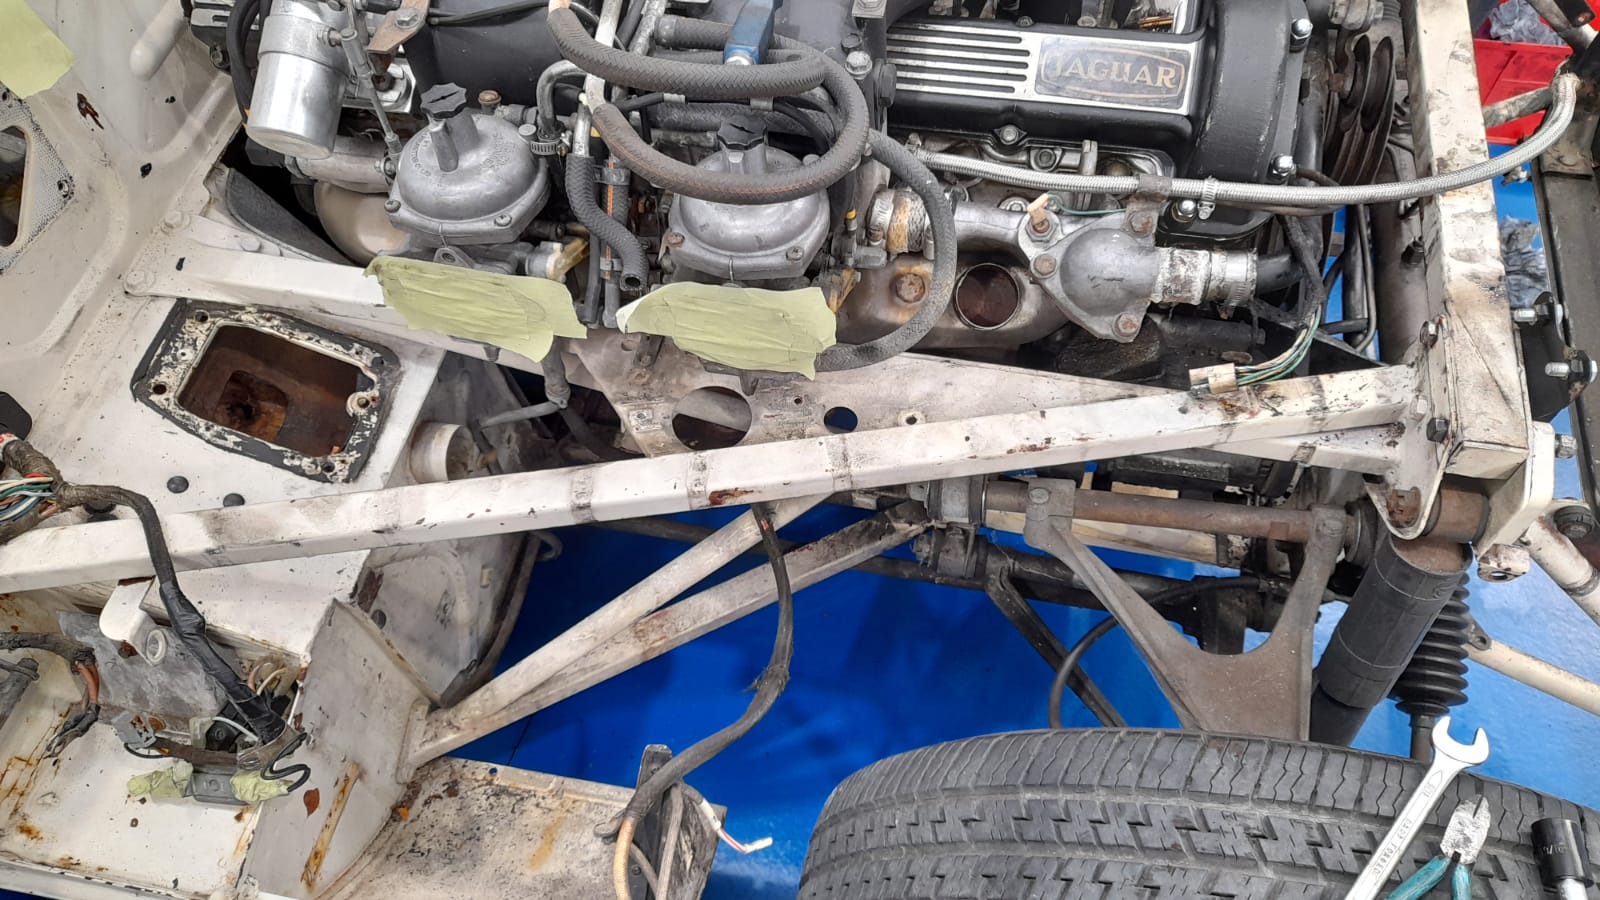
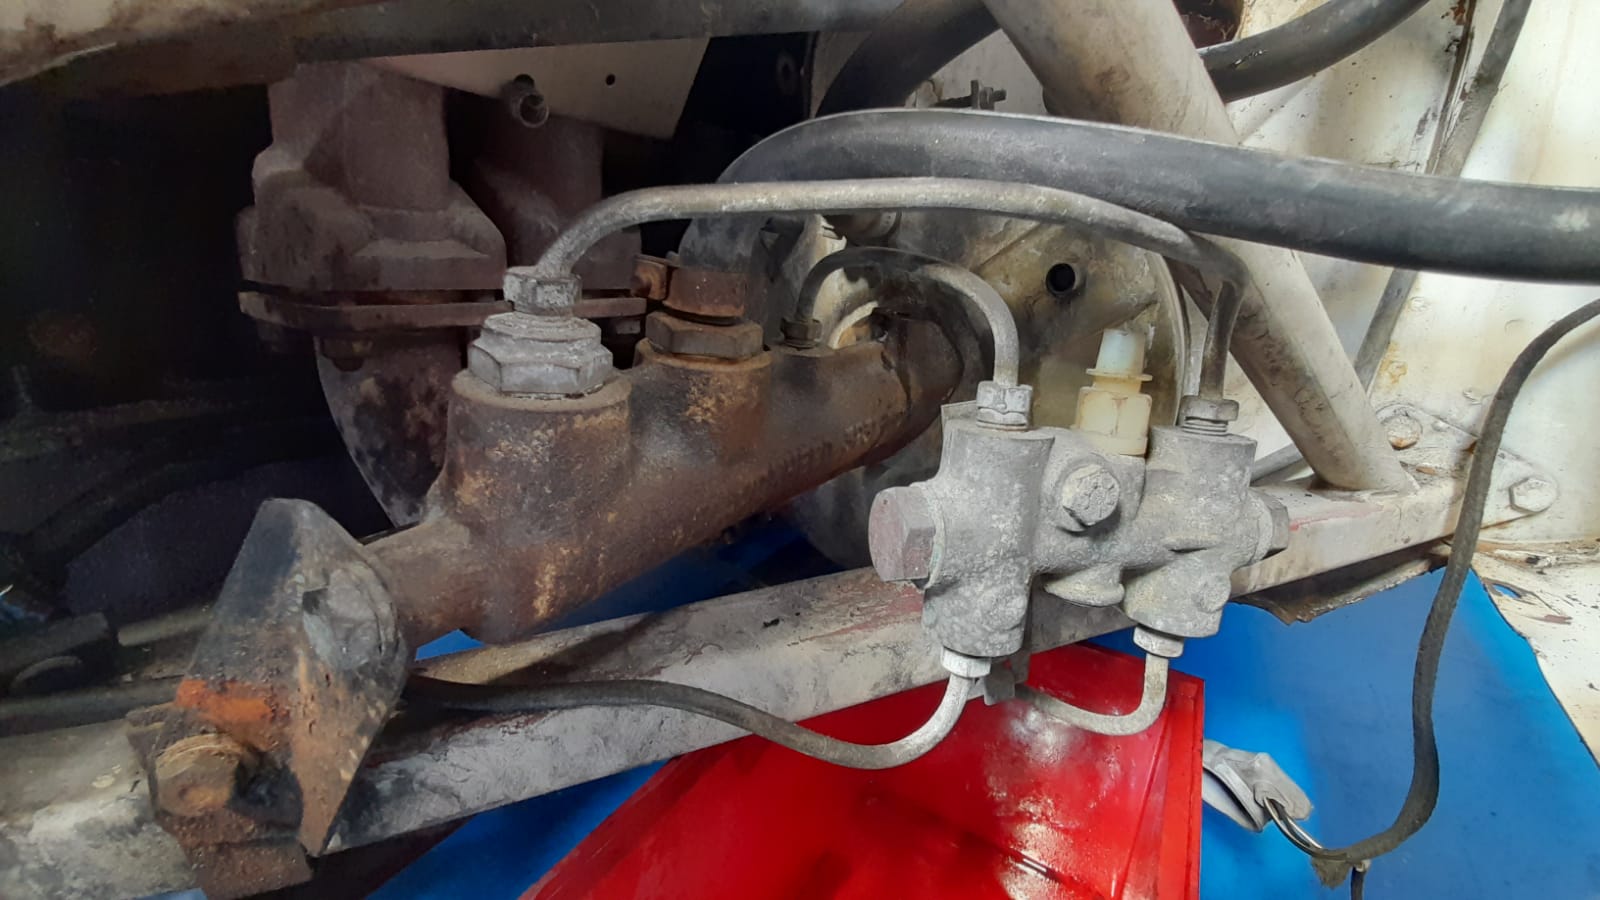
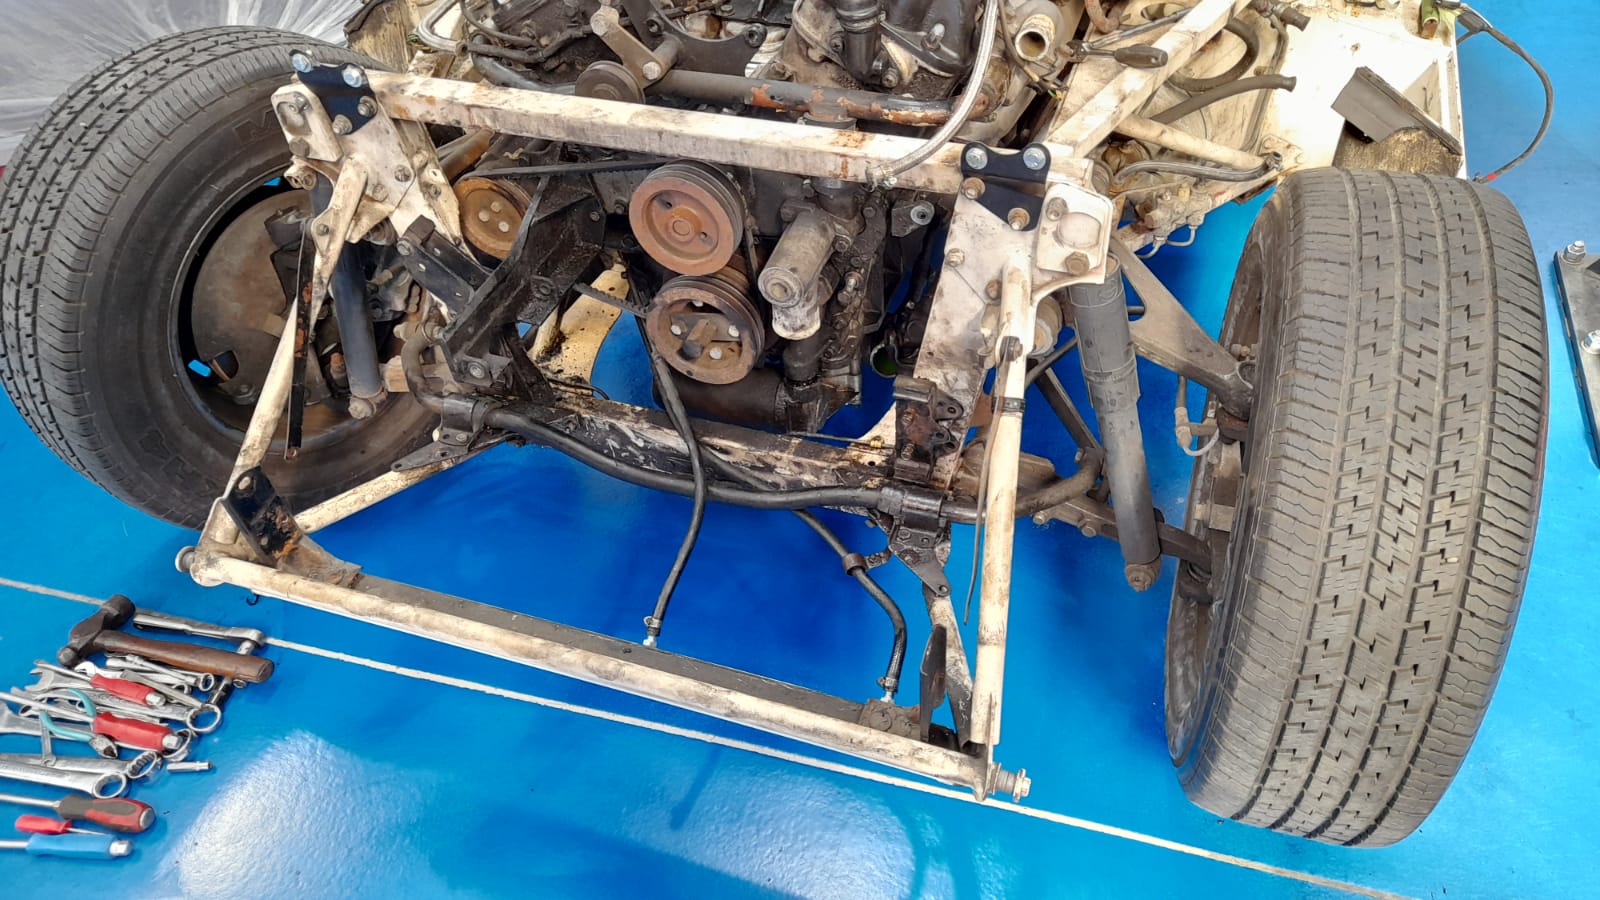
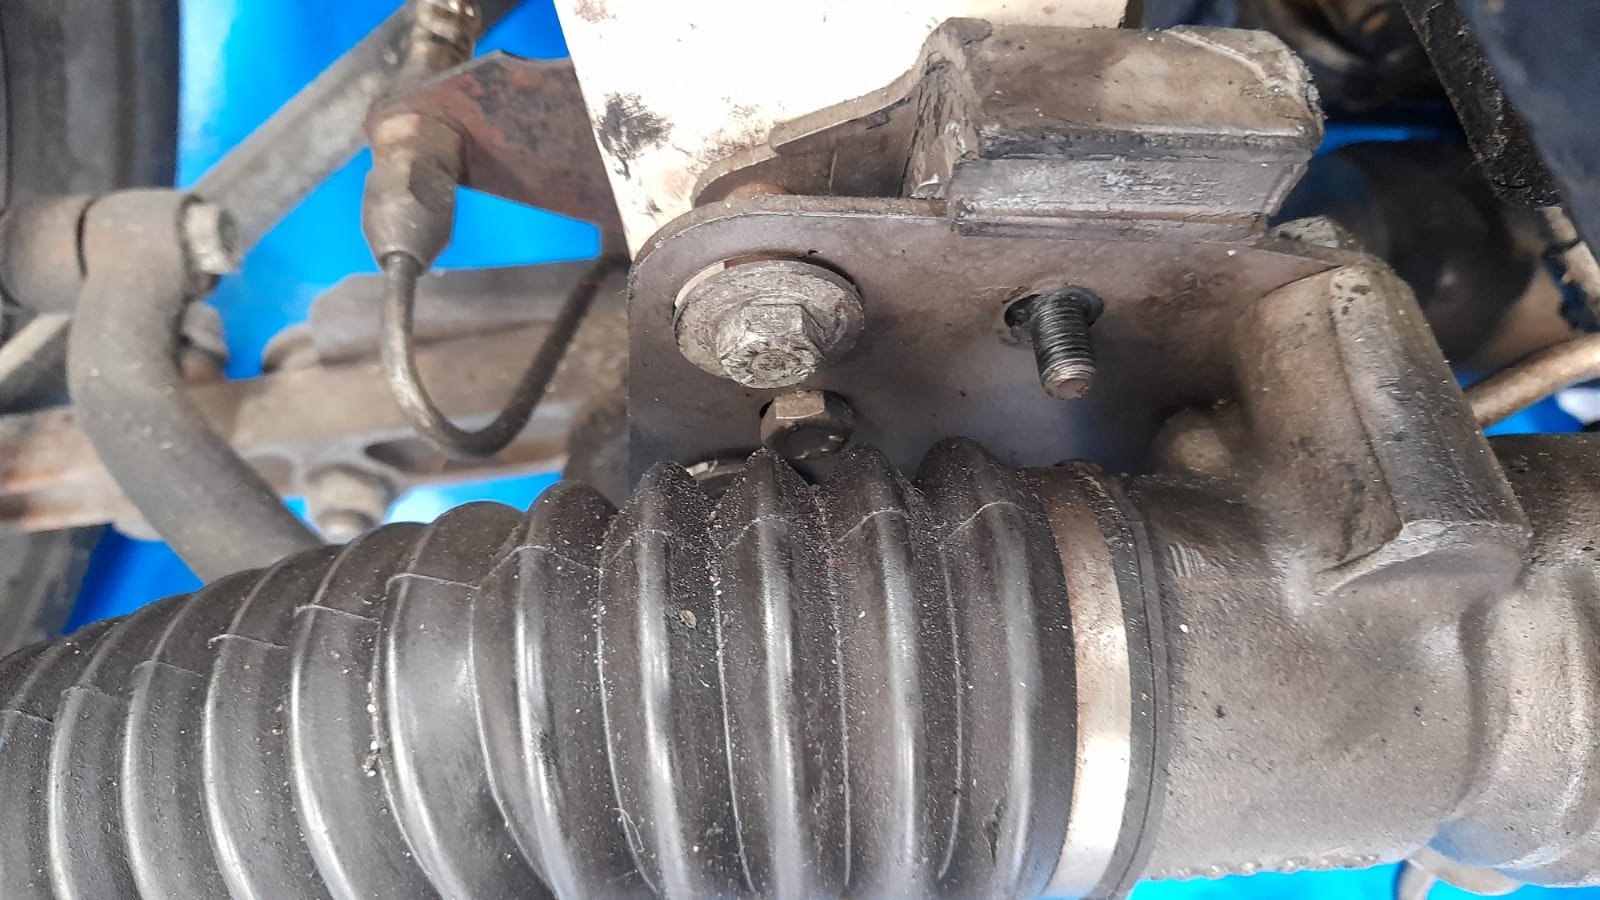
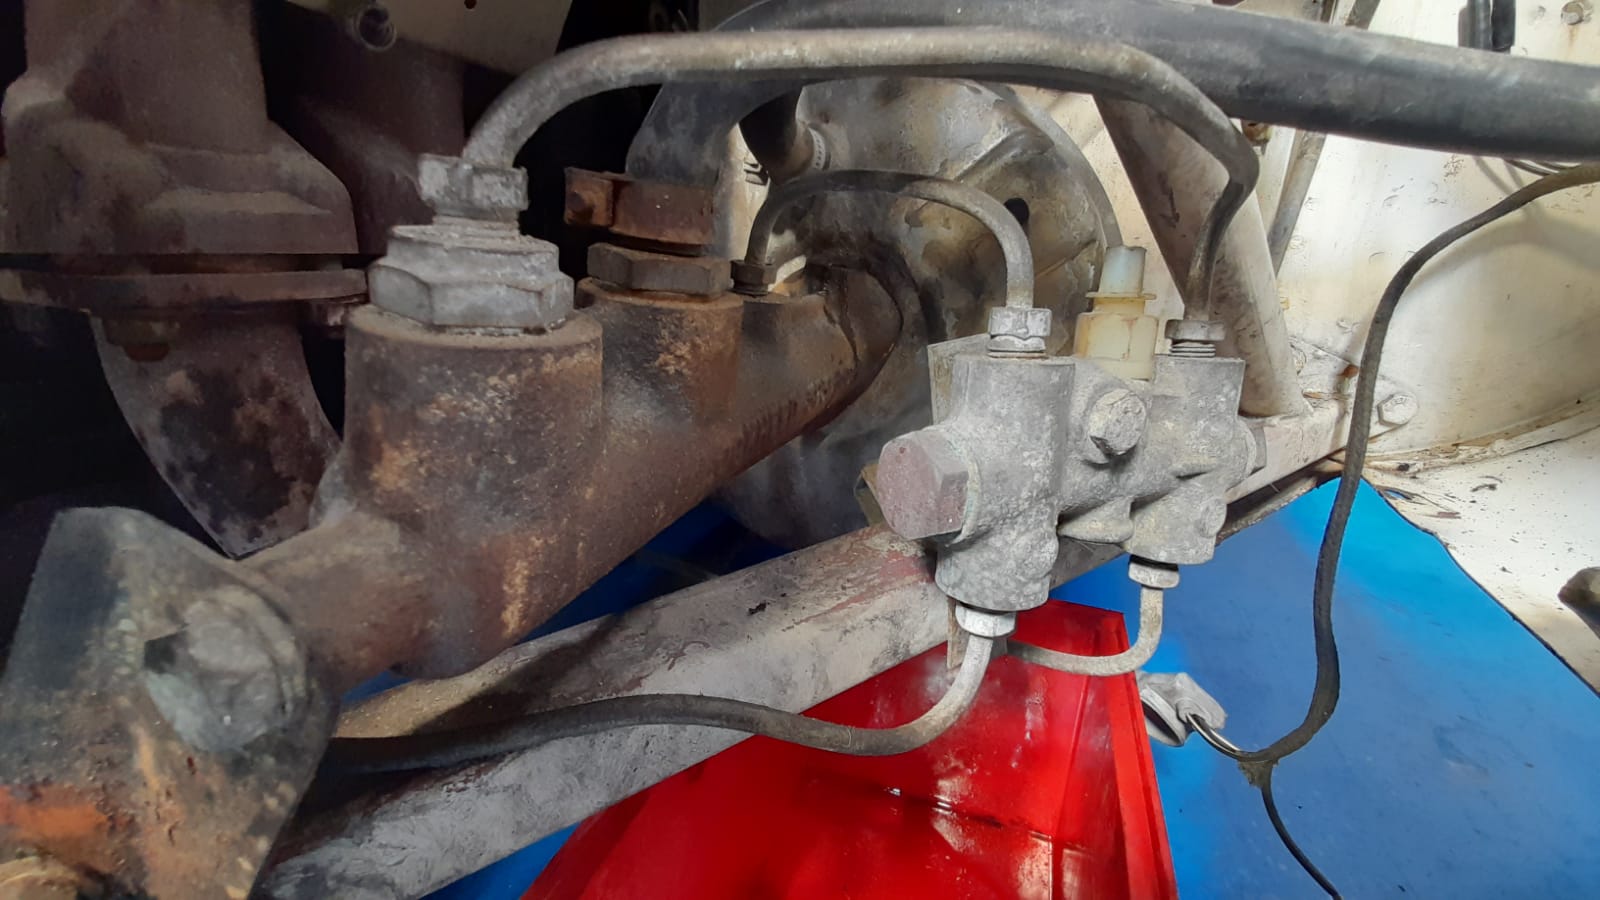
This stunning 1978 Triumph TR7 V8 has come back in for some servicing issues such as the power steering, track rods ends being too stiff,

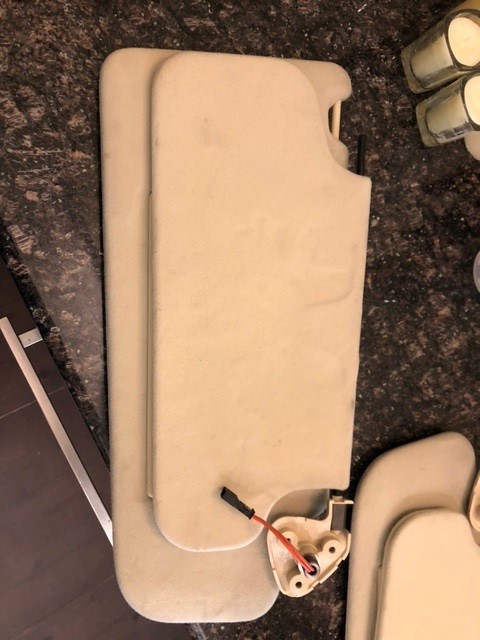
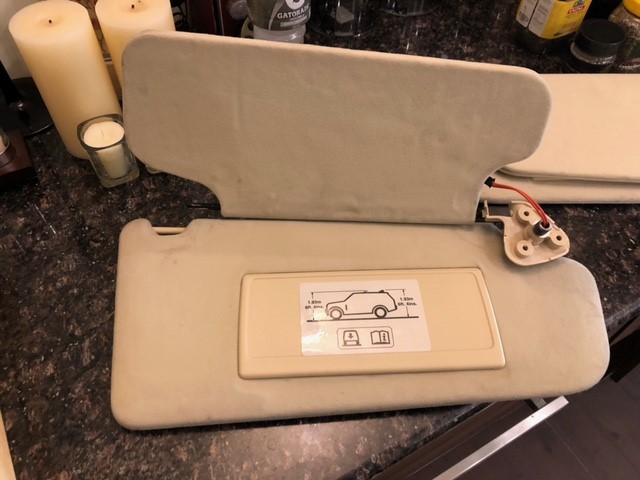
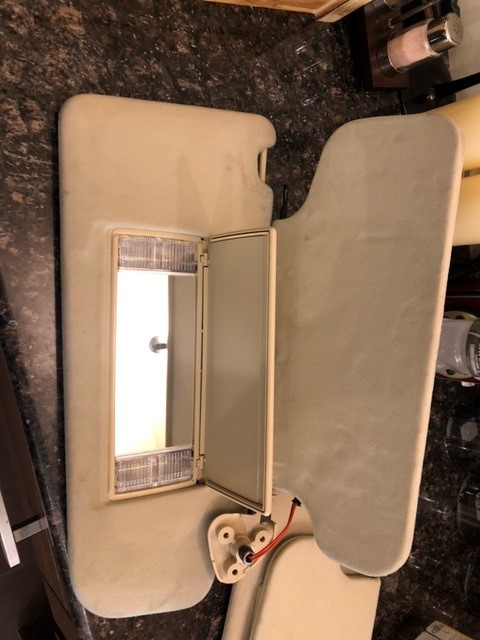
A customer, based all the way out in Pakistan, has requested that we recover their 2006 Range Rover Vogue sun visors that have started to
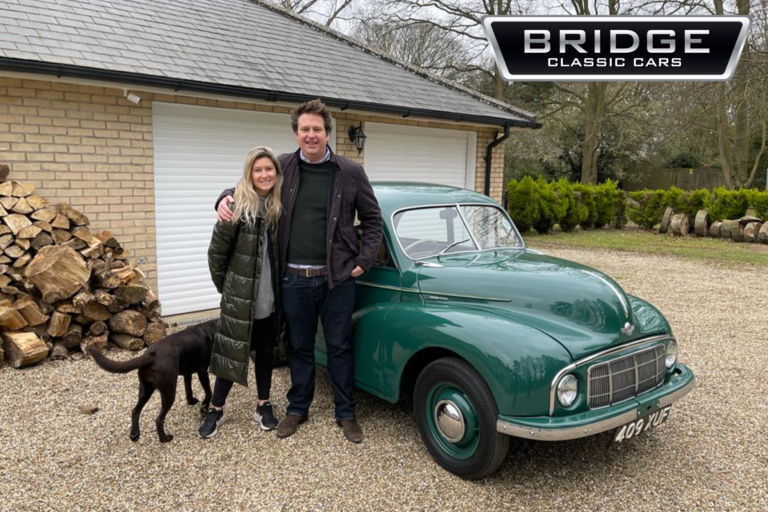
Our lovely little 1949 Morris Minor was delivered to its new owners in Ipswich over the weekend. Matthew Sudgen won with his lucky ticket number
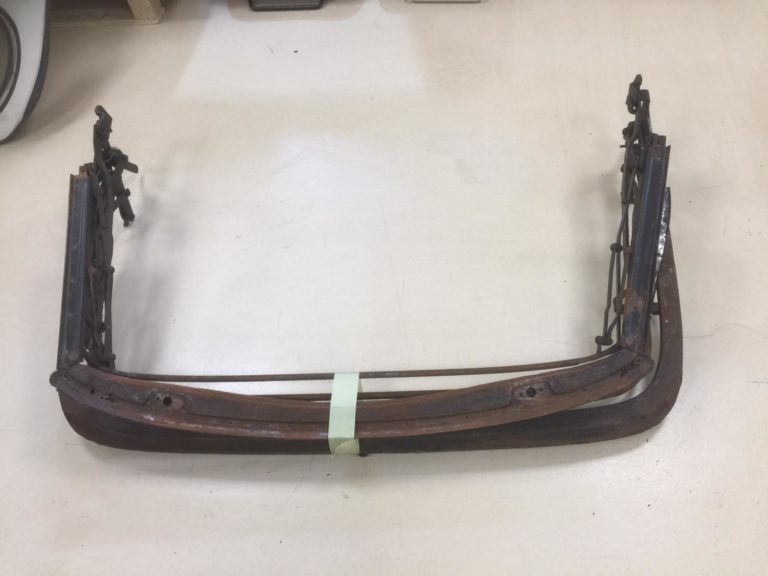
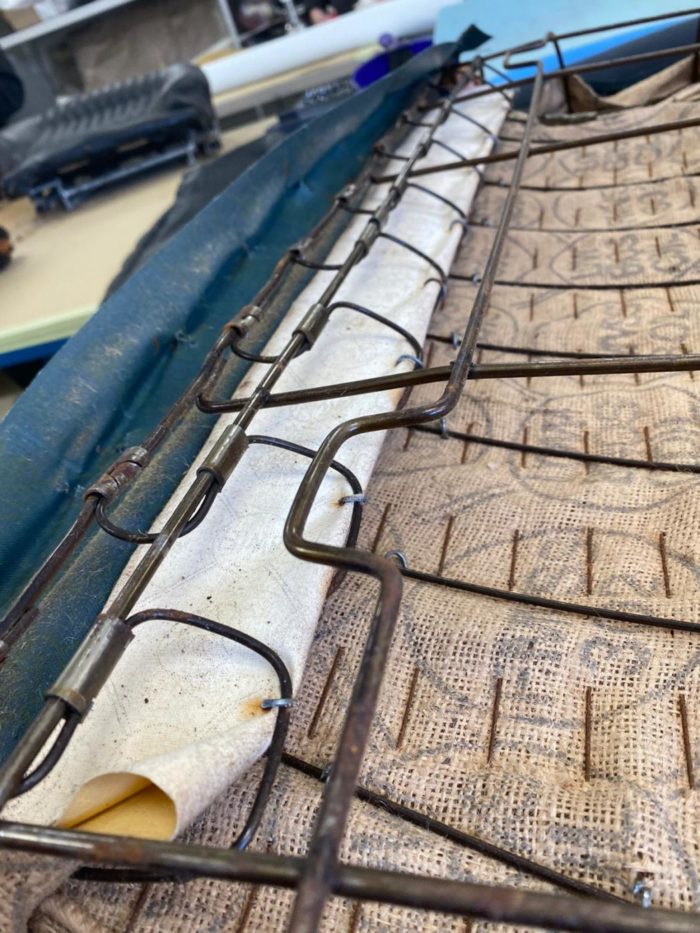
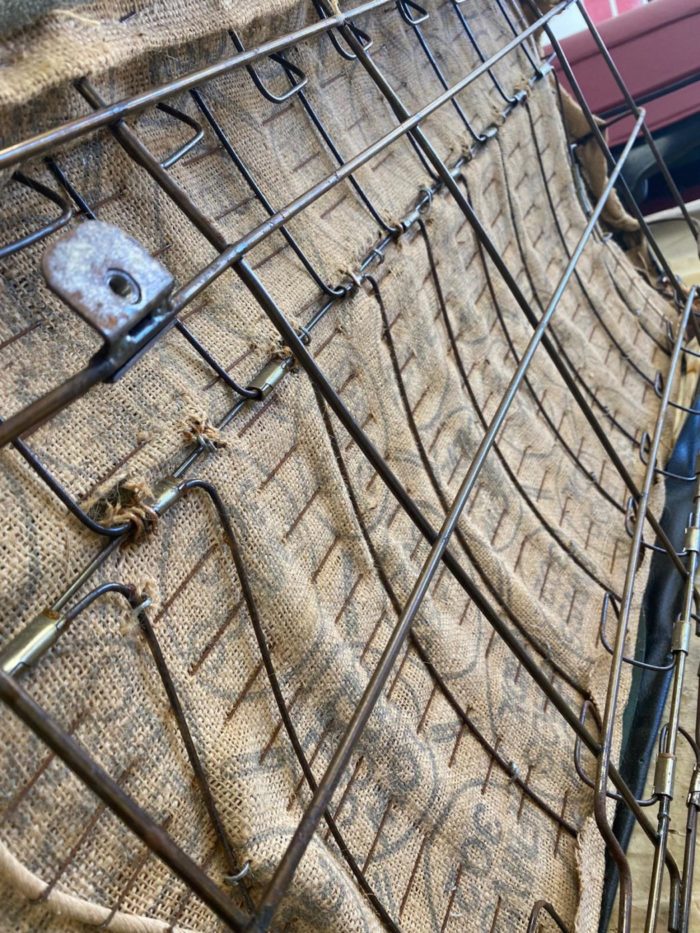
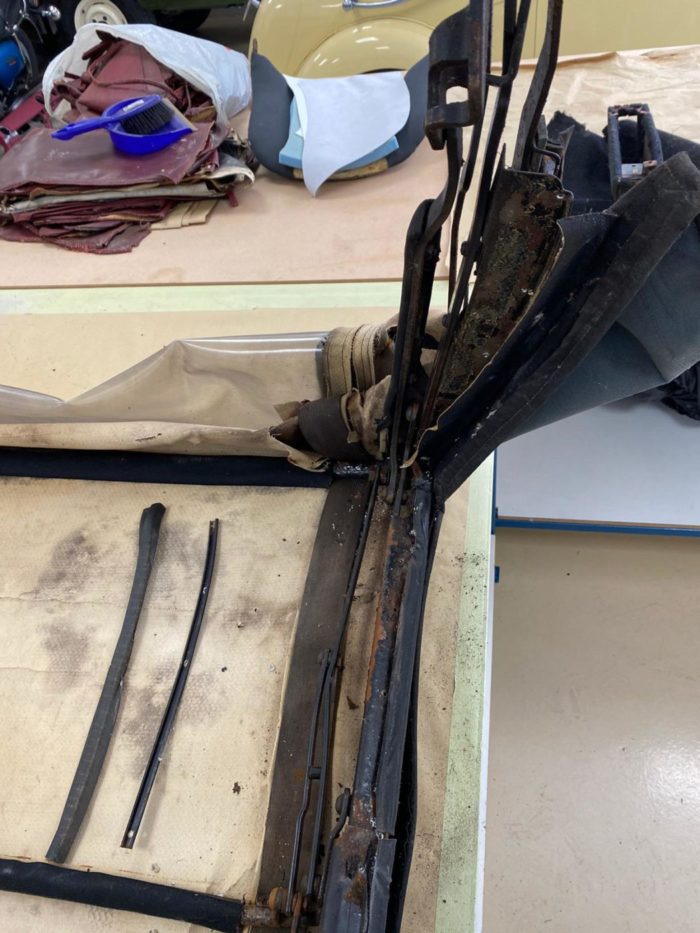
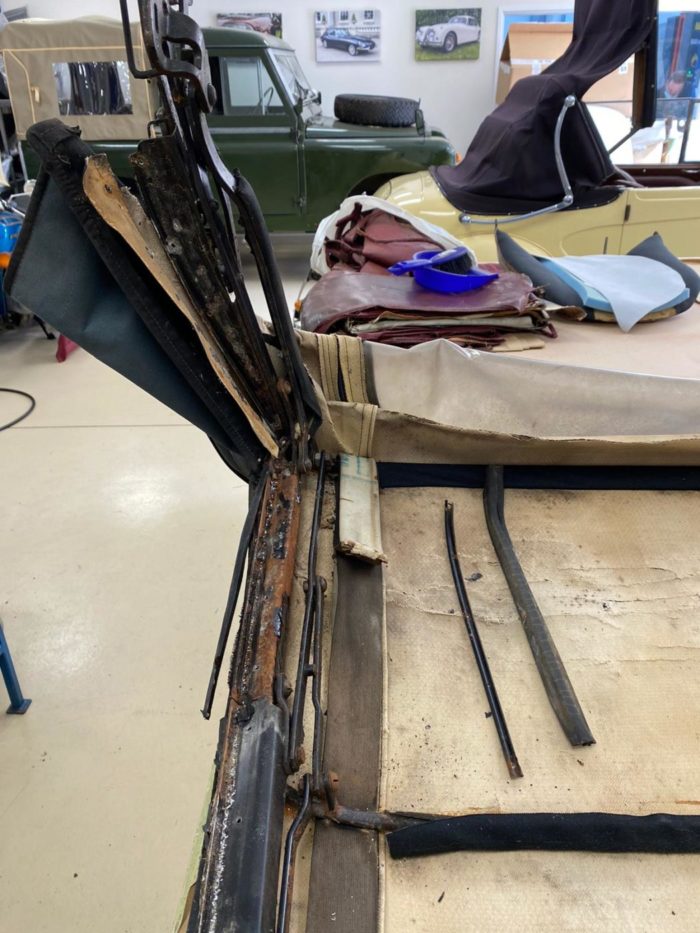
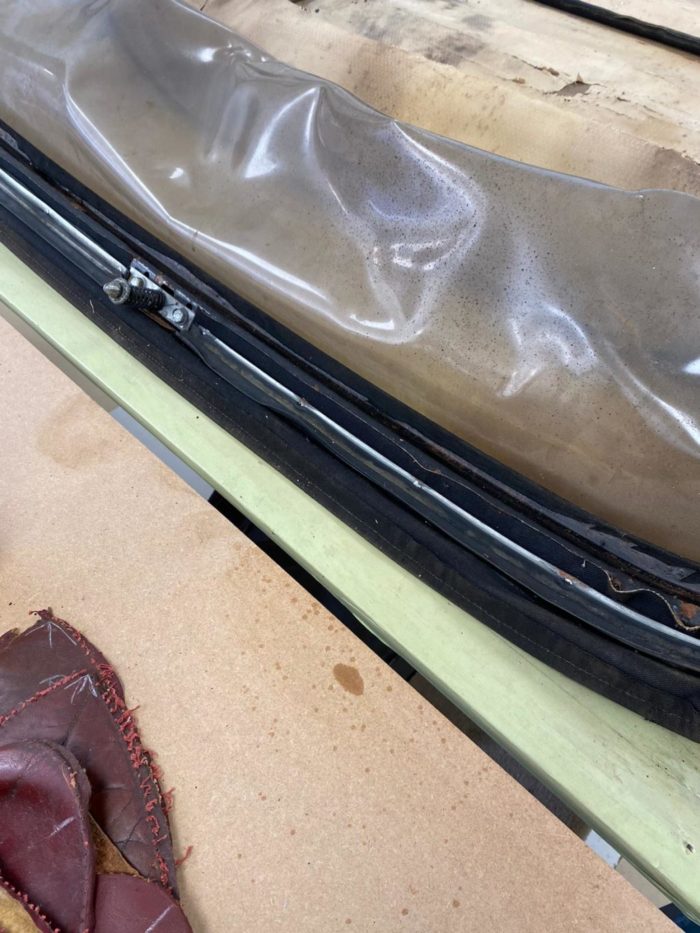
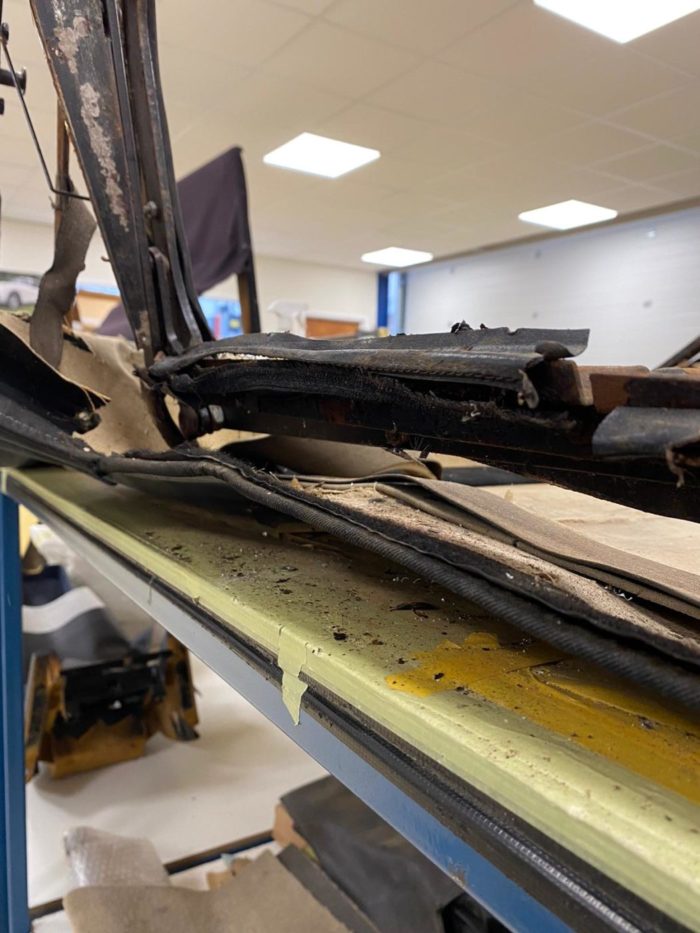
Our 1973 Triumph Stag has had its hood frame removed ready to be sand blasted which will allow our technicians to see what we have
Some months ago a well used and much loved Nissan patrol came in for a cosmetic respray and although we tried to purchase new bumpers
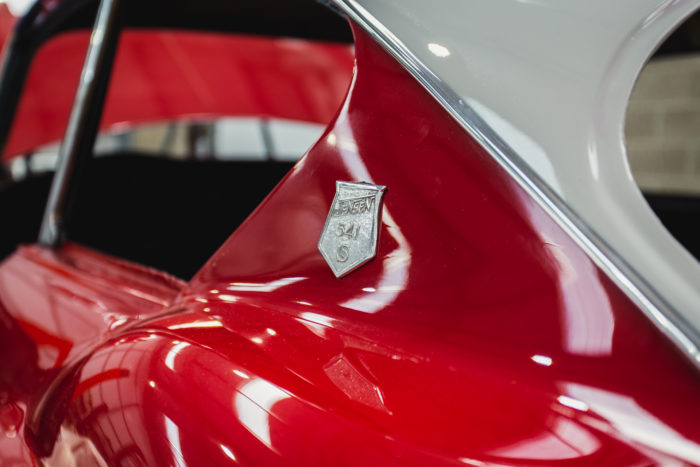
Our stunning custom build Peony Red Jensen is really taking shape now. Thanks to the continuous hard work from our skilled classic car technicians, this

Our classic 1957 Jensen had it’s test drive today and came back with the all clear. John just wants to bleed the brakes and clutch
Last night our marketing team and visual gurus, Ellie and Freddie headed over to Bentwaters to shoot some photos and videos with Charlotte. The overcast

Our lovely 1974 Beetle has come in for some TLC. We’ve fitted new wheel cylinders and bled the brakes as well as stripping the brakes

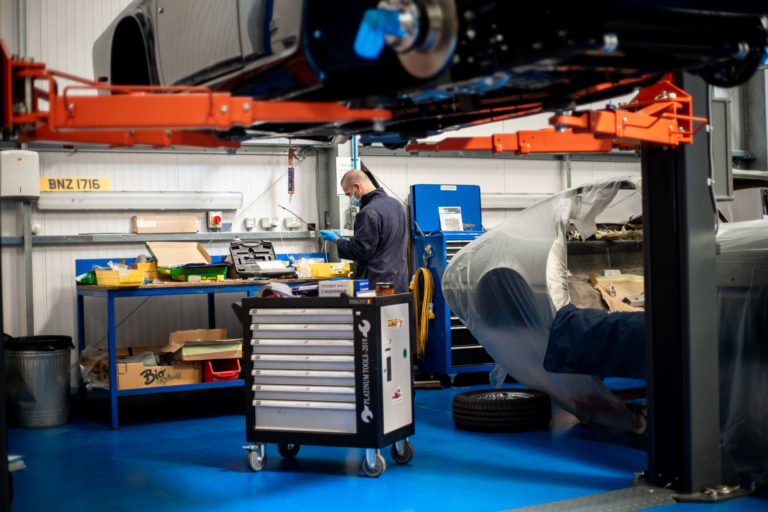
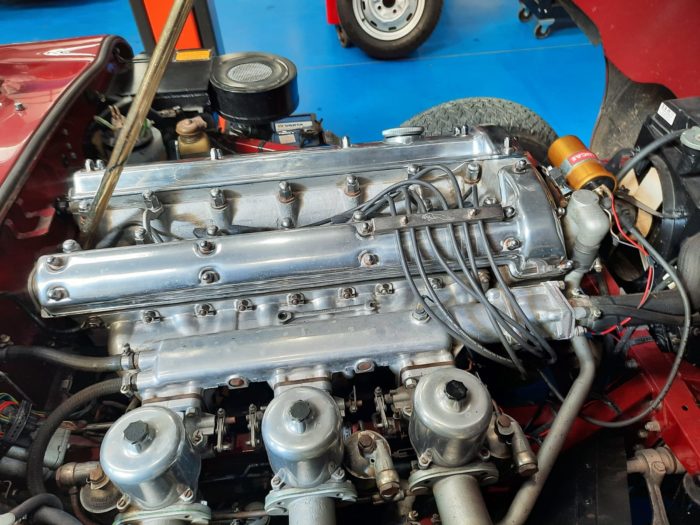
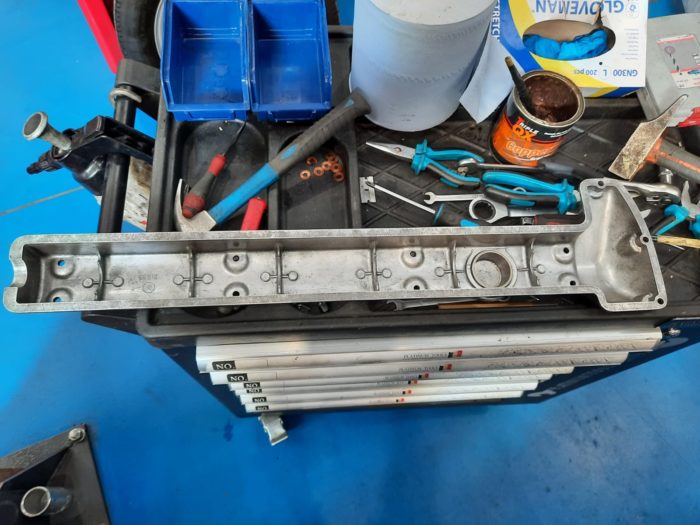
Ady has almost completed fitting the engine back together after its full re-build, part of which was done here and part of which was done

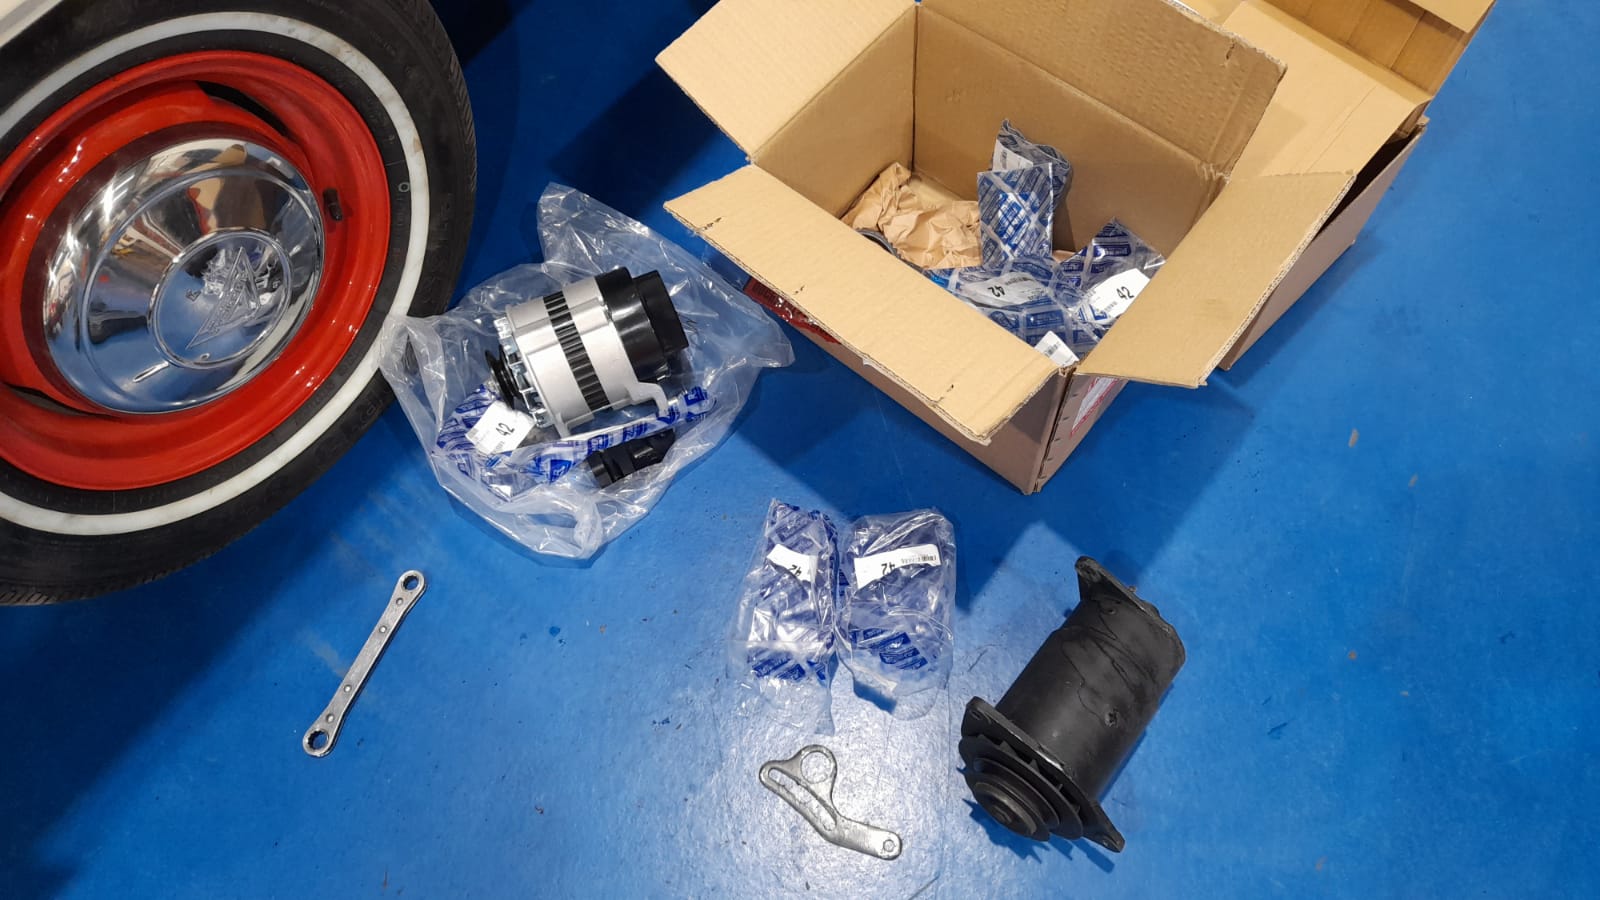
Scott has been working on the engine of the Amphicar, converting the dynamo to an alternator to make the charge more reliable. Scott has also
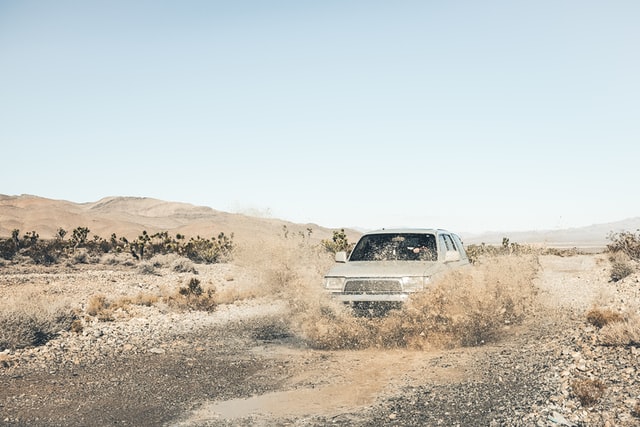
All women driven off-roading race, Rebelle Rally, is an intense 8 day feat of endurance and speed across America’s most unforgiving landscapes from Nevada to

Our lovely 1957 Grey Jensen 541R/S now has its new speedo fitted into the dash. It’s also had its steering centralised. John is now going

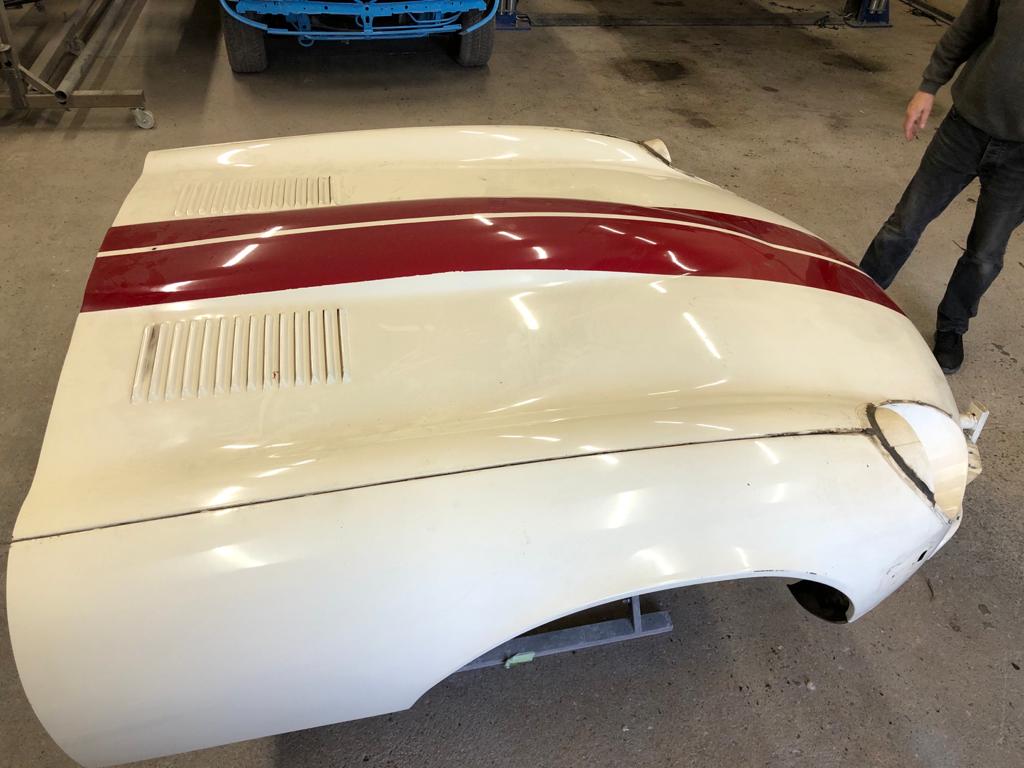
Our classic Jaguar MKVII has recieved its first layer of paint. Chris and Matt spent the morning masking the body up in preparation for paint.

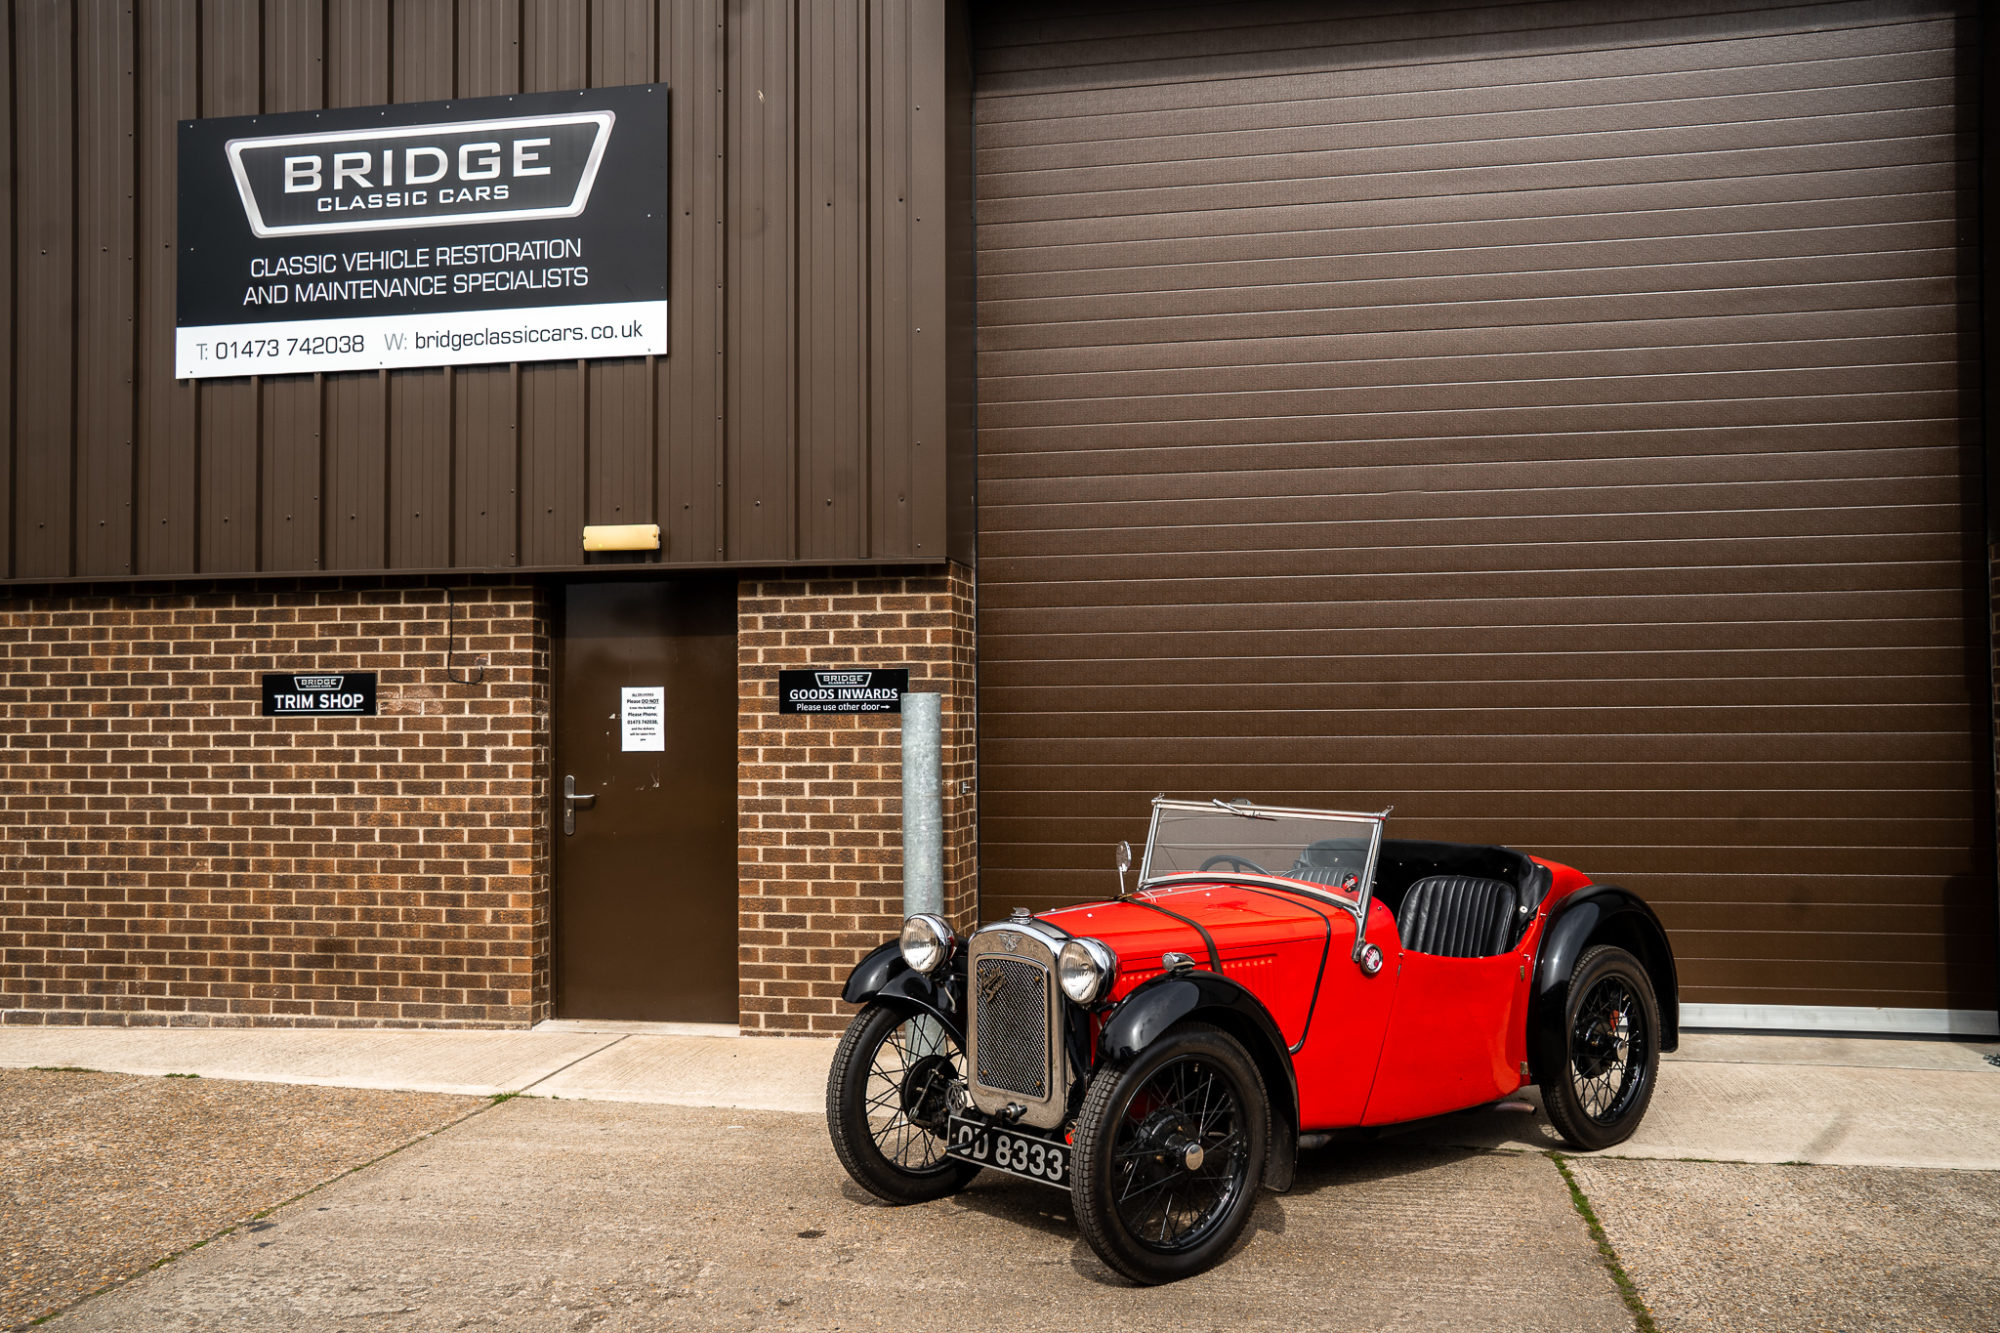
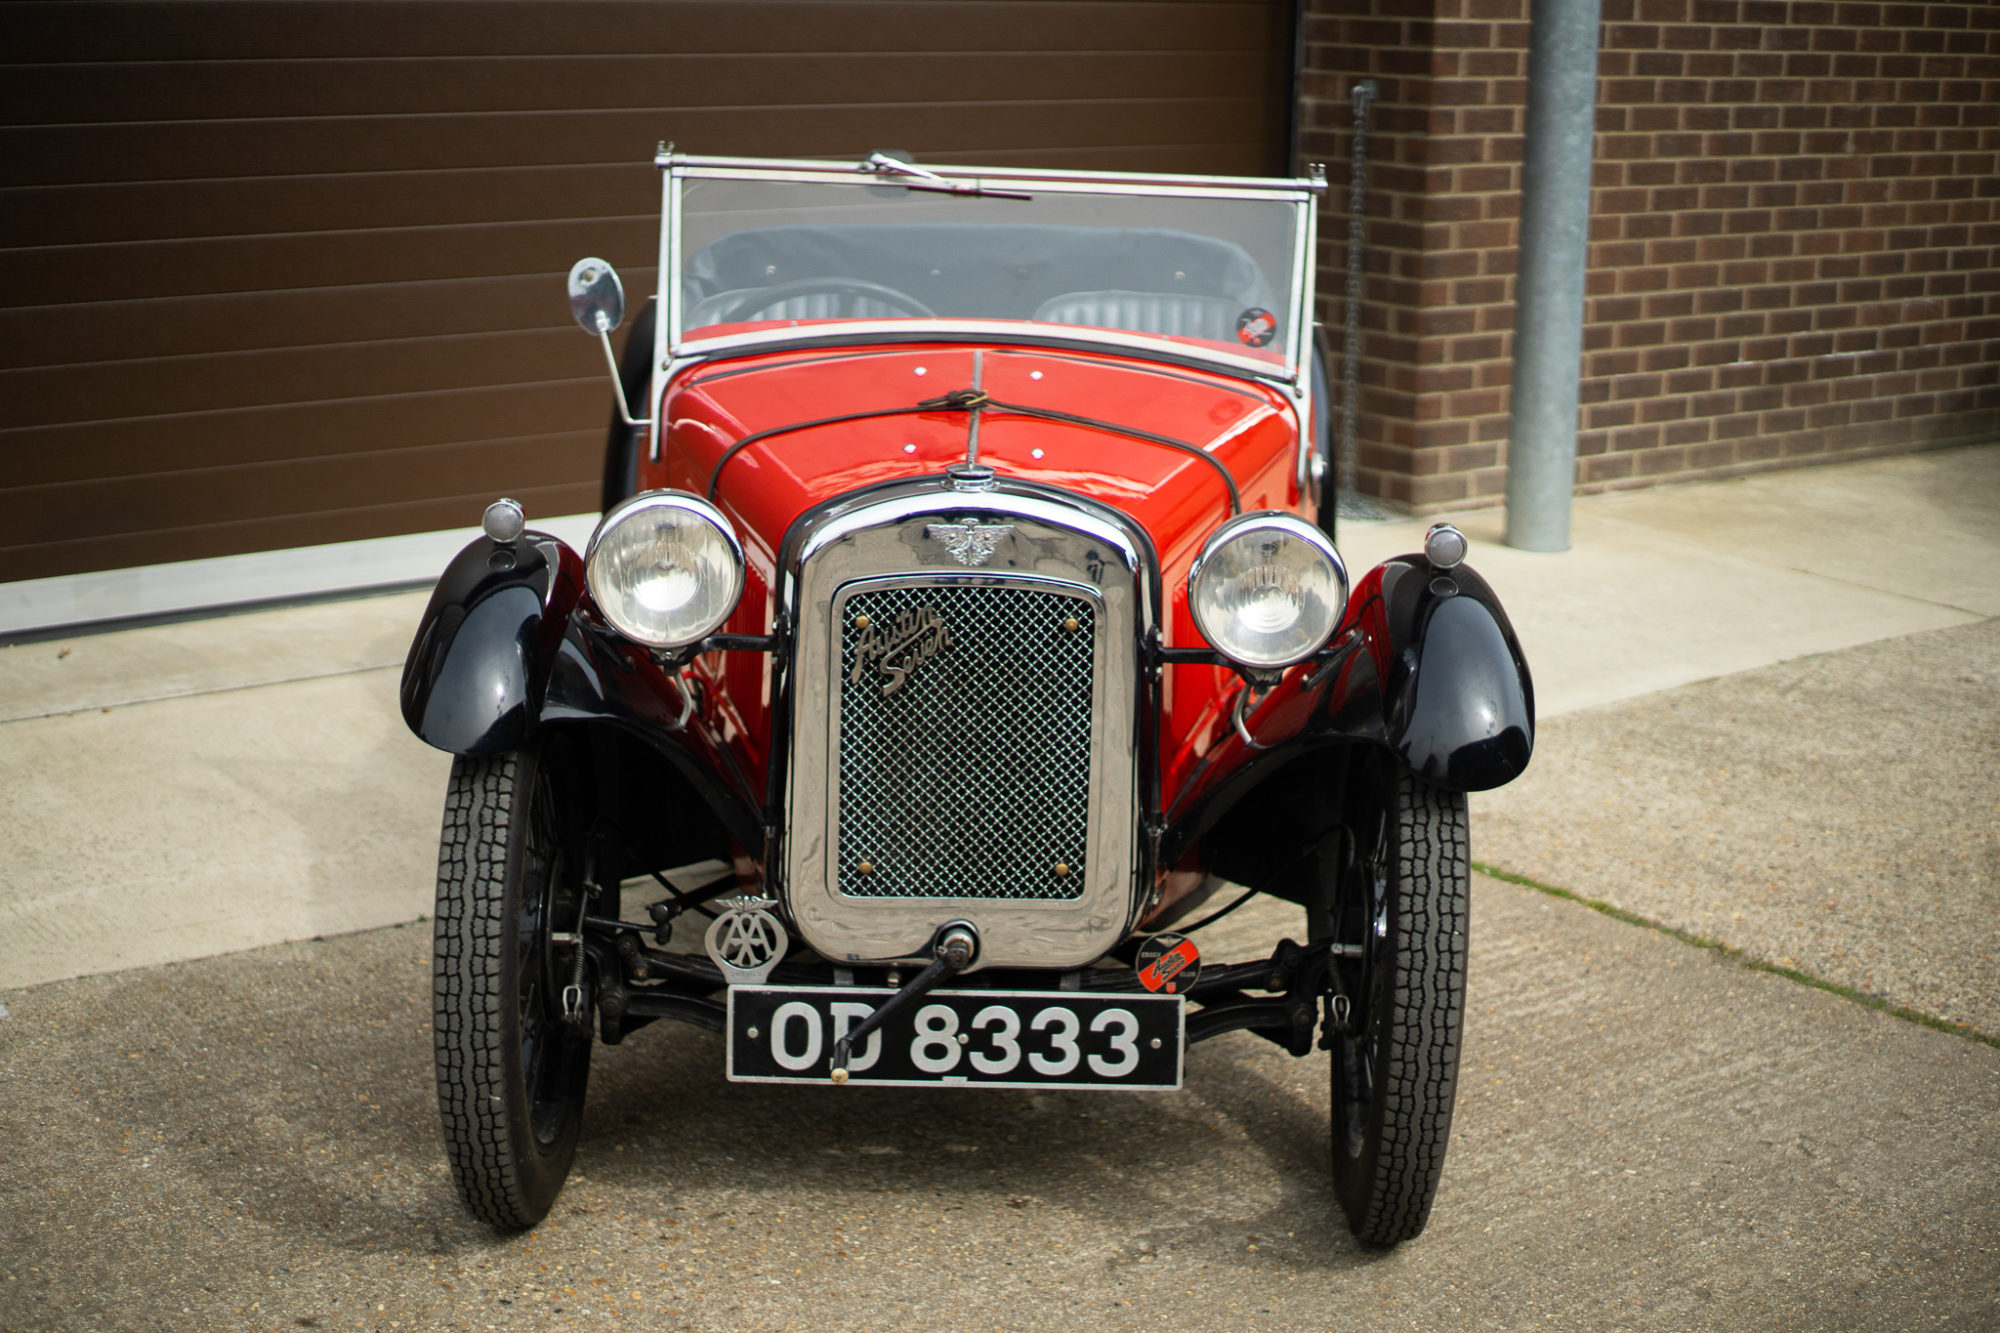
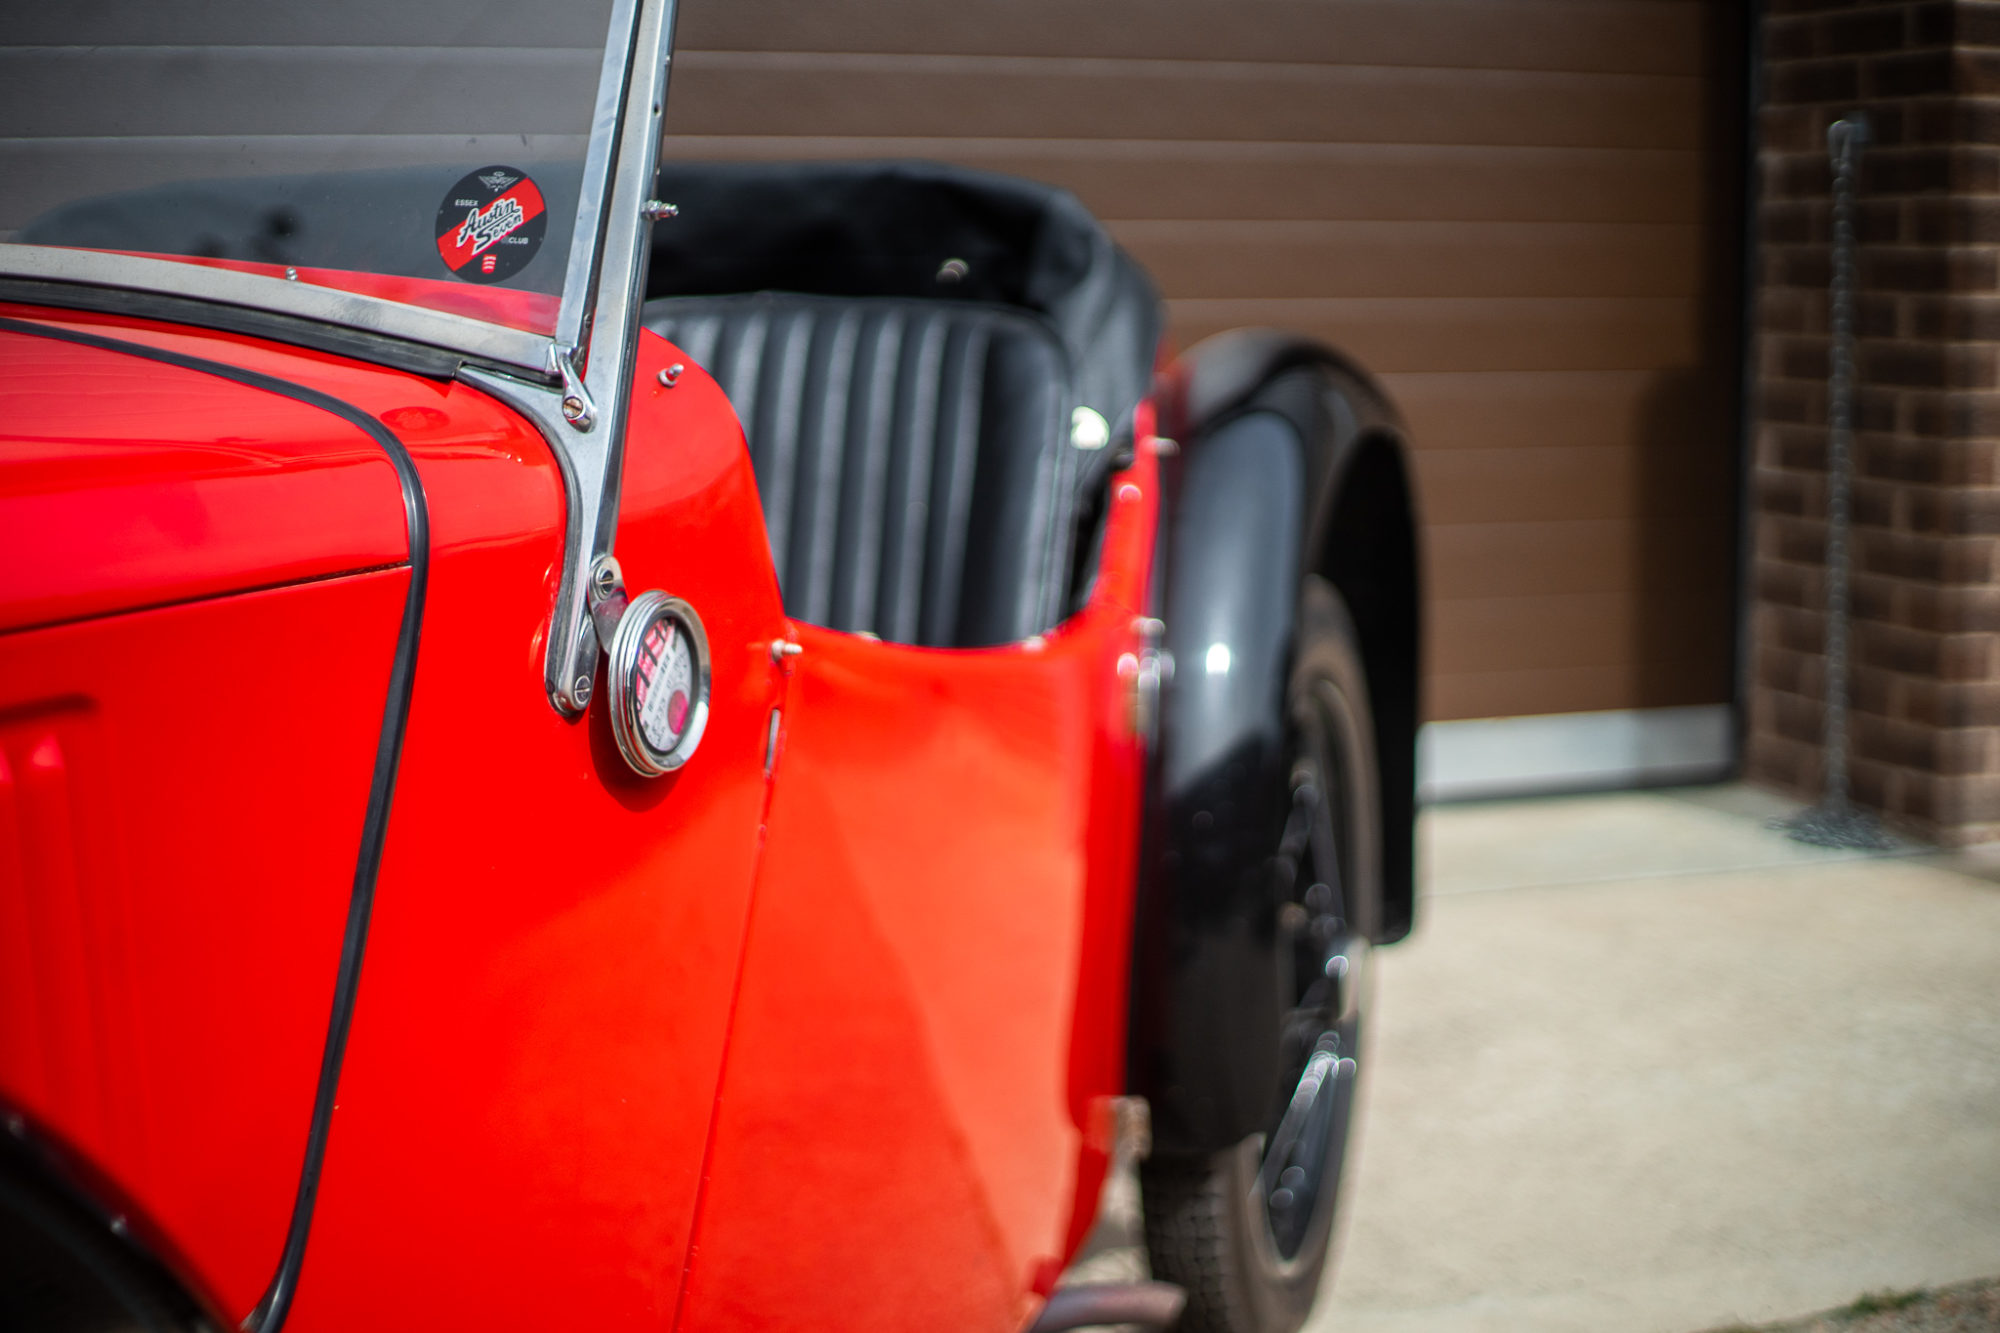
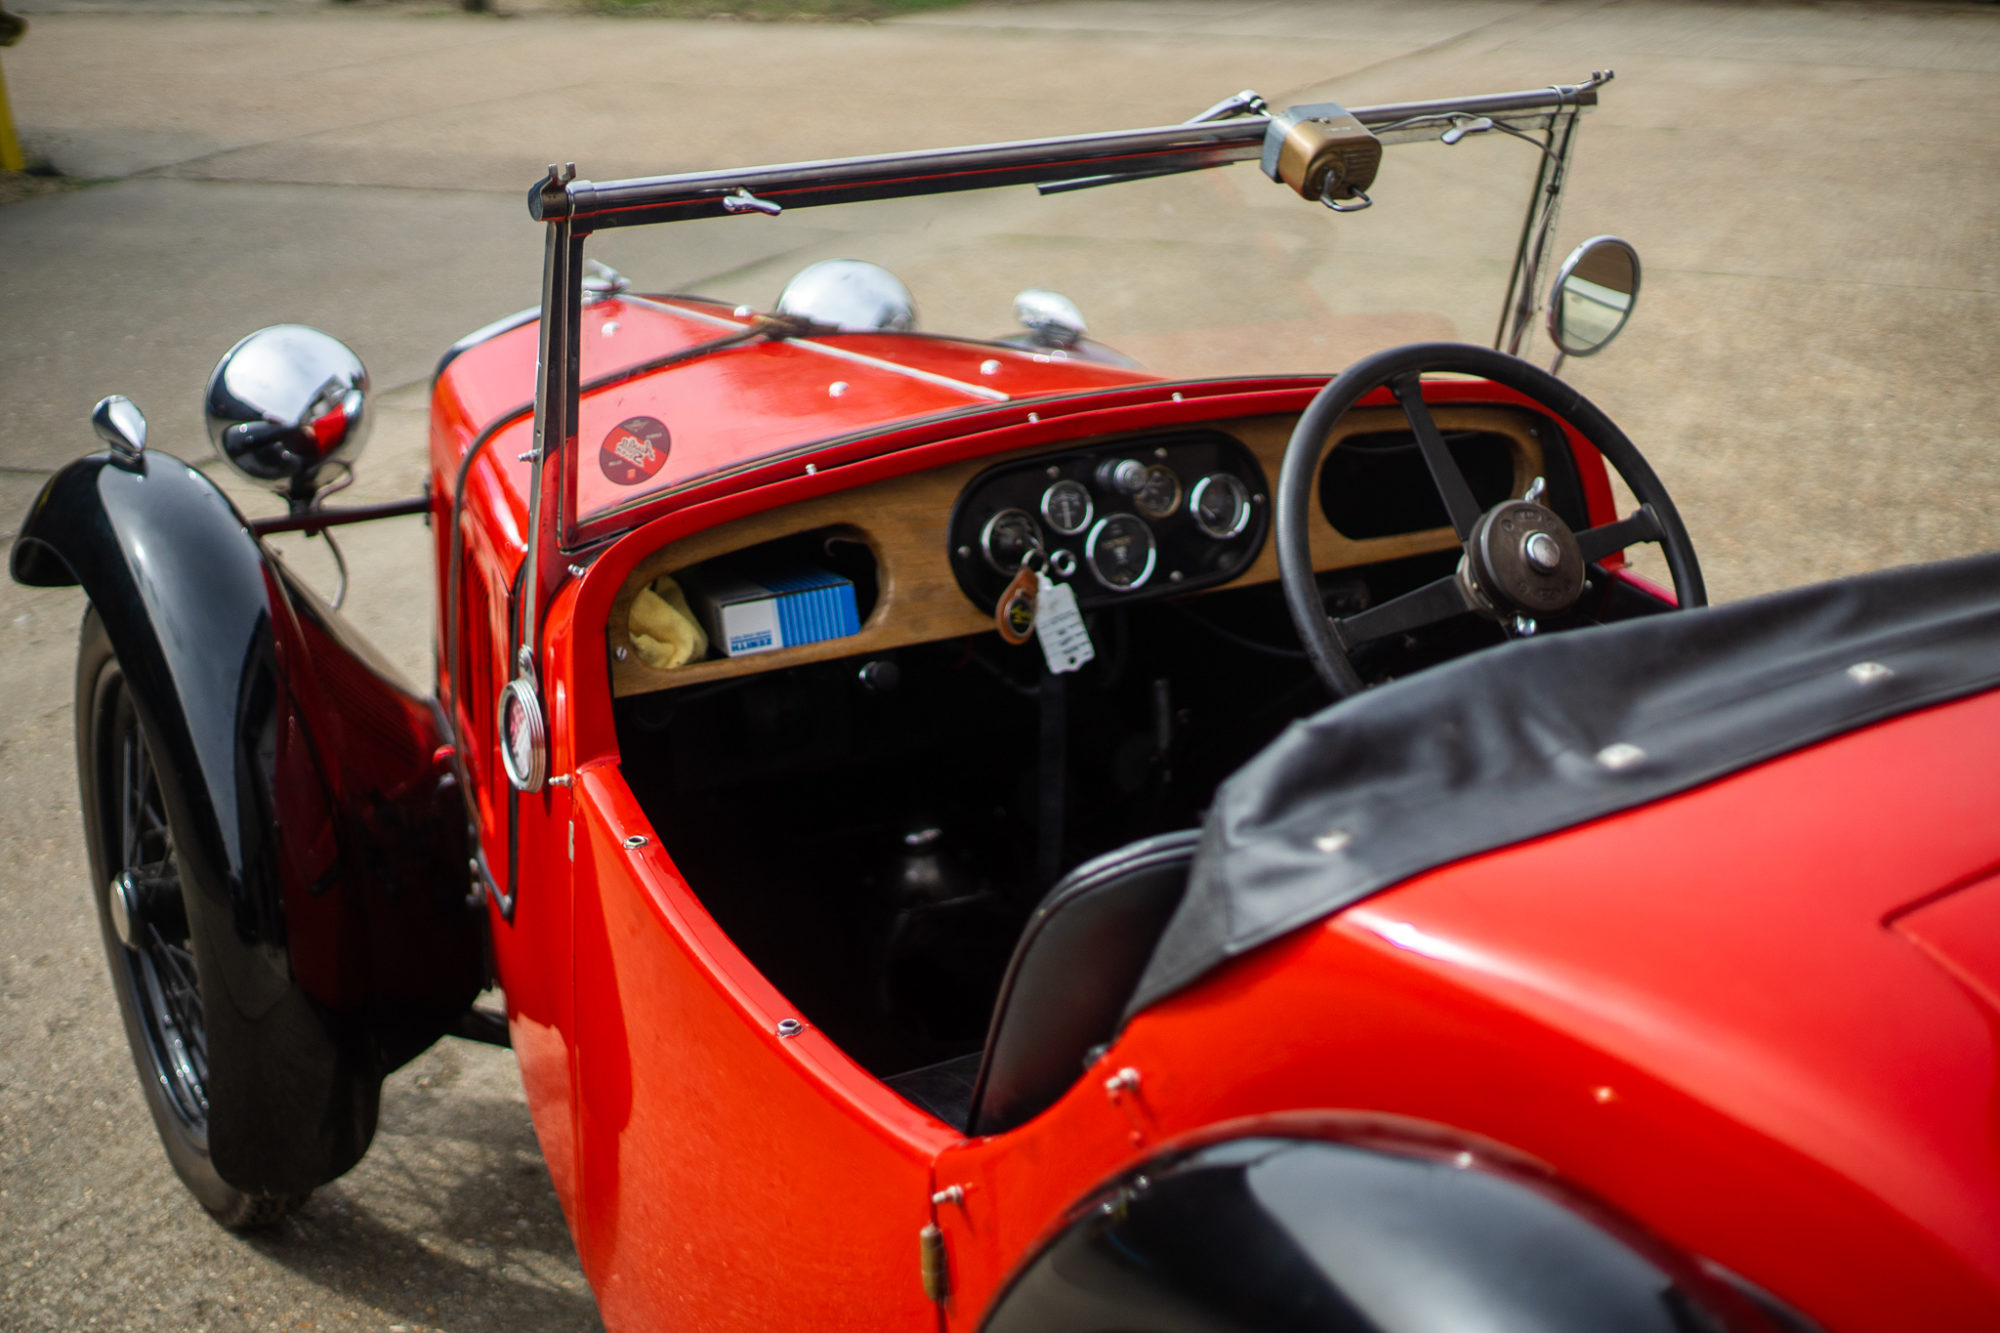
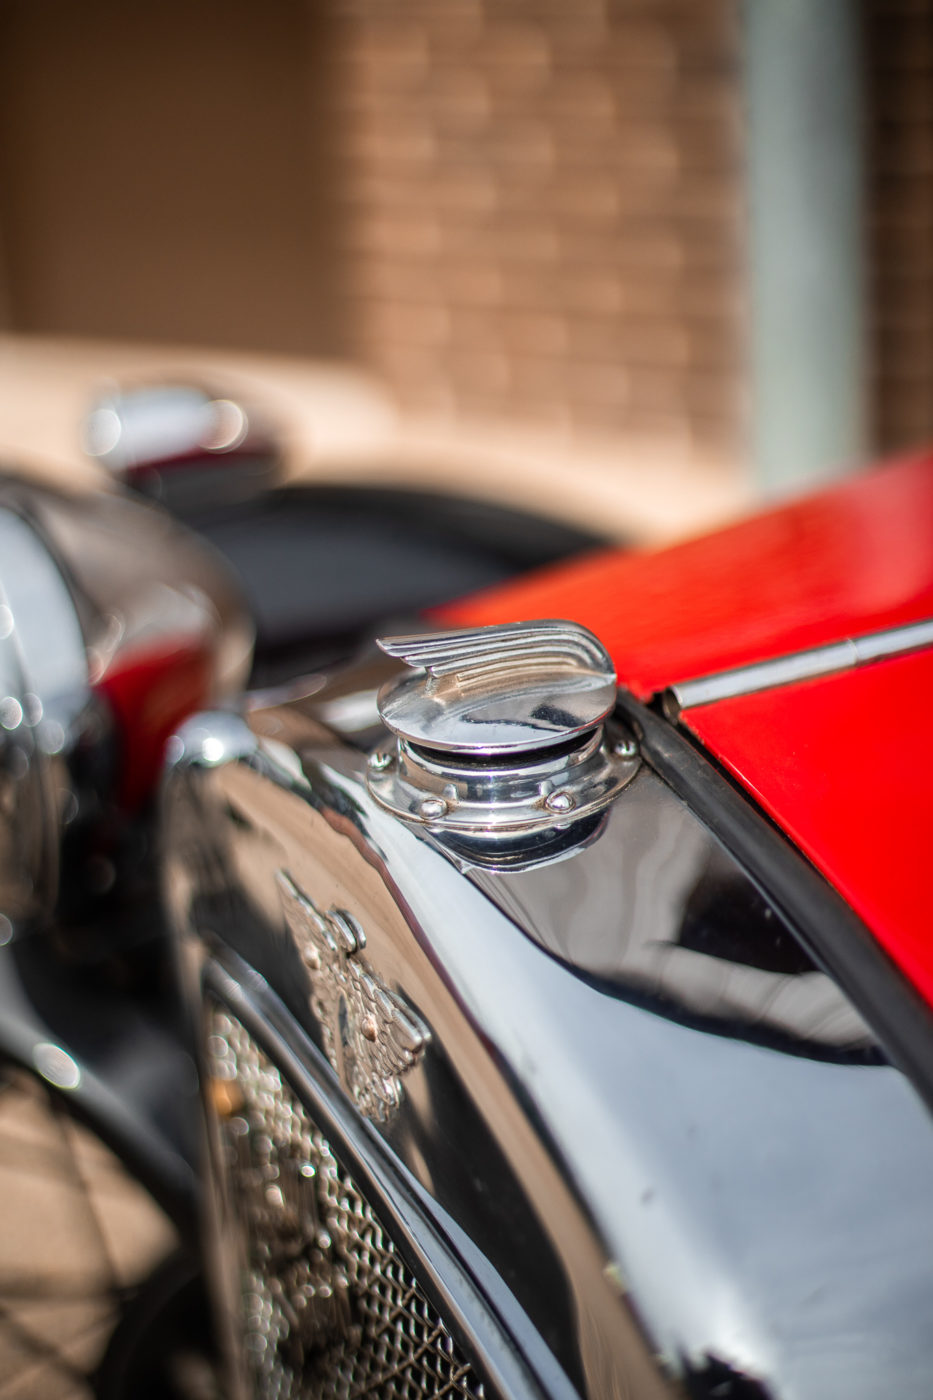
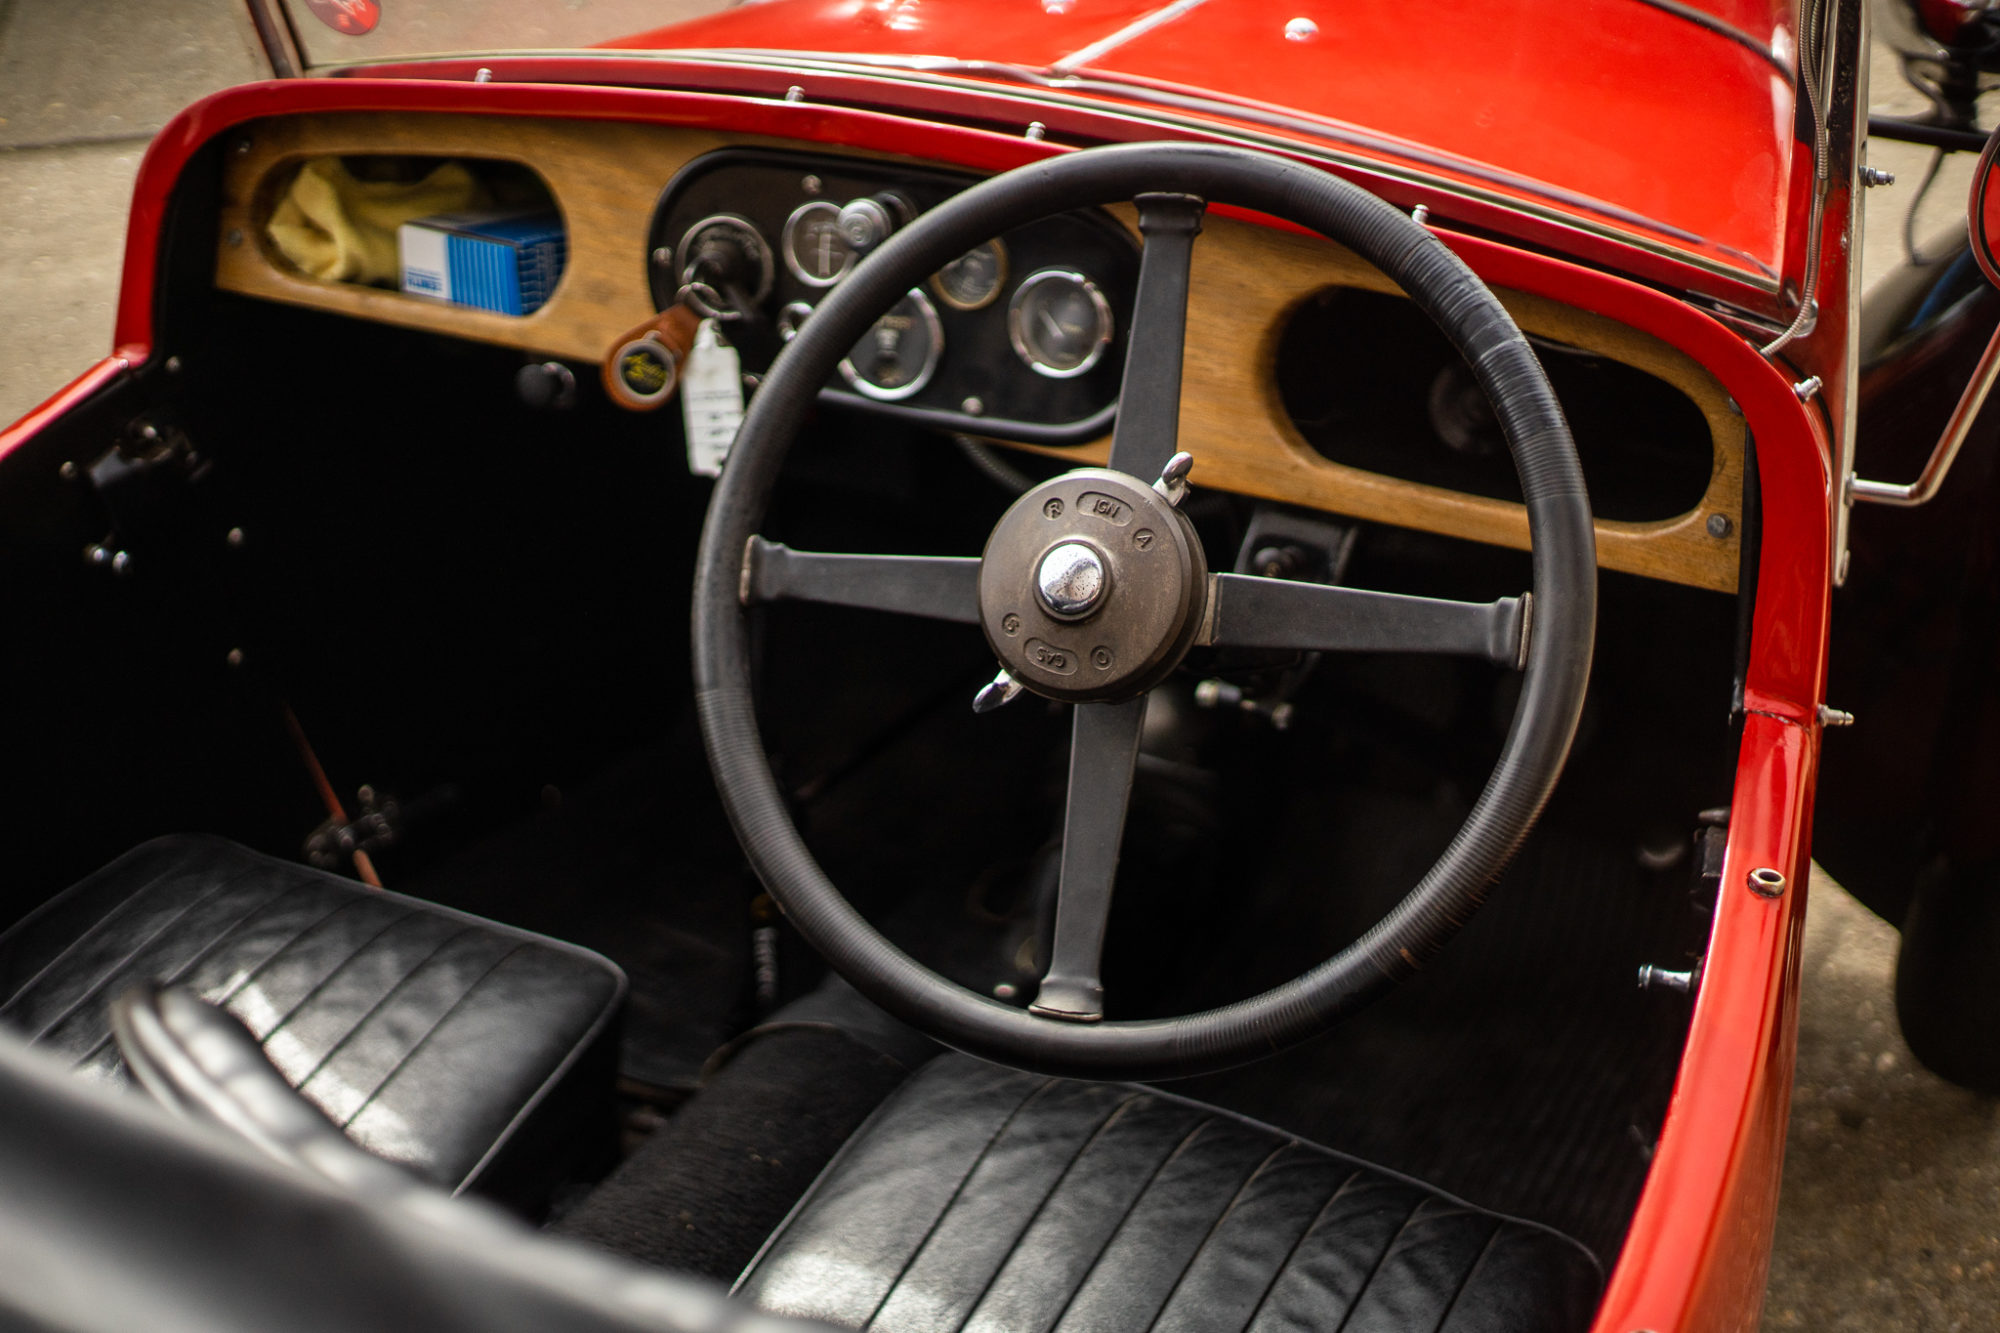
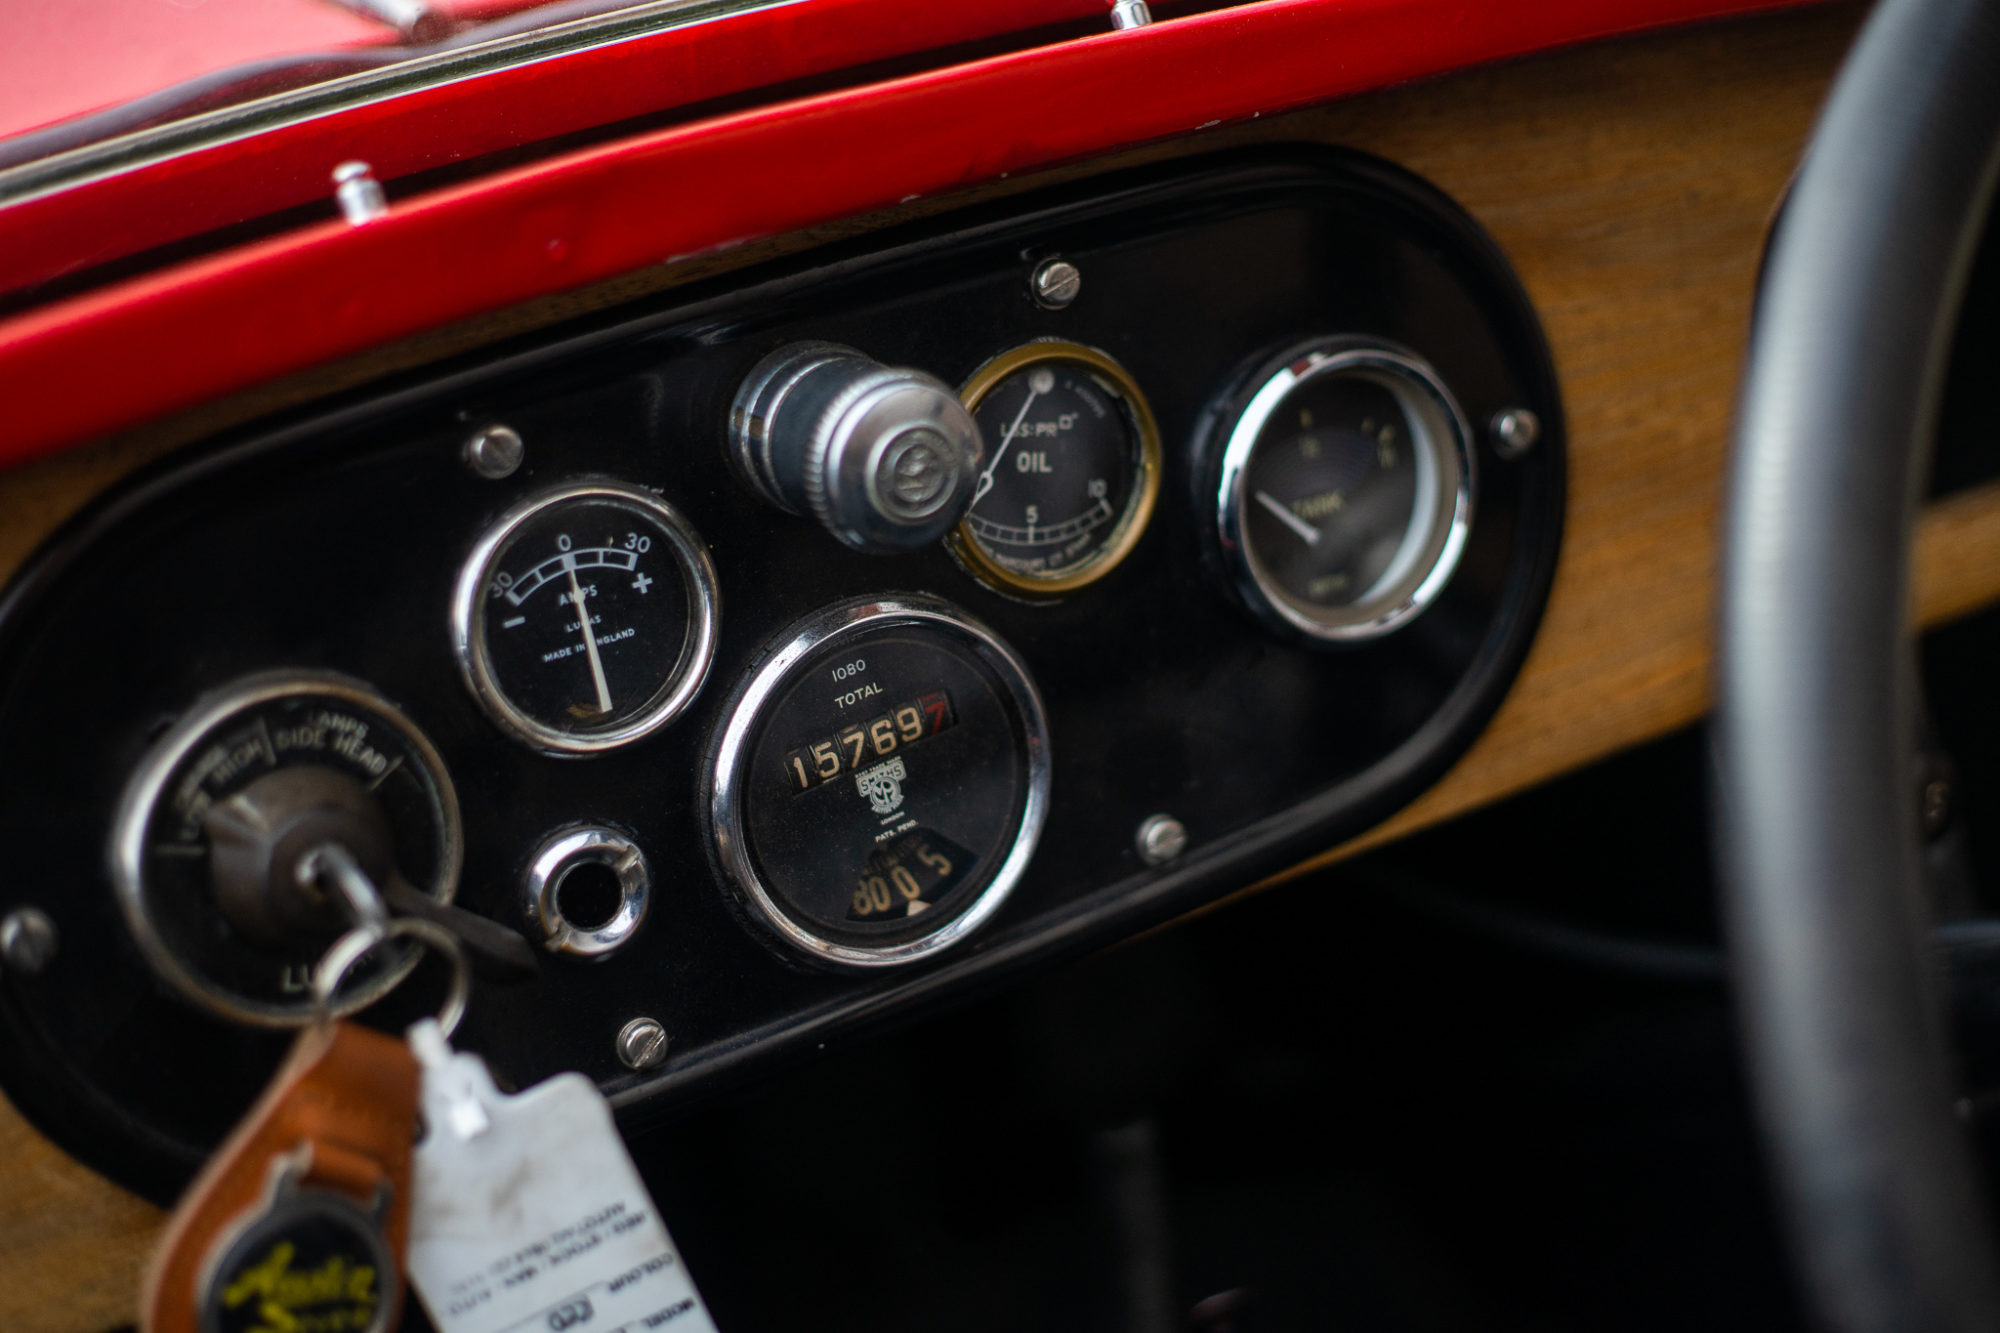
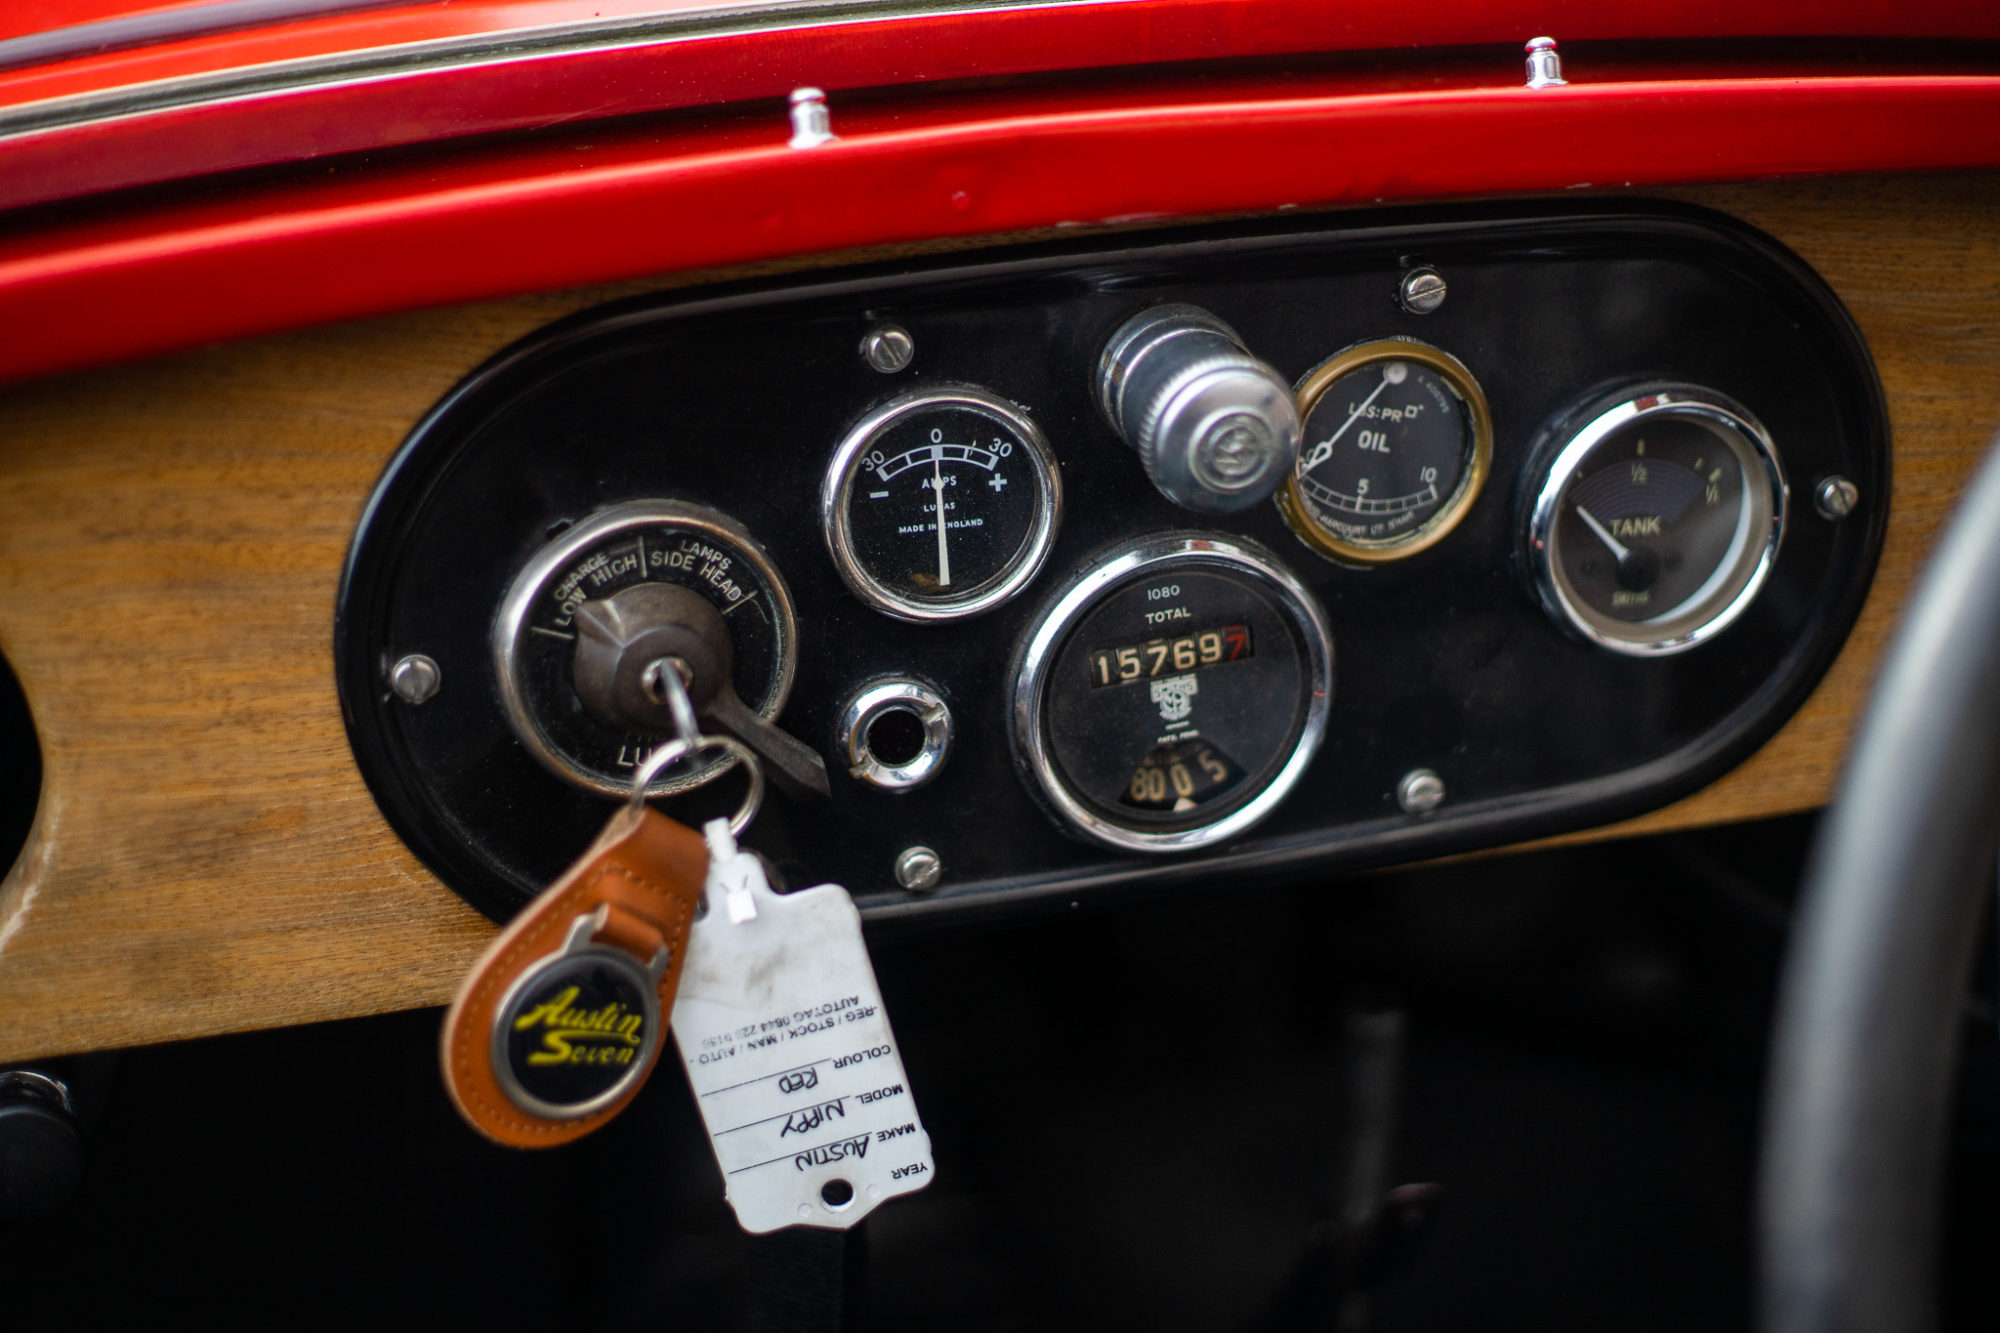
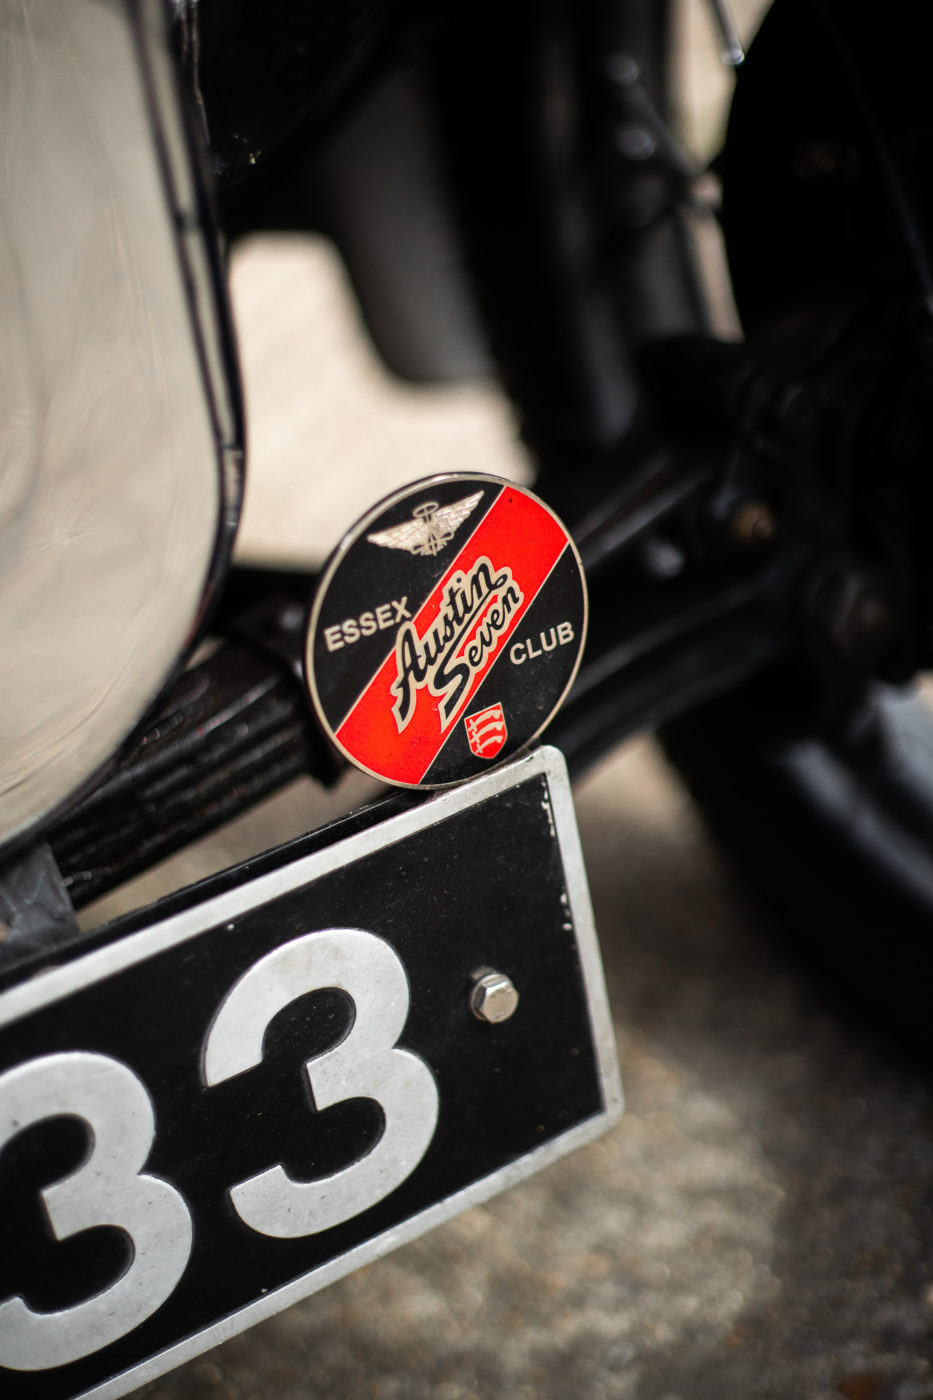
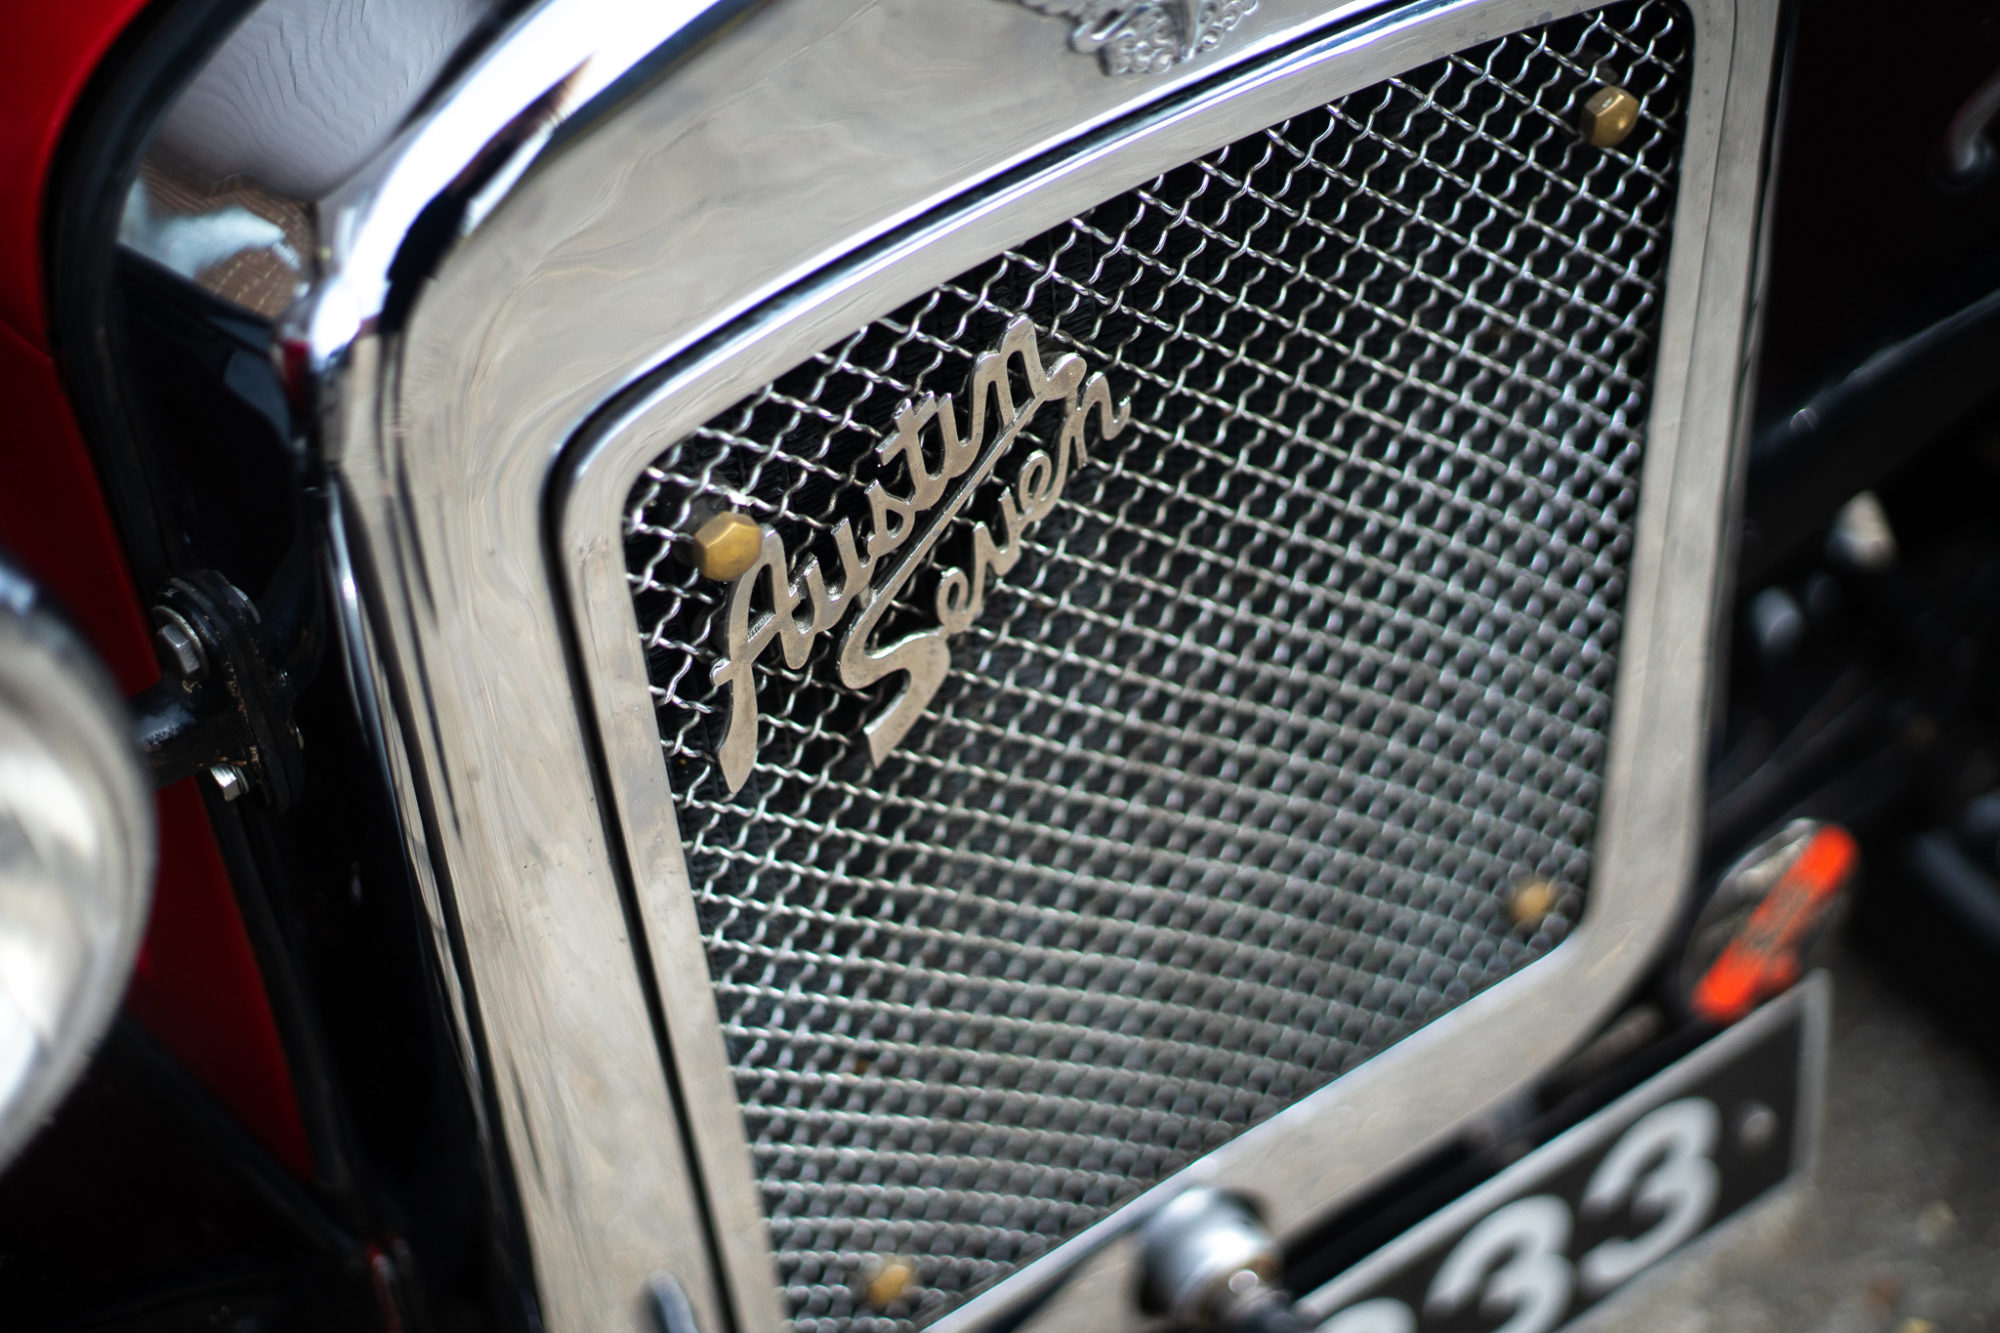
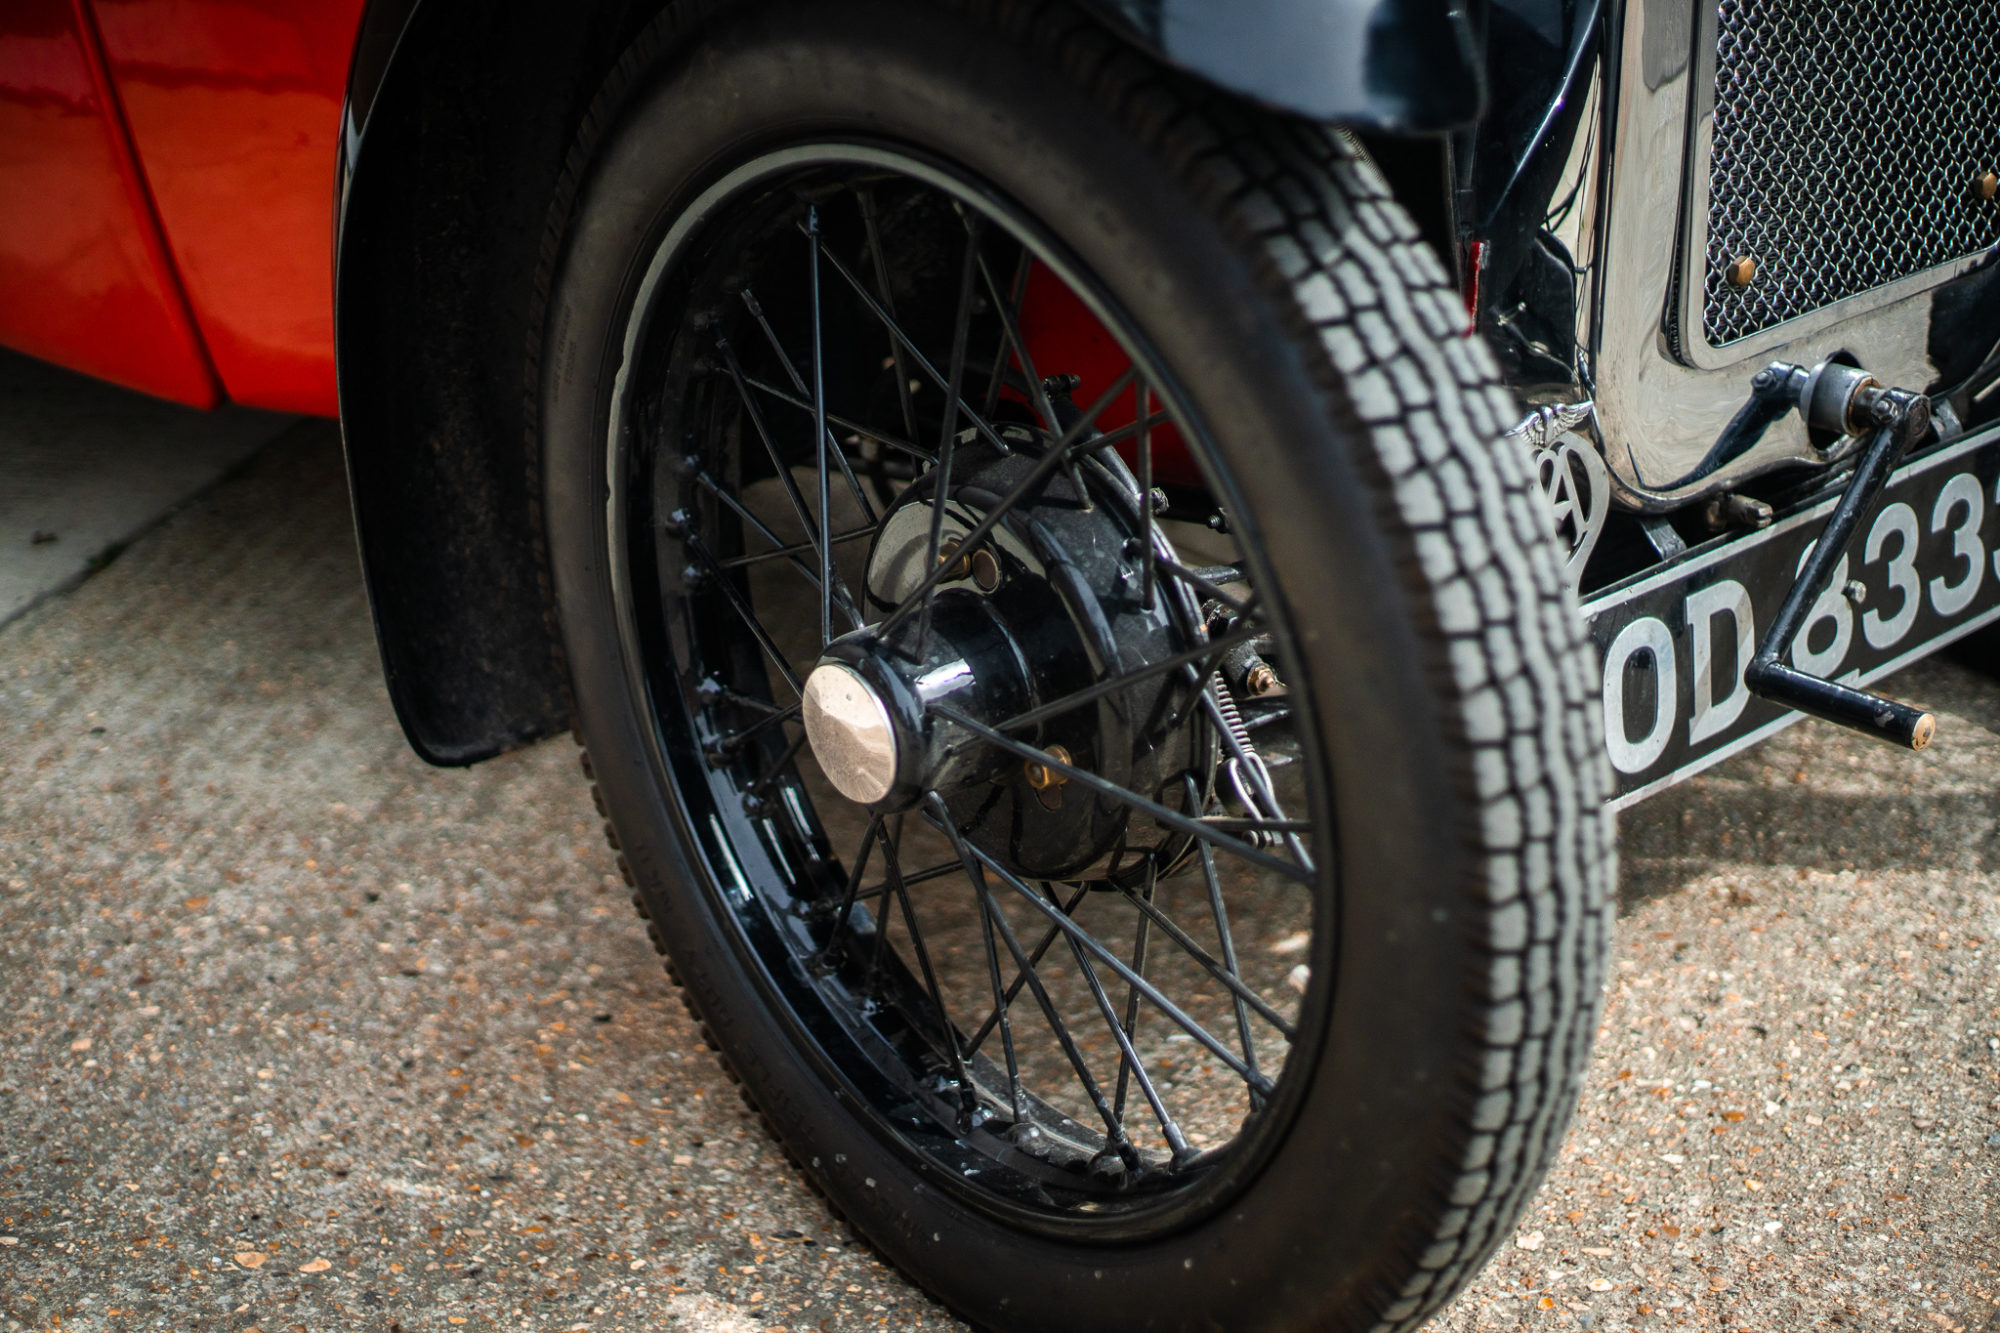
Our 1934 Austin Seven Nippy has been completed as of today and we’re delighted to see it up and running! Gordan and Craig took it
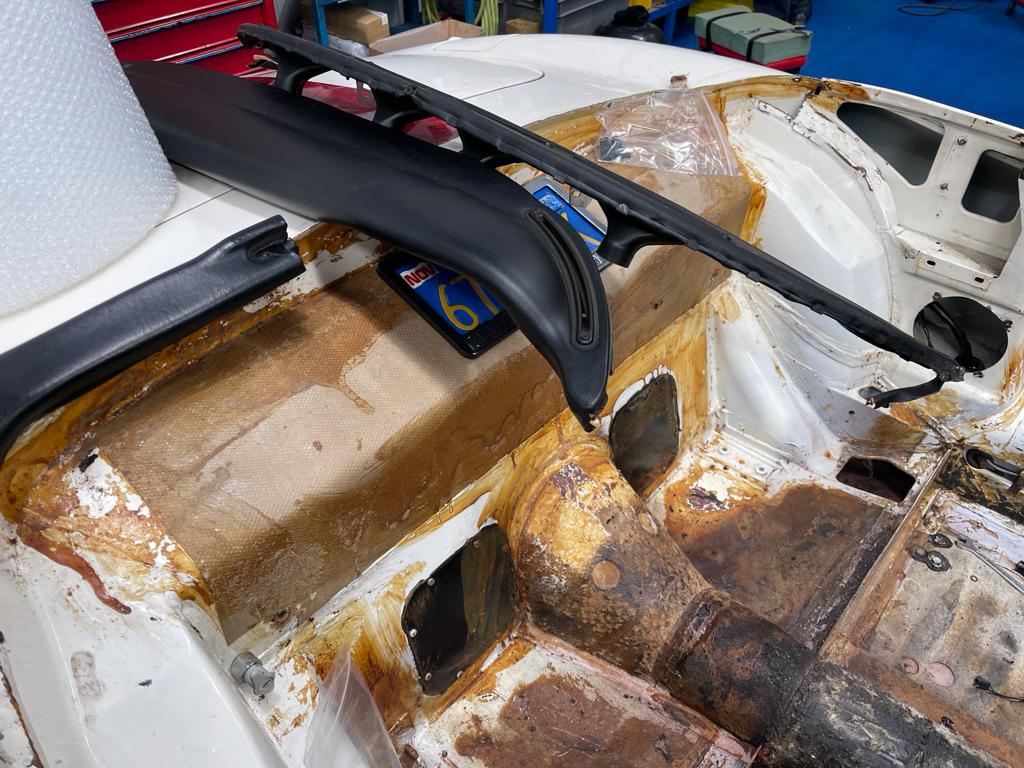
Our 1973 Blue Jaguar E-Type has had its front inner wheel hub replaced as the rings near the splines were showing serious wear from spinning
With everything finished on our 1968 Jaguar E-Type roadster, there’s one last thing to do before we send it on its way. We found a
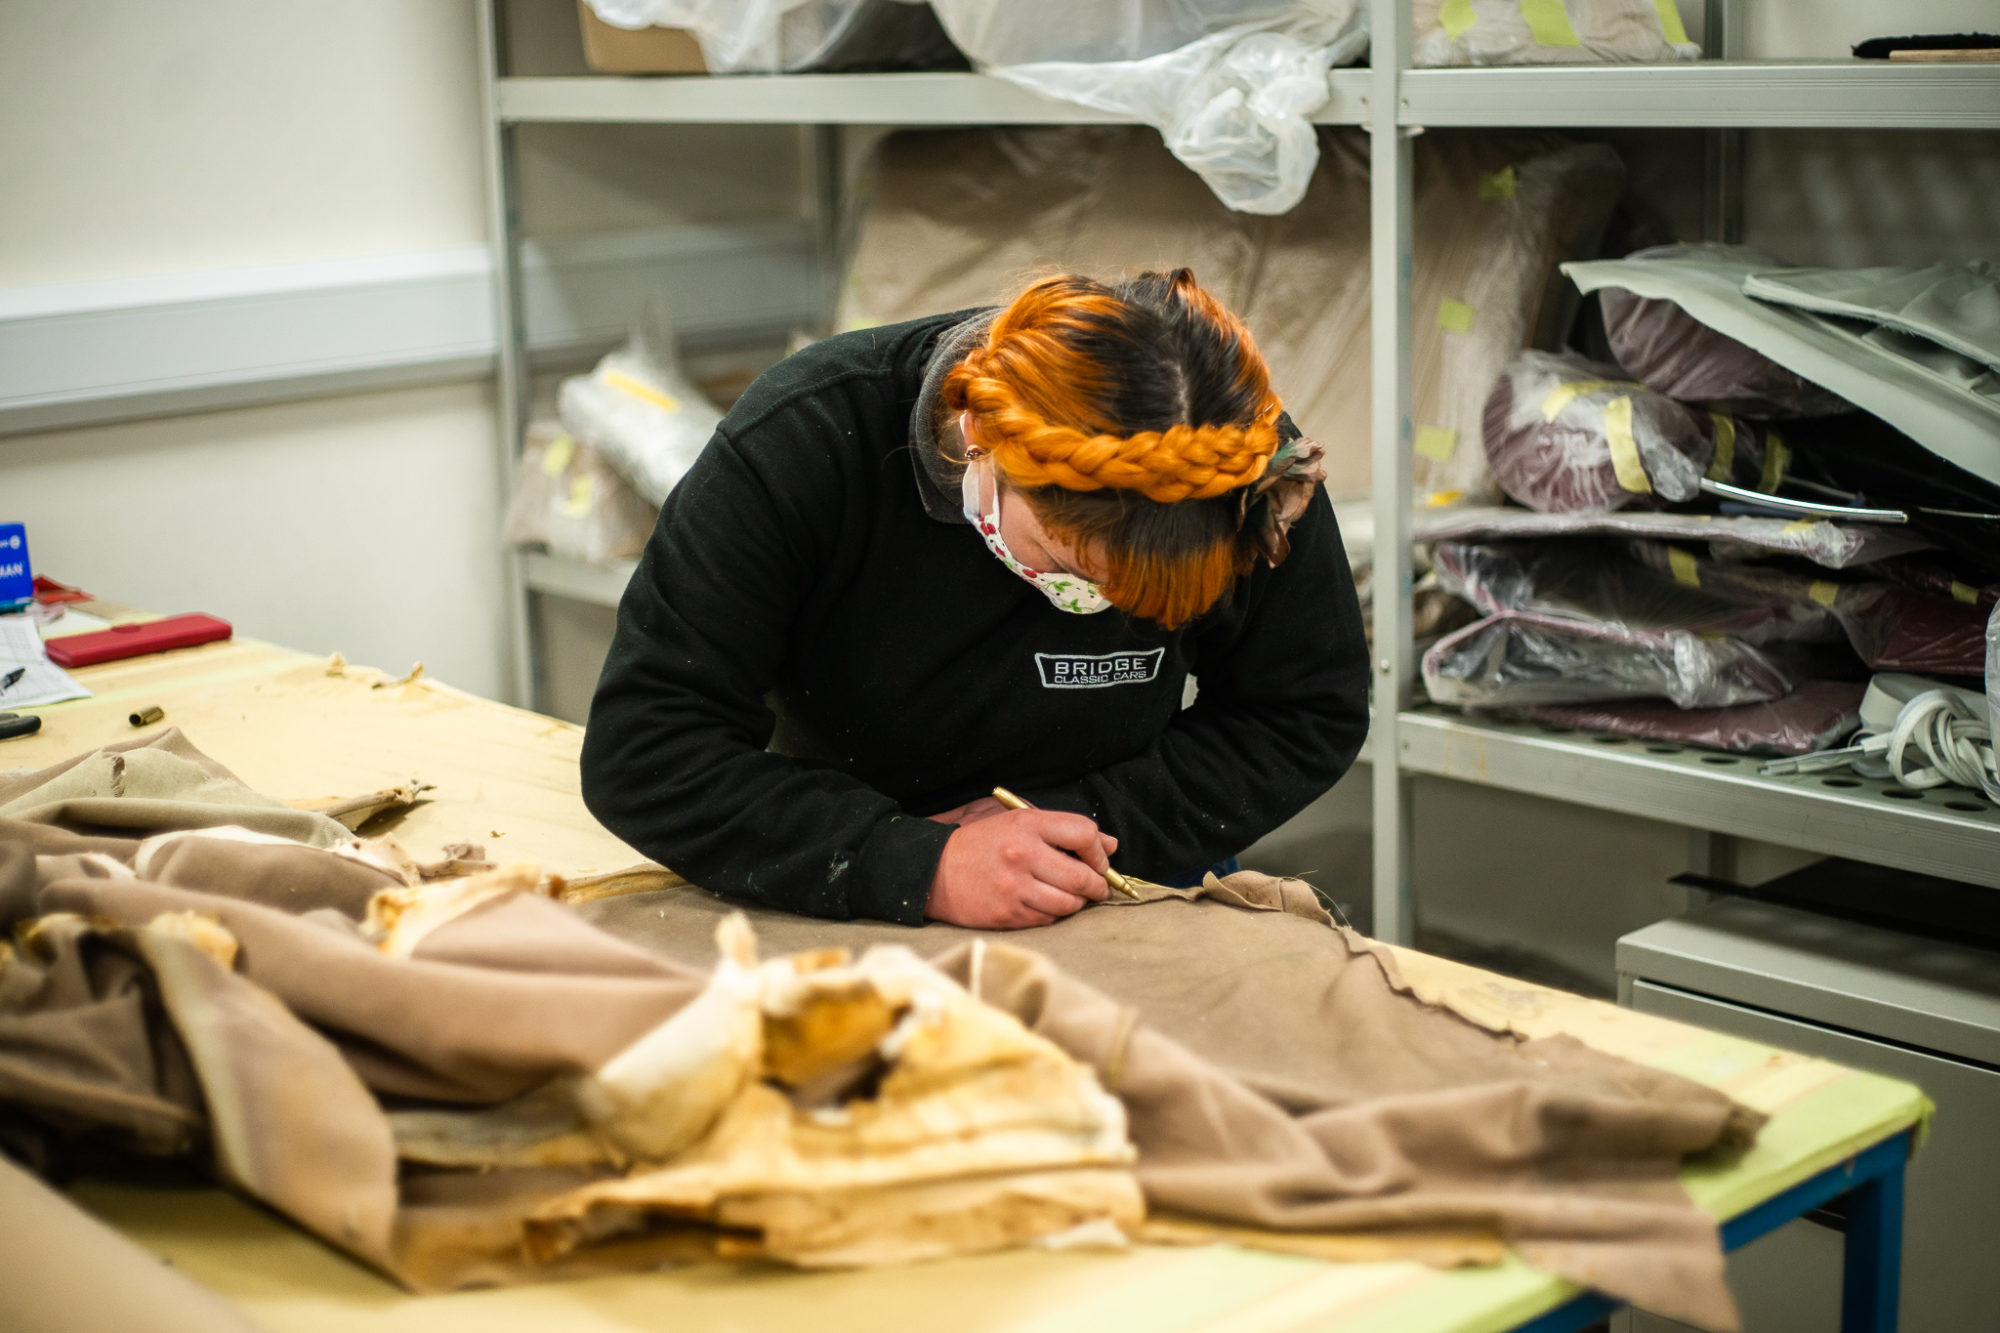
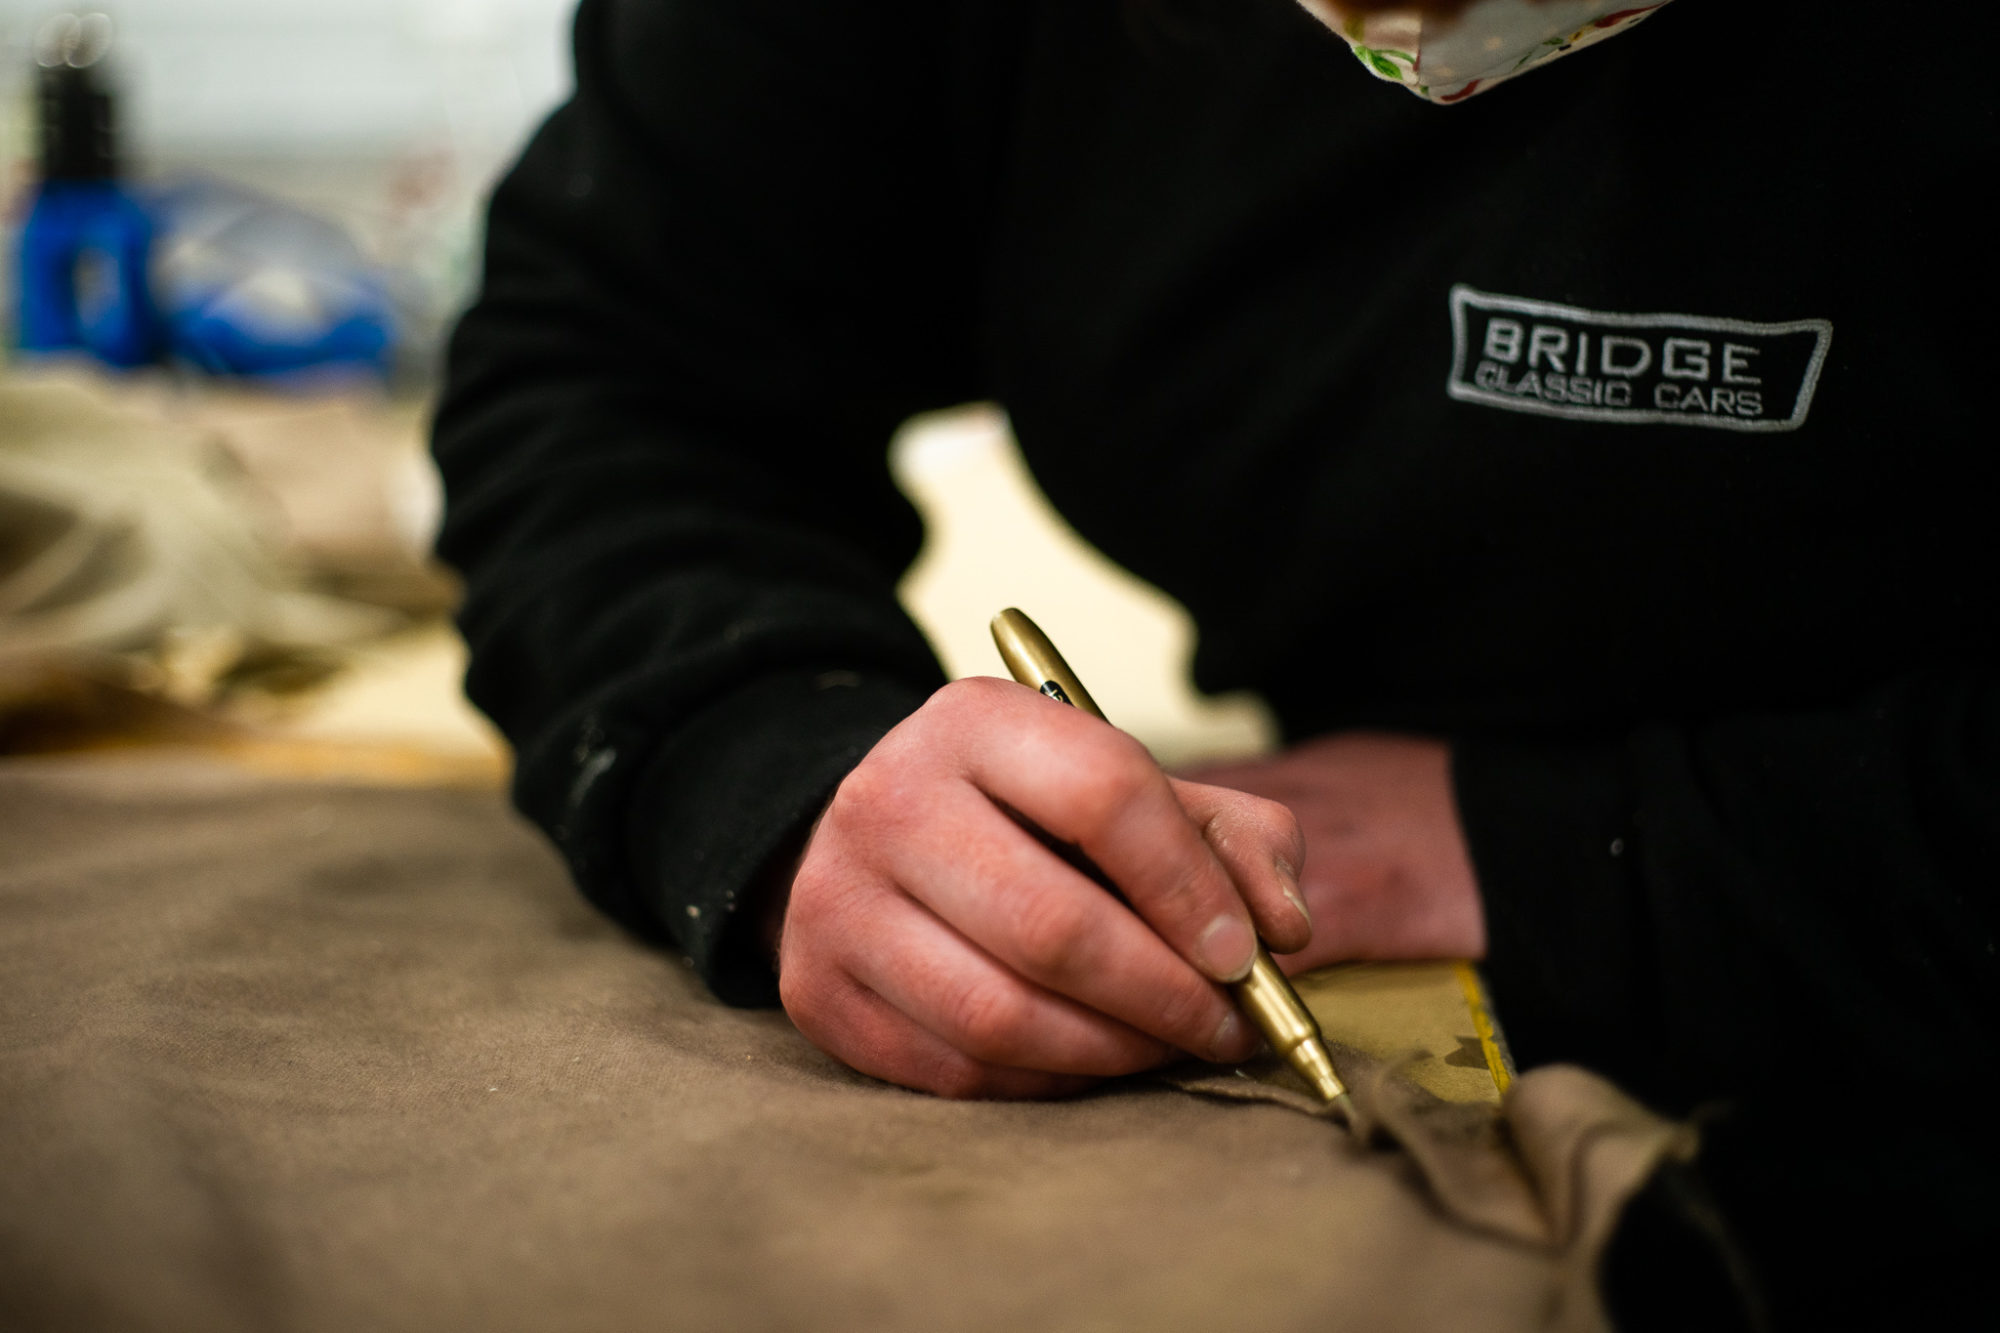
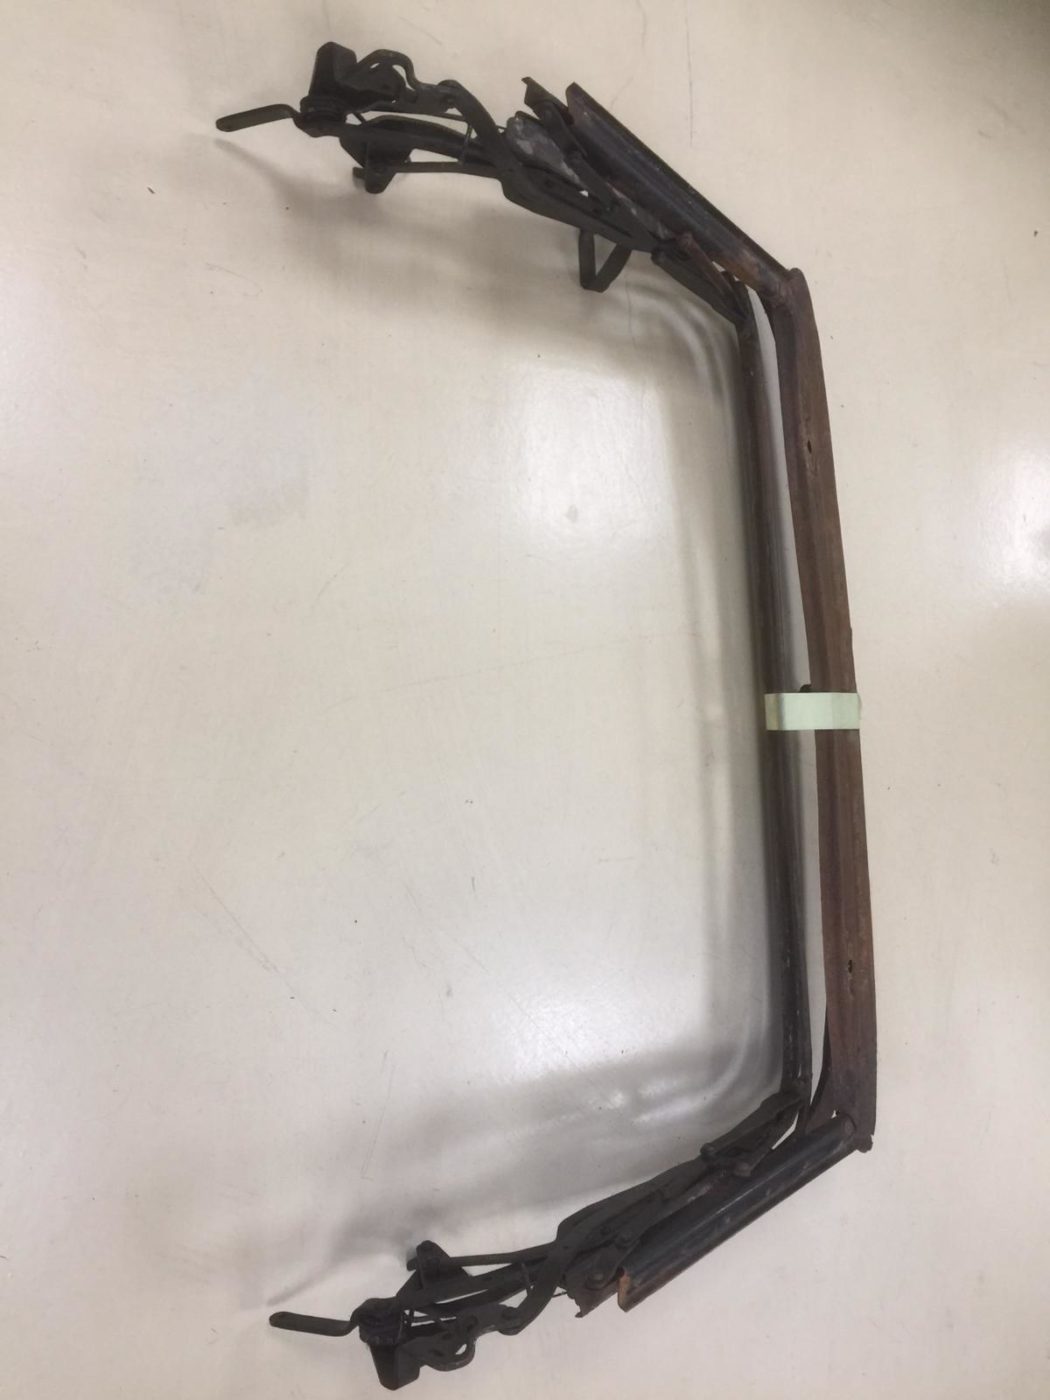
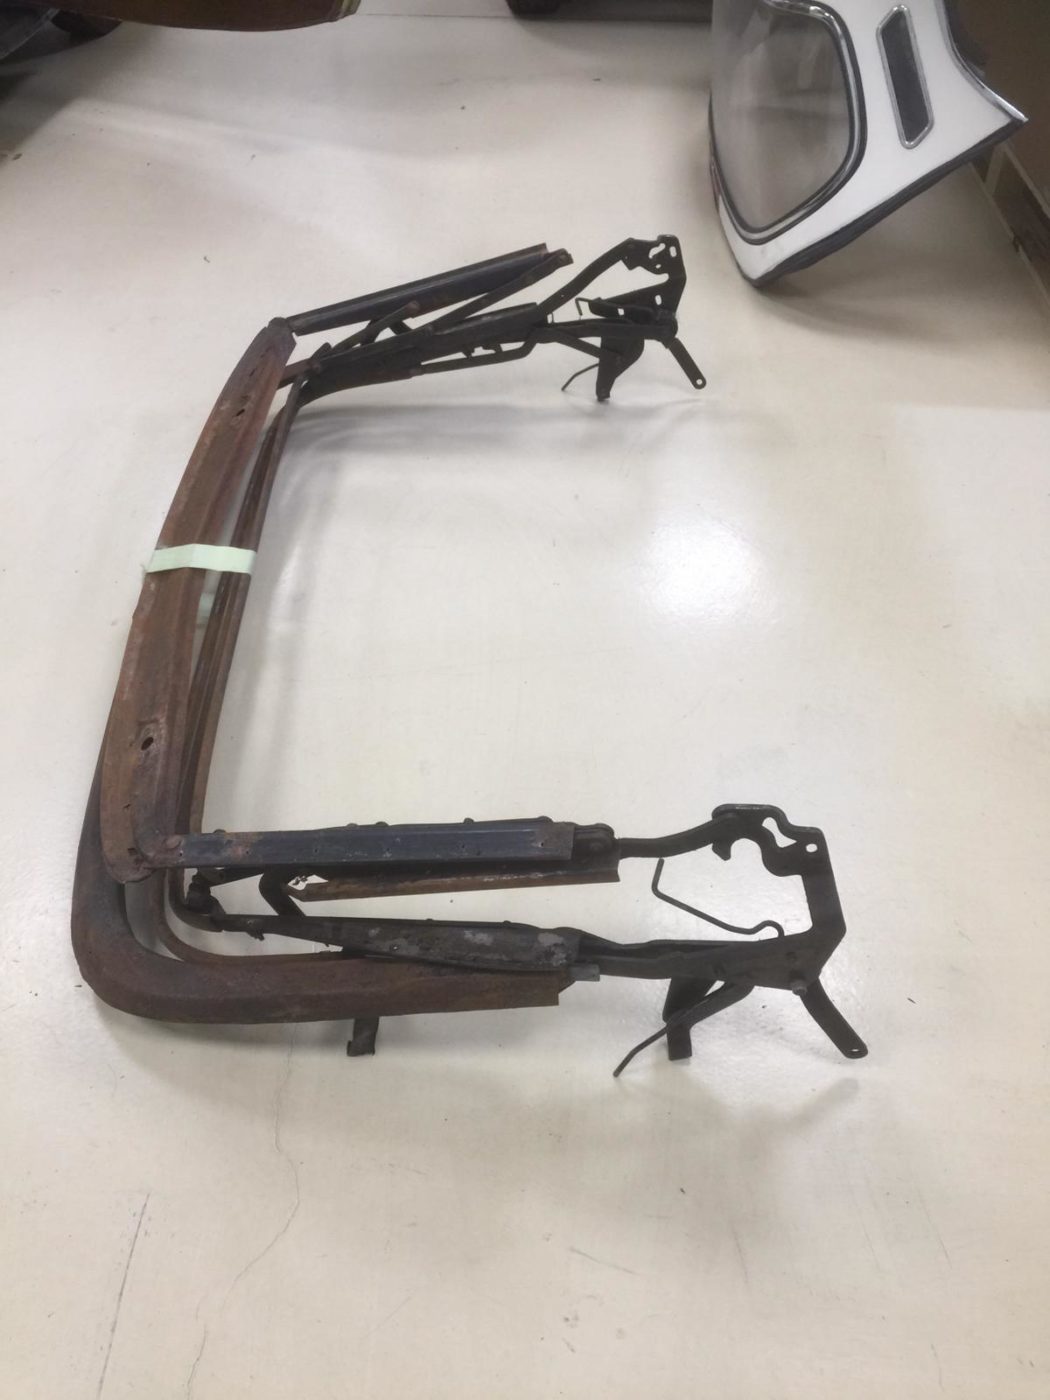
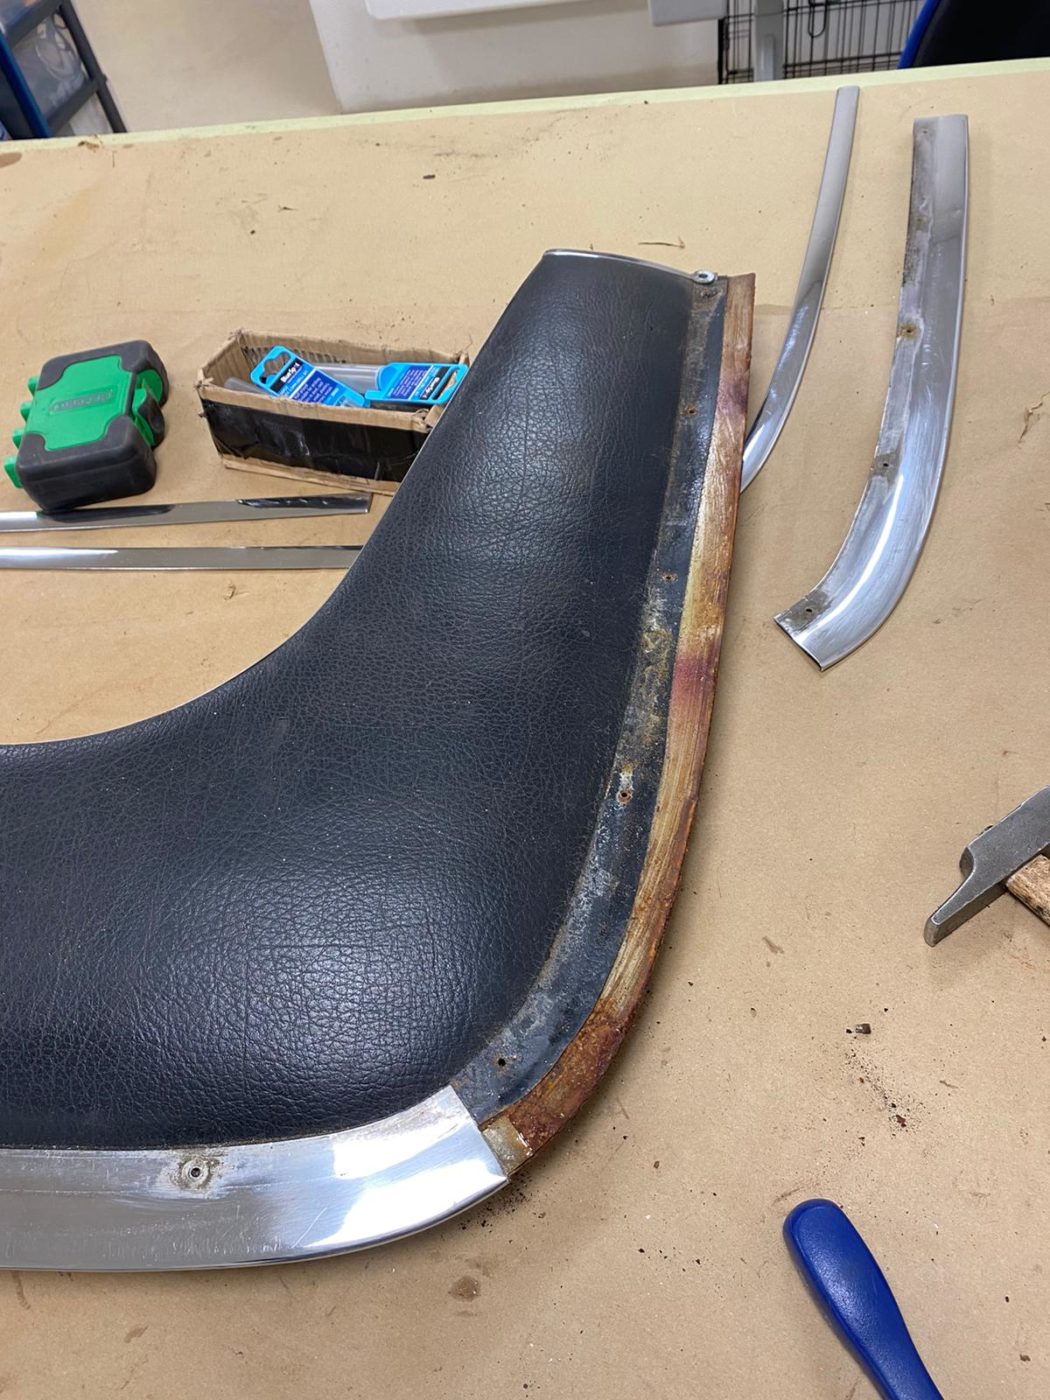
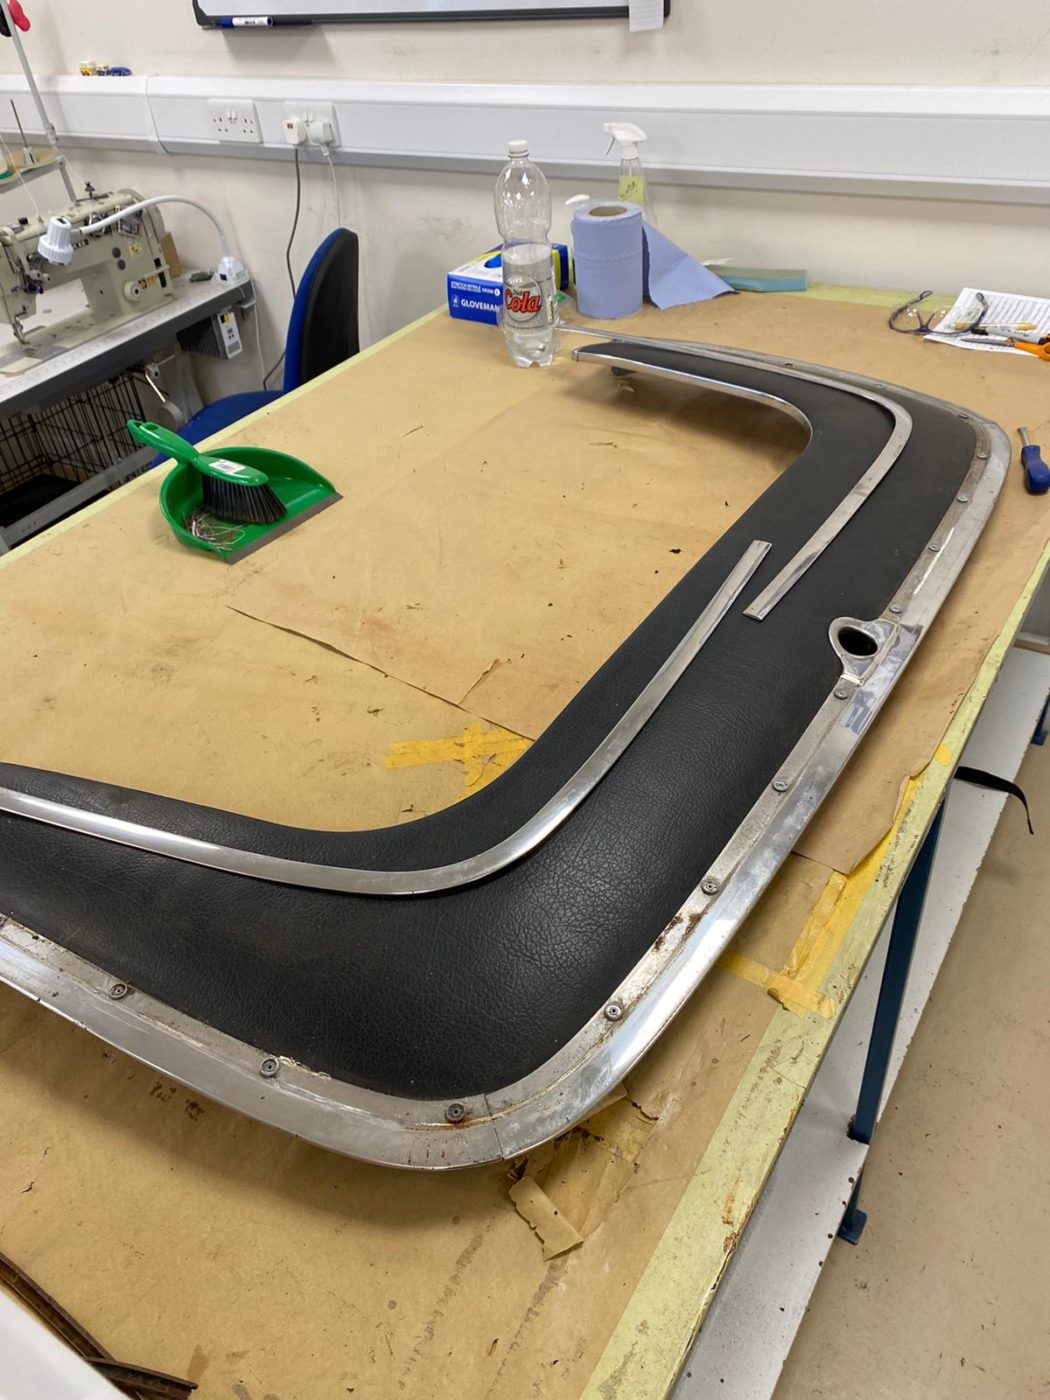
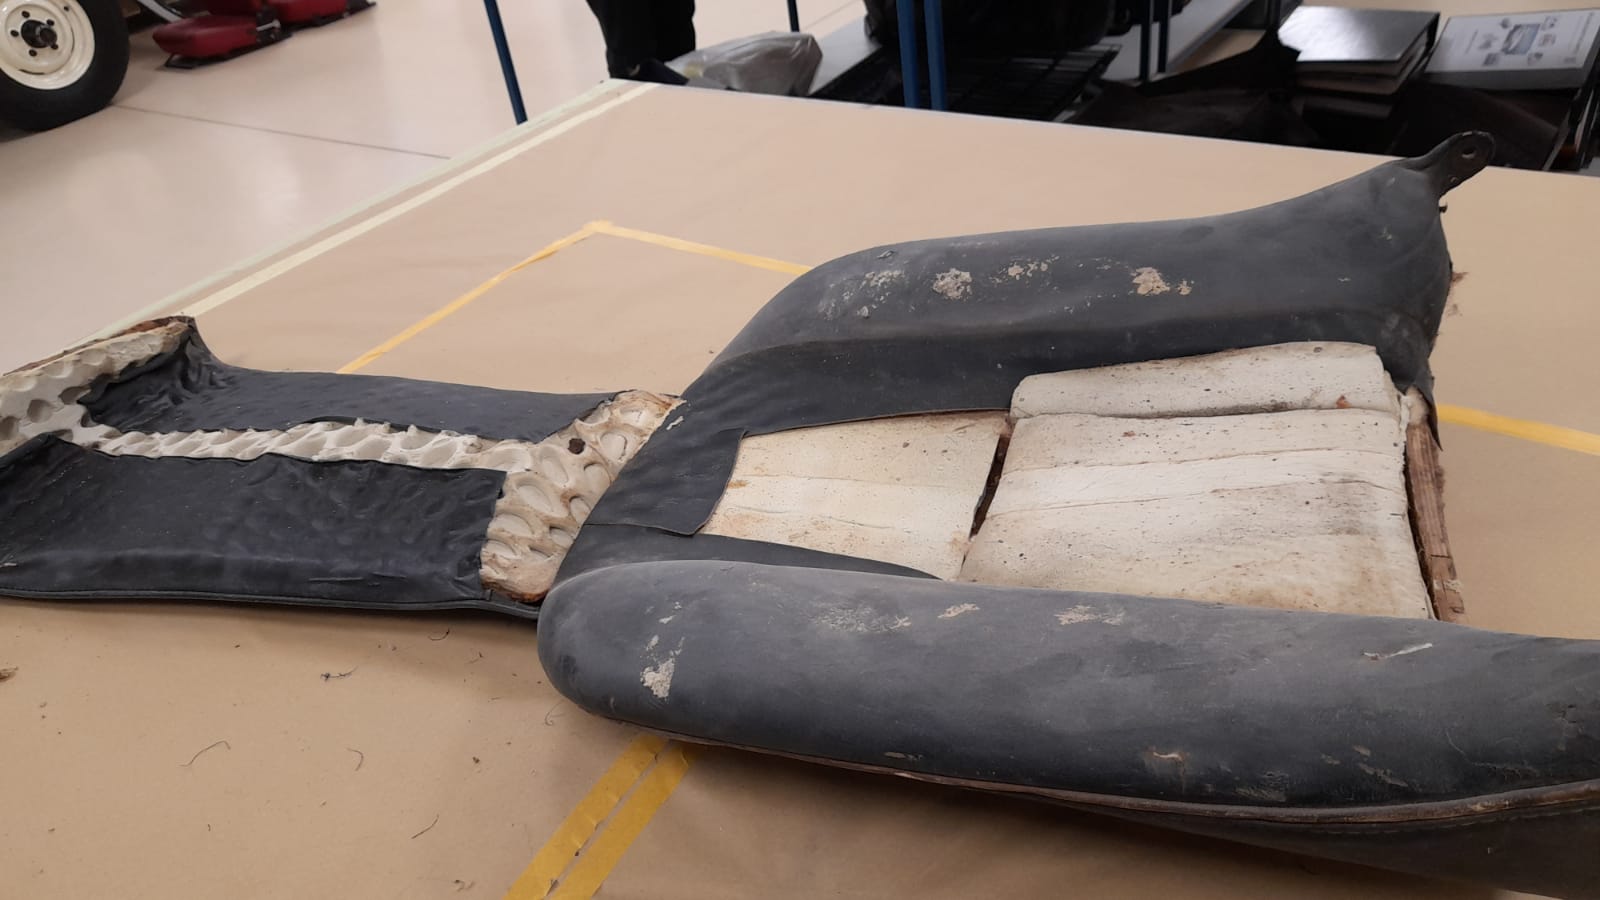
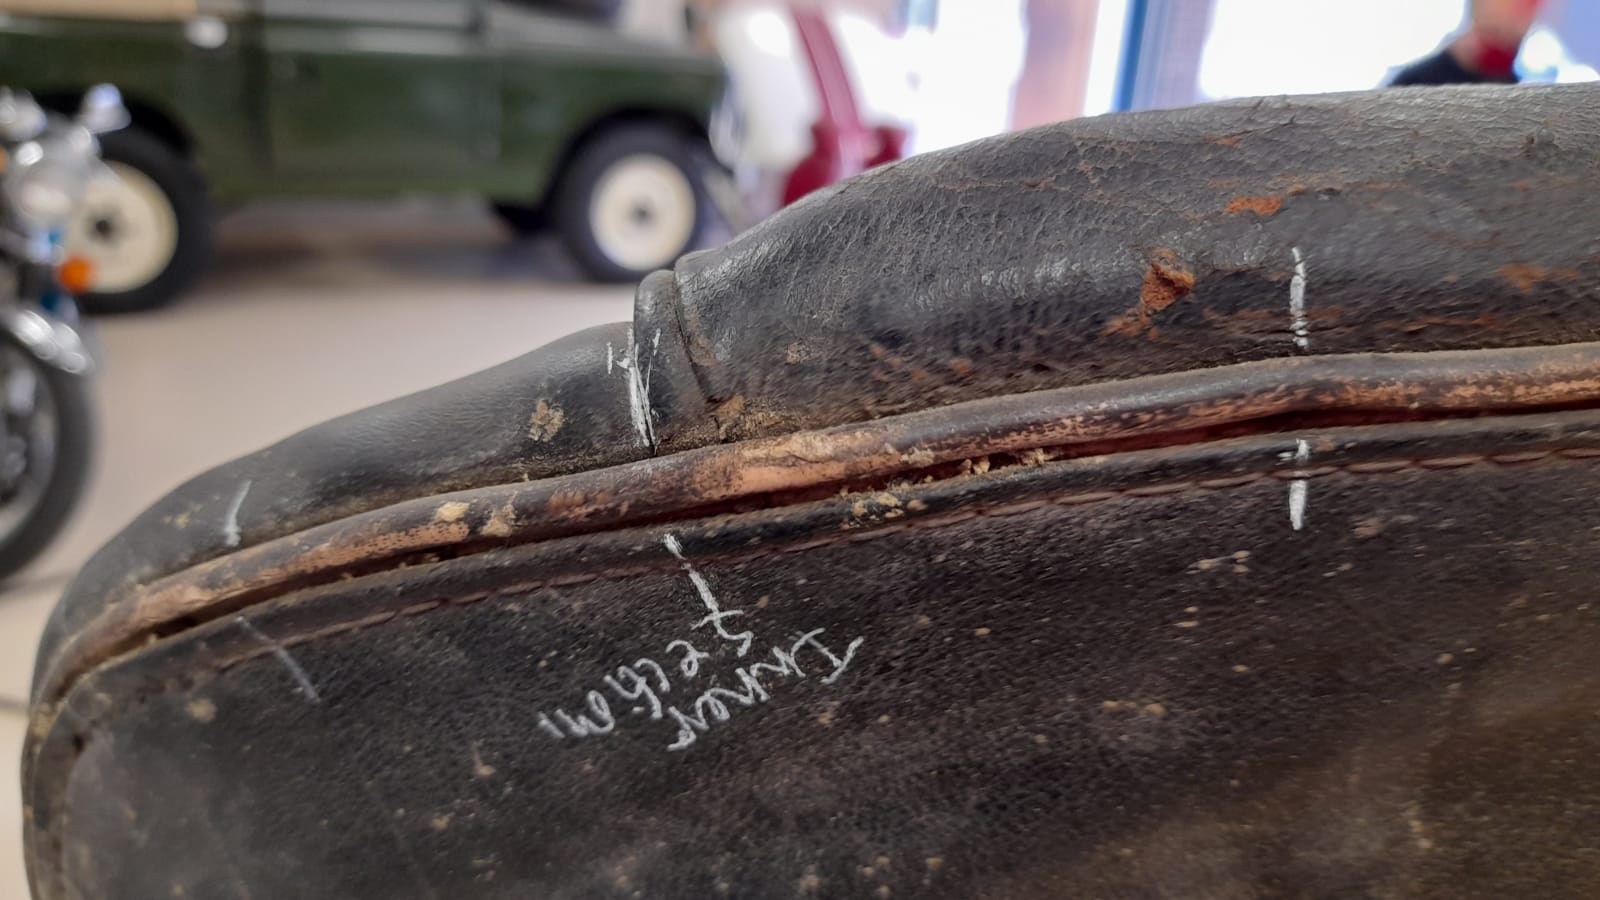
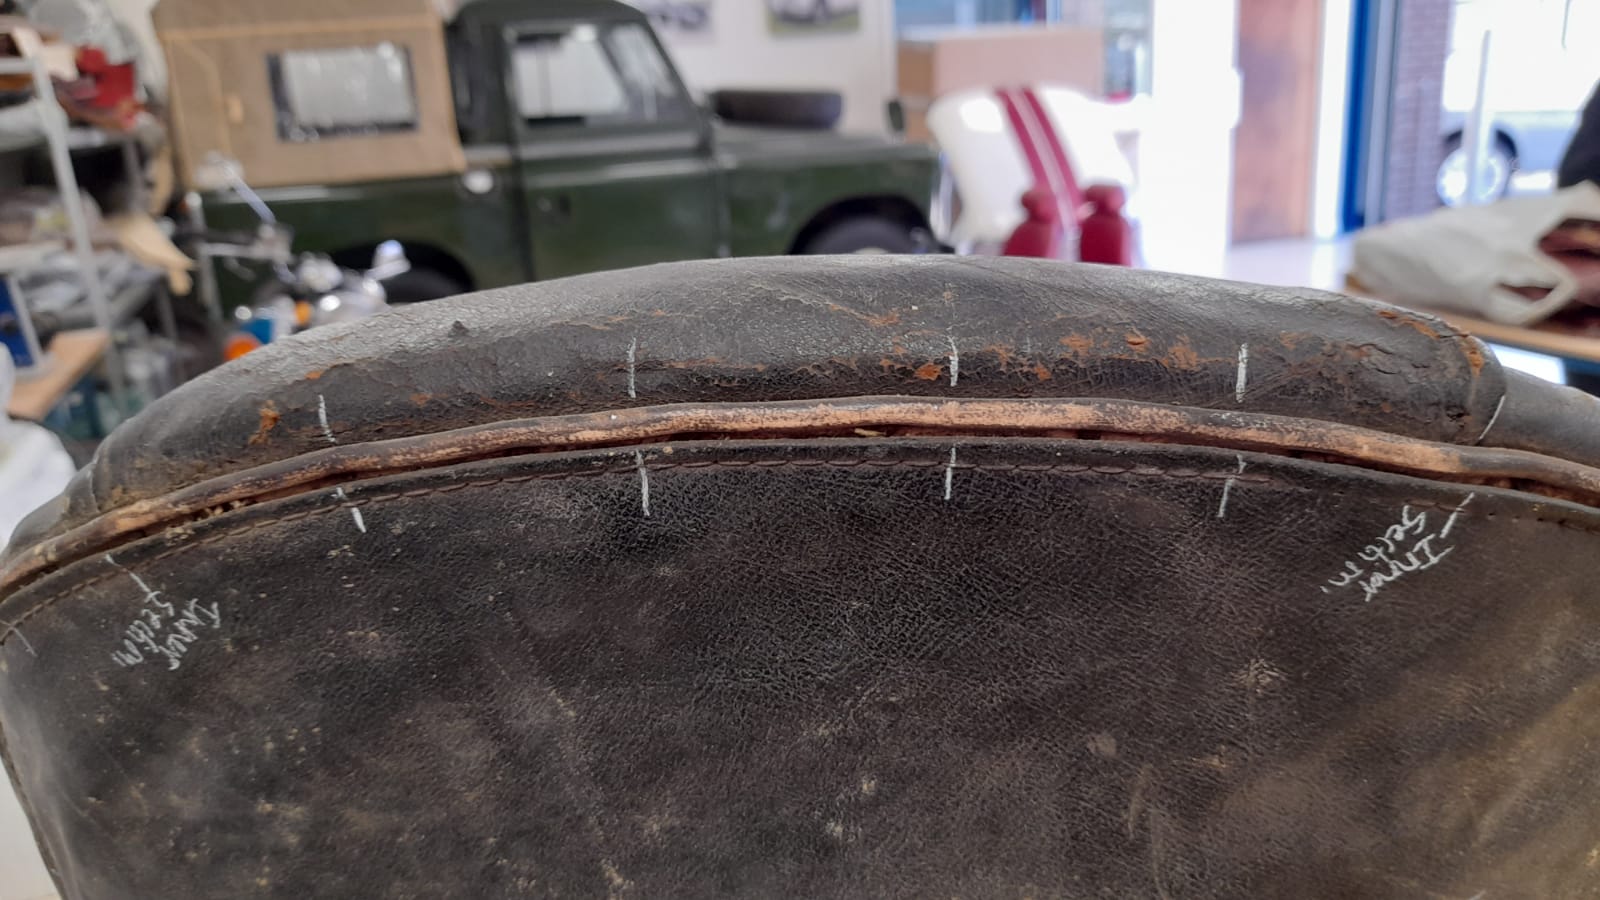
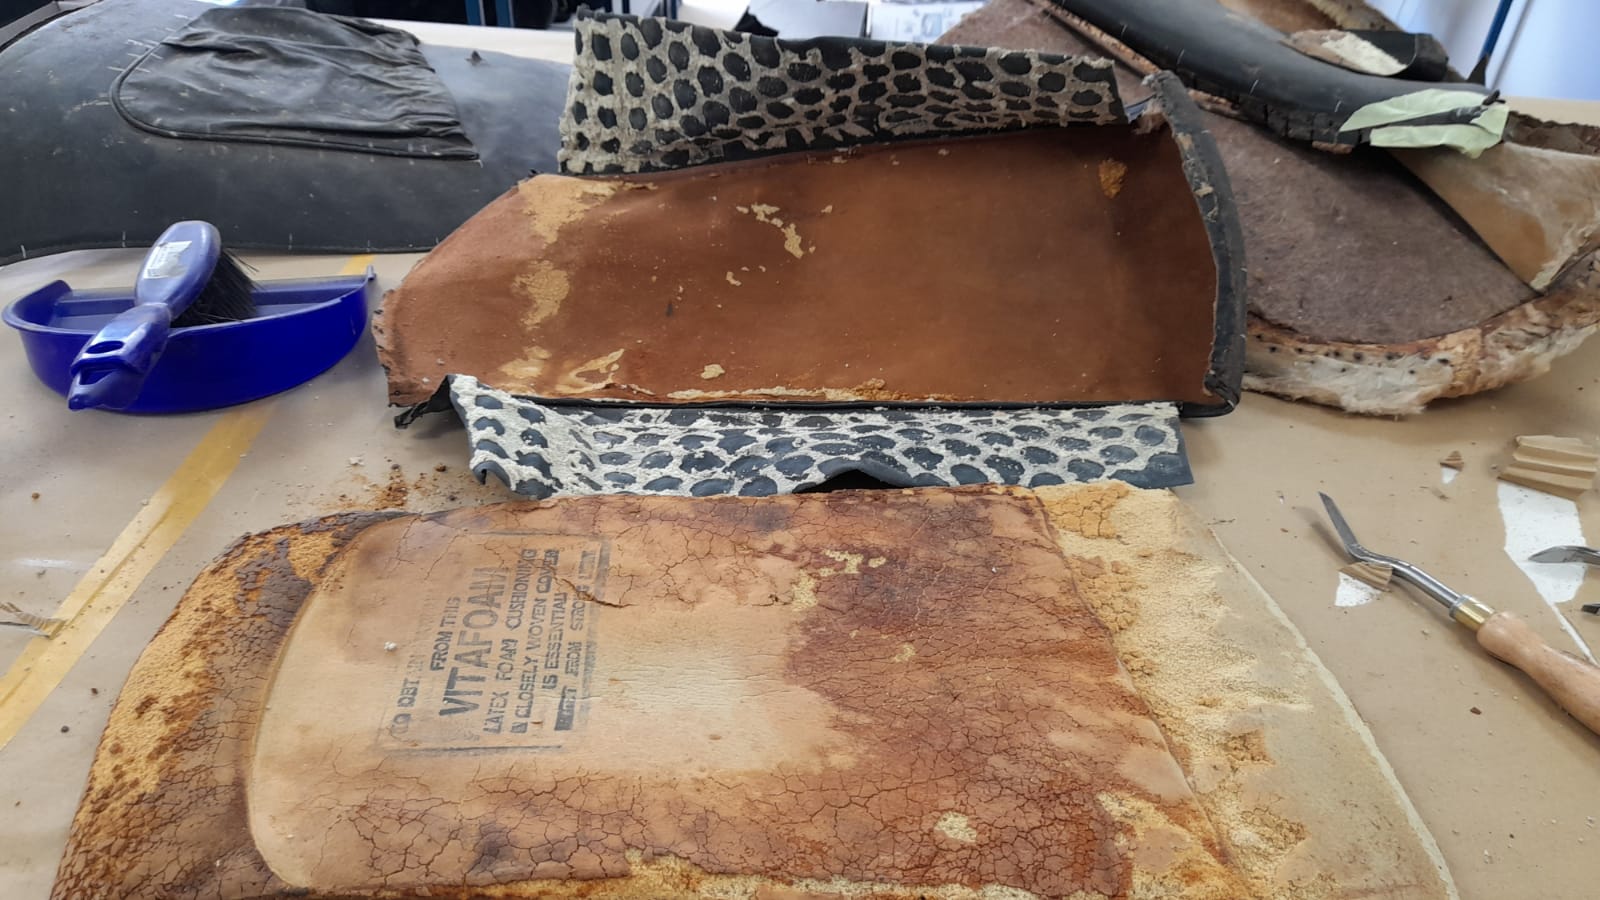
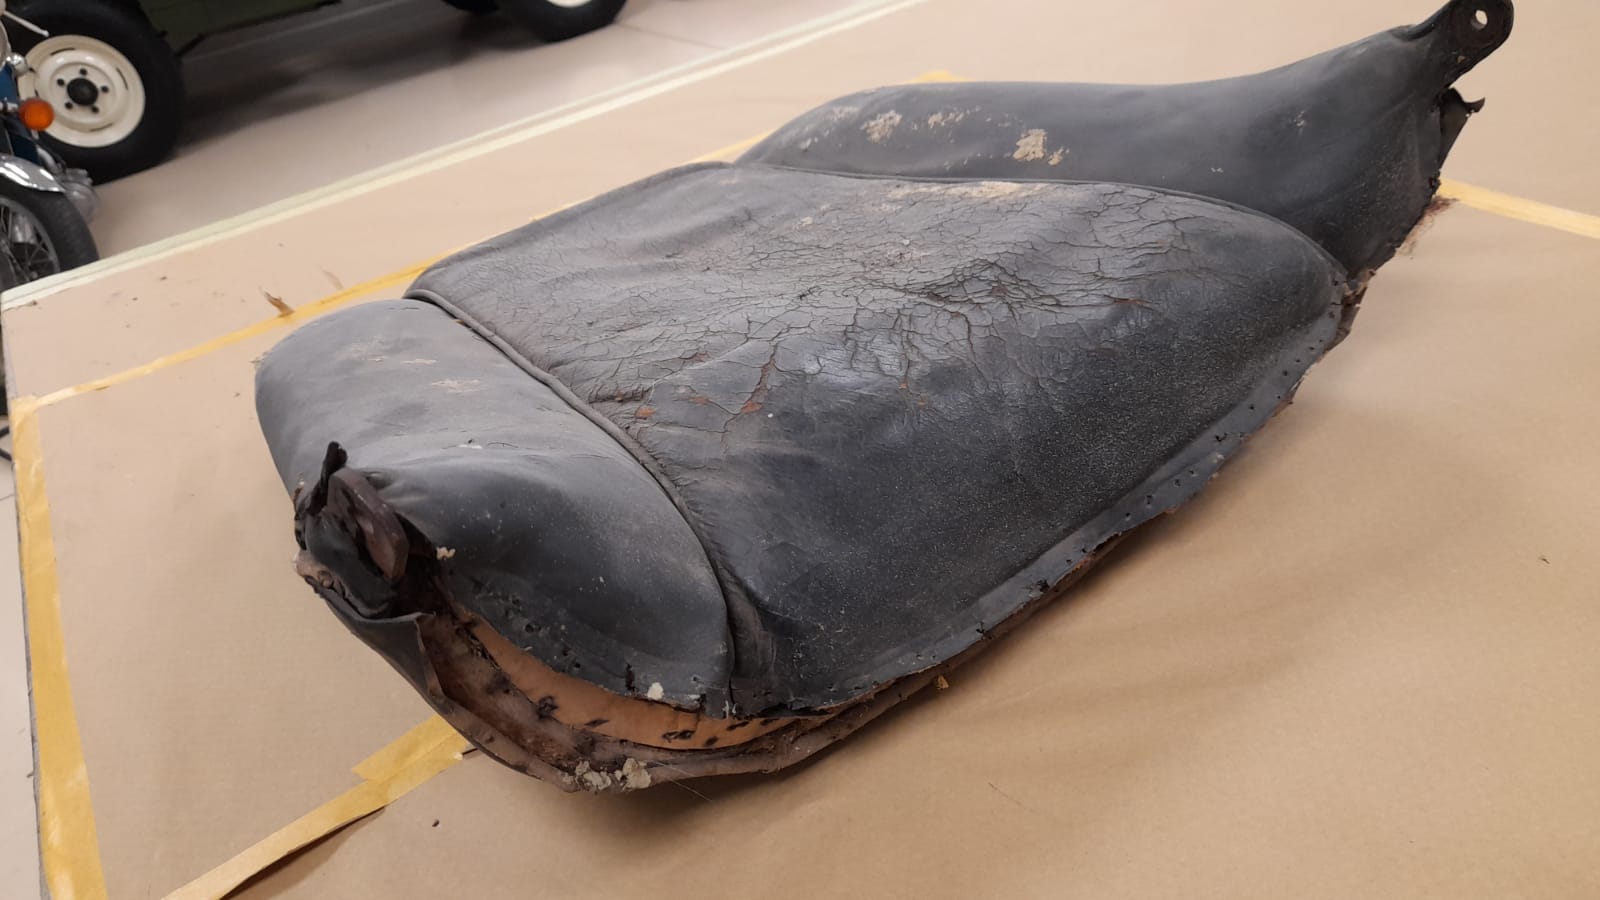
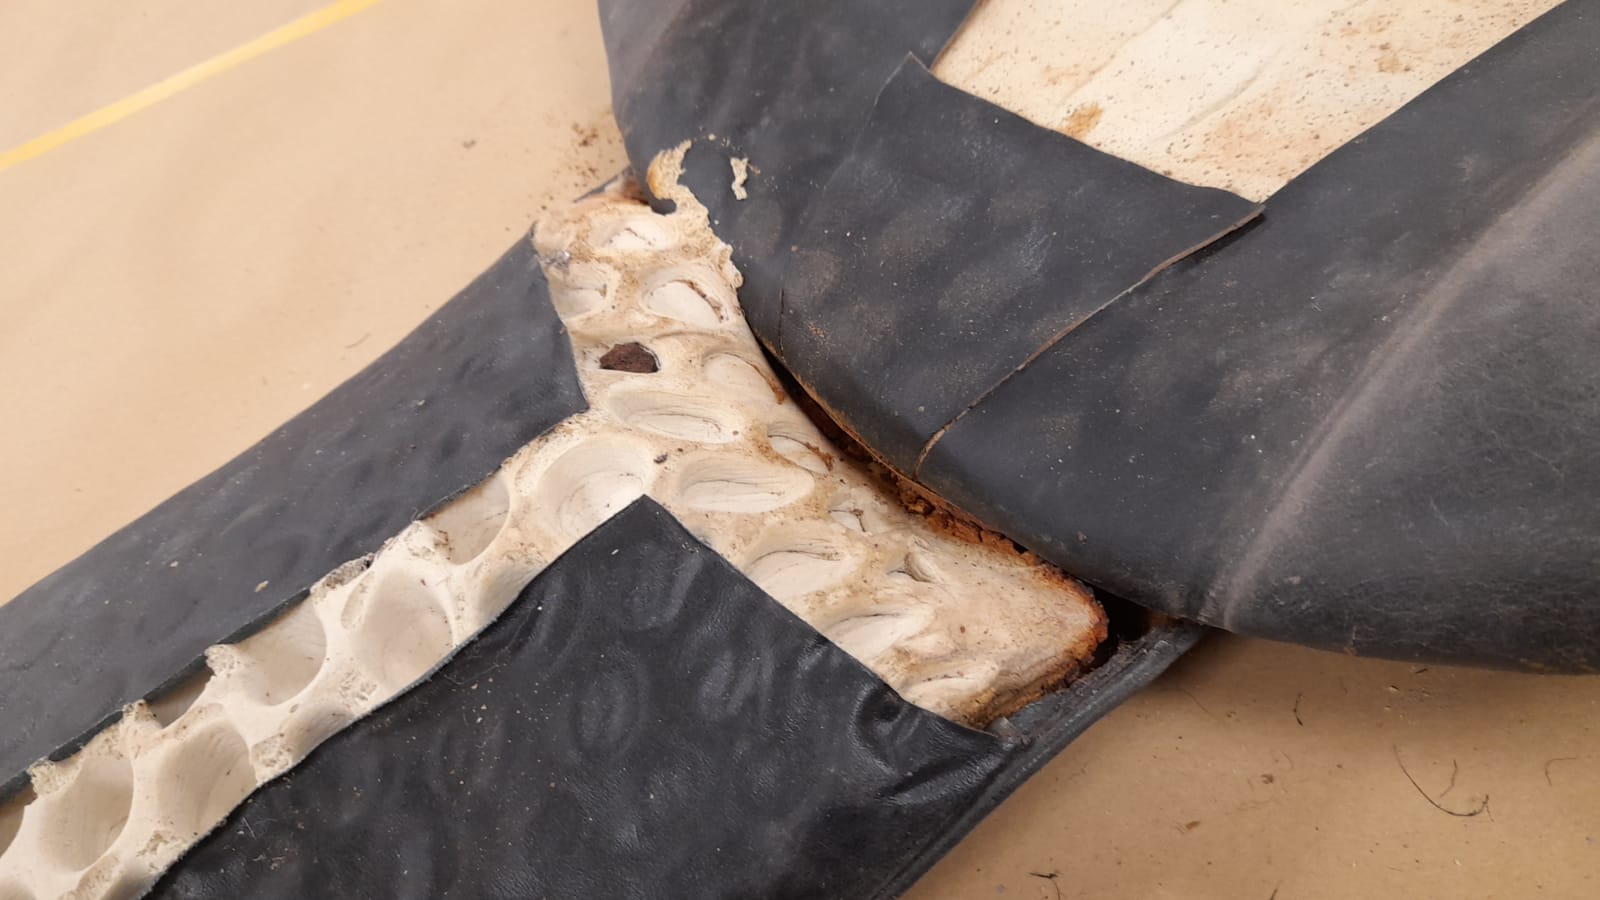
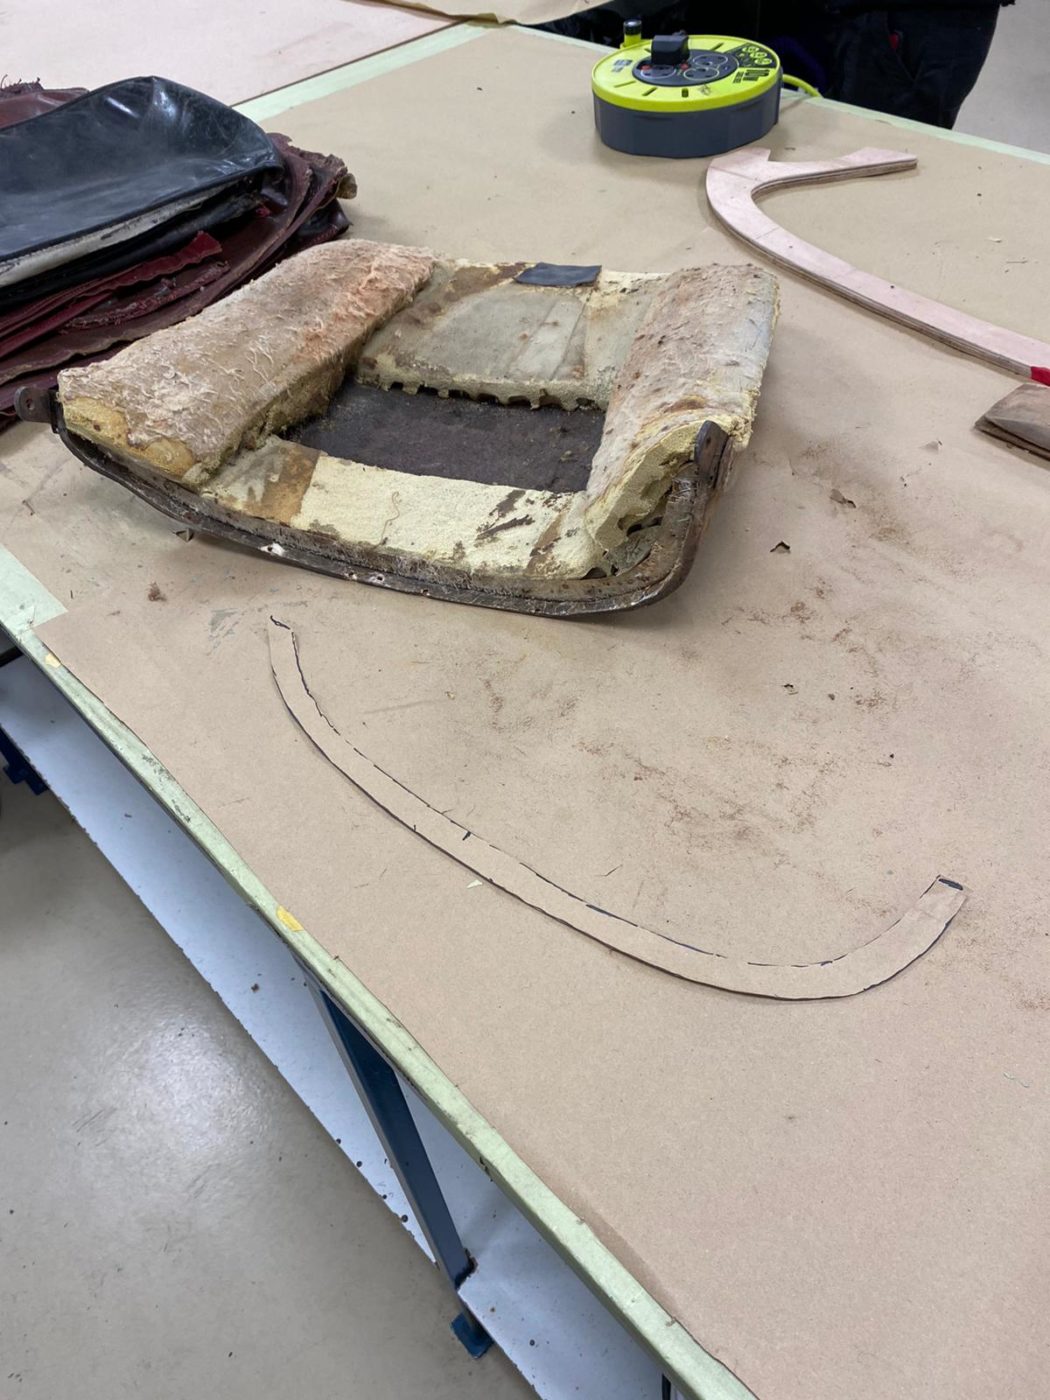
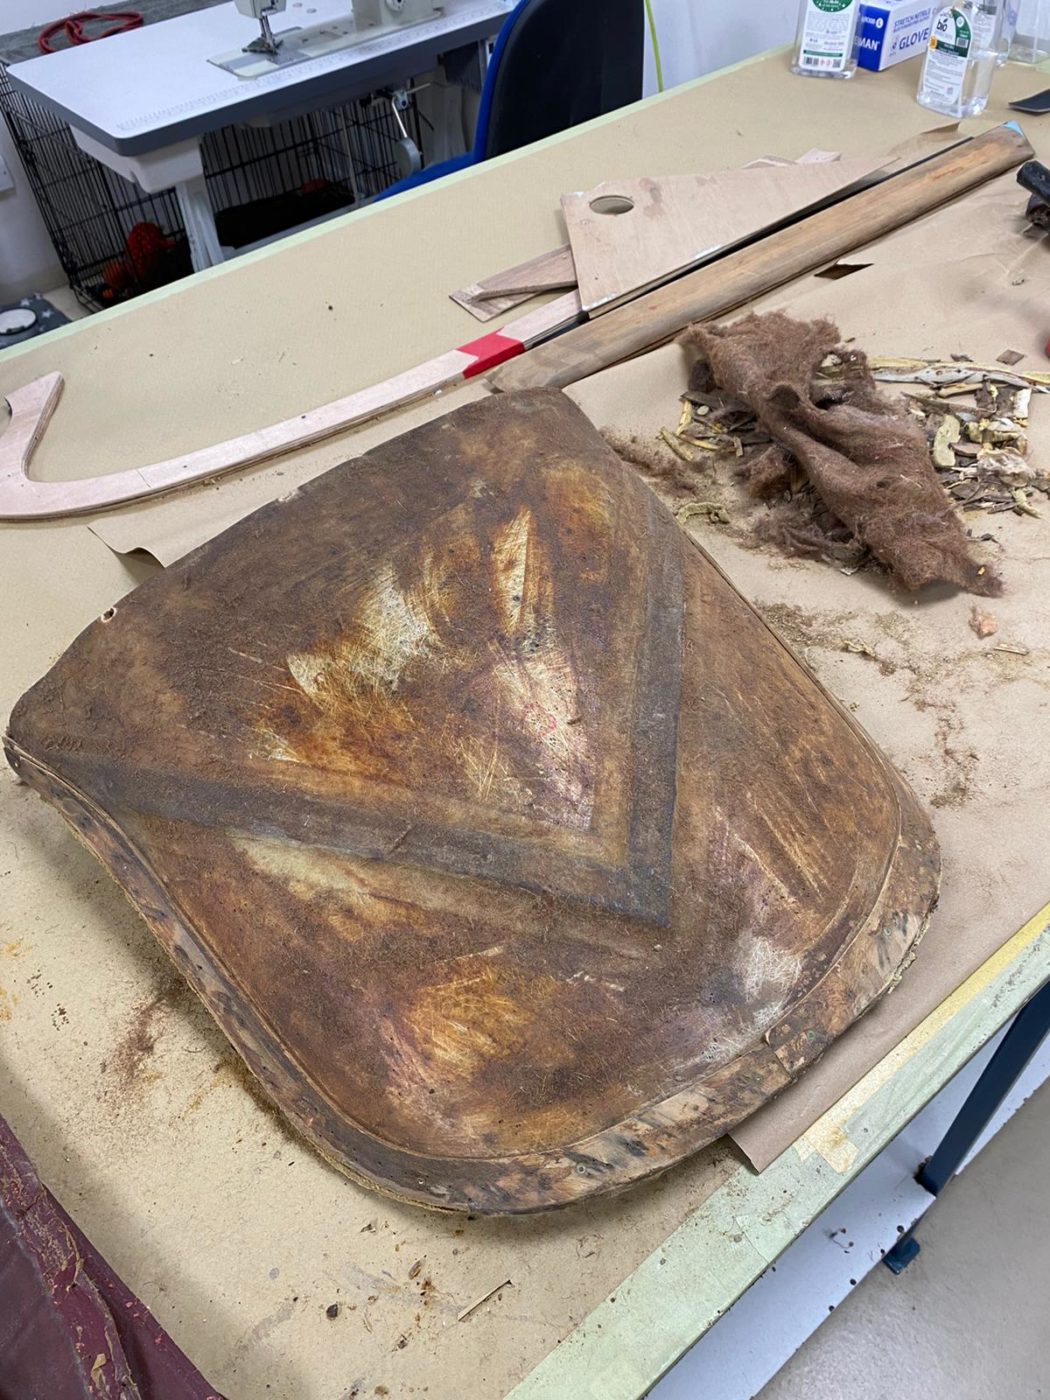
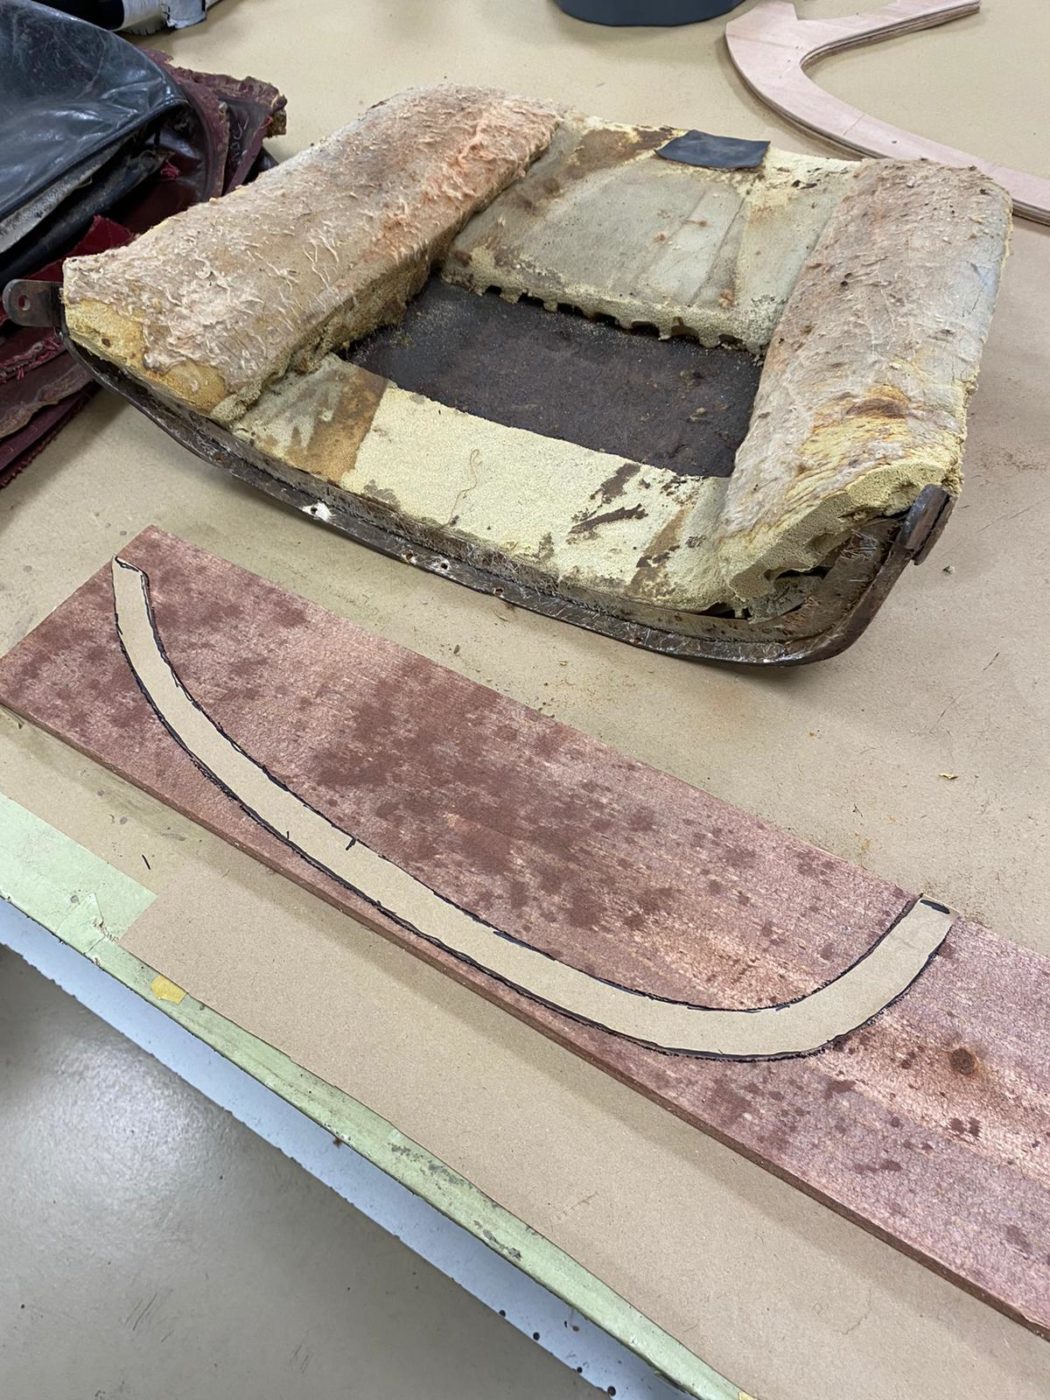
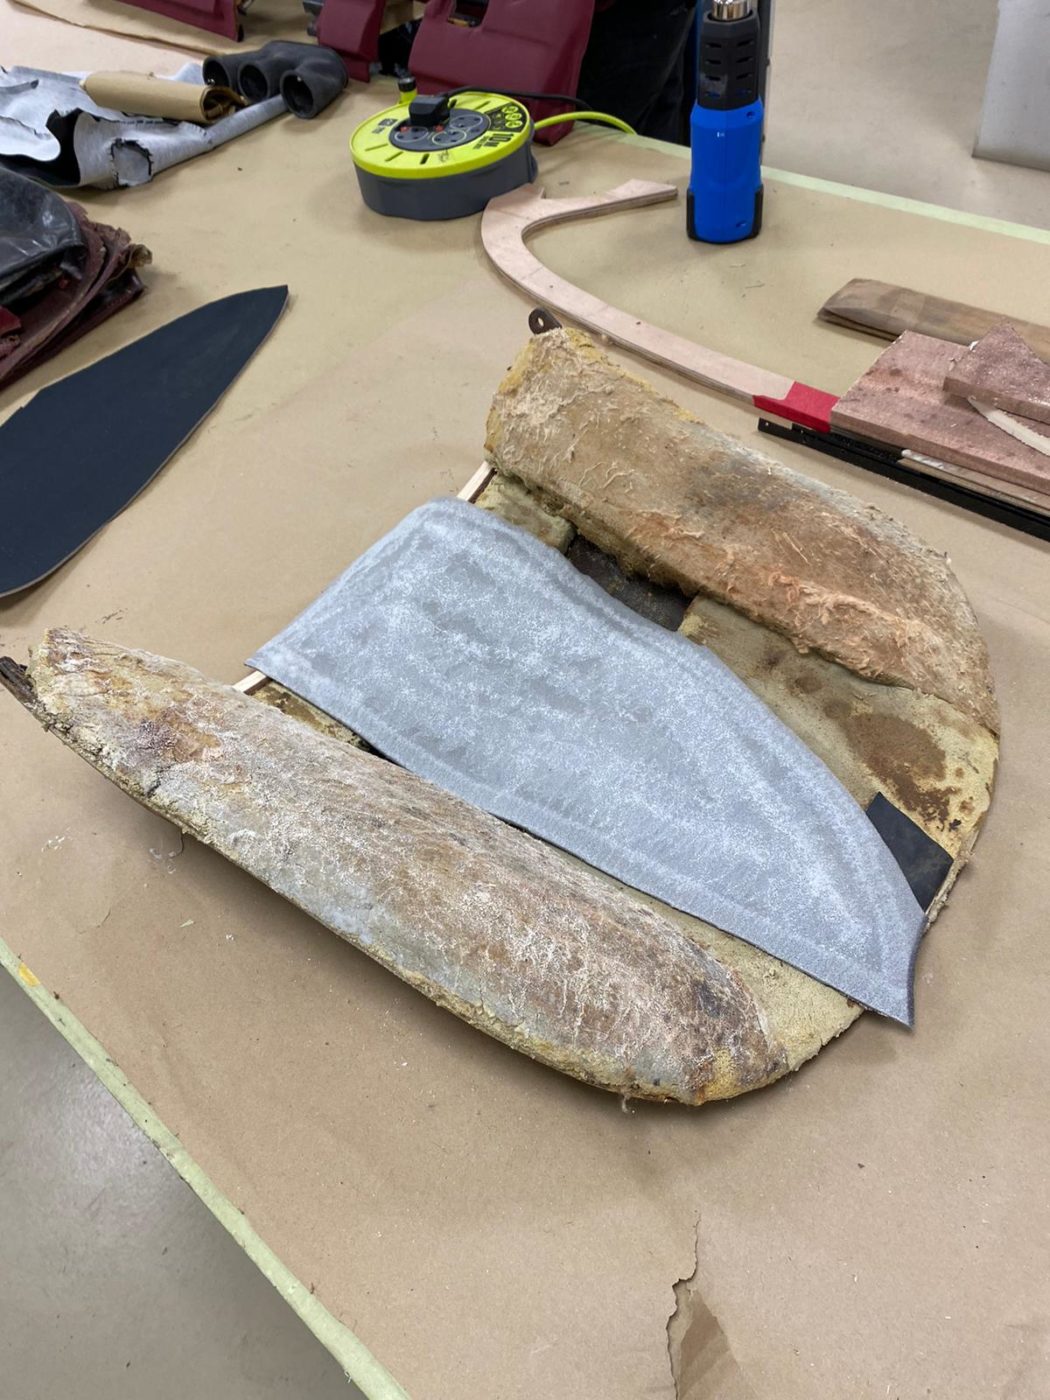
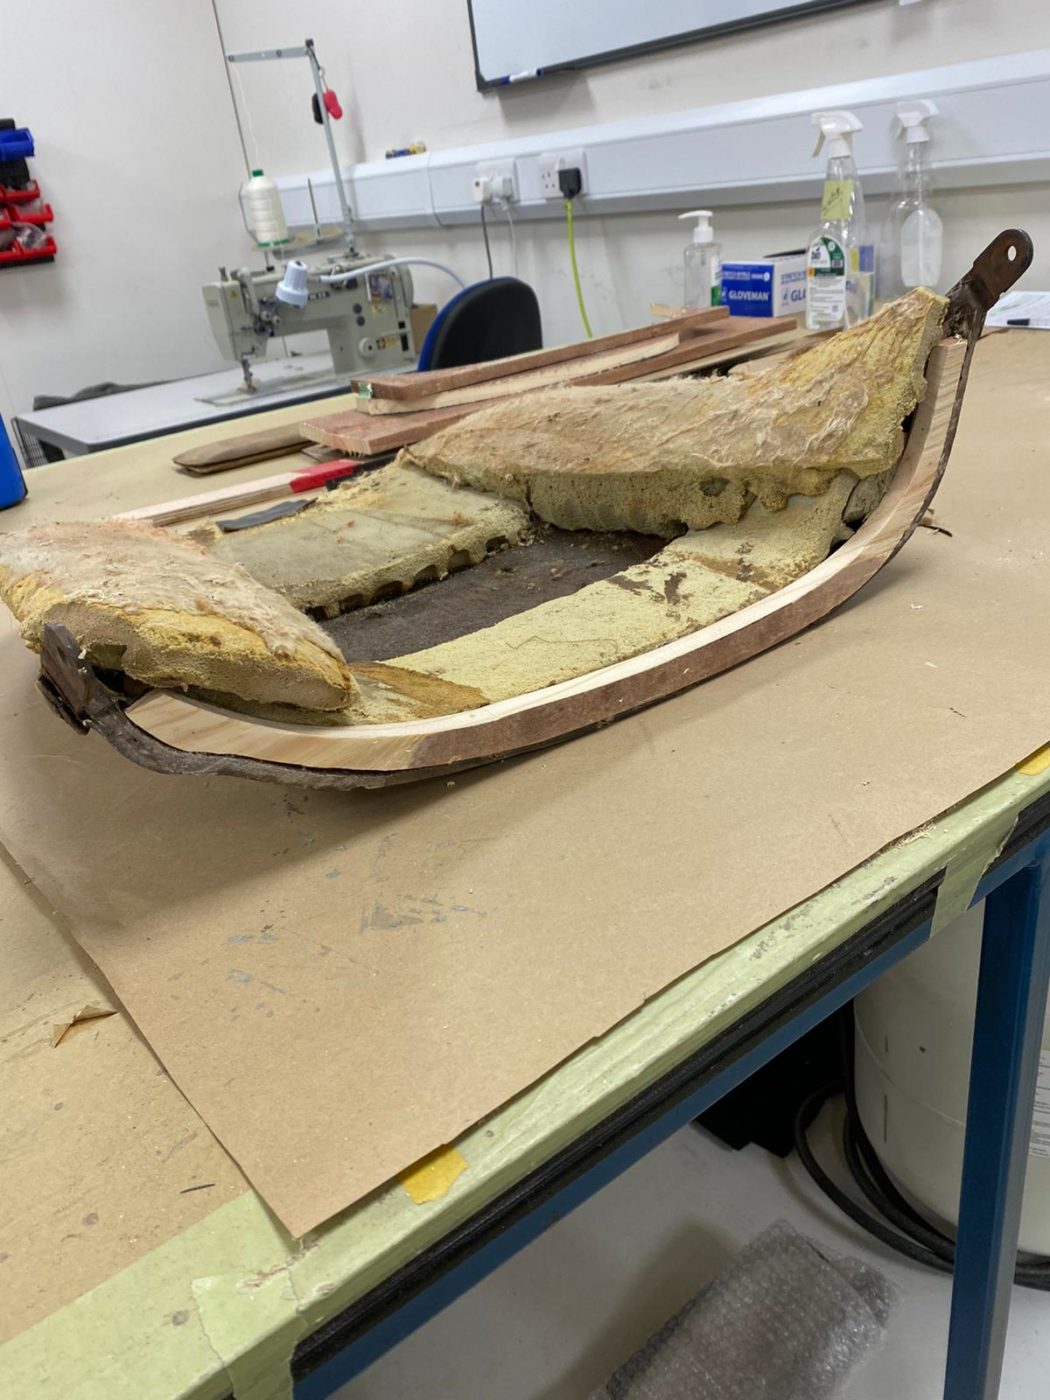
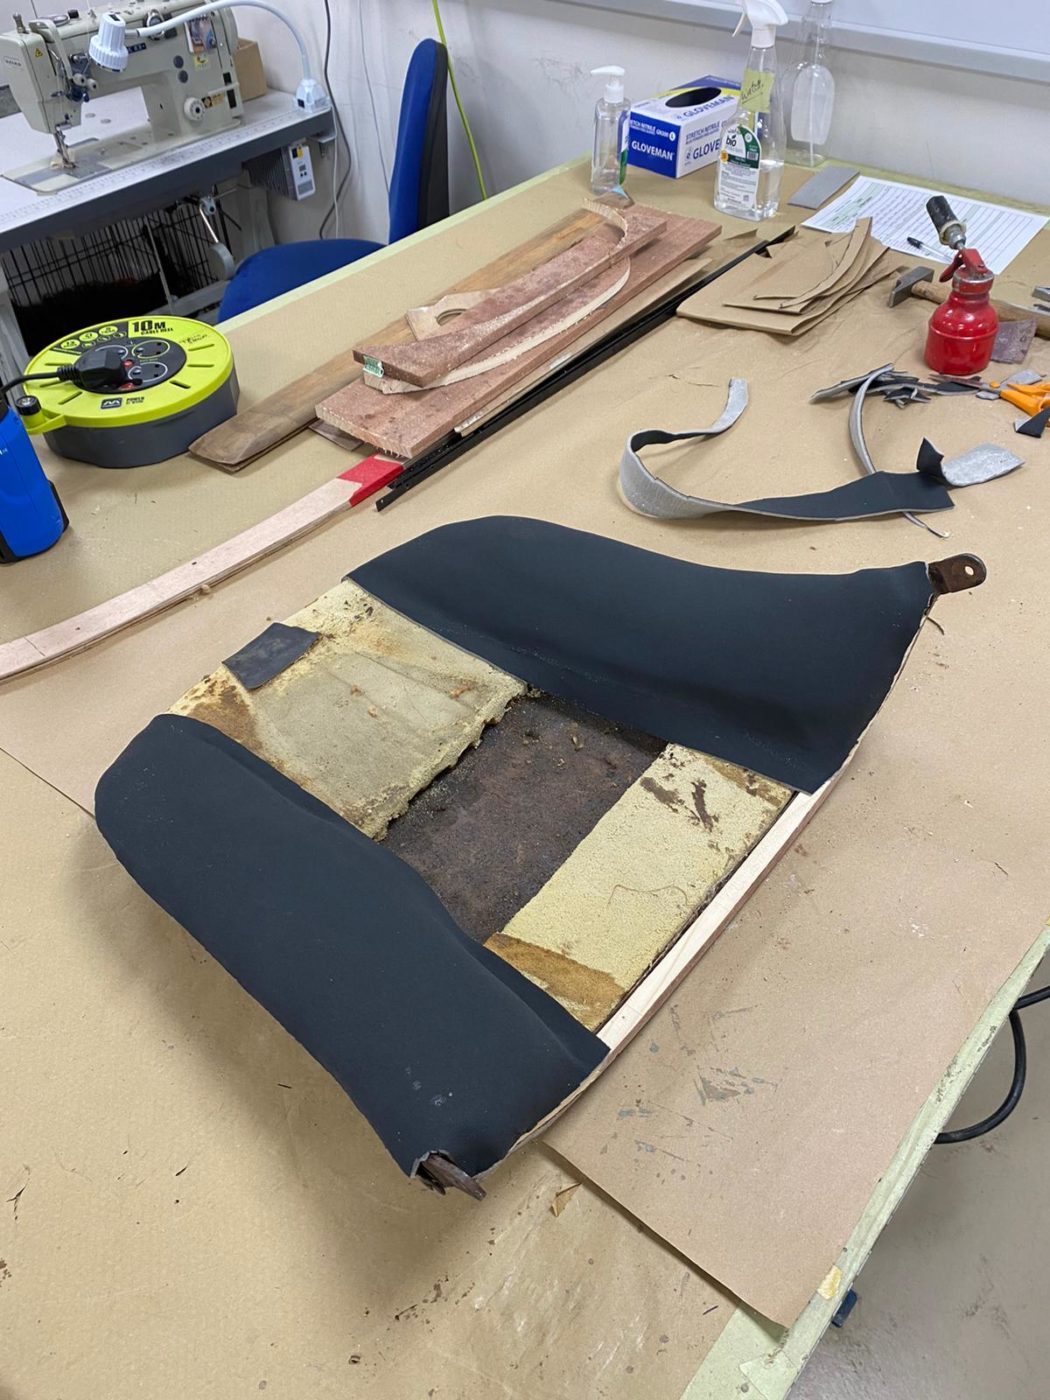
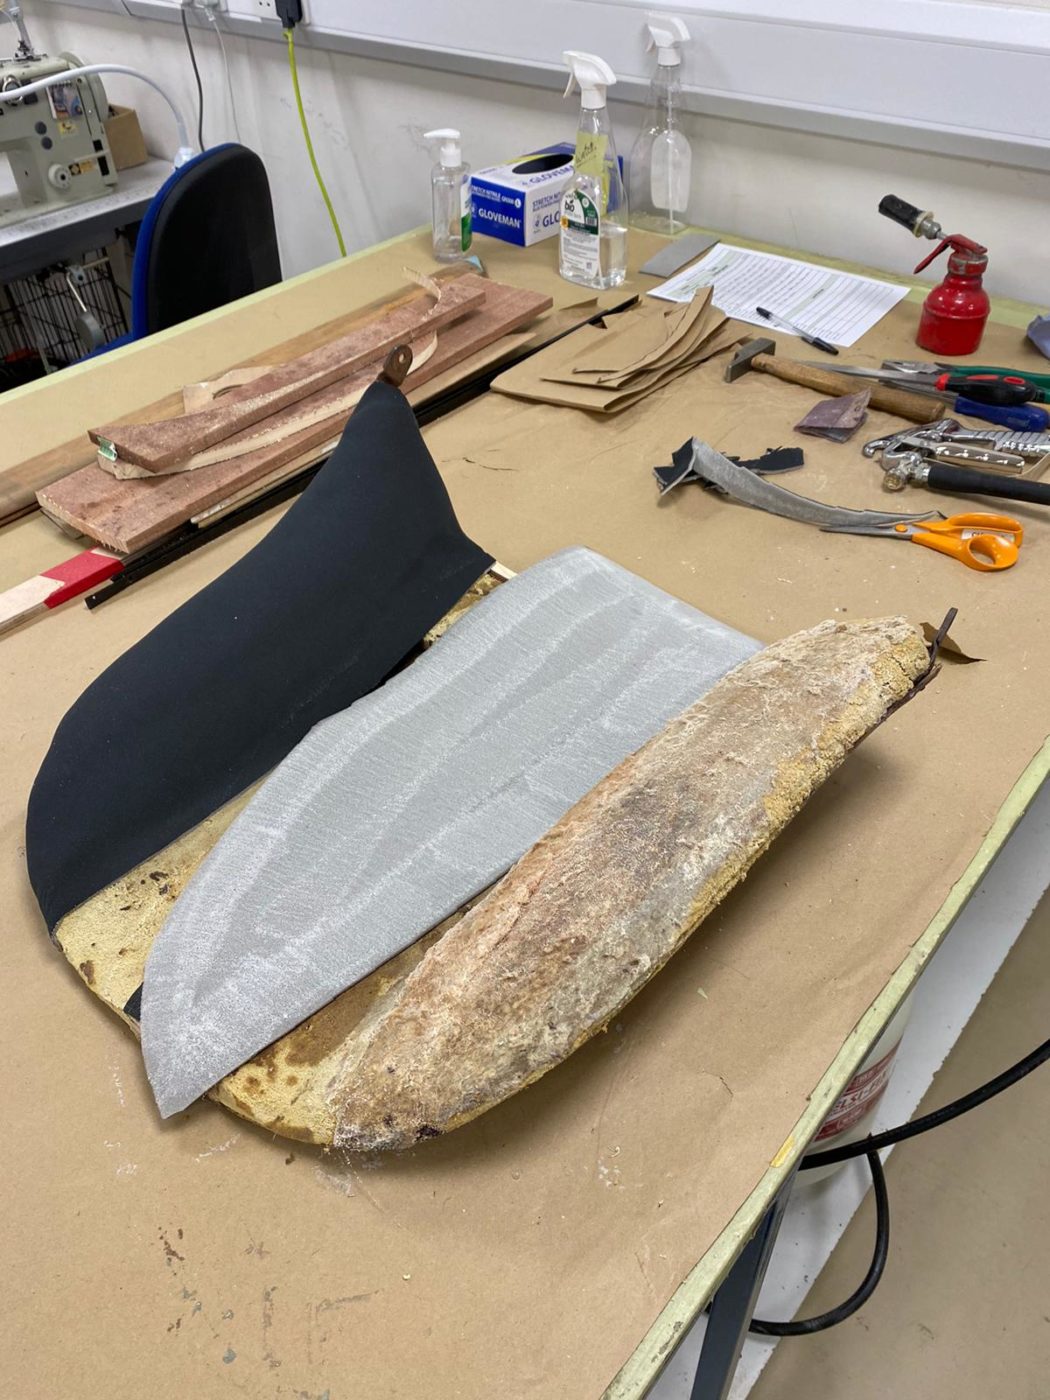
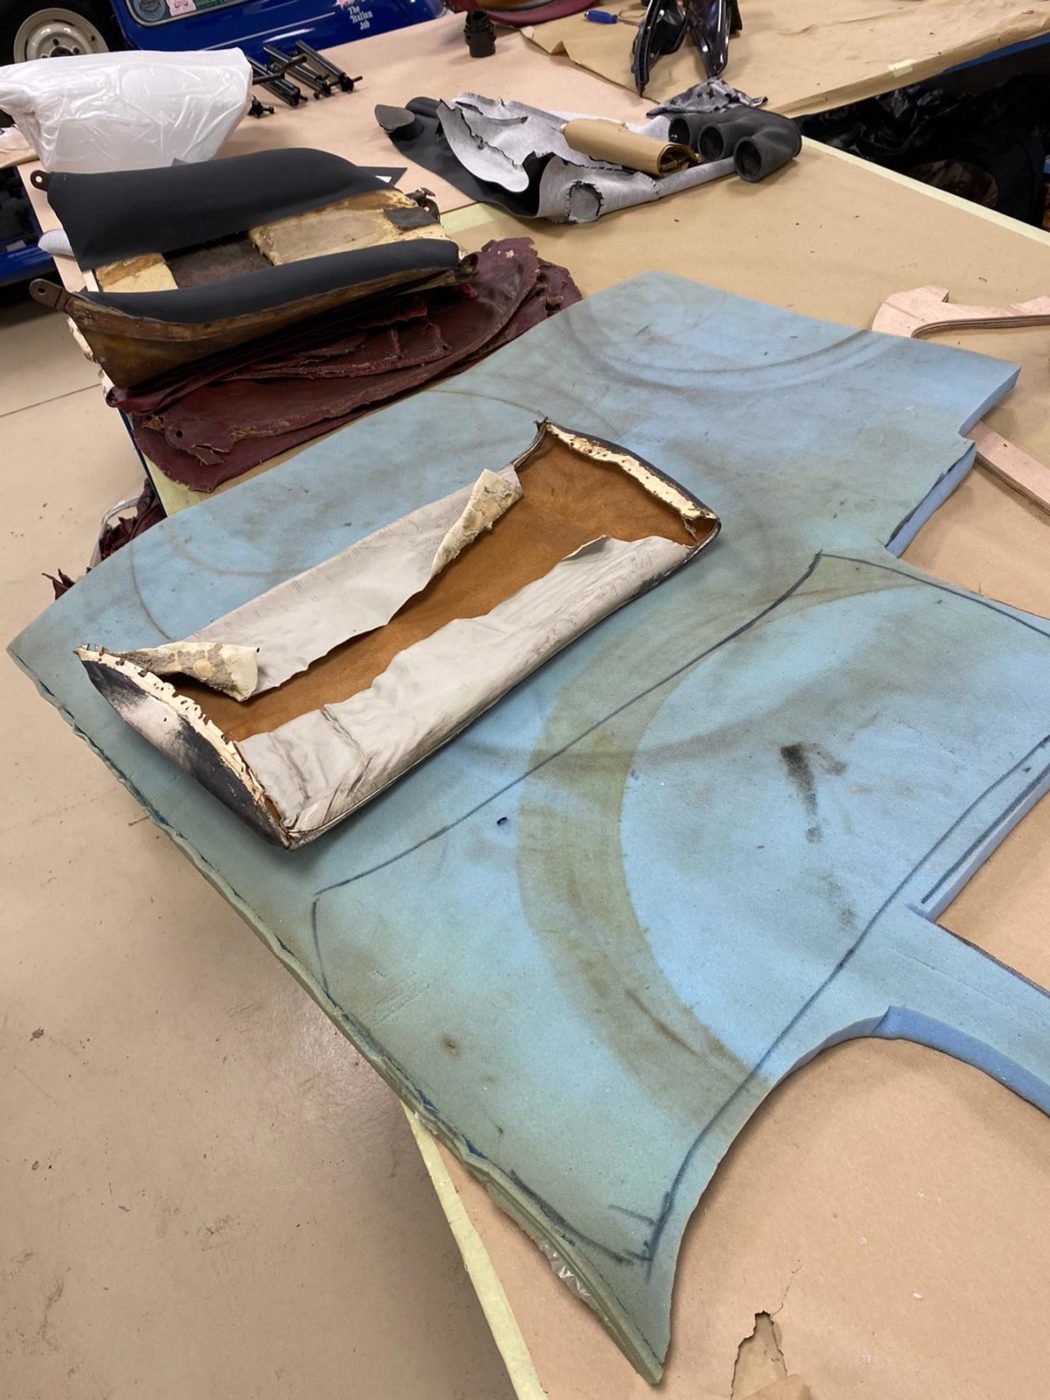
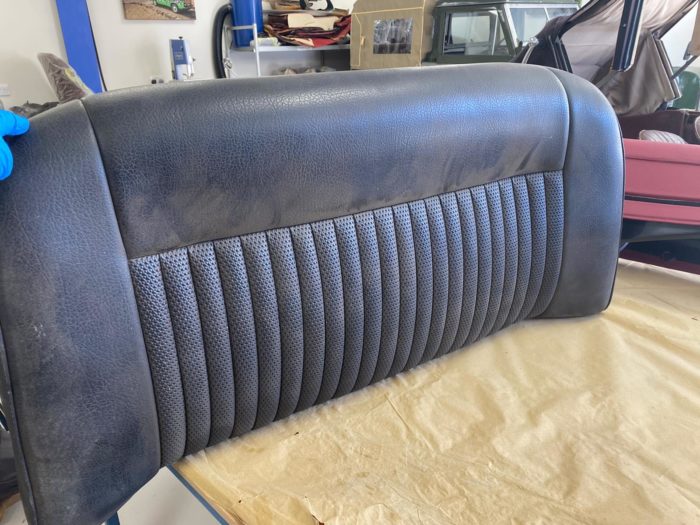
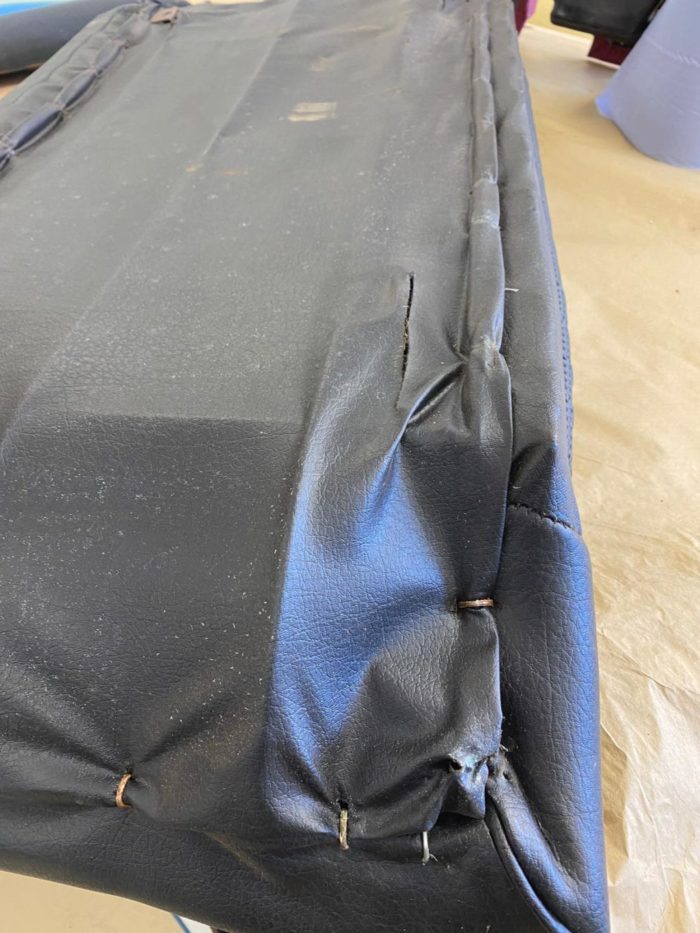
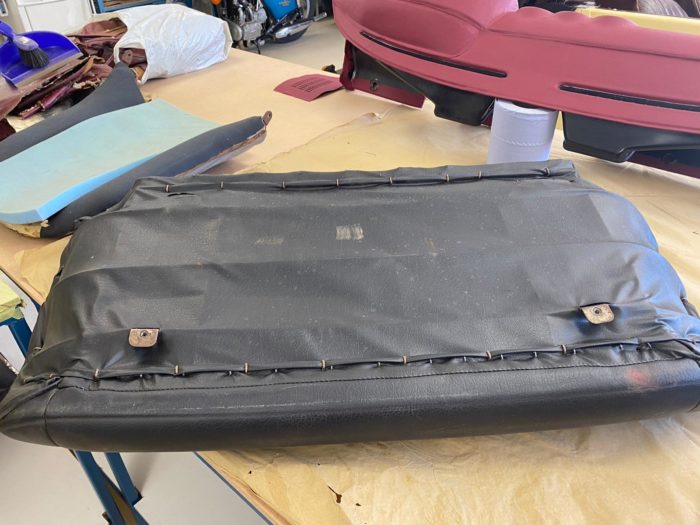
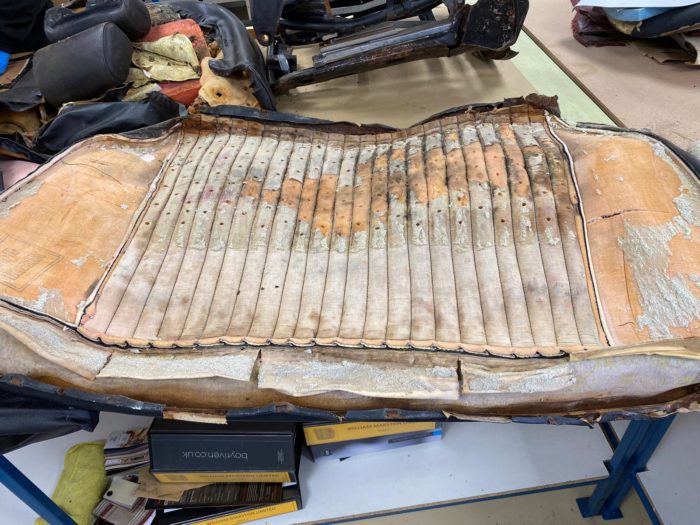
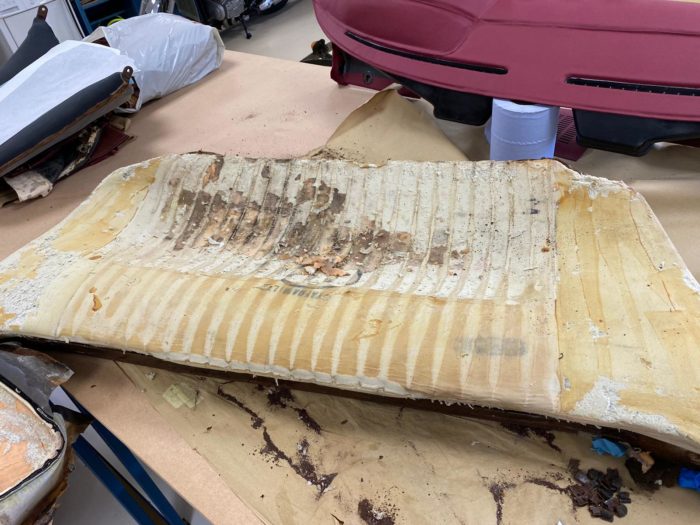
The trim shop having been tackling our red 1973 Triumph Stag interior restoration recently, which has begun by stripping all the seats down to their
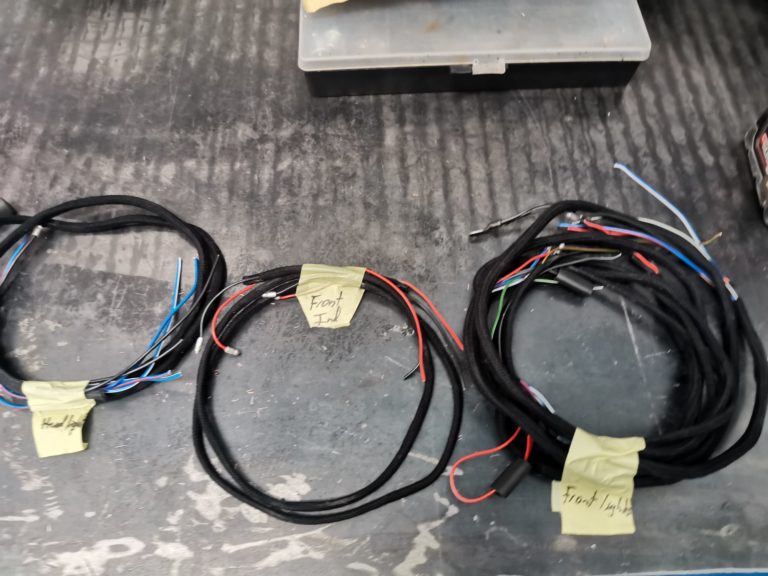
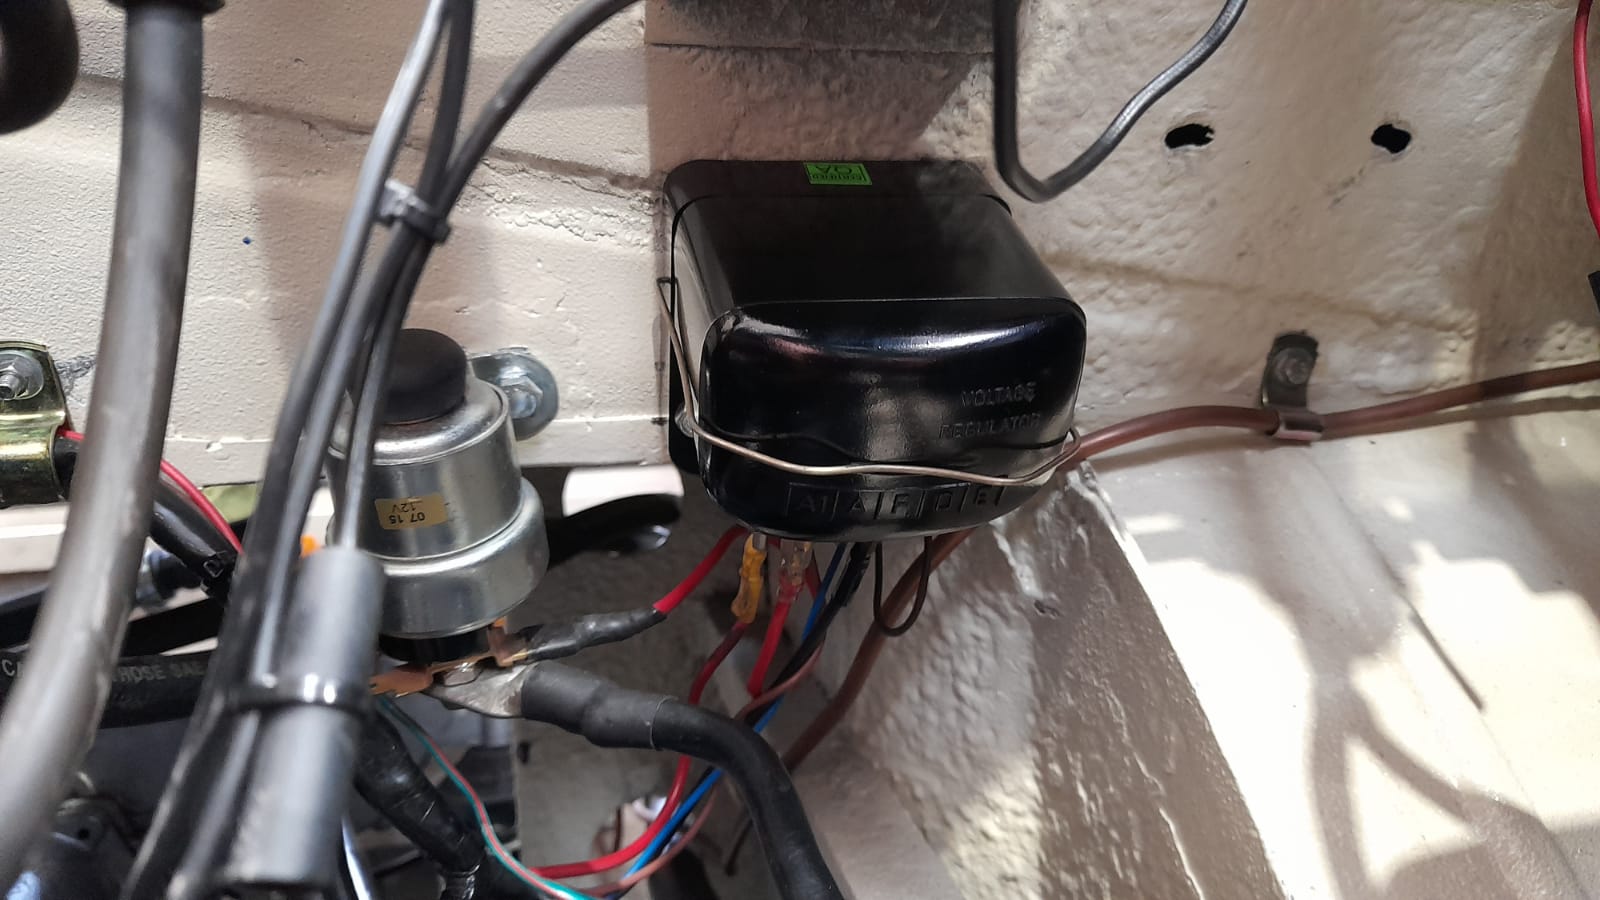
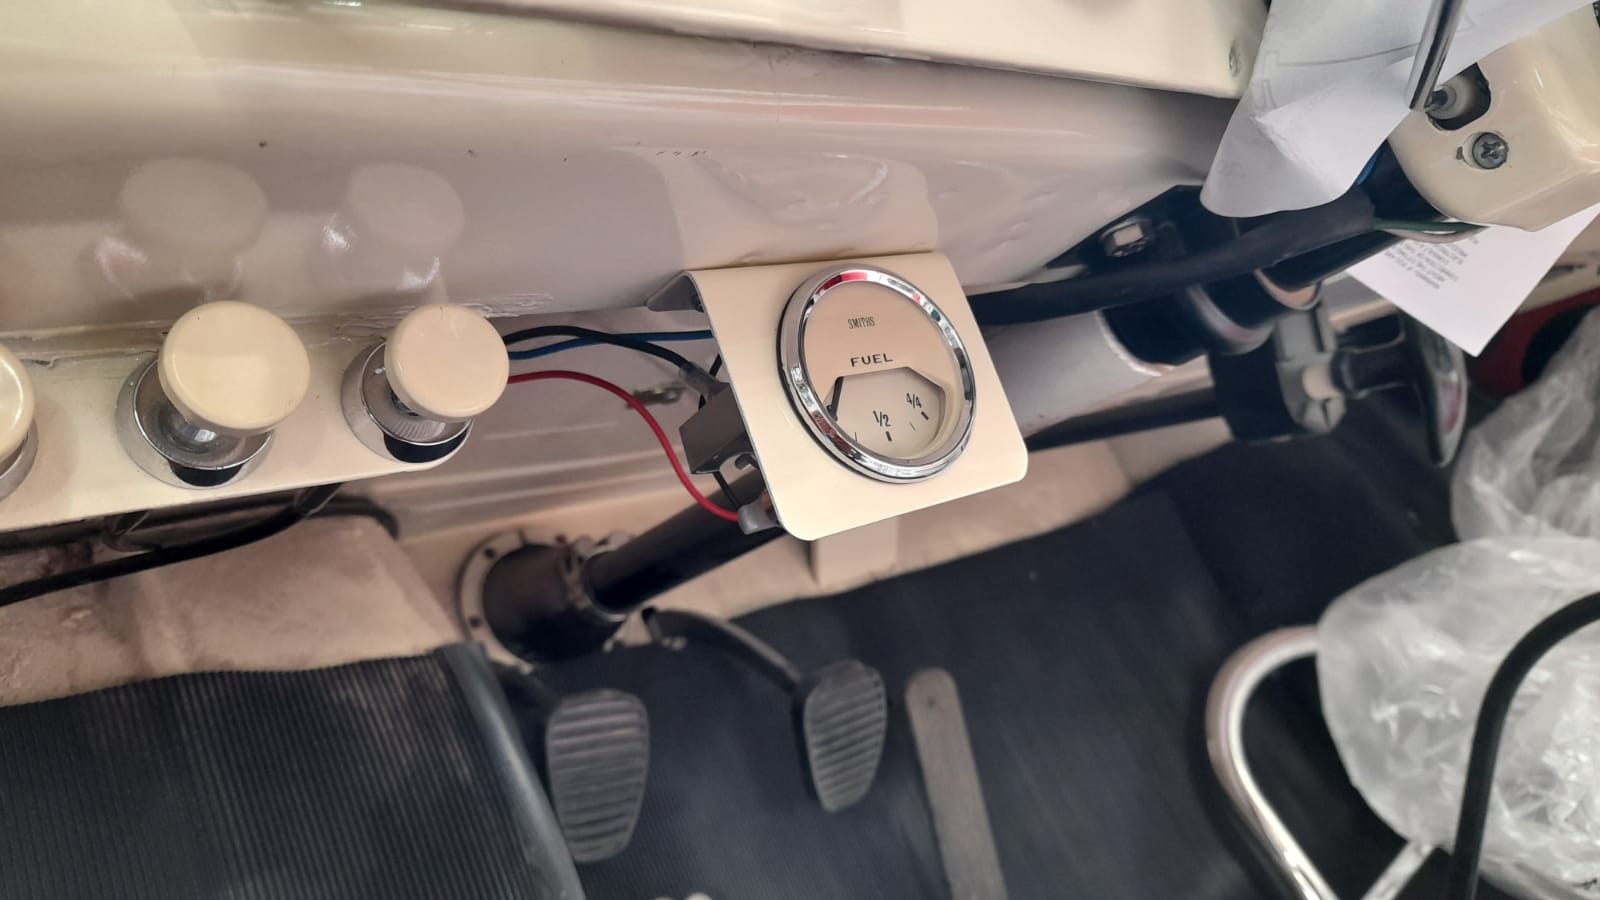
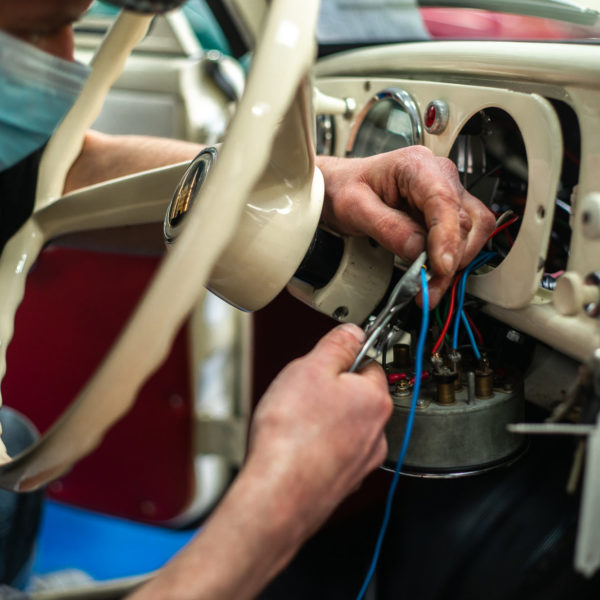
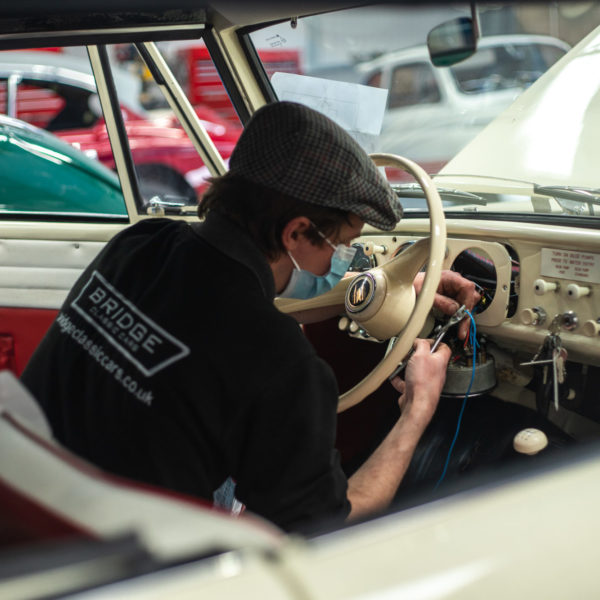
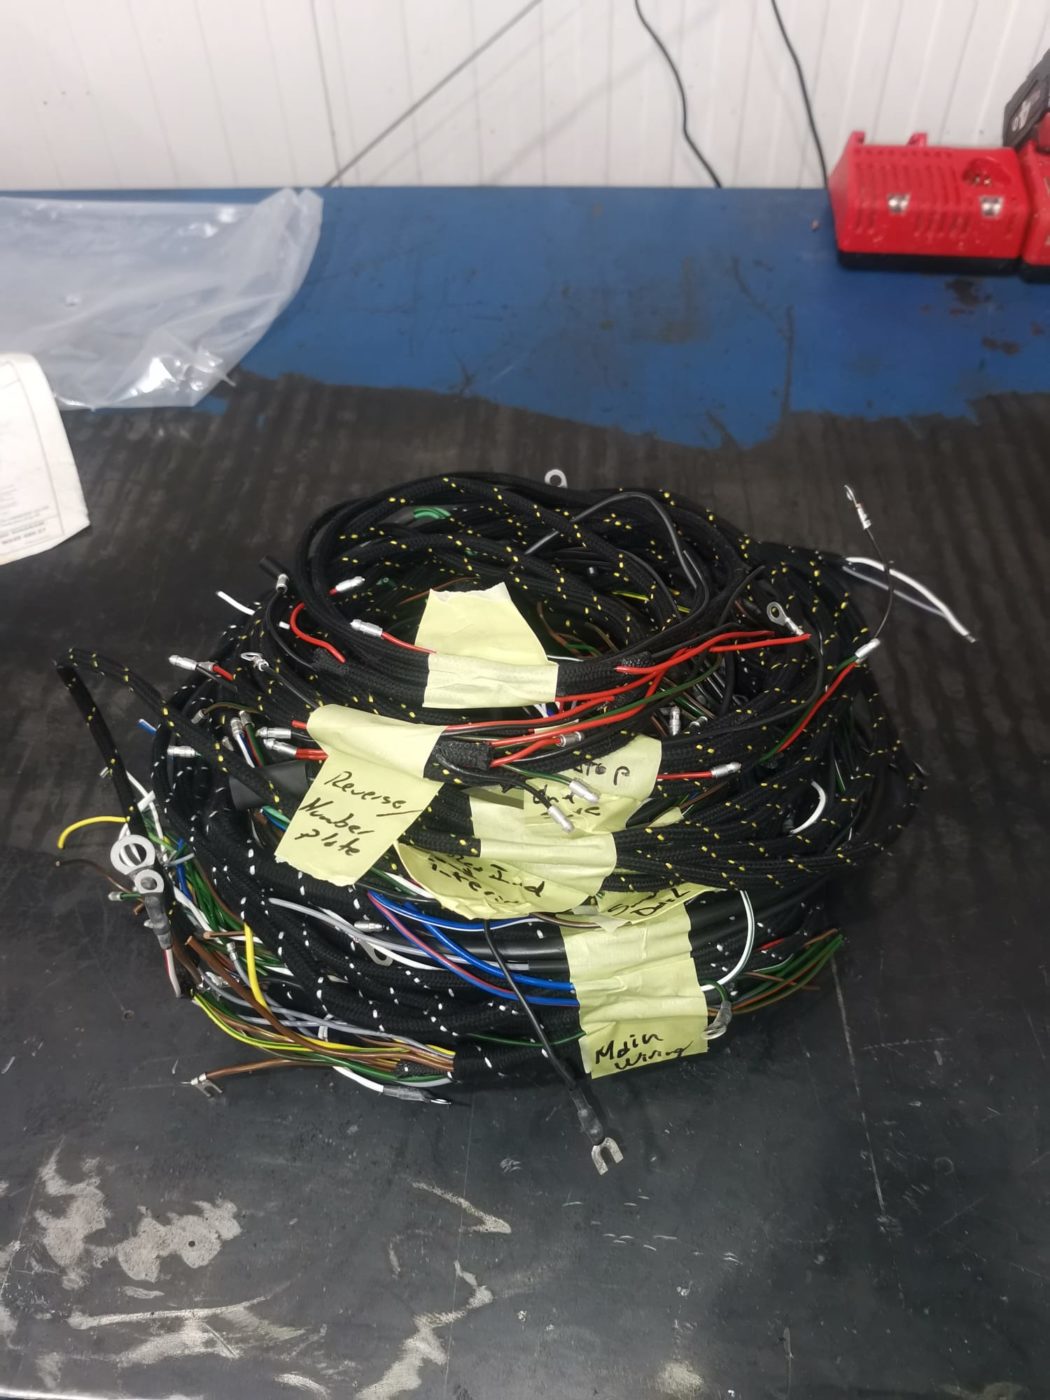
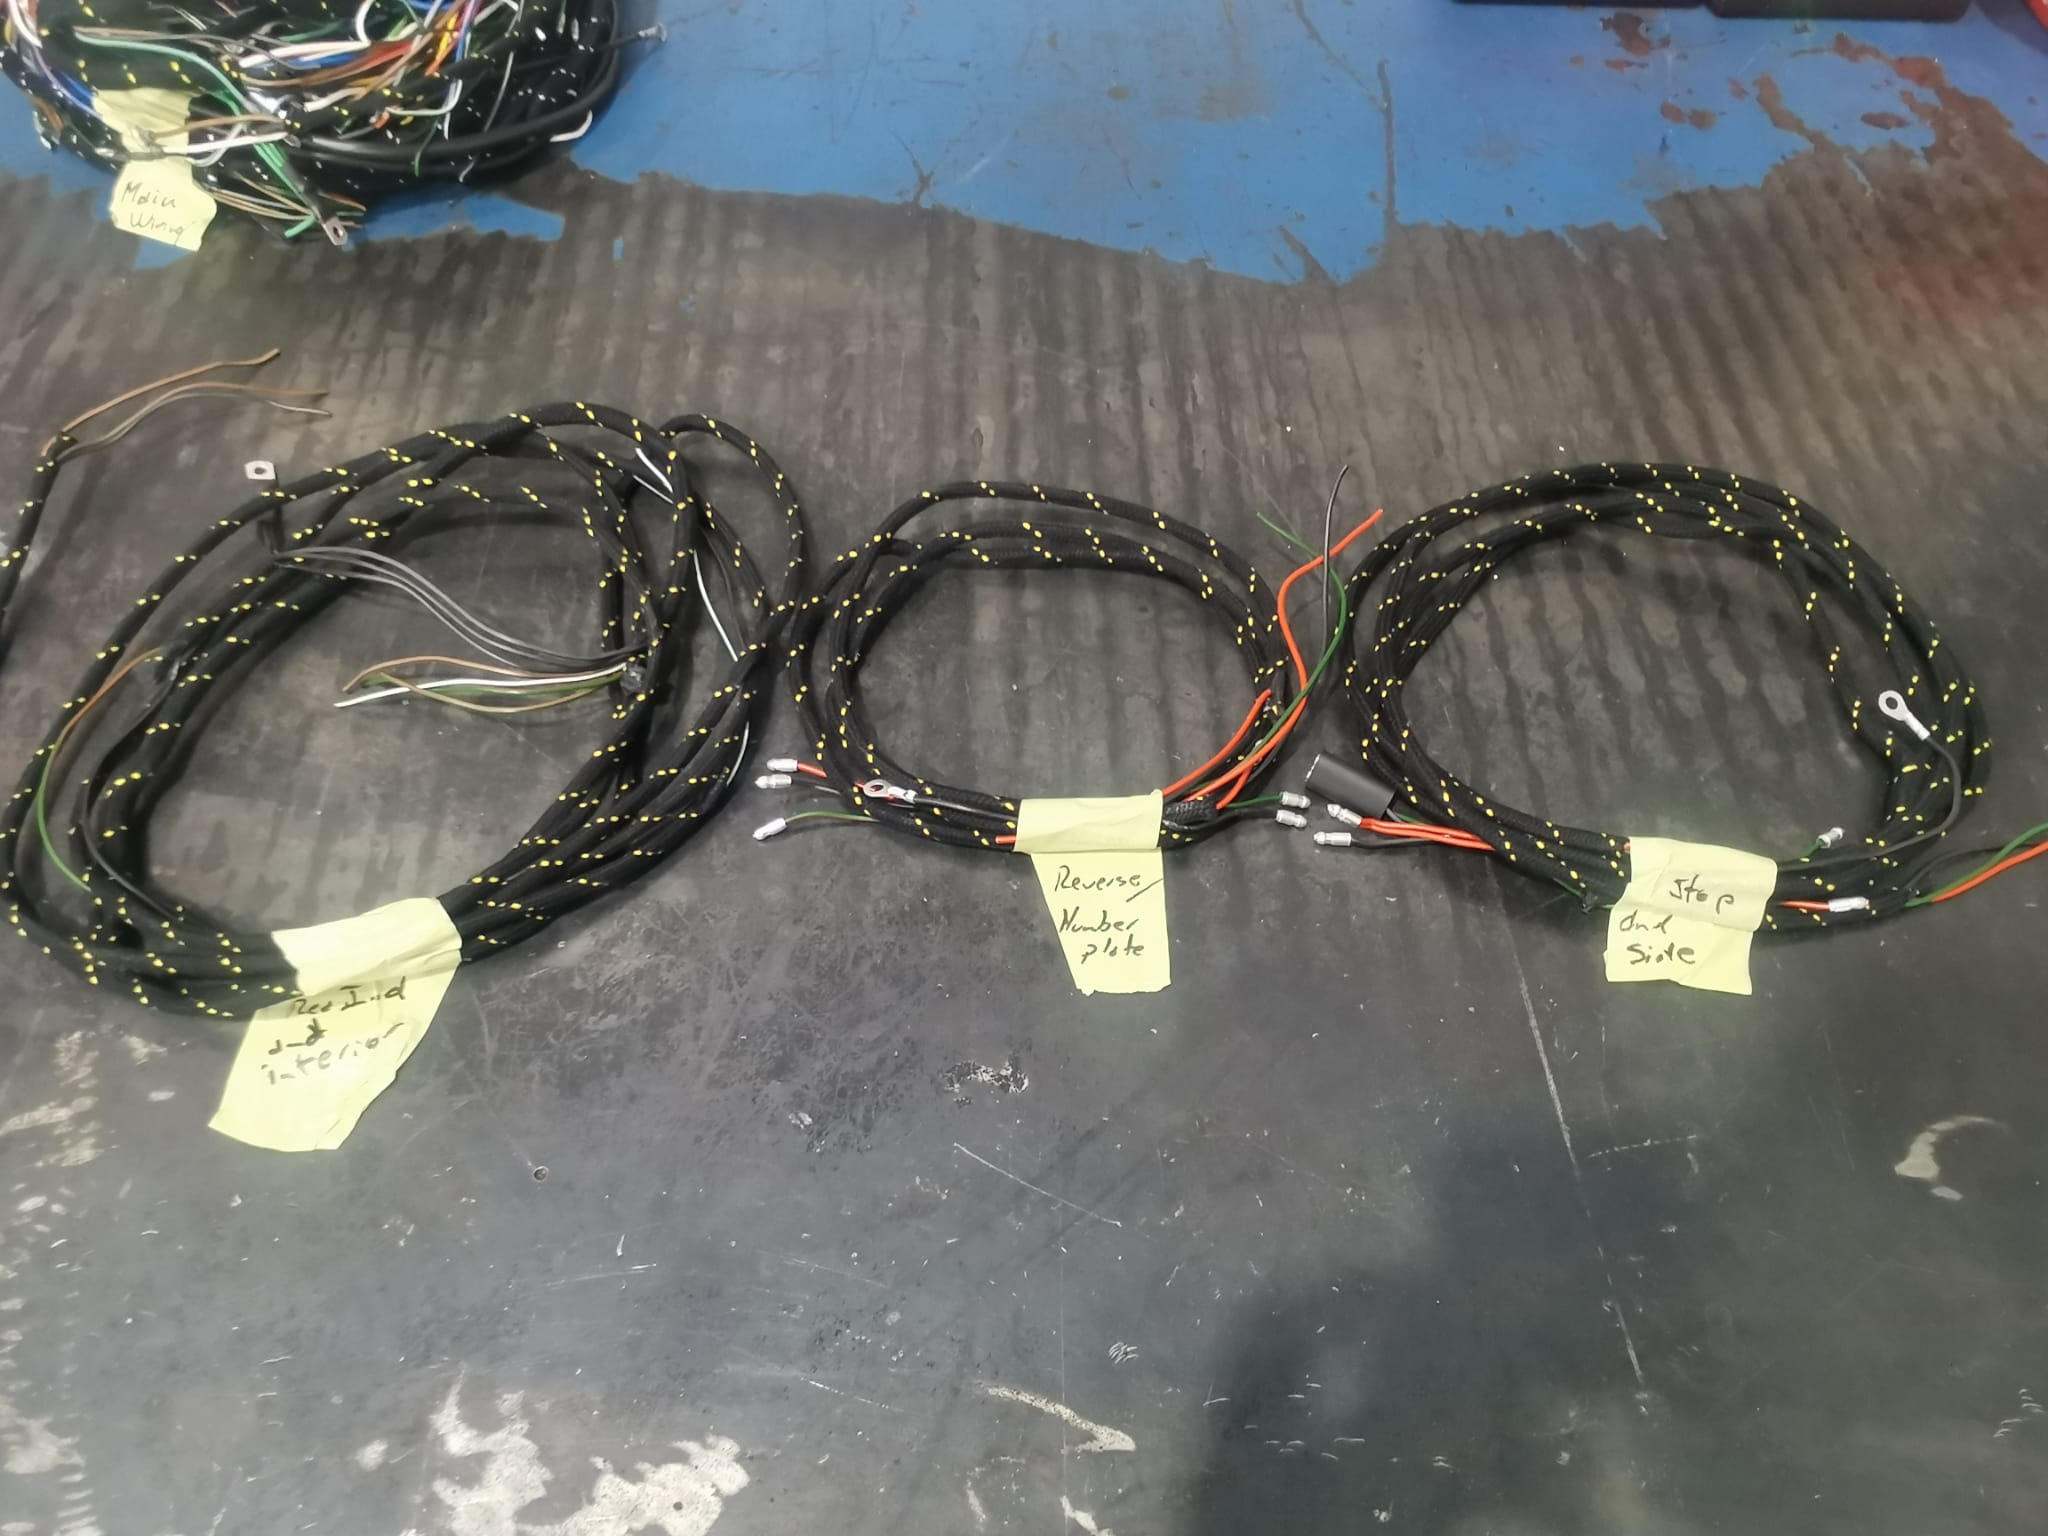
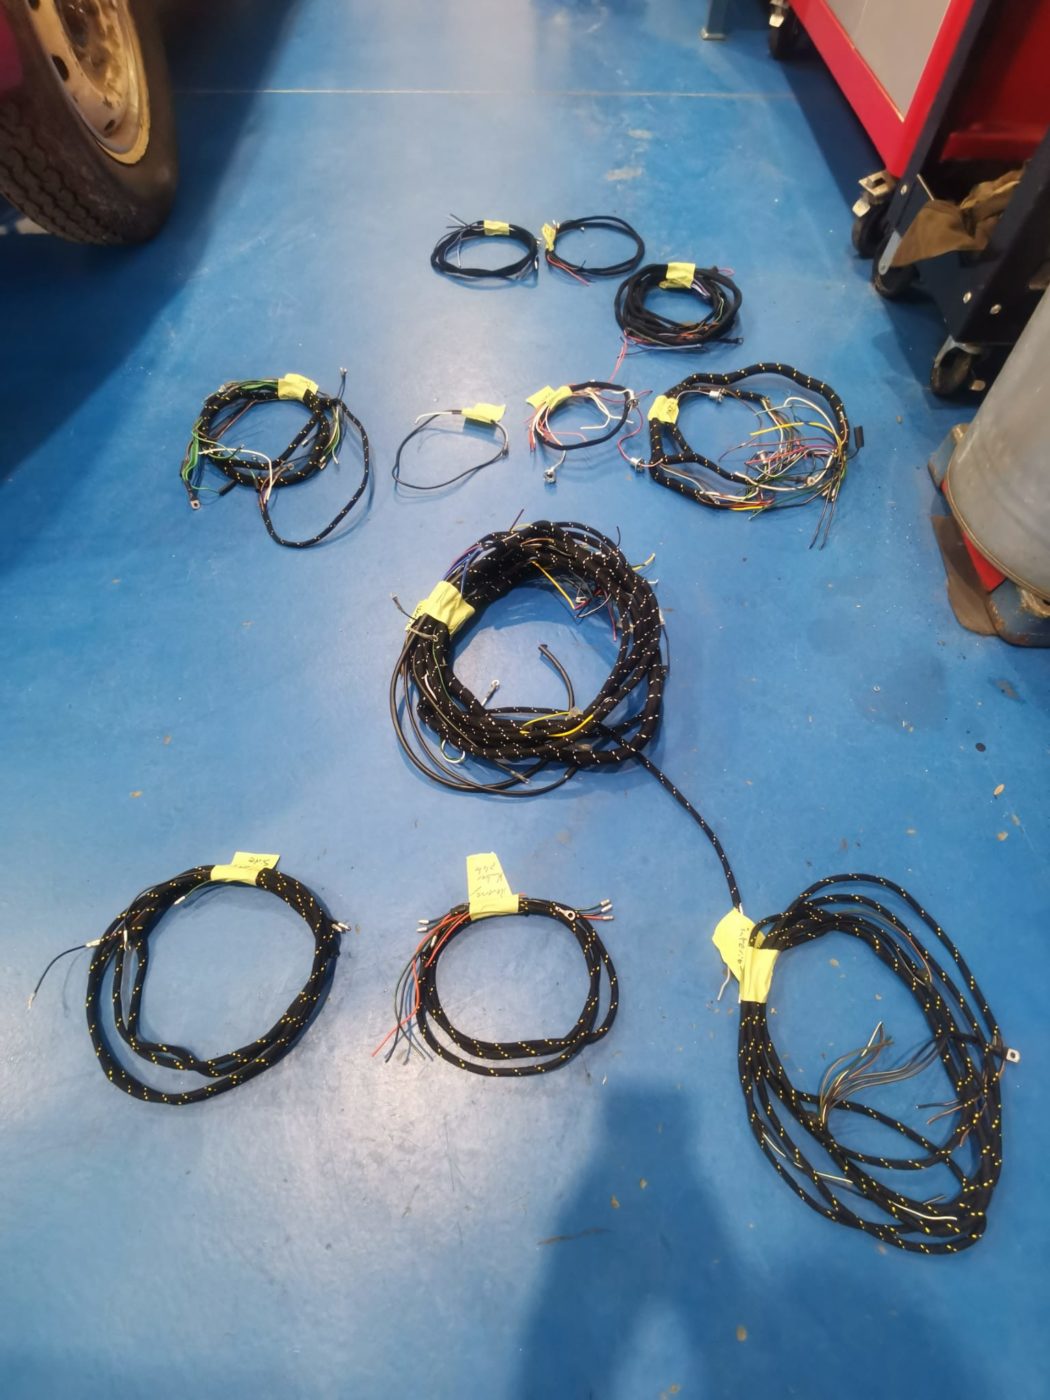
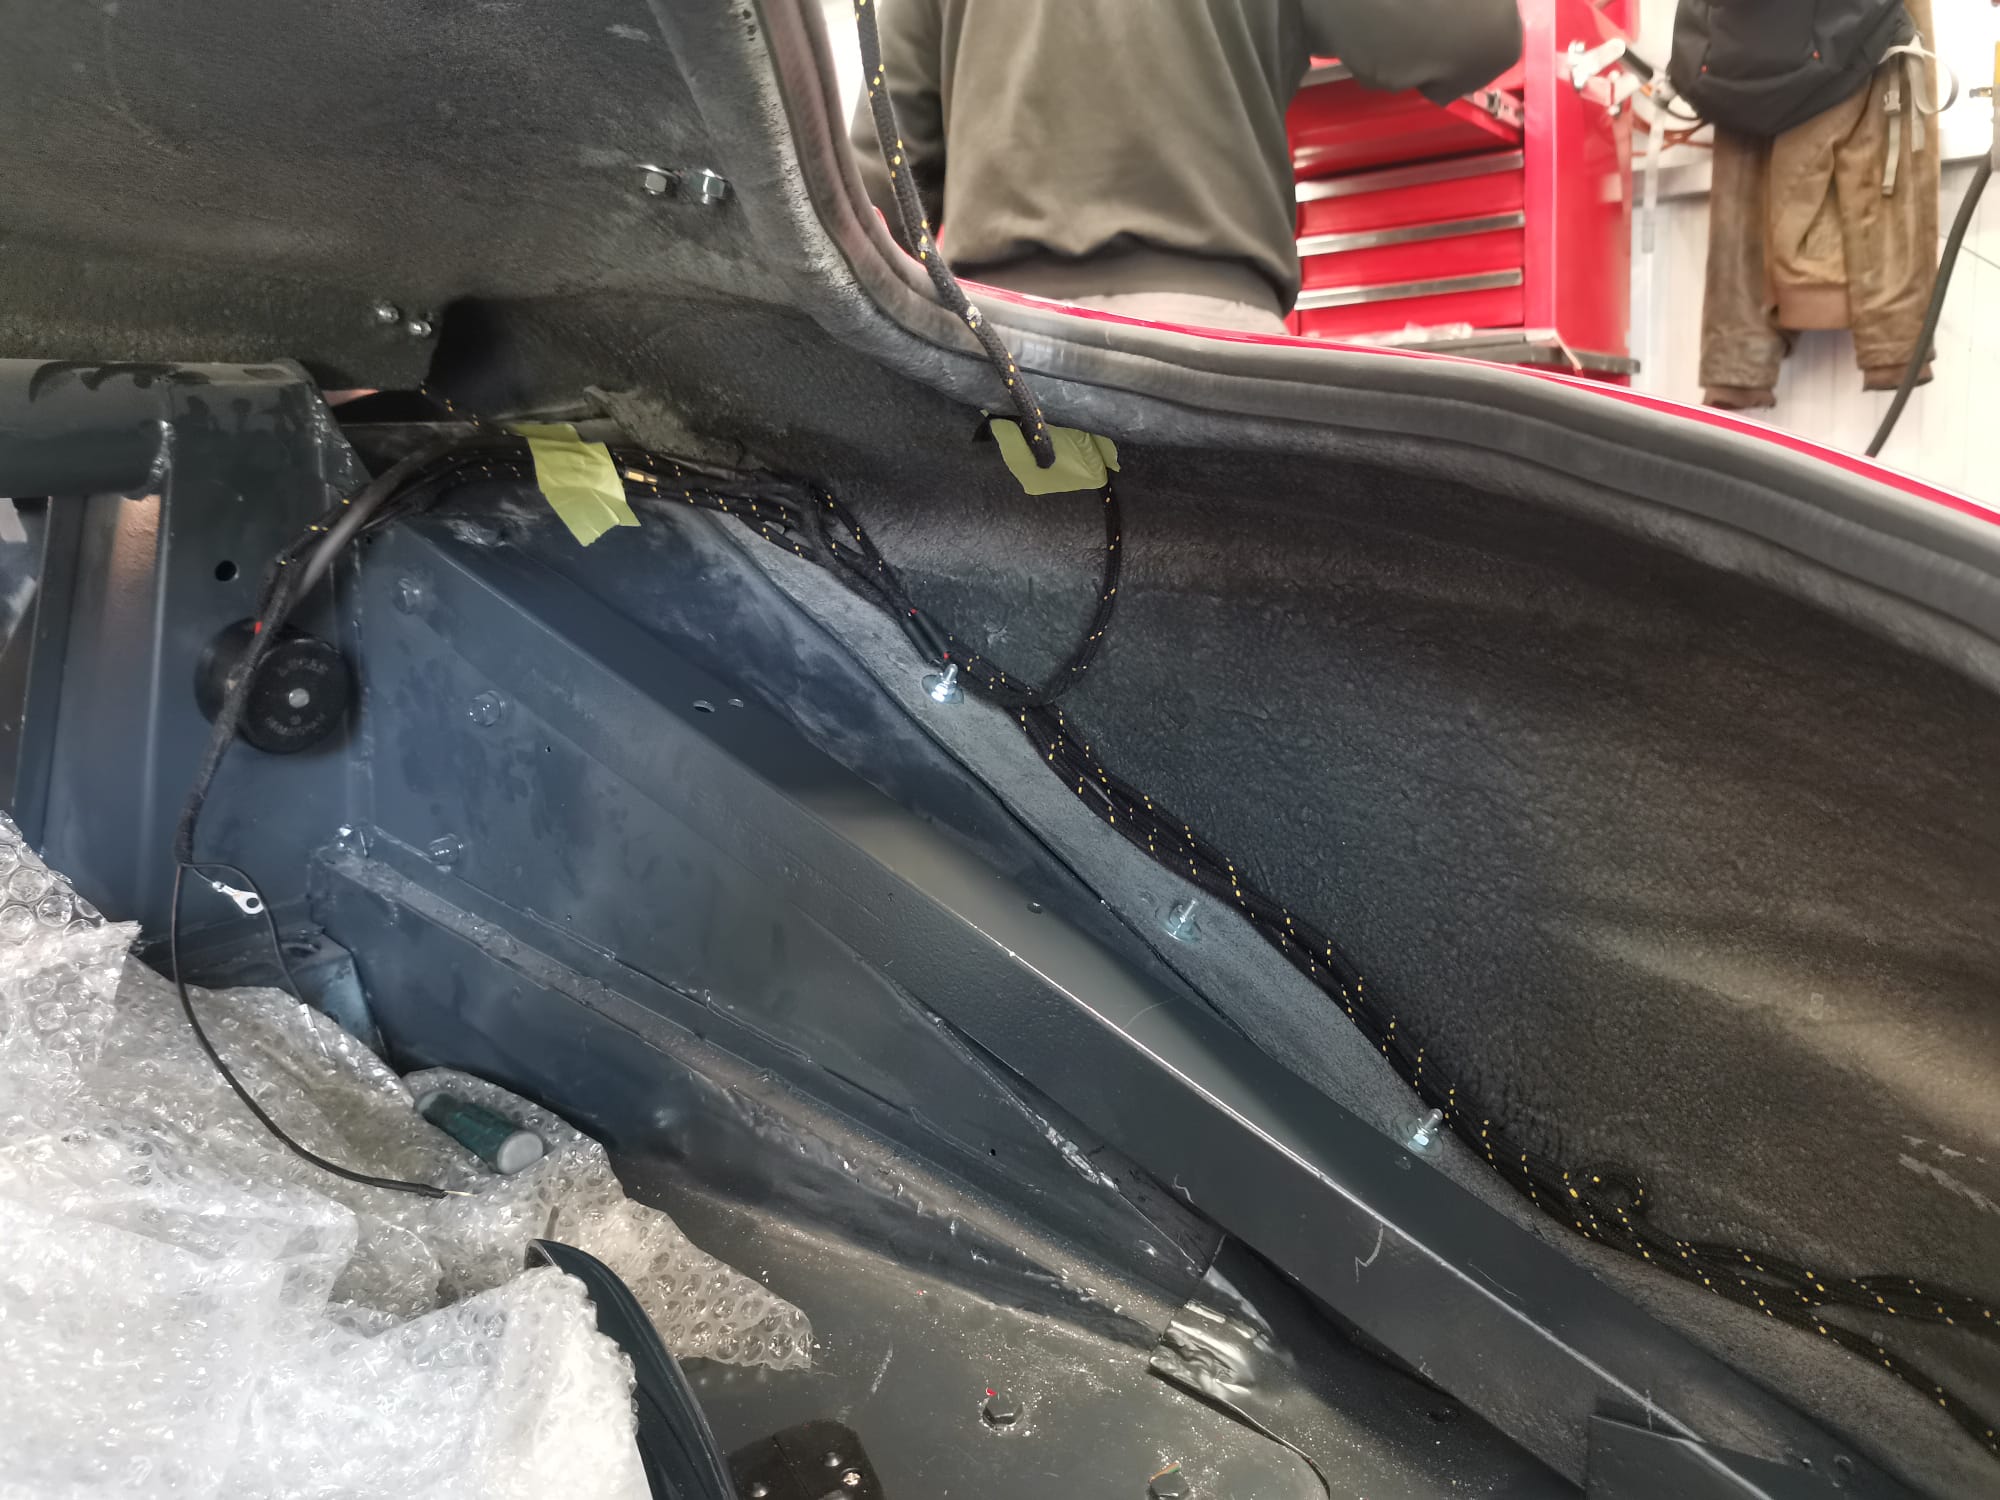
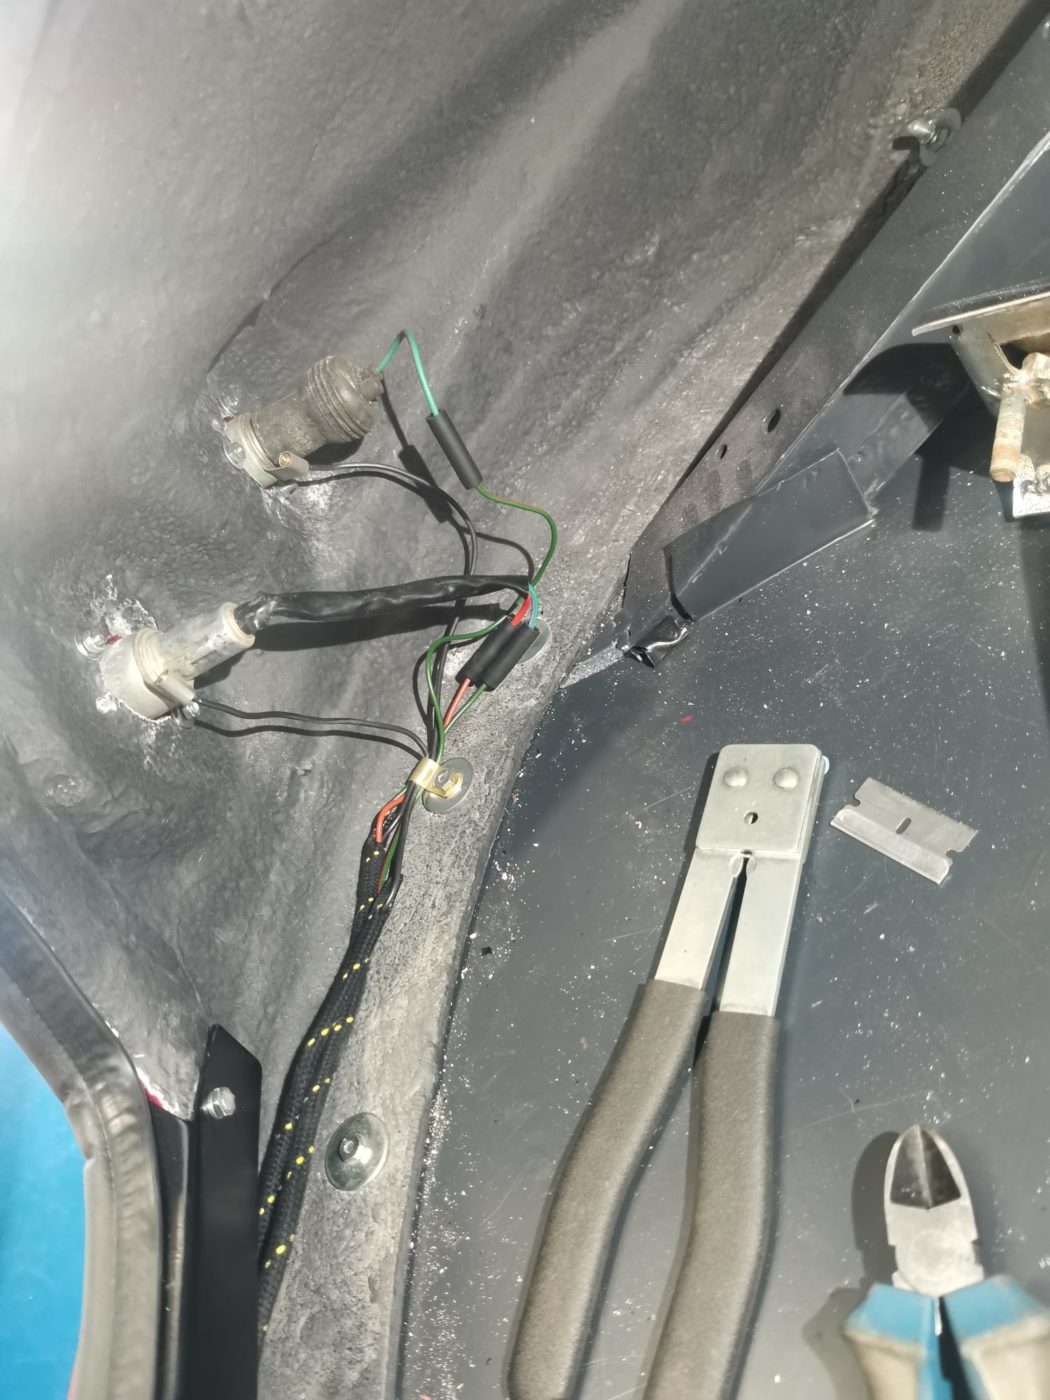
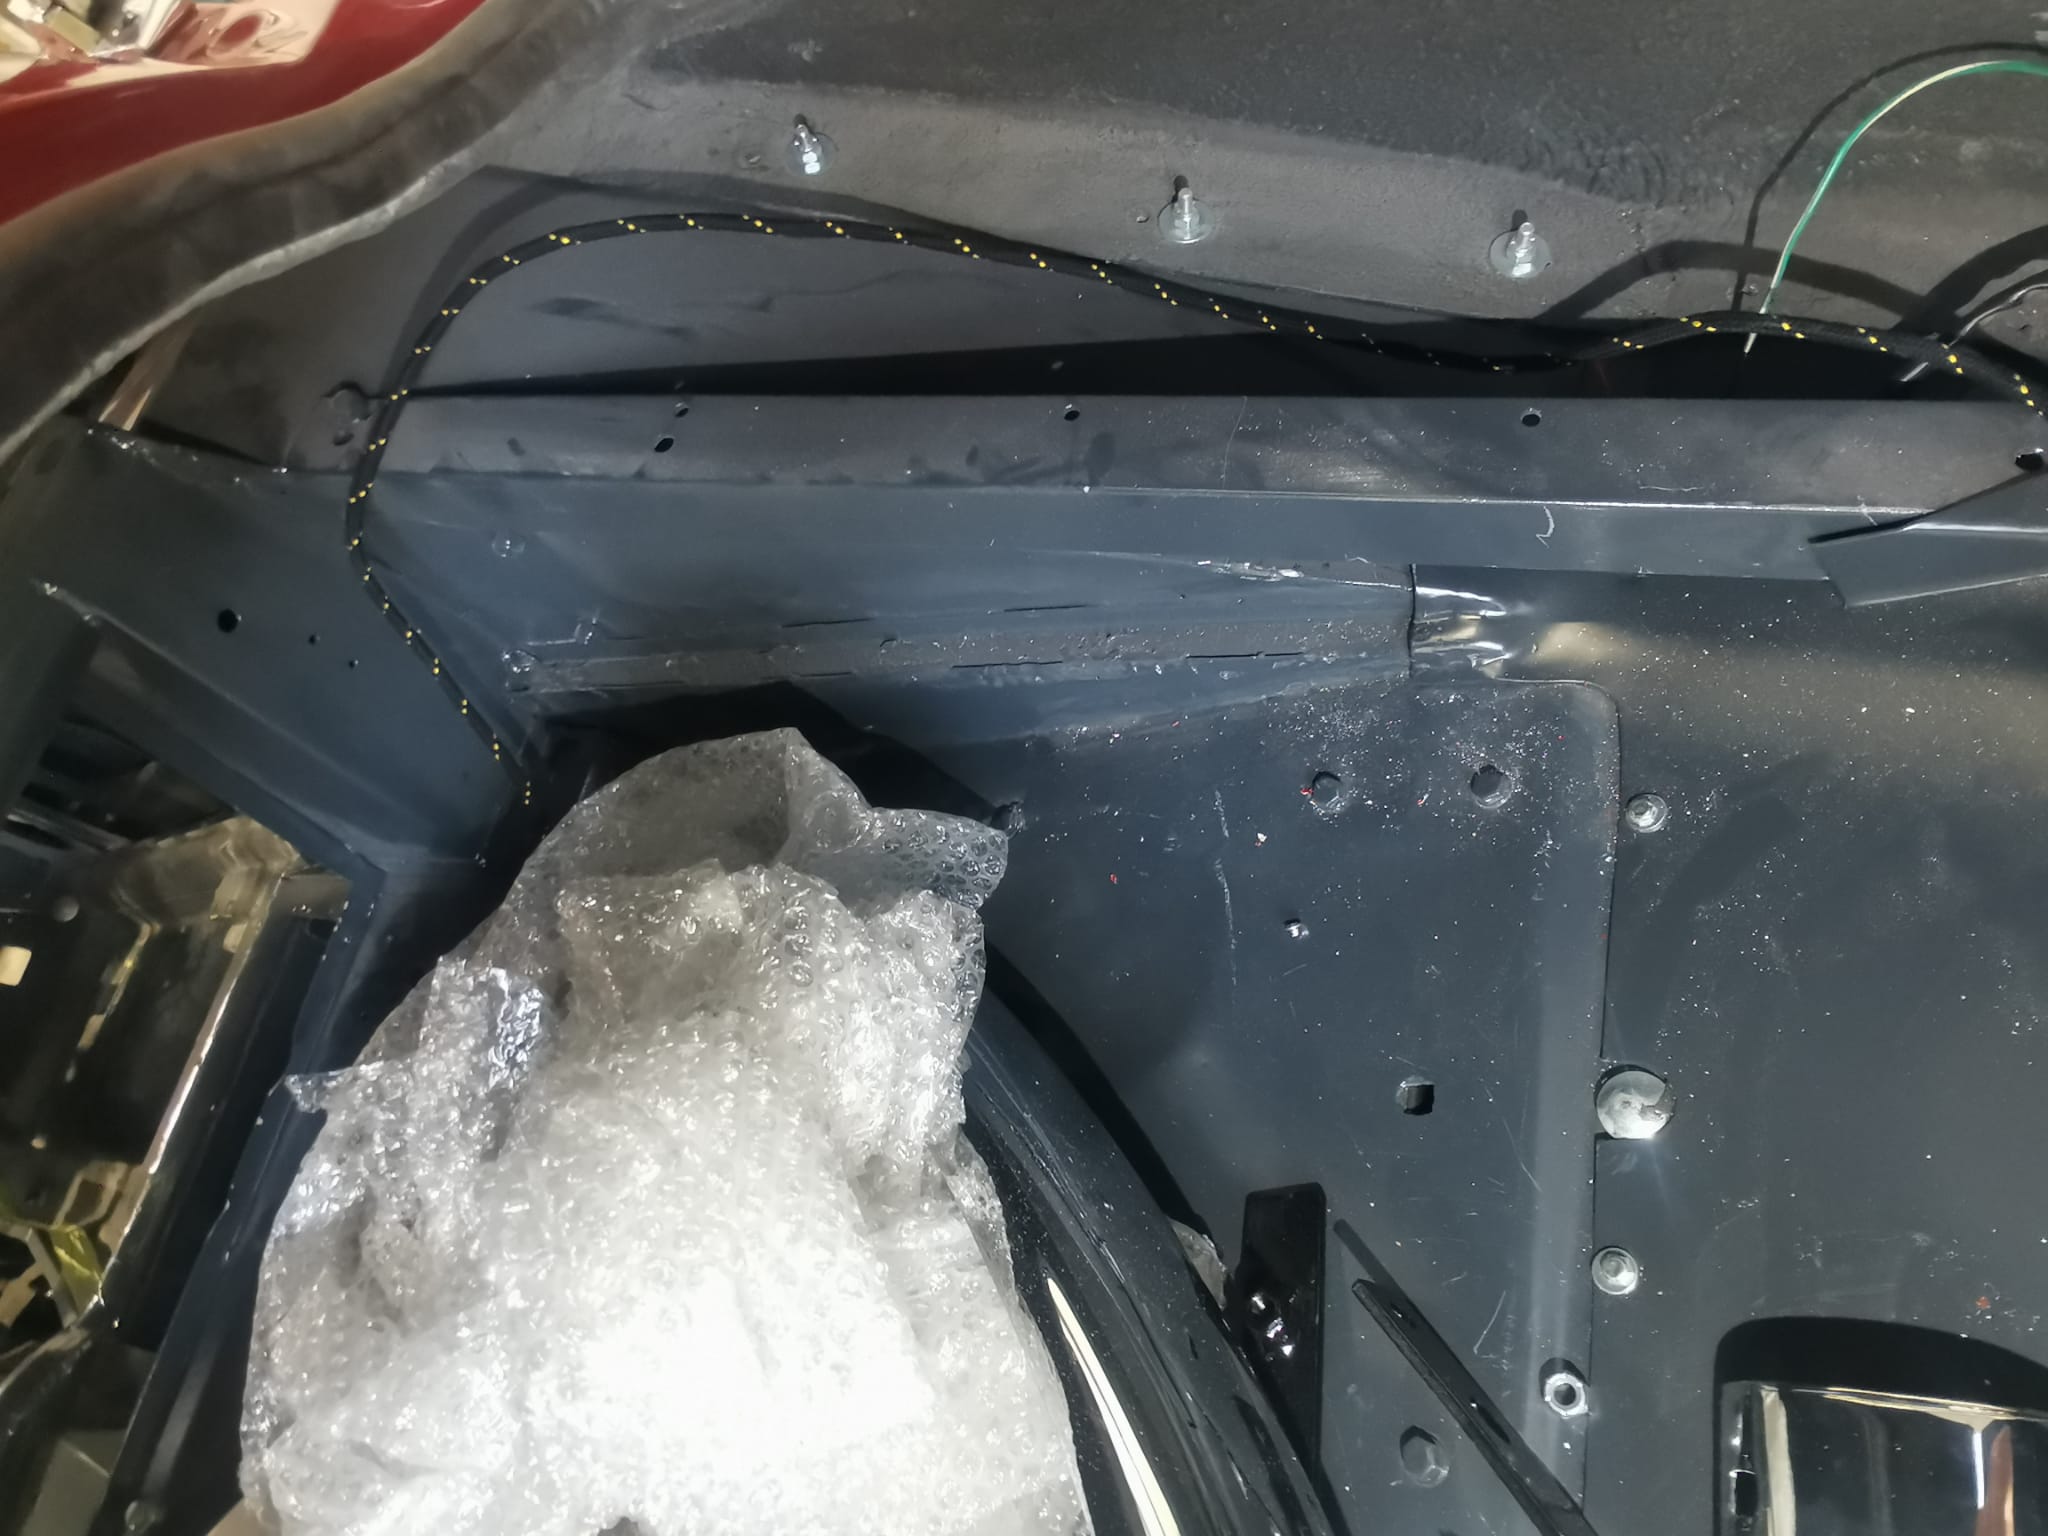
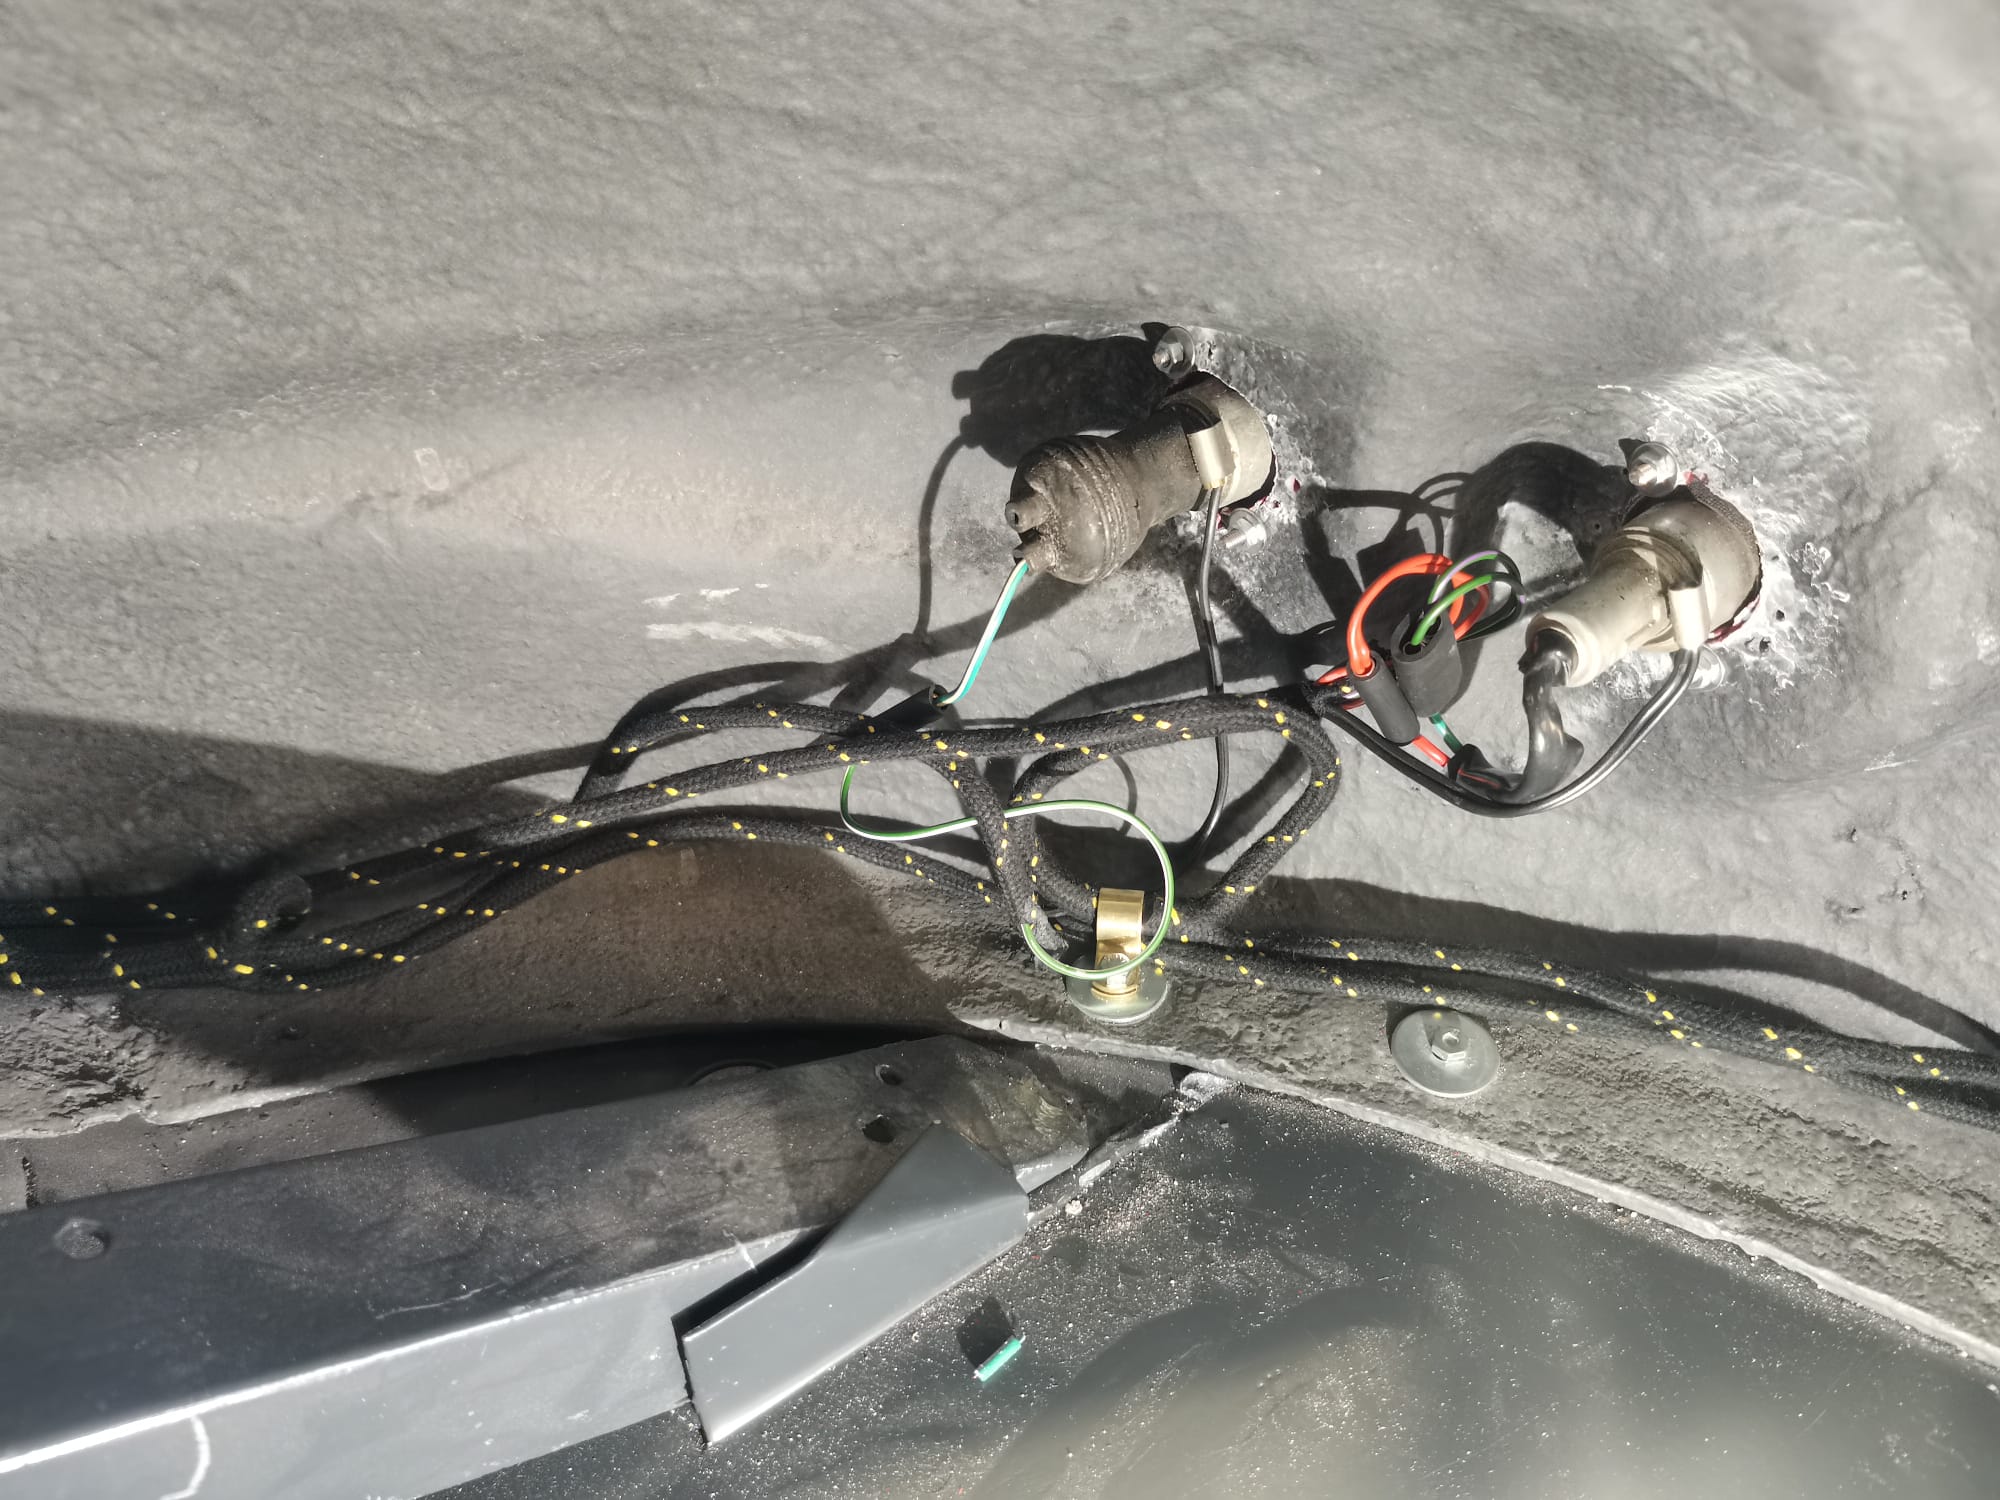
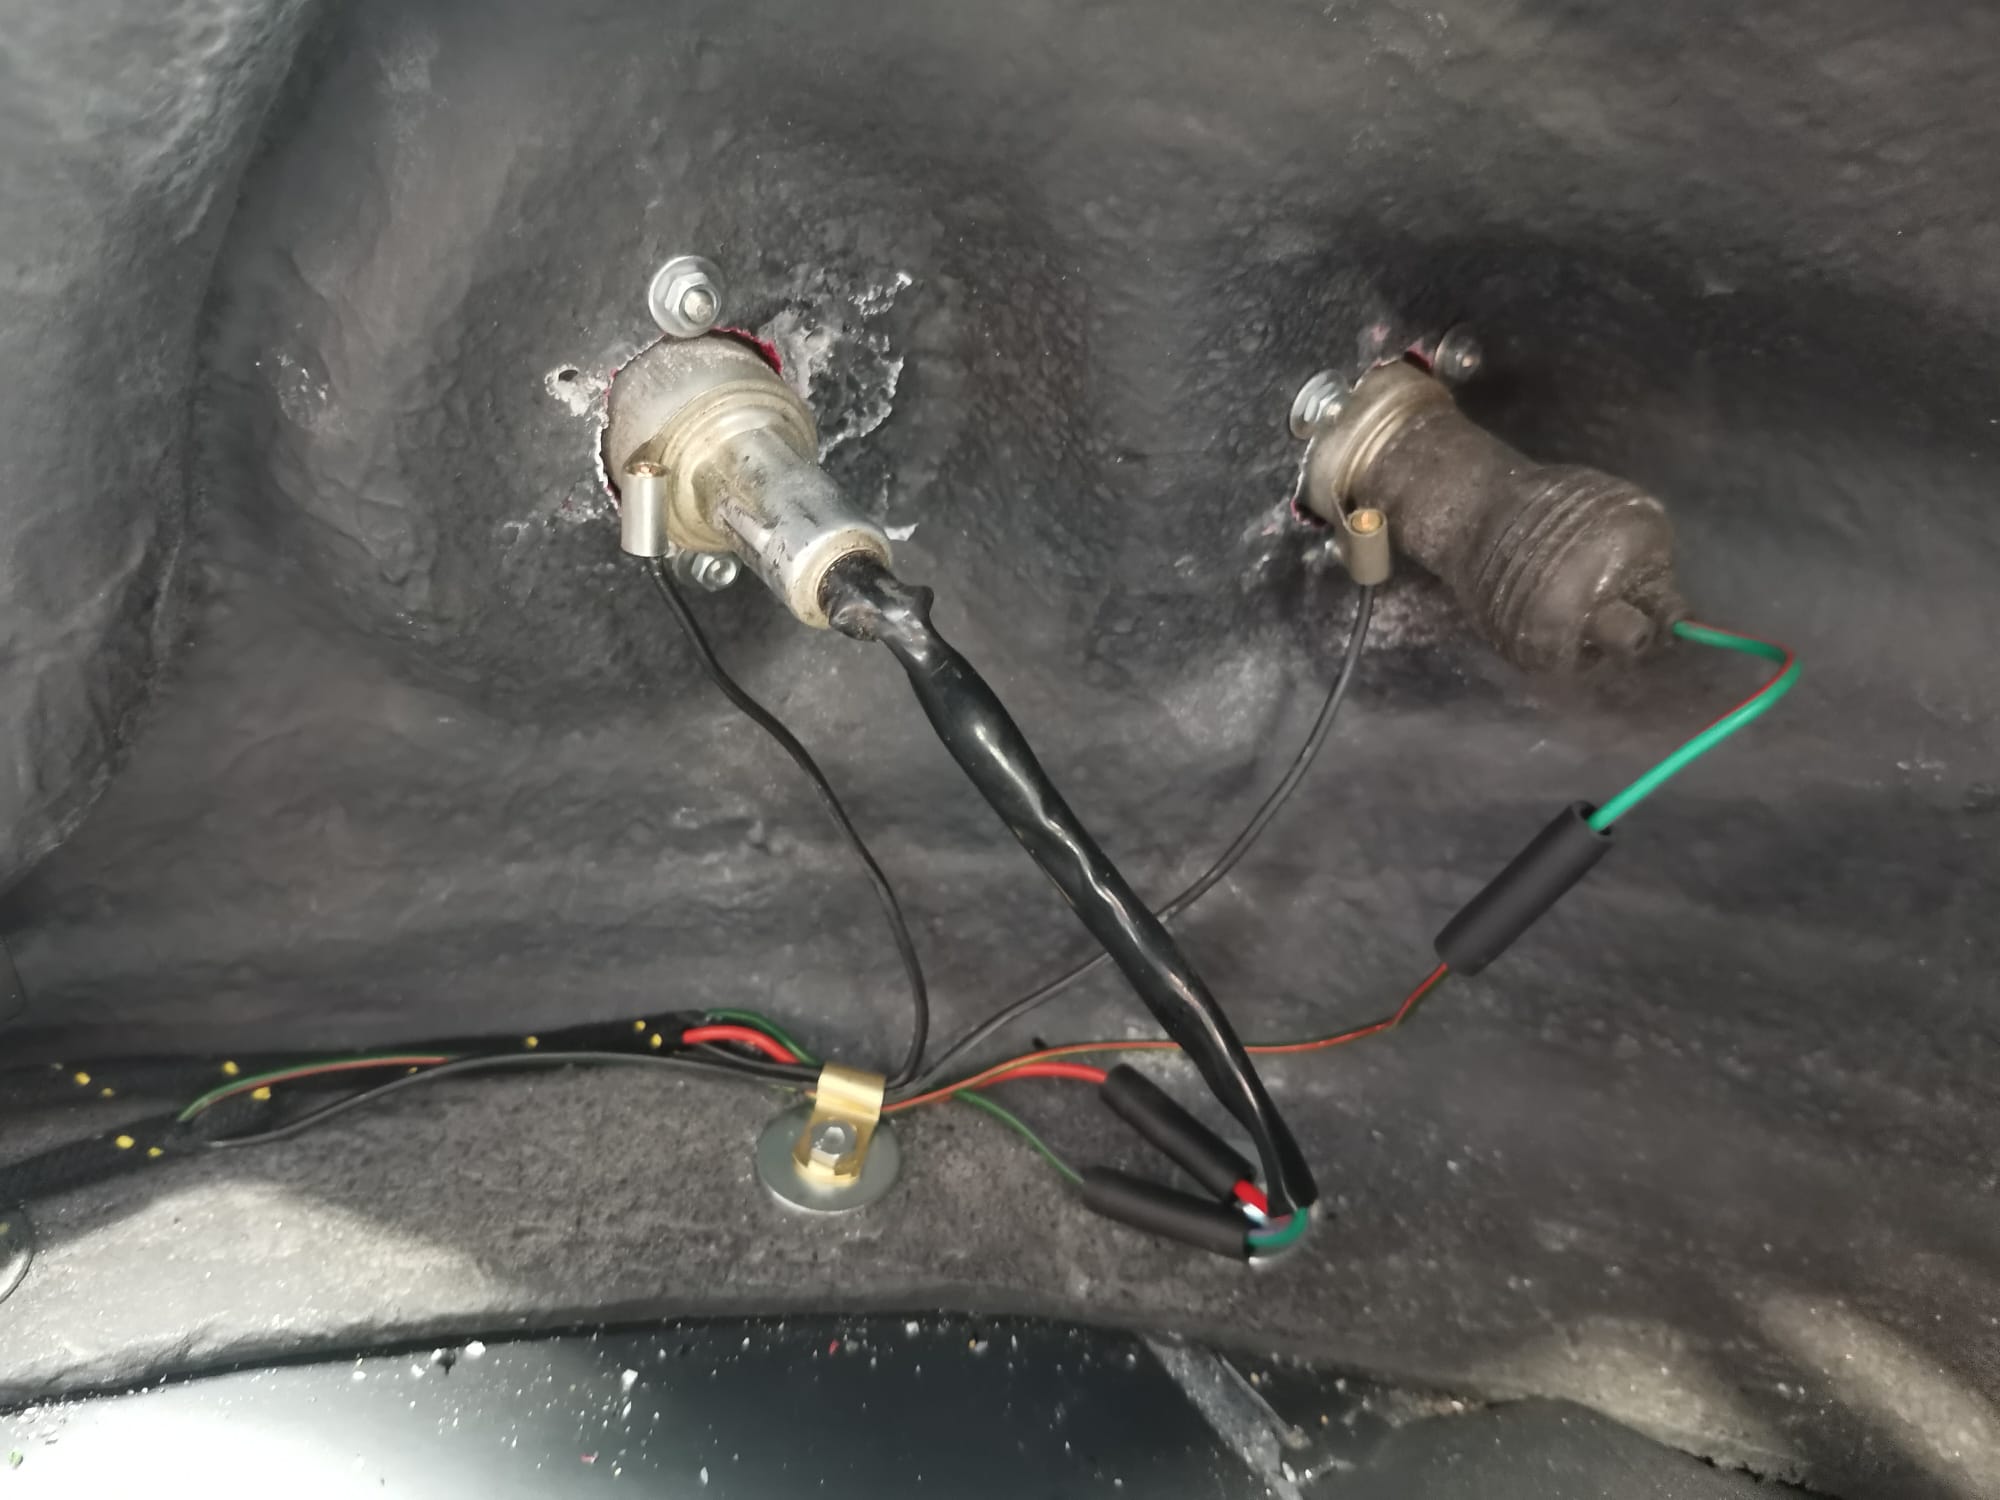
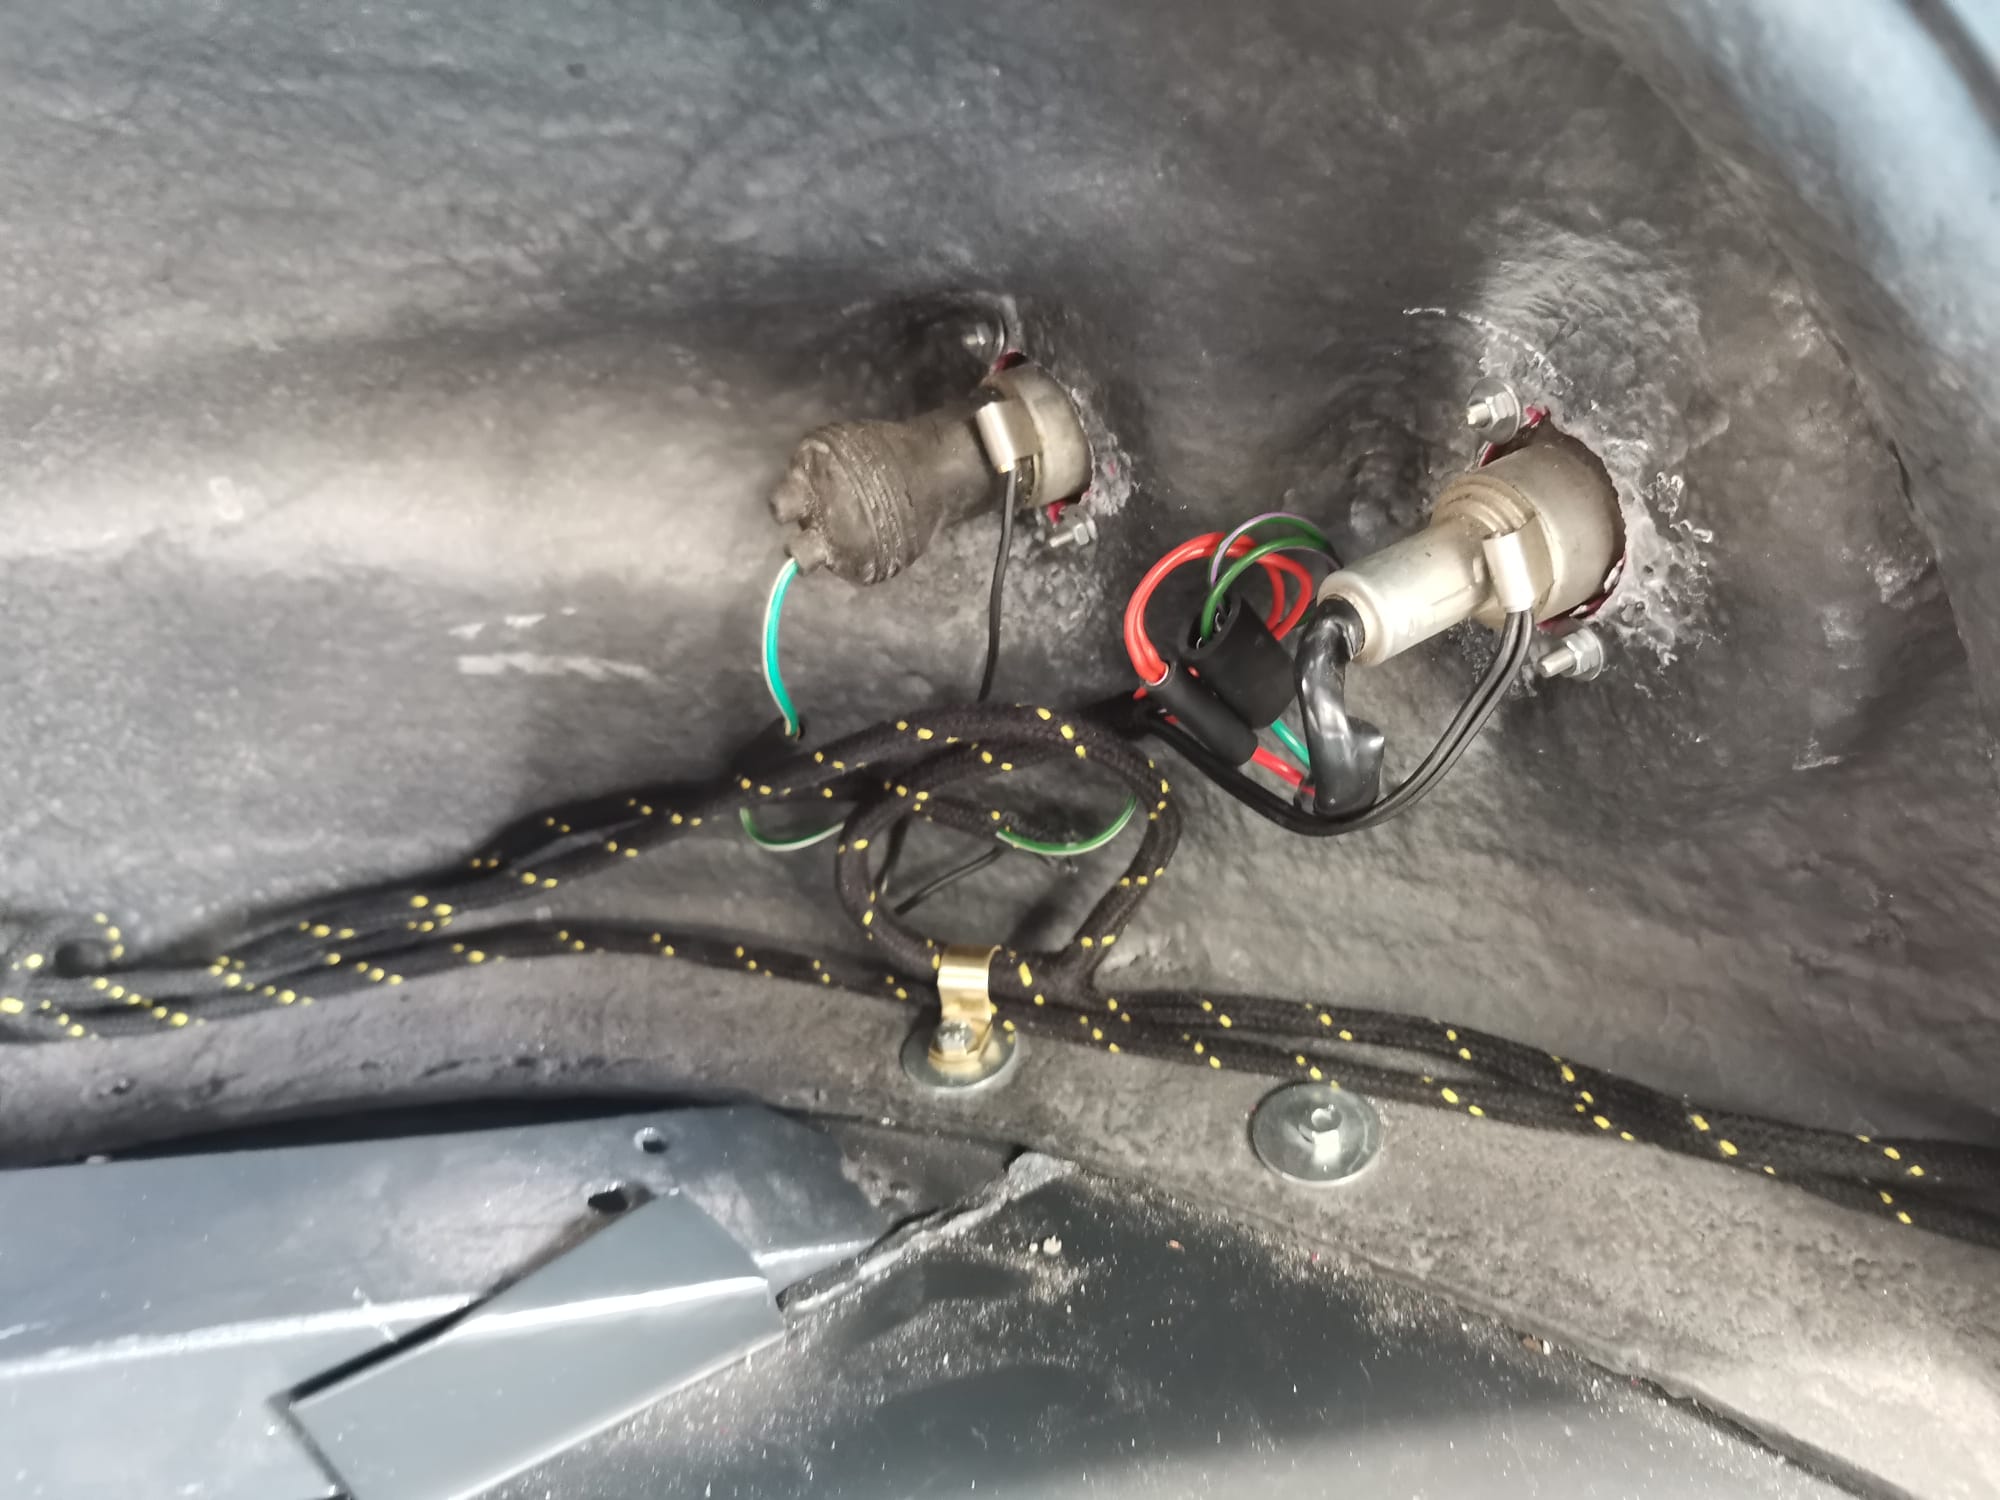
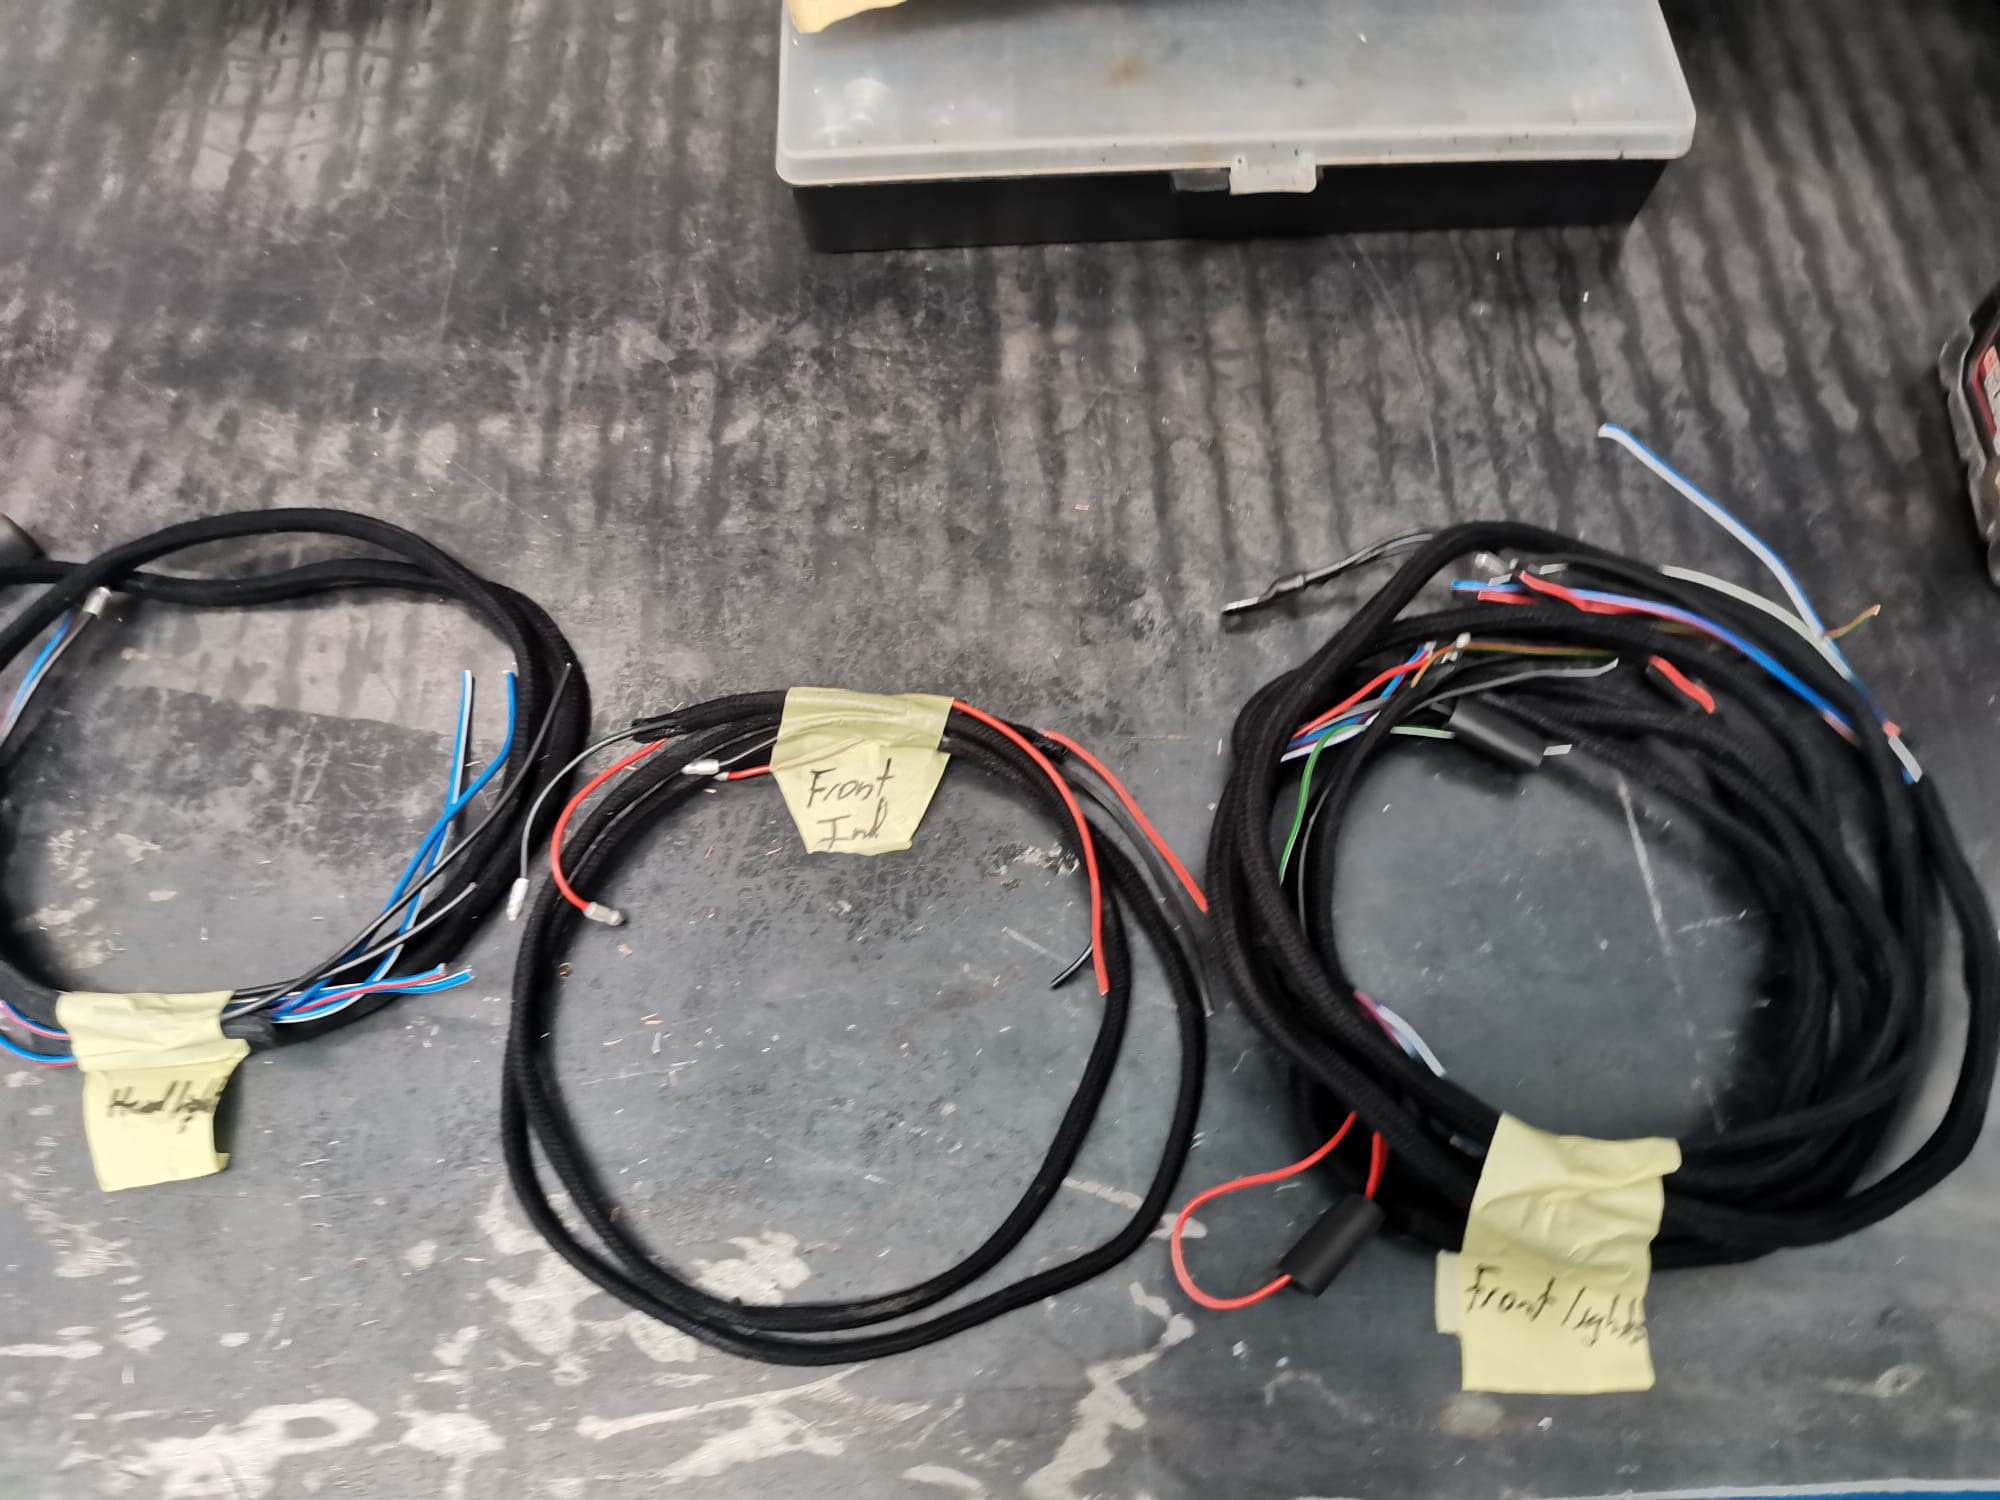
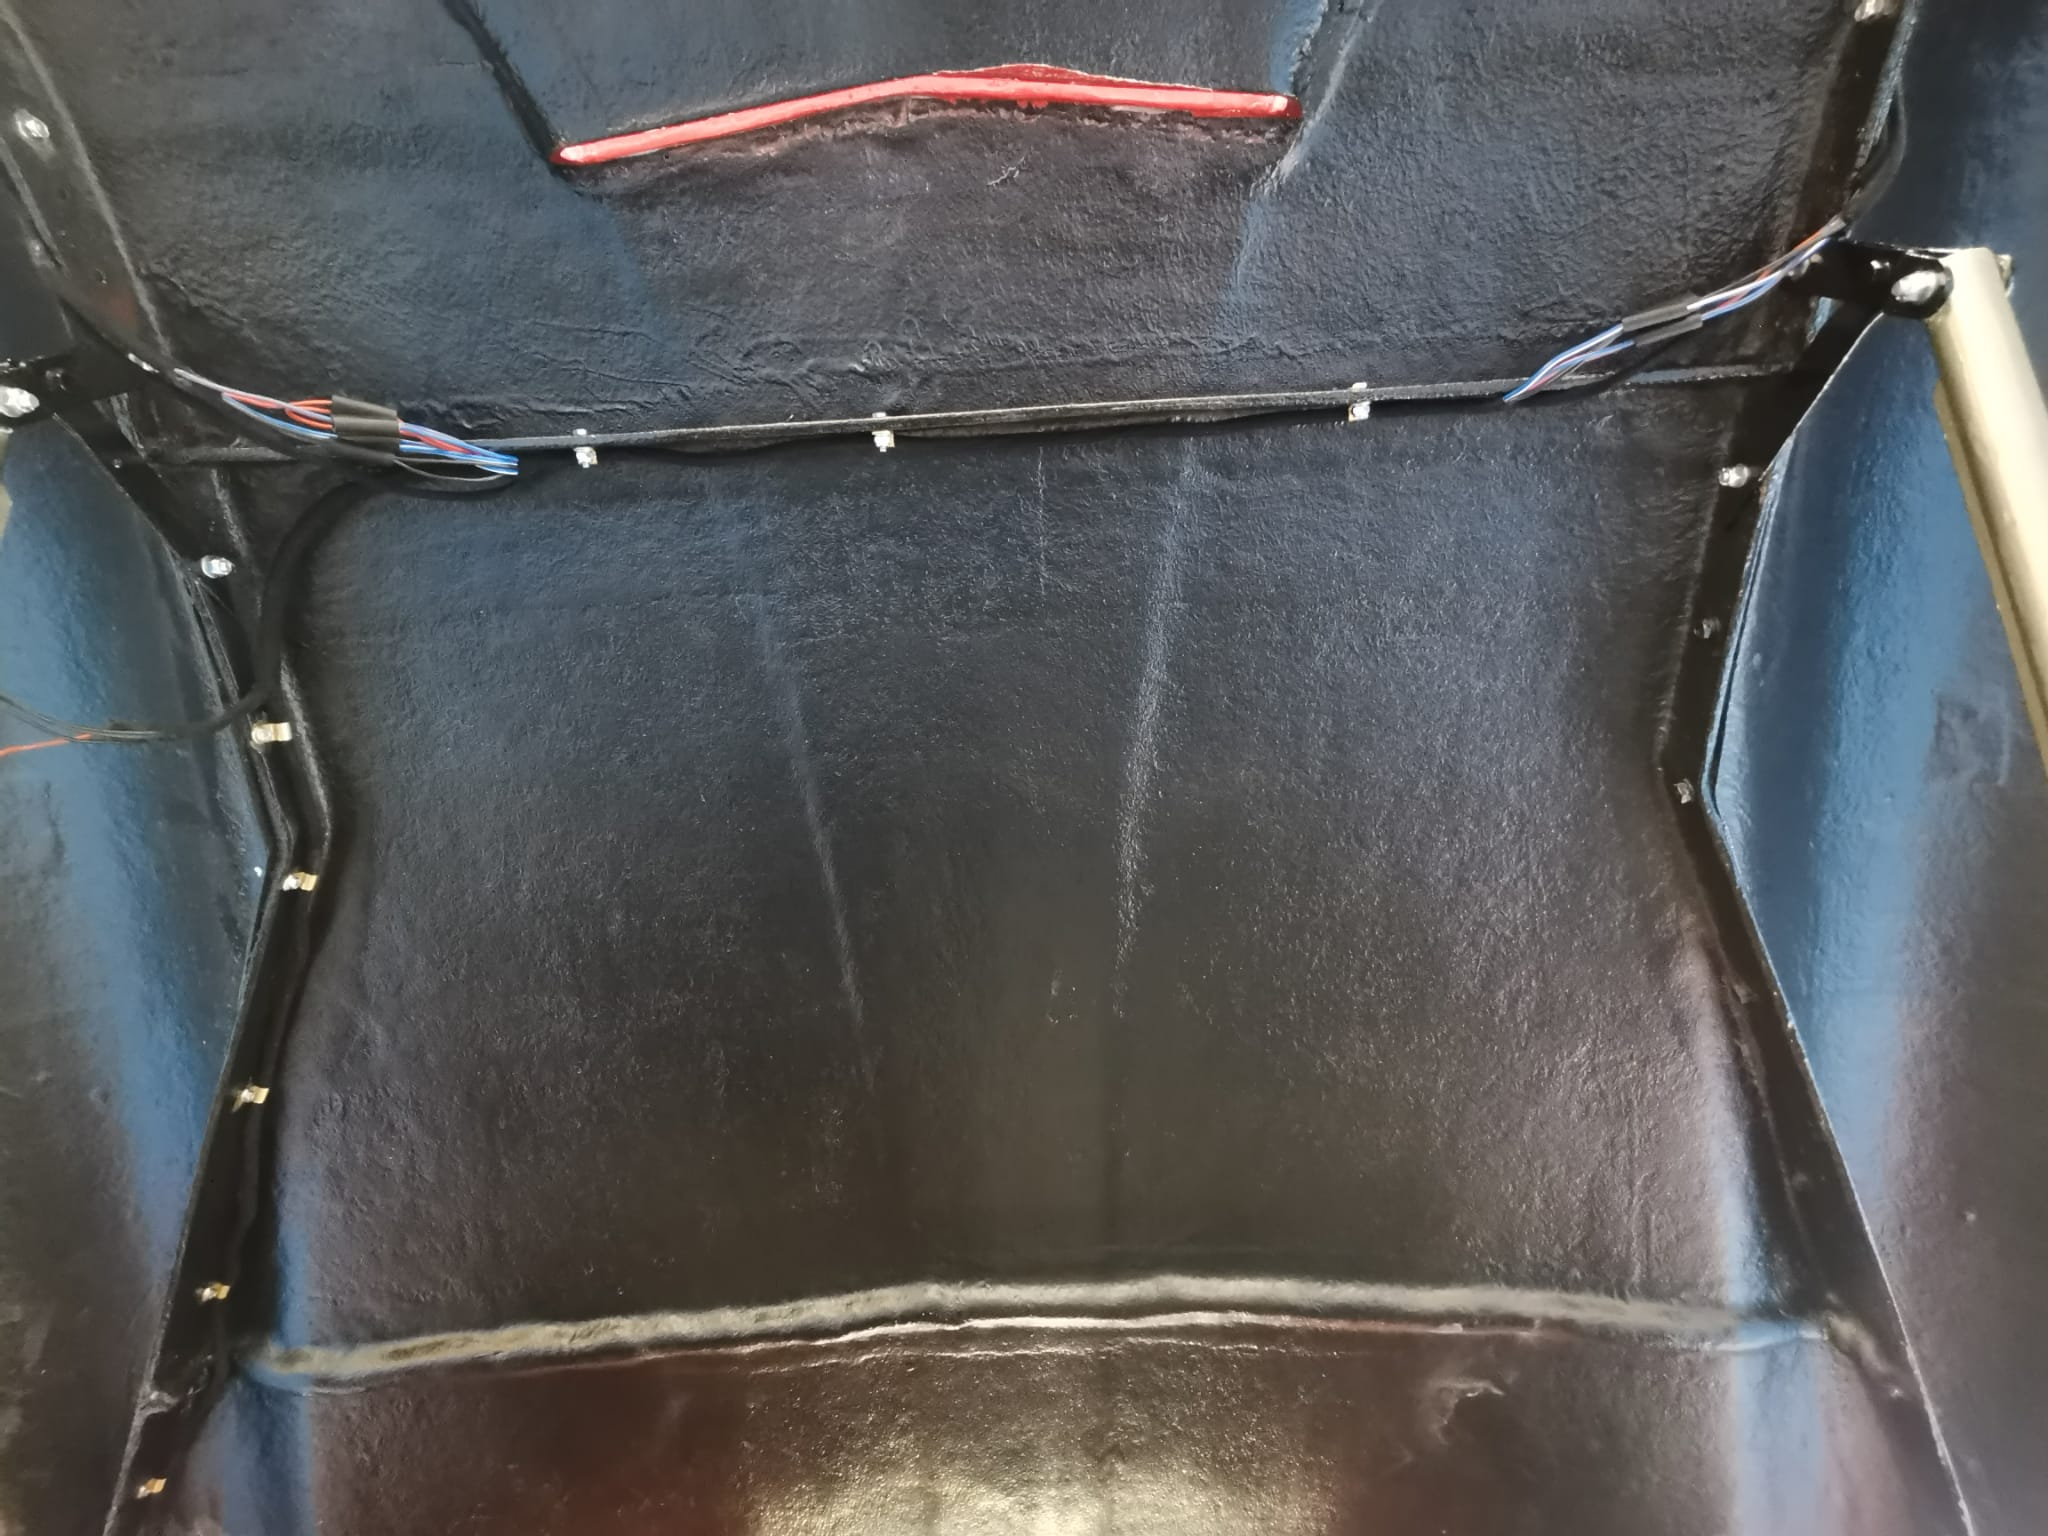
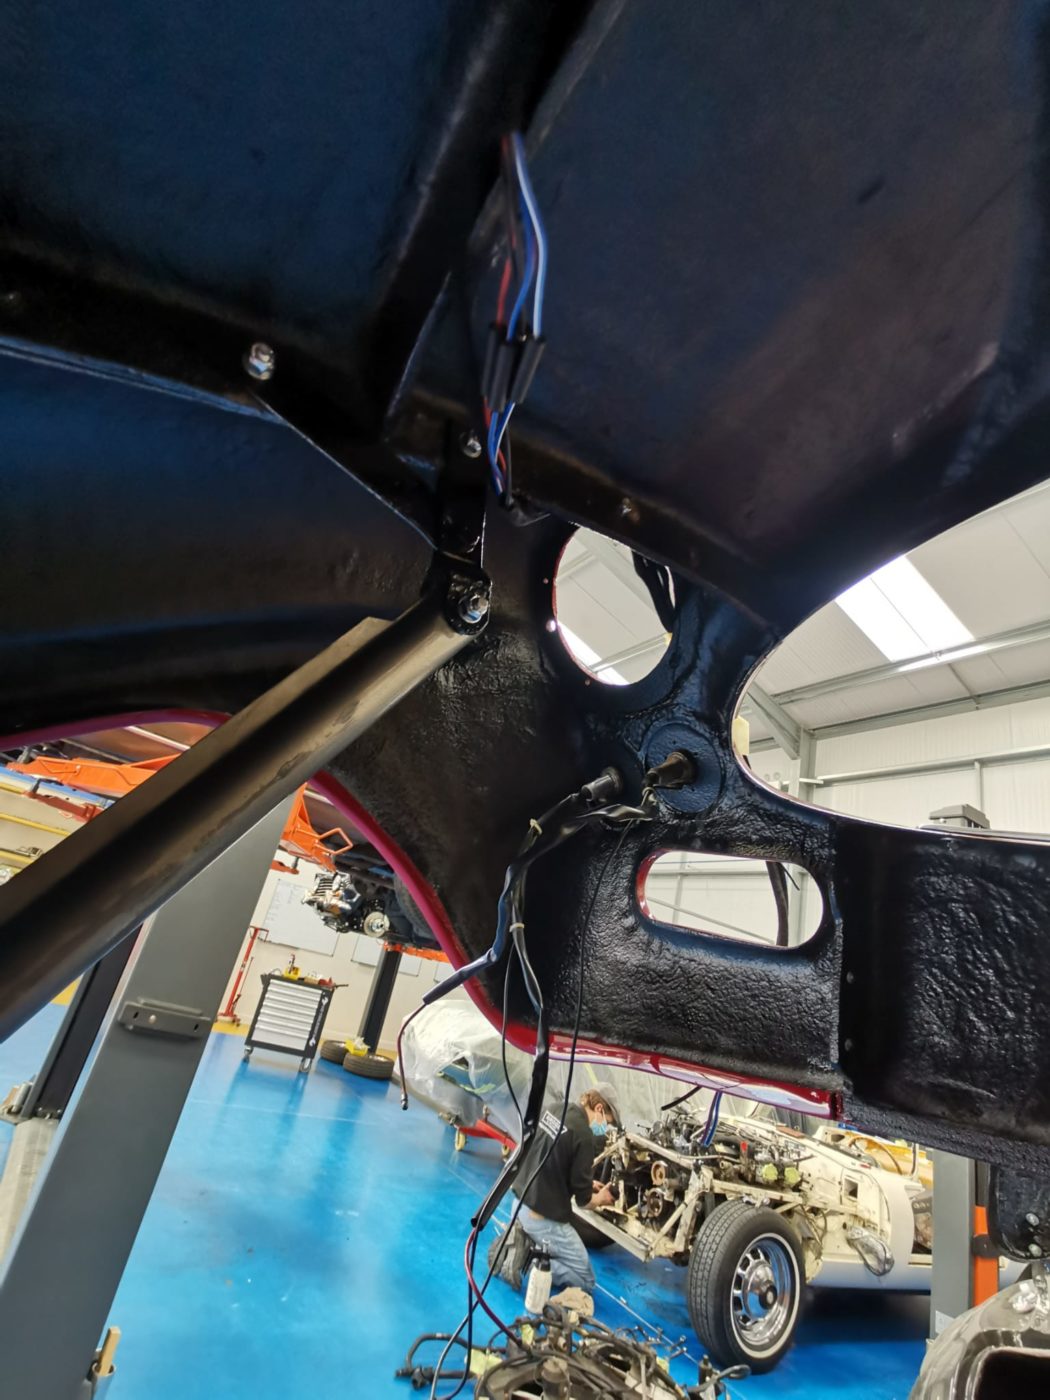
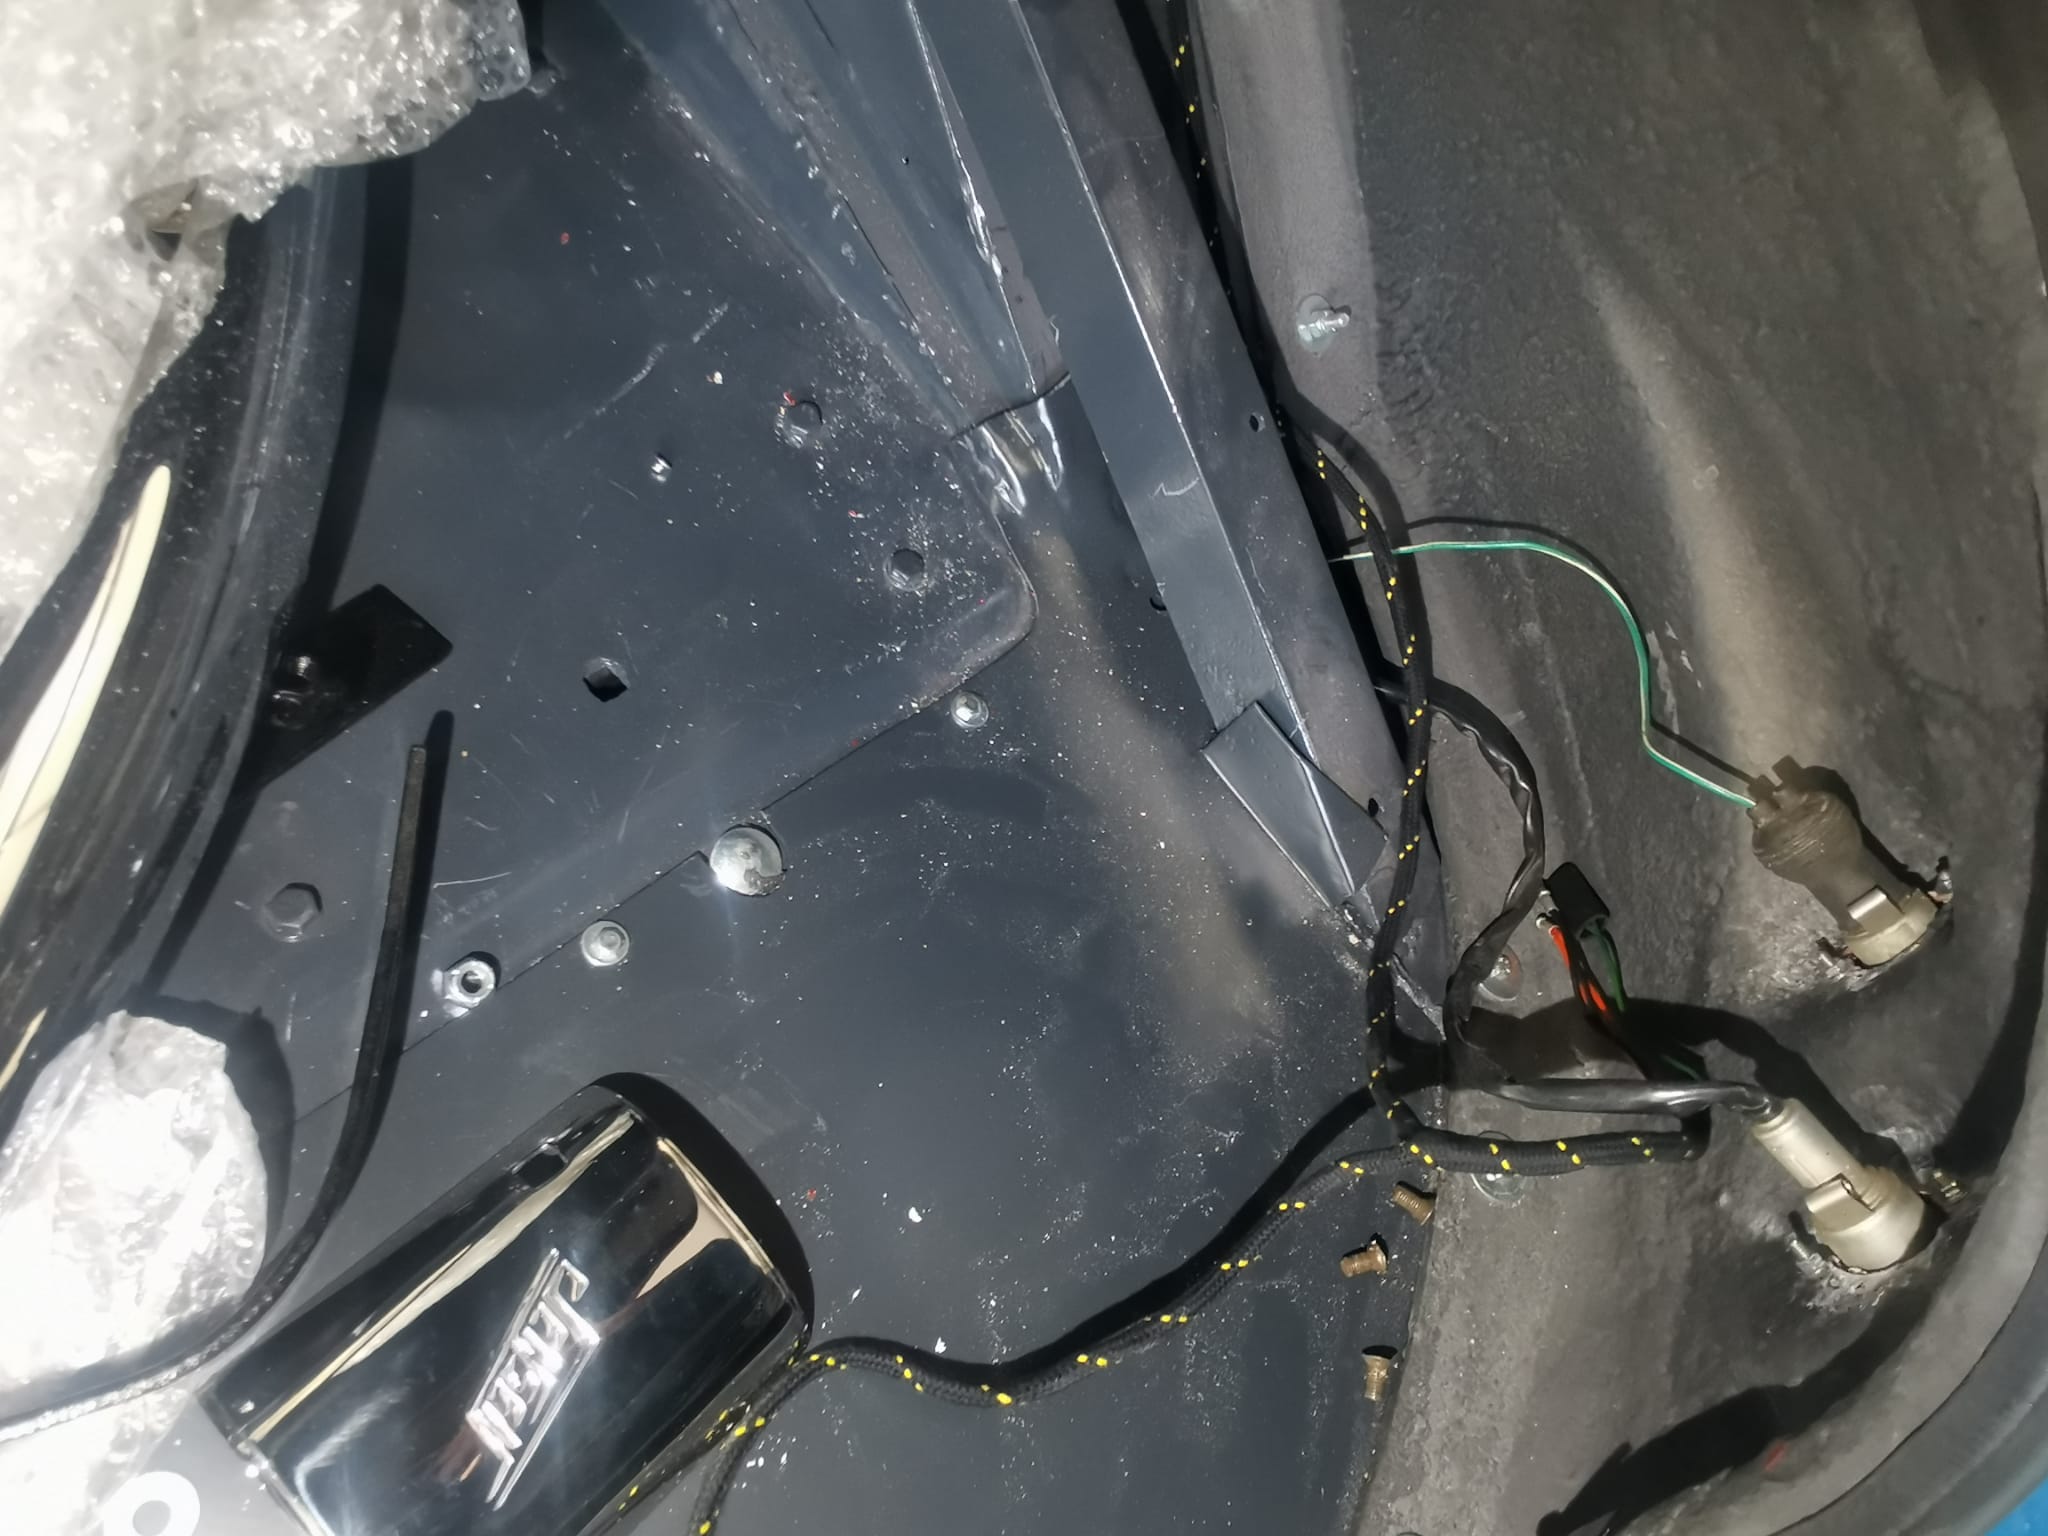
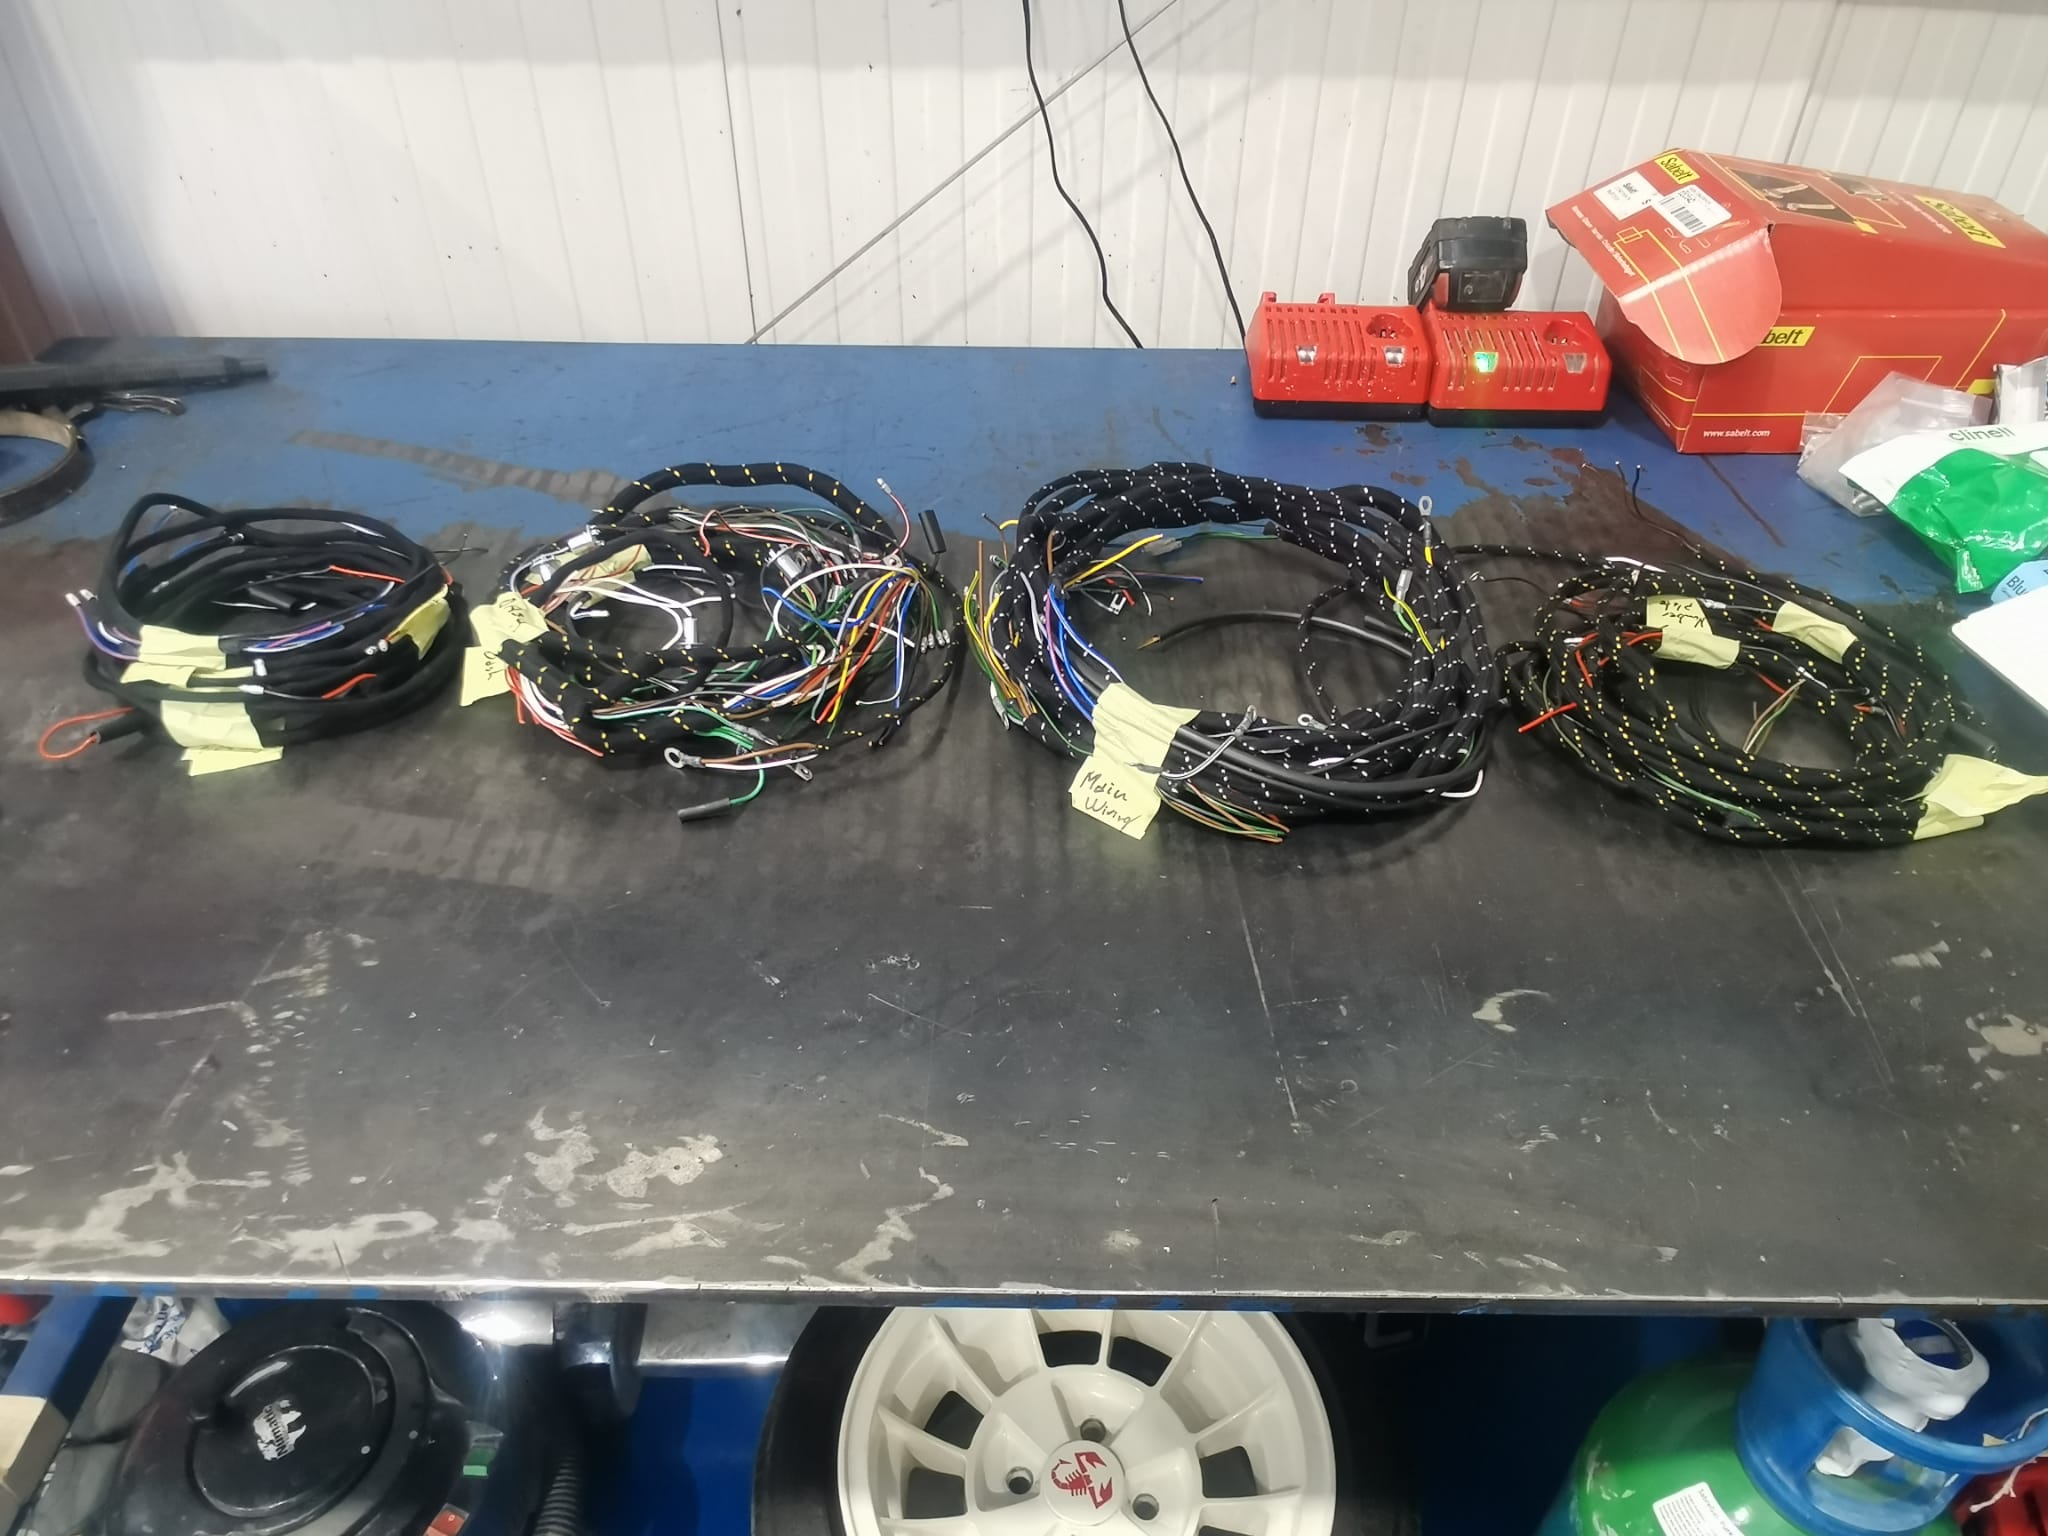
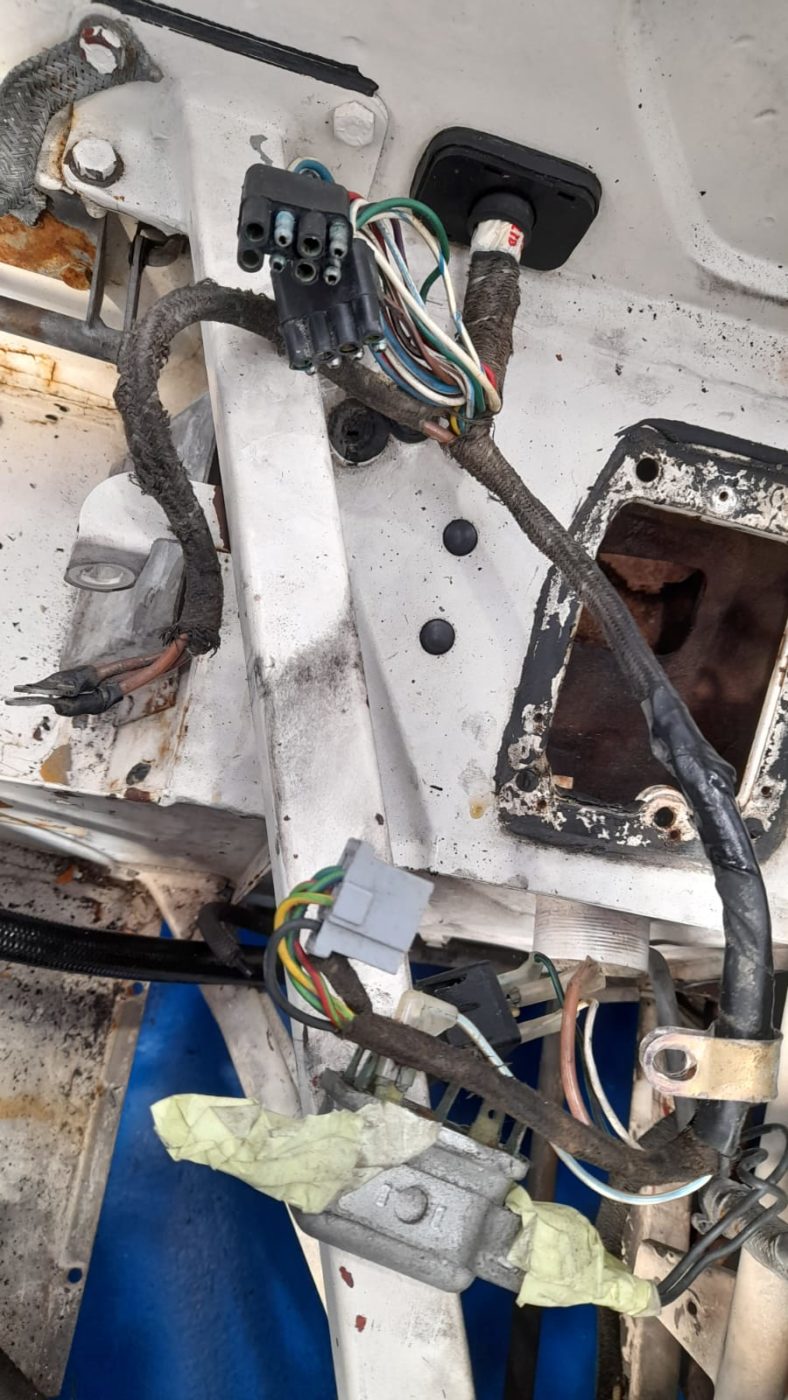
Tom has begun to catalogue the different wiring looms for our 1960 Jensen 541S. He’s started with the rear wiring loom, connected the rear indicators,
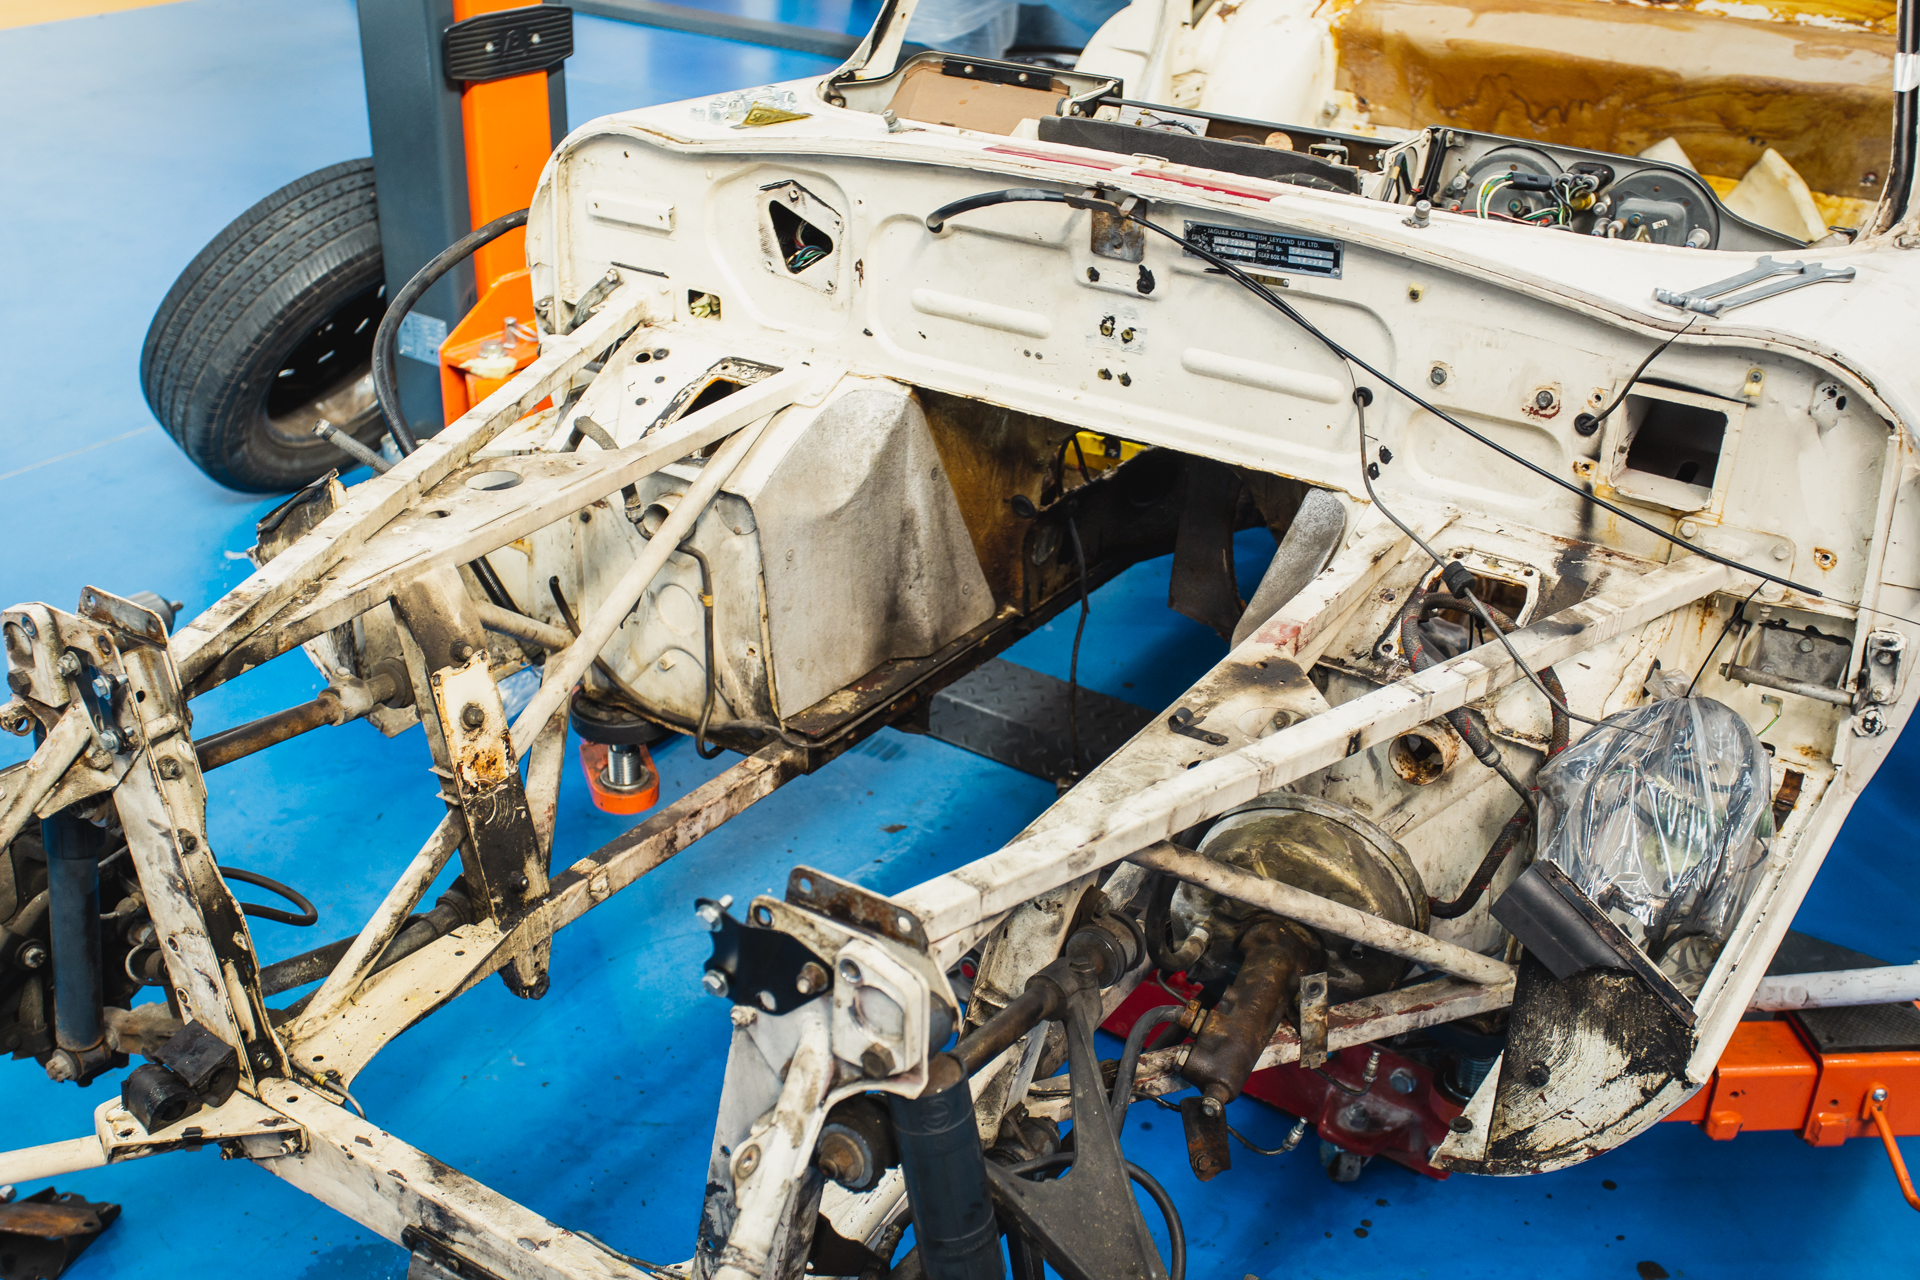
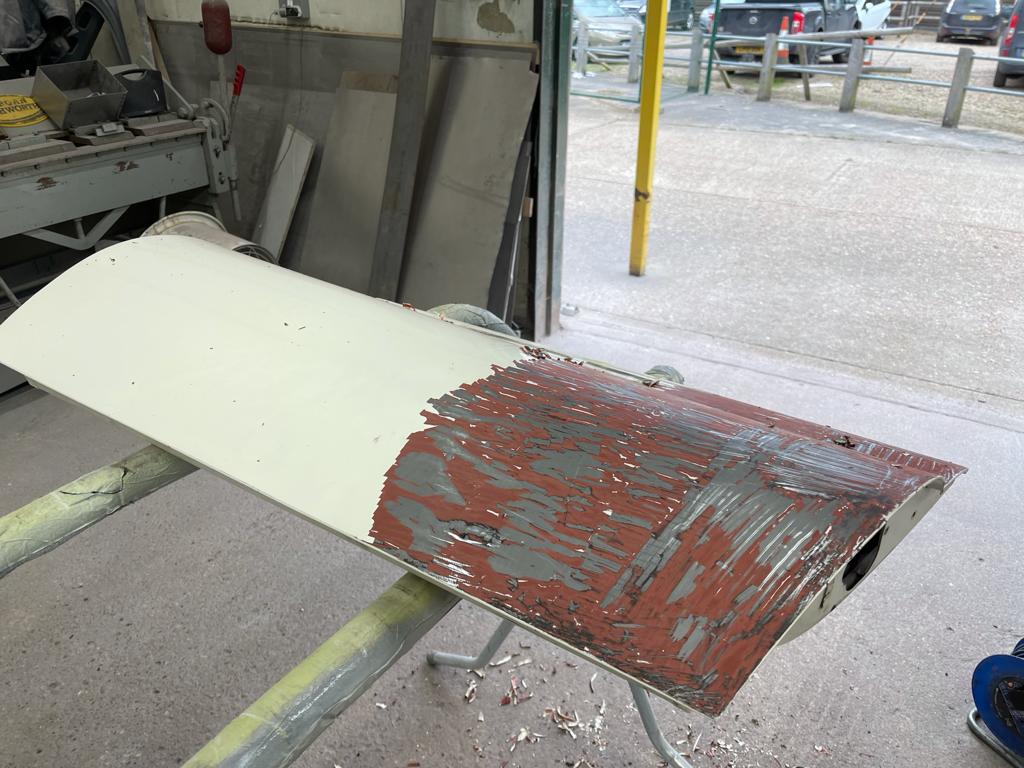
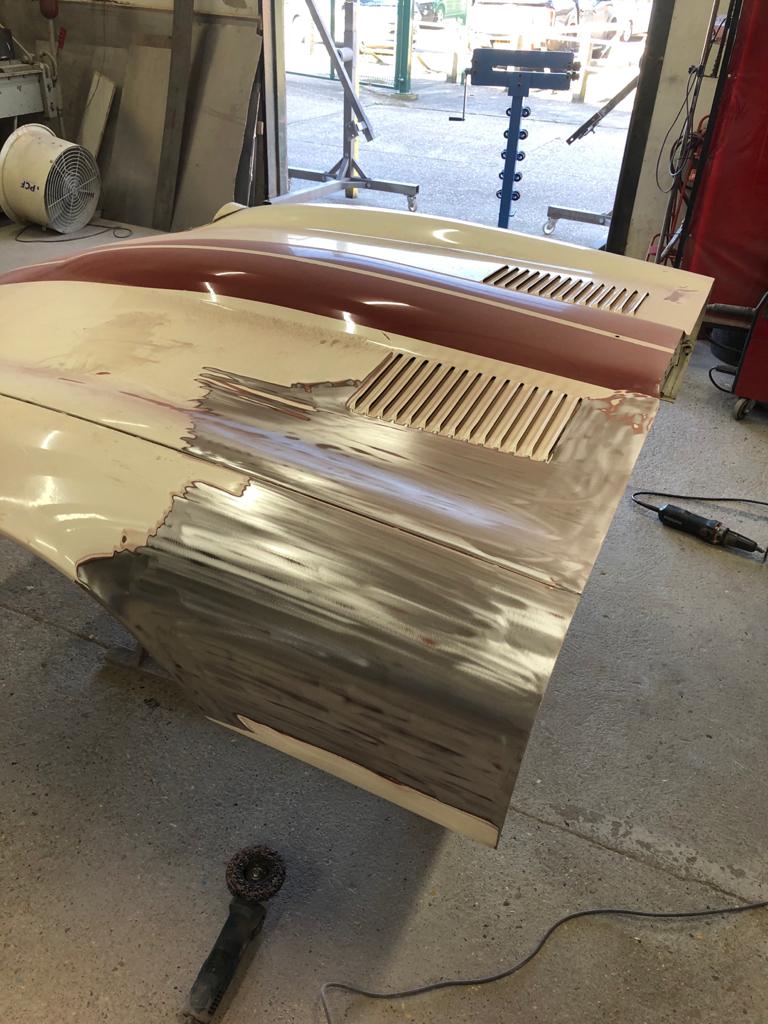
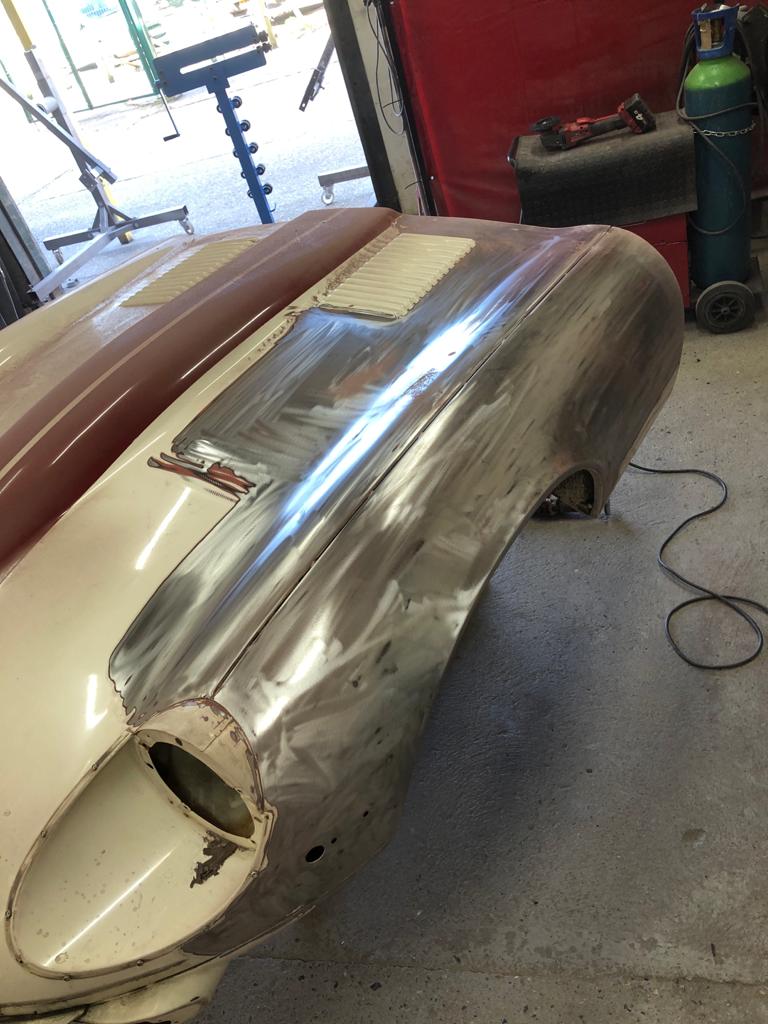
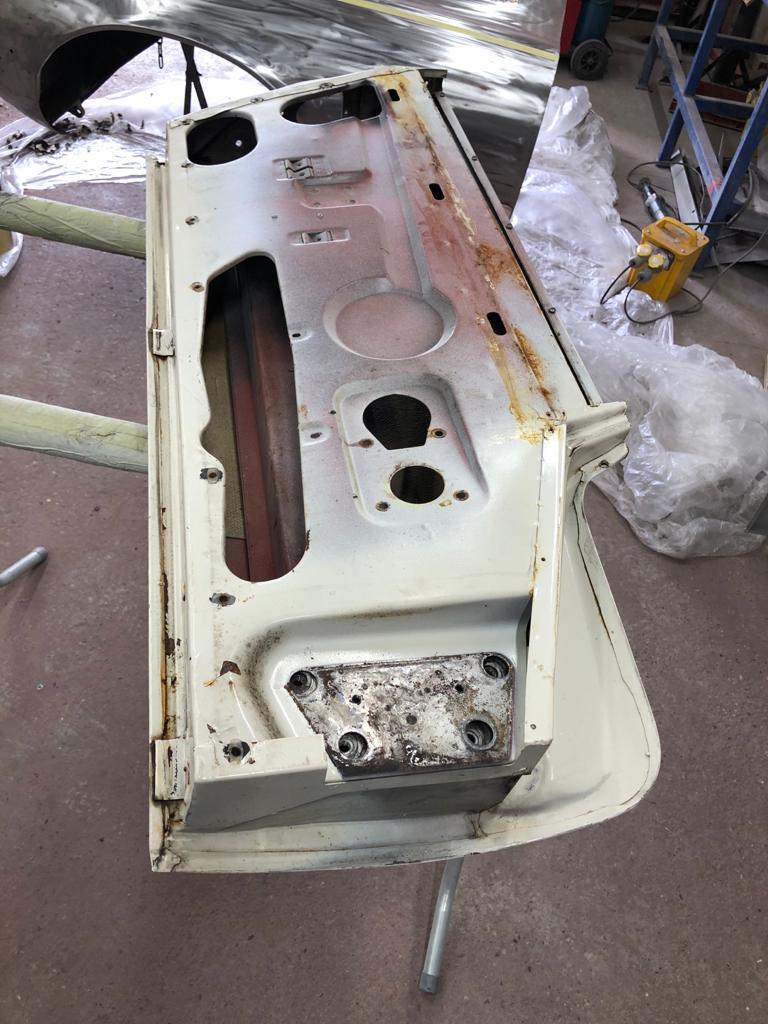
We’ve now begun stripping the paint from our 1973 Beverly Hills E-Type bonnet so that it can sit in bare metal and ask as a
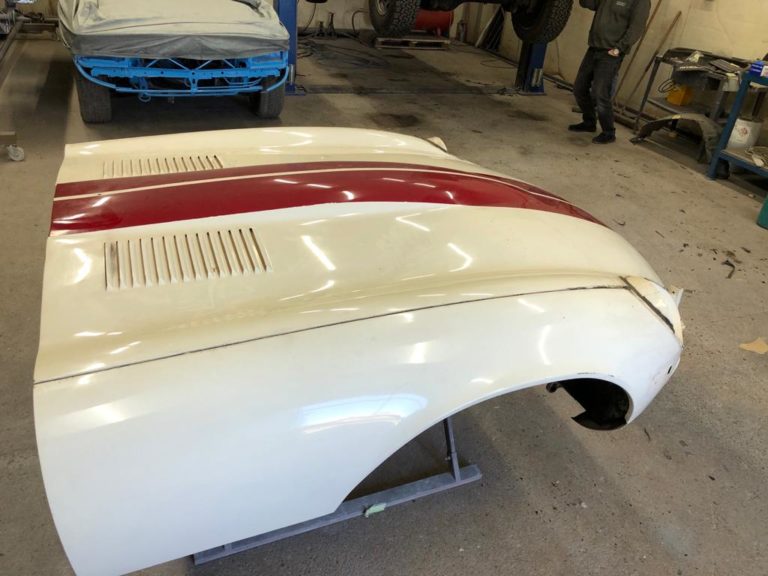
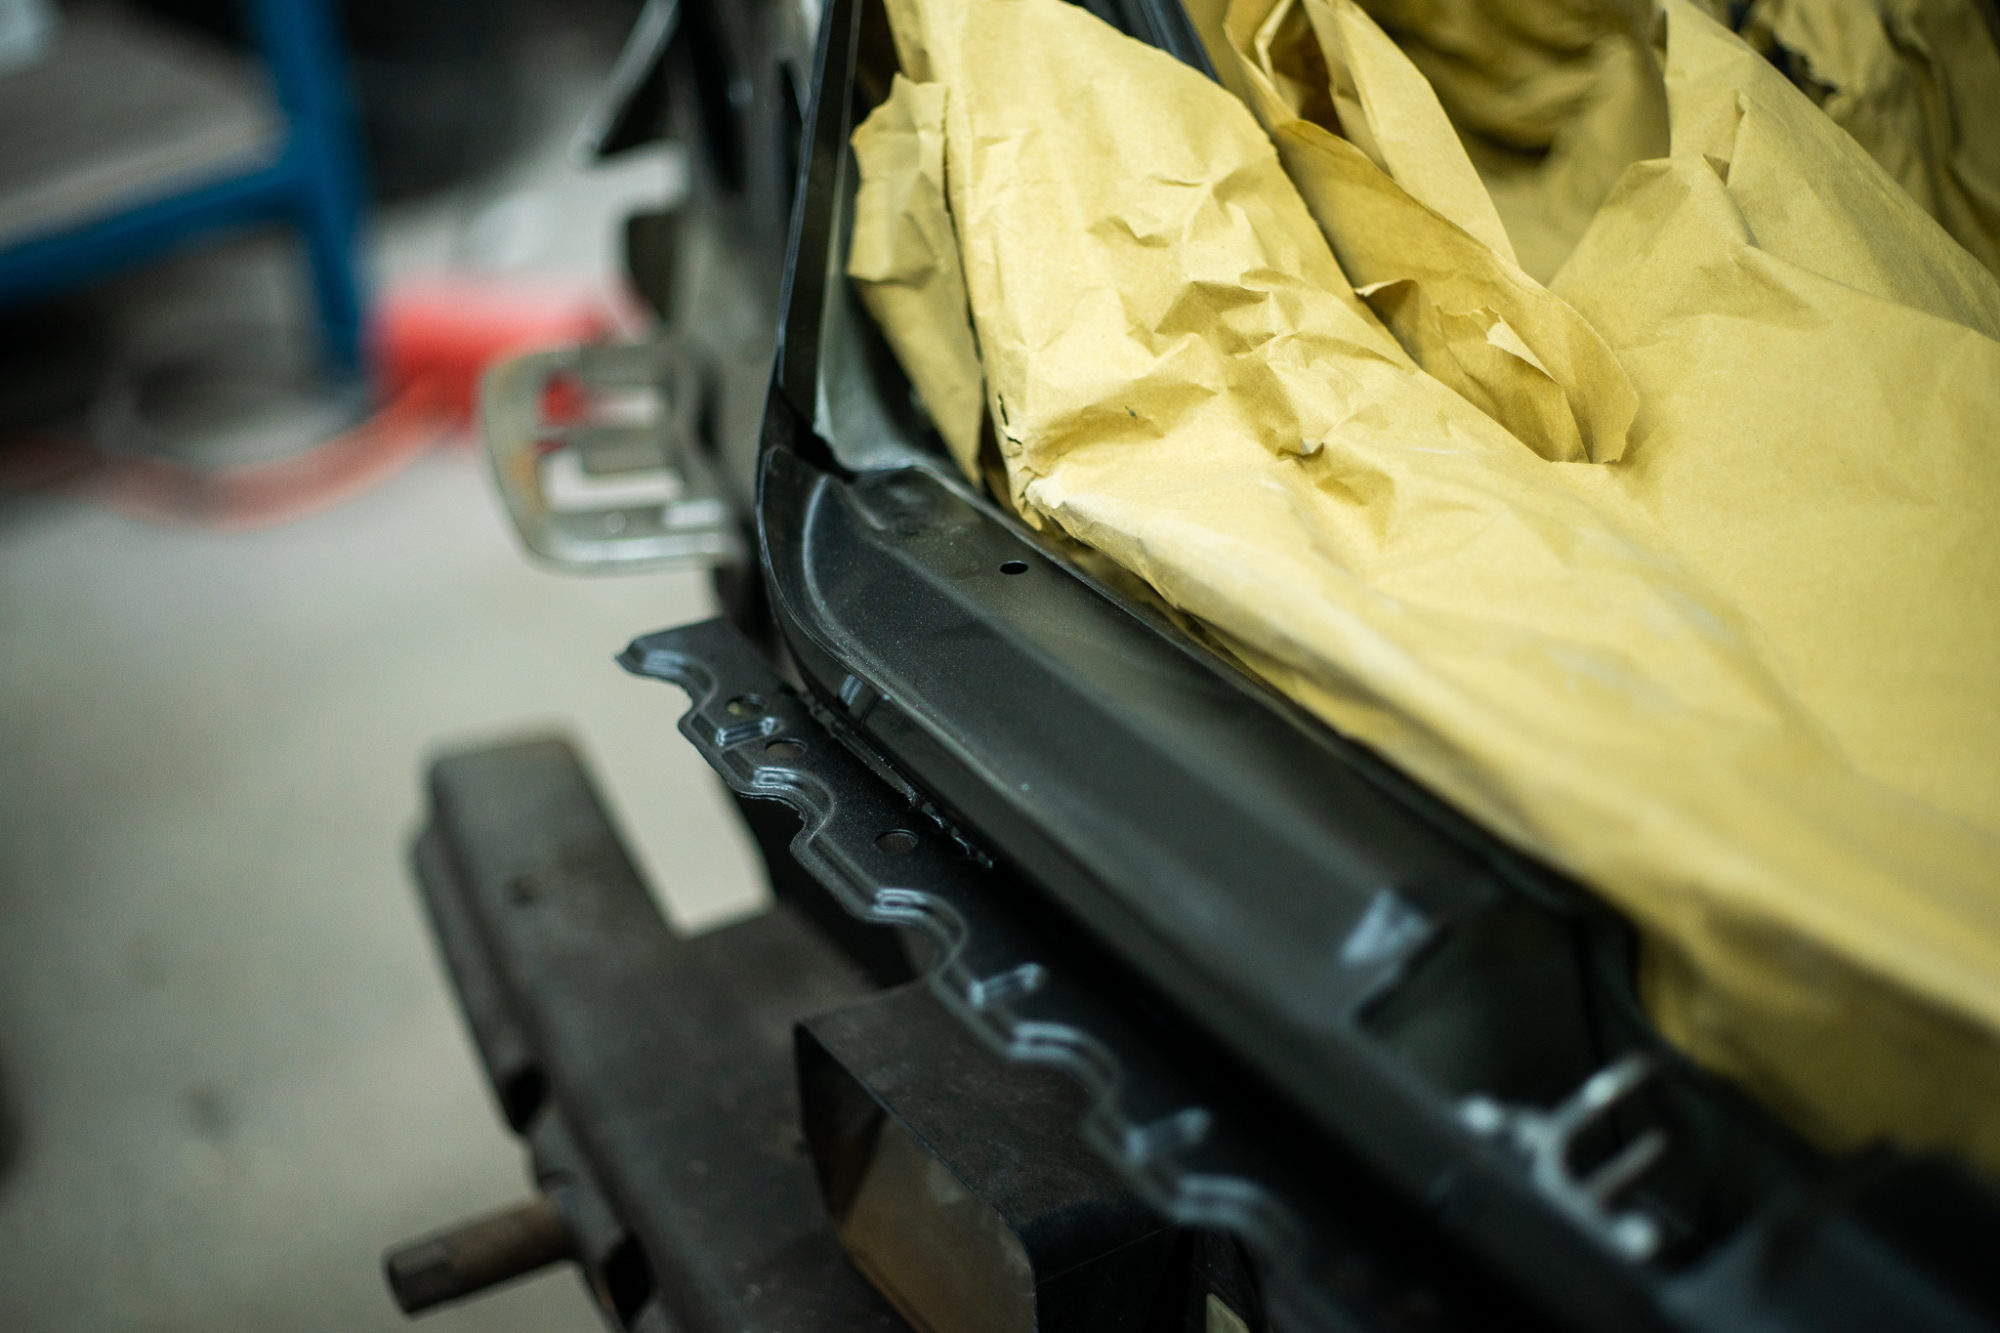
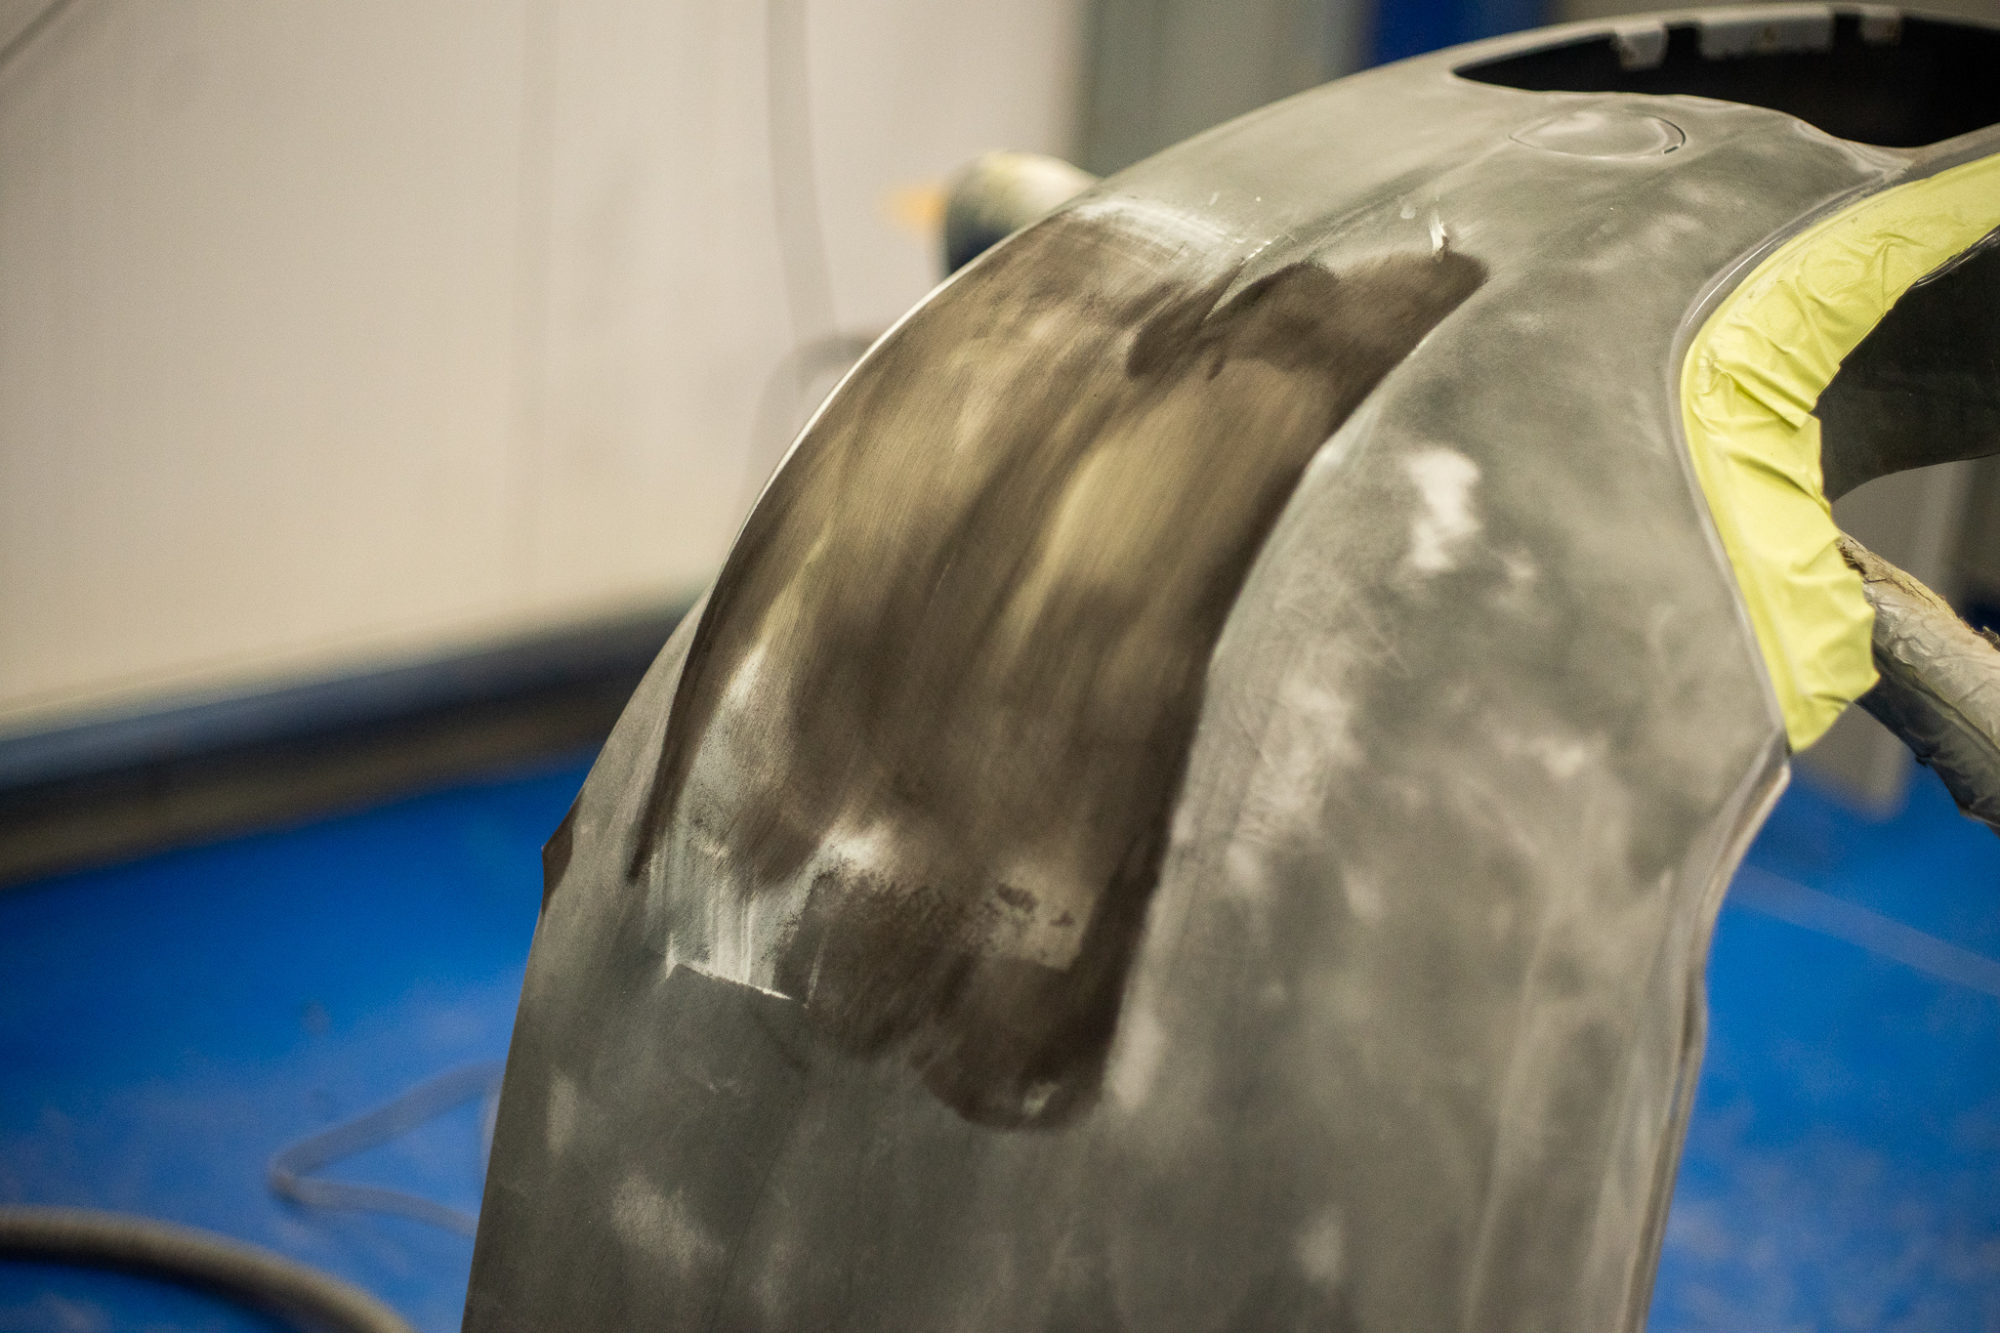
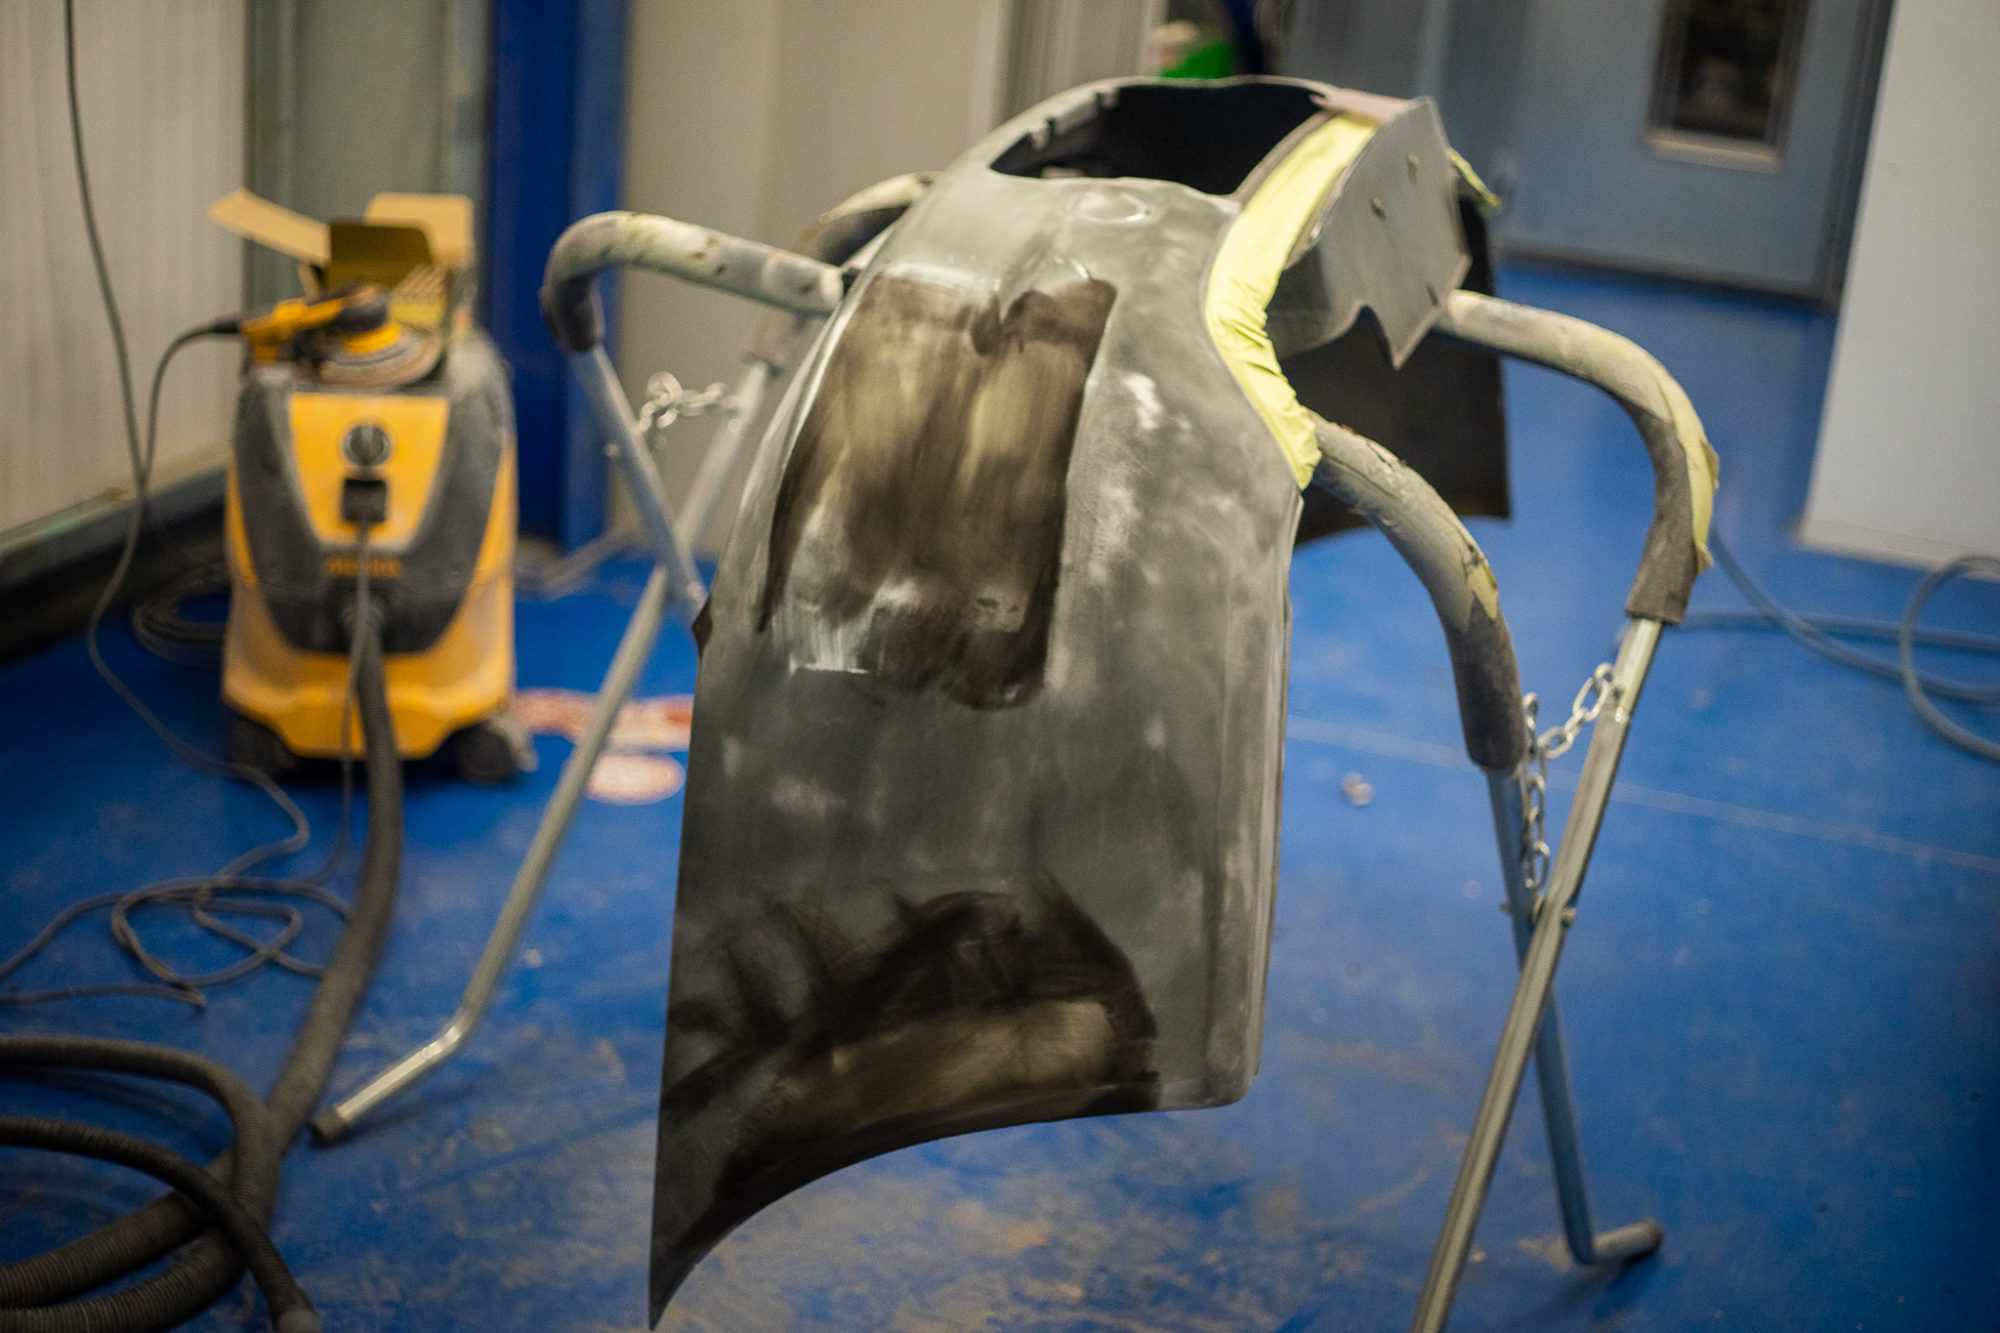
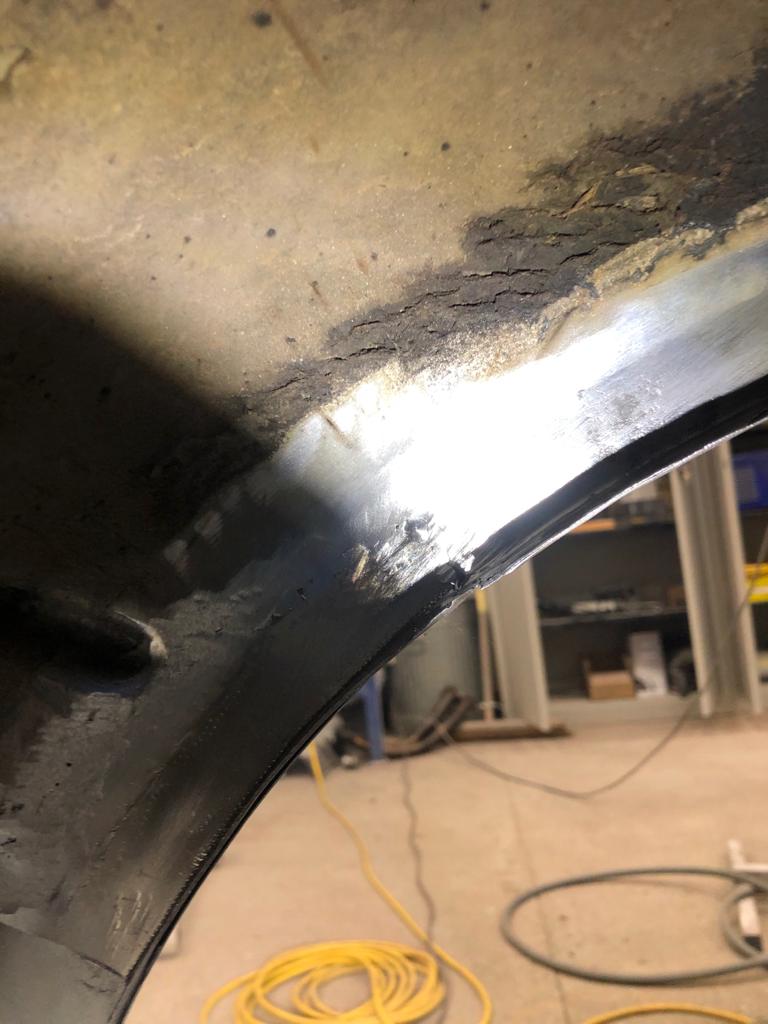
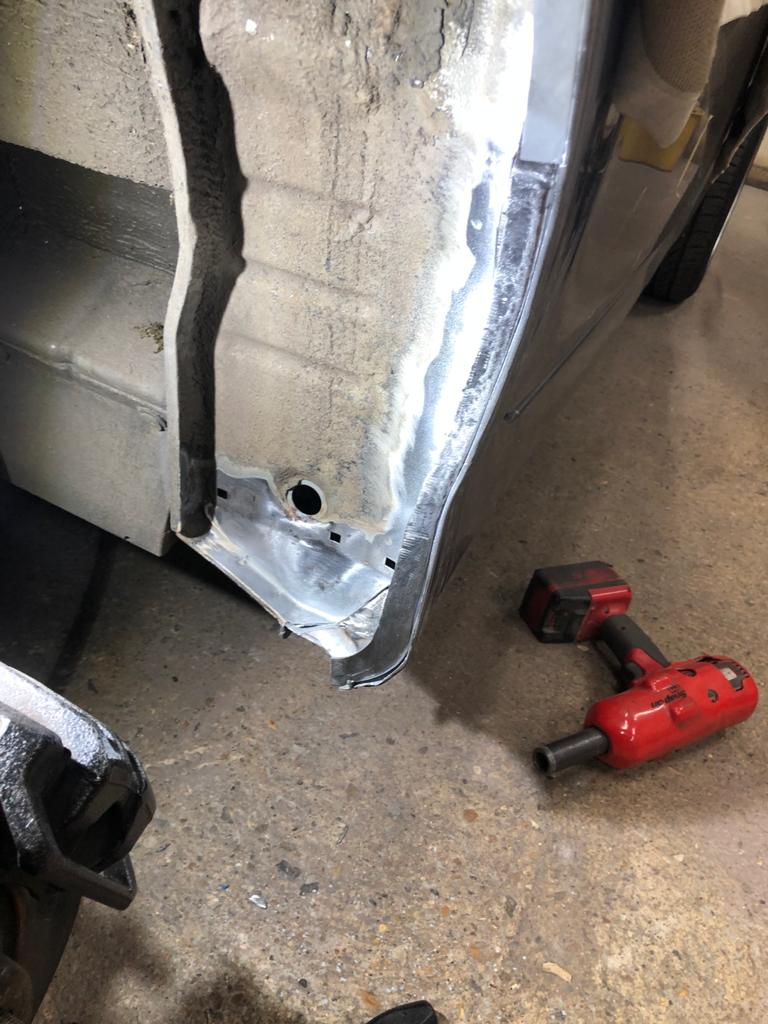
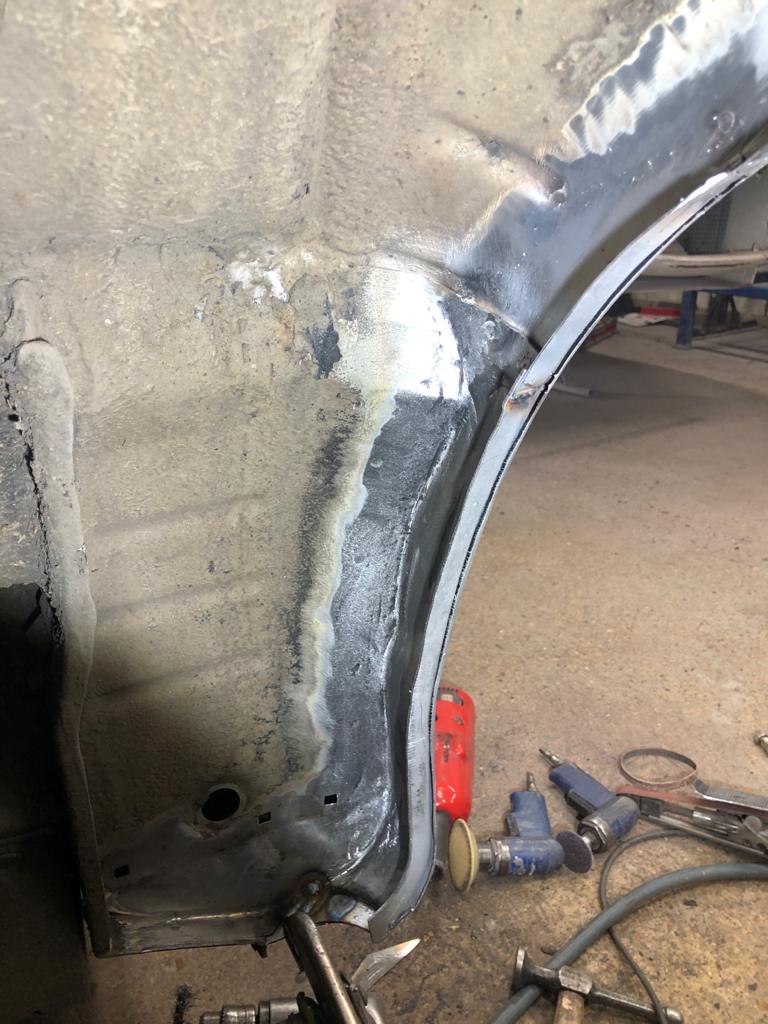
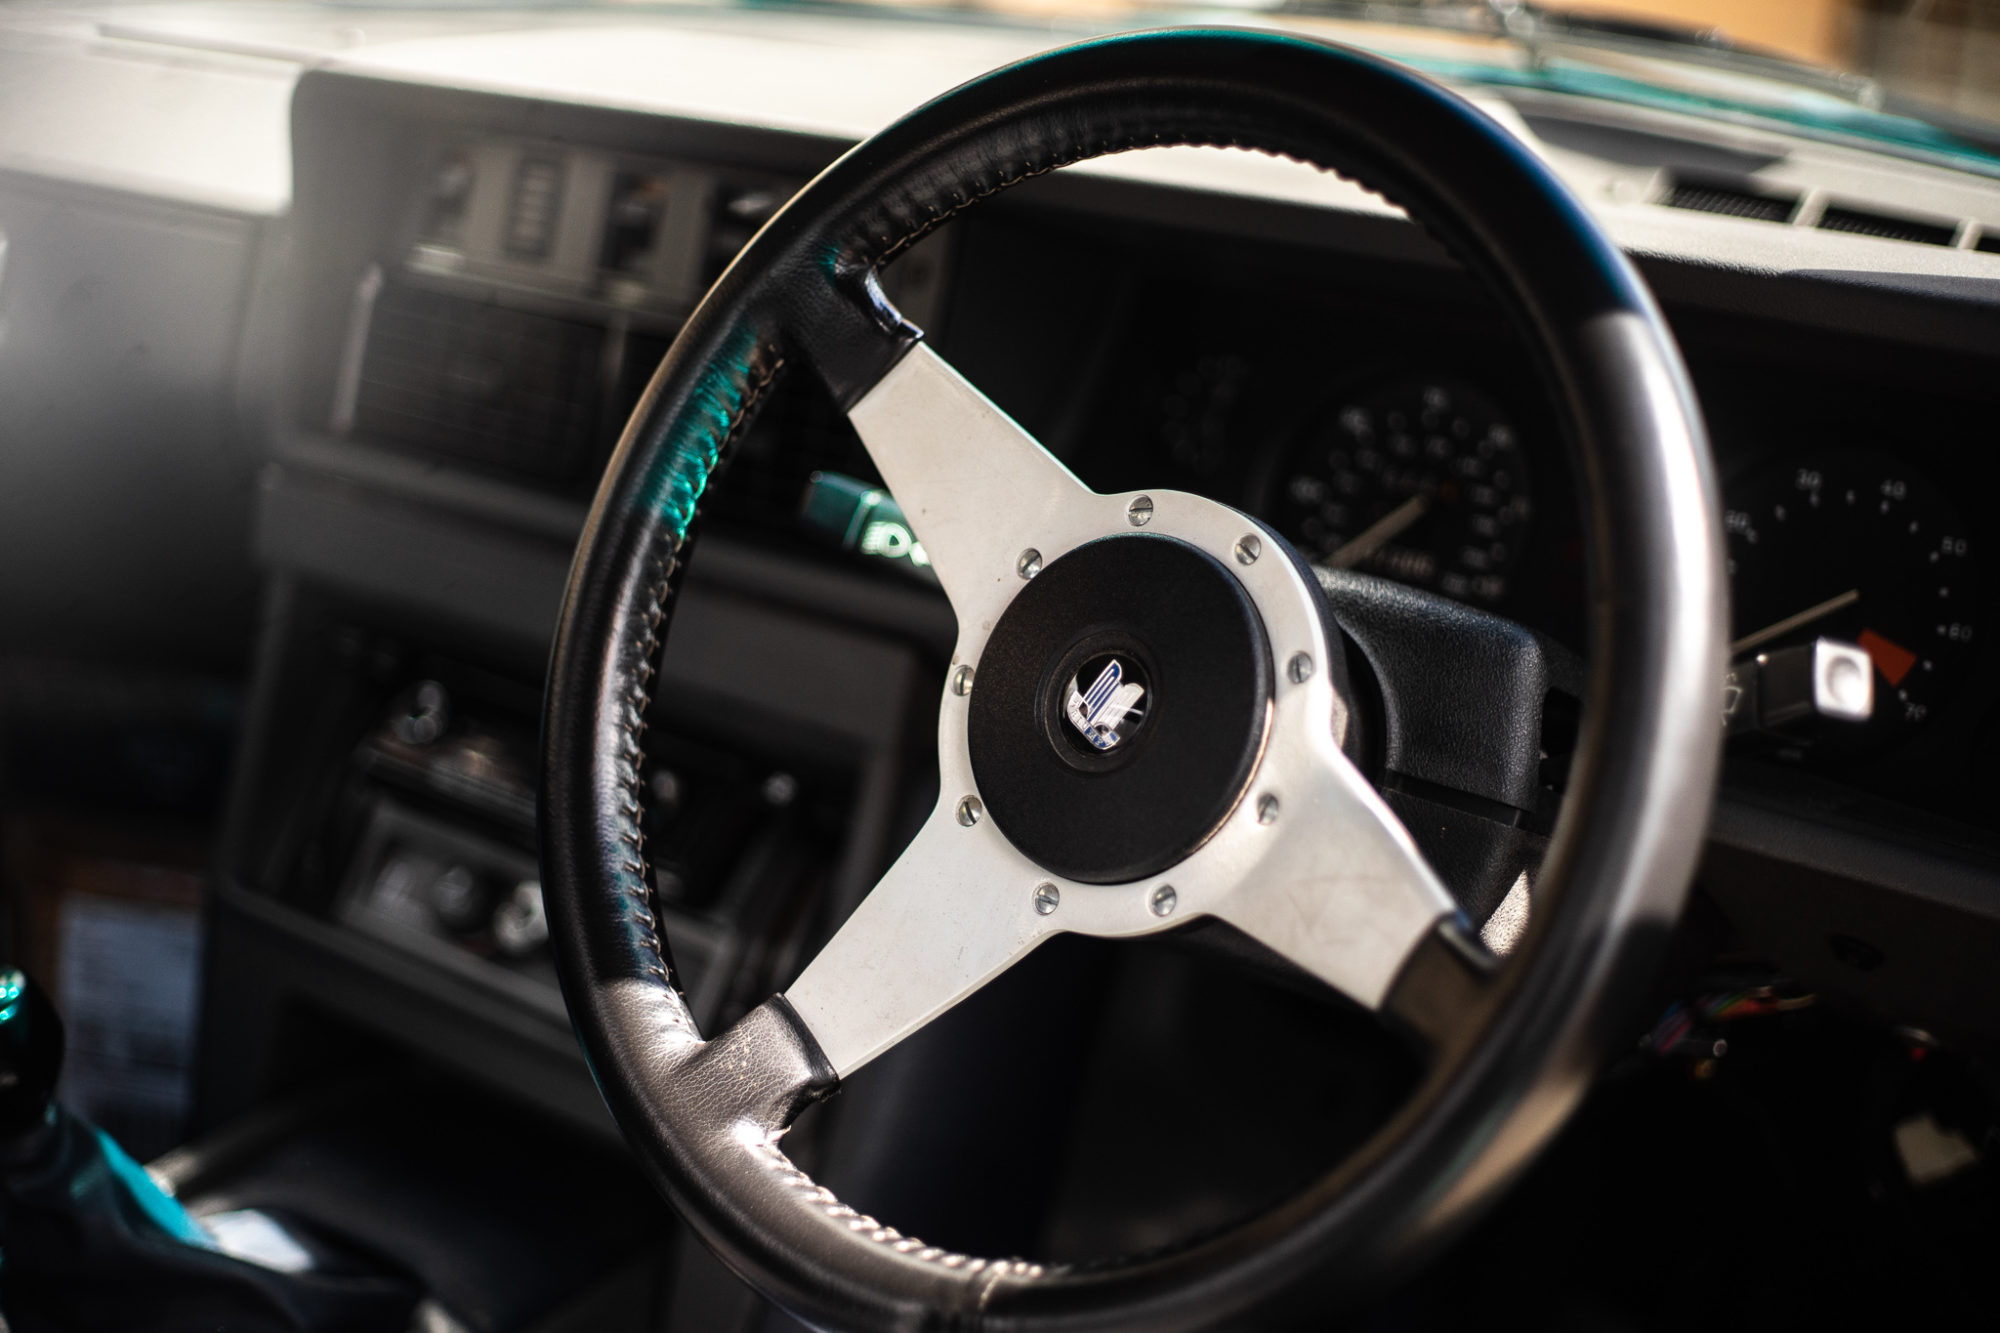
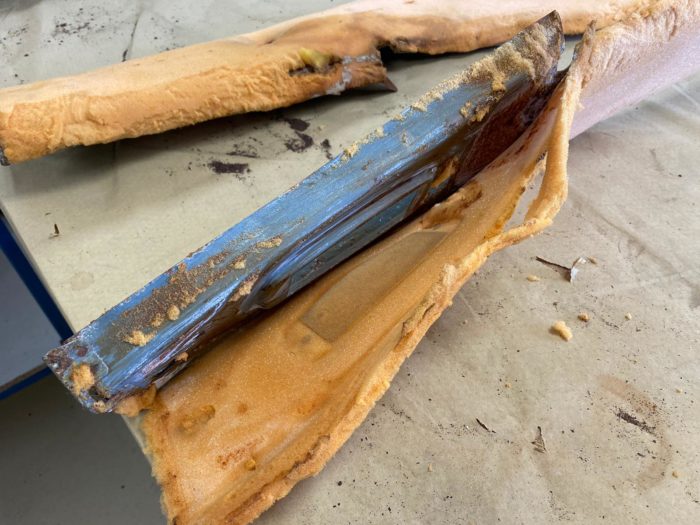
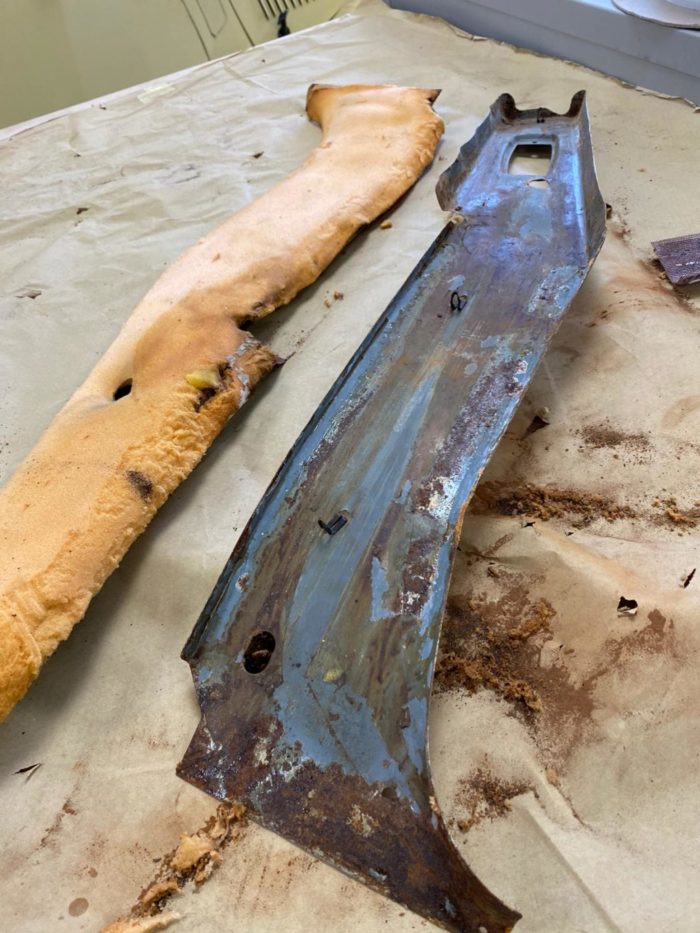
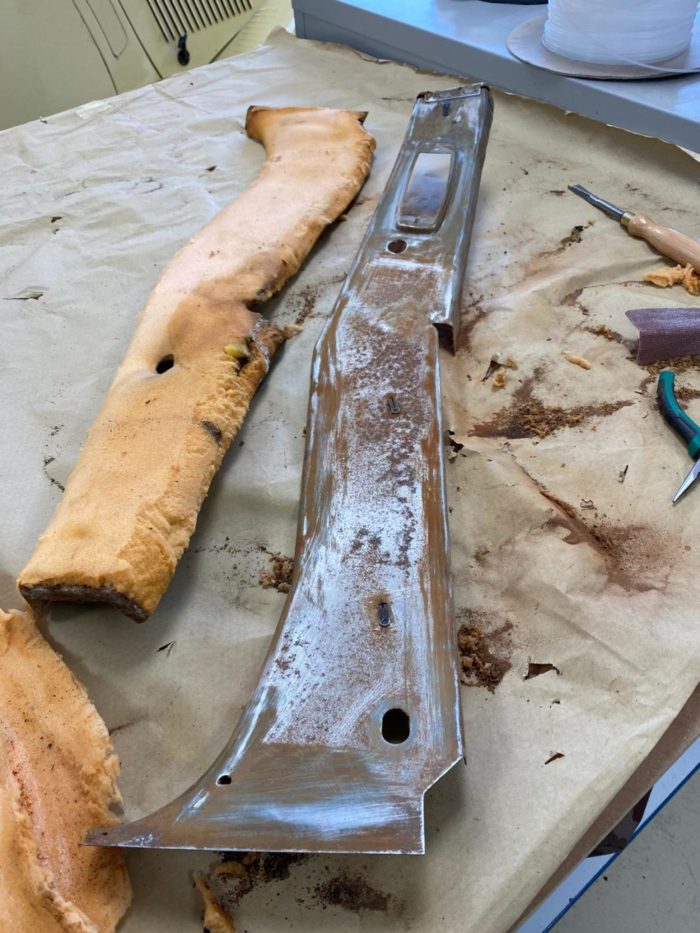
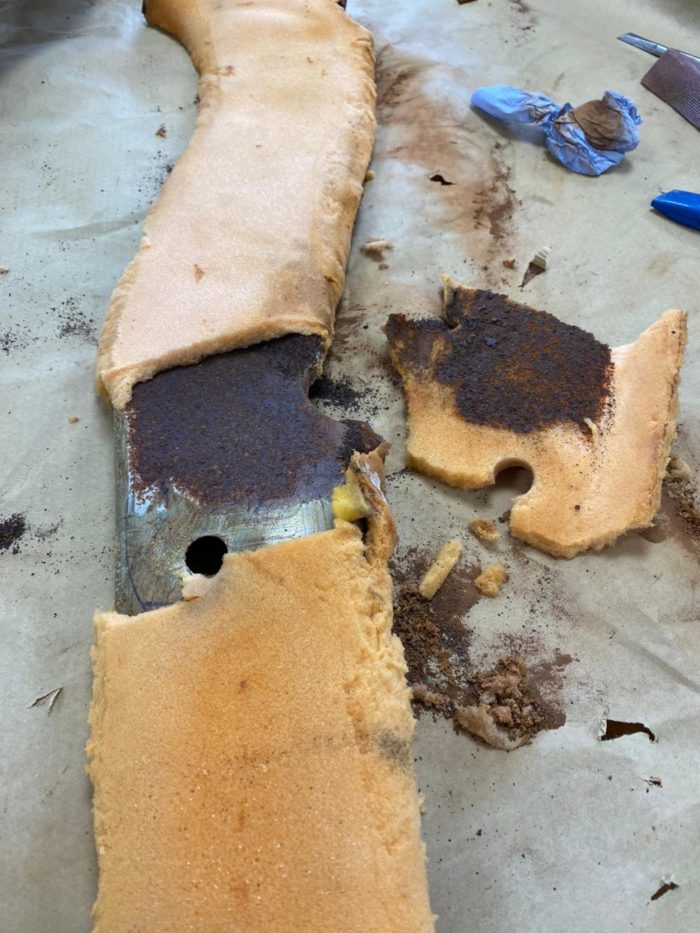
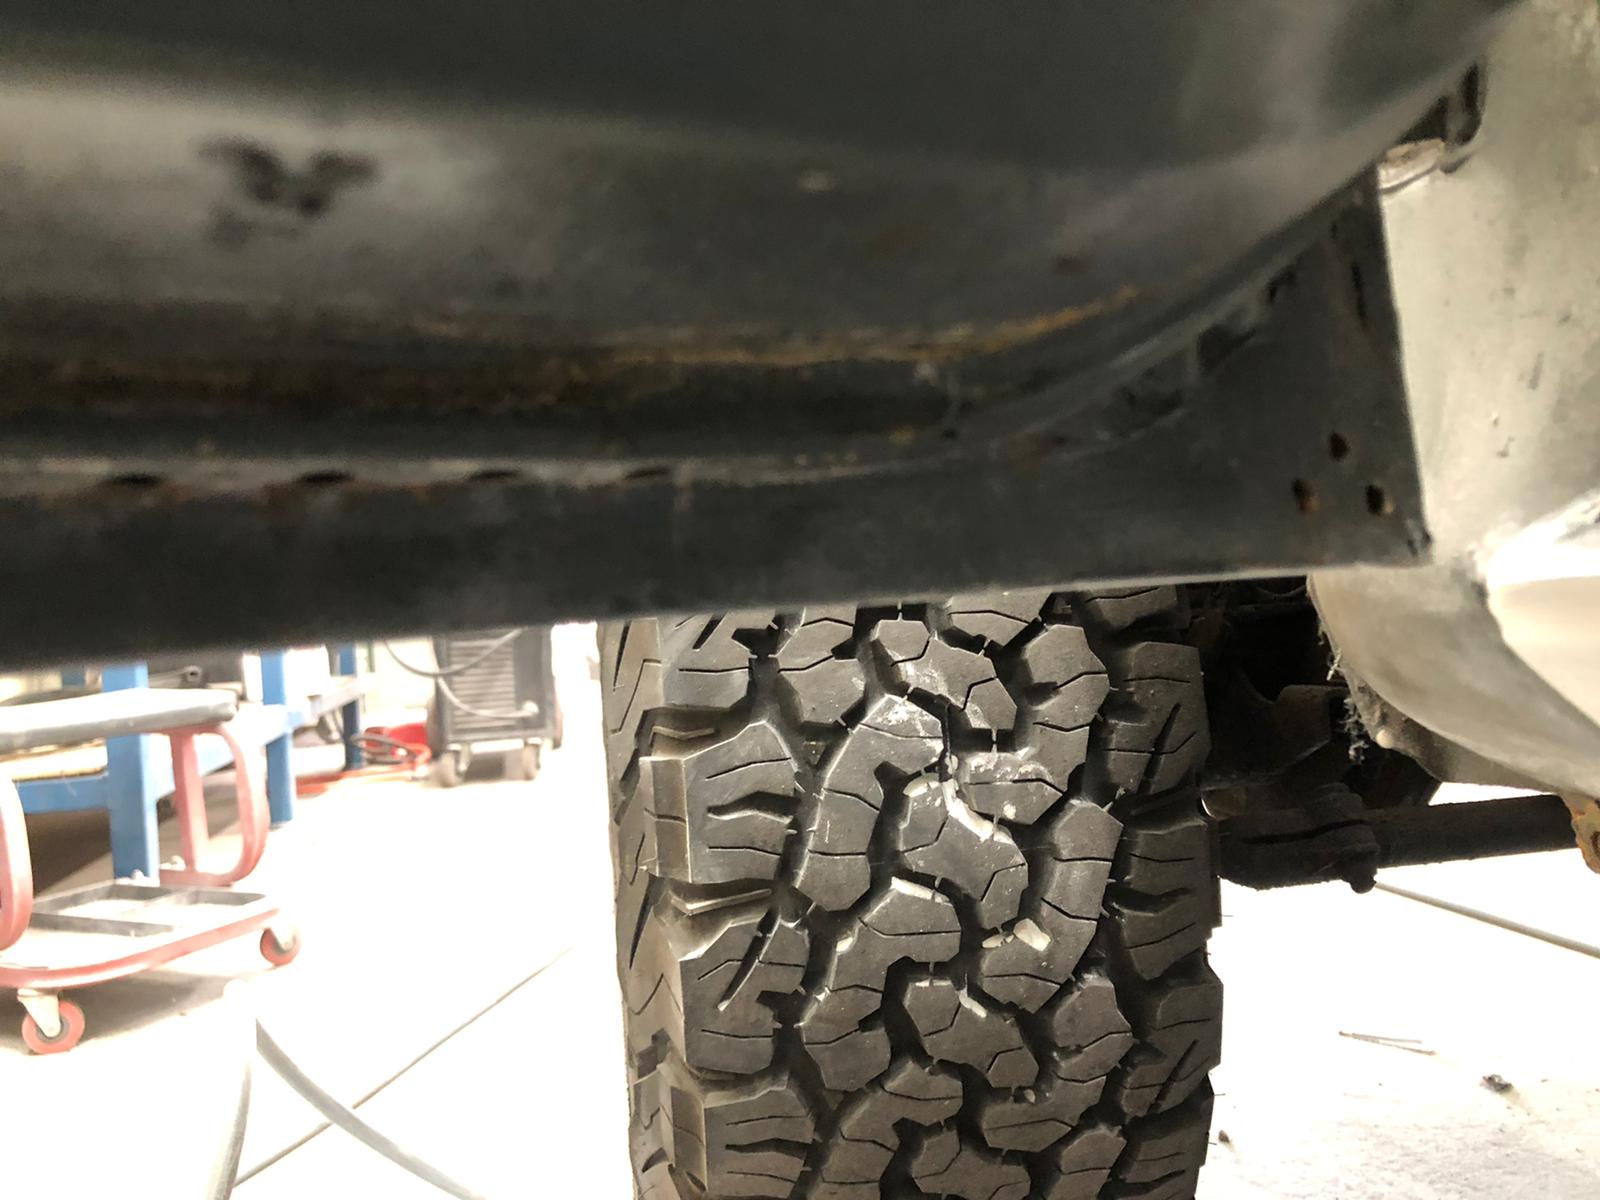
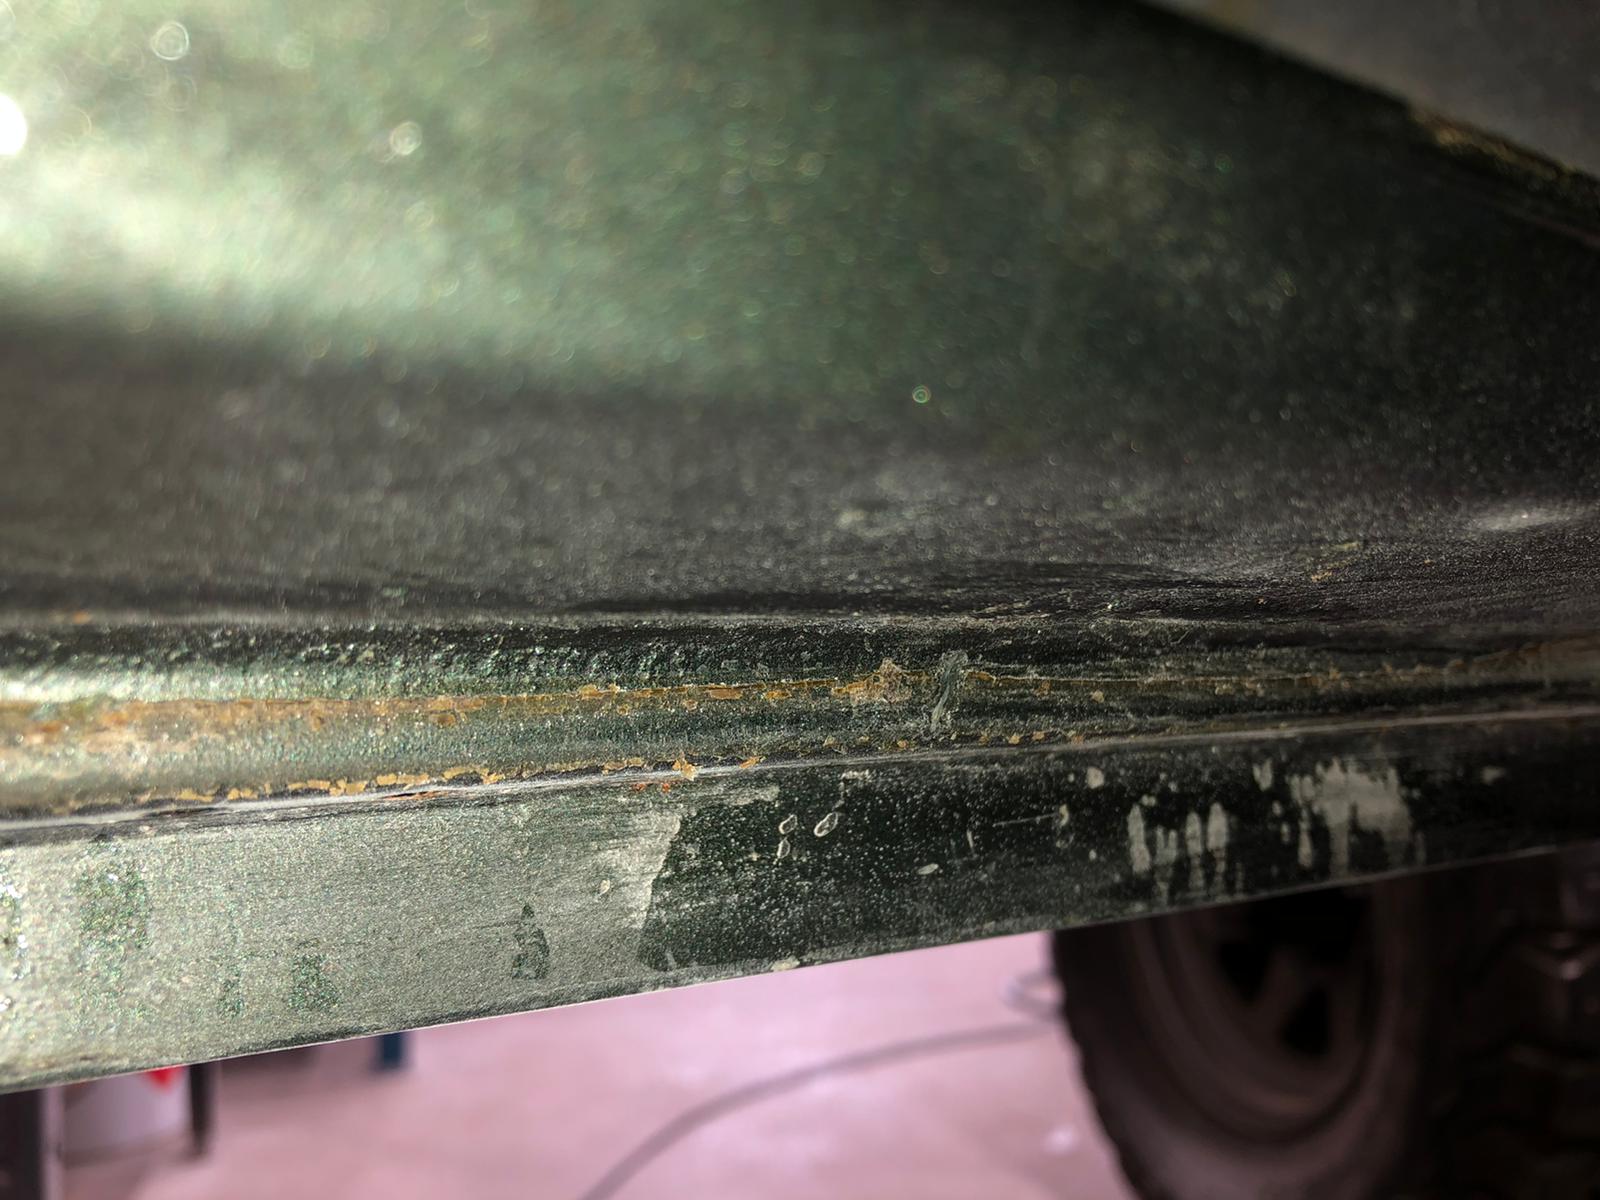
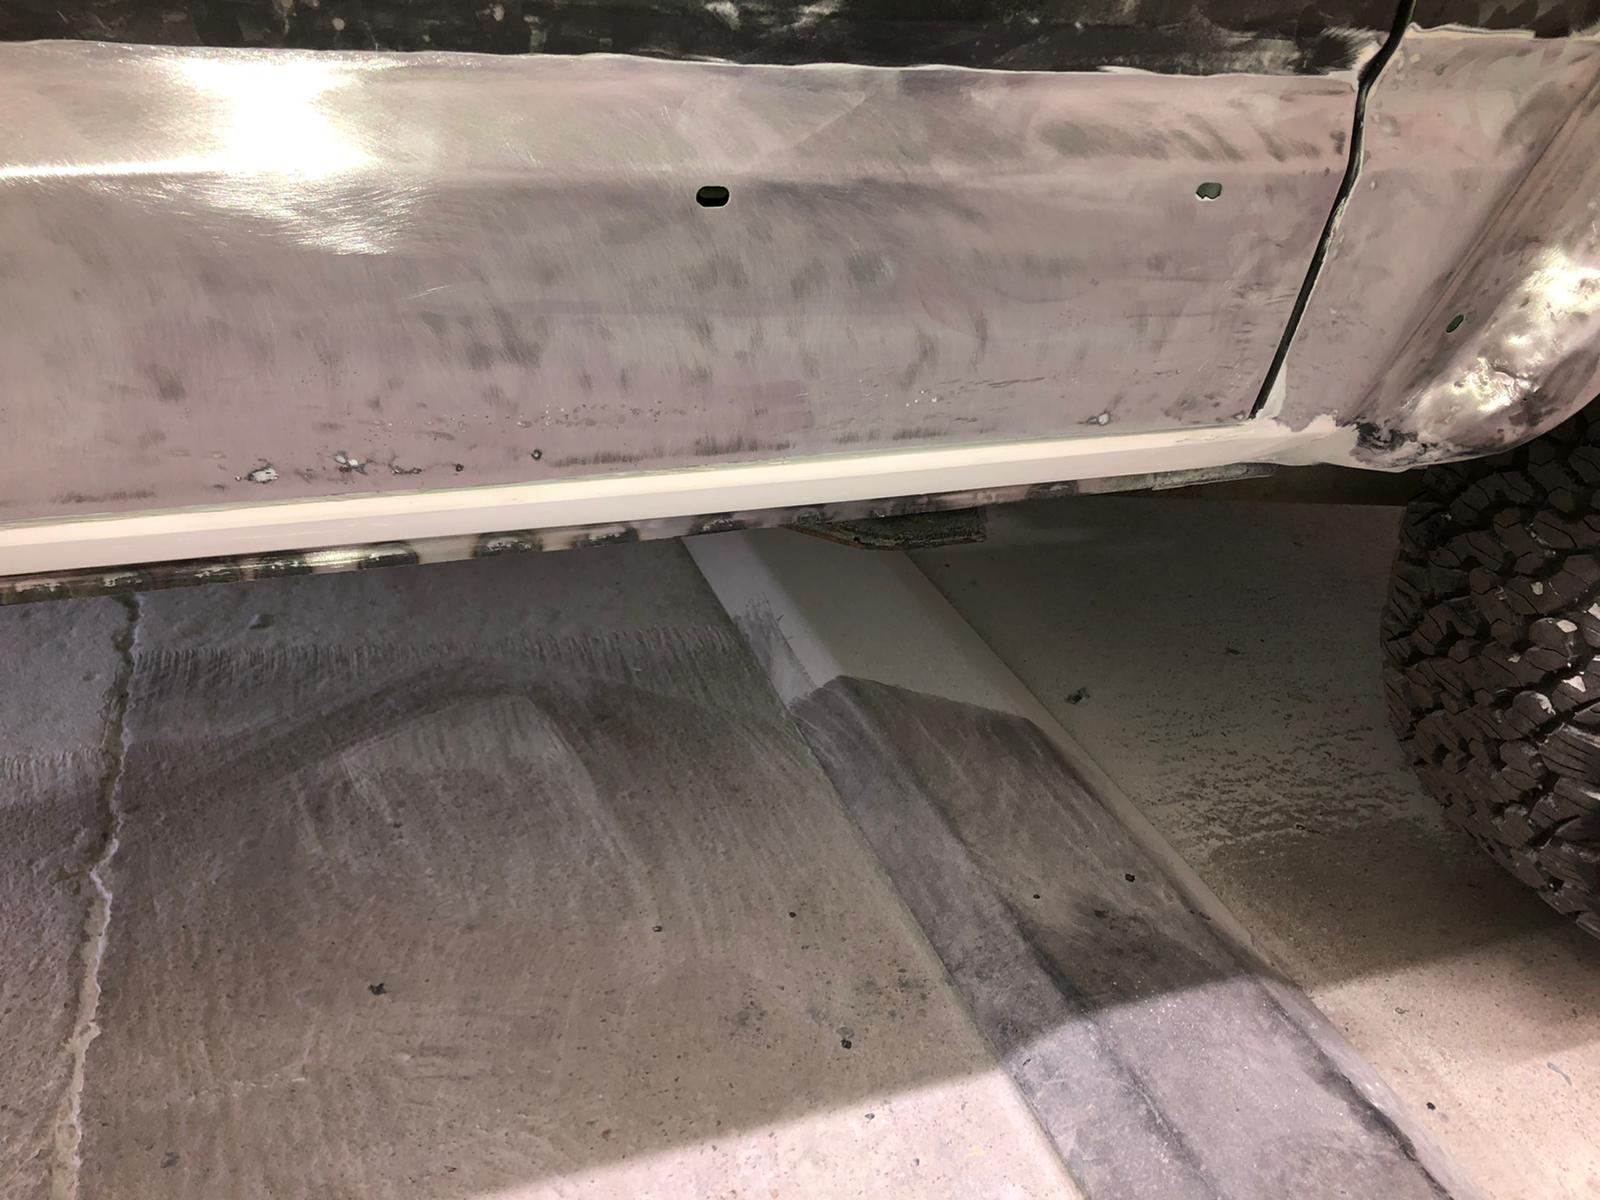
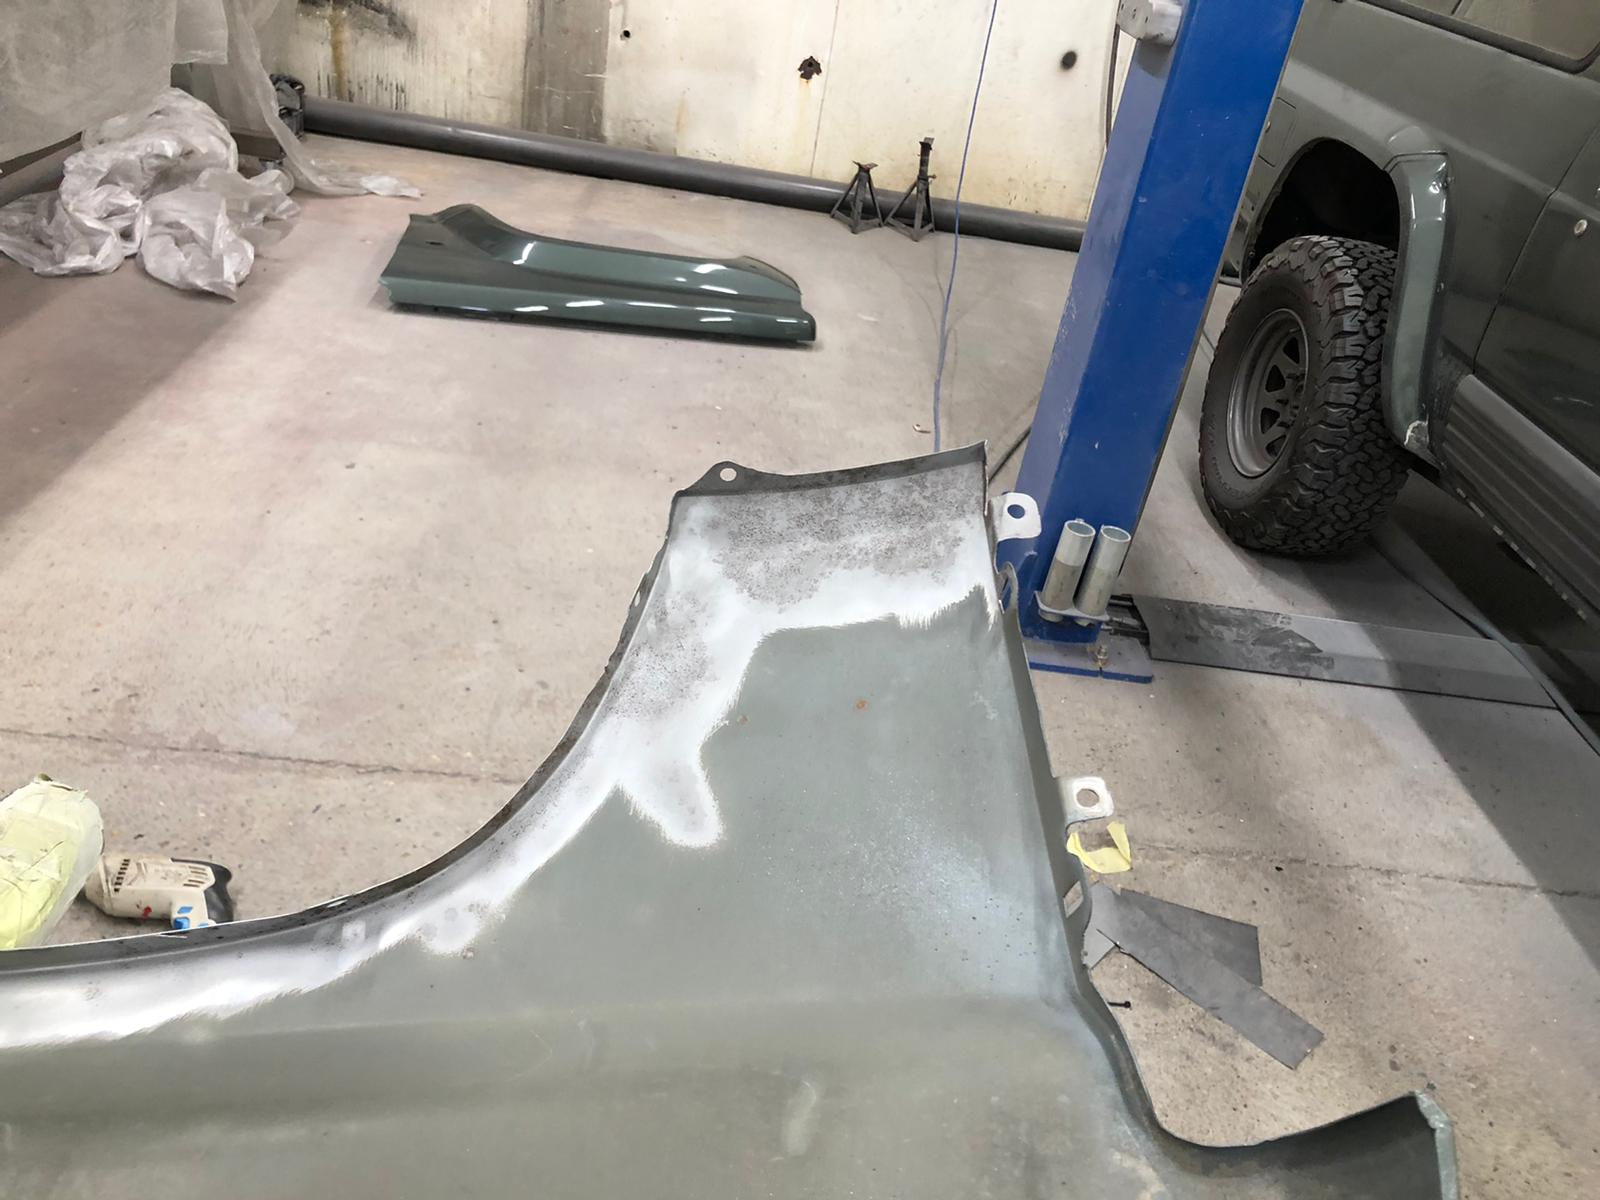
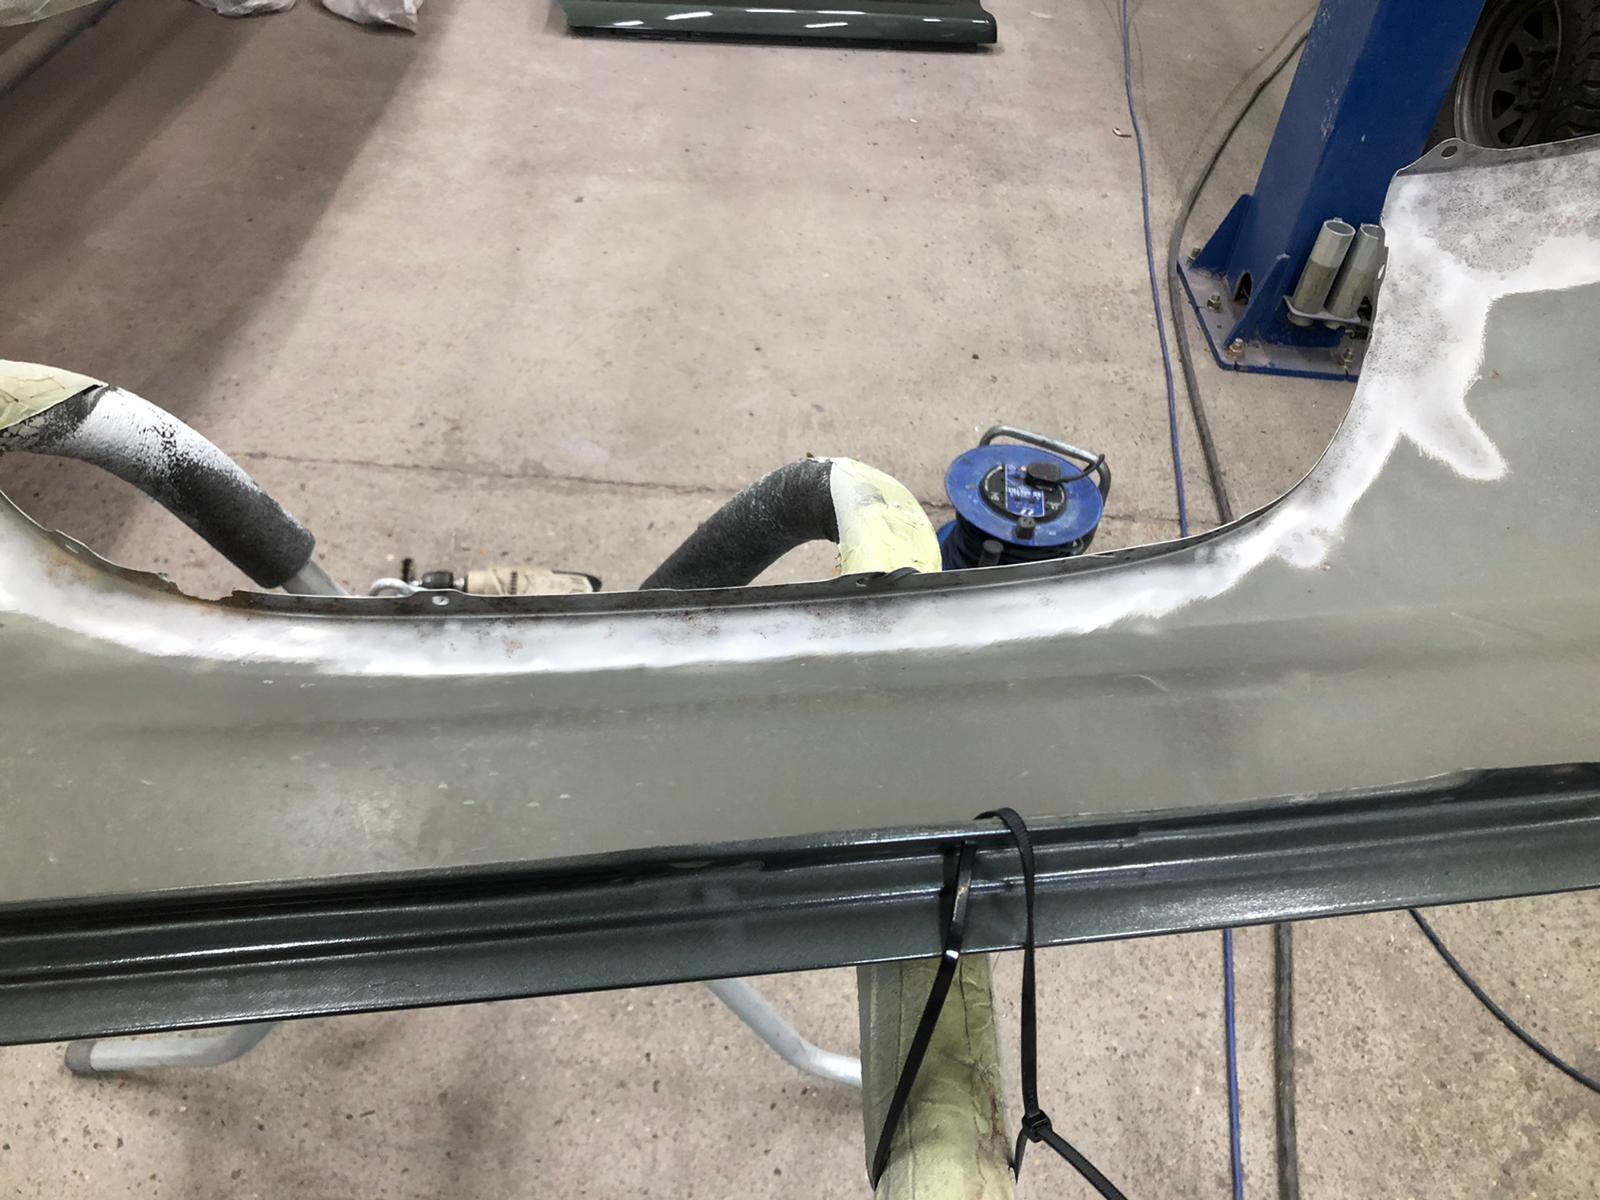
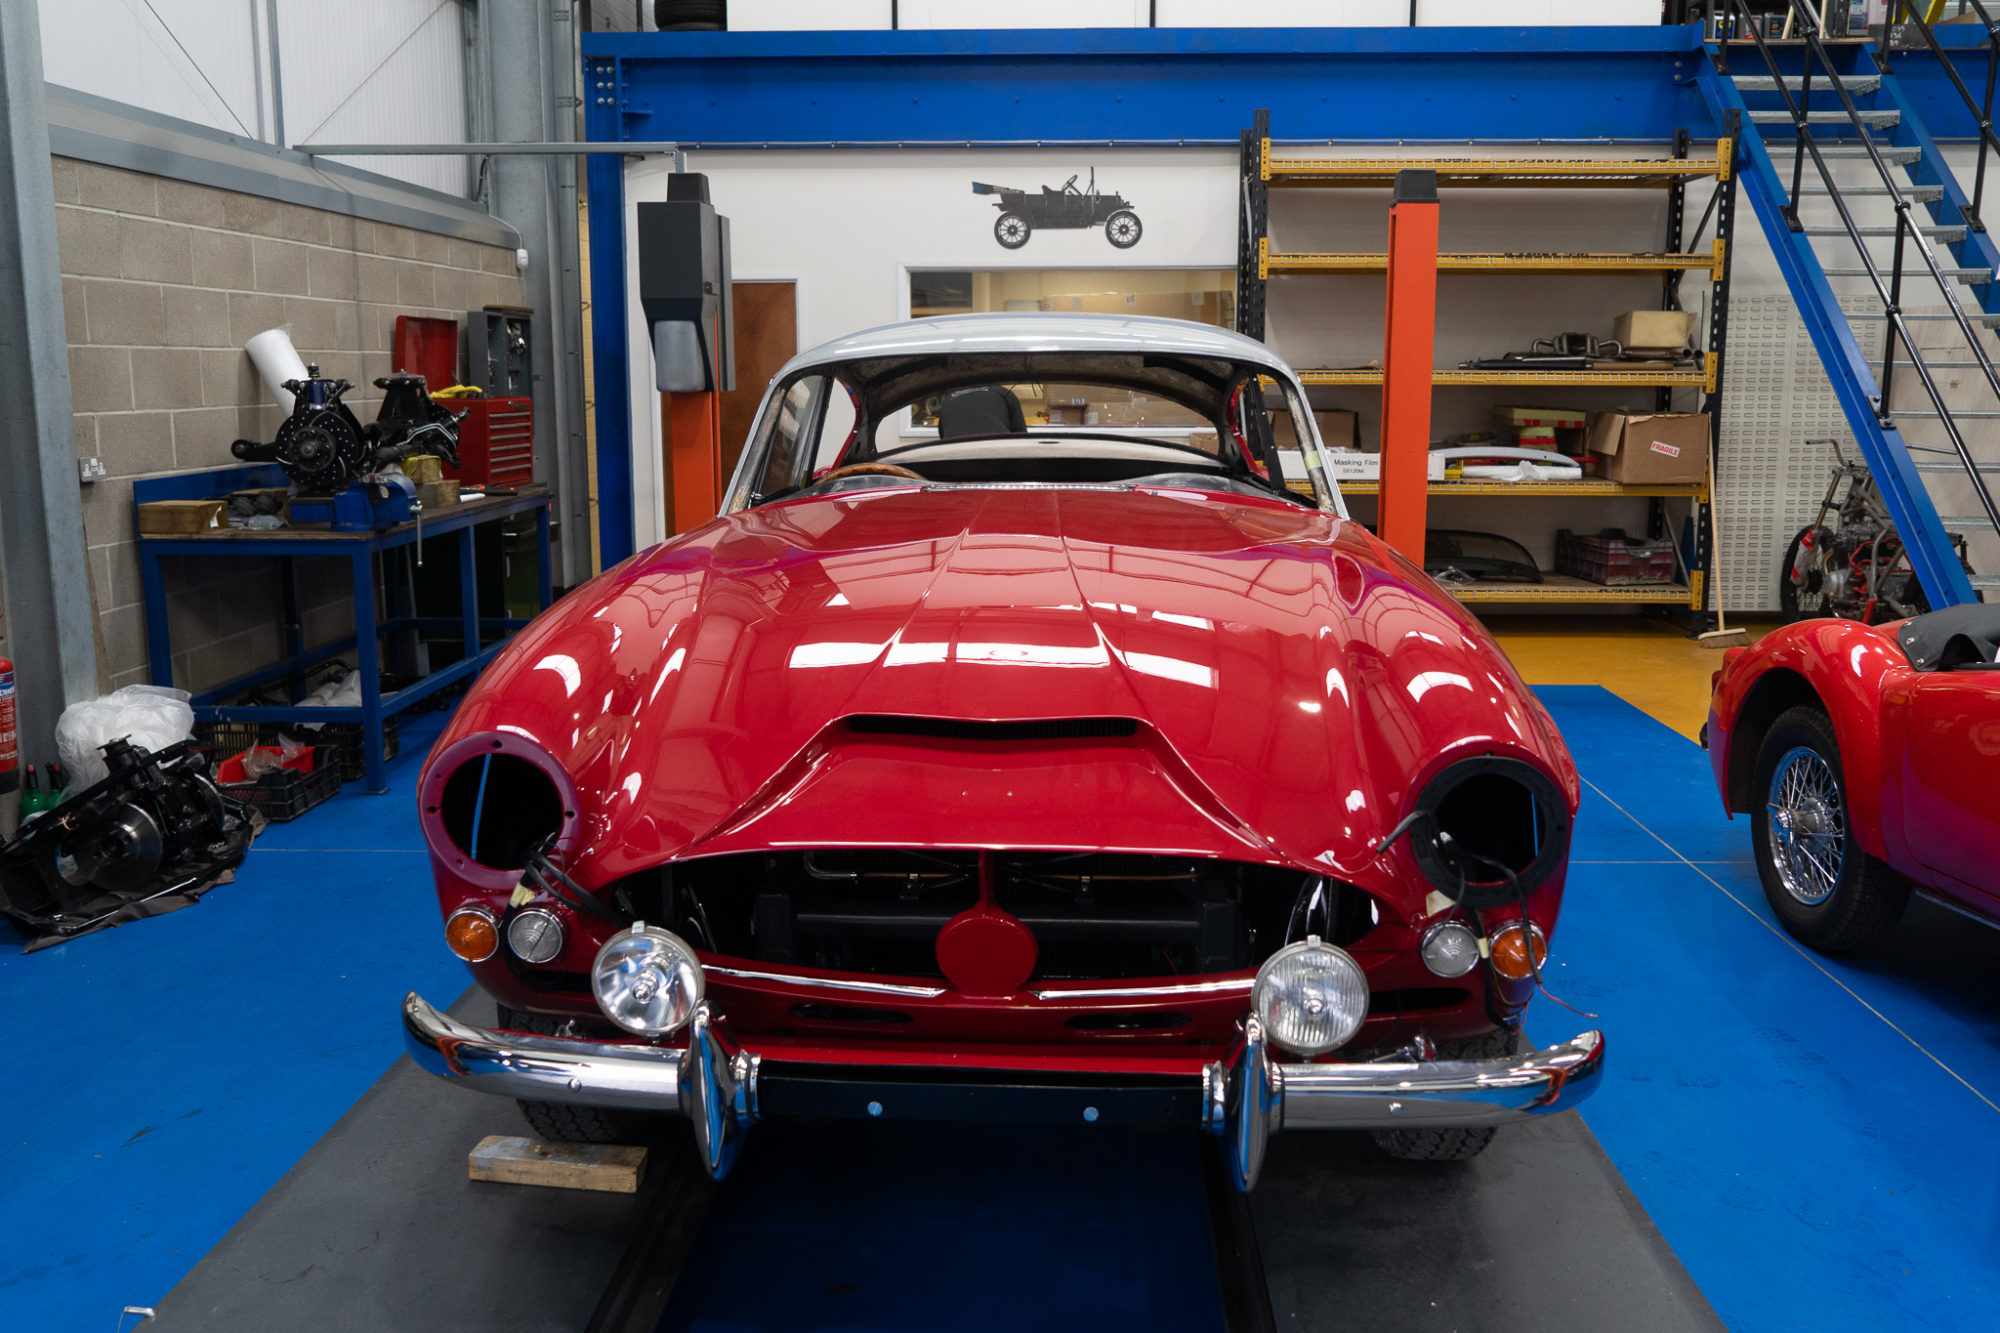
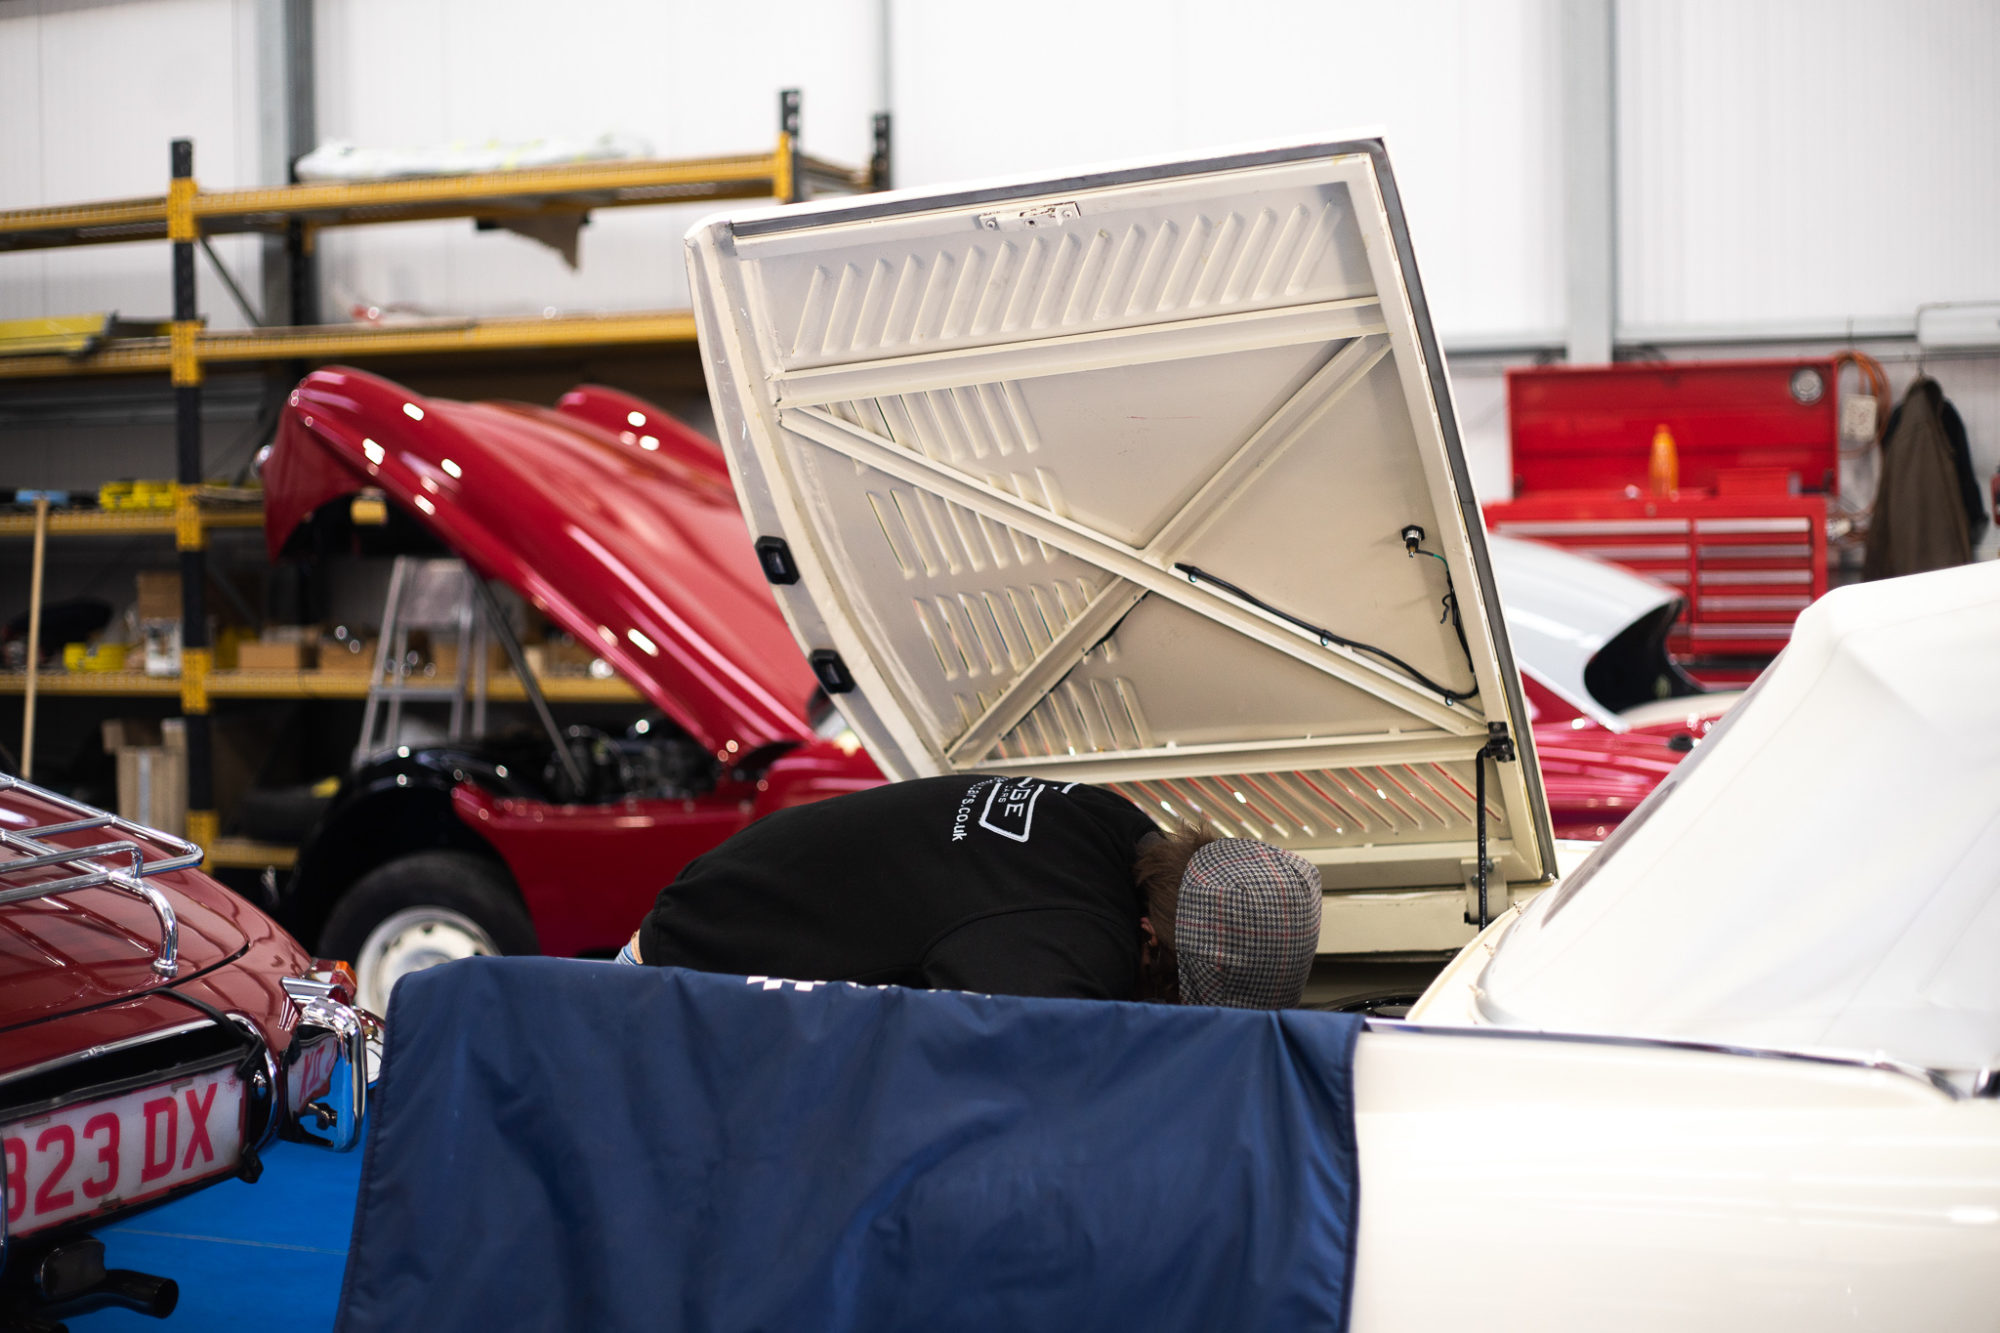
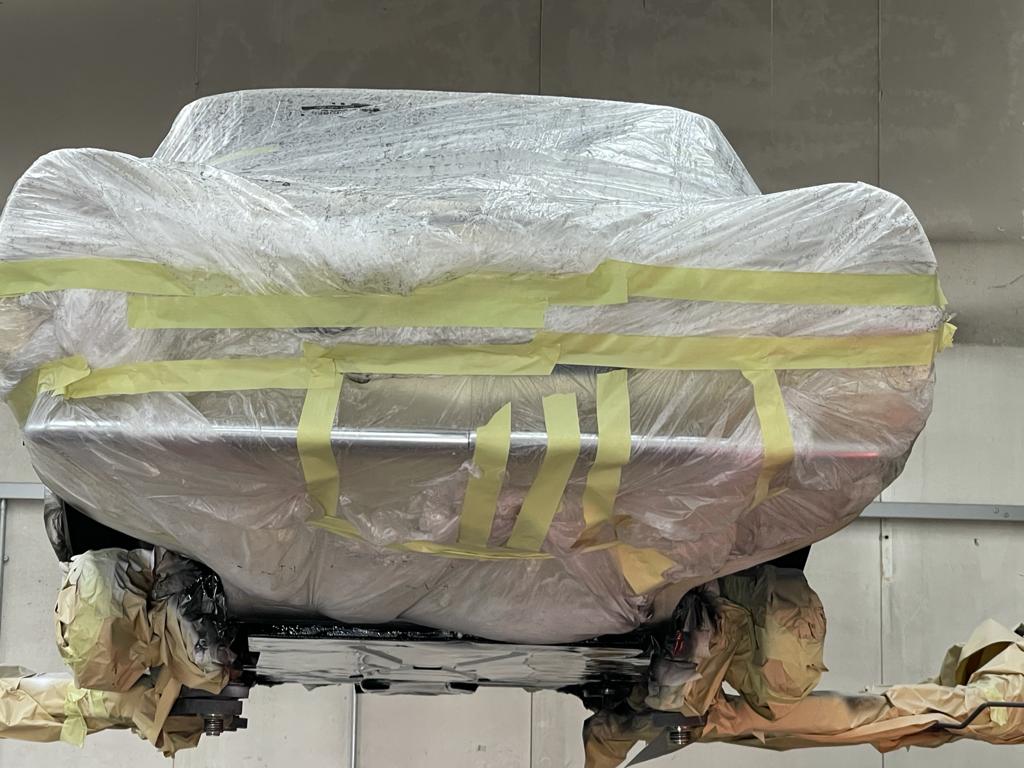
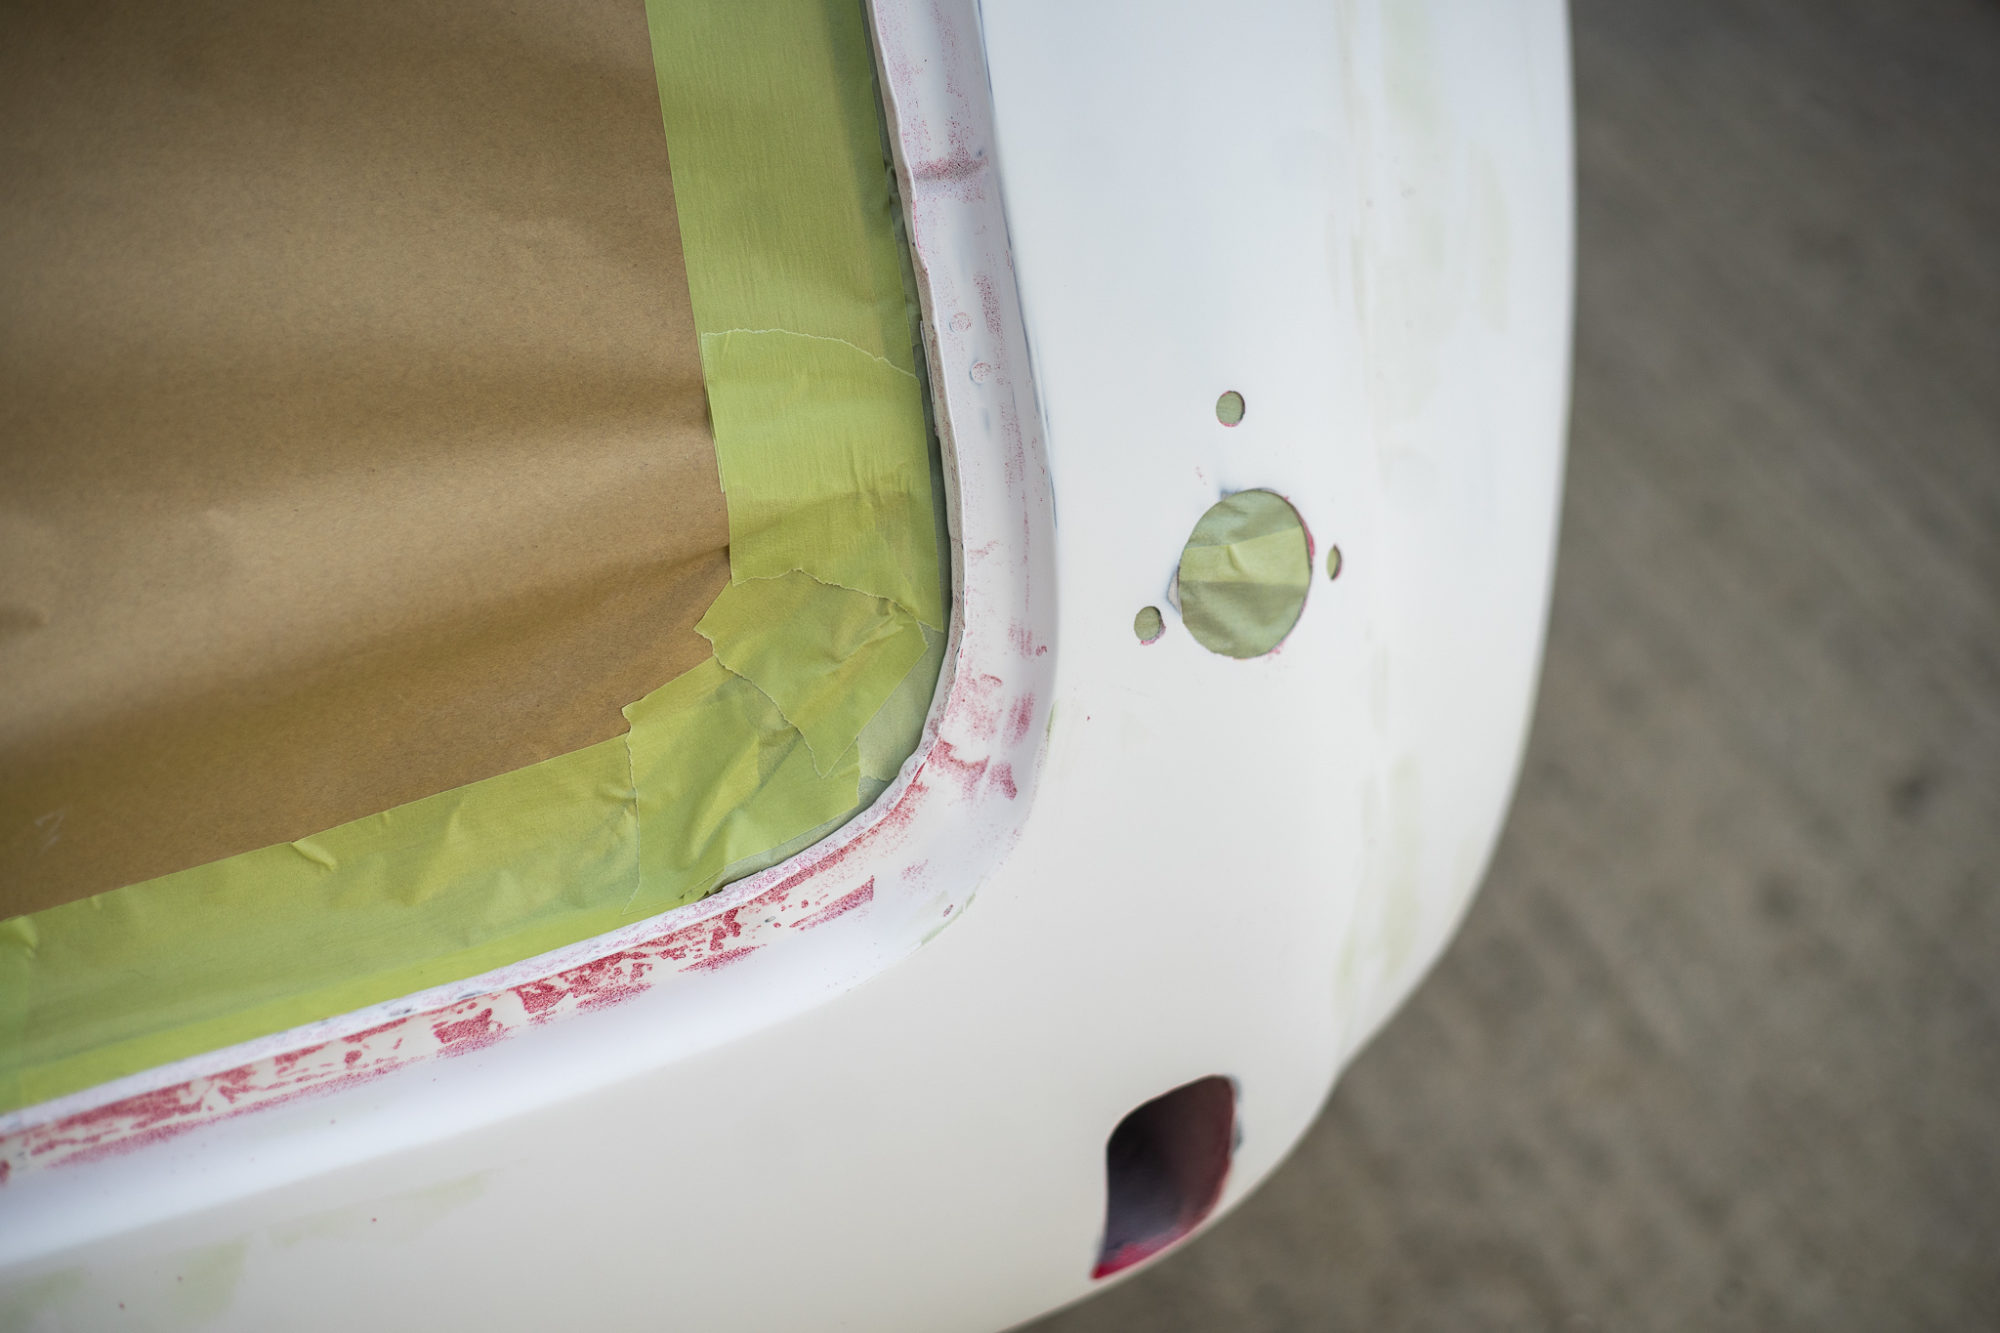
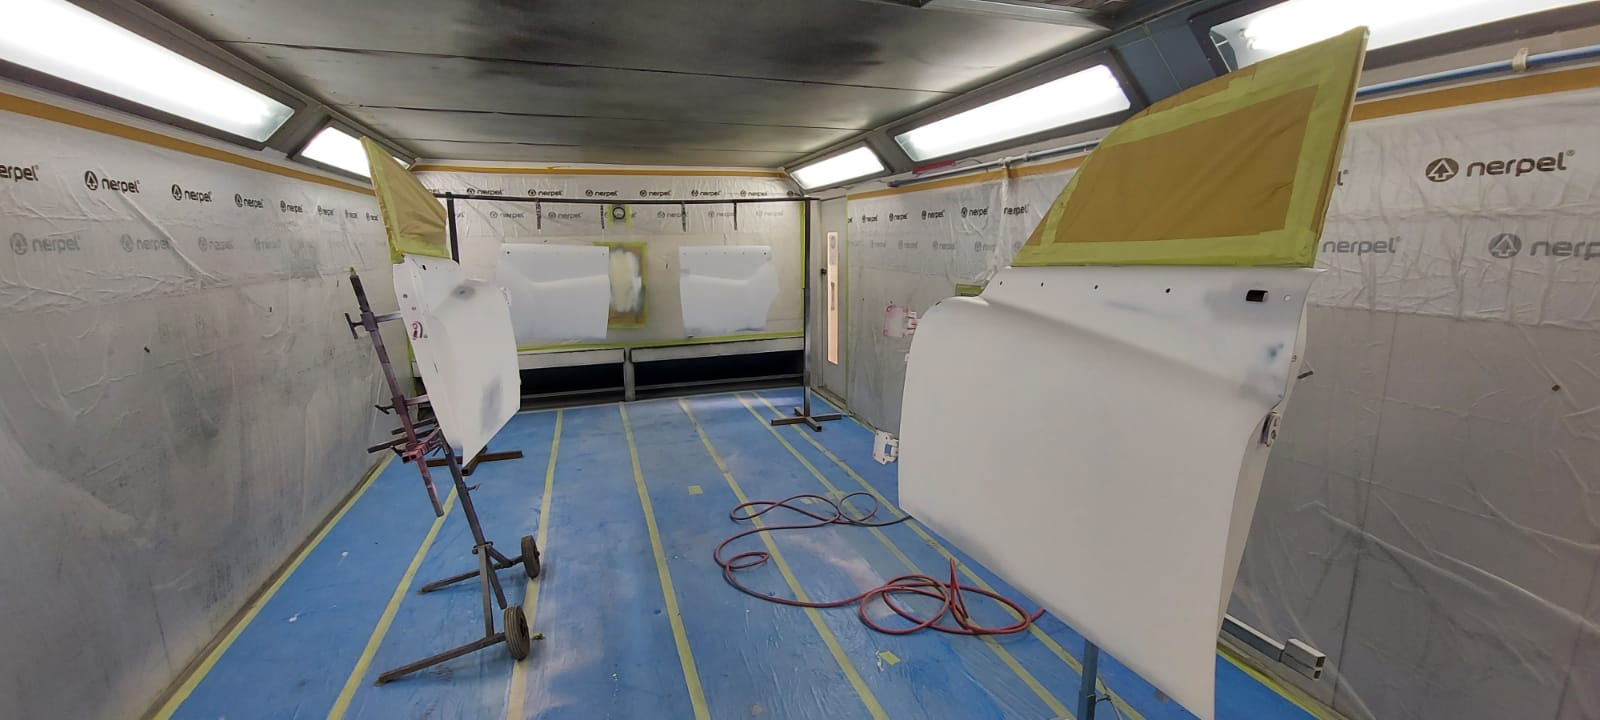
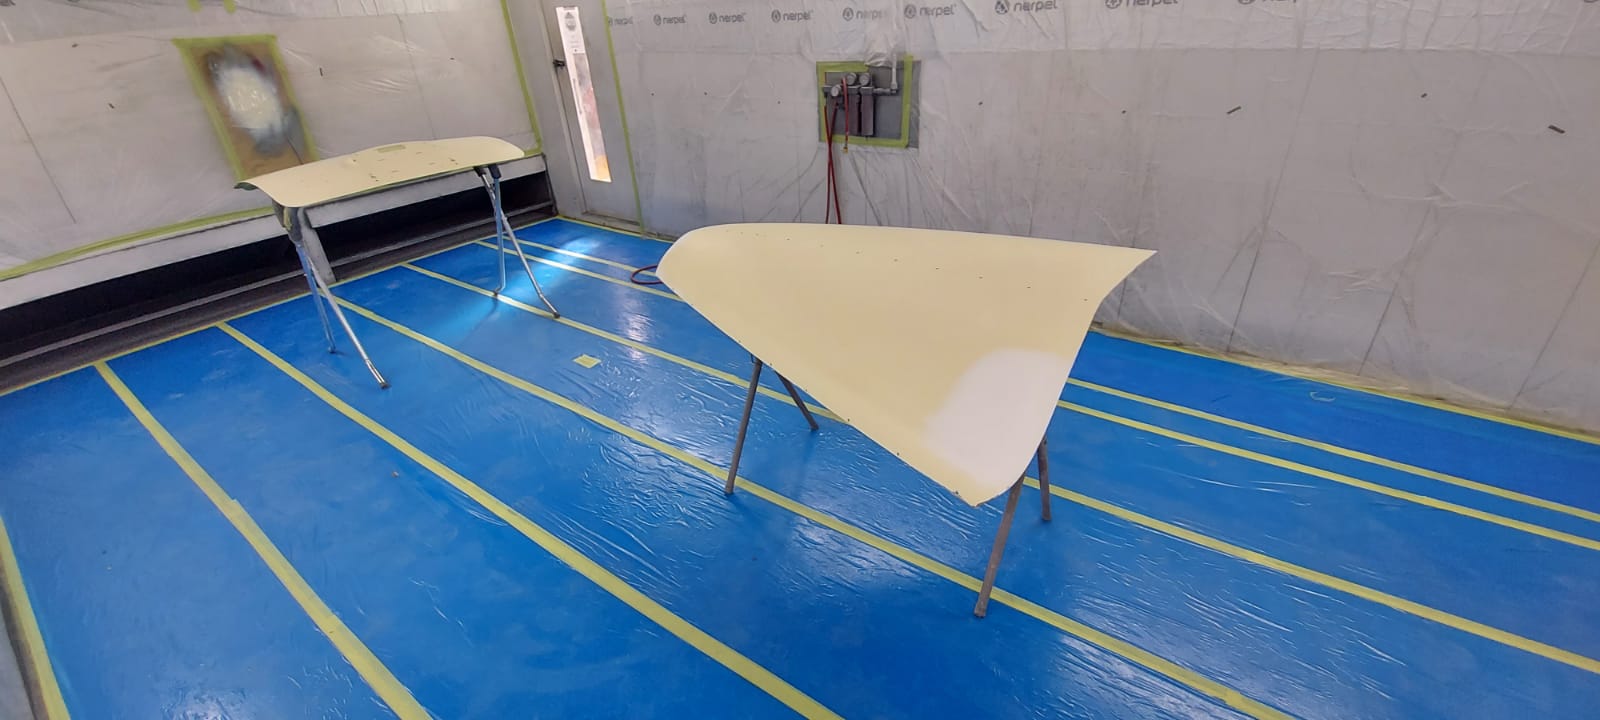
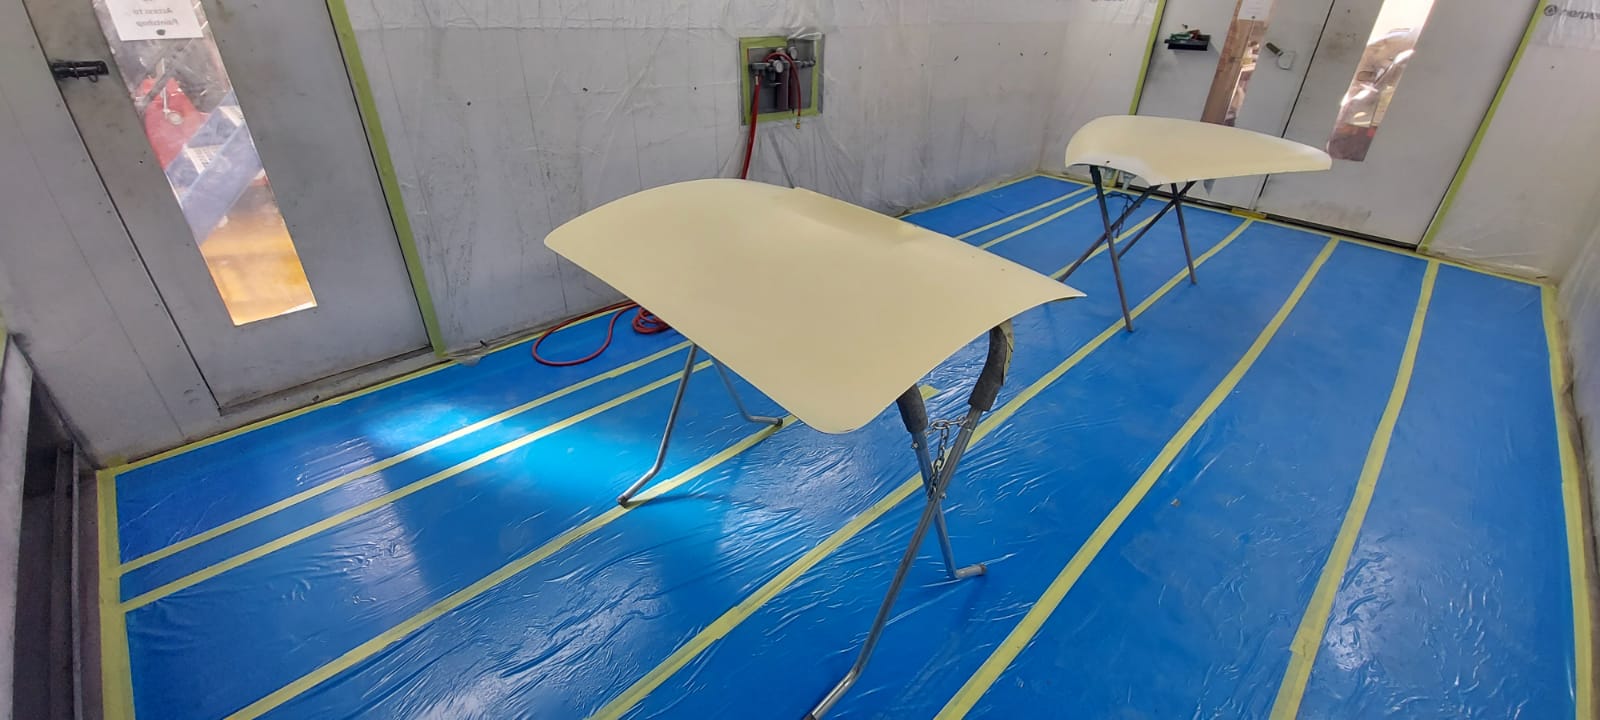
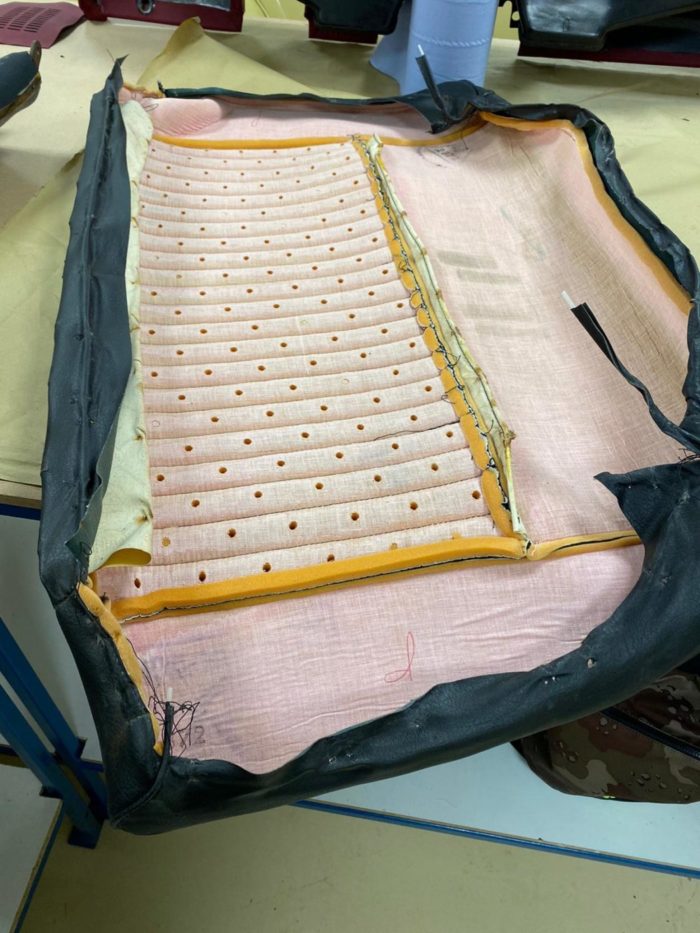
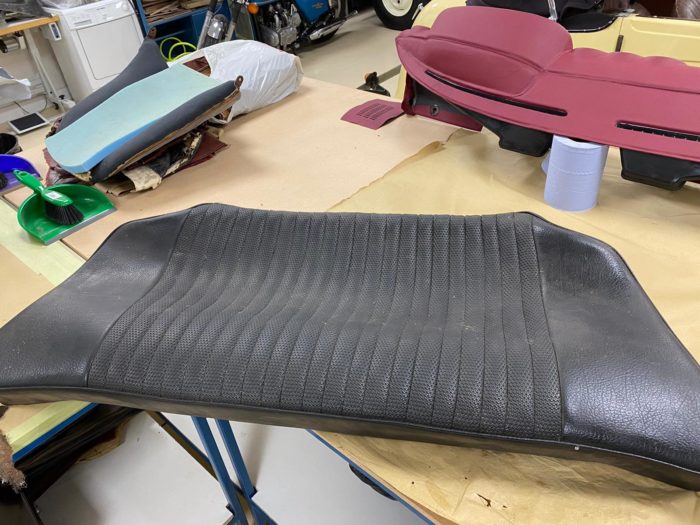
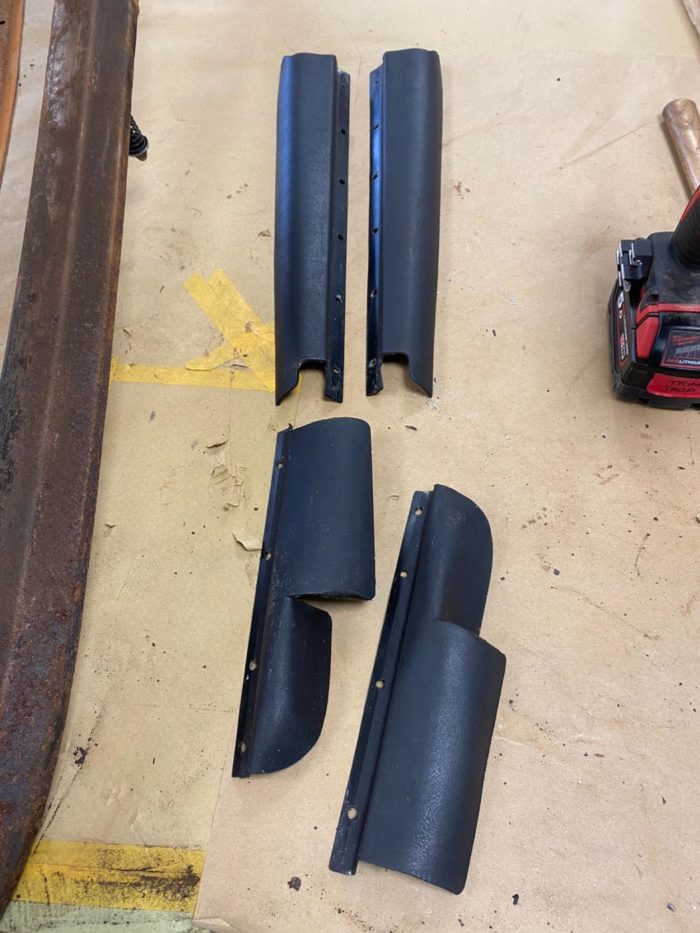
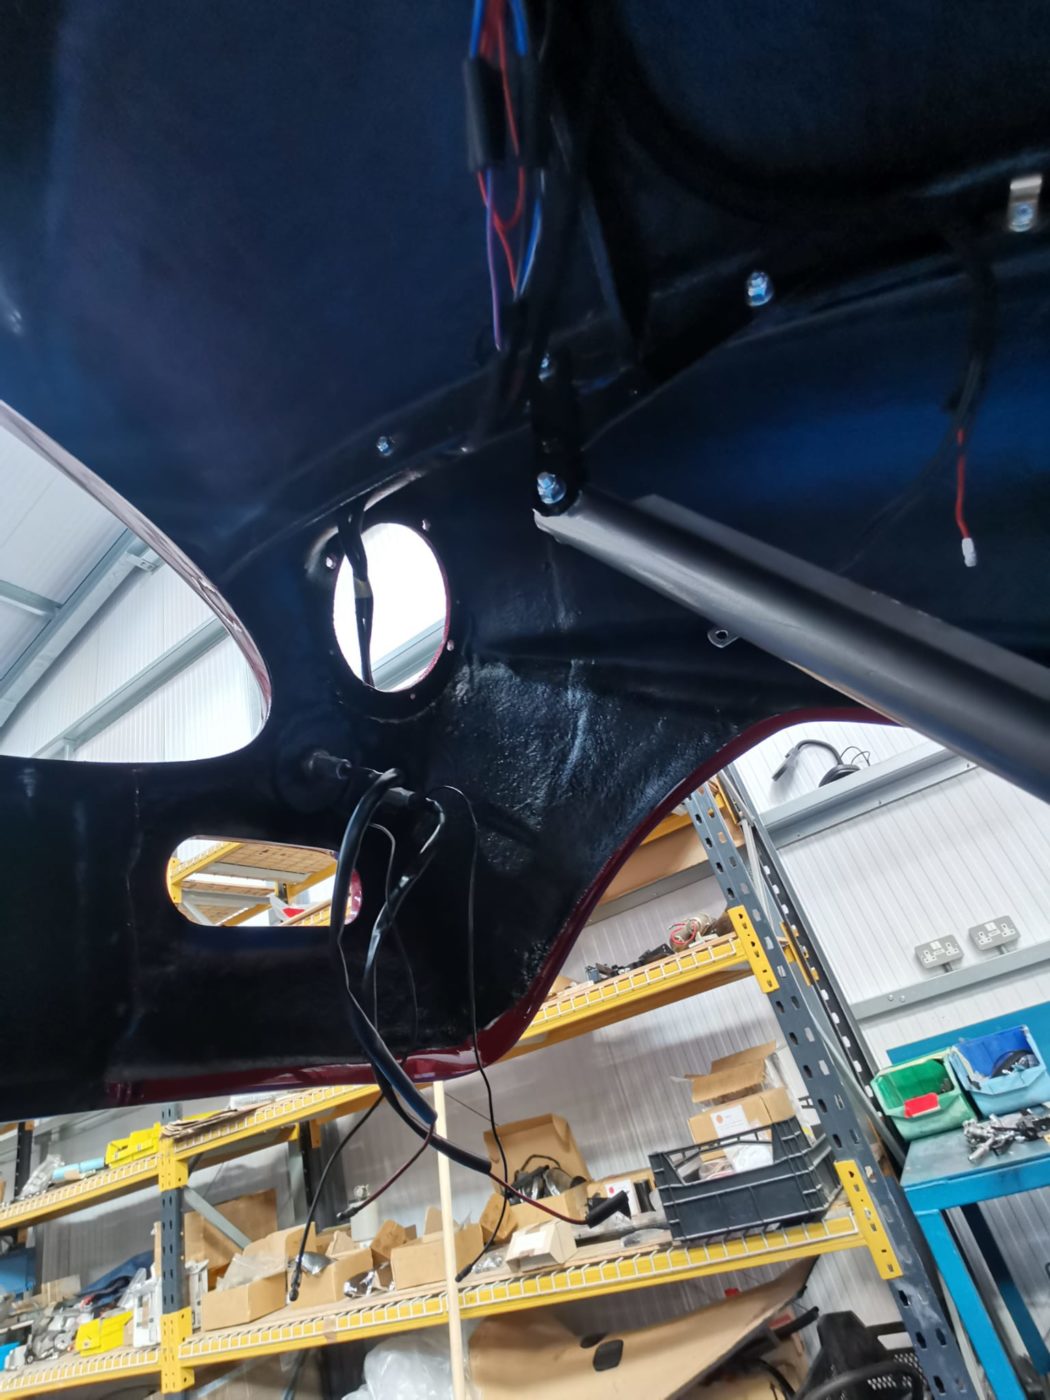
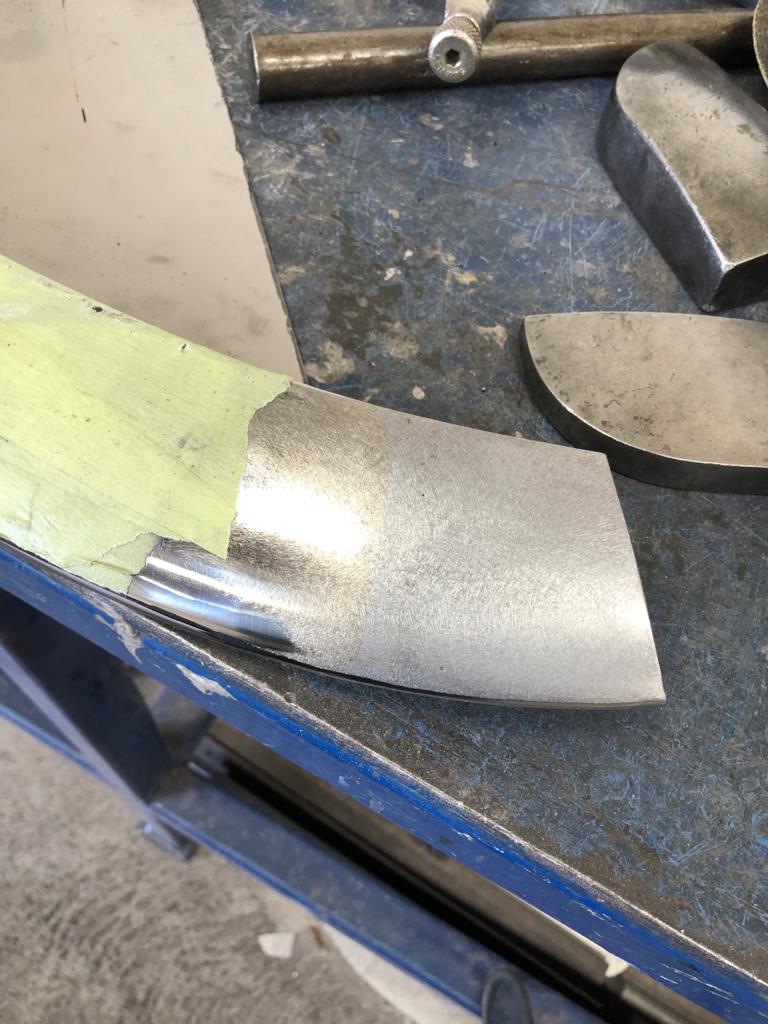
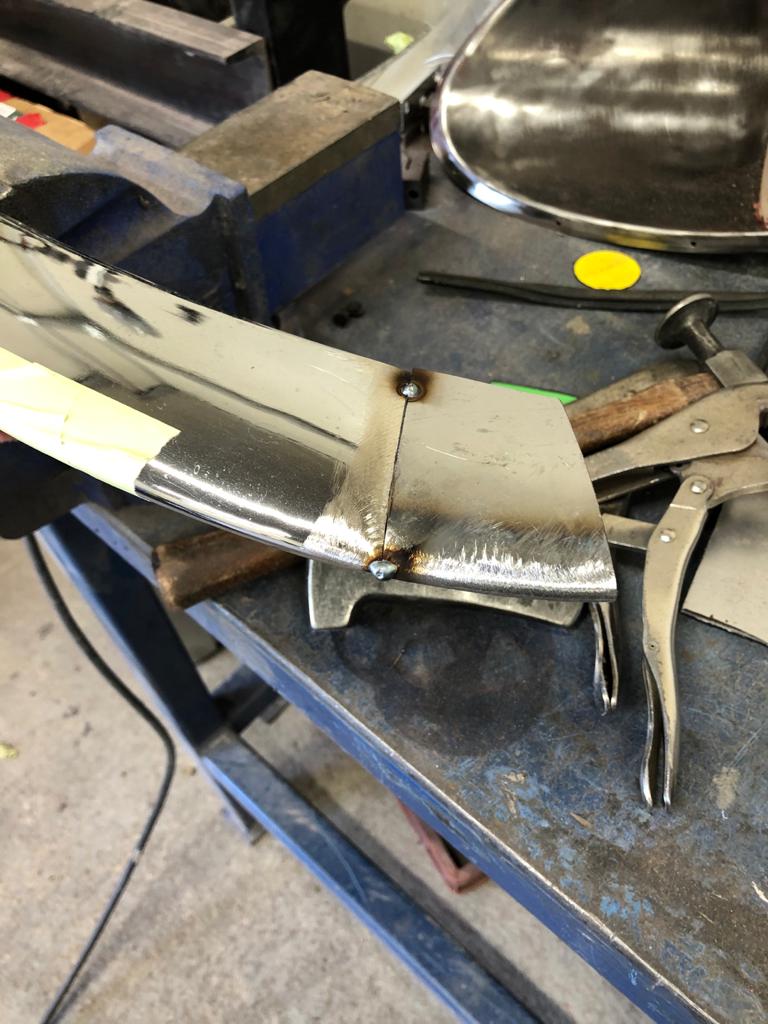
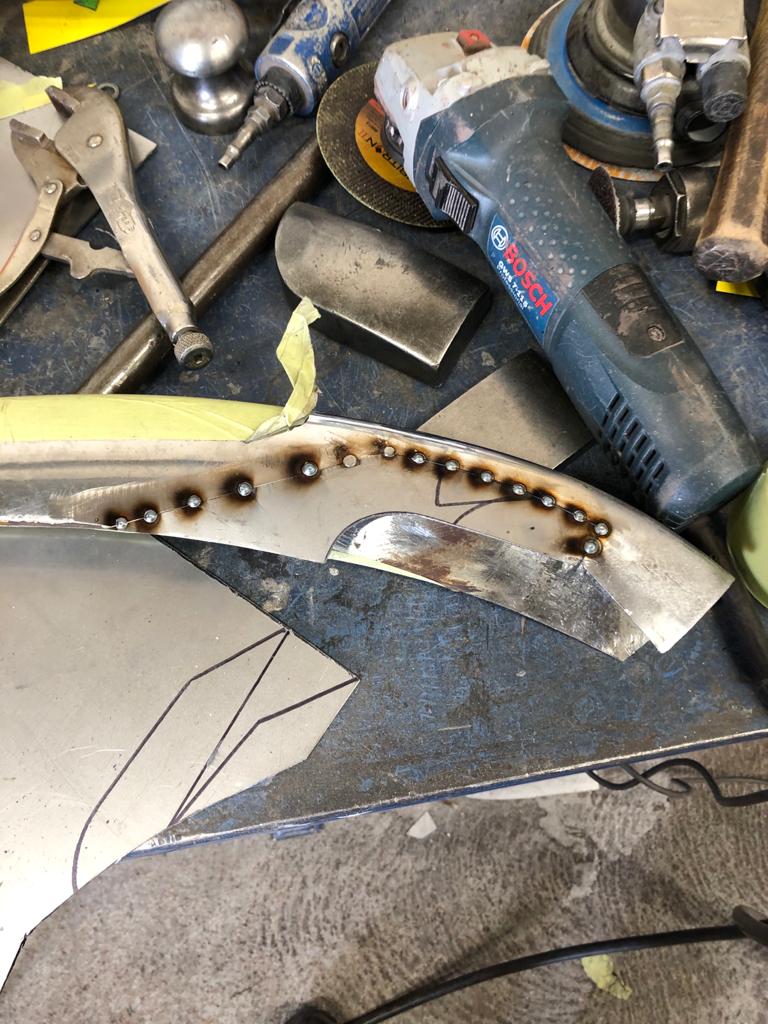
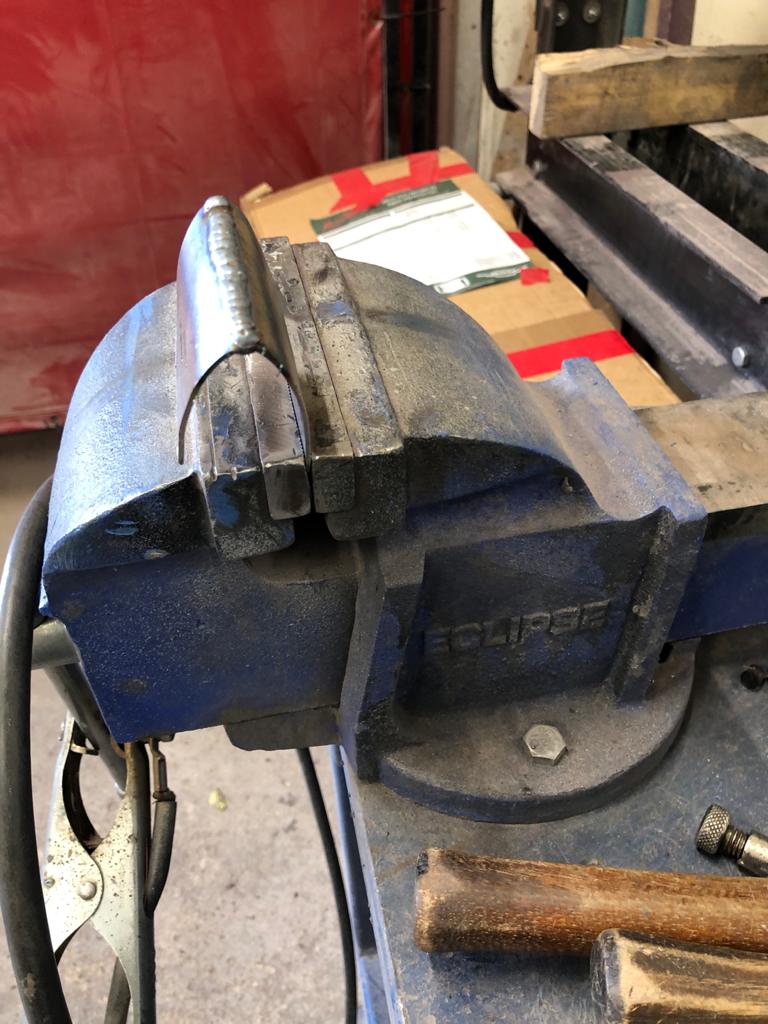
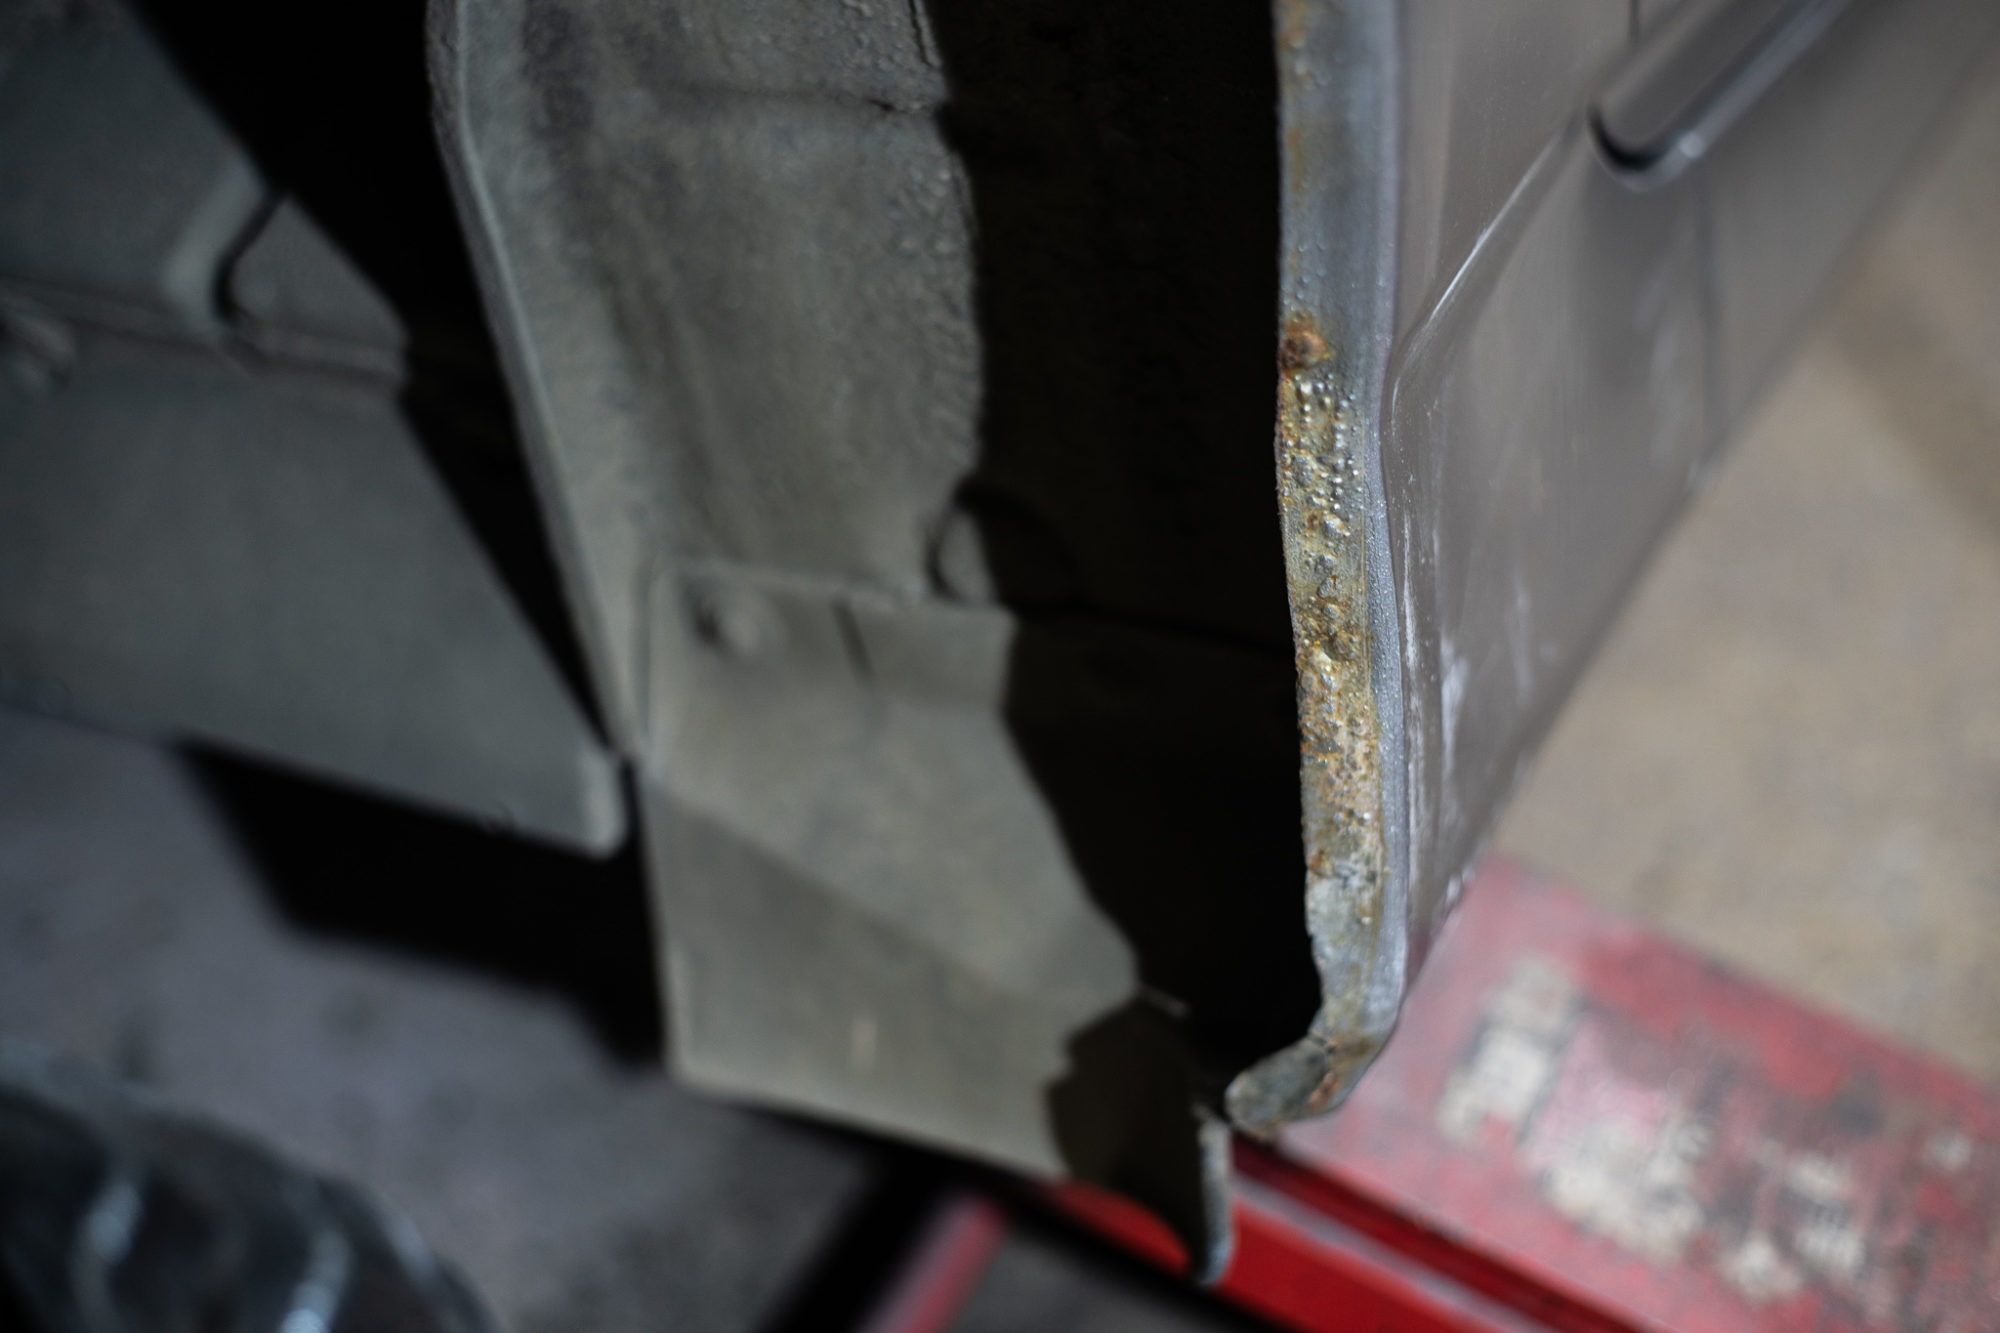
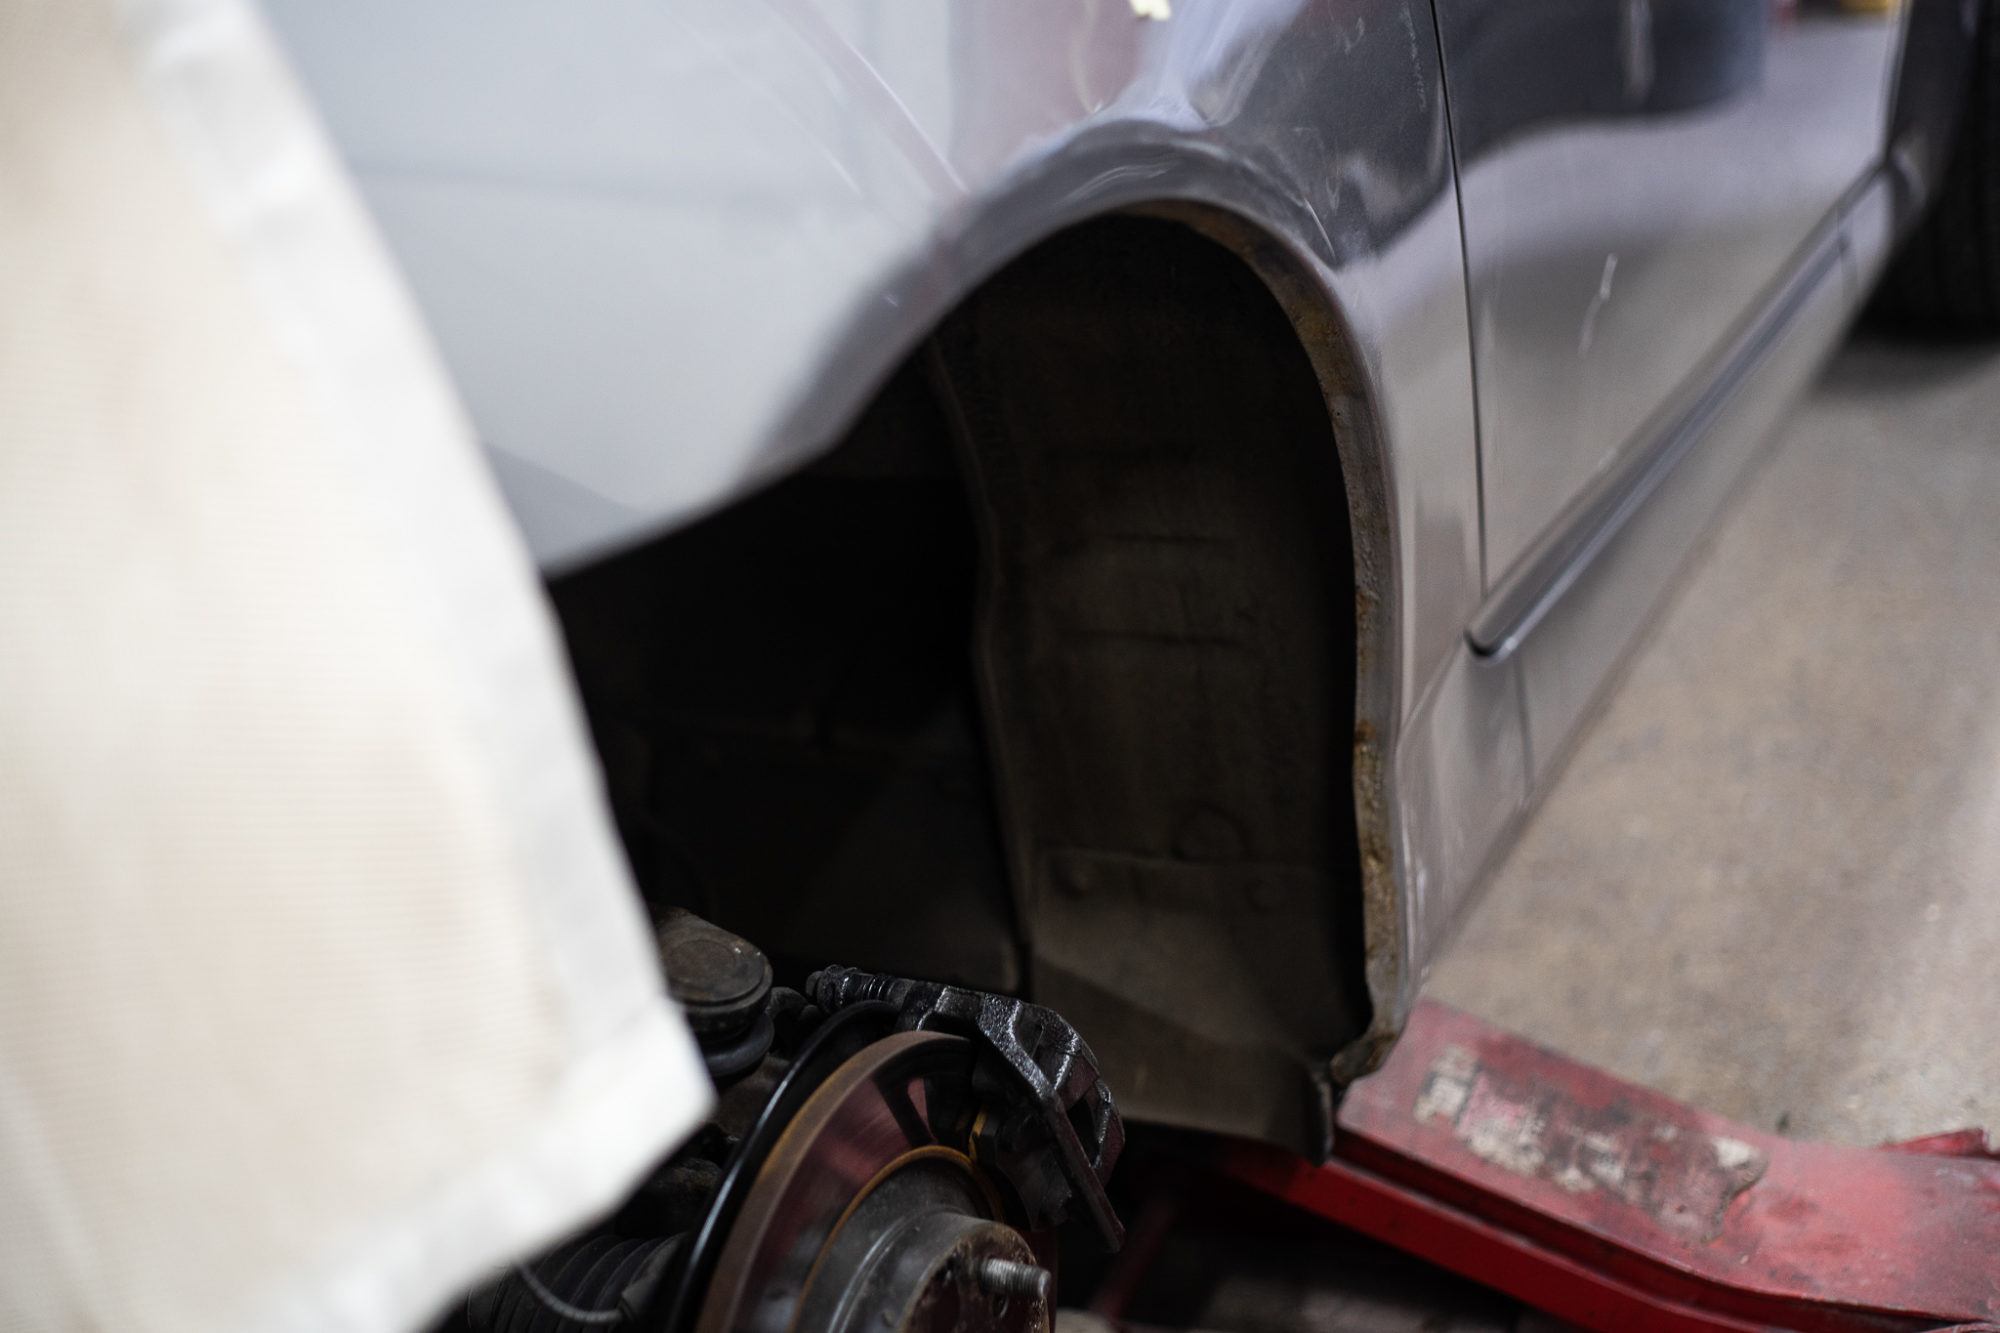
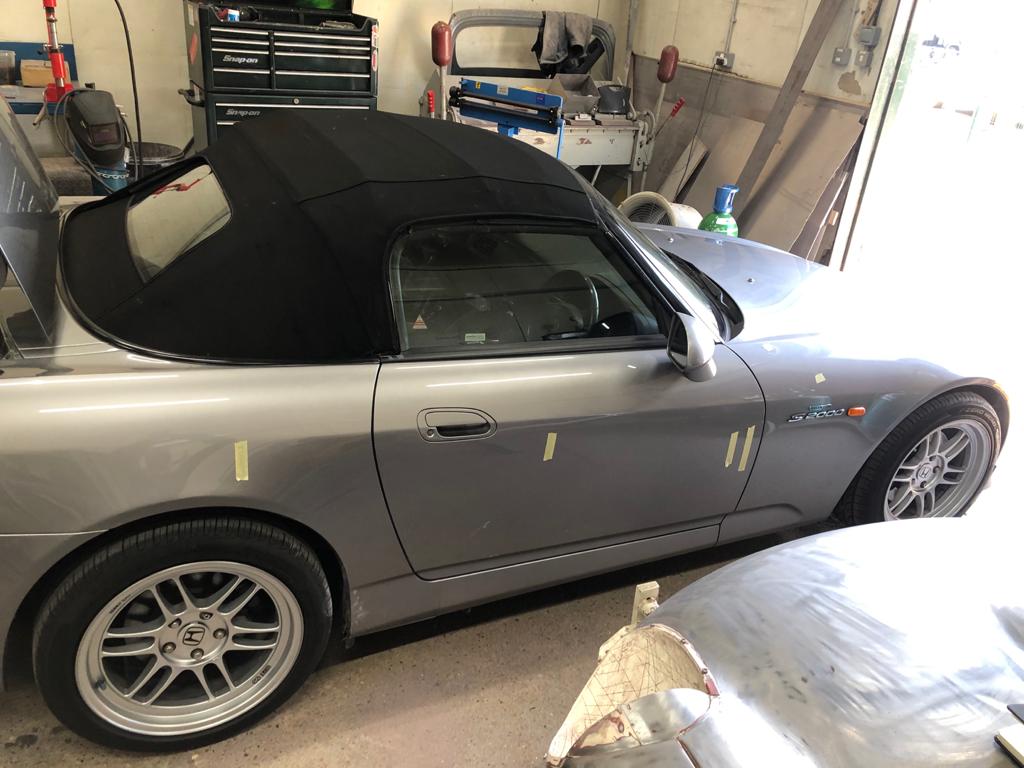
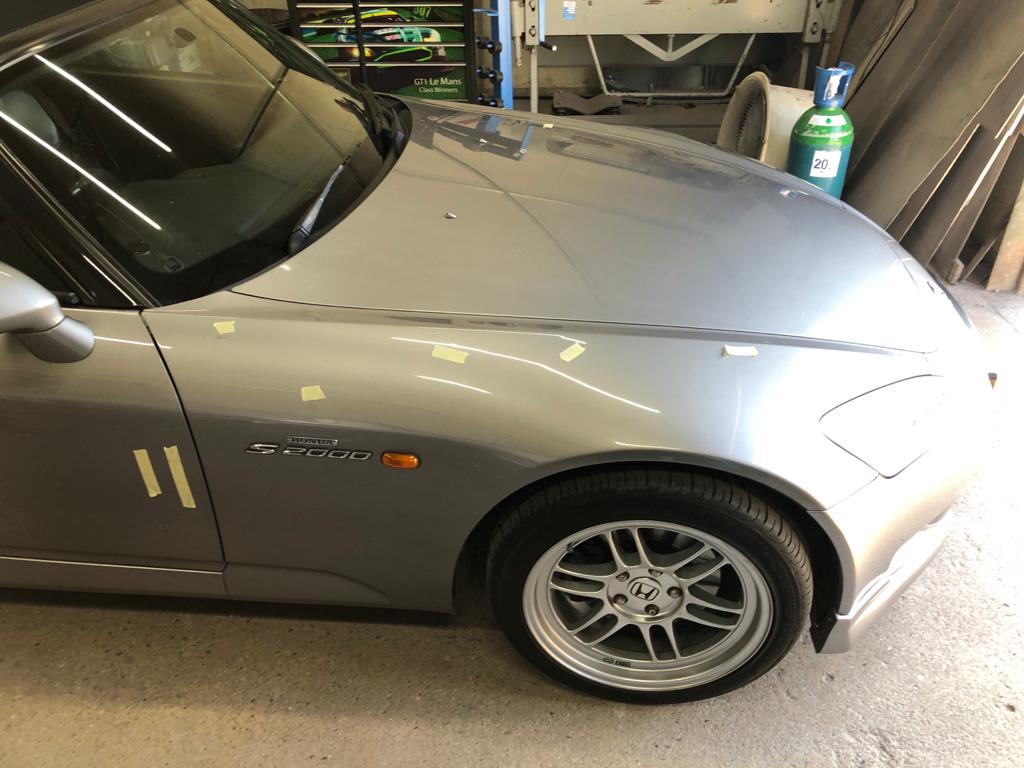
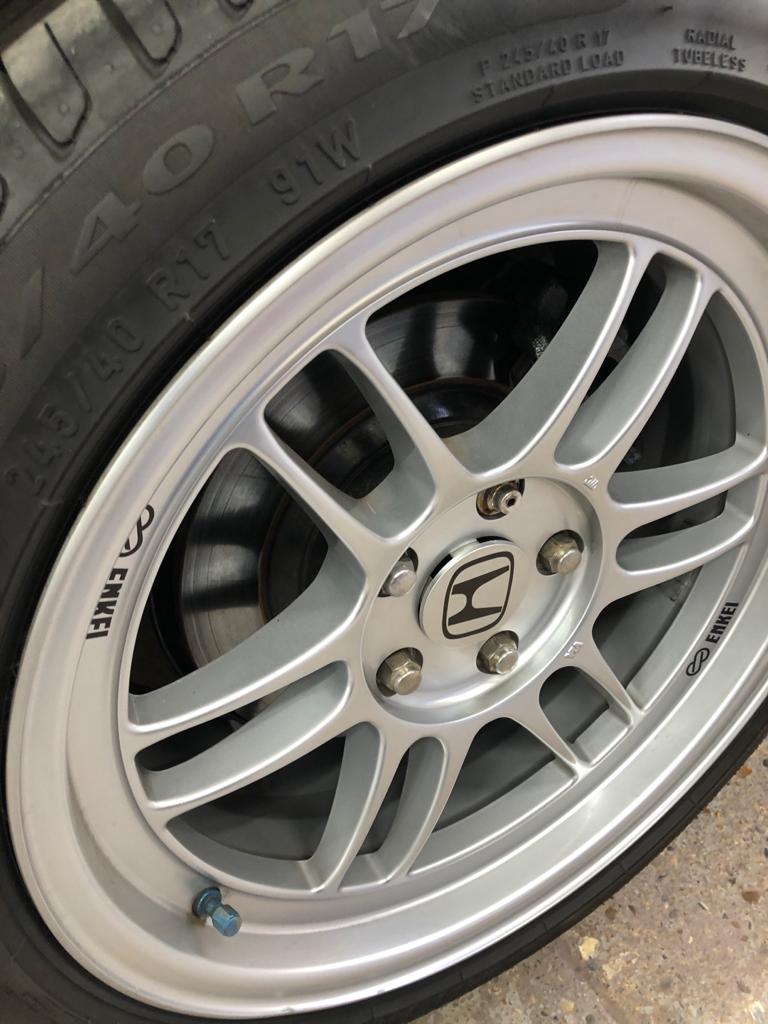
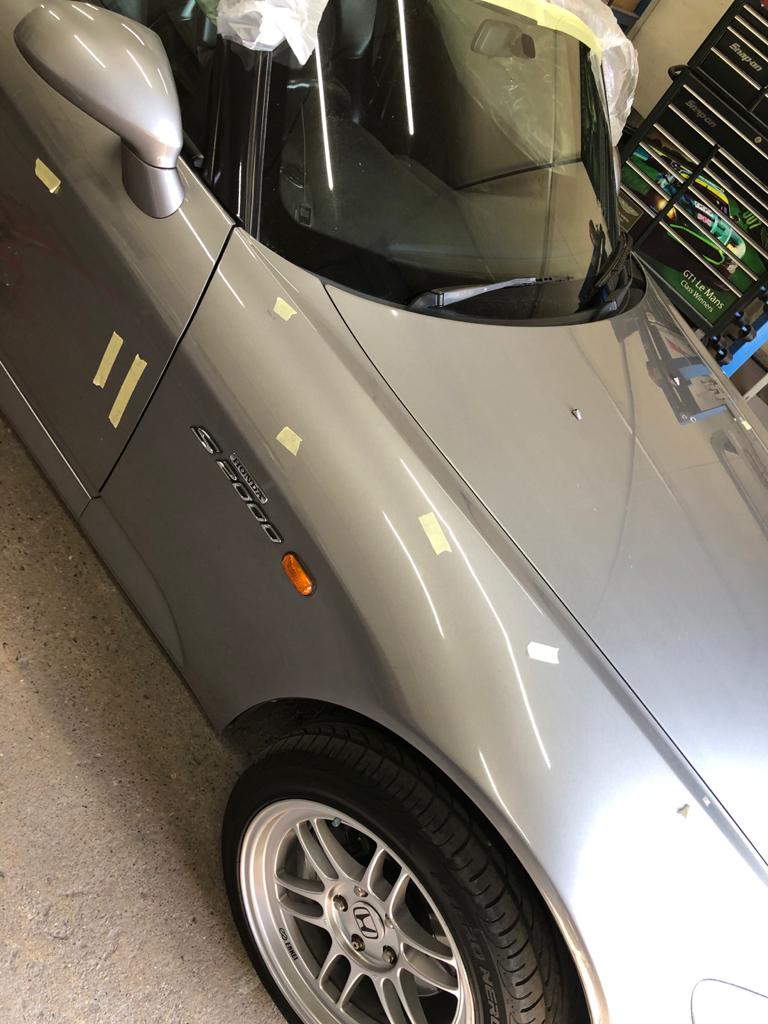
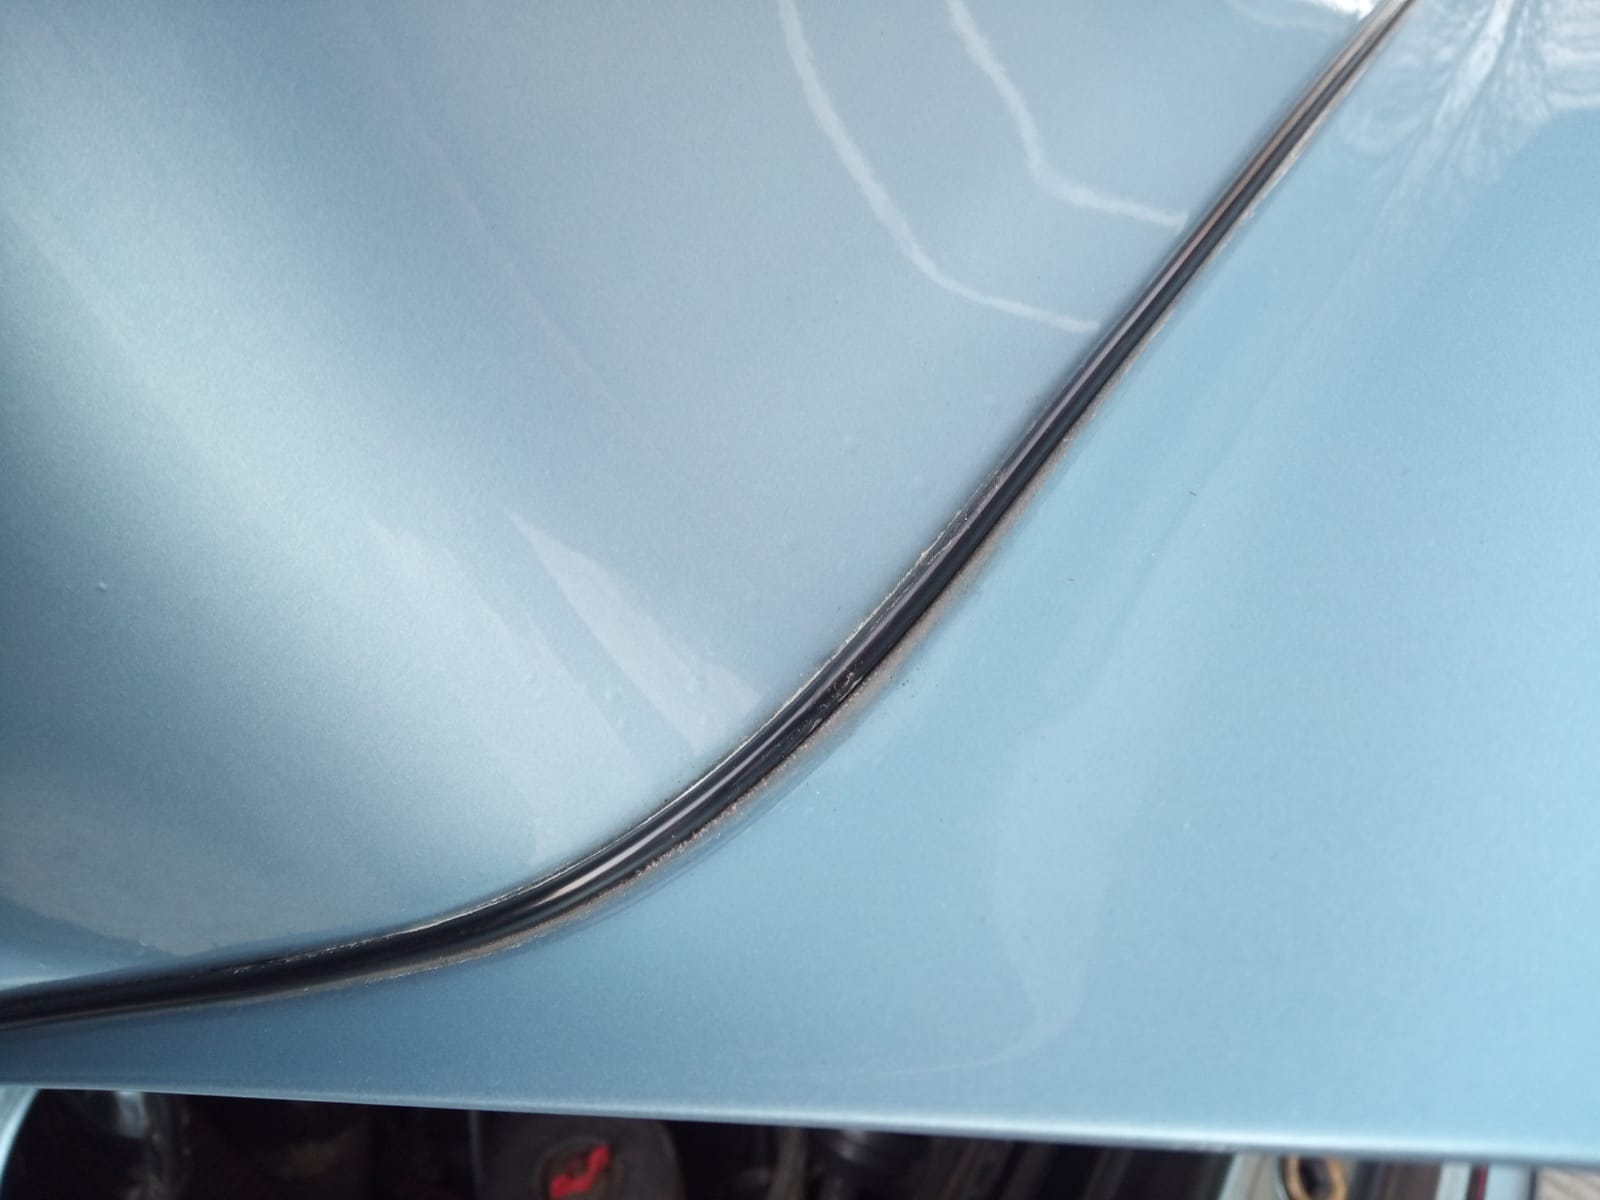
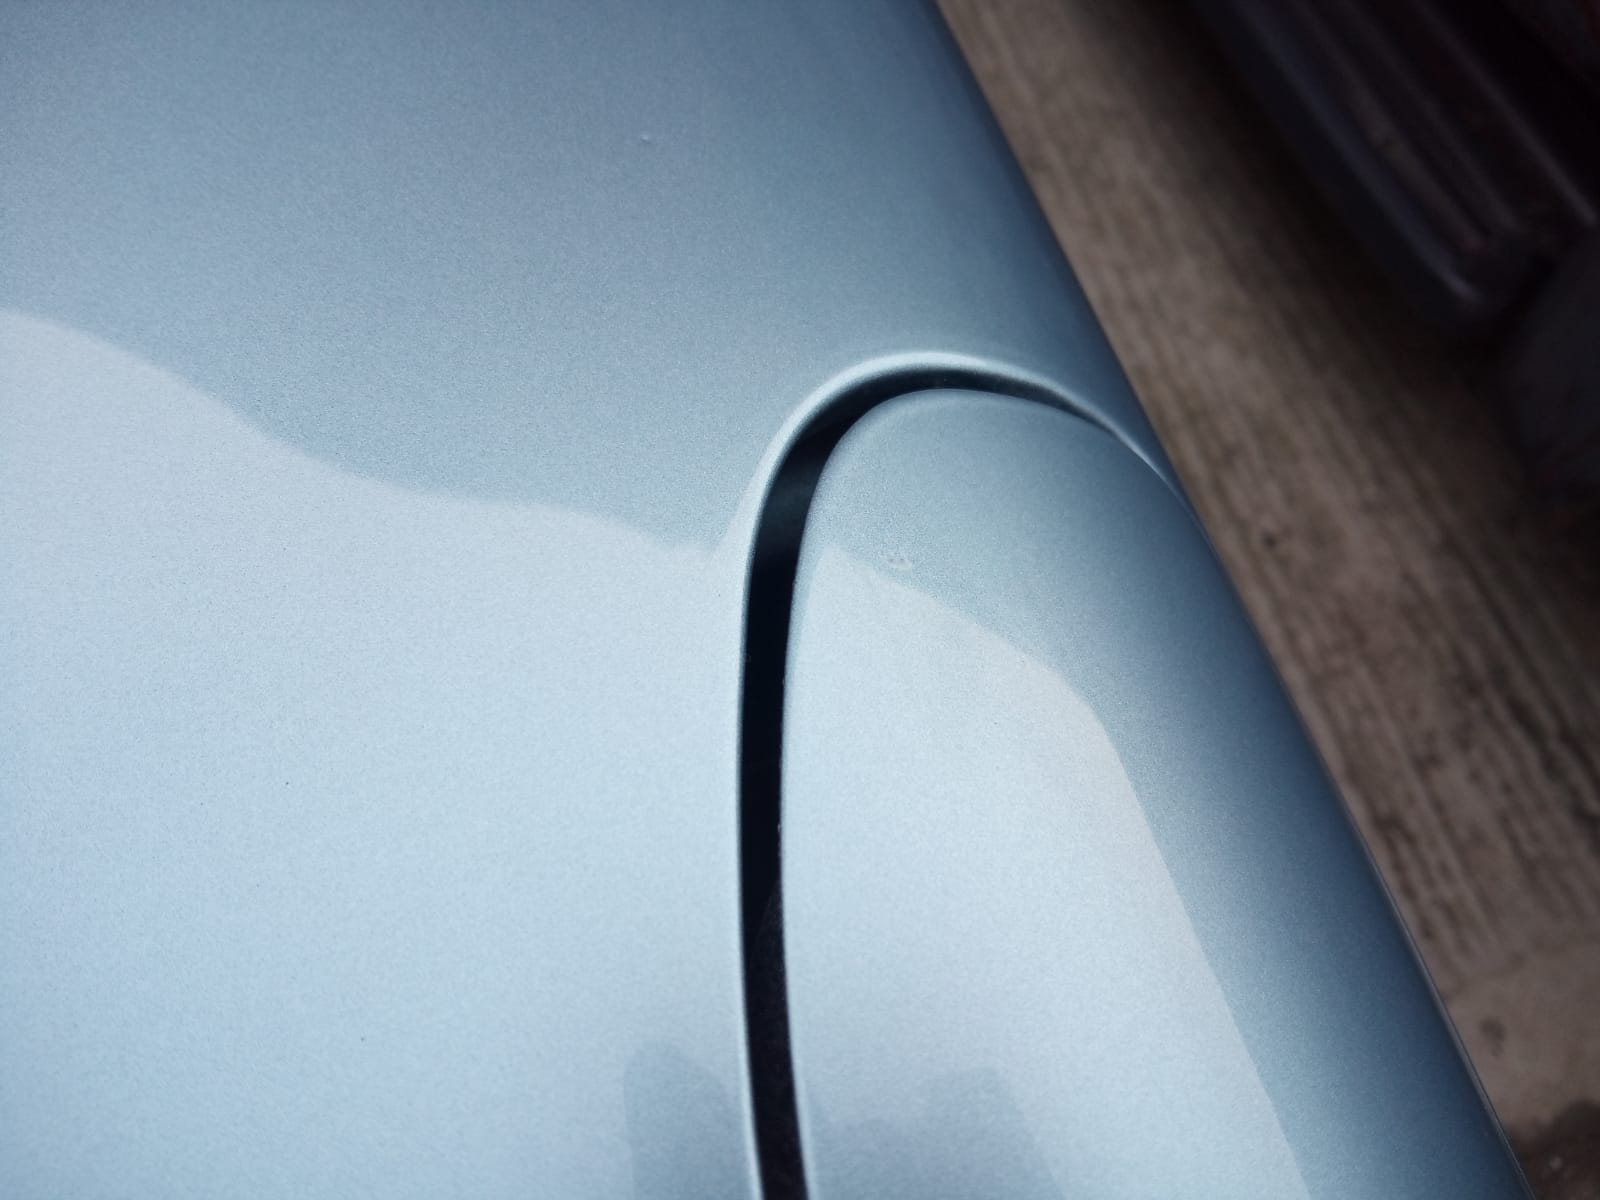
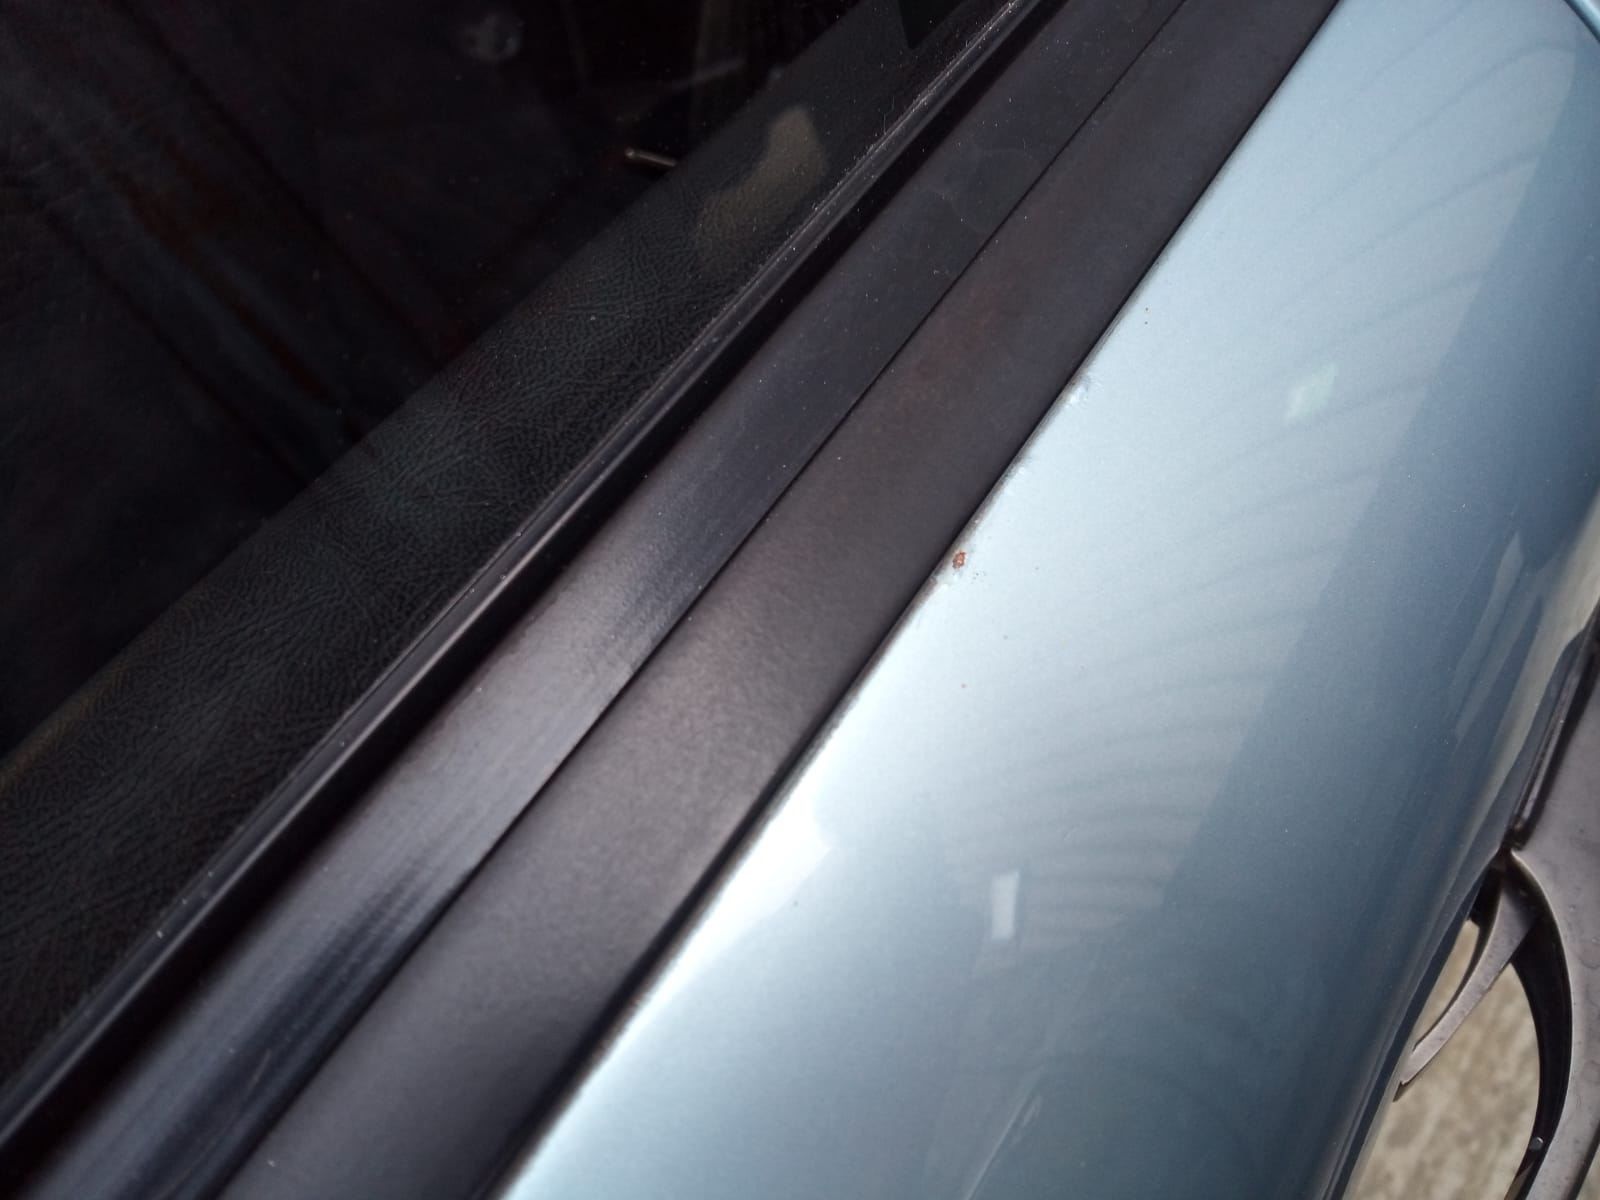
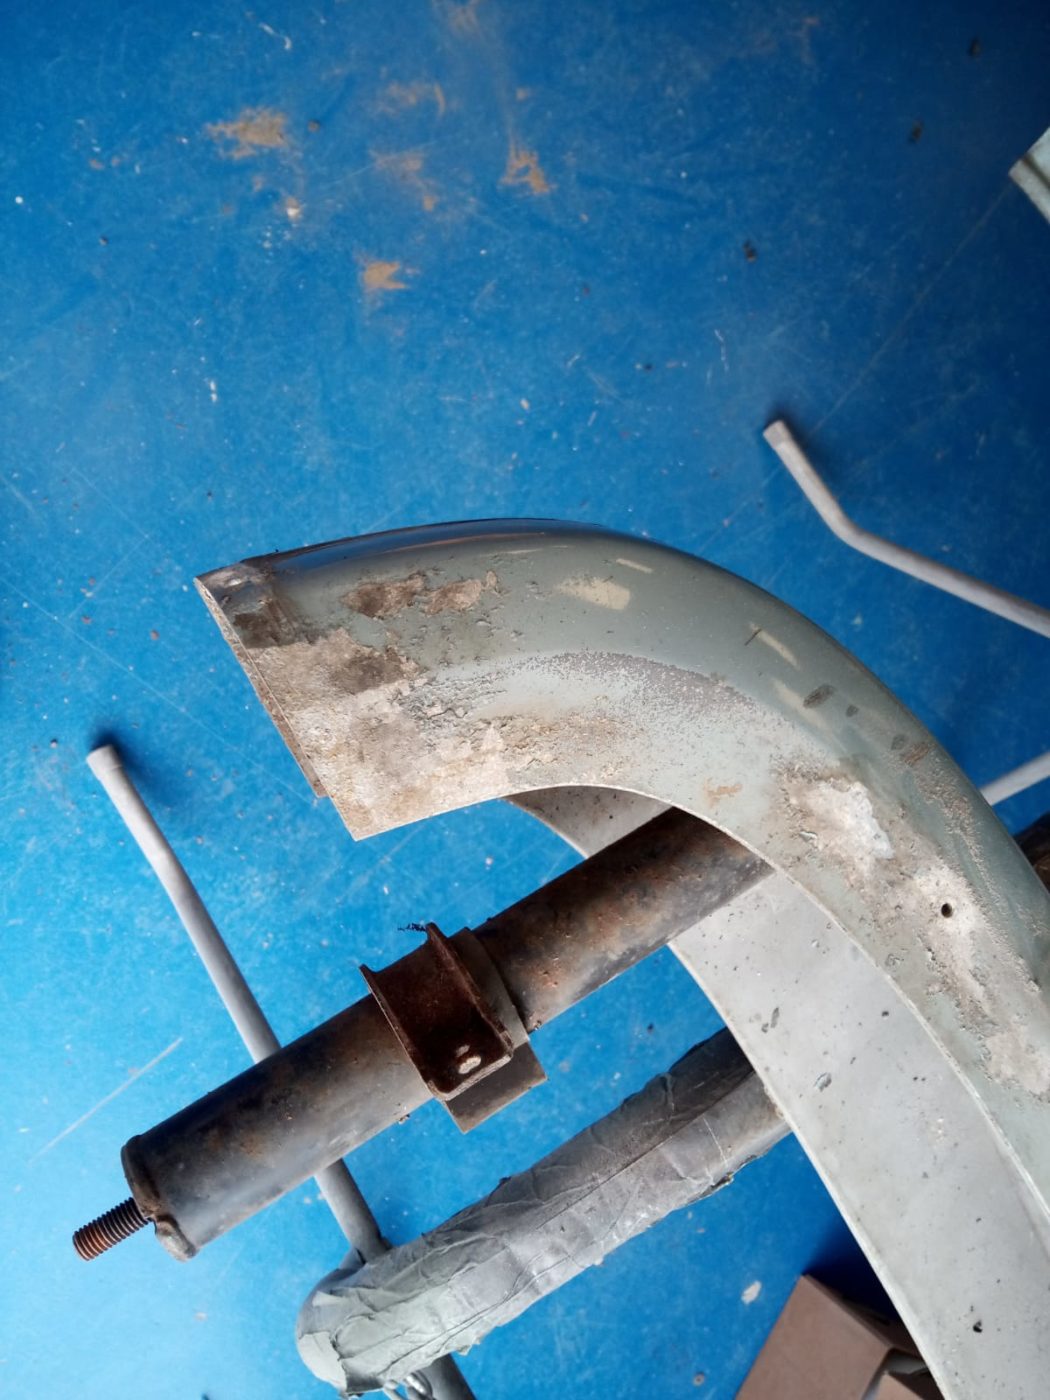
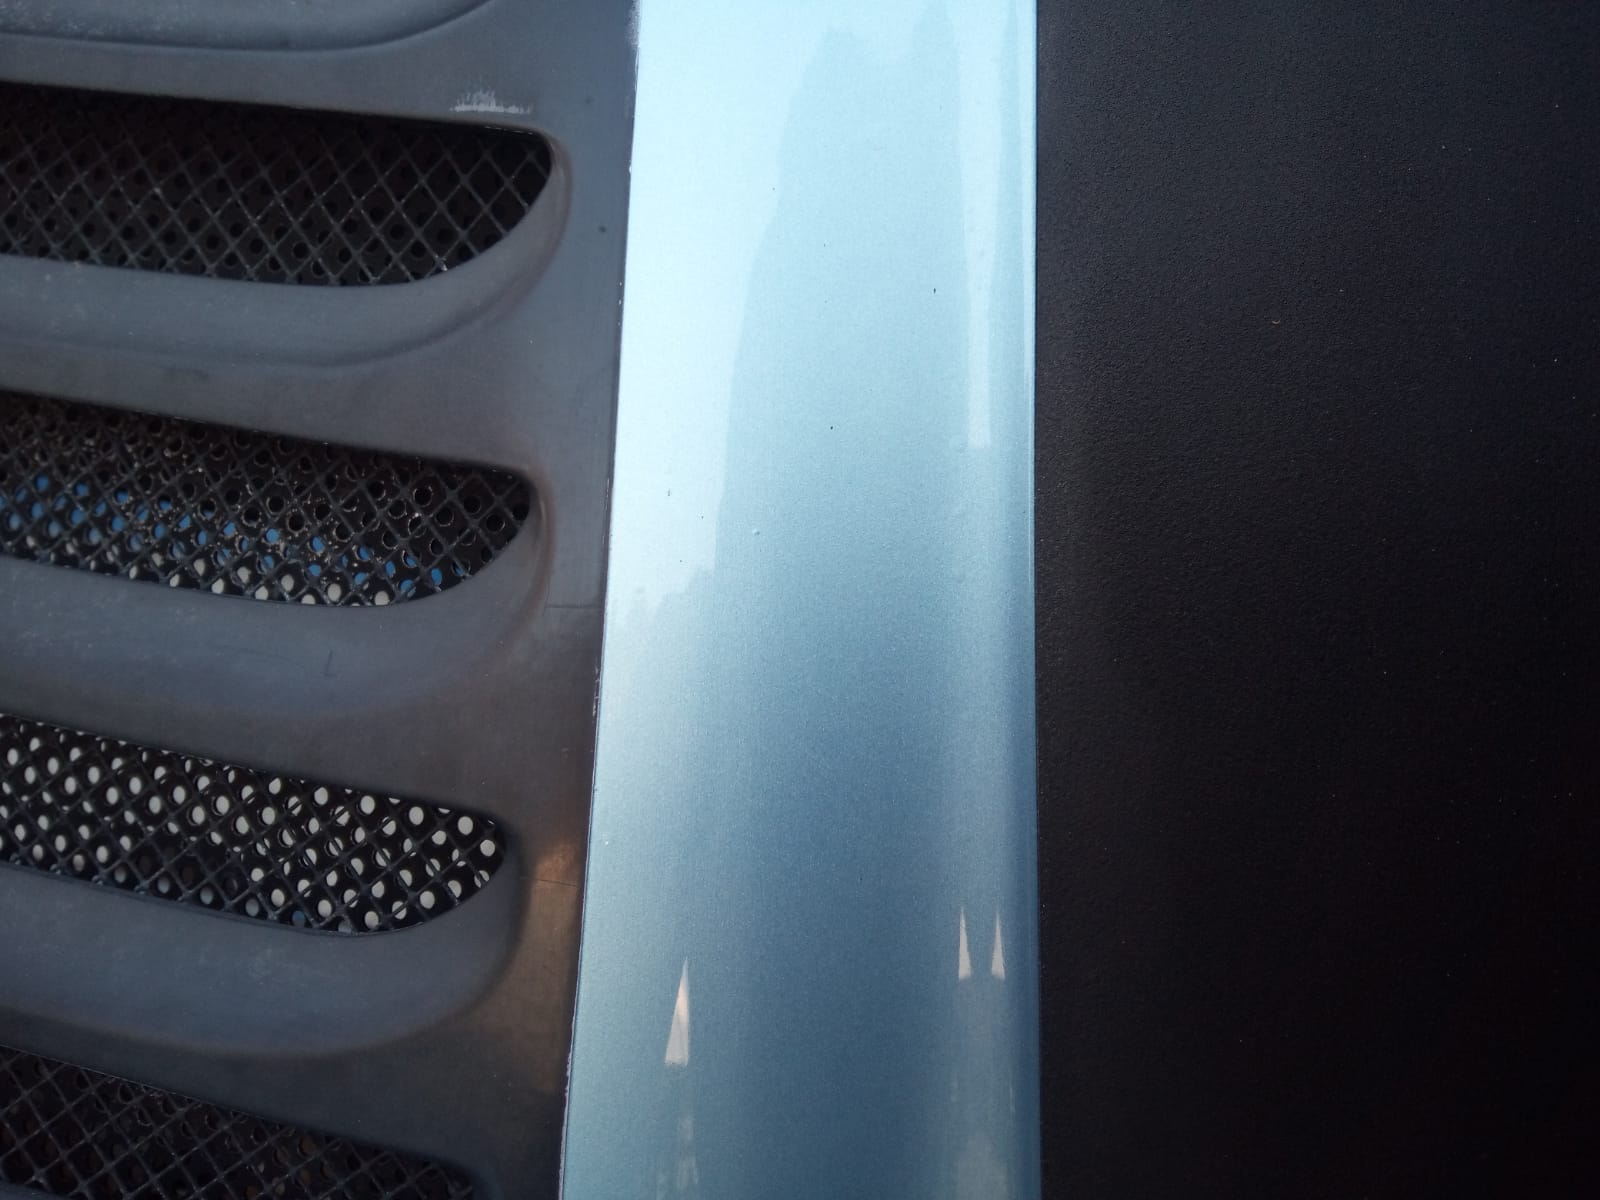
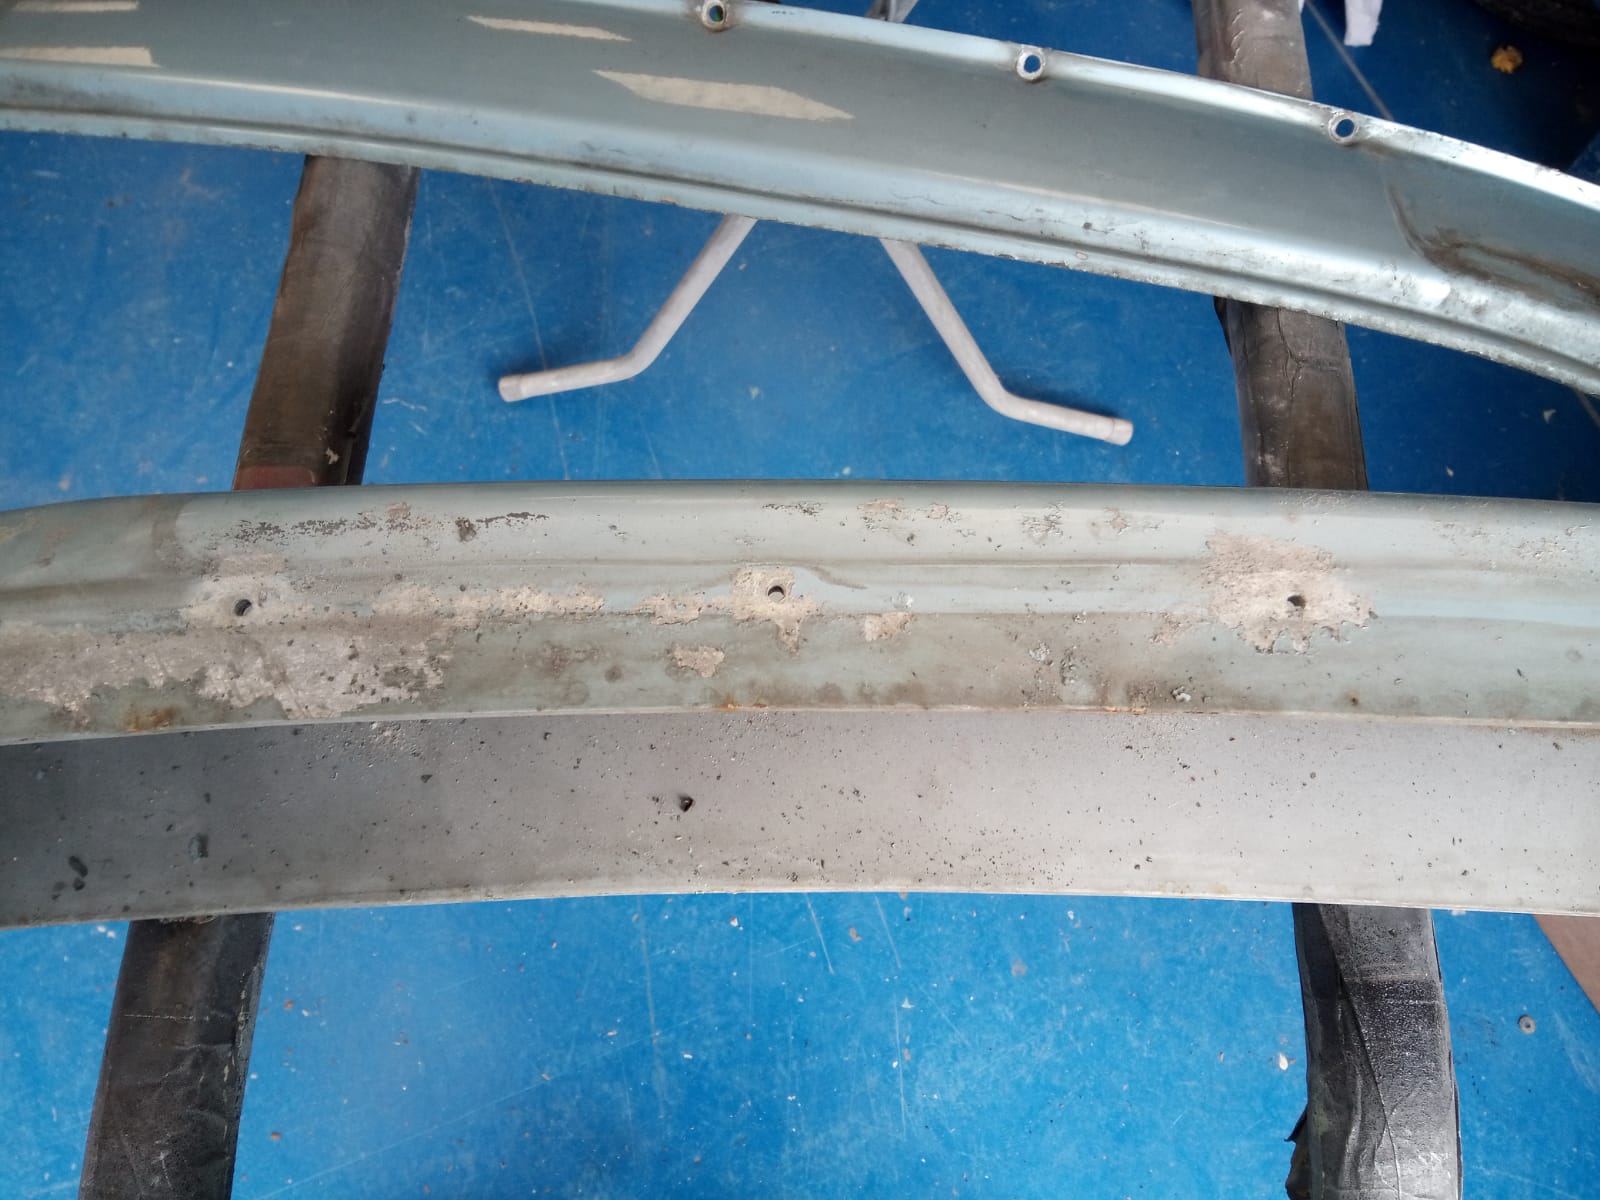
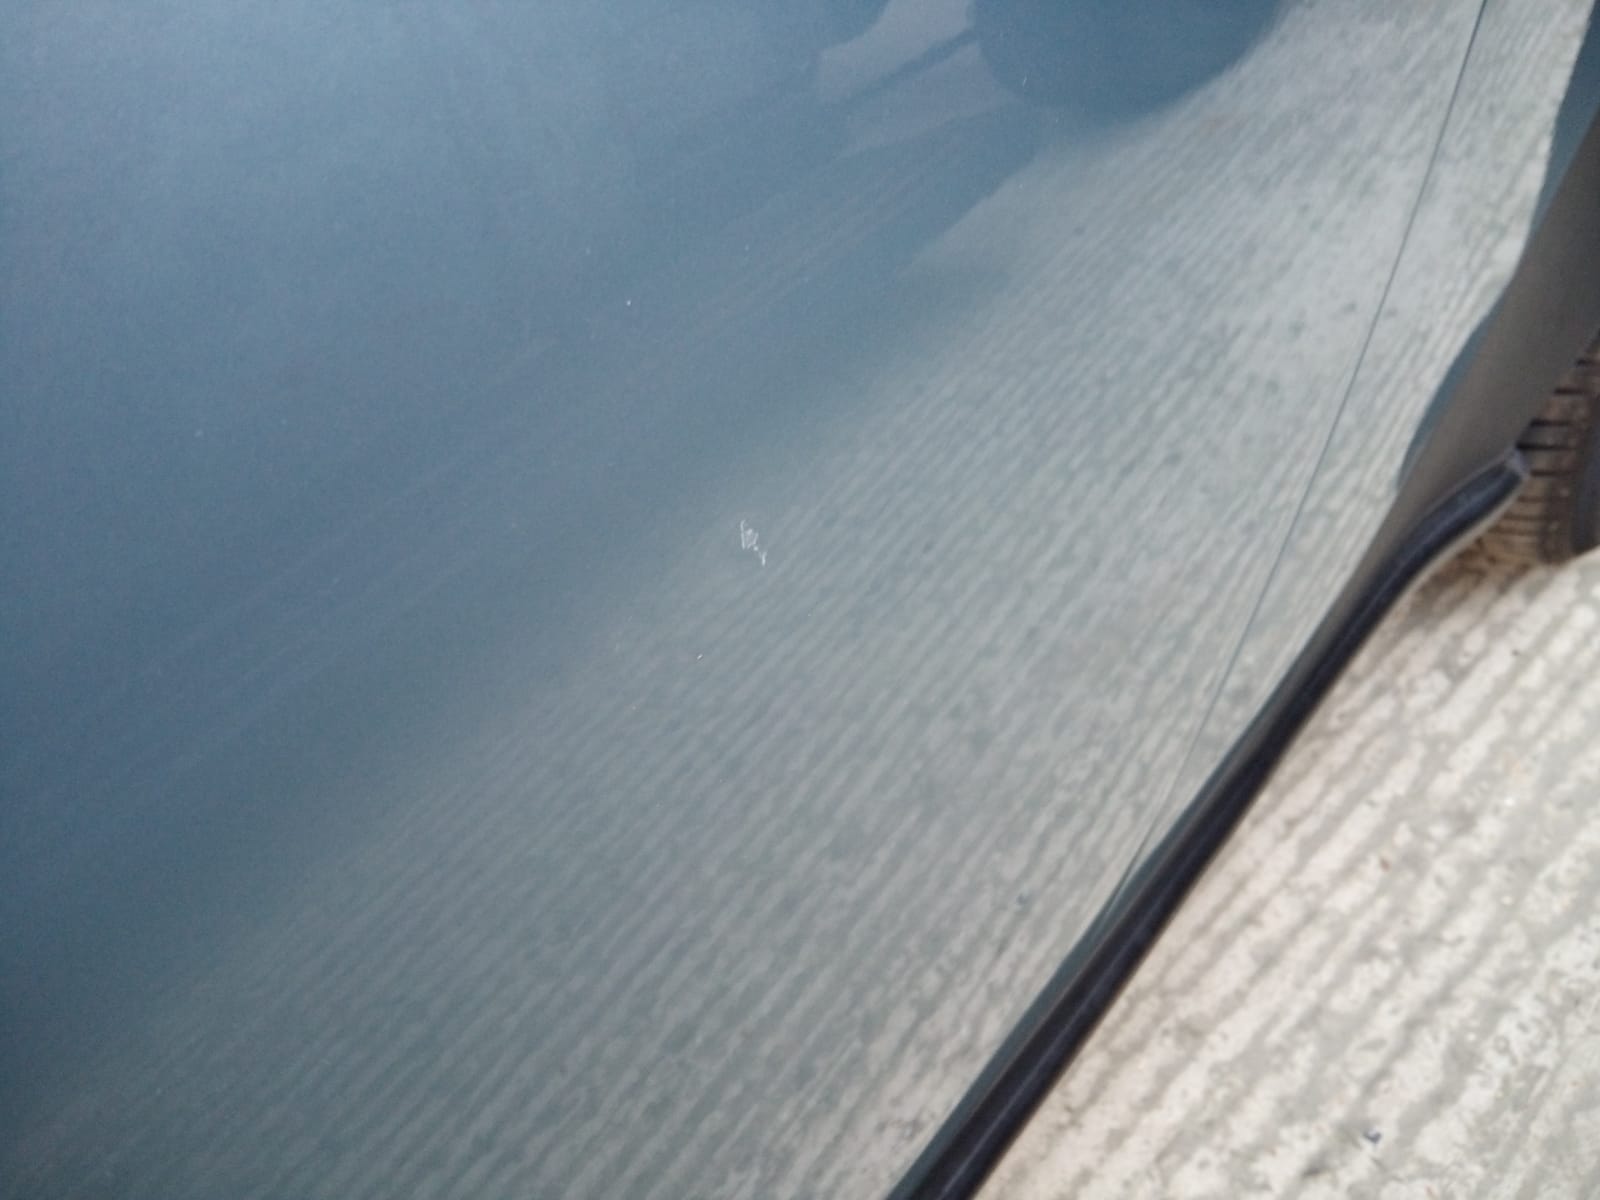
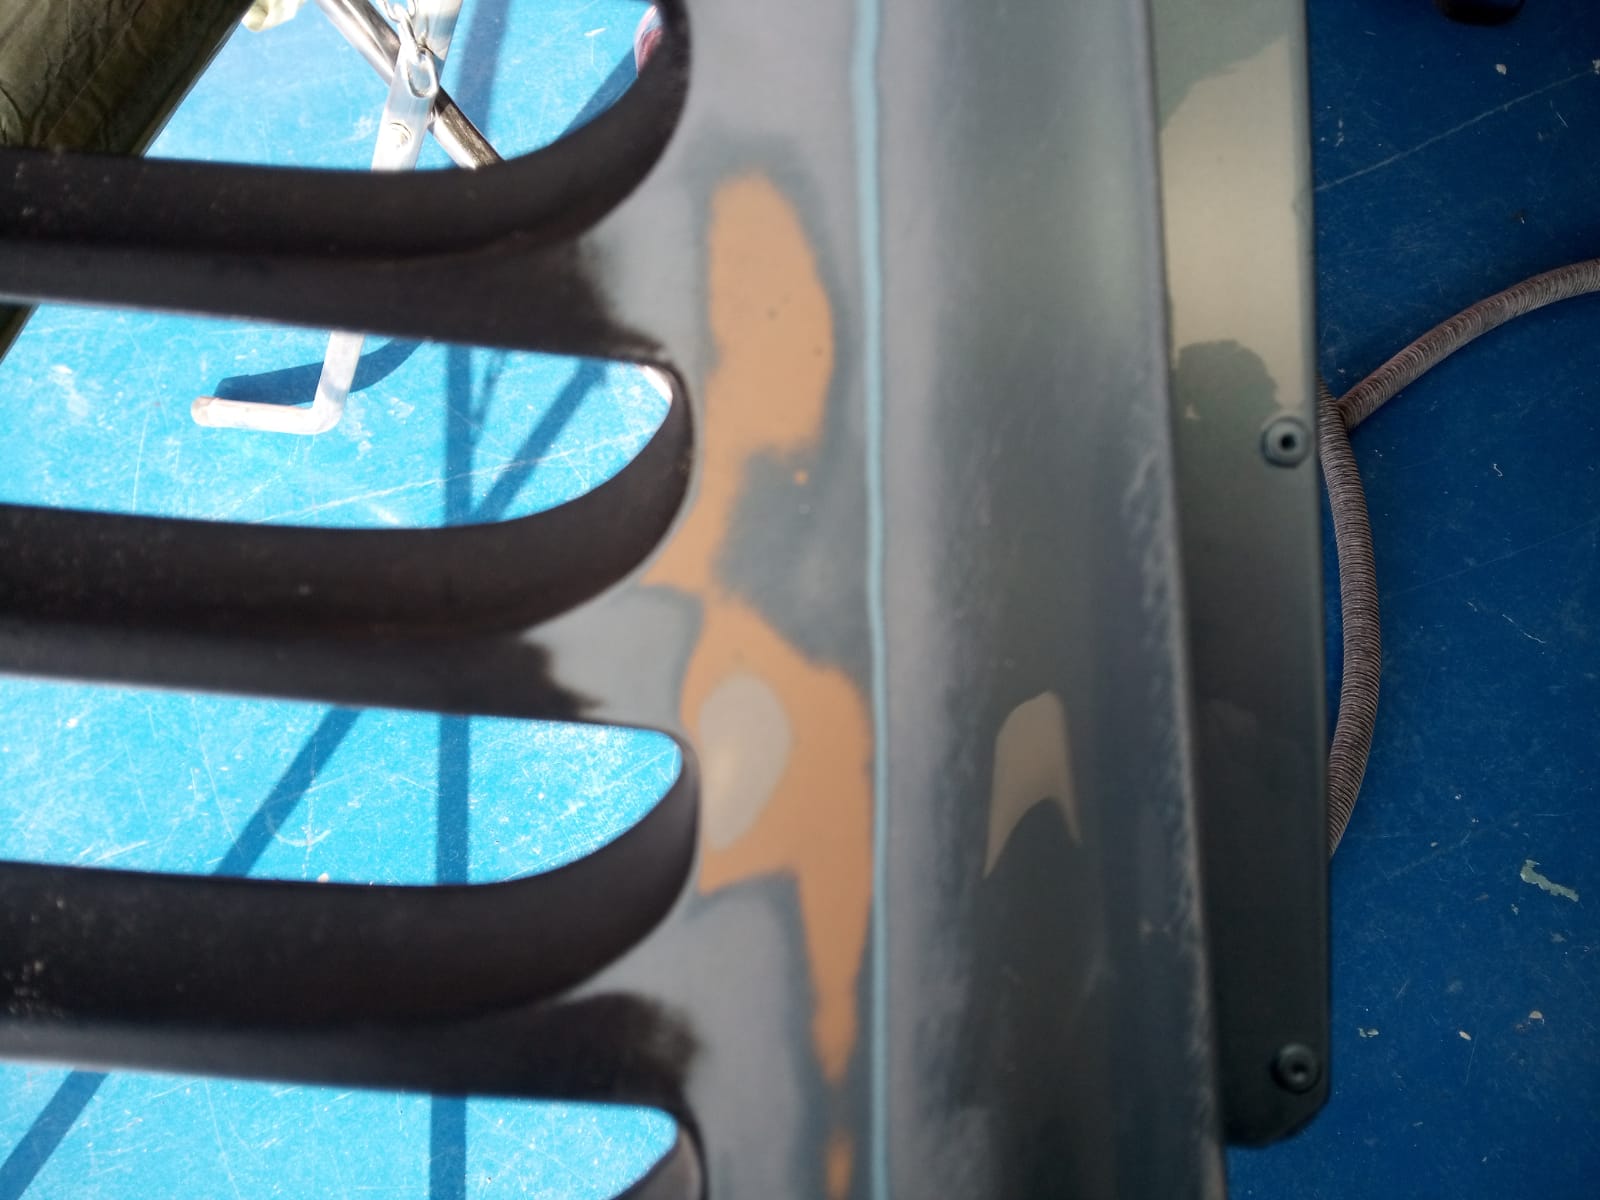
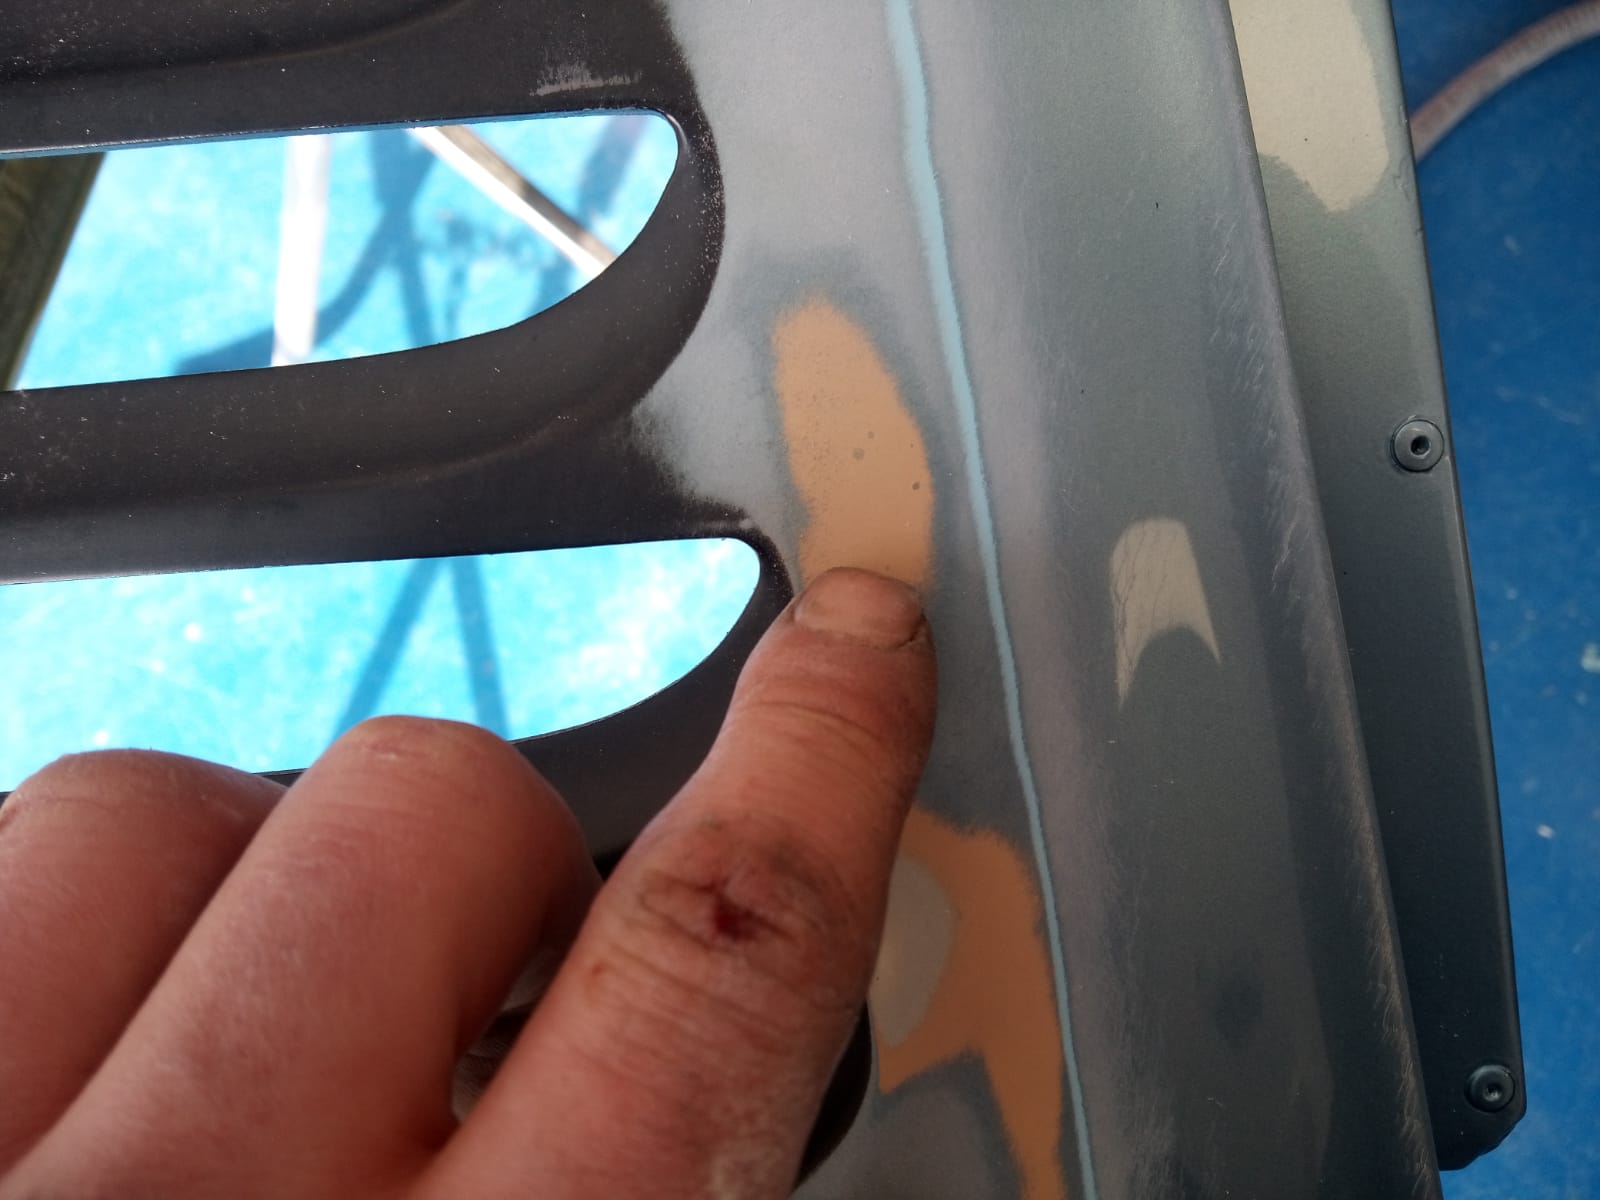
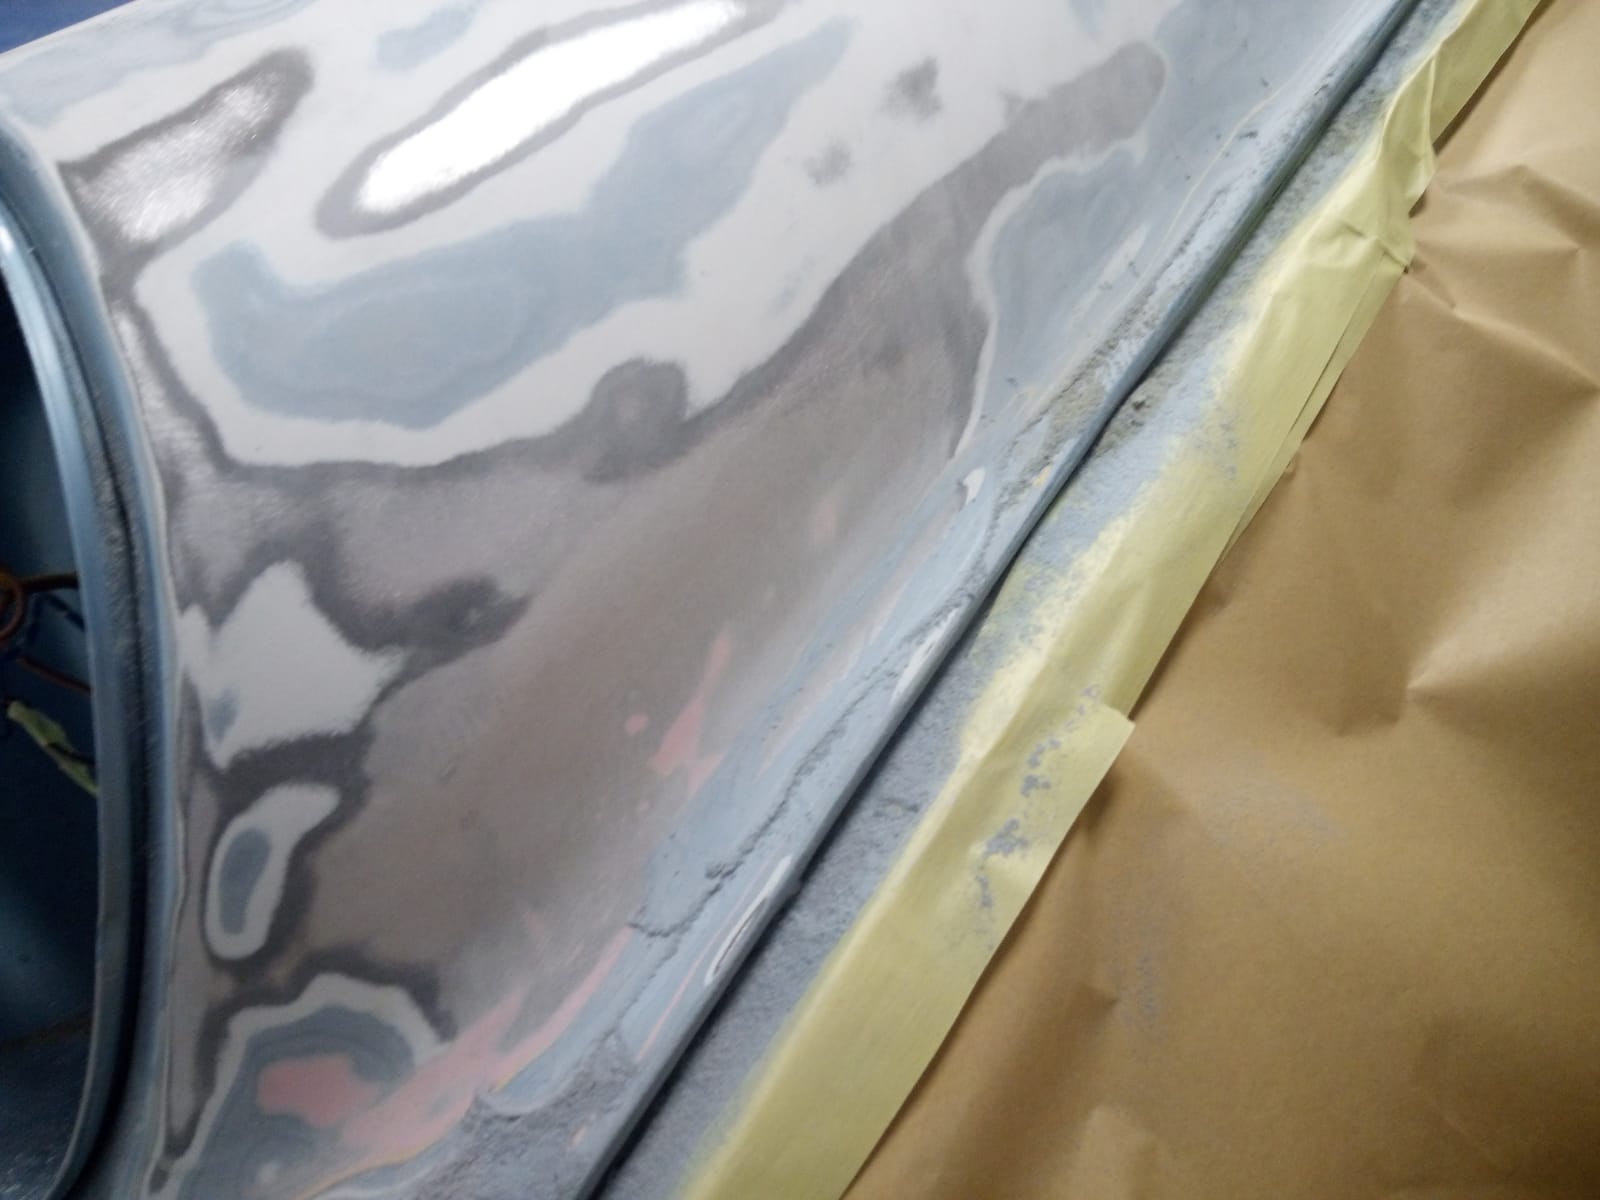
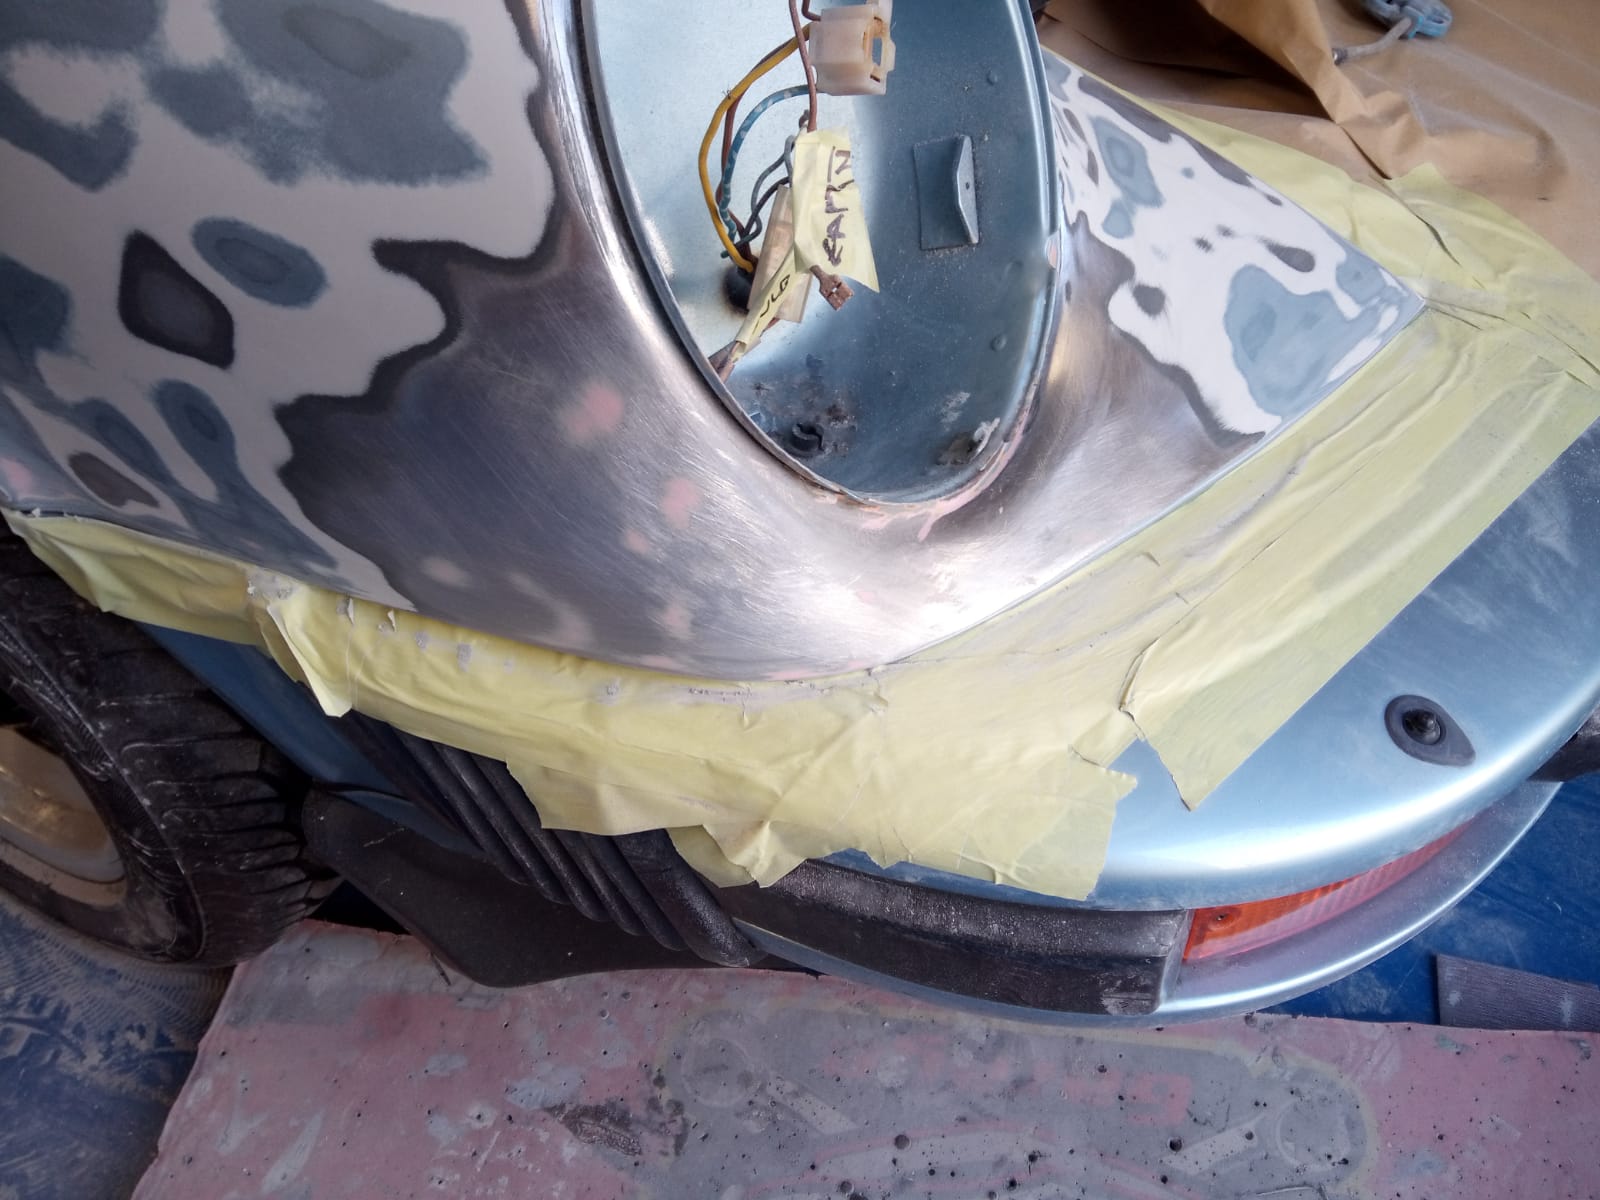
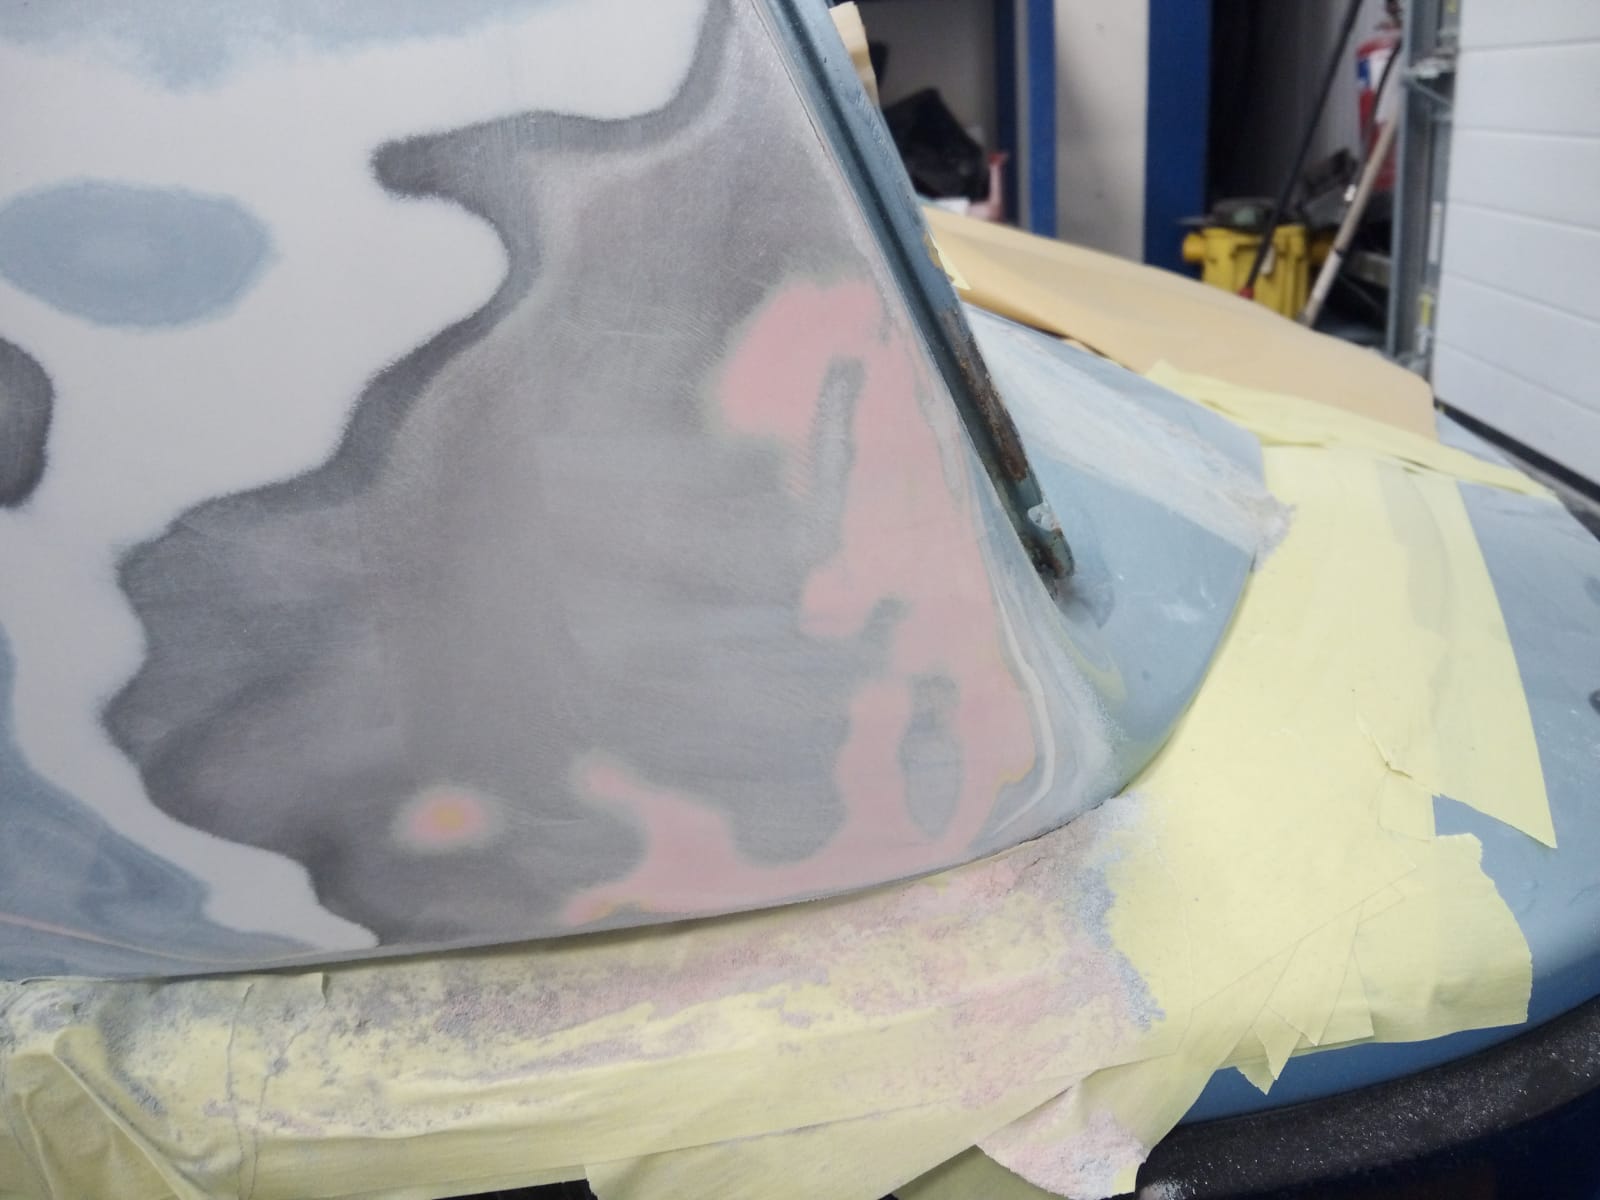
This 2000 Honda S2000 has come in for some paint and rust corrections on its wheel arches, boot, bonnet and side panels. These minor imperfections

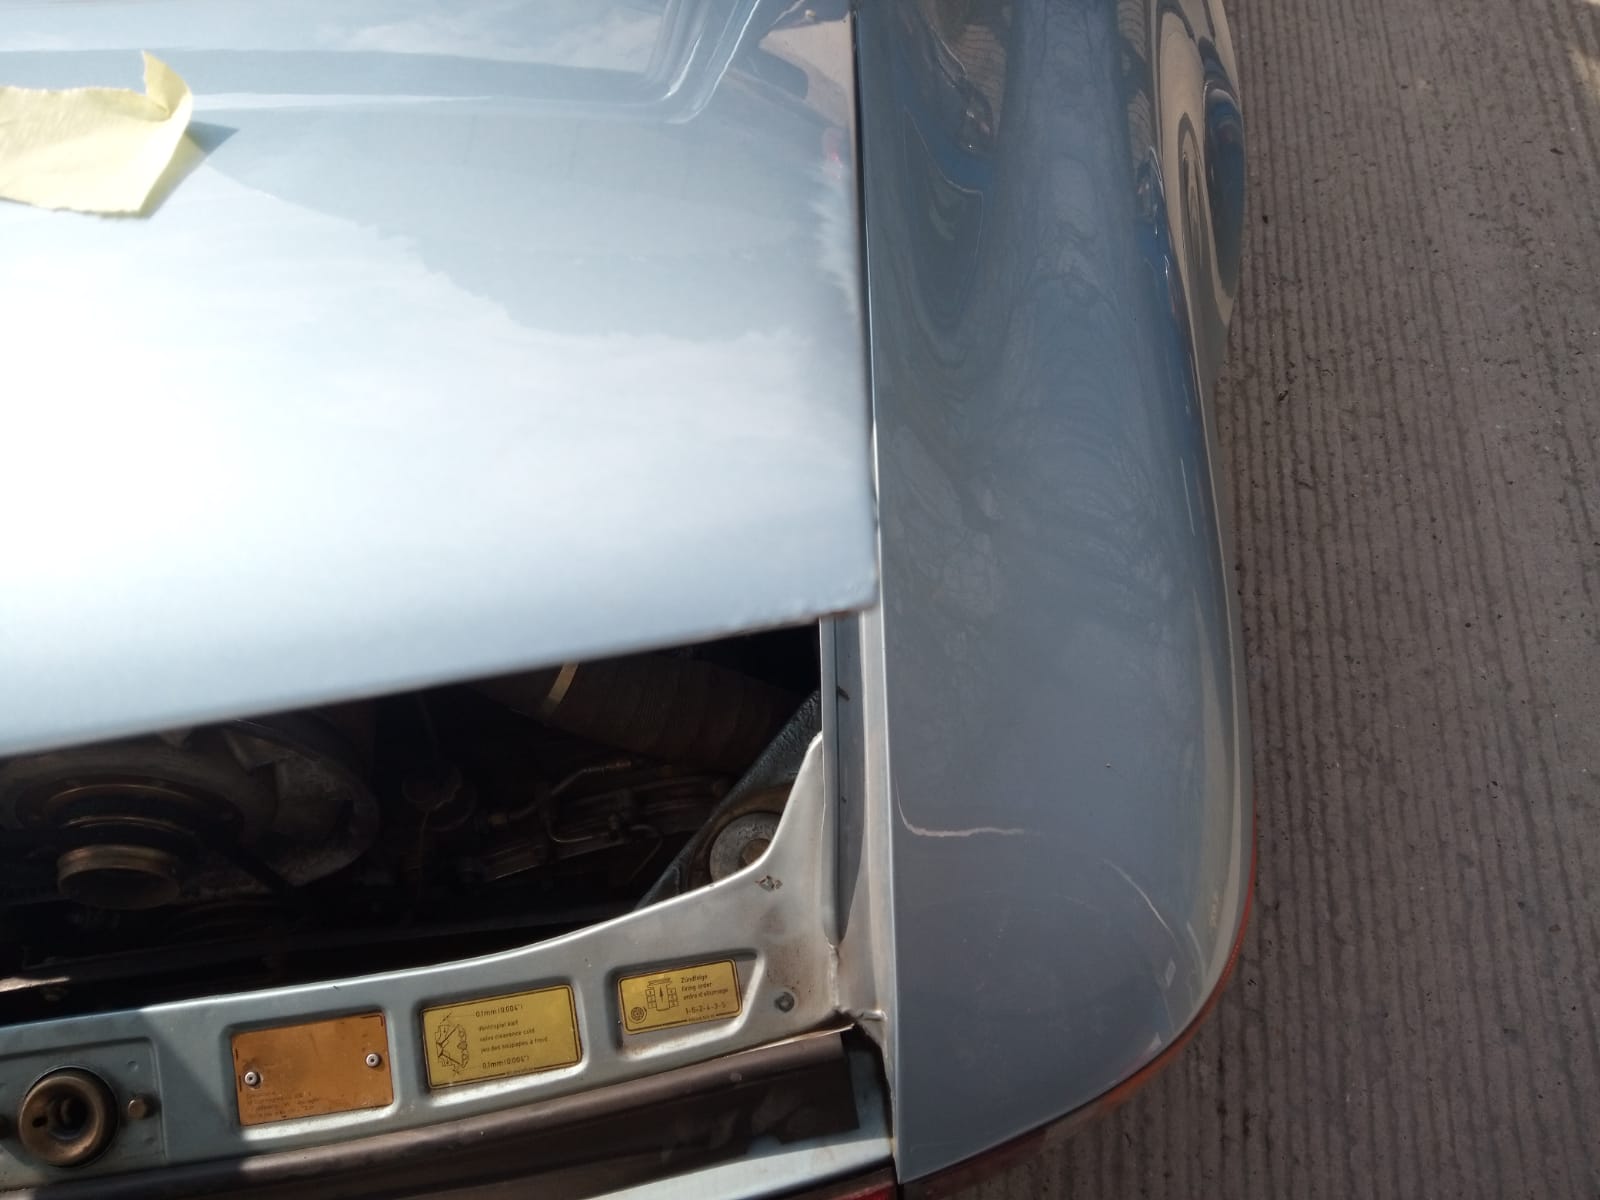
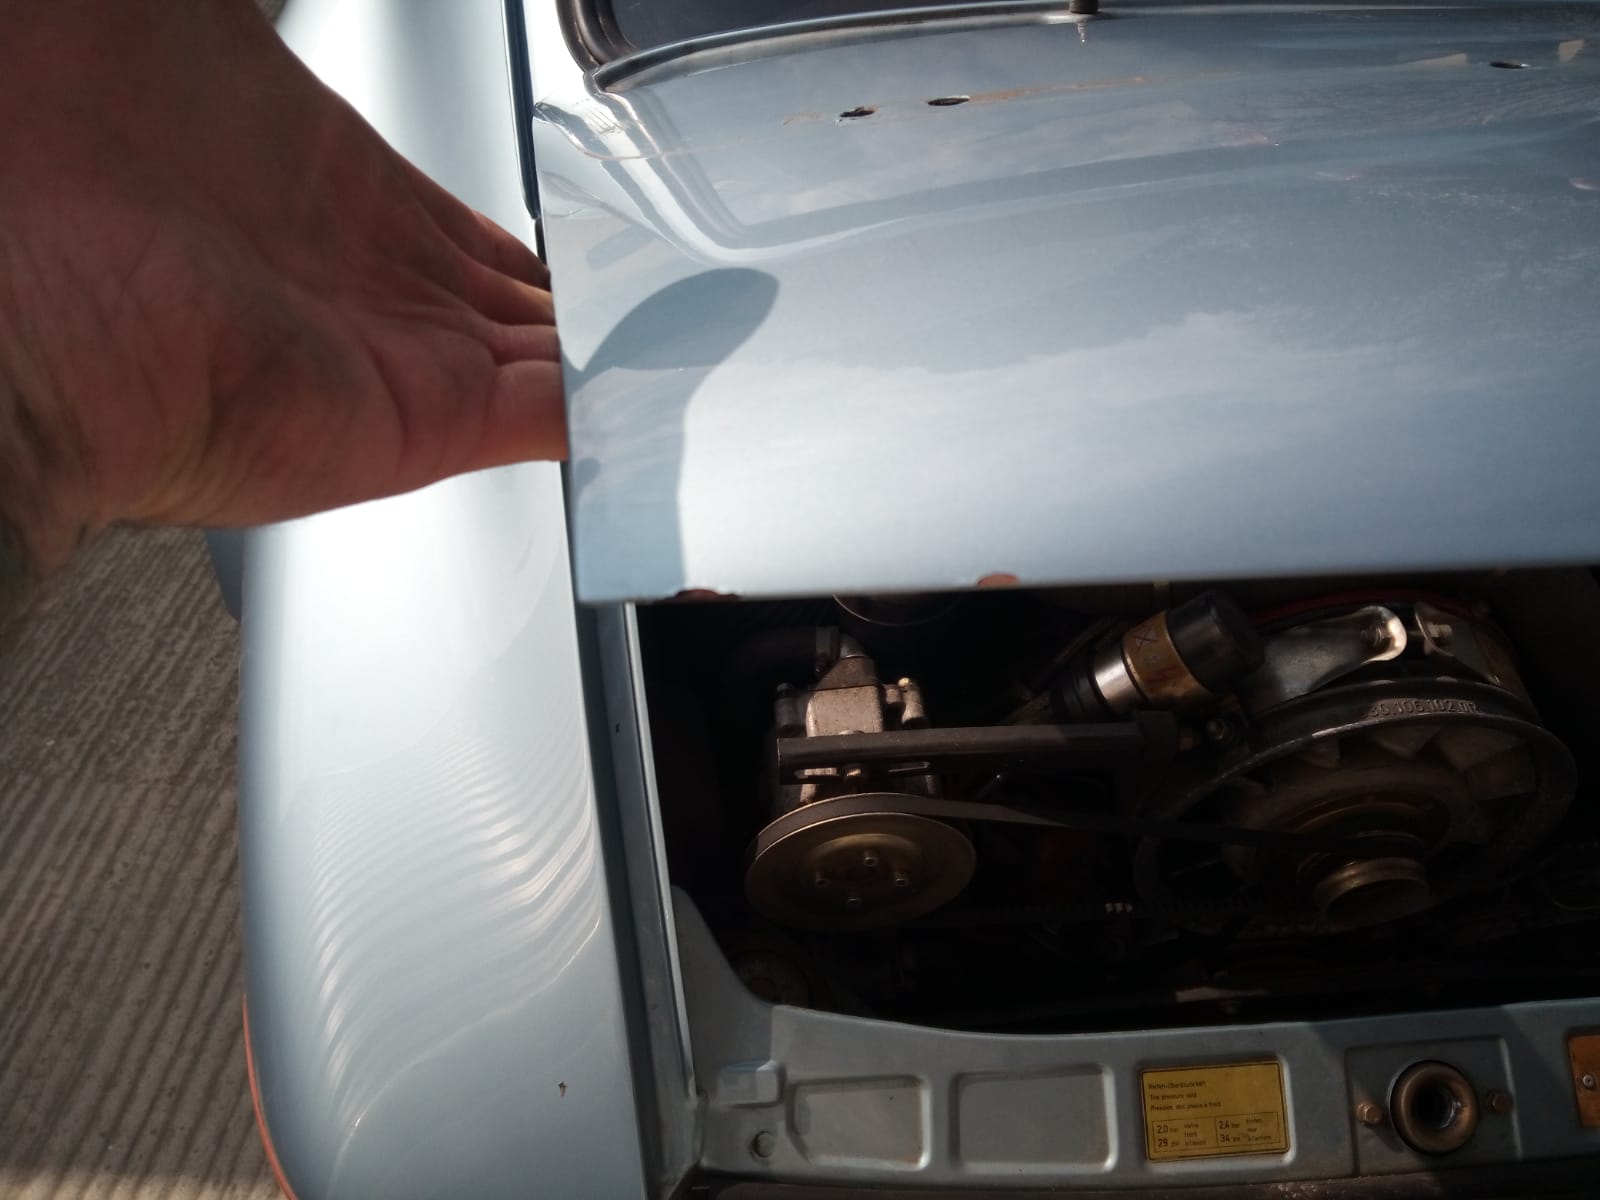
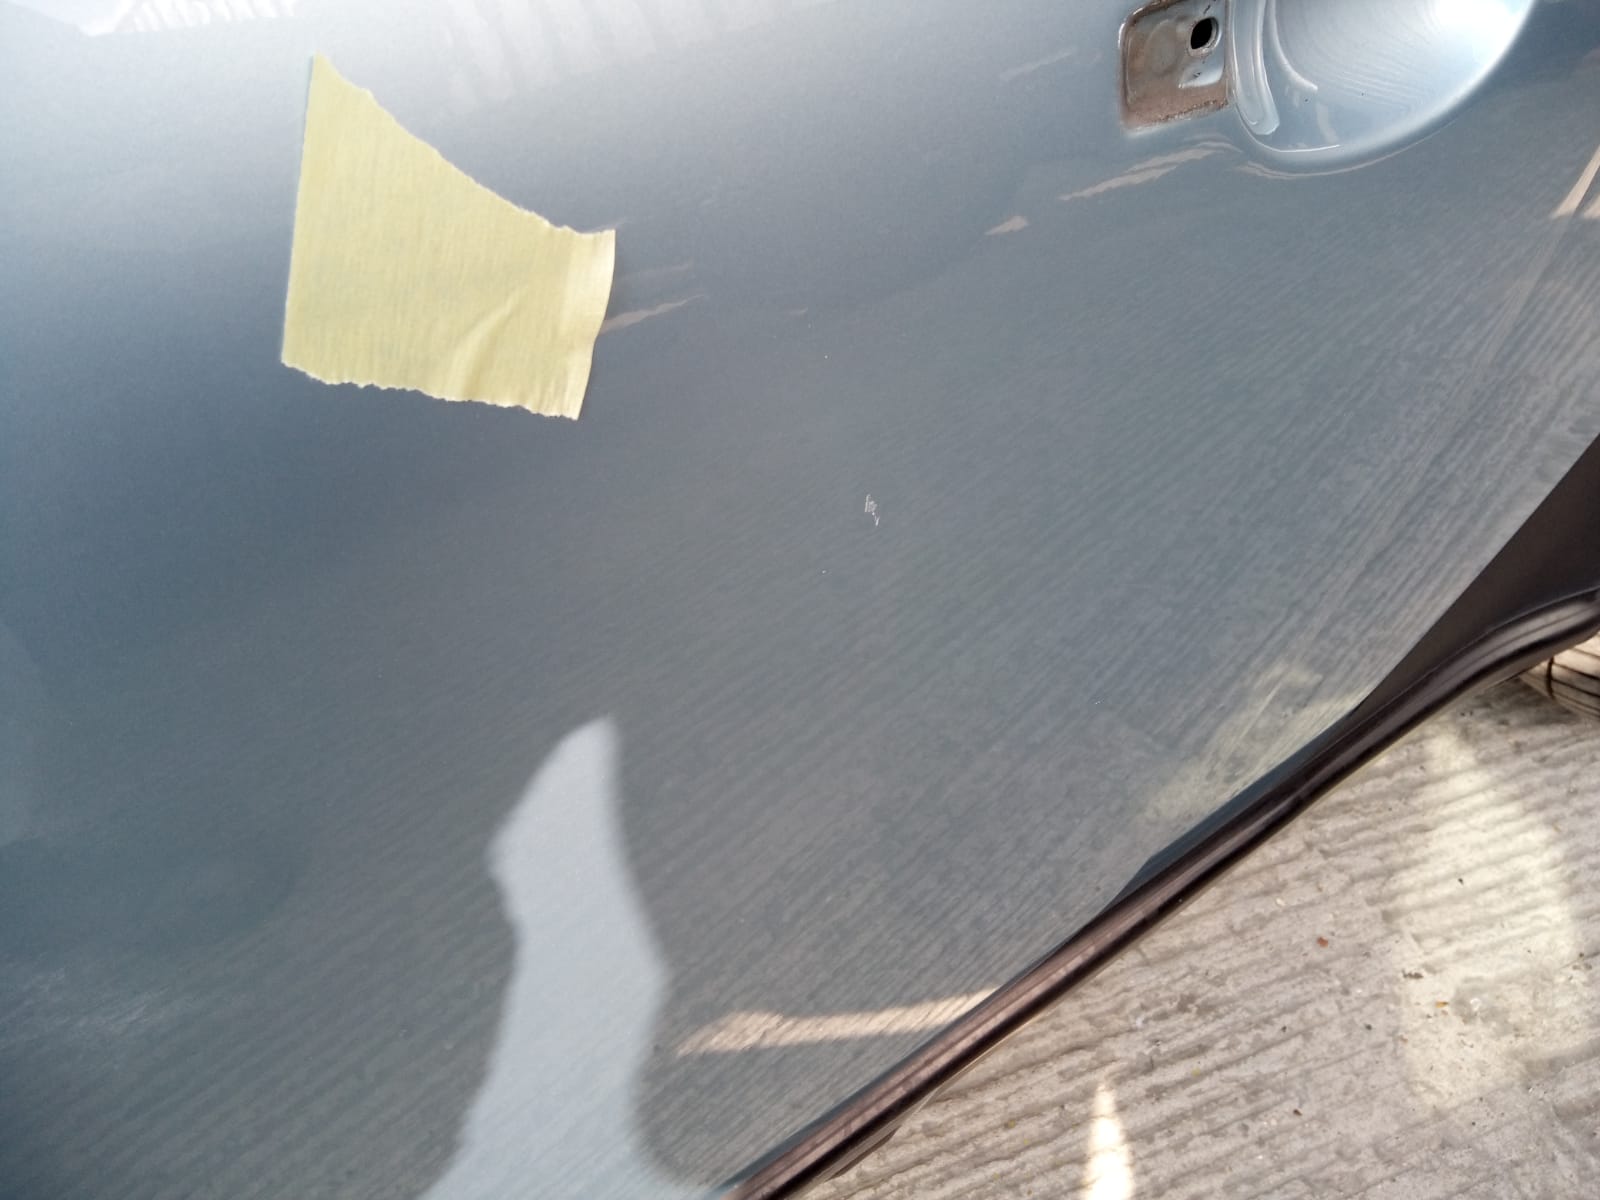
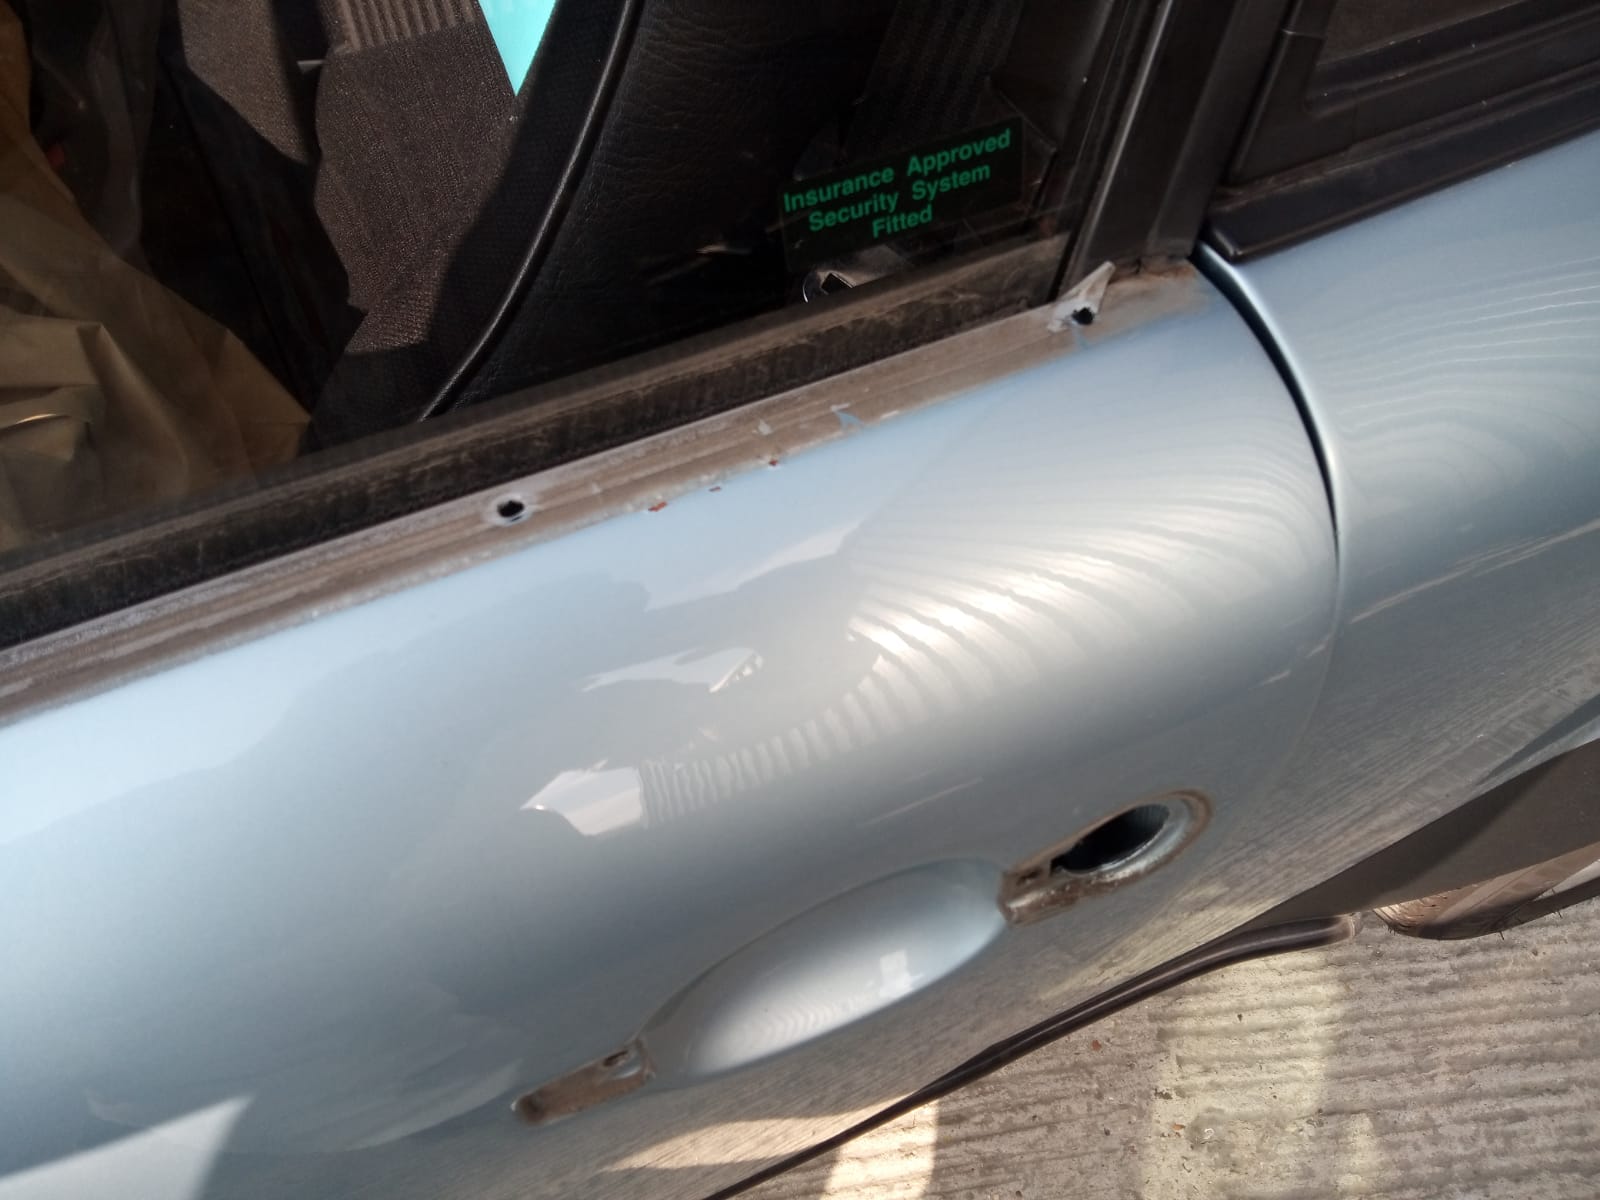
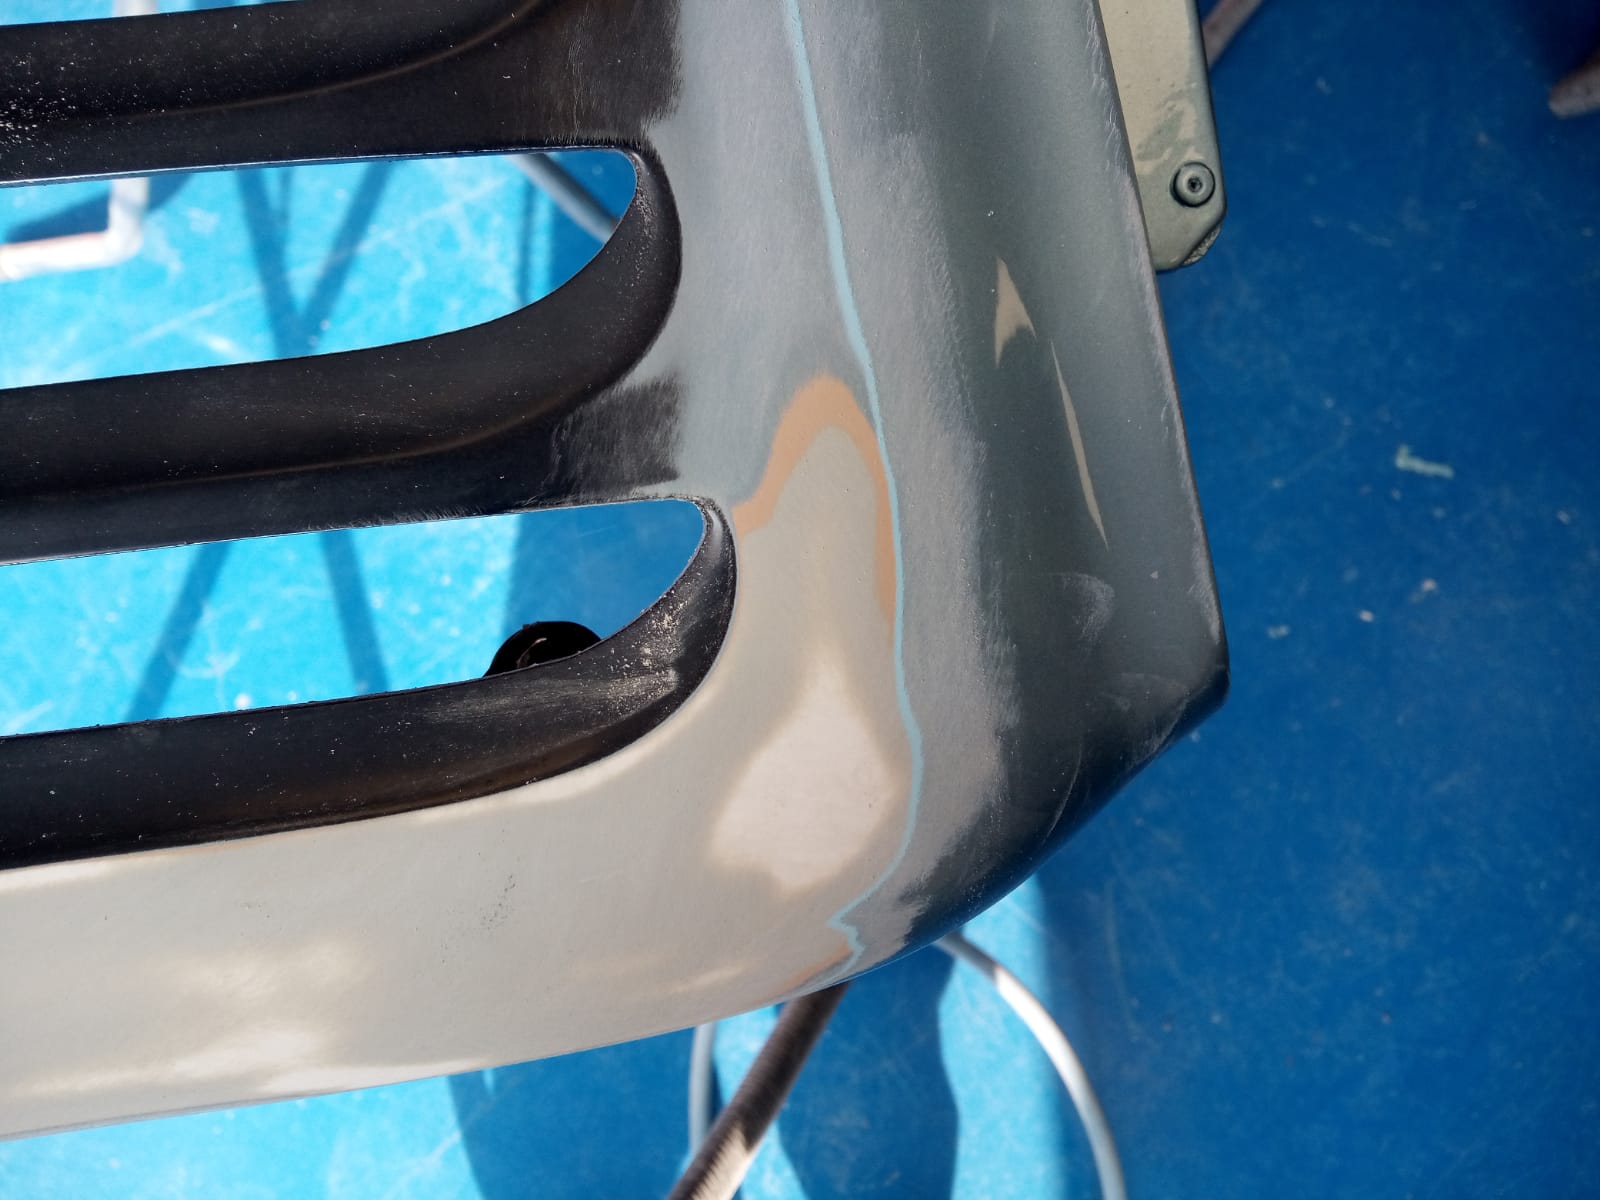
Our stunning 1982 Porsche 911SC has come in recently for some paint TLC. The paint shop have been accessing what needs doing and in the
When we’re out and about, we love to see classic cars, and when we do, we try our best to snap a photo of it

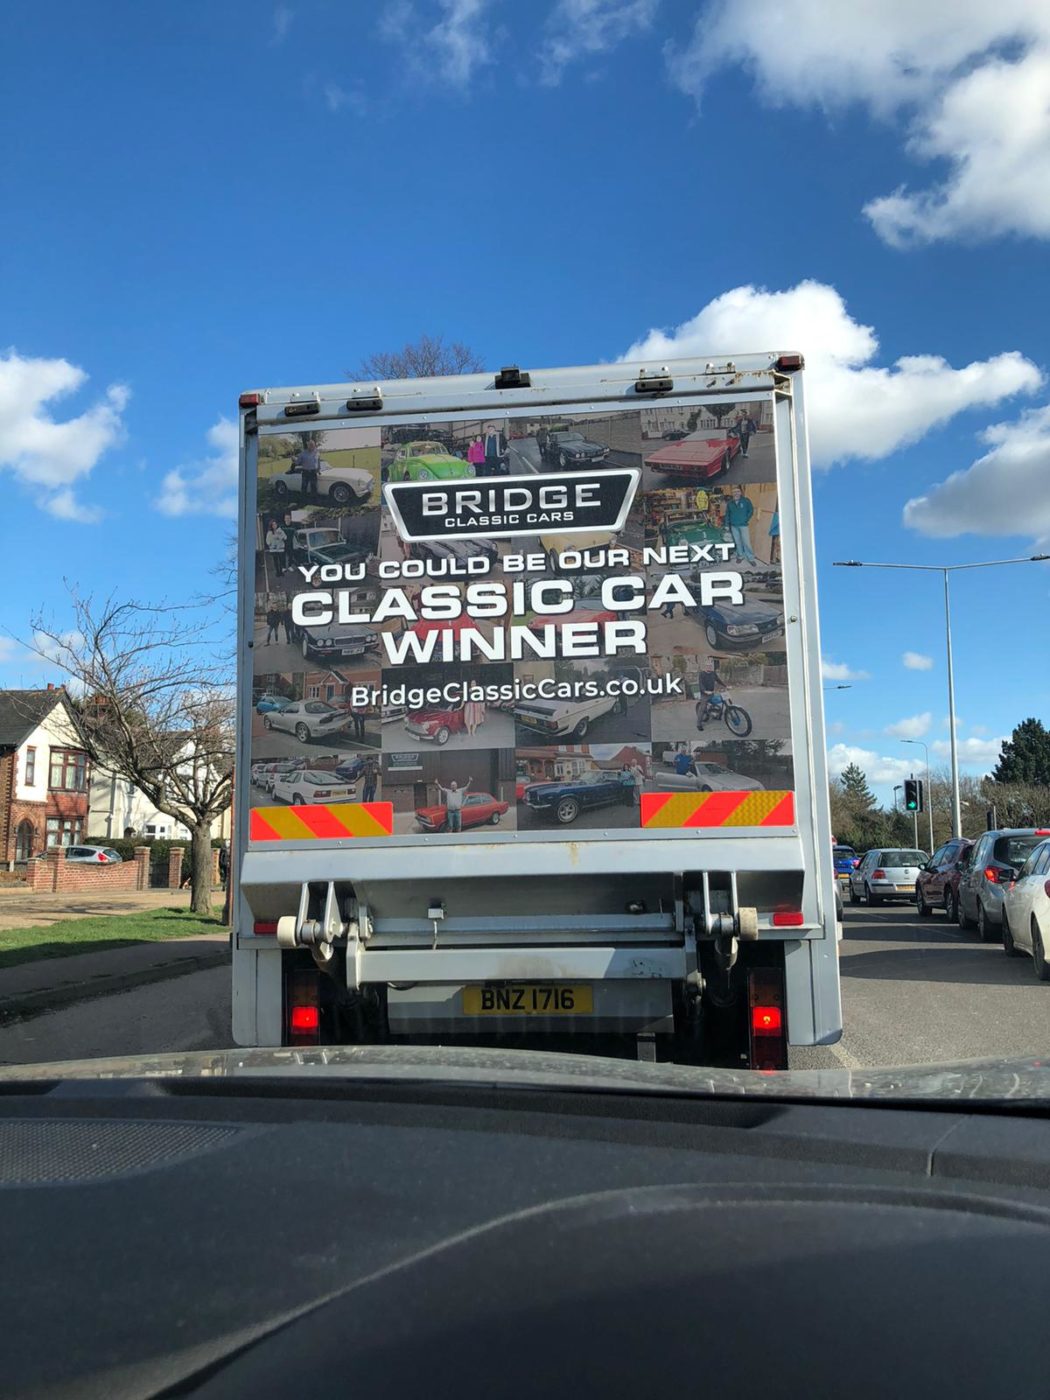
We often hear from commuters when our van and lorry have been spotted travelling up and down the country. We’re always delivering and collecting exciting
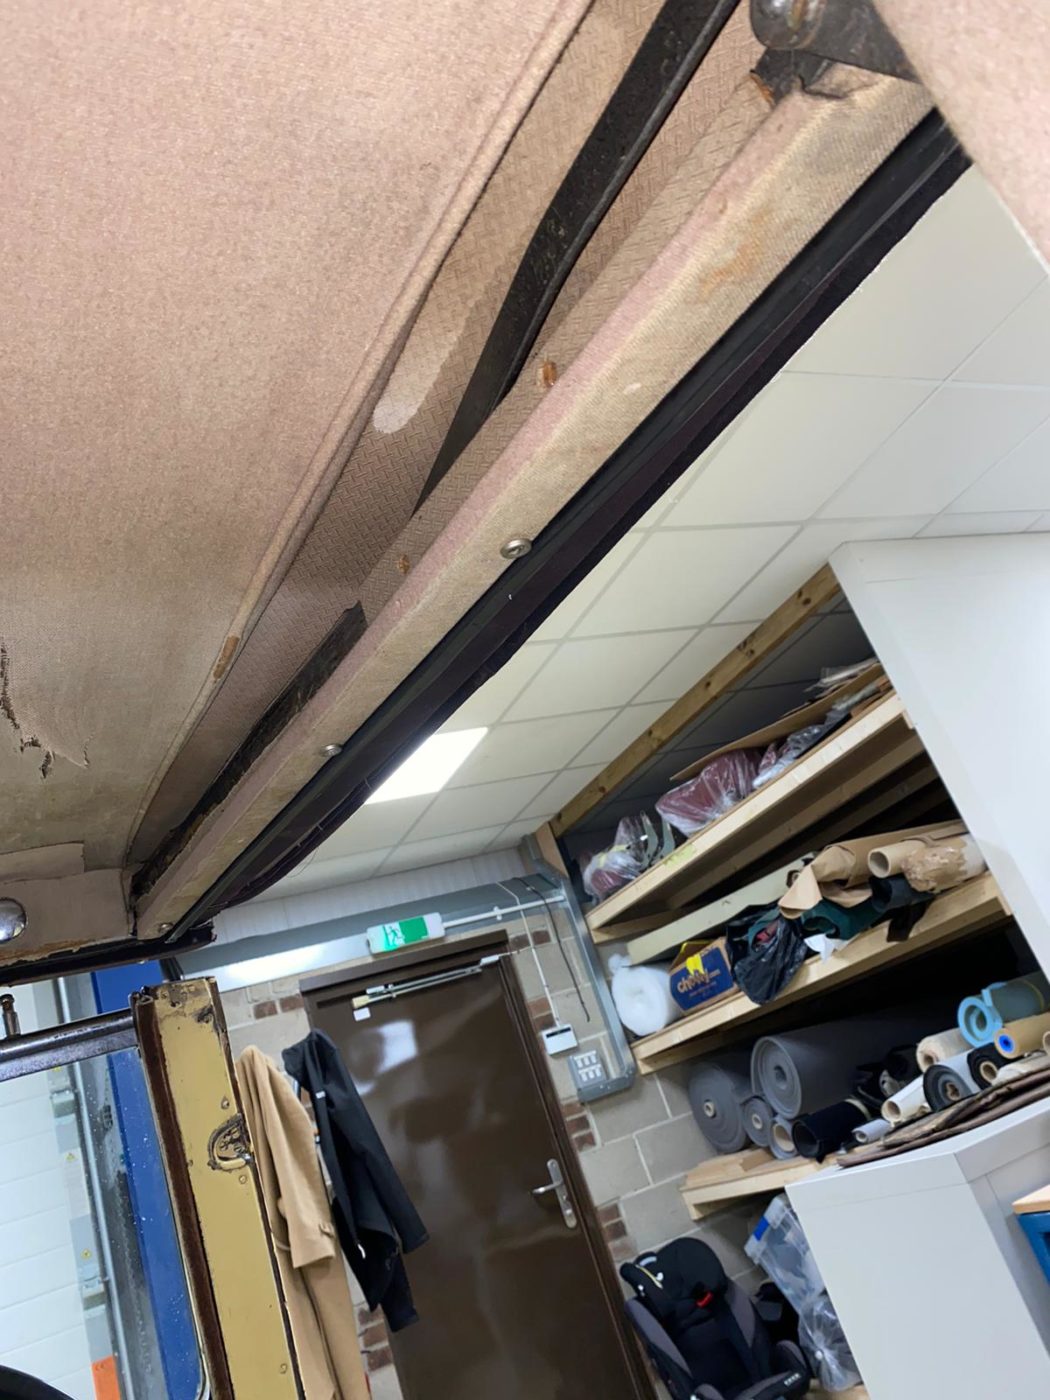
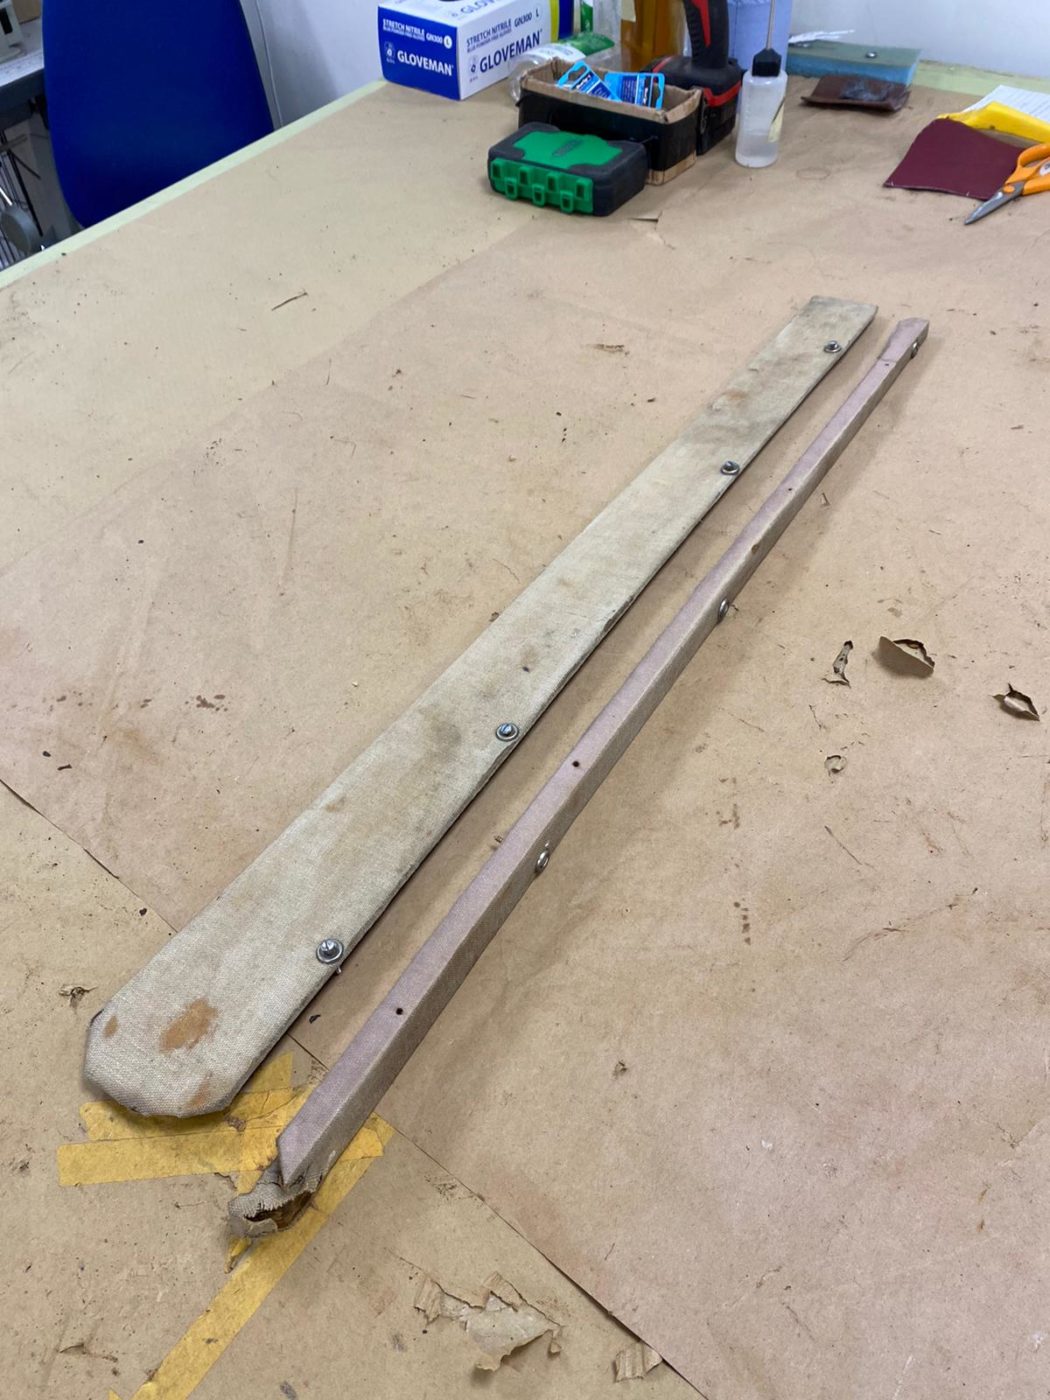
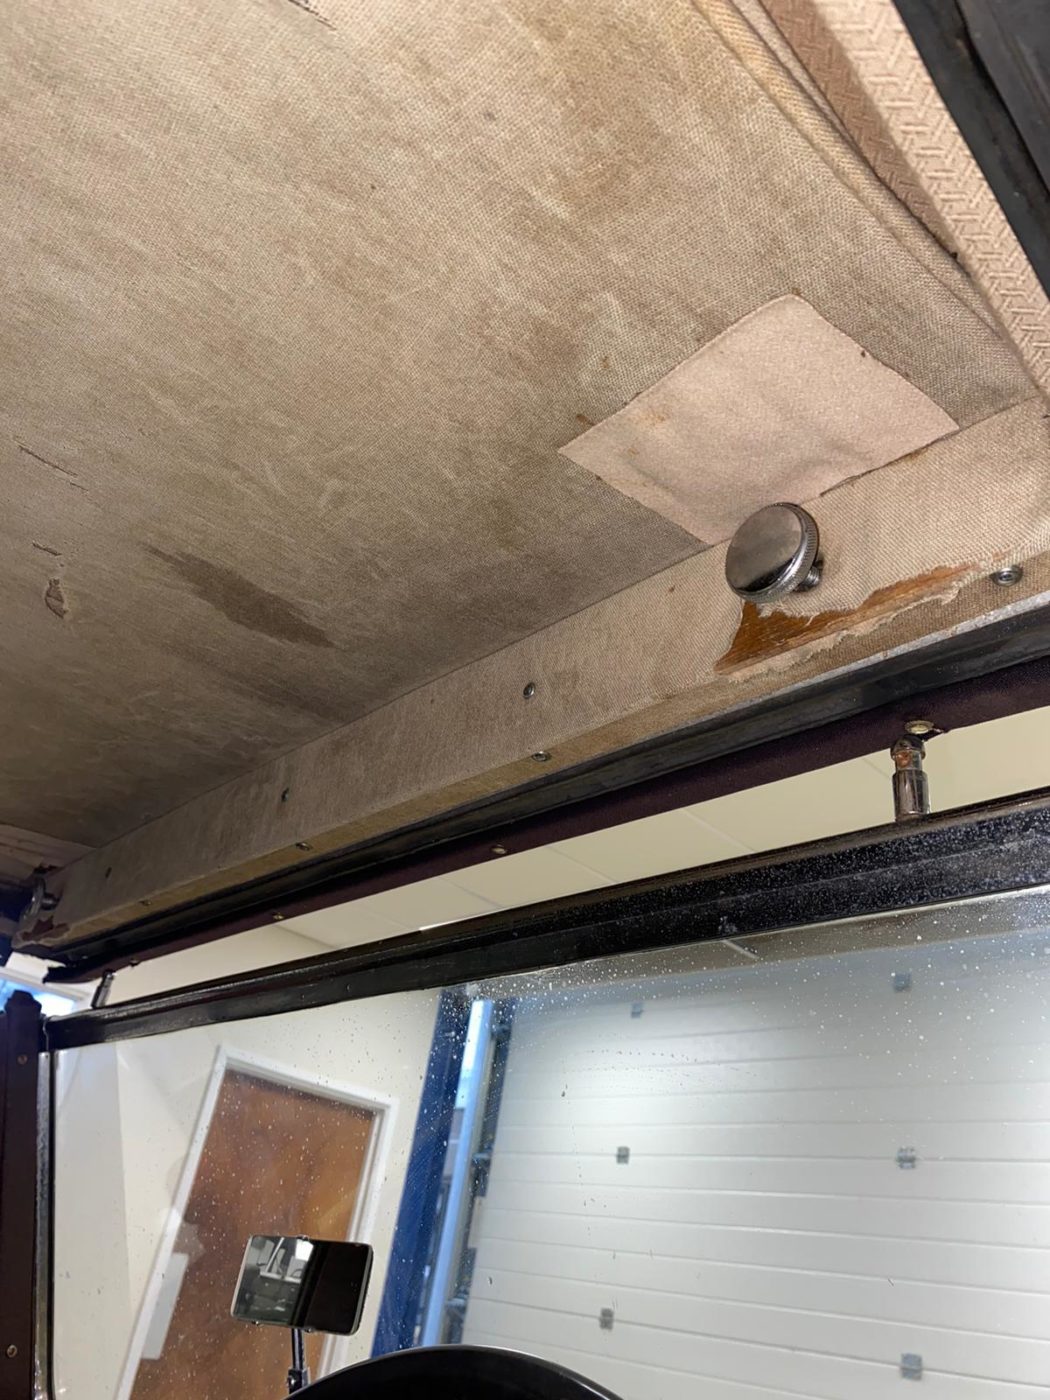
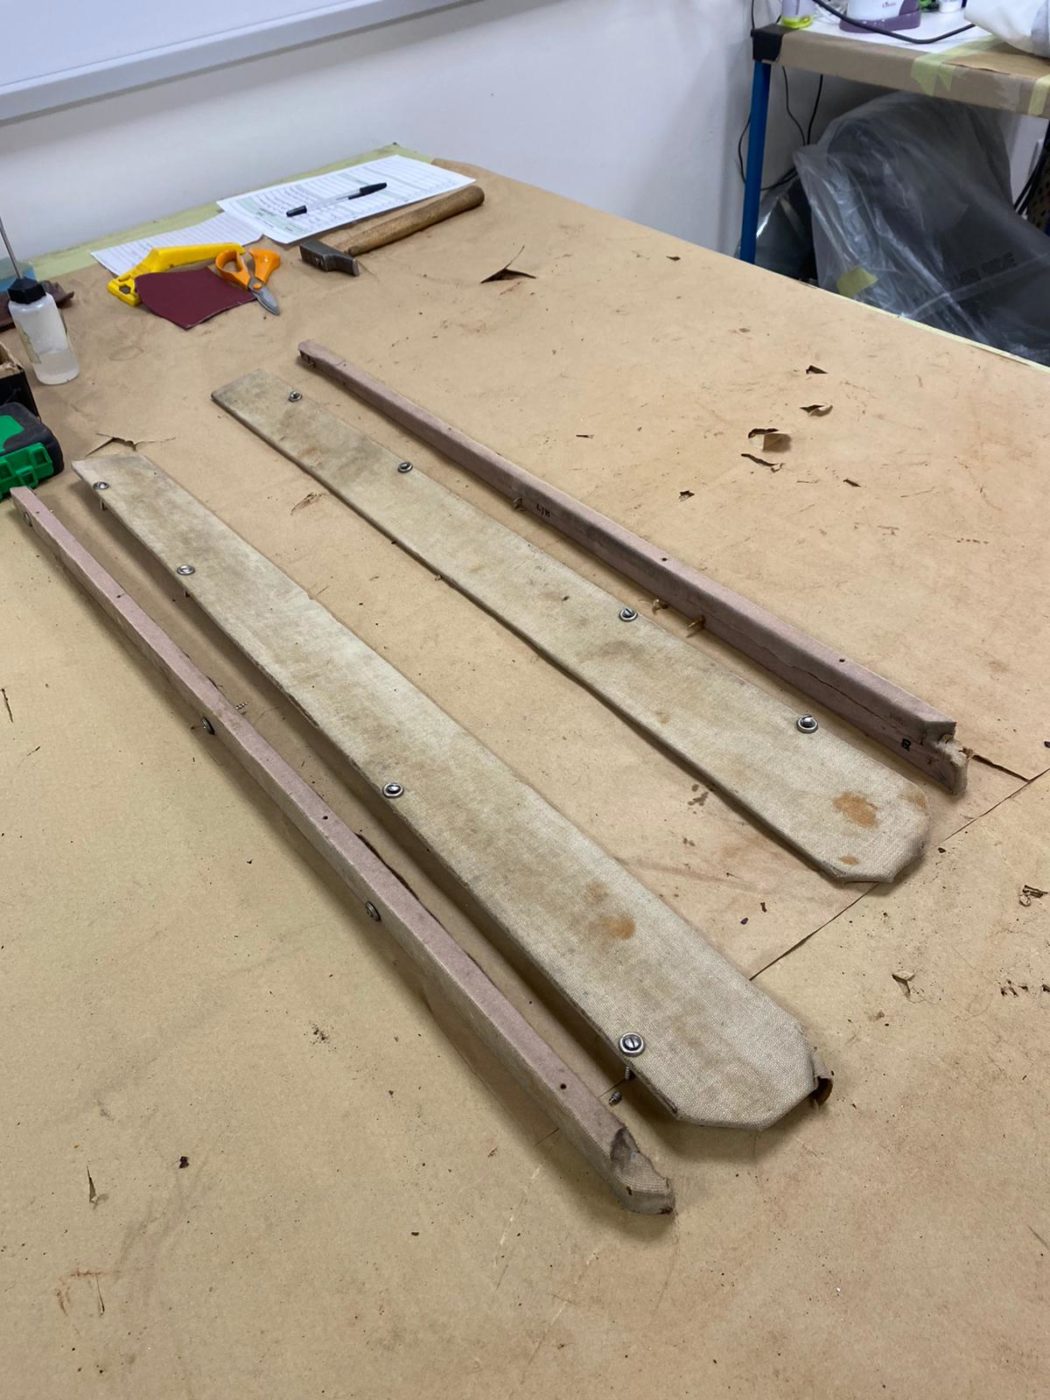
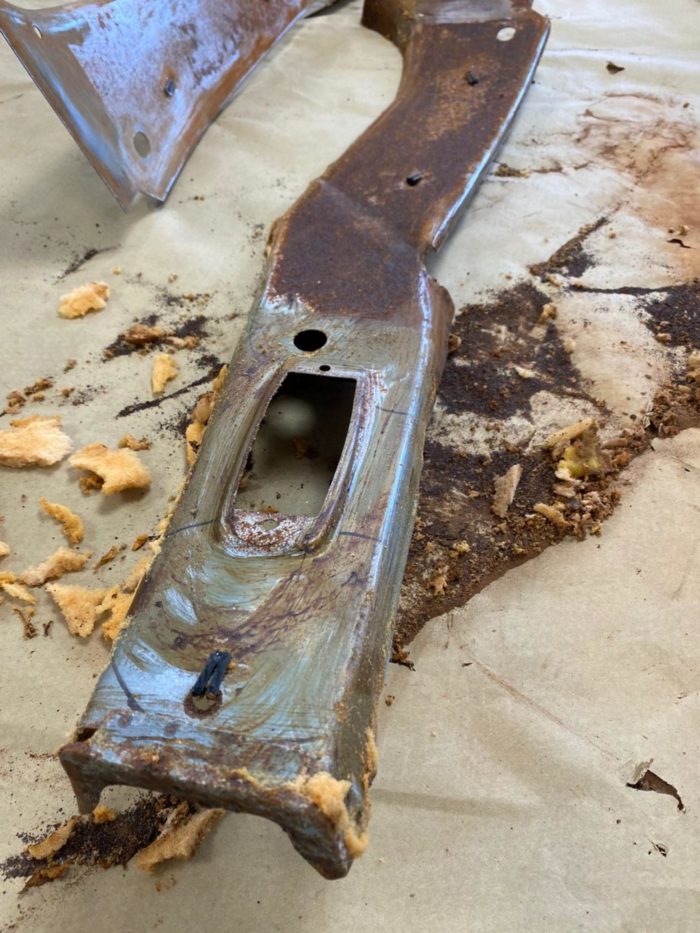
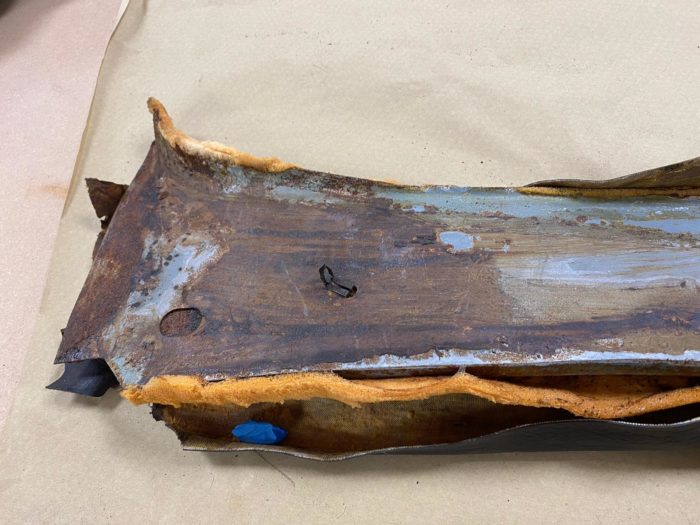
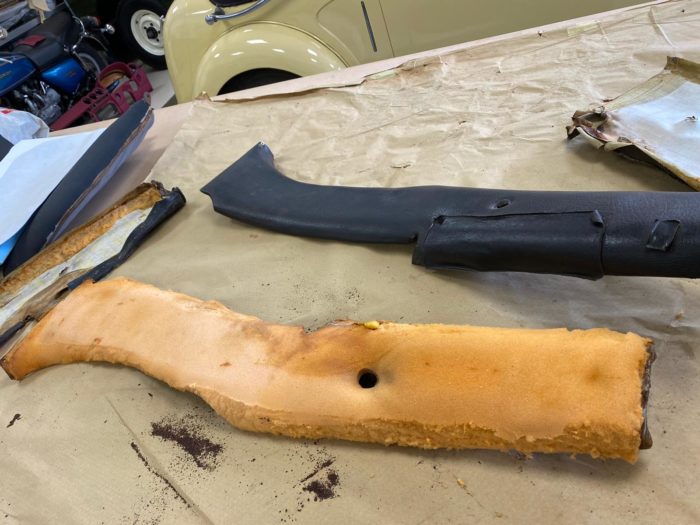
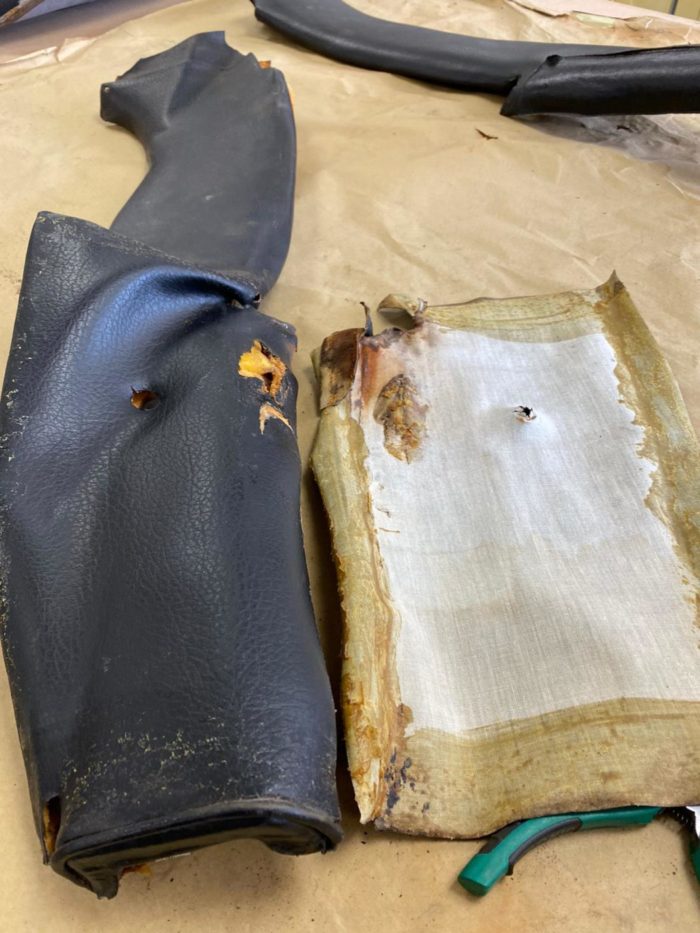
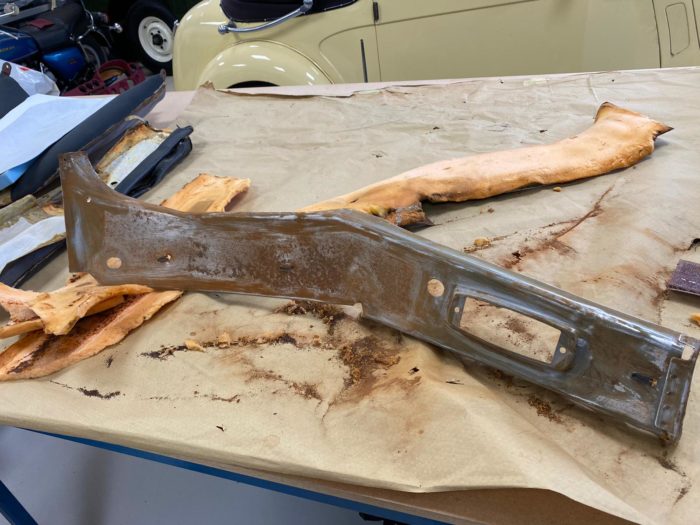
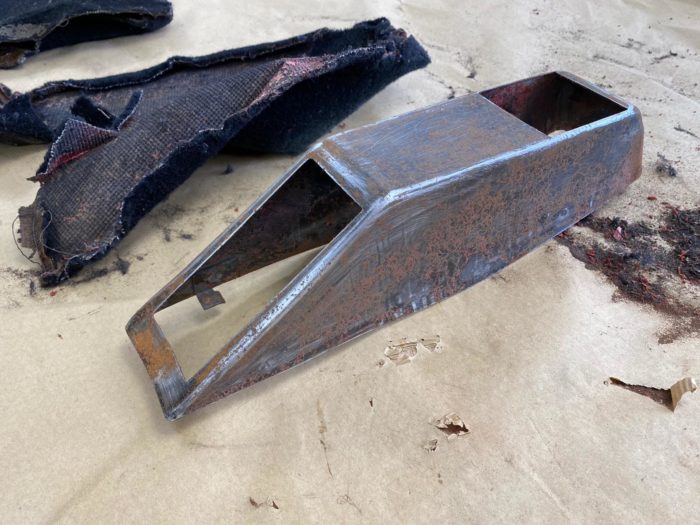
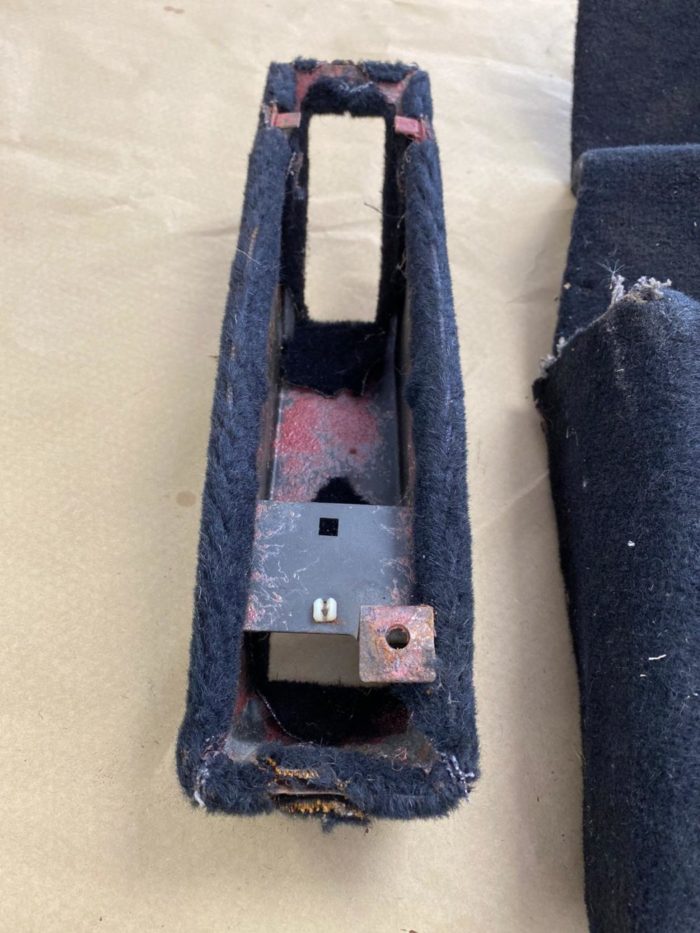
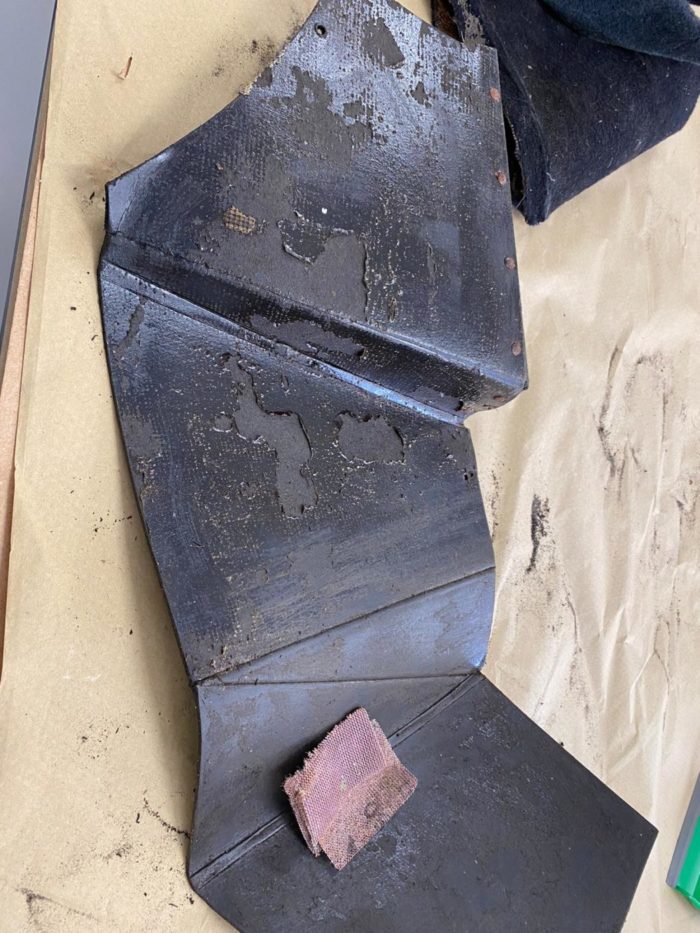
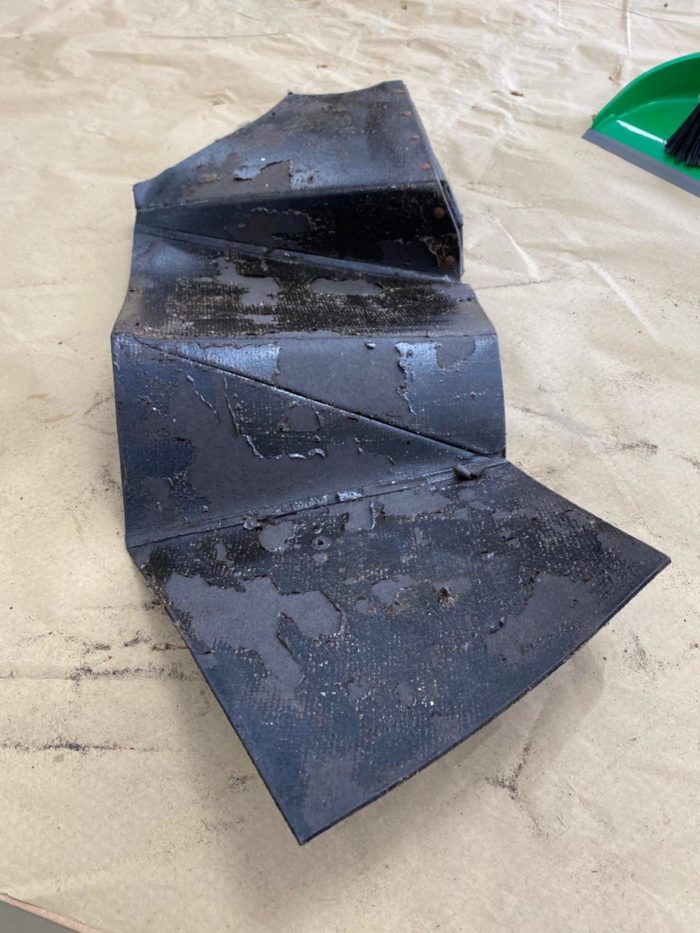
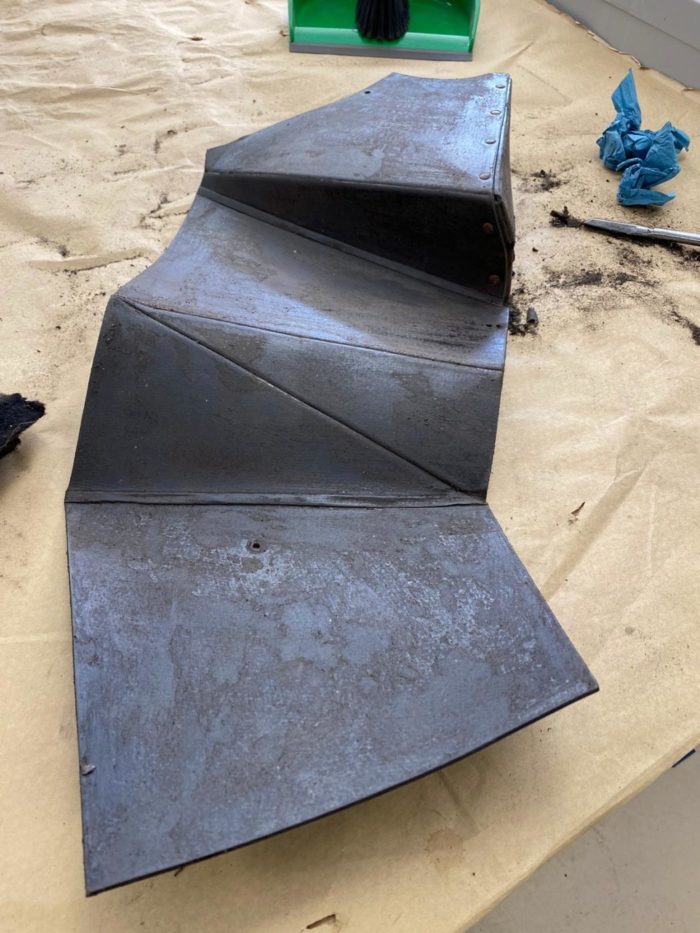
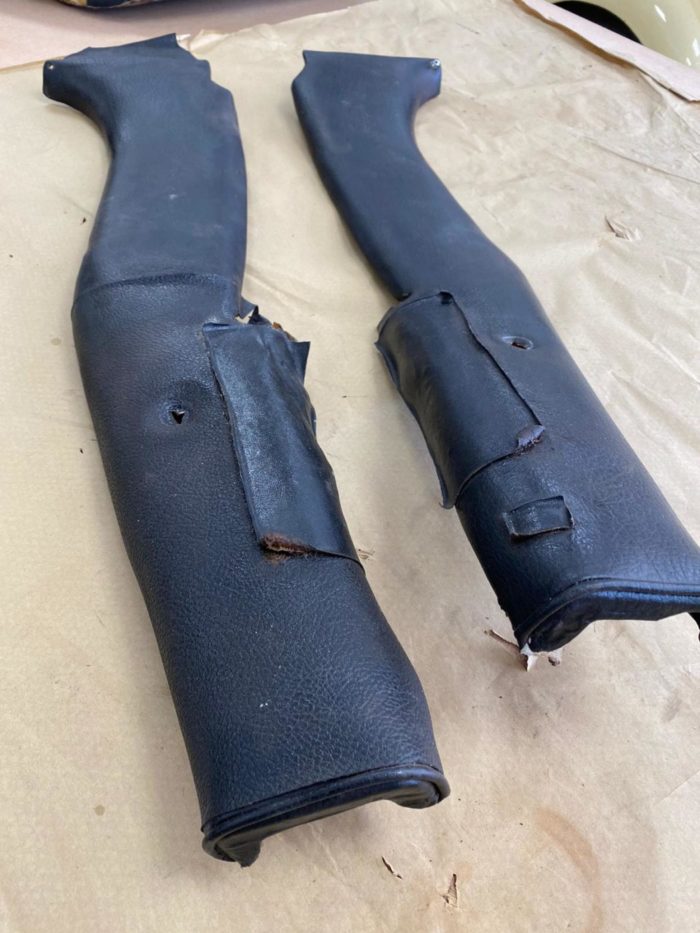
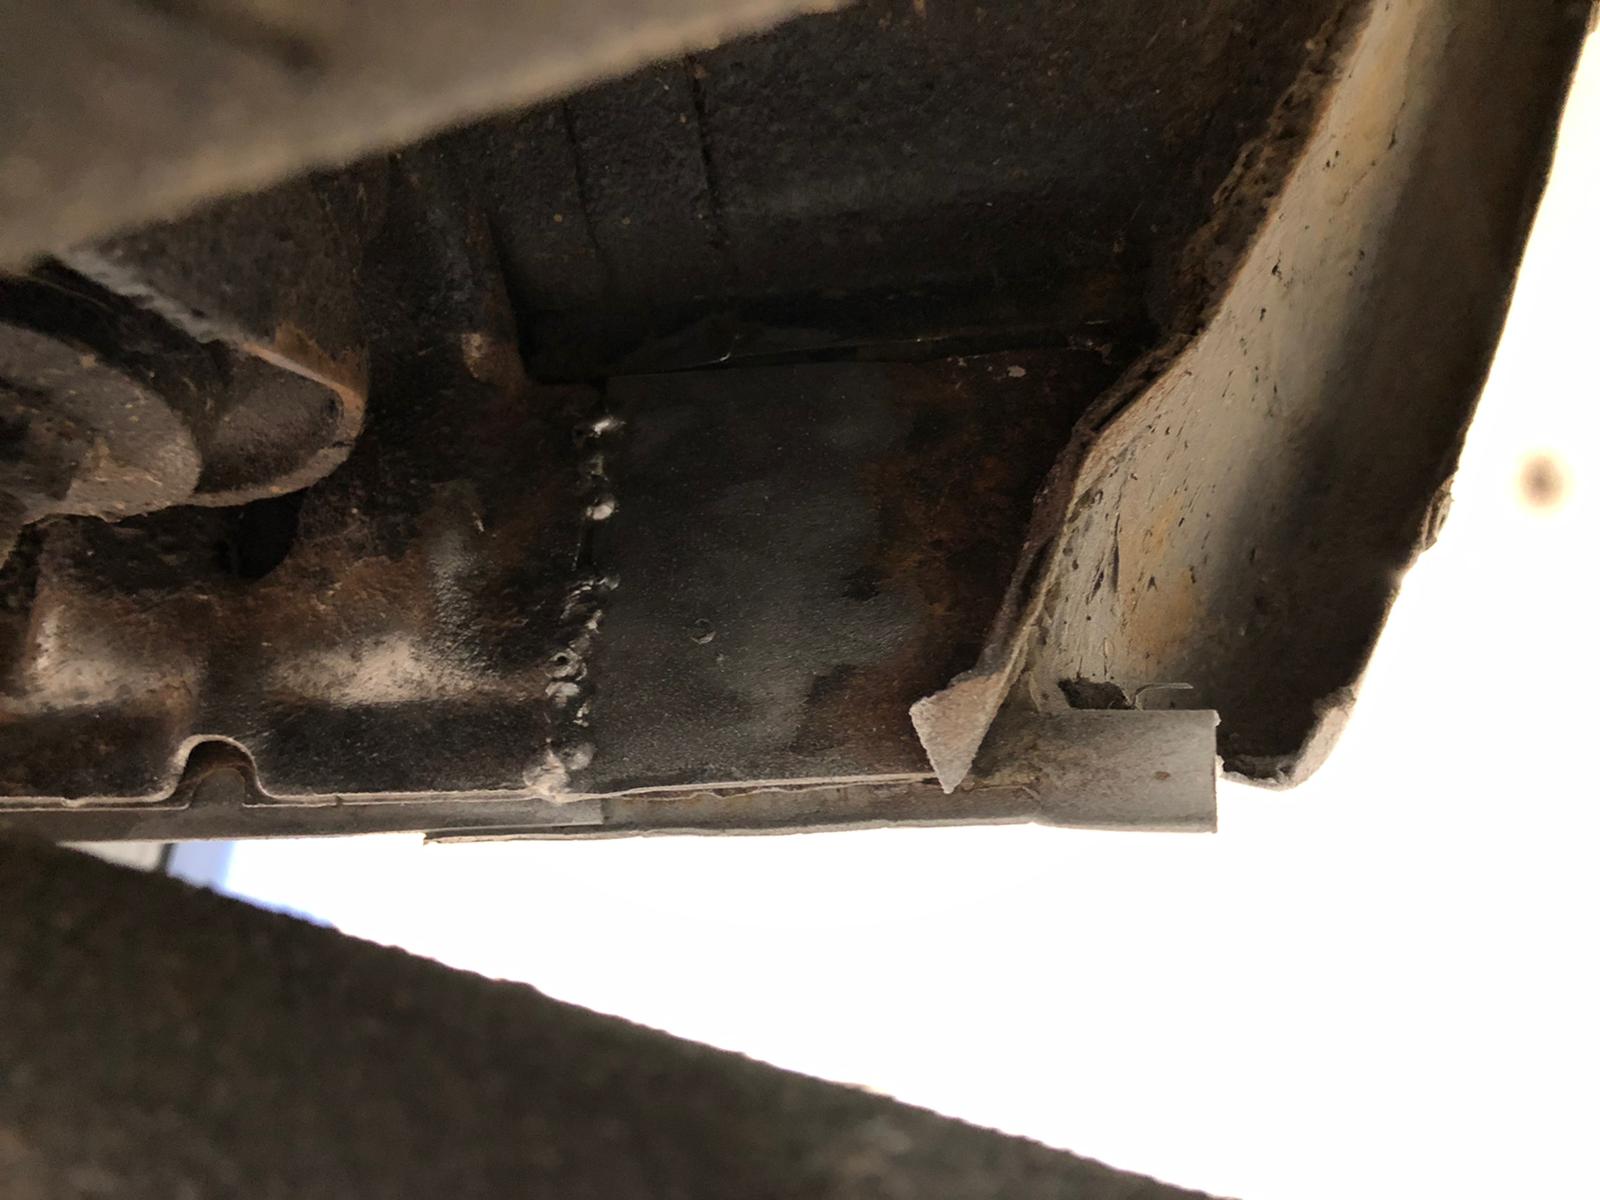
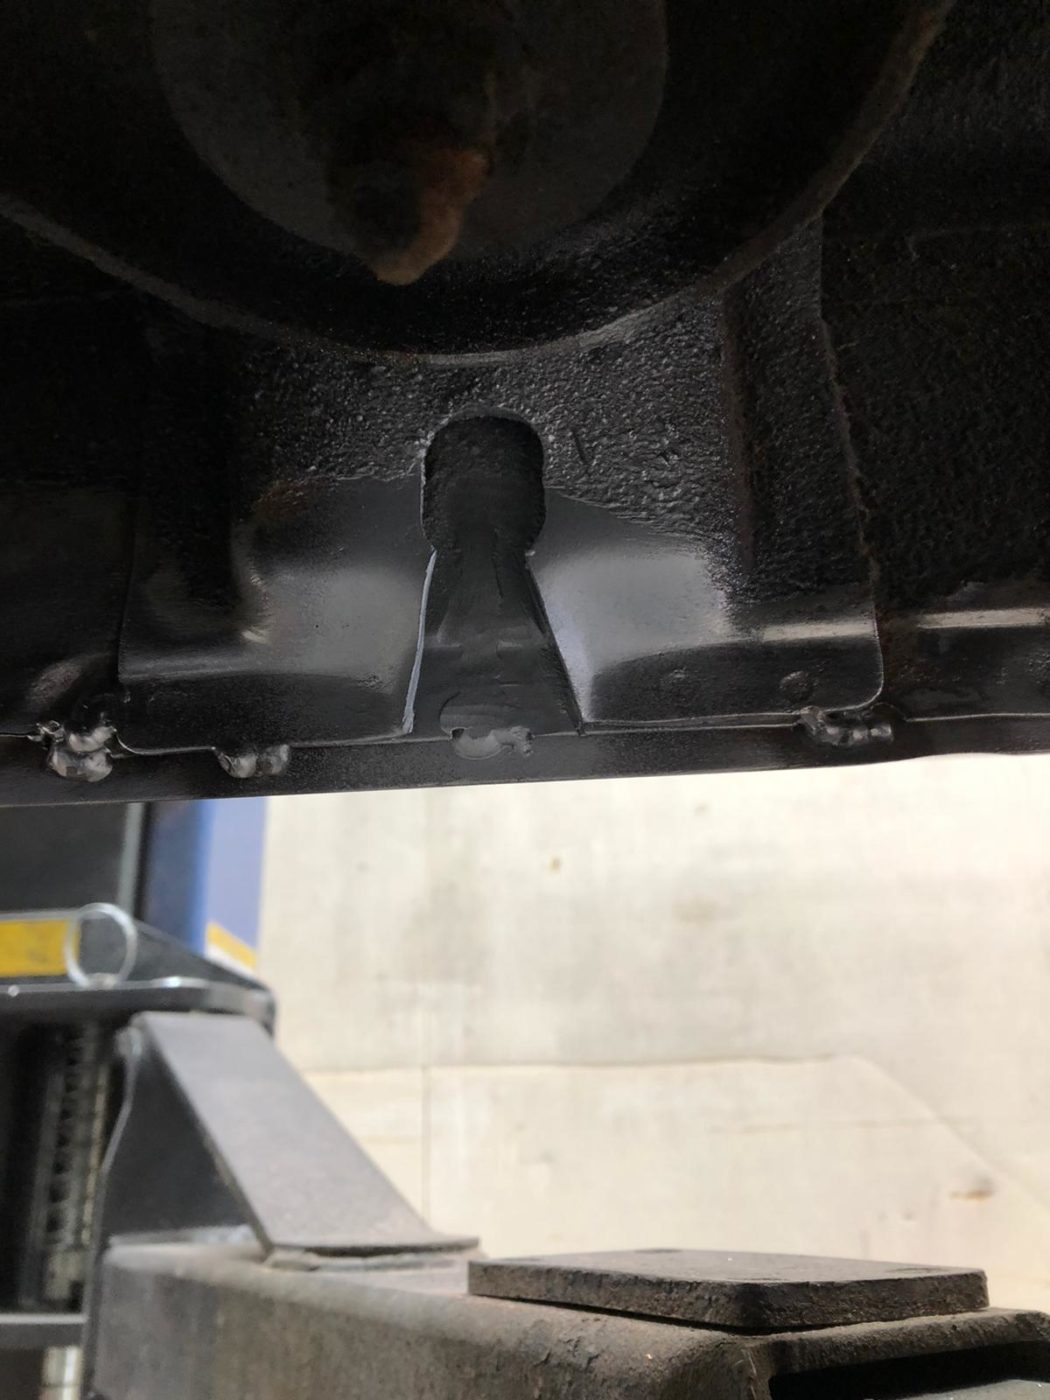
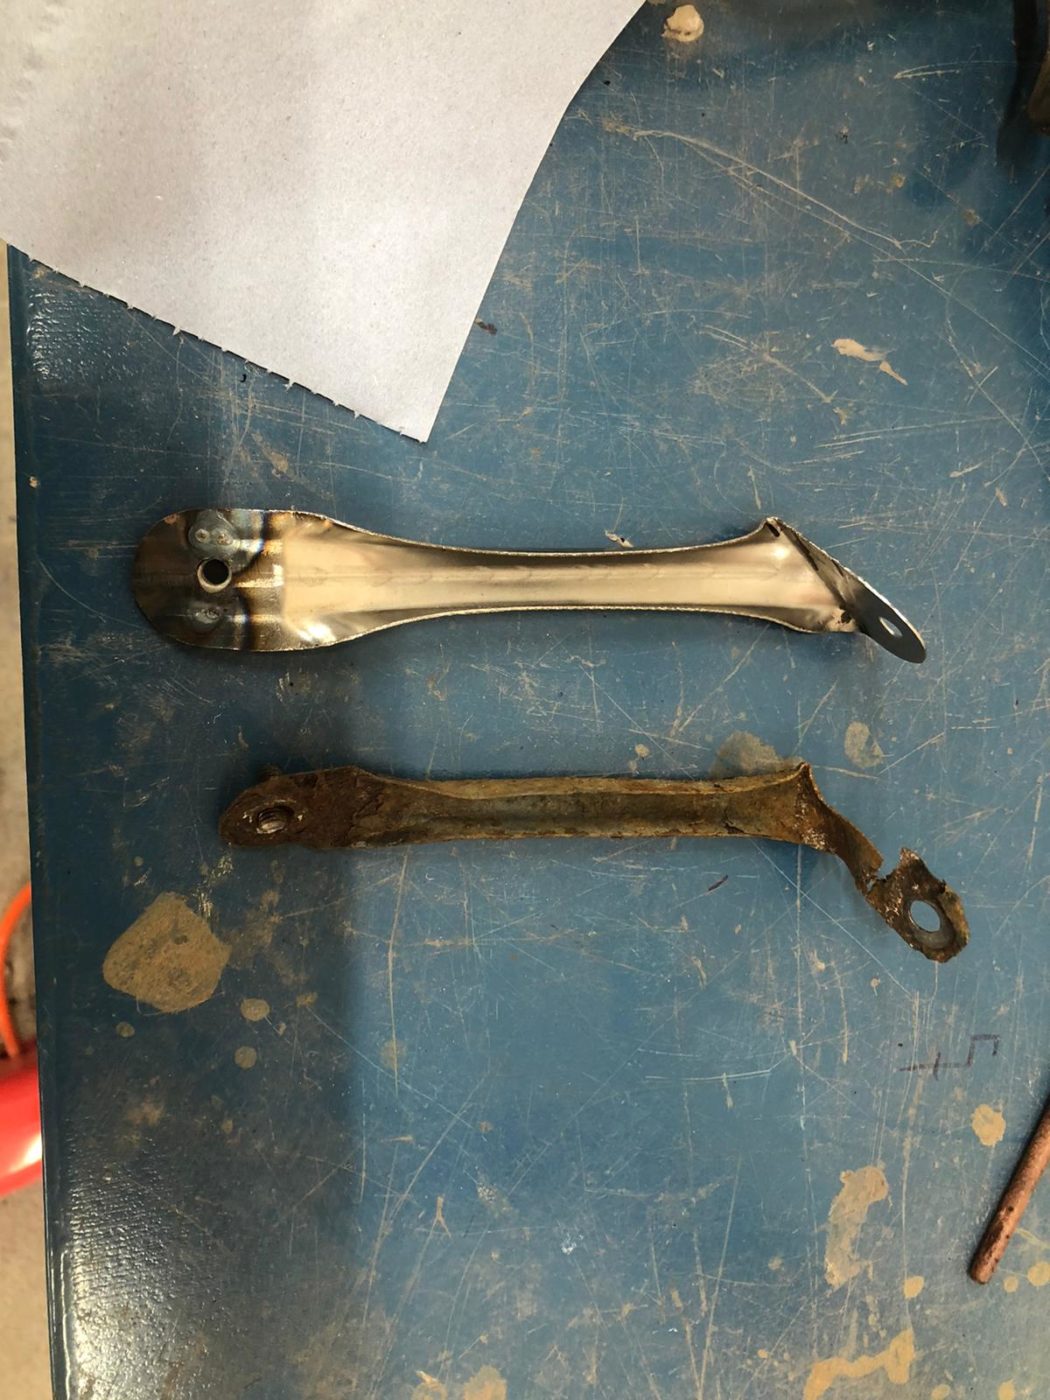
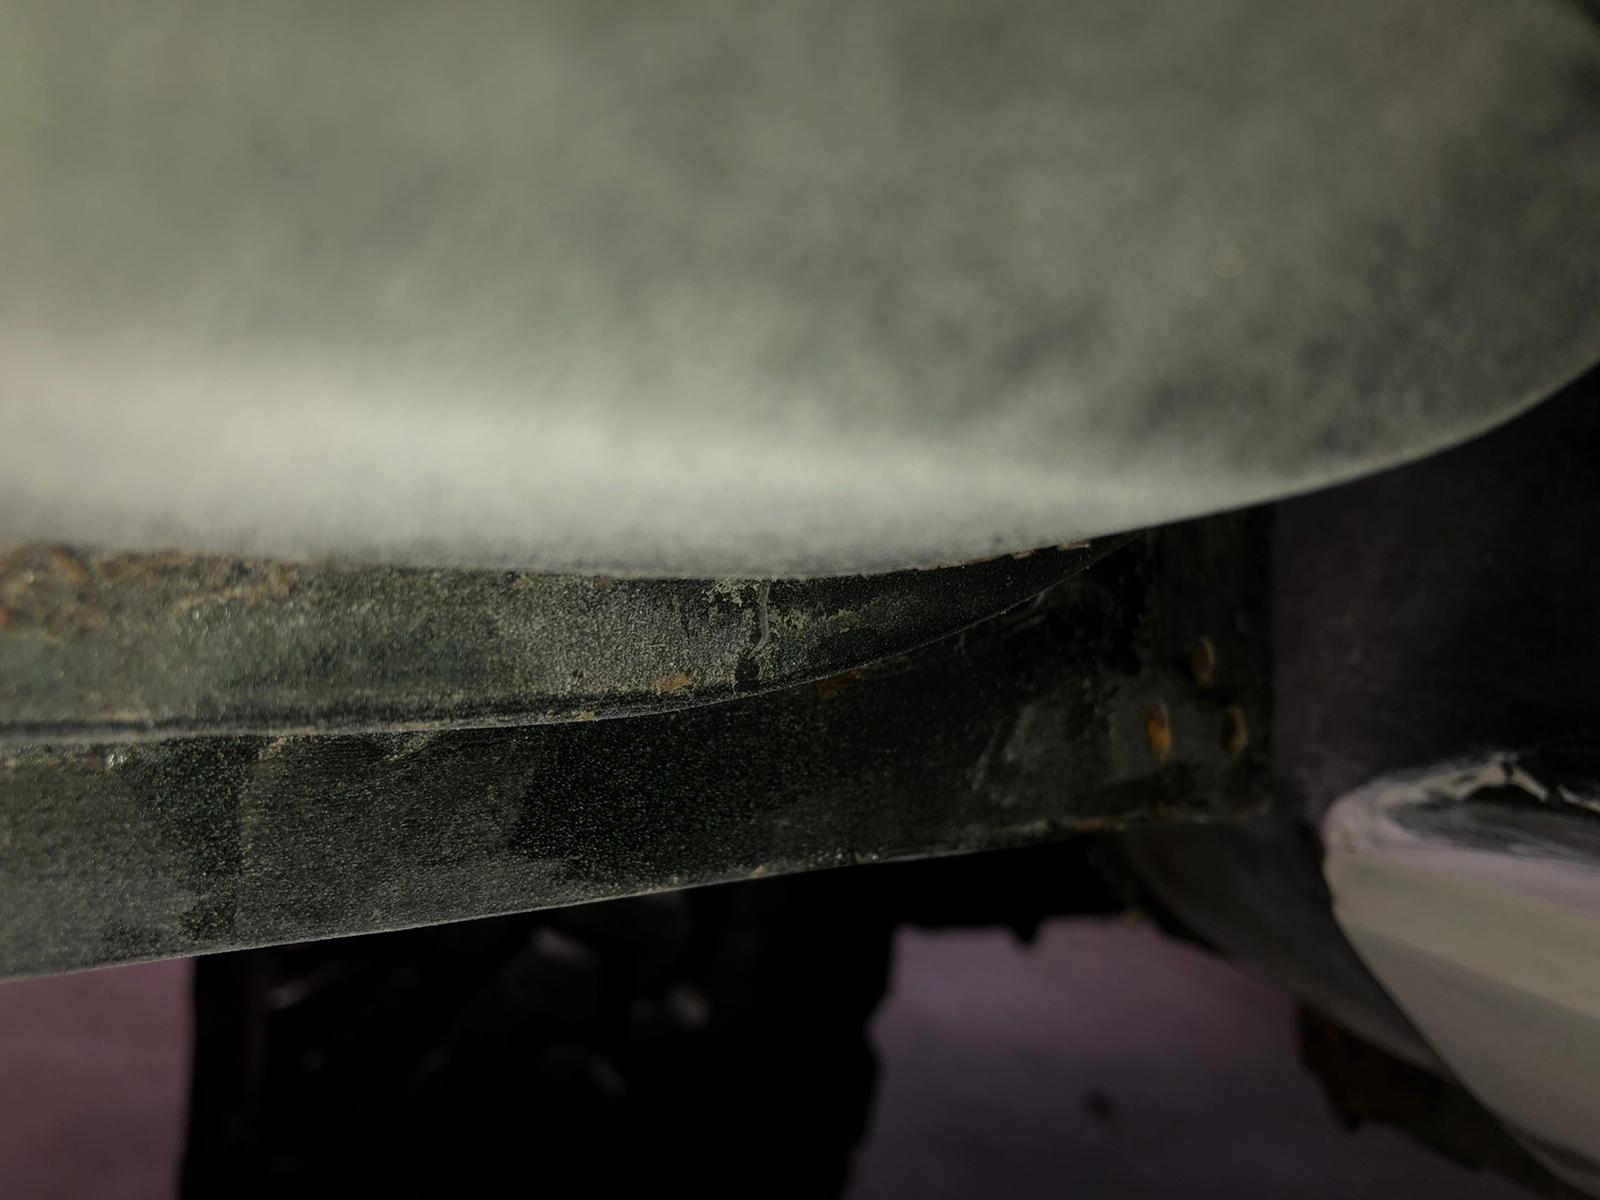
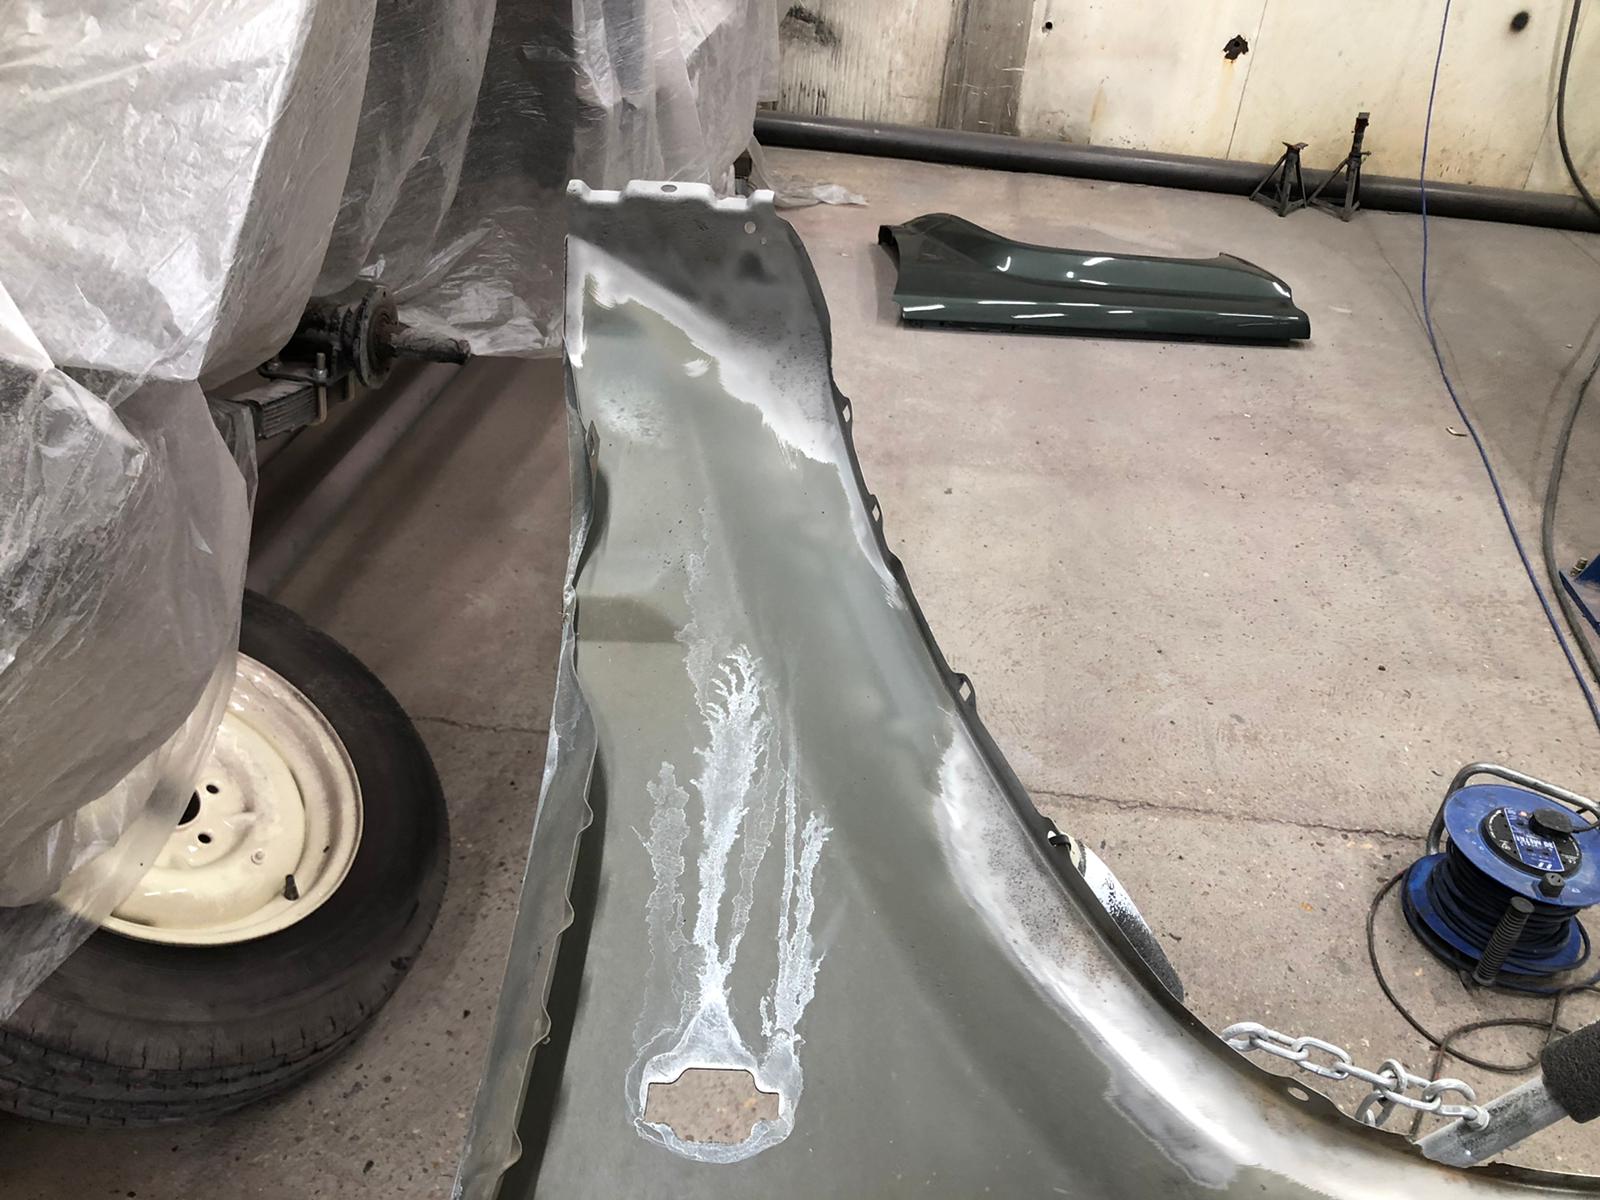
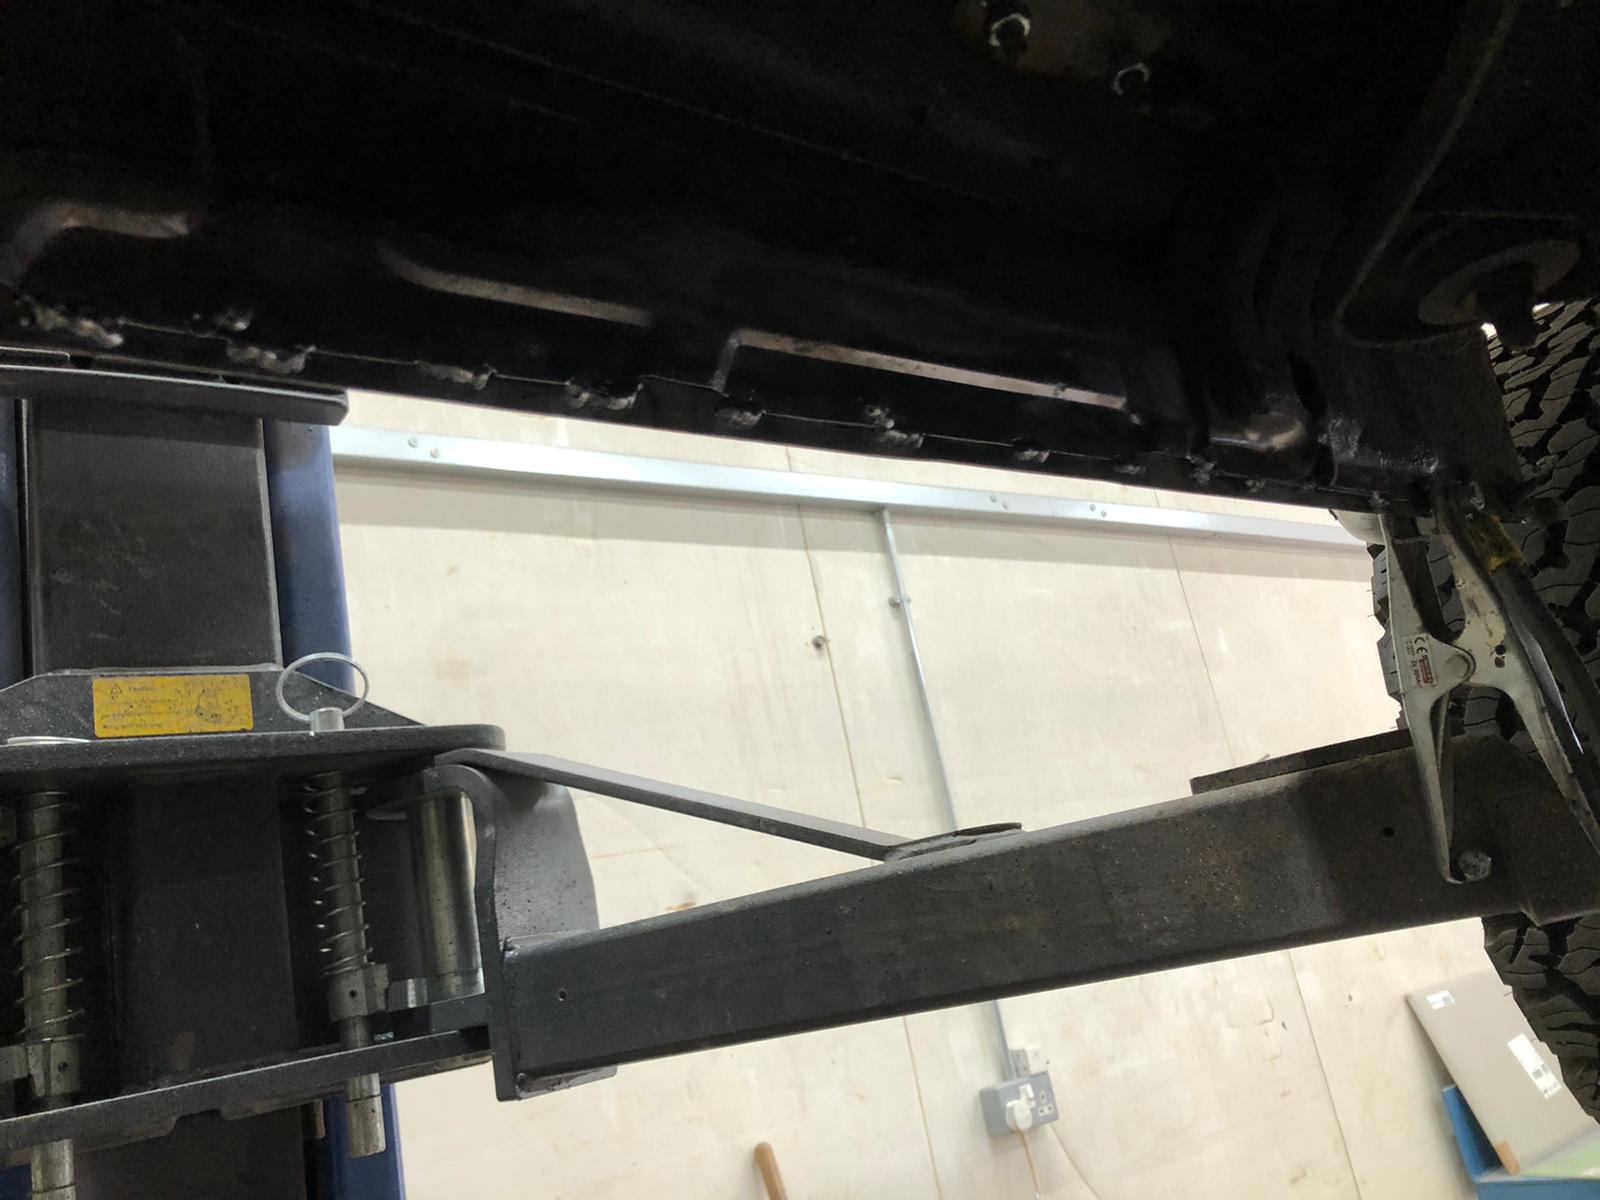
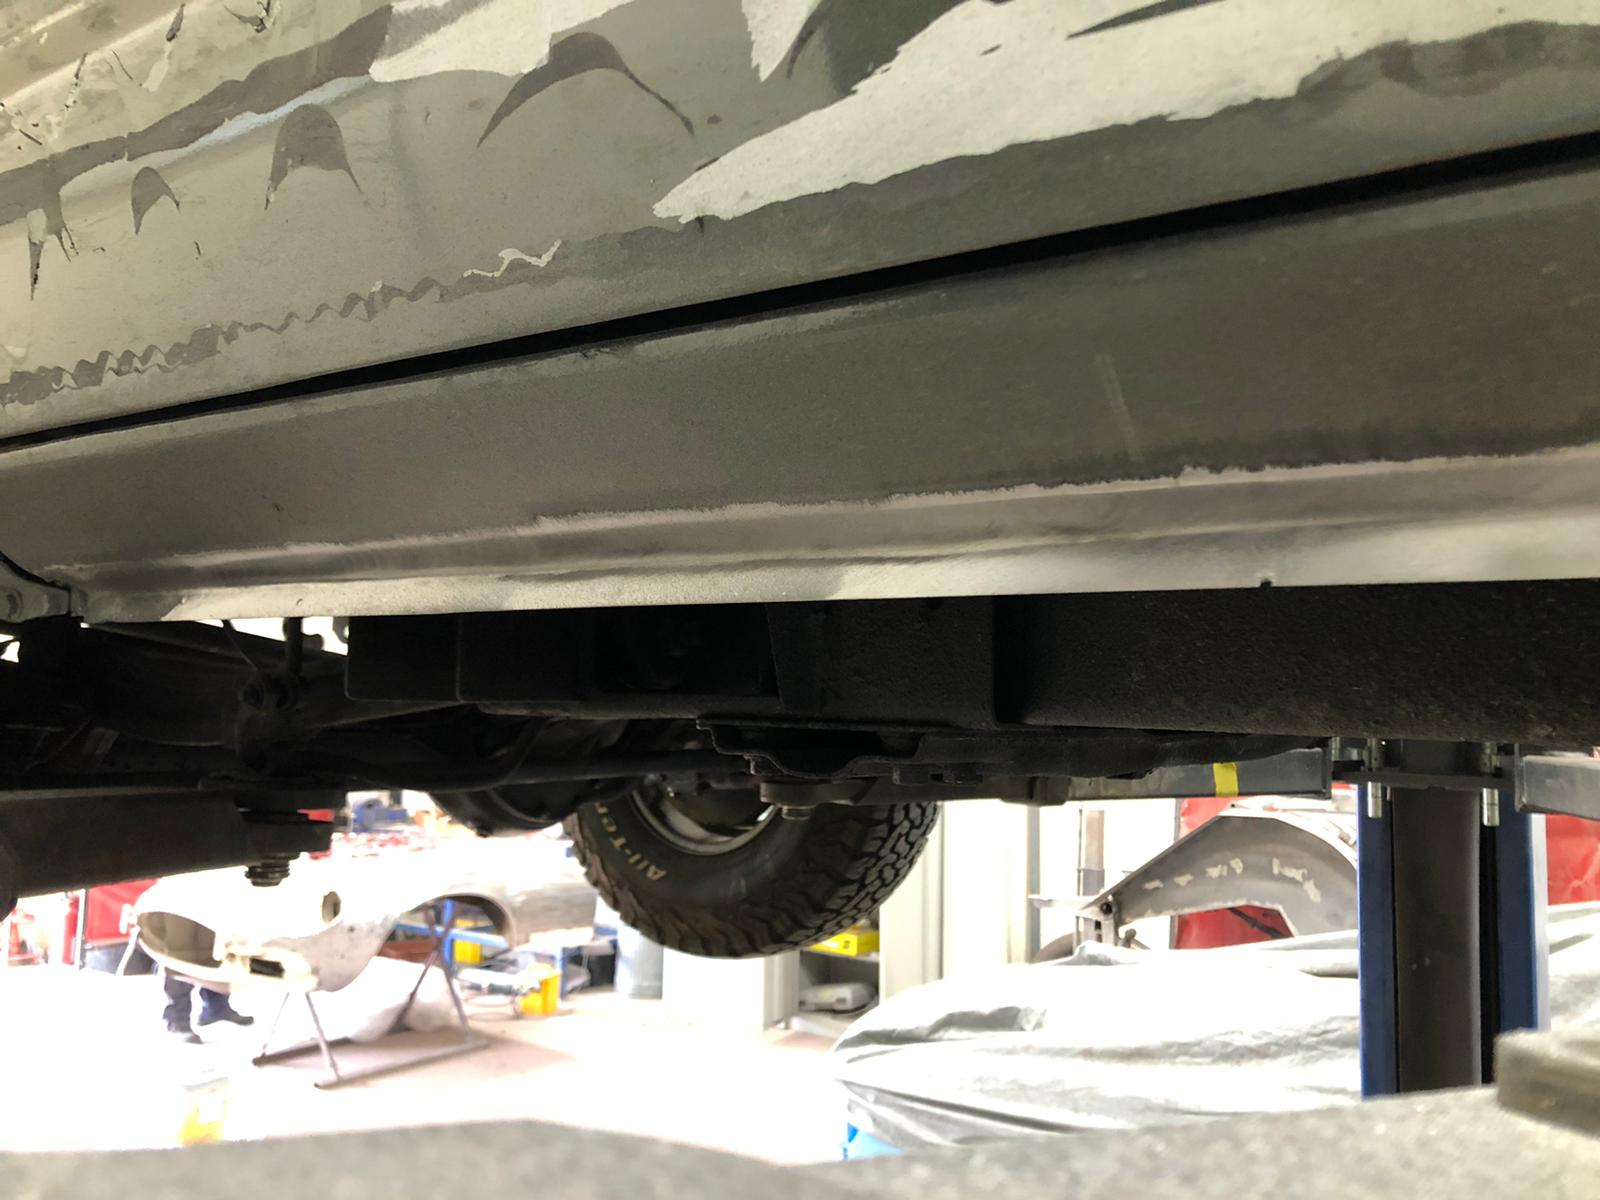
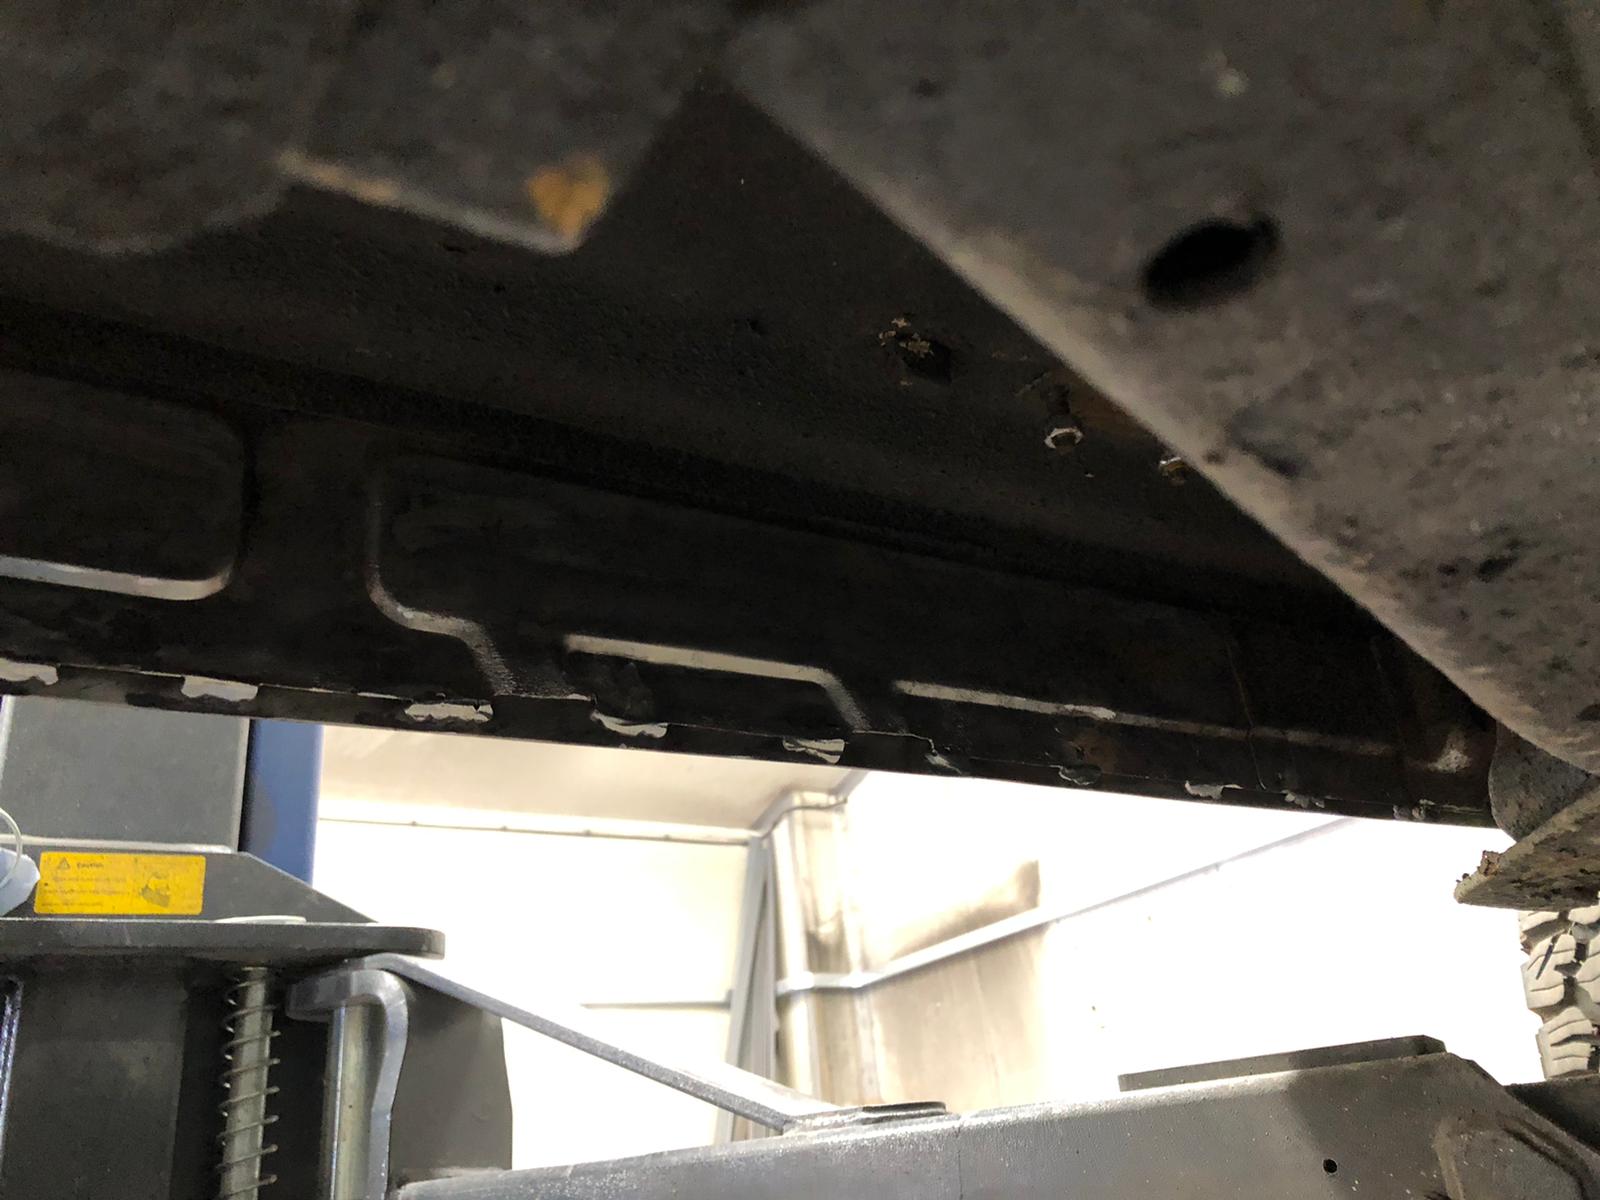
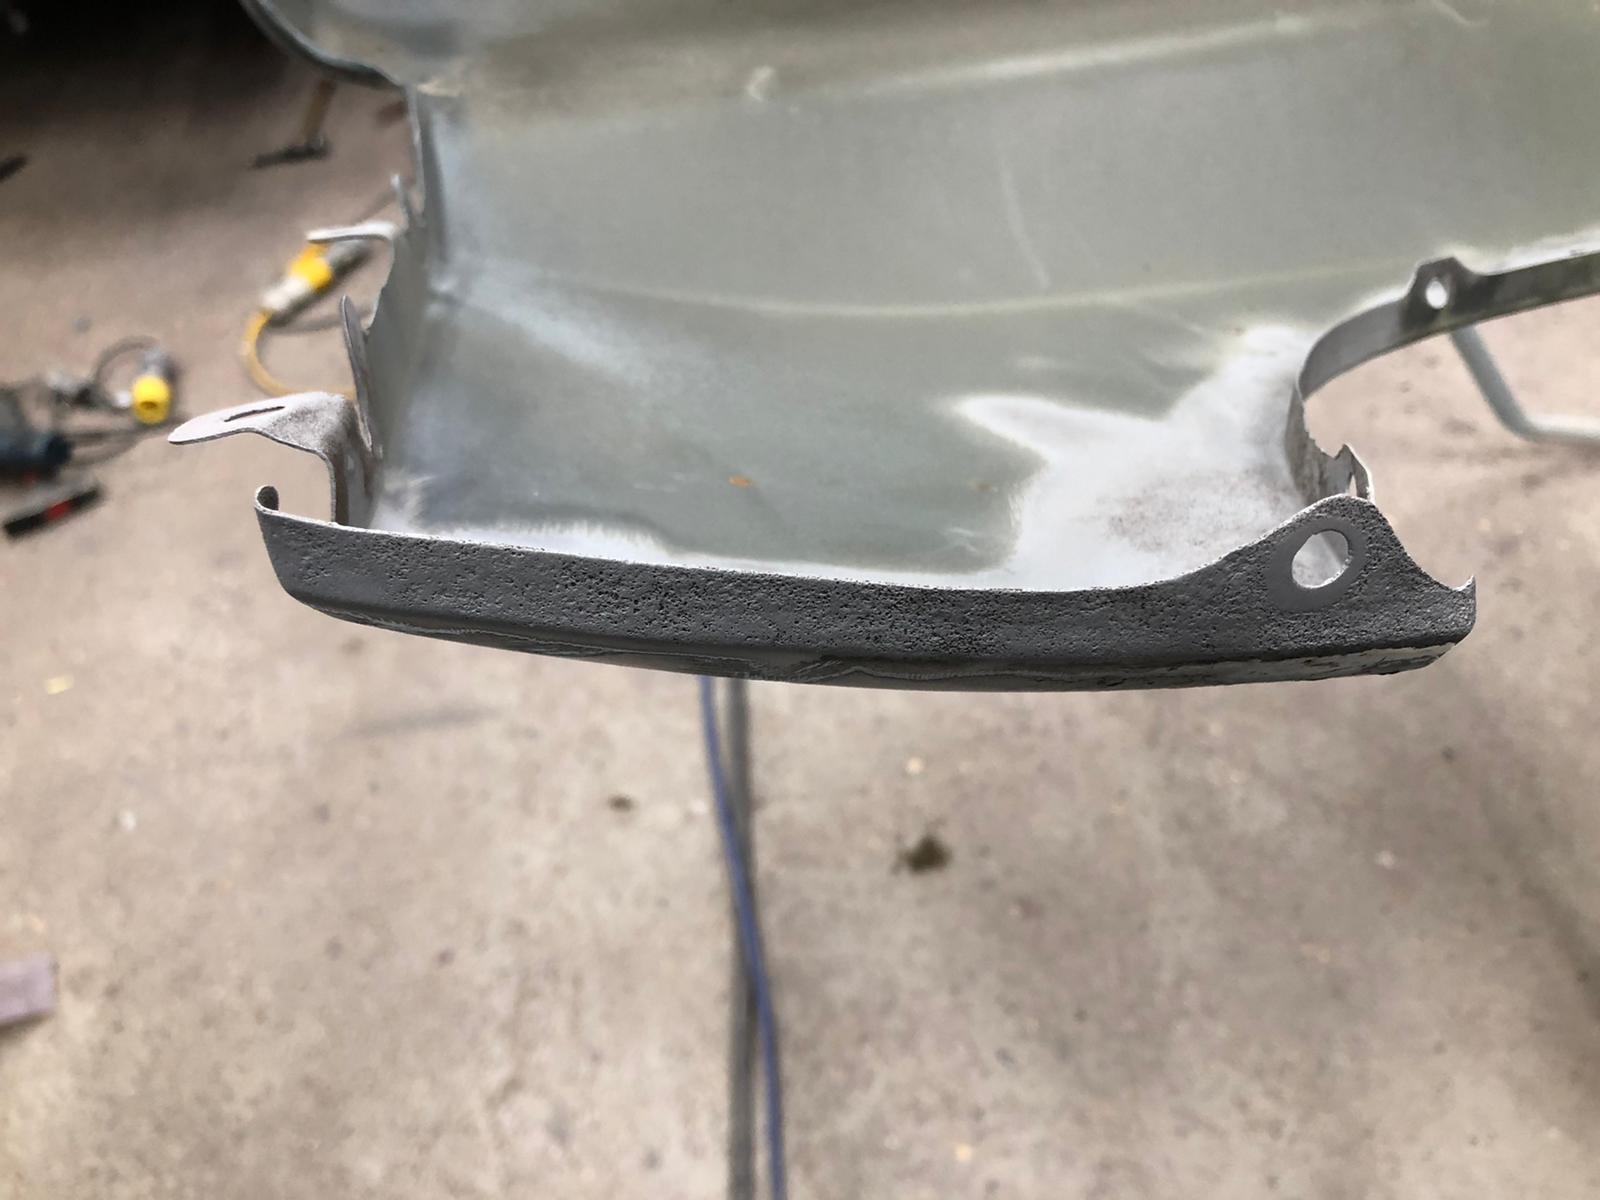
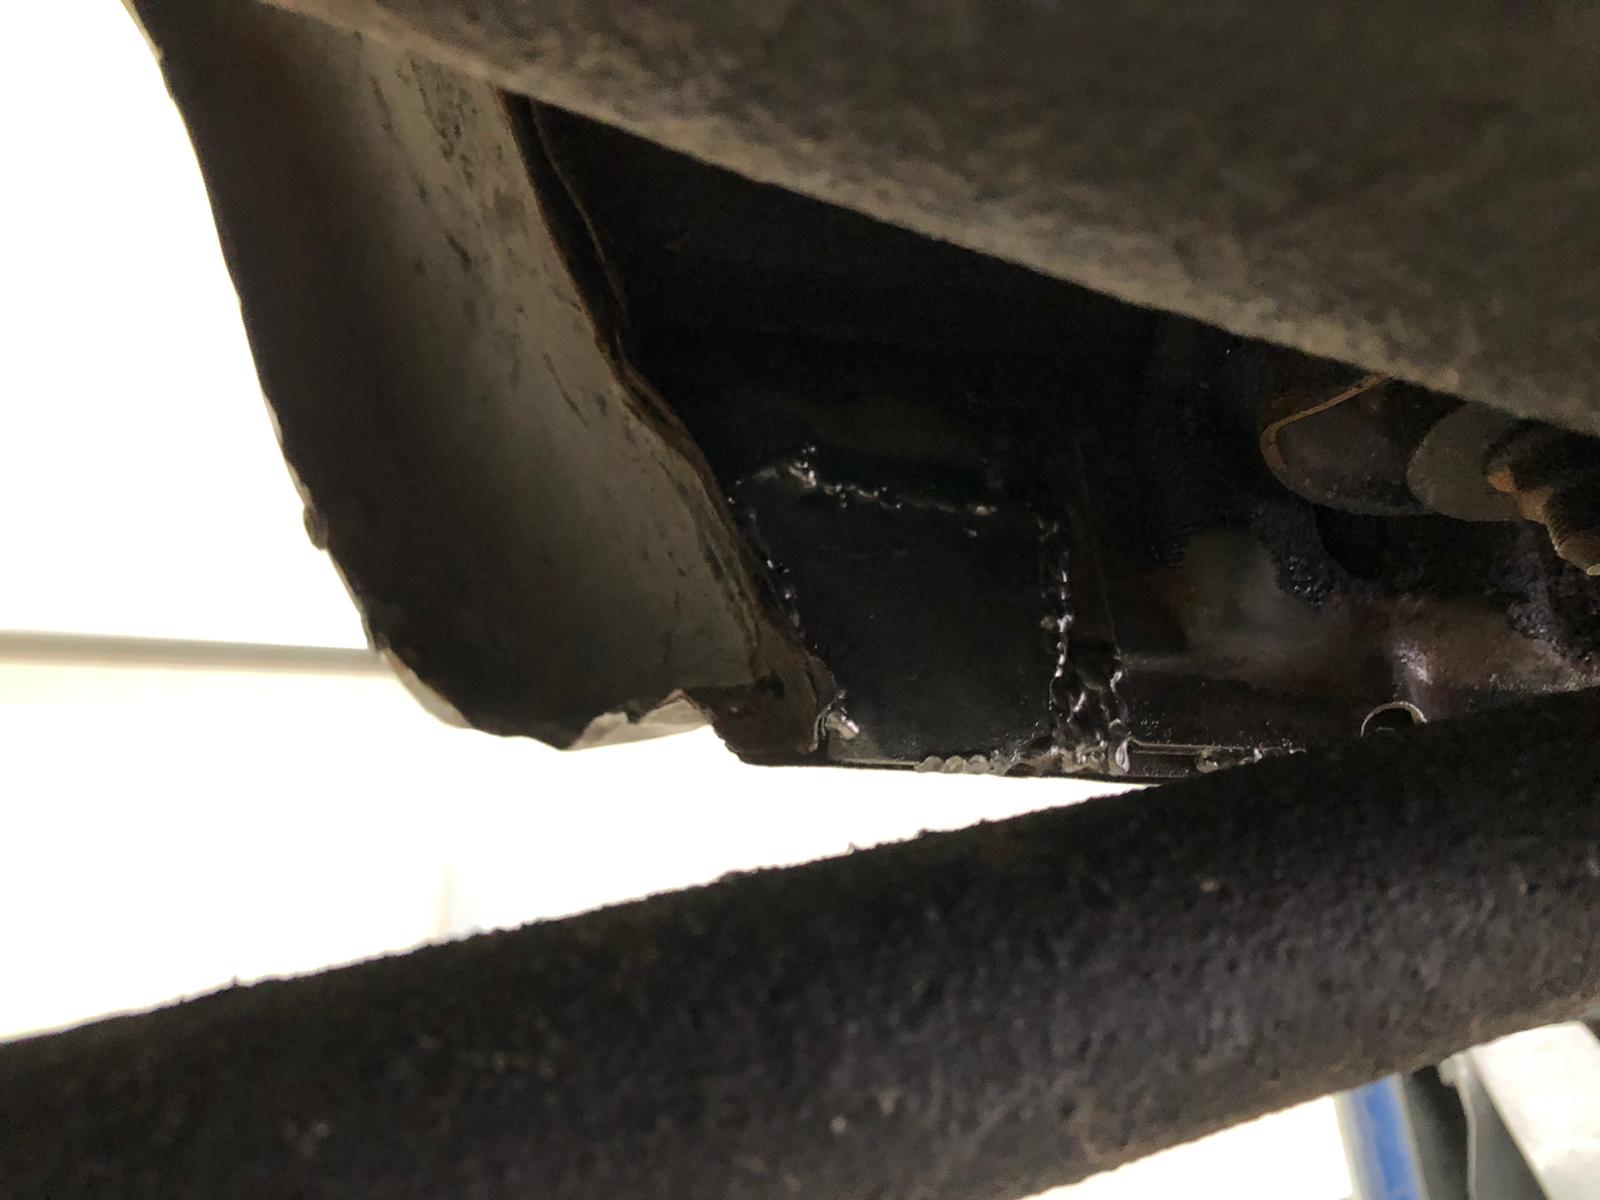
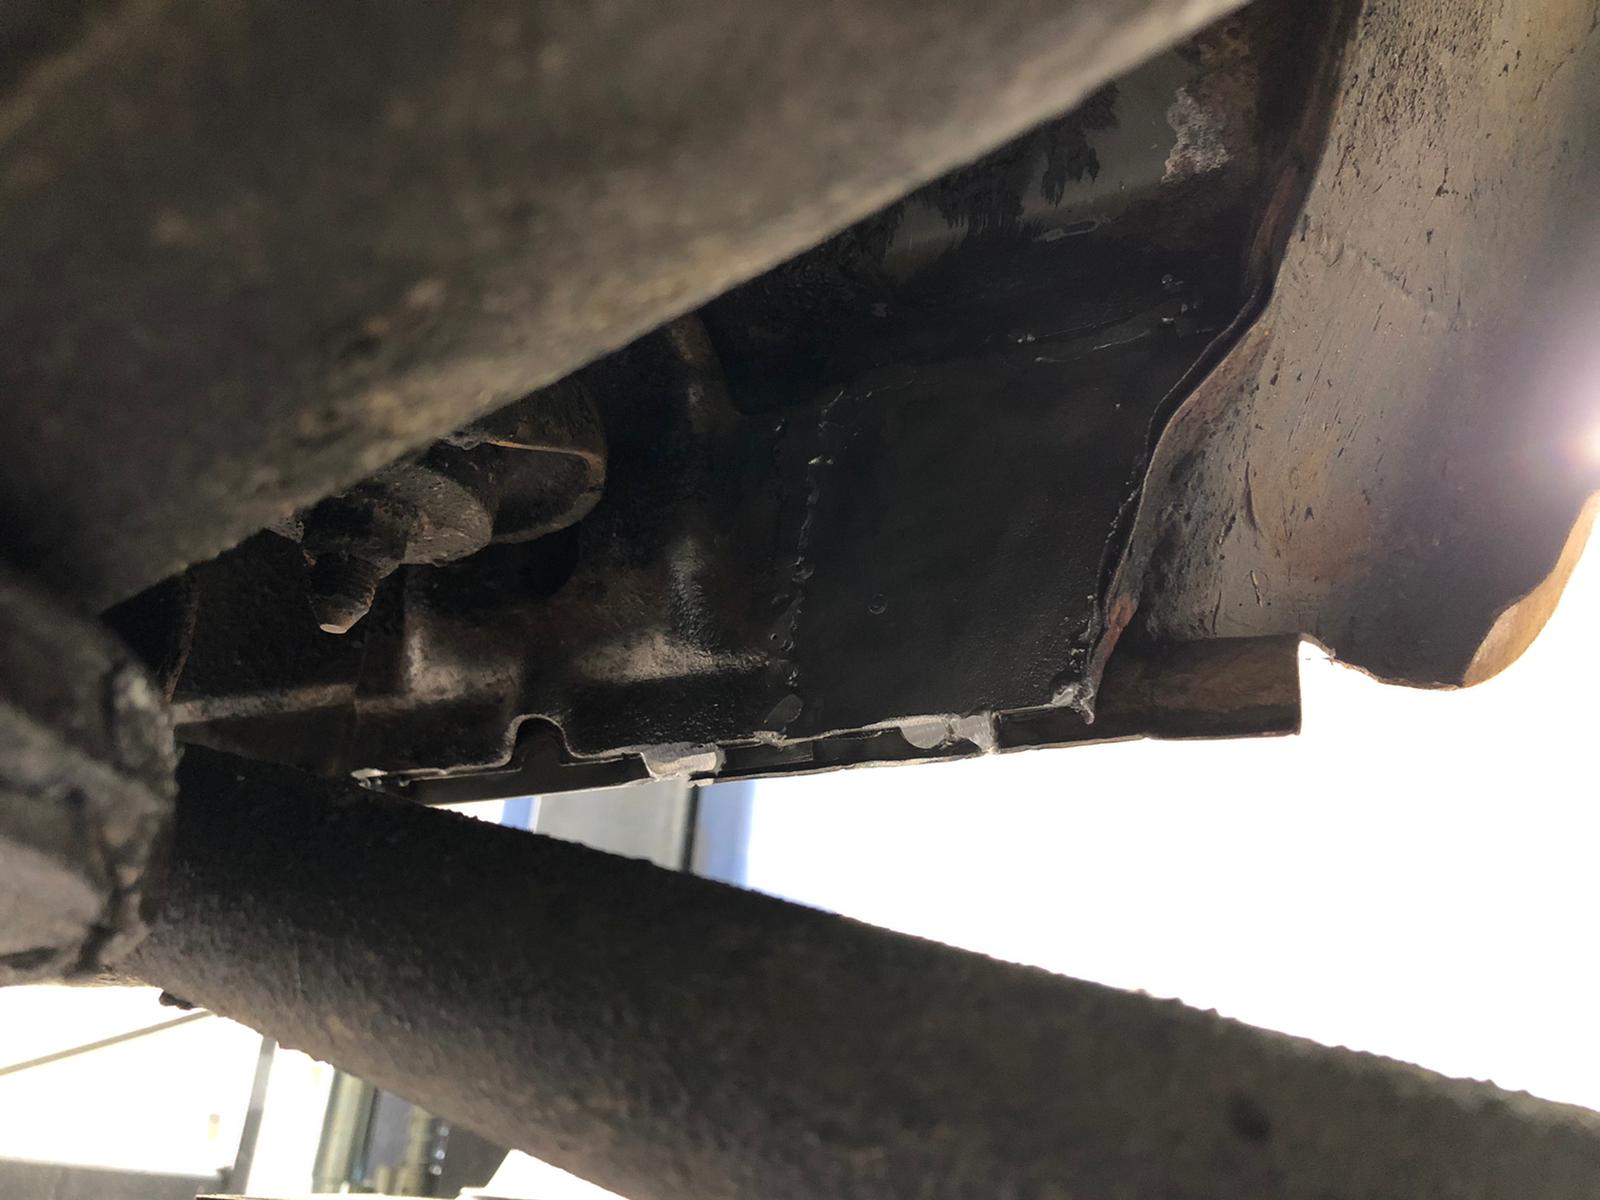
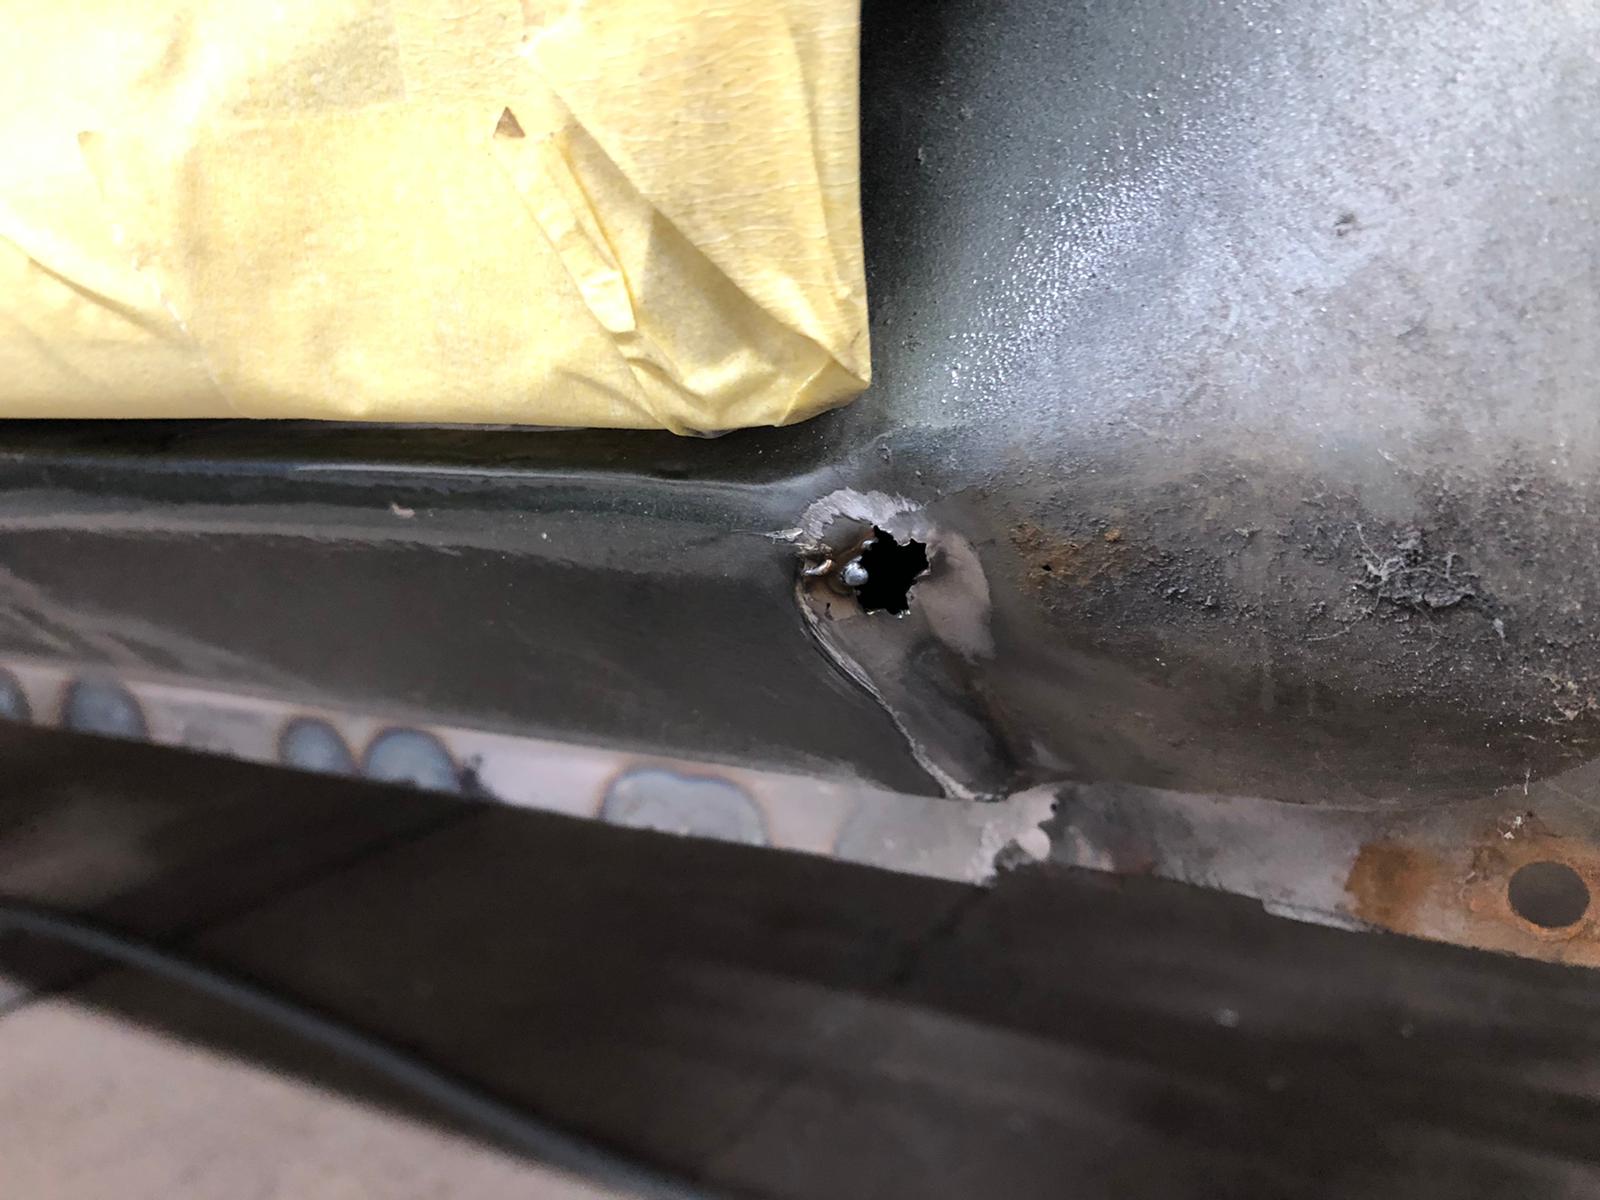
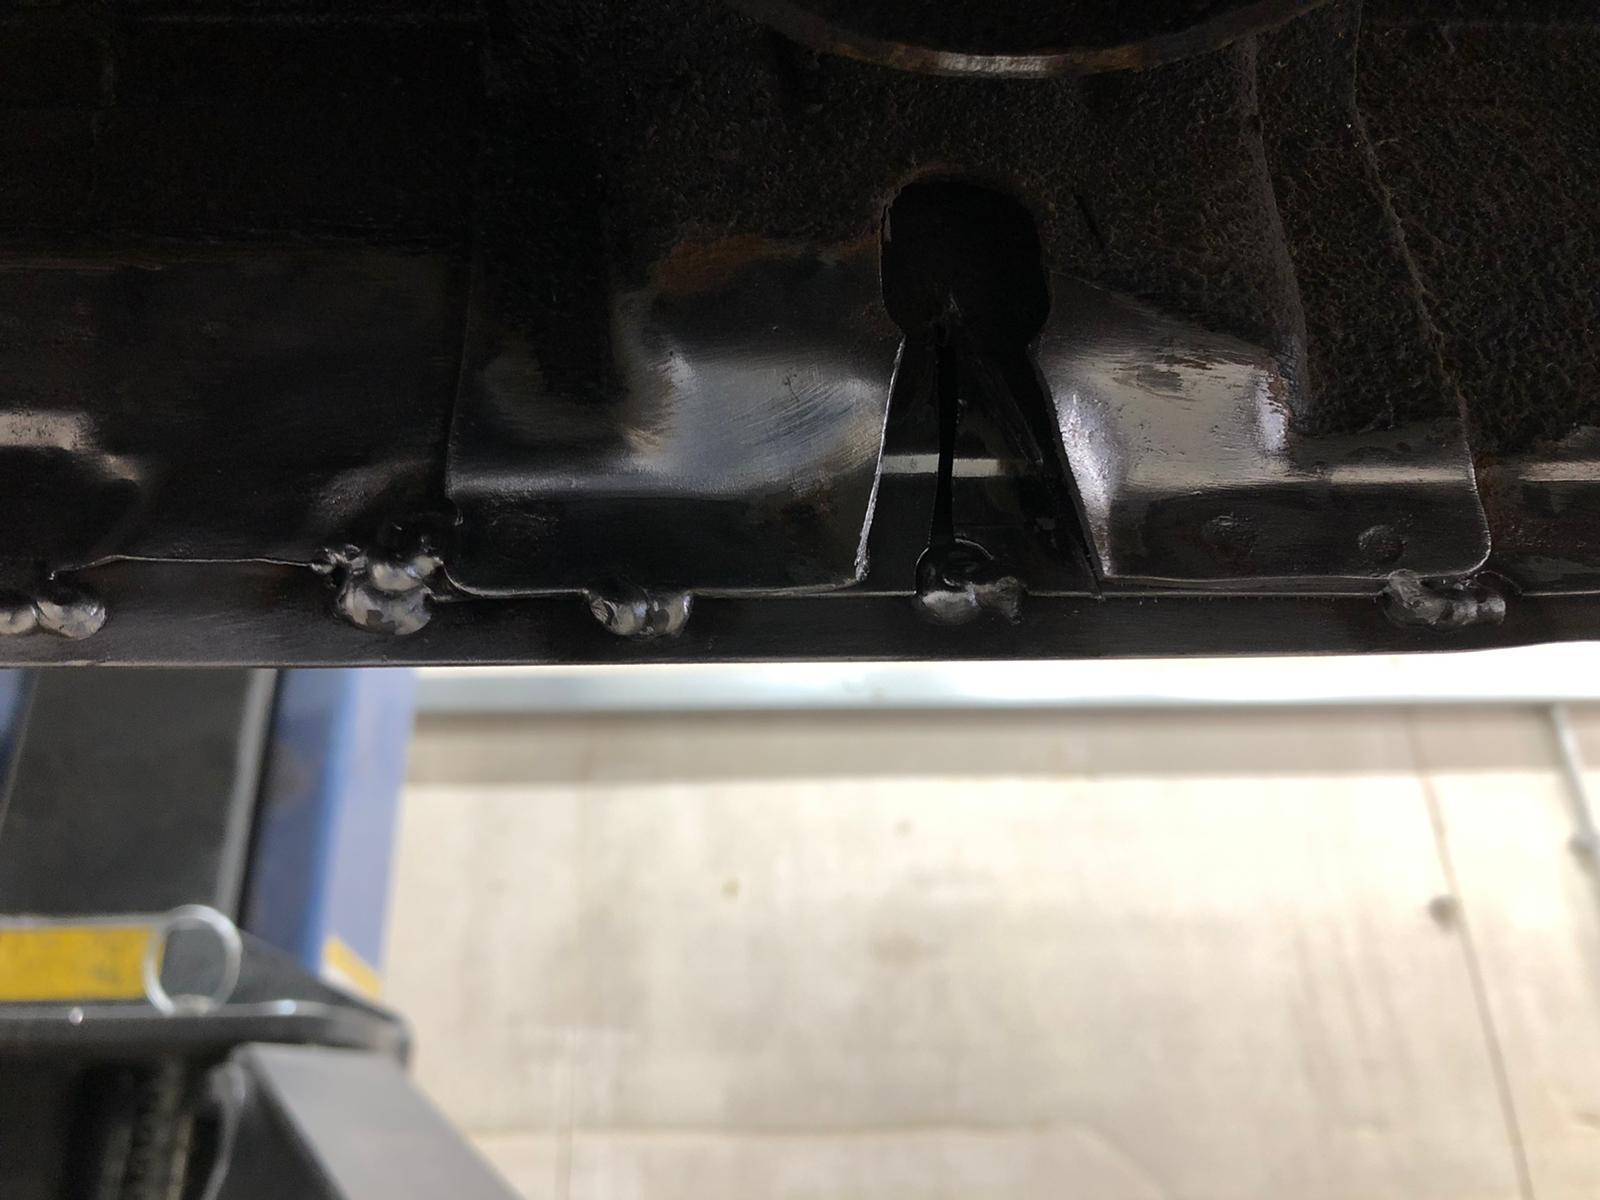
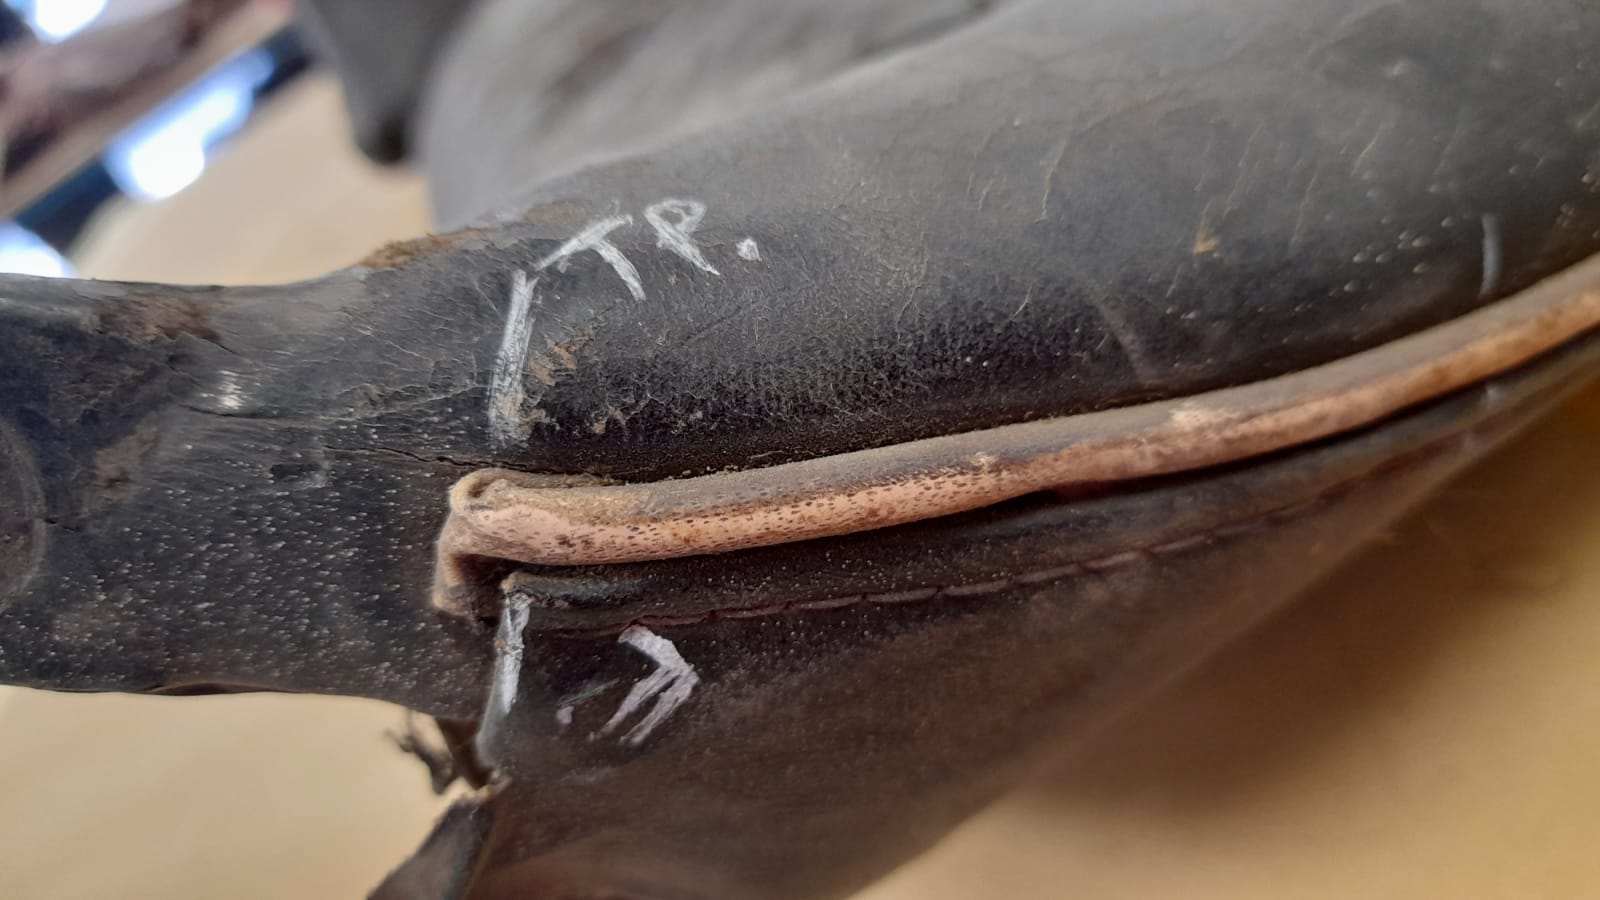
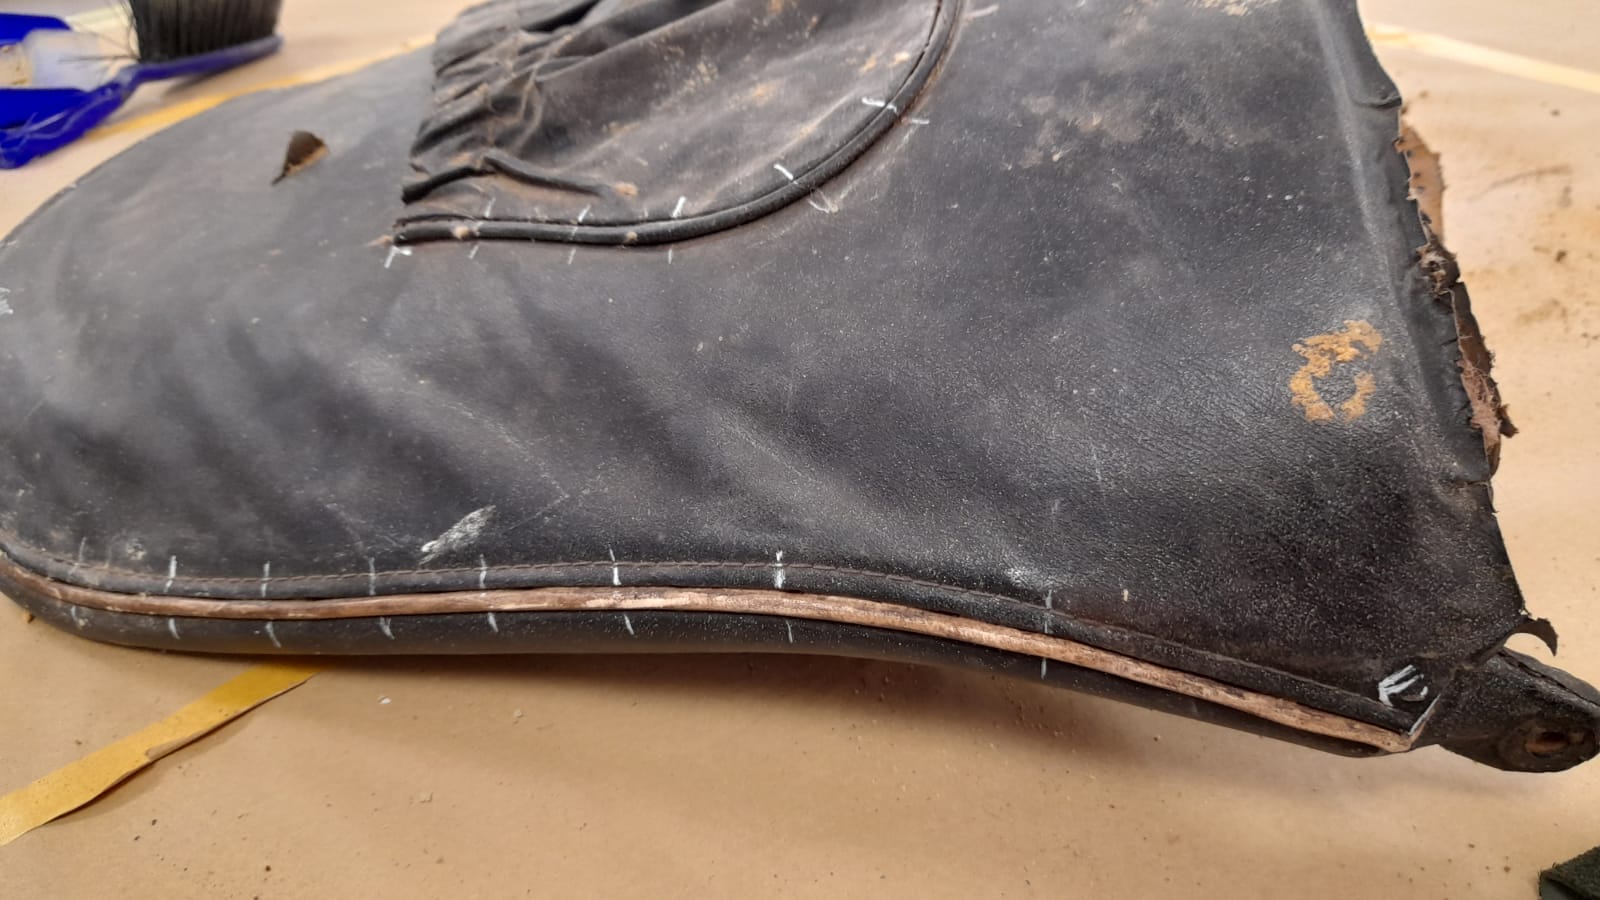
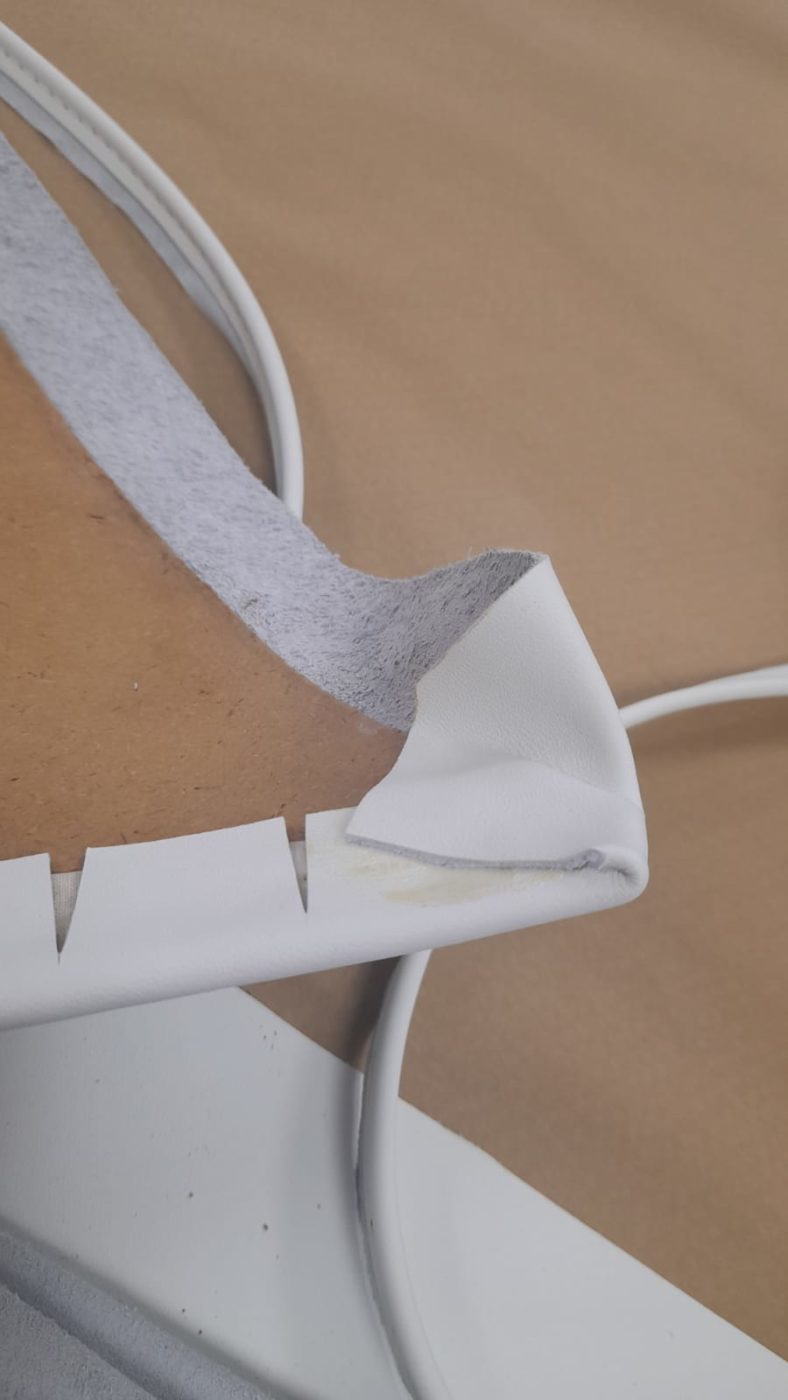
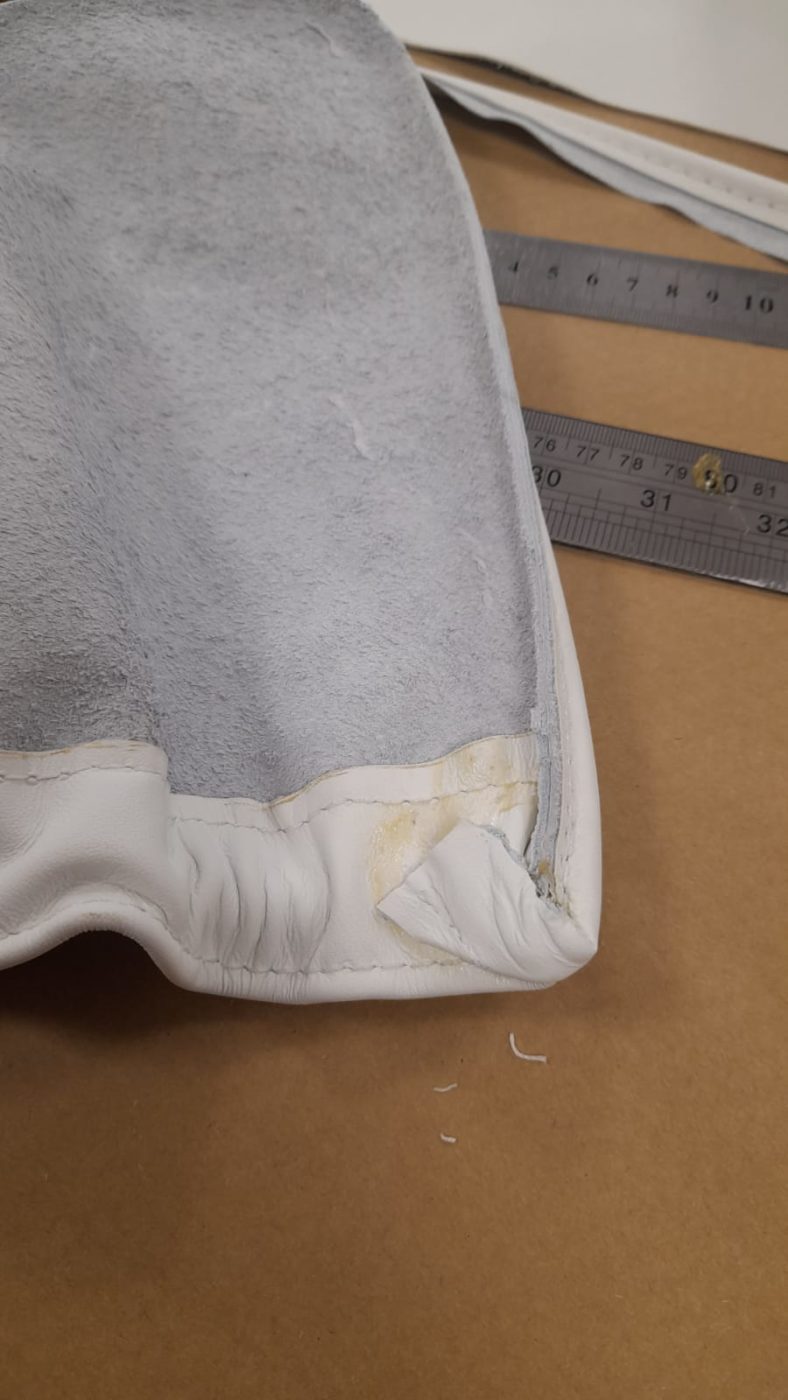
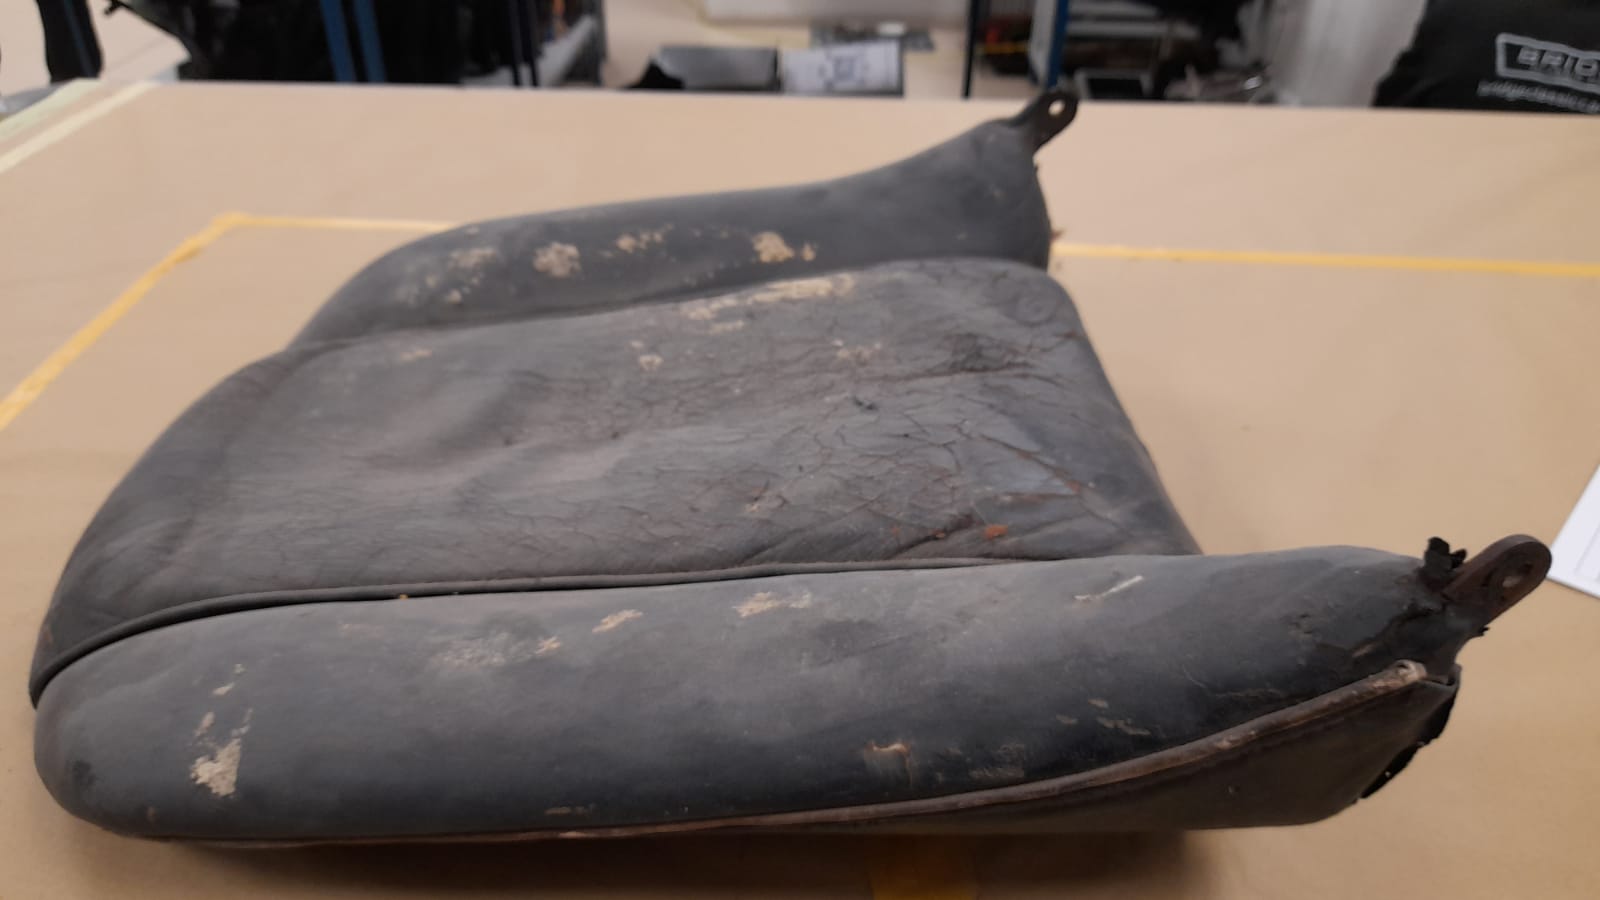
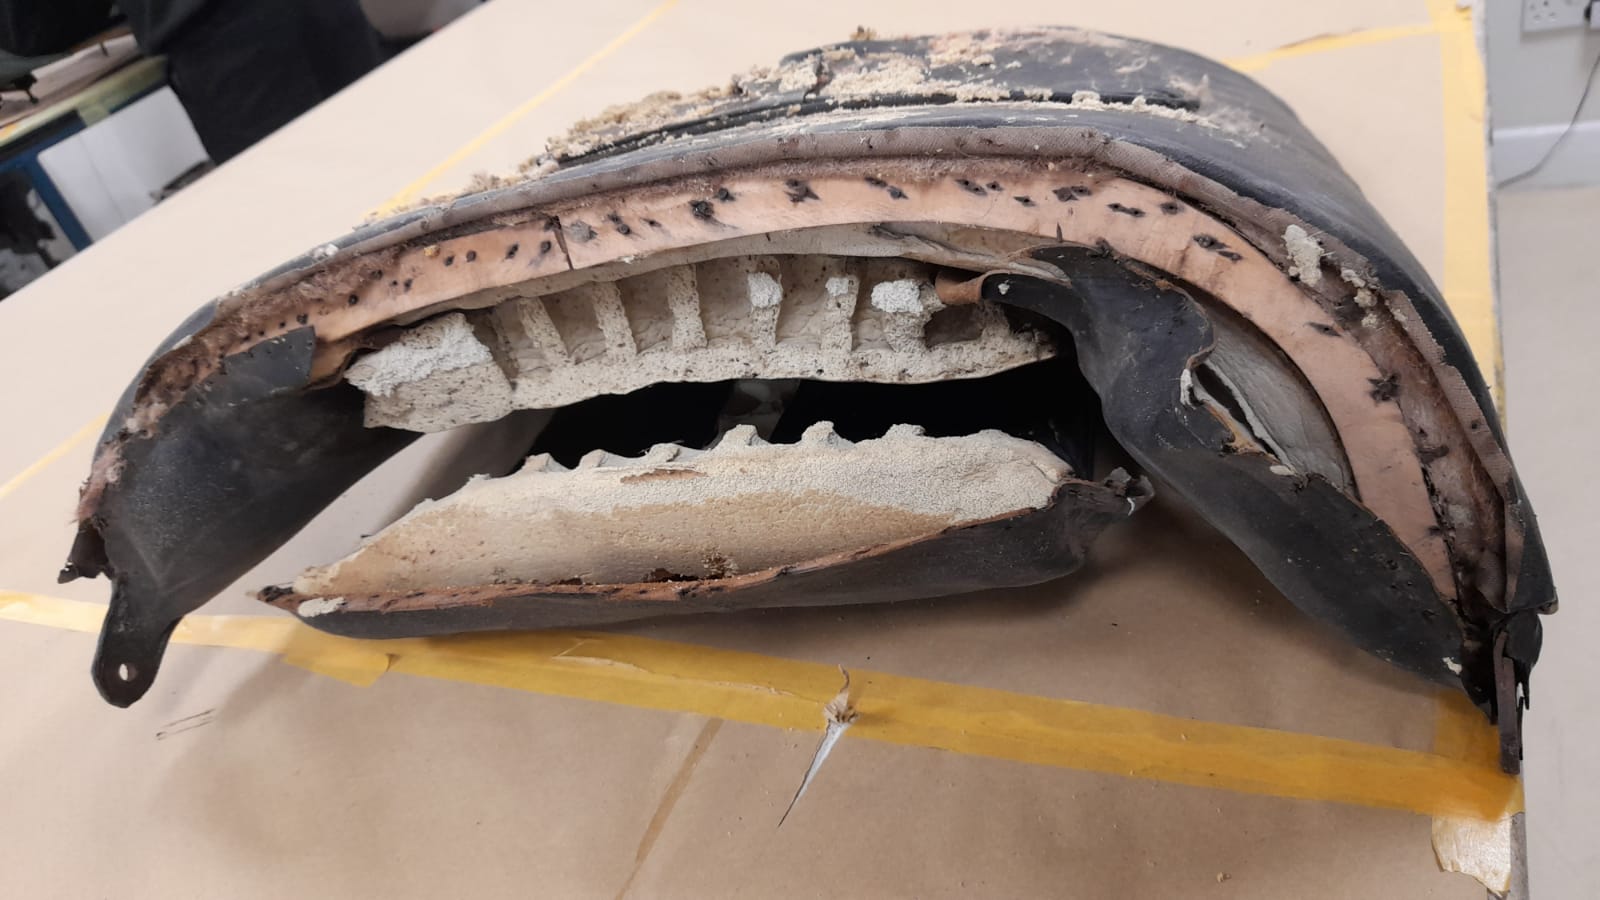
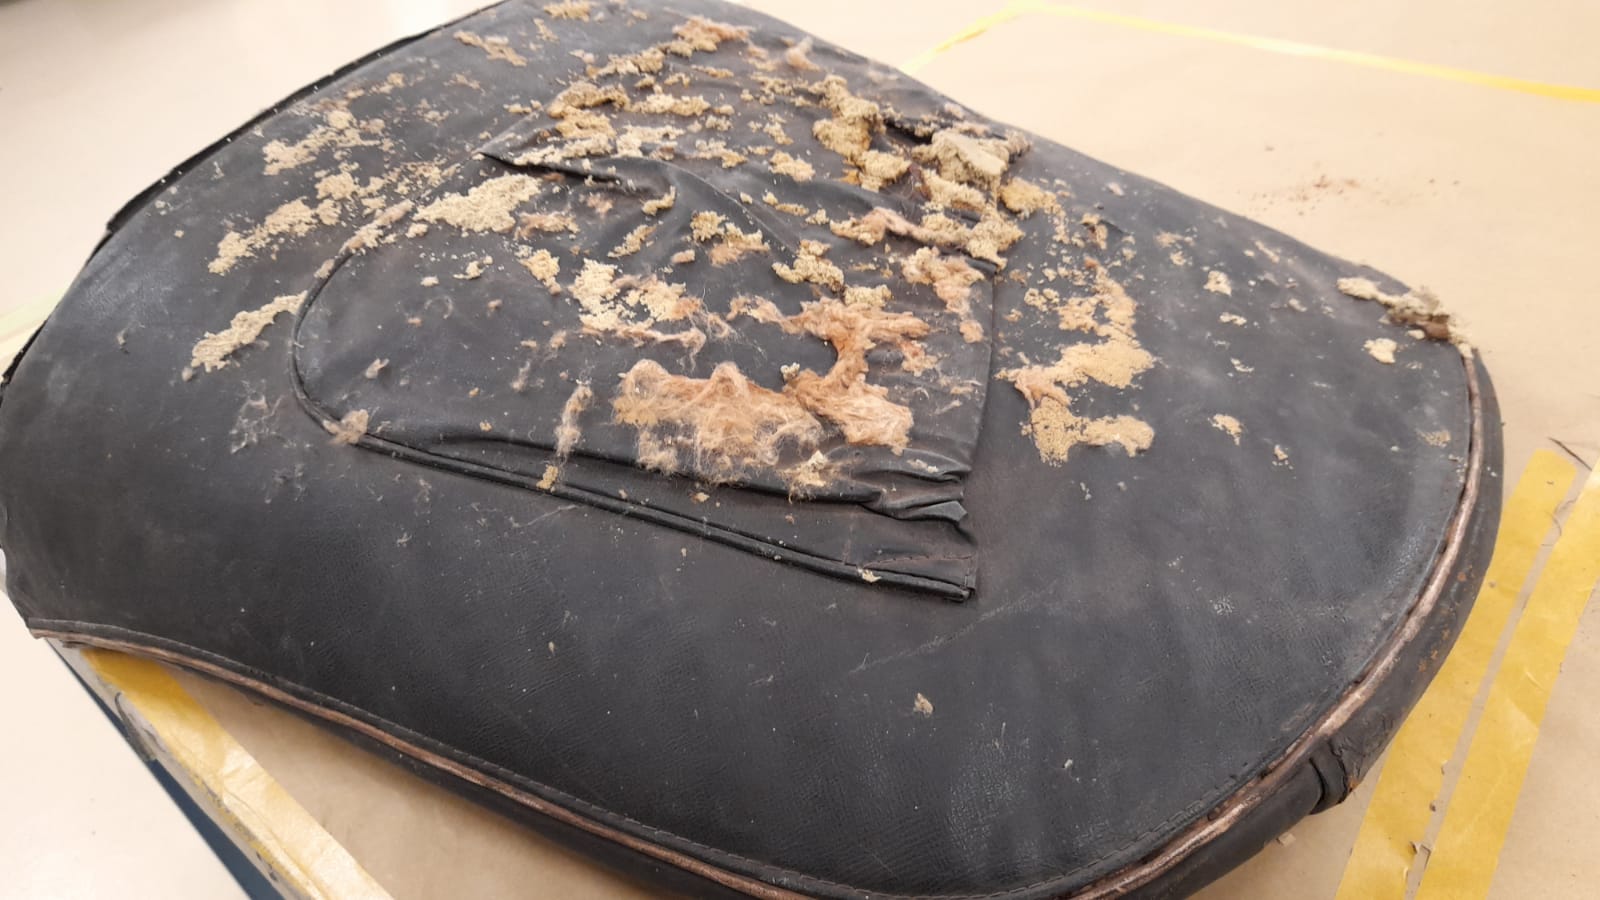
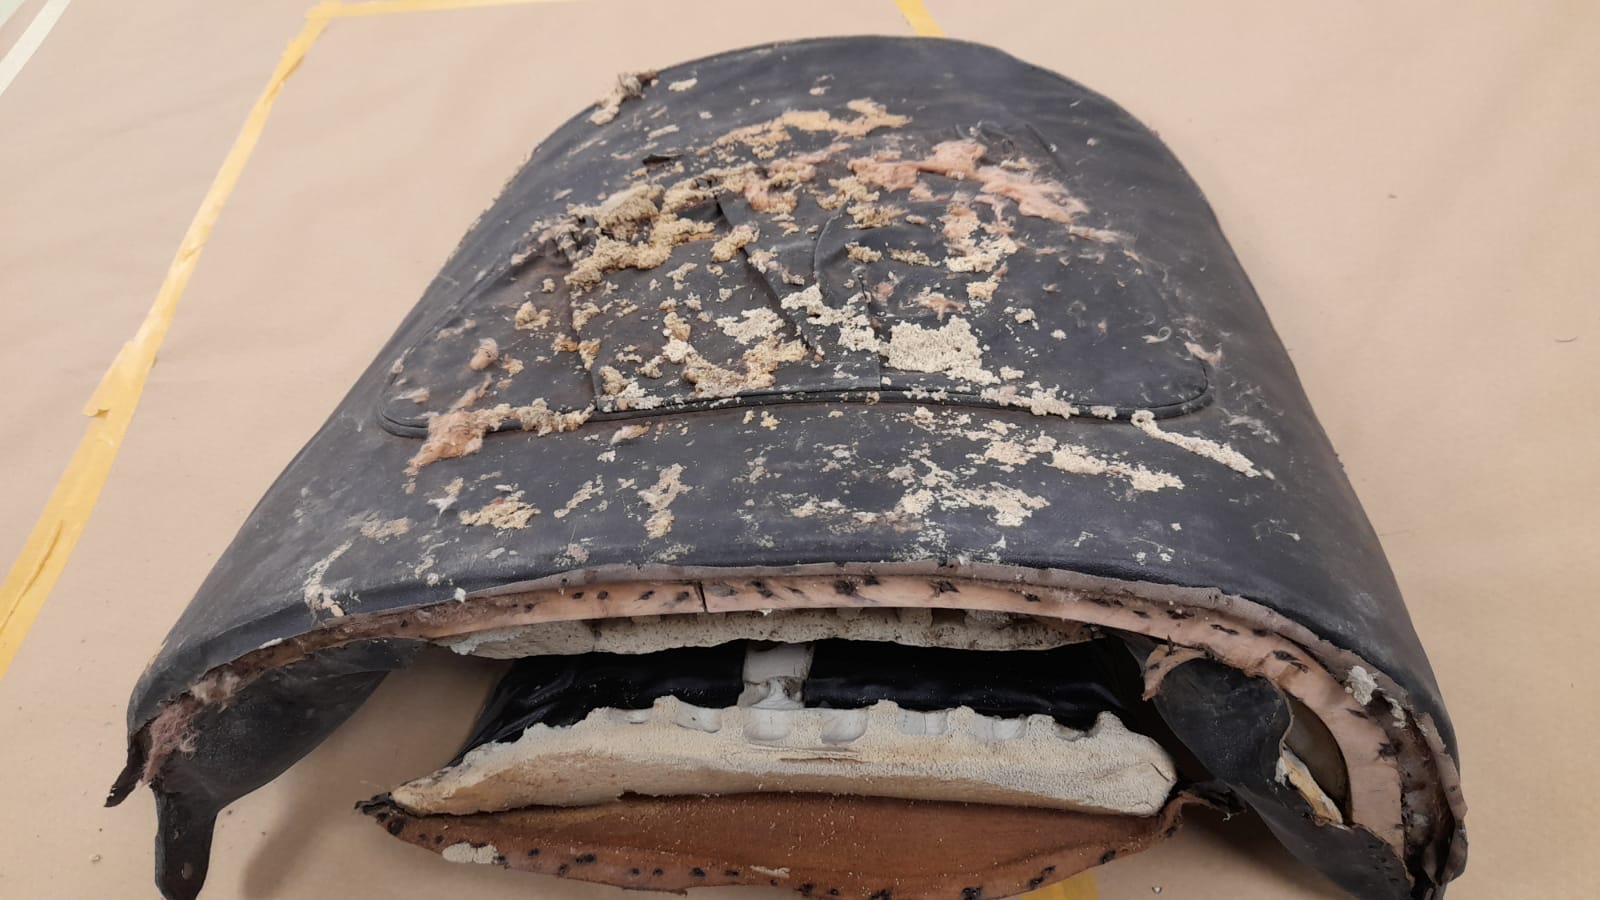
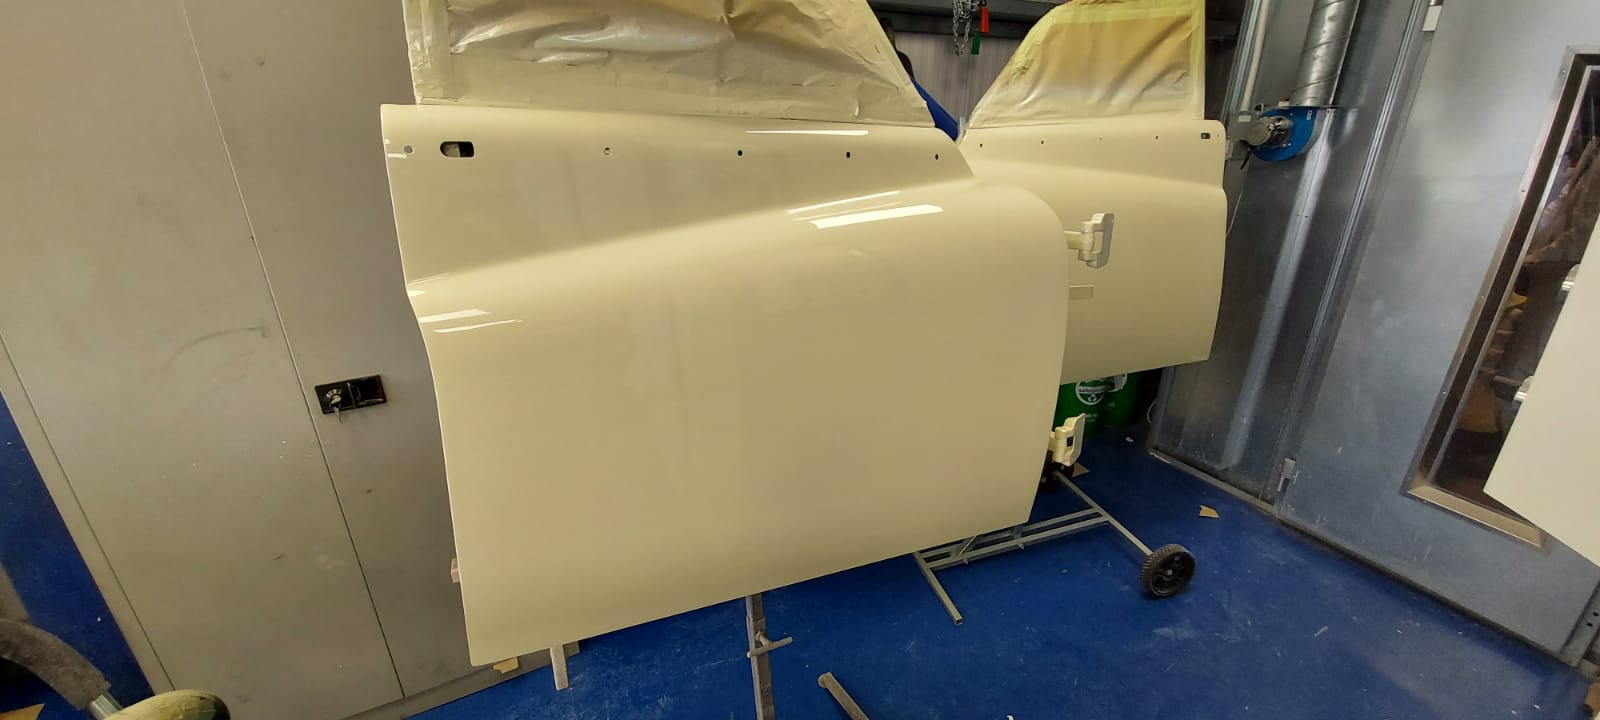
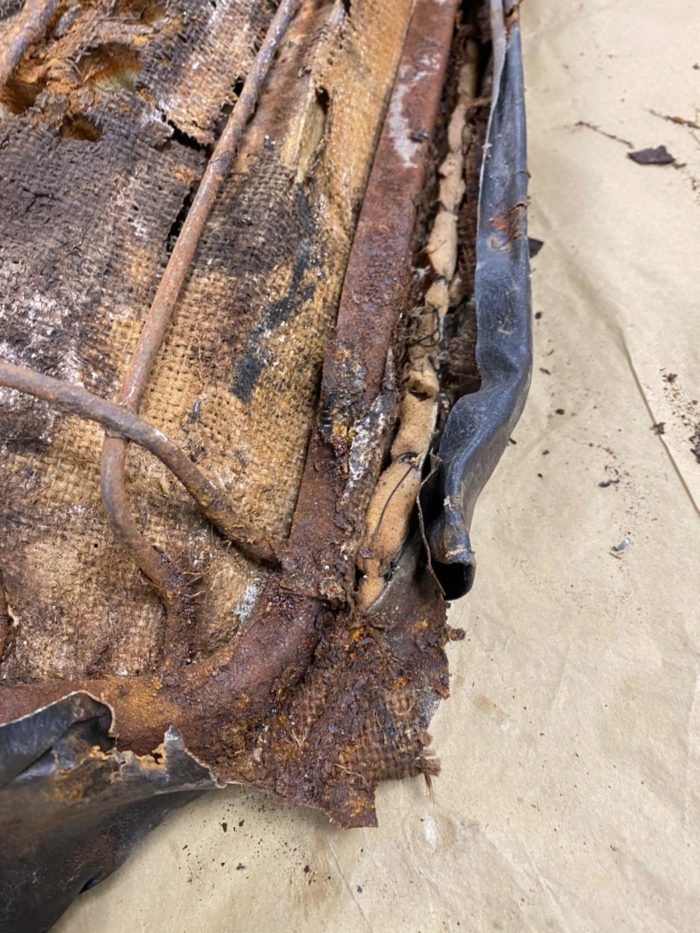
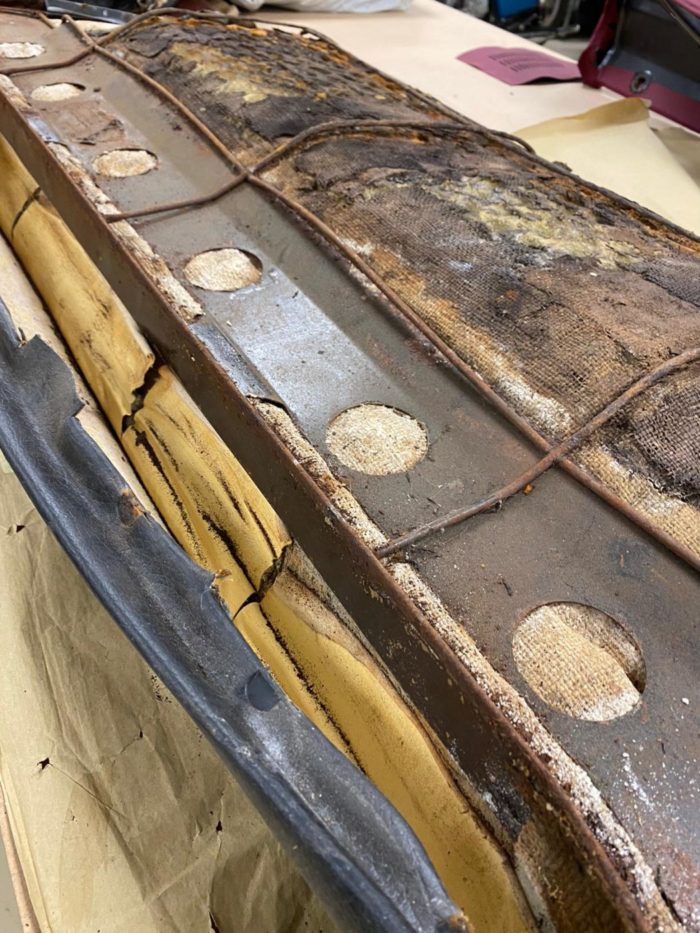
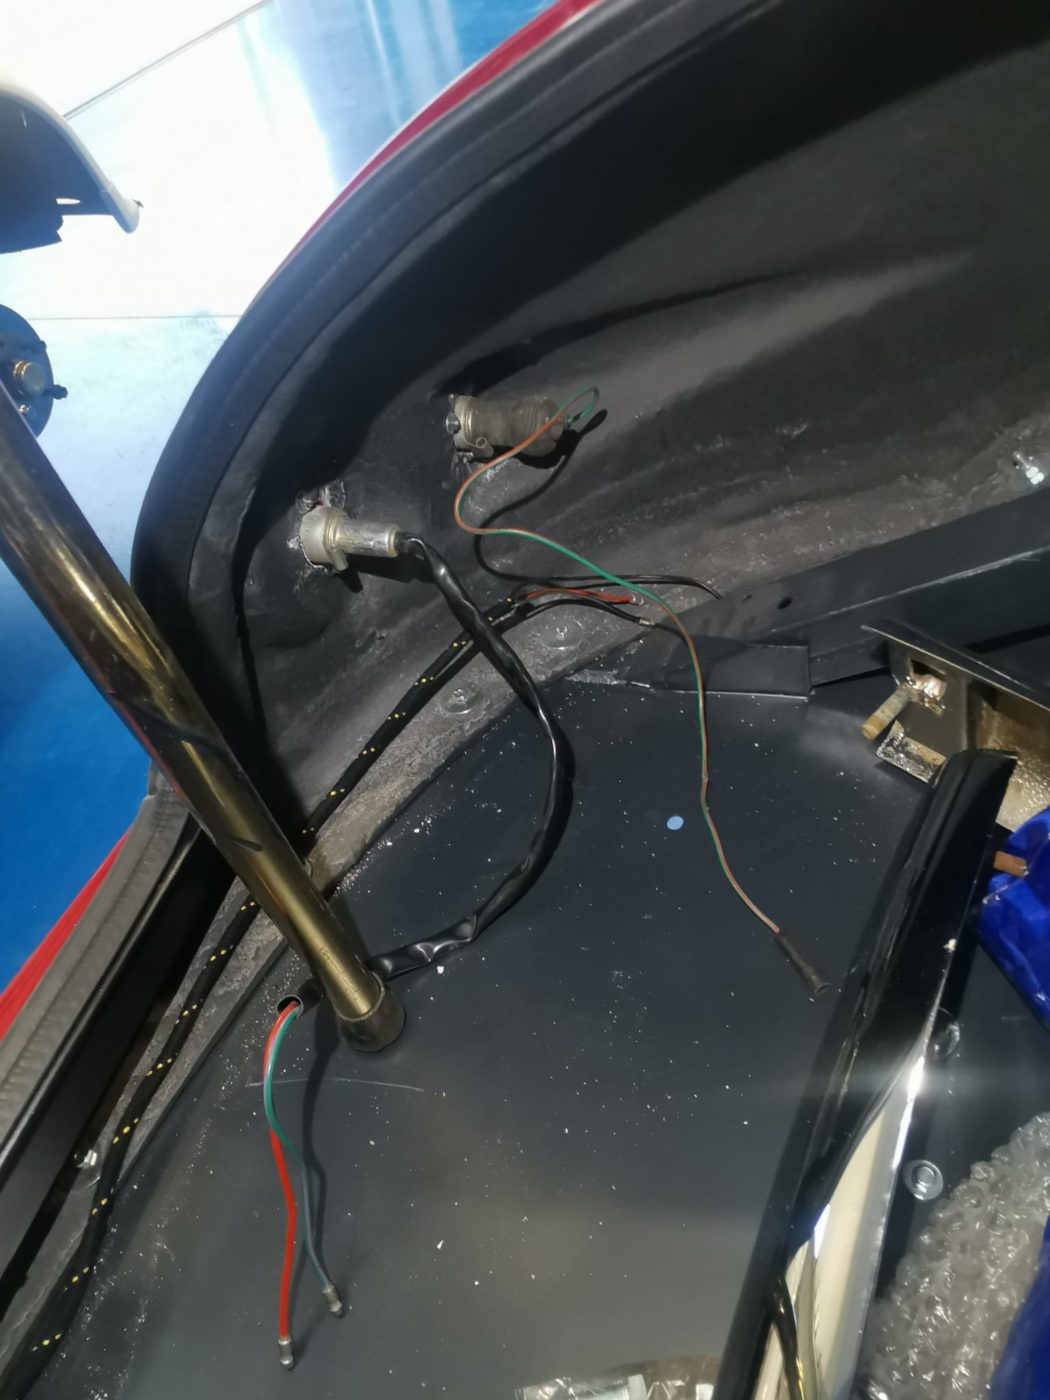
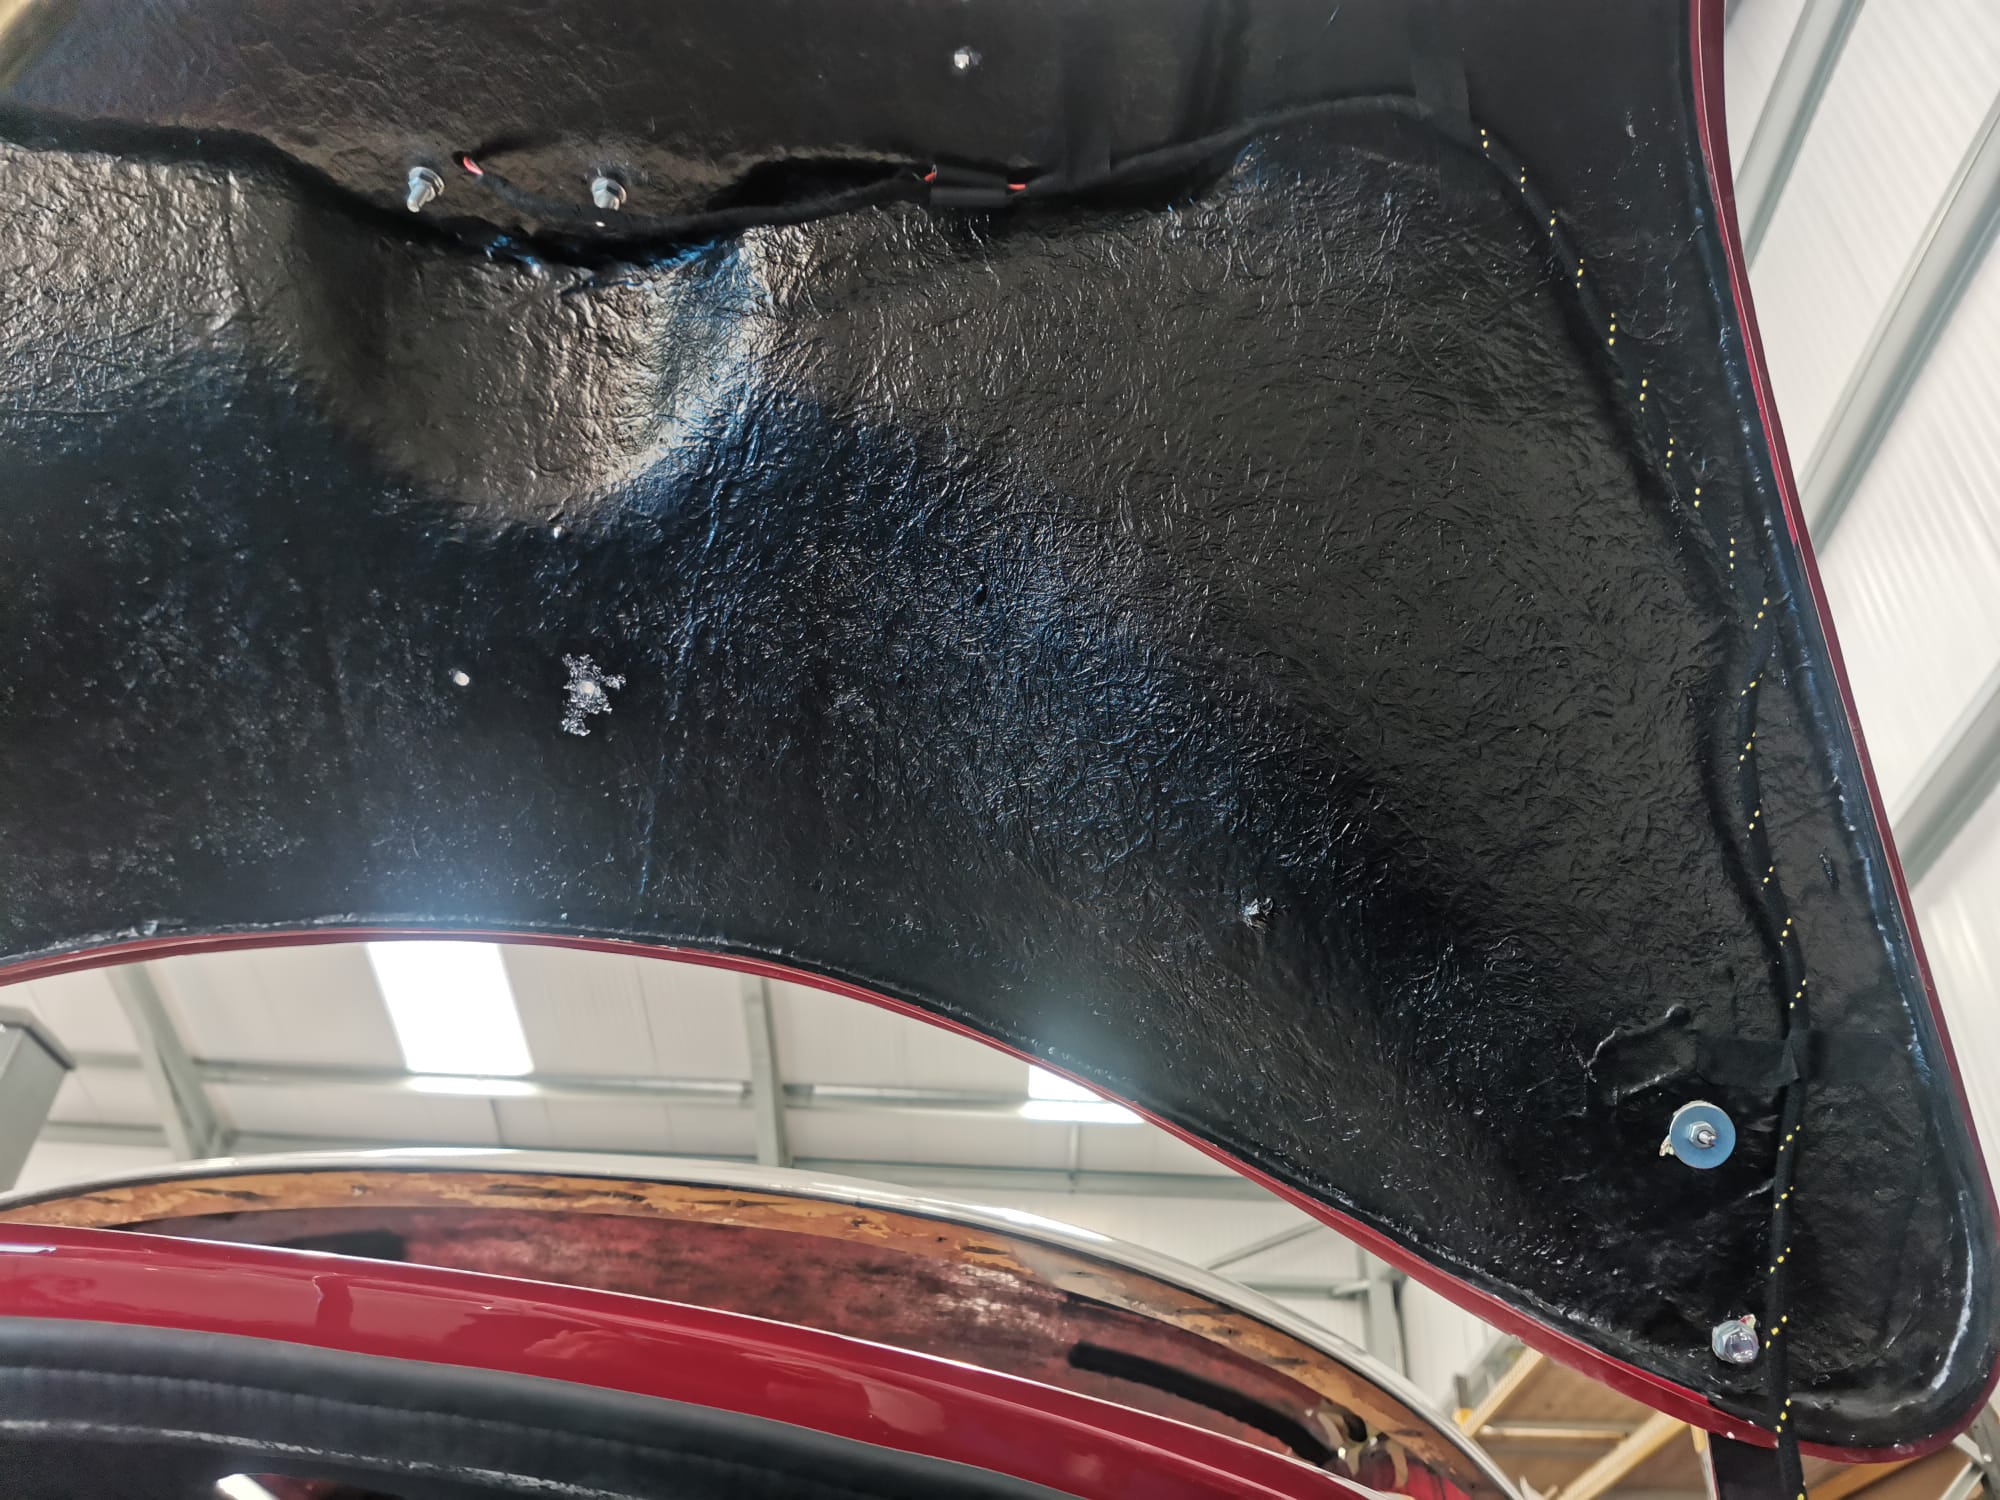
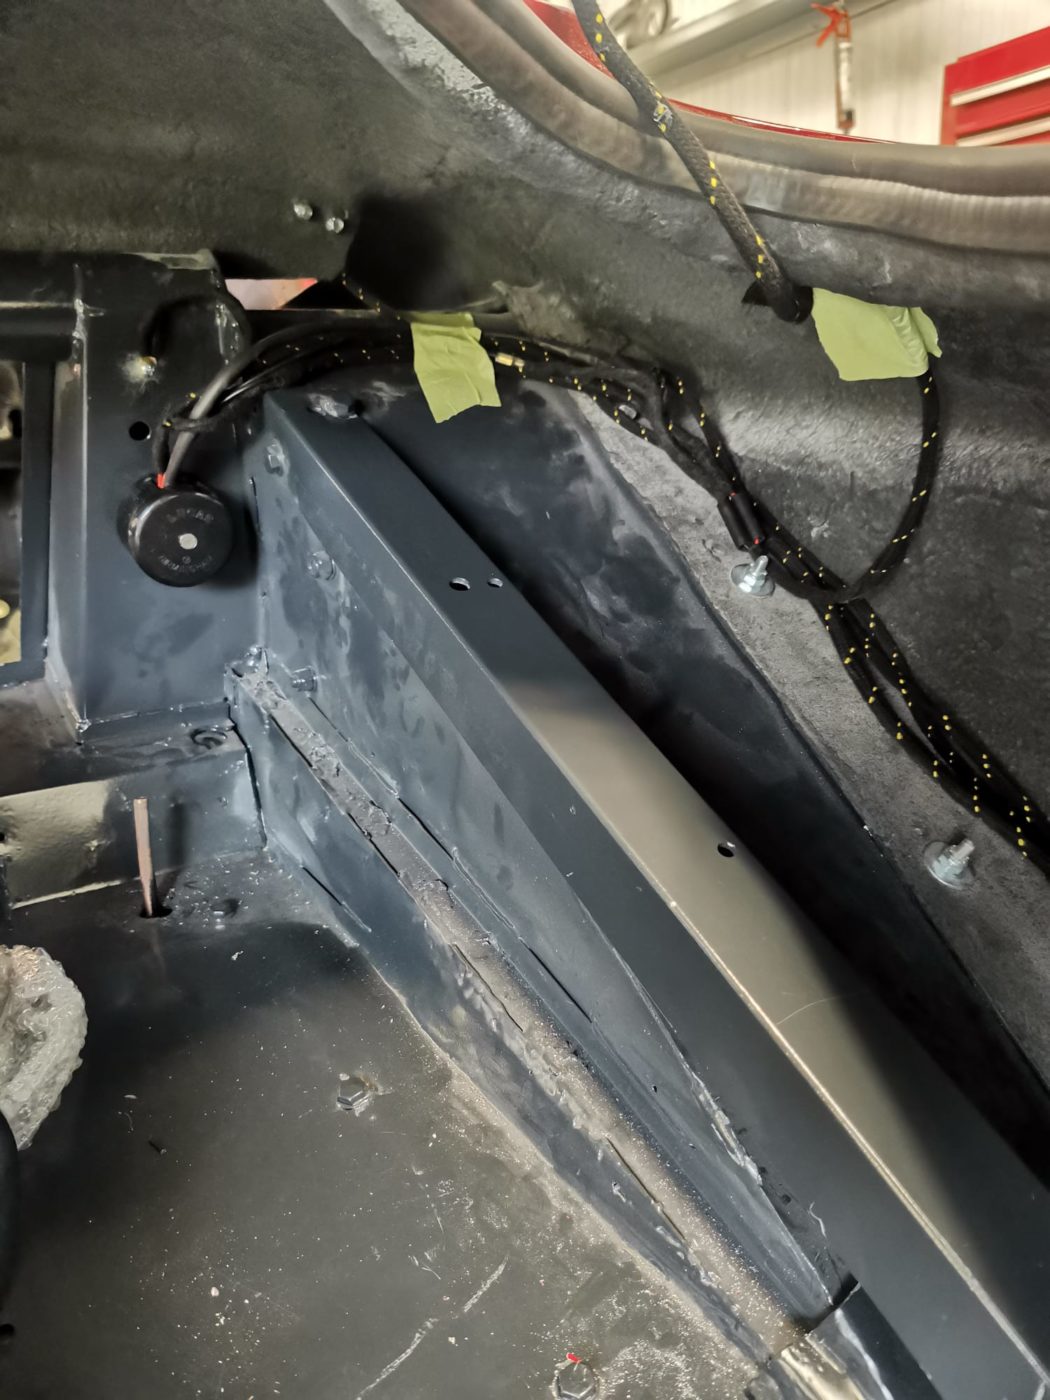
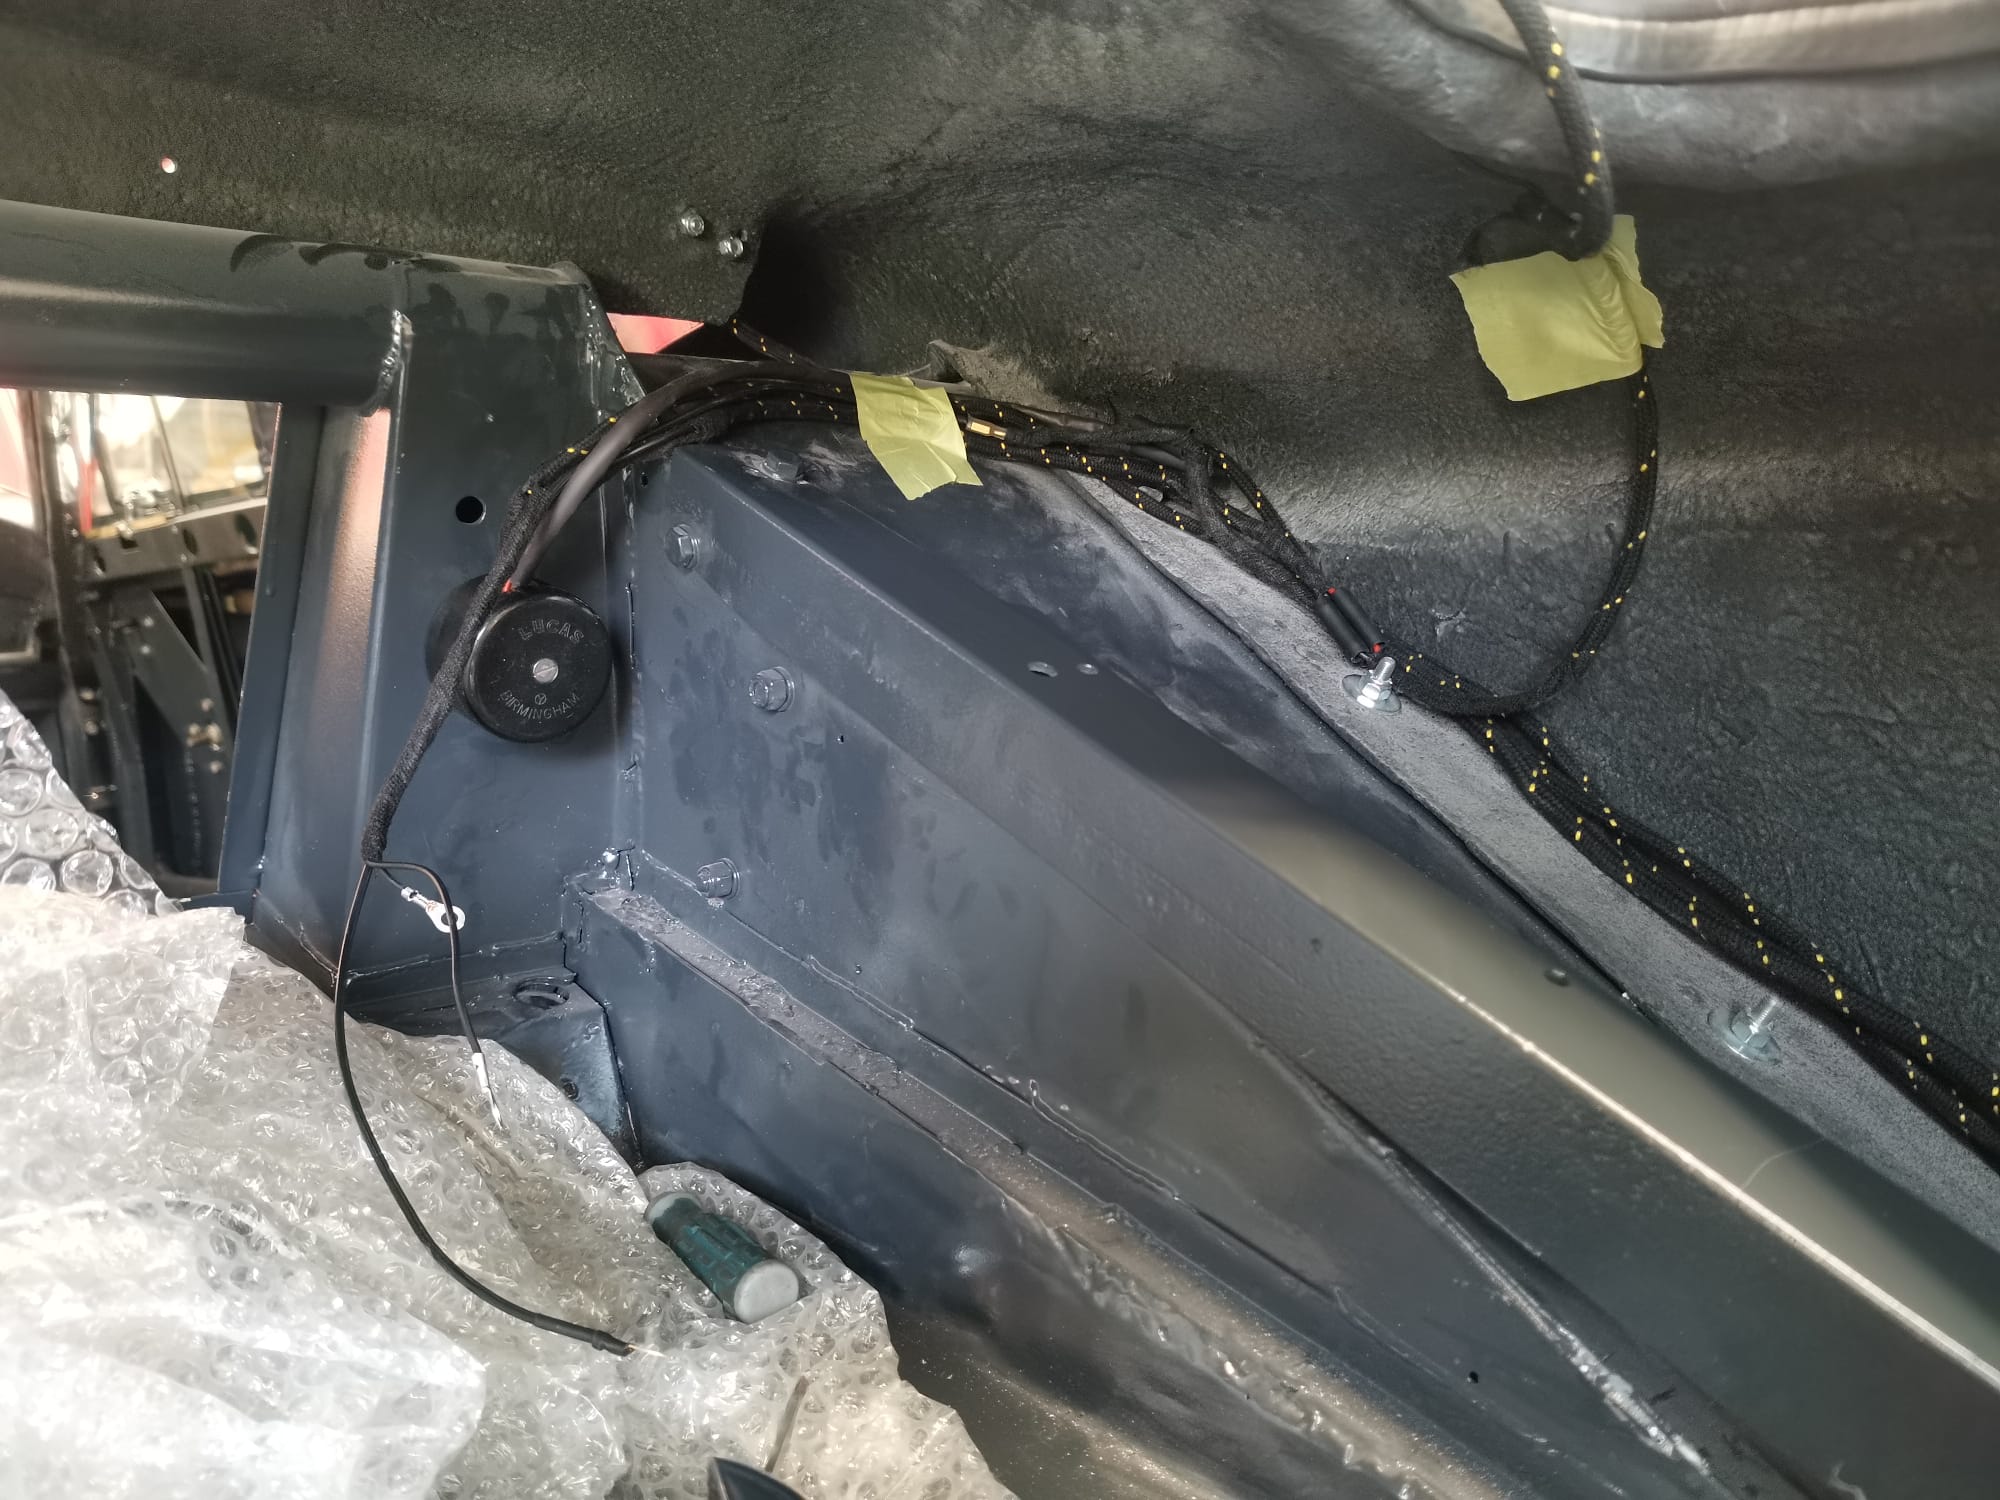
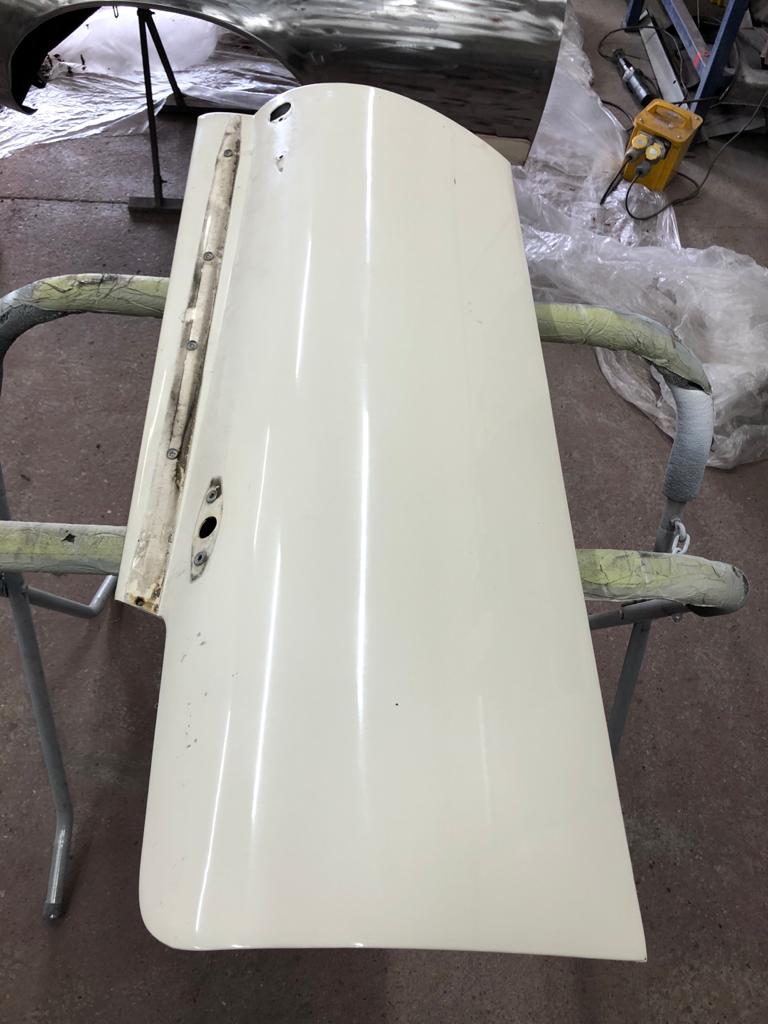
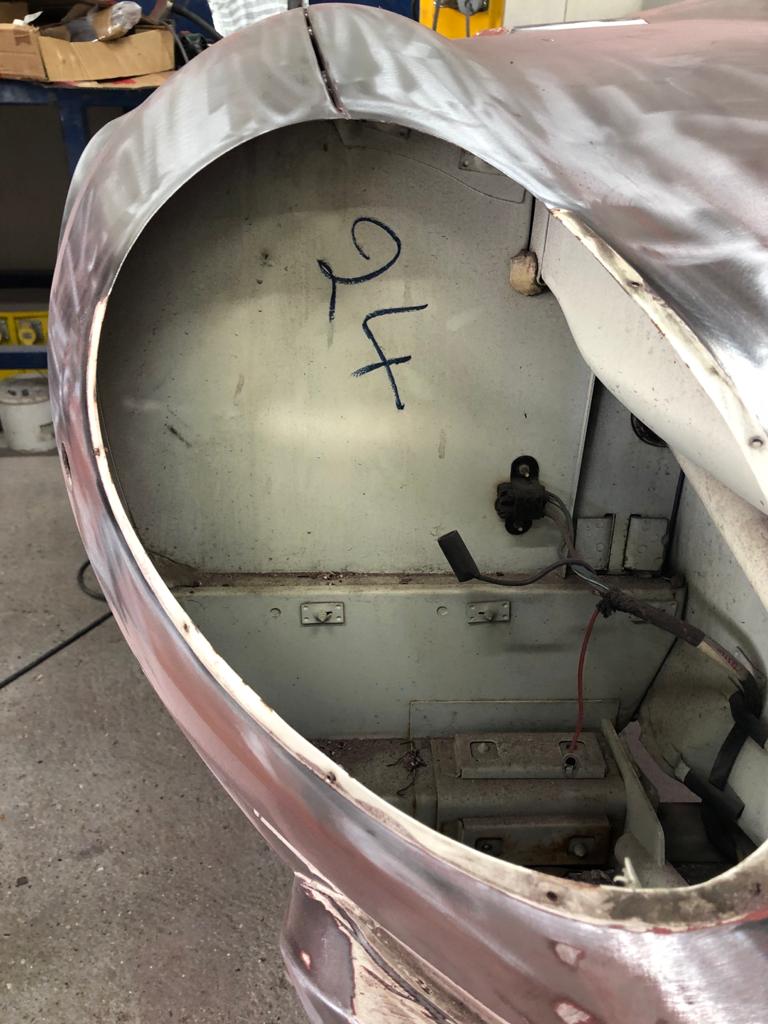
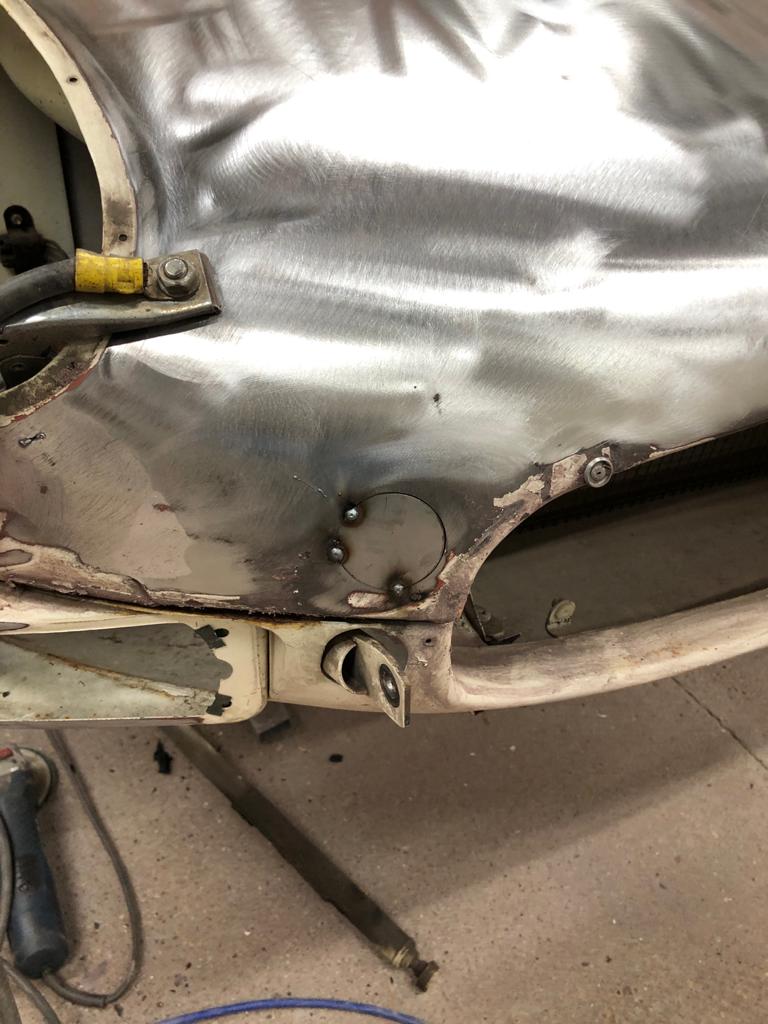
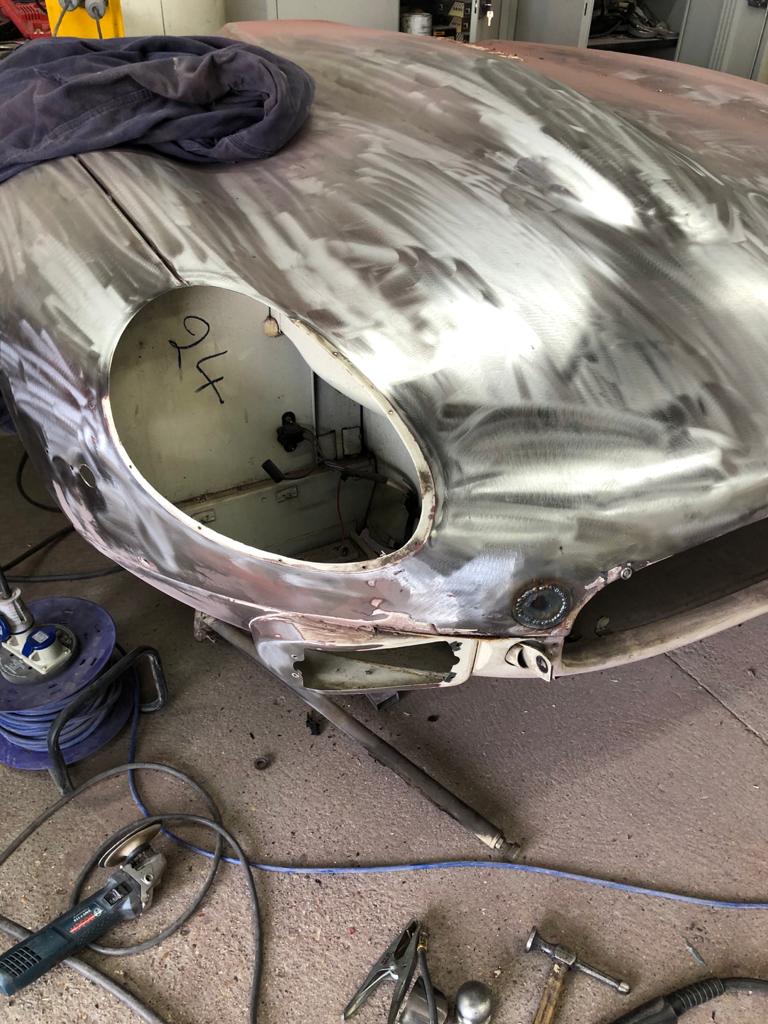
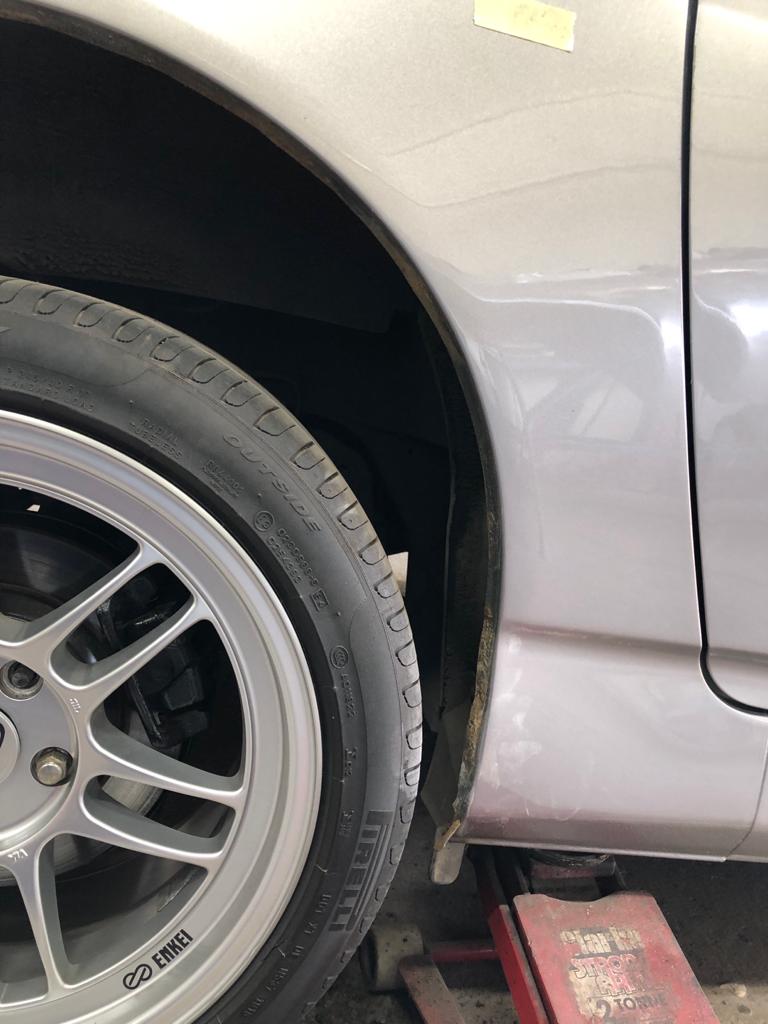
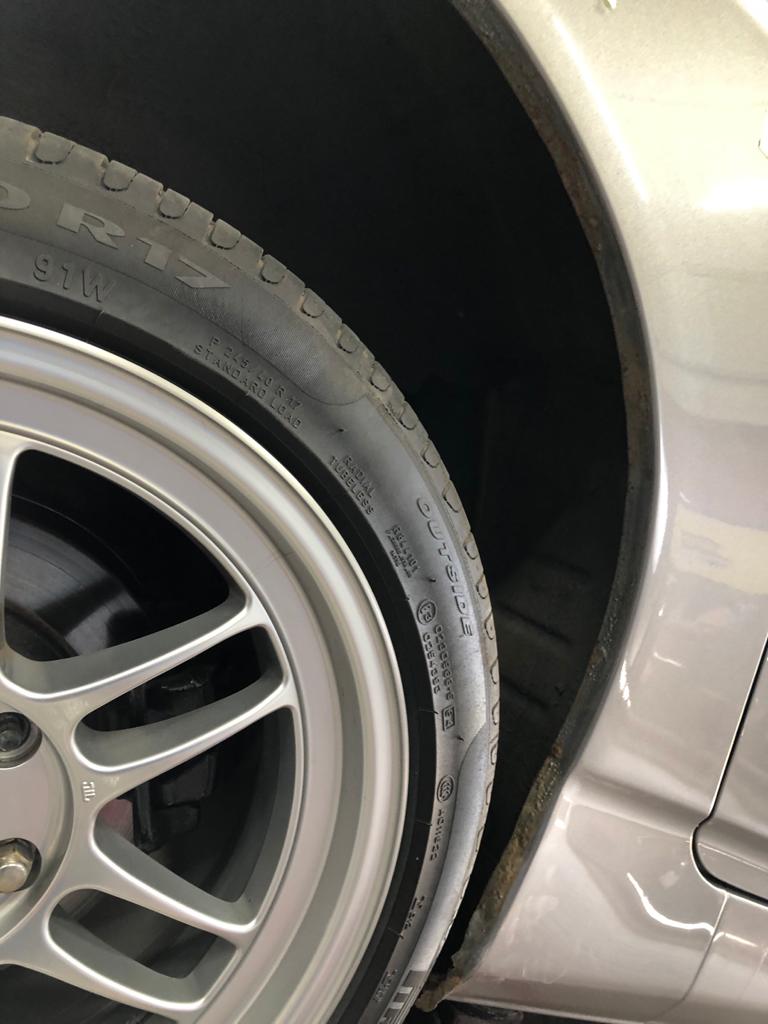
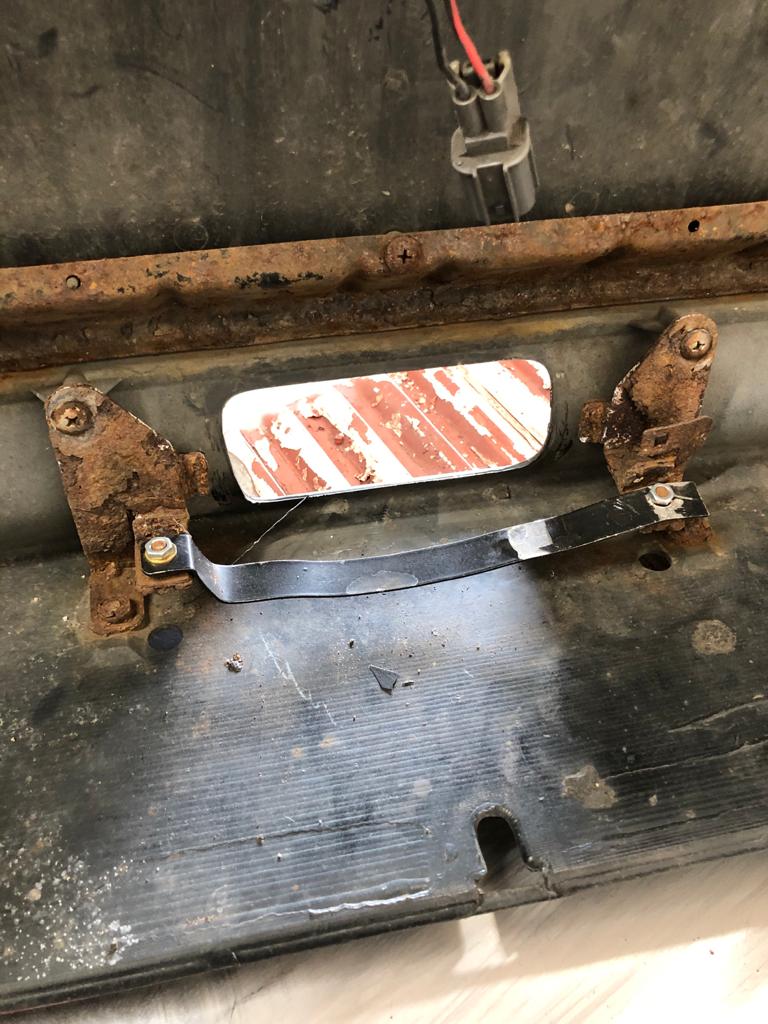
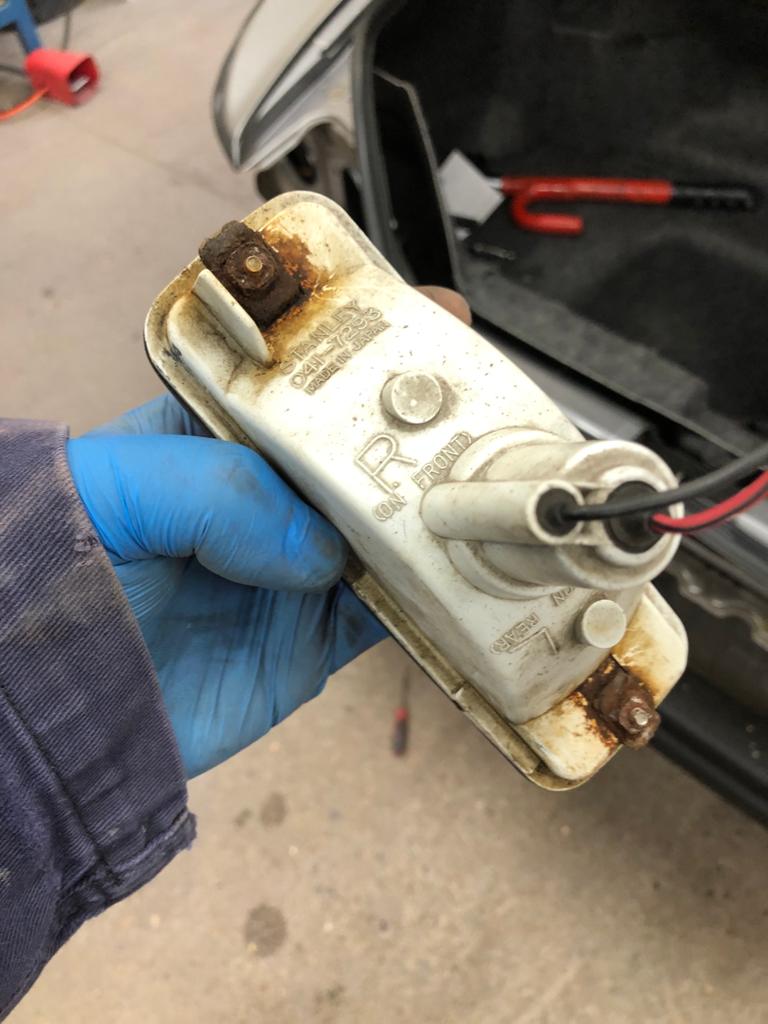
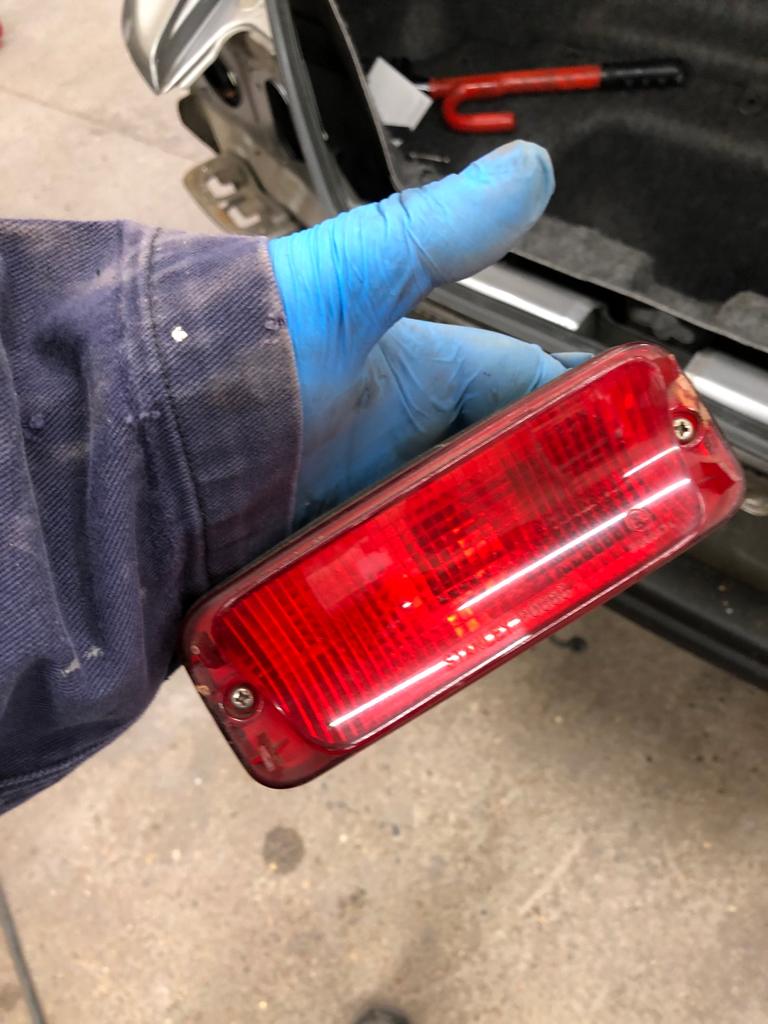
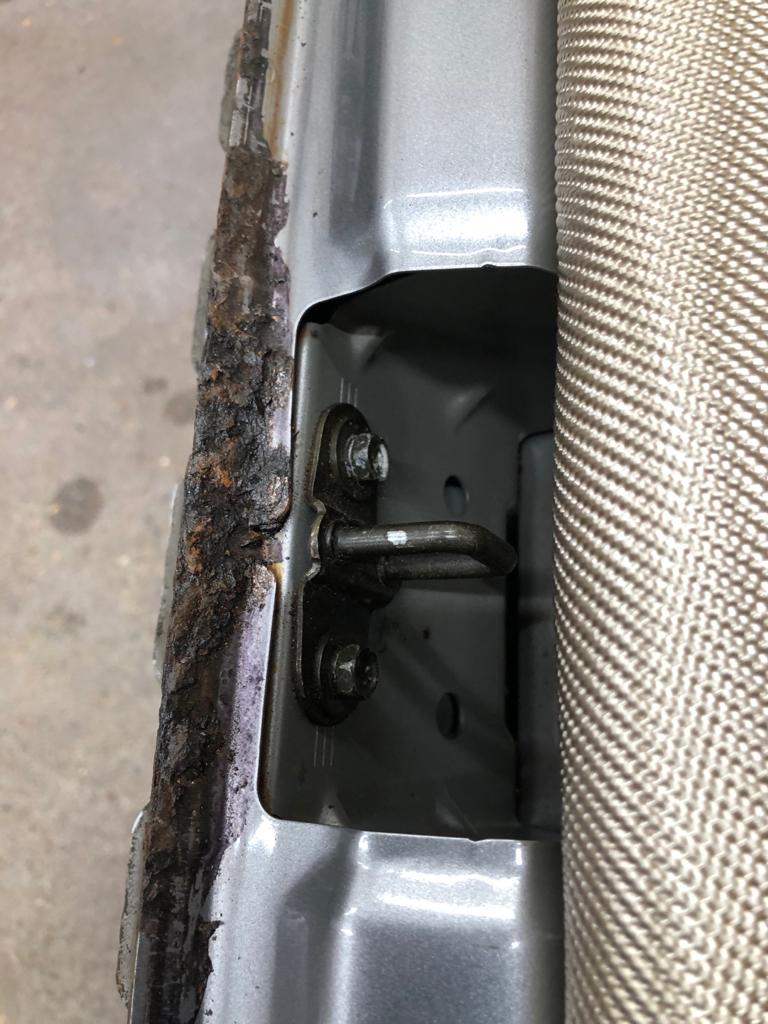
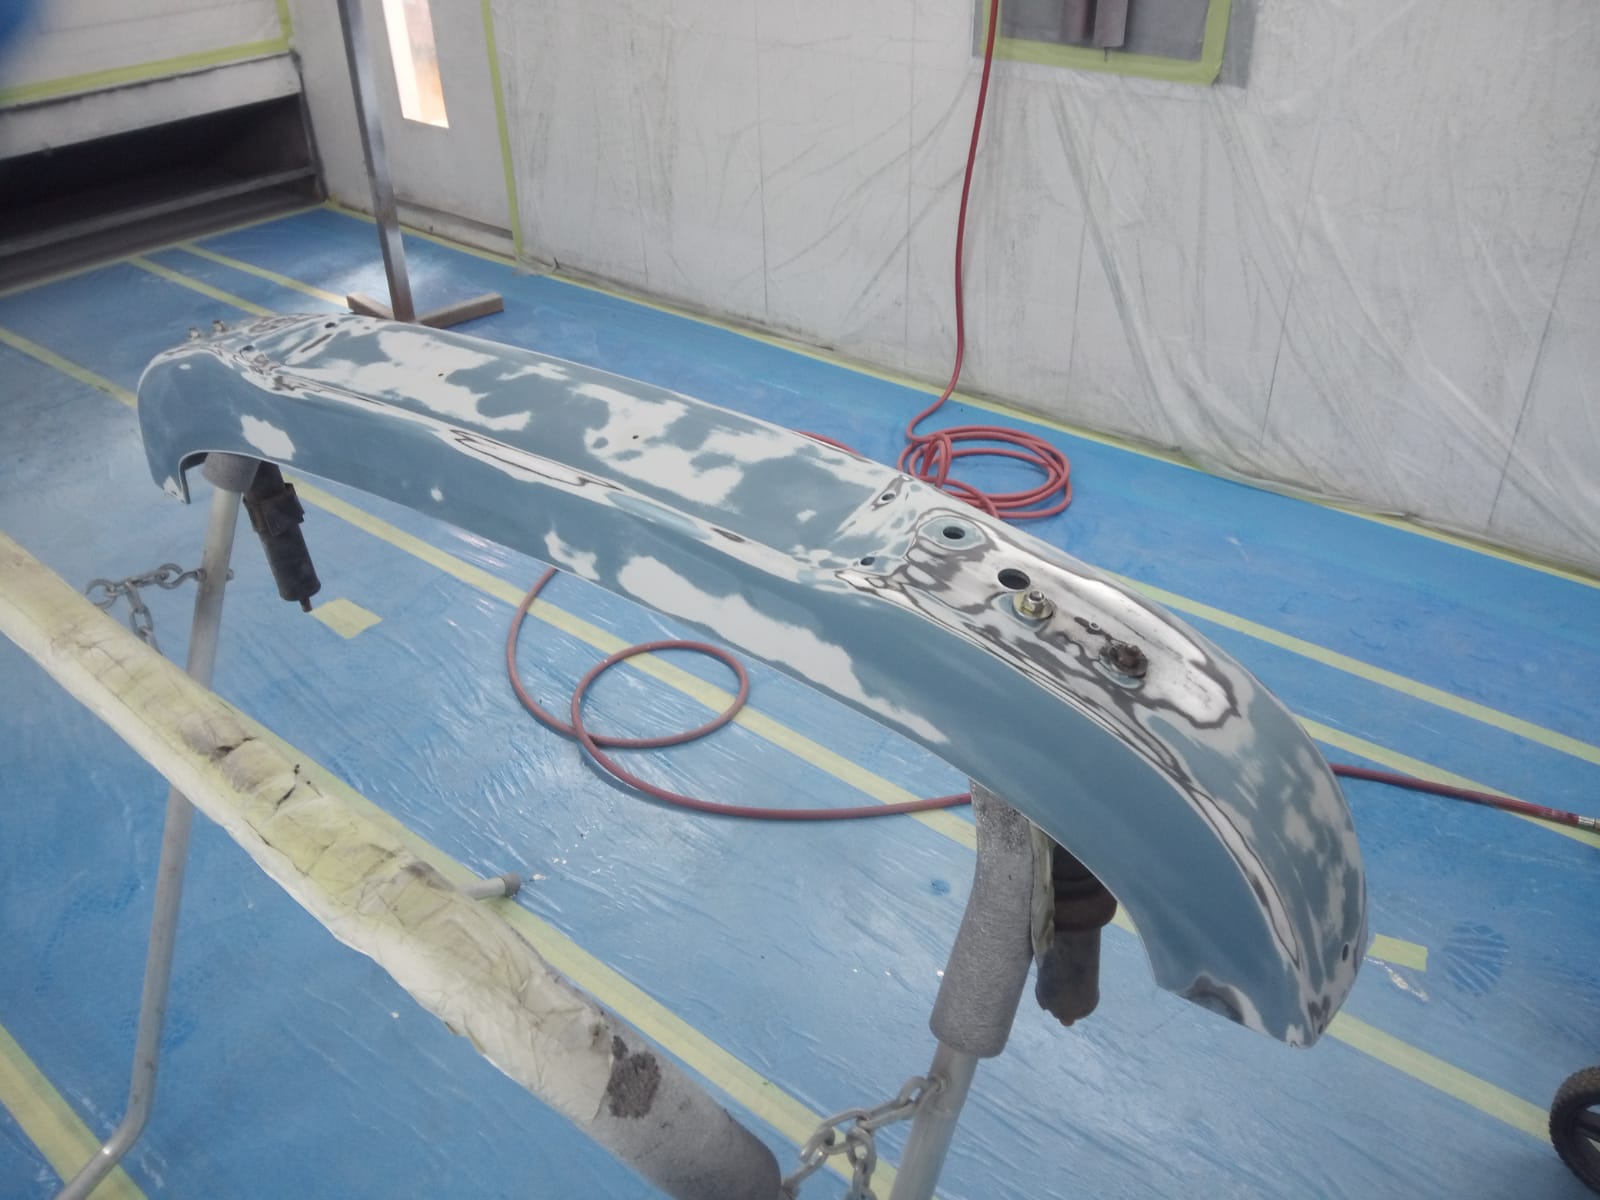
Our Honda S2000 is a modern classic from the turn of the millennia. Following on from our last update, James has been focusing on rebuilding the wheel arch that has been lost to corrosion and rust. James has also rebuilt and painted the boot lip which is hidden beneath trim as well as welding and spot welding areas that have suffered due to rust.
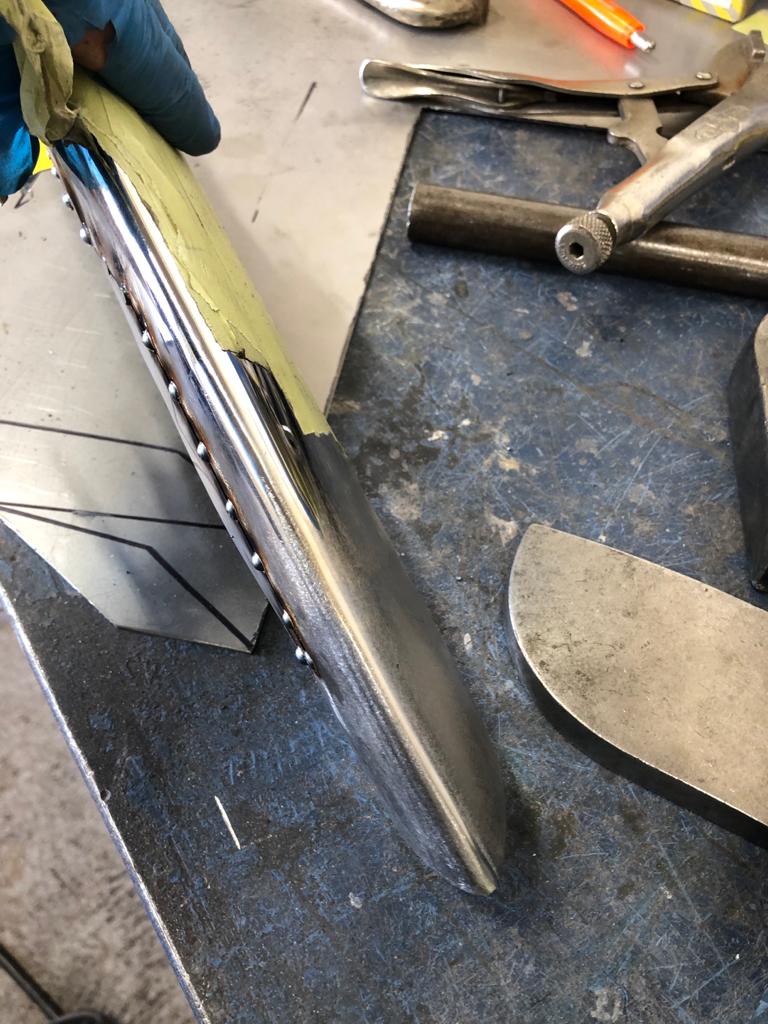
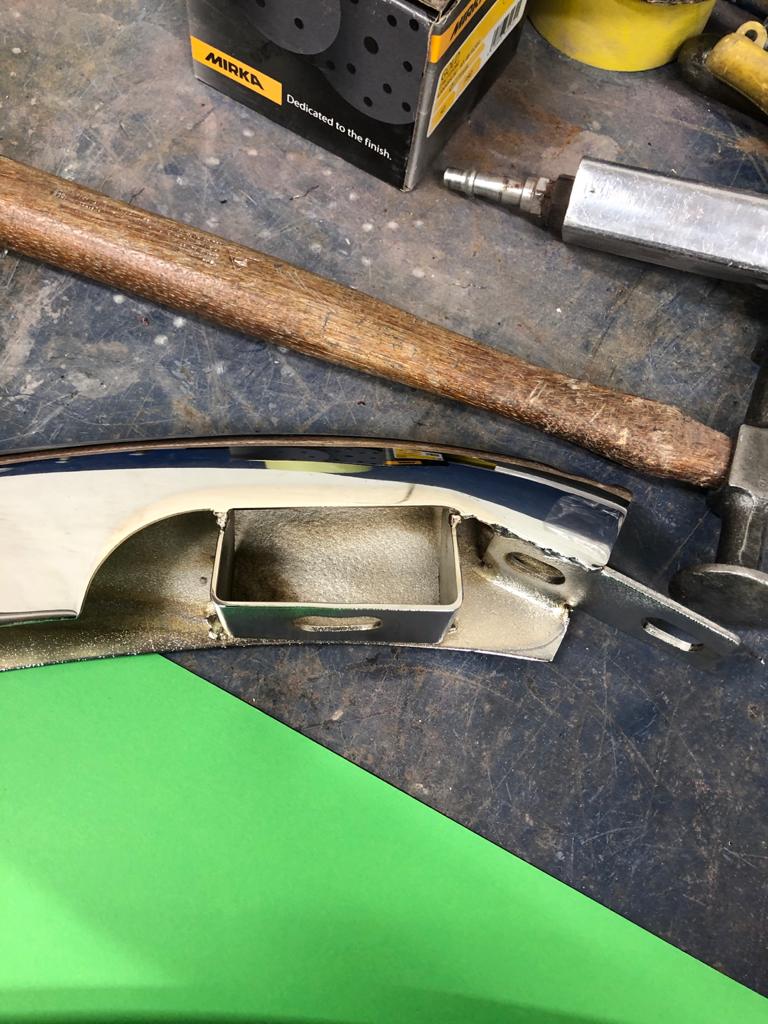
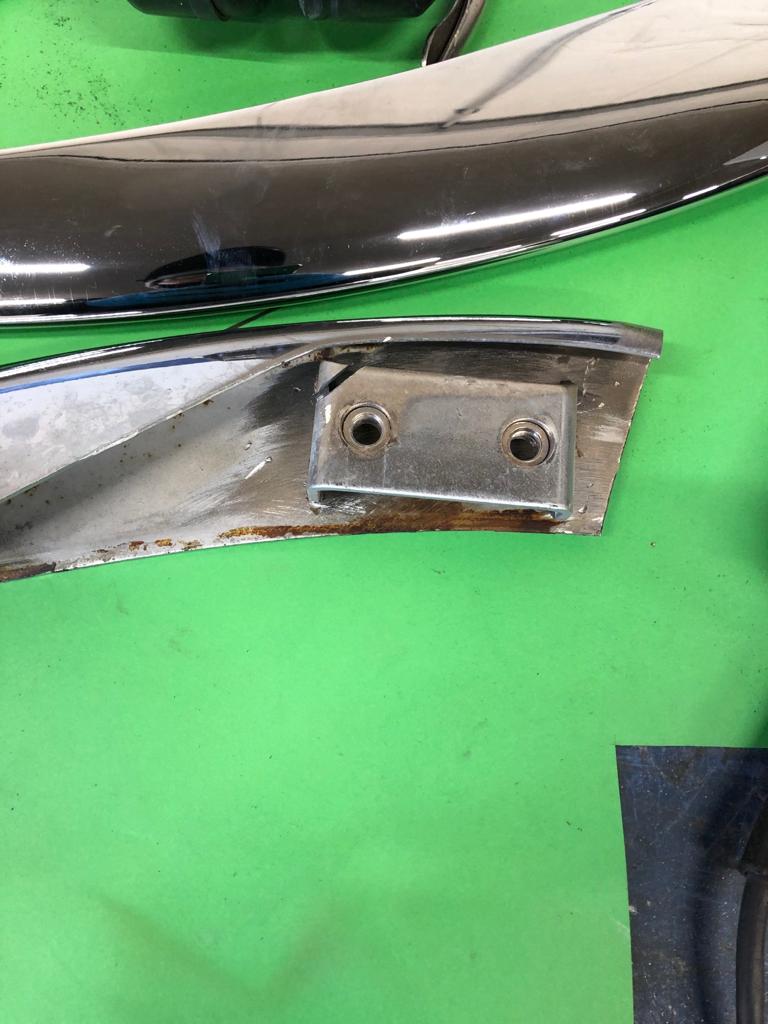
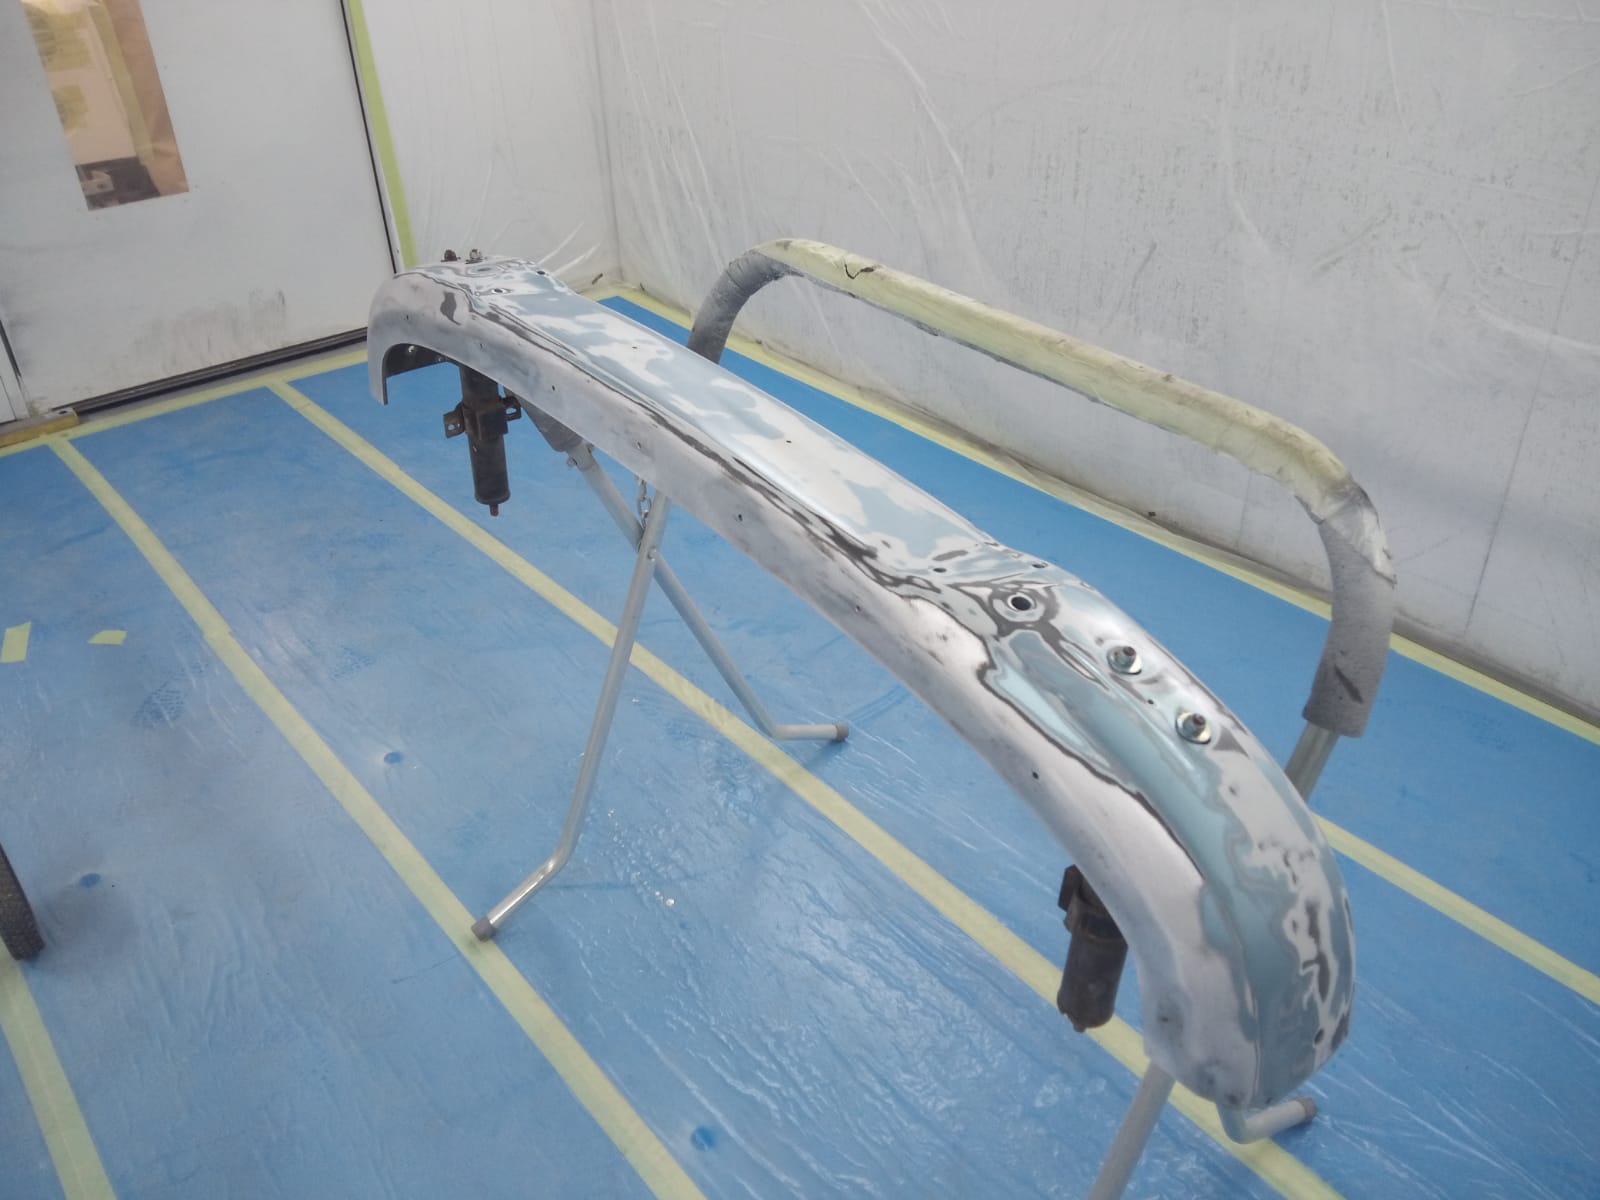
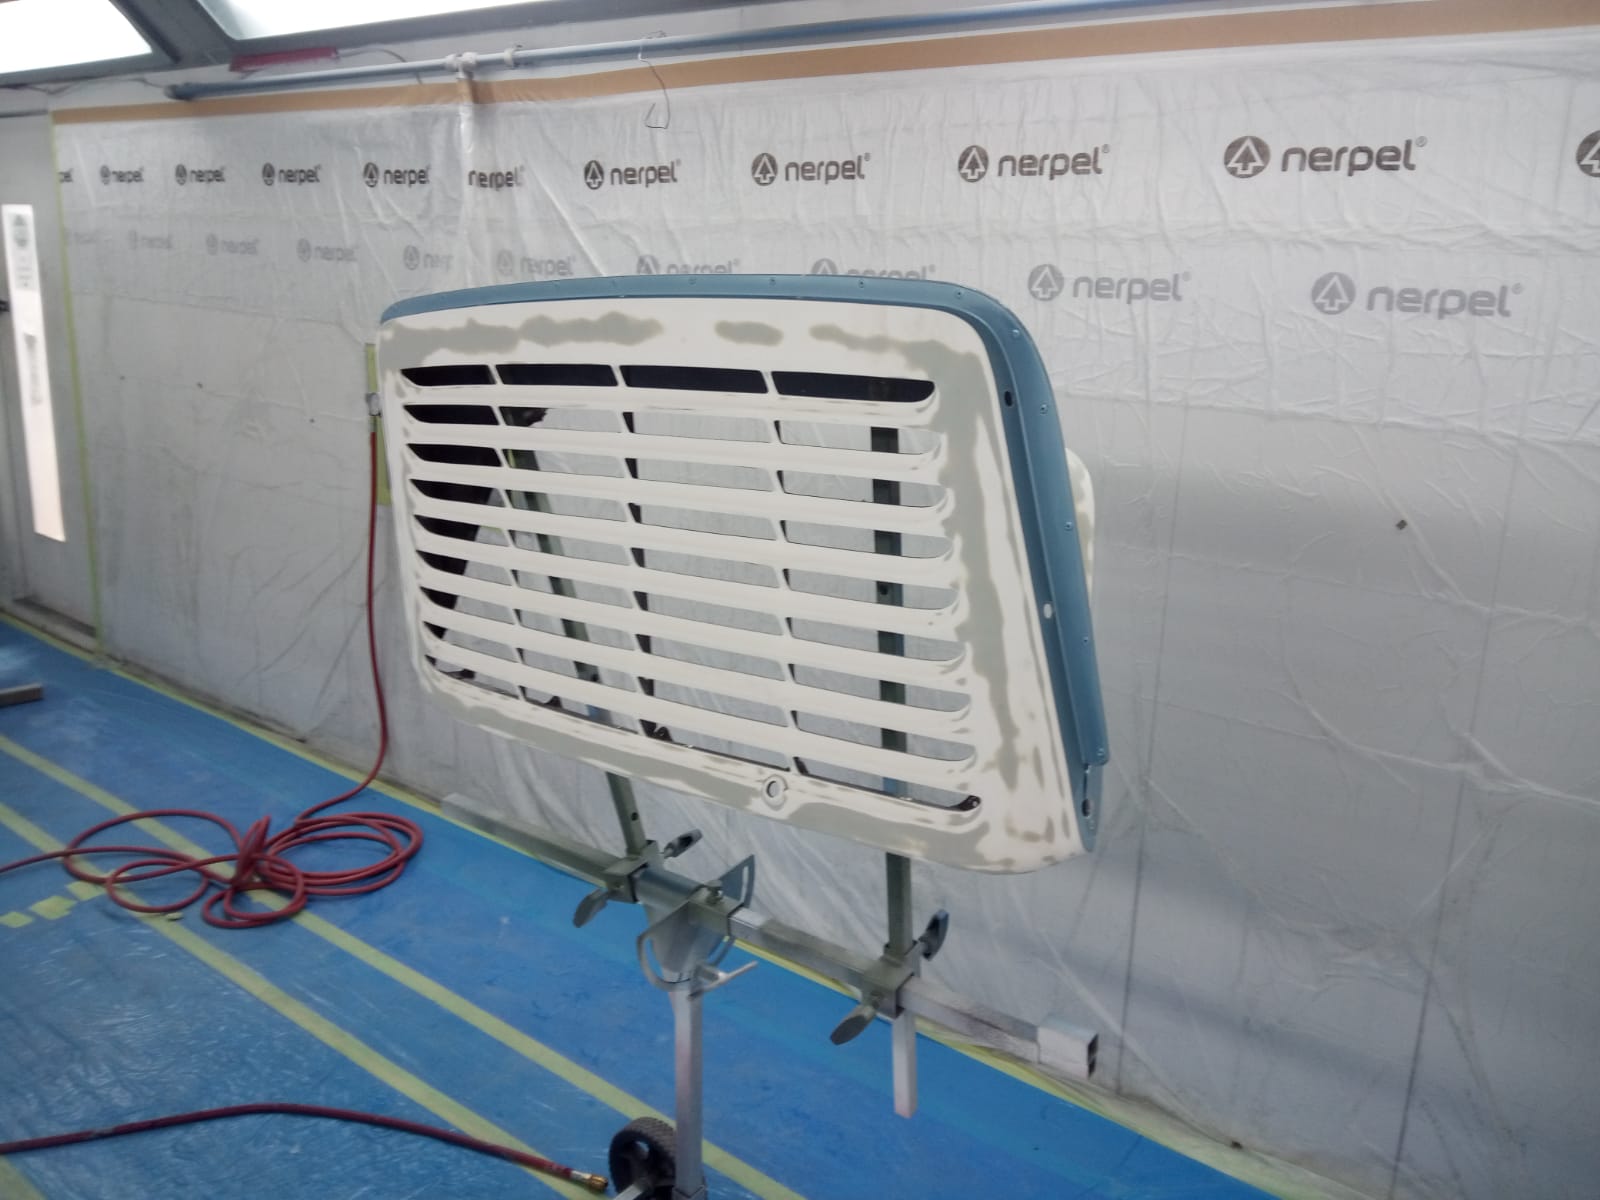
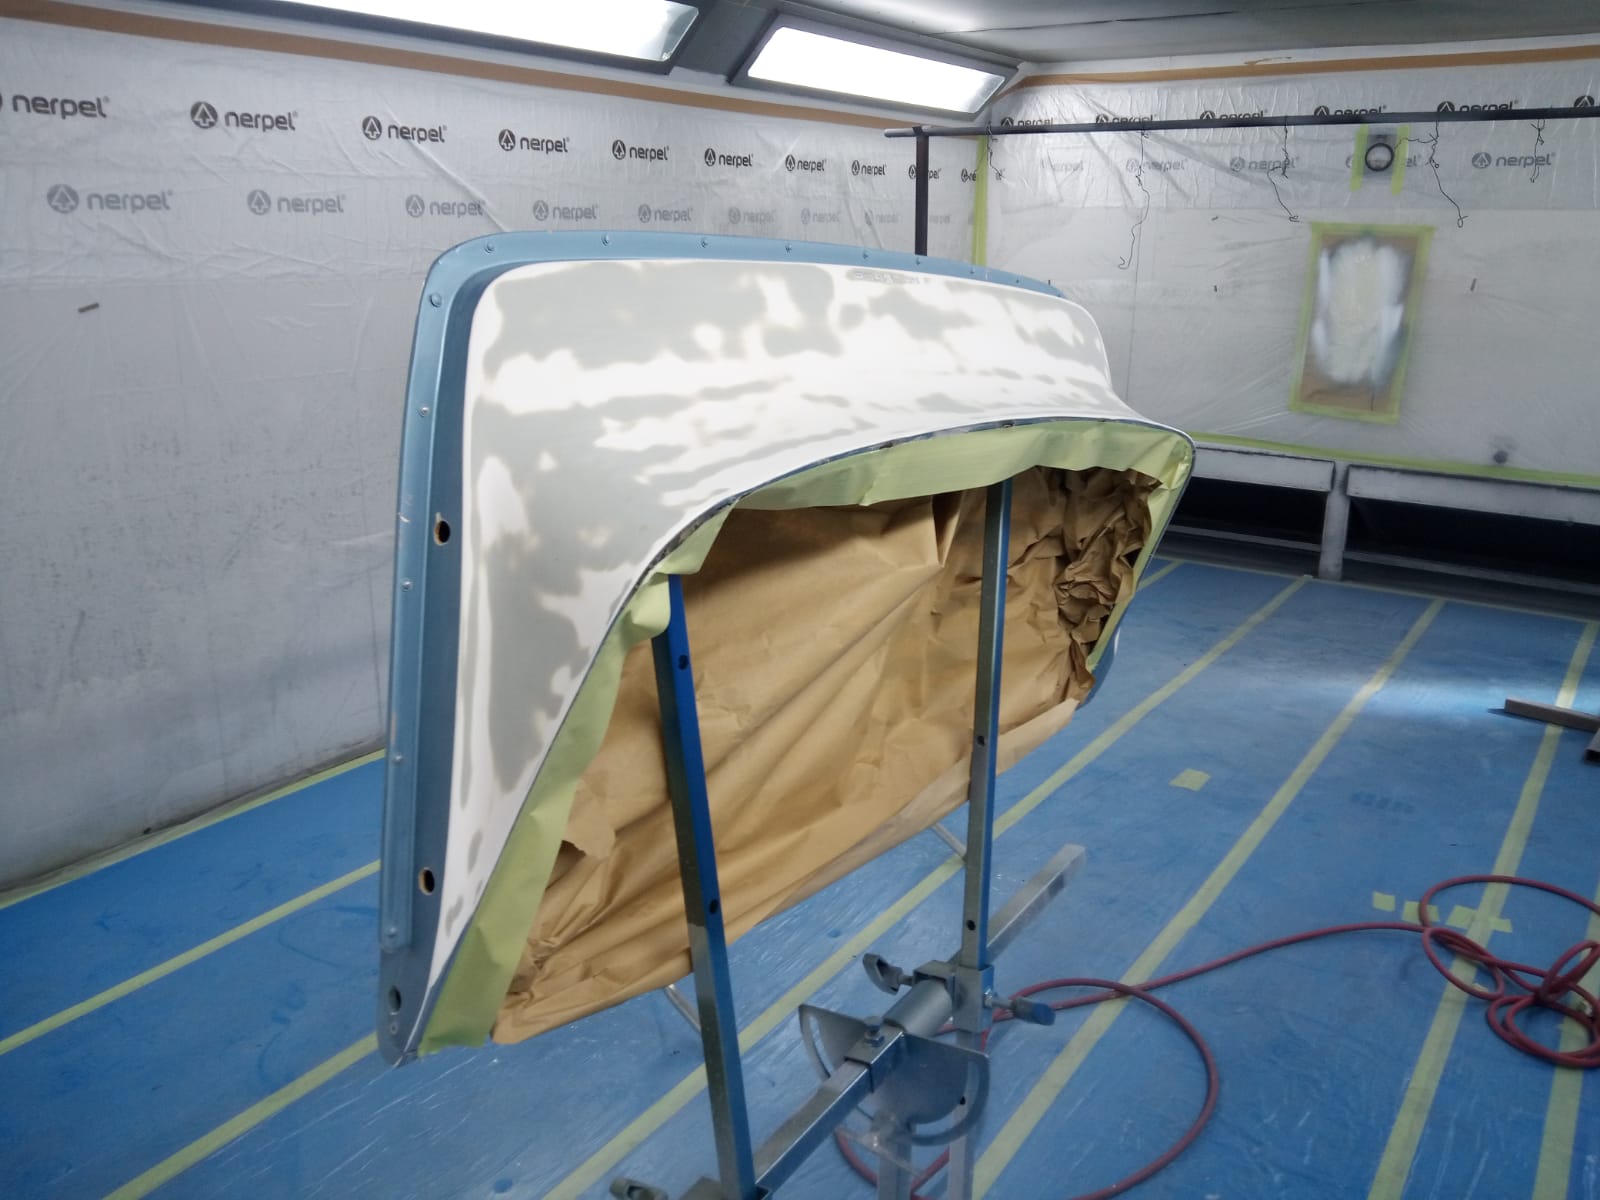
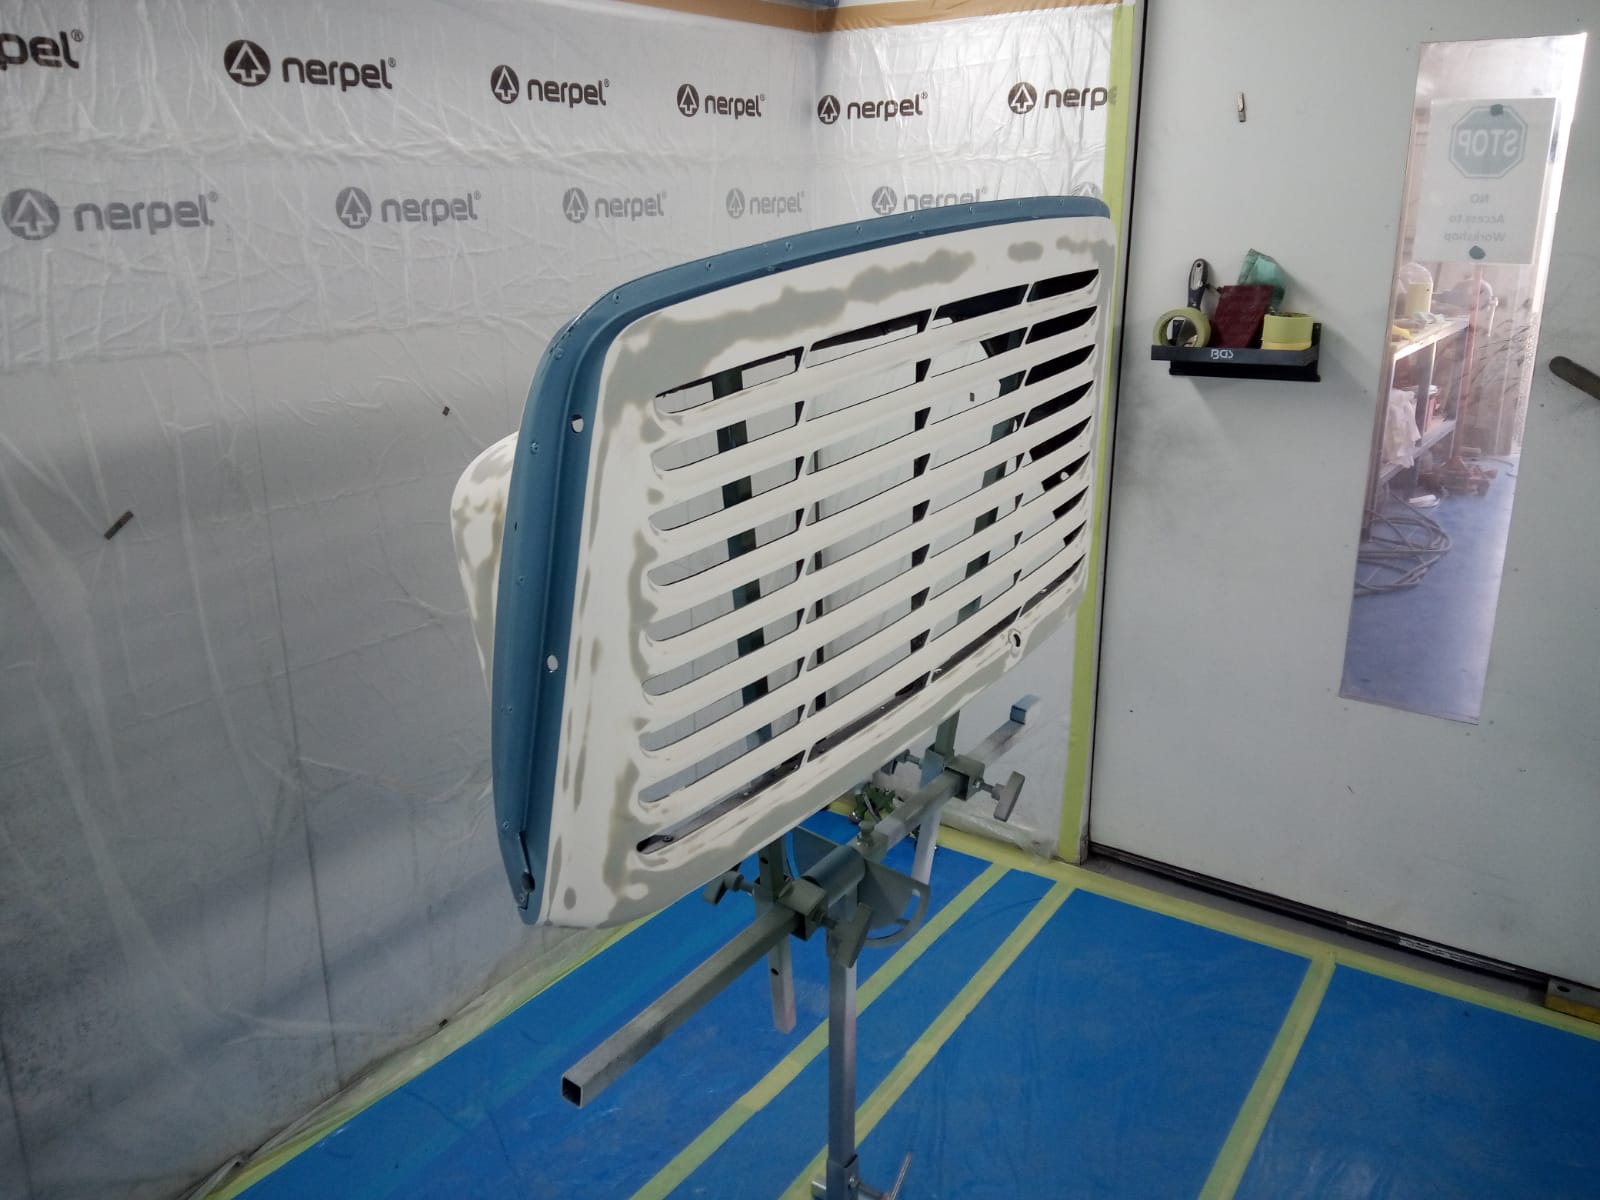
Matt has been repairing the bumper in the paint shop which was showing signs of stress fractures. Its previously been poorly repaired as Matt found excessive filler in it, meaning he had to strip it to bare plastic and apply dolphin glaze to repair it.
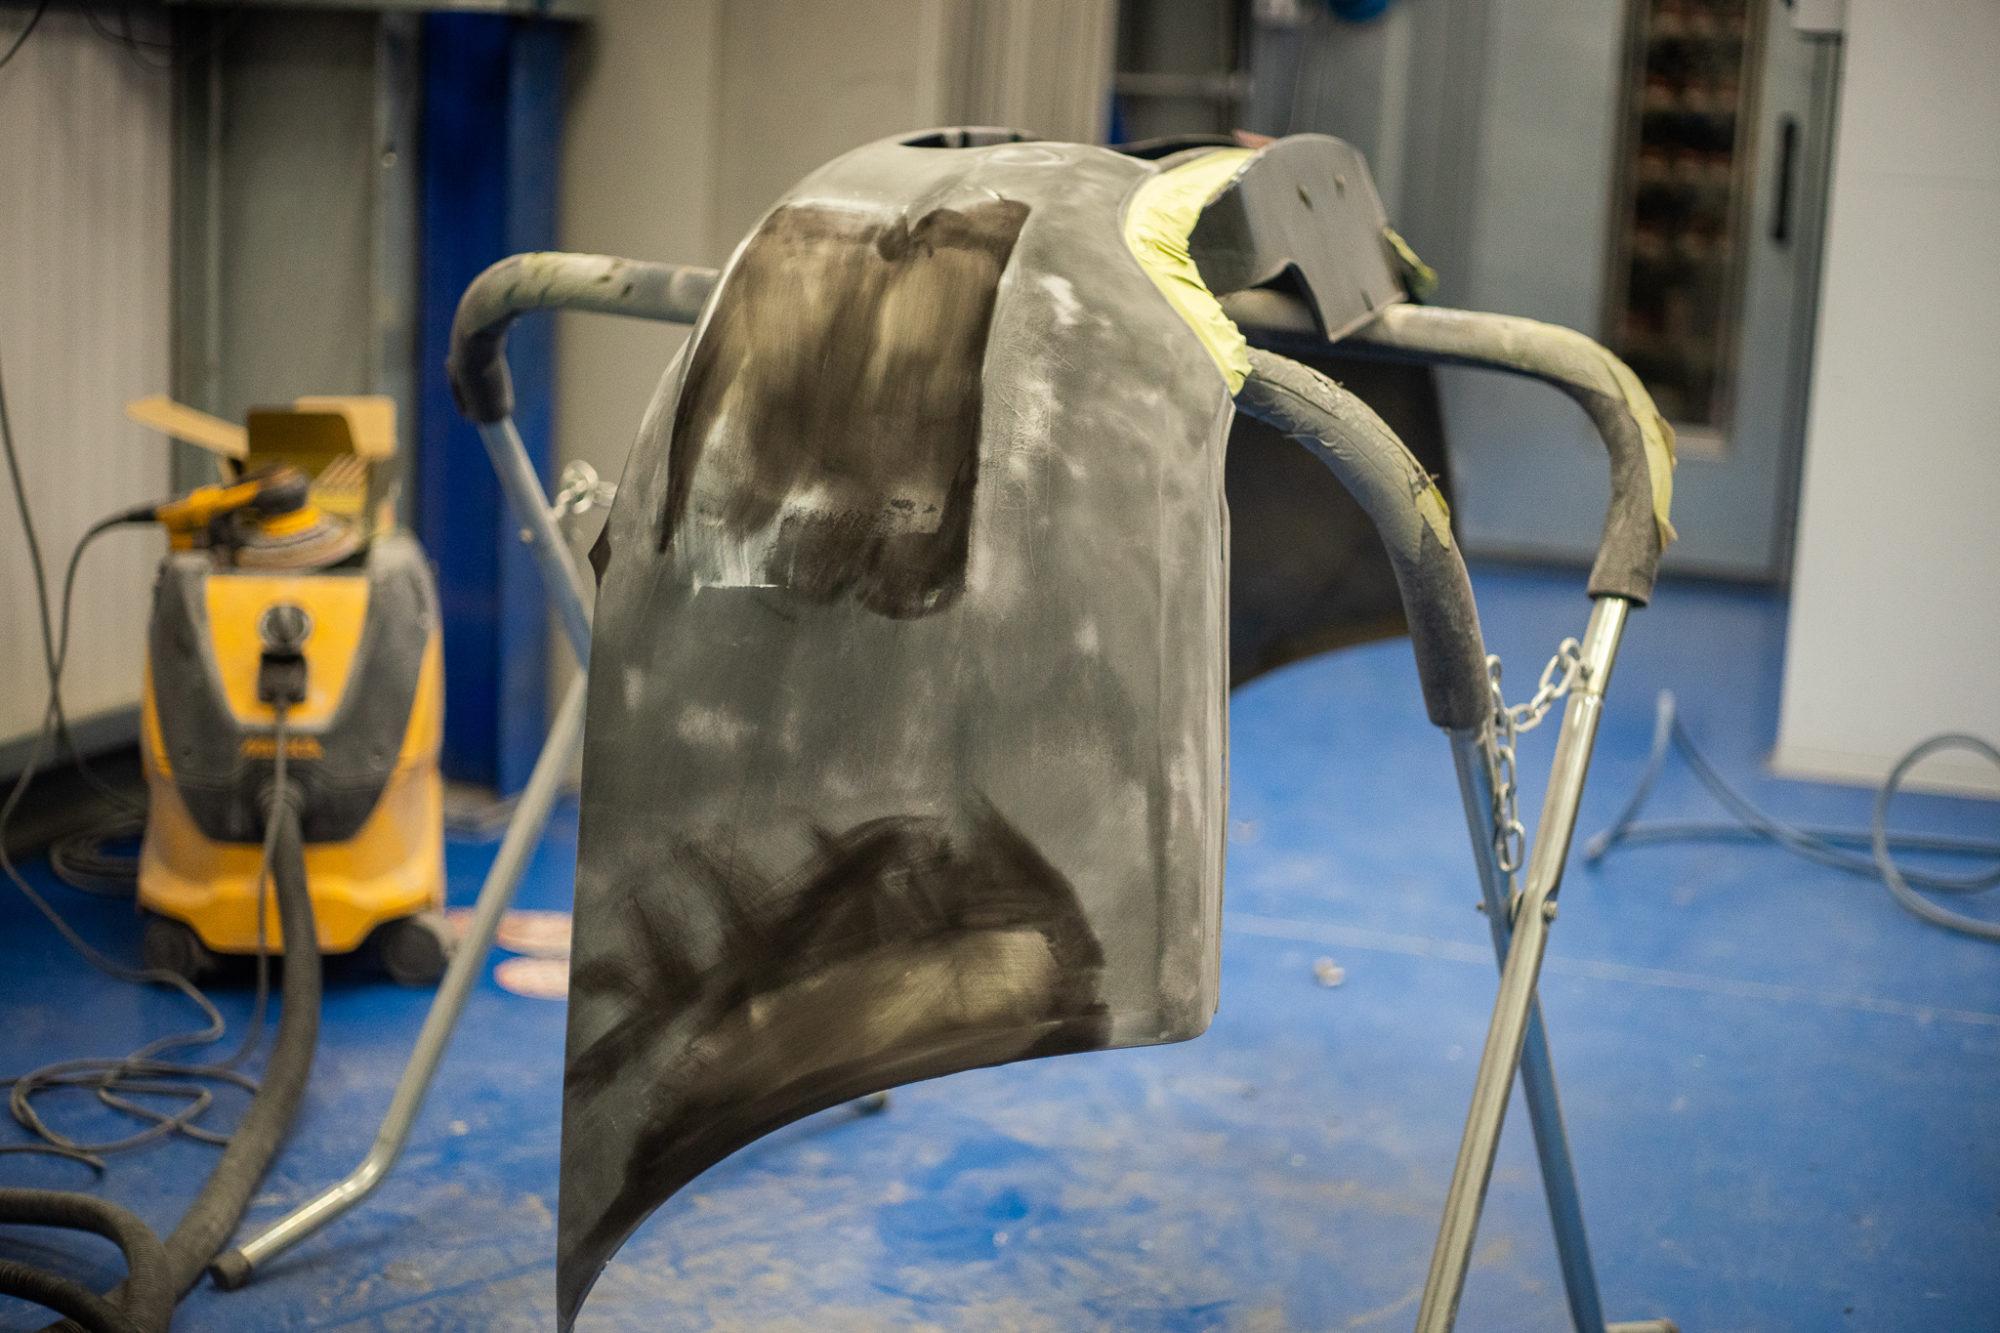
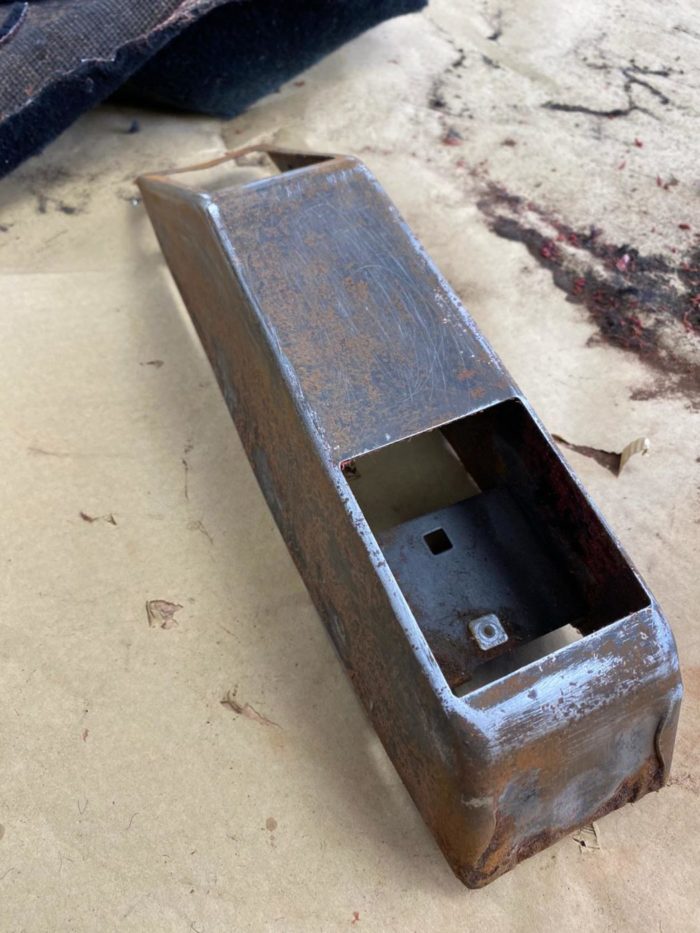
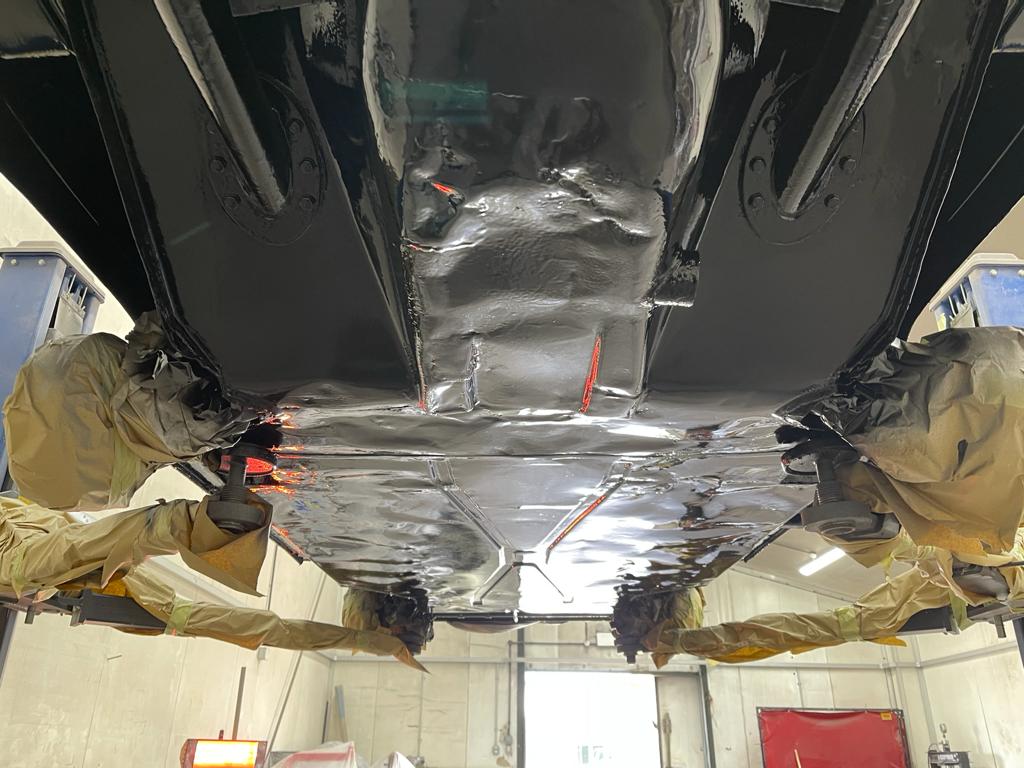
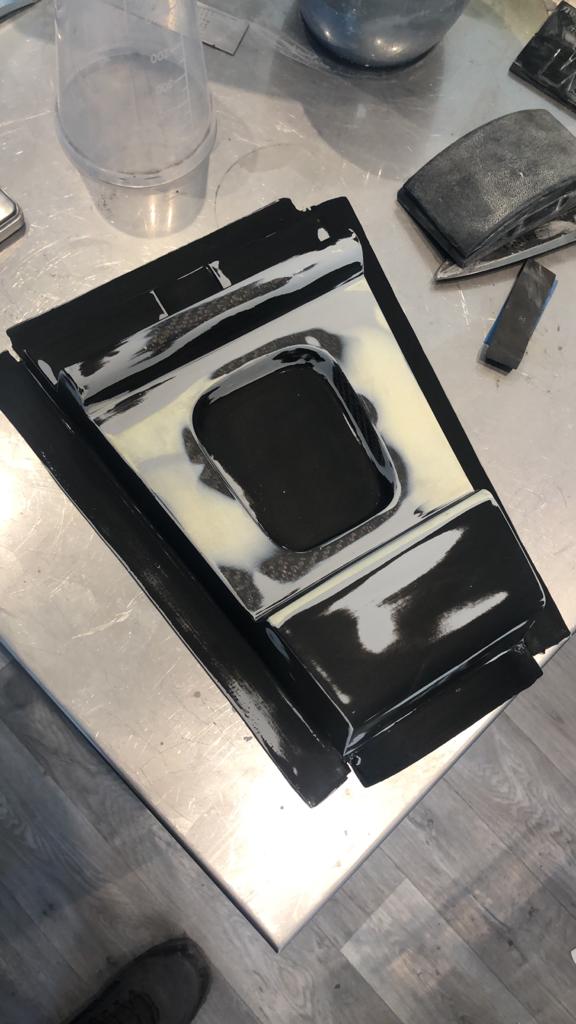
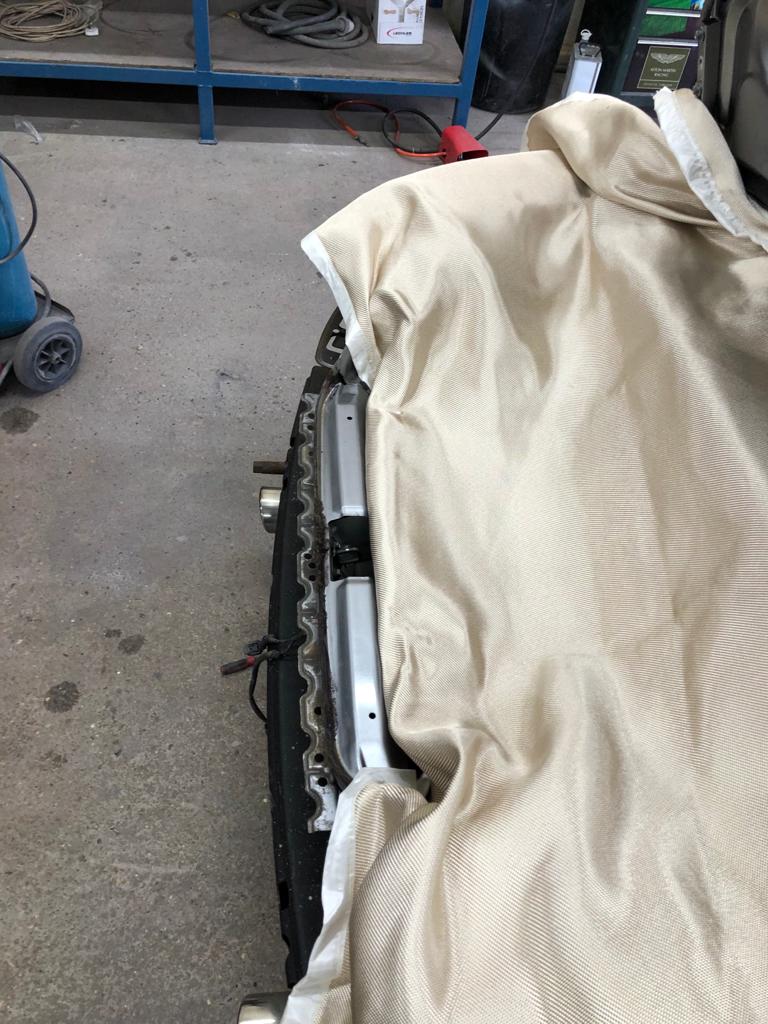
This is the wheel arch complete:
Our stunning 1954 Jaguar MKVII has been full painted and the panels have been smoothed and flattened. The rest of the body now needs to be flattened and shaped before it goes back into the workshop to have its chrome and trim fitted back in as well as the mechanics.


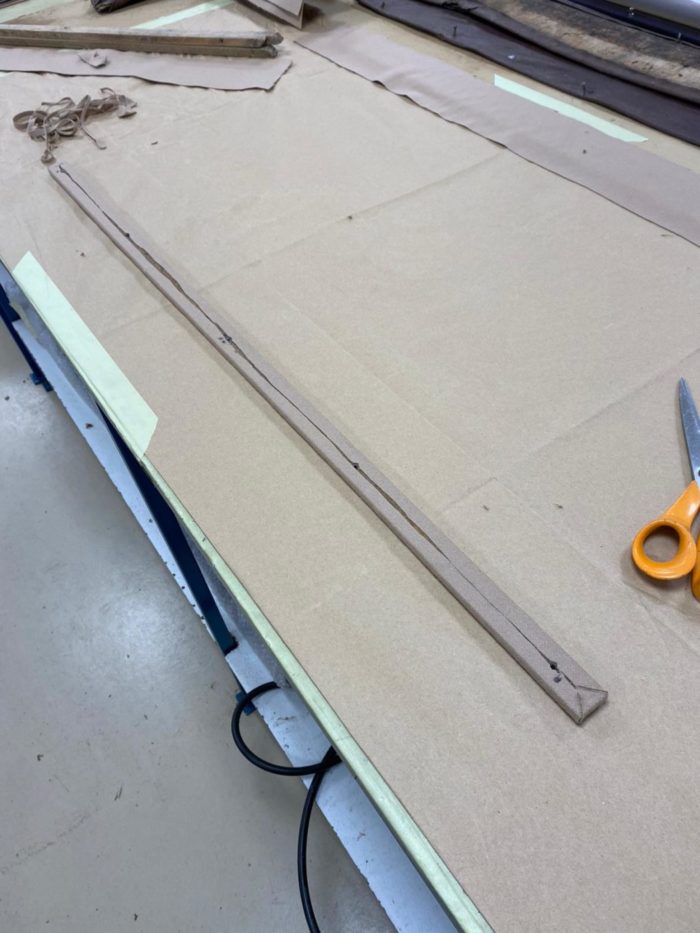
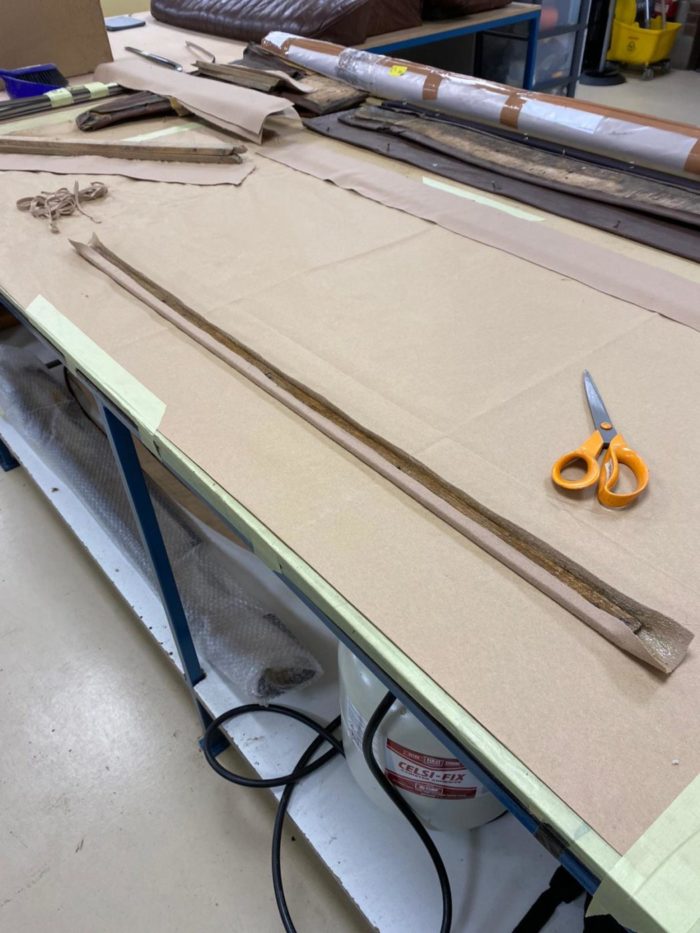
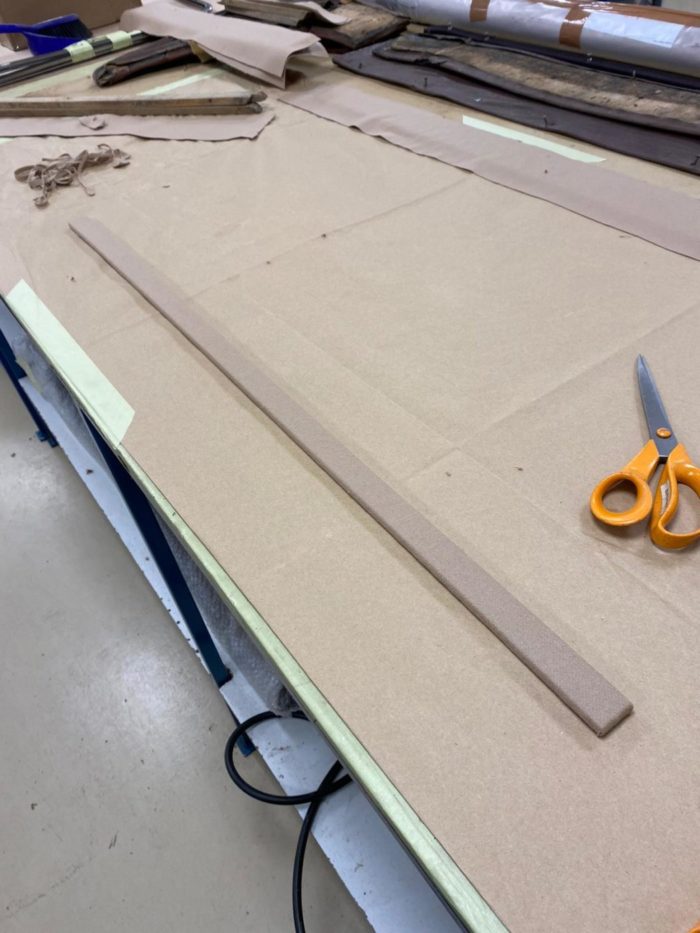
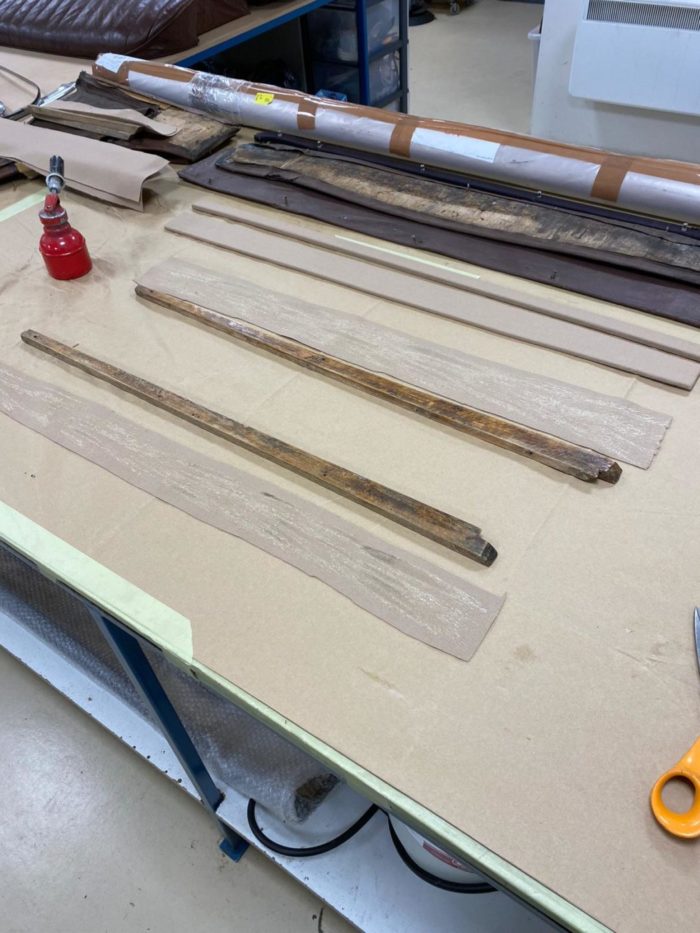
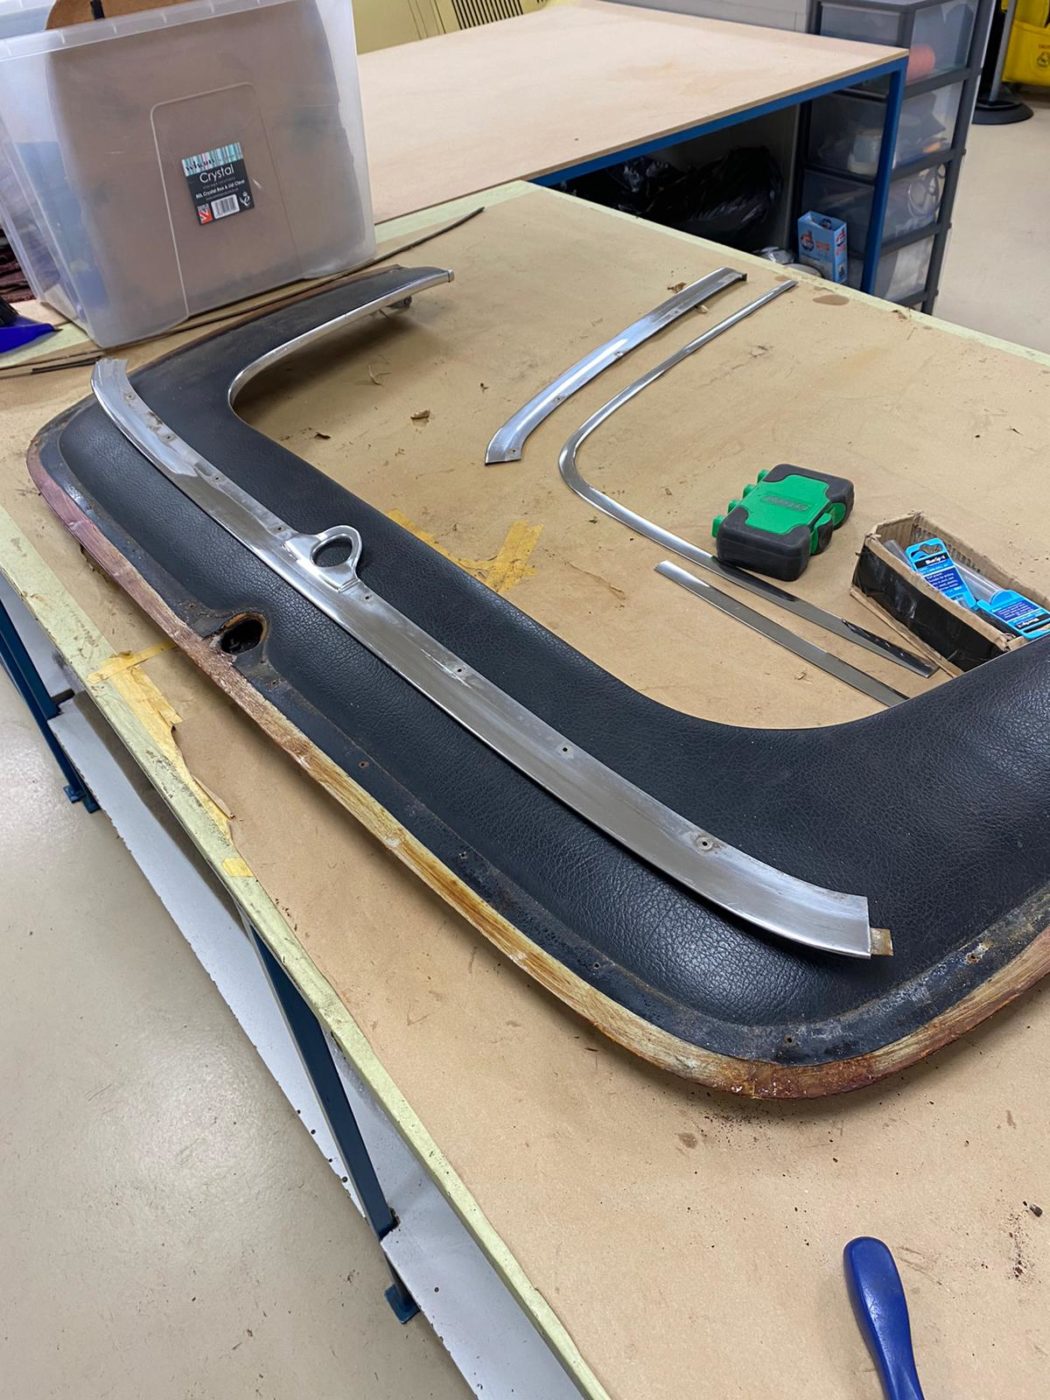
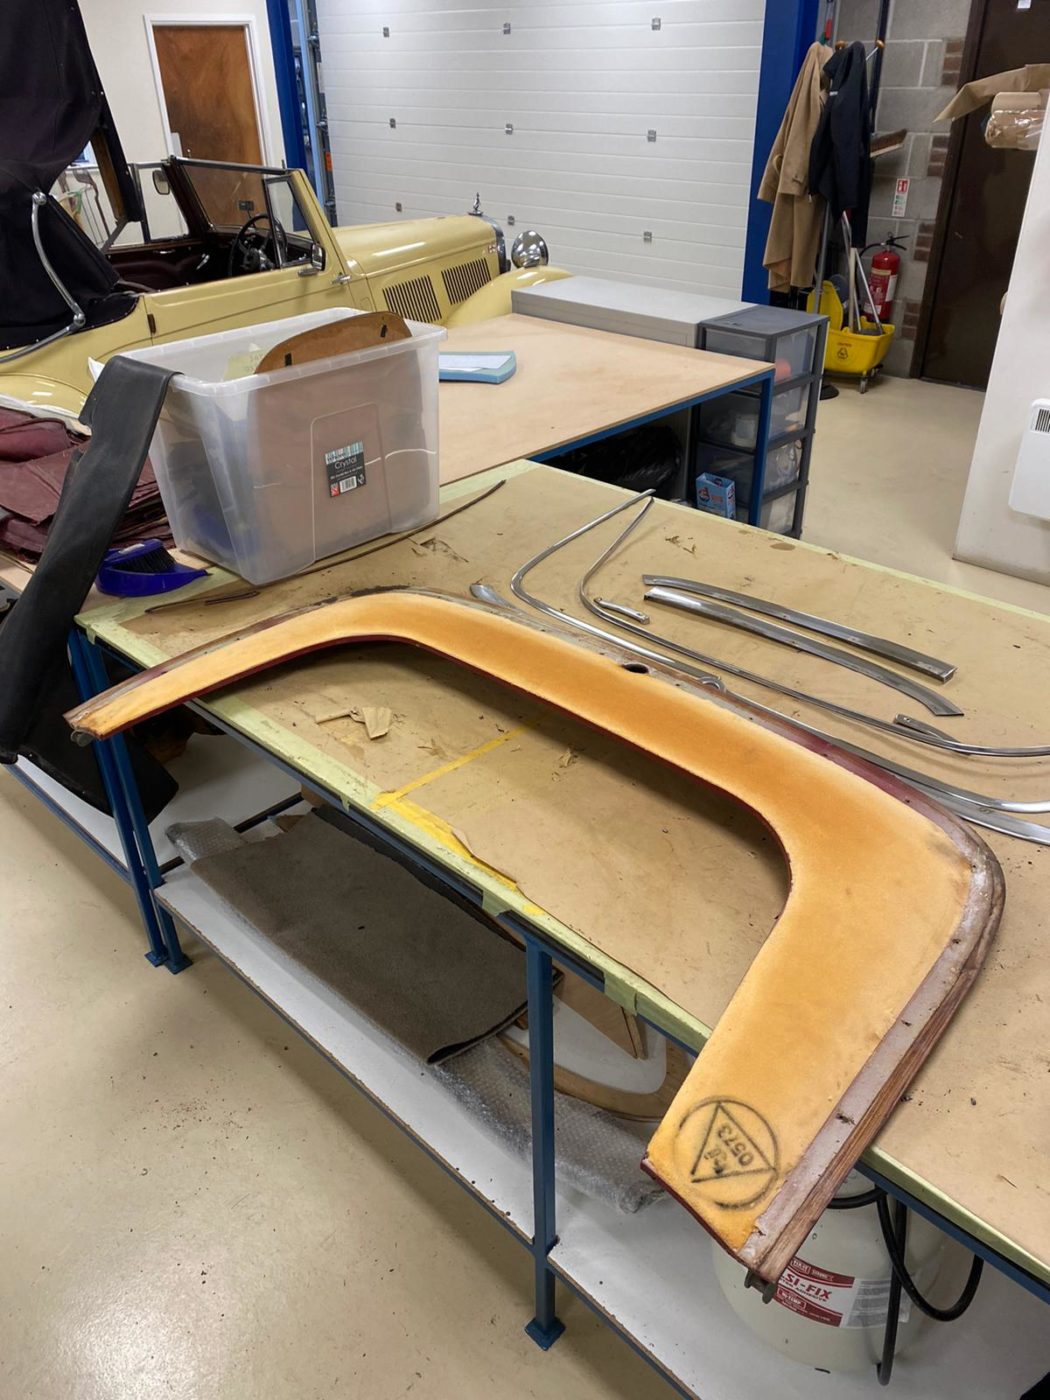
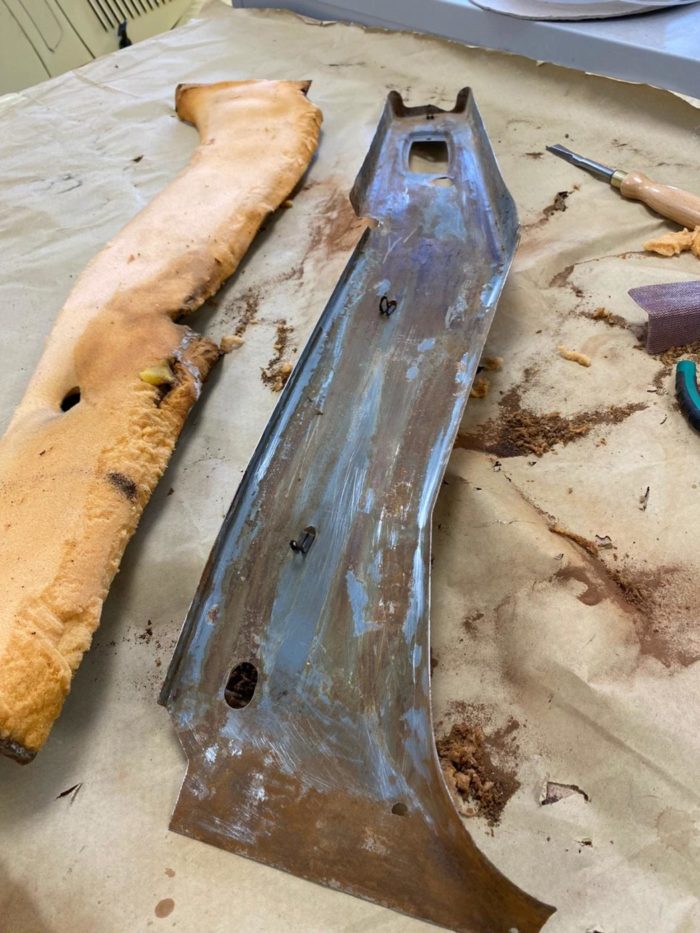
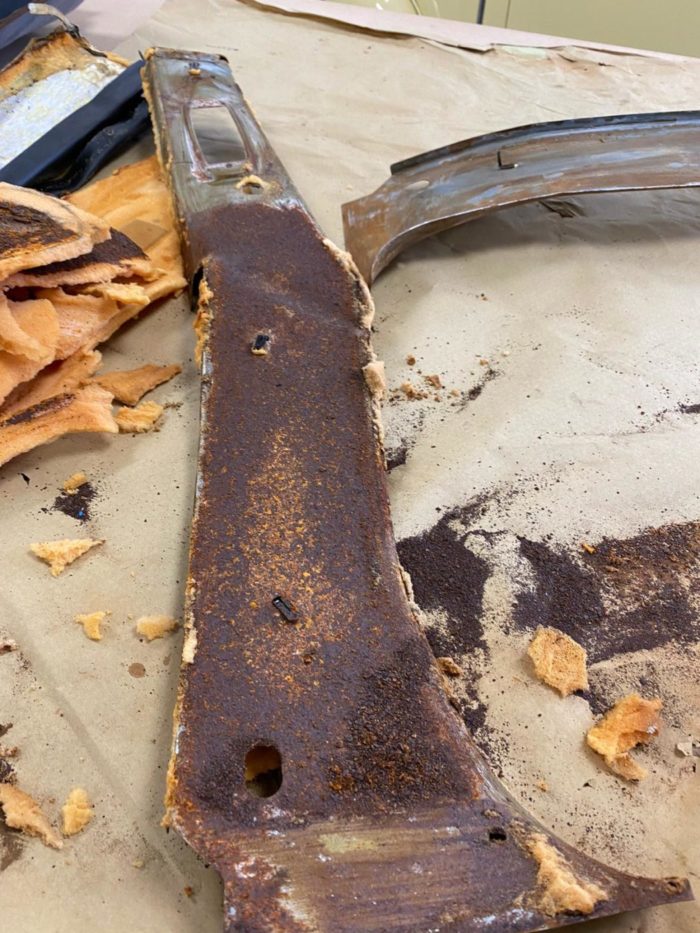
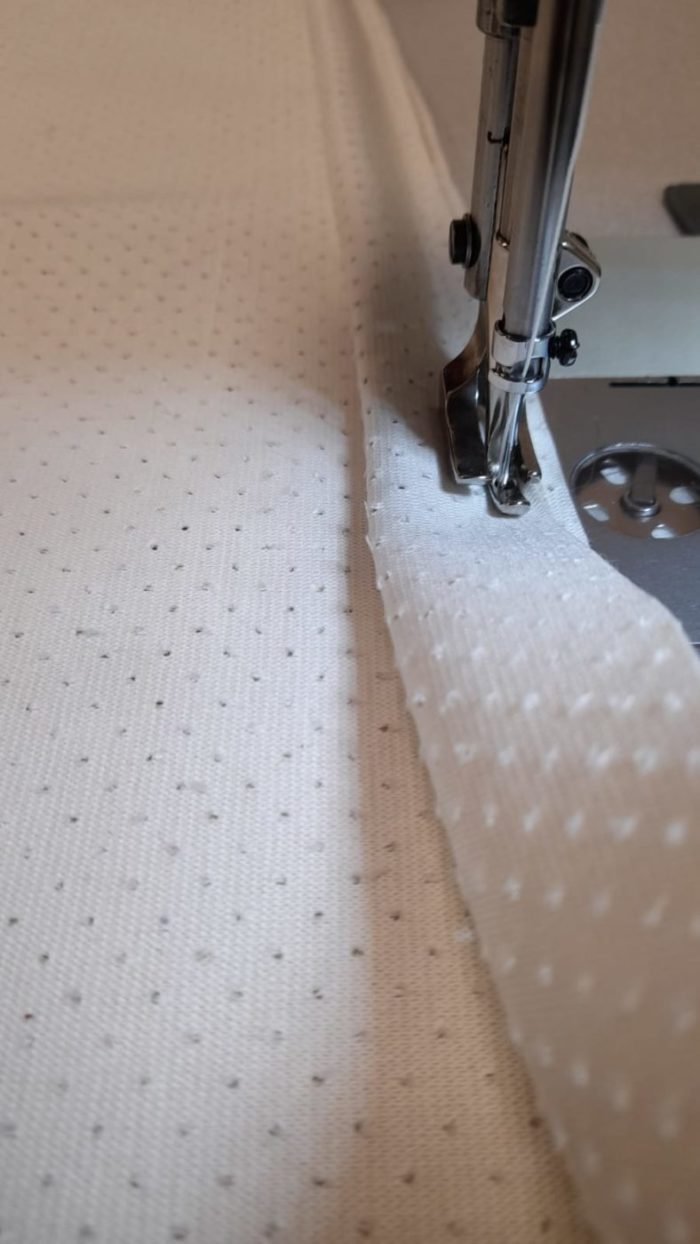
Our 1940 Alvis came in last week to have its hood restored and that process has begun today. Brian and Lydia have been taking apart all the pieces including the rear panels and seats so that they don’t get damaged in the process. Lydia has been marking out where the stitches are on the fabric.
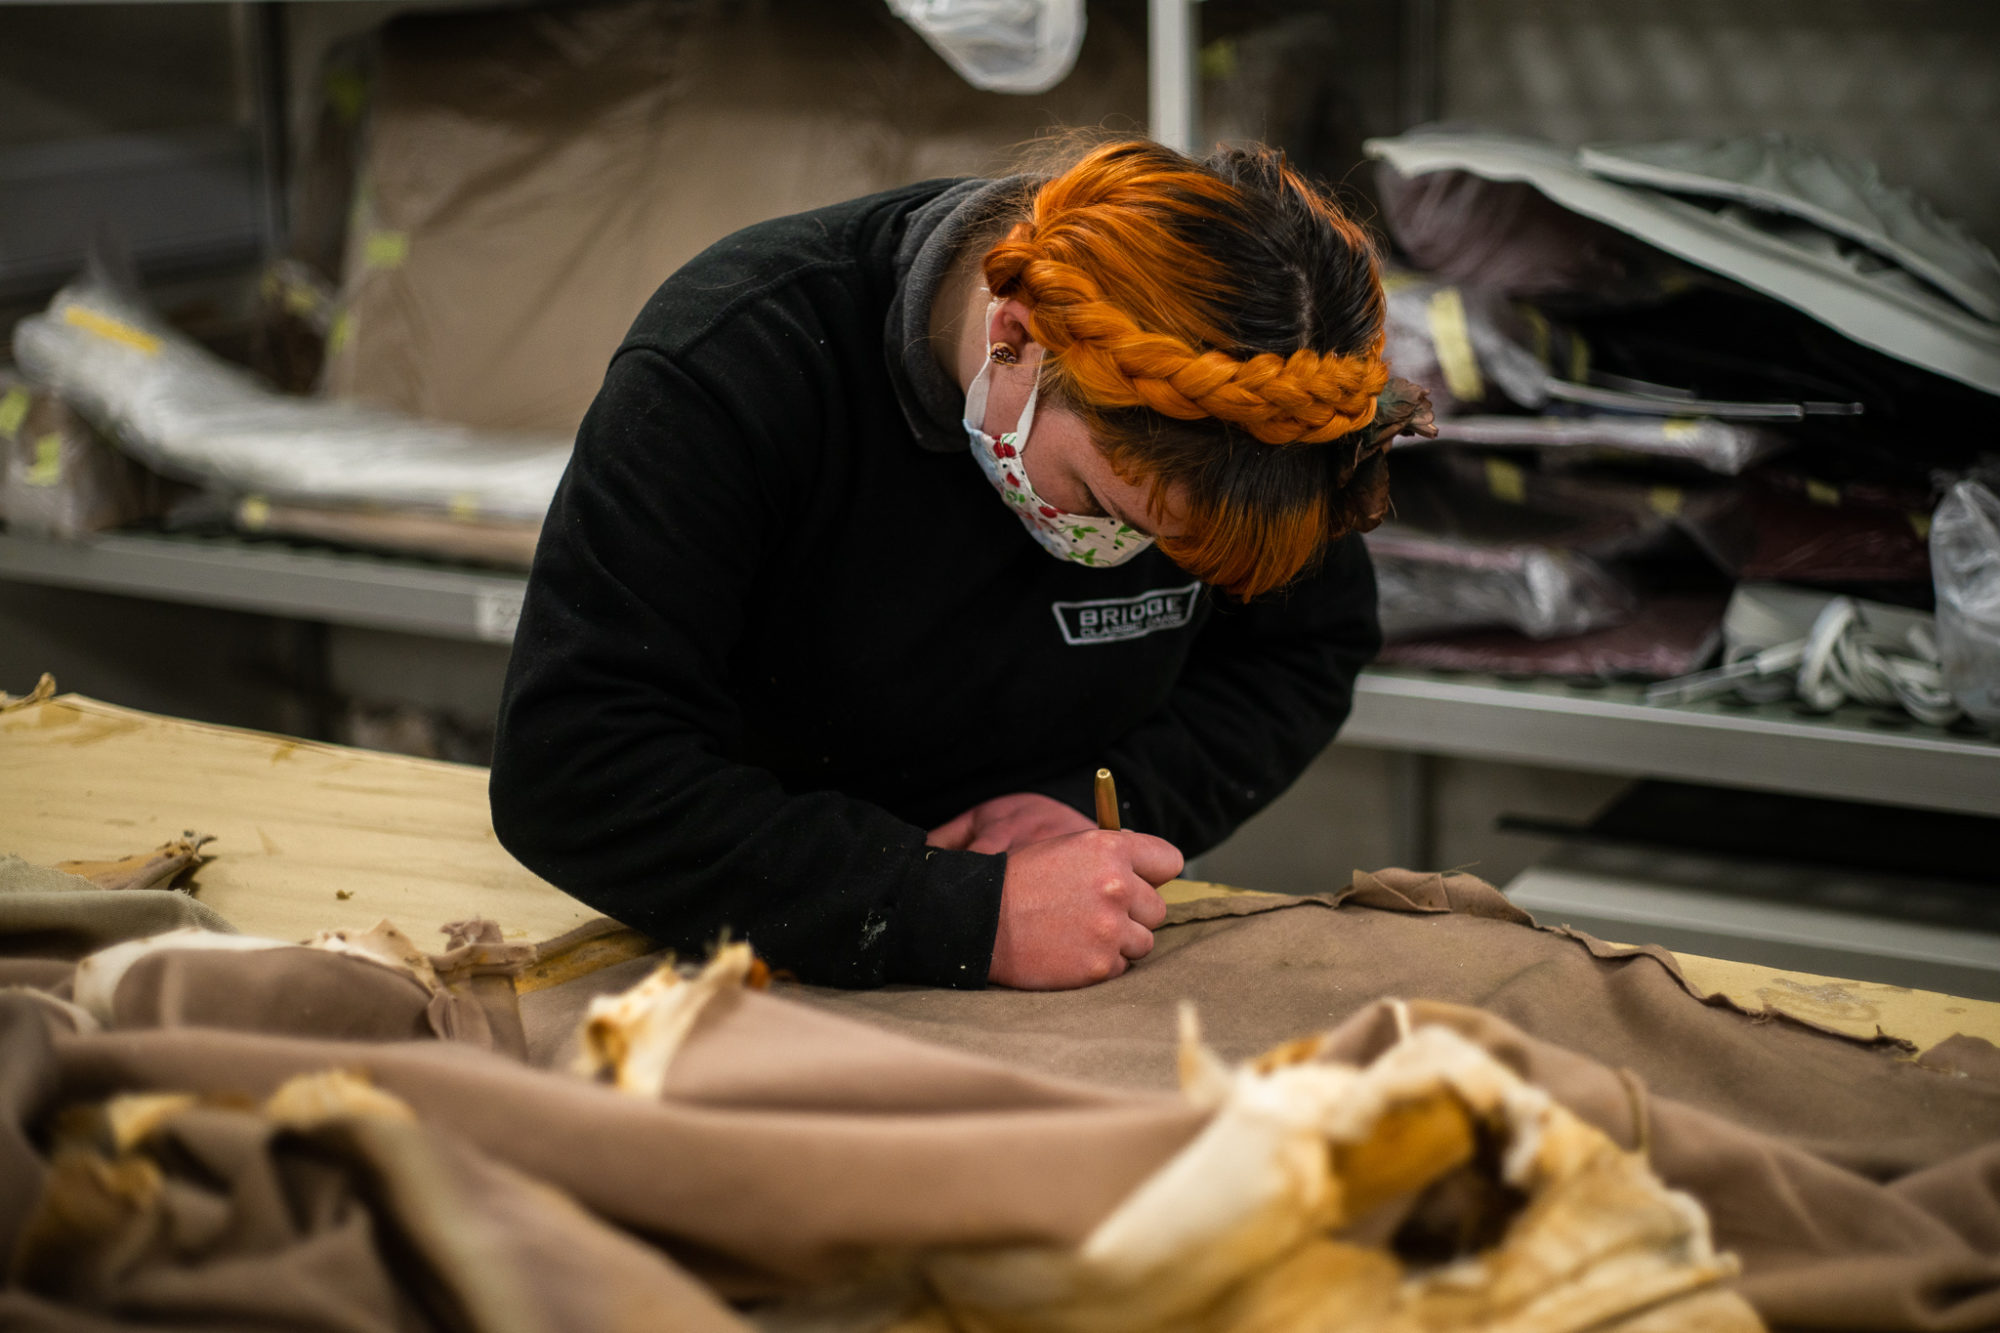
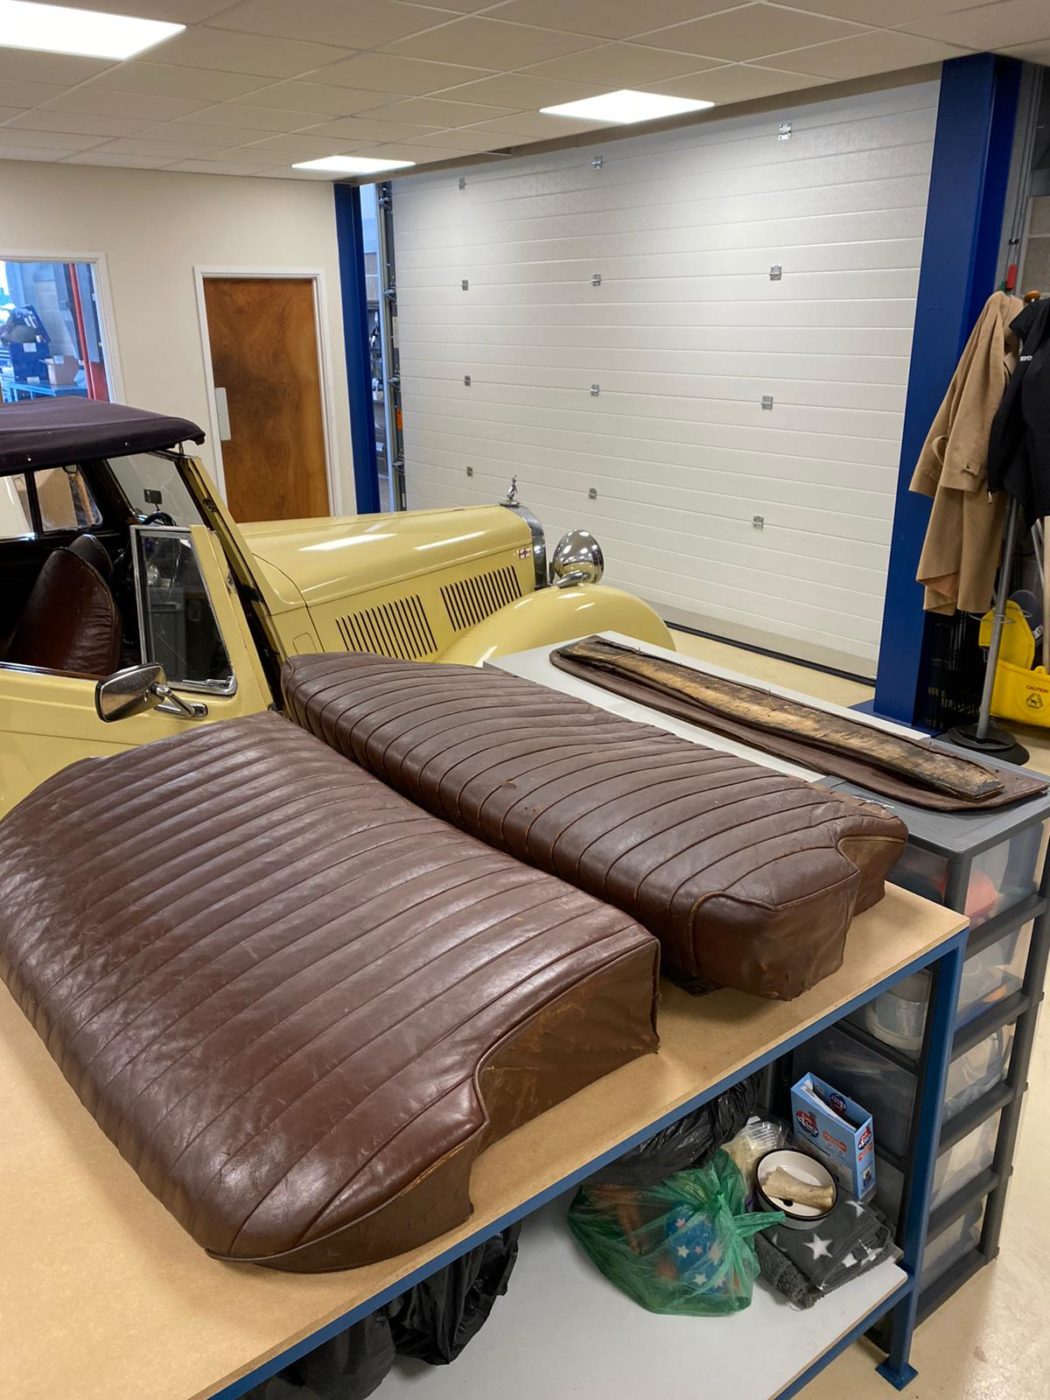
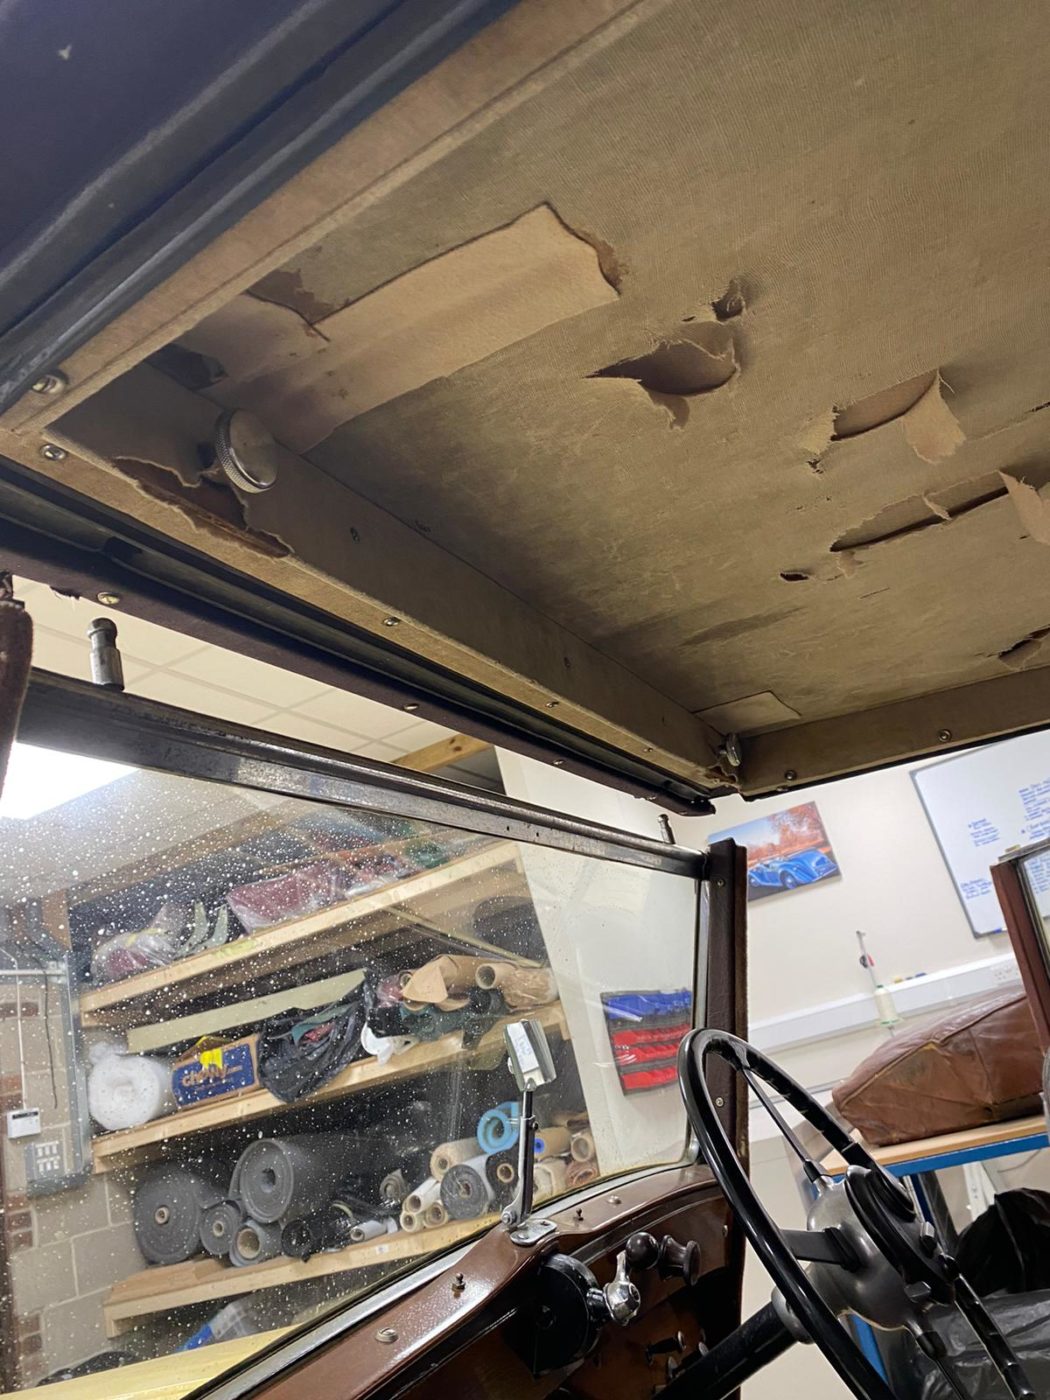
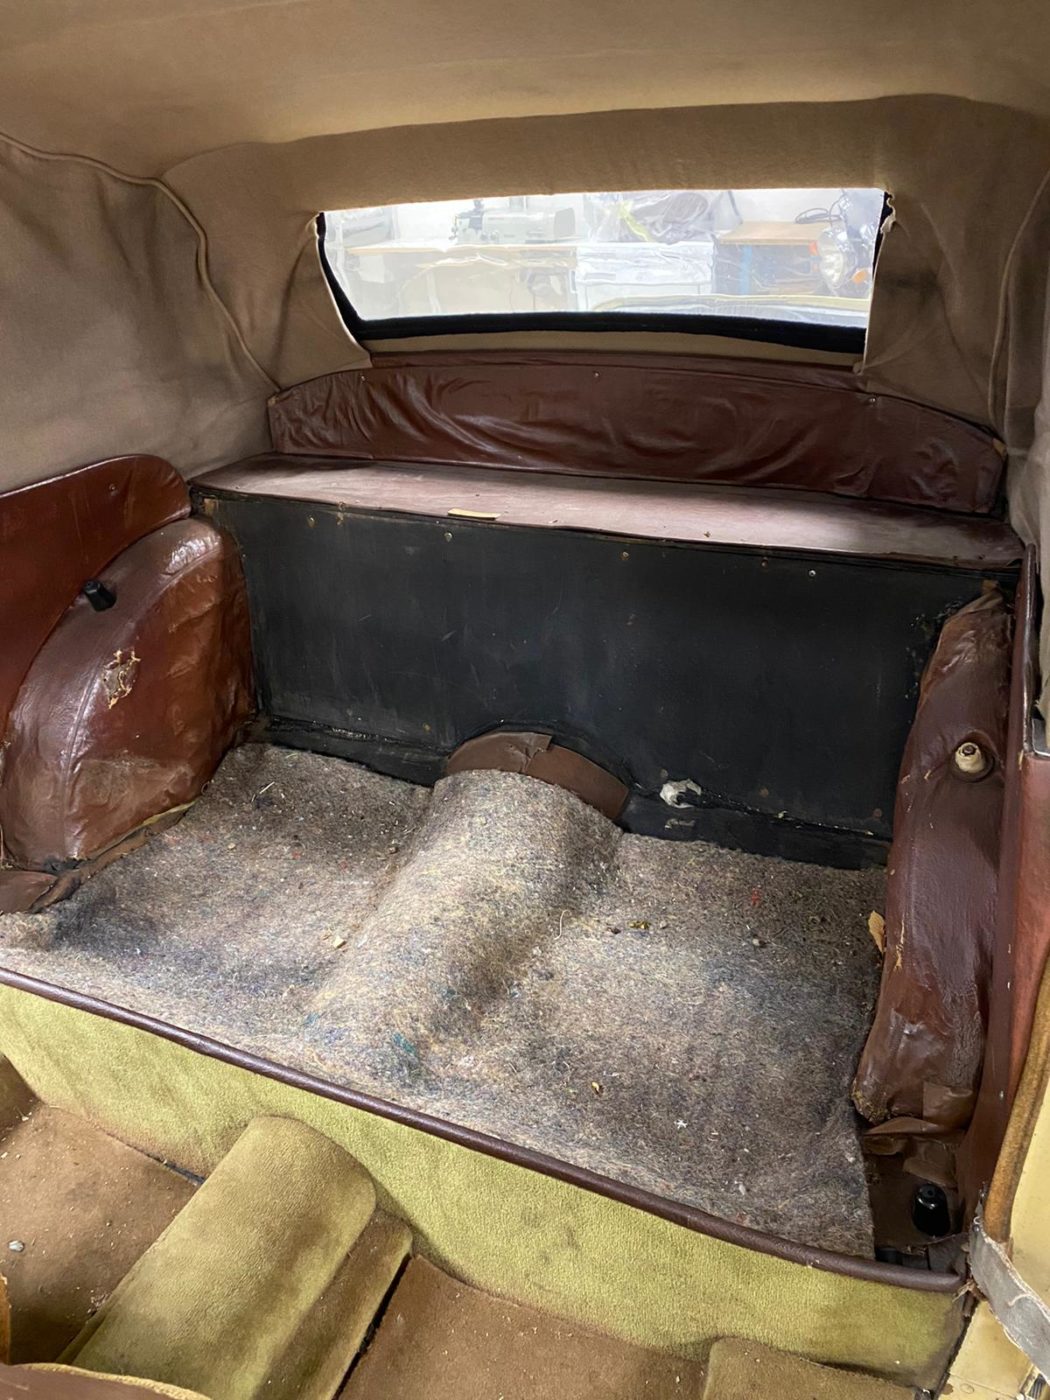
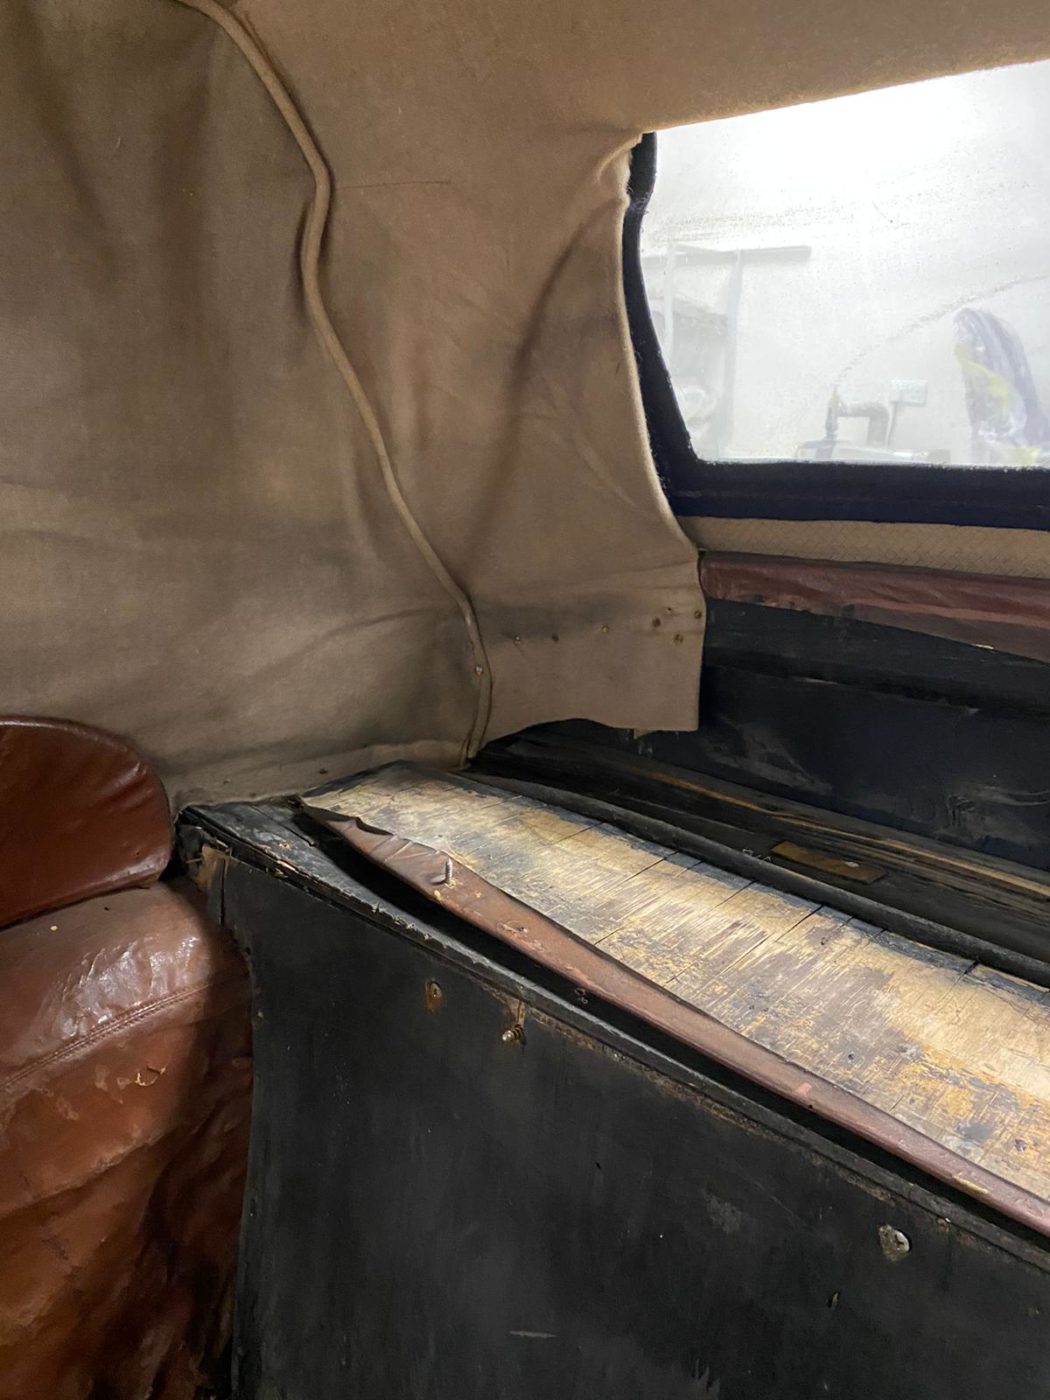
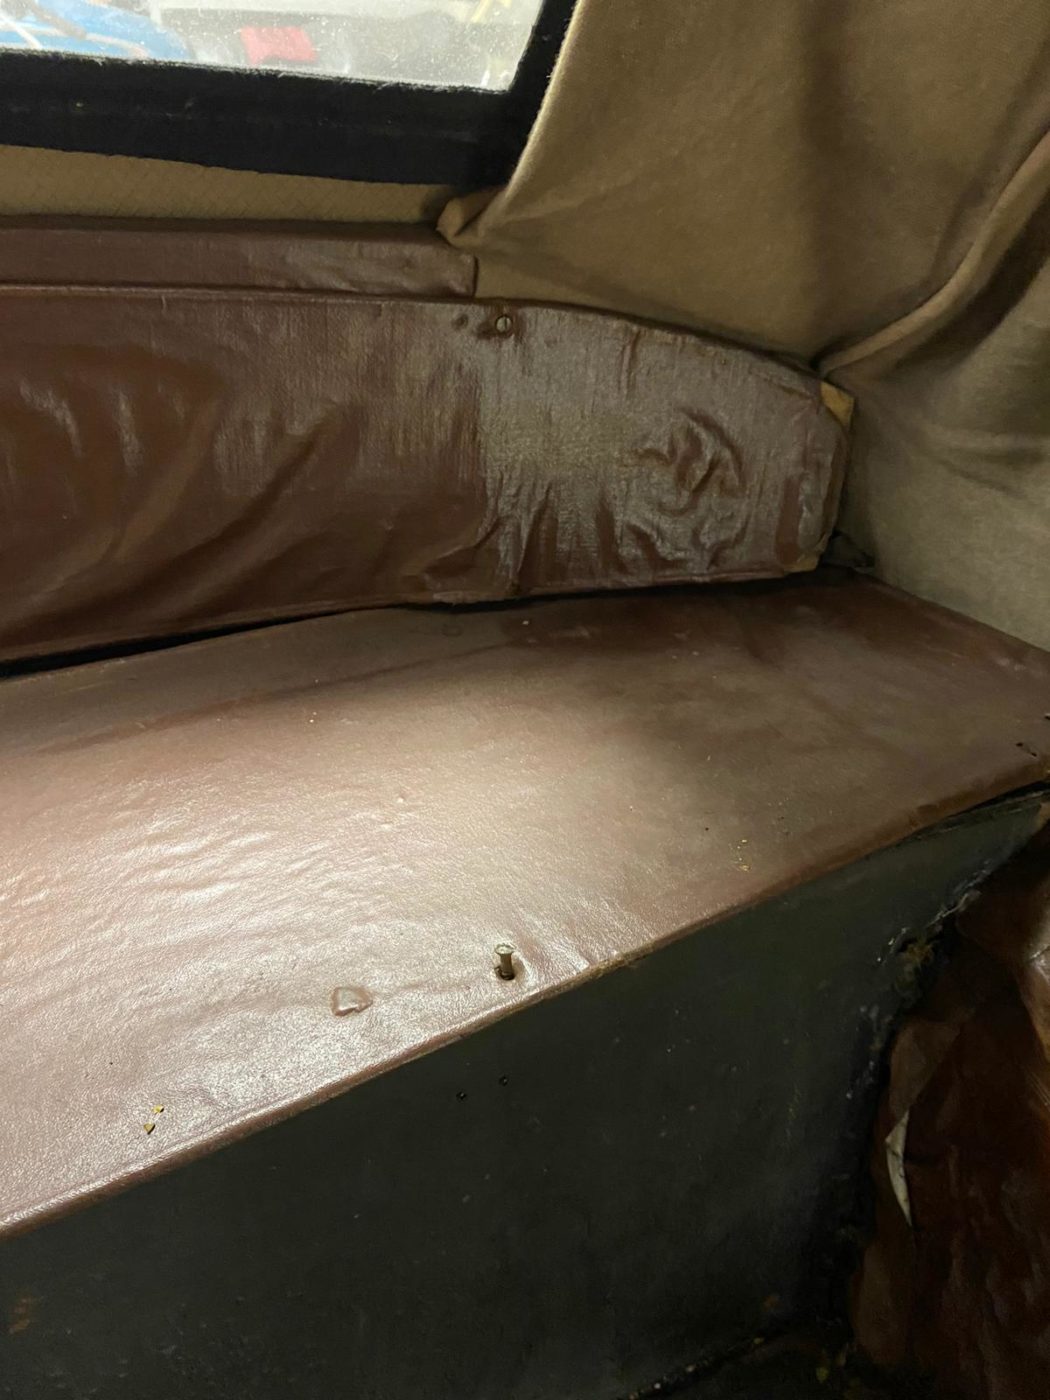
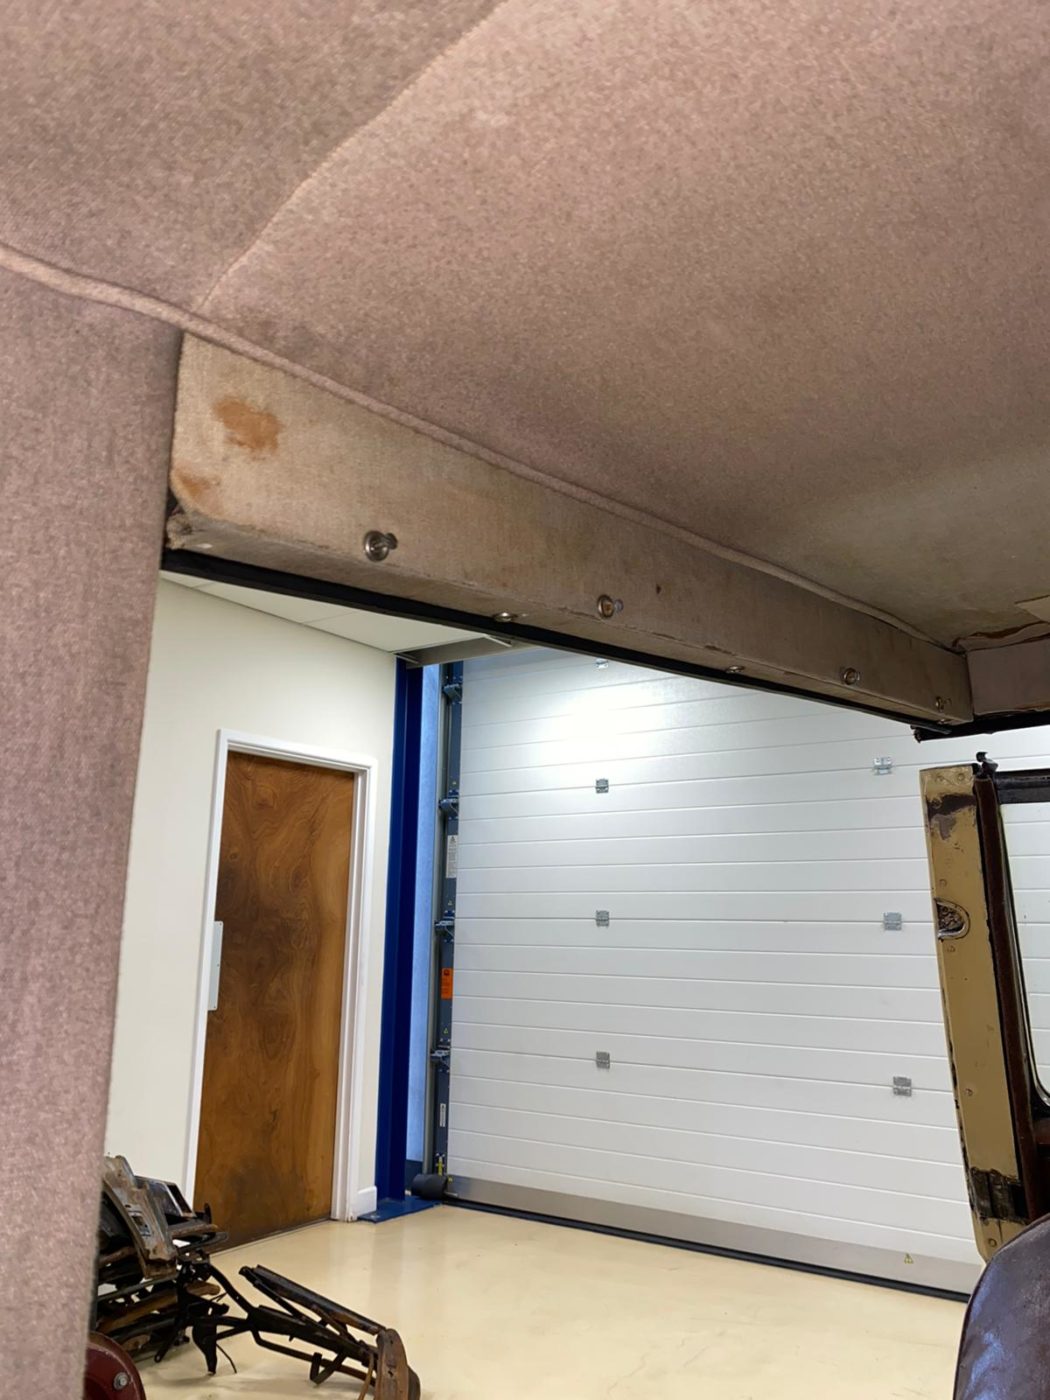
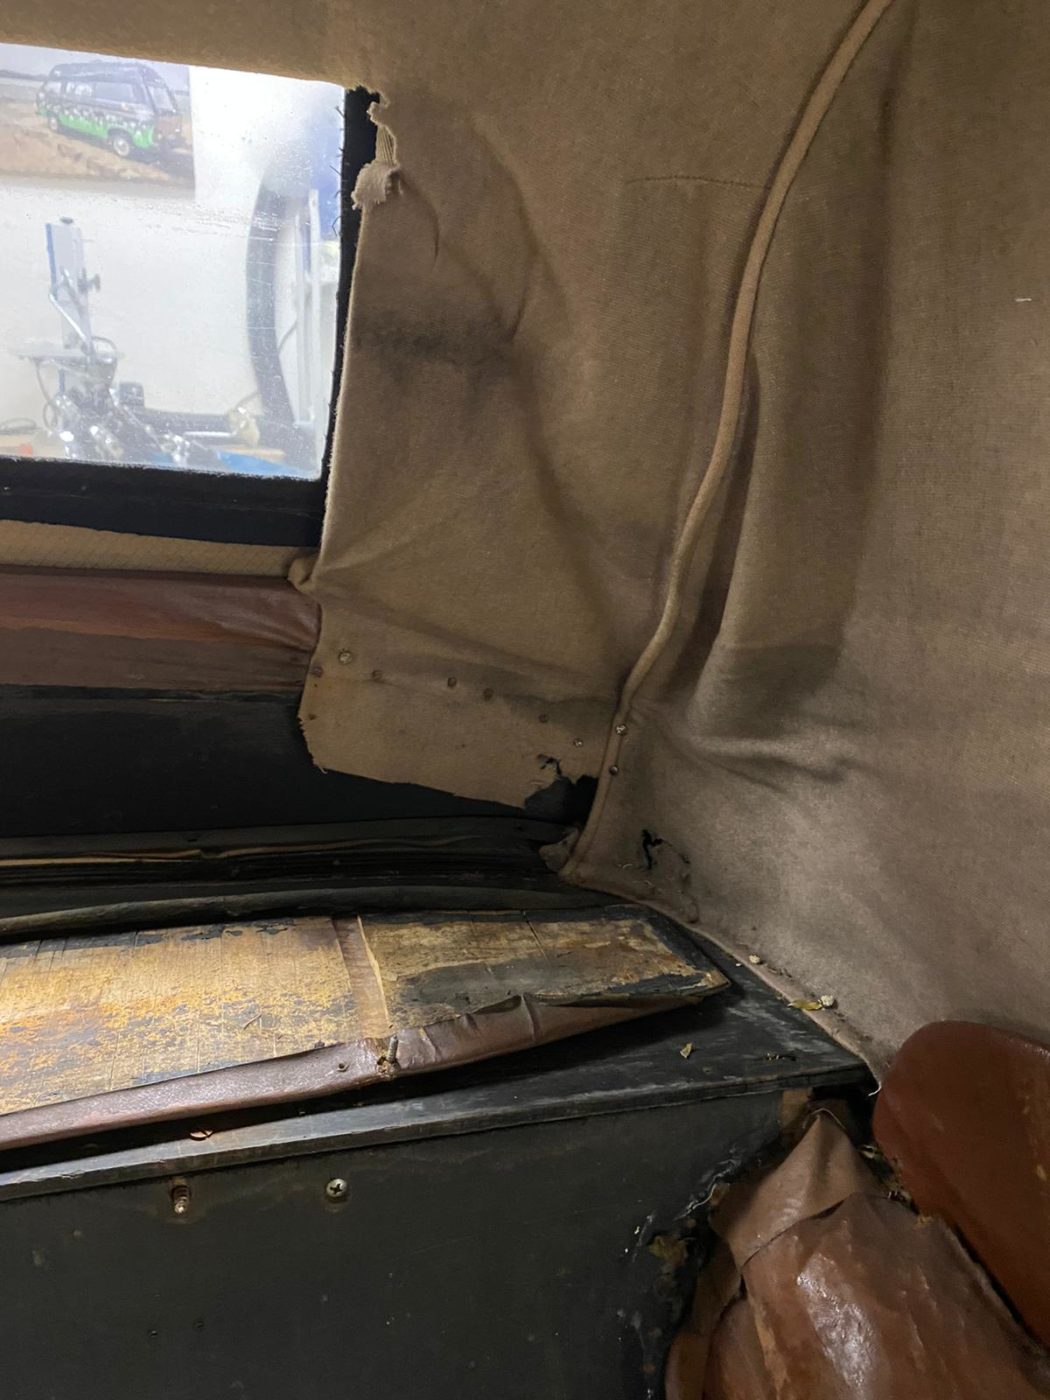

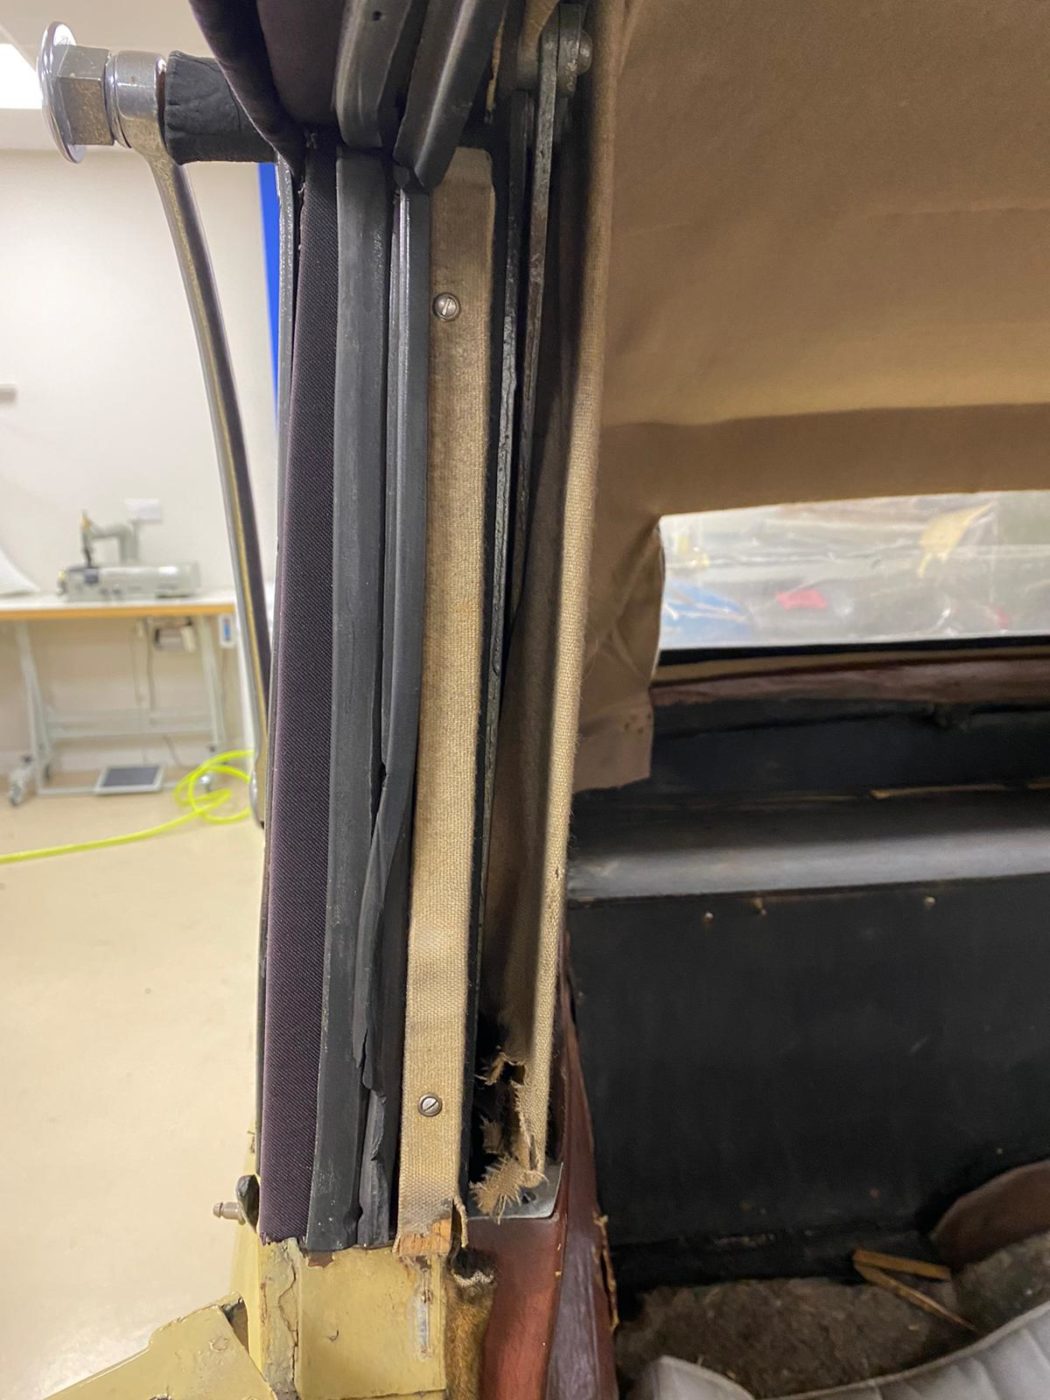
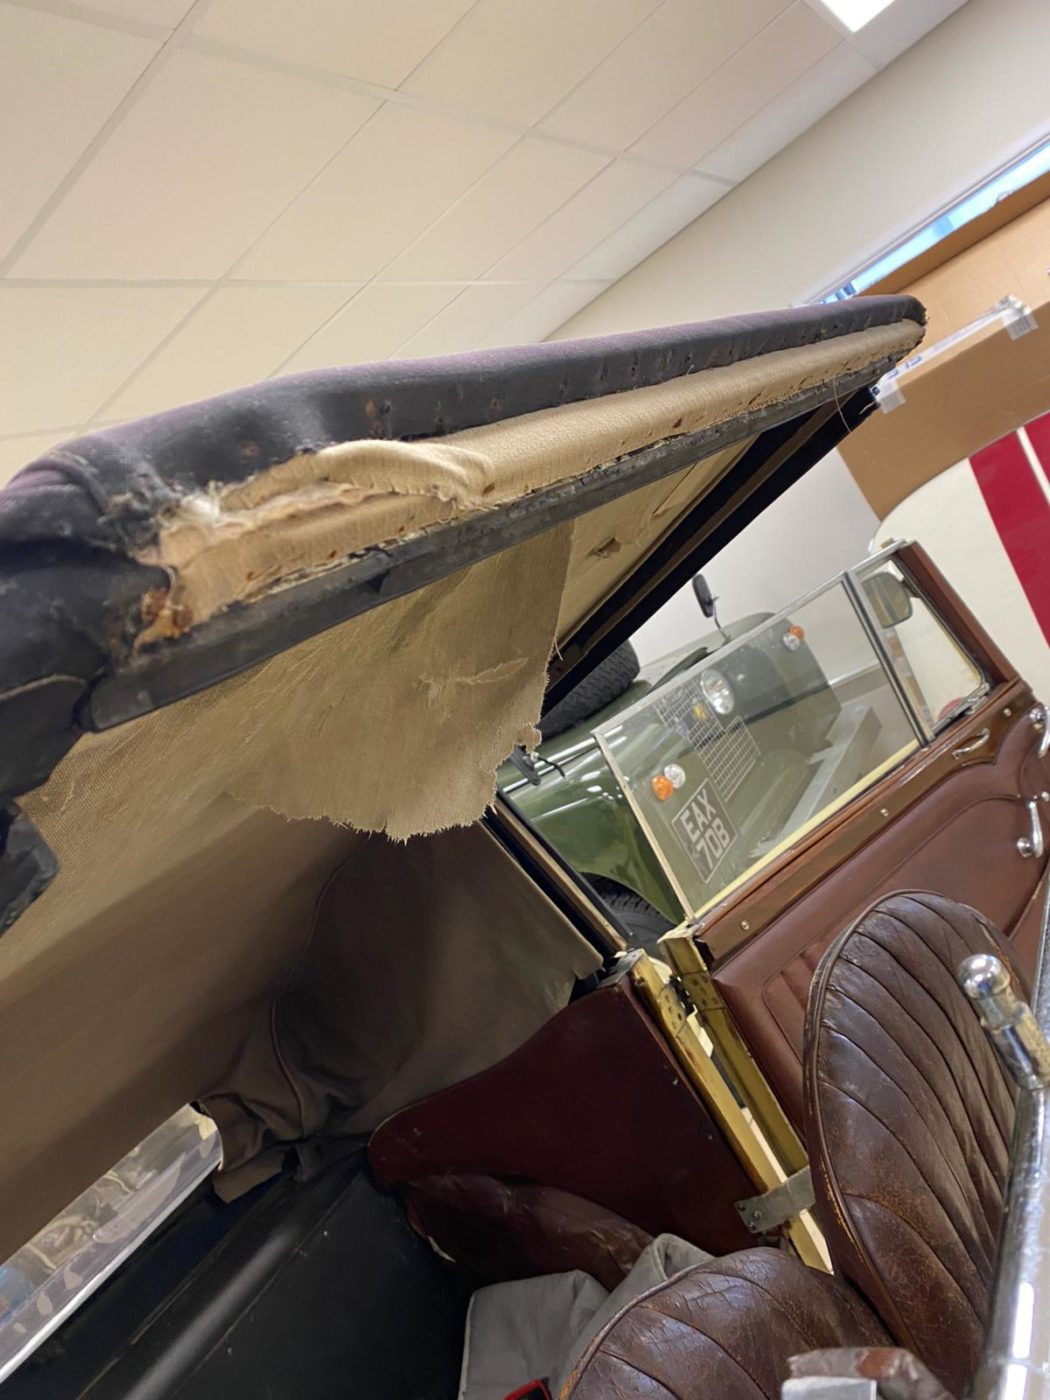
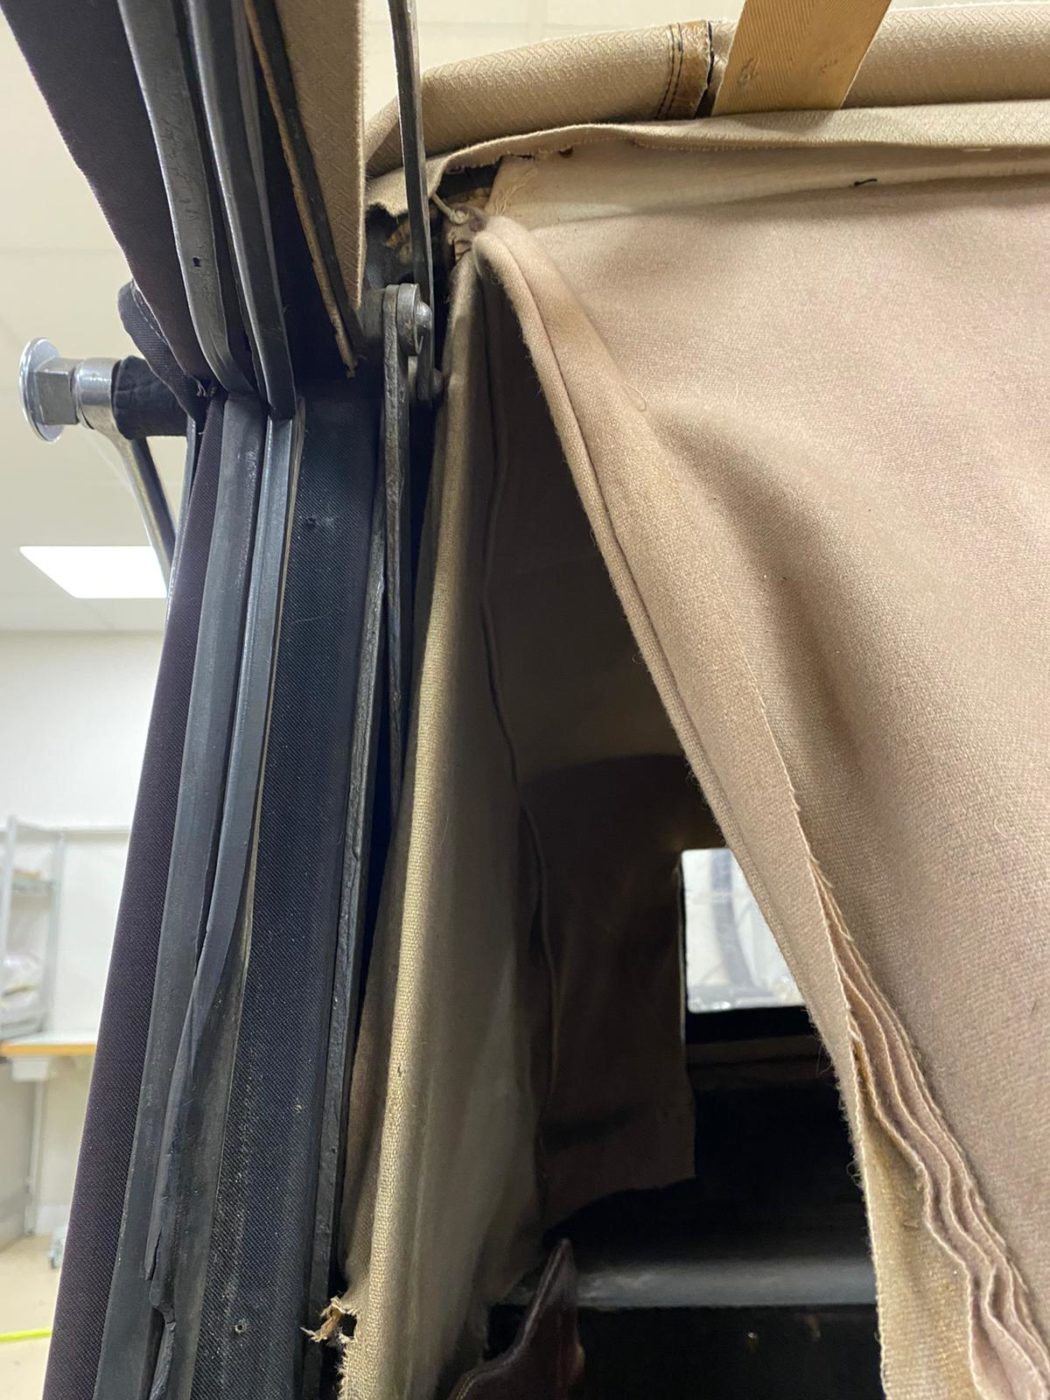
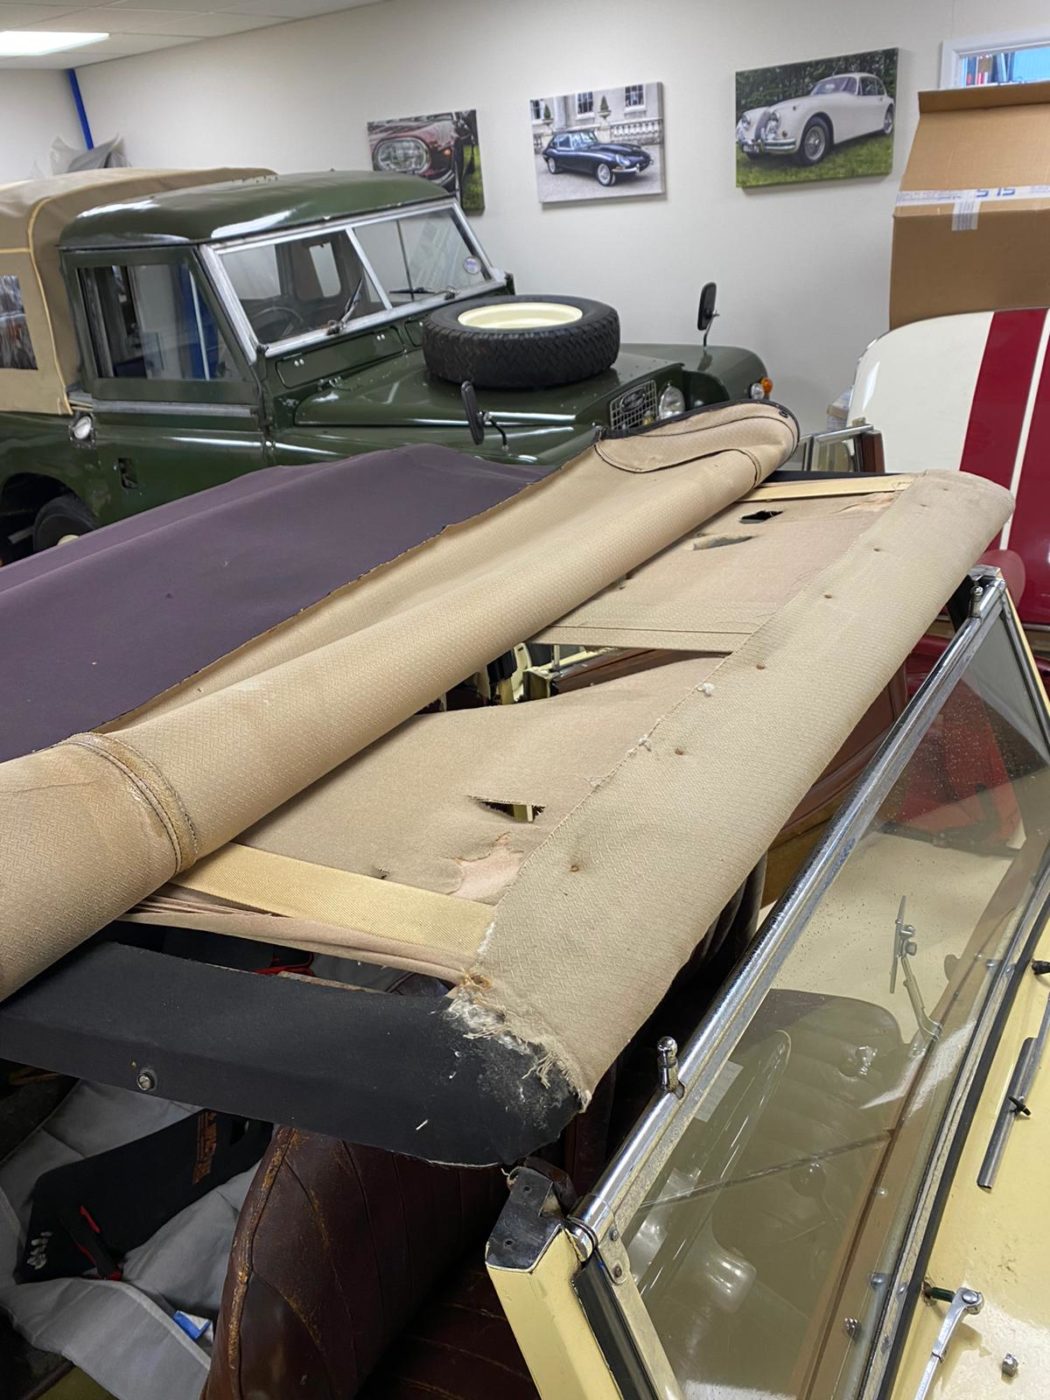
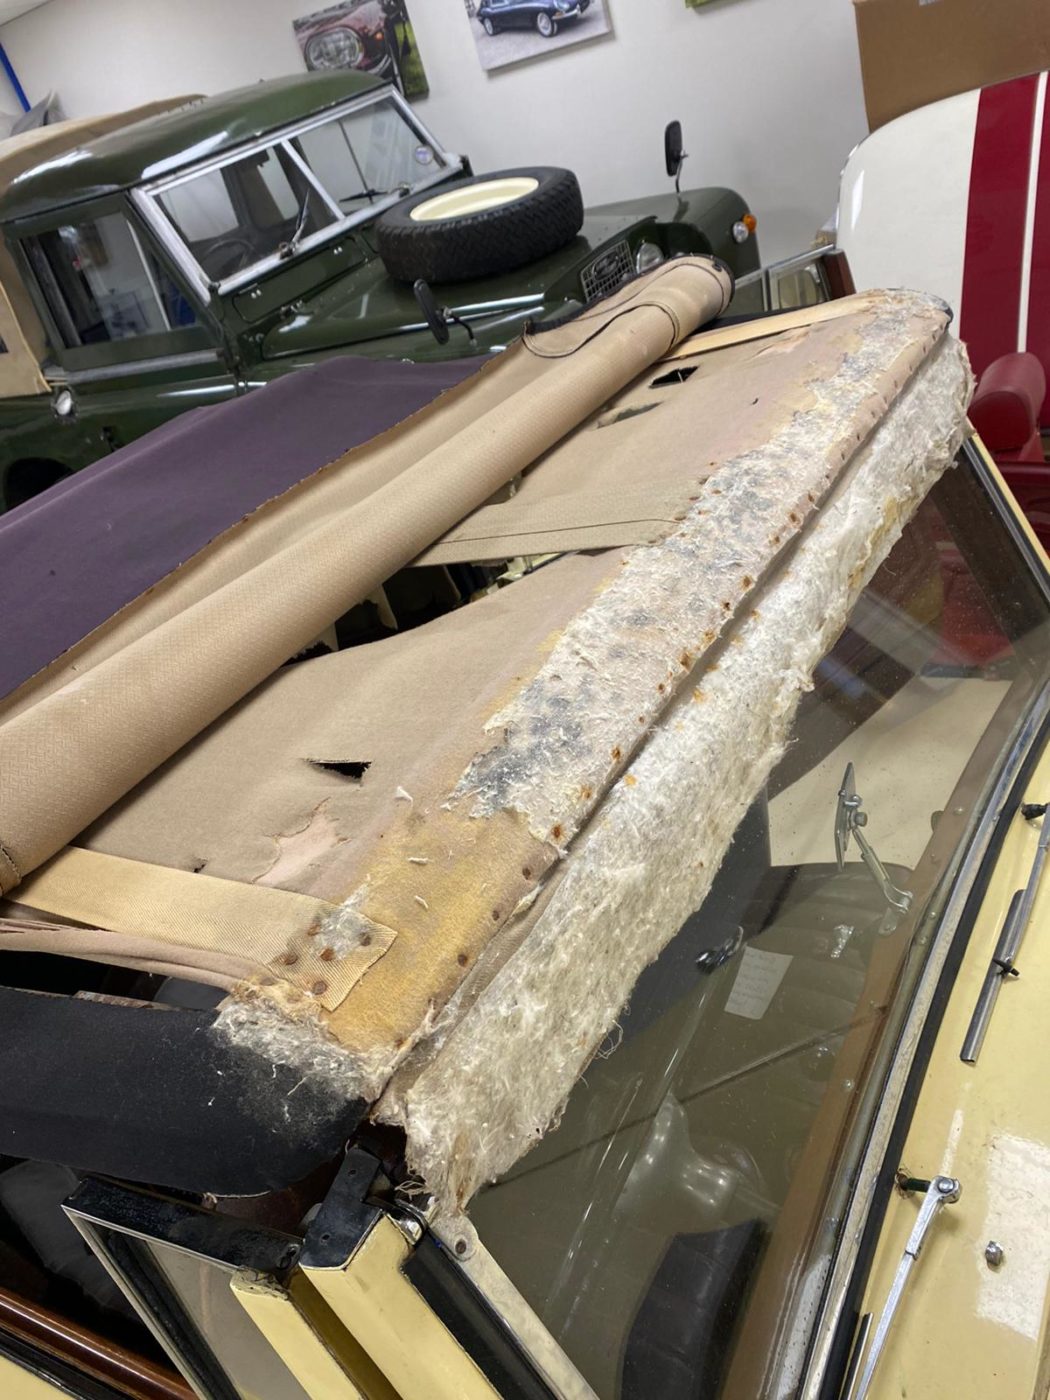
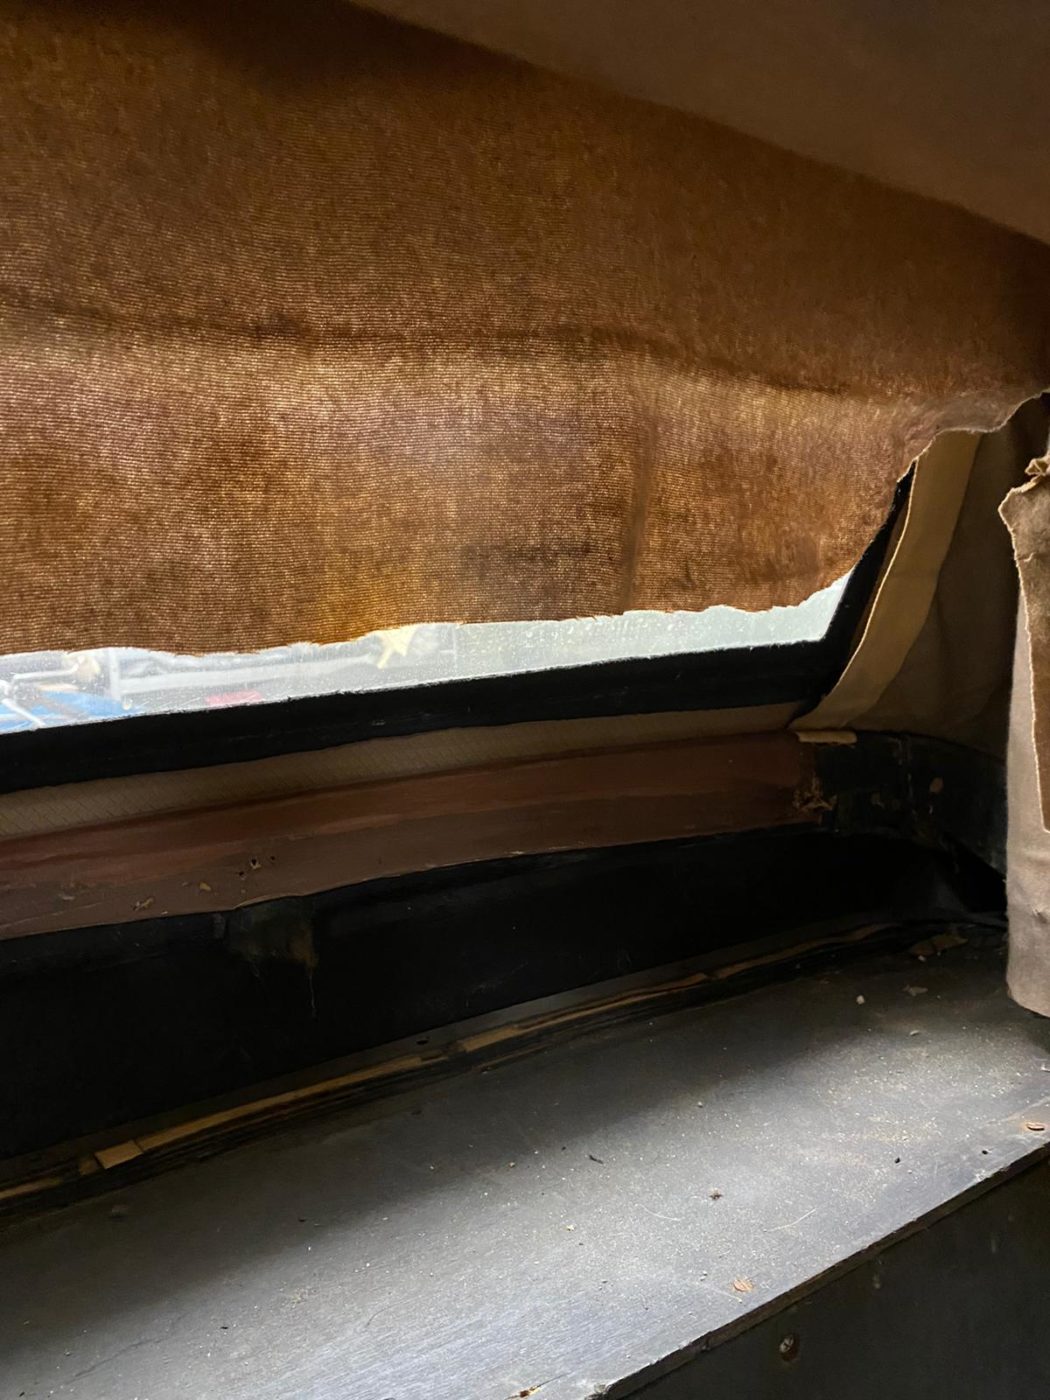
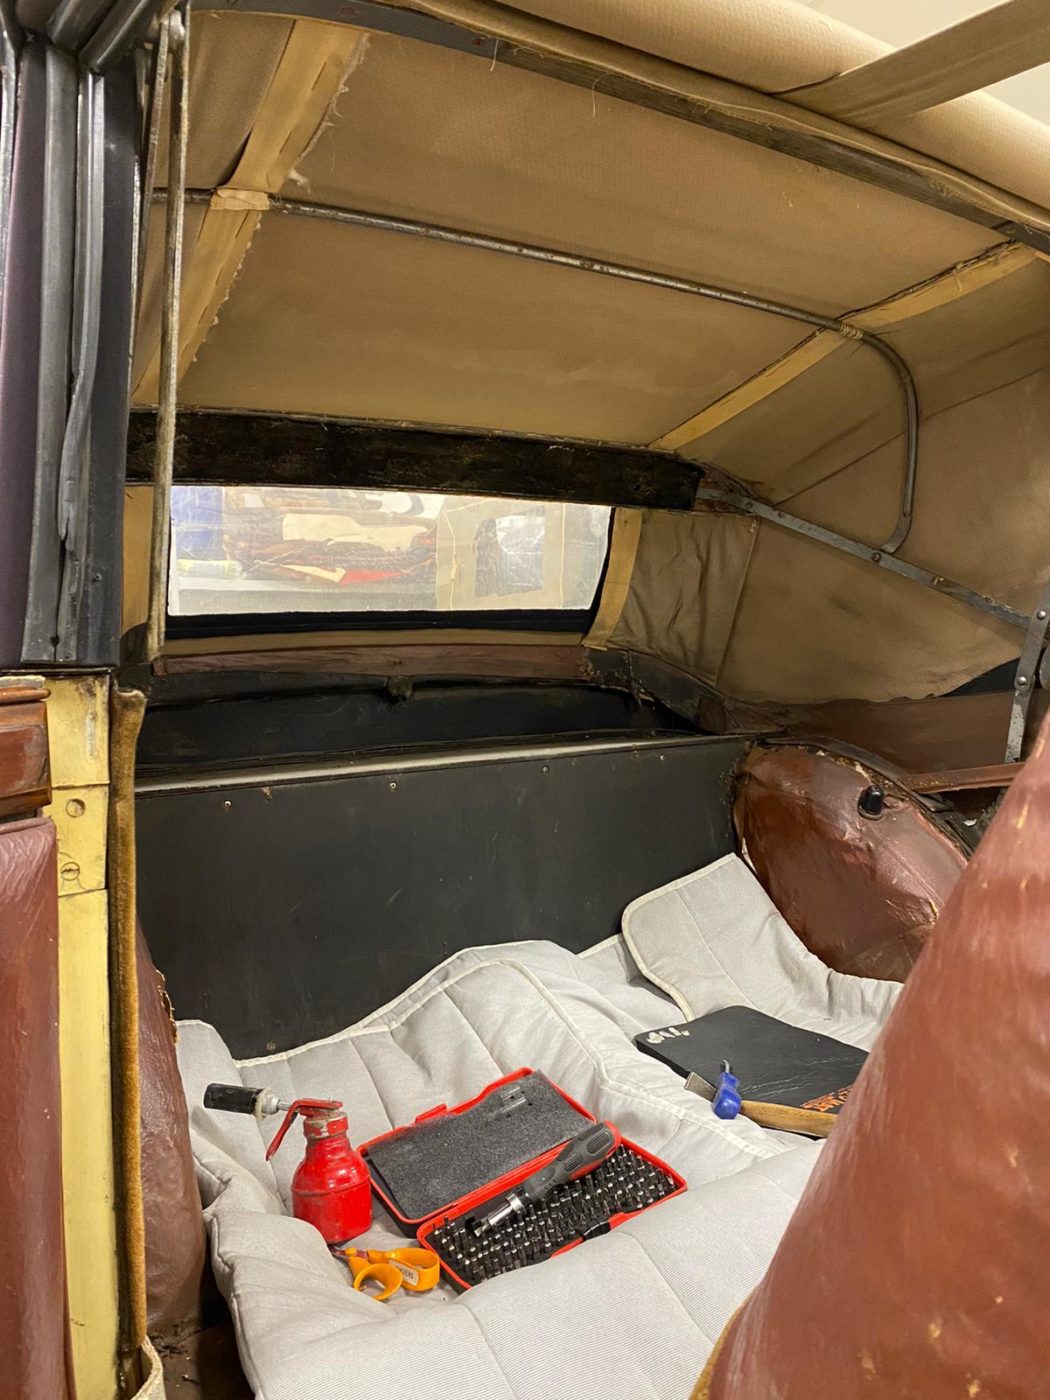
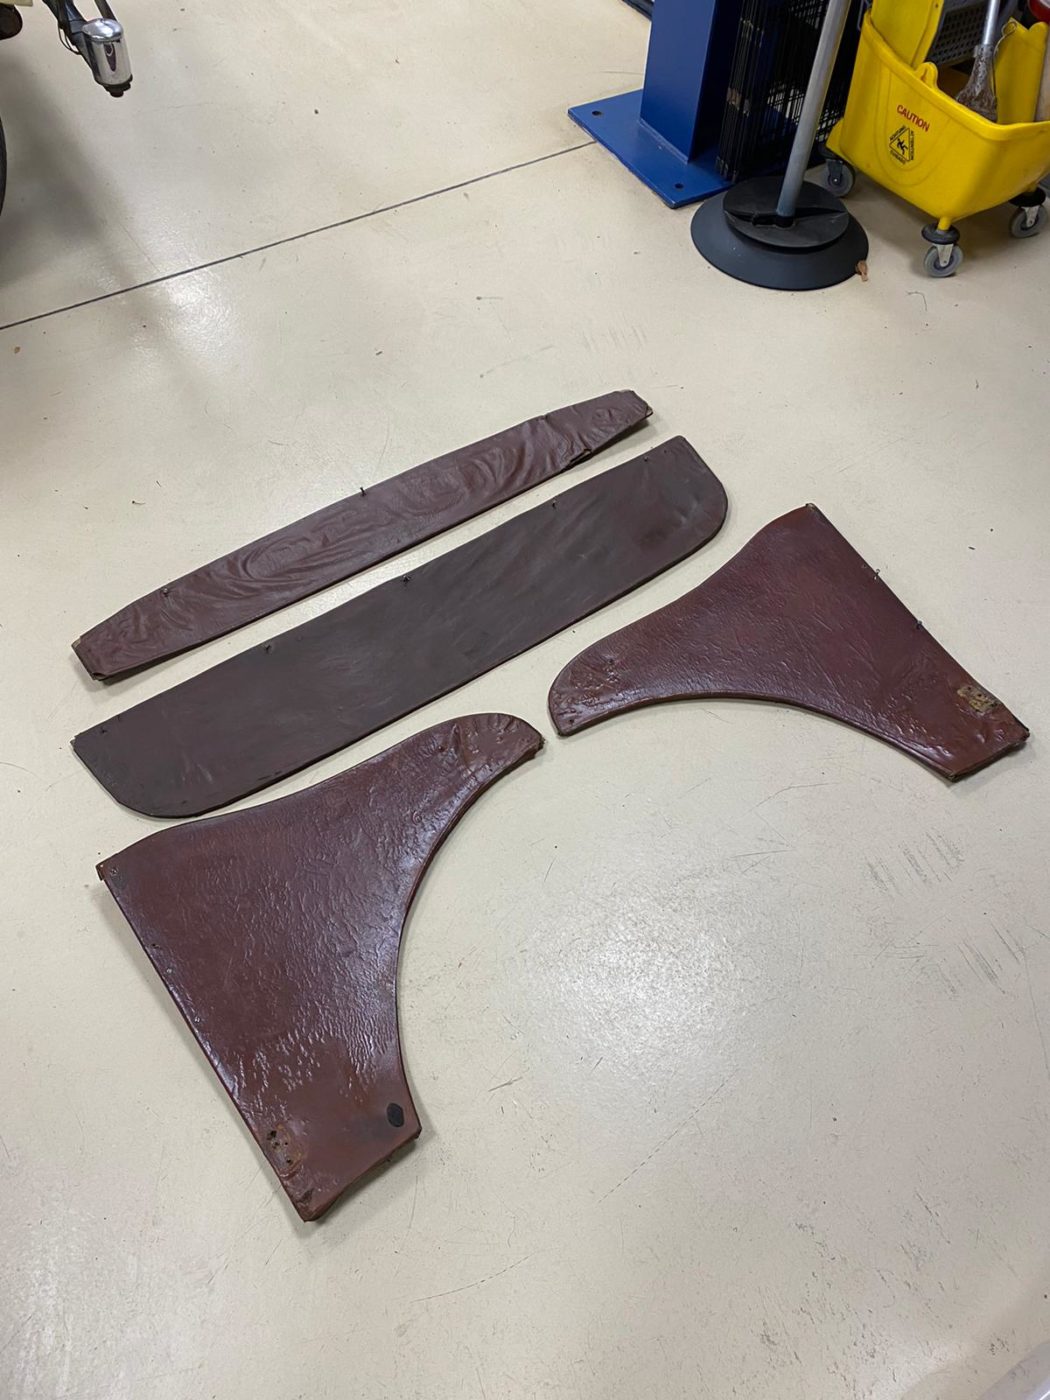
Brian has been stripping off al the old material from the front trim panels and recovering them in a new material to match the headliner. He has also removed and recovered the side trim panels and b post panels.
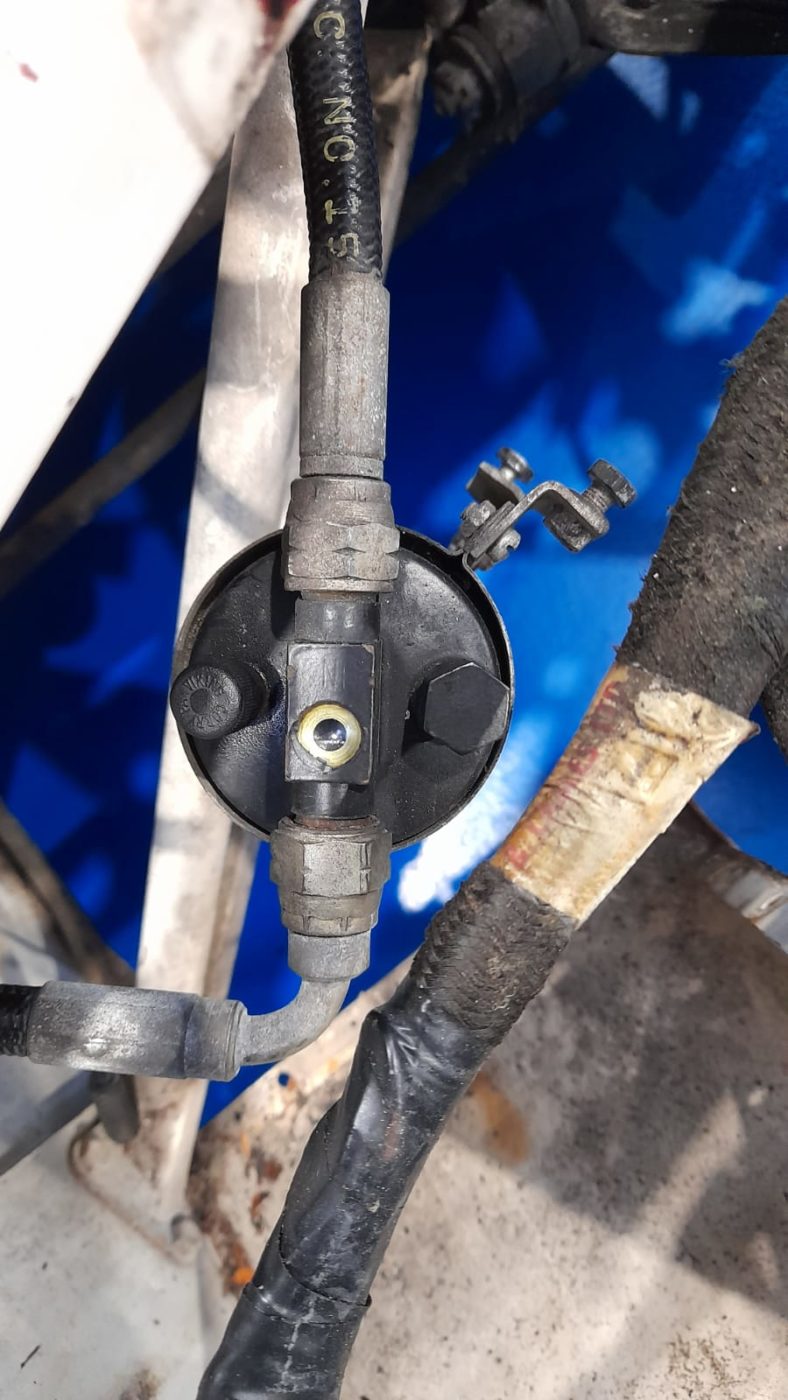
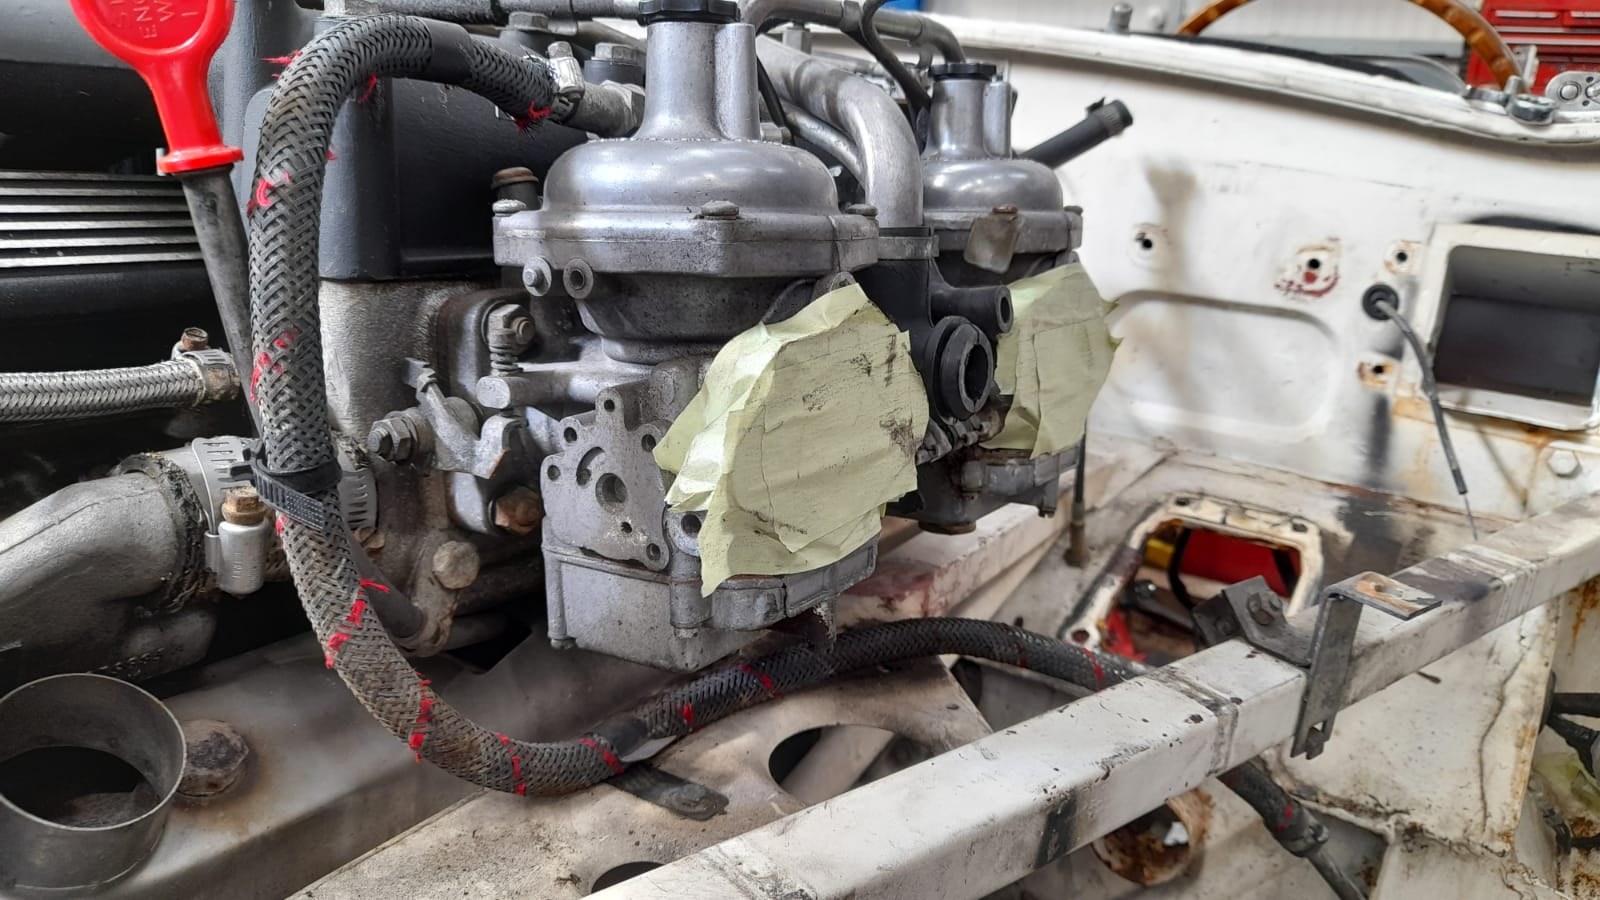
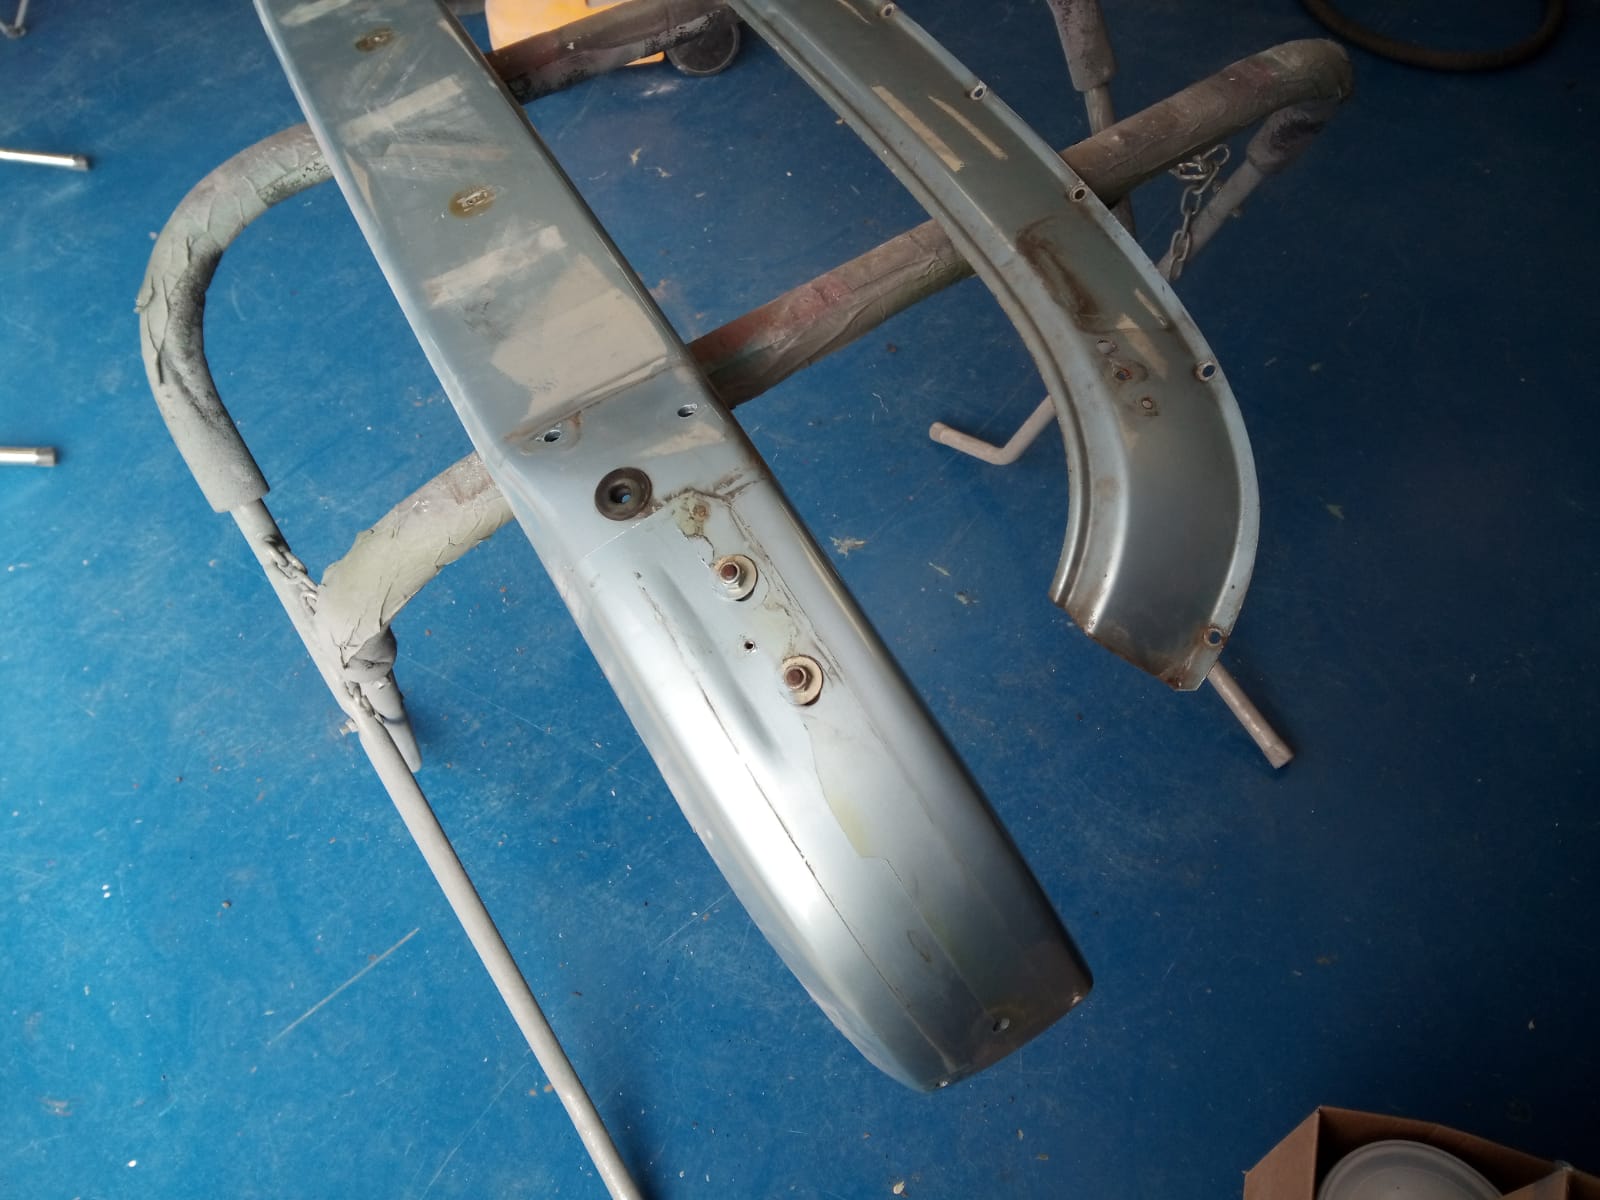
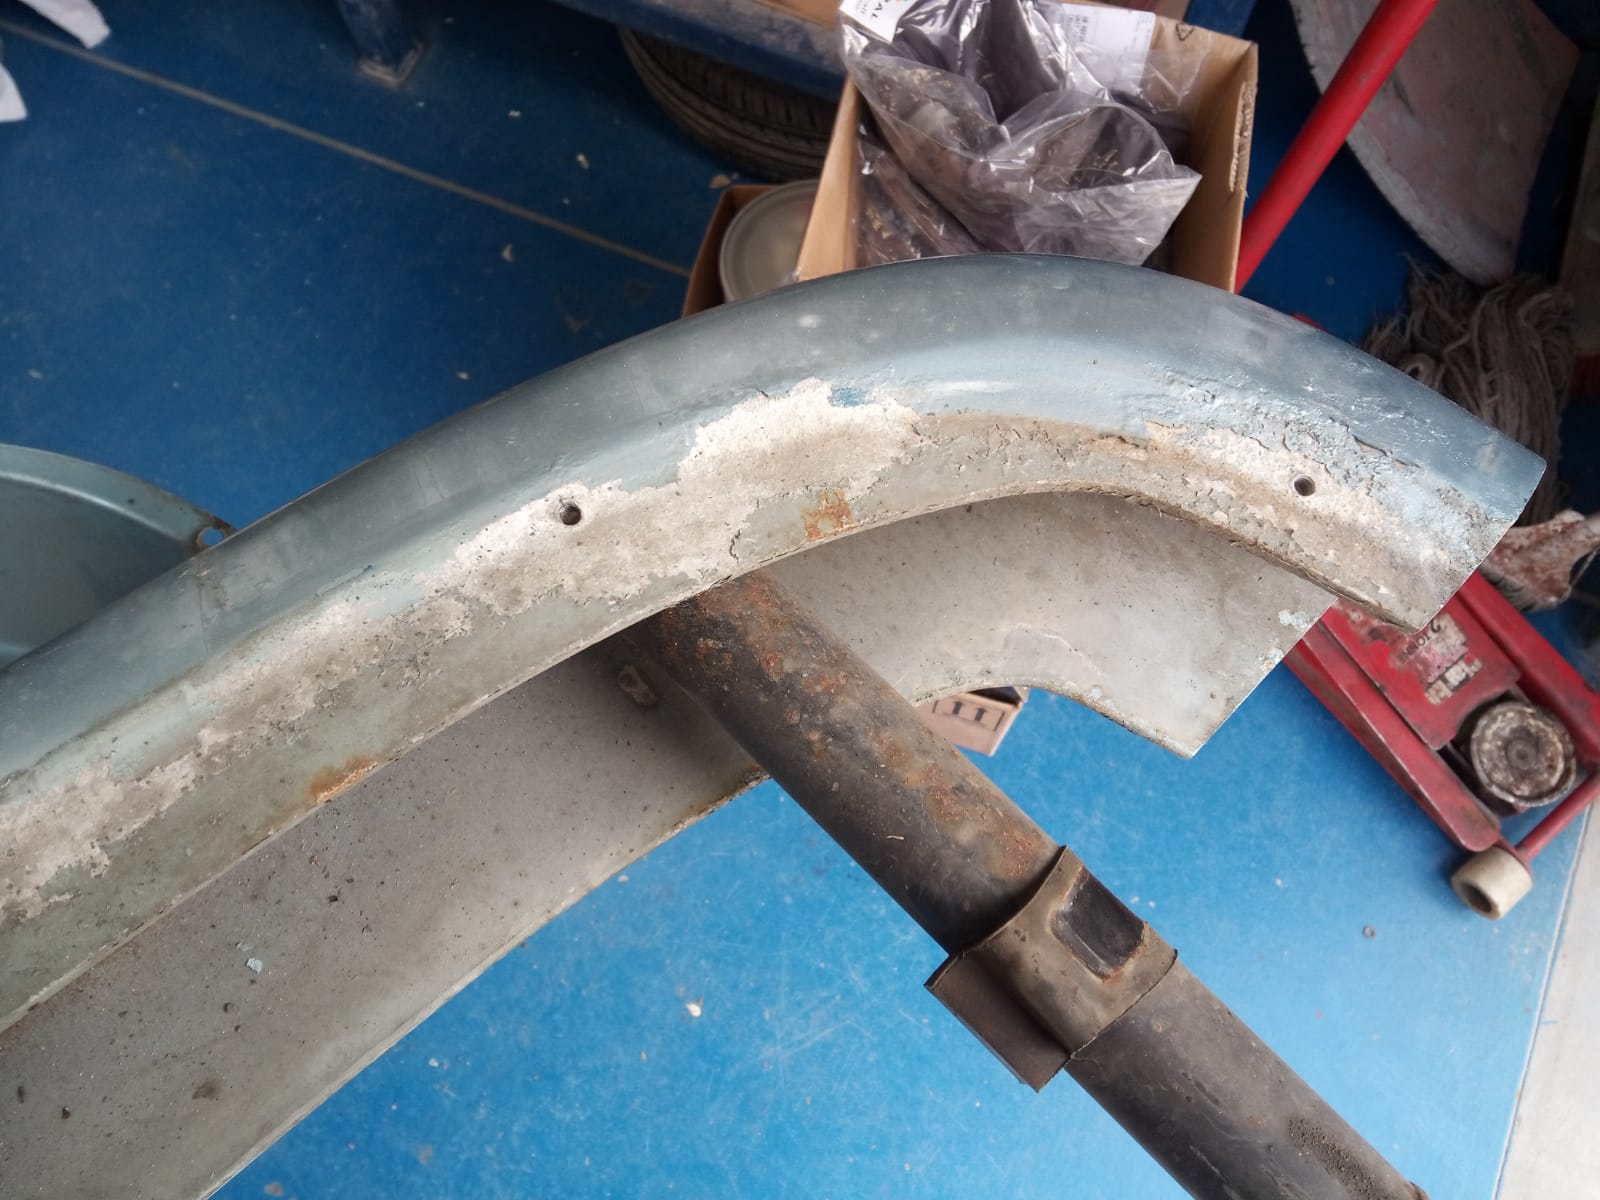
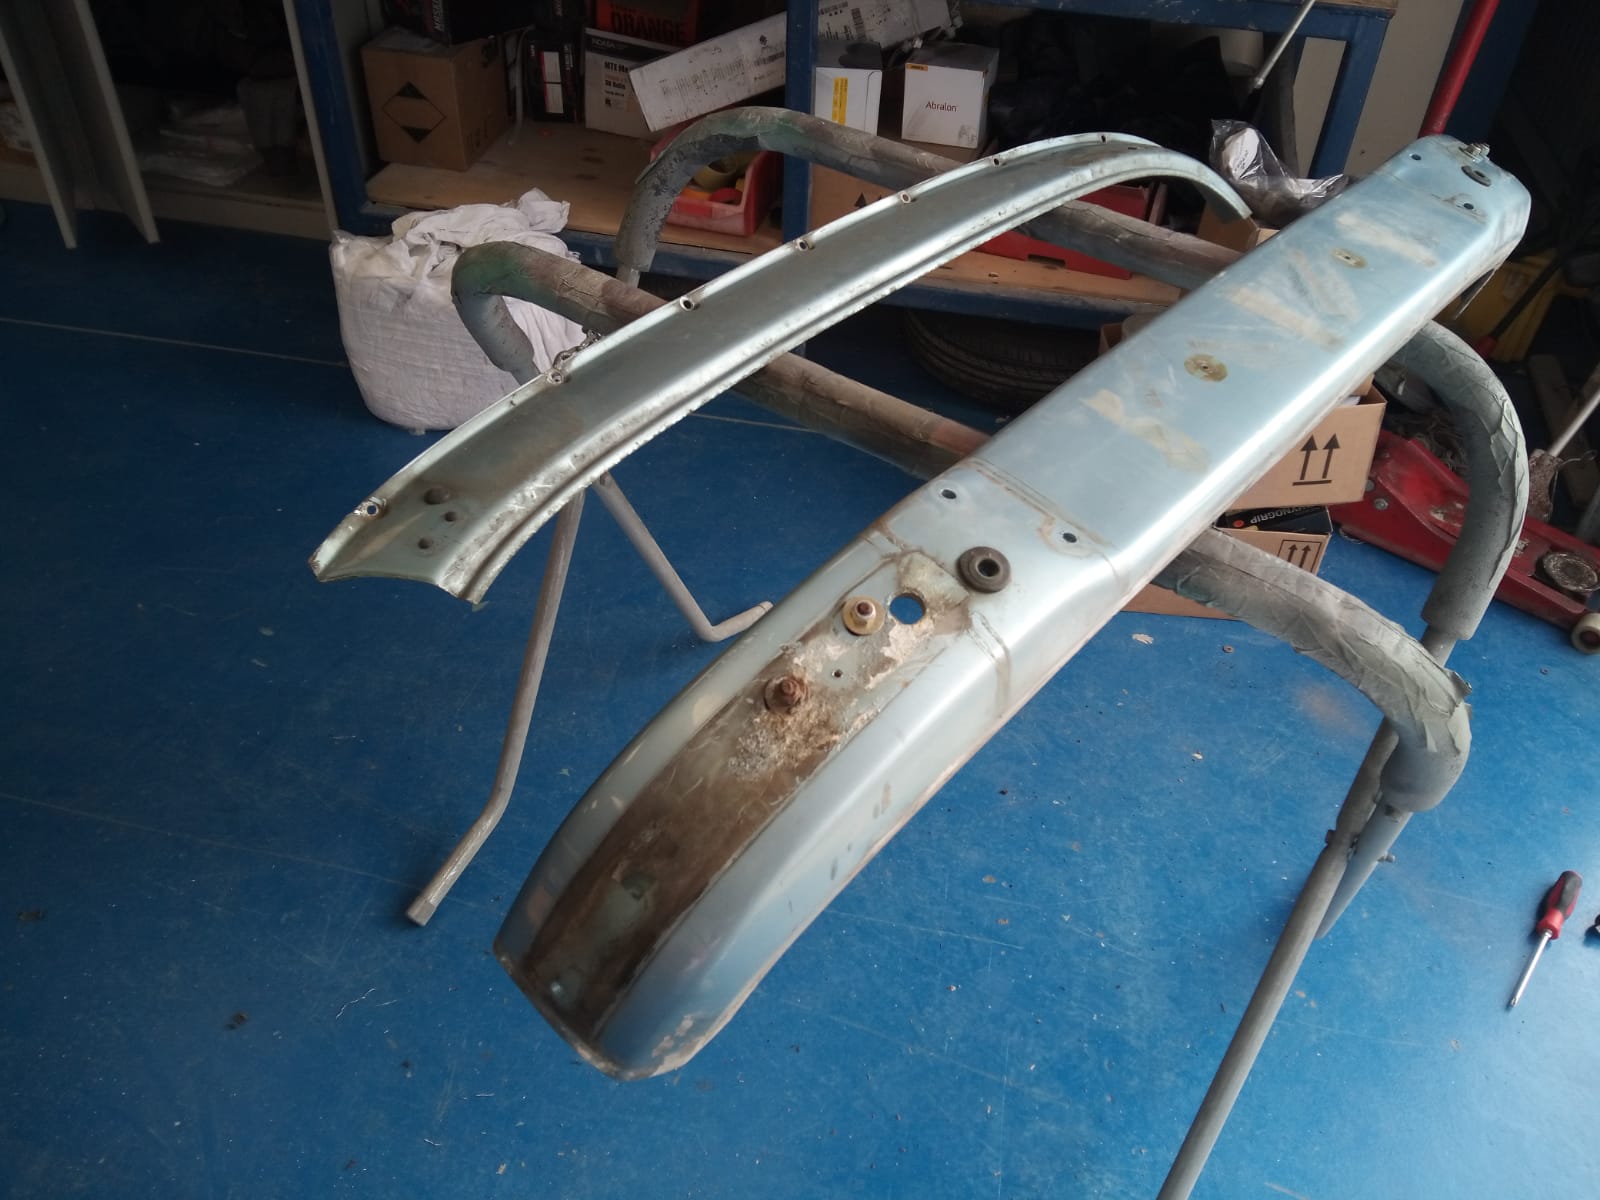
Our classic Triumph TR5 is progressing well through its nut and bolt restoration. Mauro has recently fitted the fuel and brake lines as well as fitting the panel in the wheel arch known as the ‘baffle’ plate.

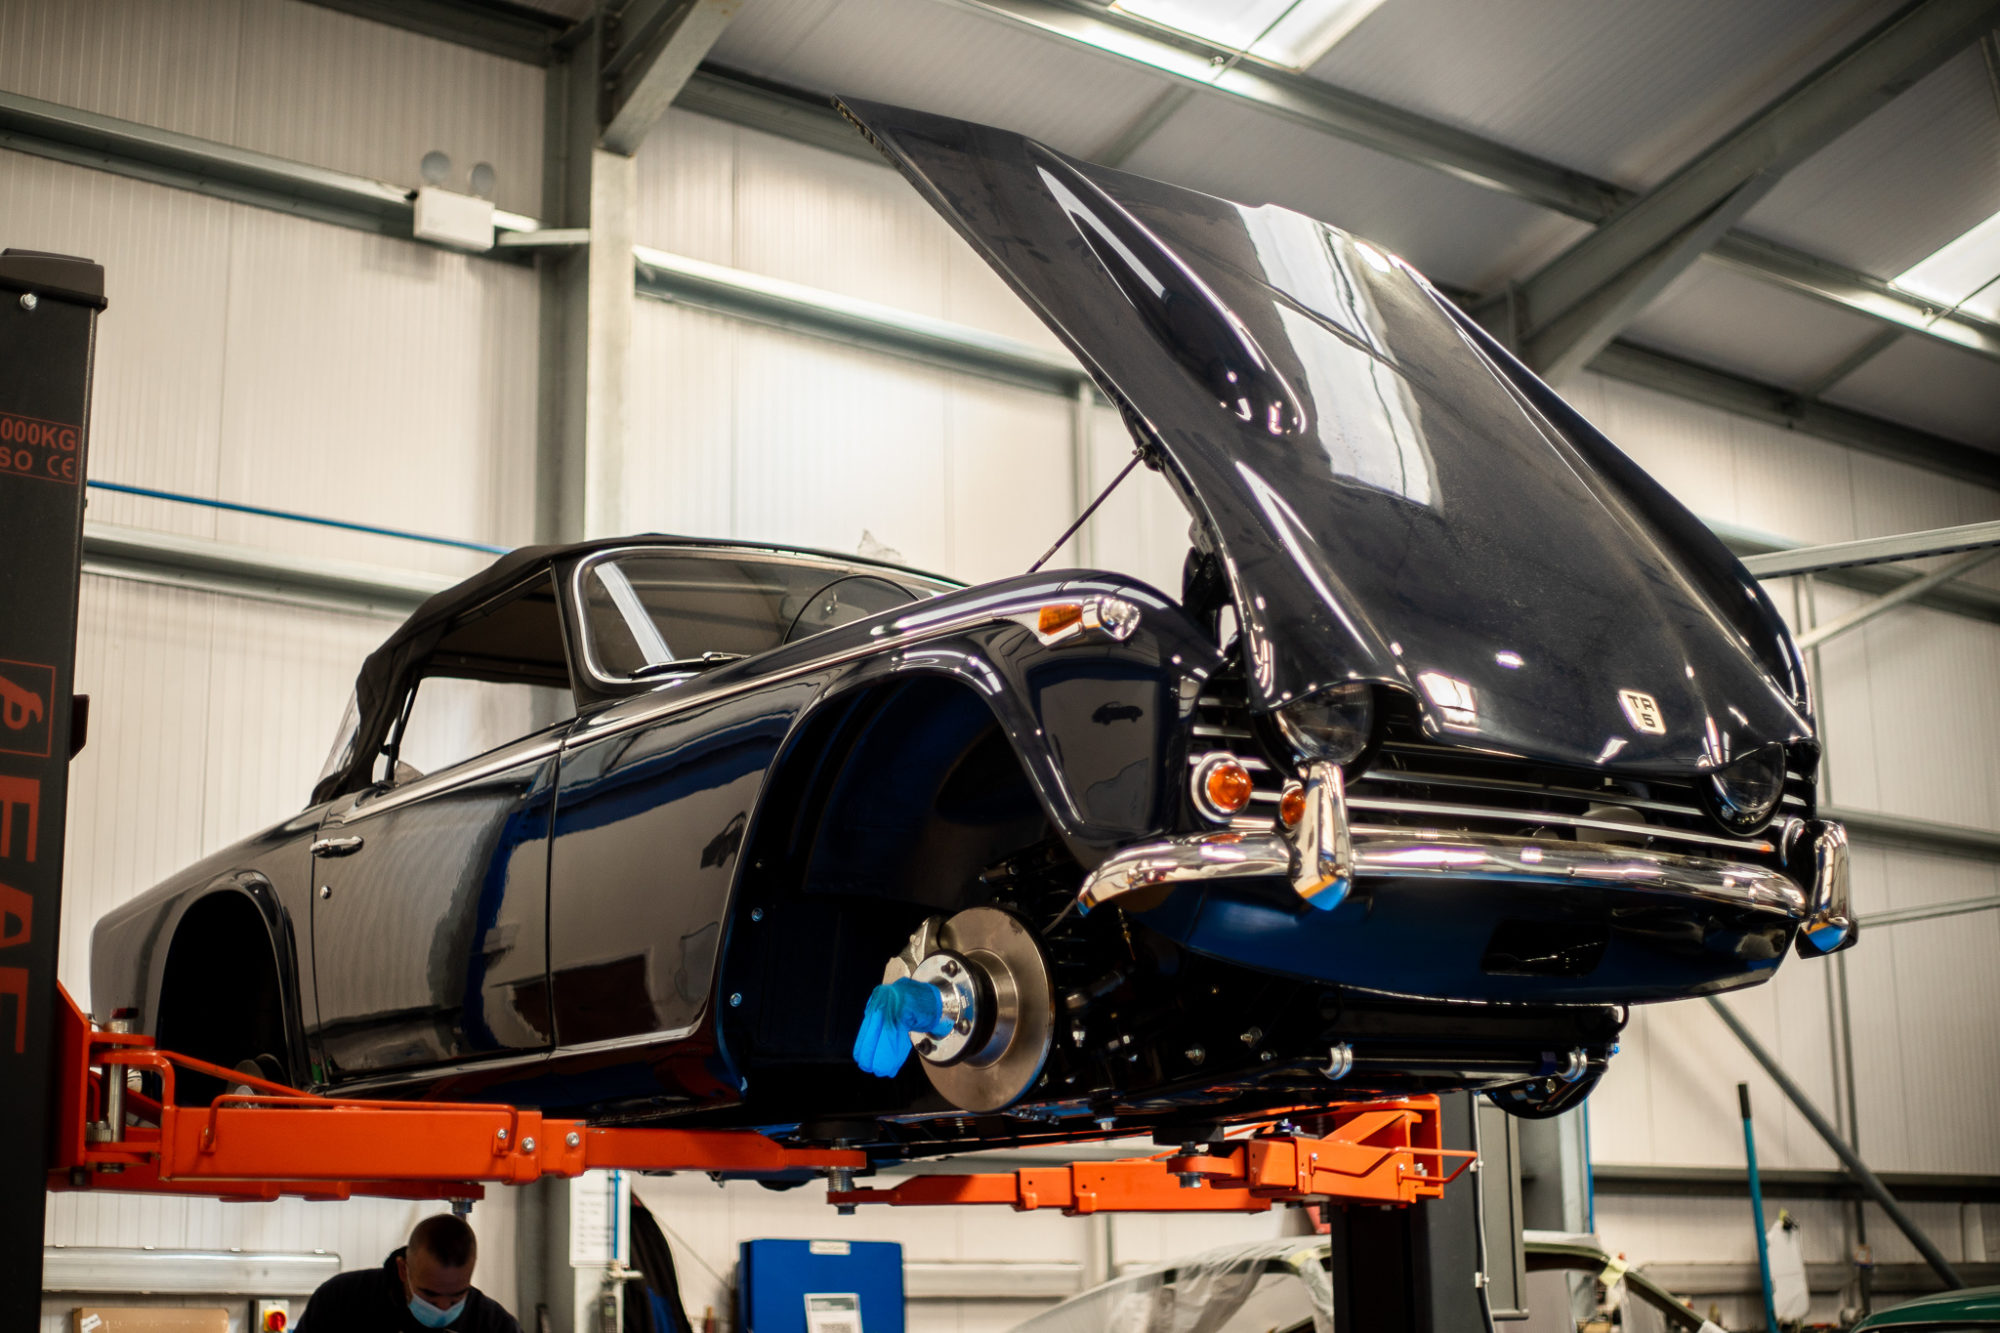
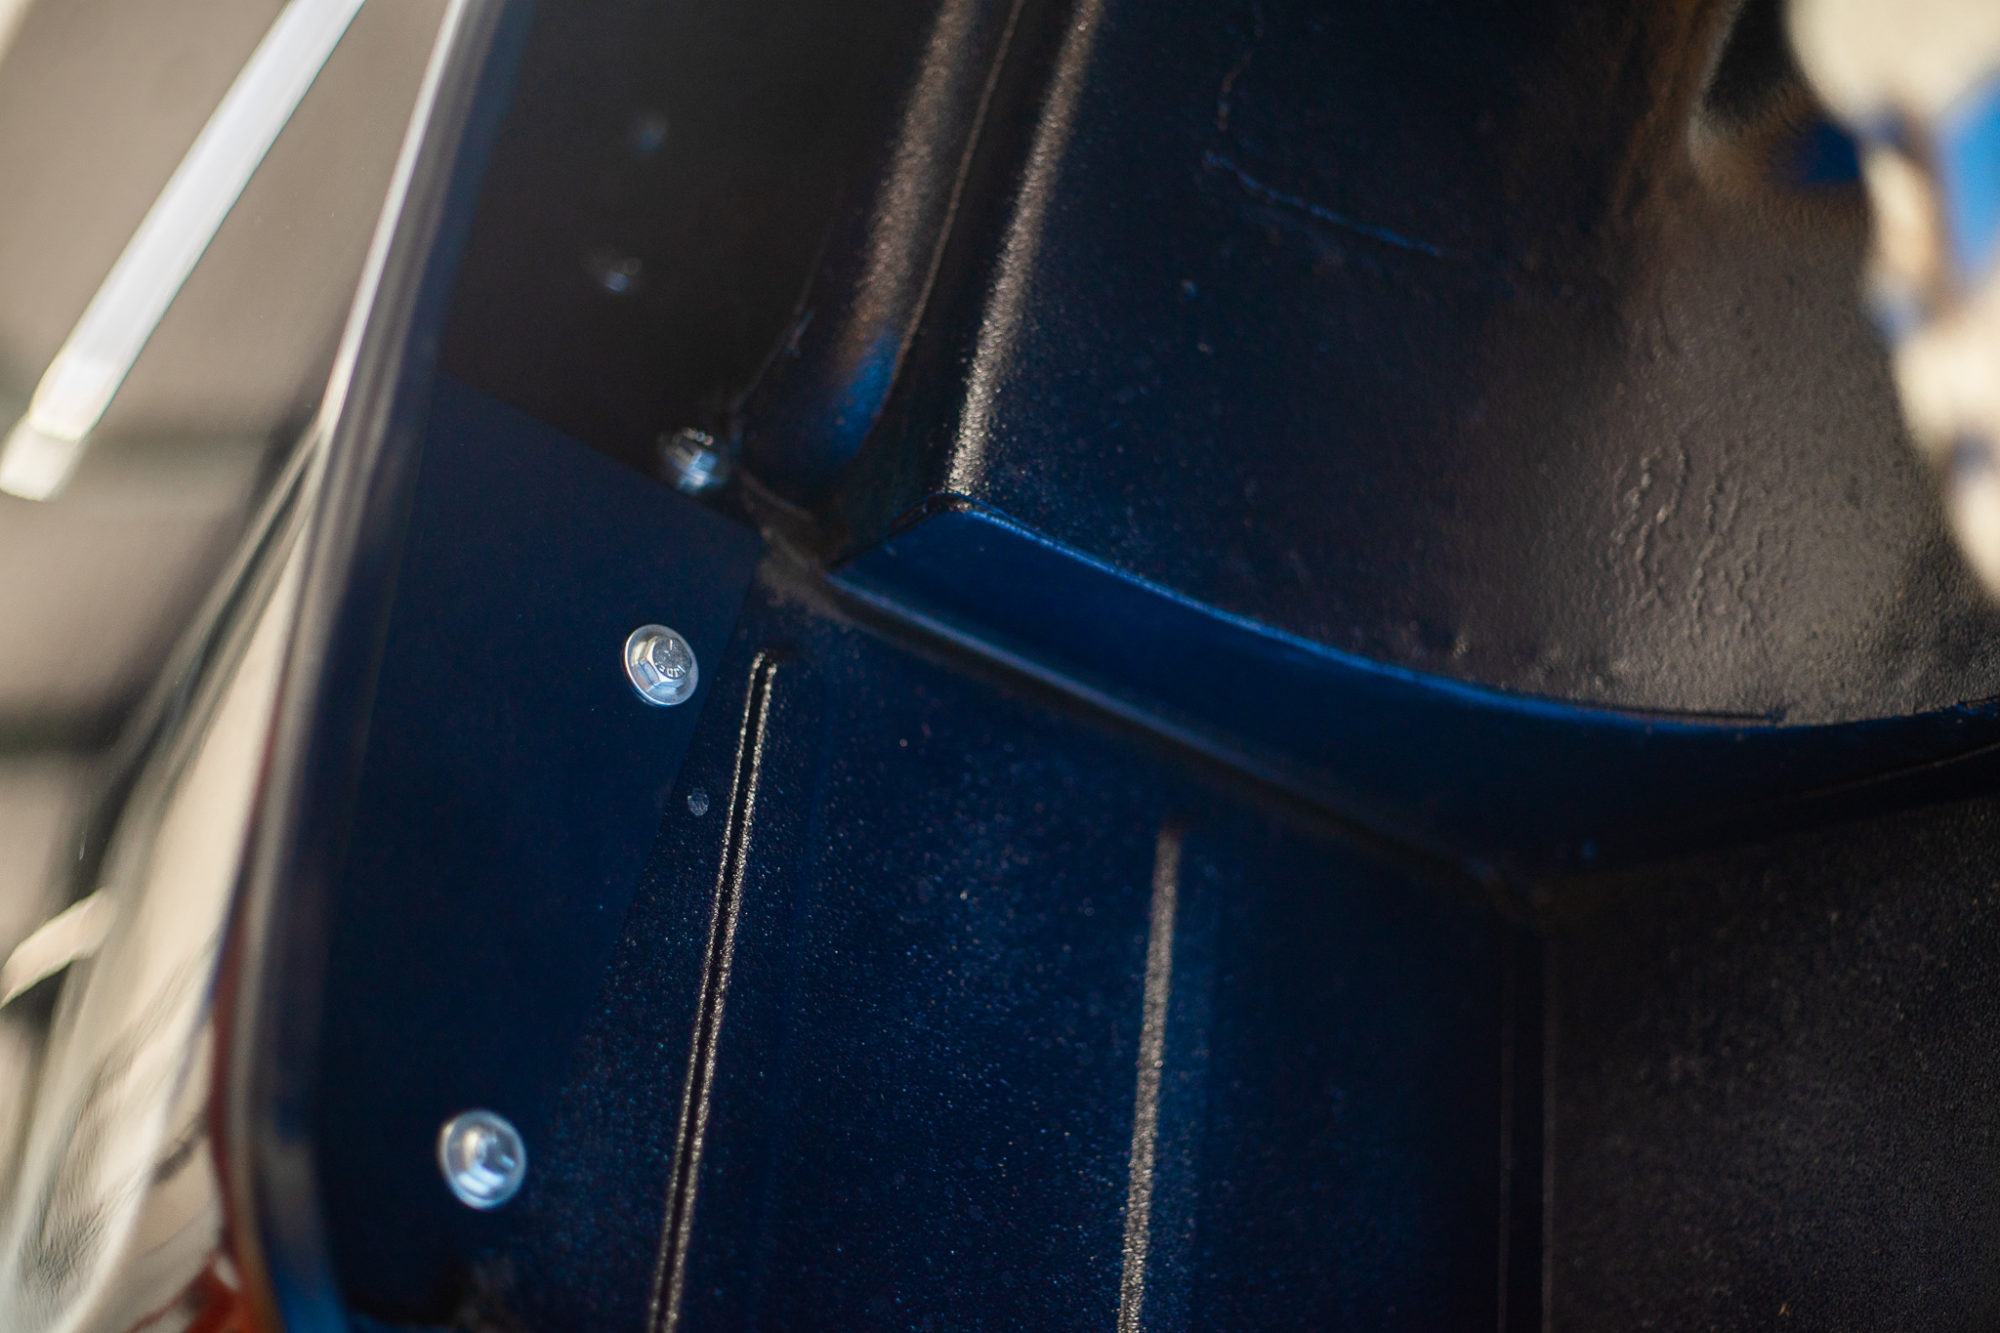
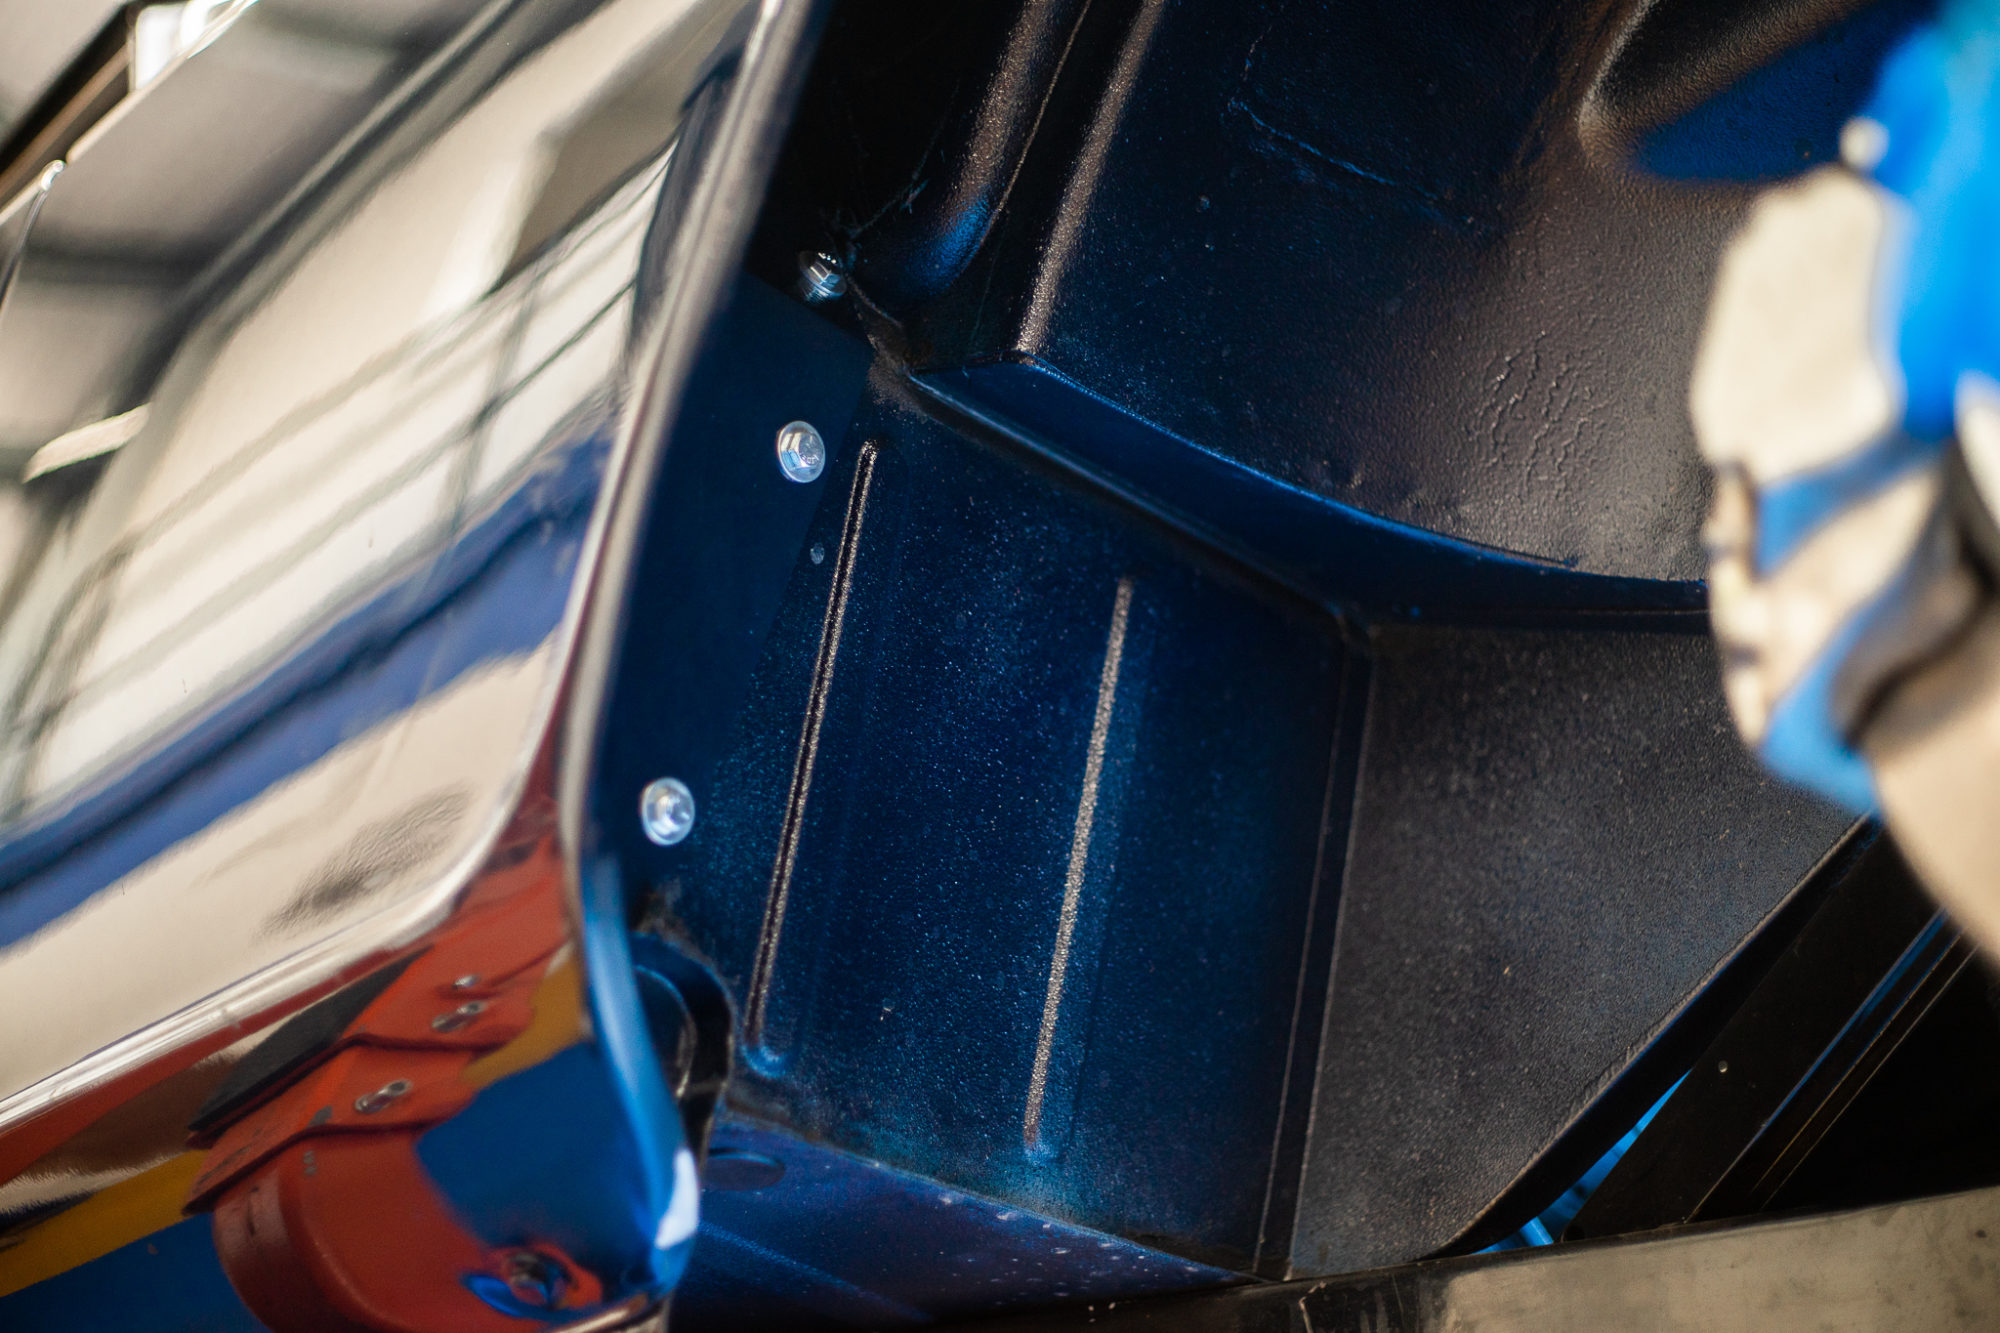
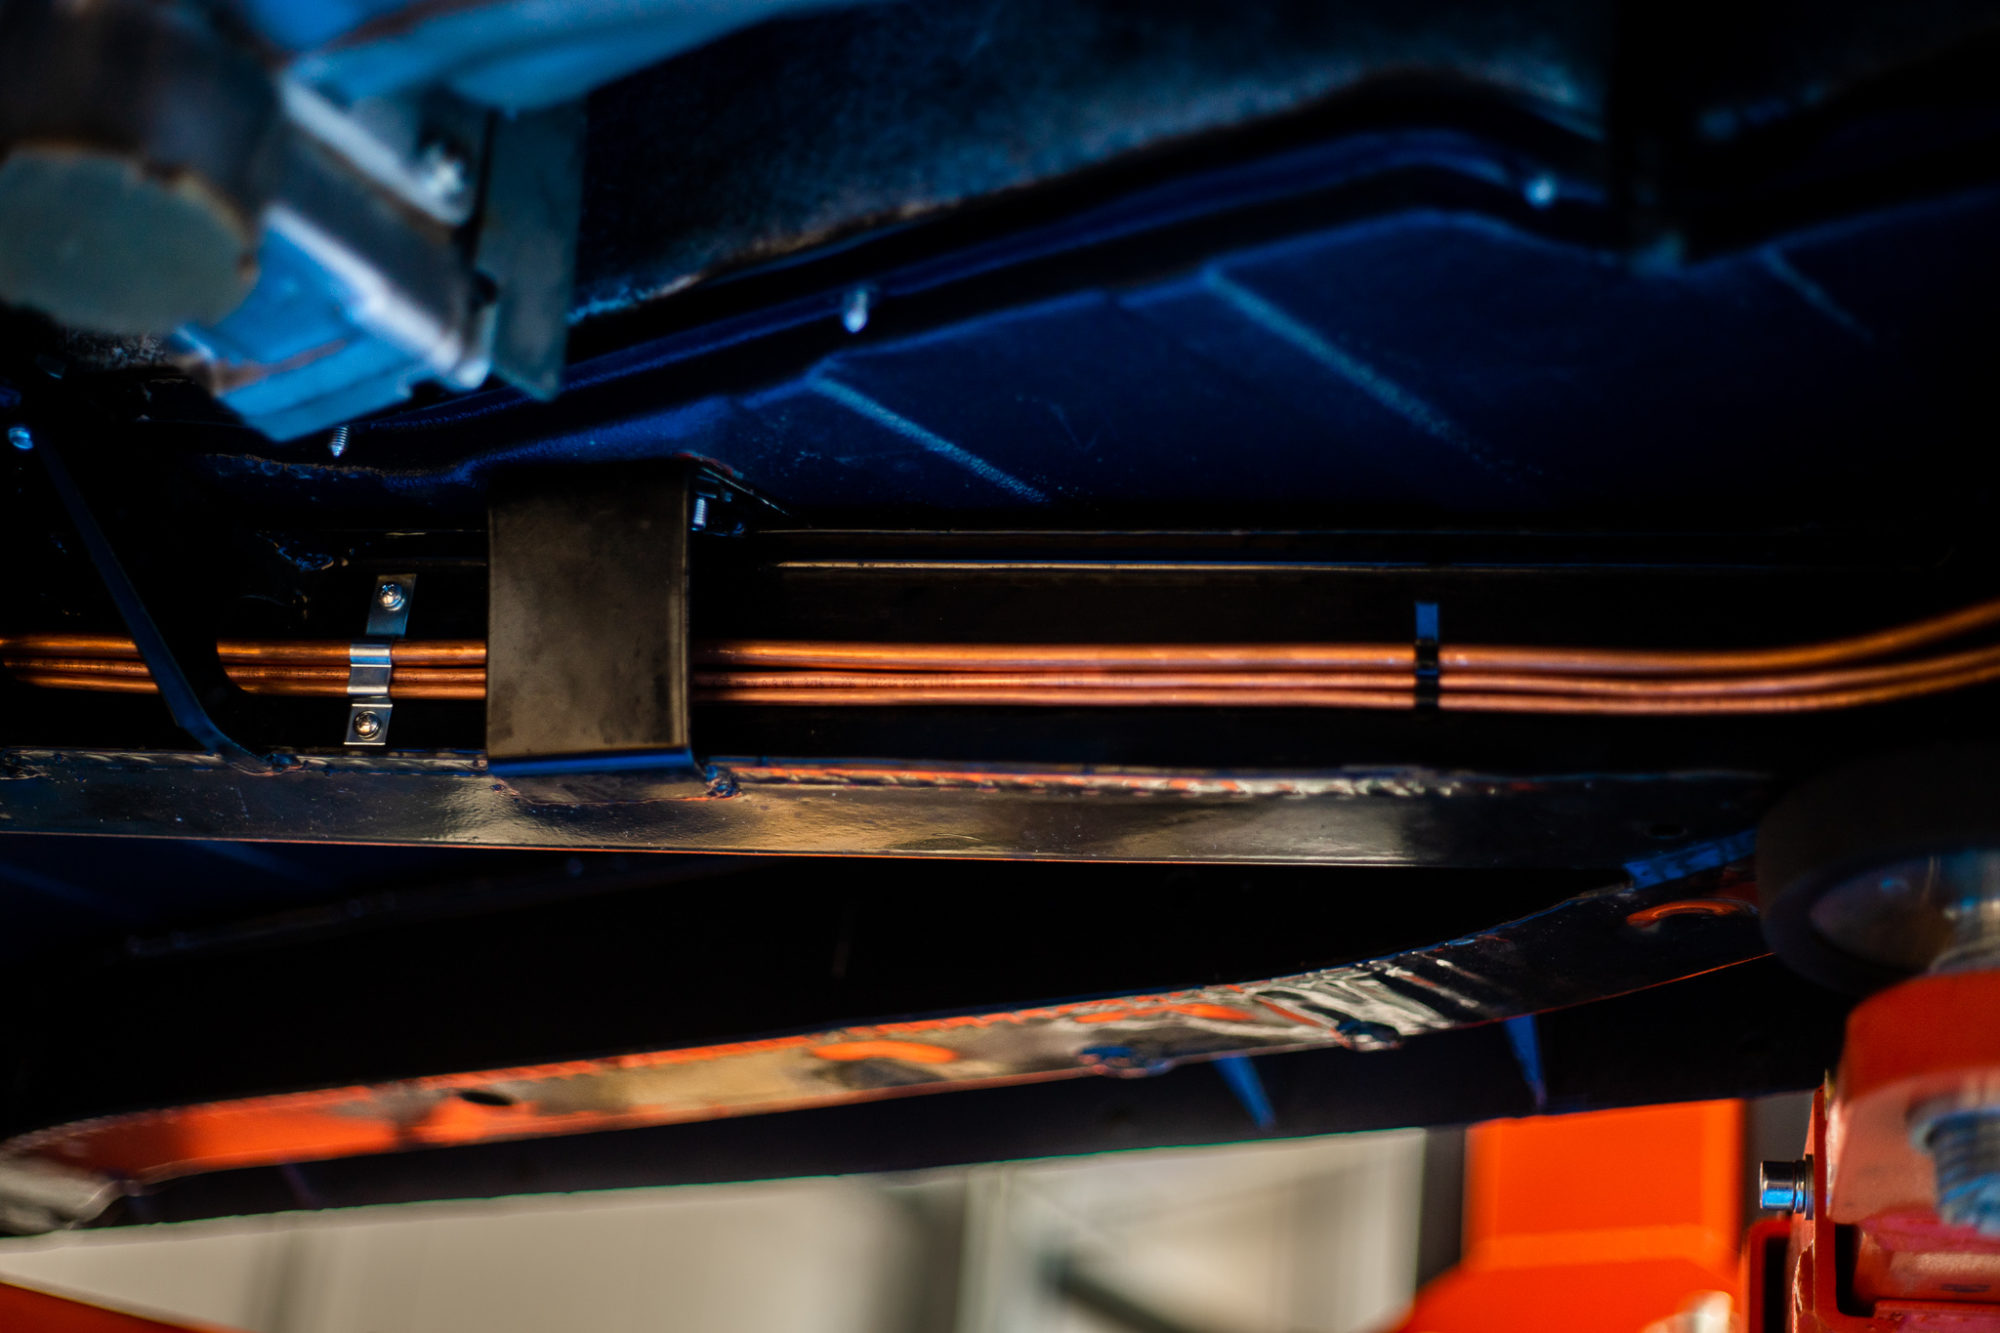
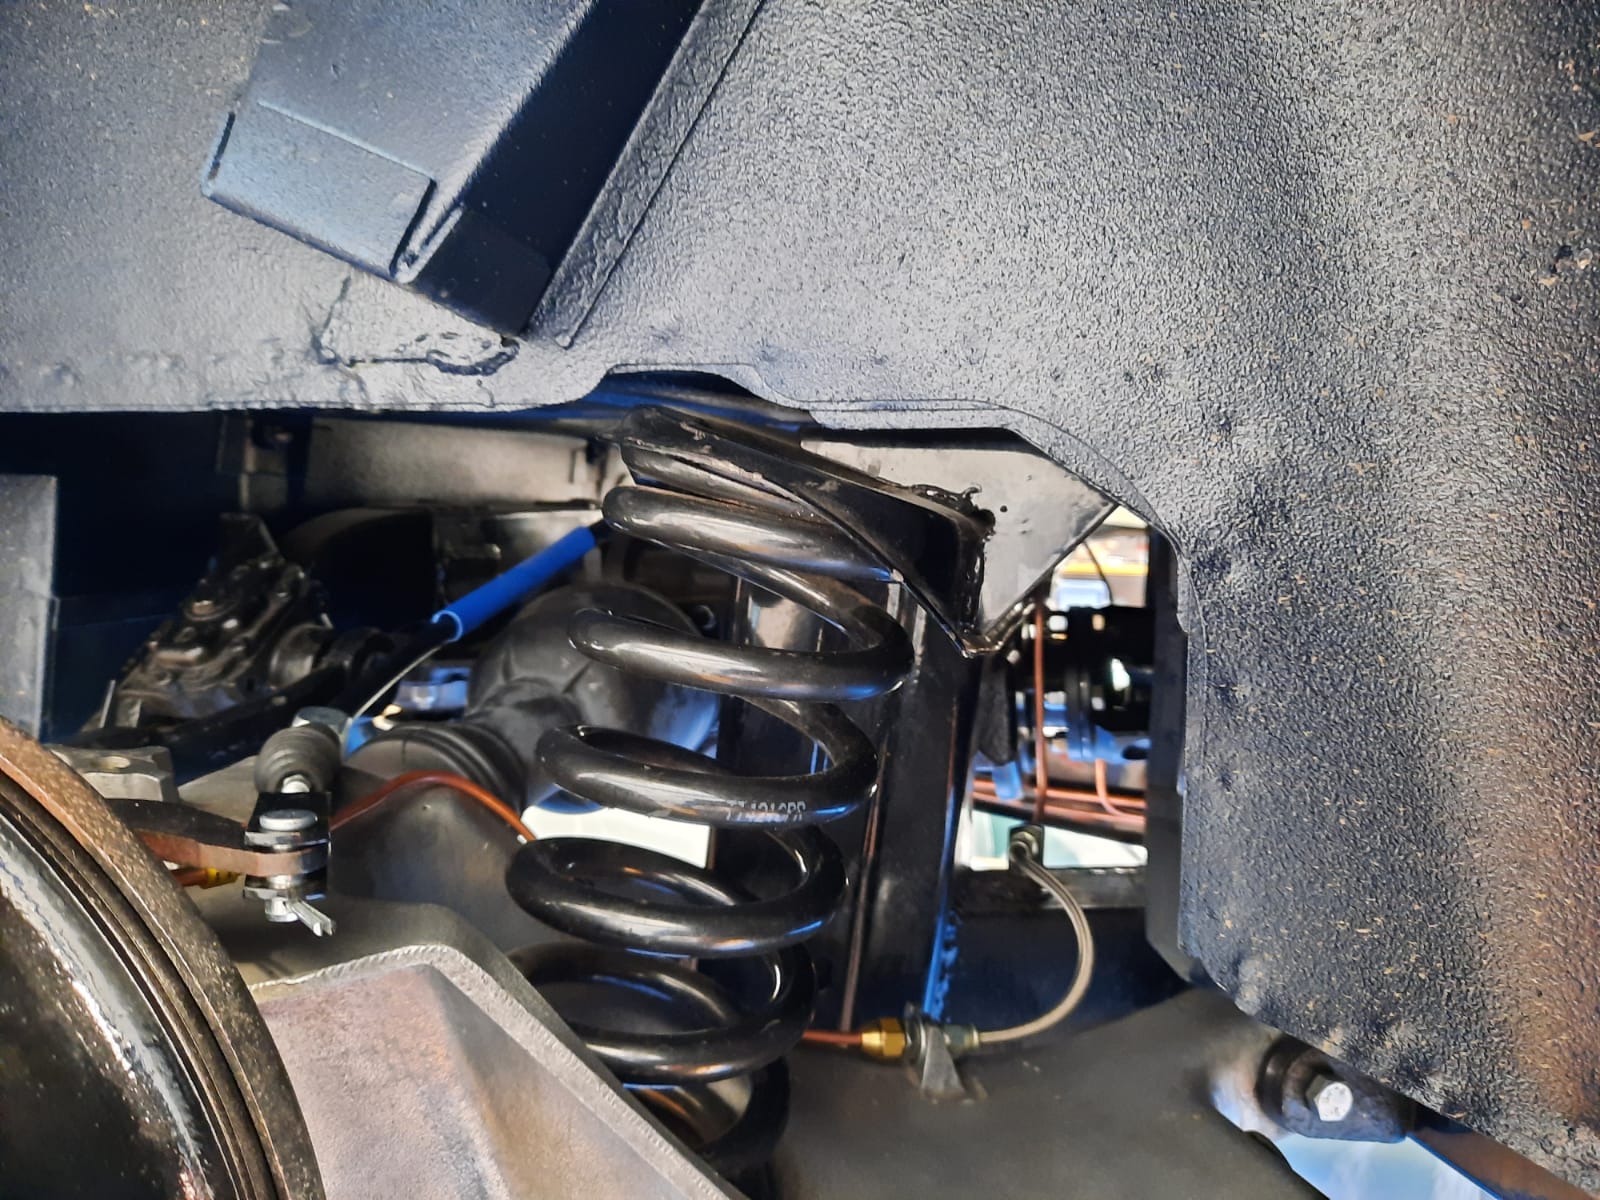
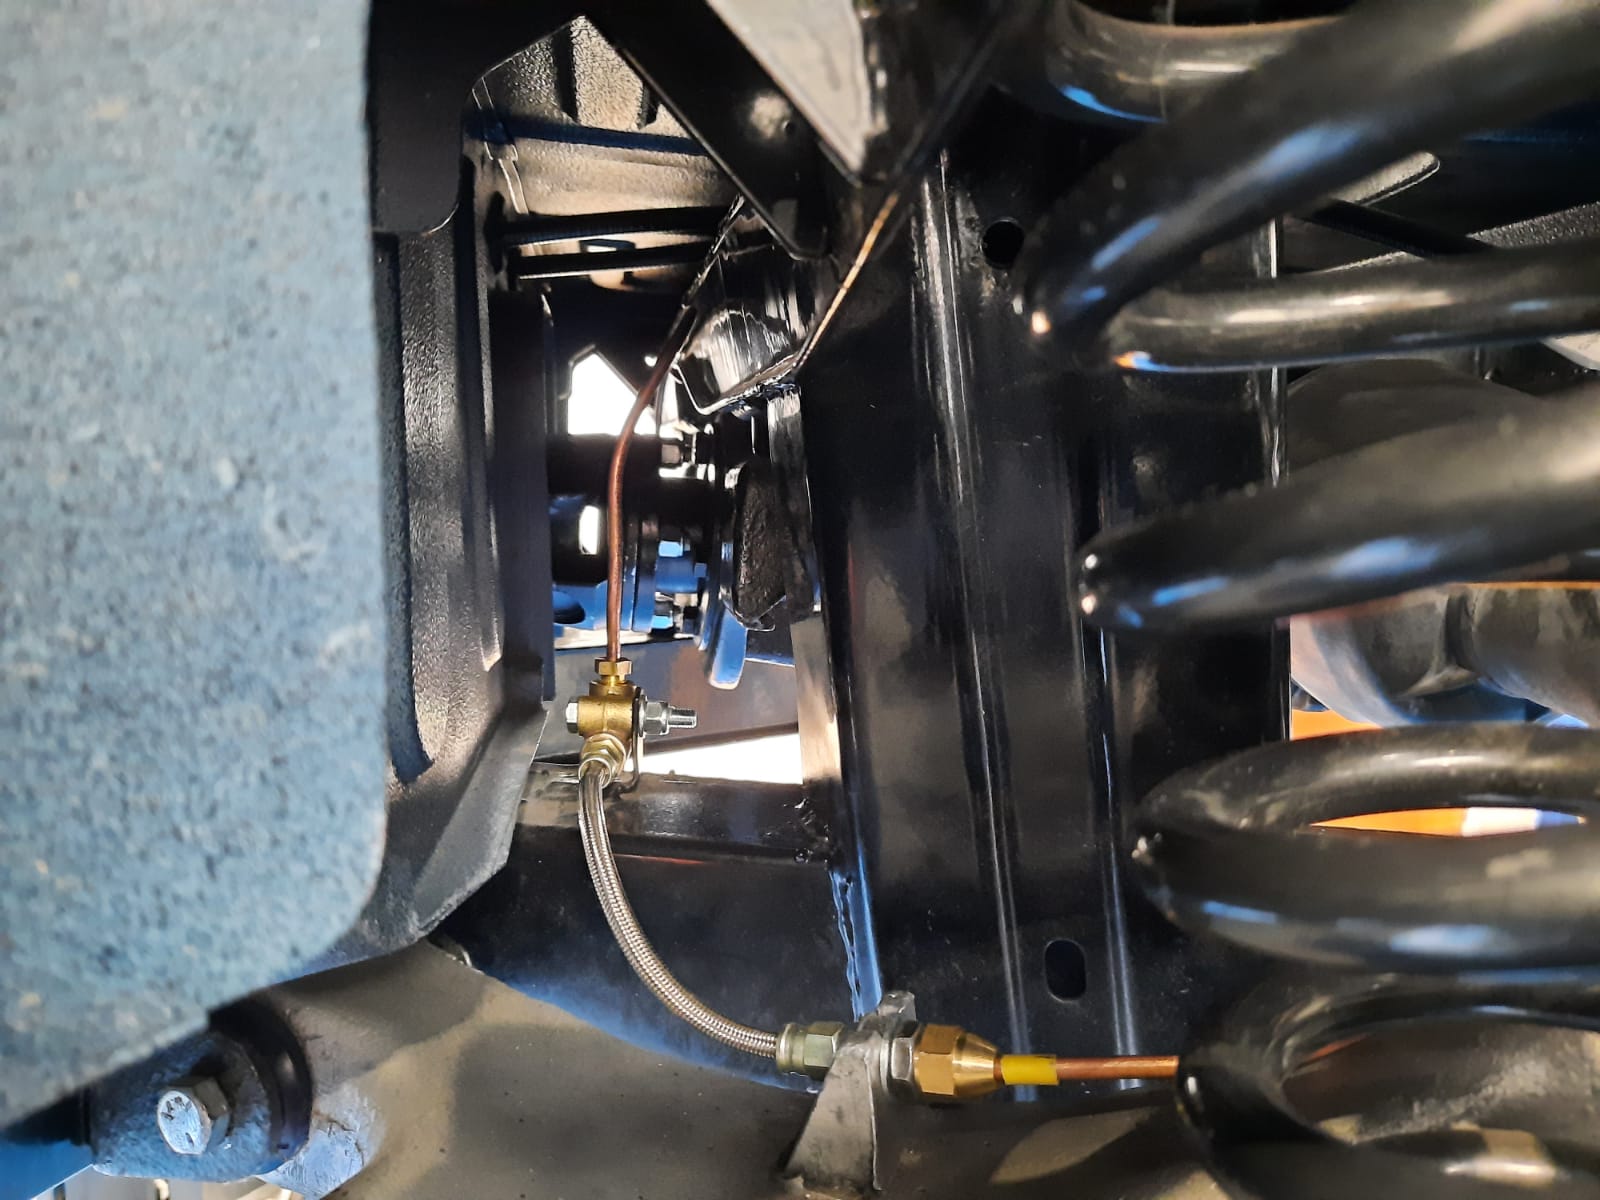
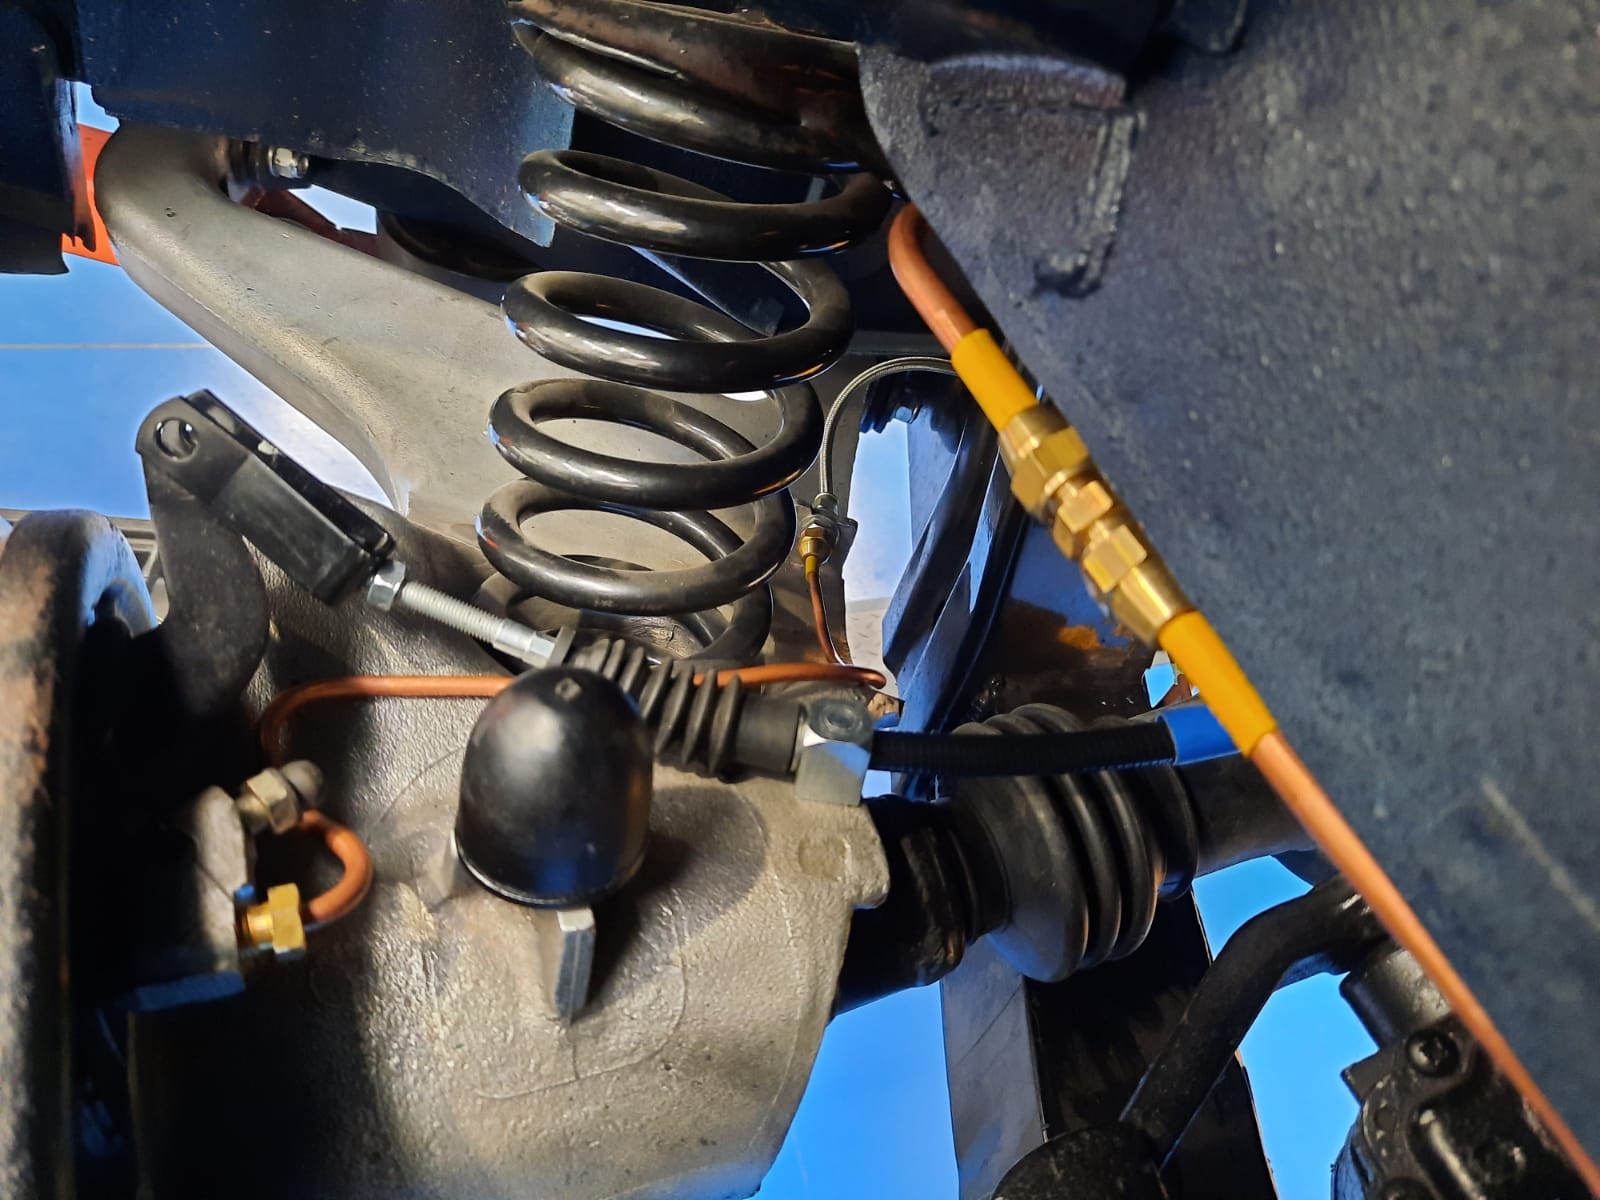
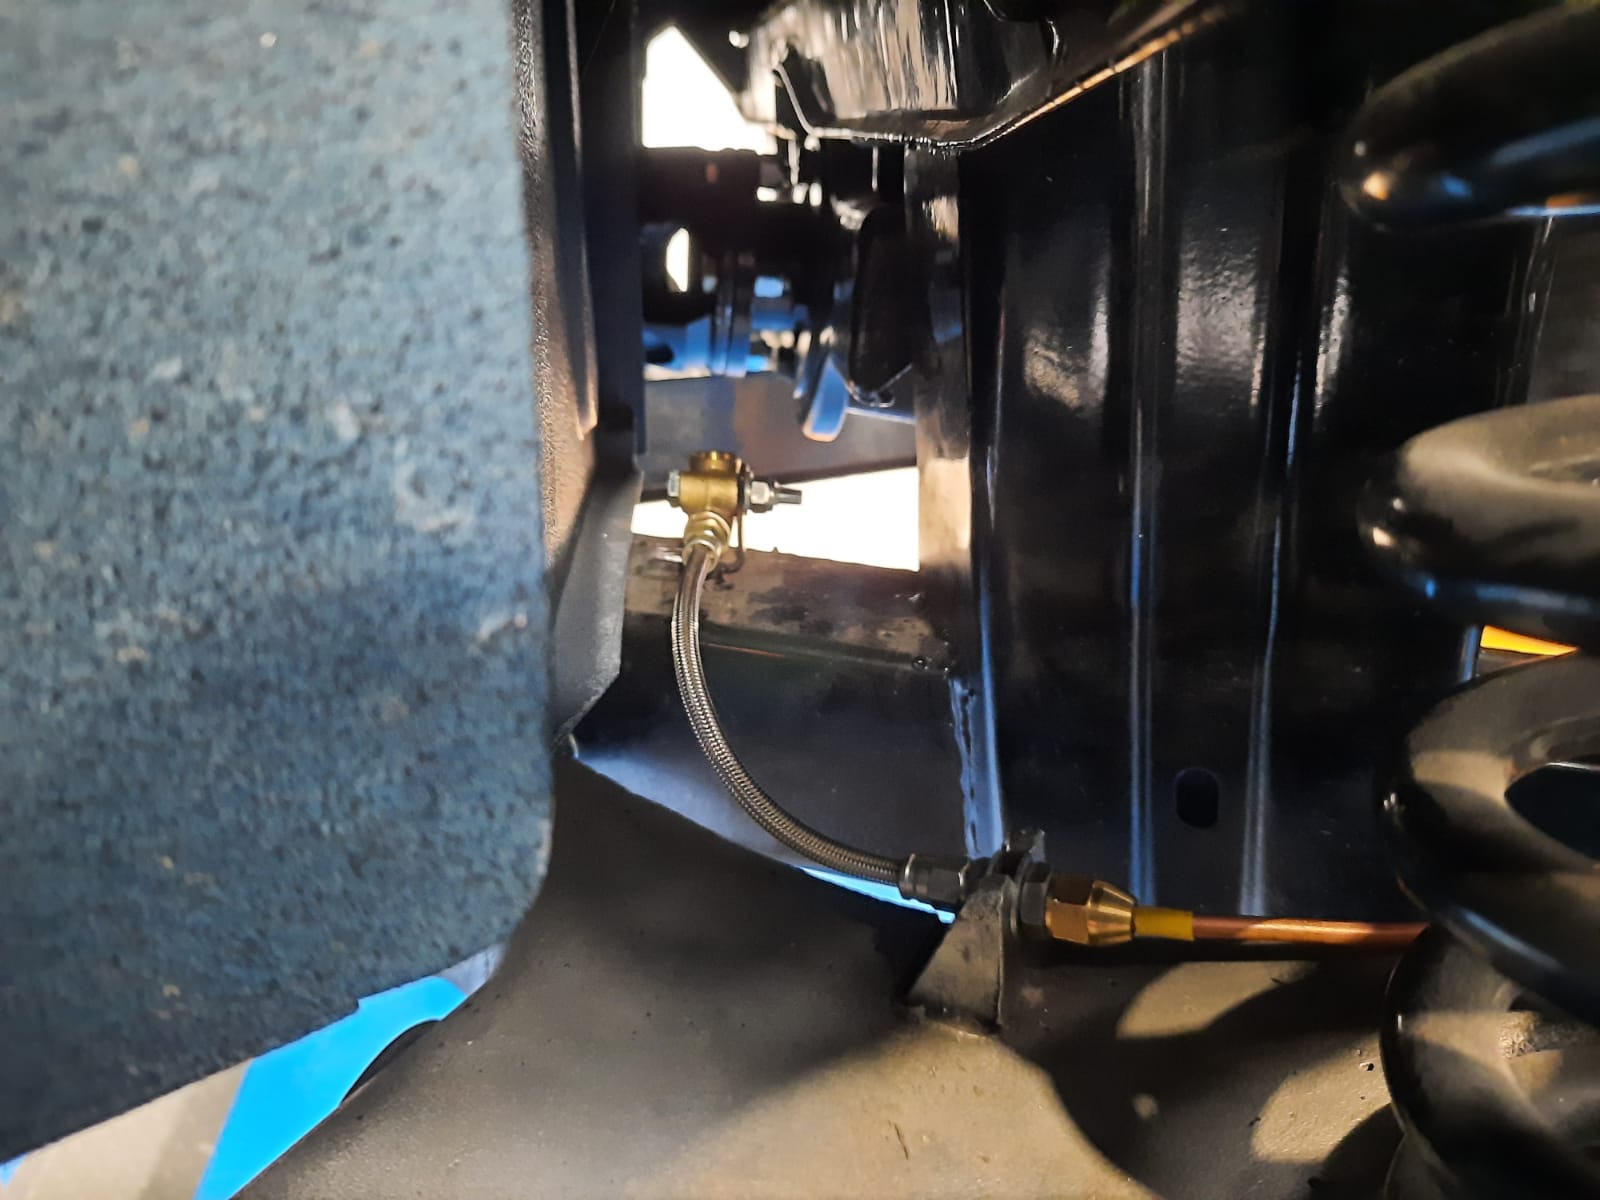
Mauro has also been working on correcting and fitting the bumper as he wasn’t happy with how it was sat.
Our 1960 Peony Red Jensen is coming along well. With the continuation of chrome fitting, Paul has been making an fitting seat belt strengthens to ensure safety. Originally only being fitted to the metal shell, Paul has made some enforced pieces of metal to make sure the seat belts are fixed in well.
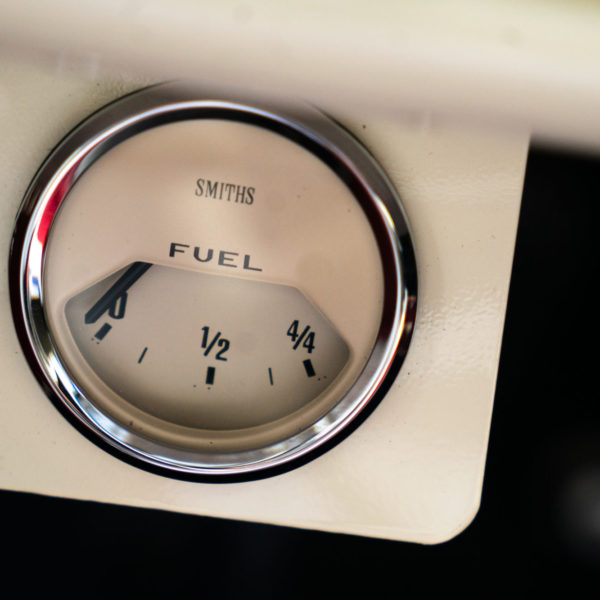
Tom is also linking up the main loom to the fuel gage and reserve, as well a securing it in place so that it runs to the rear loom.


Our 1973 Jaguar E-Type from Beverly Hills has had its engine removed today so that it can be sent off to be rebuilt. Scott has been working to strip the engine of any pieces that don’t need to be sent off.


This stunning 1978 Triumph TR7 V8 has come back in for some servicing issues such as the power steering, track rods ends being too stiff, alignment and tracking required, the fitting of some Cibie driving lights, the fixing of some wiring and some trim needing to be amended round the base of the gear stick.

A customer, based all the way out in Pakistan, has requested that we recover their 2006 Range Rover Vogue sun visors that have started to look worn out. No job is too big or too small for our trim shop!

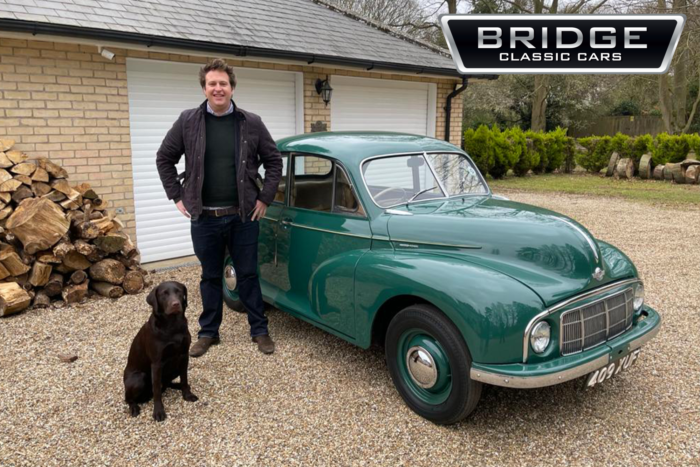
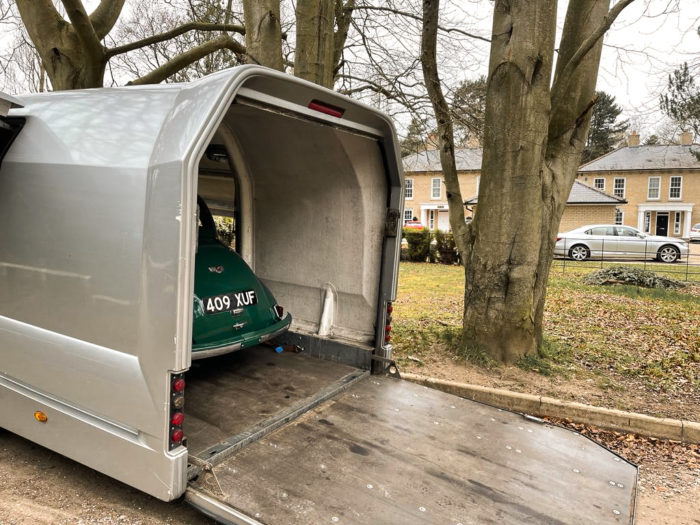
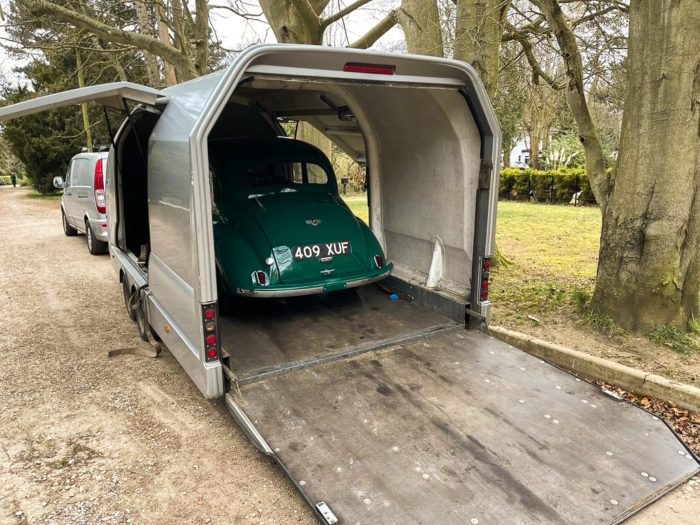
Our lovely little 1949 Morris Minor was delivered to its new owners in Ipswich over the weekend. Matthew Sudgen won with his lucky ticket number 25.
Pictured with partner, Alex and their dog Truffle, Matthew was absolutely delighted to see his new Morris Minor arrive over the weekend – what an Easter treat.

Thank you to everyone who entered to win this lovely classic. We wish you the best of luck if you enter any of our upcoming classic car competitions
Could you be our next winner?www.bridgeclassiccarscompetitions.co.uk
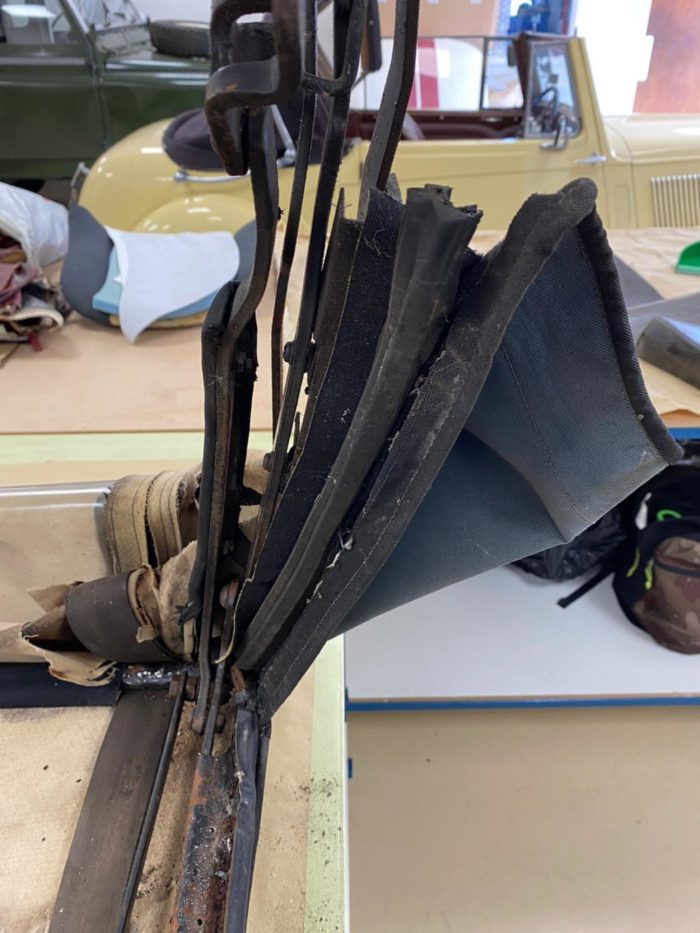
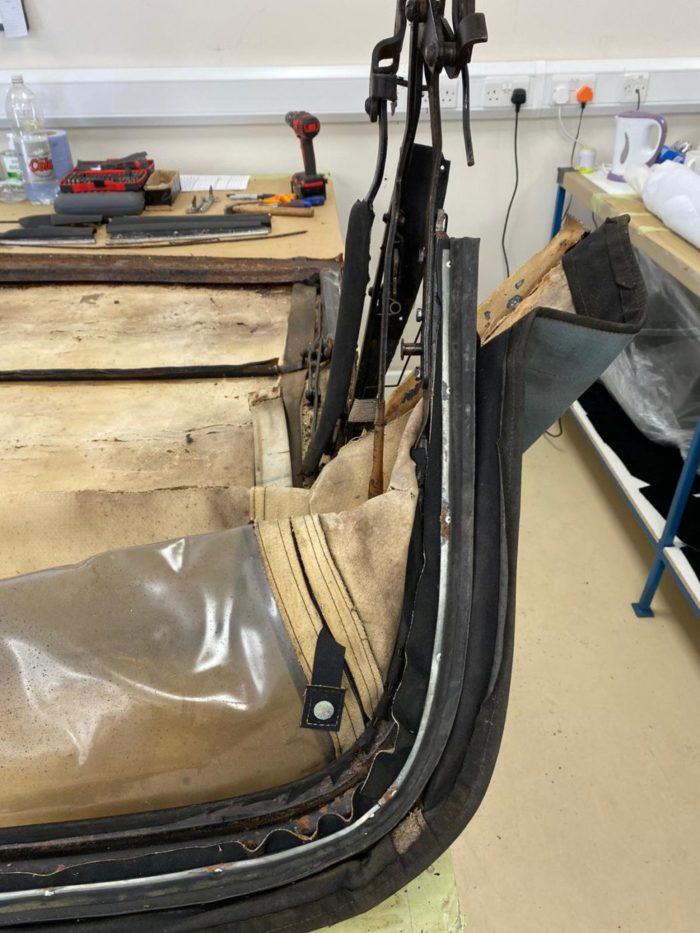
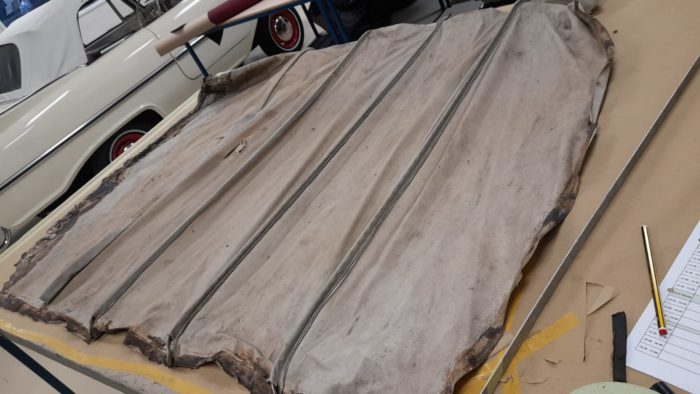
Our 1973 Triumph Stag has had its hood frame removed ready to be sand blasted which will allow our technicians to see what we have left and what might need to be fabricated.
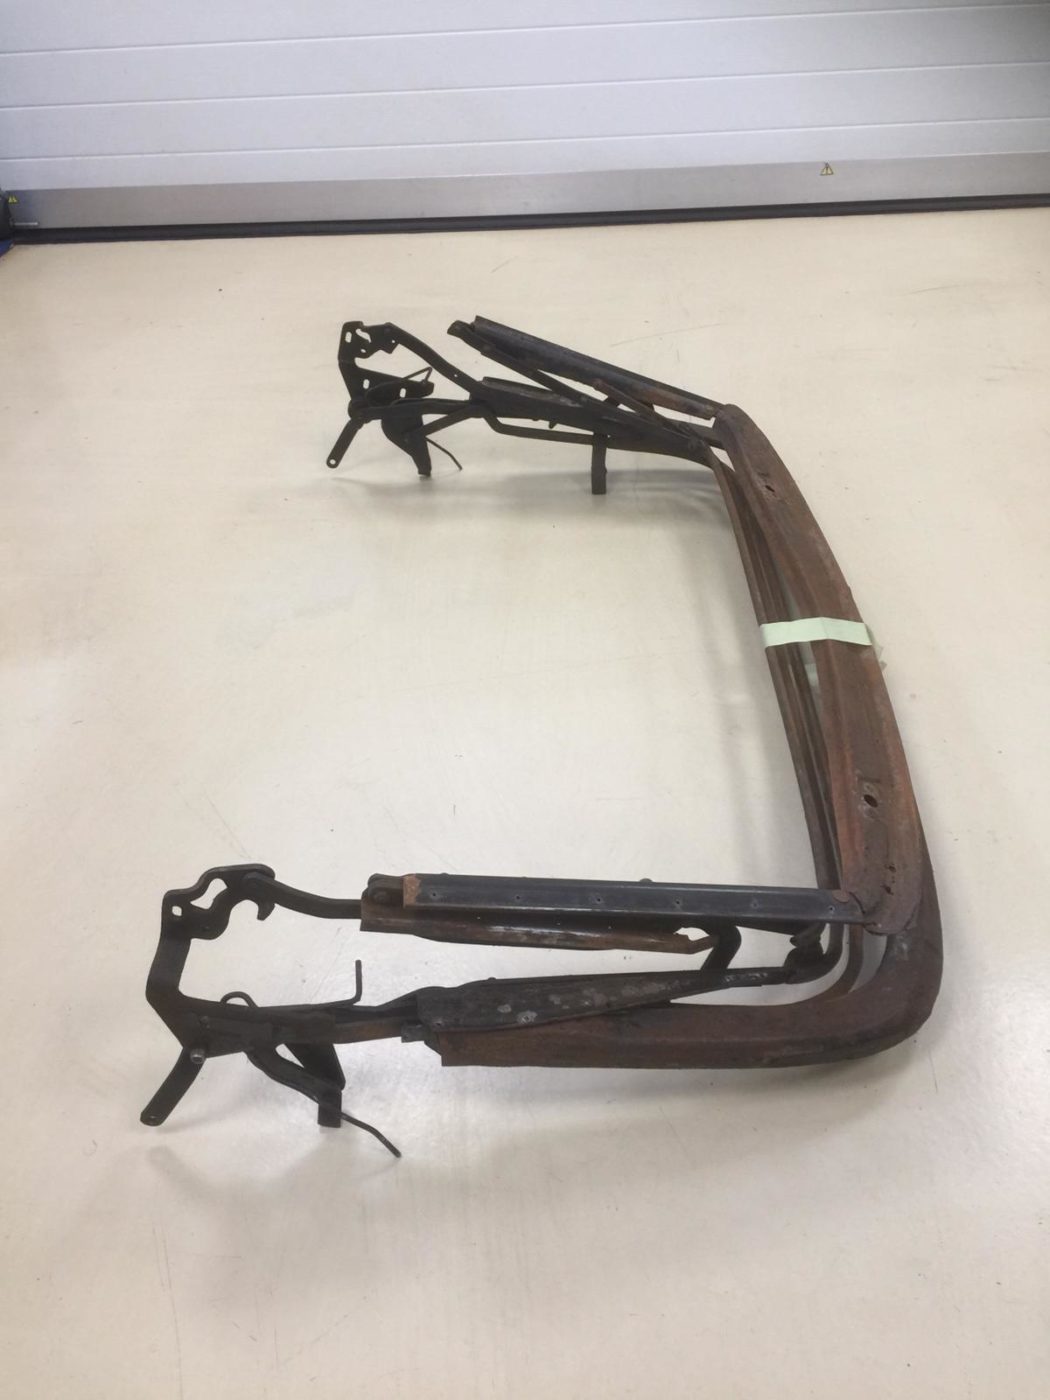

The silver chrome trim has also been taken off on the tonneau cover.
Kath has been working on the Stag as well. She has disassembled the centre hand brake section and the B-posts so that the metal is ready to be sand blasted.
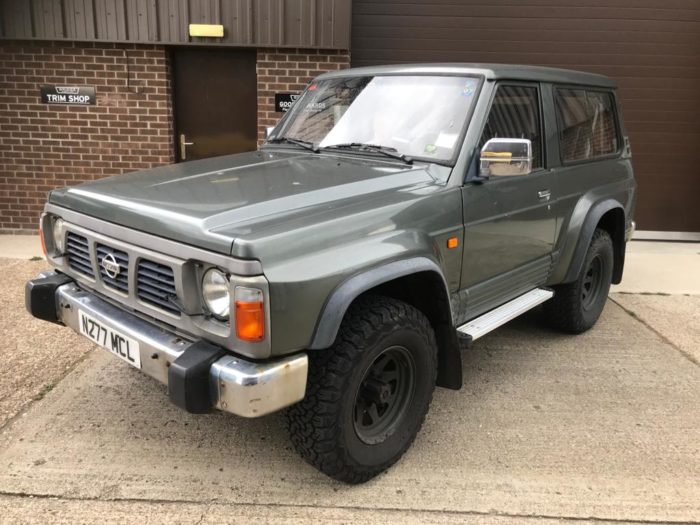
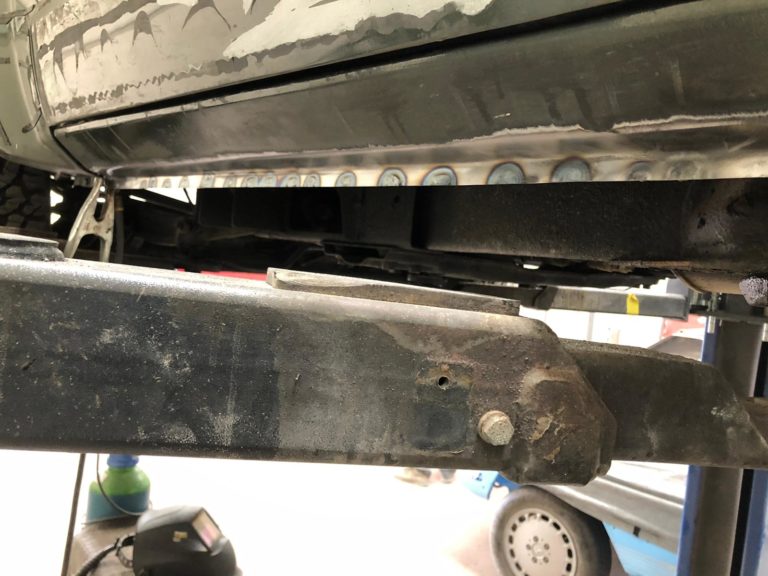
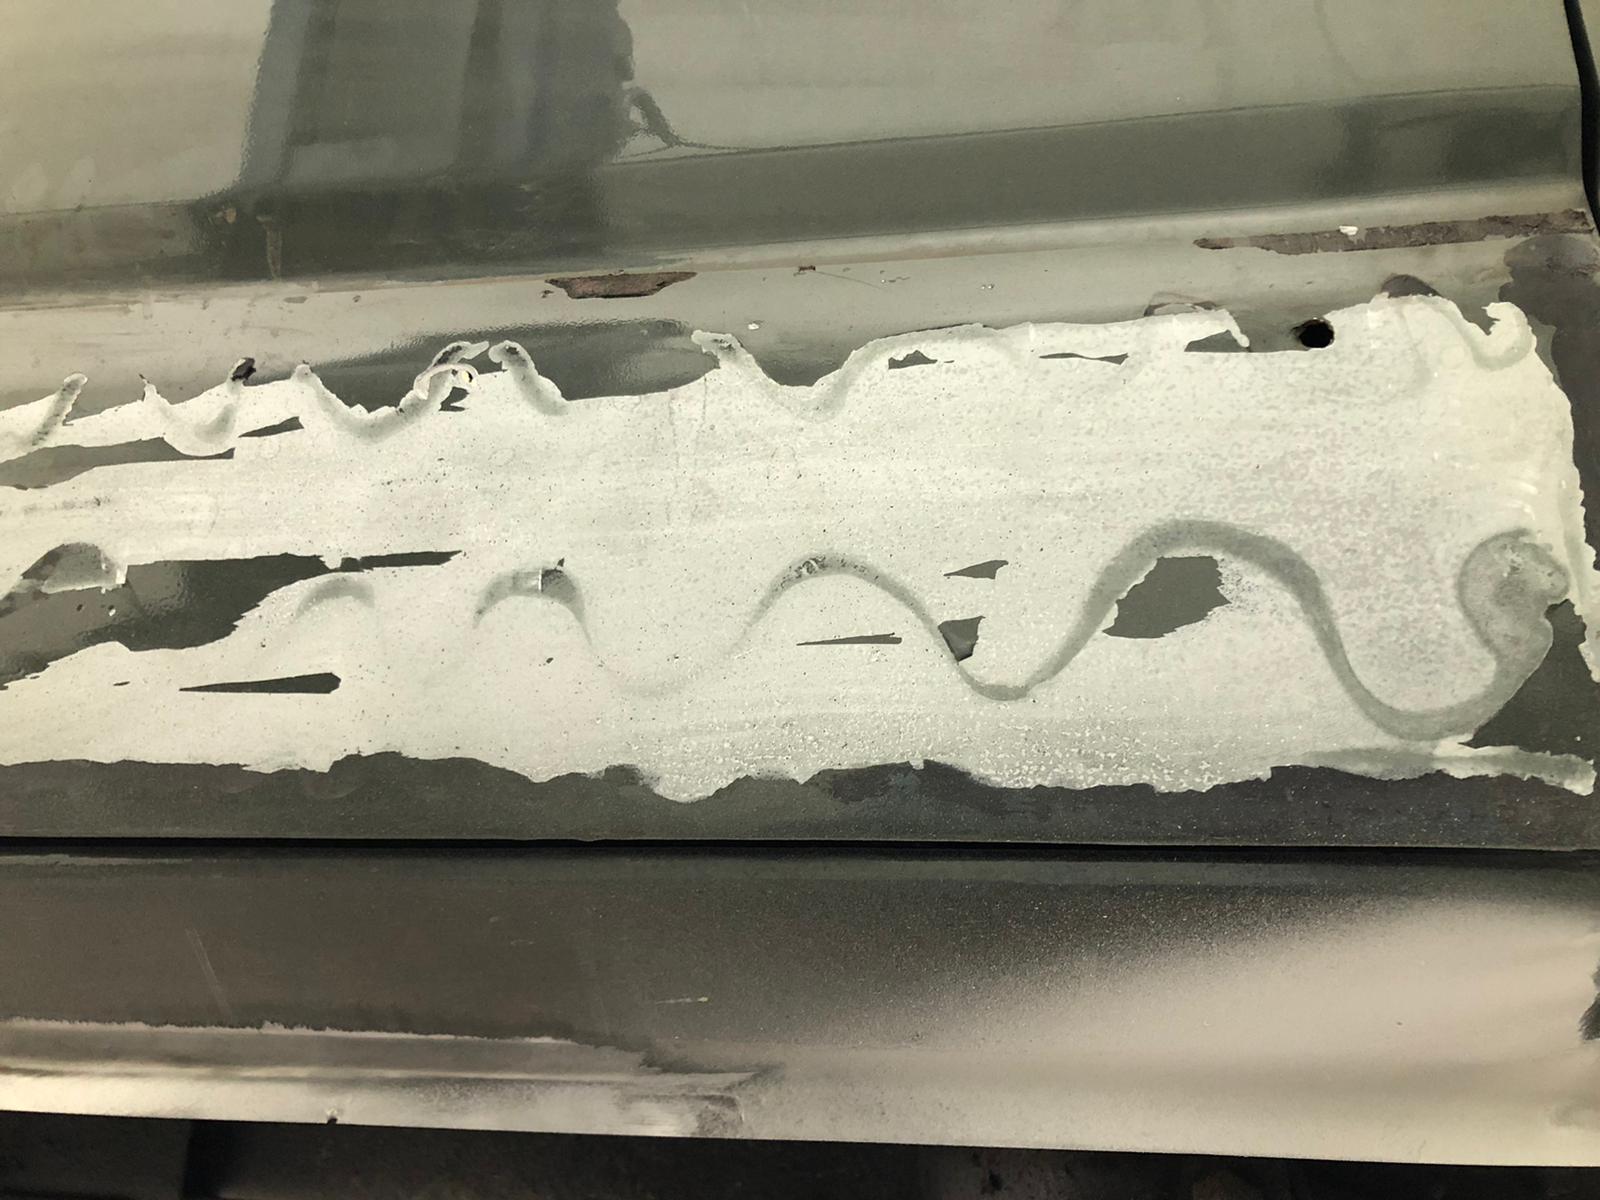
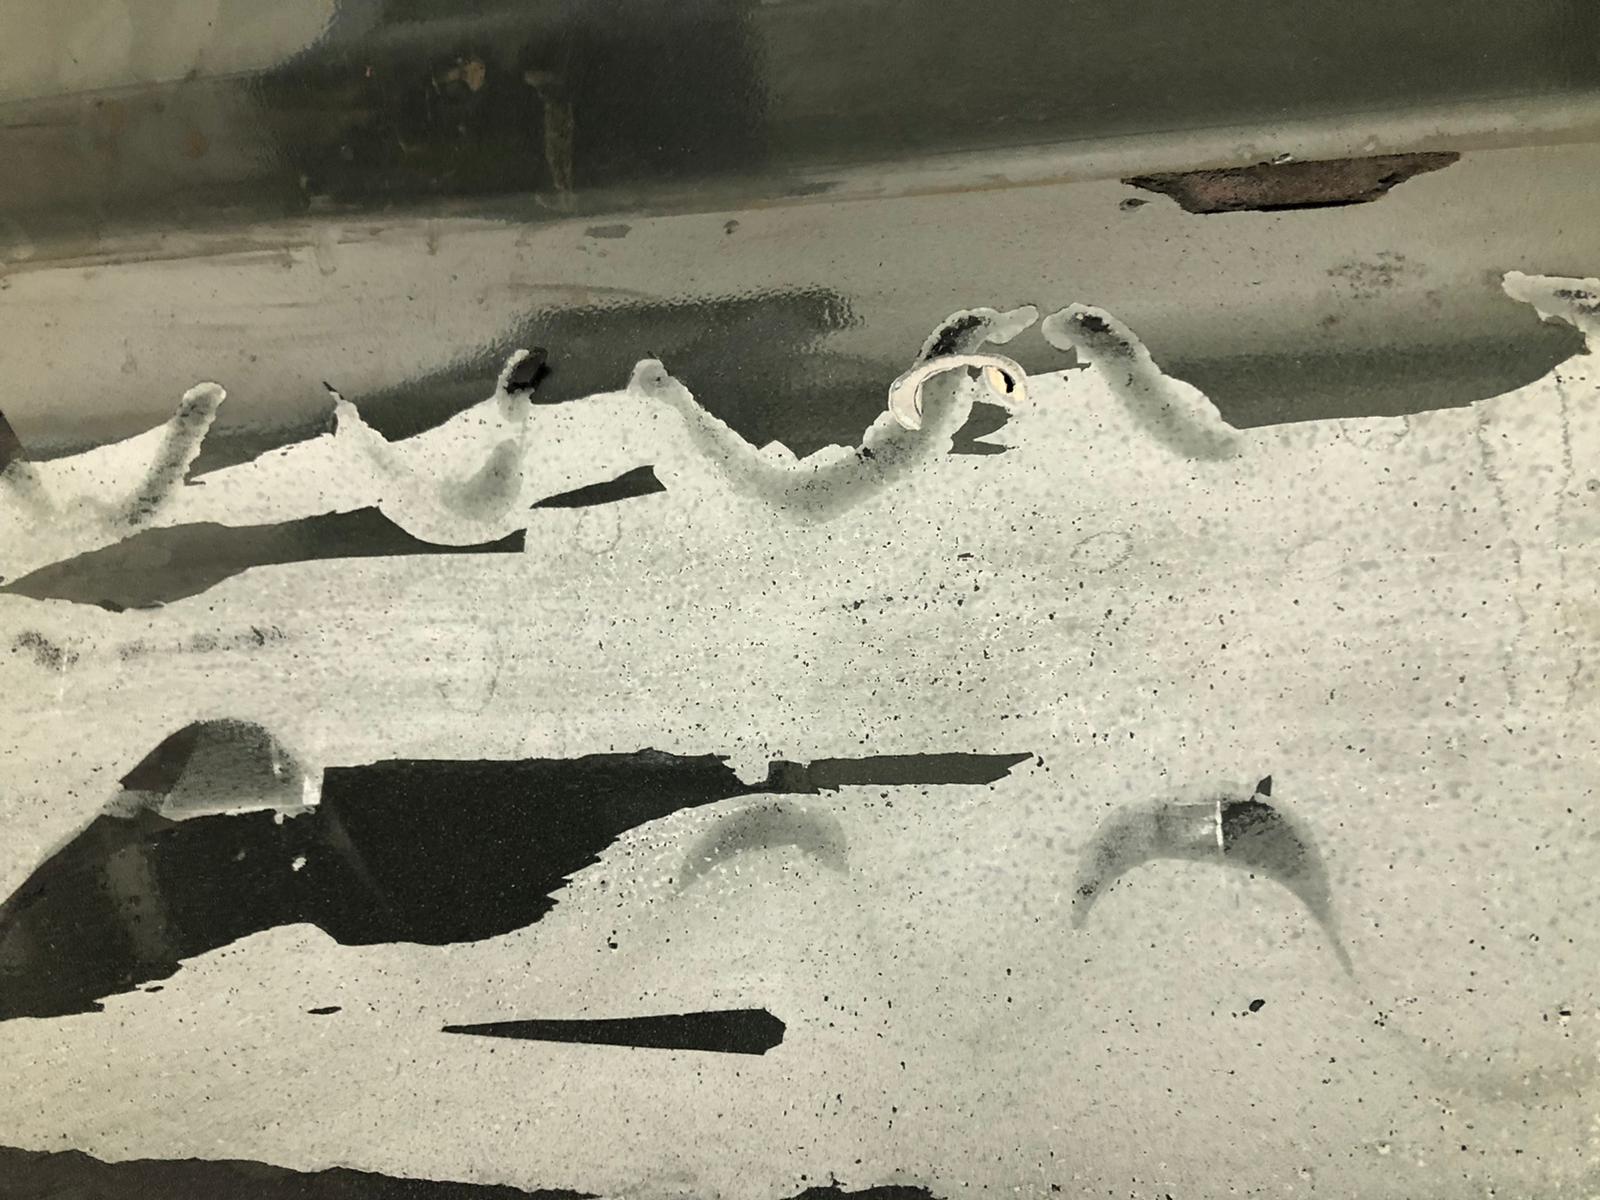
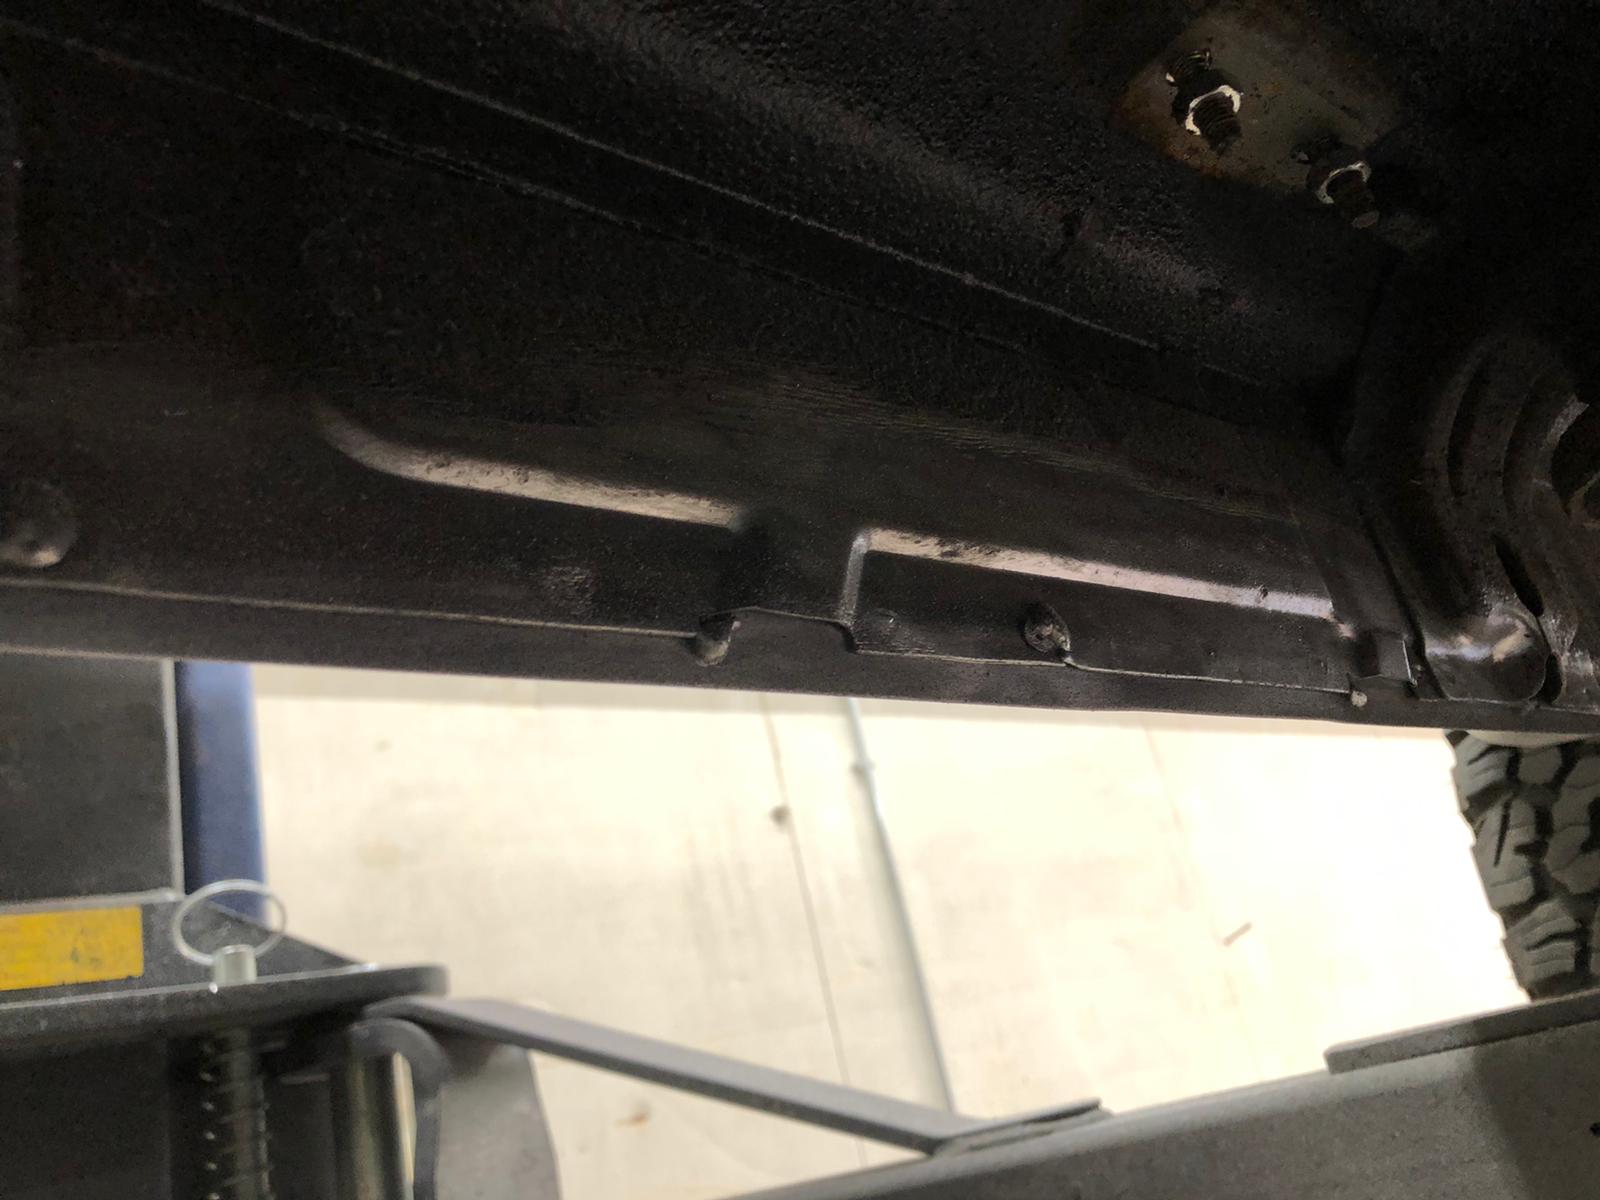
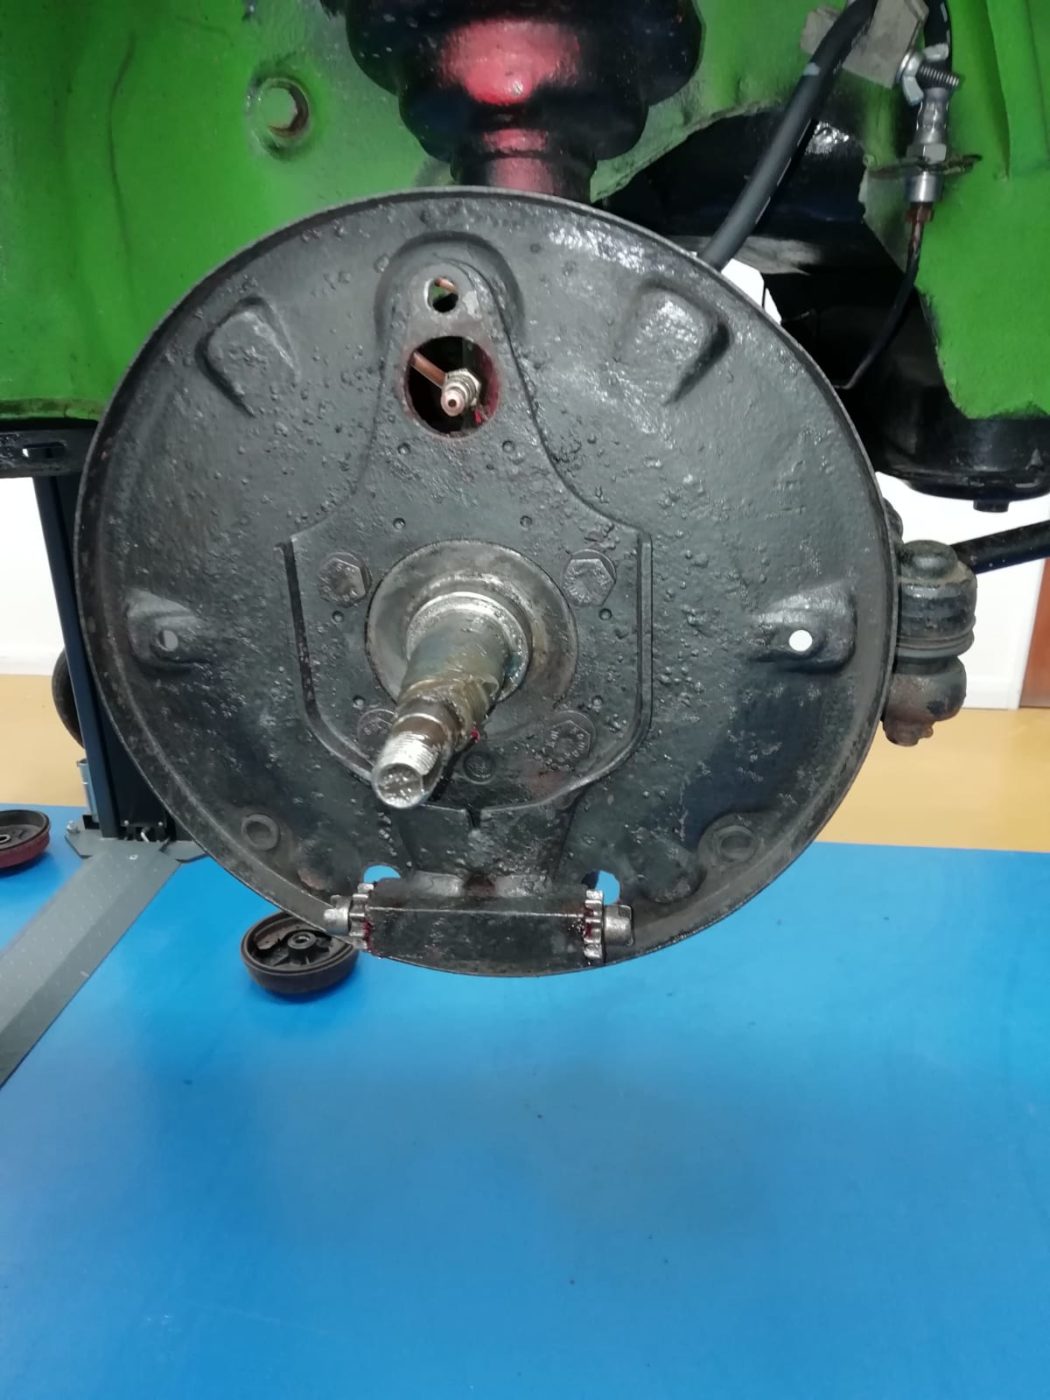
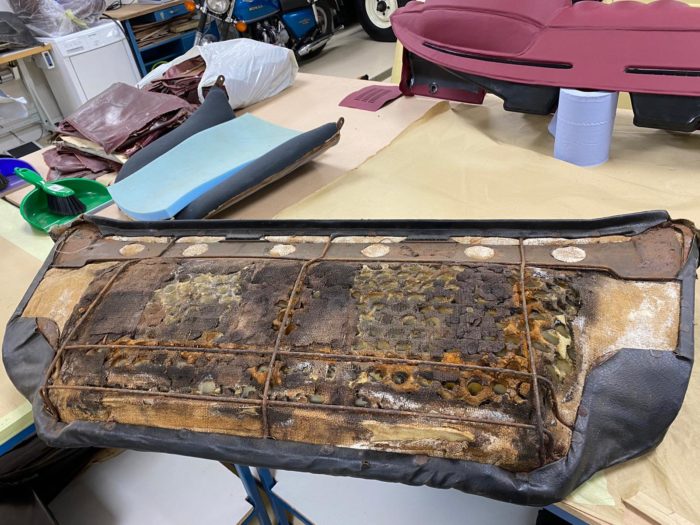
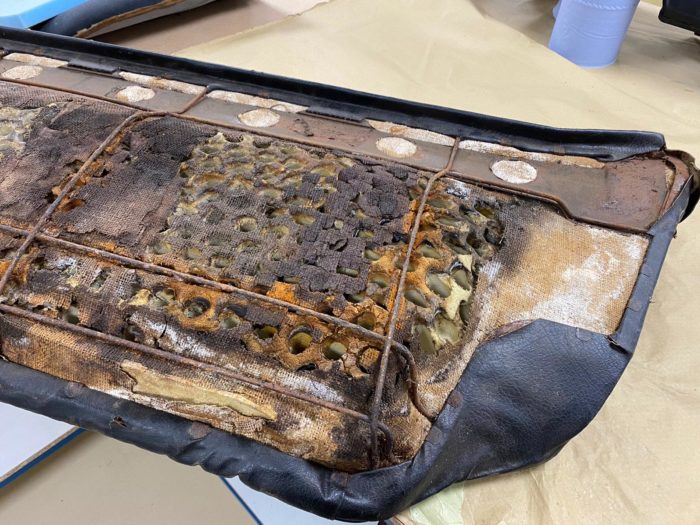
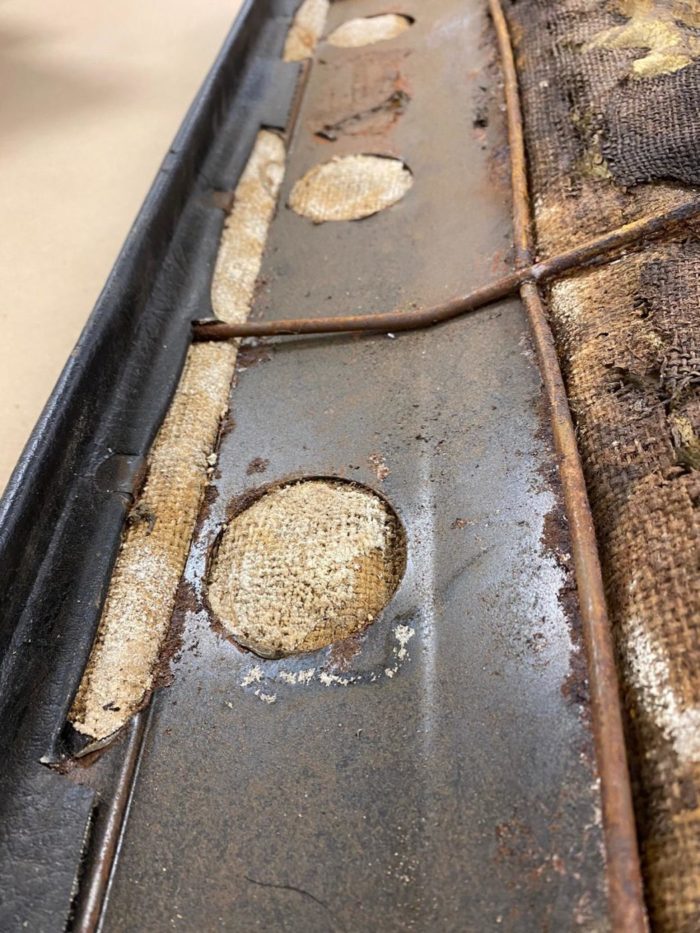
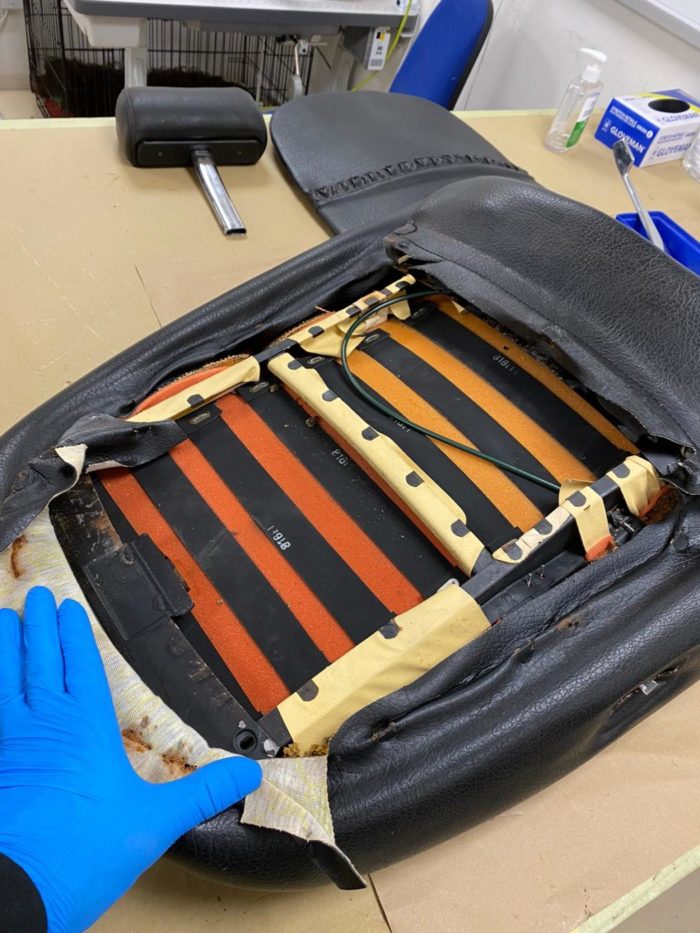
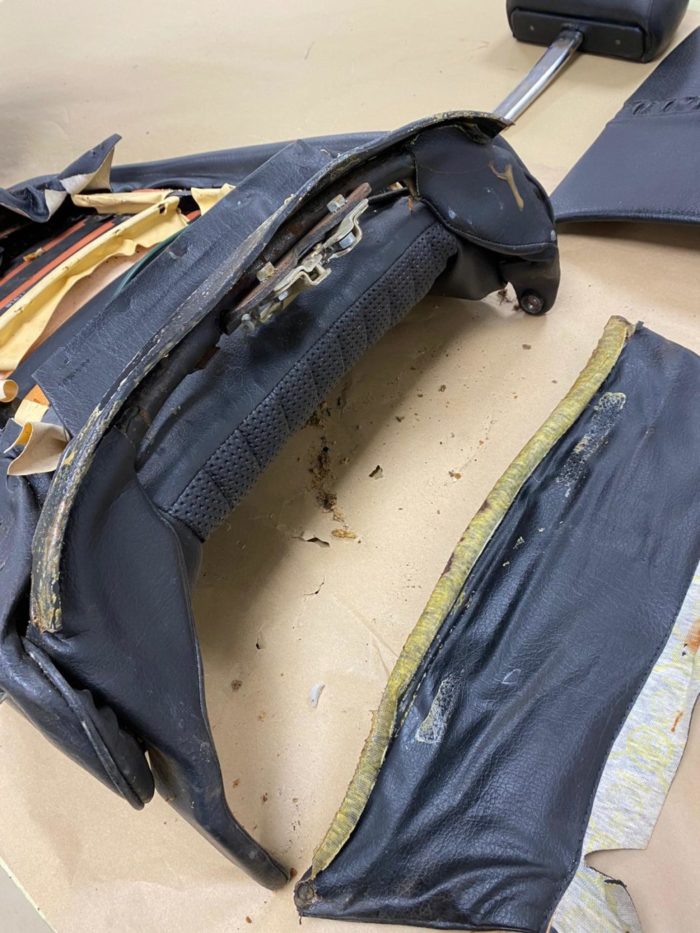
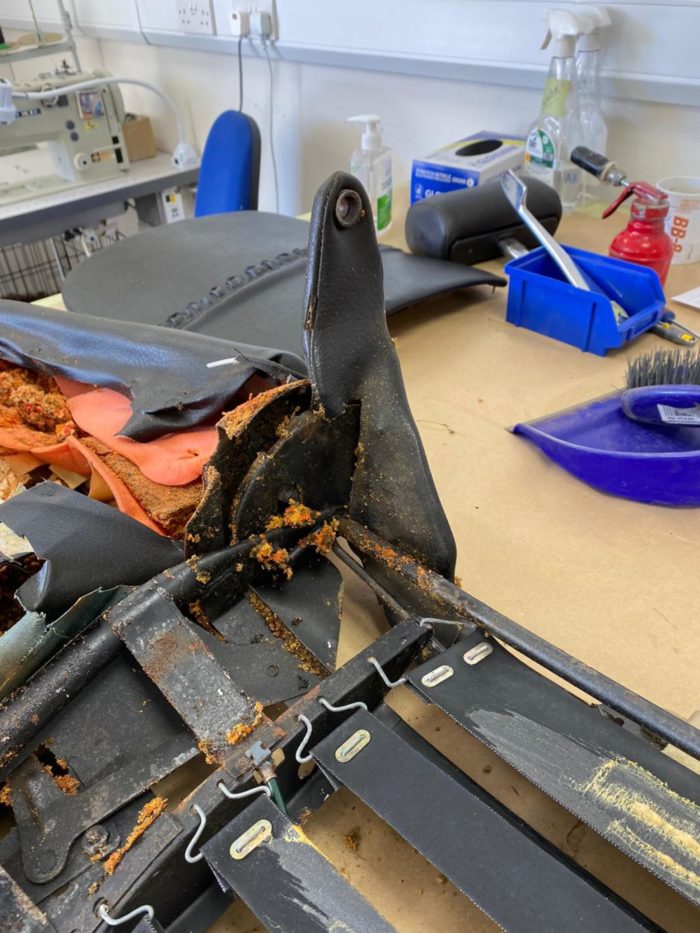
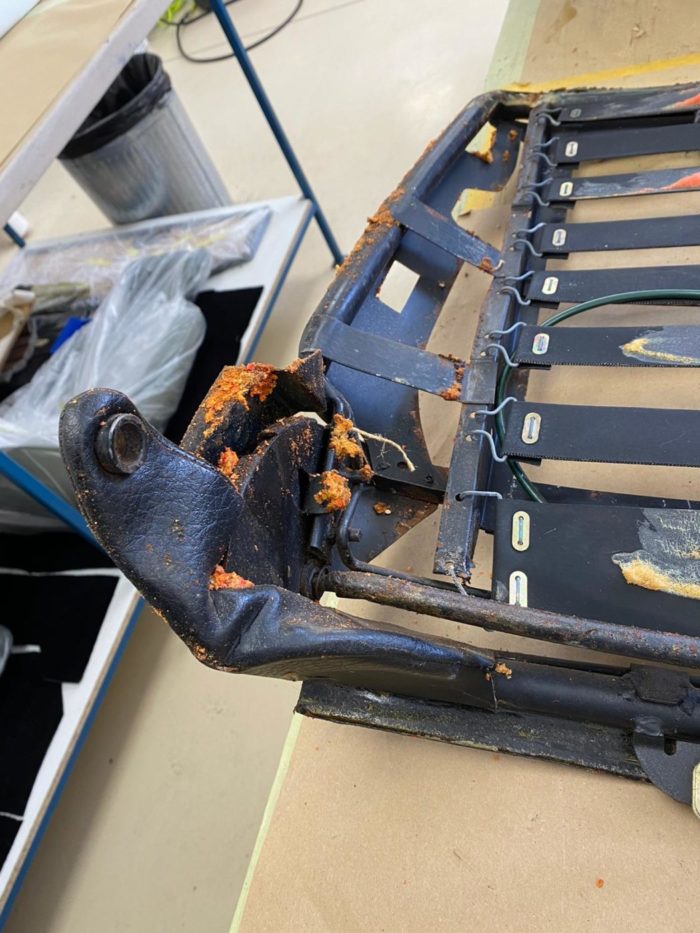
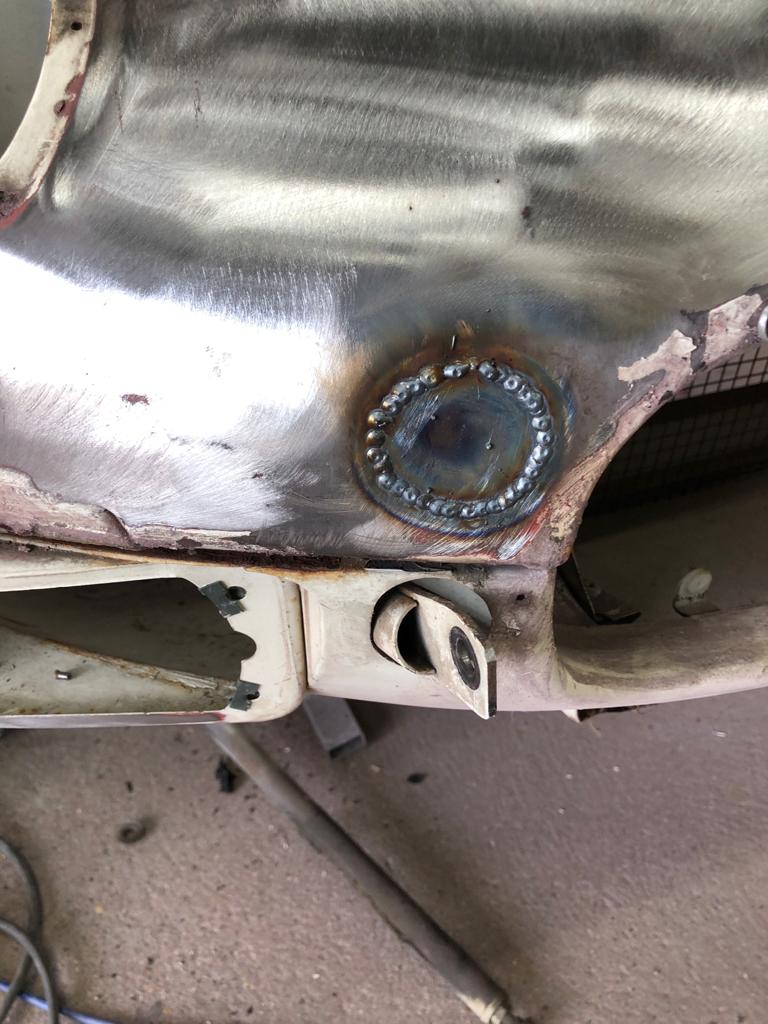
Some months ago a well used and much loved Nissan patrol came in for a cosmetic respray and although we tried to purchase new bumpers we ended up repairing and rechroming the originals.
We also put the Bridge Classic Cars twist into the respray and colour coded the side fenders, side mouldings and wheels in a grey which looked superb against the new green paintwork. Carried out some minimal interior uplift and the customer was very happy.
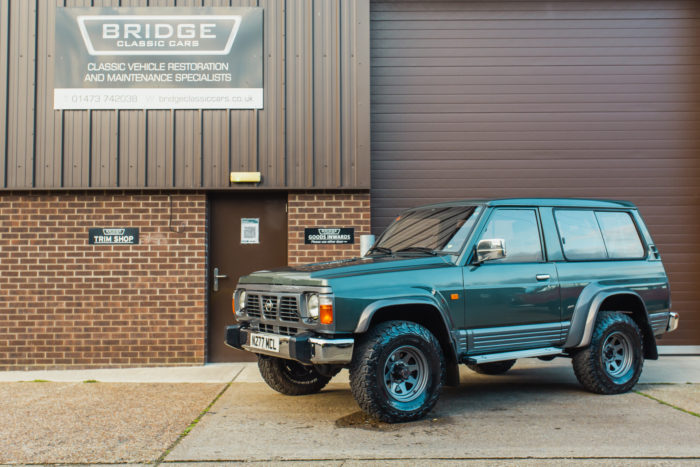
Sadly after a period of time the owner convinced himself that the chrome was re rusting and returned the car to us for inspection.
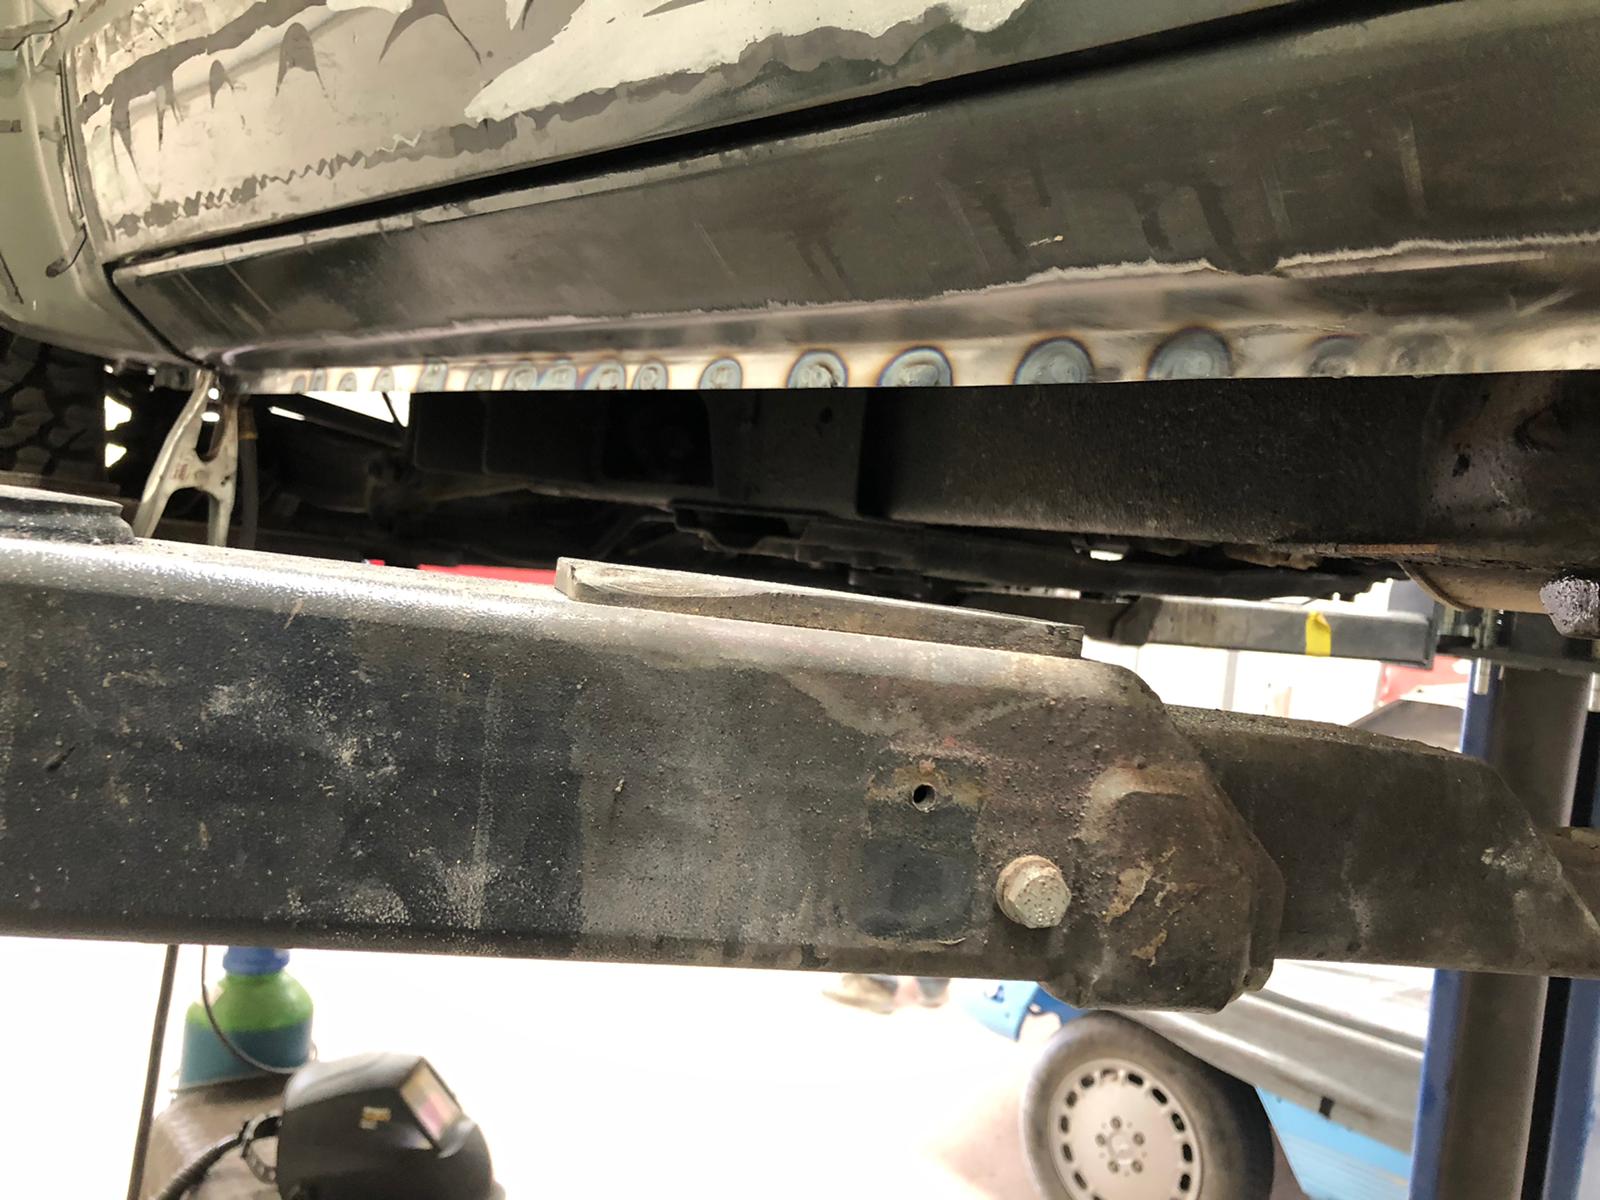
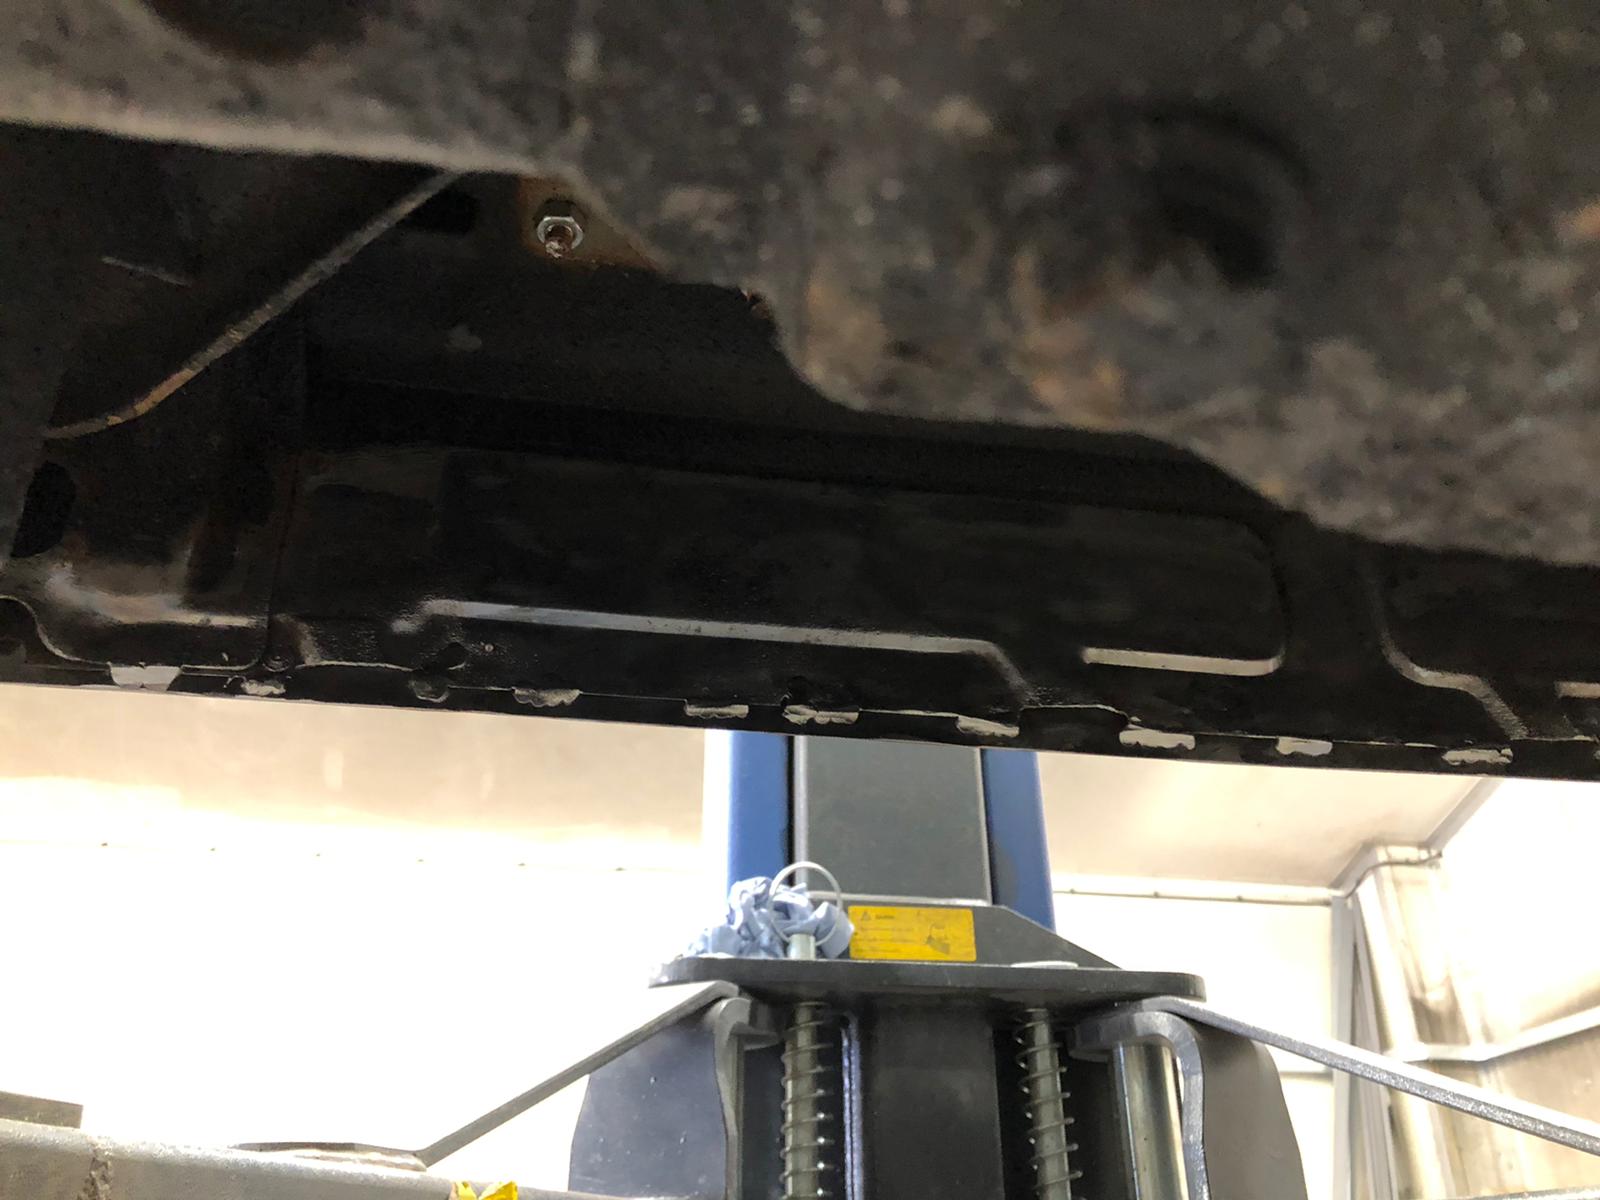
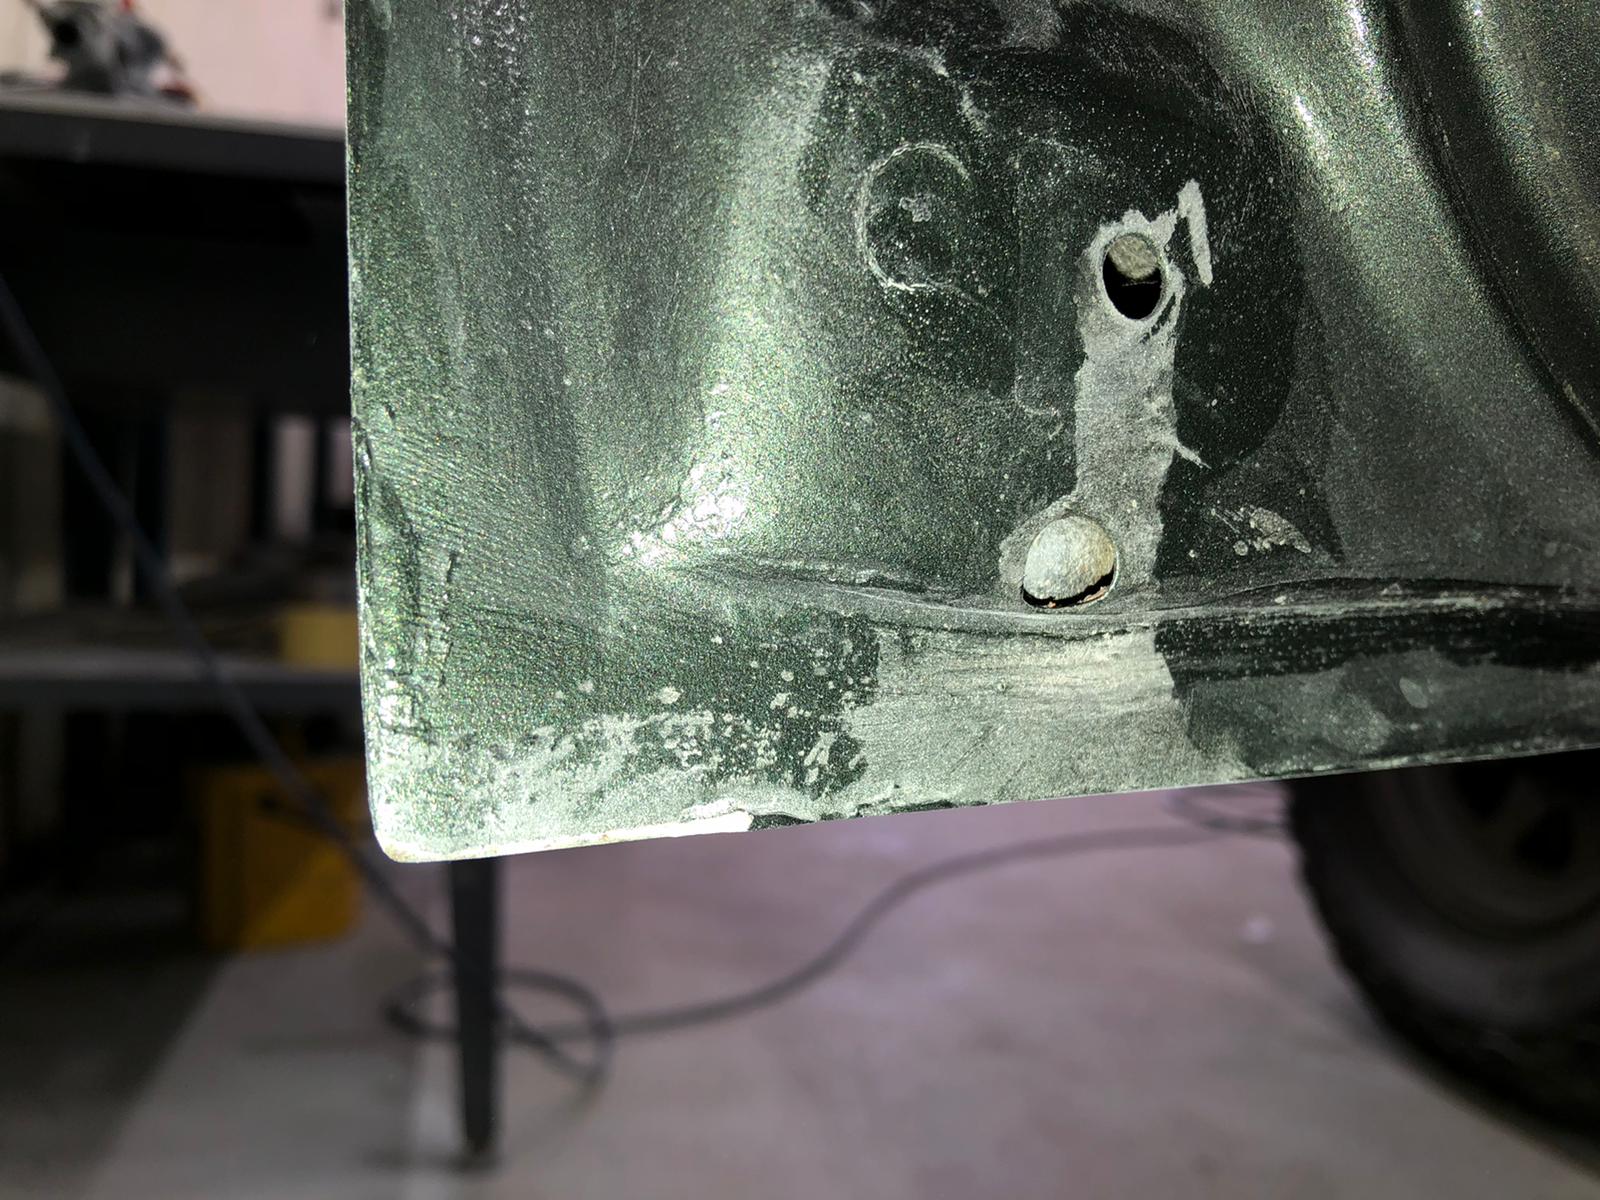
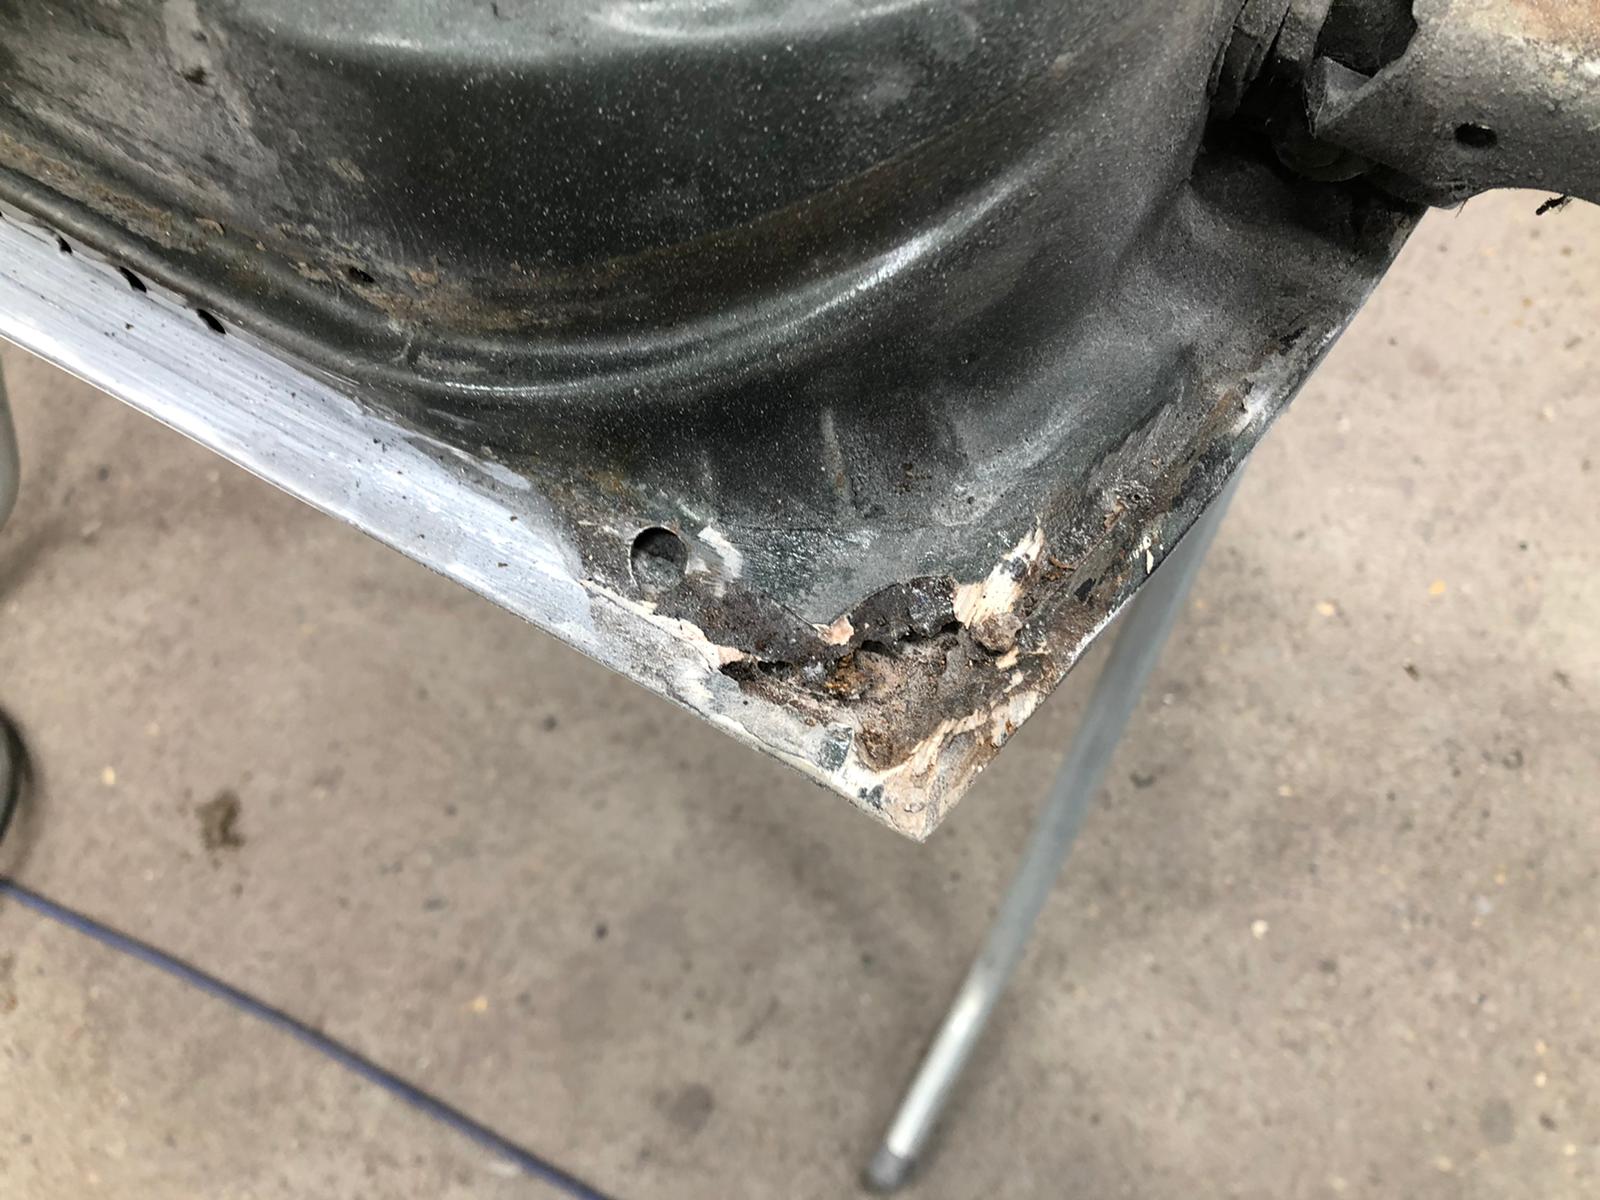
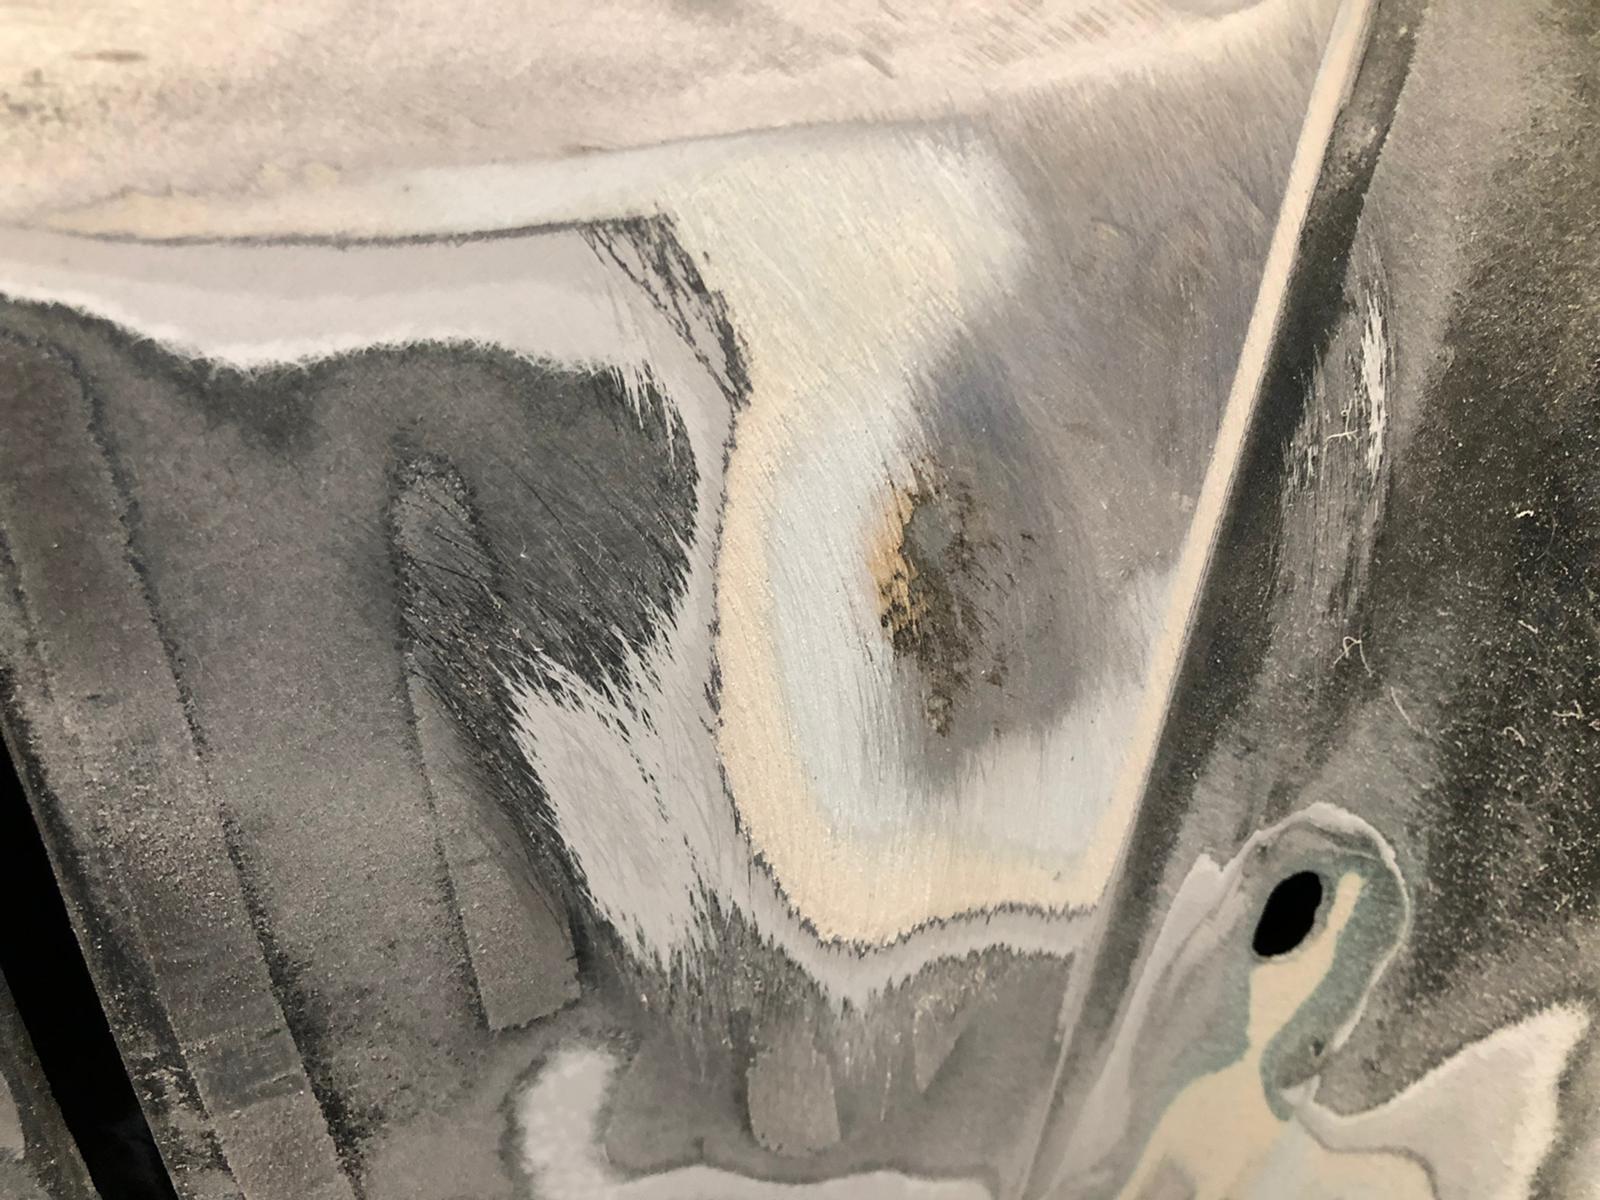
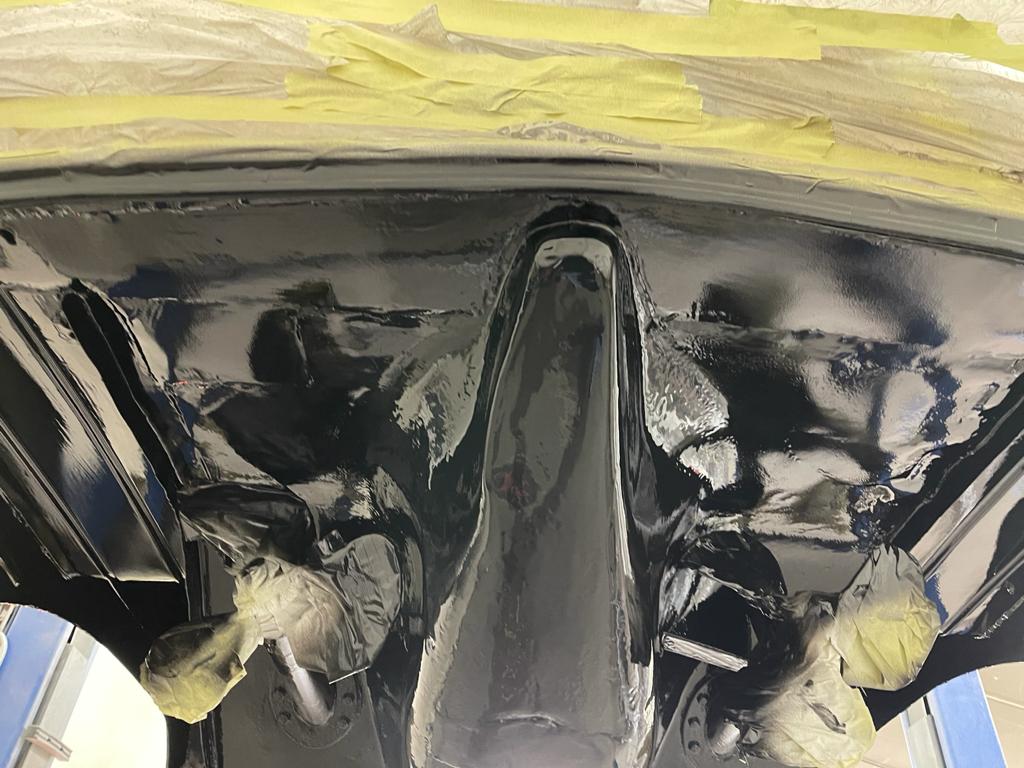
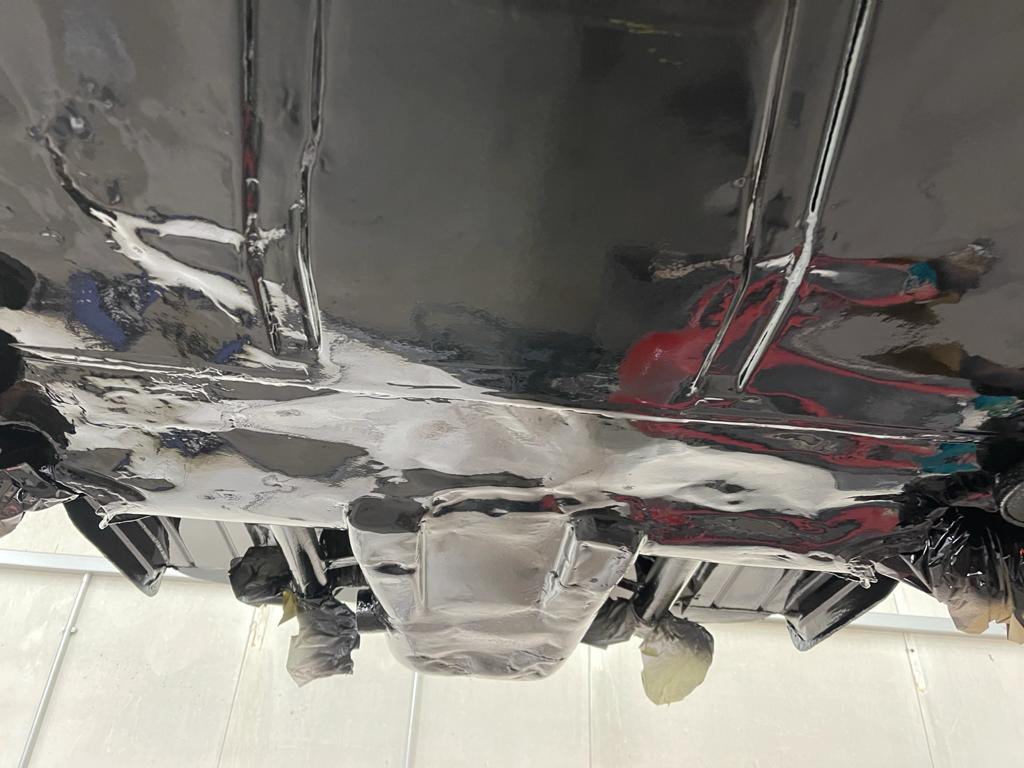
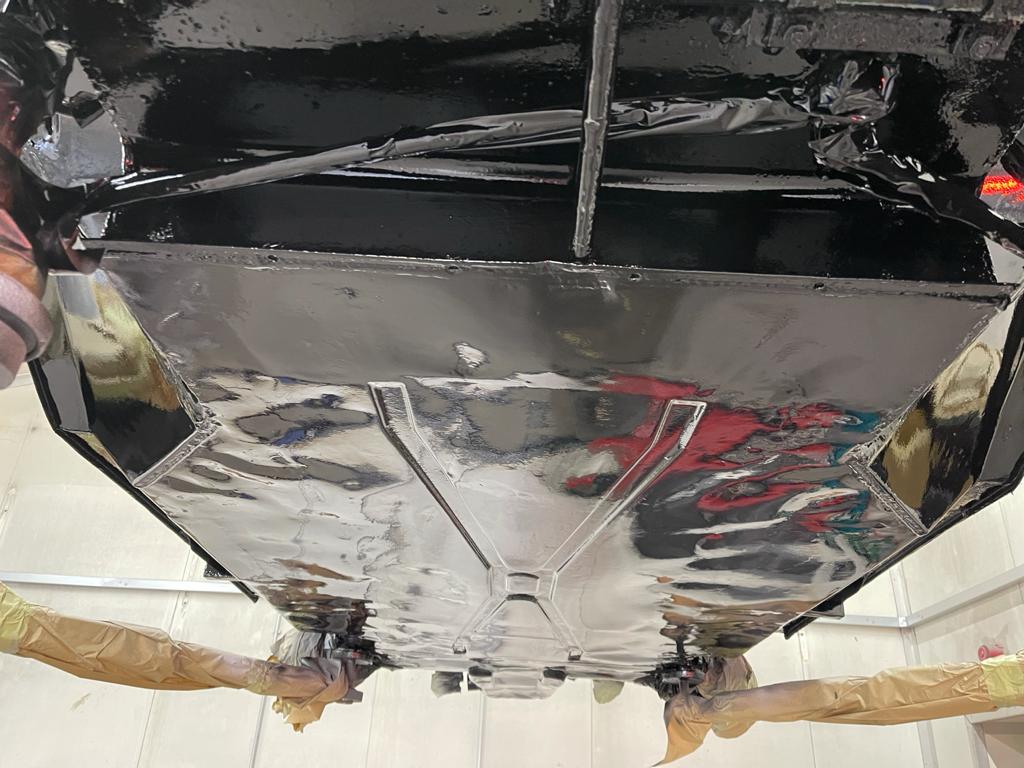
After a close look we established that the rust staining to the bumpers was actually coming from underneath the car and high up in the inner wings and dripping on to the now lovely chrome bumpers and side steps.
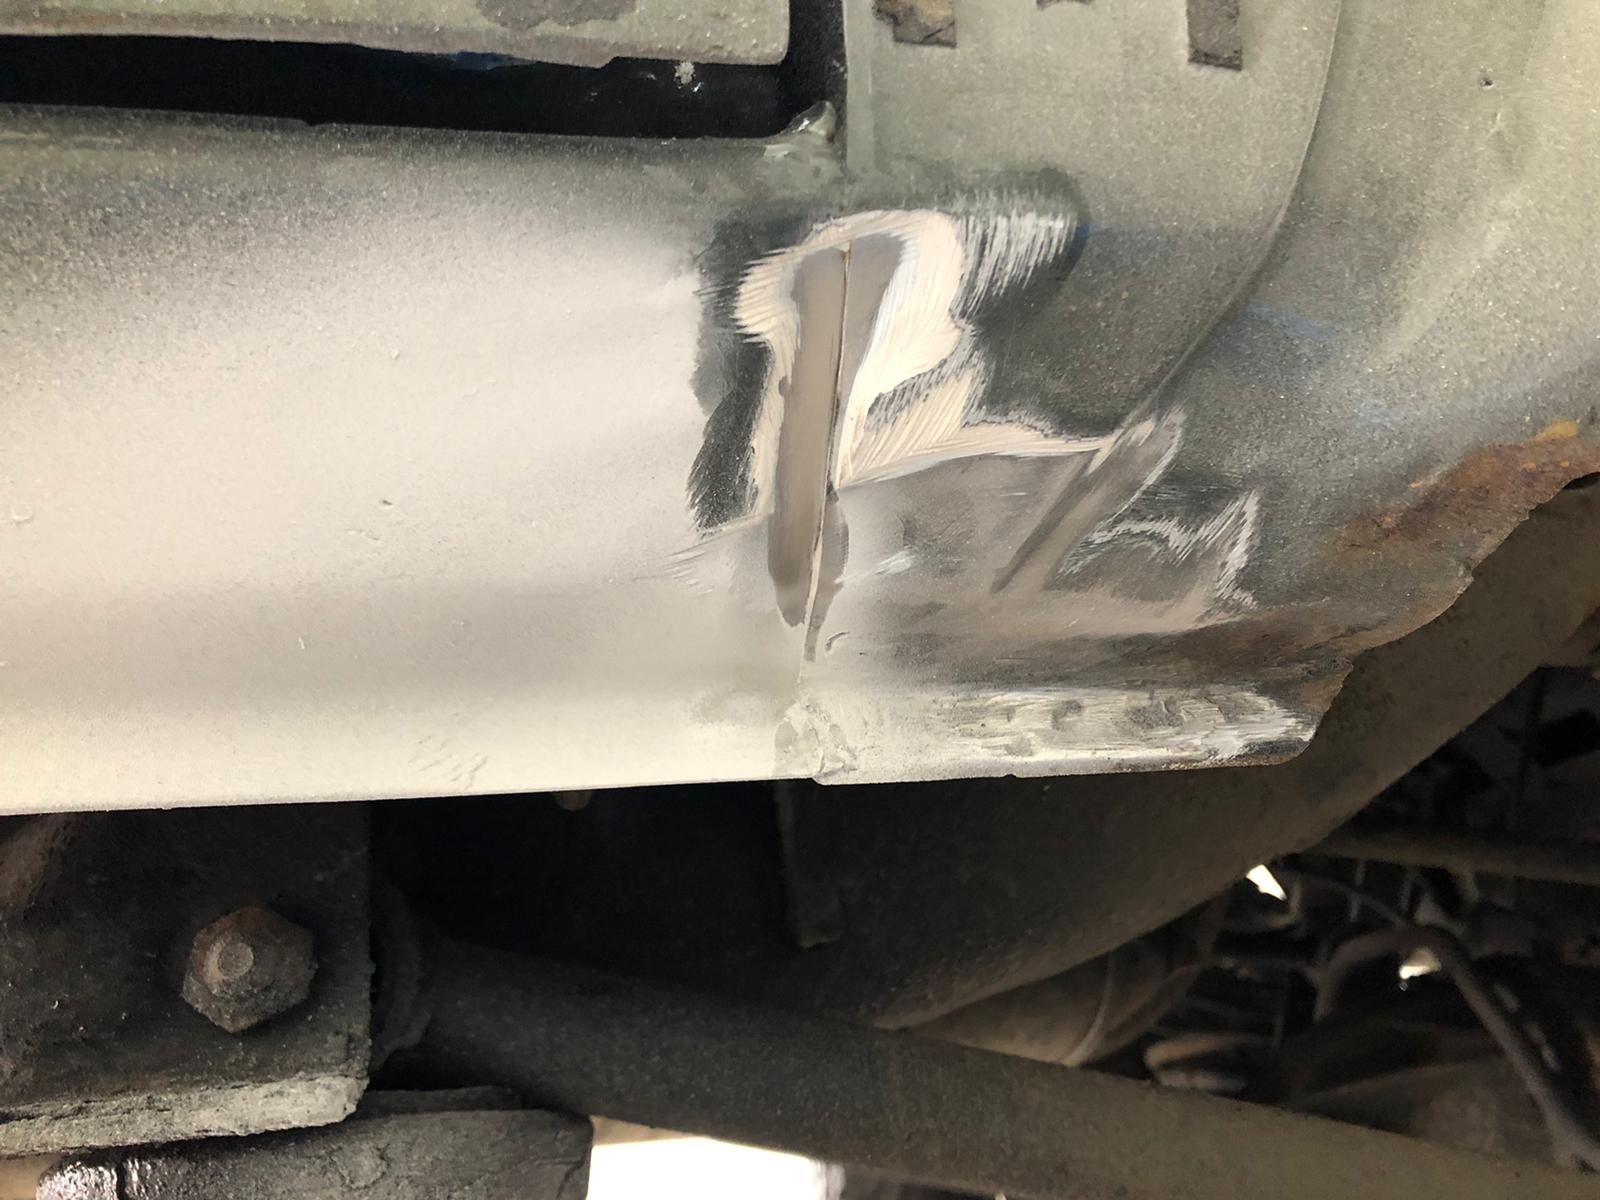
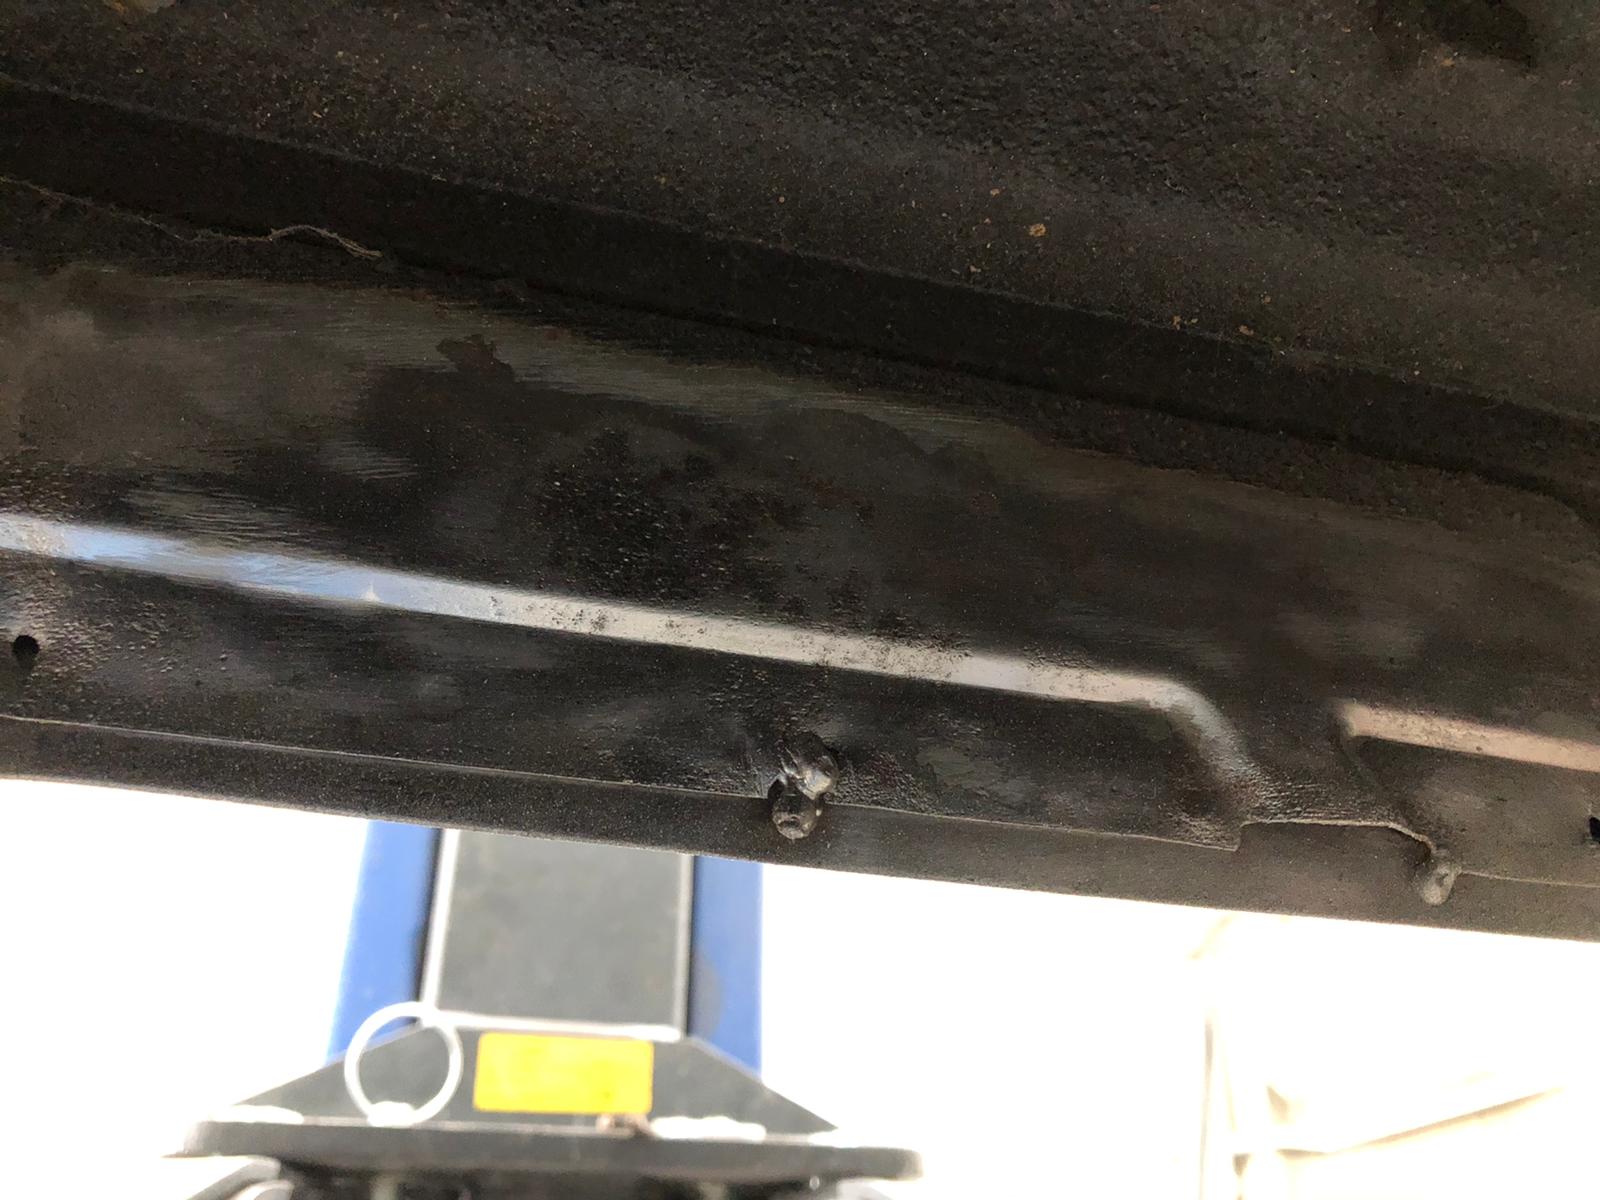
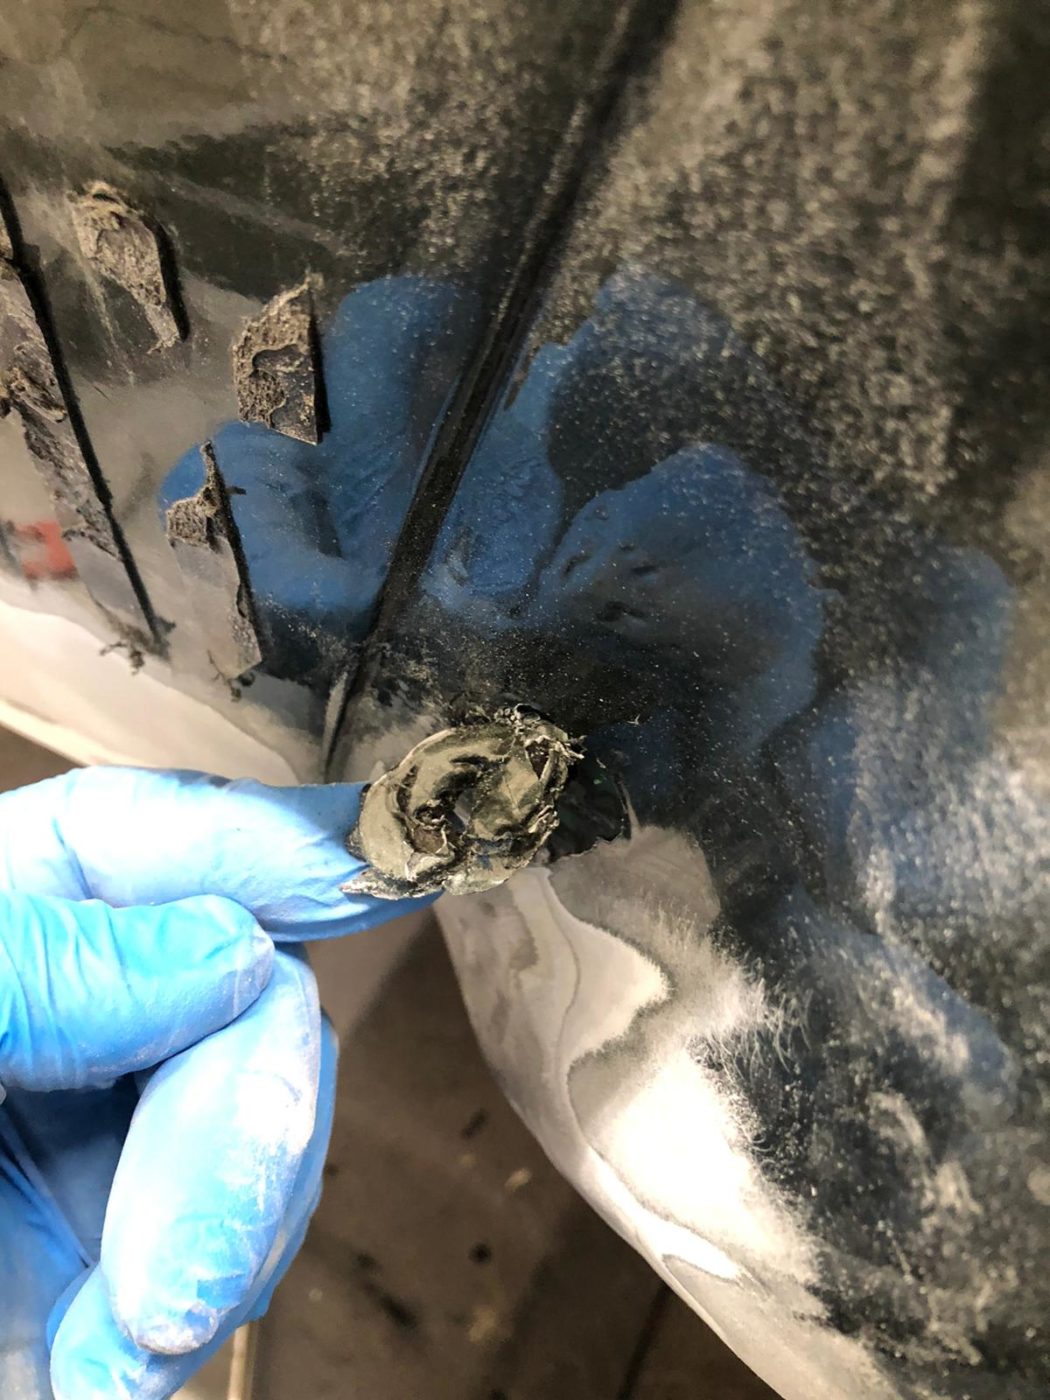
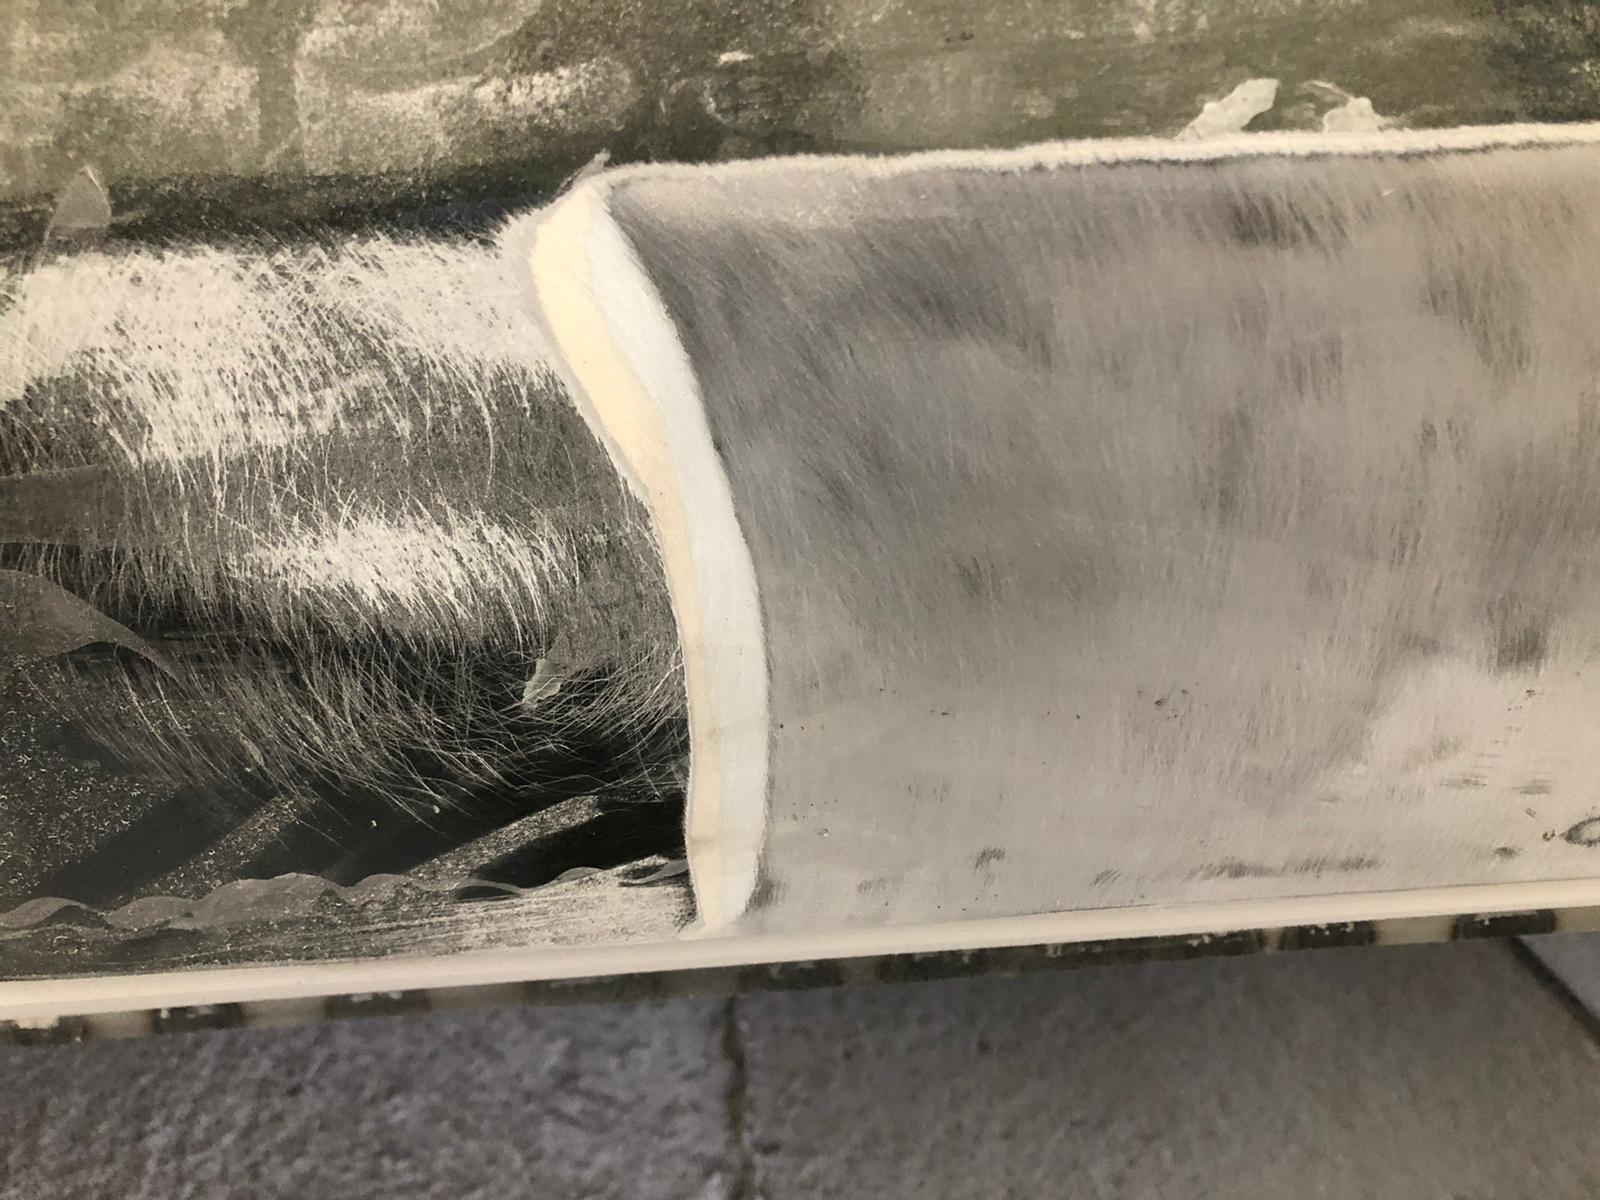
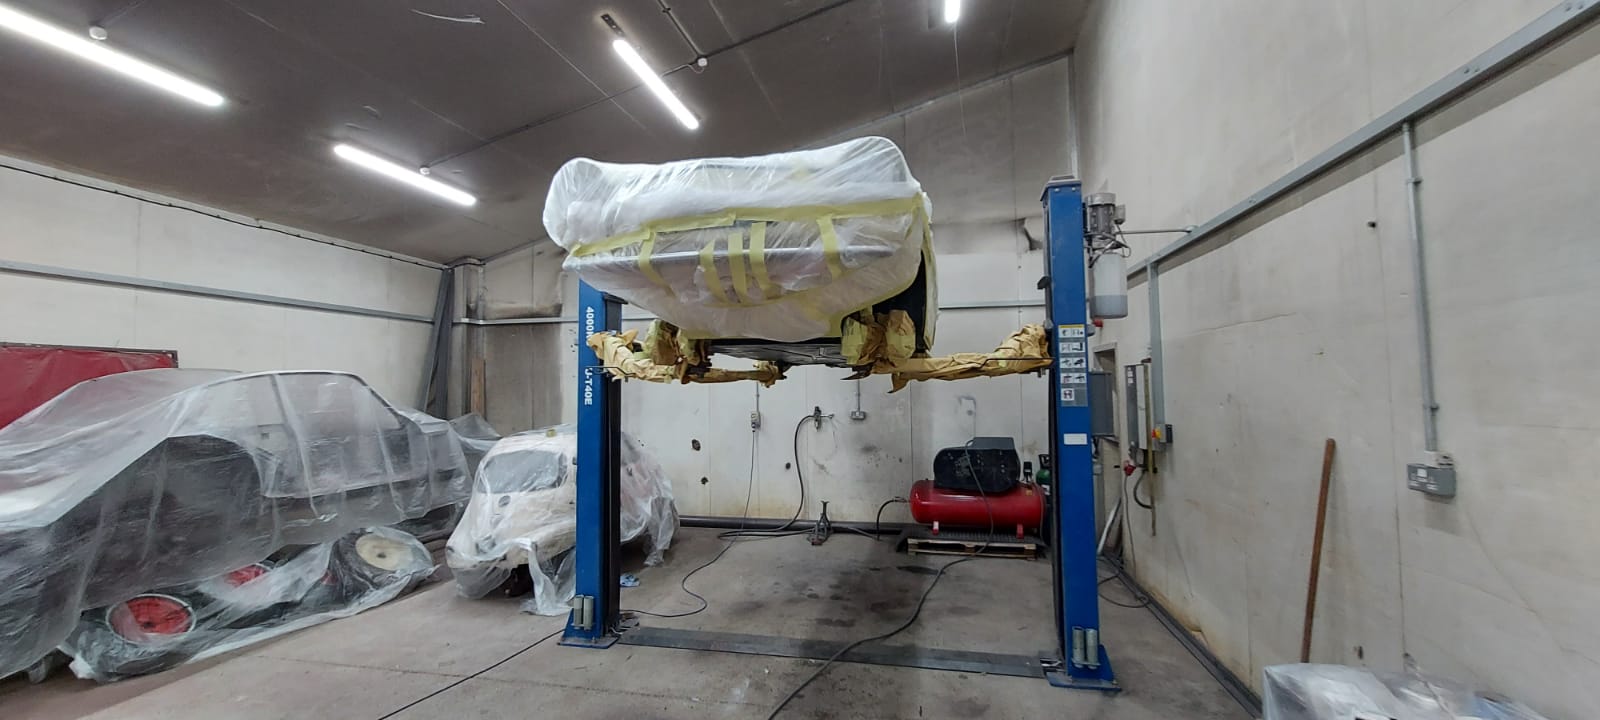
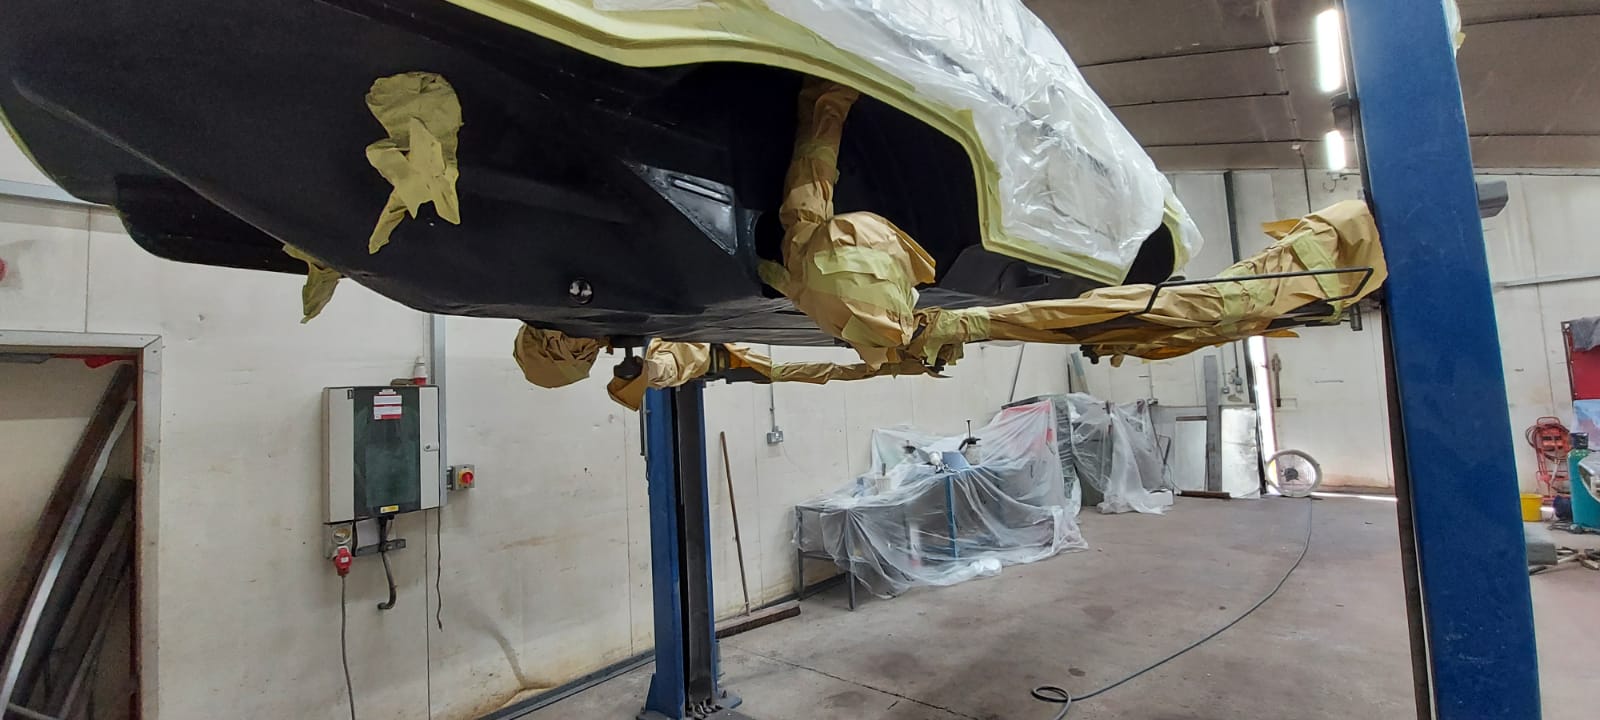
James (Pricey) Price one of our body work technicians dug deep into the problem and the deeper he delved the more apparent it became that to help to stop any further rust giving a problem it would be necessary to take drastic action as you can be seen by these photos.
This has led to extensive removal and re-welding of parts that were never to be a part of the original scope of works.
Although we will never be able to capture all of the rust stain transferring areas we think here at Bridge that with what we have done and continuous cleaning from her proud owner will at least give longevity into what is a very usable SUV vehicle.


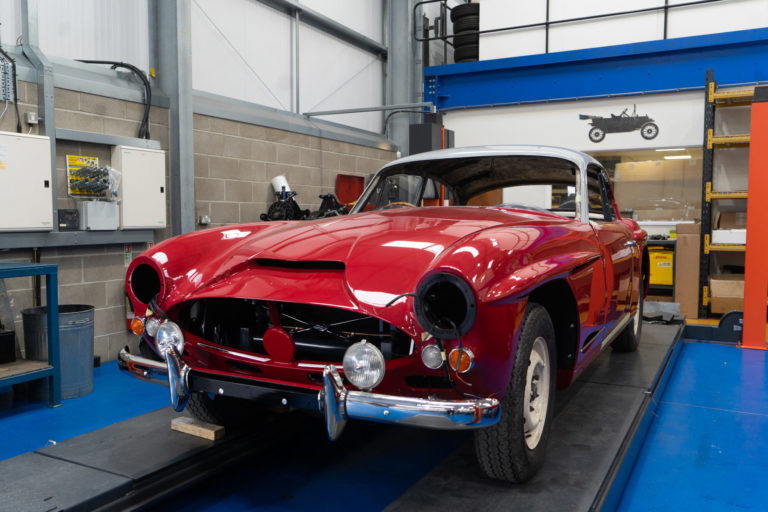
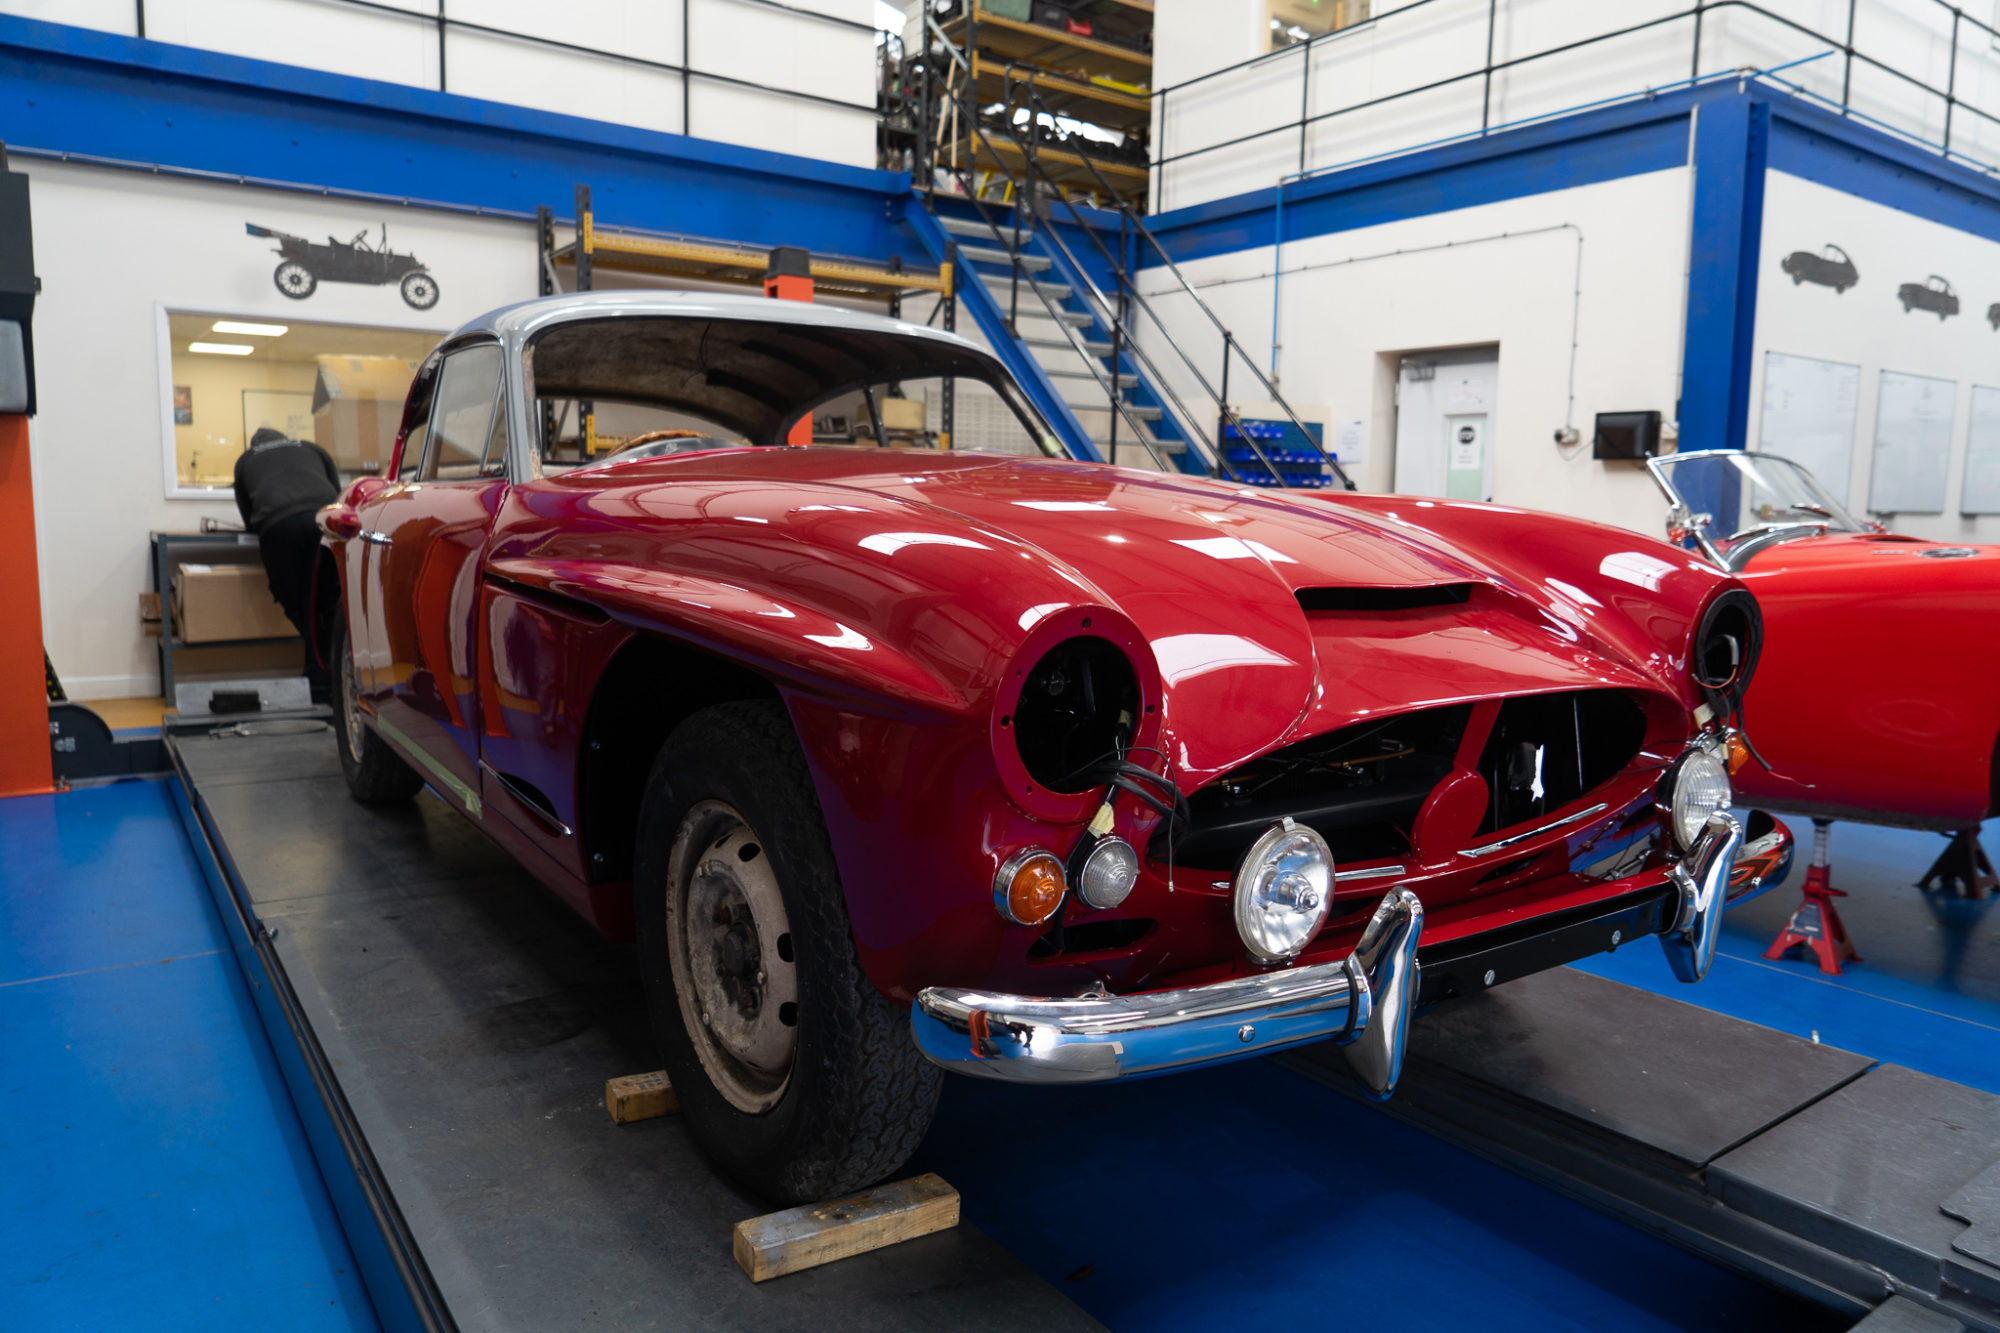
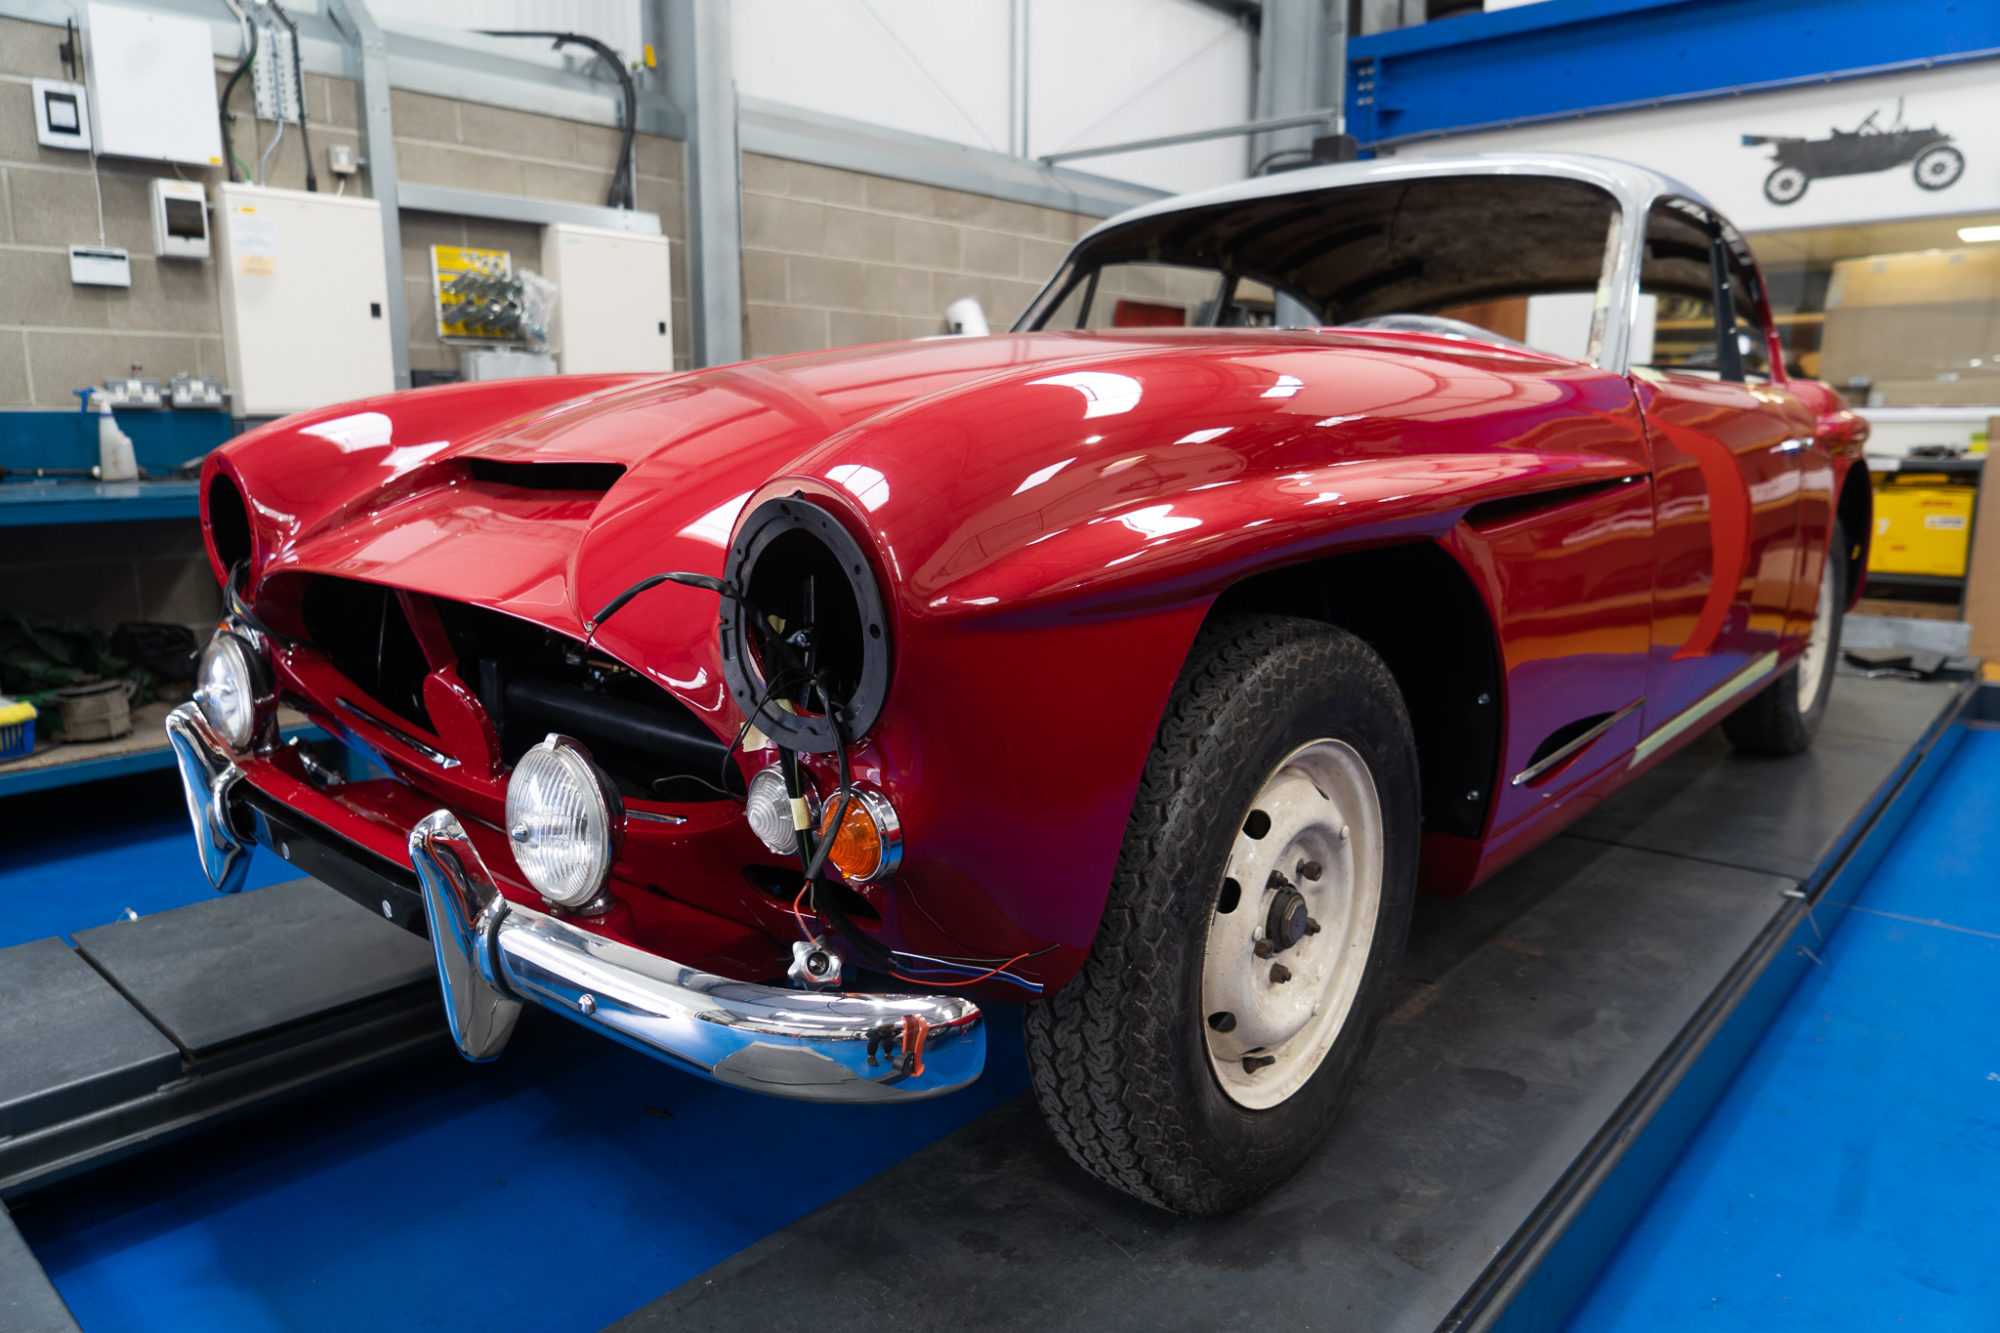
Our stunning custom build Peony Red Jensen is really taking shape now. Thanks to the continuous hard work from our skilled classic car technicians, this classic is looking more and more like the beautiful motor it was meant to be. Stay tuned for more exciting updates!

Our classic 1957 Jensen had it’s test drive today and came back with the all clear. John just wants to bleed the brakes and clutch but otherwise its running smoothly! Just listen to that exhaust note from the V8 Corvette engine…
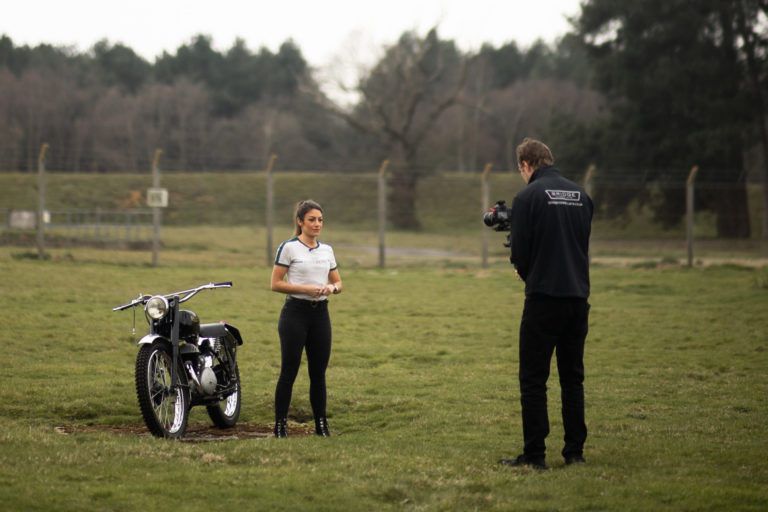
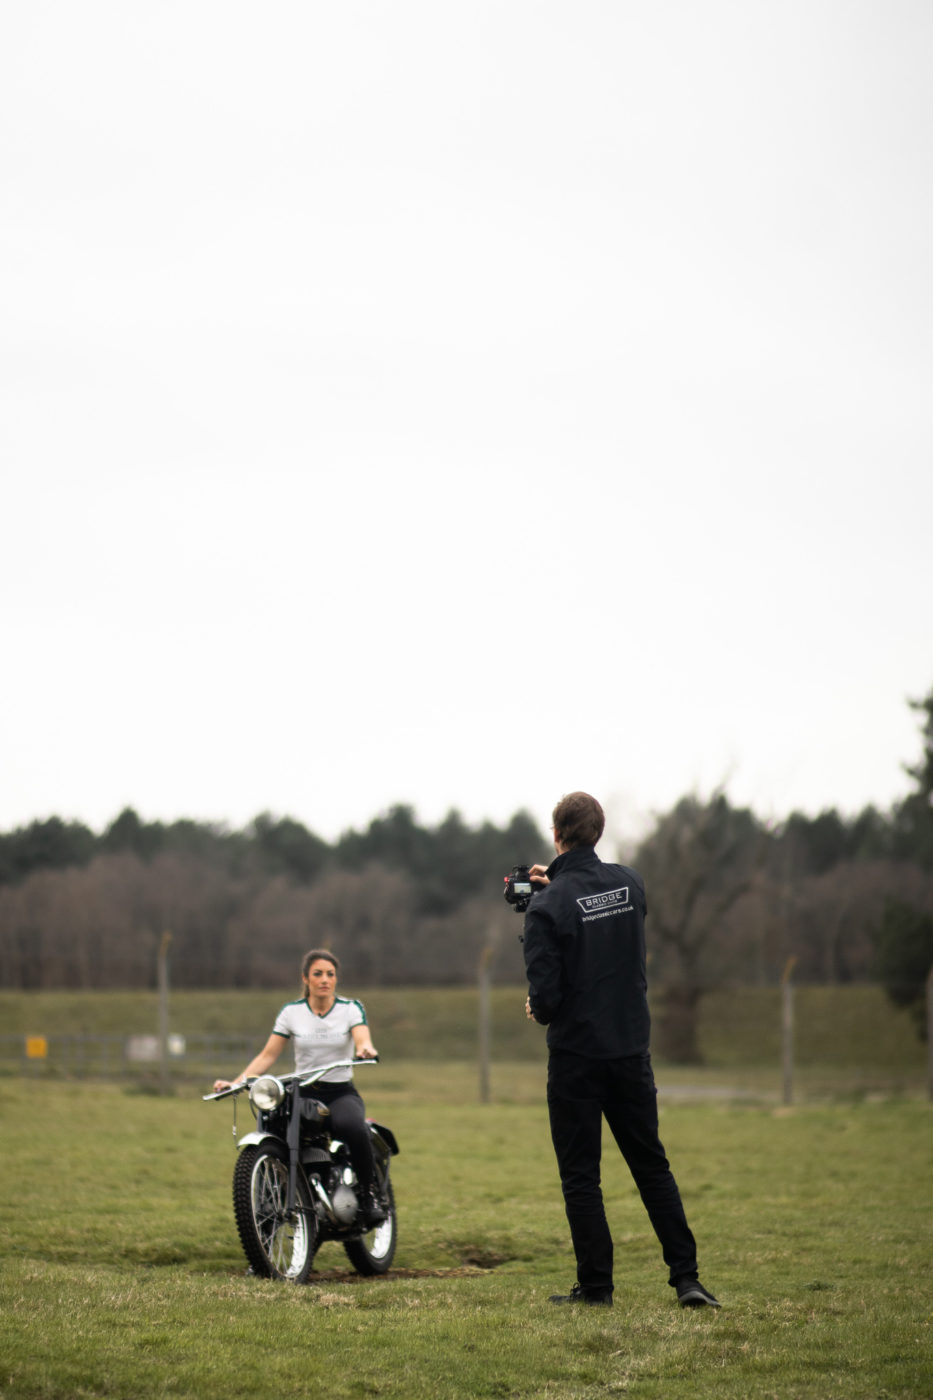
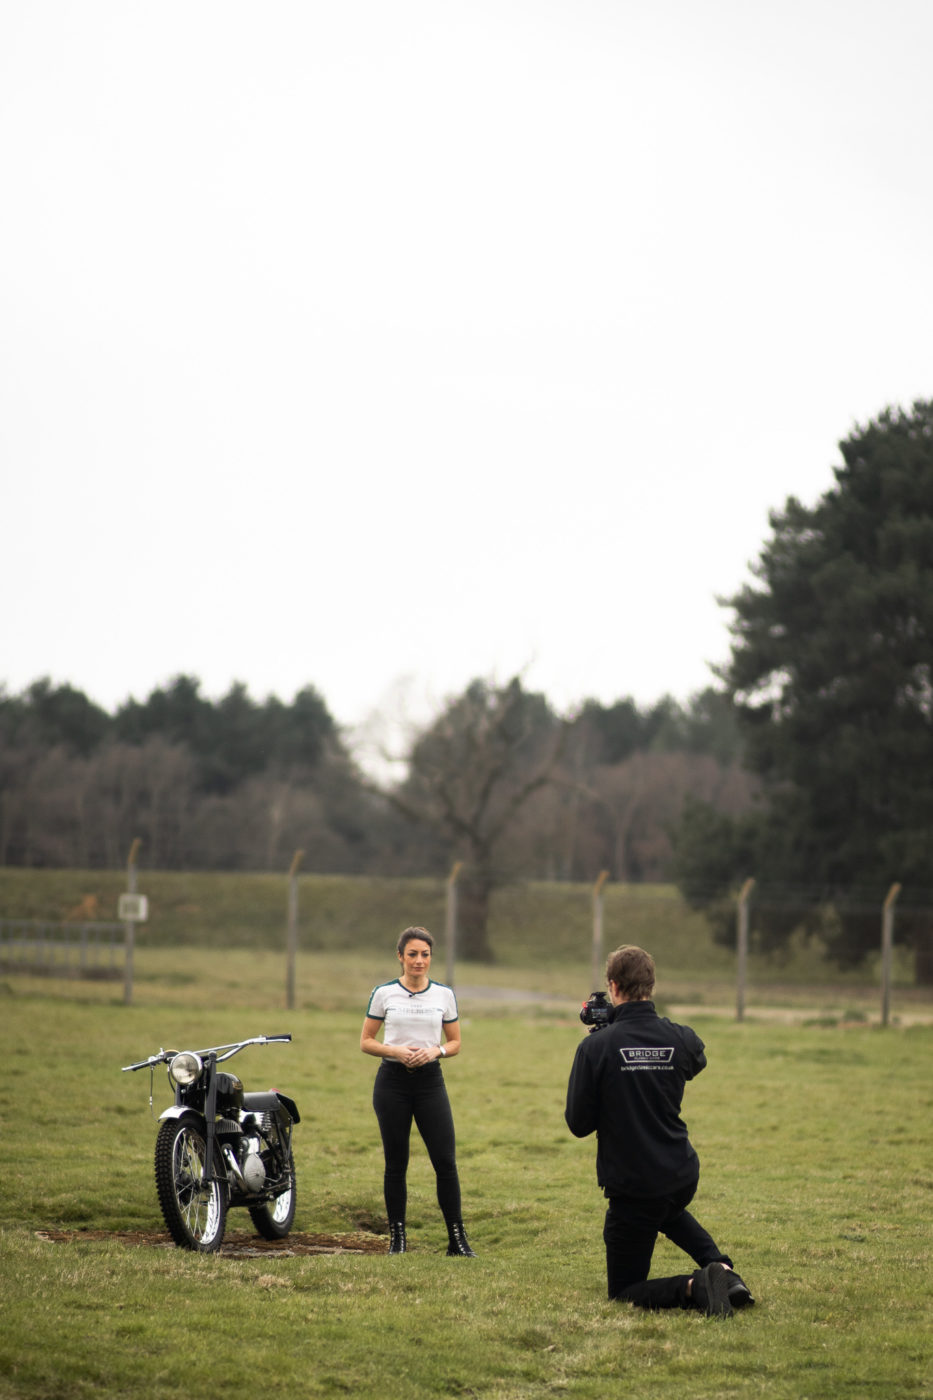
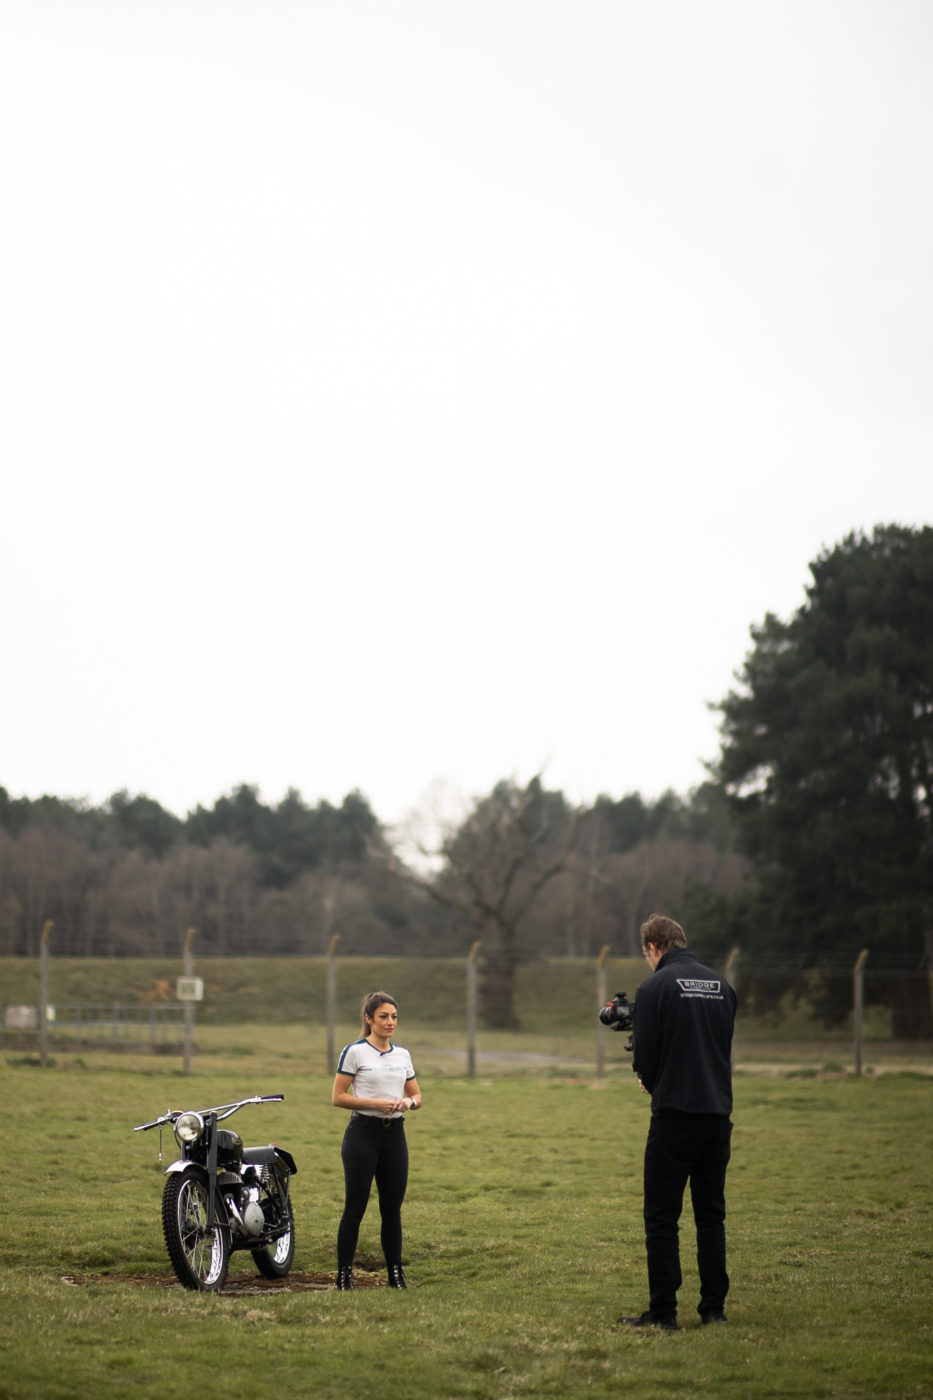
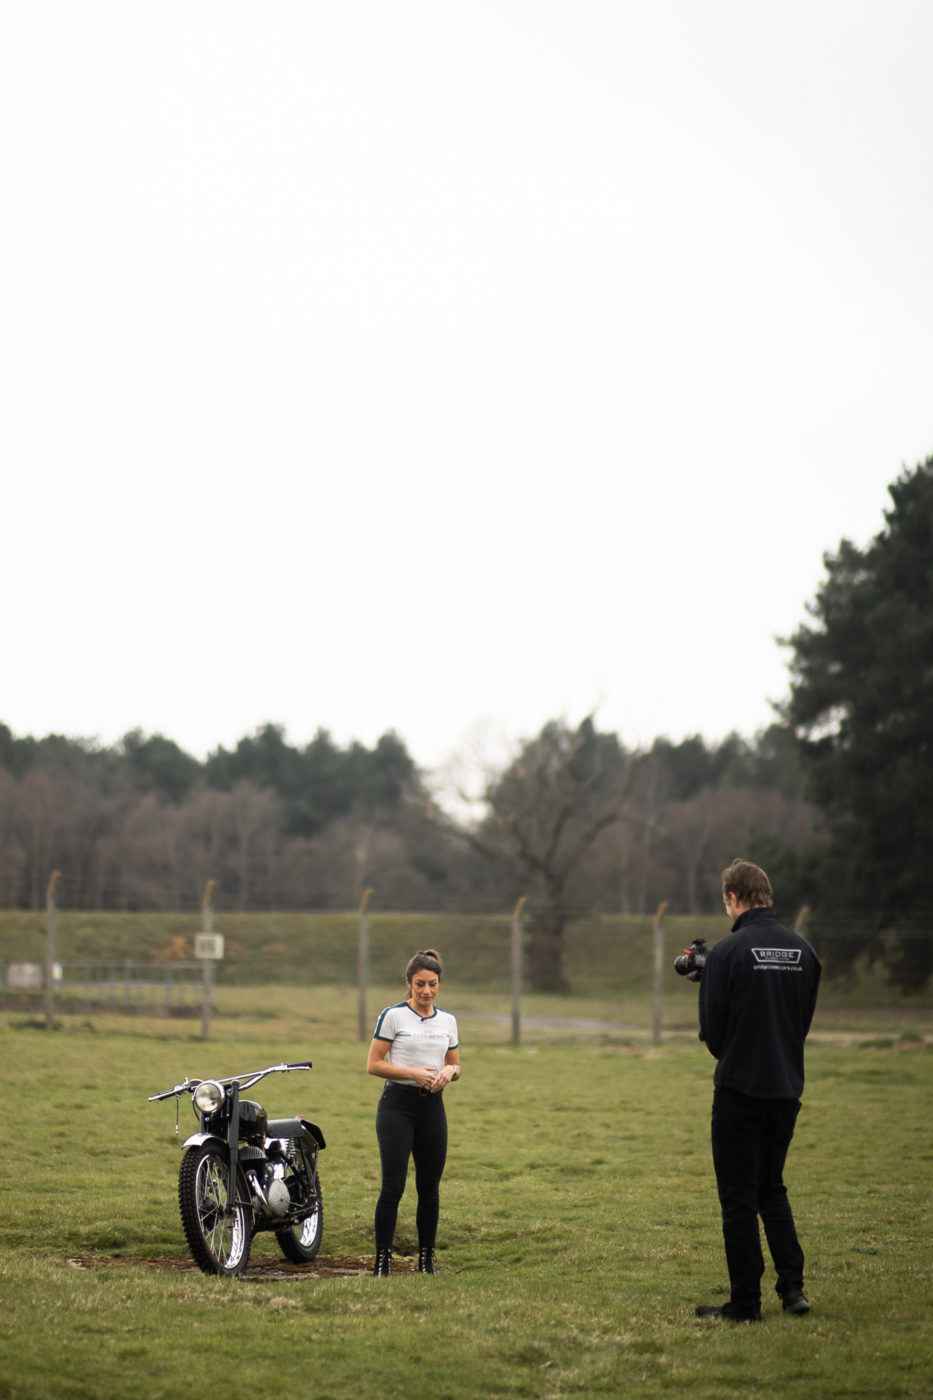
Last night our marketing team and visual gurus, Ellie and Freddie headed over to Bentwaters to shoot some photos and videos with Charlotte. The overcast evening sky made the perfect moody backdrop to shoot our classic 1953 Francis Barnett against.
We think Charlotte’s getting the hang of this bike…
Our lovely 1974 Beetle has come in for some TLC. We’ve fitted new wheel cylinders and bled the brakes as well as stripping the brakes and replacing the parts so that it now stops more efficiently. Paul has also replaced the hydraulic wheel cylinders on all four wheels and fitted a carburettor inlet manifold rubber seal.

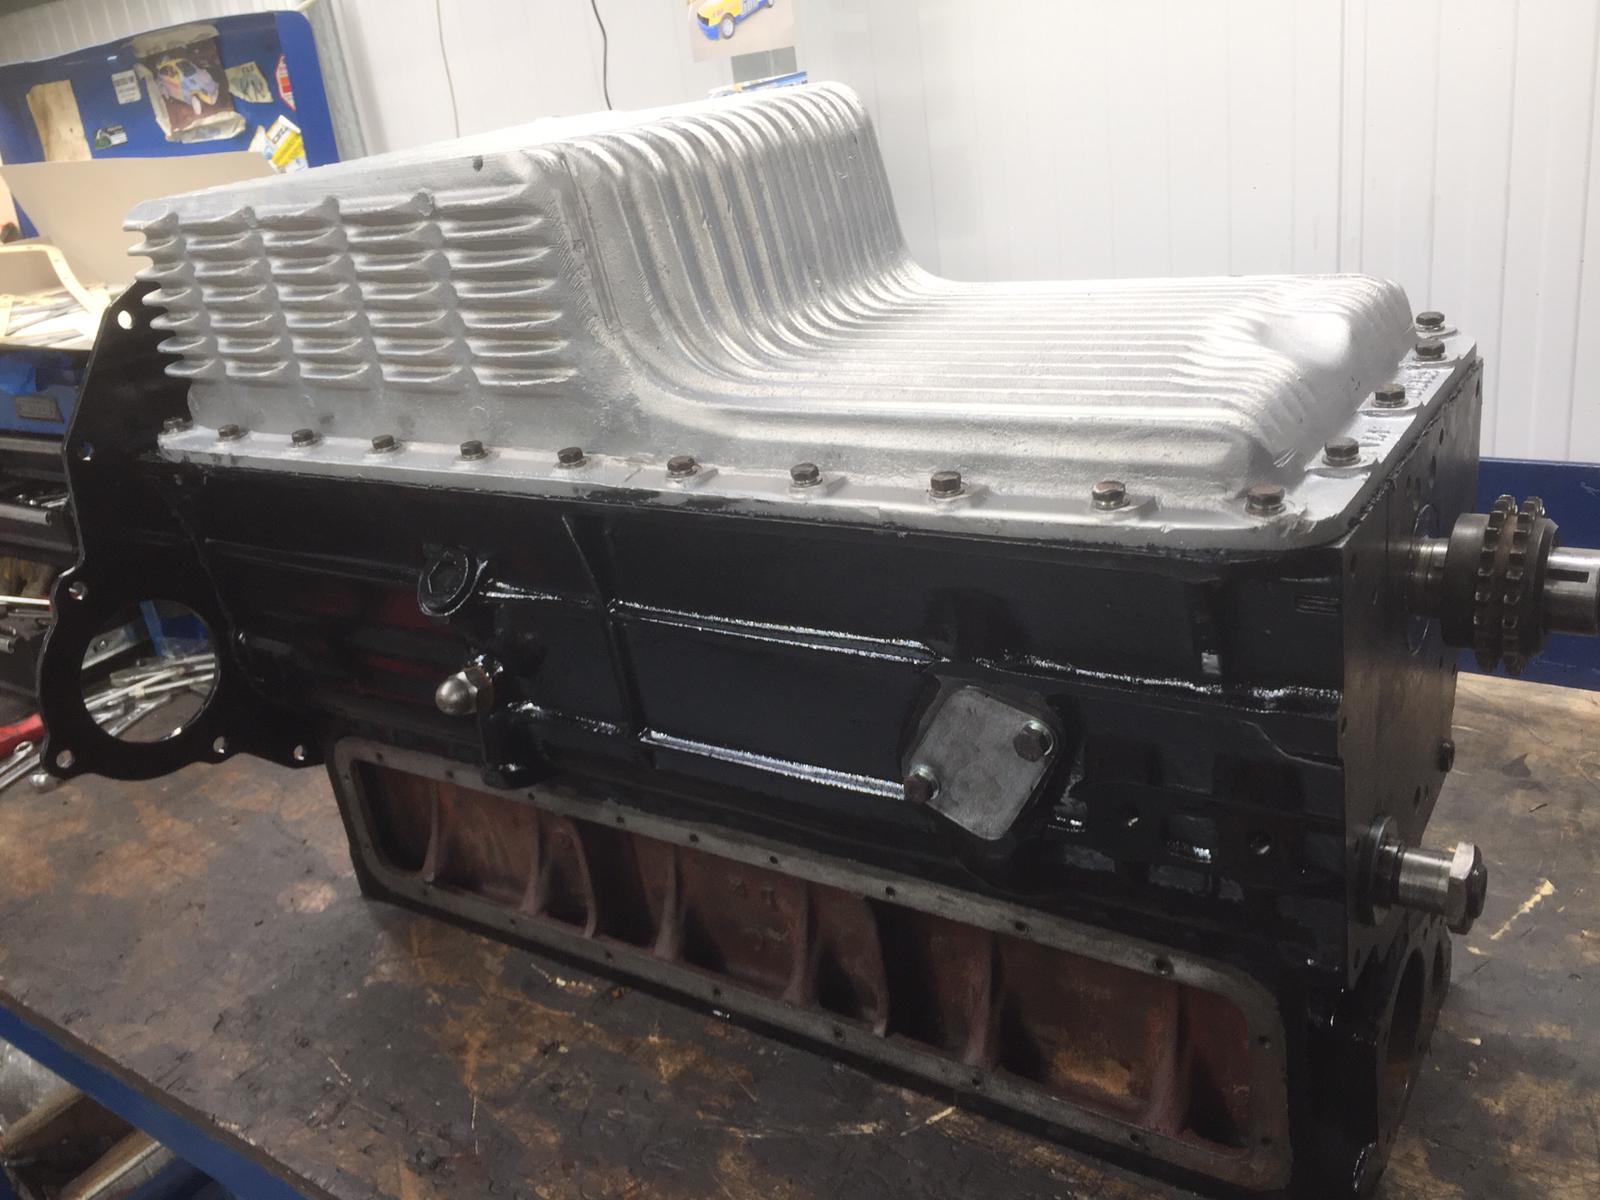
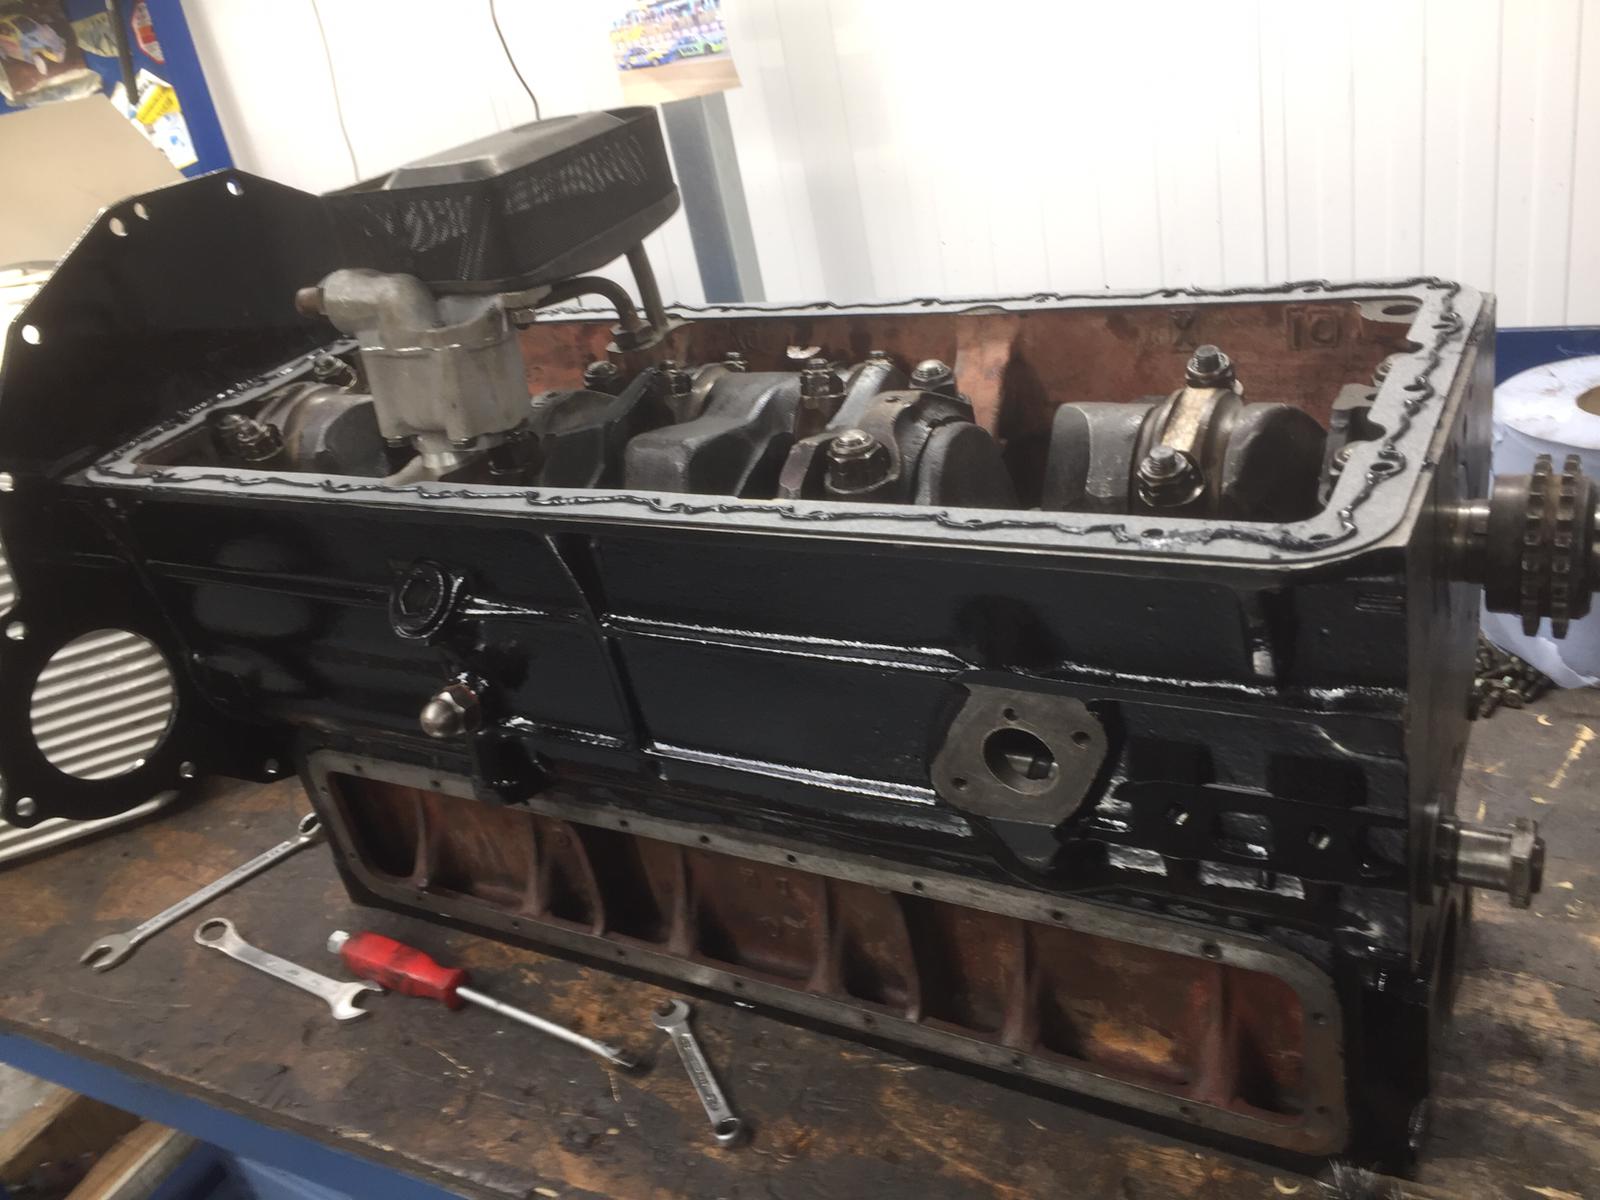
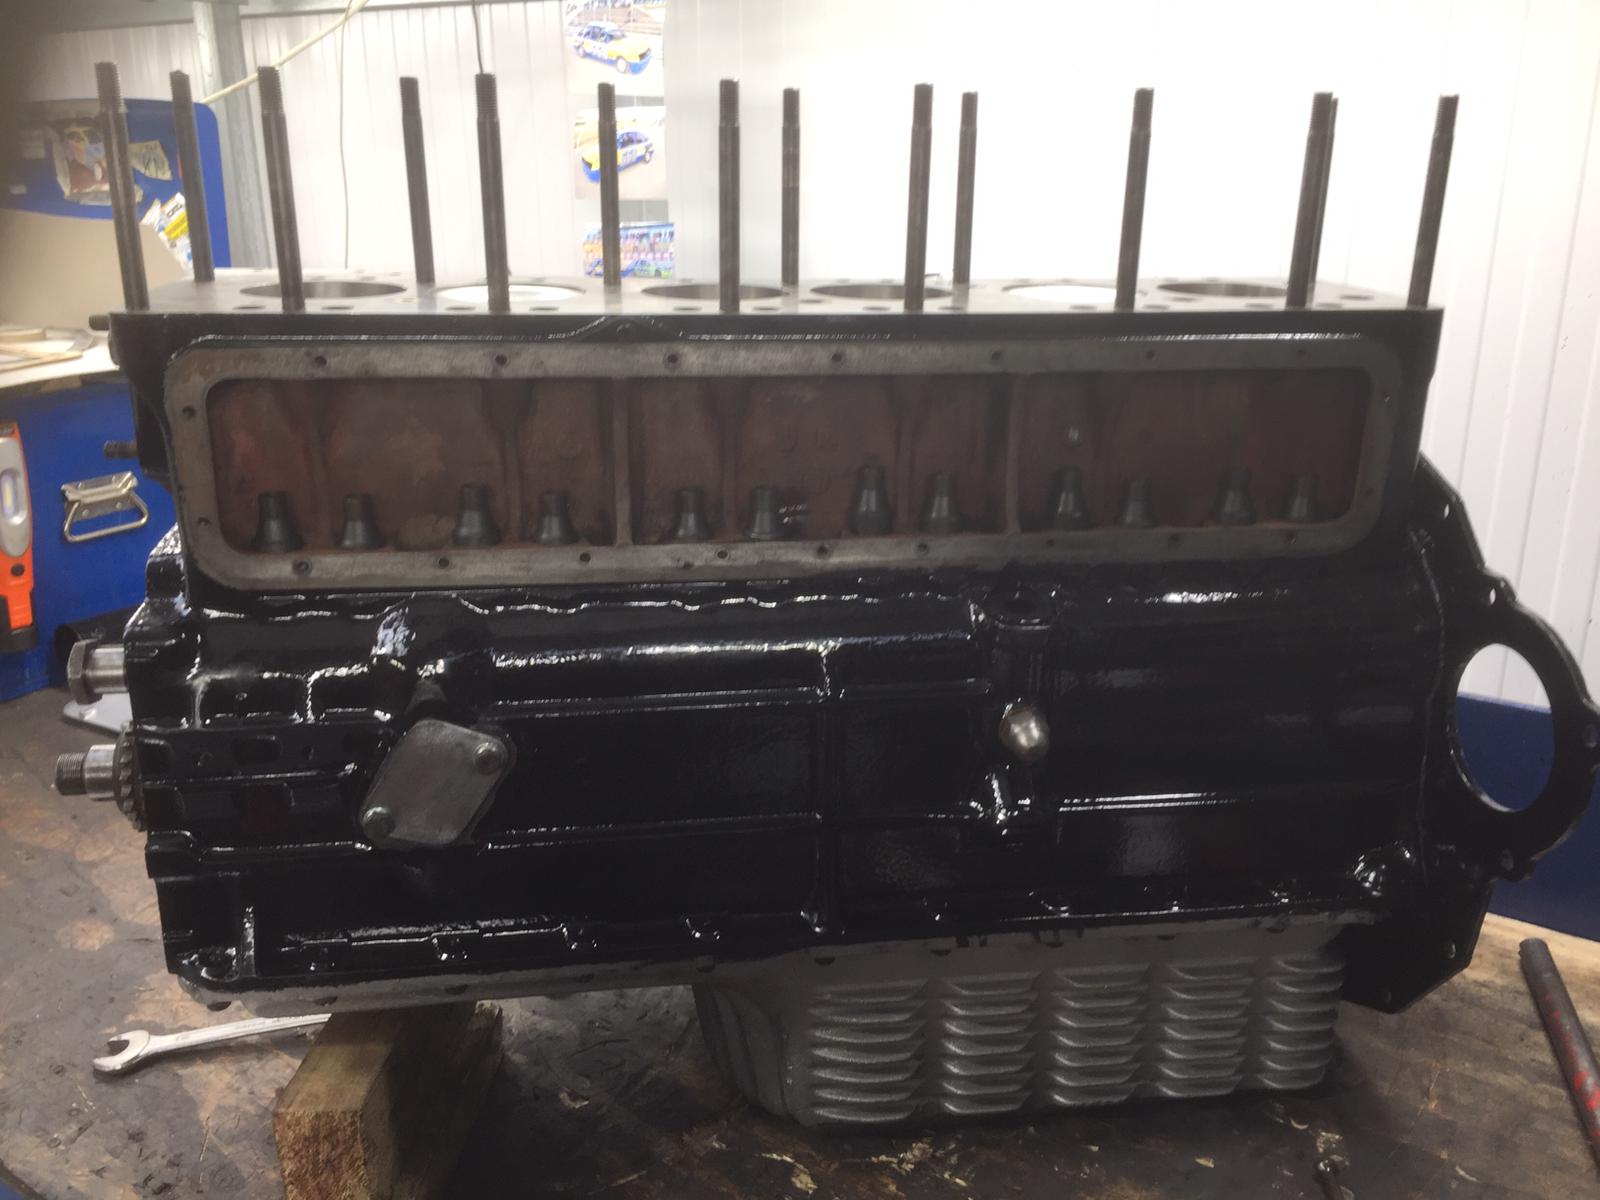
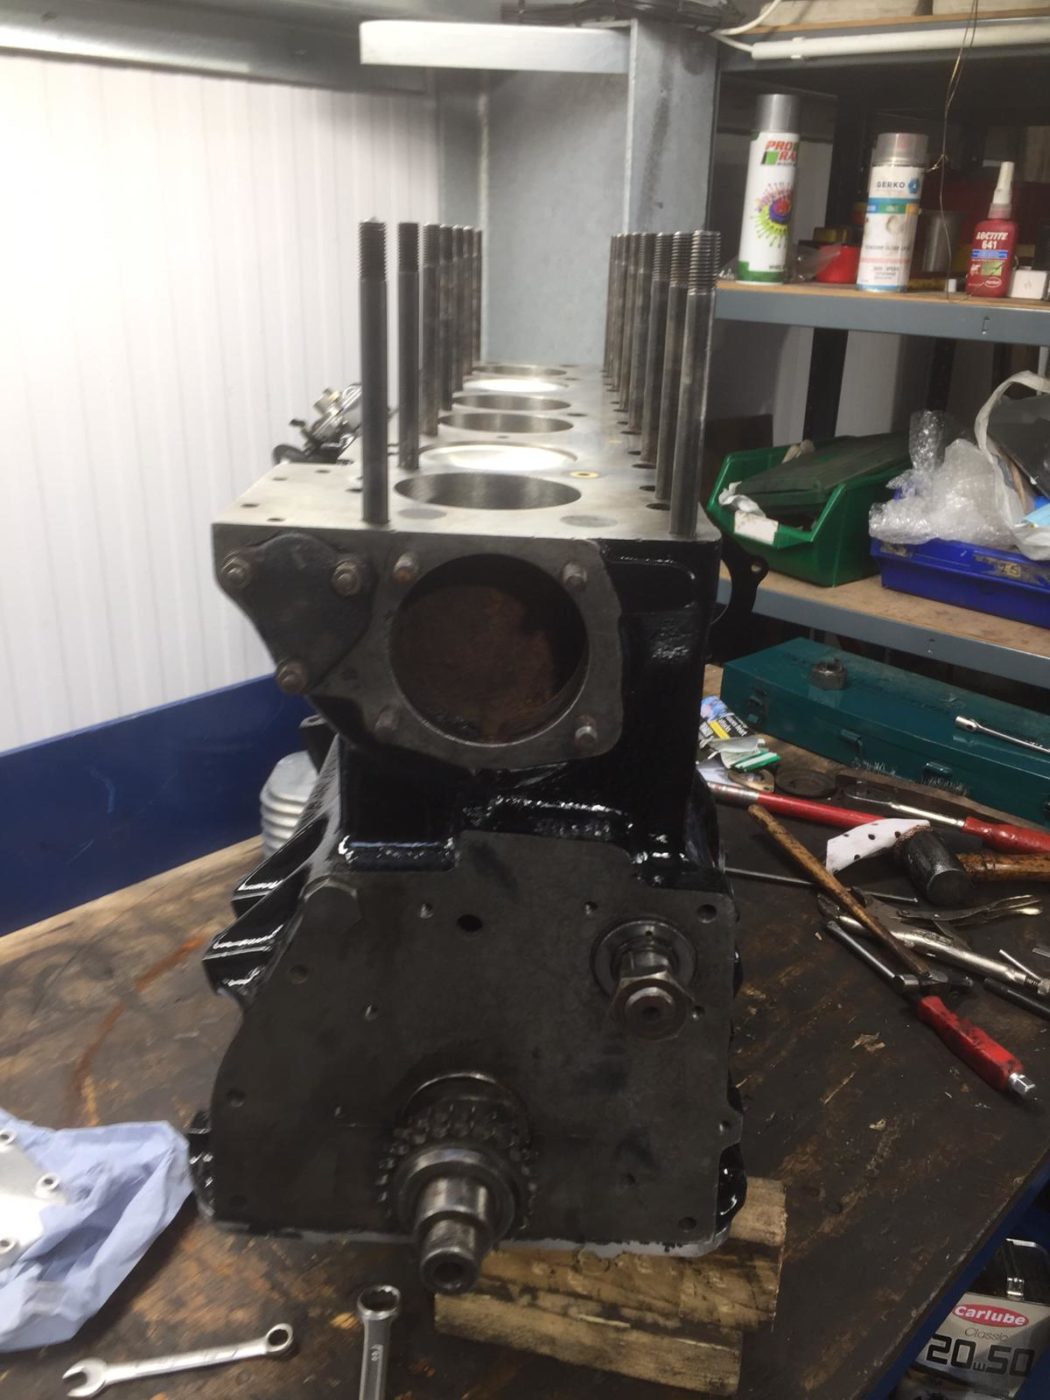
Ady has almost completed fitting the engine back together after its full re-build, part of which was done here and part of which was done at Scholar.
The engine was originally stripped down and inspected for issues when Ady found that the engine needed to be re-bored to suit new pistons. The crankshaft was also reground and new bearings were fitted. Ady also fitted new oil pumps, rear seal conversion on the rear of crankshaft, new core plugs, new timing chain and new camshaft followers. The cylinder head is currently at Coltec, having an unleaded conversion and a reface.
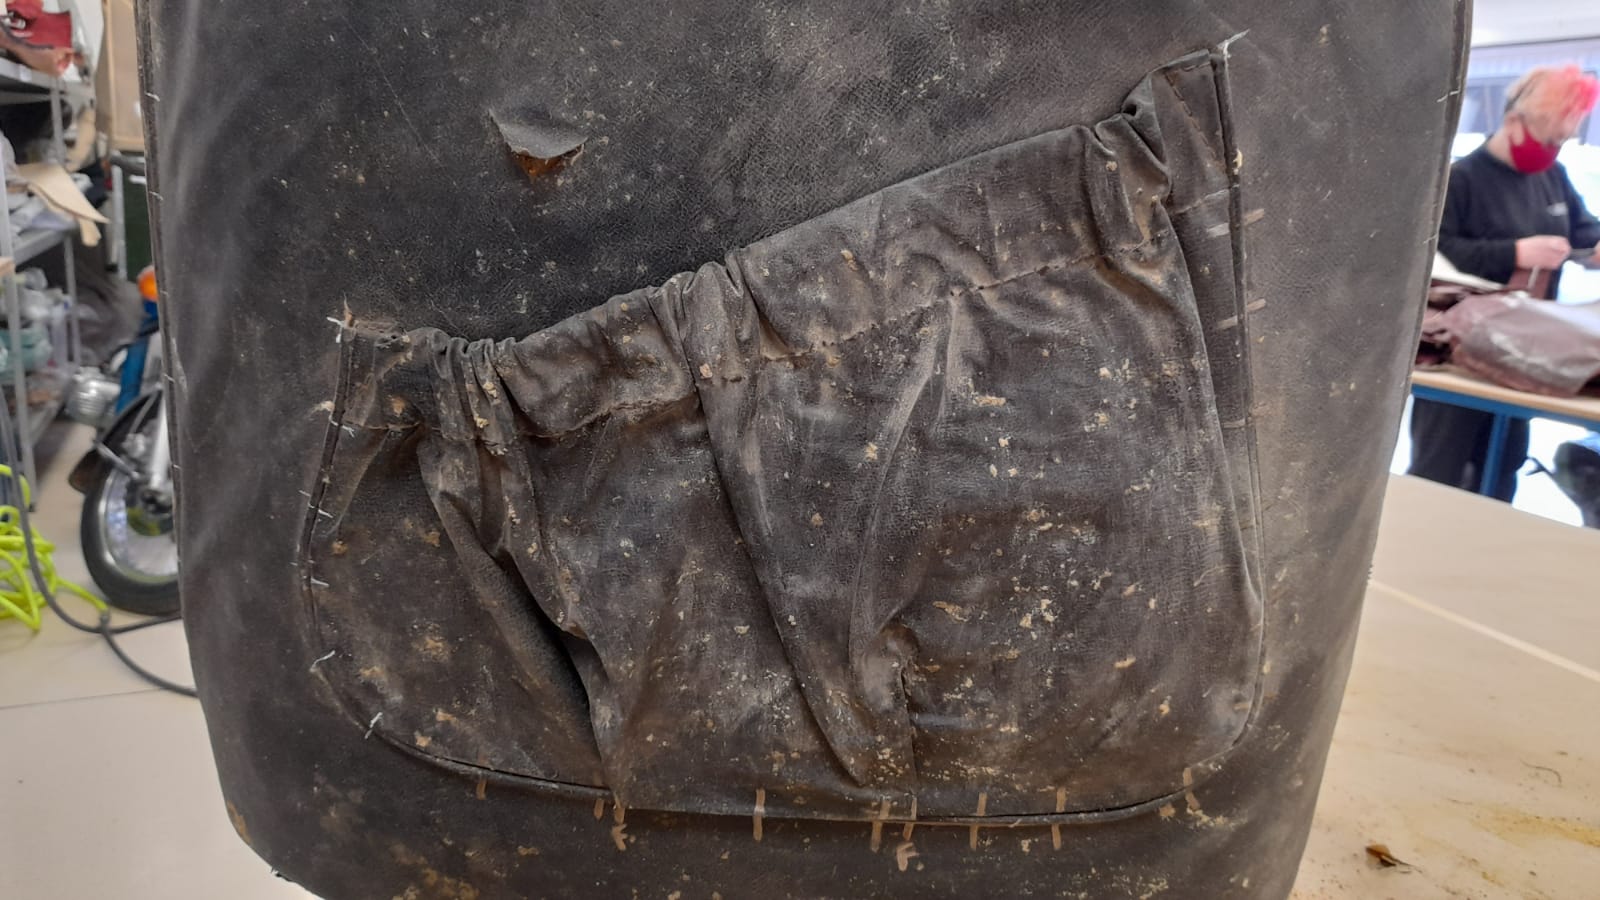
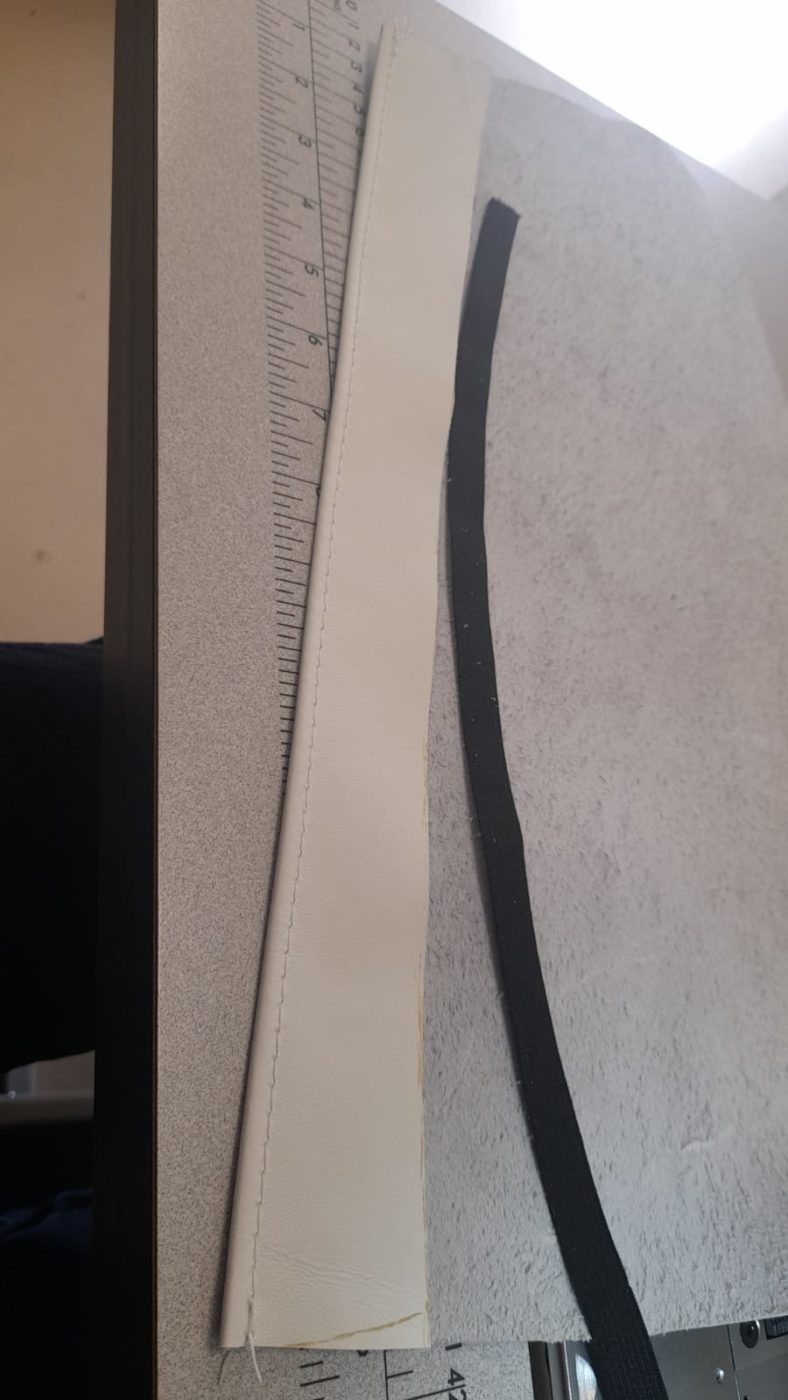
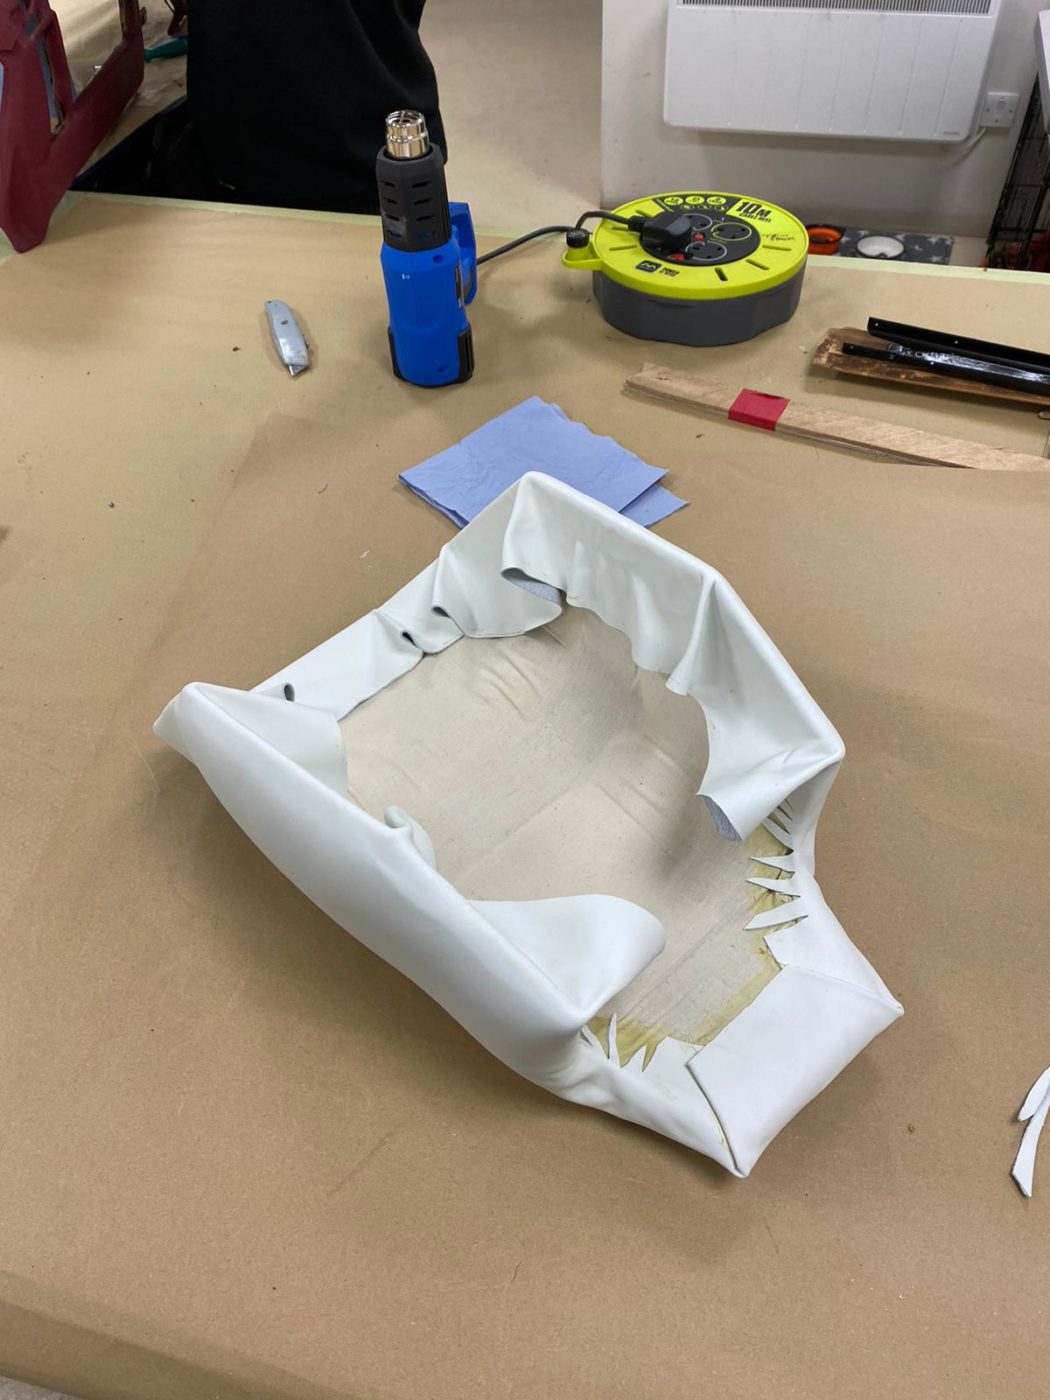
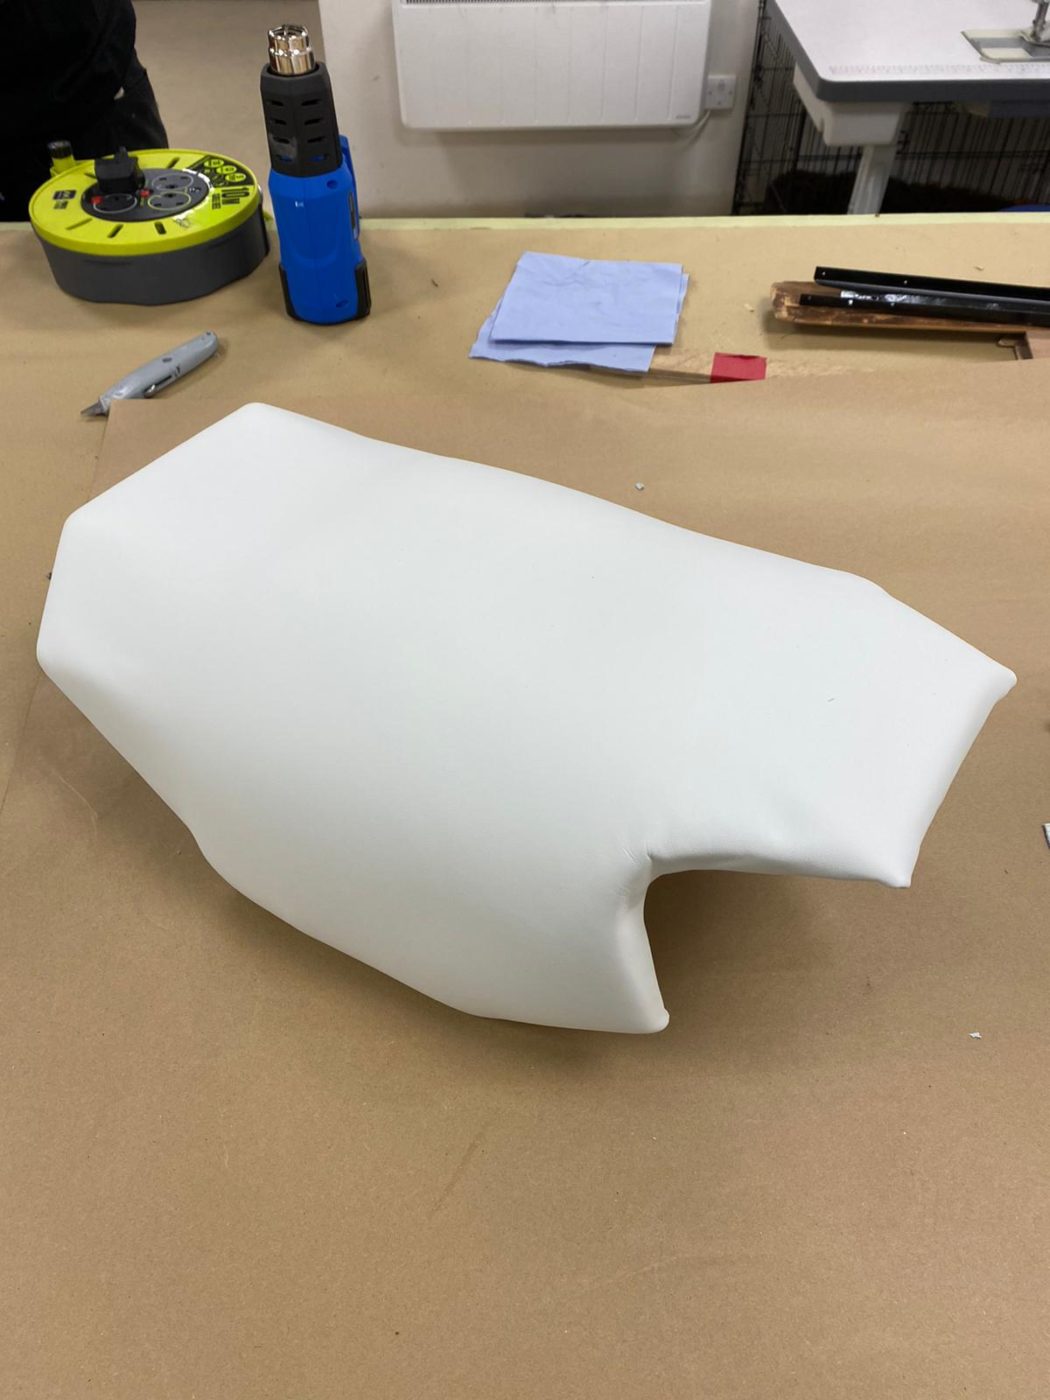
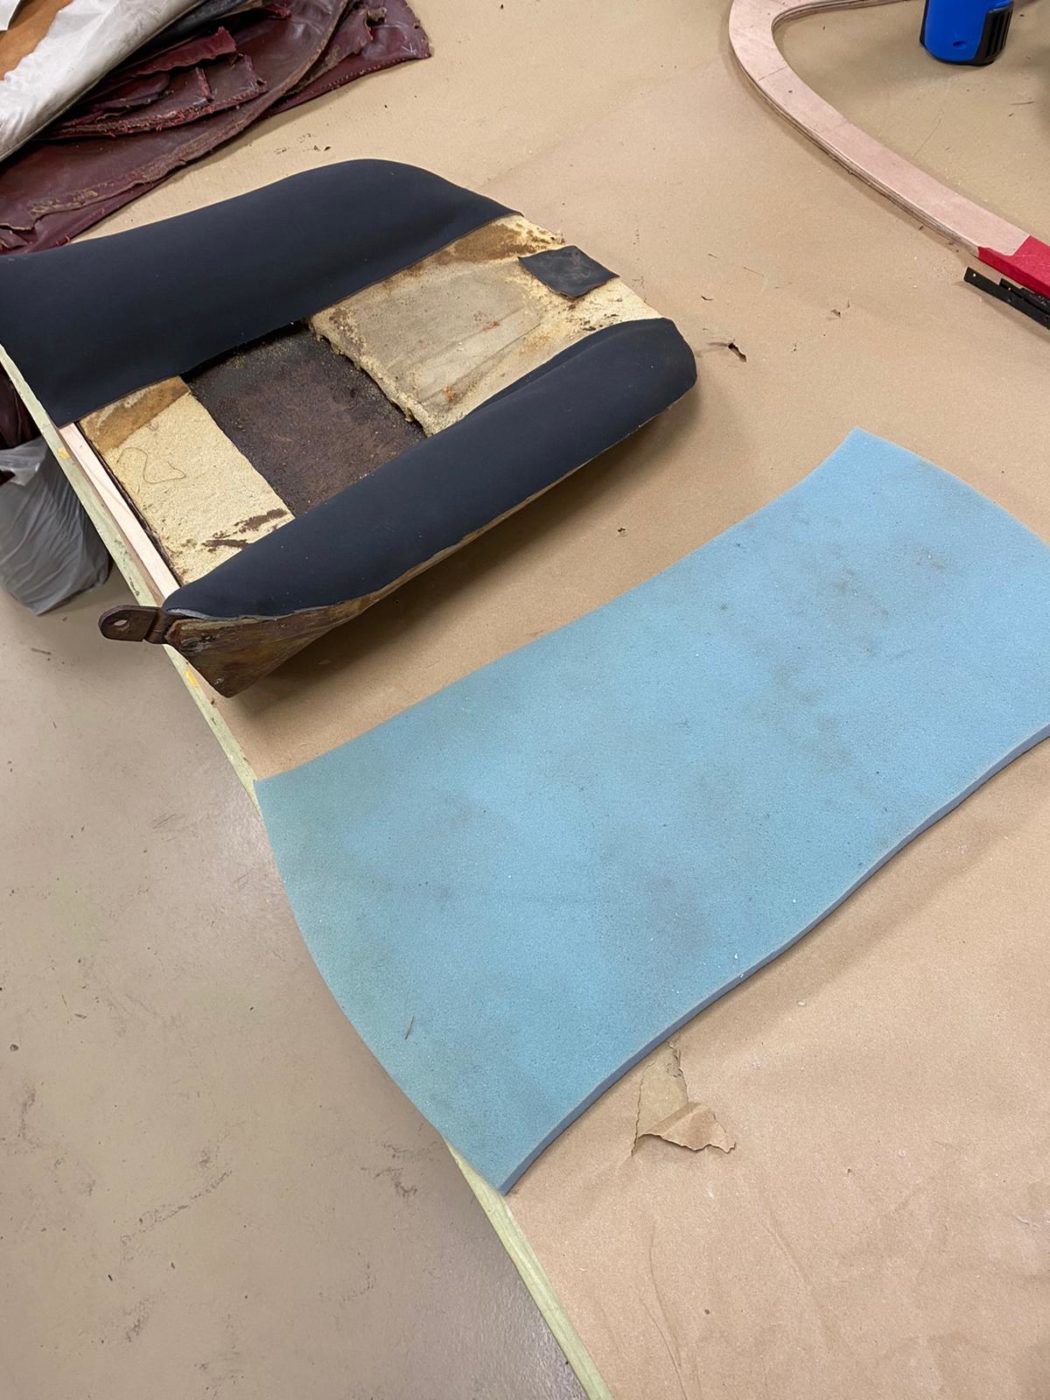
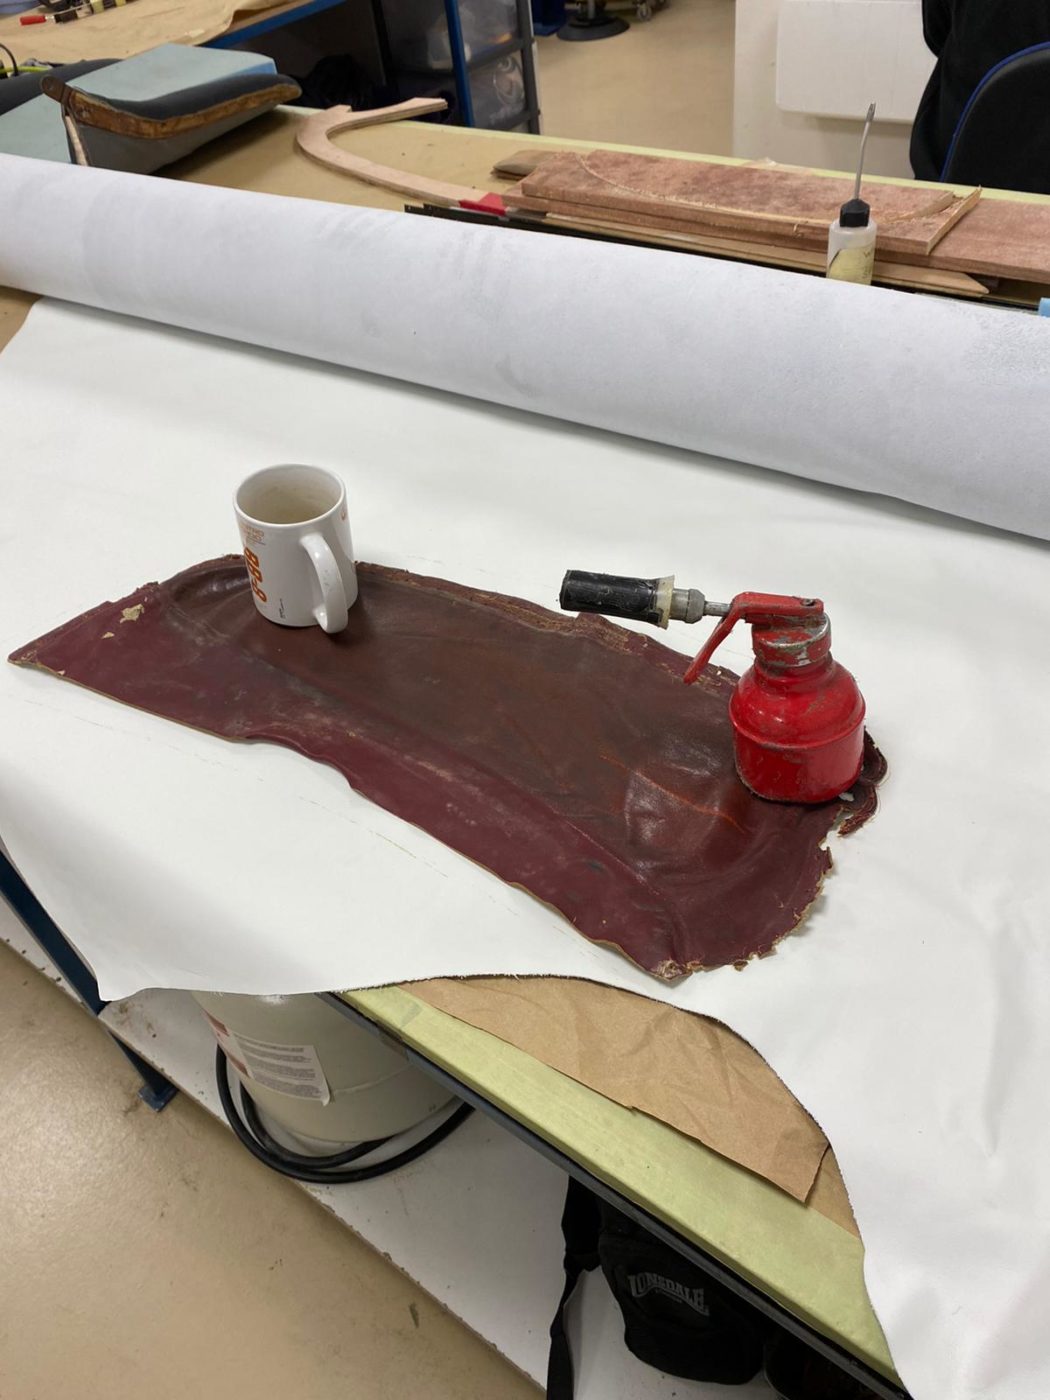
Lydia has started on remaking the headlining on the lilac Jensen project. She first cleaned up all the metal poles that go into the loops across the headline and then inserted the poles inside the loops.
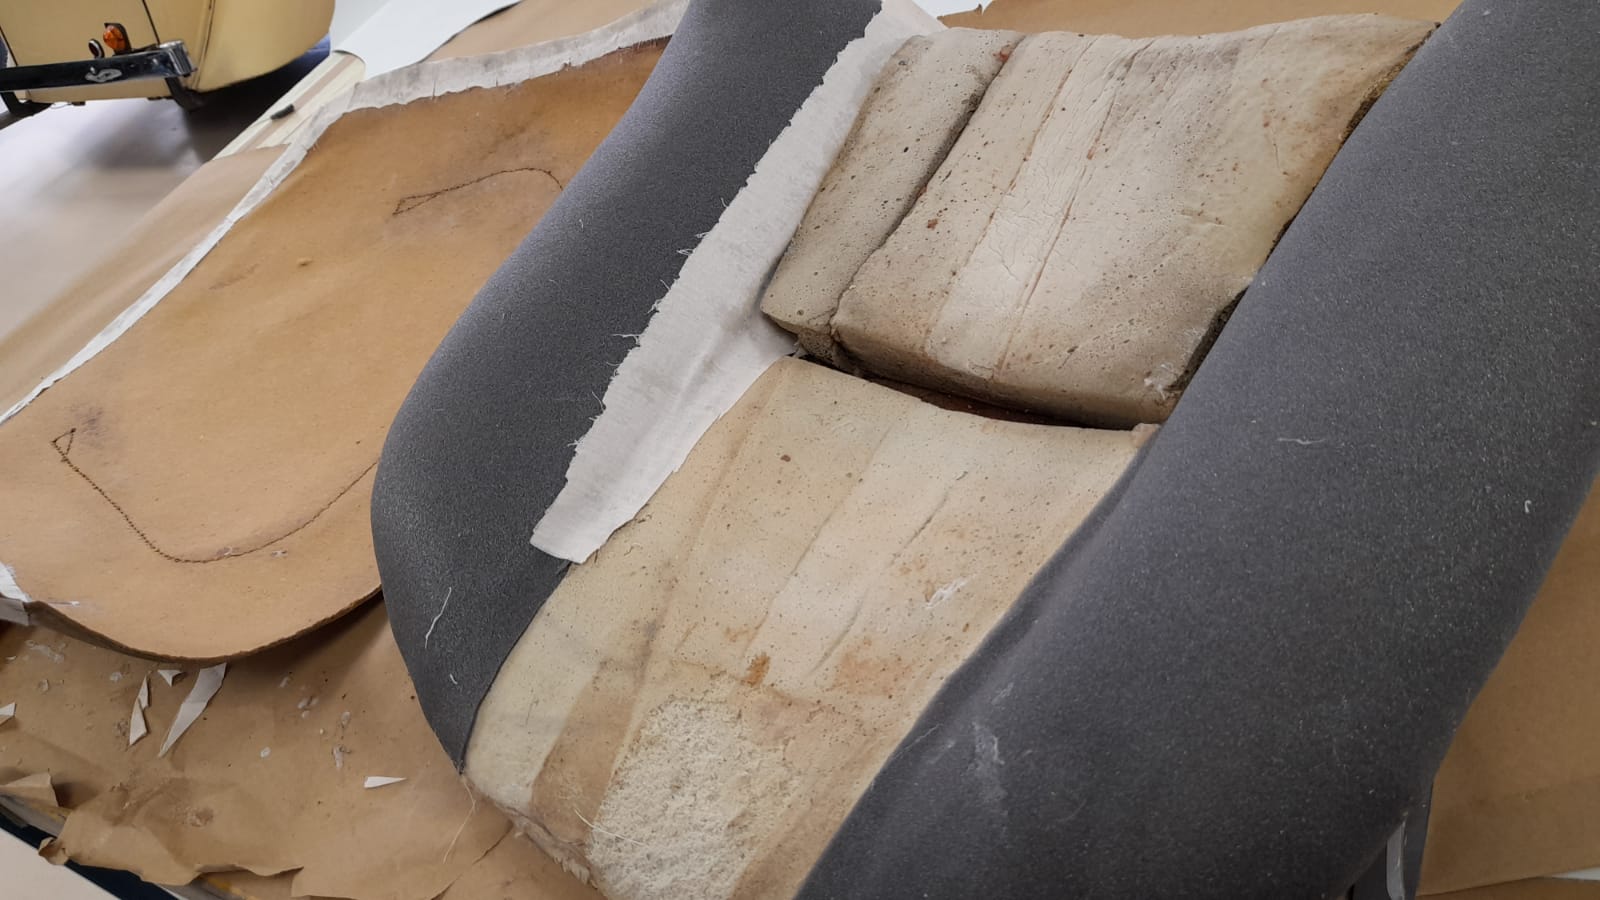
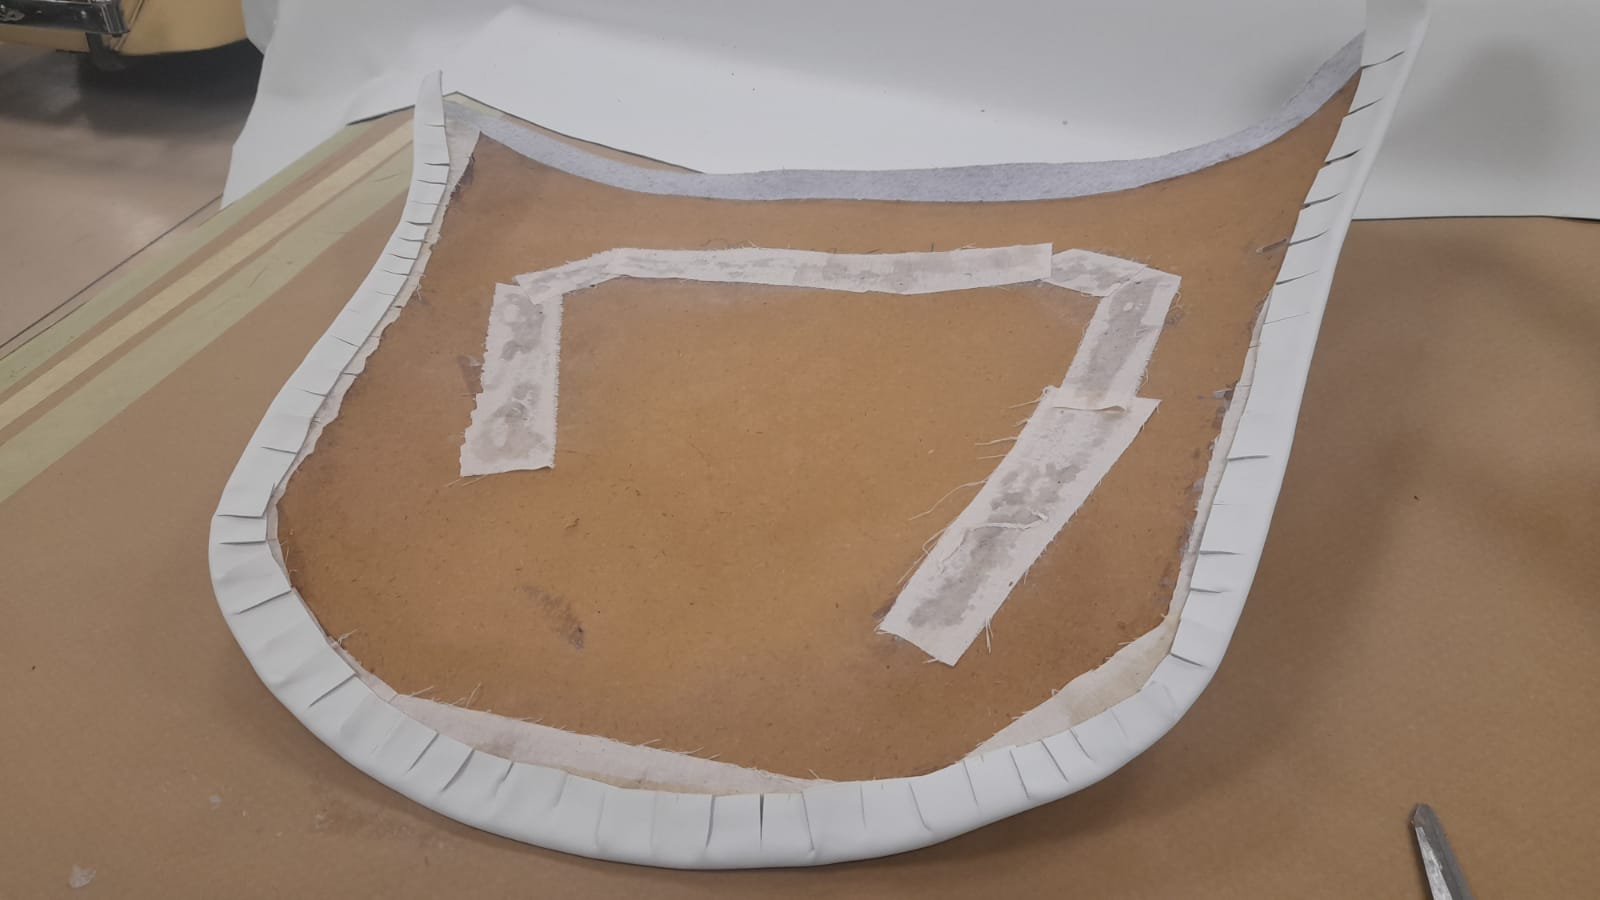
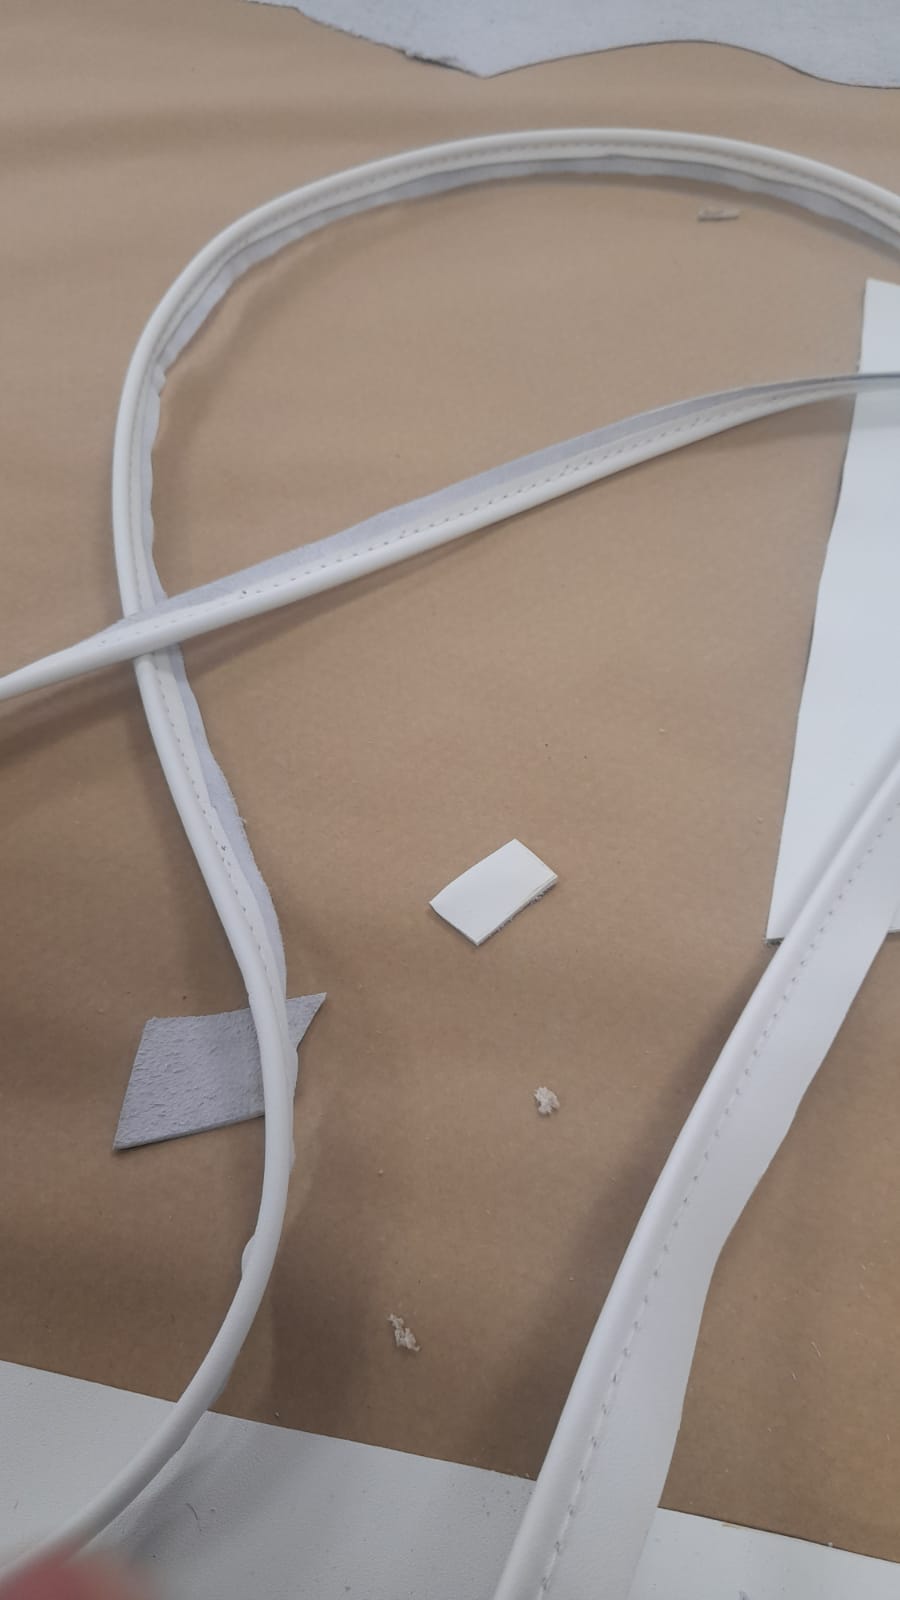
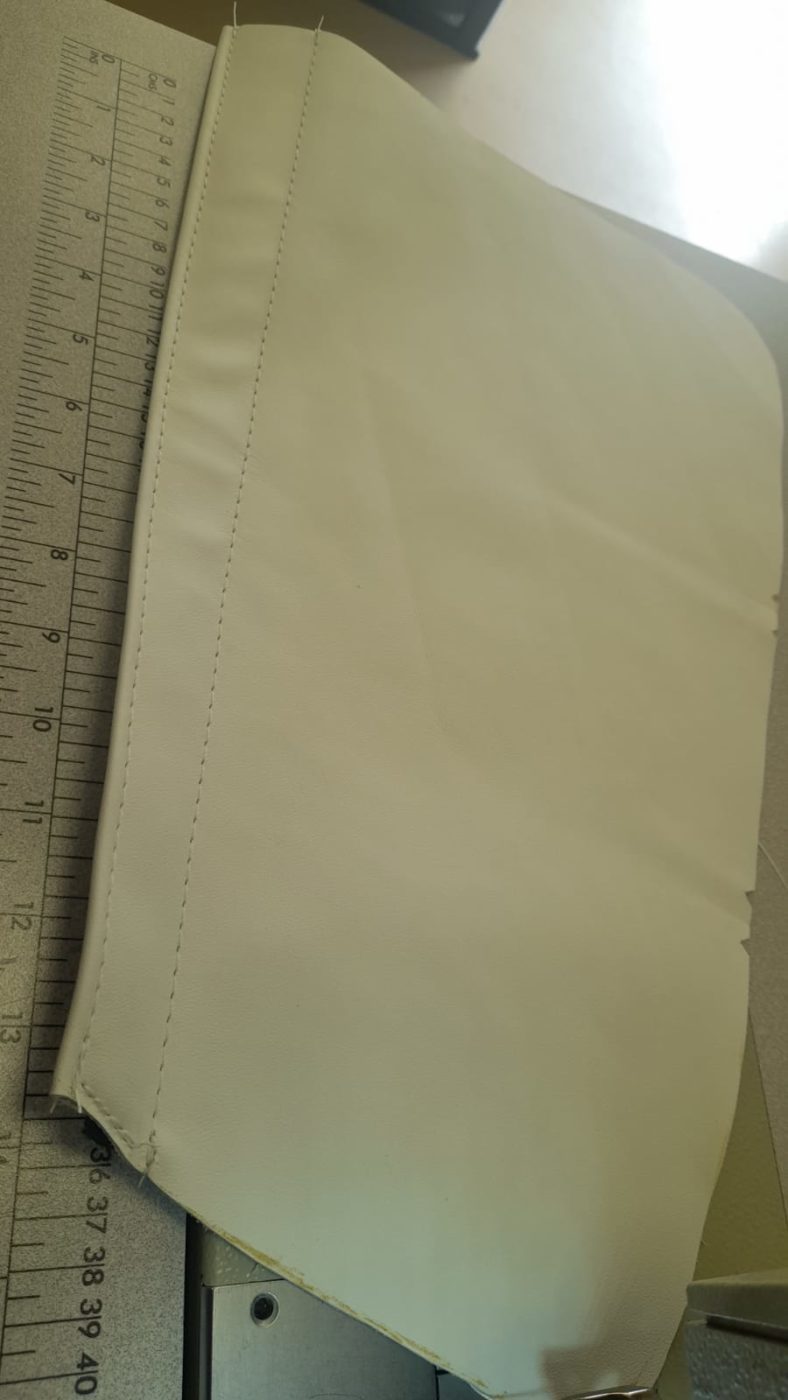
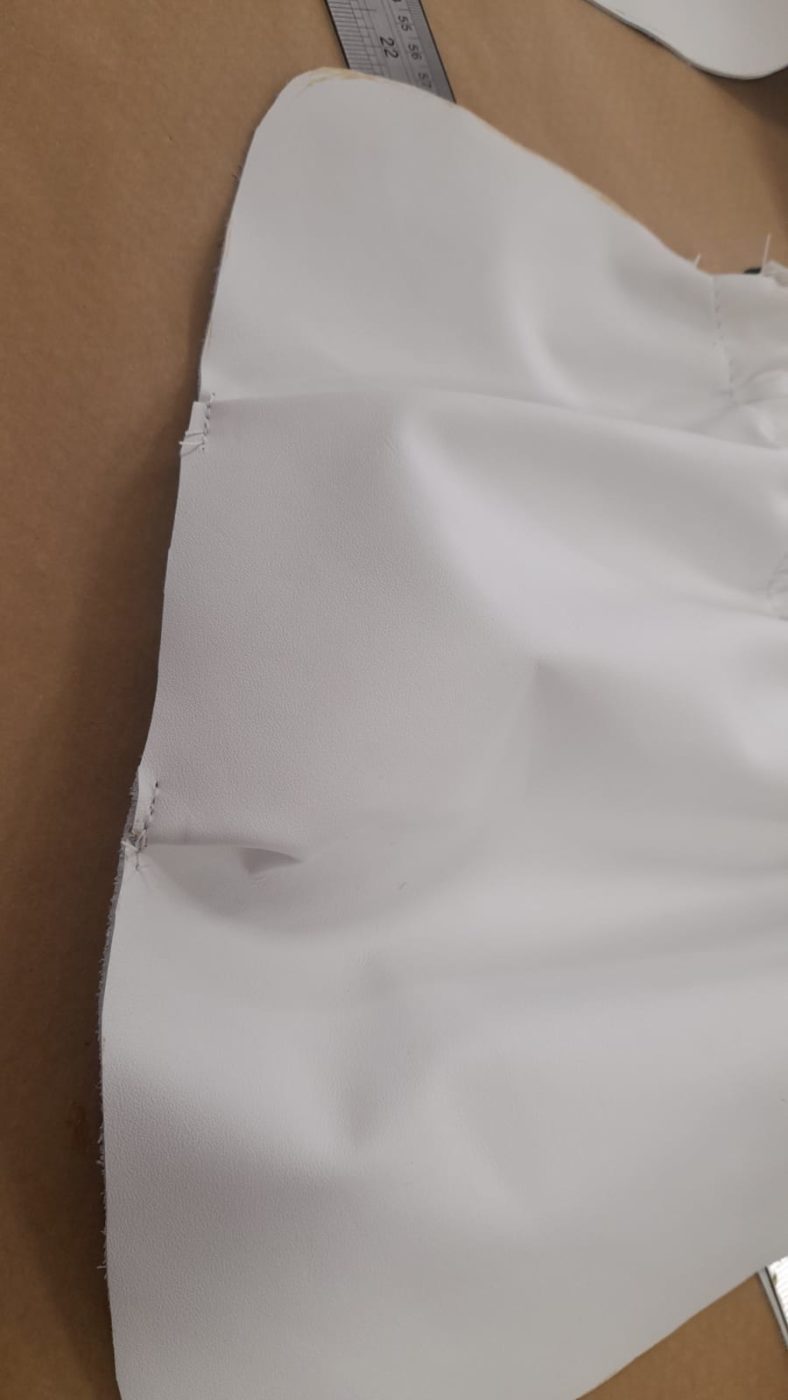
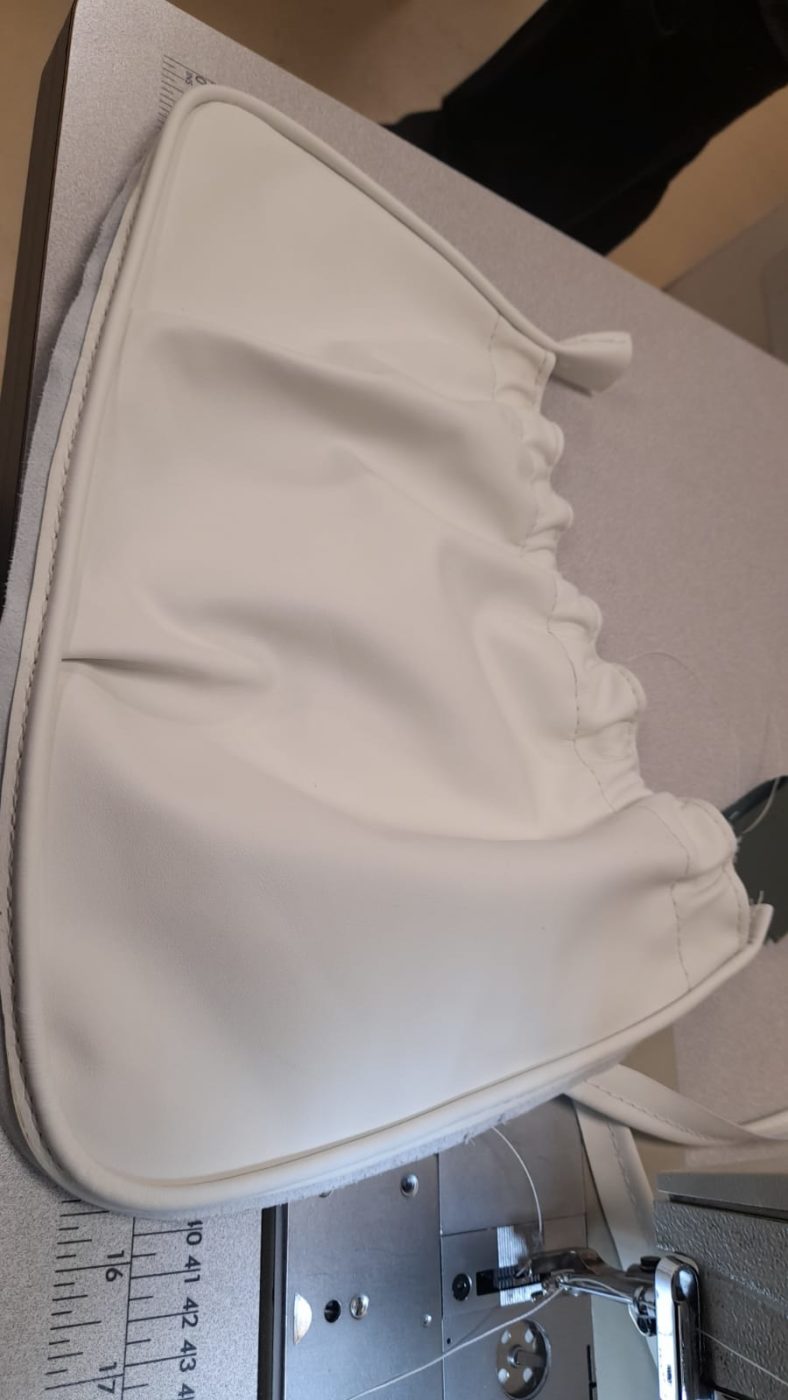
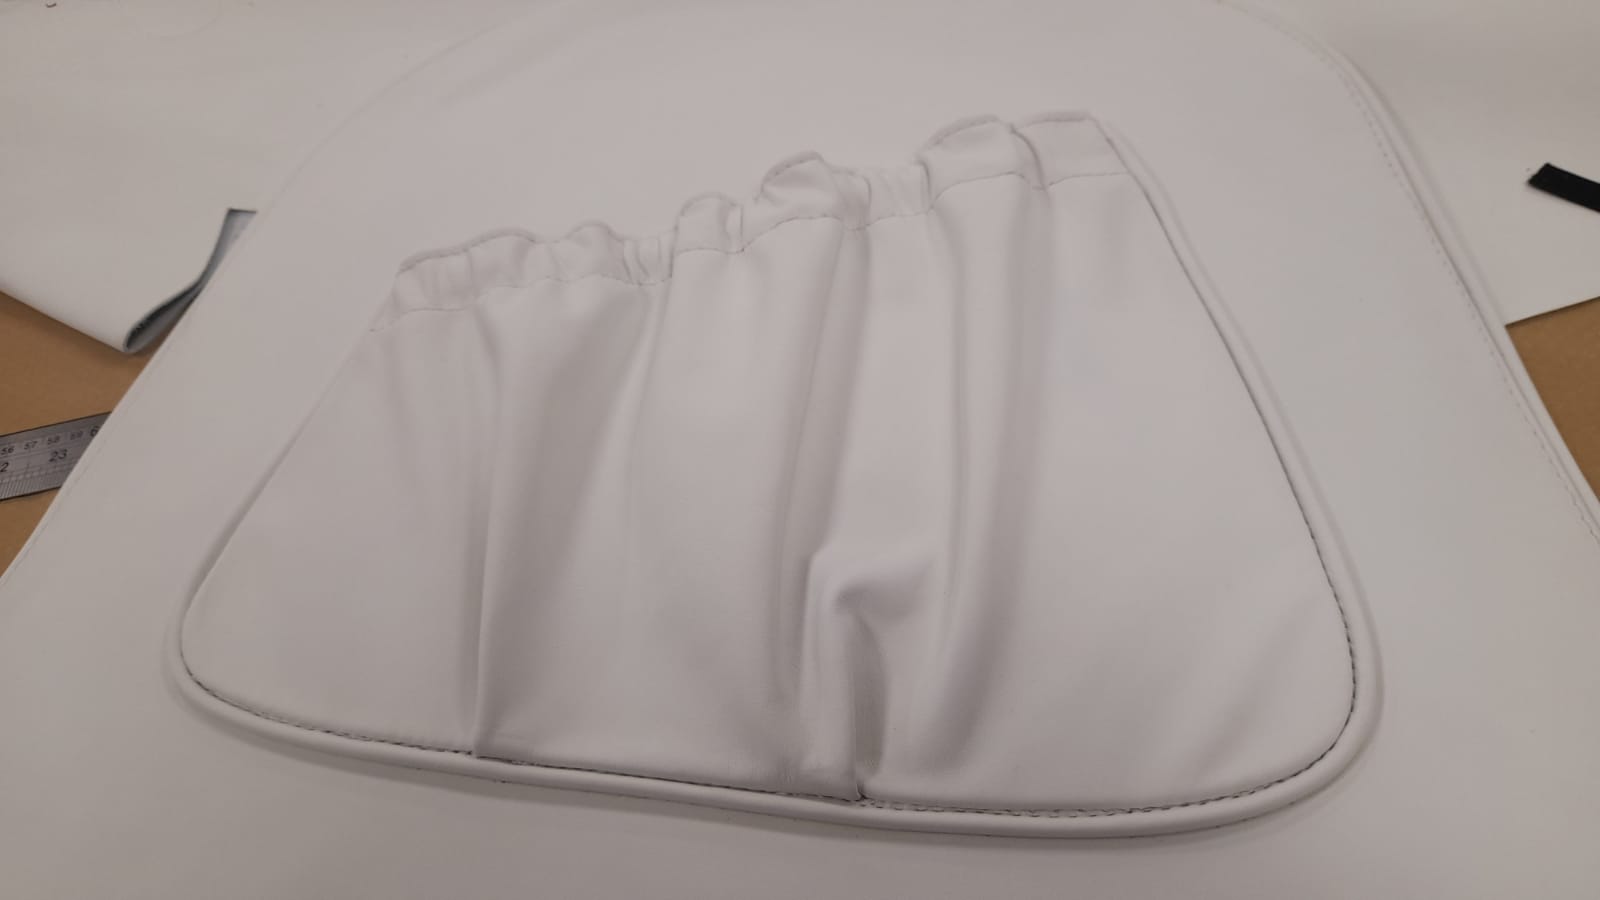
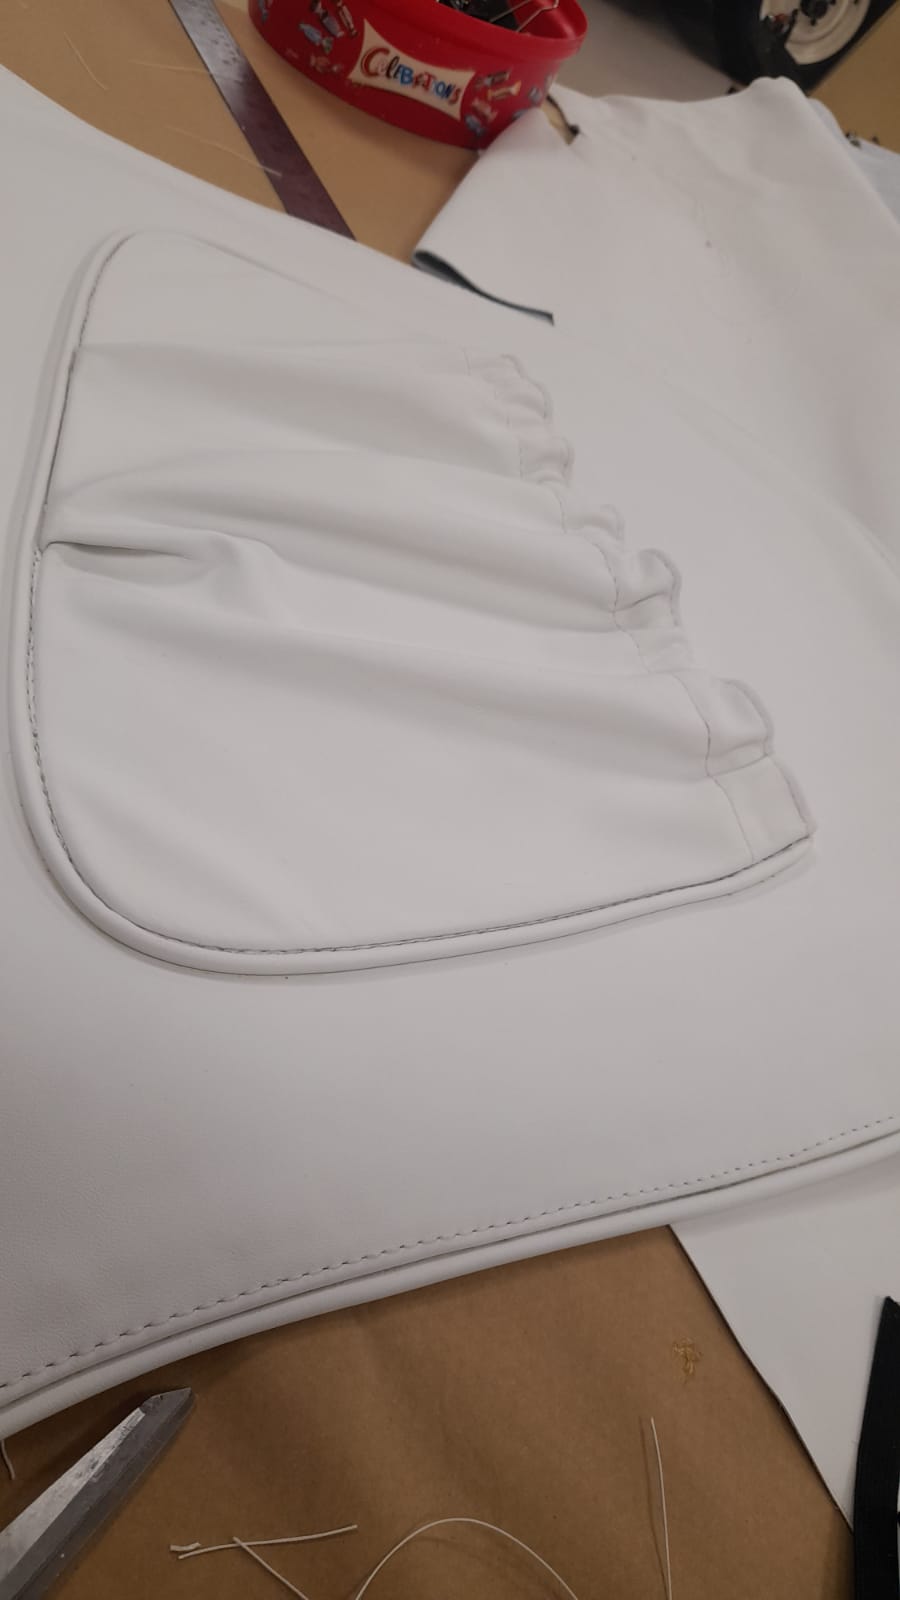
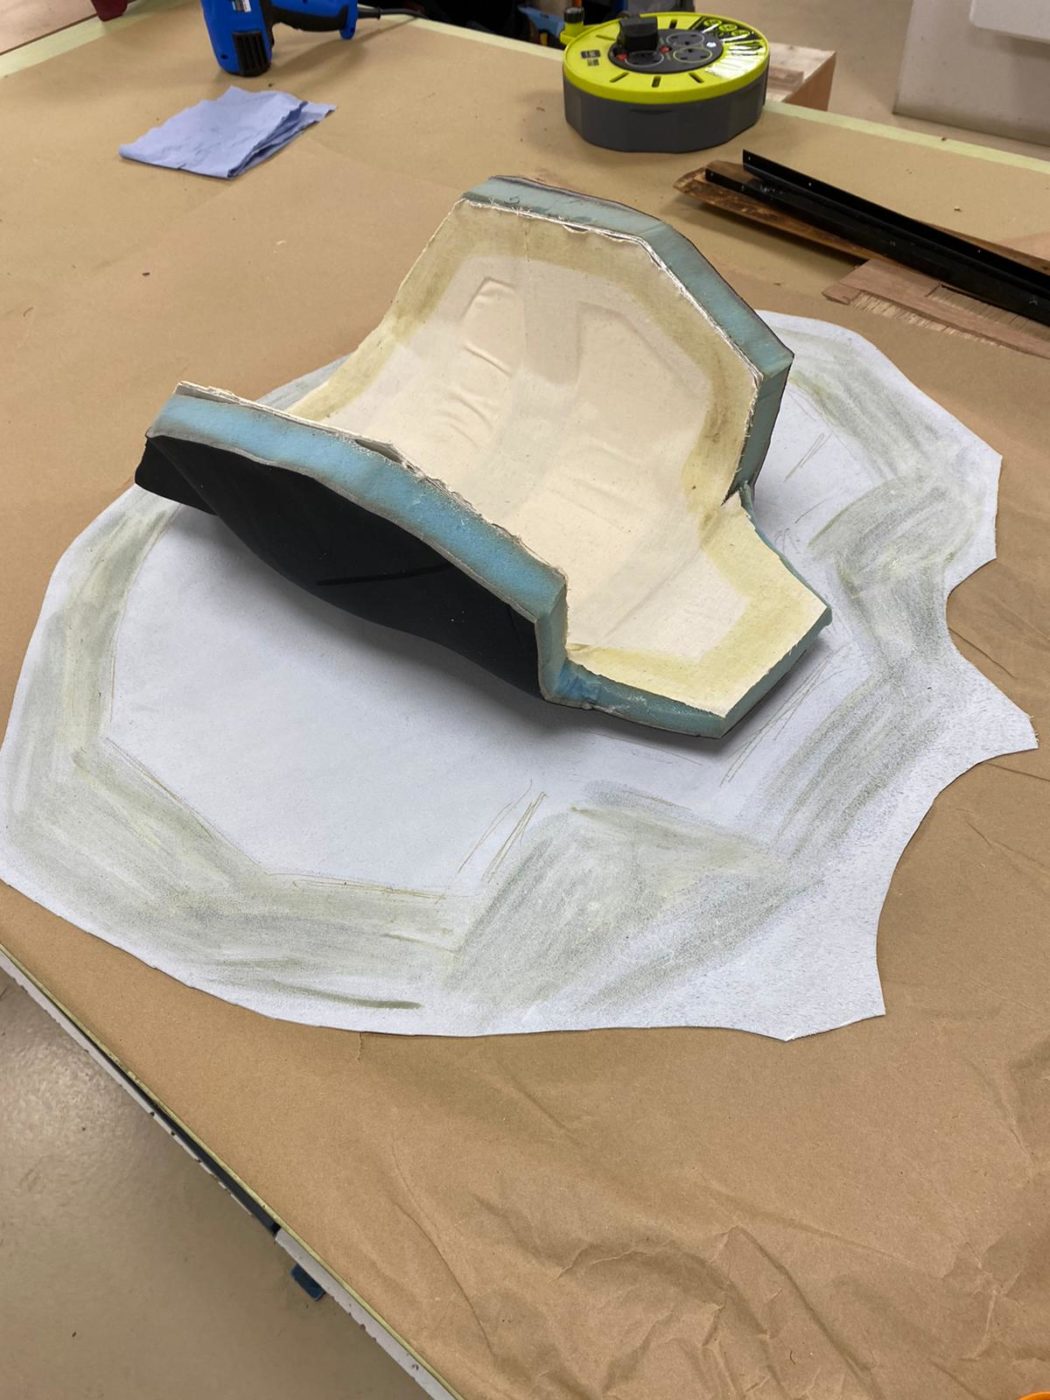
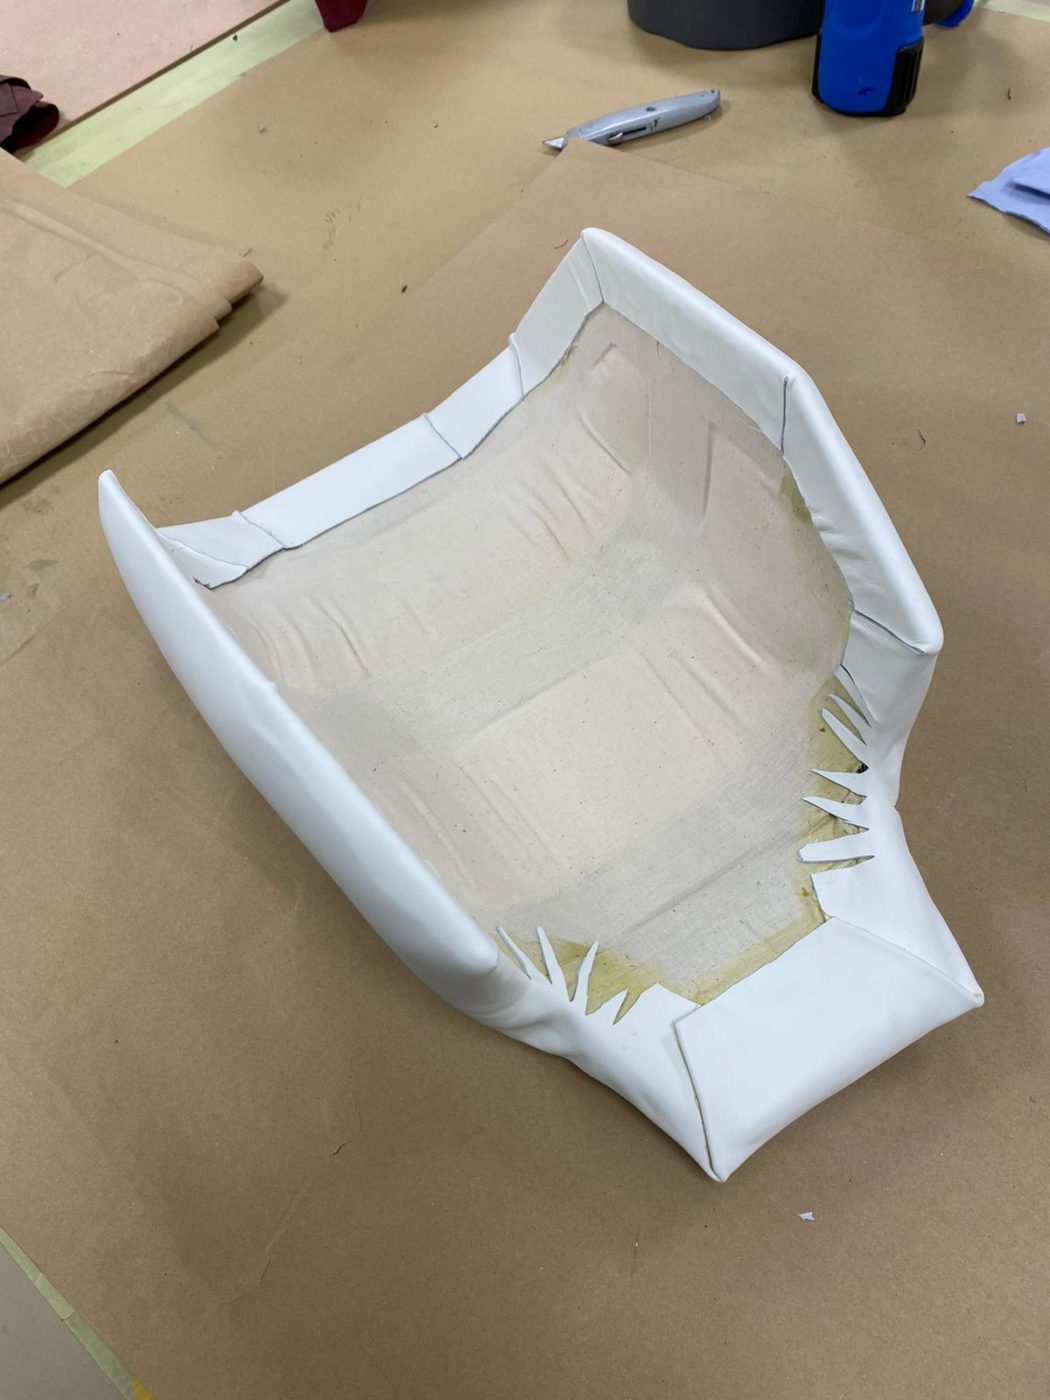
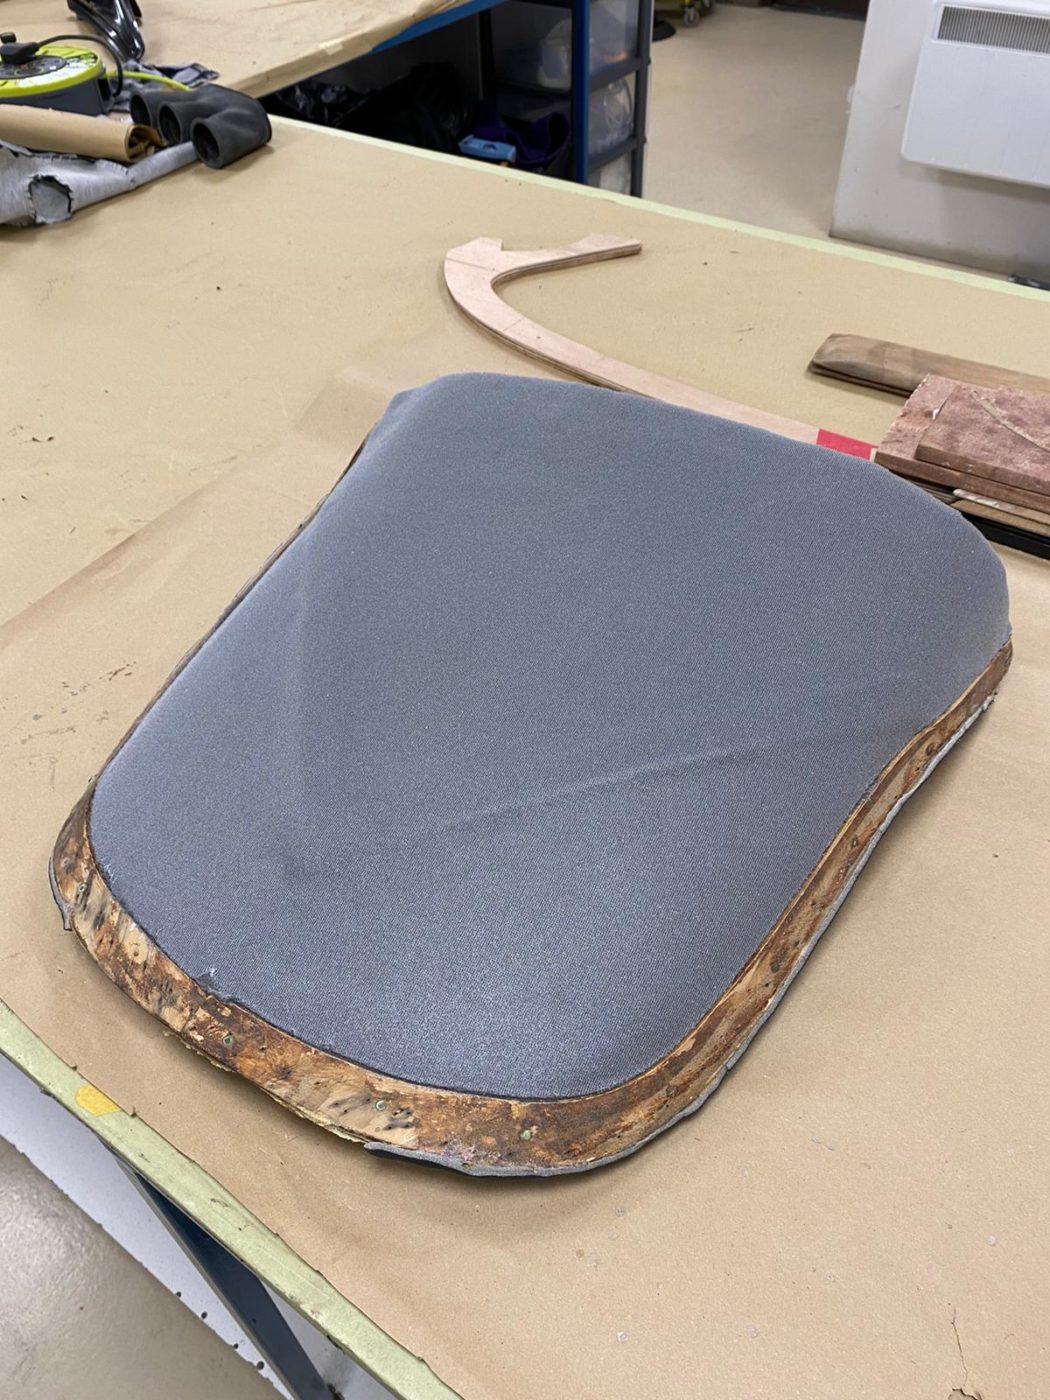
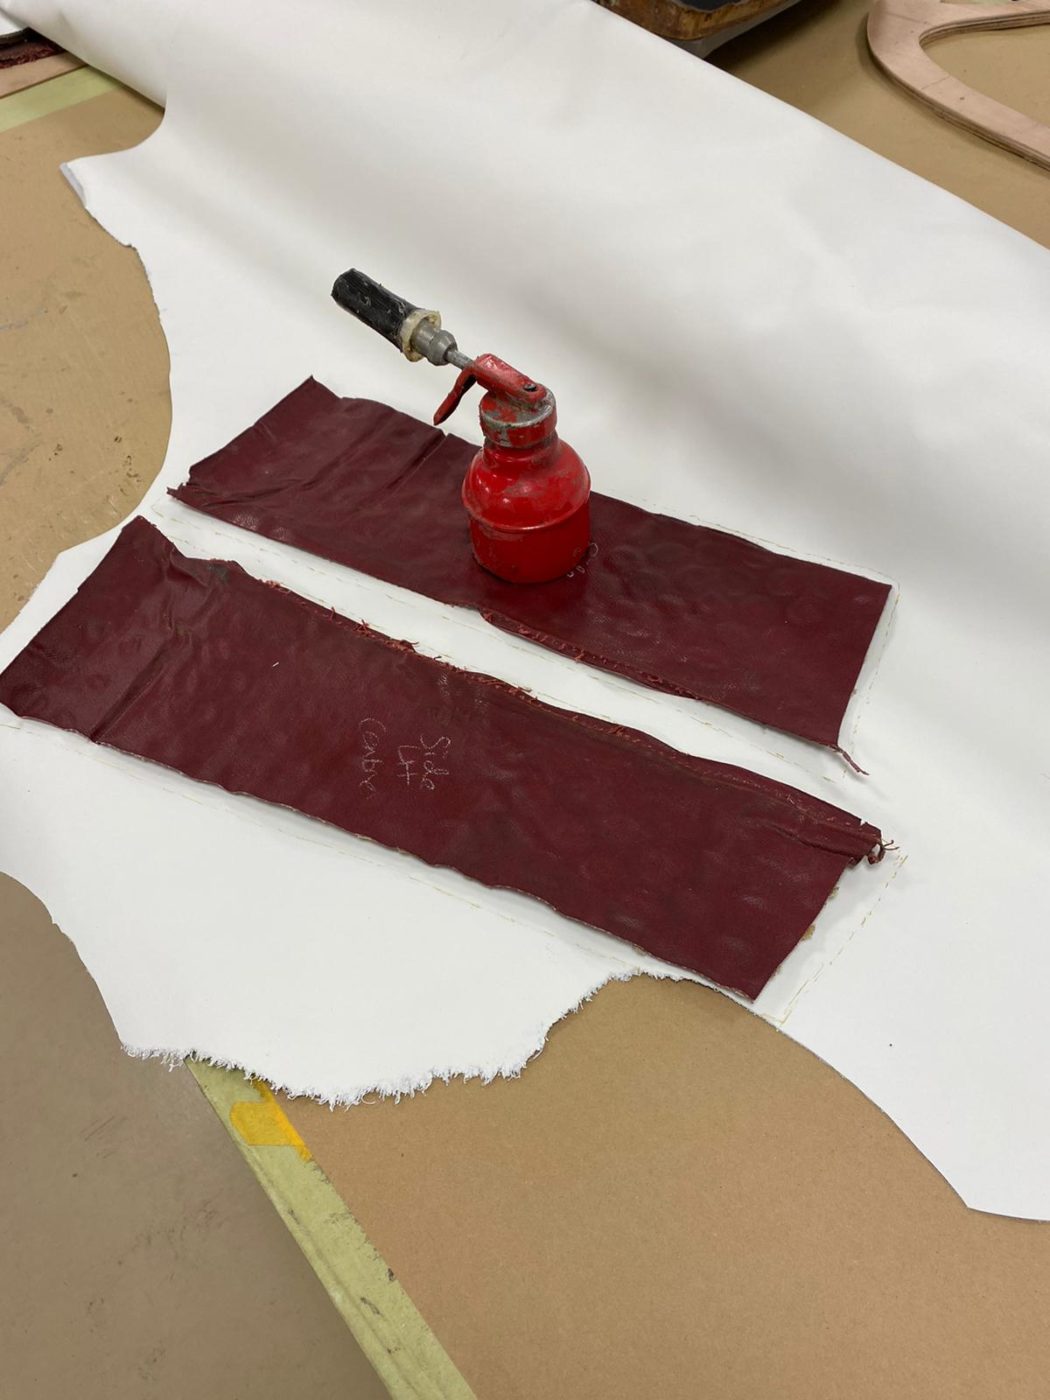
Lydia has also been working on the front seat squab. She began by marking it up so she would know how the pieces go back together, beginning by taking the back of first and then the front covers and adding in 3mm of foam. She then glued in some calico onto the back board to strengthen it when sewing. Lydia then made and added piping to go around the back board and covered the front of the backboard with new white leather. She then glued and sewed the piping in place. She then started making the pocket by drawing around an the original one onto the new leather, sewed the elastic in the top and tacked the folds in place at the bottom. Lydia then folded the edges under and glued the pocked onto the backboard.
Brian has also been working on this Jensen alongside Lydia and has bade the rear seat centre section of of the new leather. He begun by marking out the fabric, adding in extra foam and gluing the cover over the centre, pulling tight the leather over the sides. He’s also re-glued the foam back in place for the front seat squab which was done after he removed the old foam. Brian then made the new wood section for the bottom of the seat frame and added new foam to the side sections. New foam has been added to the middle section for the back of the squab.


Scott has been working on the engine of the Amphicar, converting the dynamo to an alternator to make the charge more reliable.

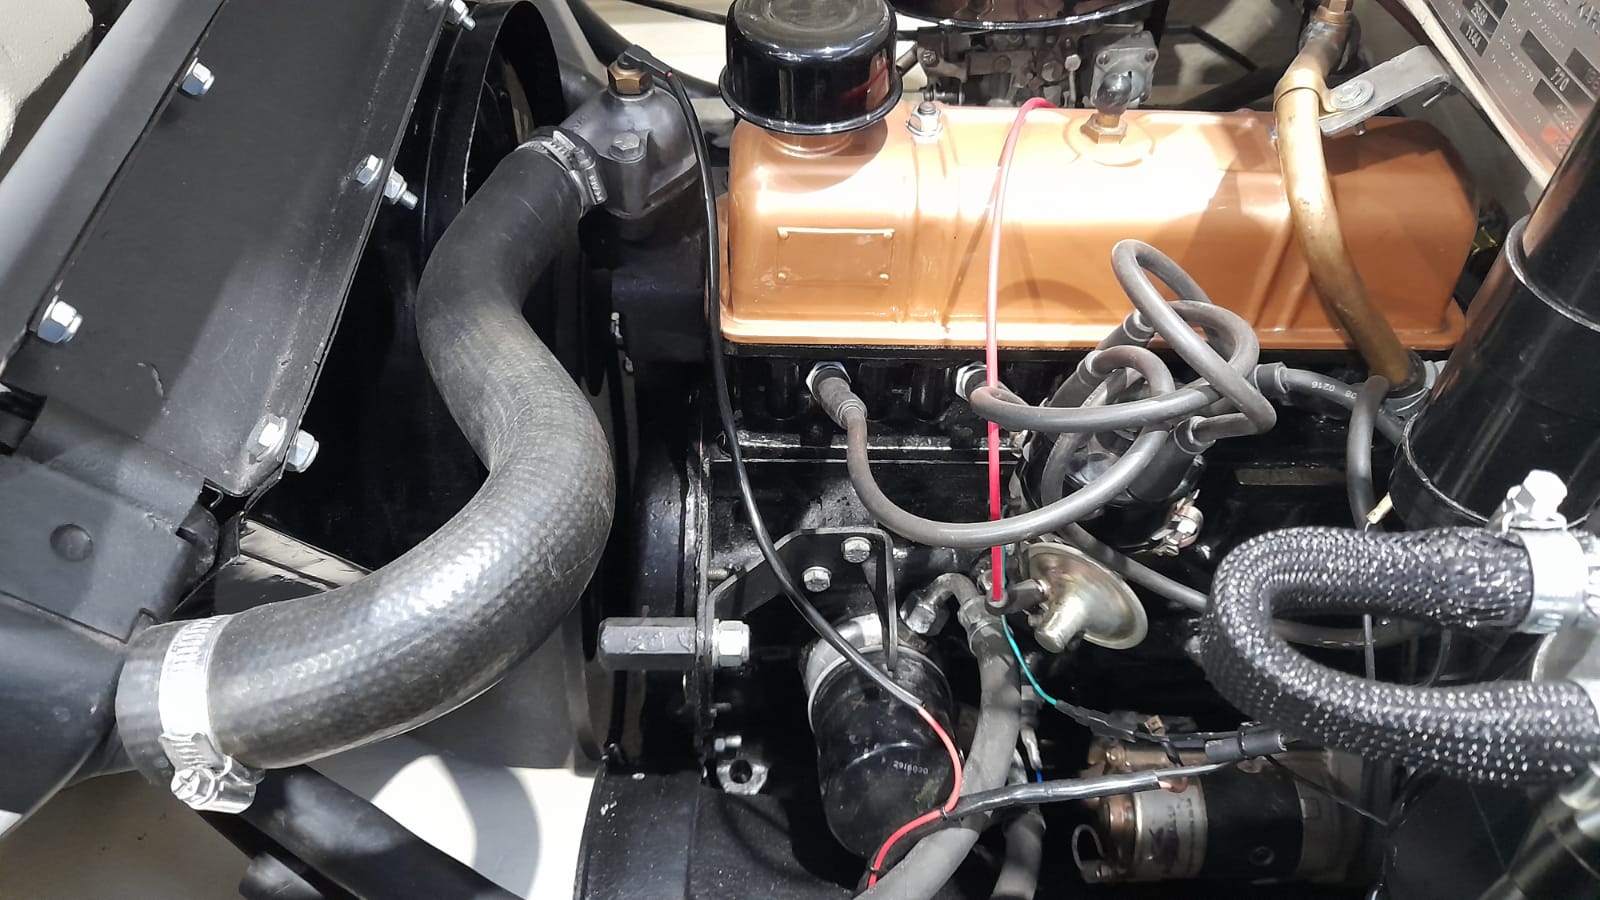
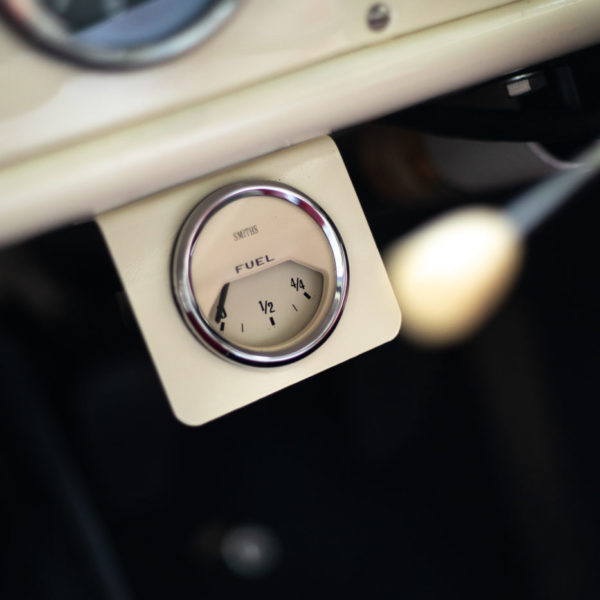
Scott has also fitted and wired the fuel gage:
The underside of the Amphicar has also been masked and painted to make it water-resistant and ready for the water. MarineWare came to assist with the application of this.
Amphicar’s are known for leaking, predominantly through door seals or other gaps. As this is a totally newly restored Amphicar, there is always risk of water ingress from other areas. Whilst taking the advice from others who have restored Amphicars, we were advised if possible, to apply a sealant to the underside of the vehicle. We contacted MarineWare to come and apply 2K Durepox sealant.
We bought the product and Glen Keefe from Technical Sales at MarineWare came to the workshop to go through the process with our paint technicians, Chris and Matt. The process included keying off the already applied paintwork and applying a primer followed by the Durepox resin and hardener in black to match the original paint. This hard and long-lasting sealant will aid our Amphicar in its seaworthy adventures and make sure there are no unwanted leaks.


All women driven off-roading race, Rebelle Rally, is an intense 8 day feat of endurance and speed across America’s most unforgiving landscapes from Nevada to California.
“Blending the love of driving with the ultimate challenge of precise navigation, the Rebelle tests your skills over 8 days of competition. It is not a race for speed, but a unique and demanding event based on the elements of headings, hidden checkpoints, time, and distance using maps, compass, and roadbook.”
As the first-ever female-only off-road rally in the United States, it covers 2000kms and includes multiple two women teams, ‘This is not strictly a race for speed, but rather a group tournament that is based on hidden checkpoints, time, and distance travelled. Competitors are required to hit certain checkpoints to increase their score. Each team has the option of using a modified vehicle or a stock car equipped with tools to help them navigate the rough terrain.’ explains Autoblog.
With this years rally approaching, would you enter in the future?
Our lovely 1957 Grey Jensen 541R/S now has its new speedo fitted into the dash. It’s also had its steering centralised. John is now going to start it to see how it runs and to see if there are any teething issues which he will correct accordingly.

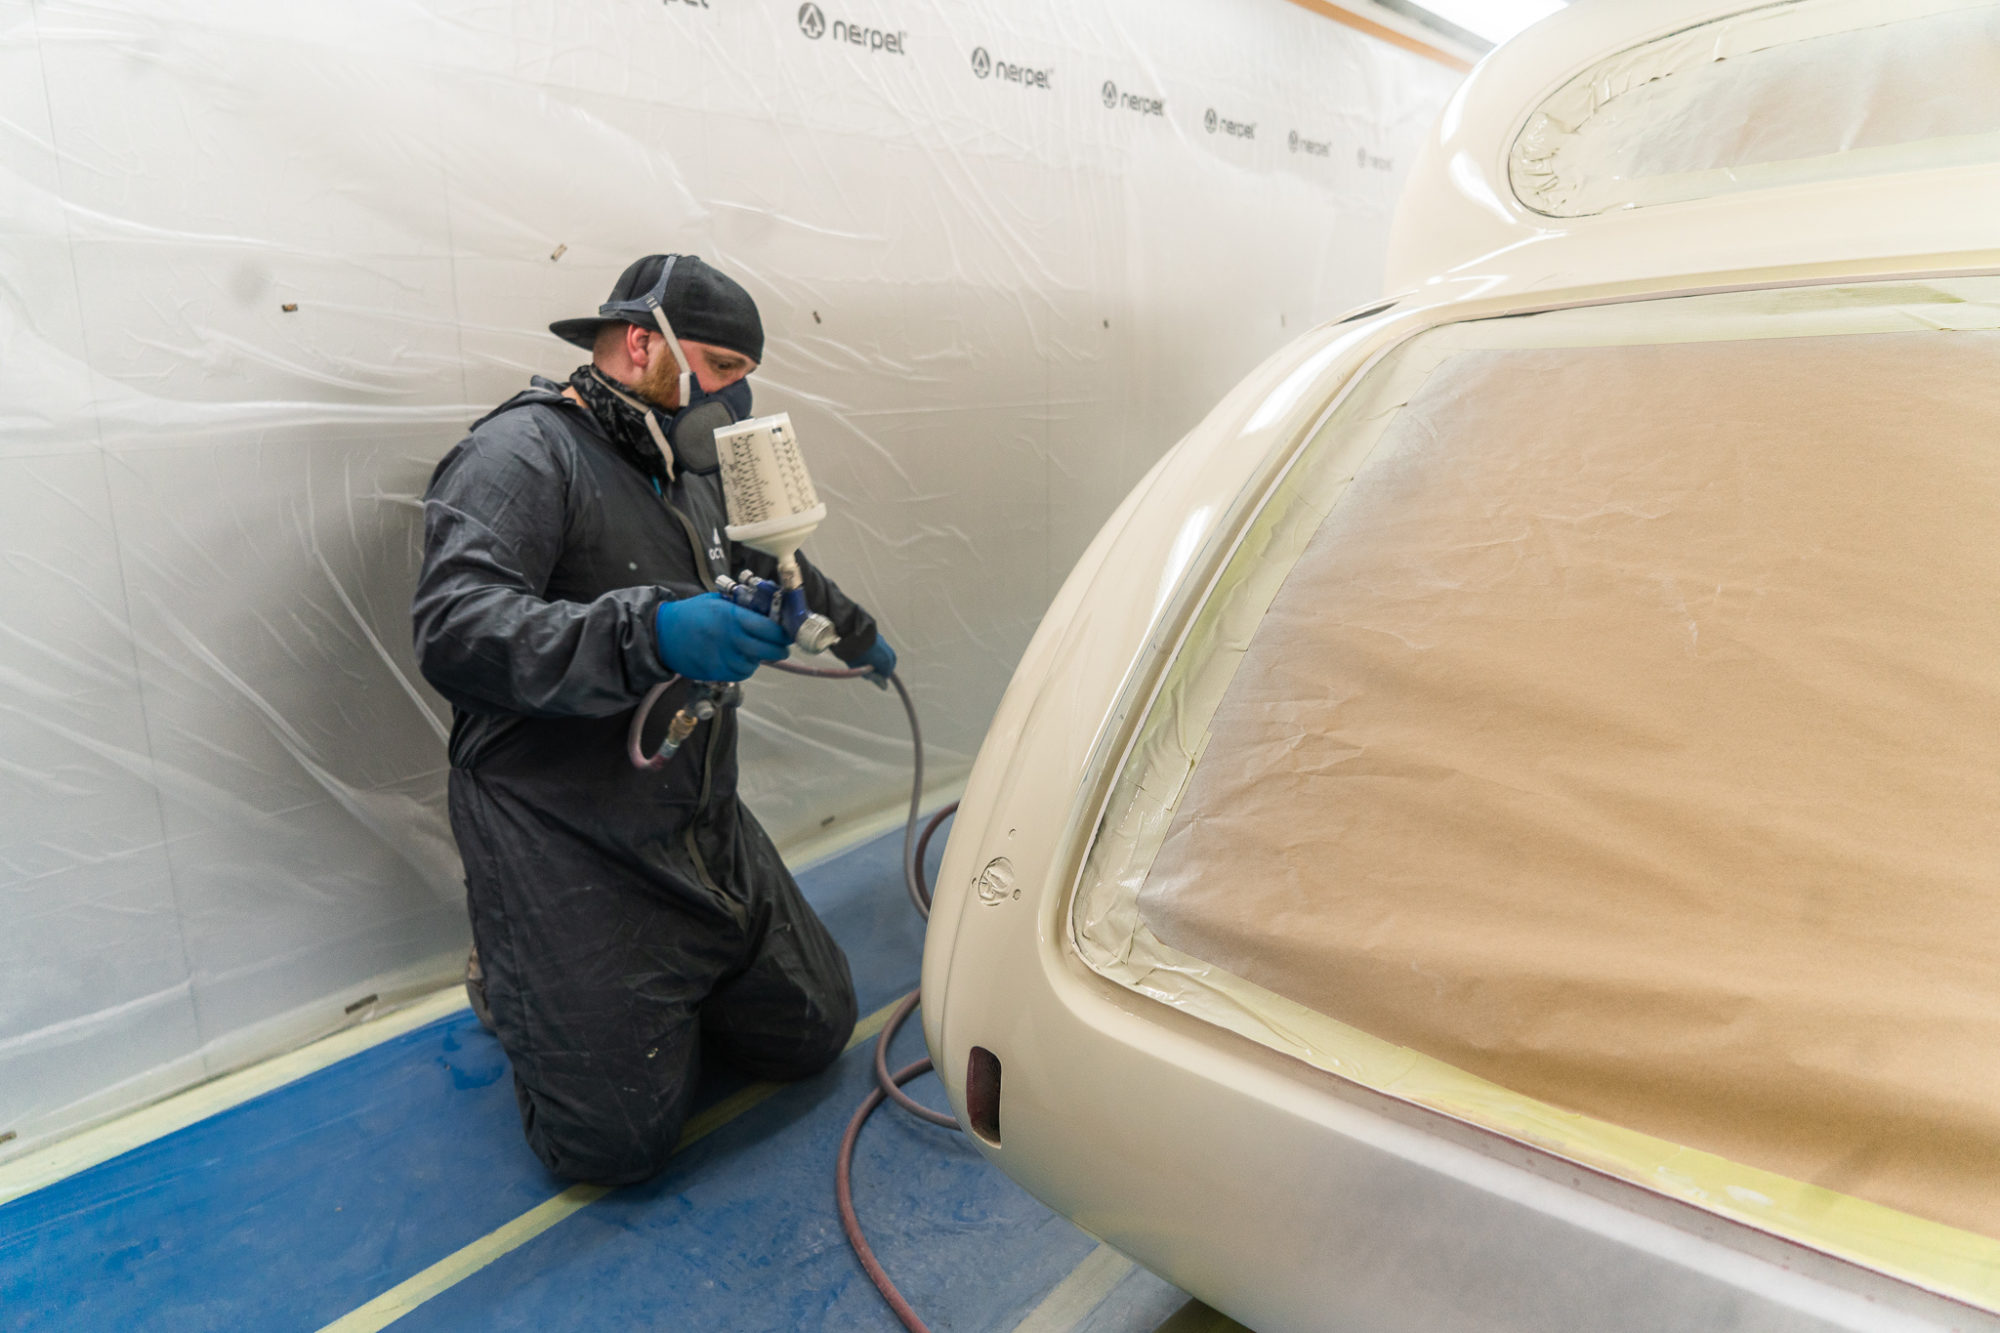
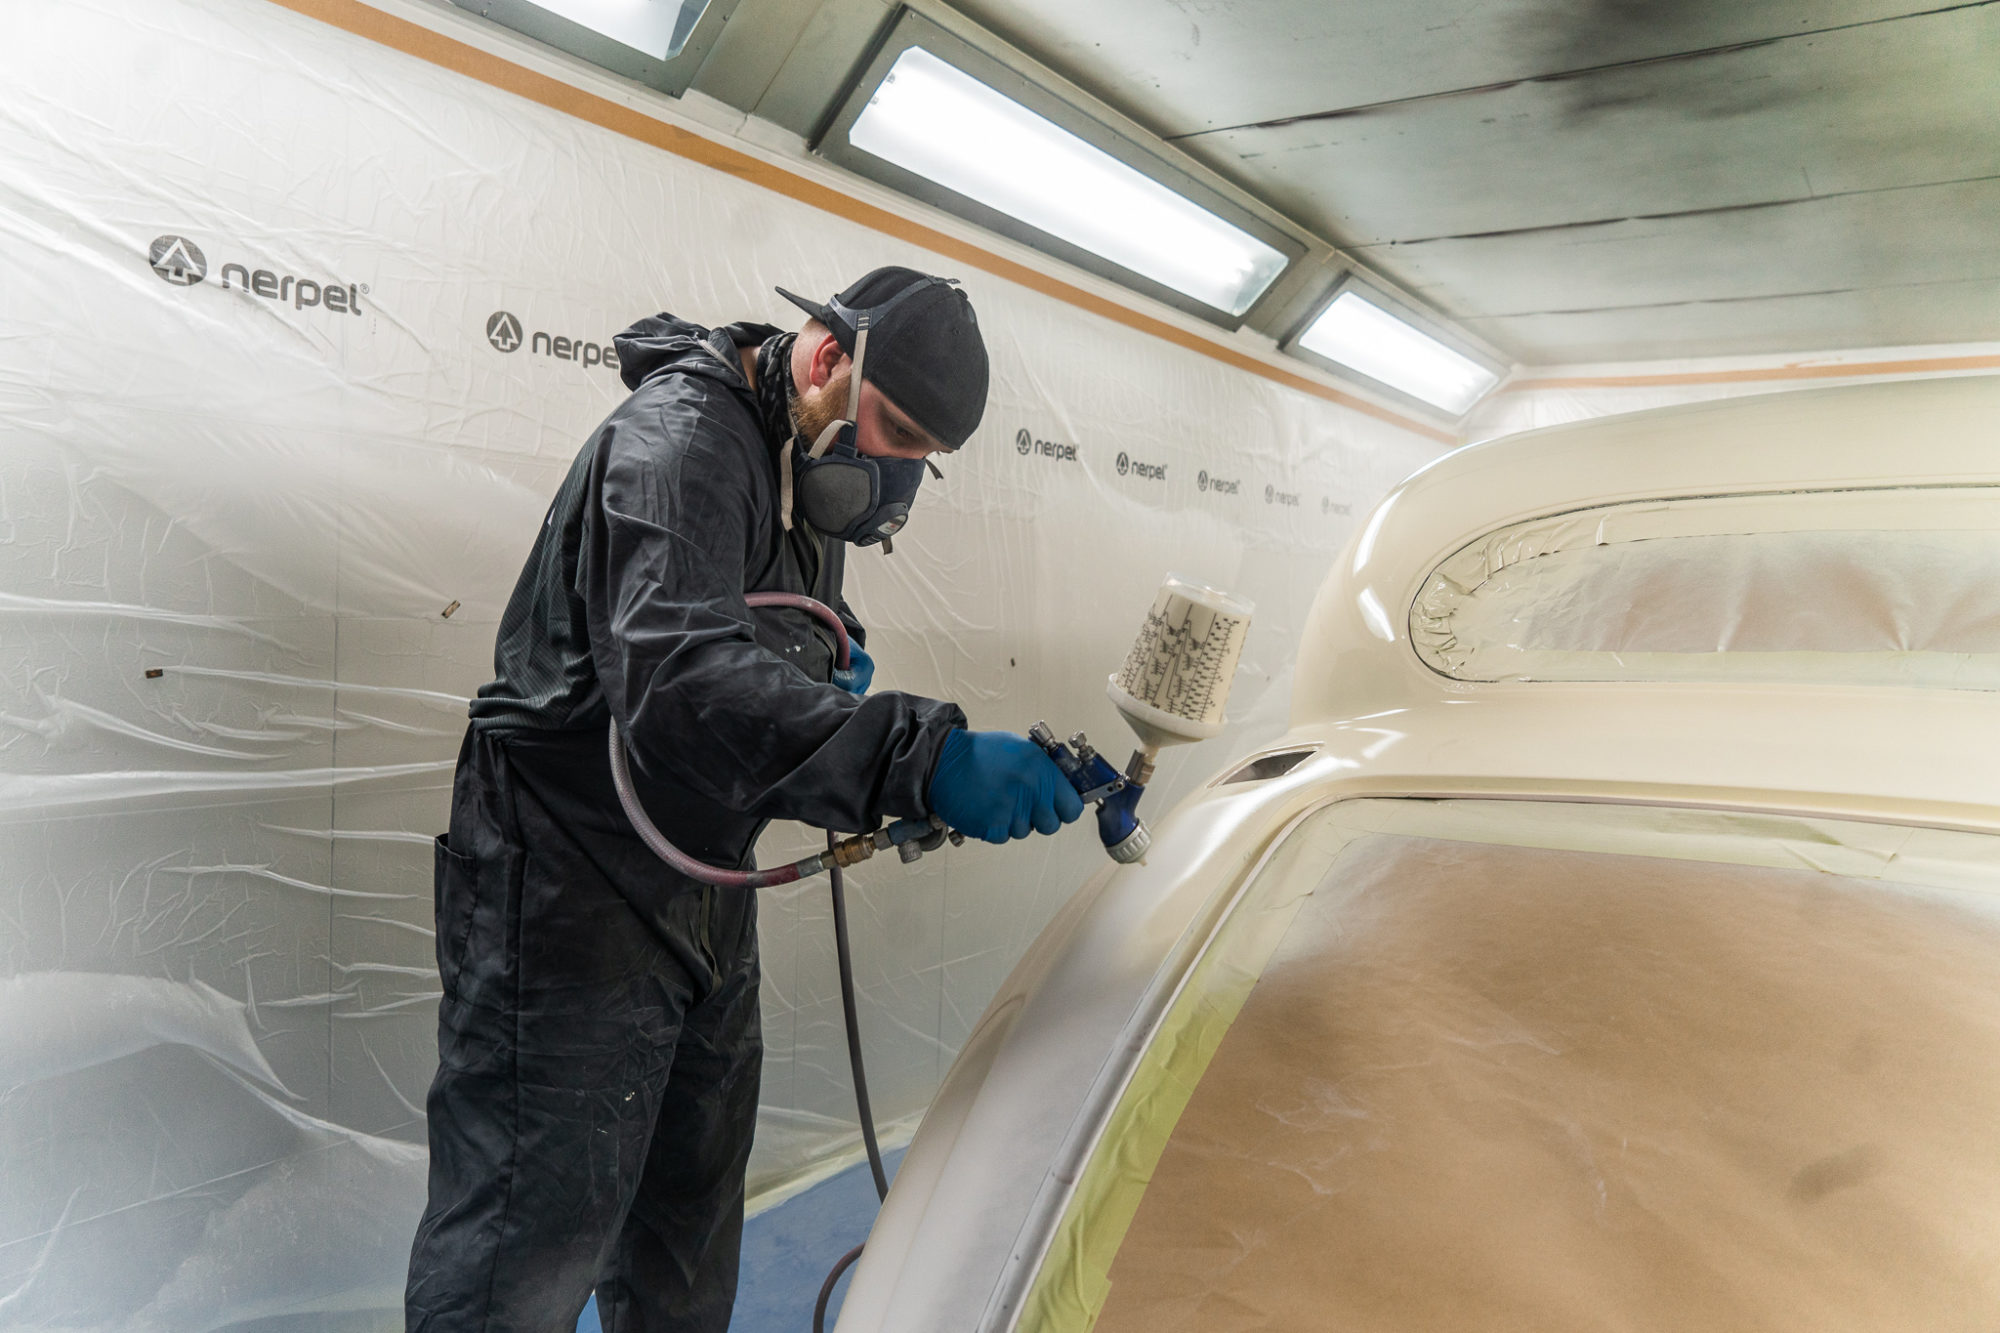
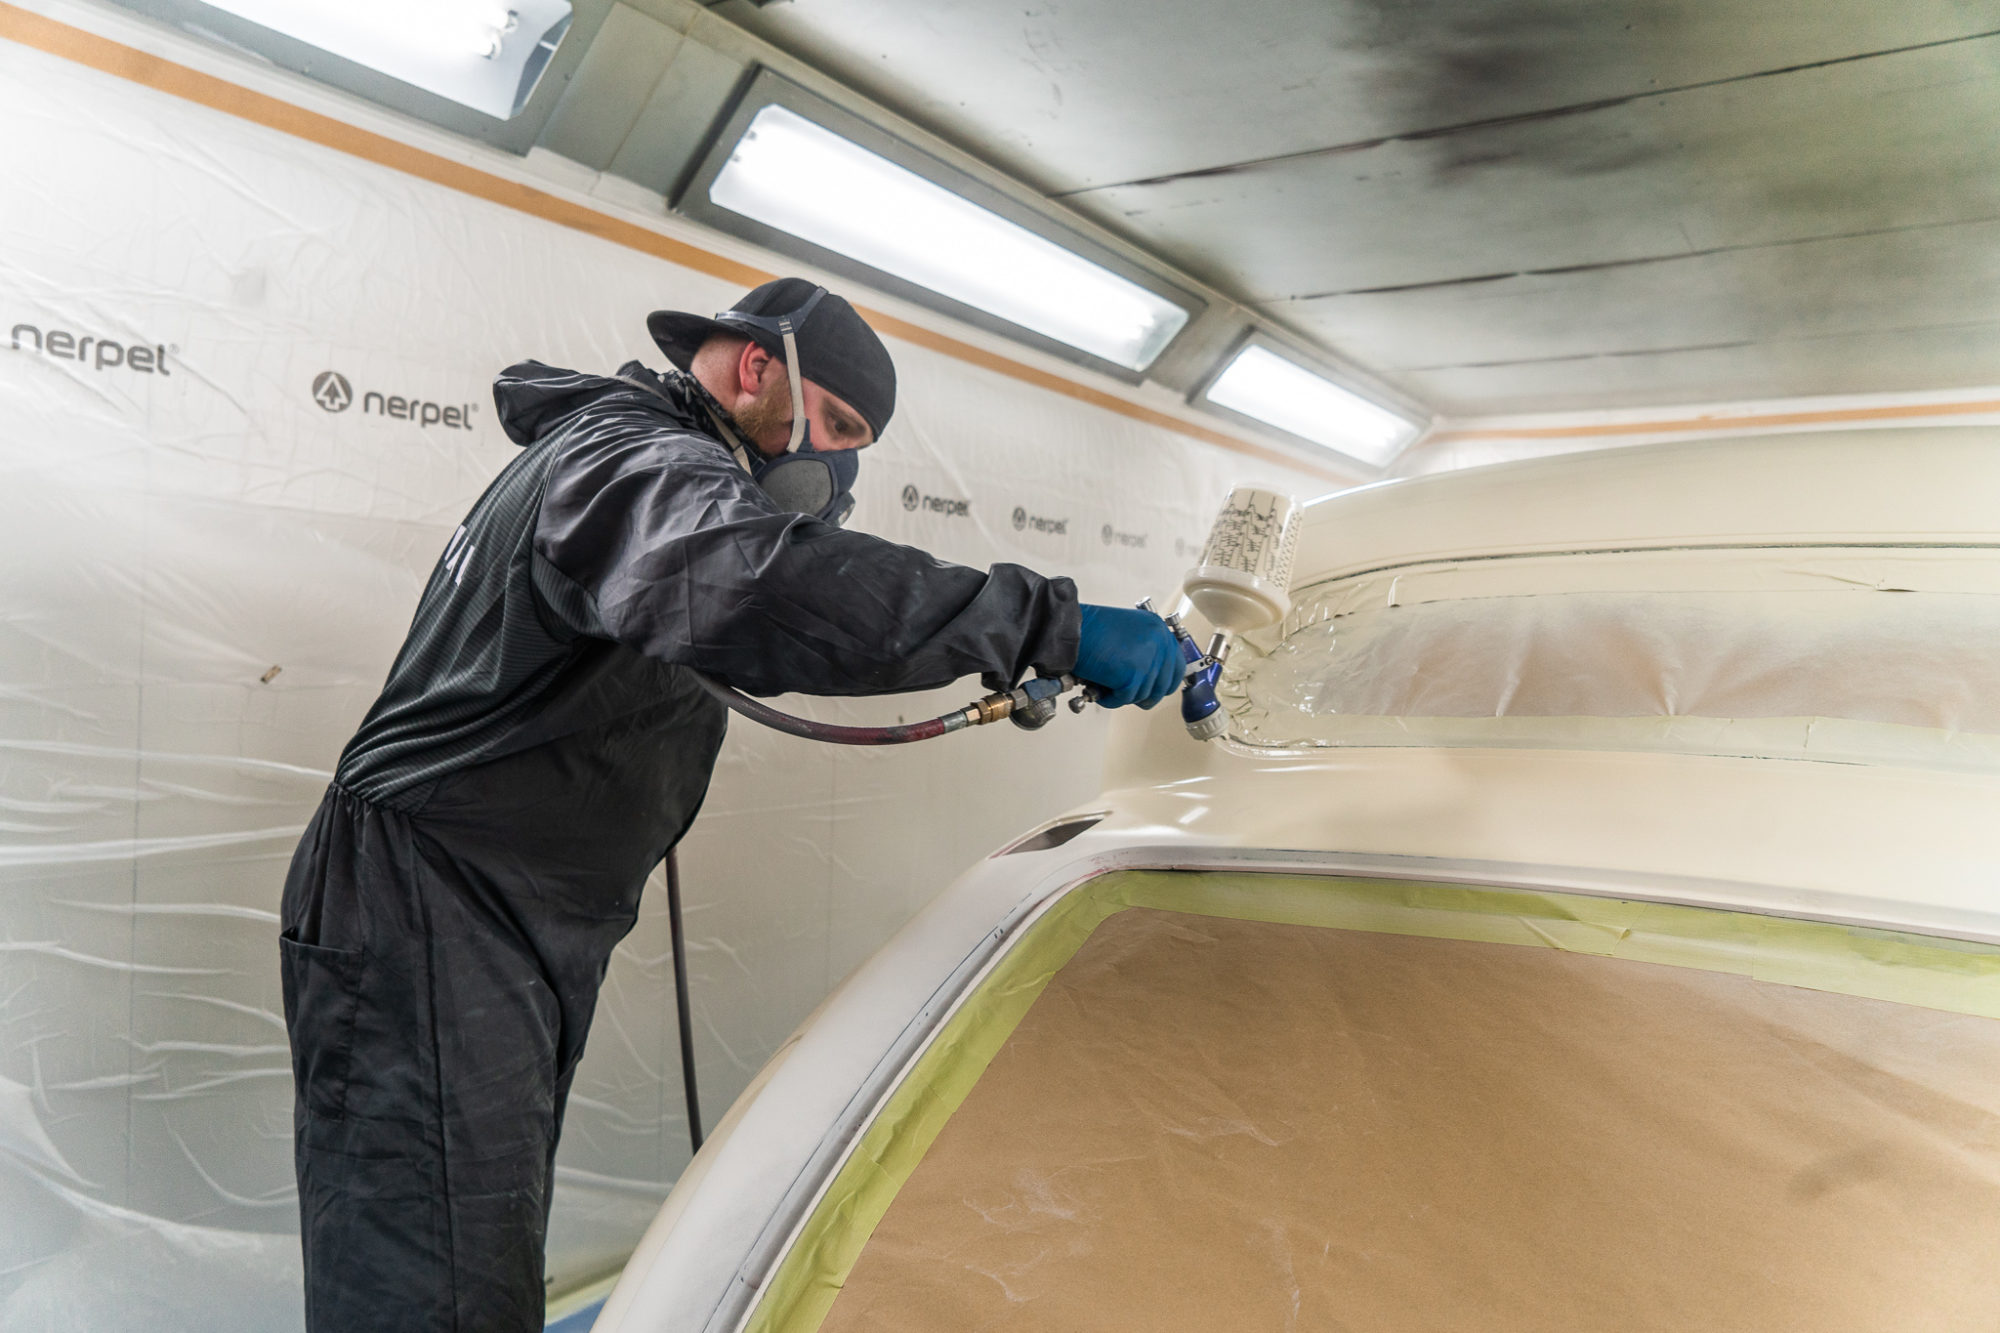
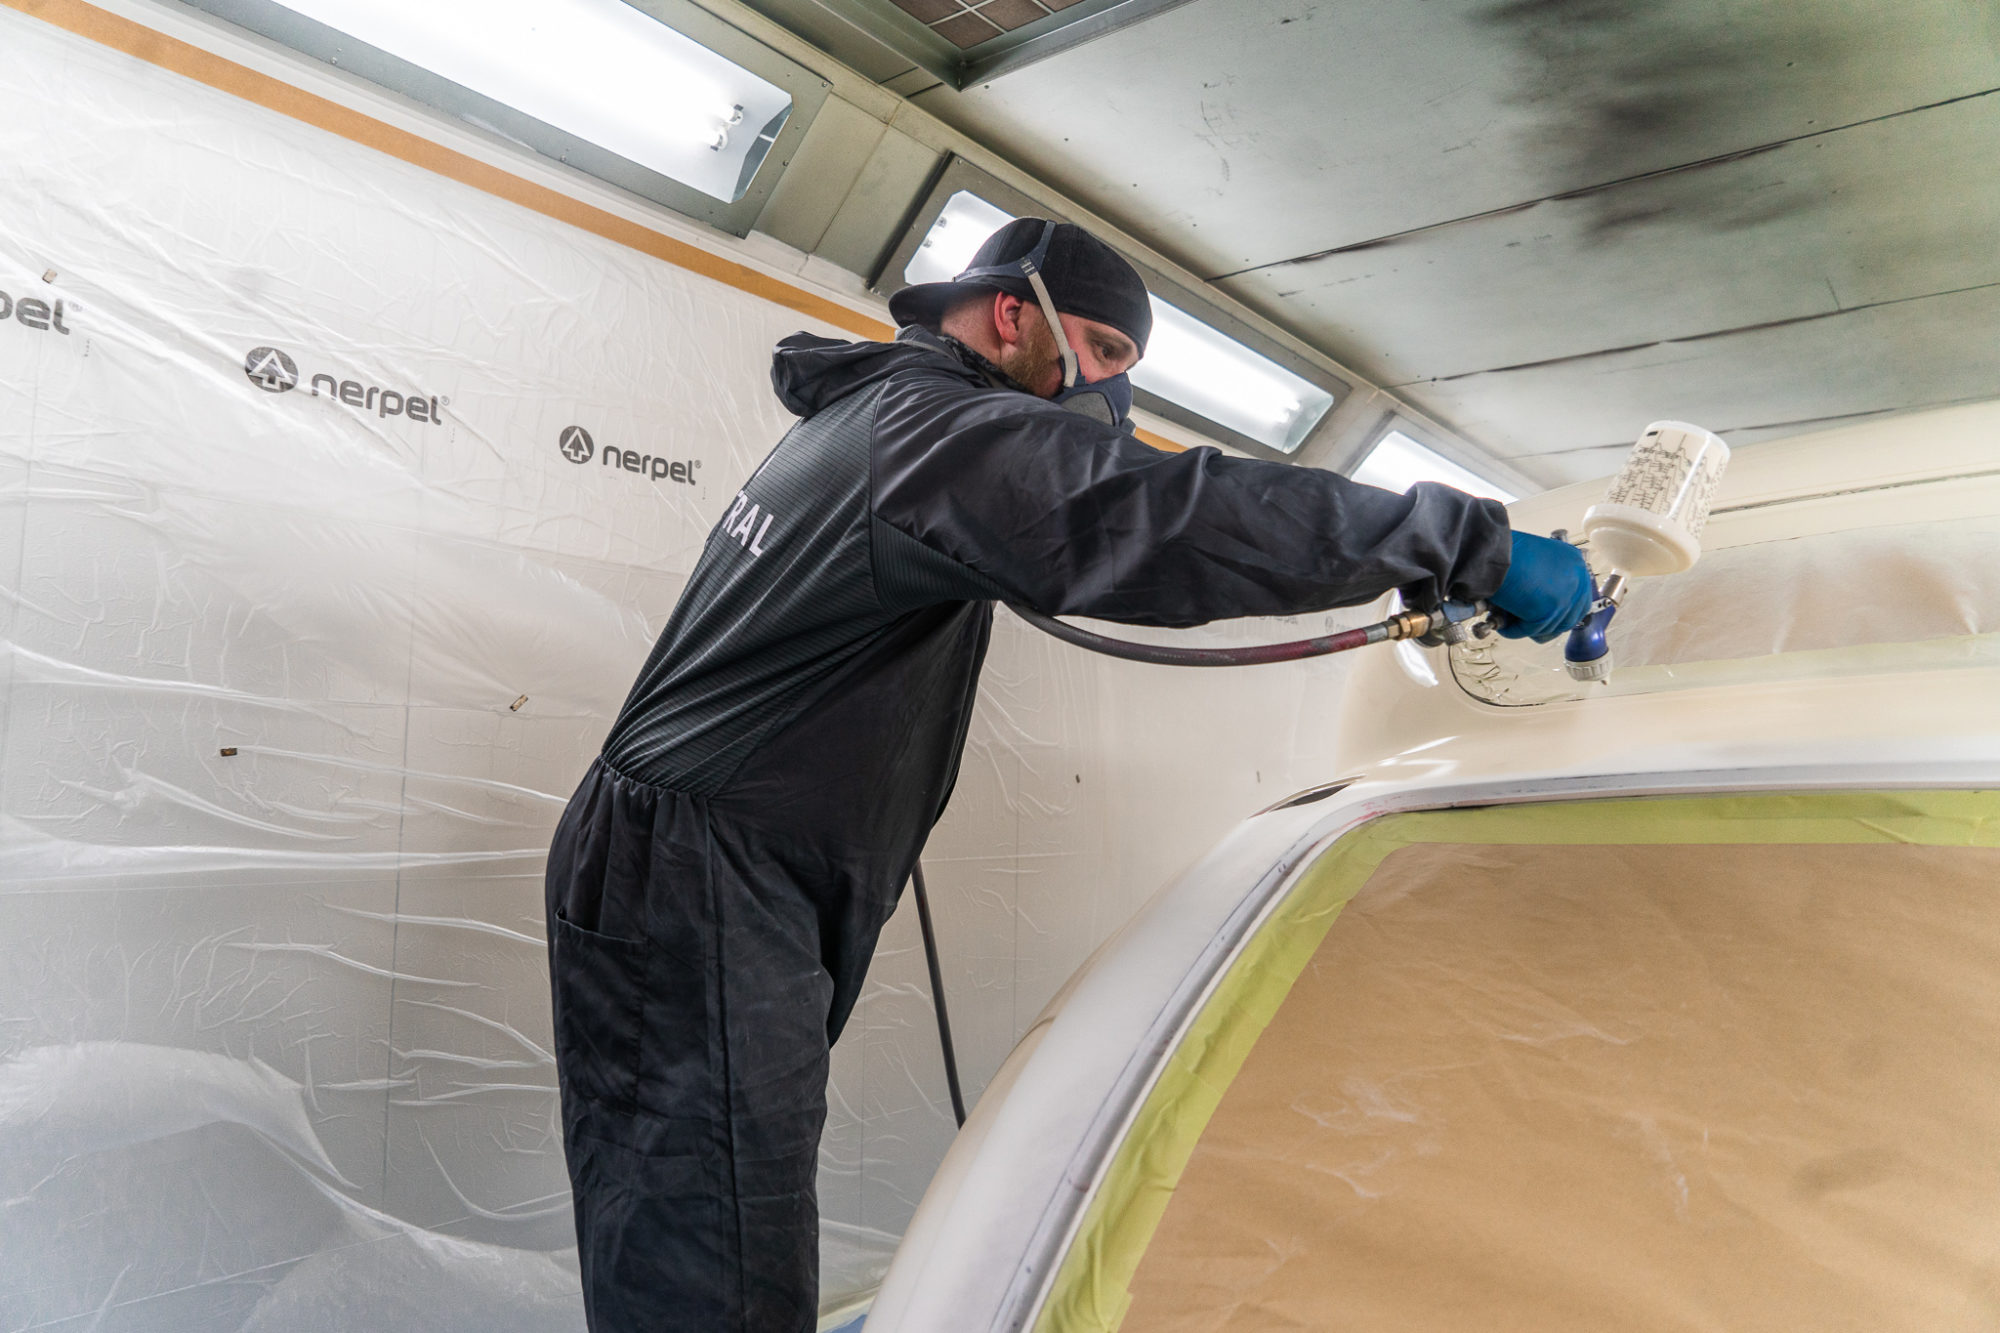
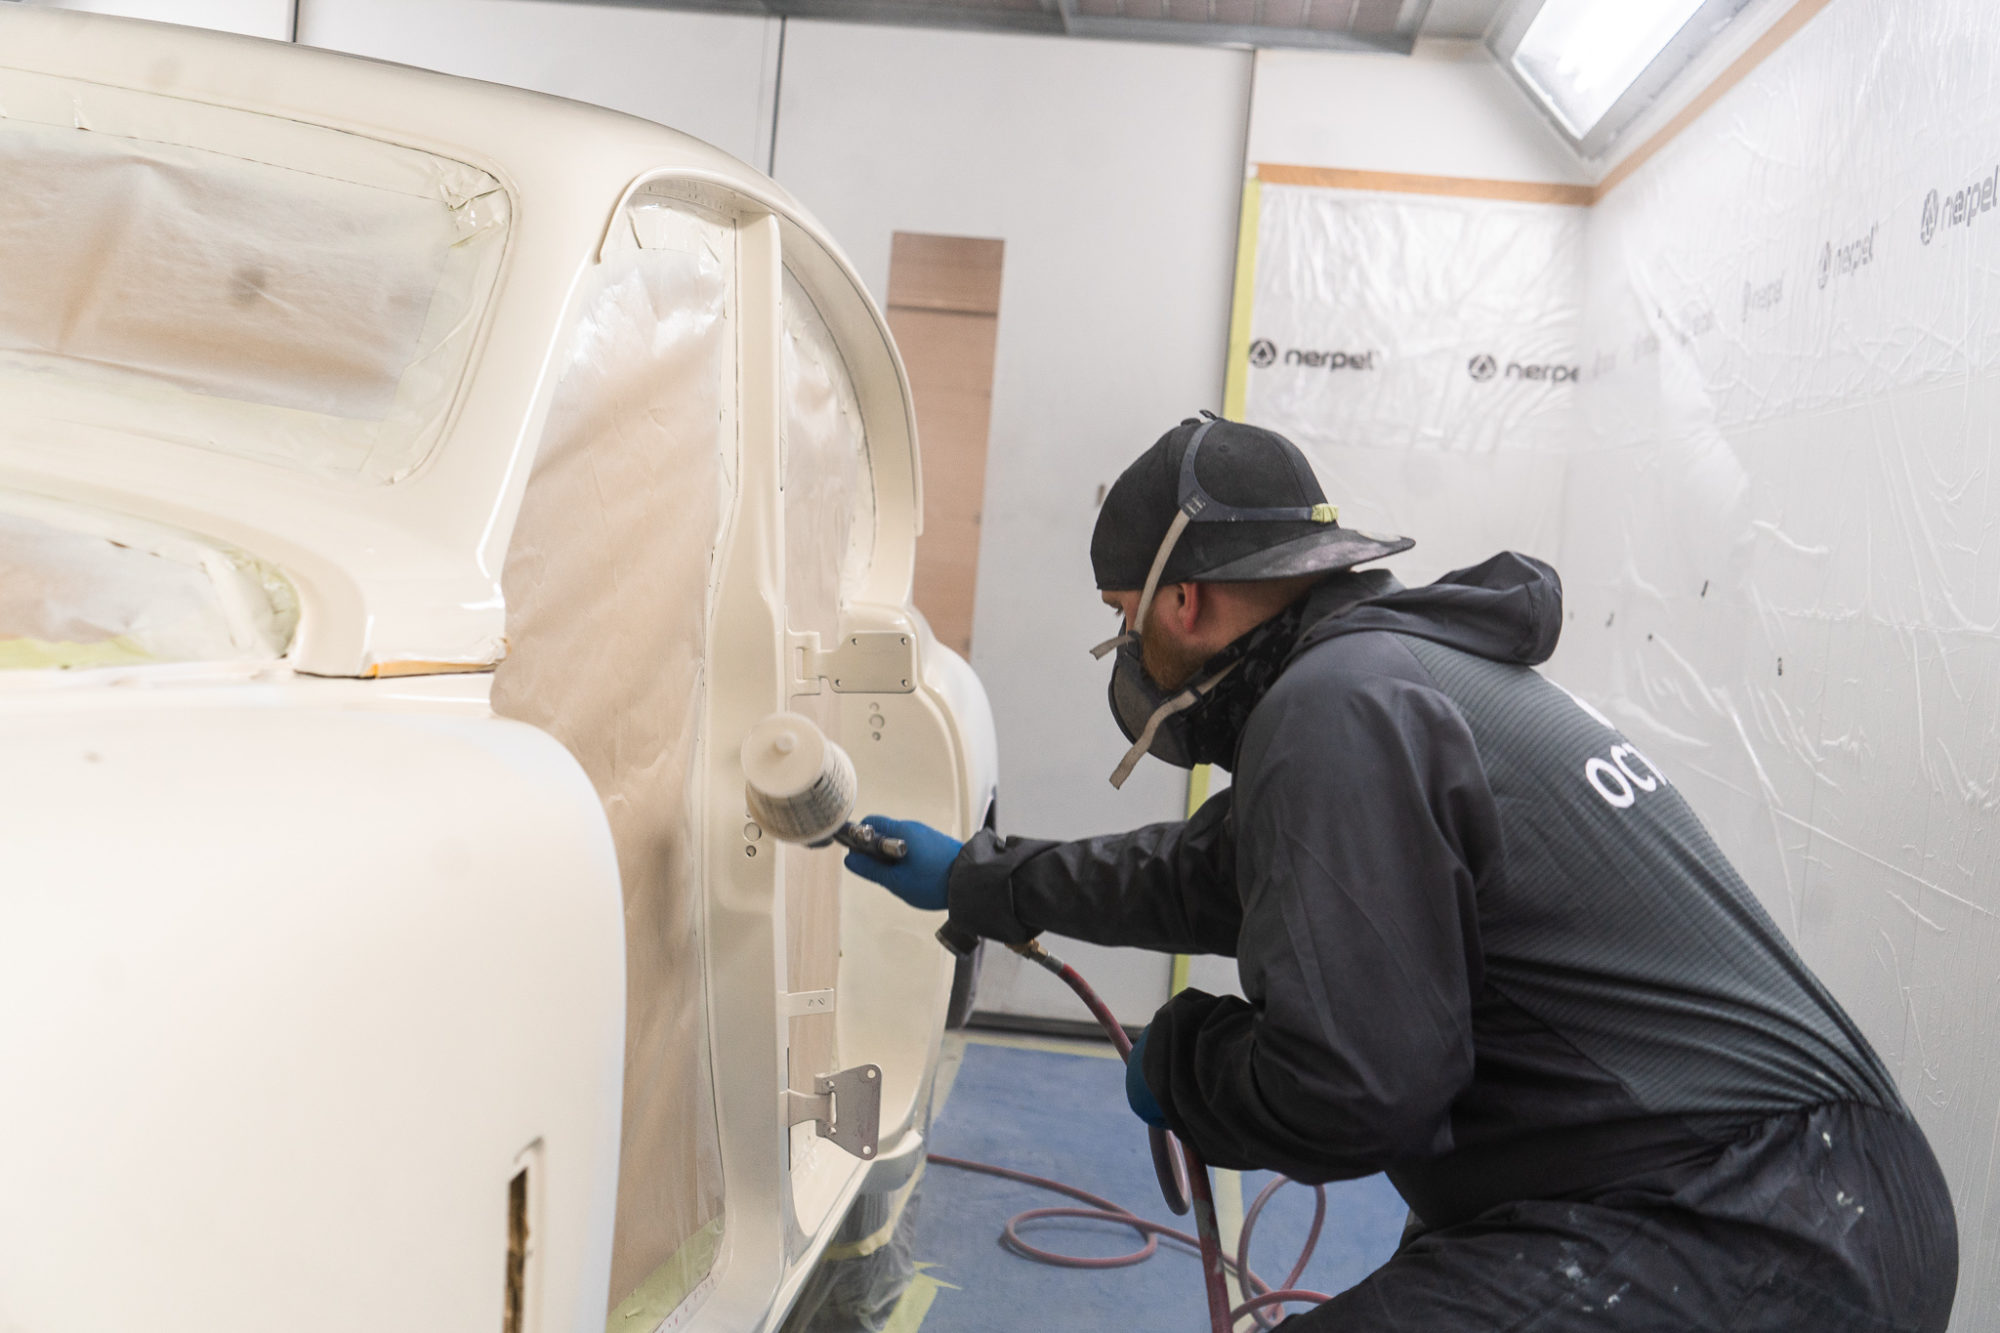
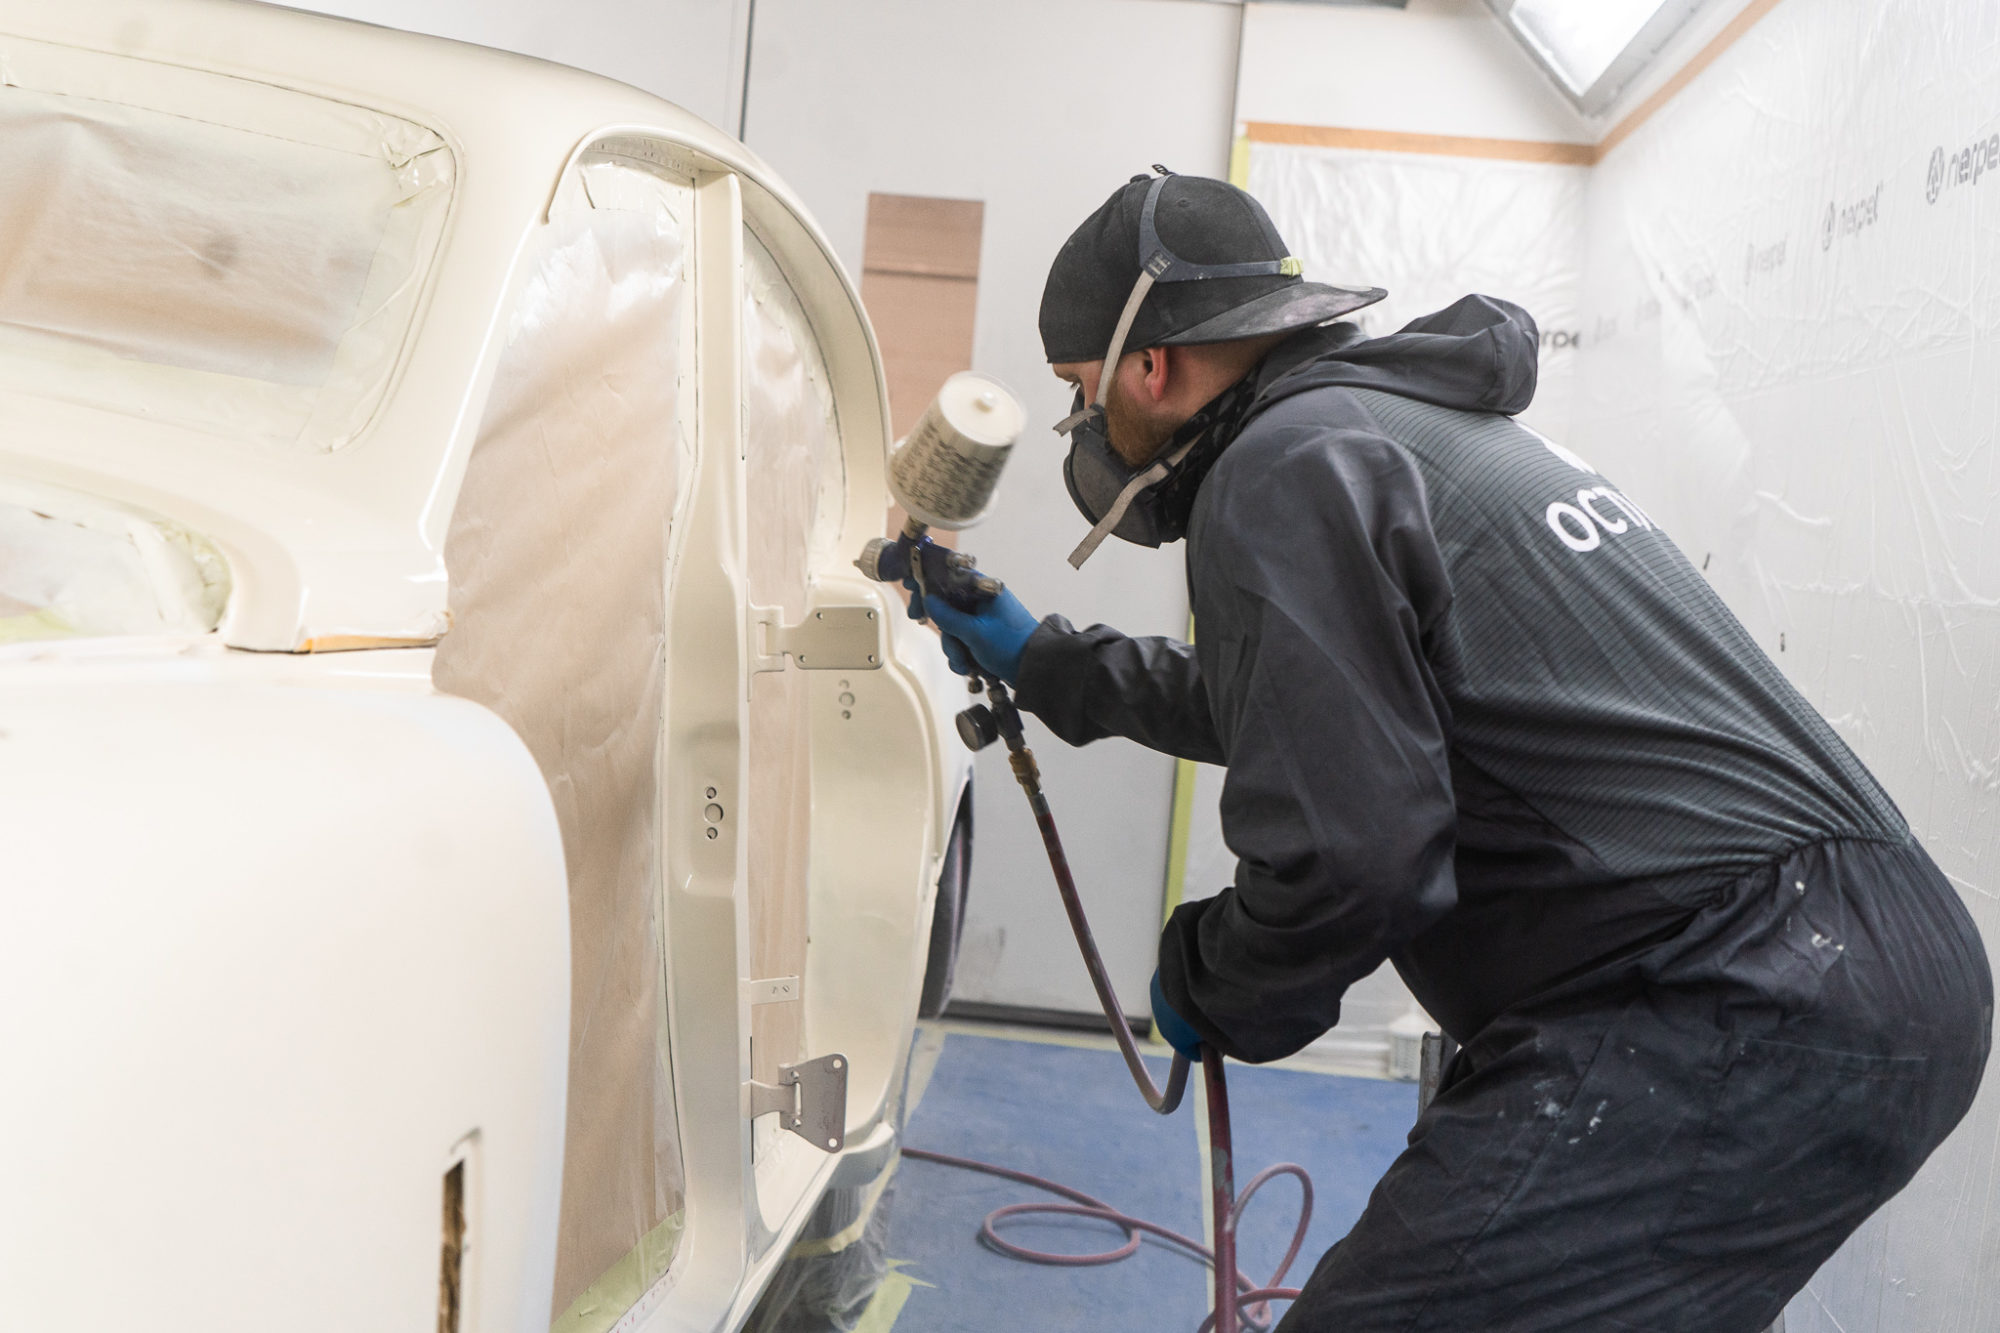
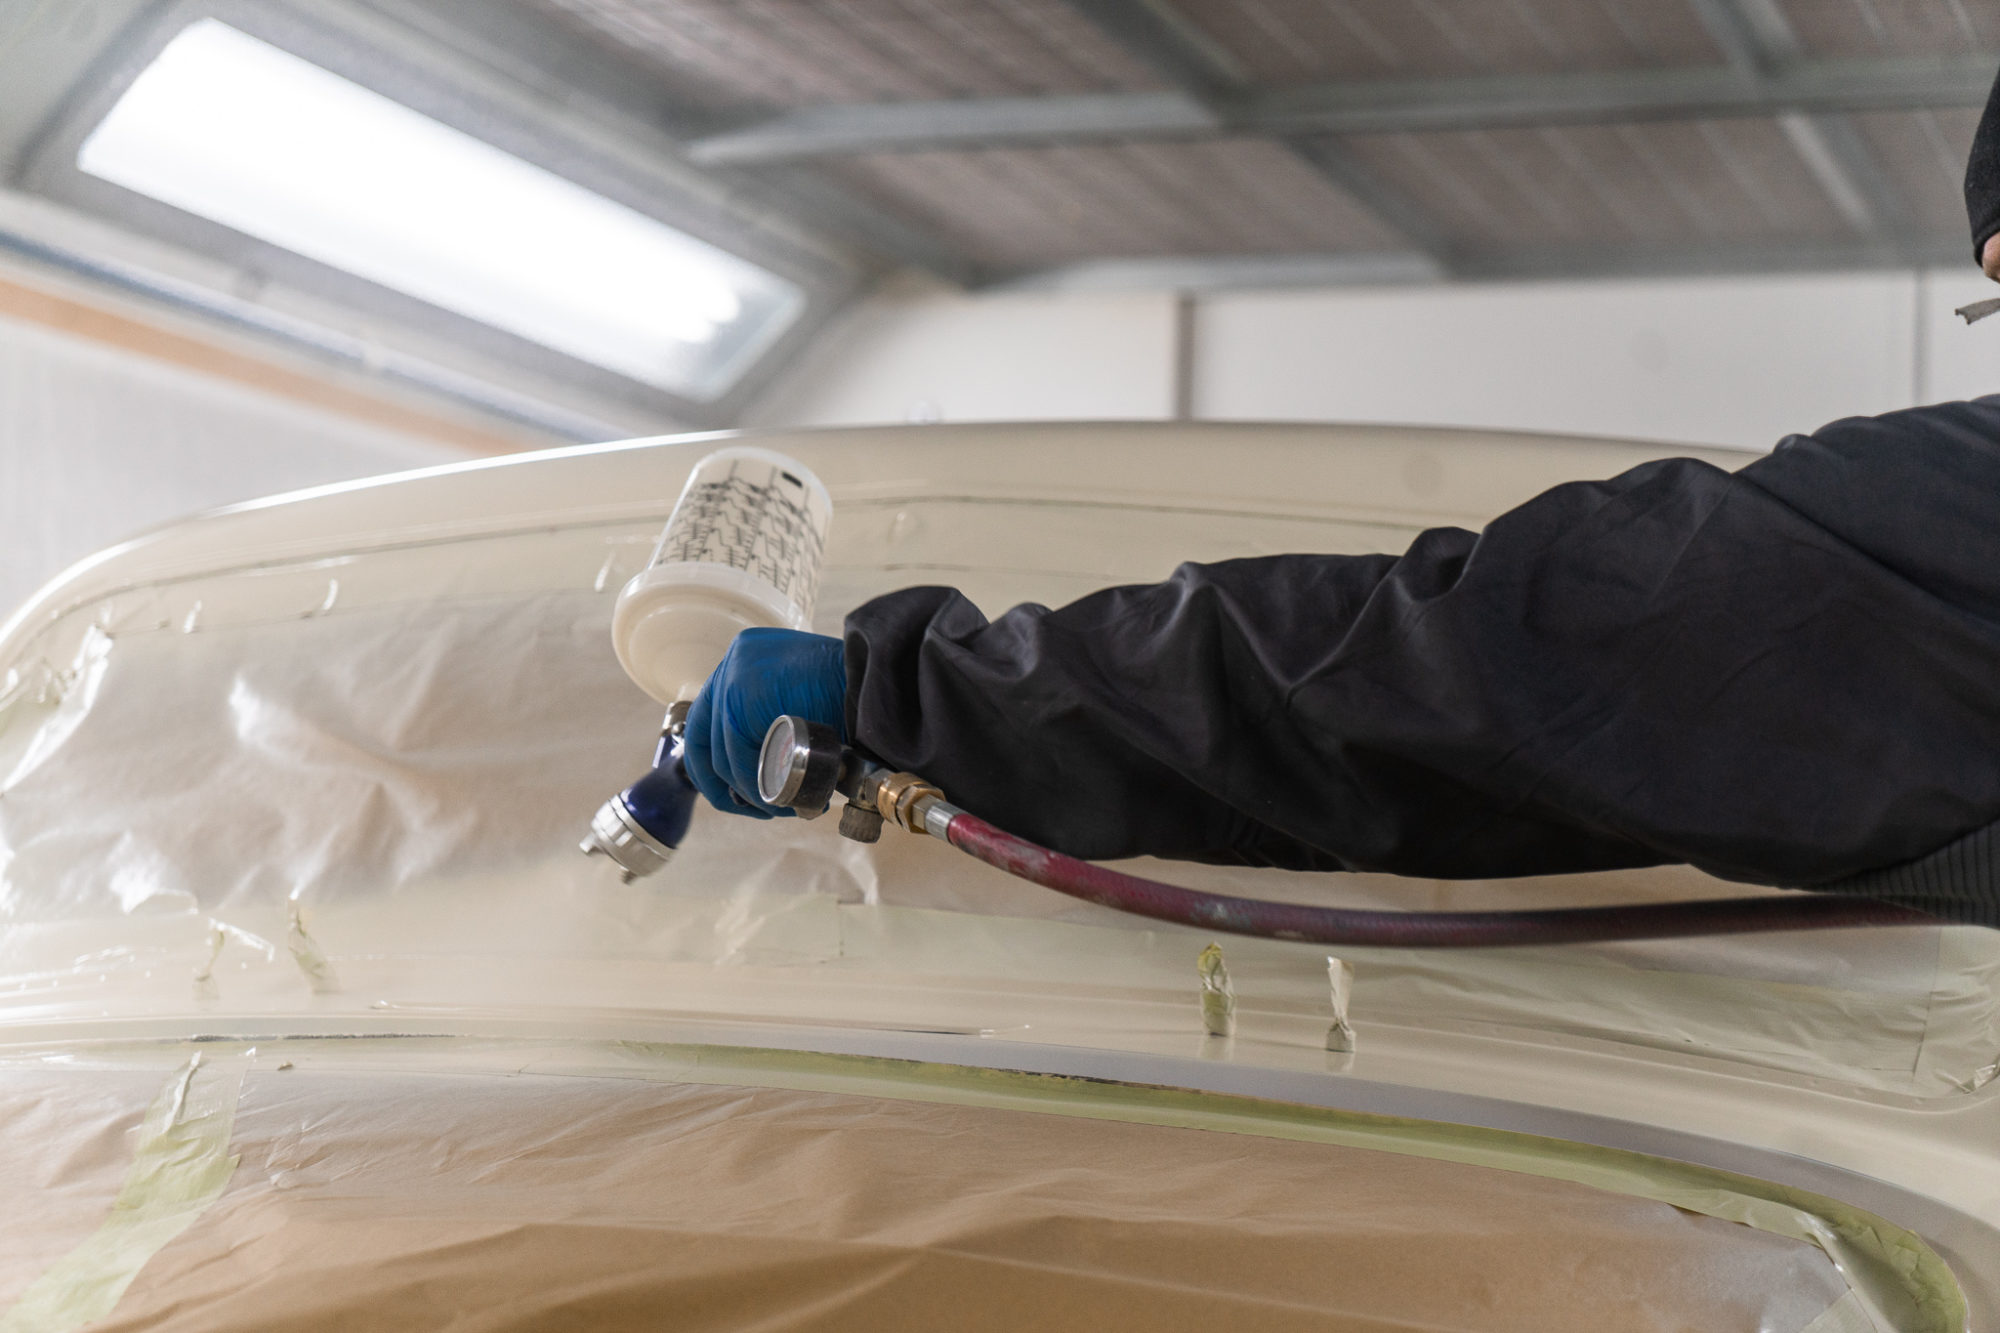
Our classic Jaguar MKVII has recieved its first layer of paint. Chris and Matt spent the morning masking the body up in preparation for paint. The body has sat in primer which had been smoothed out ready be painted over in the final cream colour.
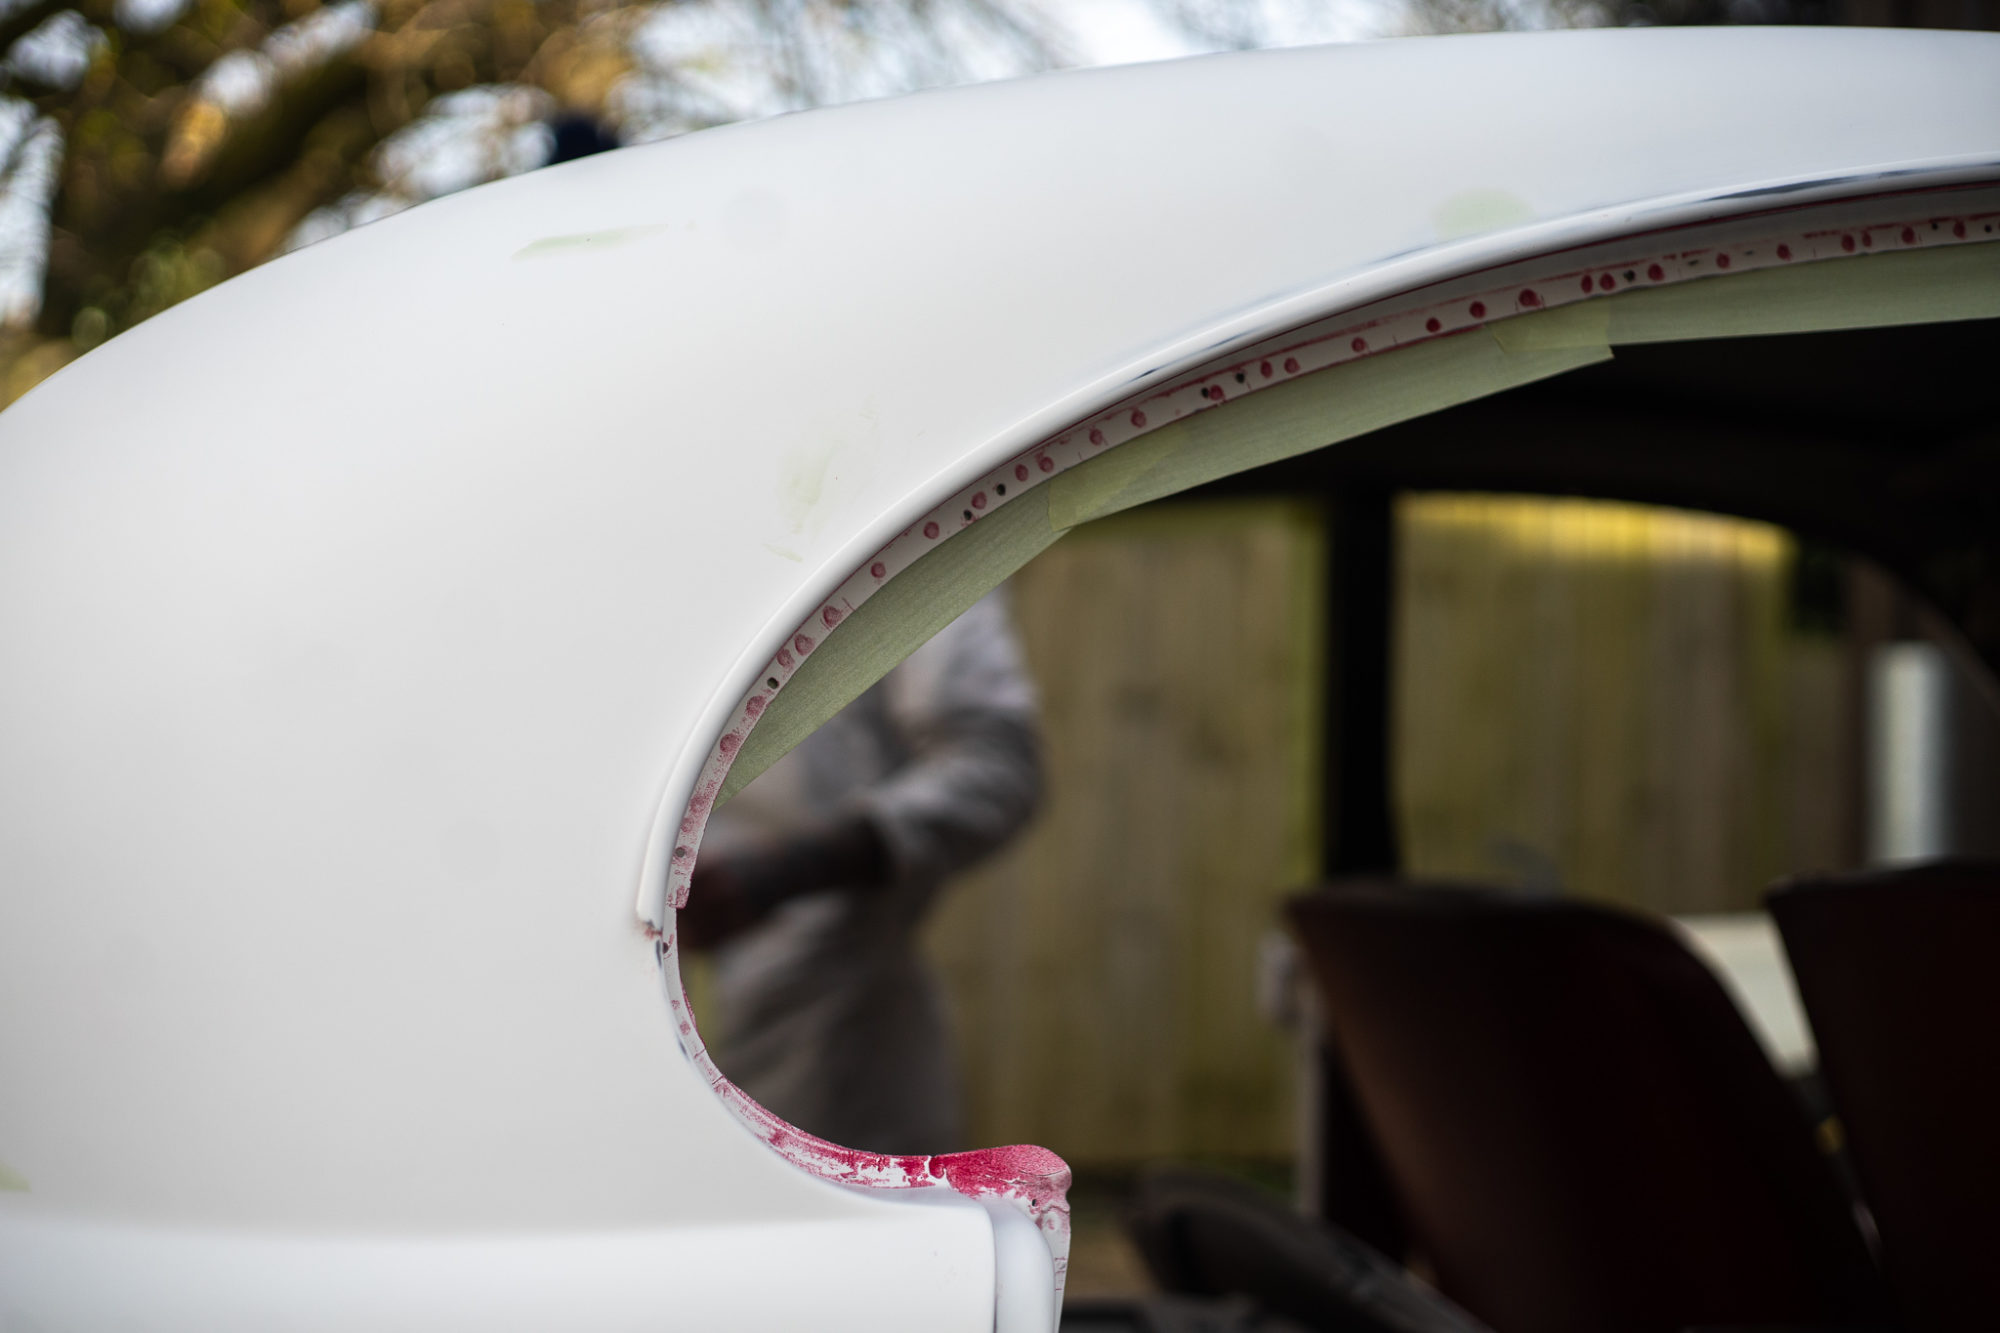
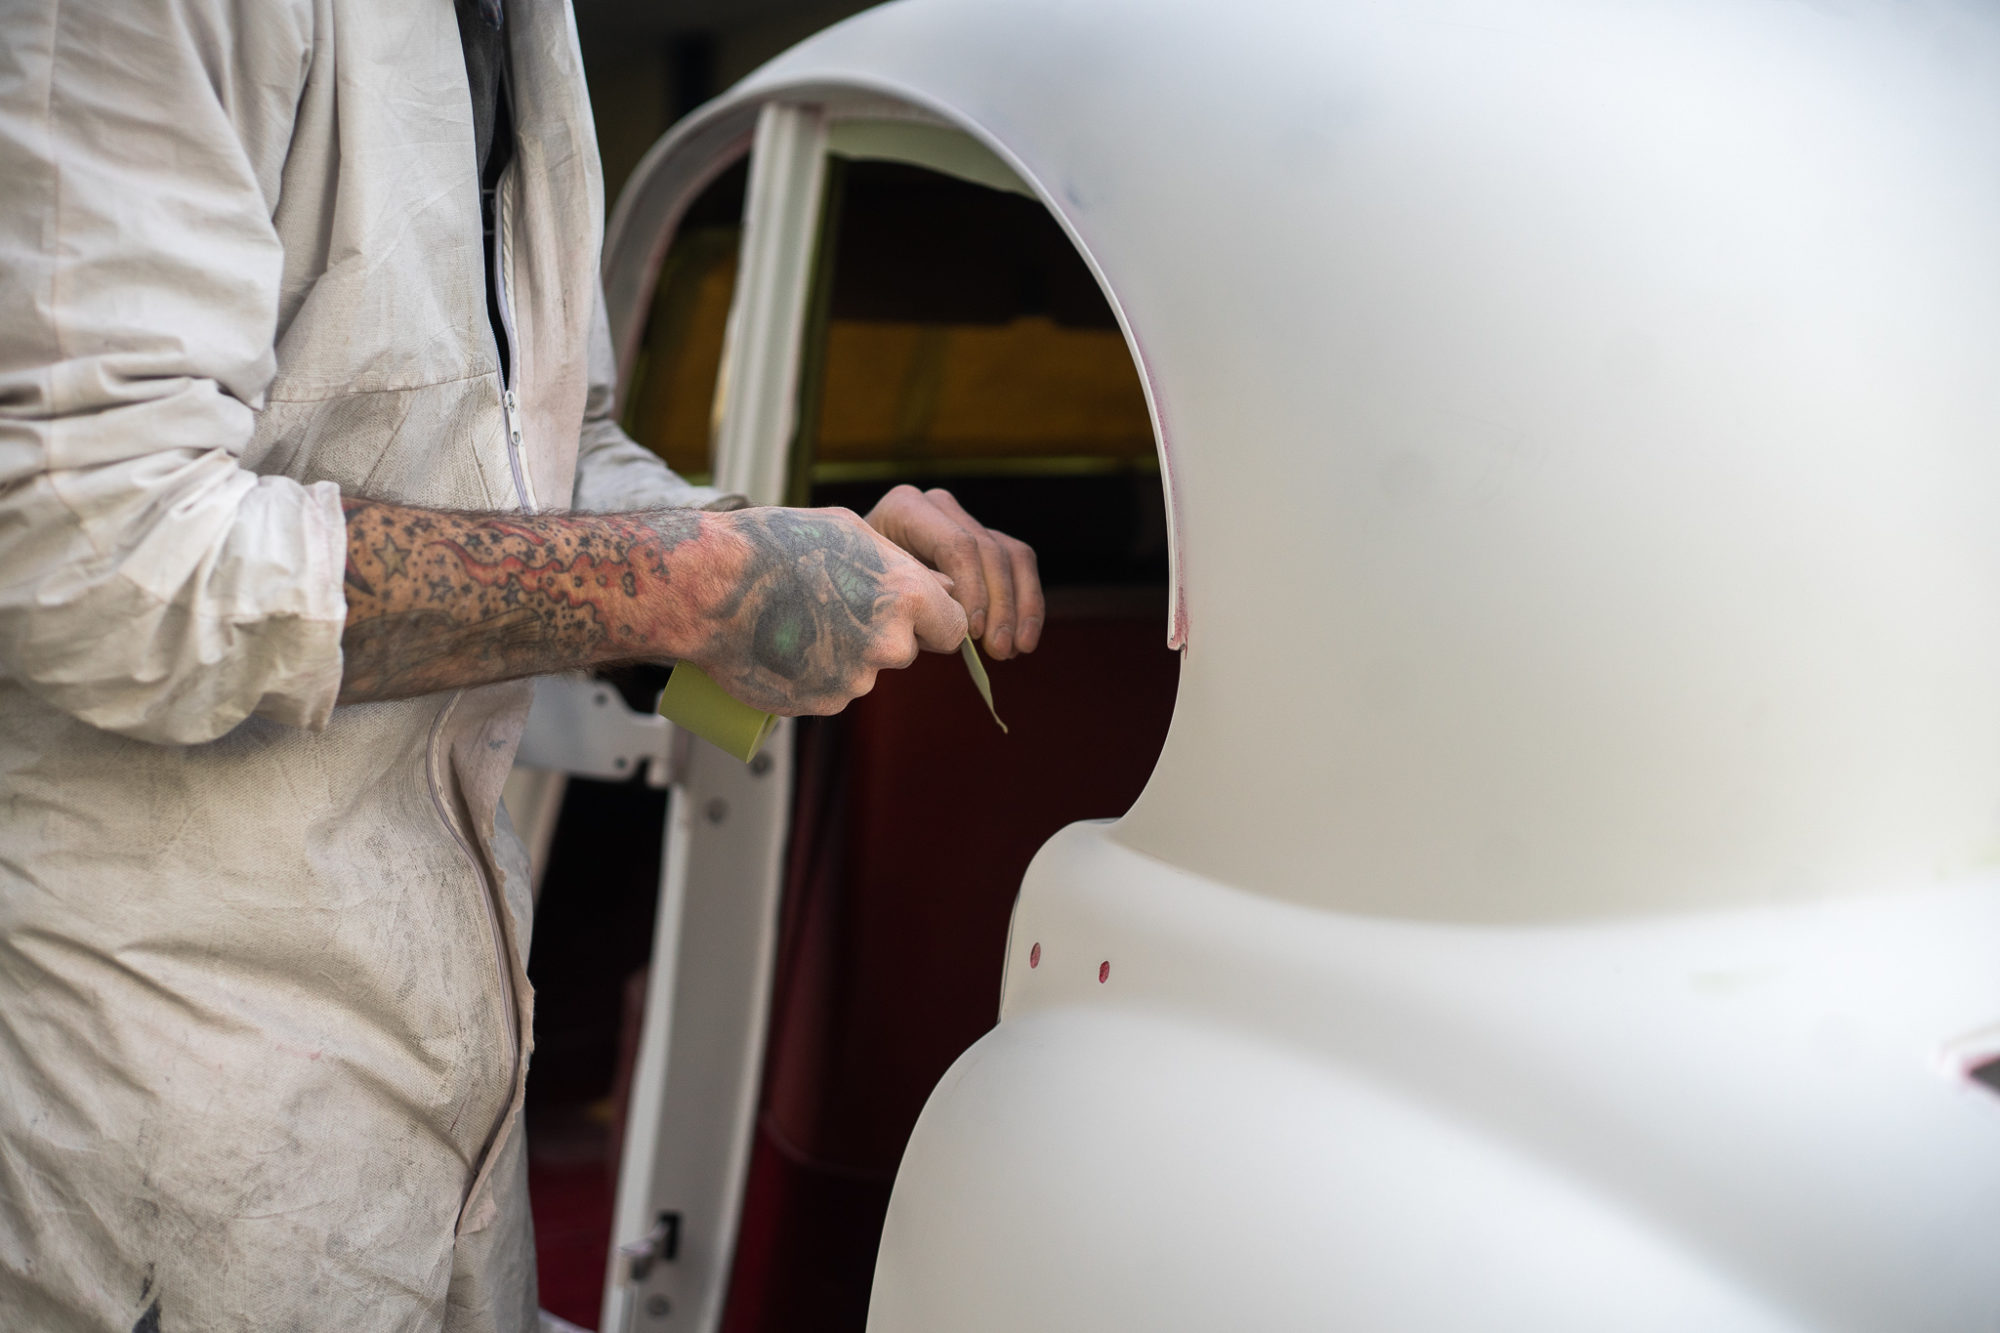
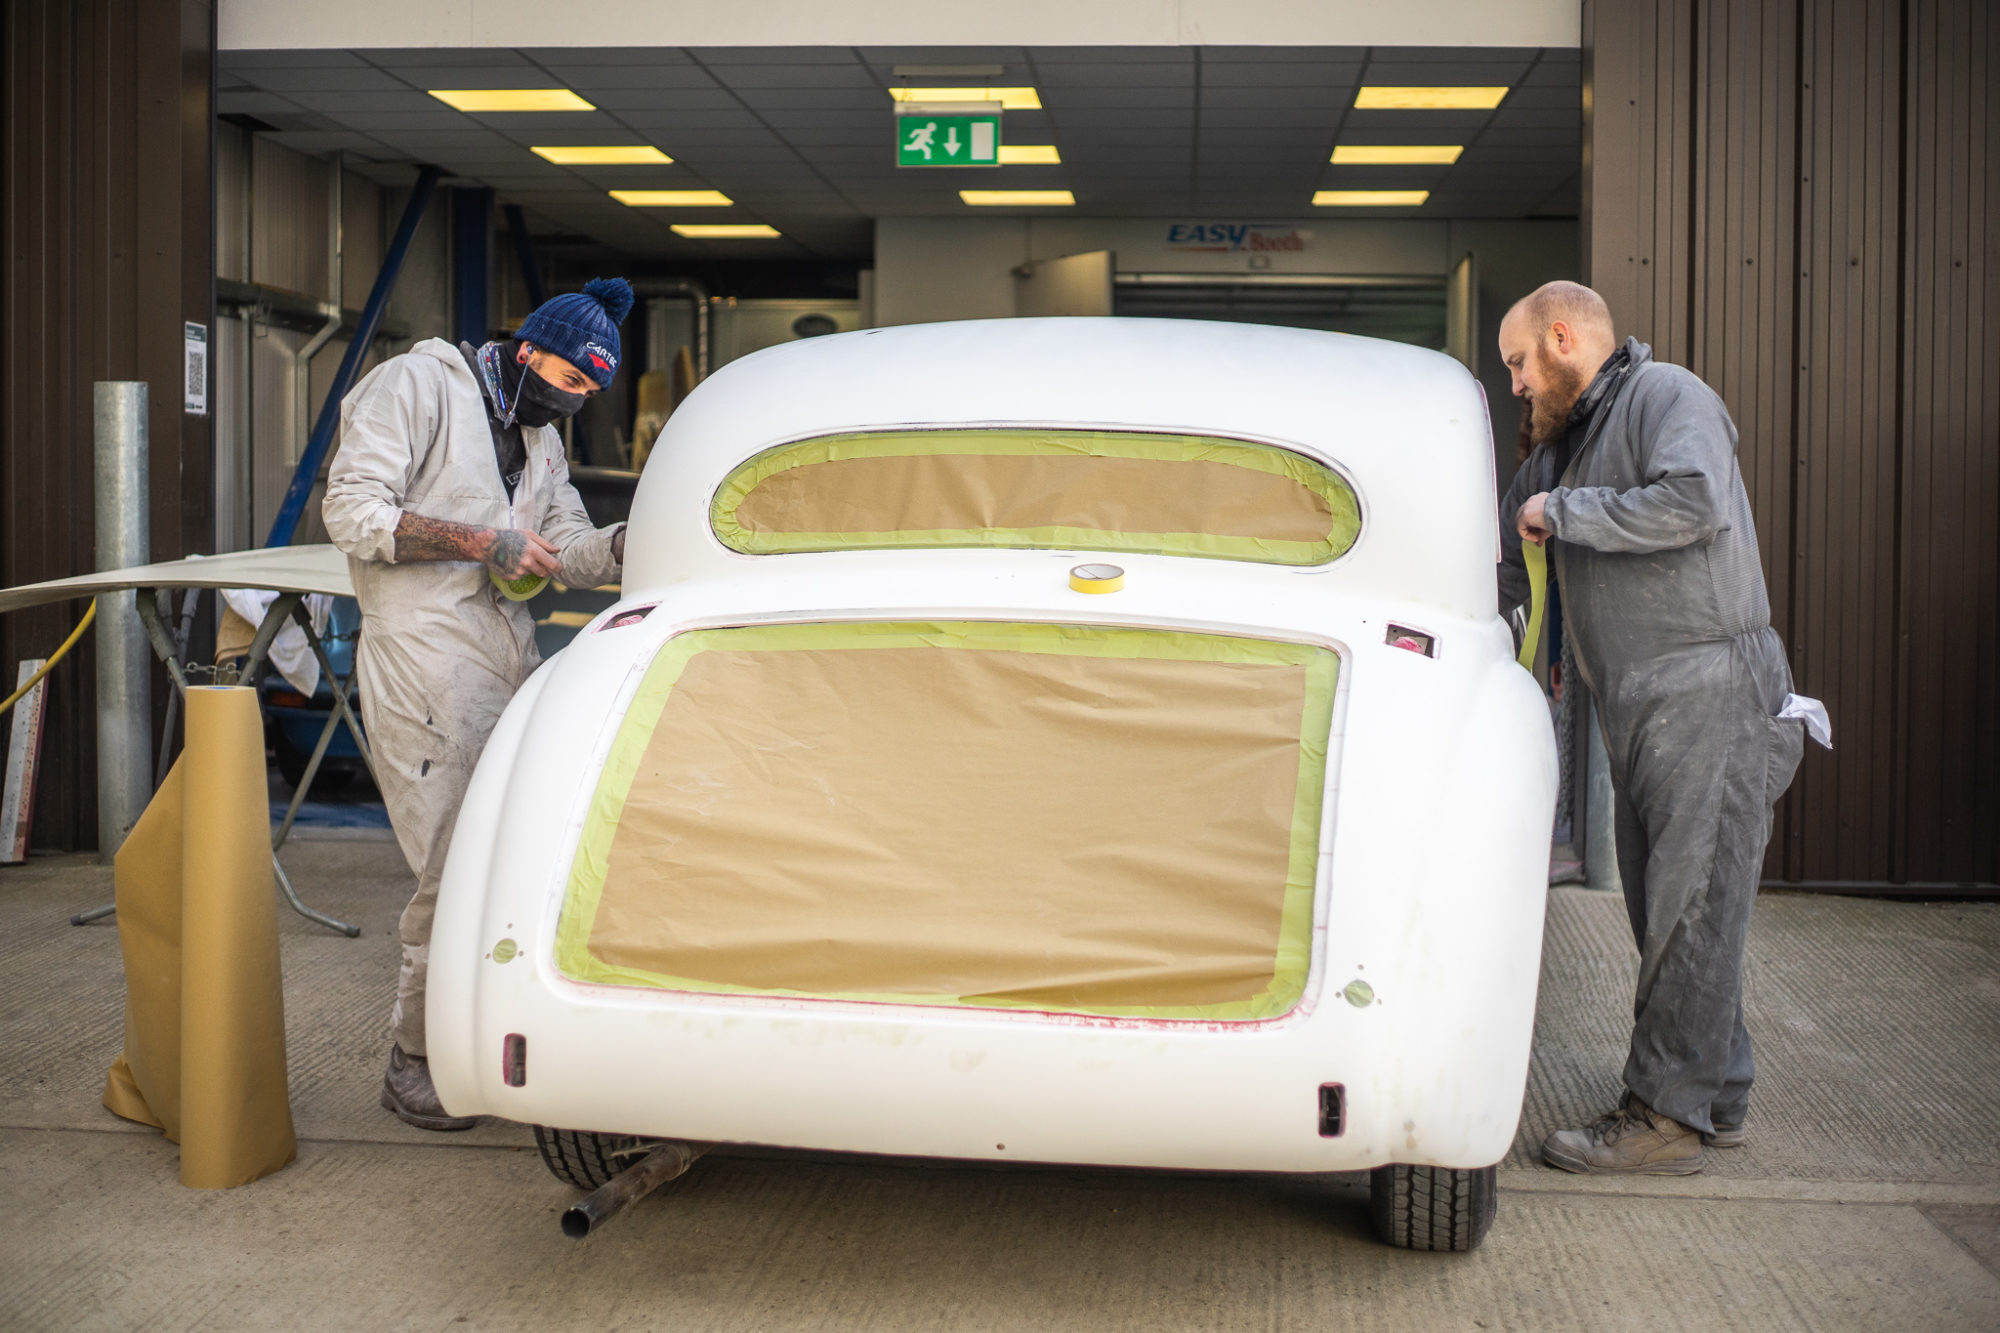
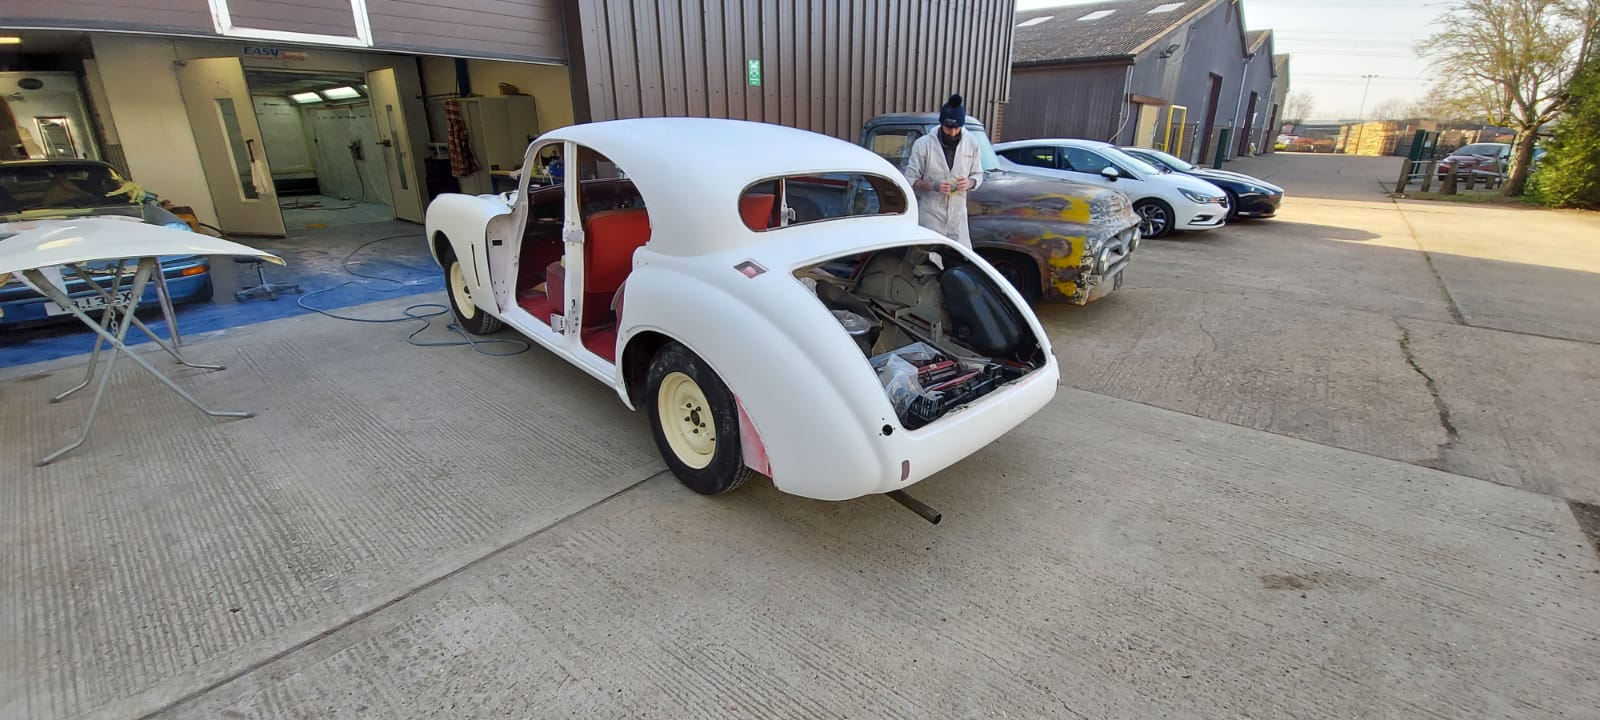
Chris started painting the body this afternoon. The doors and outer panels have already been done, meaning that when the body is finished, it will start to resemble the final product all in its original colour. Seen below is the paint process of the body and panels as well as the priming stage.


Our 1934 Austin Seven Nippy has been completed as of today and we’re delighted to see it up and running! Gordan and Craig took it out for a test ride and it ran perfectly. With the engine and bonnet back on and all issues resolved, this little Nippy is set to go!


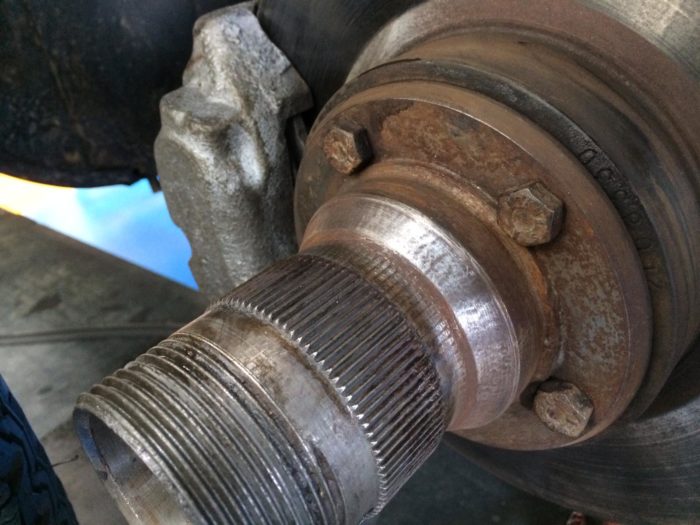
Our 1973 Blue Jaguar E-Type has had its front inner wheel hub replaced as the rings near the splines were showing serious wear from spinning whilst not being correctly bolted in, causing damage to the elements.

With everything finished on our 1968 Jaguar E-Type roadster, there’s one last thing to do before we send it on its way. We found a leak in the sump which needs a new helicoil.
Mauro has also replaced the rocker cover and the brake hose pipe.

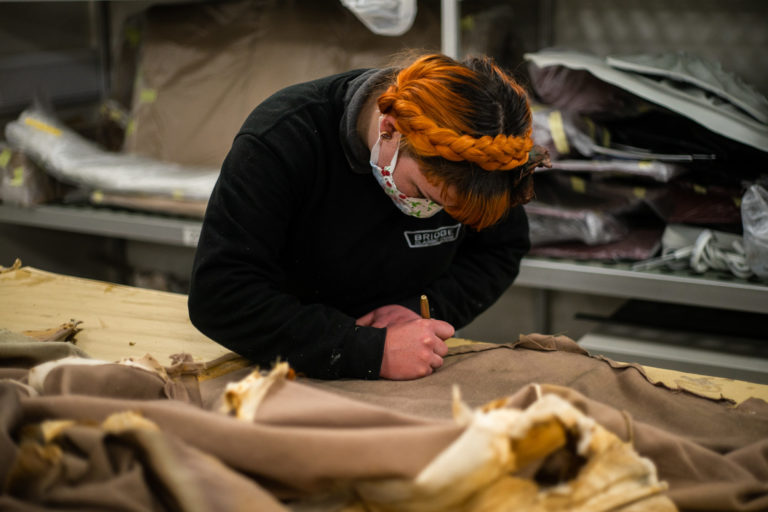
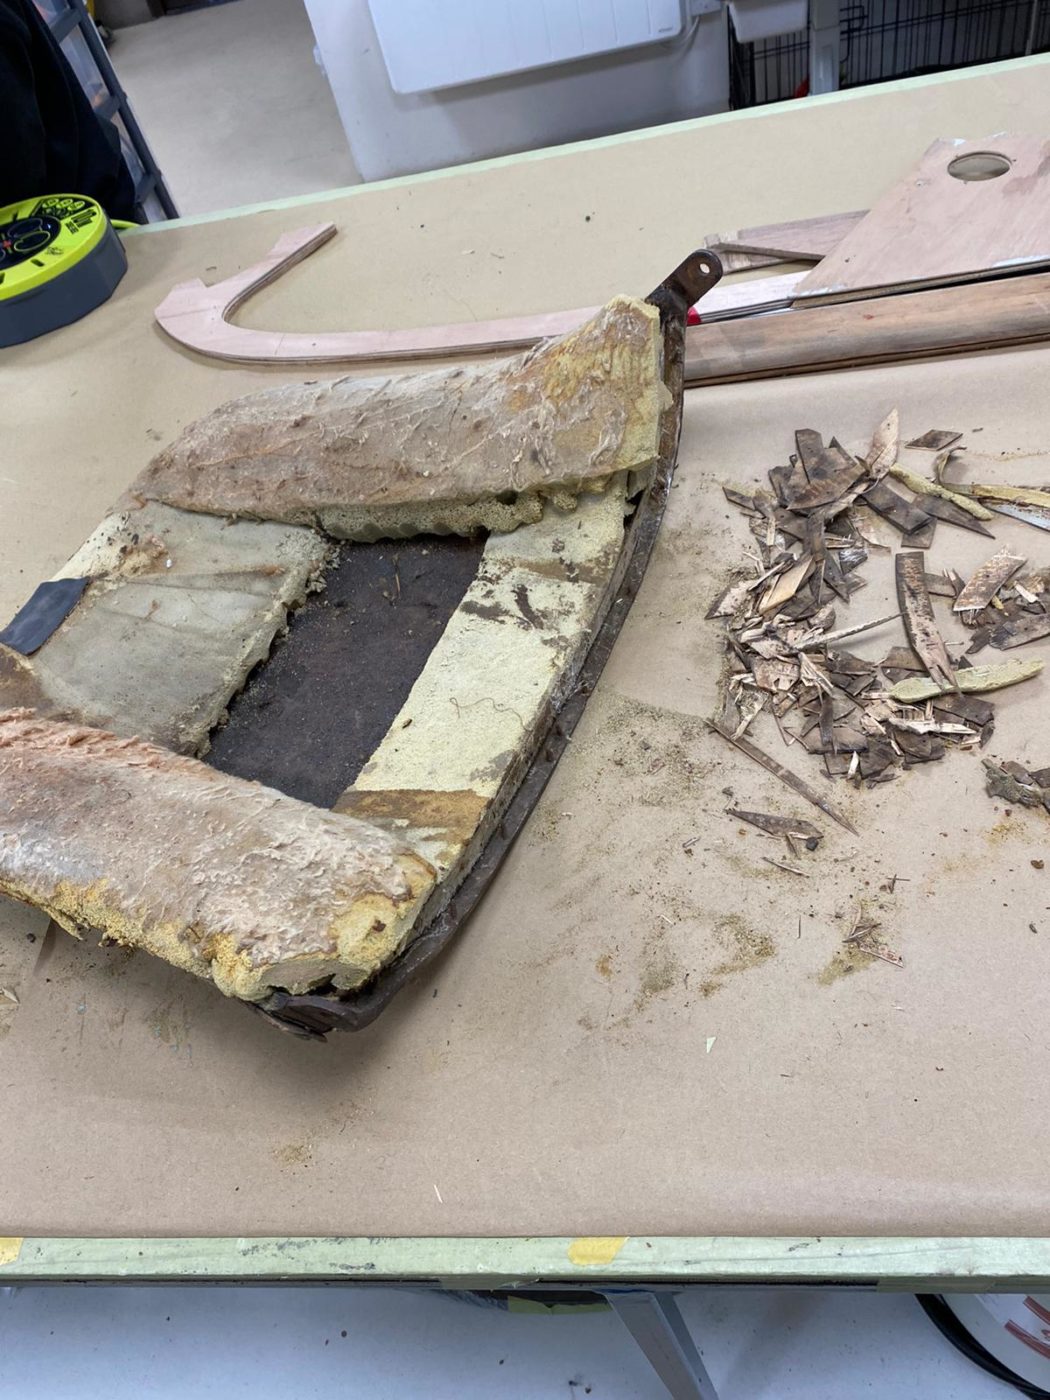
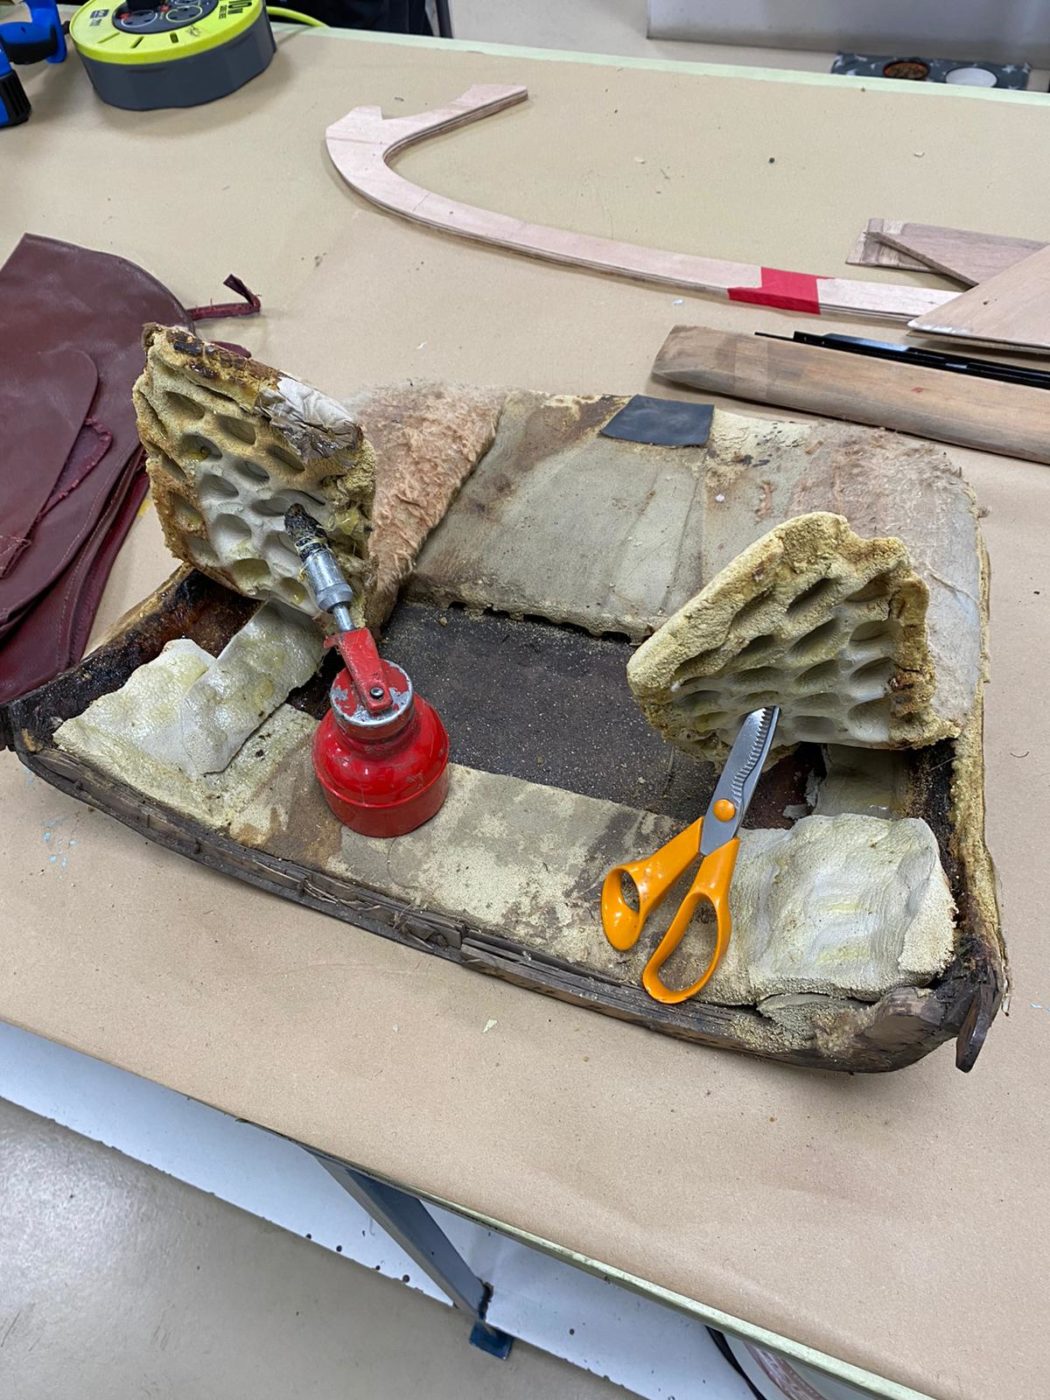
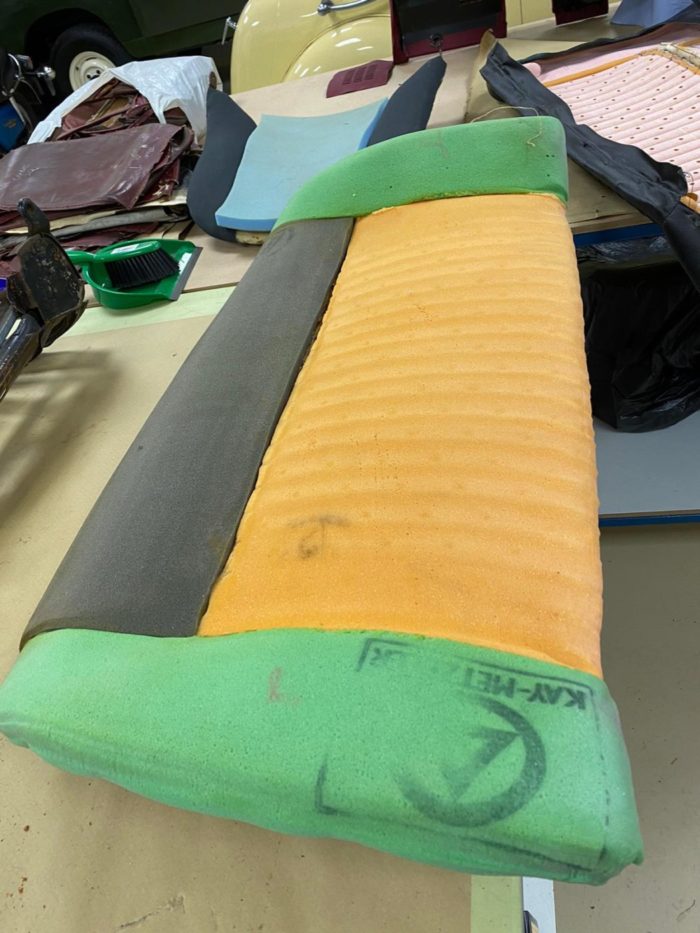
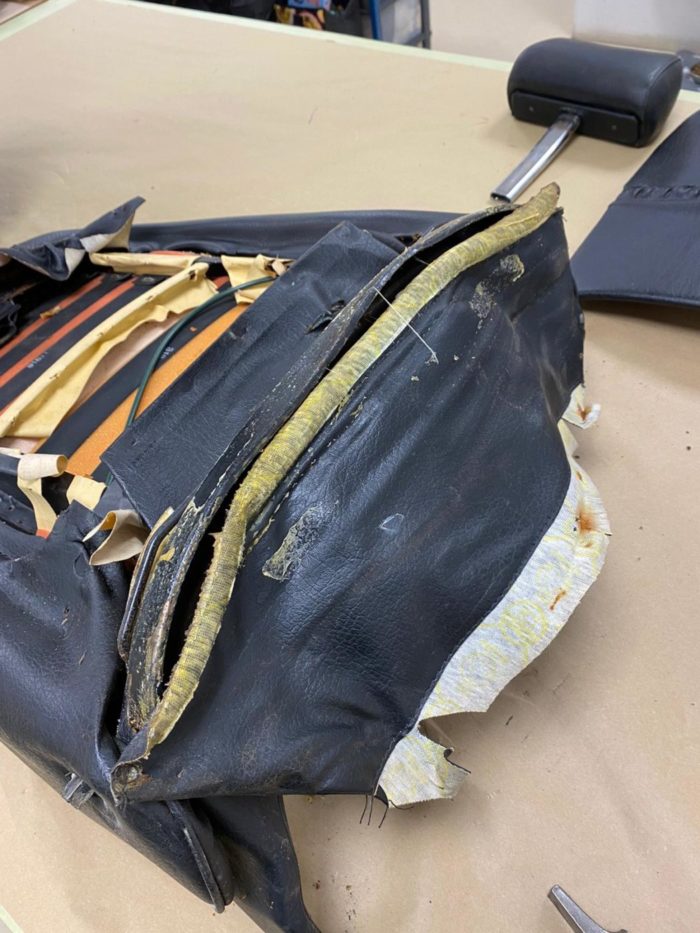
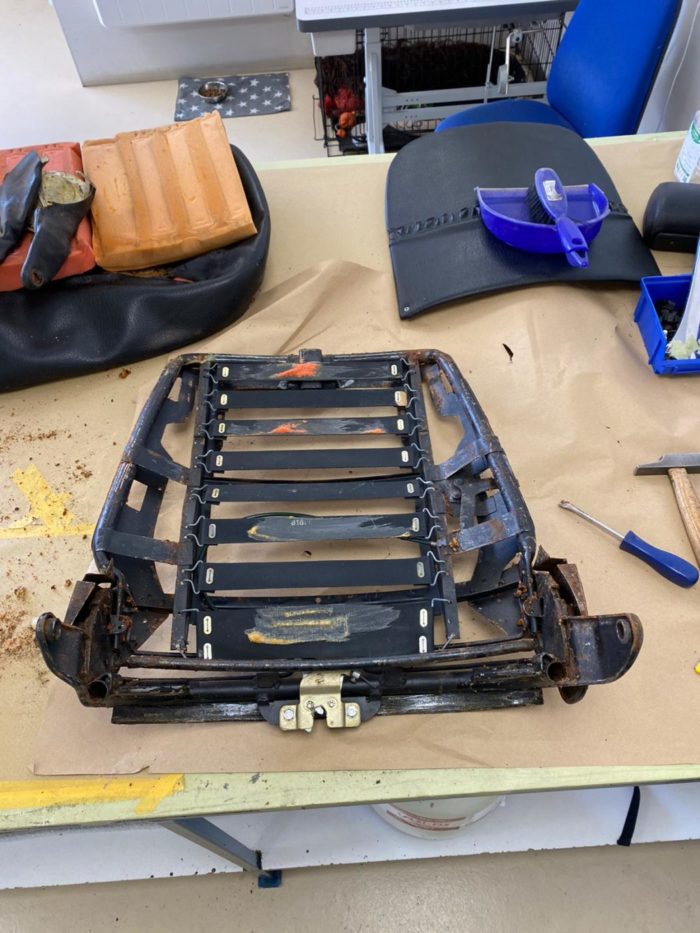
The trim shop having been tackling our red 1973 Triumph Stag interior restoration recently, which has begun by stripping all the seats down to their frames which will be sandblasted. Kath has removed all the hog rings, the back vinyl, the cover and base, the seat clips, as well as removing loose rust and glue from the frames.
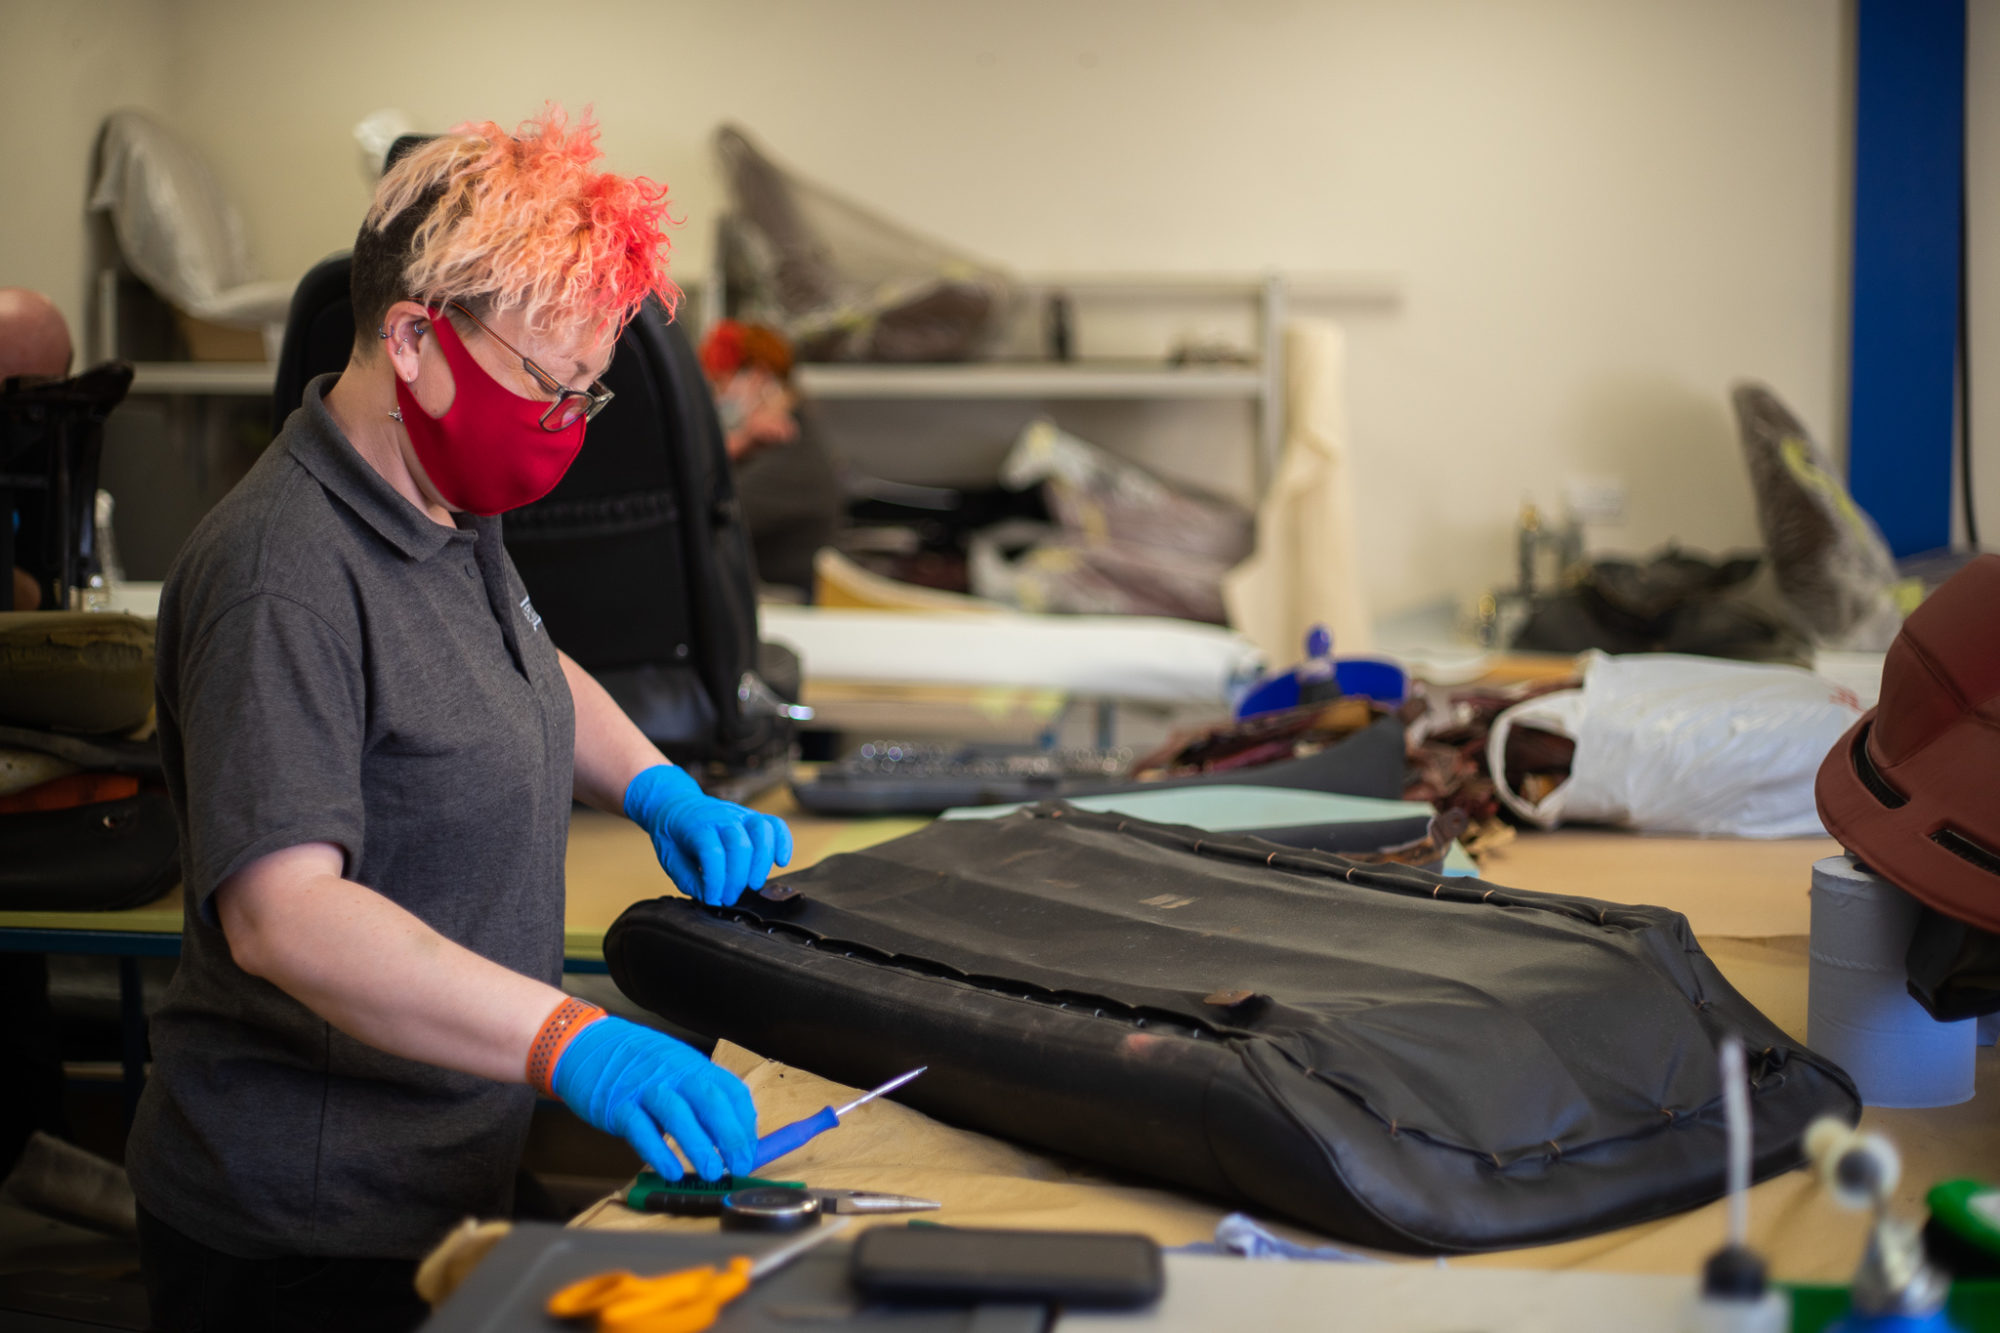
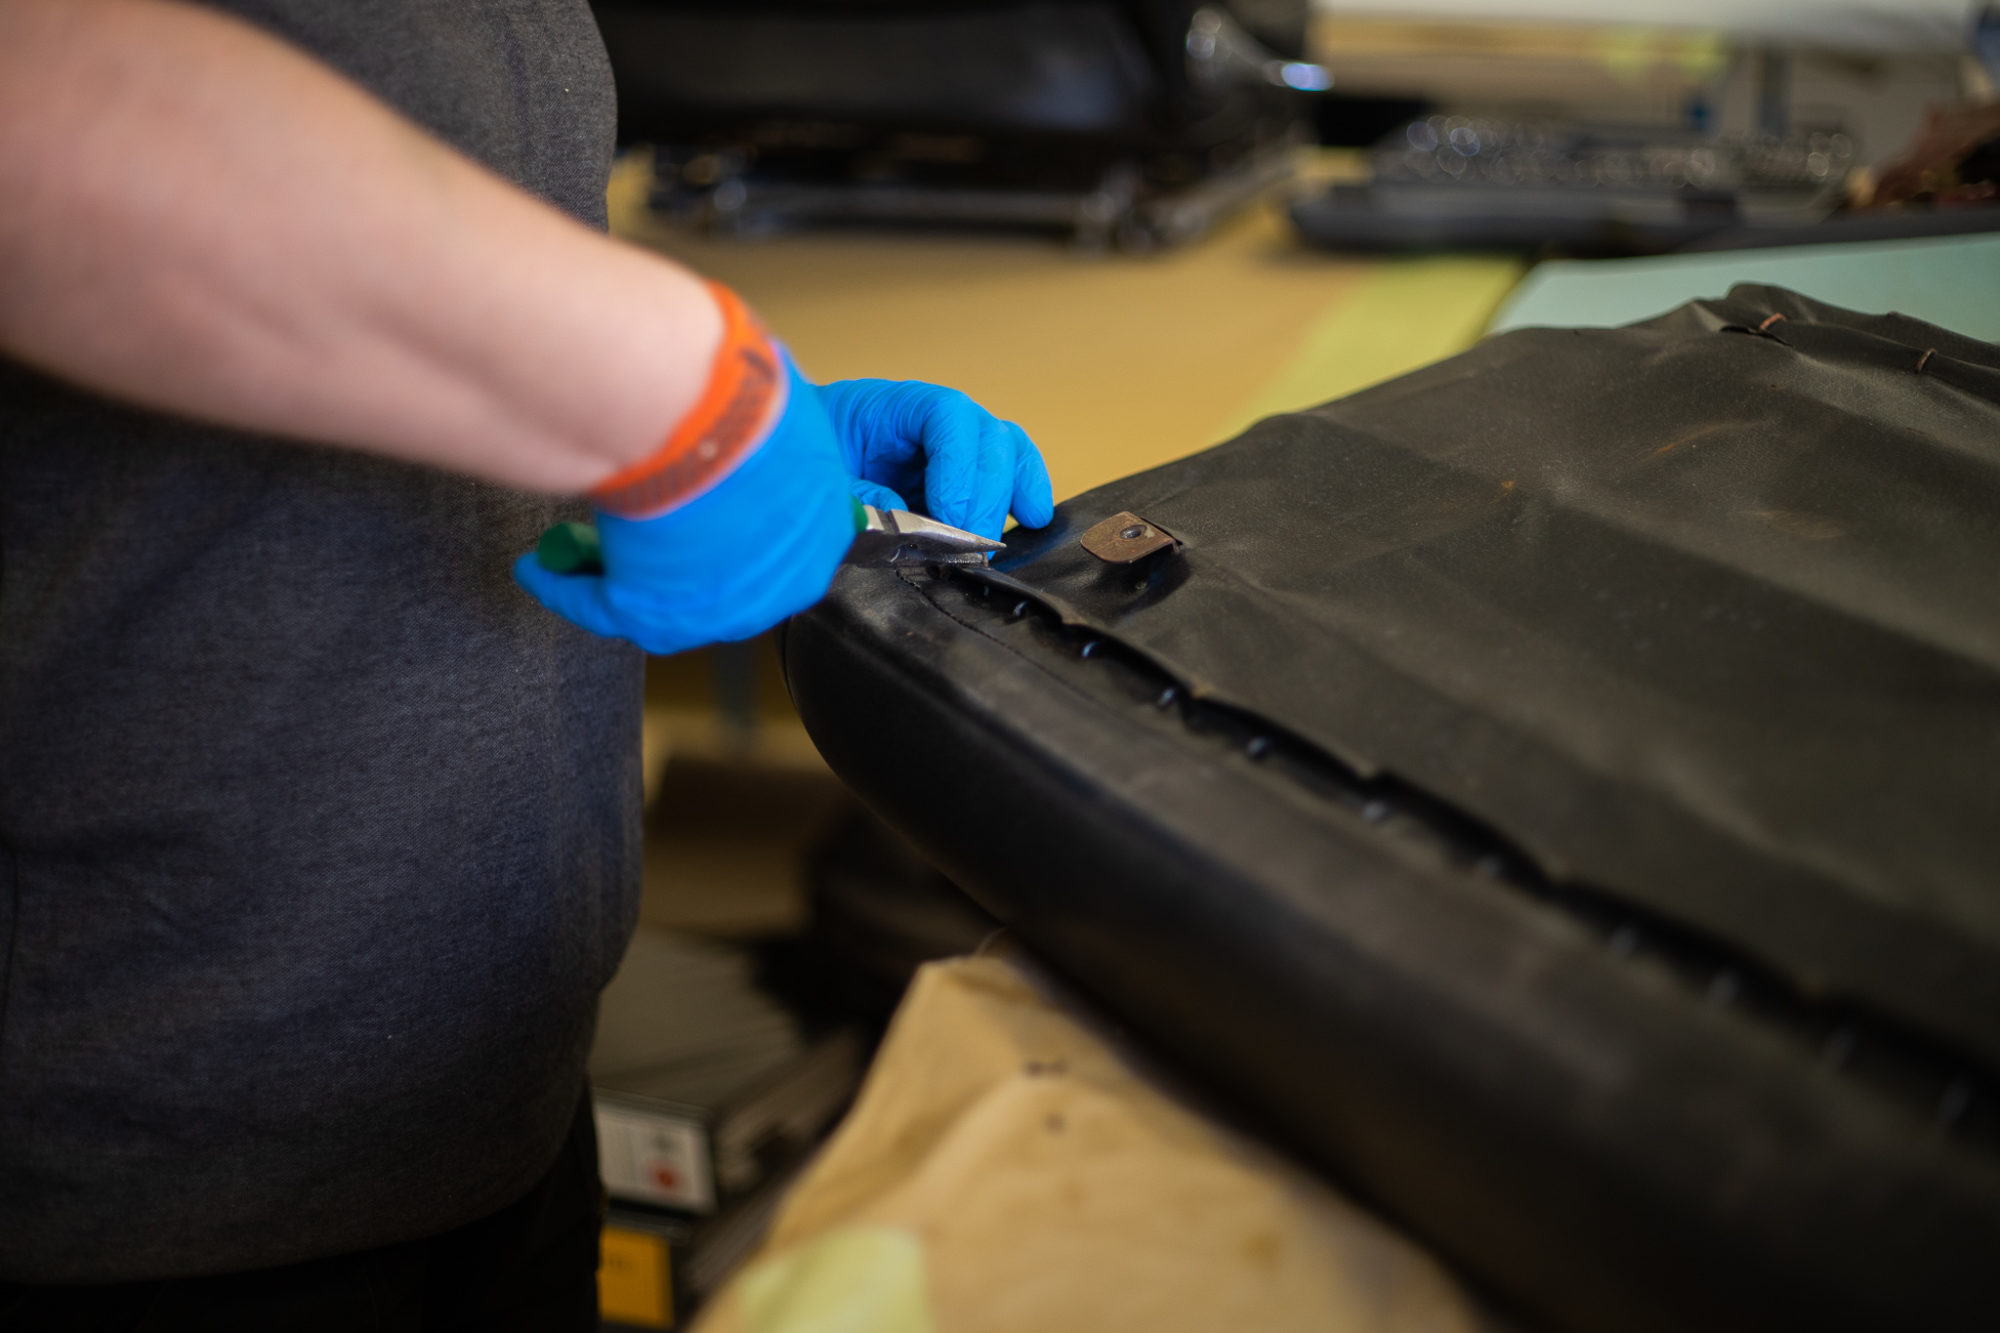


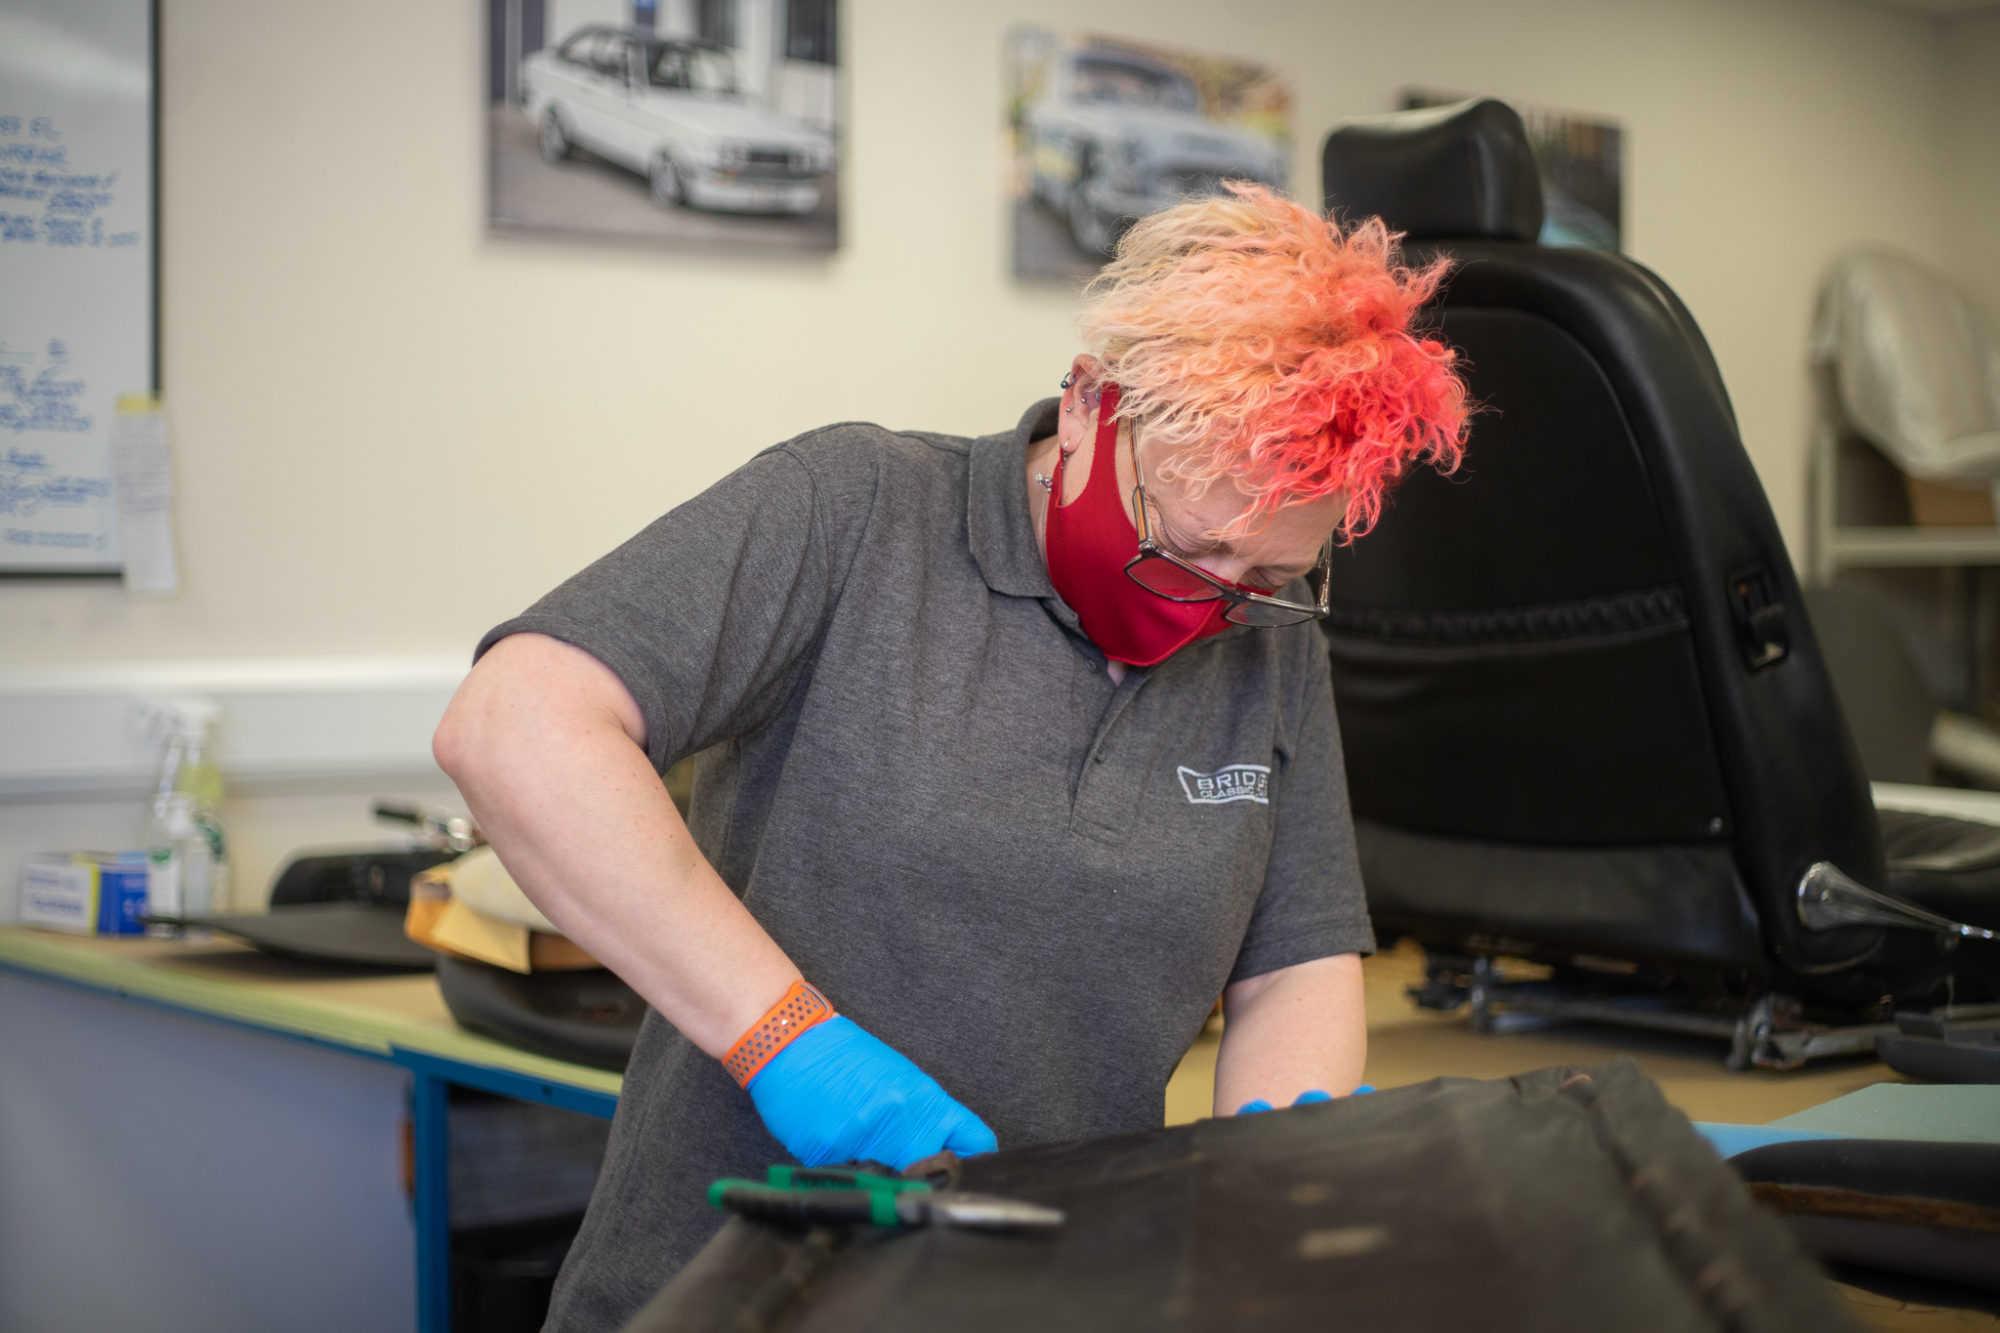
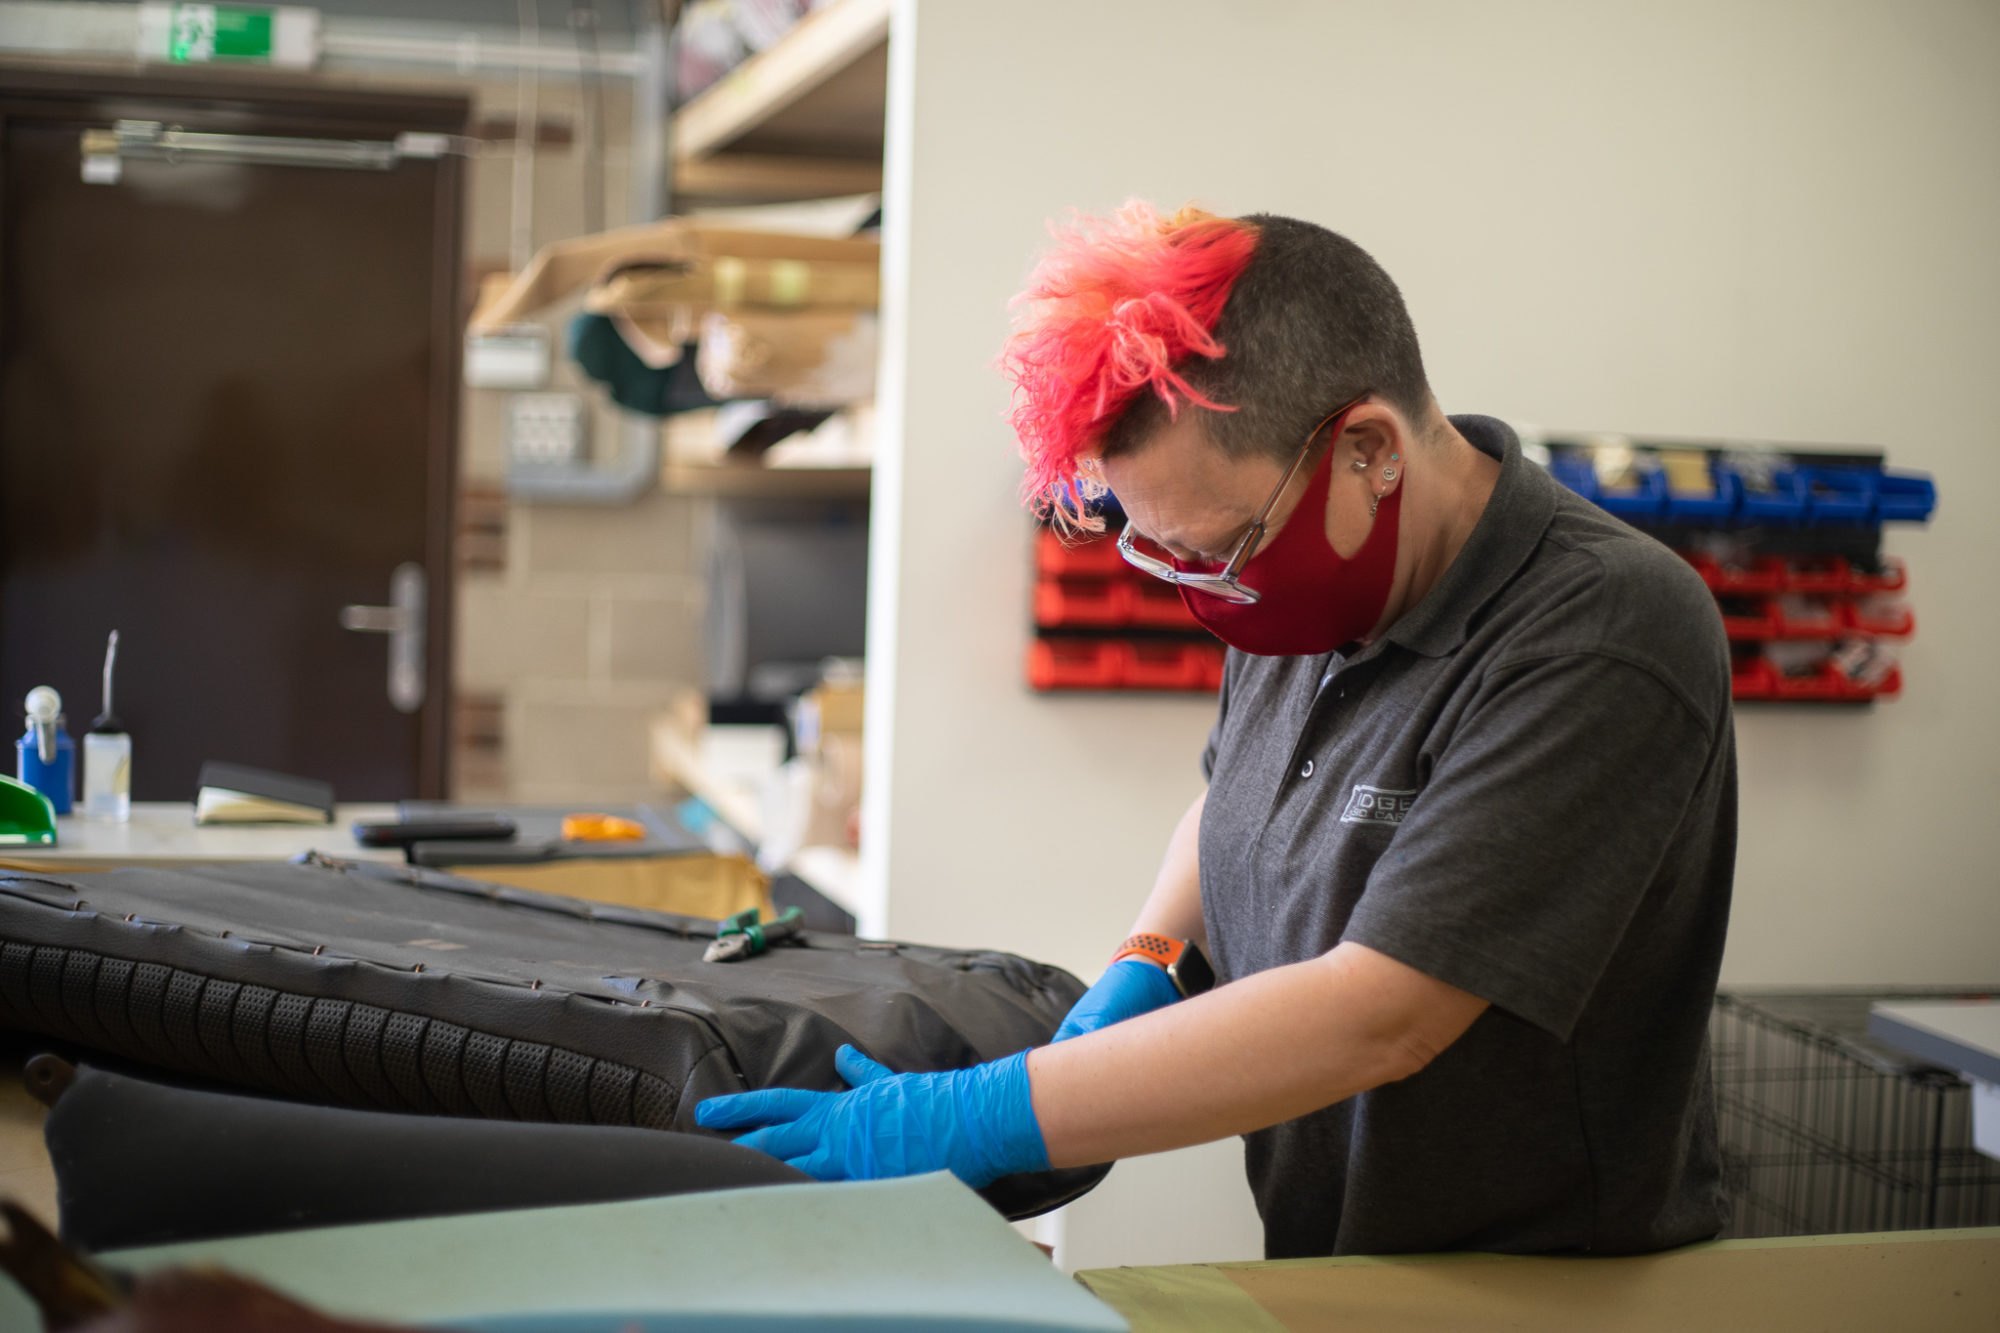
The process is gritty and messy but will allow the trim shop to re-cover these seats so they look brand new.

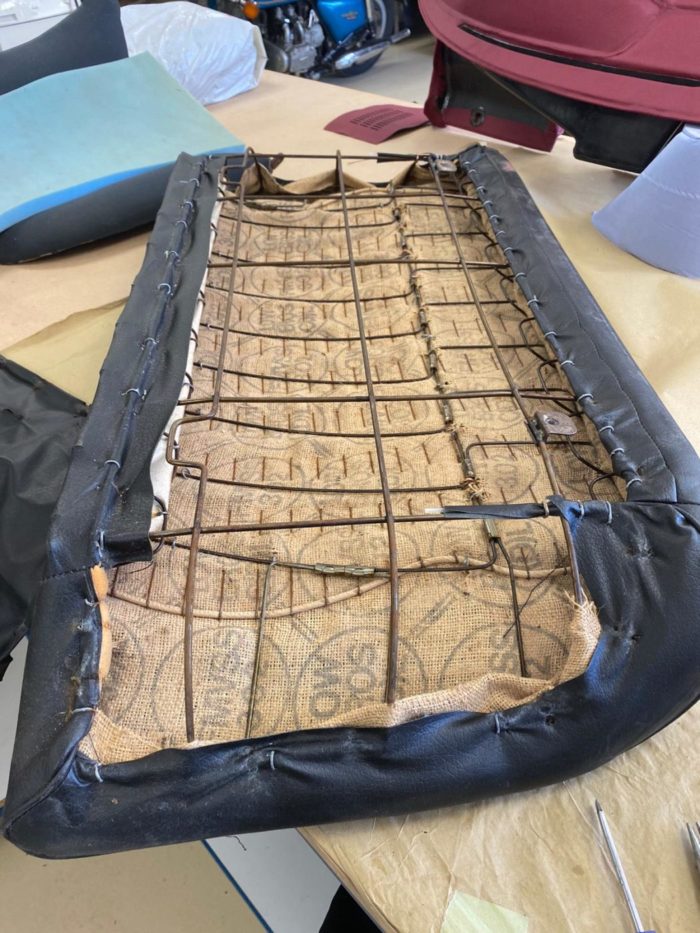
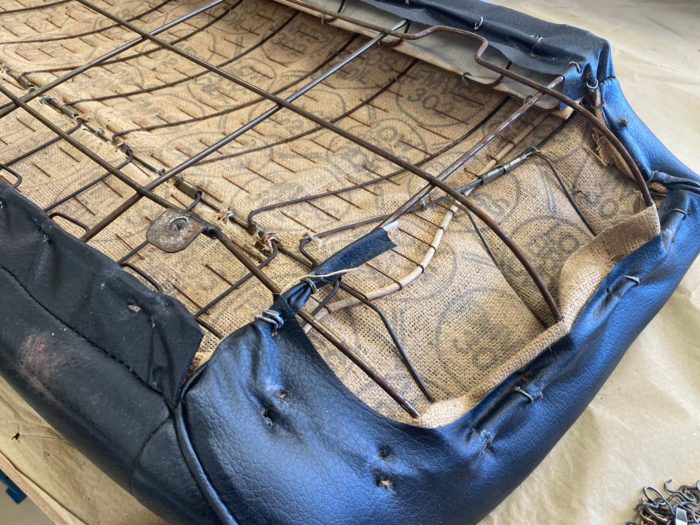
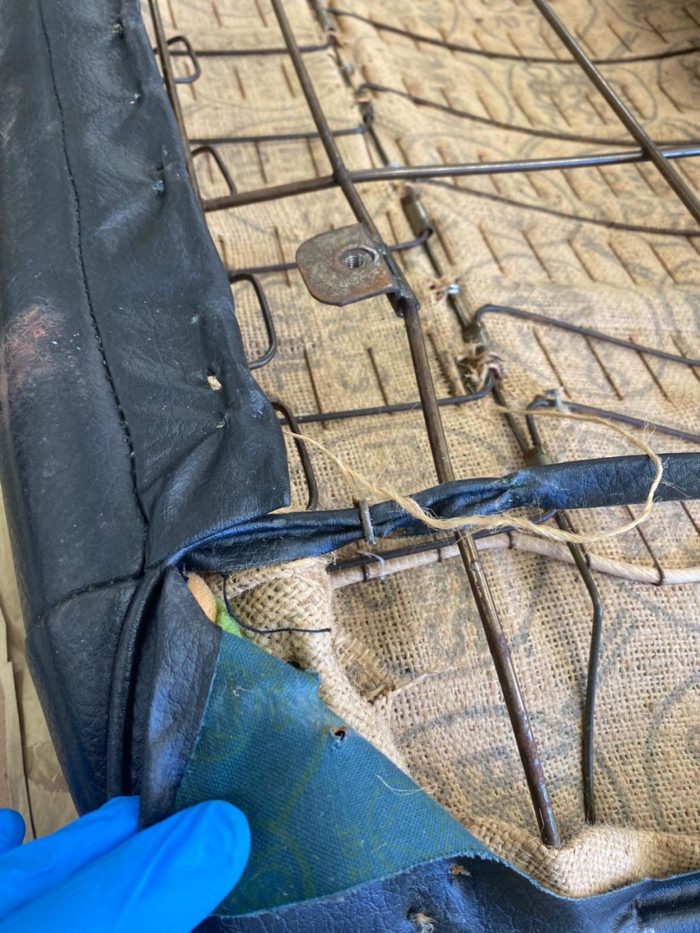
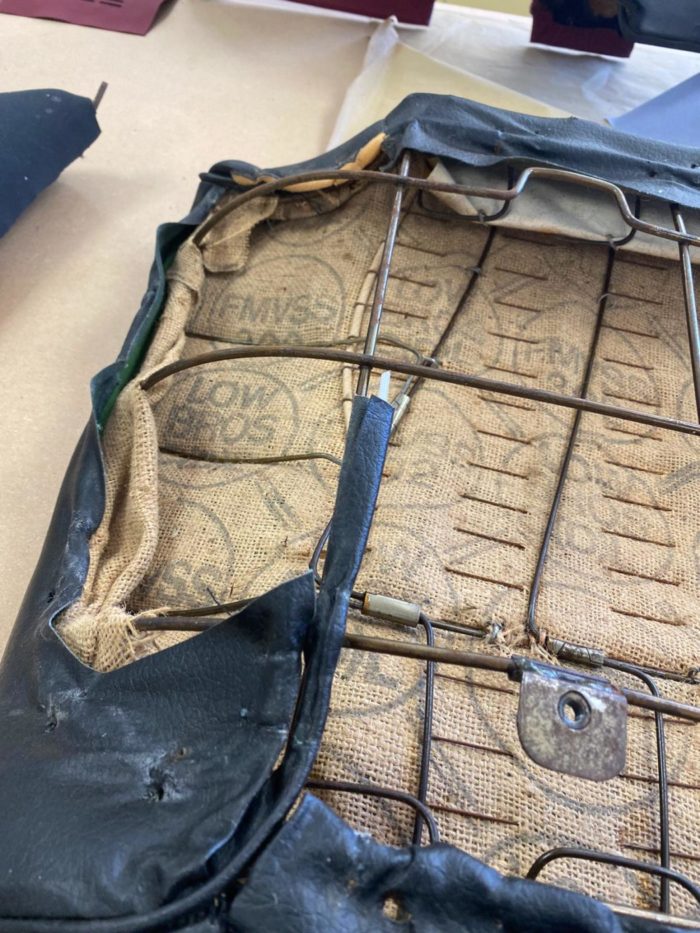
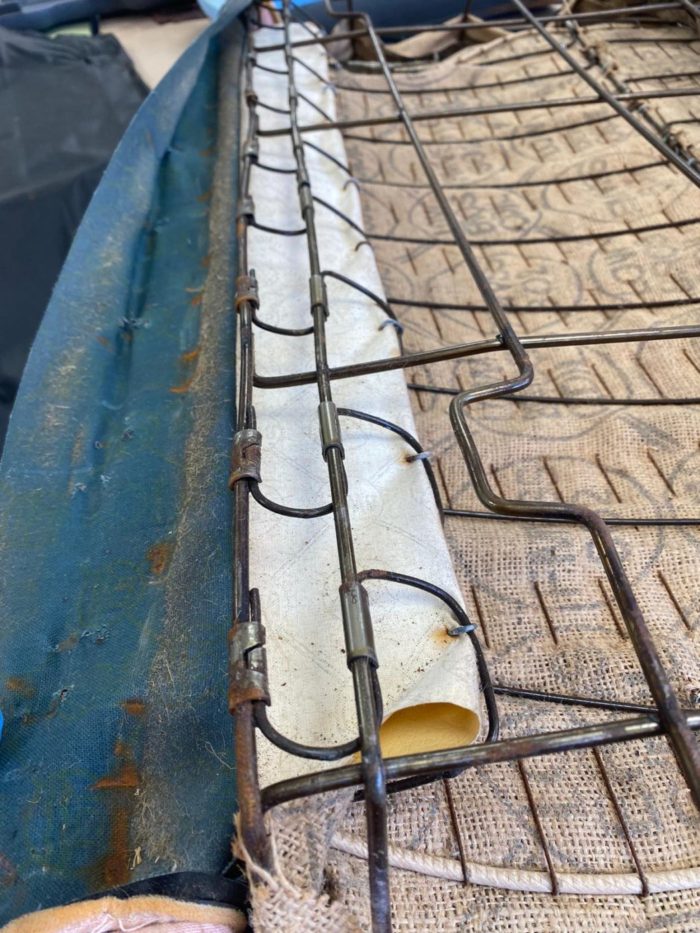

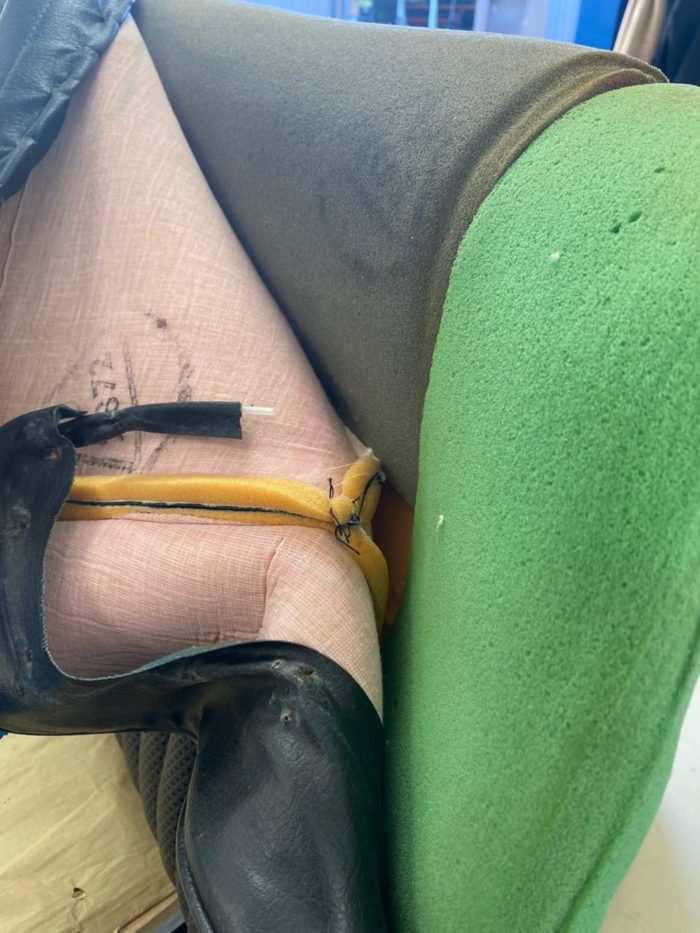

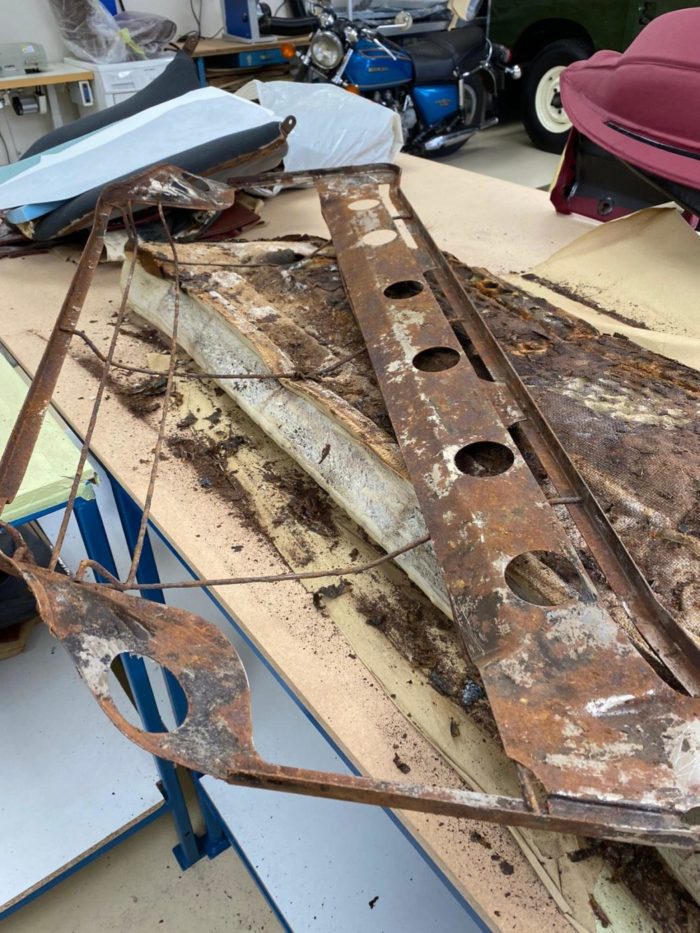
Brian has removed the seat backboard to access the clips holding the cover flaps in place. These are then removed as part of stripping the seat frames. Once the front seat squab cover was removed, he could then remove the cover from the front seat base-frame which he did by undoing the clips holding the cover flaps in place, he also removed the rubber buffer and rubber diaphragm. Brian then moved onto removing the front rubber and metal chancel from the hood as well as the front side rubbers, metal channel and plastic trim. He then followed up by removing the rear side rubbers, metal channel and plastic trim, removing rubbers & channels from ‘b’ post section of the hood and then removing the rear section rubber and metal trim. Brian finished the hood by removing the velcro from the side of the frame and cleaned up the plastic trim.

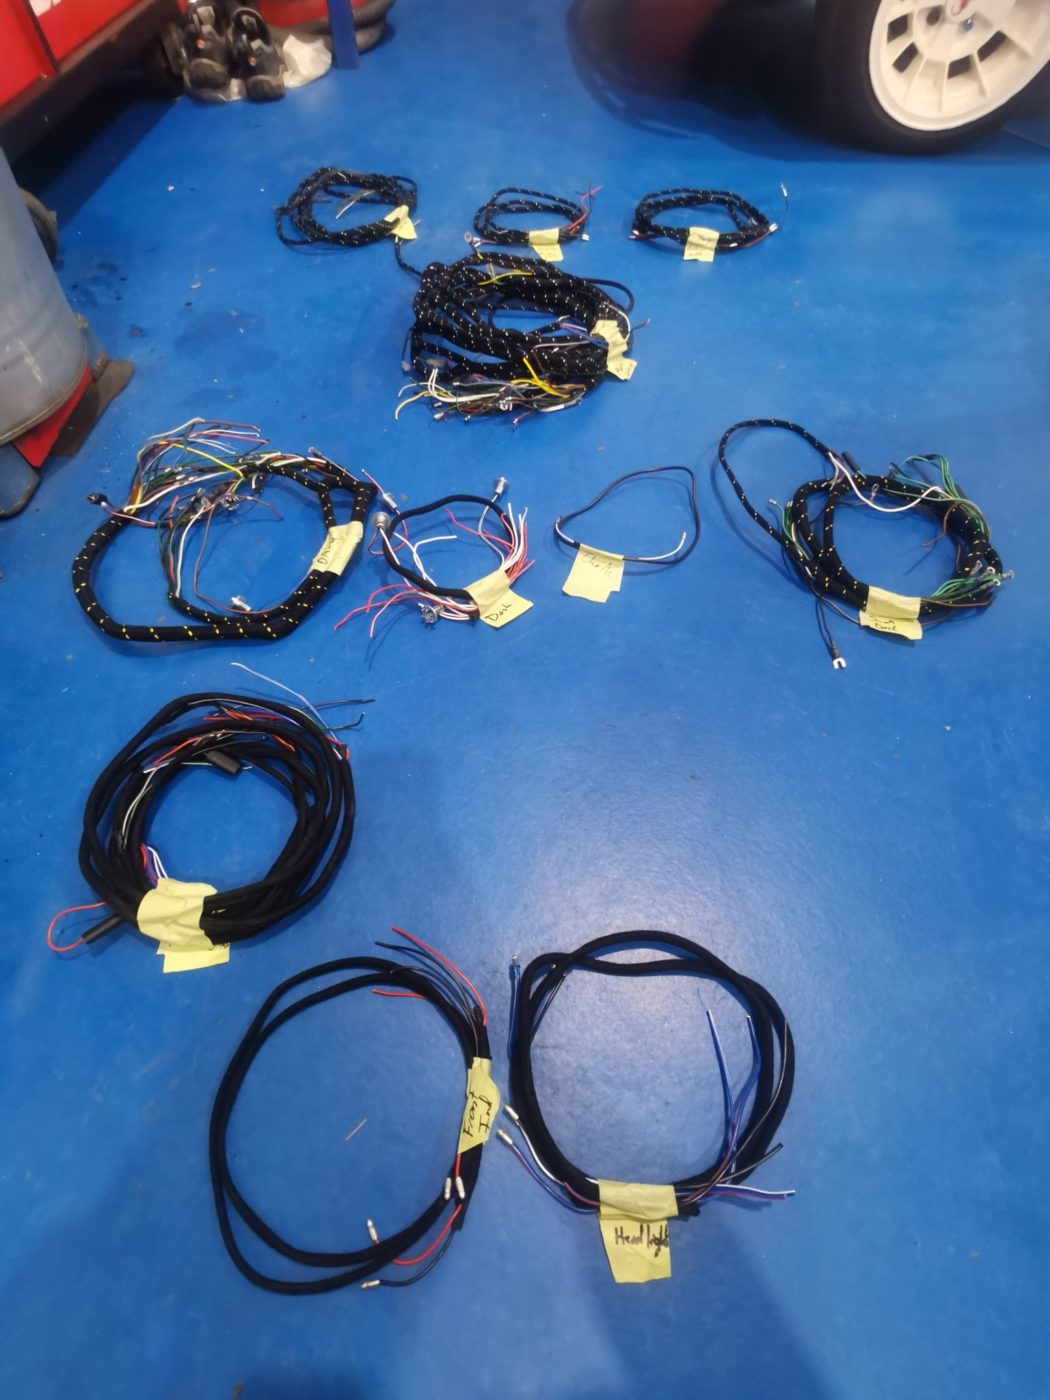
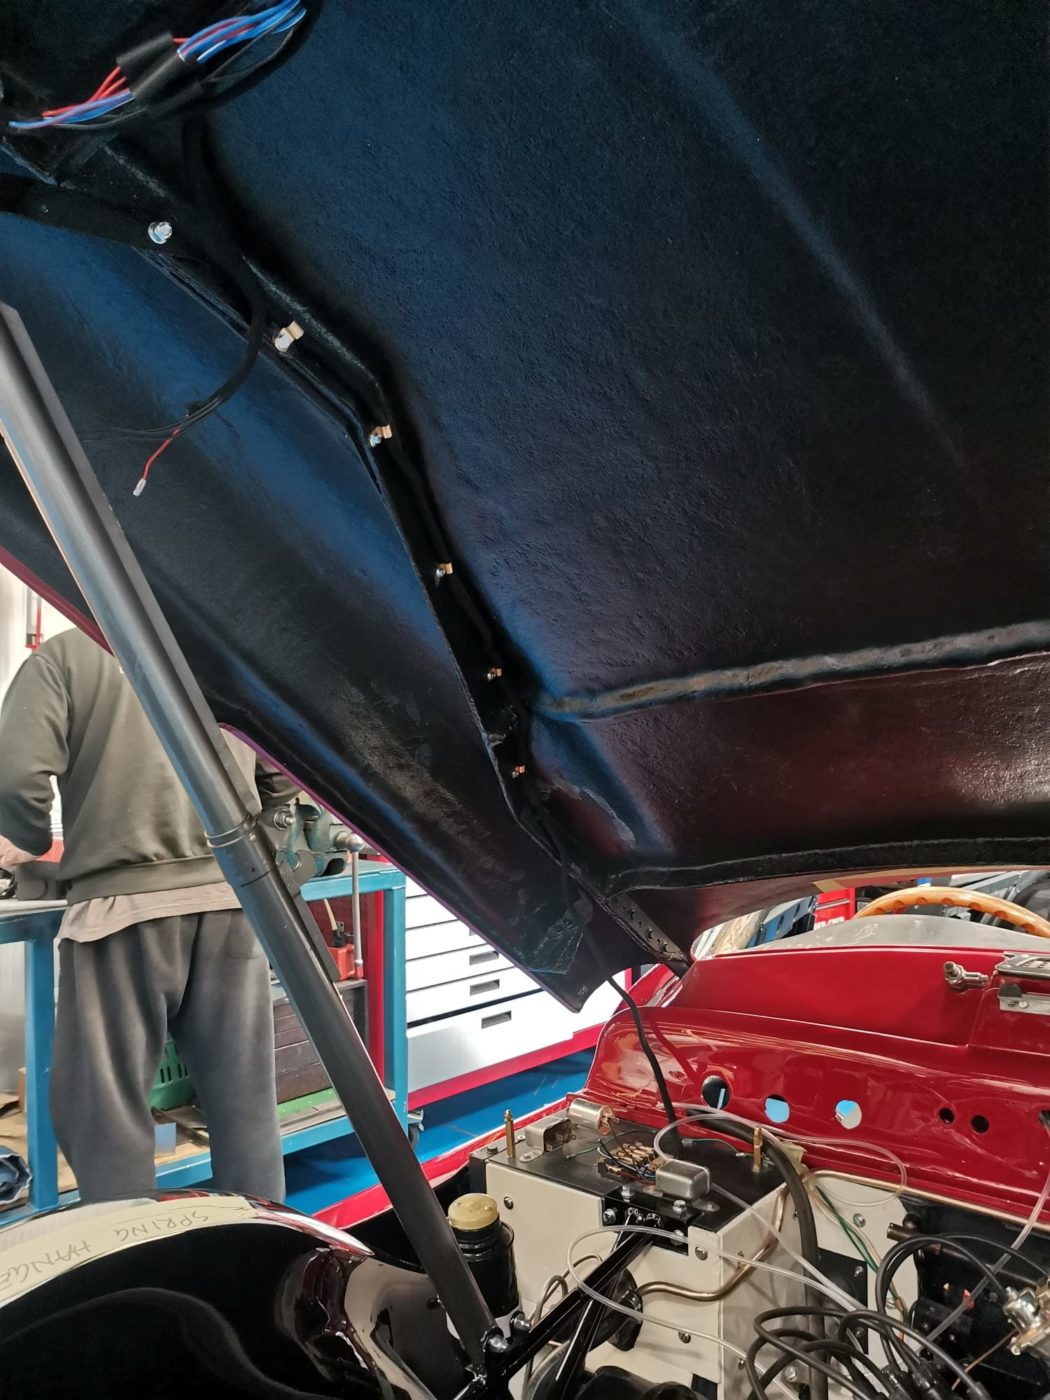
Tom has begun to catalogue the different wiring looms for our 1960 Jensen 541S. He’s started with the rear wiring loom, connected the rear indicators, brake lights, sidelights, number plate lights and the reverse light. Tom has also allocated the rear wiring loom in the rear junction box. He has then continued to install the bonnet wiring loom and has connected the headlights, indicators and sidelights wirings to the bonnet wiring loom.
Paul has also fitted the rear bumper.


Lydia has also taken apart the head lining. She’s started by laying out the old fabric to see what it looks like. Once she made the new version, she sewed in calico loops onto each headlining part while attaching the sections together.
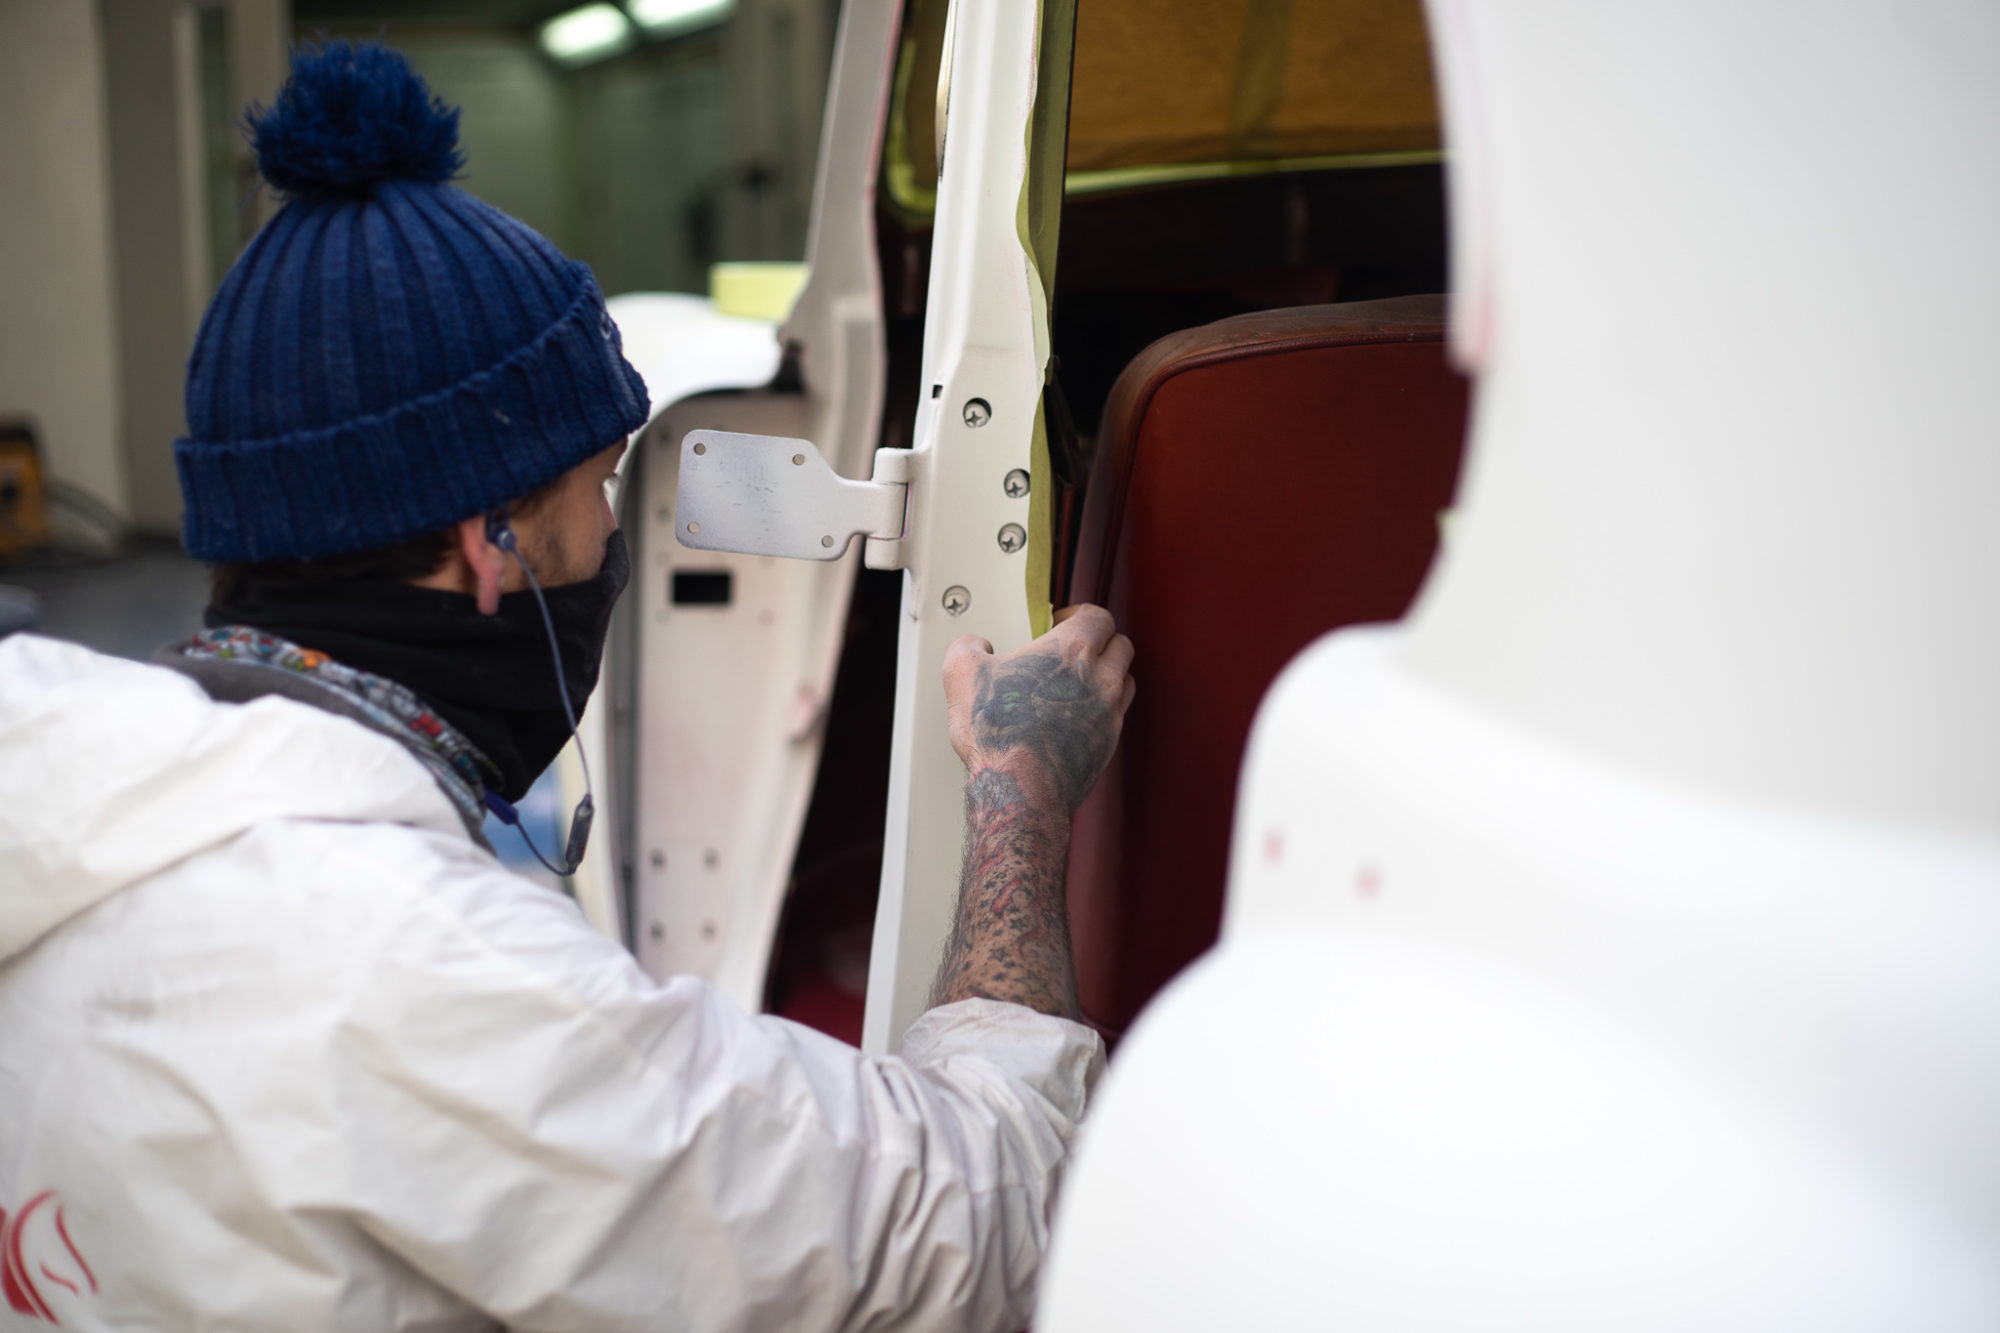
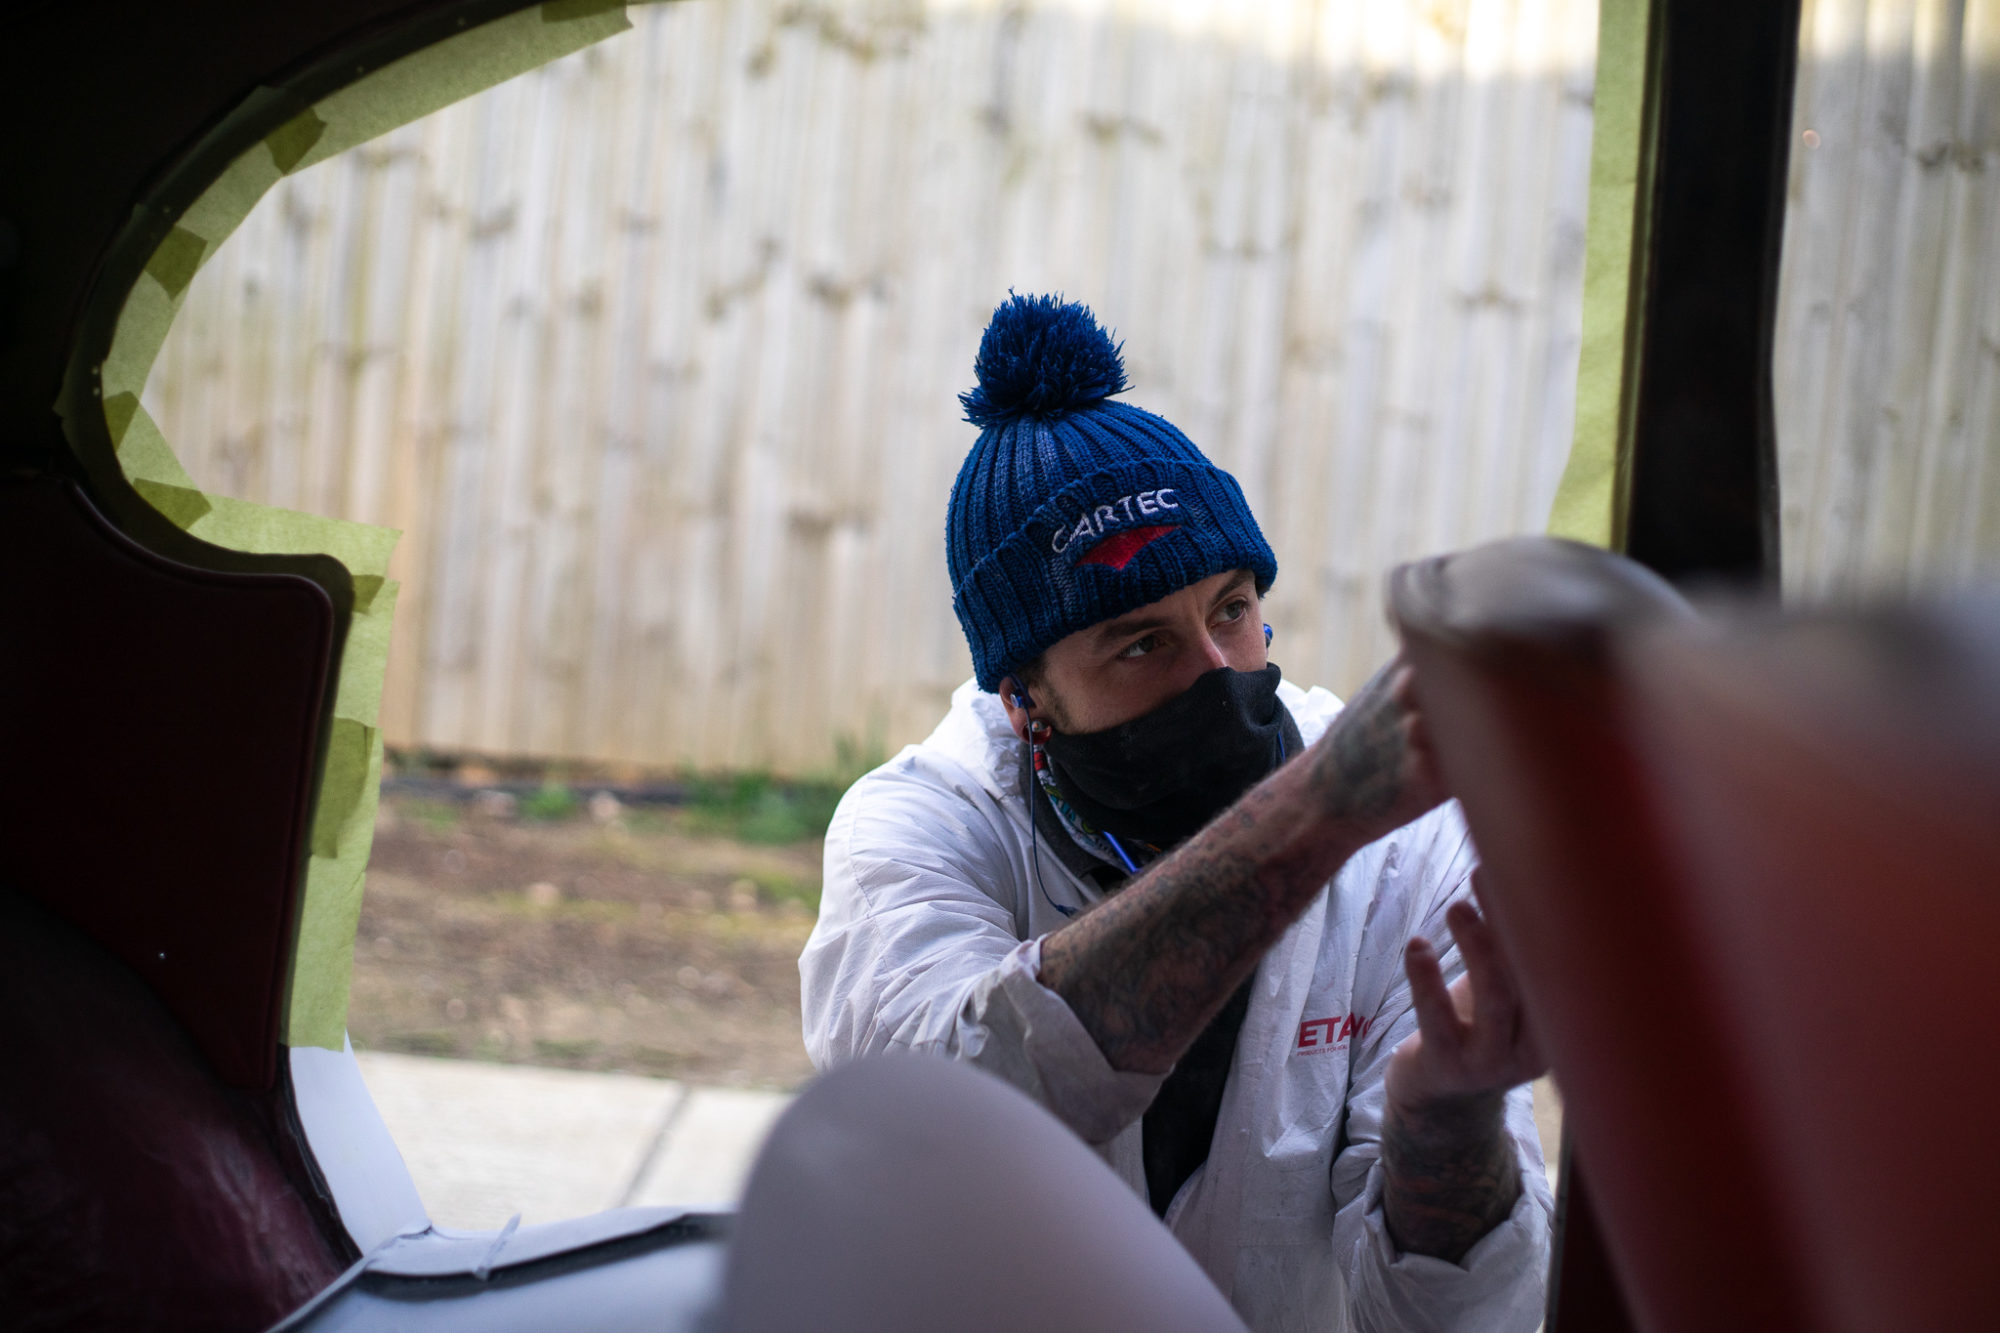
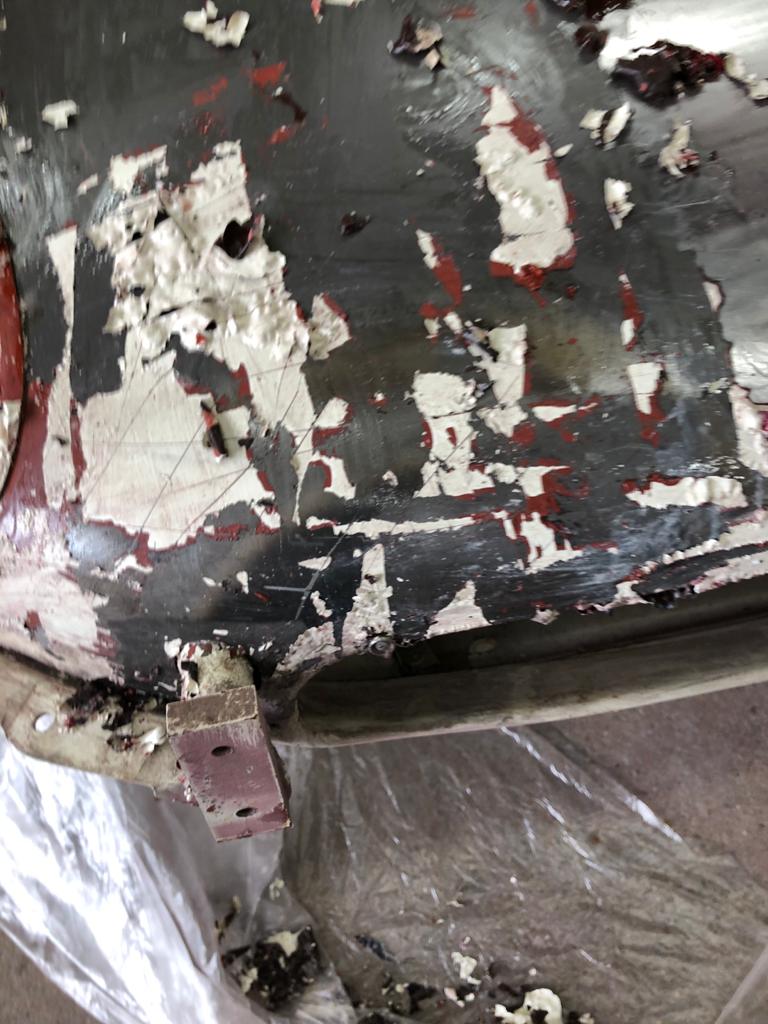
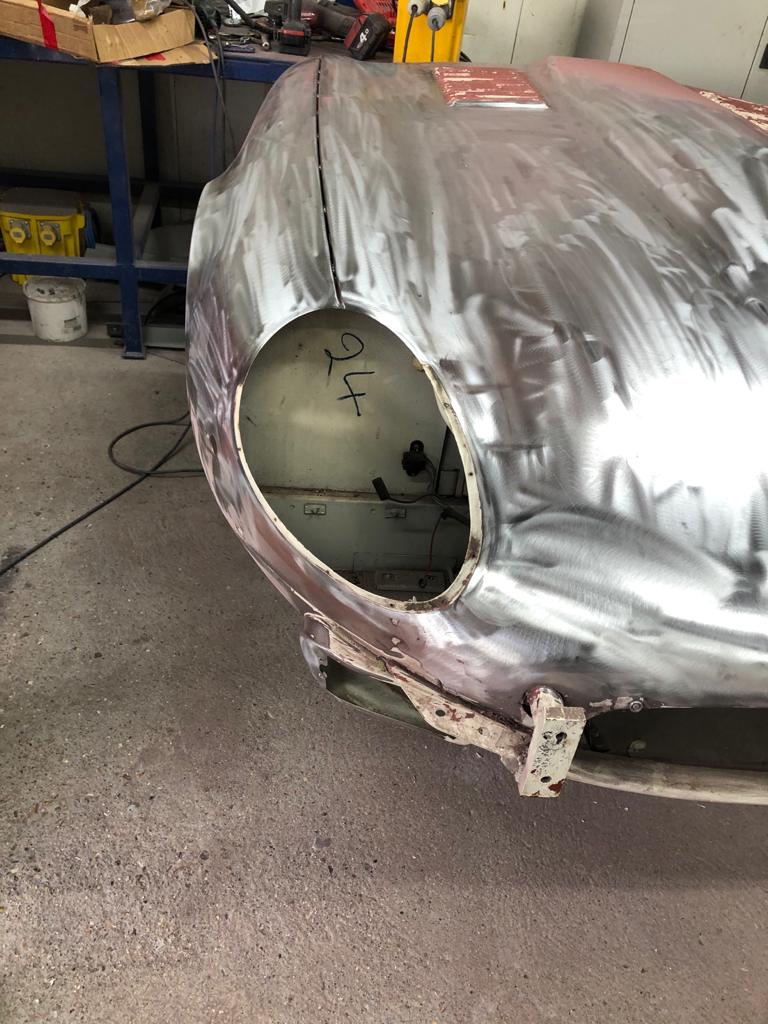
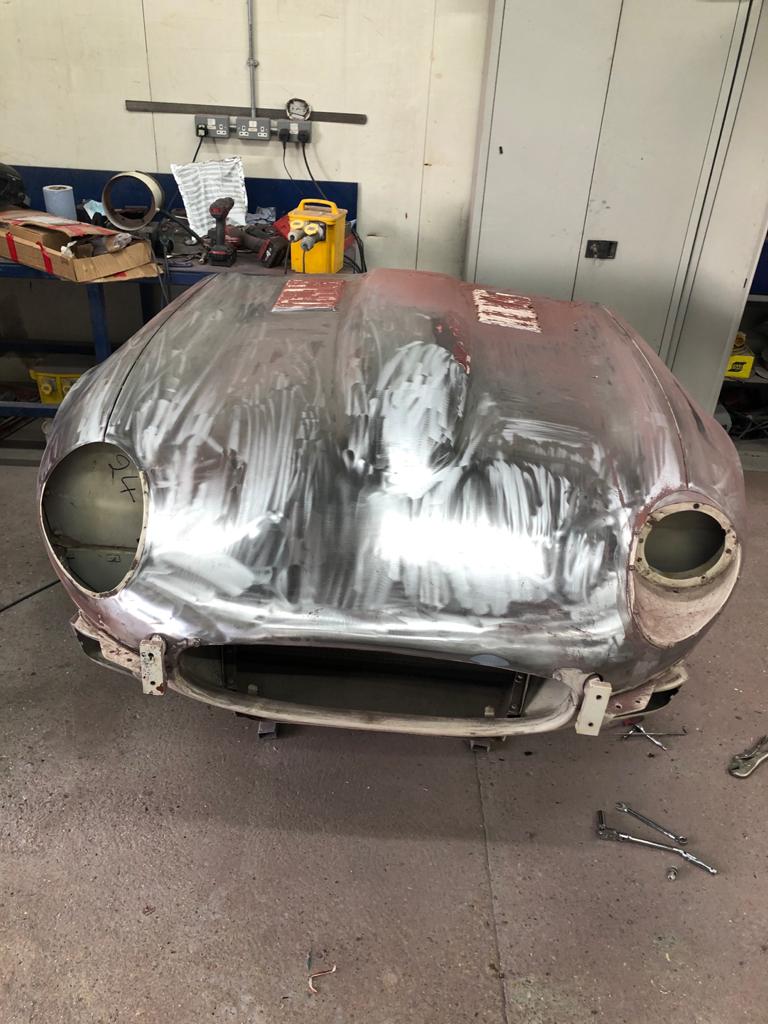
We’ve now begun stripping the paint from our 1973 Beverly Hills E-Type bonnet so that it can sit in bare metal and ask as a blank canvas to be reworked and repainted. James in the fabrication bay has started to smooth out the body and will start to correct any imperfections. The bumper also needed some fabrication and welding to repair some corrosion damage.
This is the bare metal work stage that comes before the paint prep. The fabrication bay will get the whole body down to bare metal and then make sure it all lines are perfectly and there aren’t any bumps or rust in the bodywork.
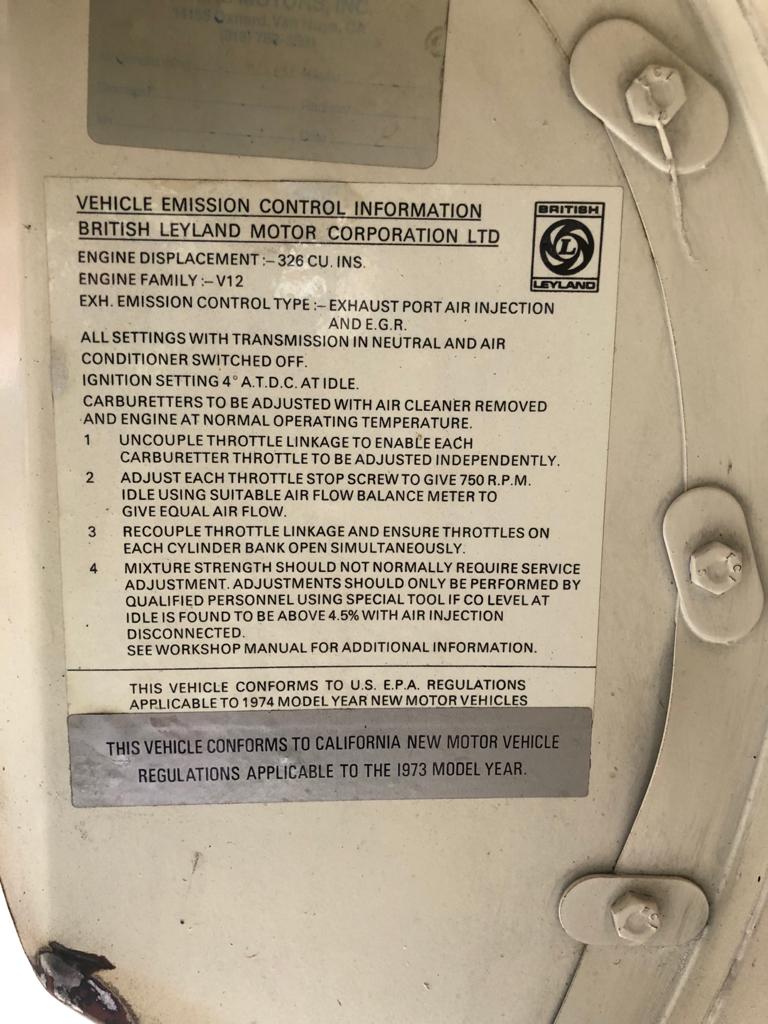
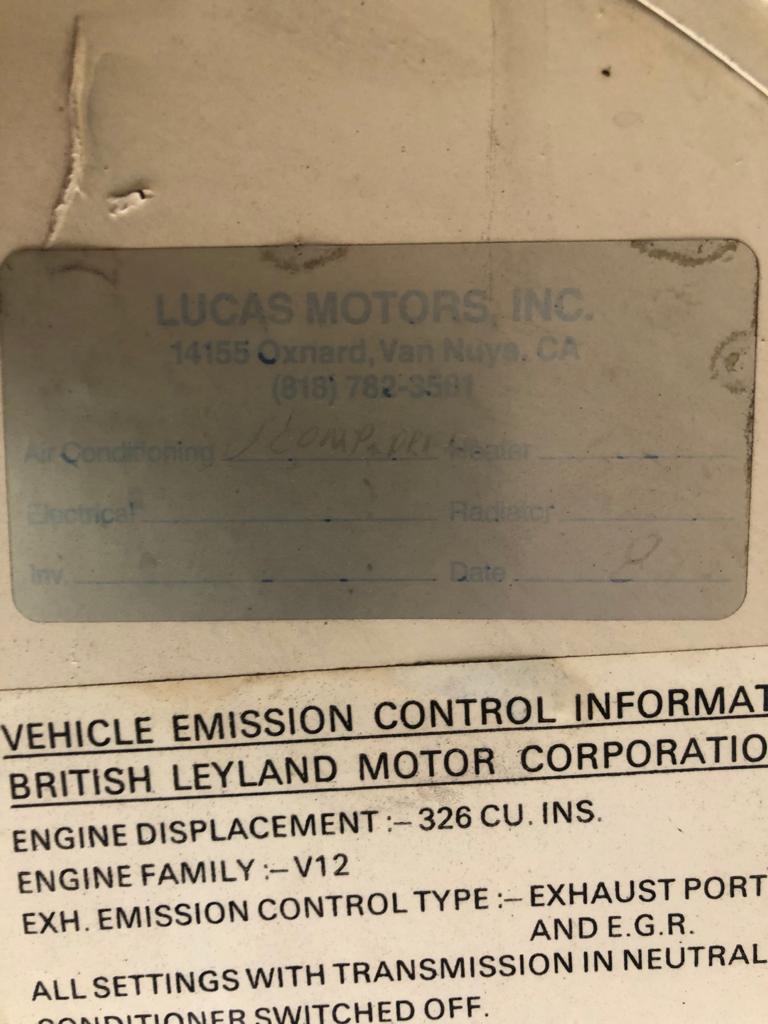
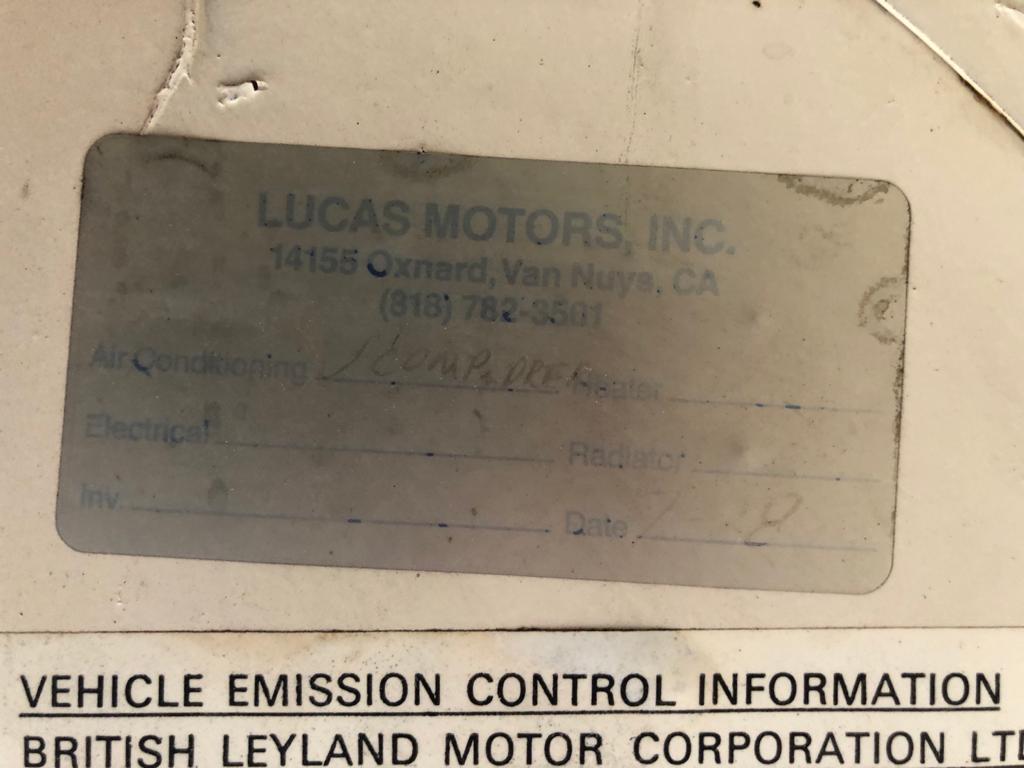
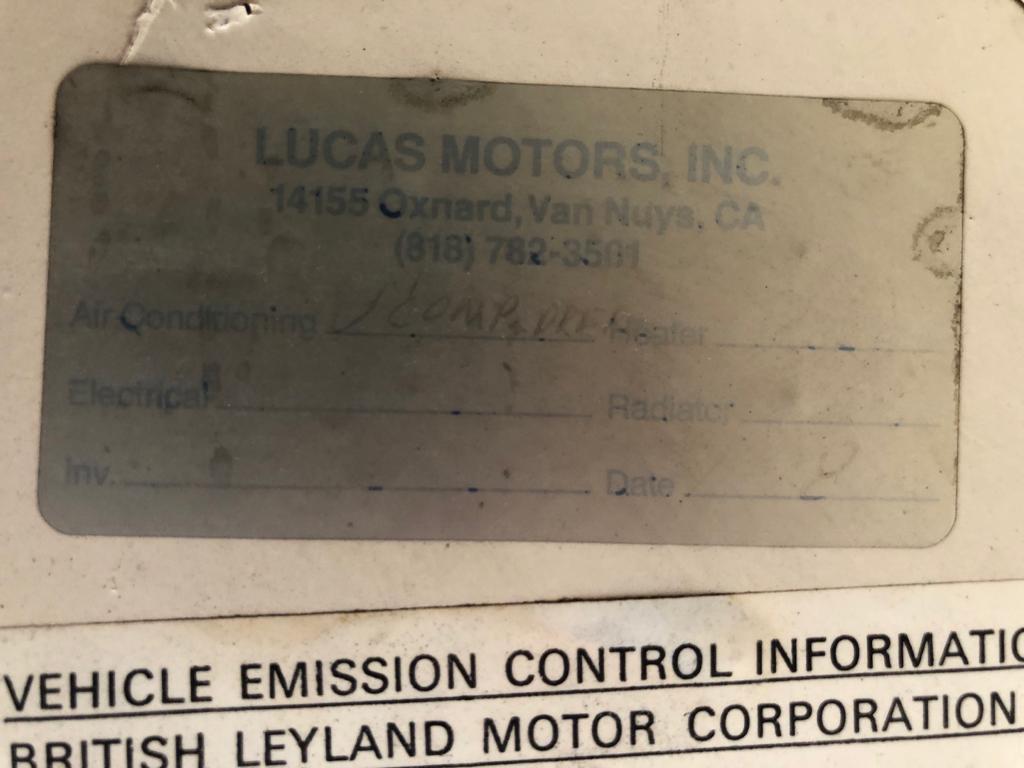
As seen below, the original British Layland factory stickers are still intact on the underside of the E-Type bonnet and go to show how original this E-Type really is. Asides from the addition of the red strips and American modifications, this Jaguar is a stunning original example. Among James tasks has been to take off the American standardised bumper and weld in the hole so that the original Jaguar chrome one can be re-fitted.


Scott has also continued to dismantle the body of the E-Type too.

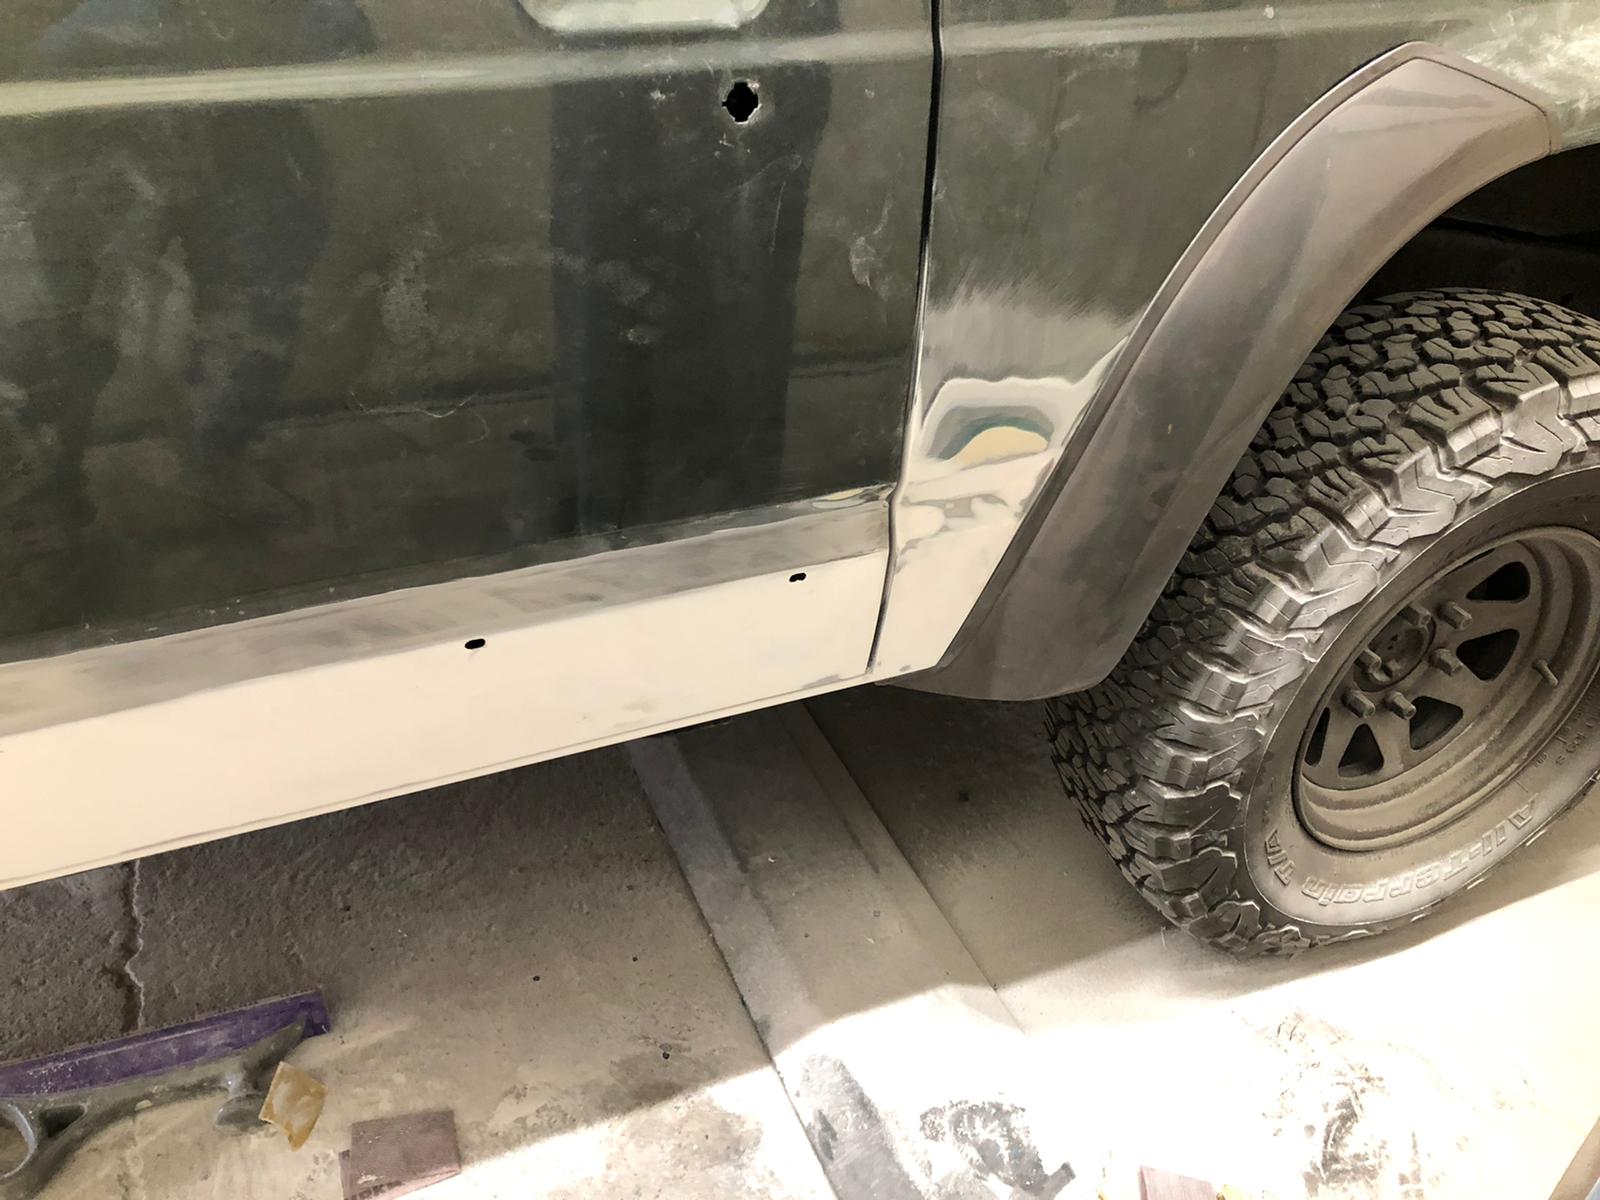
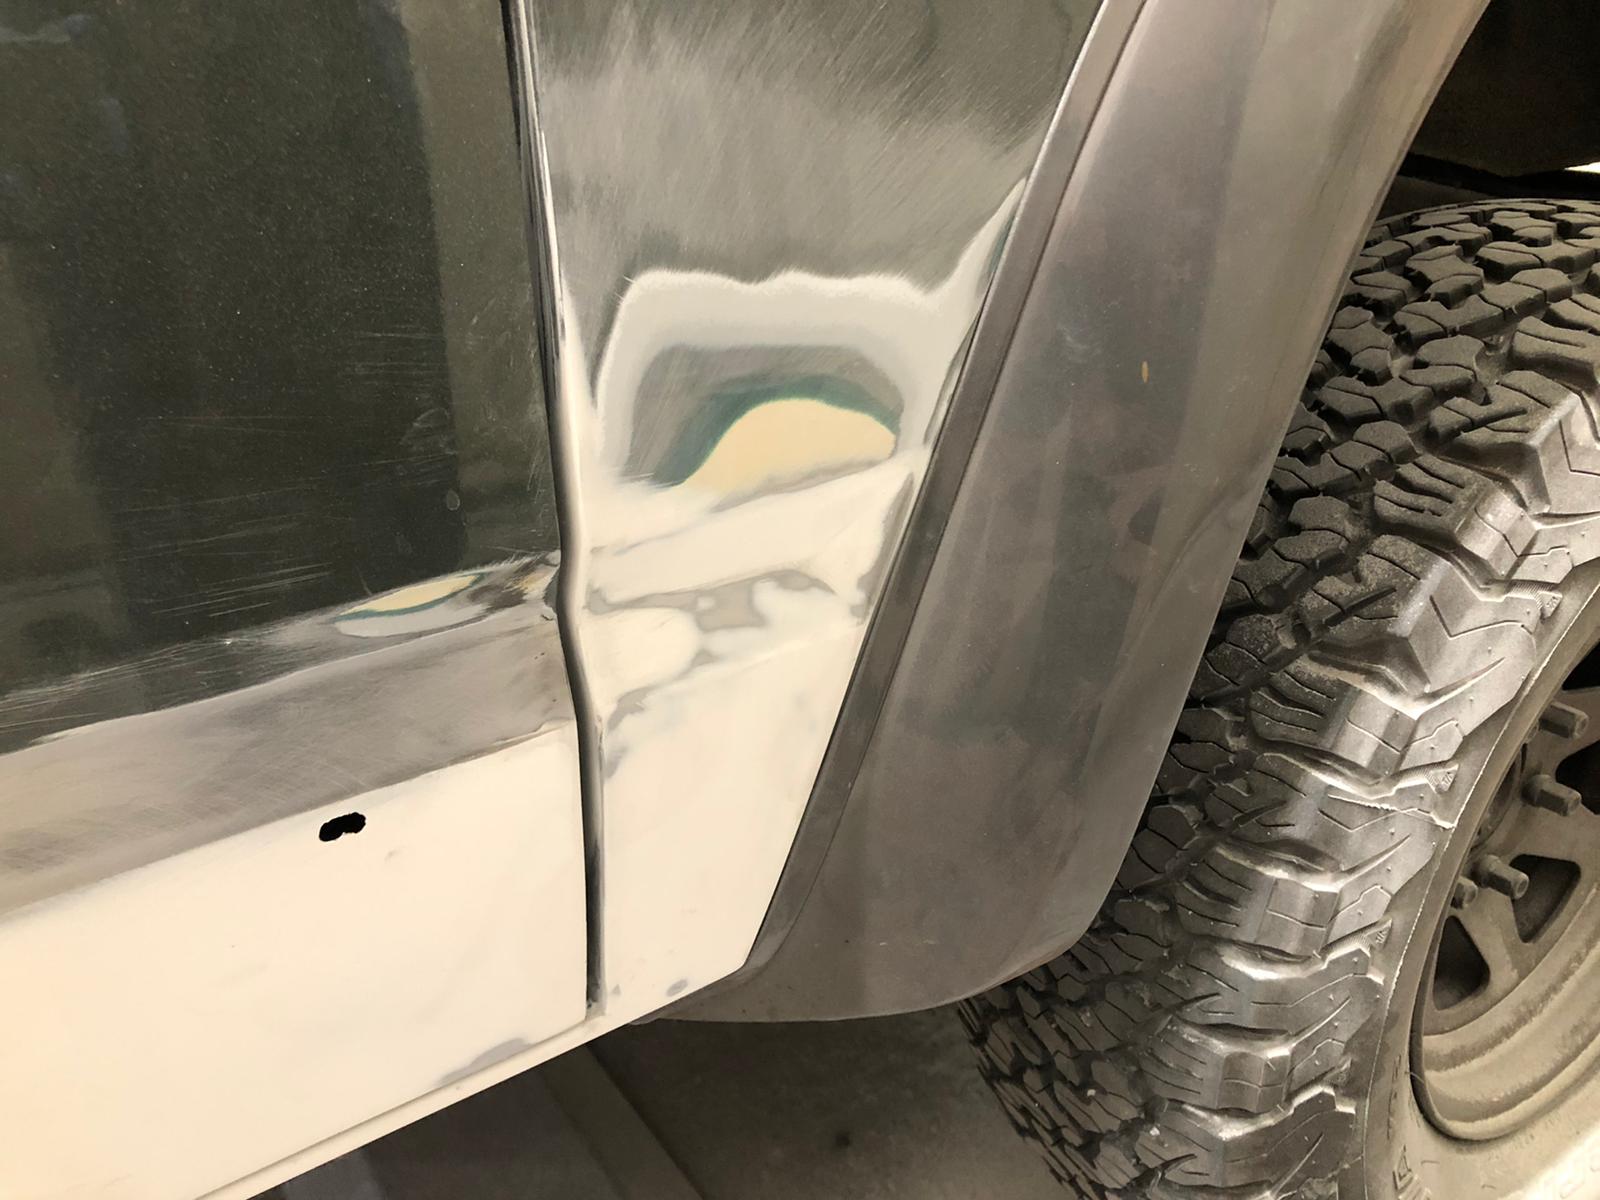
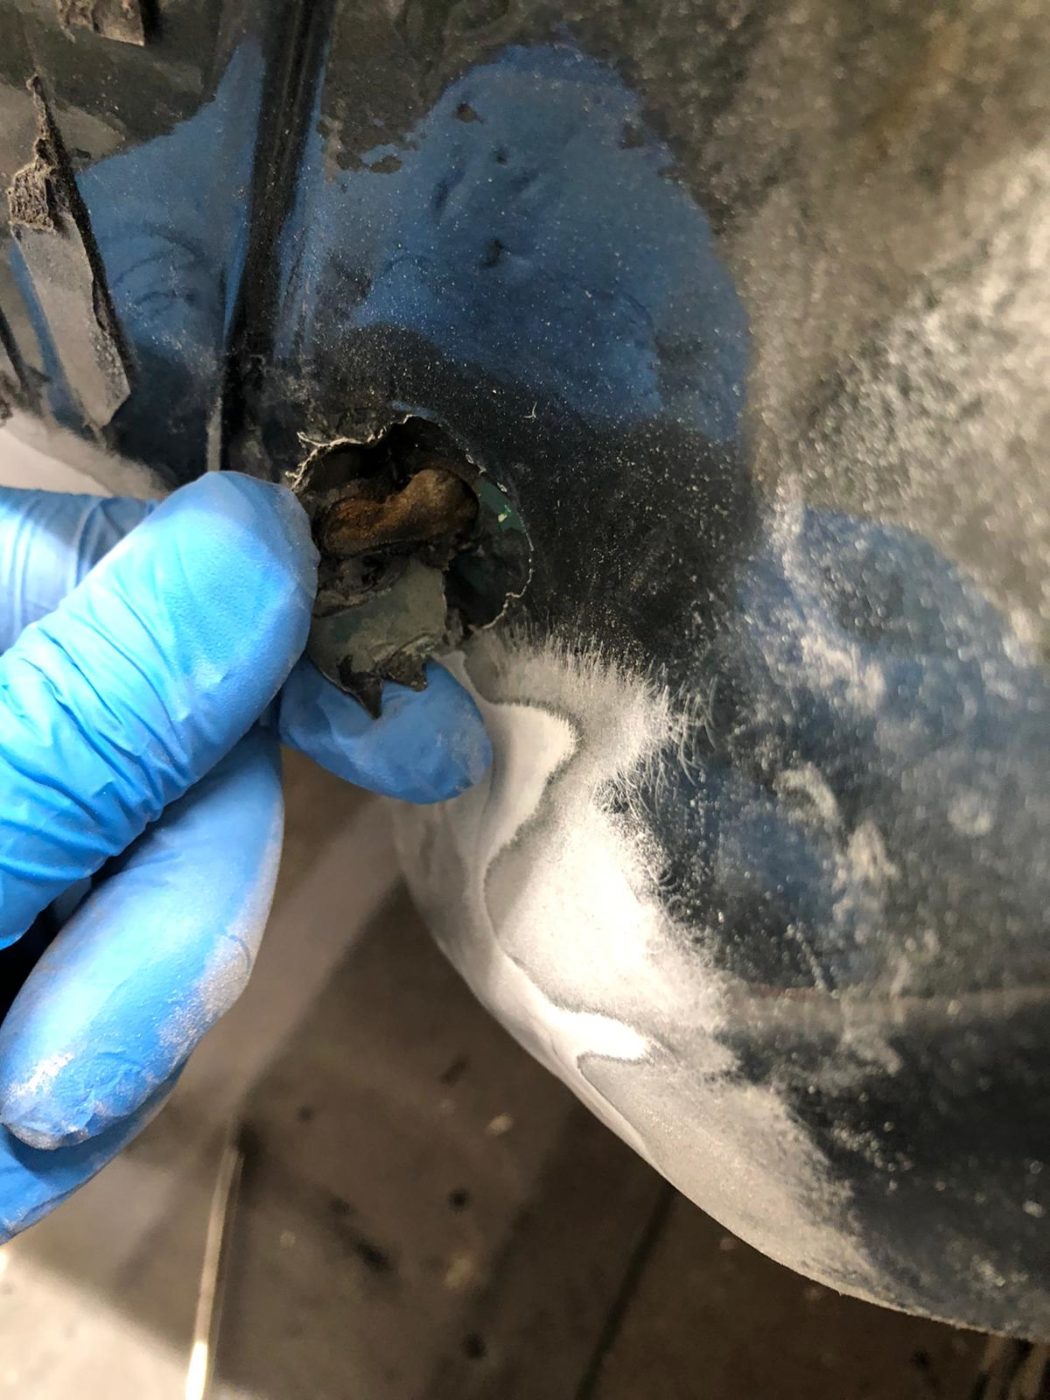
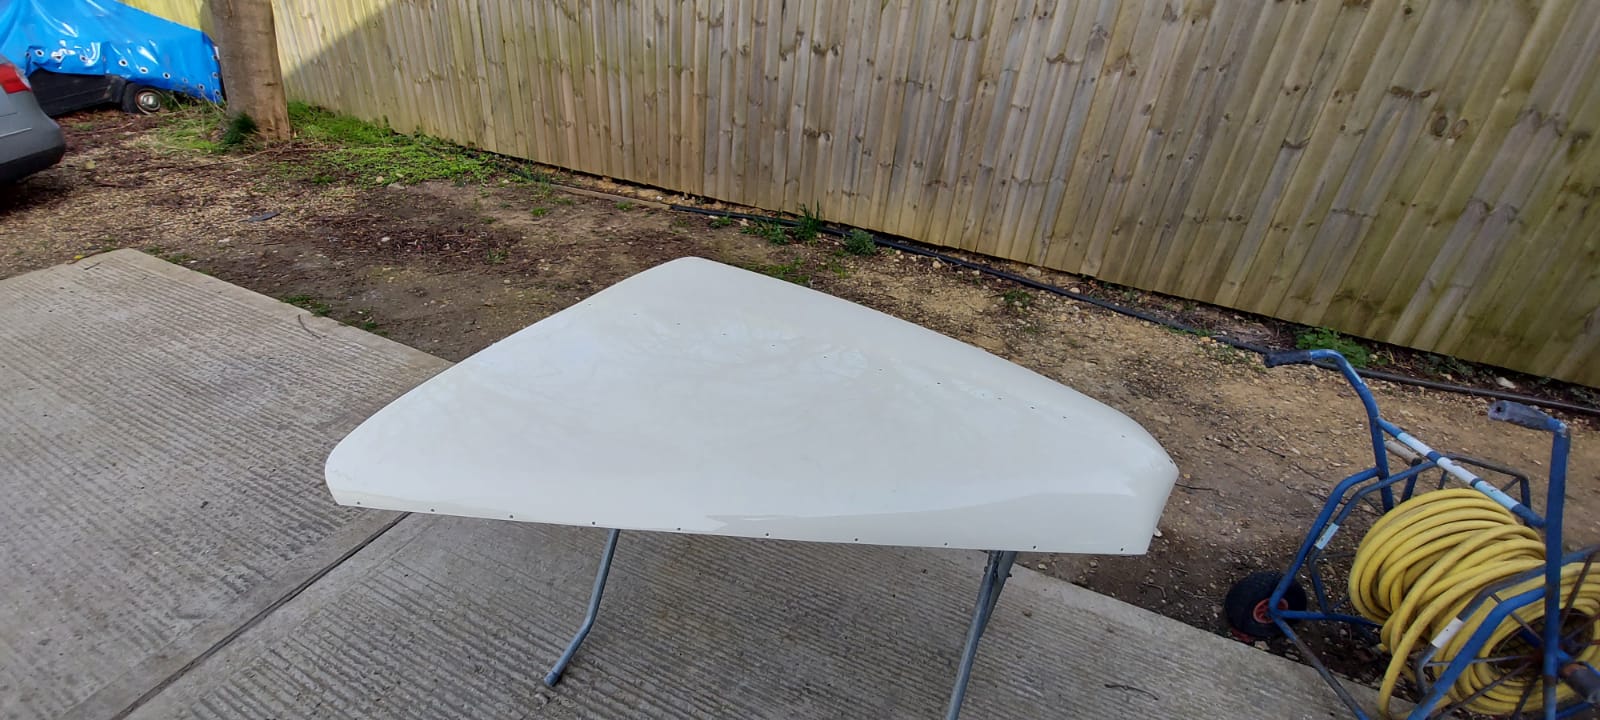
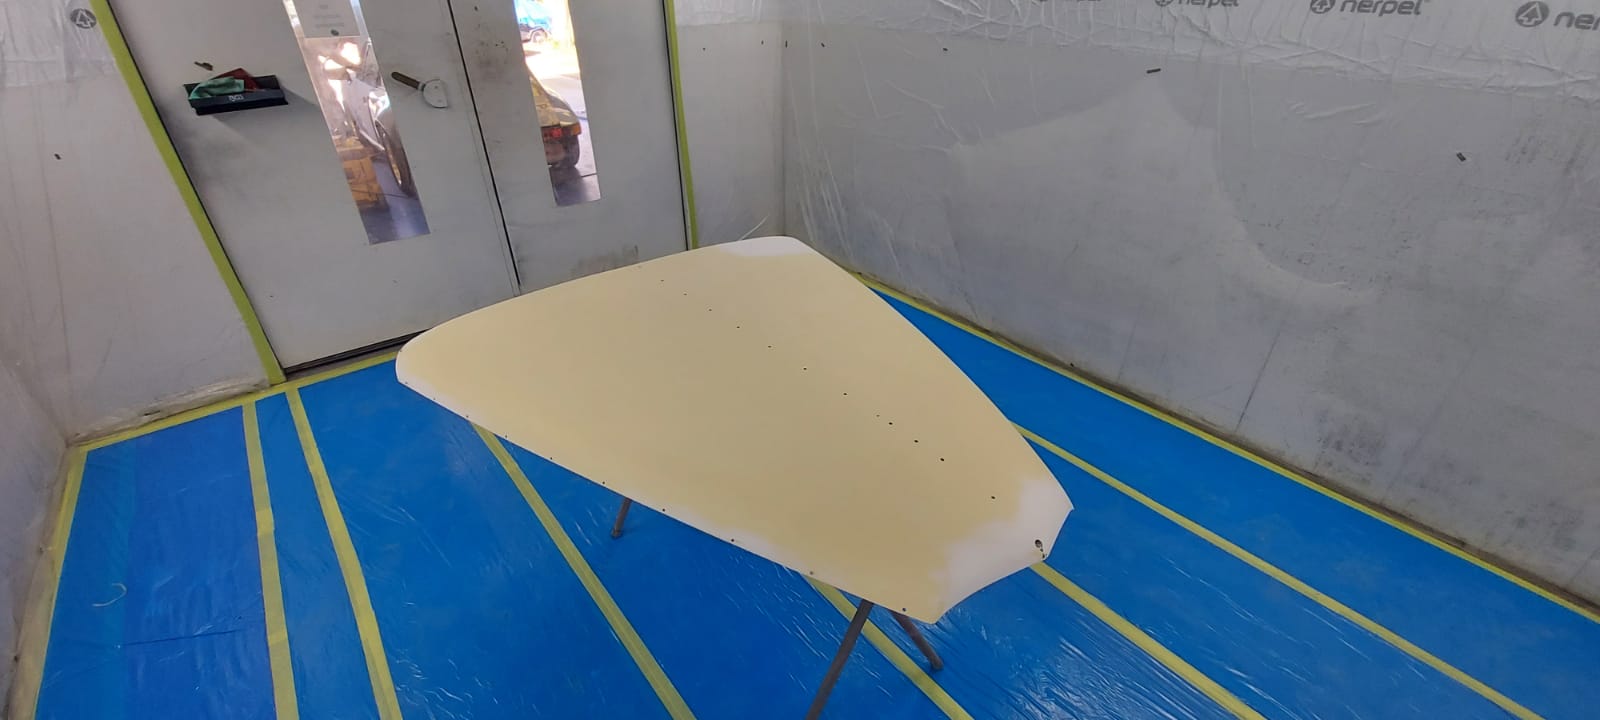
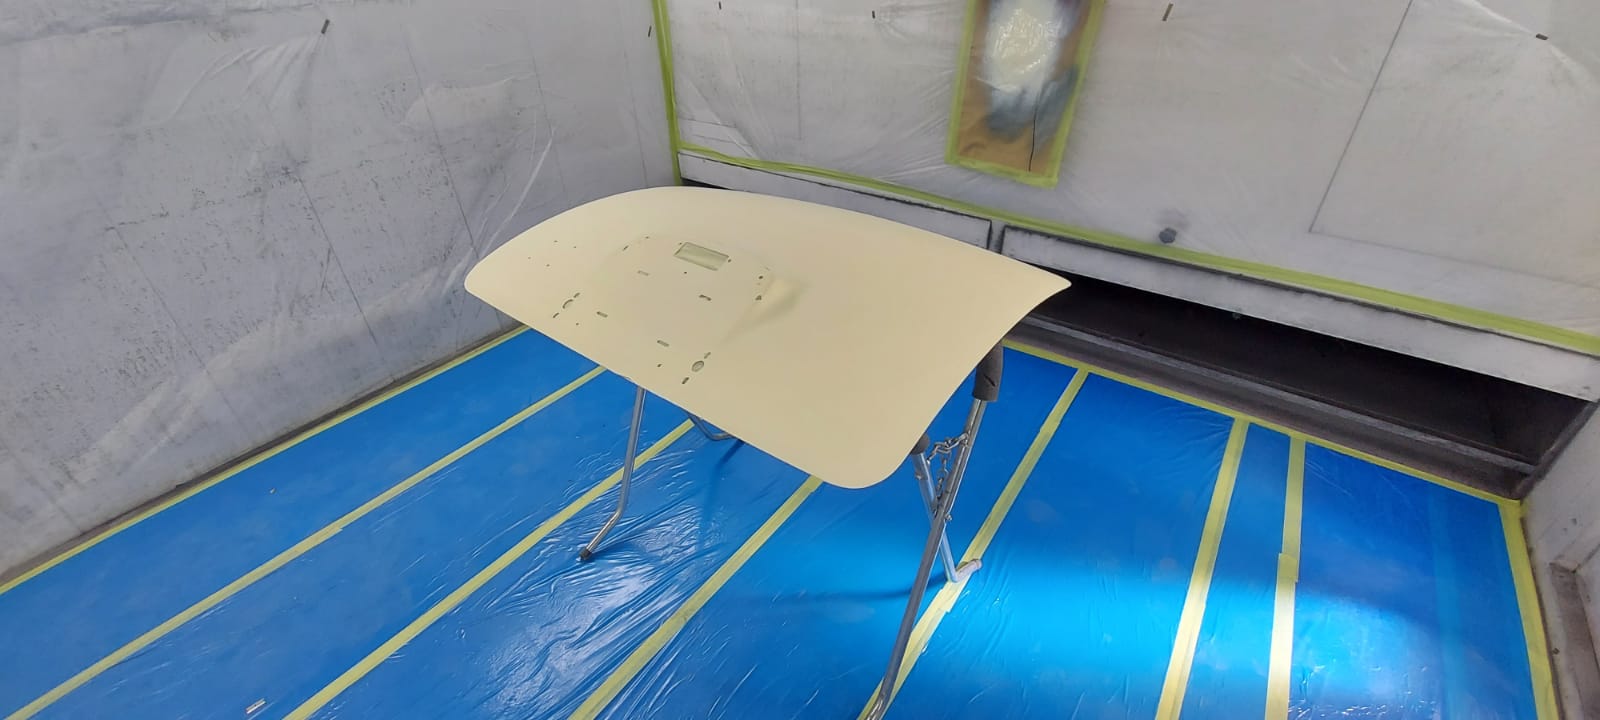
This 2000 Honda S2000 has come in for some paint and rust corrections on its wheel arches, boot, bonnet and side panels. These minor imperfections are best caught early before the rust spreads to something more insidious.
The fabrication bay and paint shop will be working together to ensure that these minor imperfections don’t become major.

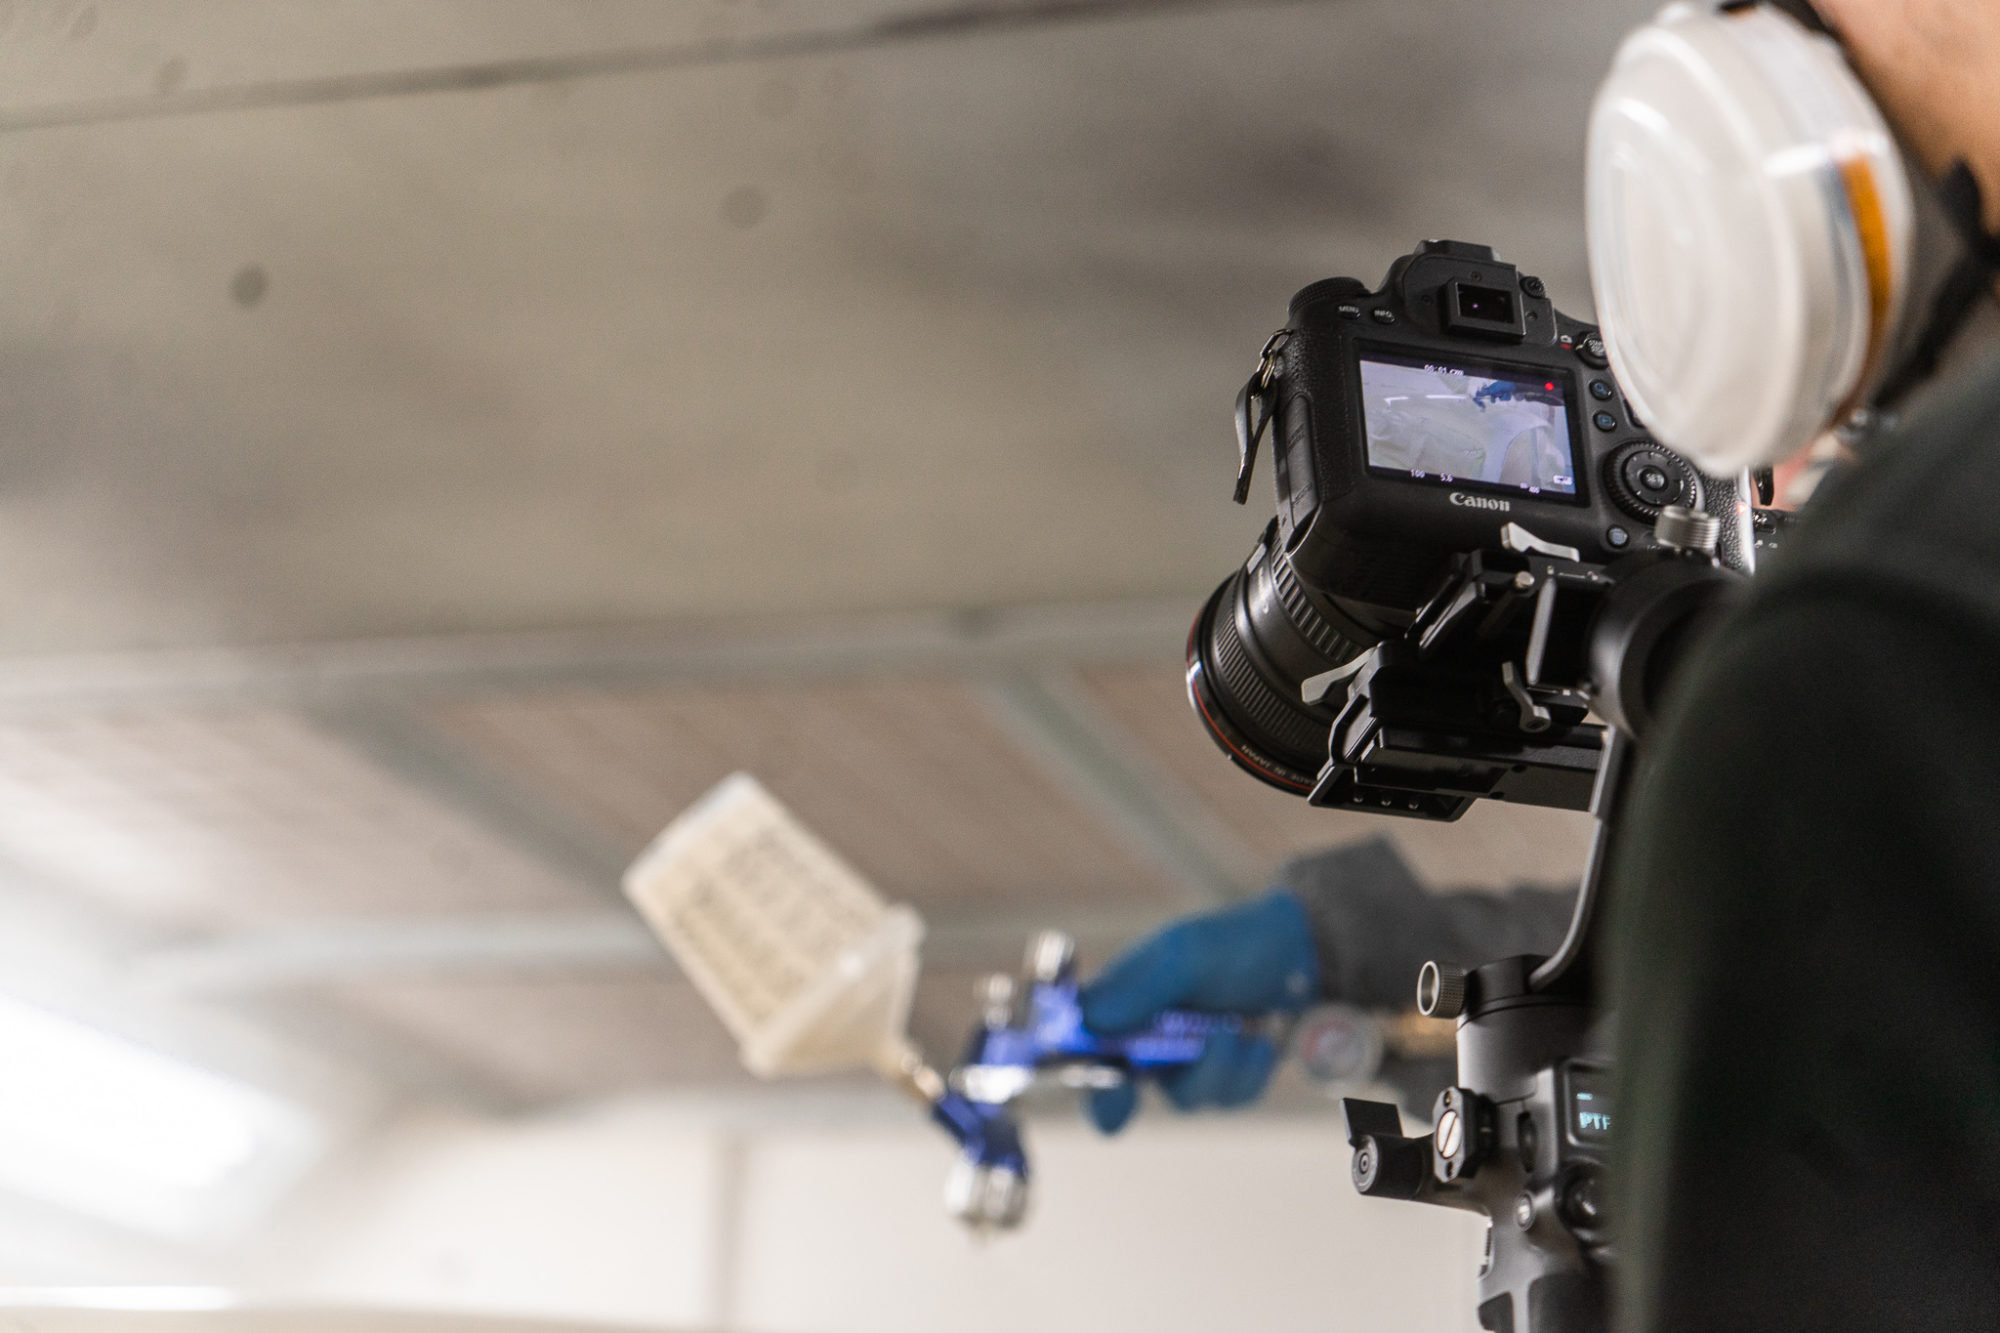
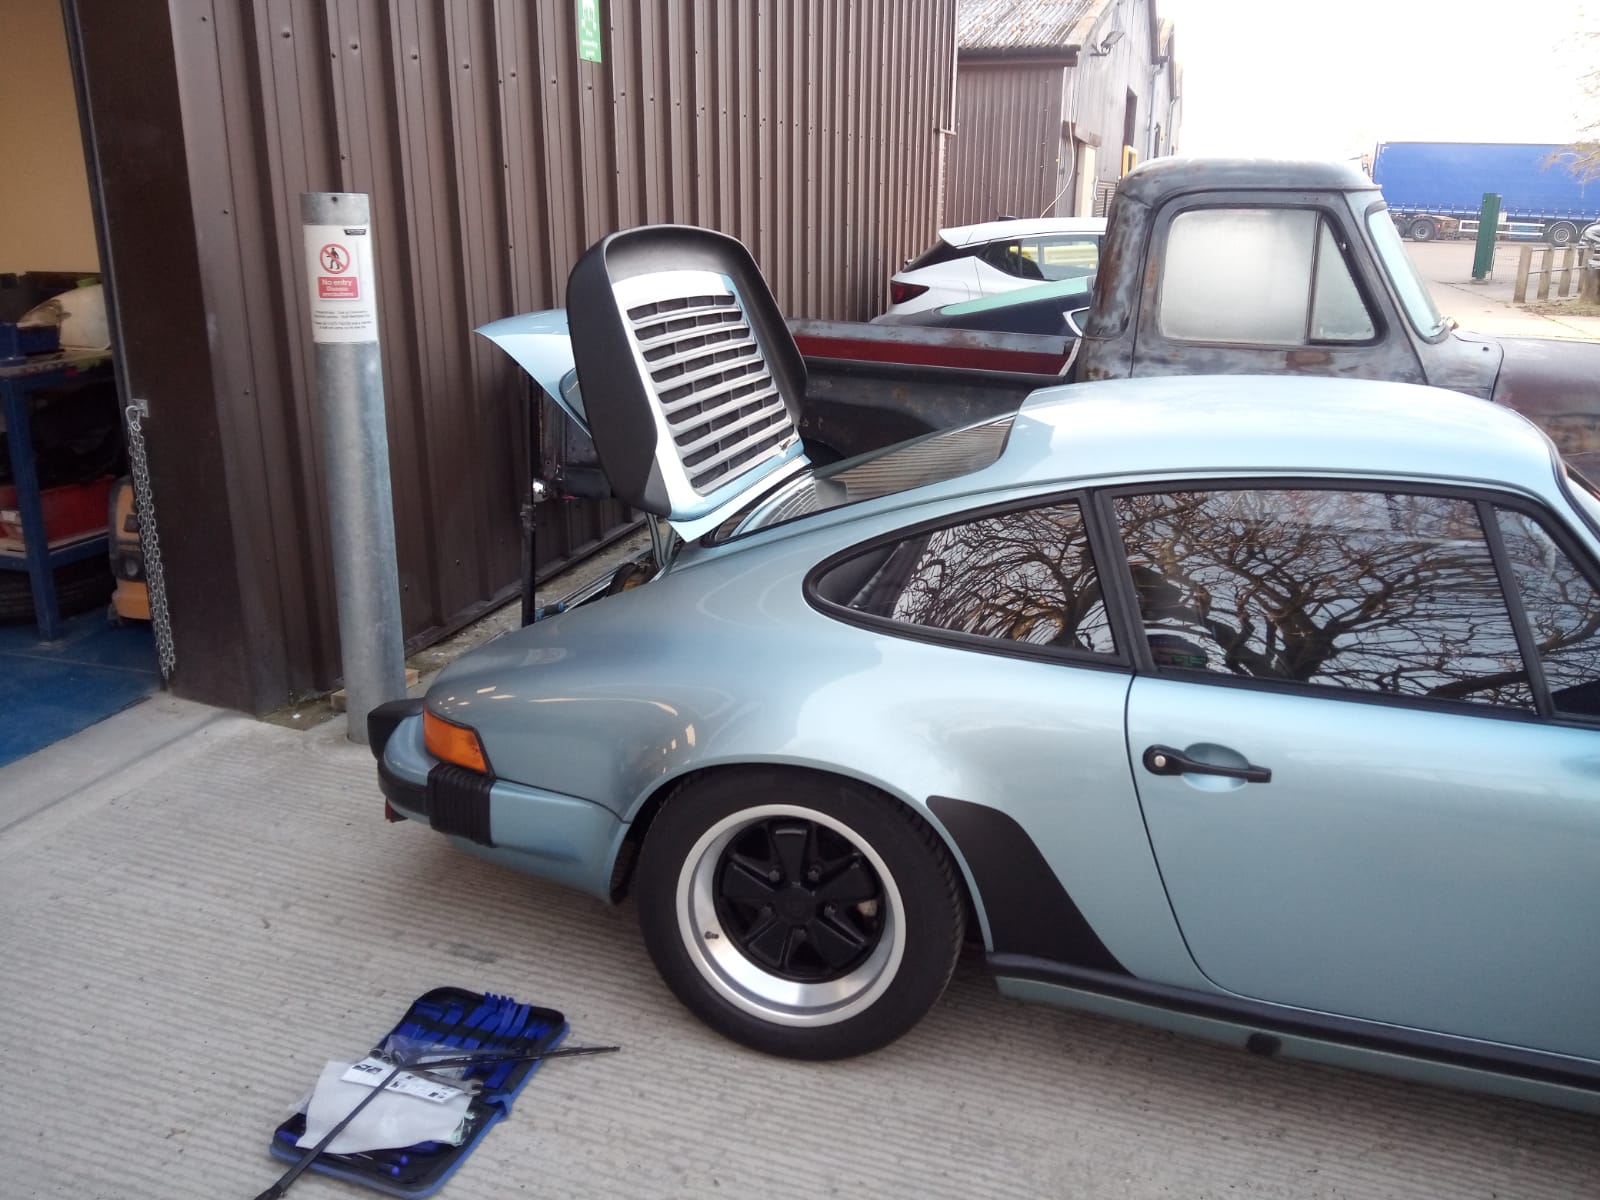
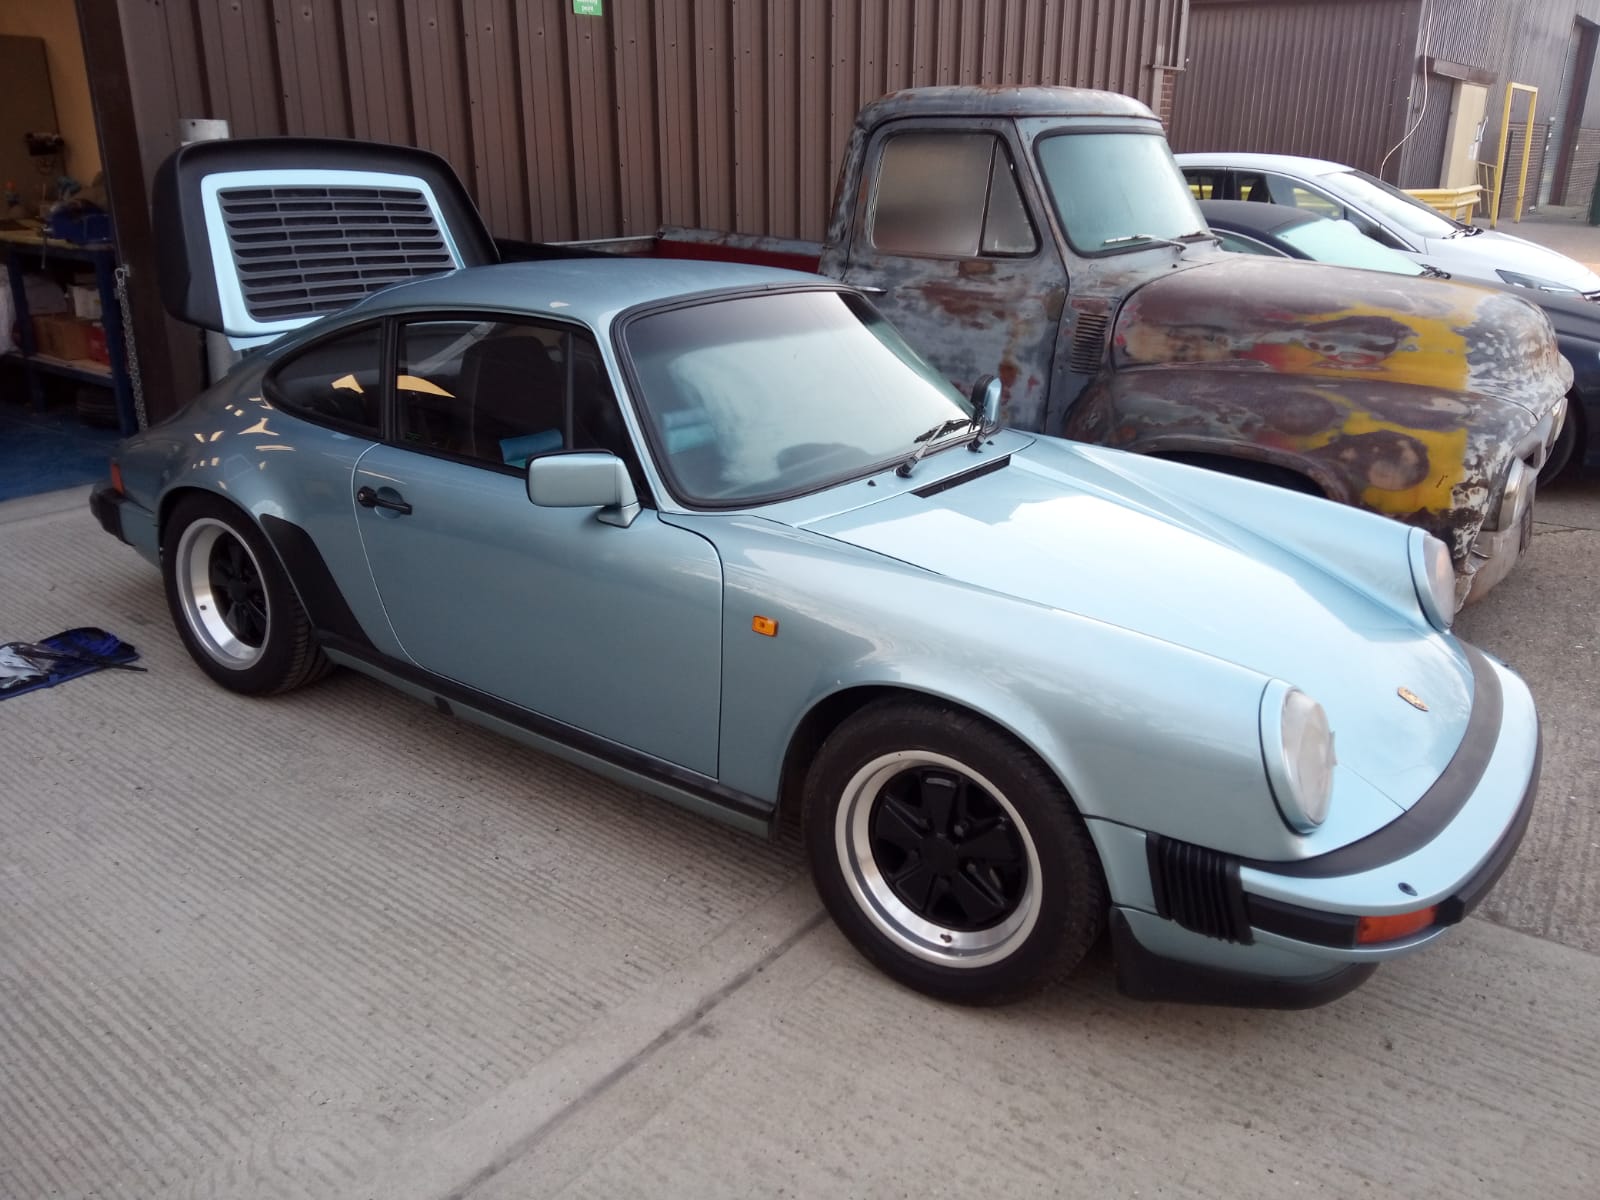
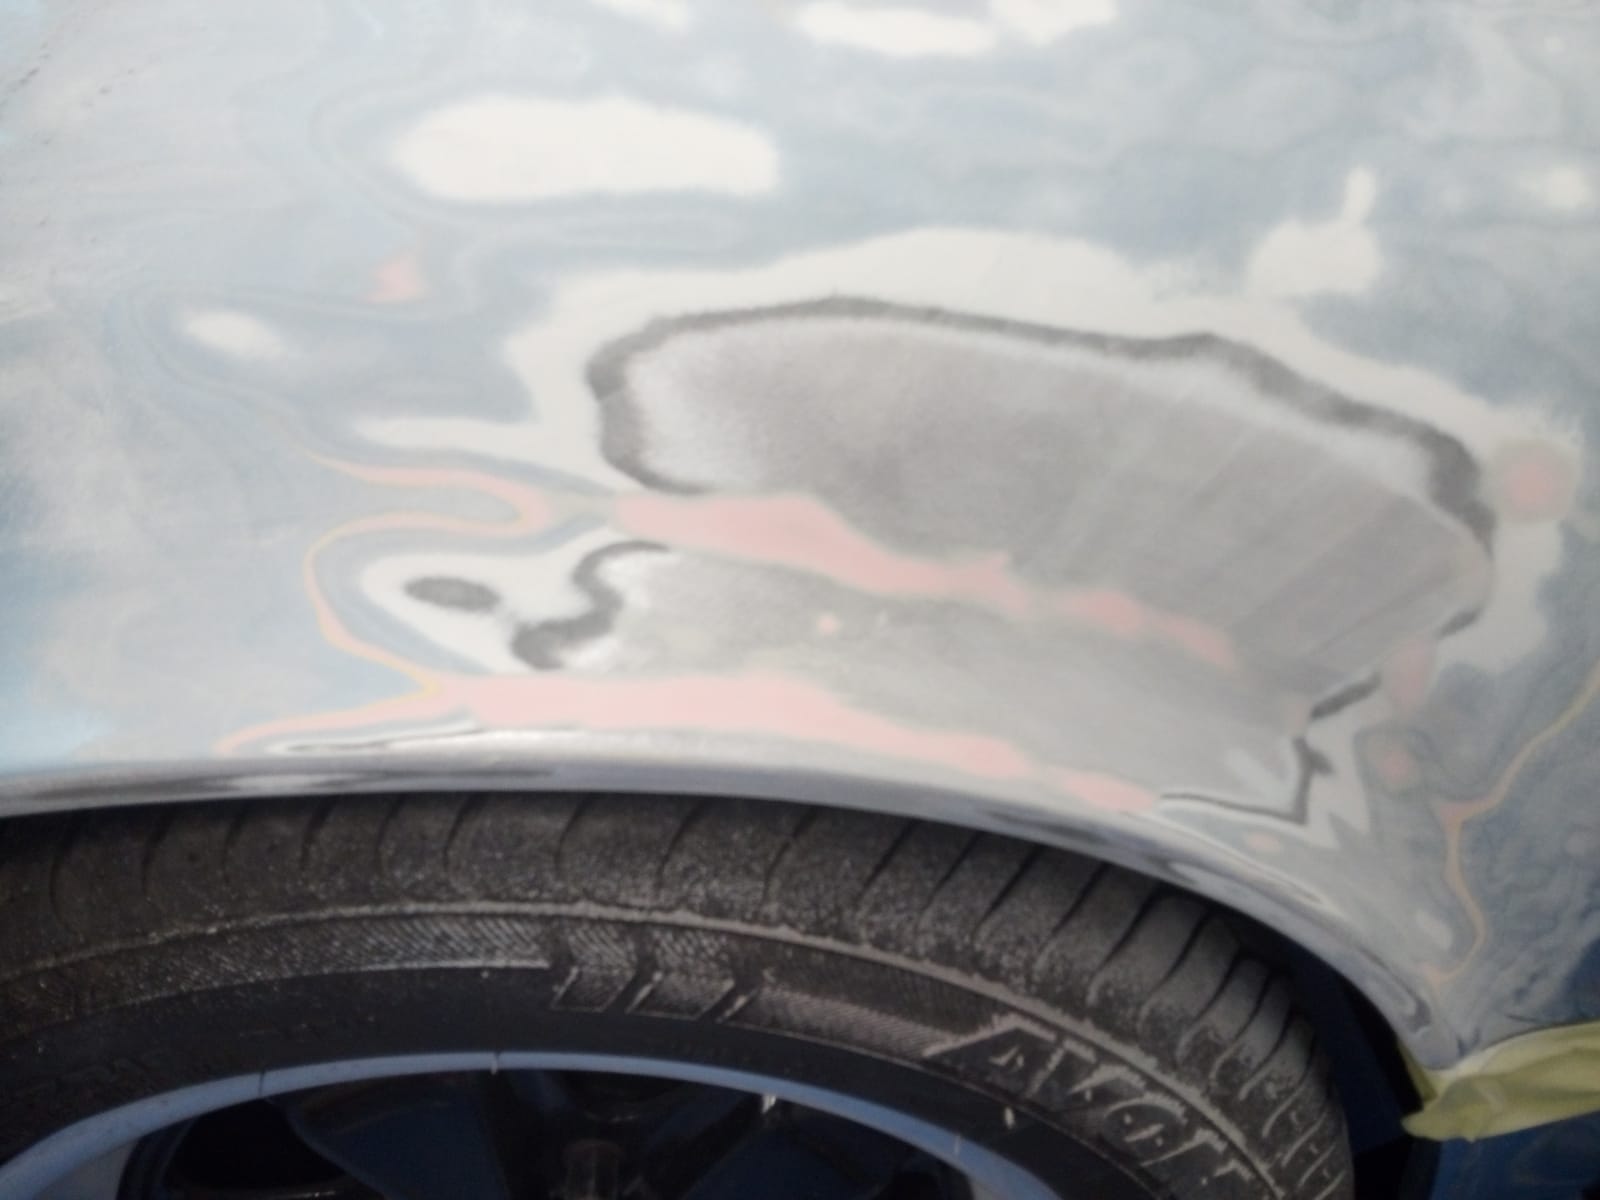
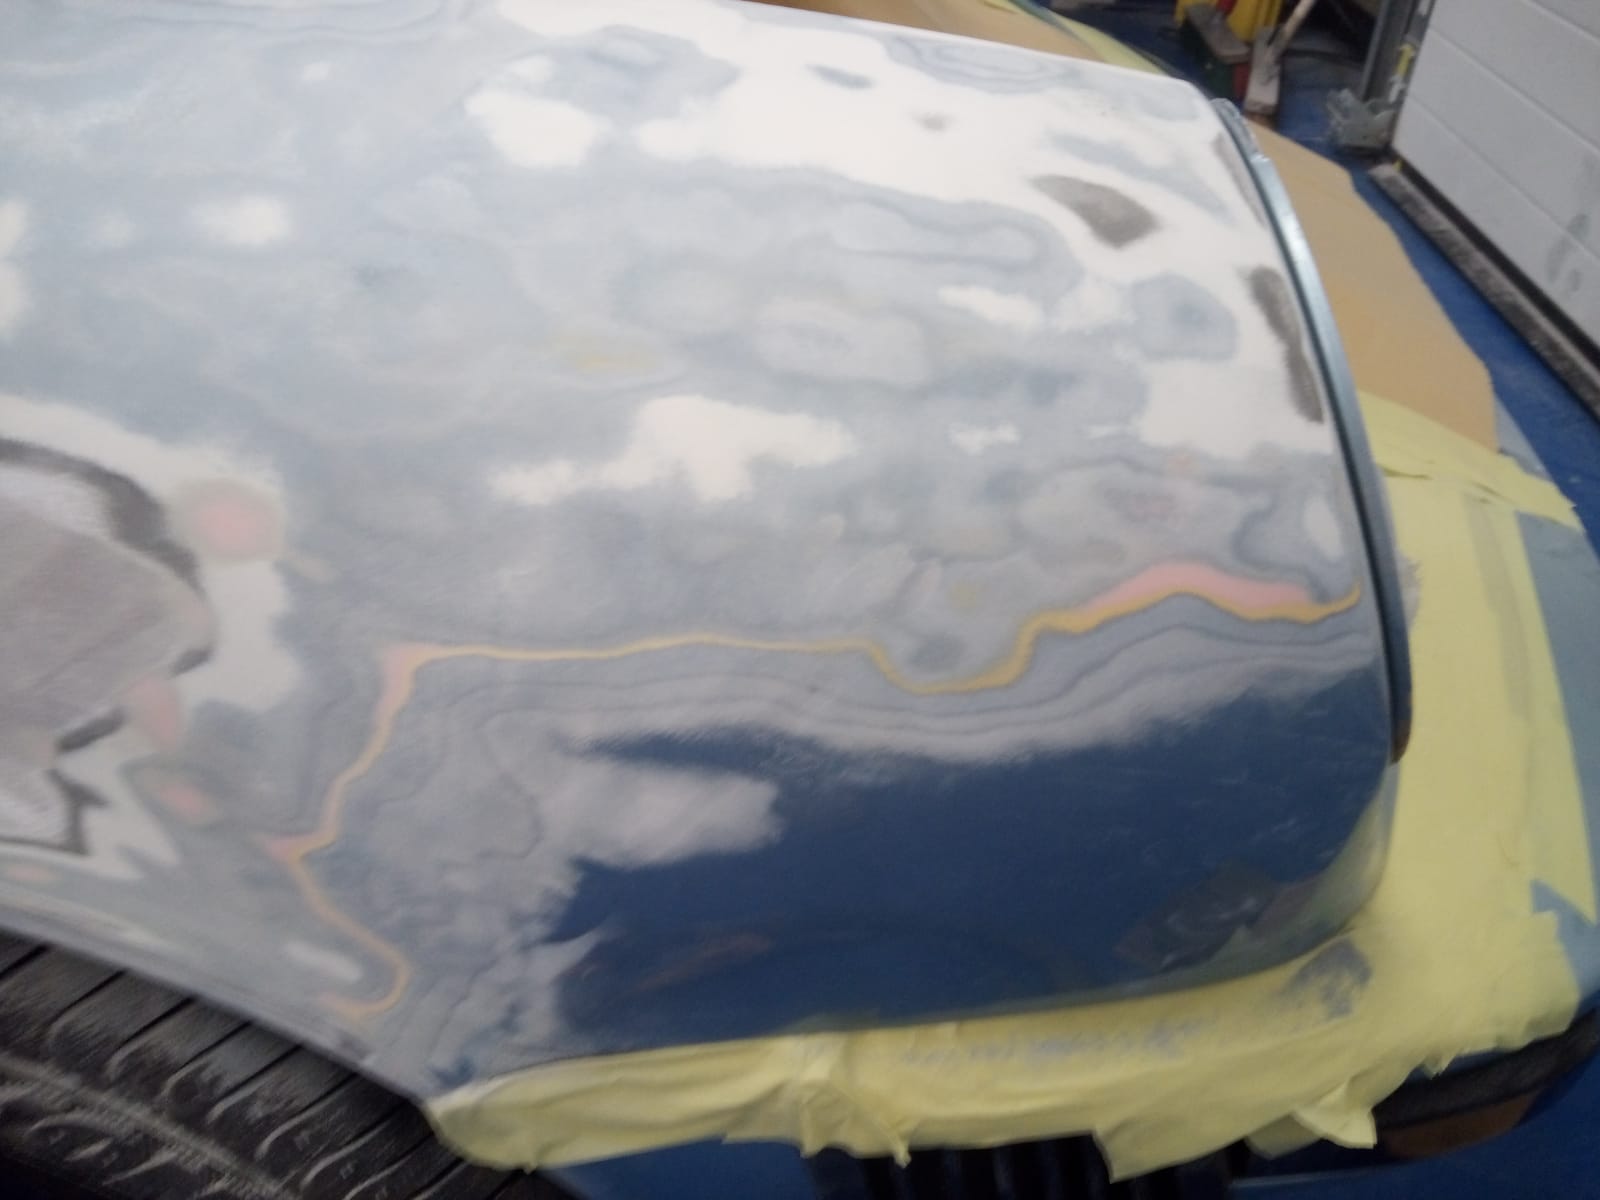
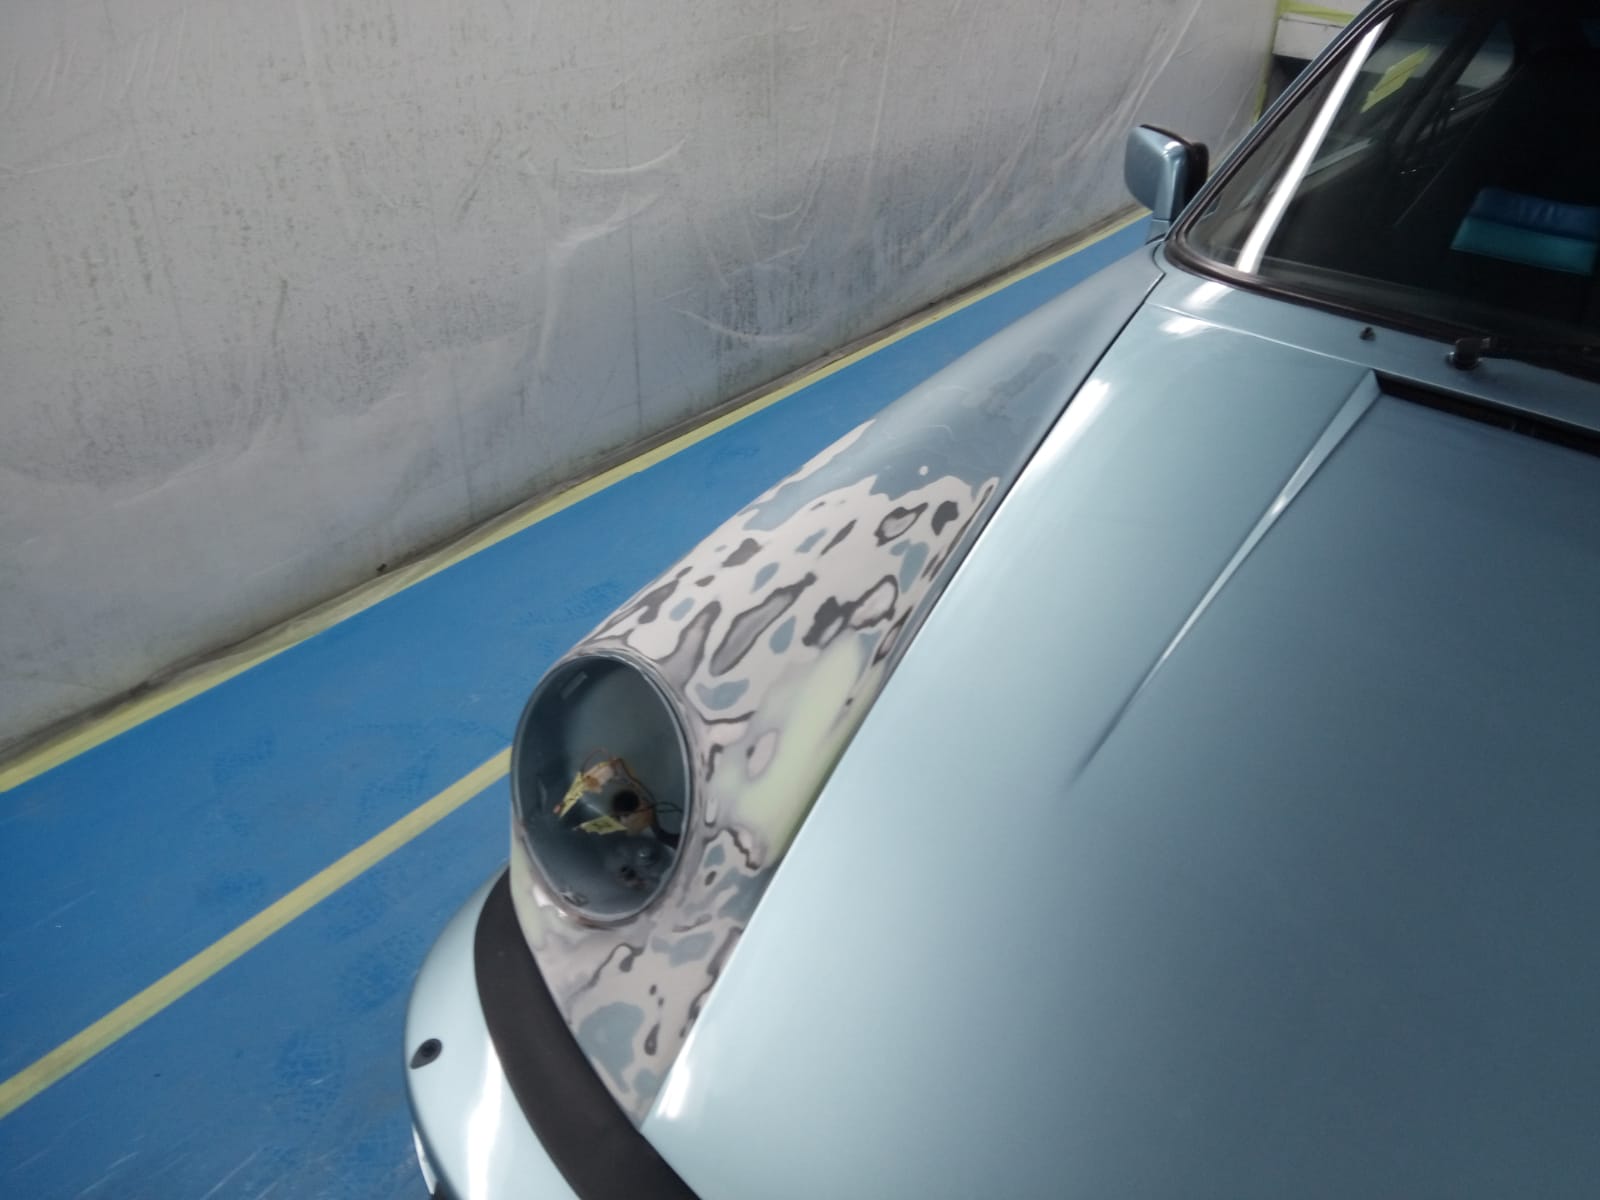
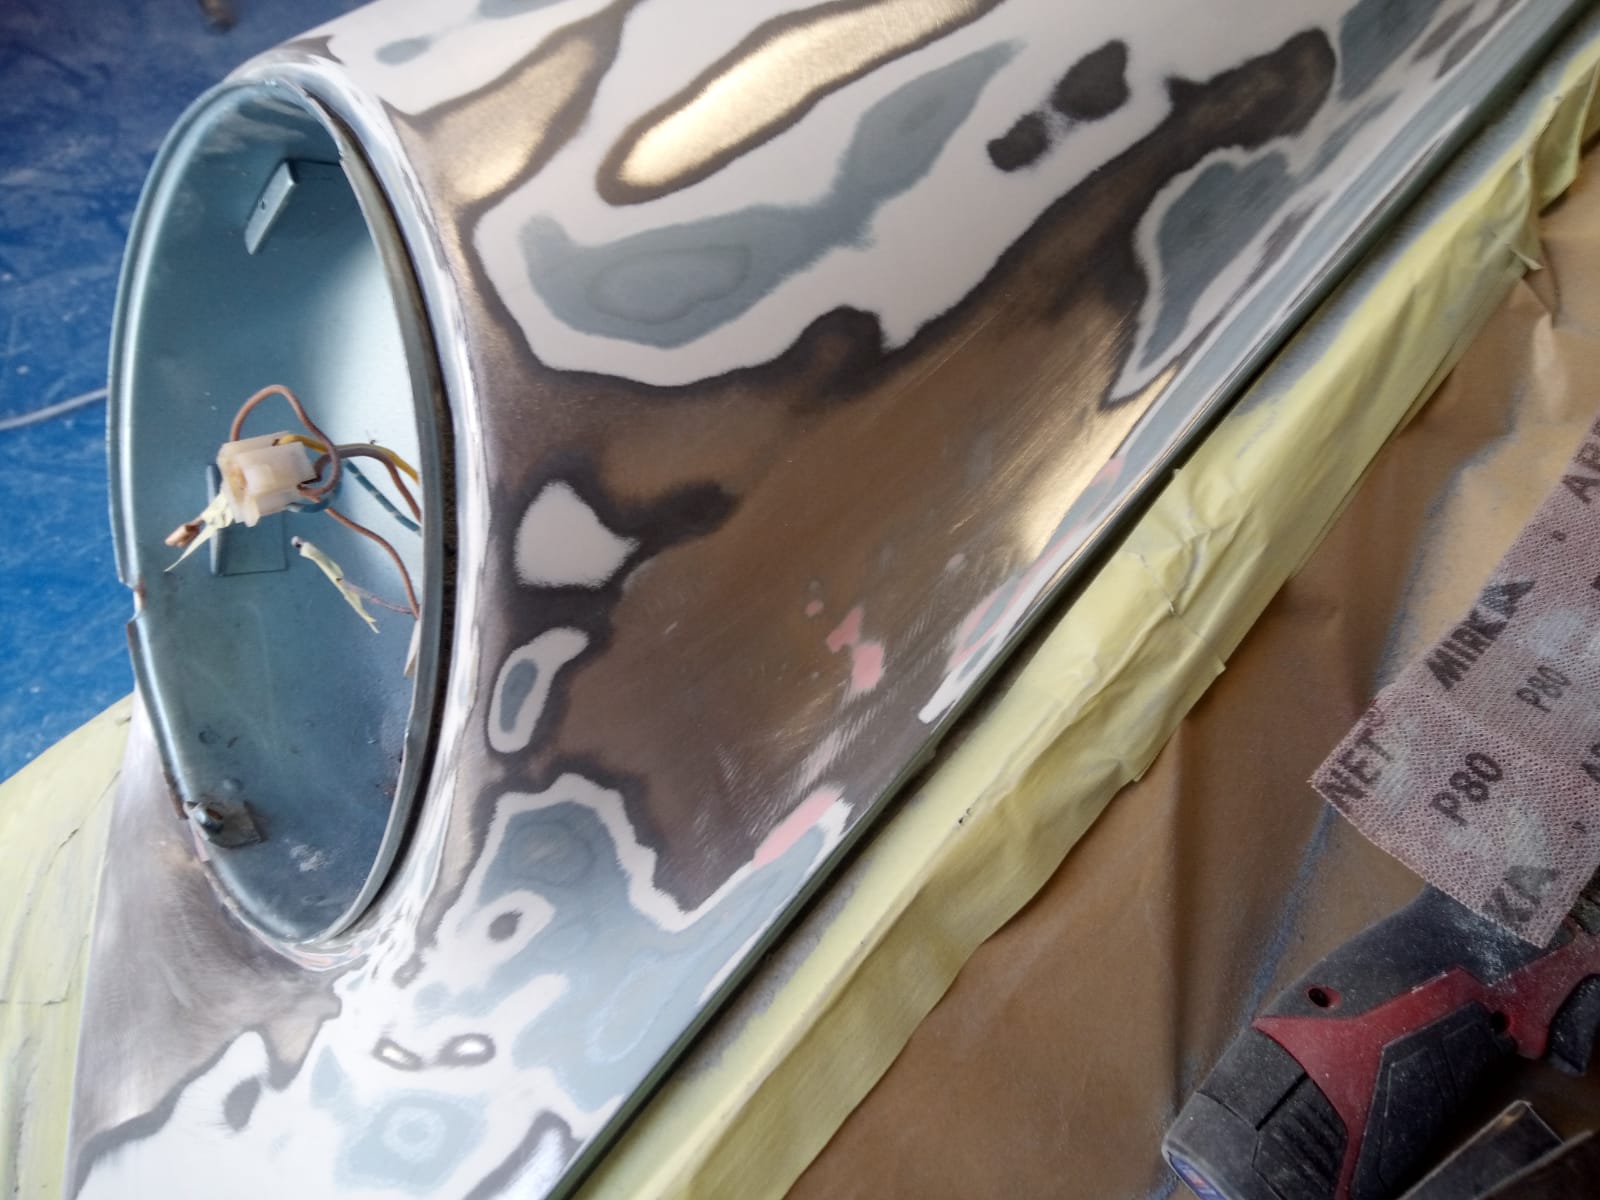
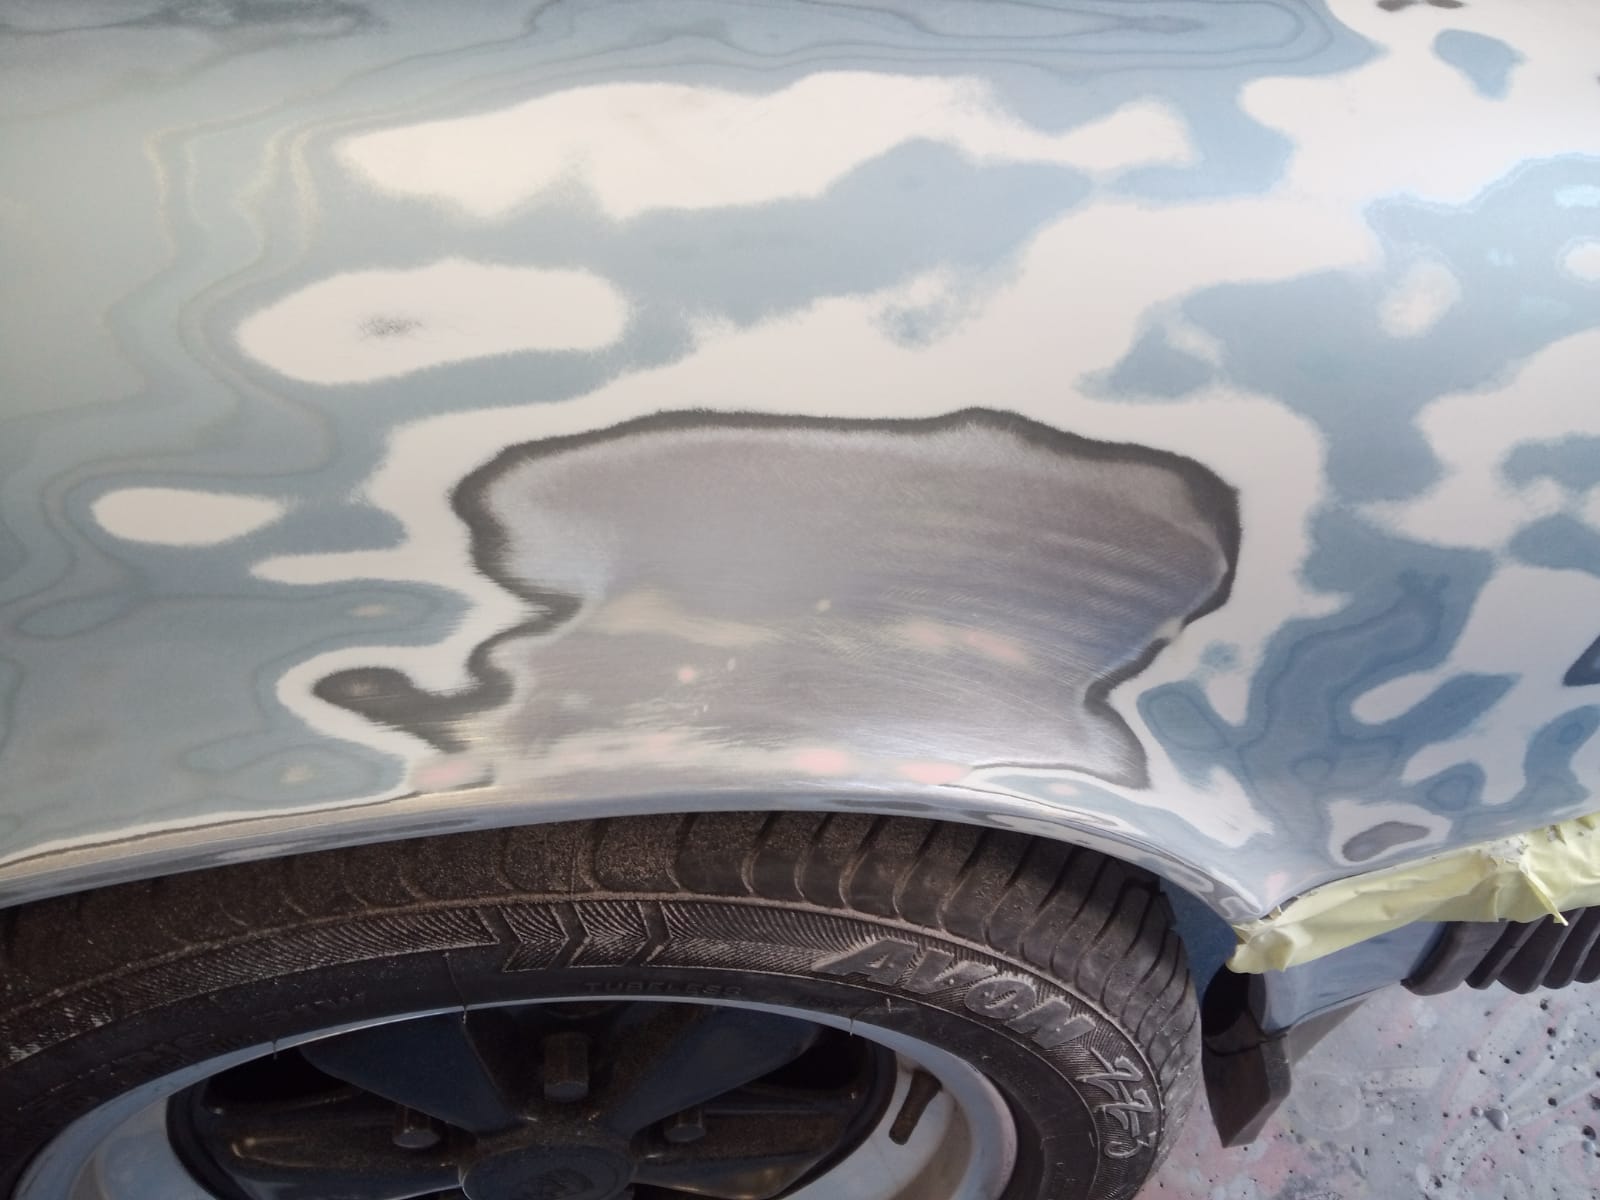
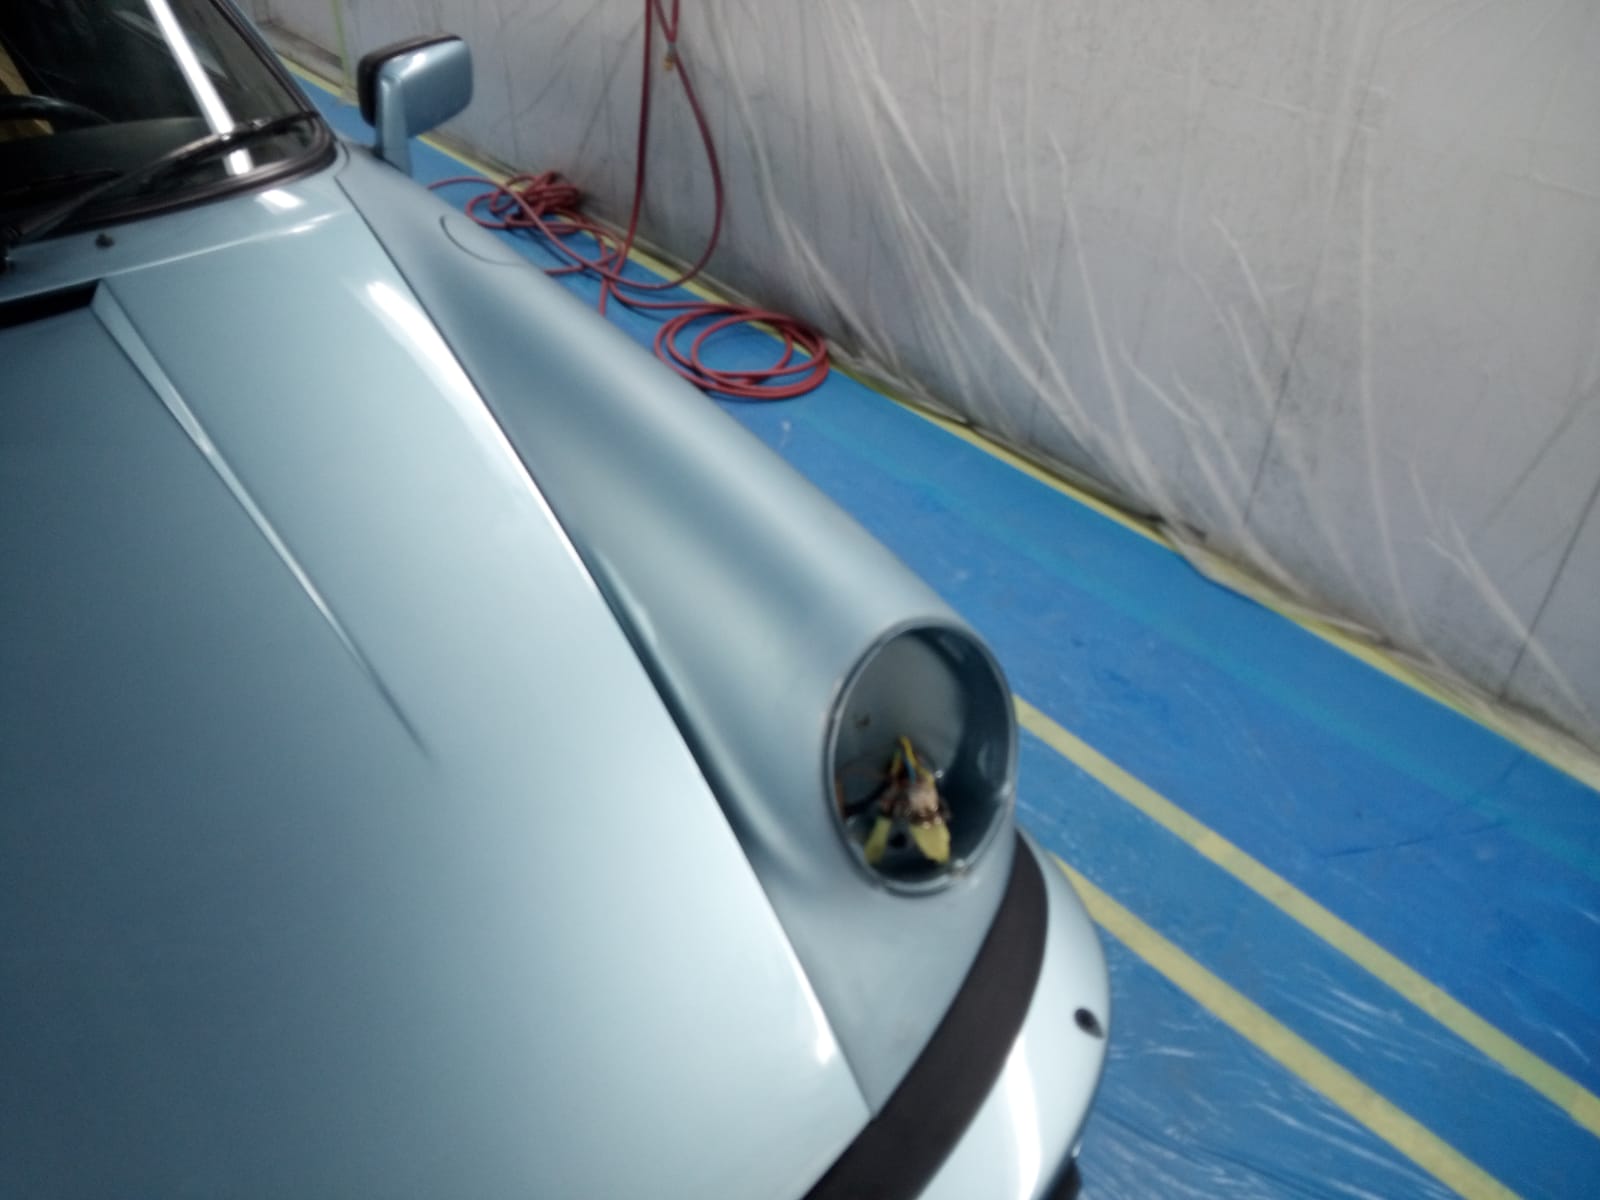
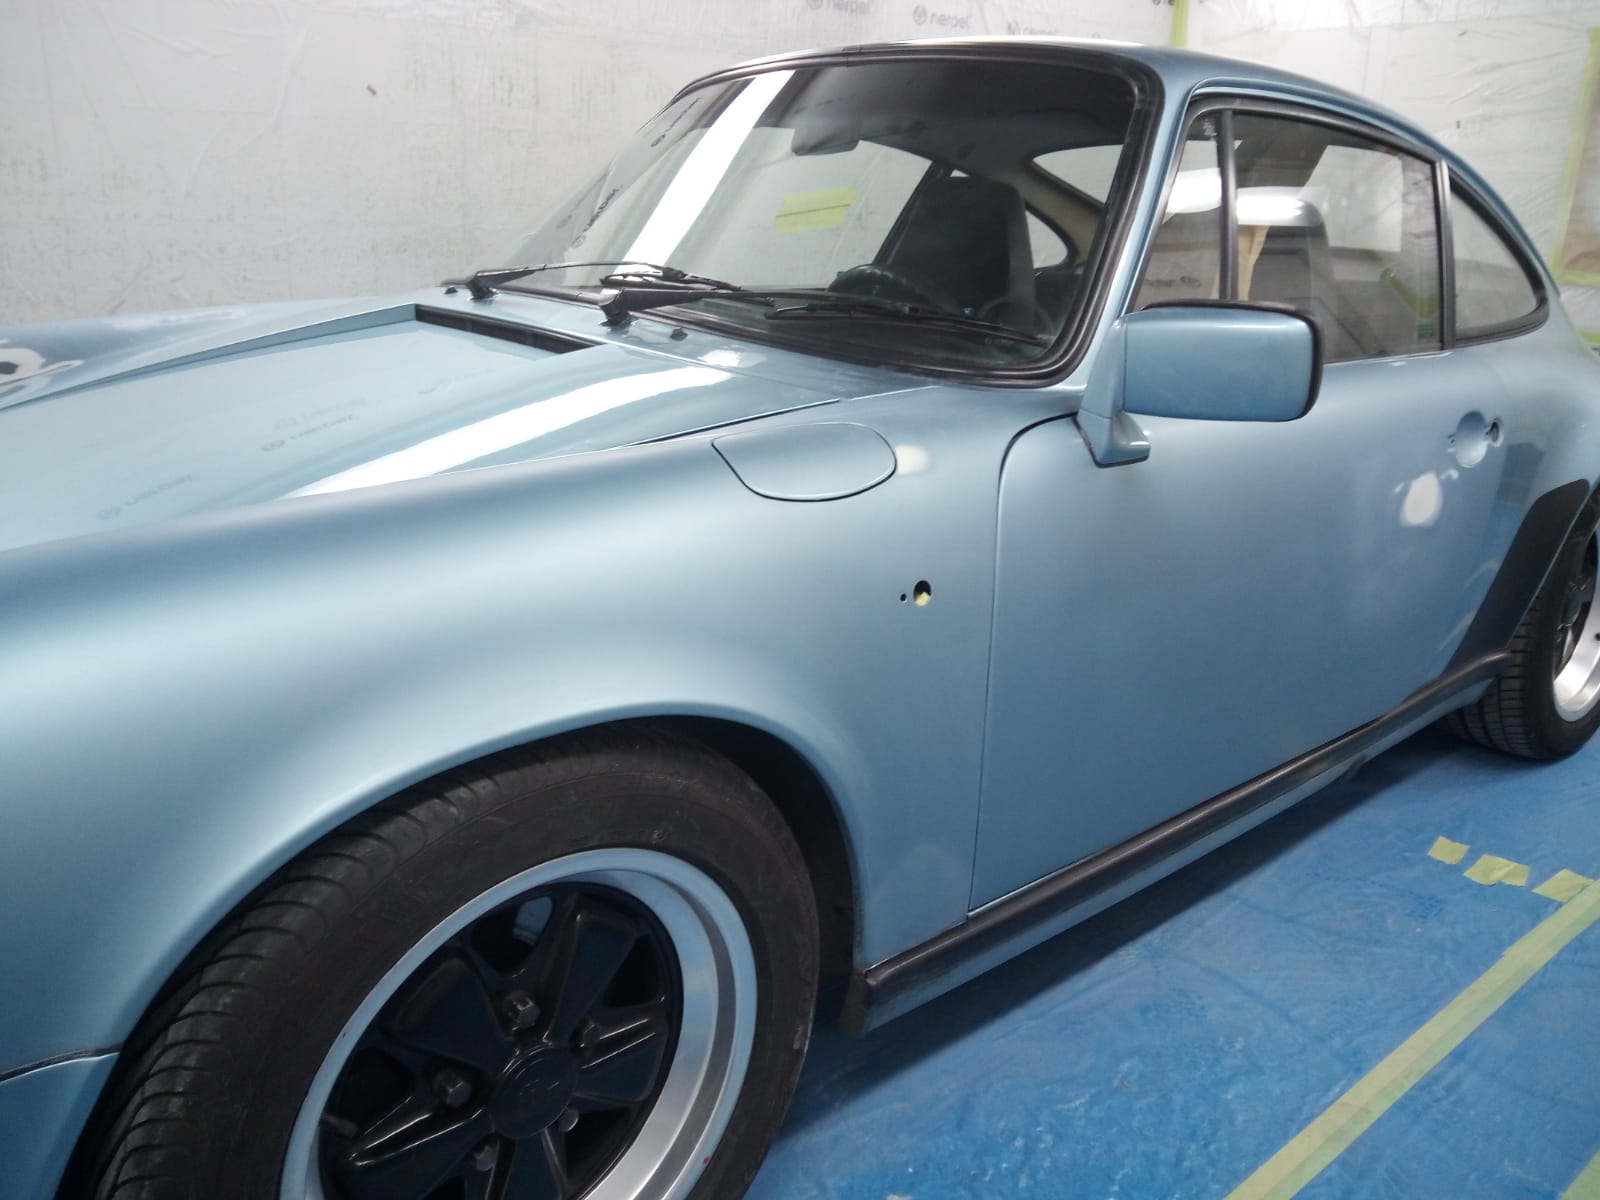
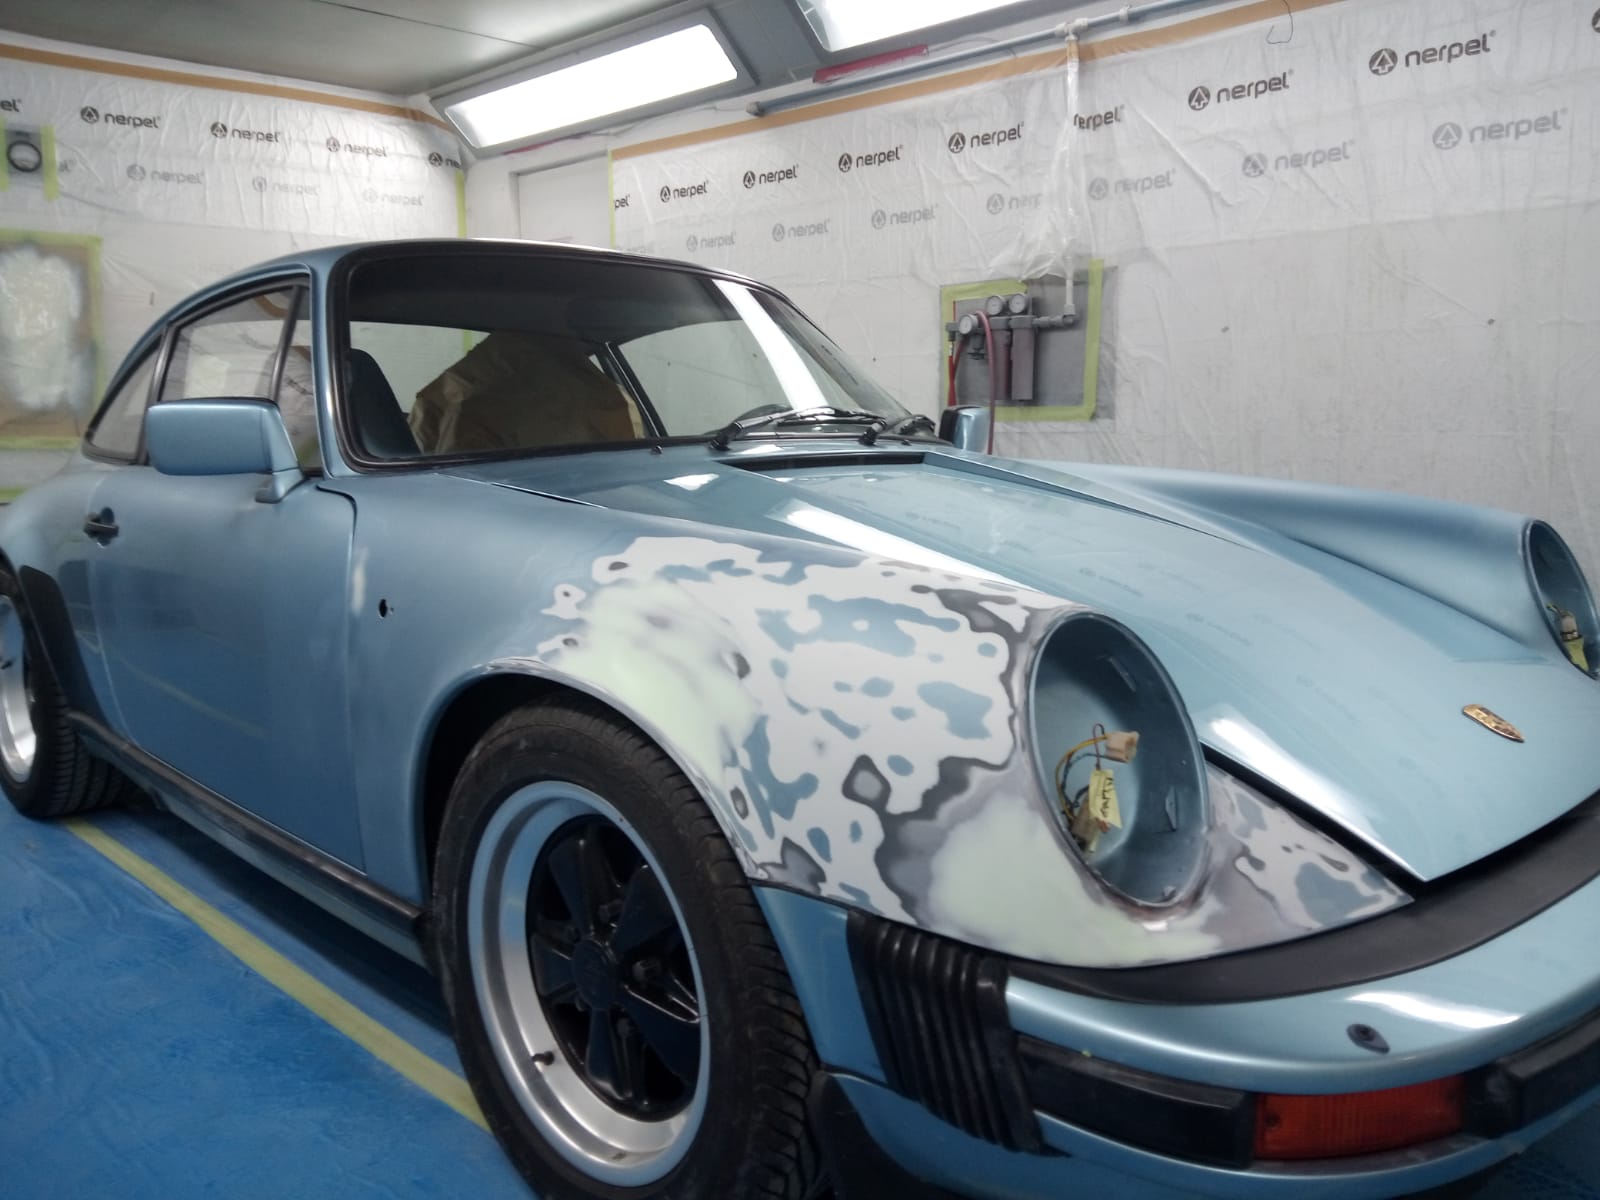
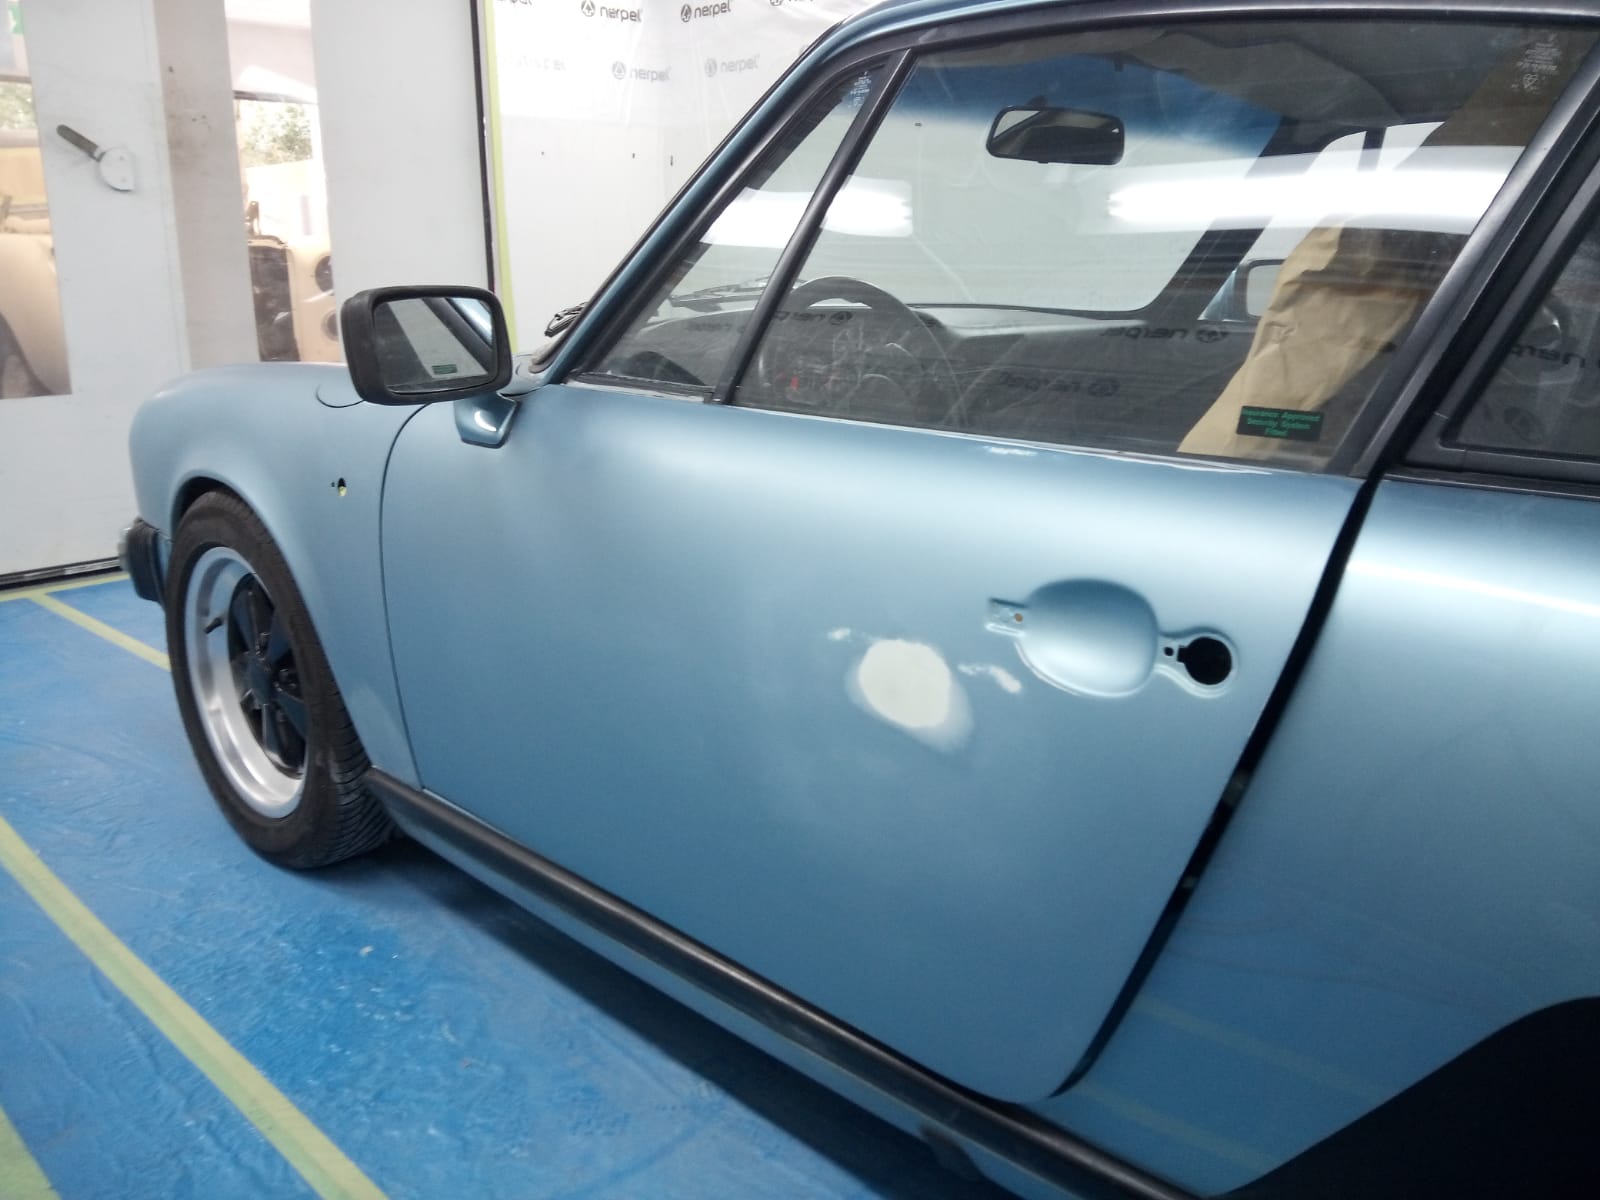
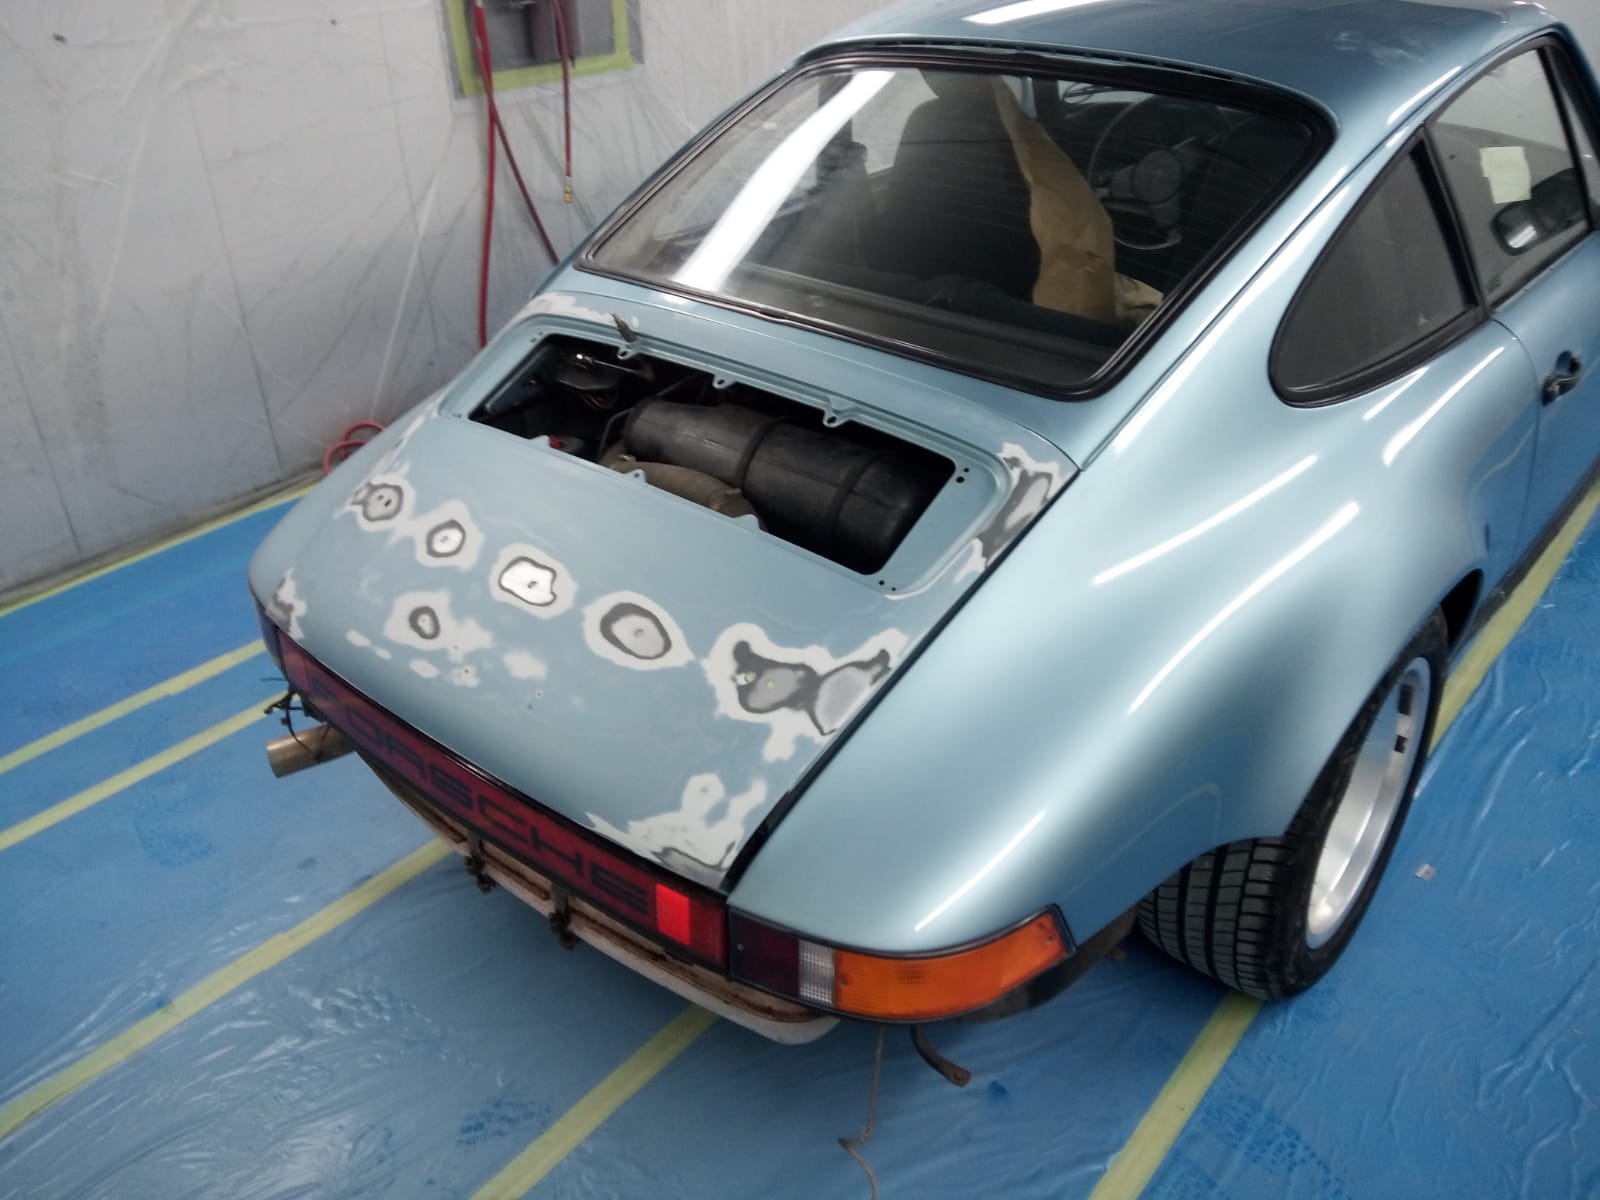
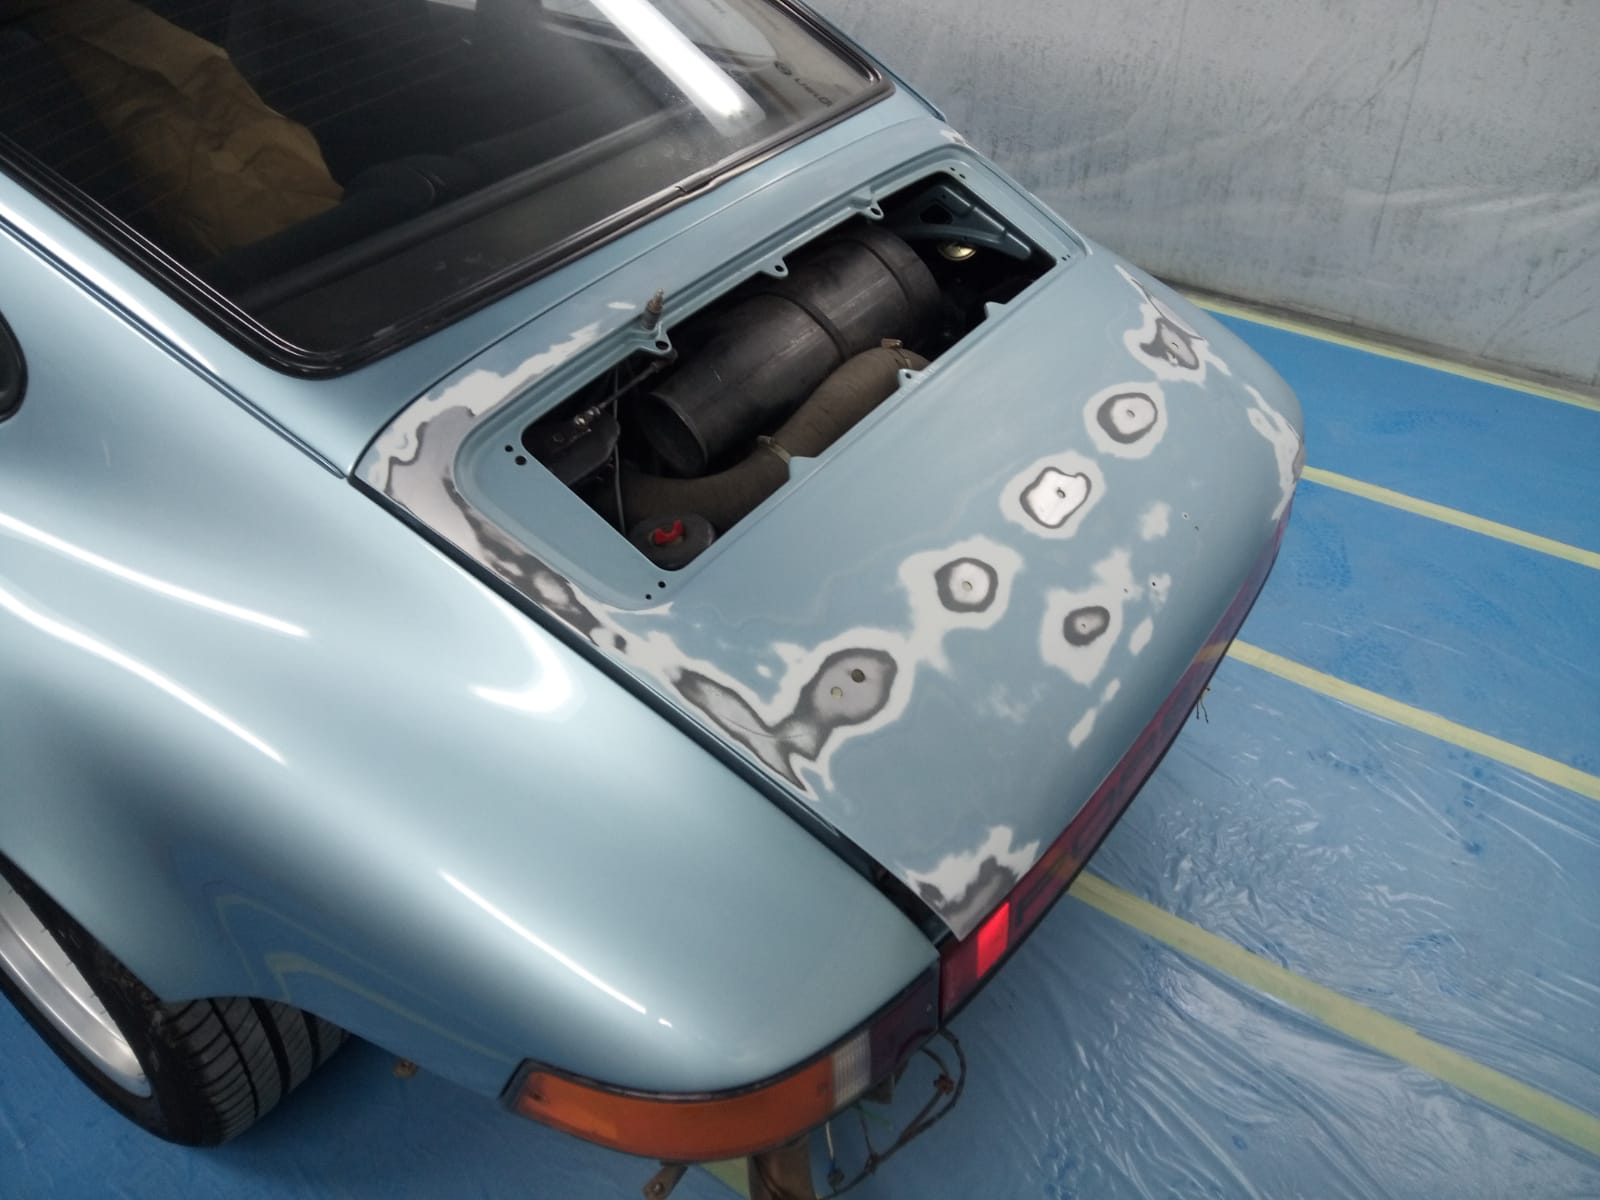
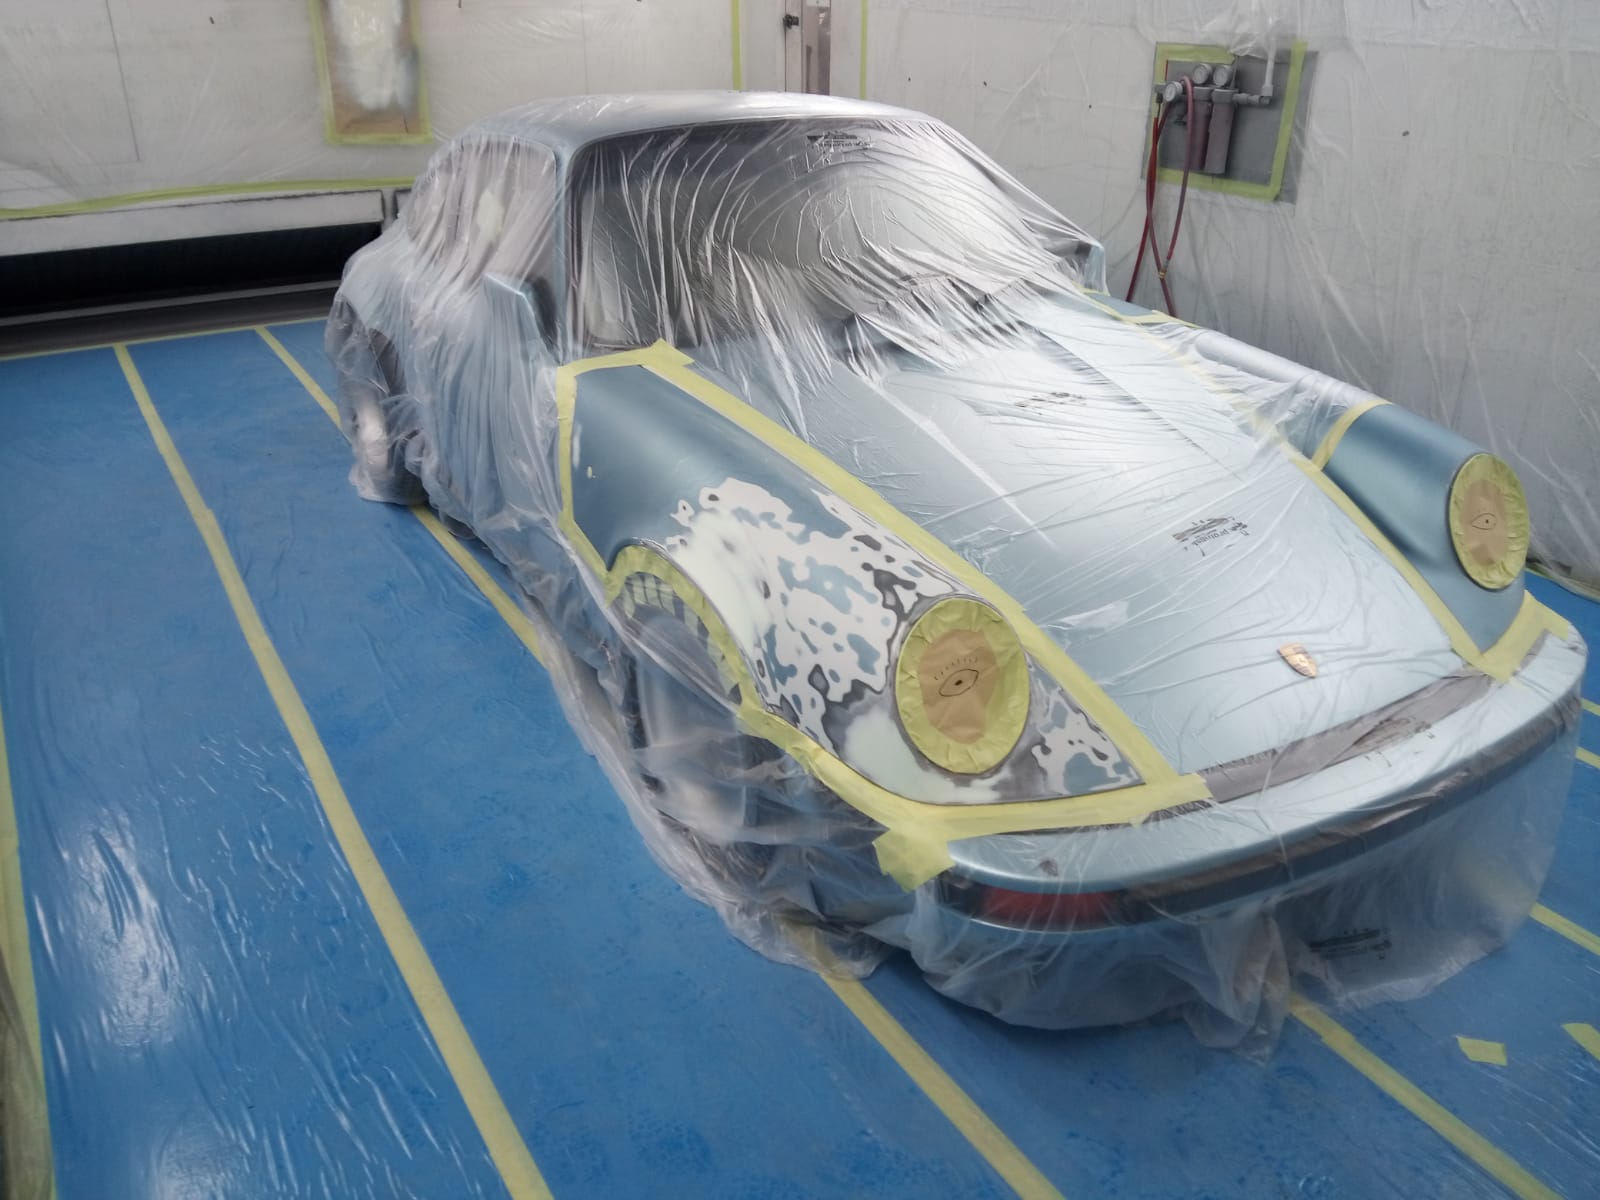
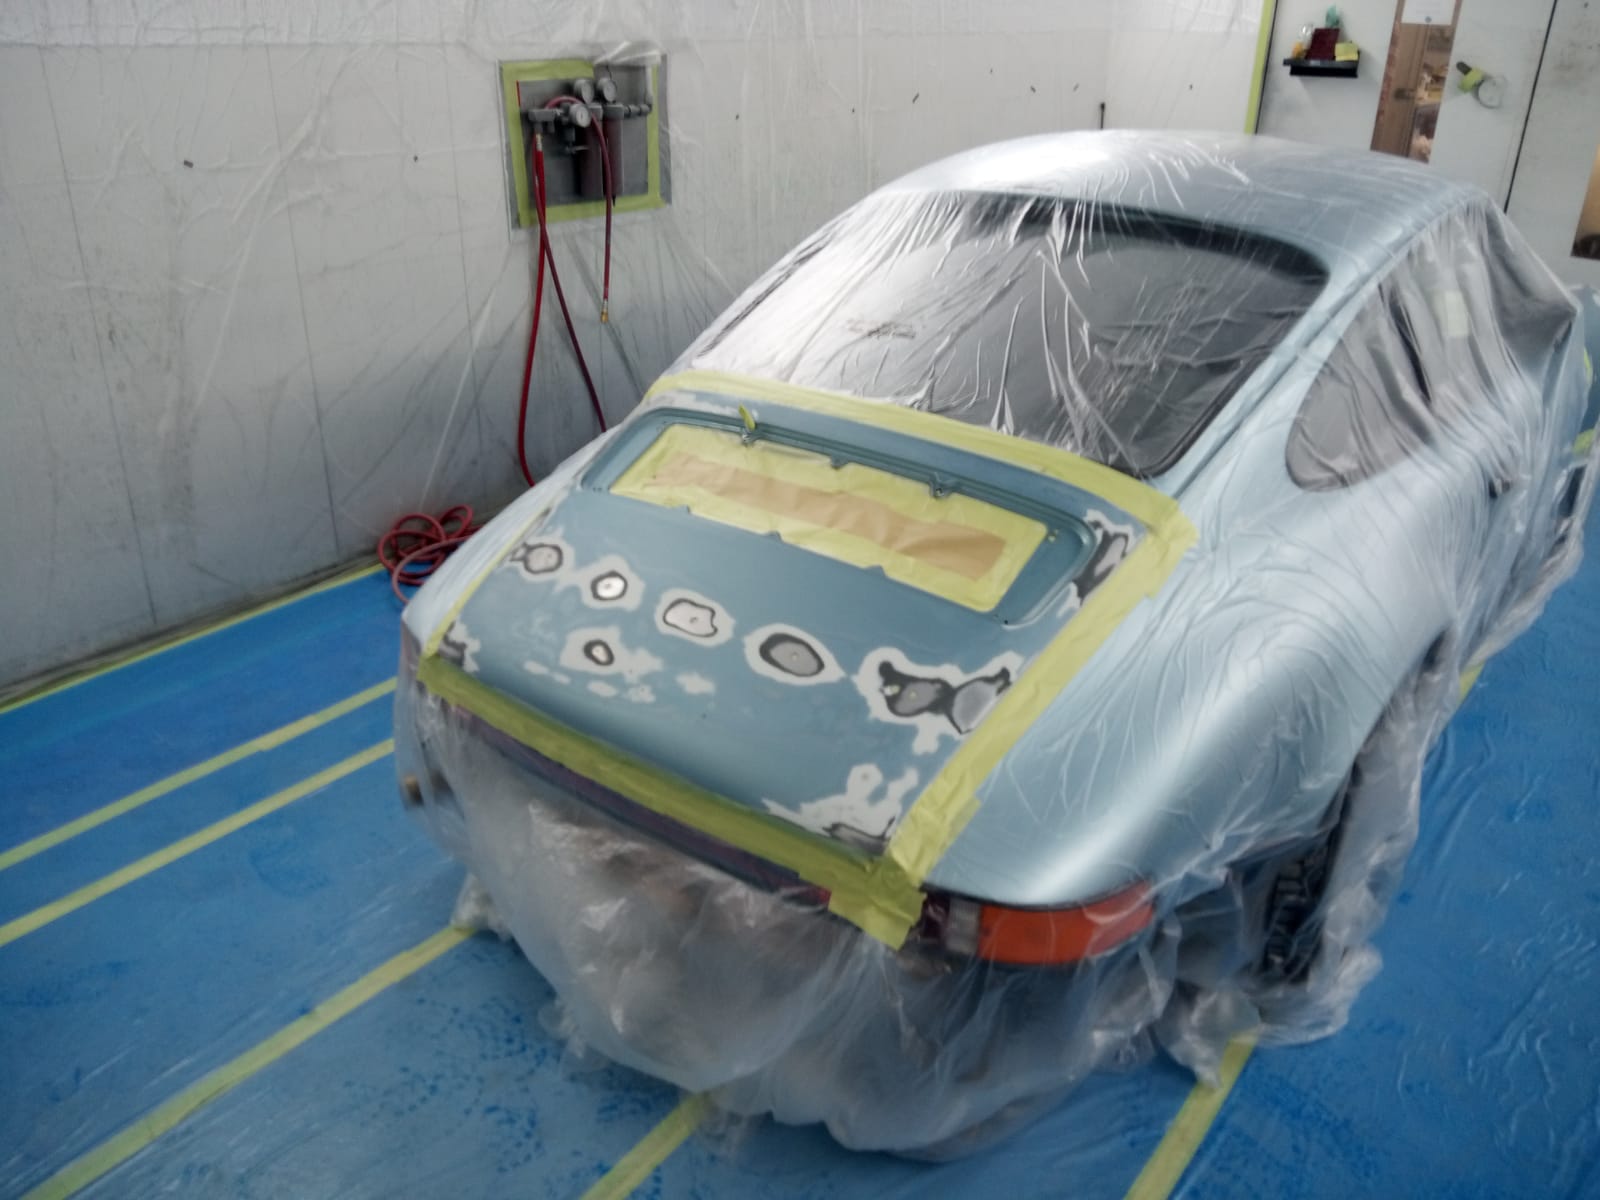
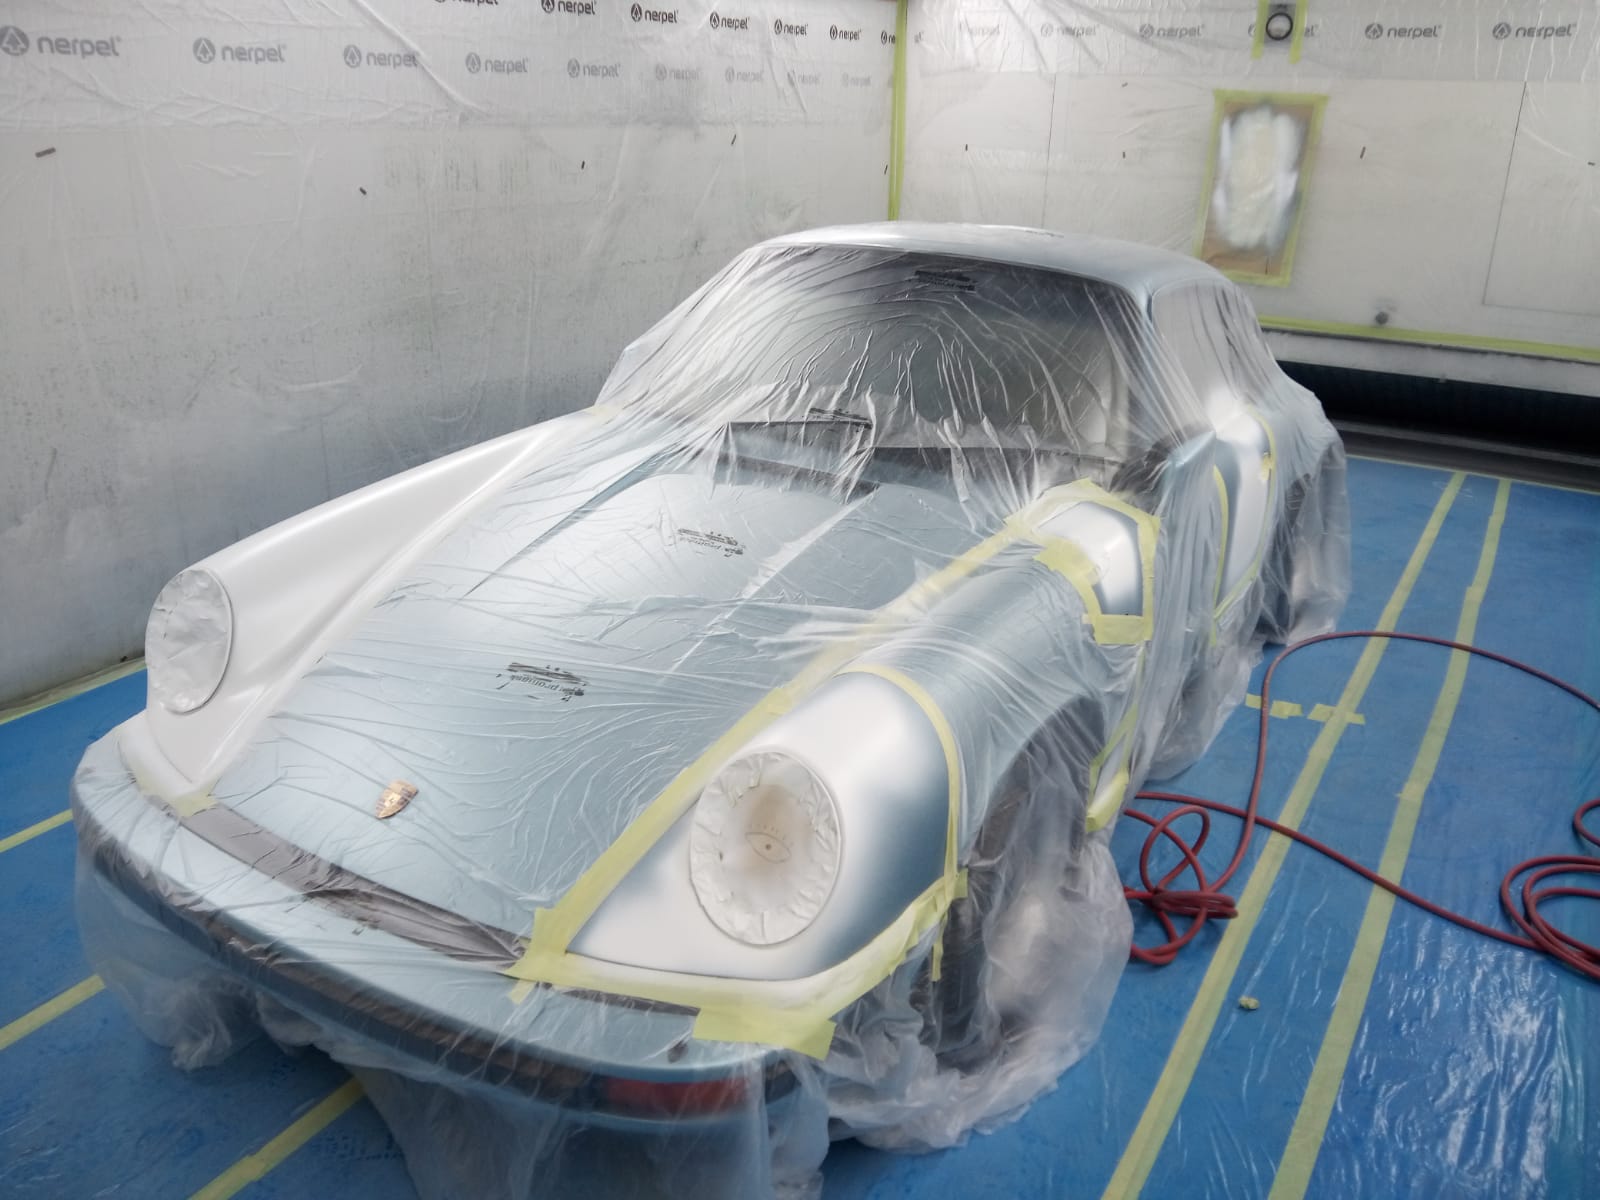
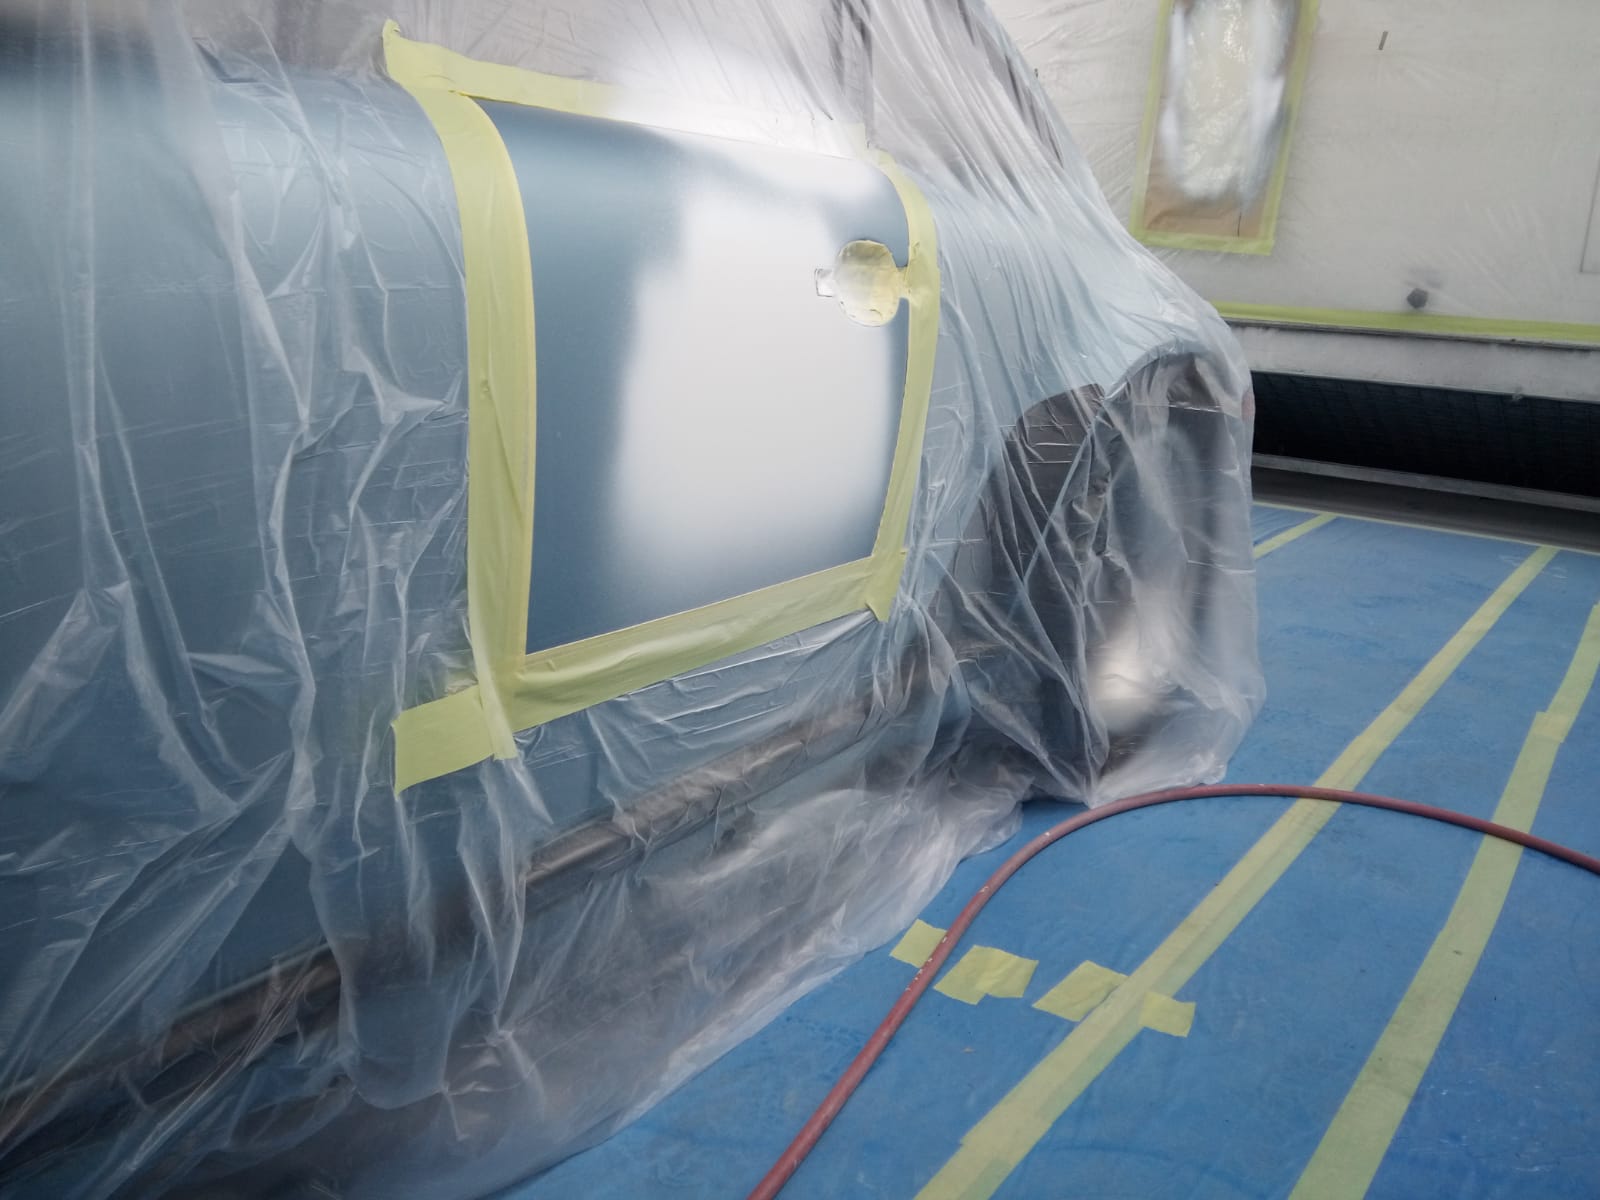
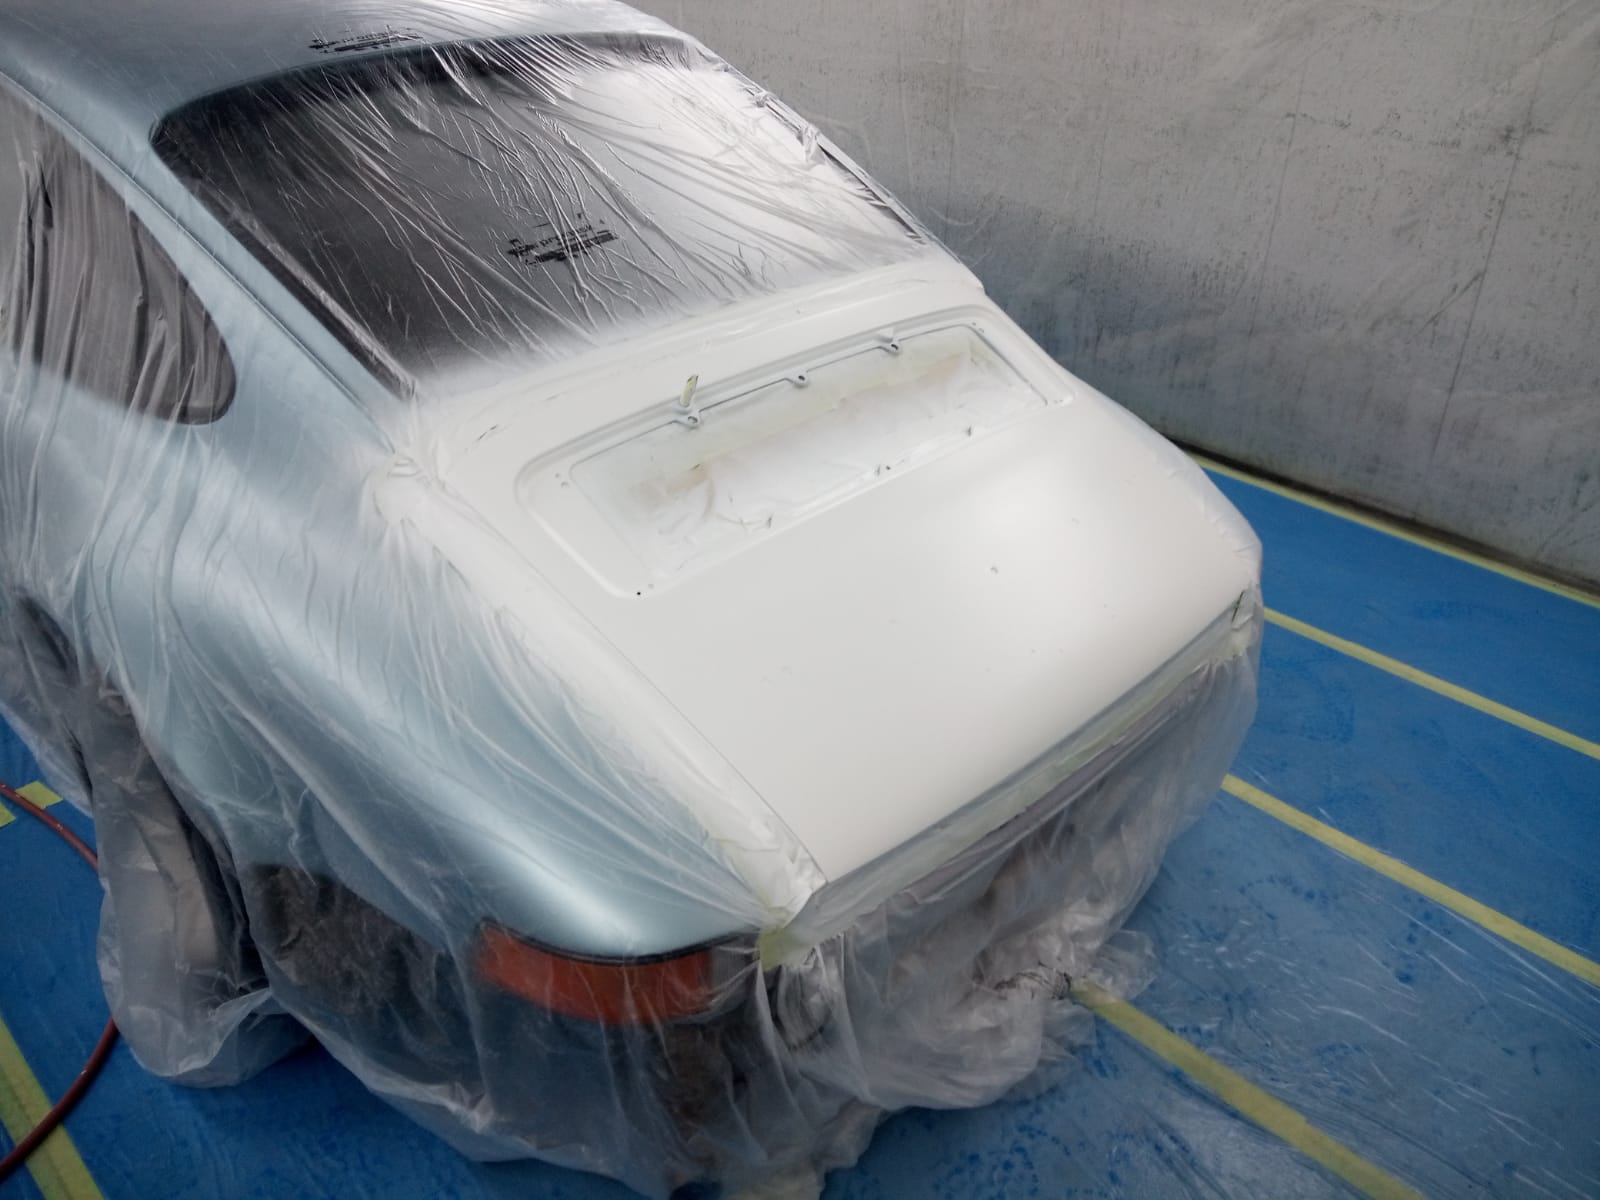
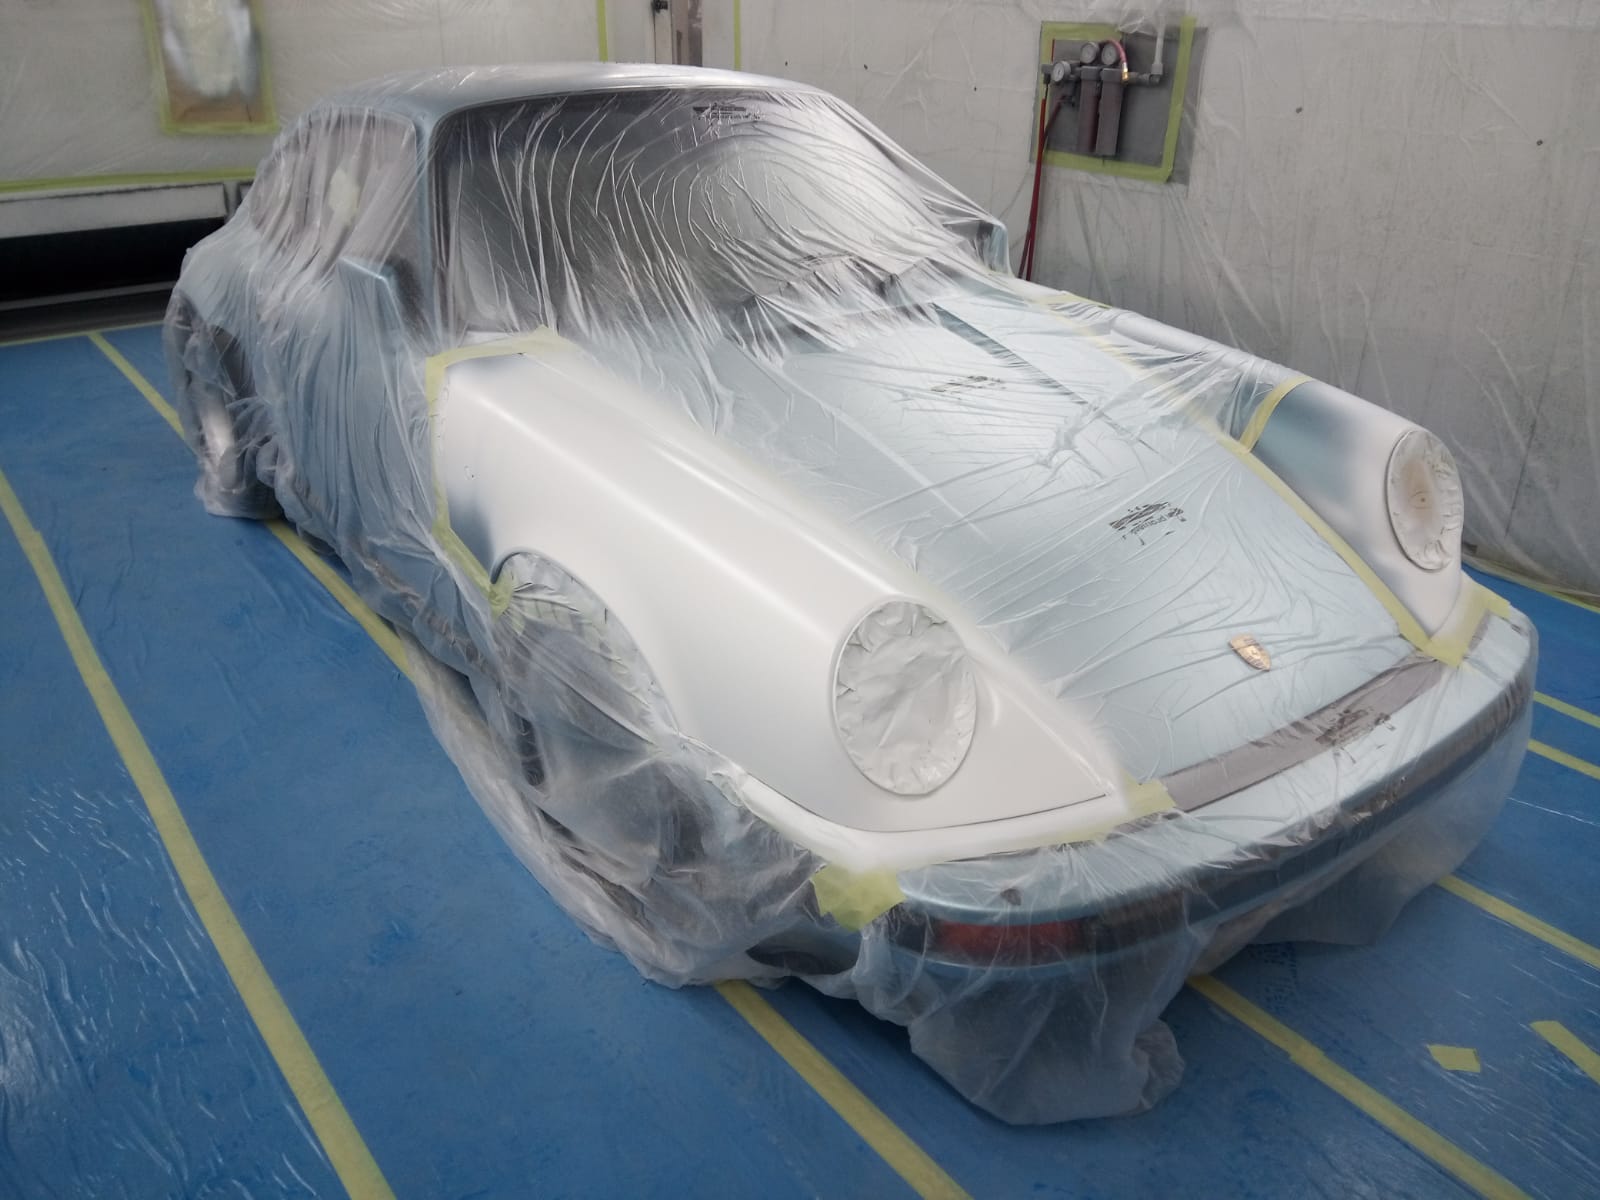
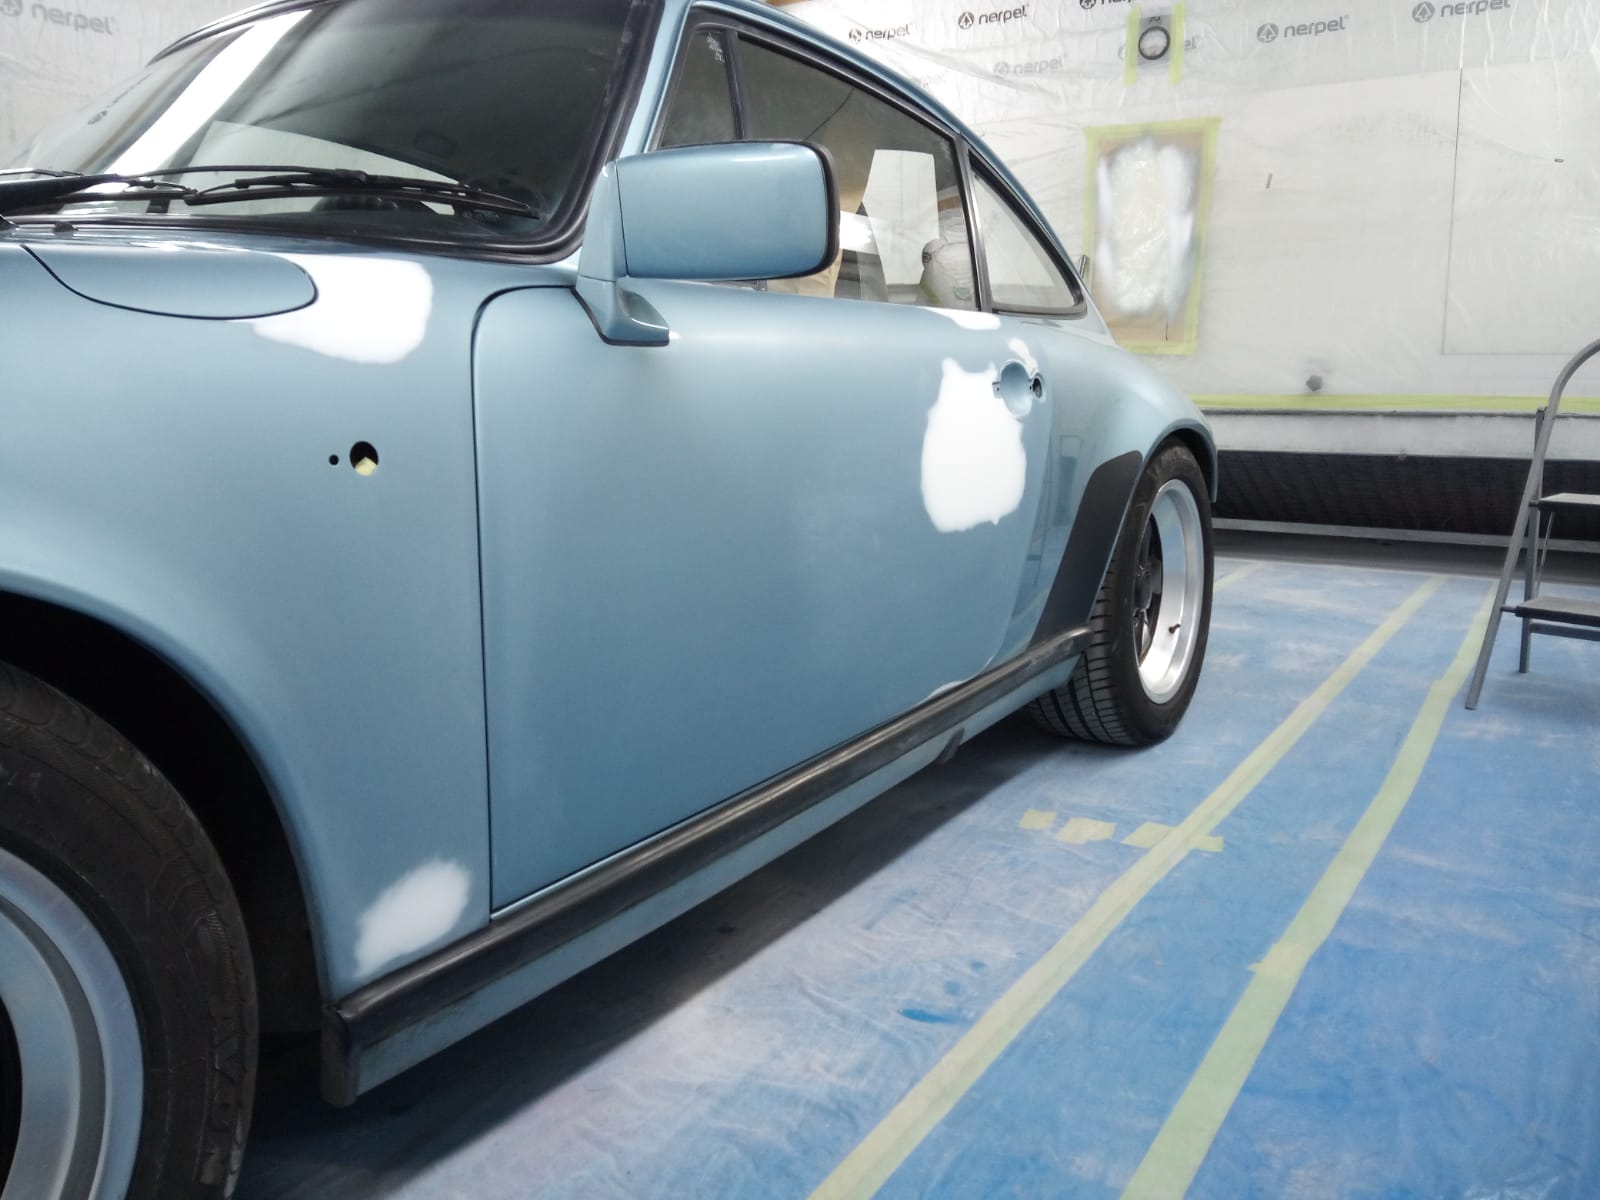
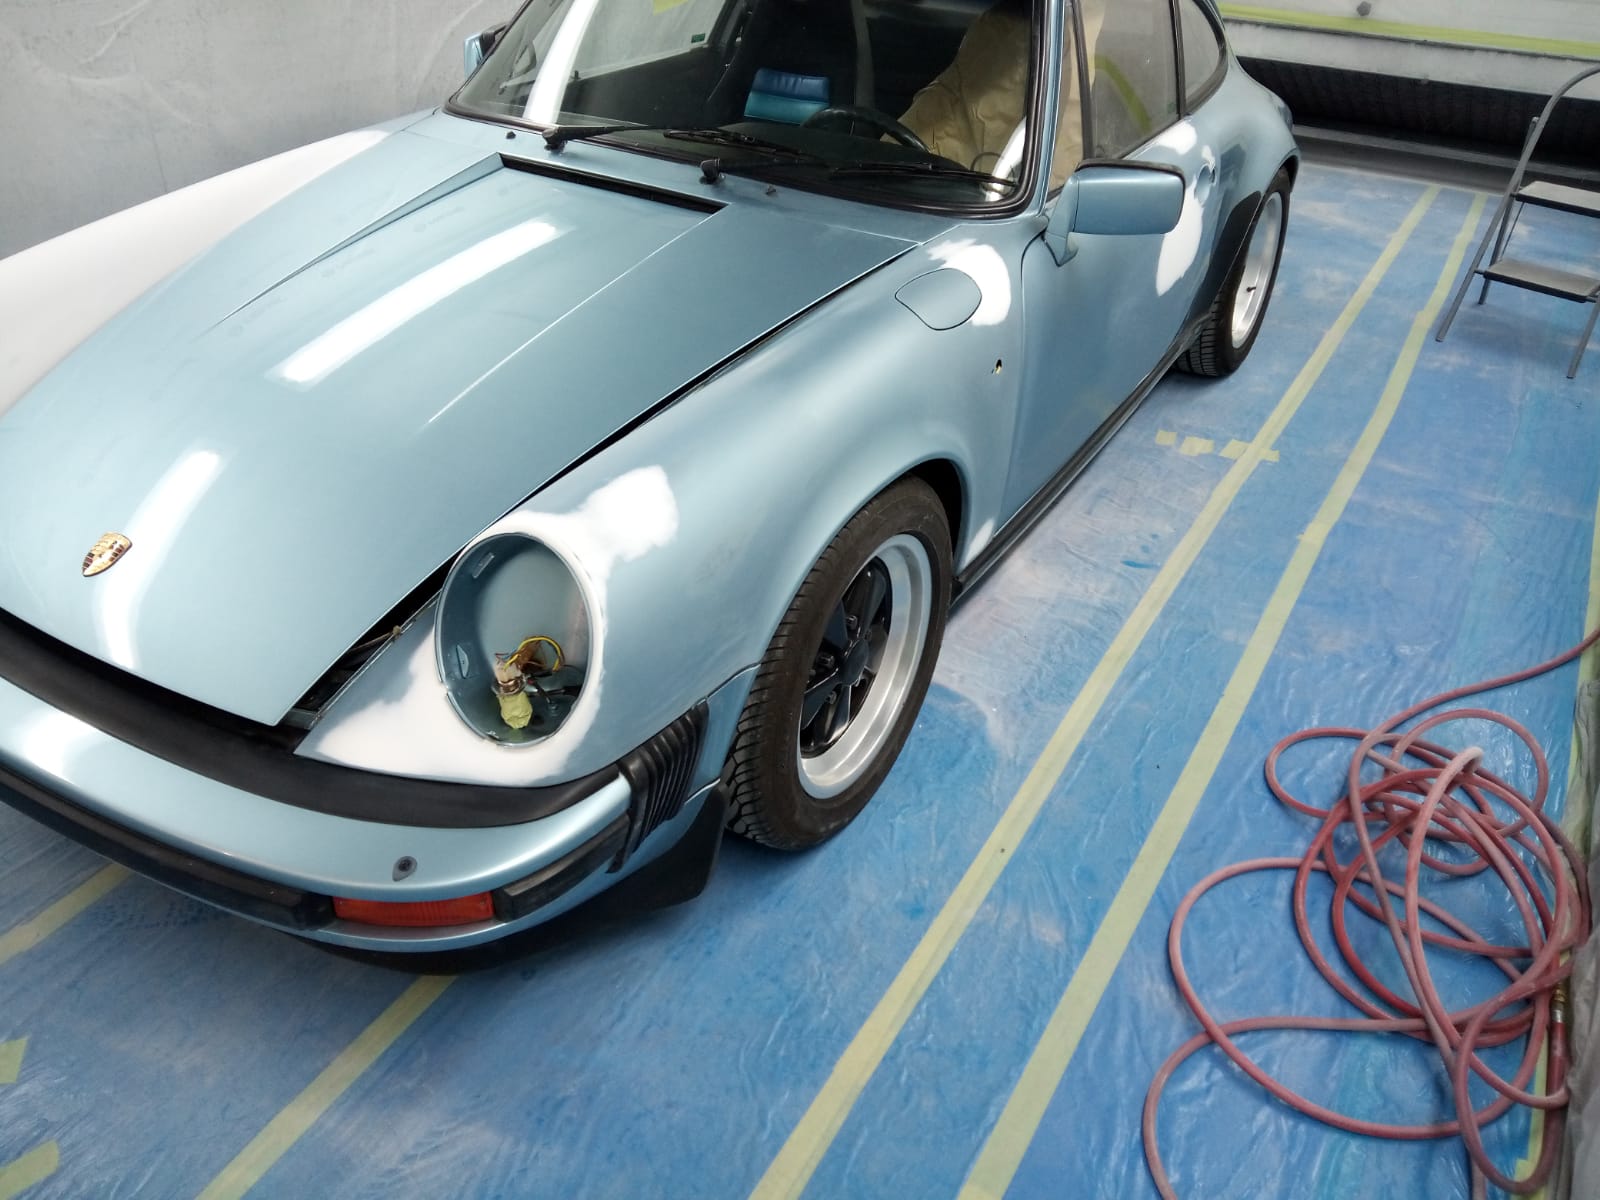
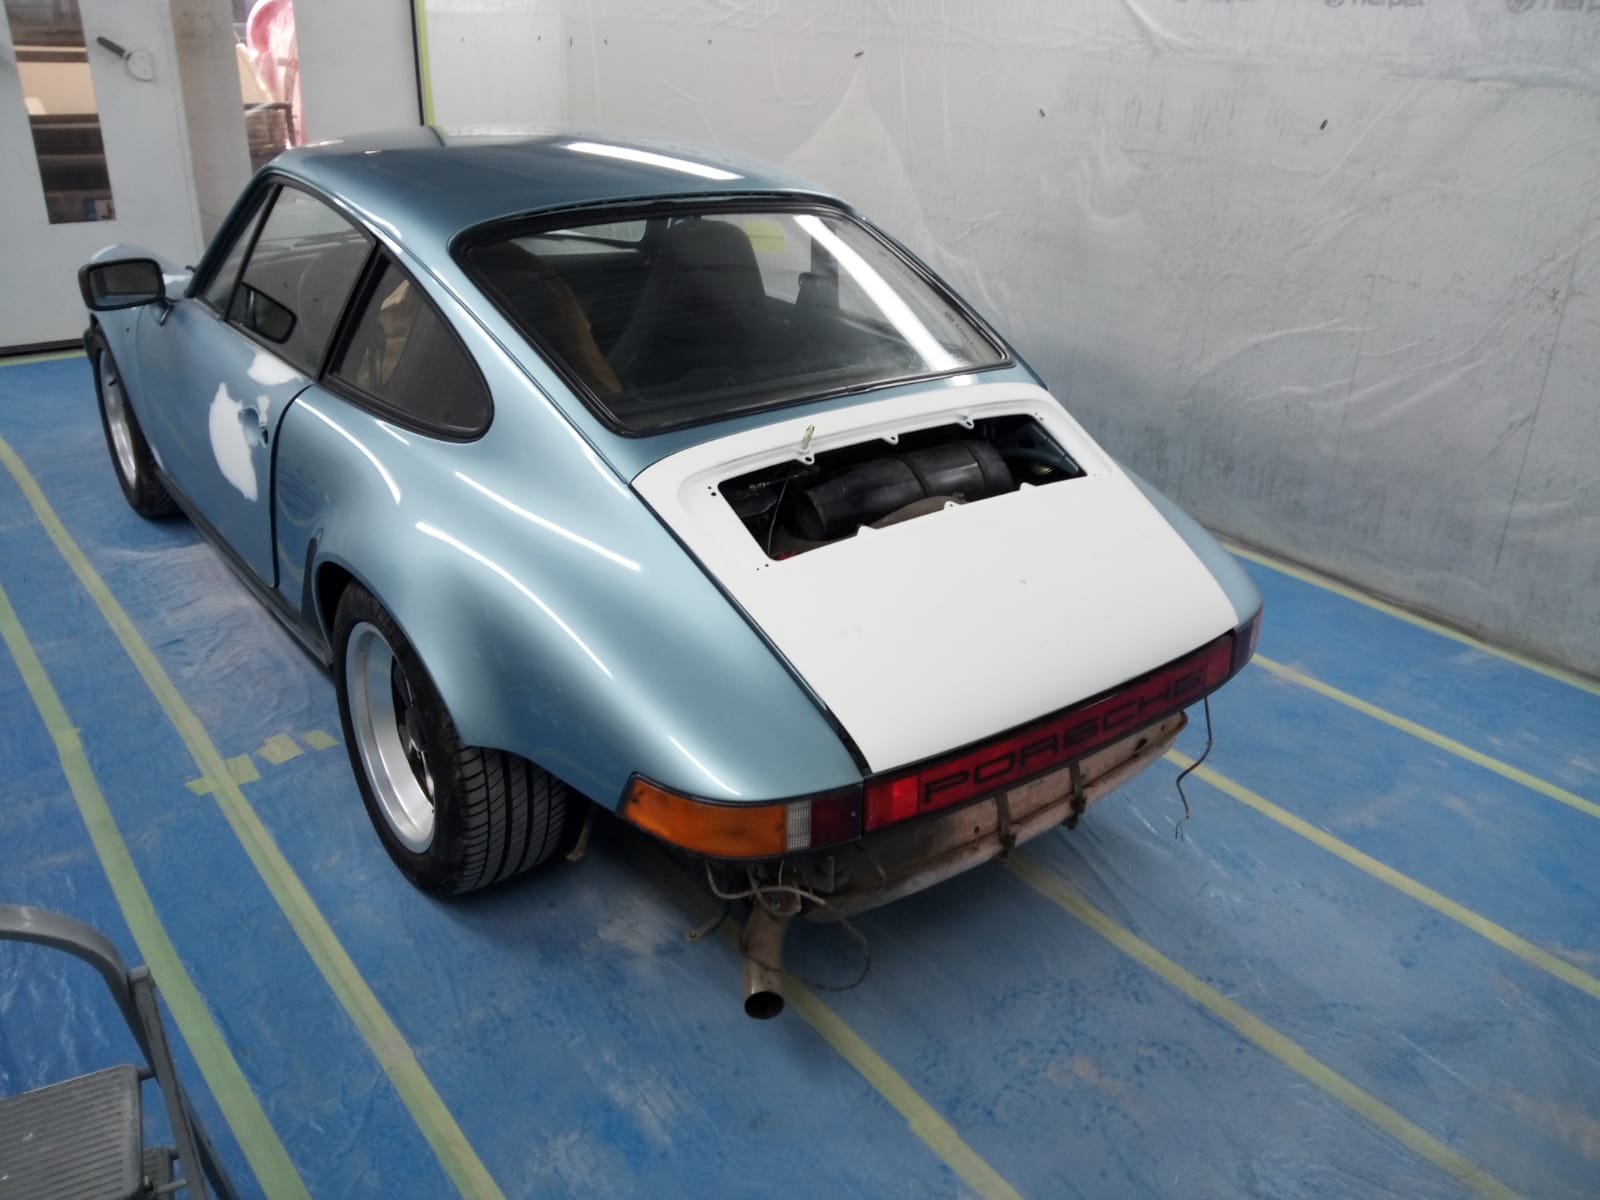
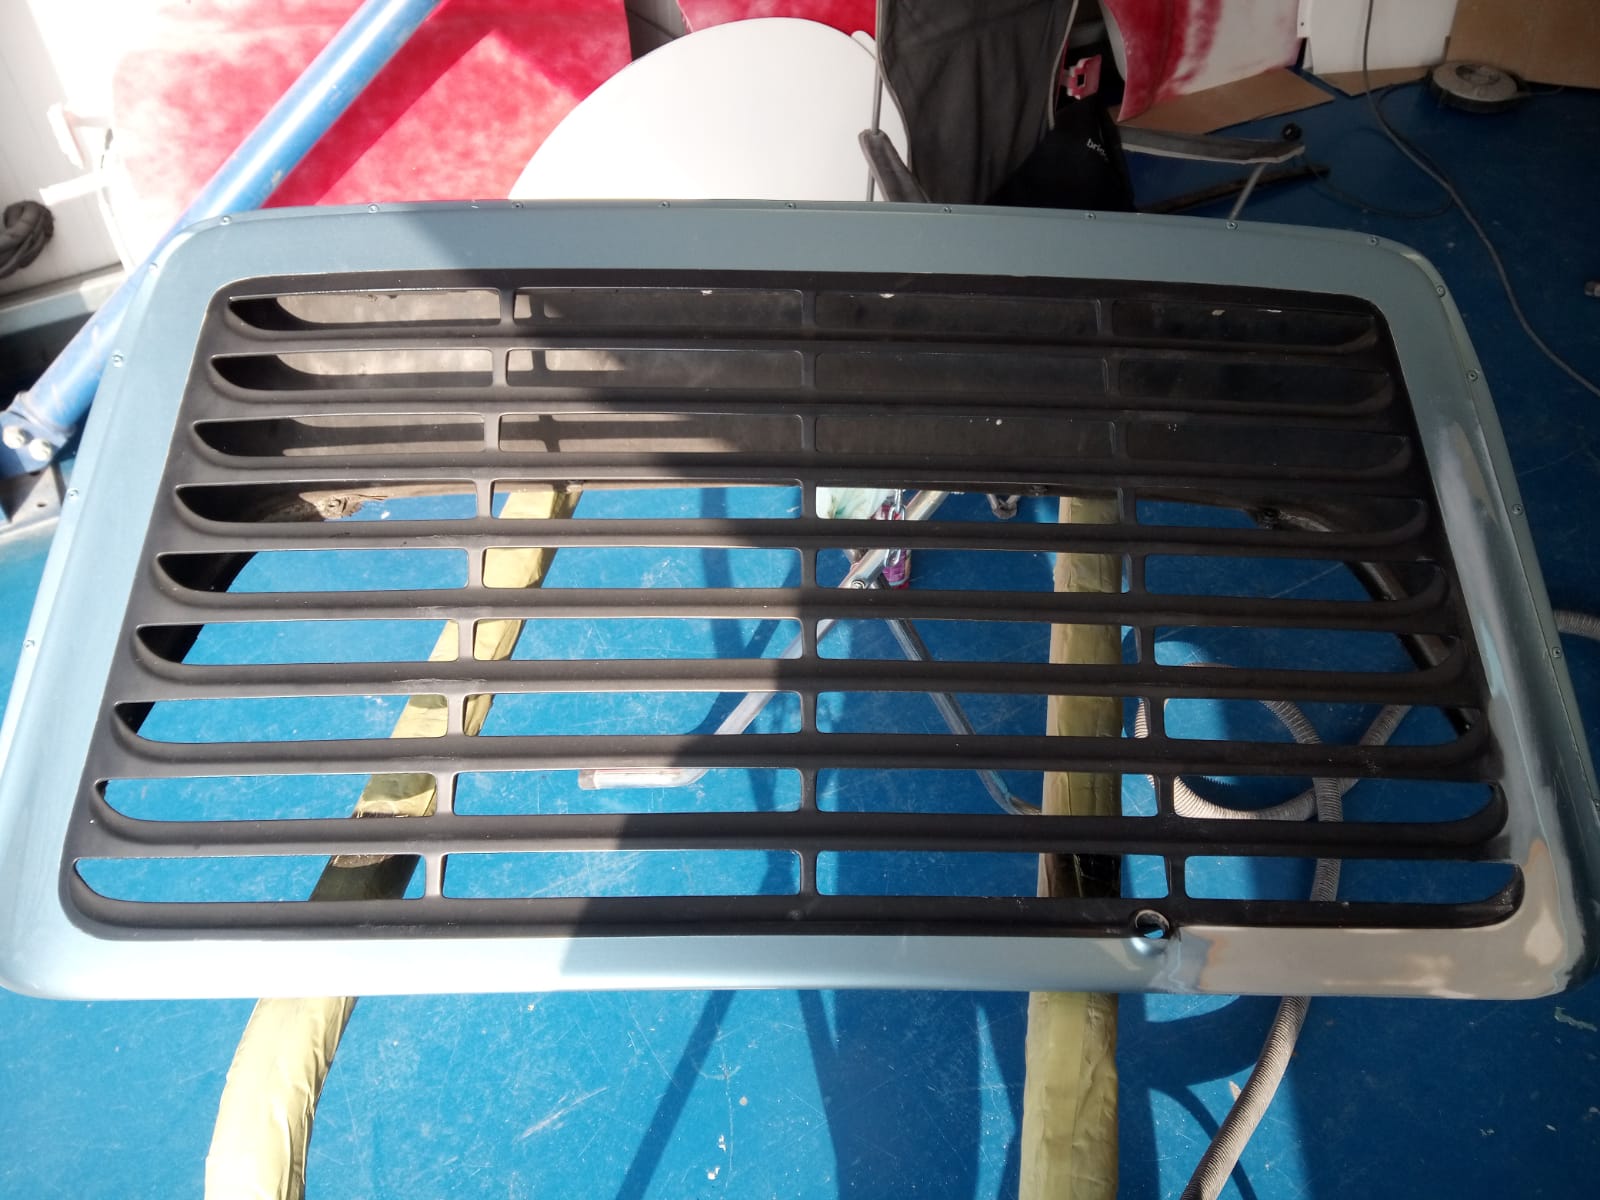
Our stunning 1982 Porsche 911SC has come in recently for some paint TLC. The paint shop have been accessing what needs doing and in the process, have identified some rust, micro-bubbling, cosmetic imperfections and chips.
The team have sent a sample off to be colour matched at our paint manufacturers at Lechler to replace the worn-out paint and correct the imperfections. Our Porsche will be looking good as new in no time!
The body has been masked and prepped in readiness for paint. We’re aiming for this to be painted next week.


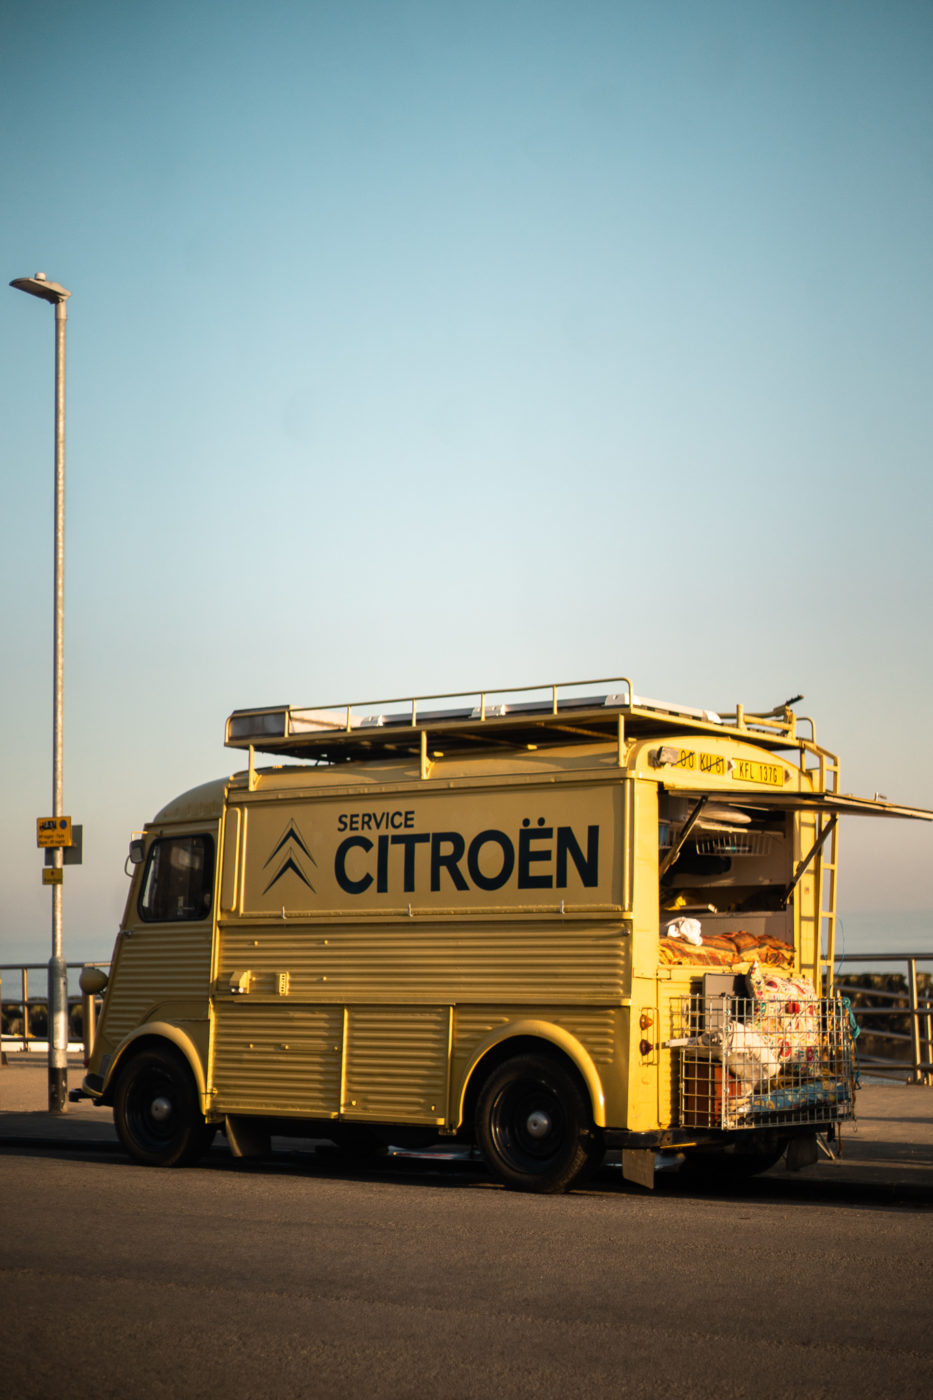
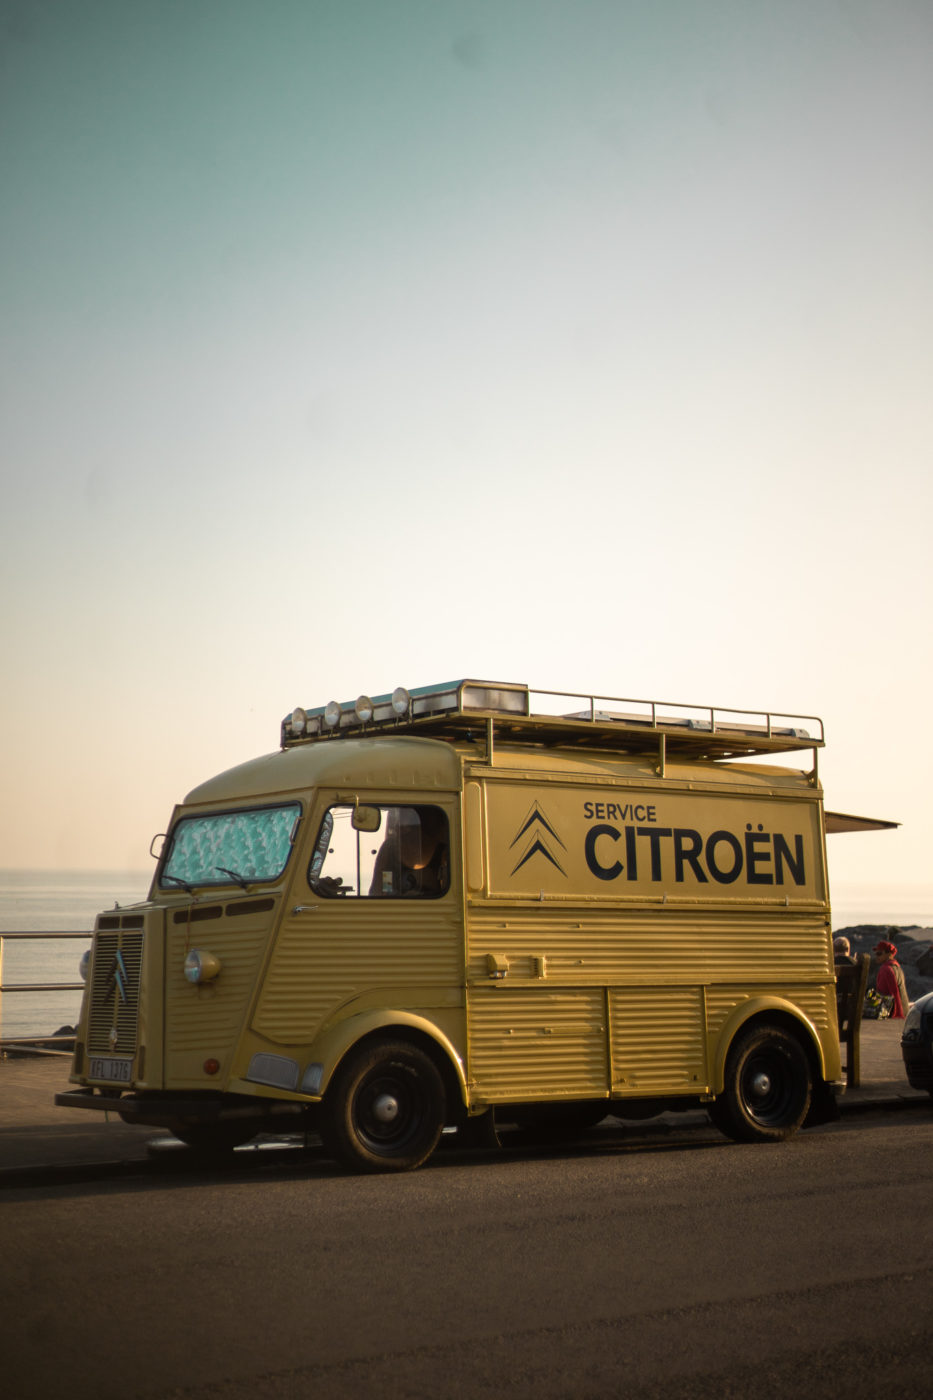
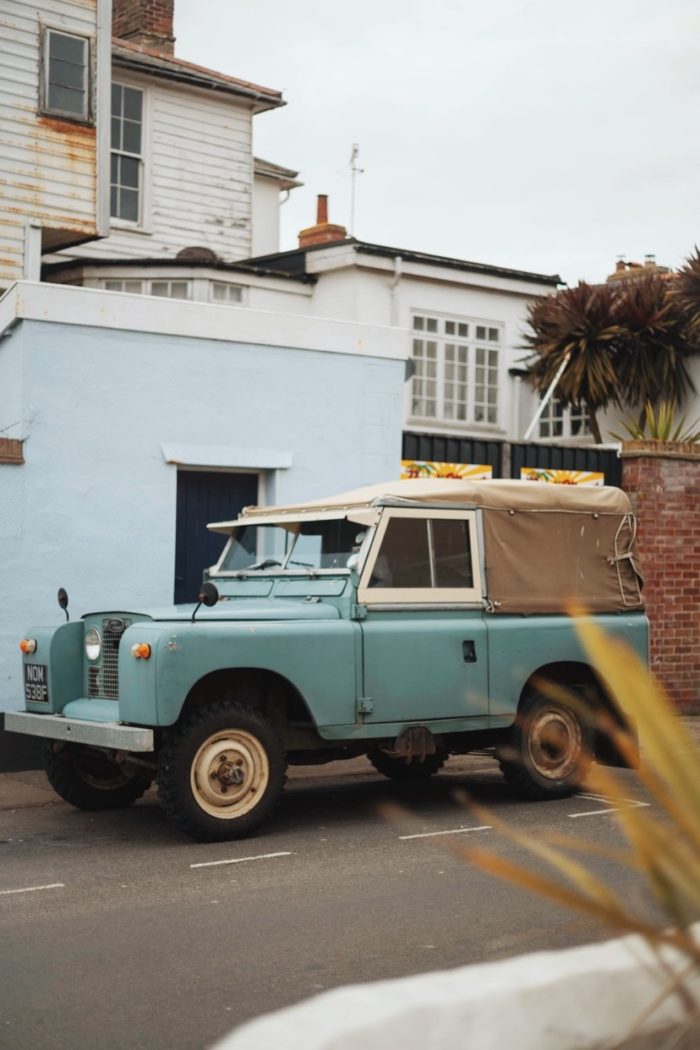
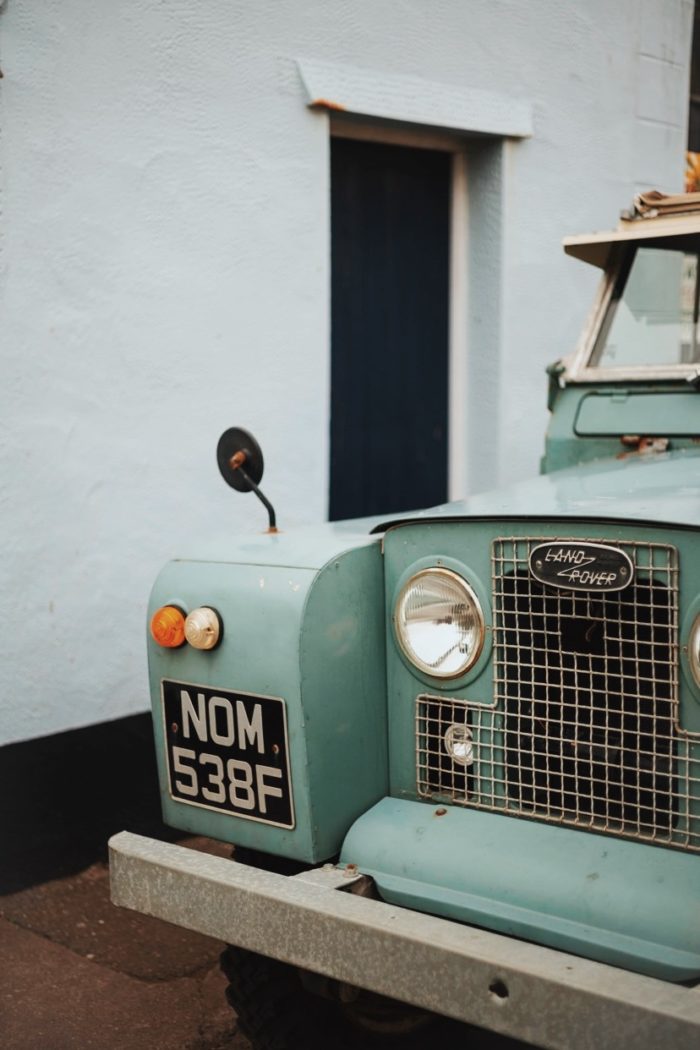
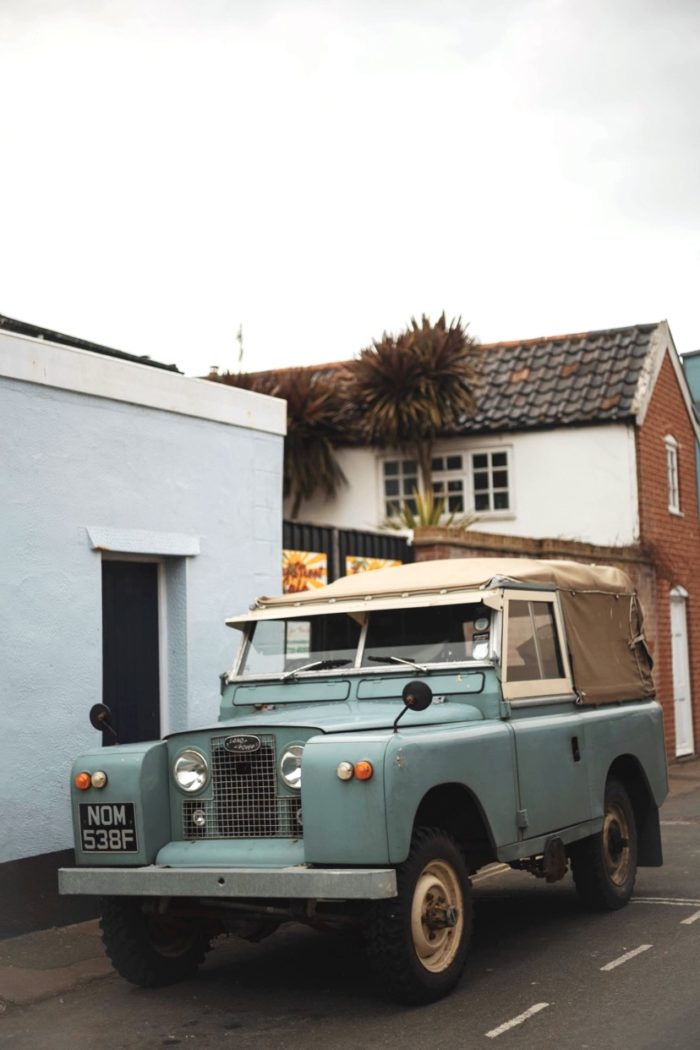
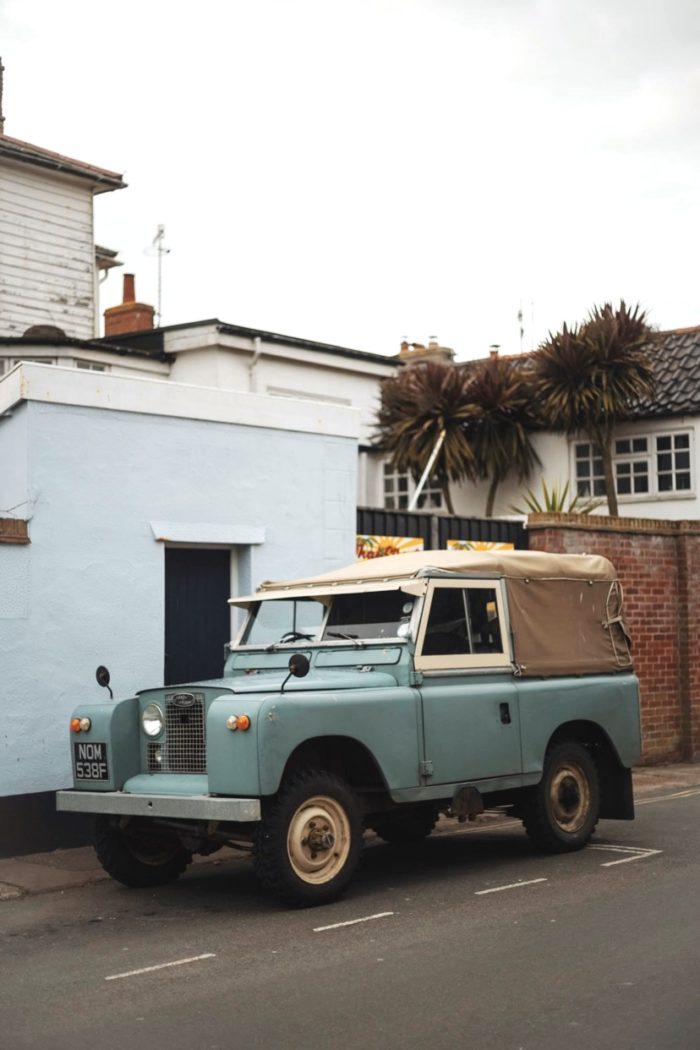
When we’re out and about, we love to see classic cars, and when we do, we try our best to snap a photo of it and share it in our Classic Car Spotting blog series! These two seaside classics have recently been spotted around Suffolk.

We often hear from commuters when our van and lorry have been spotted travelling up and down the country. We’re always delivering and collecting exciting projects and we love it when you see us and recognise our vehicles out and about.