Removing the Jensen dashboard
[vc_row][vc_column][vc_column_text]With the engine now out Asa and John are concentrating their efforts on removing the dashboard this afternoon. Before any work is carried out we


[vc_row][vc_column][vc_column_text]With the engine now out Asa and John are concentrating their efforts on removing the dashboard this afternoon. Before any work is carried out we

[vc_row][vc_column][vc_column_text]Today’s the day we are removing the engine ready for our engine rebuilder Don Warman to work his magic on her. Initially the engine was

When we were stripping and cleaning the inside of the camper we noticed that the side door was not running as smoothly as it should
[vc_row][vc_column][vc_column_text]Having recently completed the restoration of our 1971 Triumph Spitfire, this week we had her back in our workshops for a general check over. We
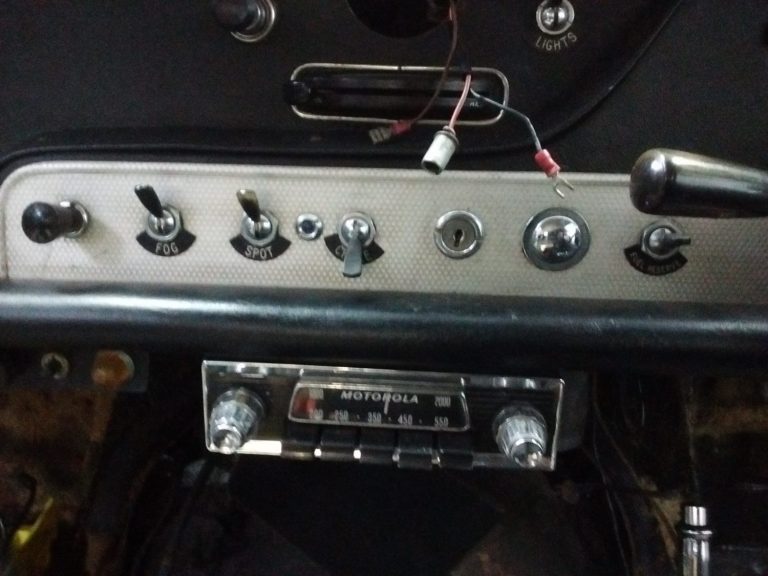
[vc_row][vc_column][vc_column_text]With the engine now out Asa and John are concentrating their efforts on removing the dashboard this afternoon.
Before any work is carried out we have taken a number of pictures which we can use to cross reference when we look to refit it later on in the build process.
[/vc_column_text][/vc_column][/vc_row][vc_row][vc_column][vc_gallery type=”image_grid” images=”8279,8280,8281,8282,8283,8284″][/vc_column][/vc_row]
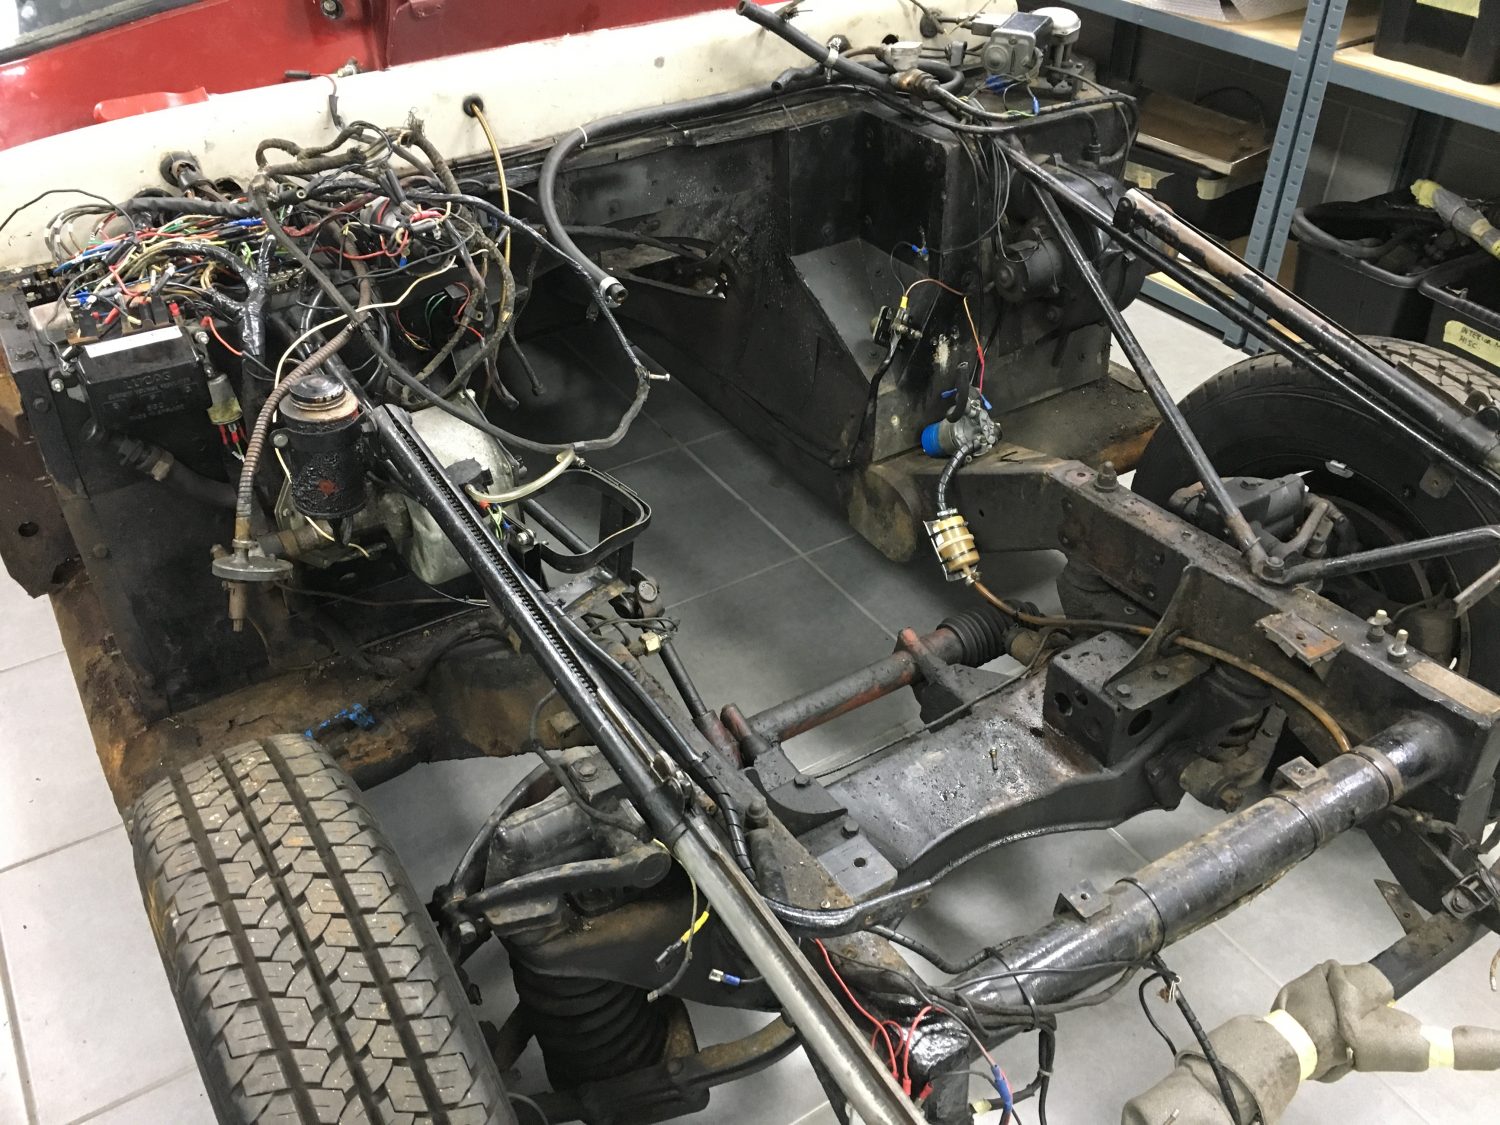
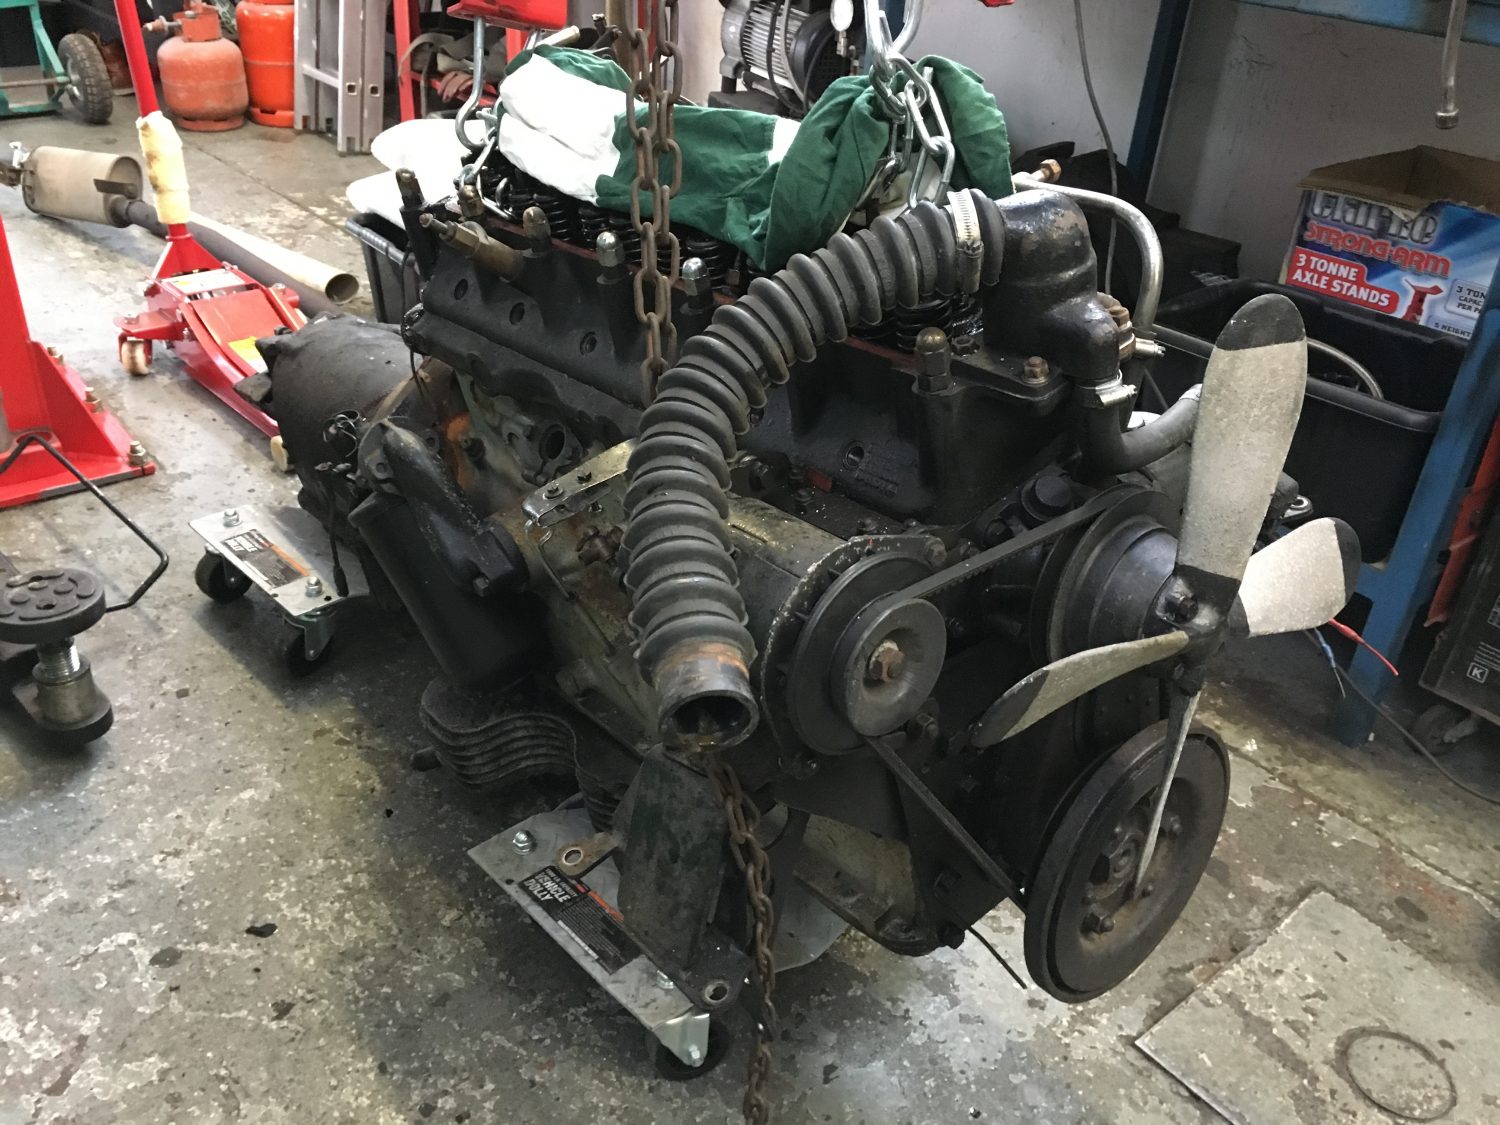
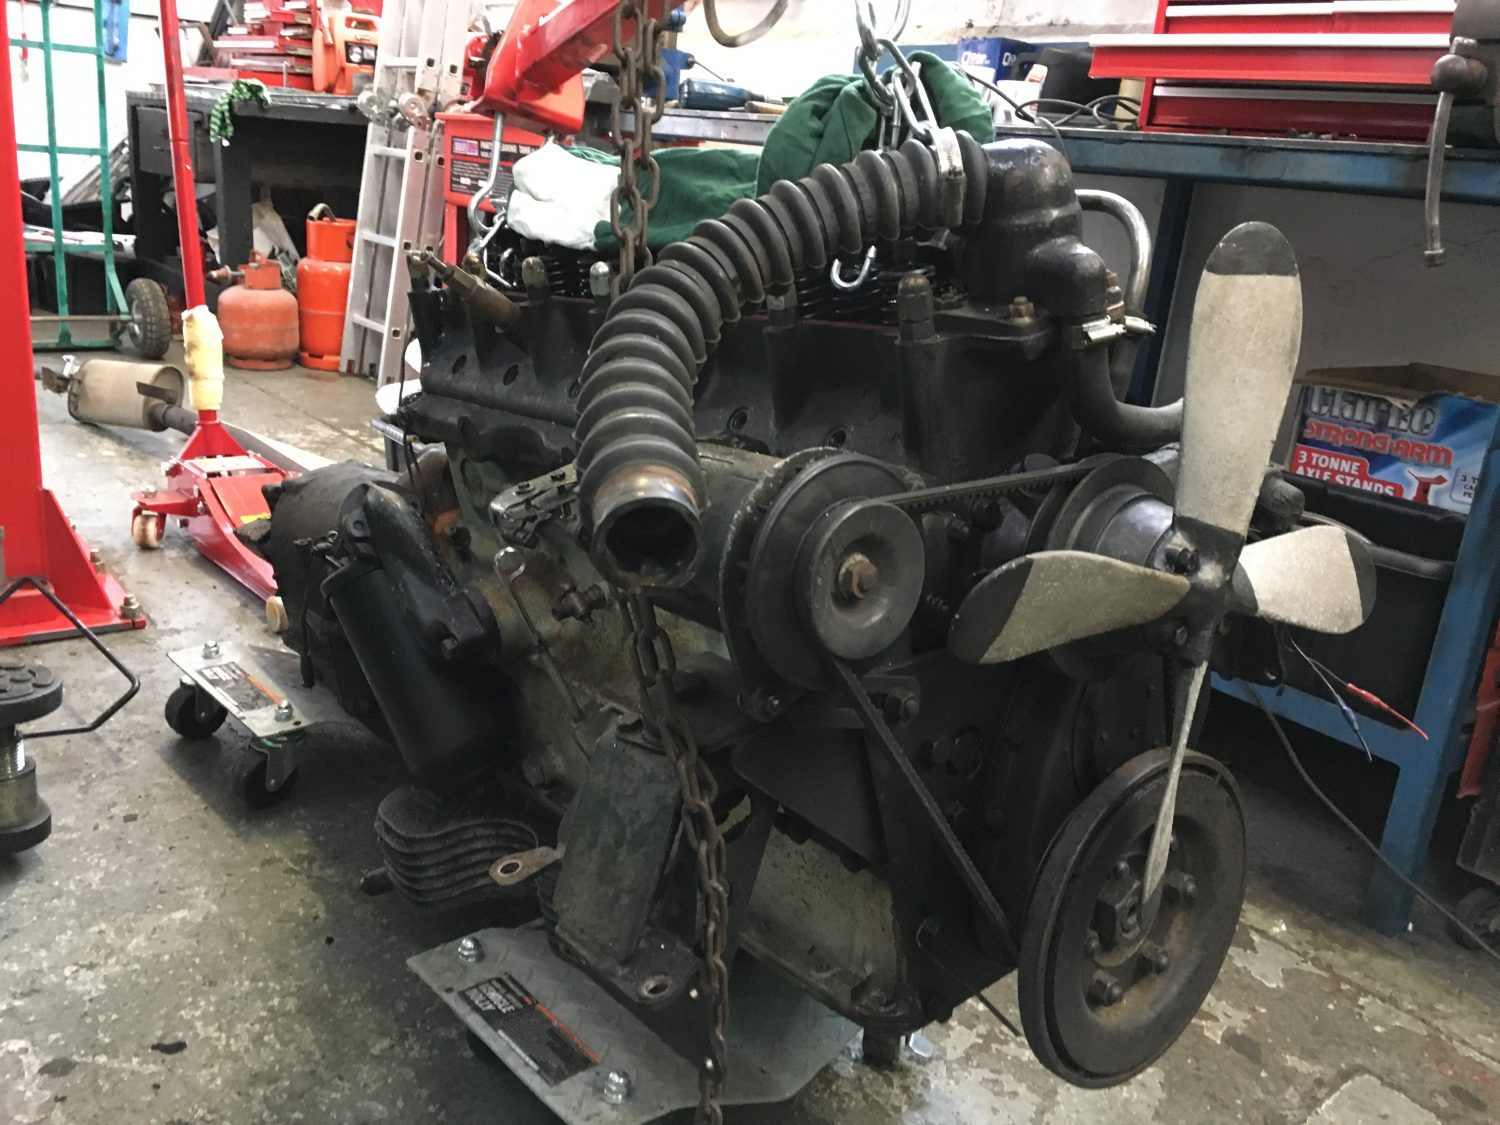
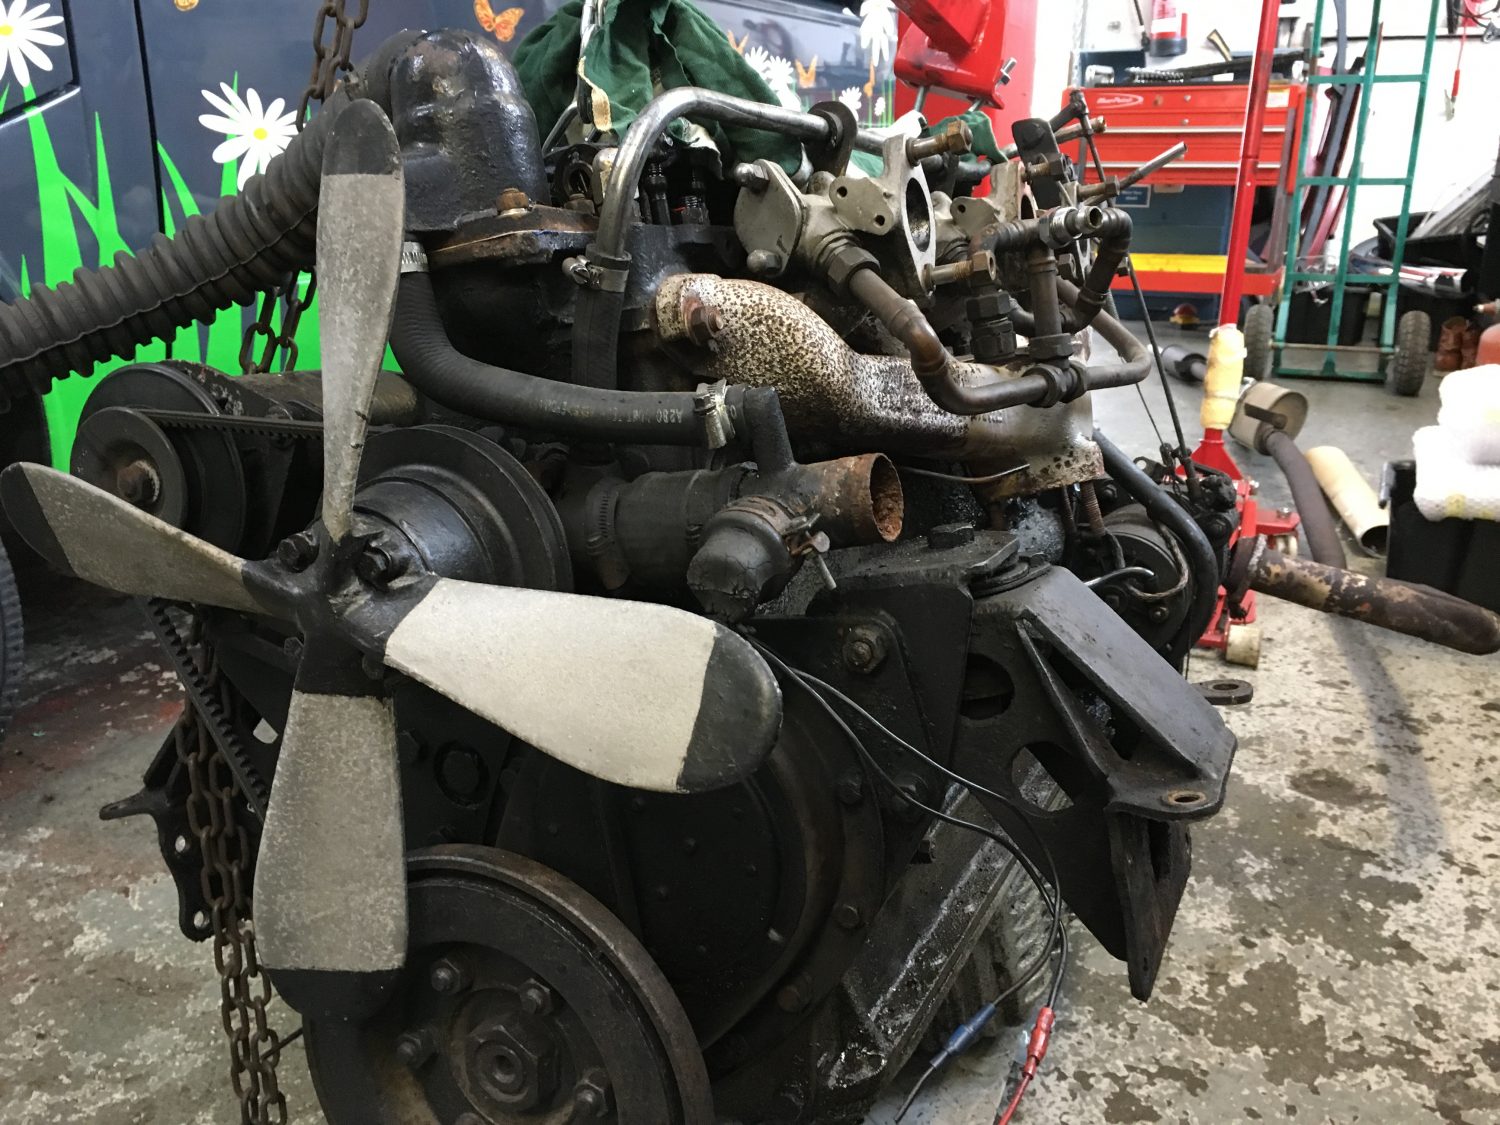
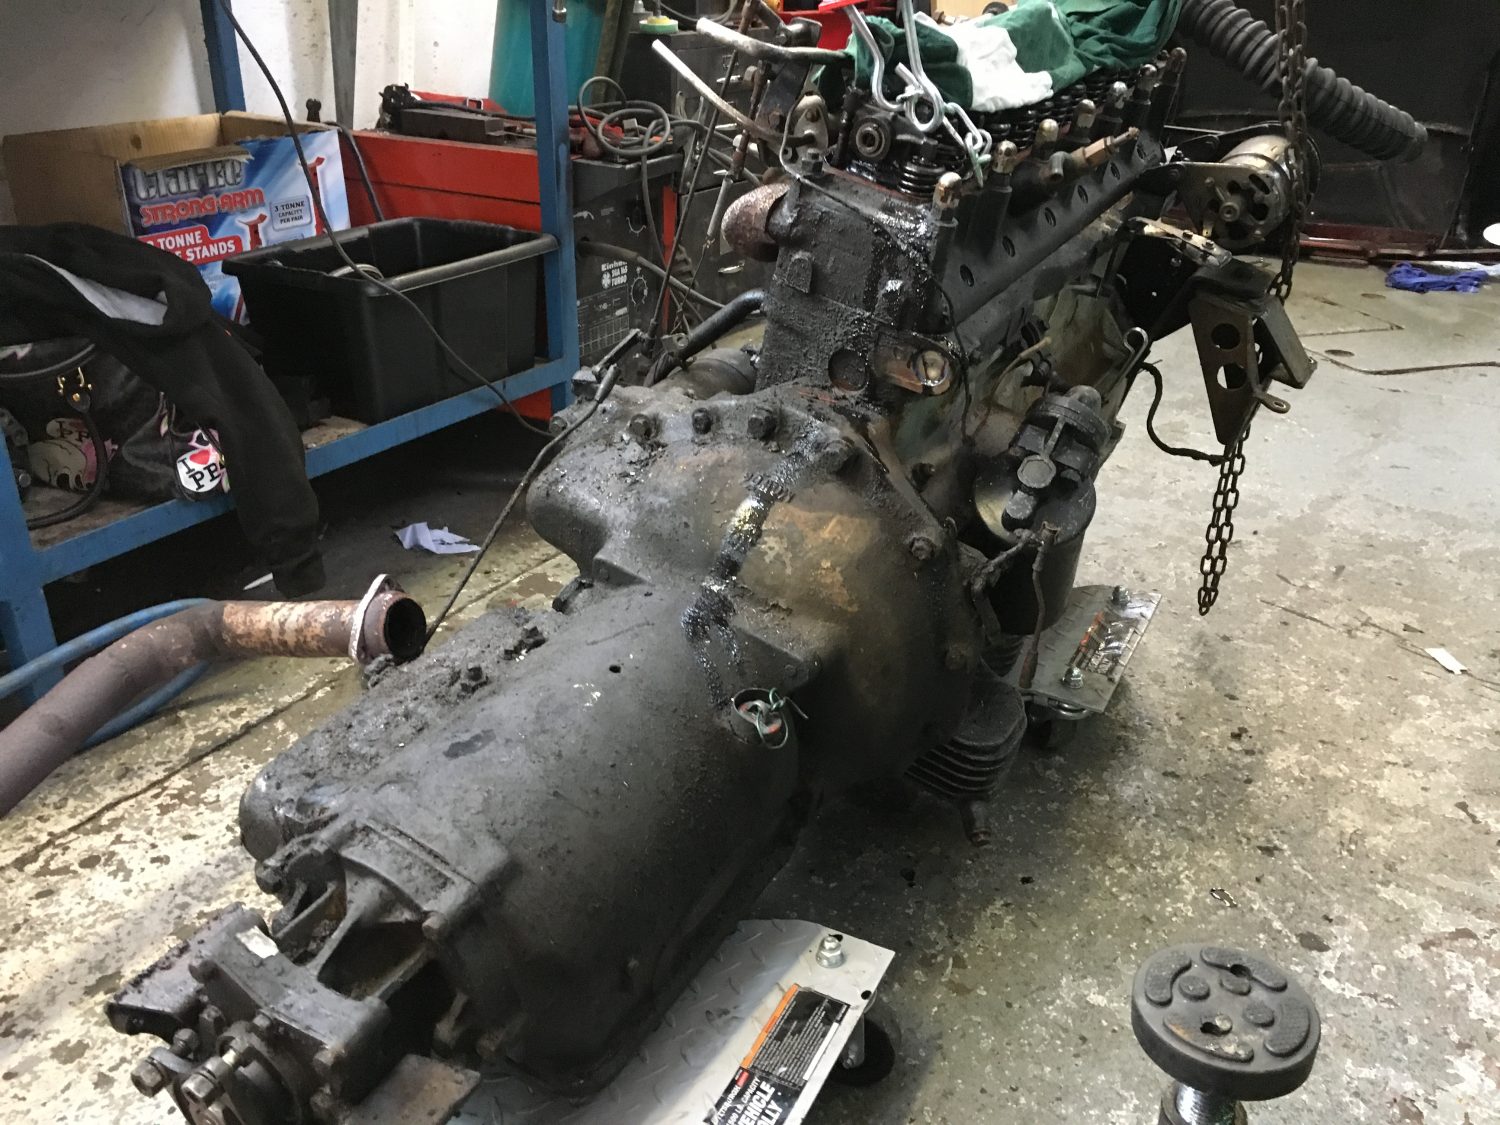
[vc_row][vc_column][vc_column_text]Today’s the day we are removing the engine ready for our engine rebuilder Don Warman to work his magic on her.
Initially the engine was going to stay in the car until the carbs had been rebuilt so that Don could run her in situ but he has since decided that it needs to come out.
Over the coming months the entire engine and gearbox will be rebuilt so before we on this huge task, first, we need to take a number of pictures as reference for when it returns in a number of months.
As we mentioned before, when restoring a car or taking on any project it is vital to take lots of pictures as you go along. You may never need them but if, one day, you’re questioning the position of something you know you have images to fall back on.[/vc_column_text][/vc_column][/vc_row][vc_row][vc_column][vc_gallery type=”image_grid” images=”8207,8208,8209,8210,8211,8212,8213,8214,8215,8216,8217,8218,8219,8220,8221,8222,8223,8224,8225,8226,8227,8249,8250,8251,8252,8253,8254,8255,8256,8257,8258,8259,8261″][/vc_column][/vc_row][vc_row][vc_column][vc_column_text]A successful morning in our Ipswich workshops and Asa and John, together, managed to lift the Jensen 541S engine and gearbox out of the car.

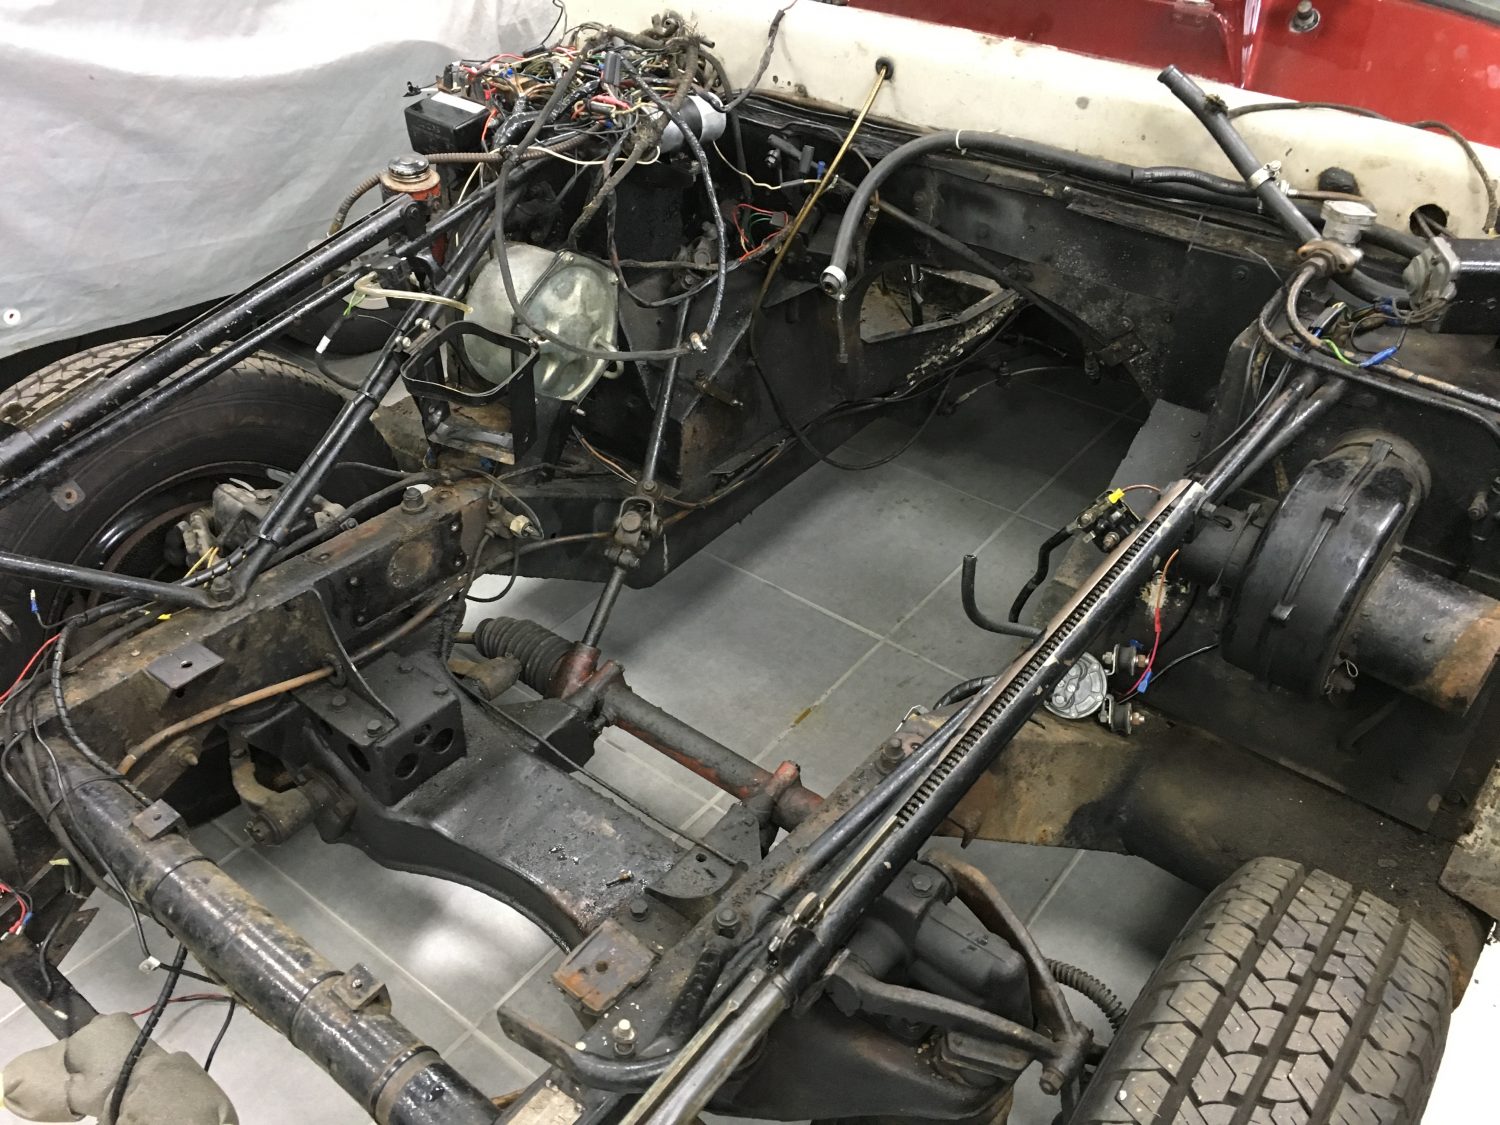 [/vc_column_text][/vc_column][/vc_row][vc_row][vc_column][vc_column_text]Here we have the huge Jensen 541S engine and gearbox. Now fully removed from the vehicle she’s ready for Don to inspect and guide us one what his next stage will be.
 [/vc_column_text][/vc_column][/vc_row]
When we were stripping and cleaning the inside of the camper we noticed that the side door was not running as smoothly as it should be. Upon closer inspection we noticed that the lower guide assembly (252843405A) was showing signs of wear.
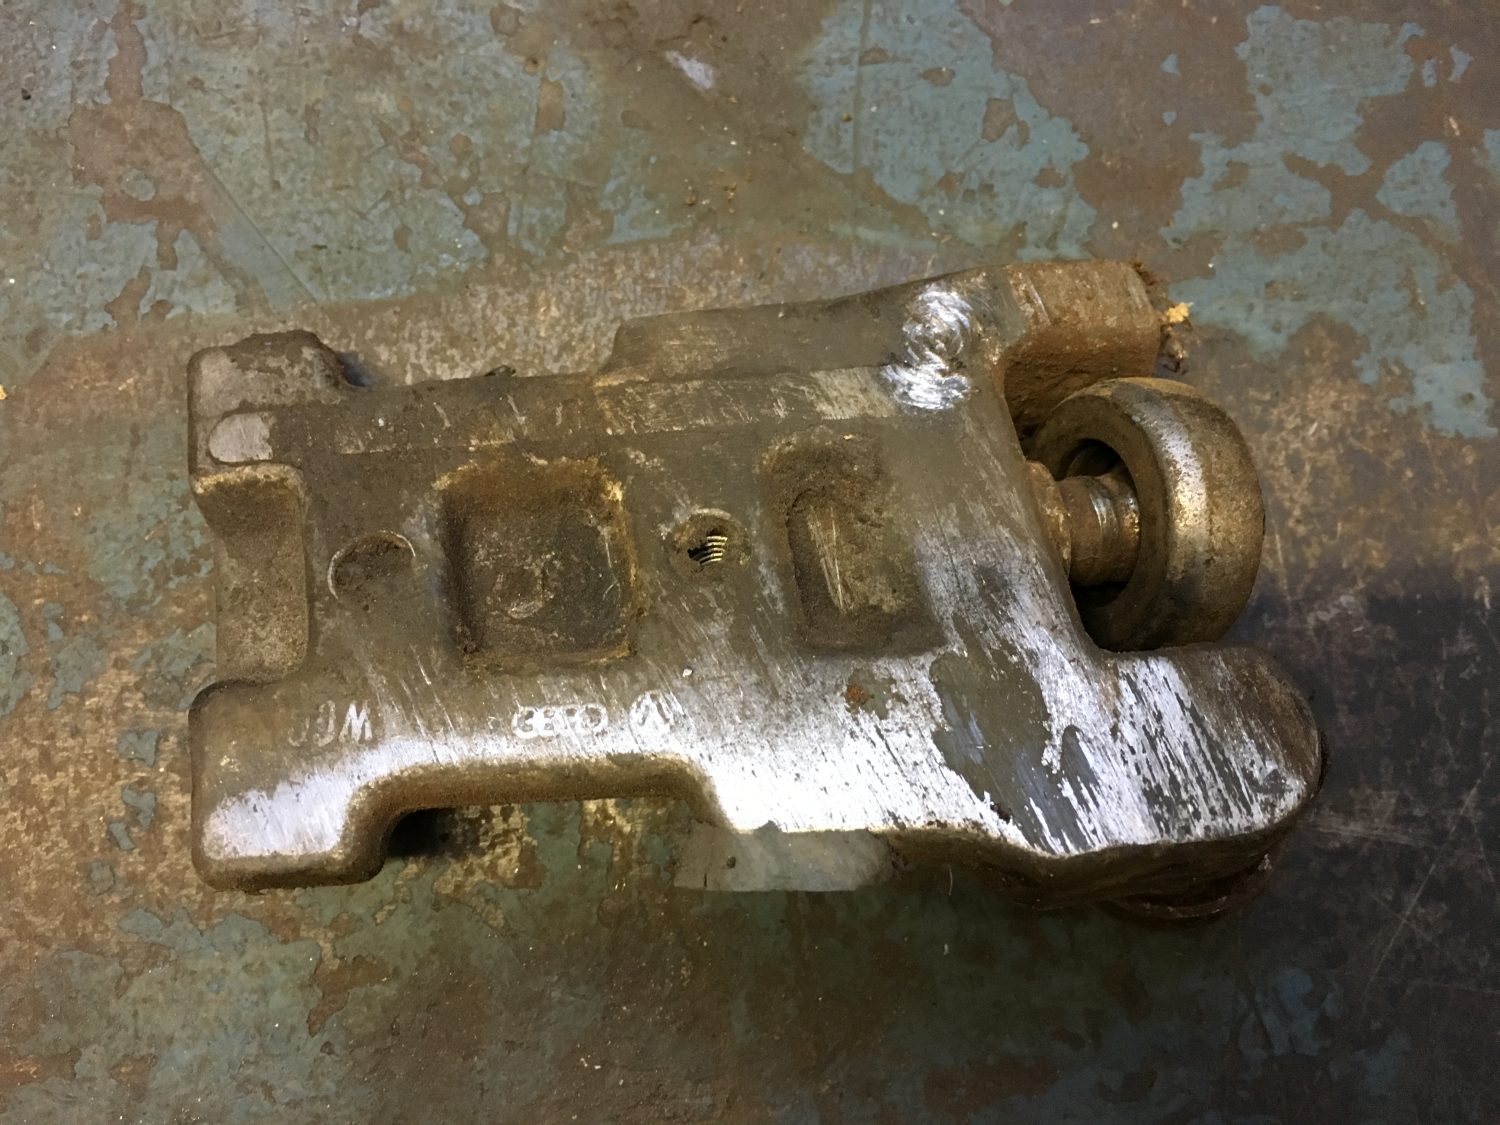
We managed to secure a new one on an overnight carriage and it was an easy fix.
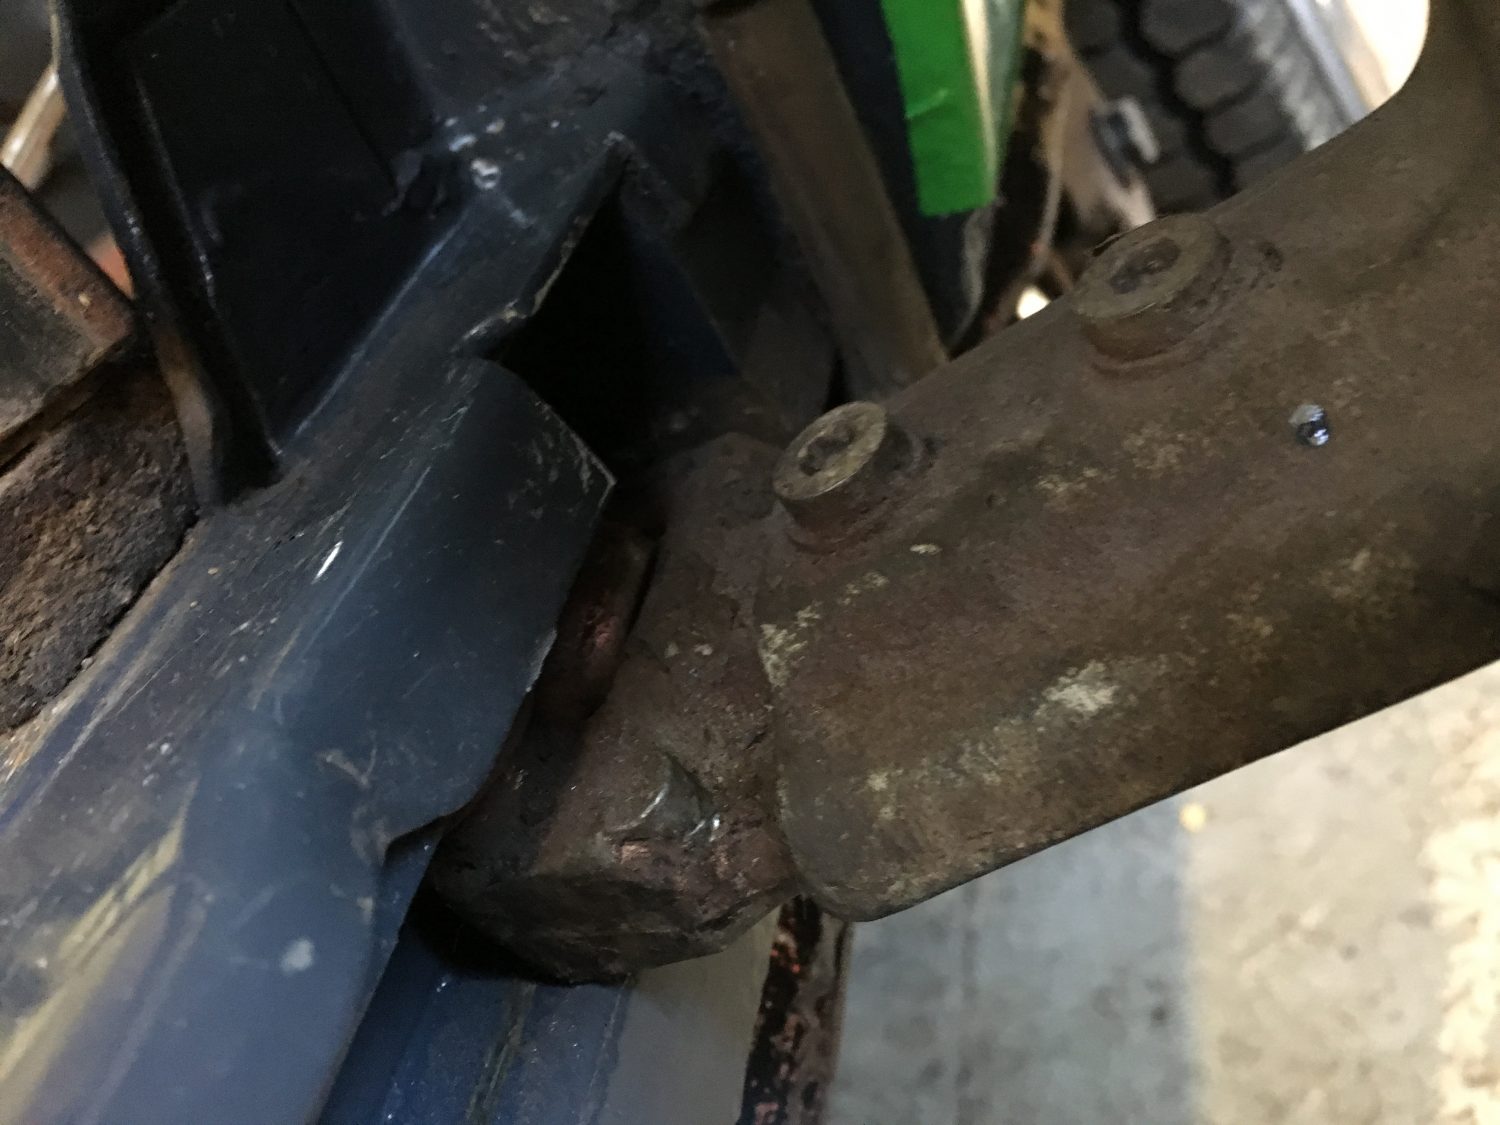
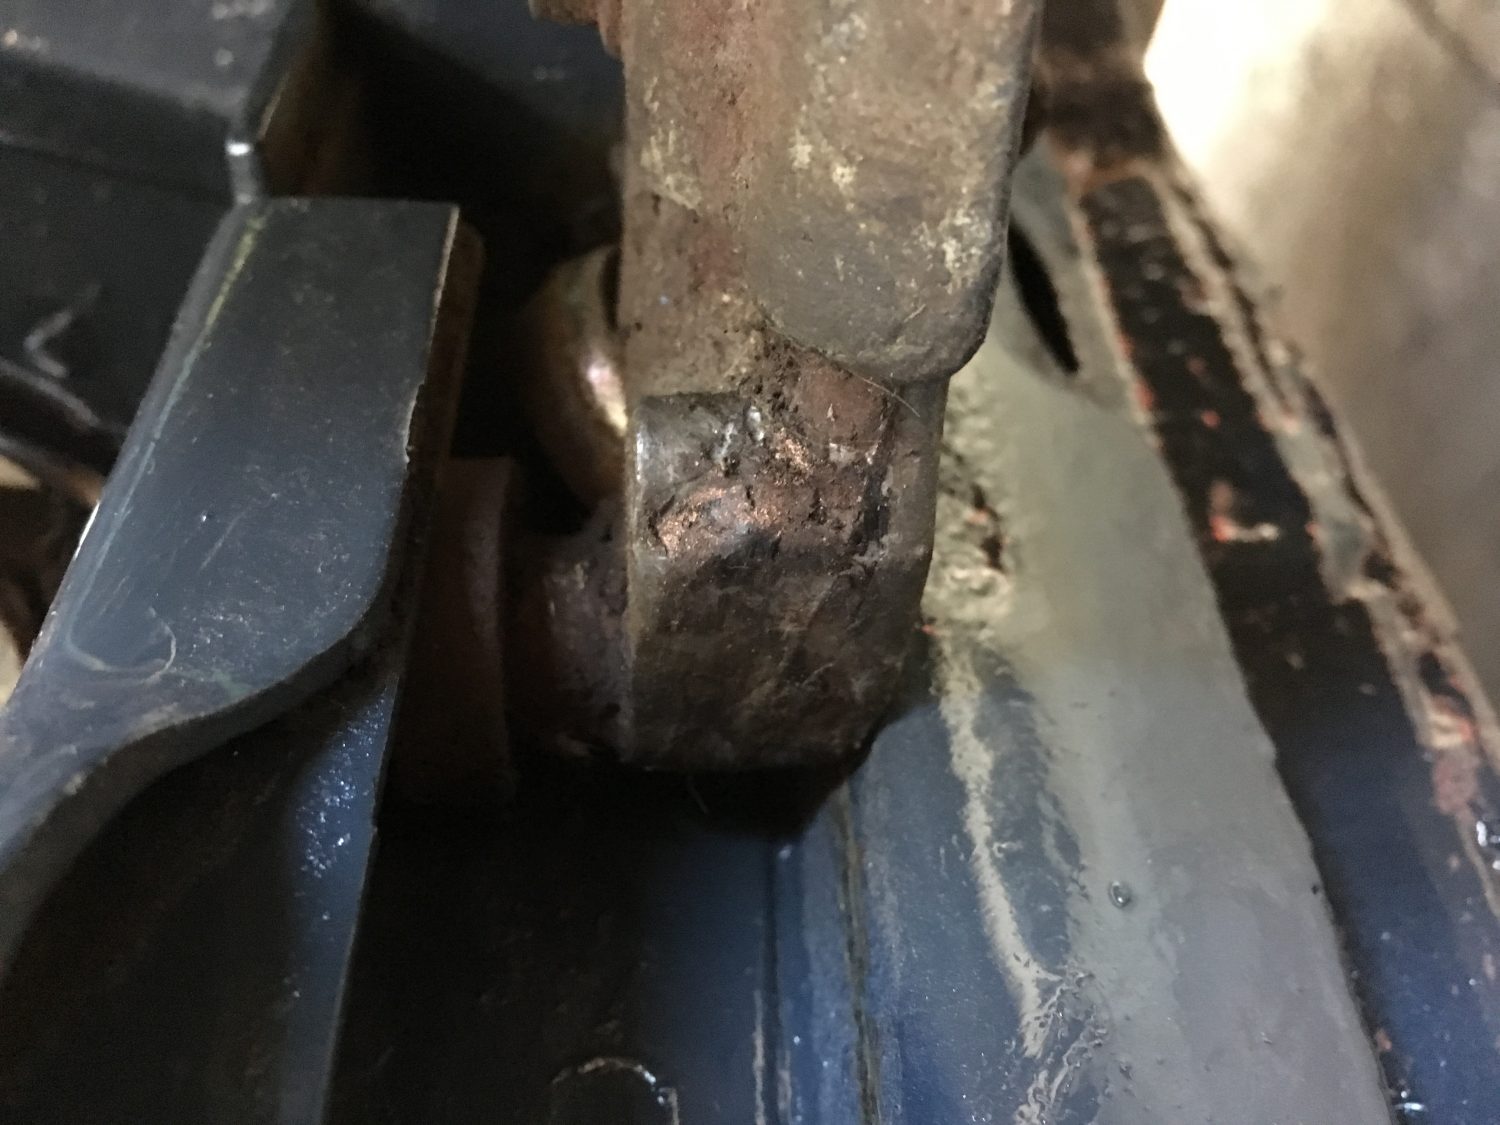
As you can see the wheels that help guide the door into position have a lot of play which they shouldn’t be able to do. This was enough to prevent the door from sliding smoothly.
A new 252843405A Volkswagen Camper T25 Lower Guide Assembly replaces the entire running guide and the door is now running how it should be.

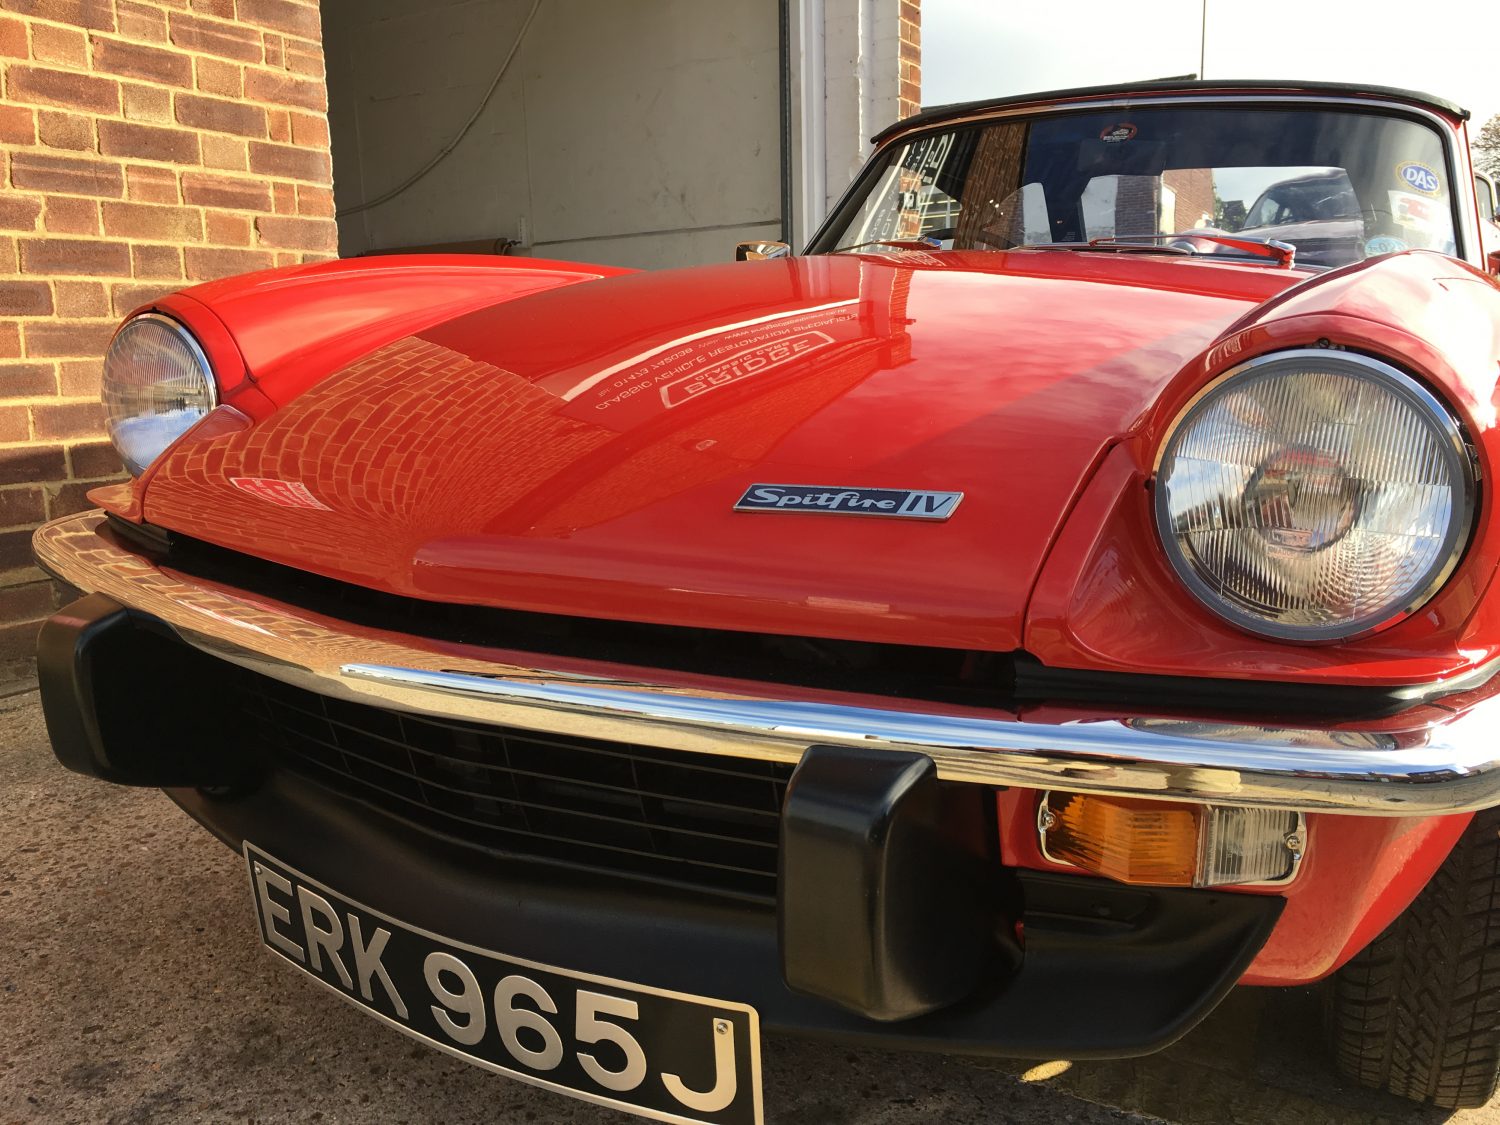
[vc_row][vc_column][vc_column_text]Having recently completed the restoration of our 1971 Triumph Spitfire, this week we had her back in our workshops for a general check over. We offer this service on all of our major projects to make sure the nuts and bolts are still tight and to iron out any imperfections that may have been found.
Here at Bridge Classic Cars, we don’t just finish a car and send it on it’s way never to see it again.
Our Customers and our Projects are very important to us so our after sales care is just as key to any other part of our business.
When you see your restoration project complete for the very first time it’s very exciting, your mind is more geared up to seeing the bigger picture and getting in it for a drive. It’s not until you really settle in to the drive do you discover things that you most probably have missed on collection day.
One of the concerns that Mr and Mrs King had on their 1971 Triumph Spitfire after taking her home was that they felt the hood was a little stiff.
Although we used the original hood frame, it was removed and completely refurbished before being fitted with a brand new hood. As components are new, they take a little time to settle and that’s exactly the case with the hood,
Here is a step by step guide, beautifully demonstrated by Asa and John of how we feel it is best to lower a Triumph Spitfire hood.[/vc_column_text][/vc_column][/vc_row][vc_row][vc_column][vc_video link=”https://www.youtube.com/watch?v=breXMSRJi-M”][/vc_column][/vc_row]
